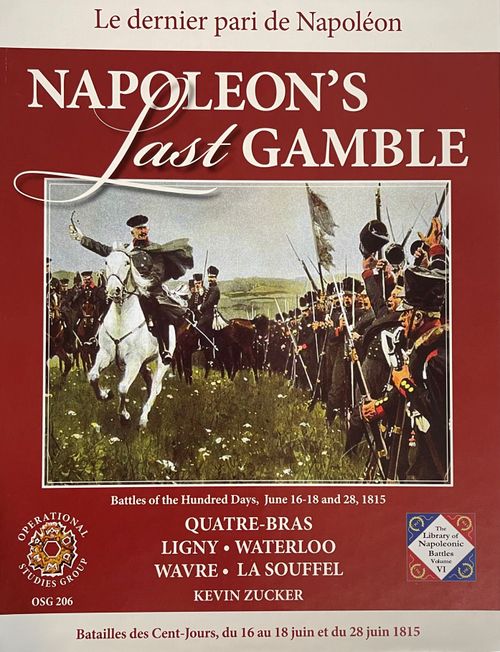
Napoleon's Last Gamble: Battles of the Hundred Days
Napoleon's Last Gamble: Battles of the Hundred Days Rulebook
Table of Contents
Table of Contents
- 1.0 Introduction
- 2.0 Sequence of Play
- 3.0 Stacking
- 4.0 Zones of Control
- 5.0 Leaders
- 6.0 Command
- 7.0 Movement
- 8.0 Hidden Forces
- 9.0 Repulse
- 10.0 Combat
- 11.0 Combat Modifiers
- 12.0 Combat Results
- 13.0 Bombardment
- 14.0 Cavalry Charges
- 15.0 Fortified Places
- 16.0 Vedettes
- 17.0 Supply
- 18.0 Baggage and Pontoon Trains
- 19.0 Reinforcements
- 20.0 March Orders
- 21.0 Demoralization
- 22.0 Recovery and Reorganization
- 23.0 Weather
- Glossary and Index
- Study Folder
- 25.0 Scenarios
- 26.0 Victory Conditions
- 27.0 The Battle of Ligny
- 28.0 The Battle of Quatre Bras
- 29.0 The Battle of Wavre
- 30.0 The Battle of Waterloo
- 31.0 The Battle of La Souffel
- 32.0 Campaign Game
- 33.0 Ligny Mini-Campaign
- Historical Notes
1.0 Introduction
This game is a two-player simulation of Napoleonic battles at the Grand Tactical level. You can play each game as an individual set-piece, or undertake a "Campaign" consisting of several battles played in sequential order.
1.1 Inventory
See the Study Folder for a complete list of components. (One six sided die is needed for play—not included). If any parts are missing, or with any rules questions, please write:
Operational Studies Group PO Box 569 • Sparks-Glencoe, MD 21152 • USA e-mail: [email protected]
1.2 The Rulebooks
This rule book contains the basic rules that apply to all games in this series. The Study Folder contains Special Rules, Scenario Information, Historical Commentary, and Design Notes. All rules about the play of cards are in the optional booklet of Card Instructions (24.0).
1.3 The Map
The maps provide the playing surfaces, depicting the area where the battles occurred. A hexagonal grid overlaying the maps divides the playing surface into hexes. Each hex is 480 meters across (525 yards, 50 acres). Each hex has a four-digit code printed on it. Slope hexsides represent a rise of 50 to 100 feet or more. Crests are 20-50 feet. A hex is Woods or Marsh if one-third or more of the hex contains the terrain symbol.
1.4 The Playing Pieces
(1.41) The playing pieces are of five types: Combat Units, Vedettes (16.0), Leaders (5.0), Trains (18.0), and Markers. All combat units have a Full Strength side; most have a Reduced Strength reverse. Leaders, Vedettes and combat units with a Strength of "one" have a Flag reverse.
(1.42) How to Read the Units: The numbers and symbols printed on combat units include:
- Unit I.D.
- Command Designation (Glossary)
- Combat Strength: one SP = ± 1 battalion, 1 cavalry regt., or 1 battery
- Initiative Rating (5.22)
- Movement Allowance (7.2)
- Size: XX Division, X Brigade, III Regiment, II Battery, [X] Ad Hoc Task Force
- Unit Type
- Number of Vedettes they can deploy (16.11)
(1.43) Markers: Markers are placed on the map to indicate status of units or hexes.
Counter reference — Leaders: a Commander shows Name, Command Points and Movement Allowance; an Officer shows Name, Command Designation, Initiative Rating and Movement Allowance. Combat Units show Unit I.D., Command Designation, Combat Strength, Initiative Rating, Number of Vedettes, Unit Type, Size and Movement Allowance. Unit-type symbols: Infantry, Heavy Cavalry, Vedettes (16.0), Artillery (13.0), Horse Artillery. Marker types: Failed Repulse, Out of Supply, Control, Demoralized, Out of Command, In Command, Pontoon Train, Baggage Train, Burnt Bridge, Turn.
1.5 Initial Set up
Carefully punch out the units and sort them by Command Designation. Then select a scenario (see Scenario Information in the Study Folder for details). The units are placed on the map according to the Initial Set up. The First Player (stated in the Scenario Information) always sets up before the Second Player. All units start hidden (8.0).
Units designated ® are set up with their reduced side facing up. Each side may place one force under March Orders if it has a Commander on the map (20.1).
2.0 Sequence of Play
The Game is played in a series of Game-Turns, representing one hour of daylight, or 3-6 hours of night.
2.1 Day Game-Turns
Each Day Game-Turn is divided into two Player Turns subdivided into four Phases. The First Player resolves all four Phases of his Player Turn, and then the Second Player does the same. Each of the Phases must be resolved in the exact order given. After the Second Player Turn, the Game-Turn is complete and a new Game-Turn begins.
First Player Turn
A. Start Phase:
- Weather Segment: The First player rolls on the Weather table on the first turn of each day, and at other times as determined by the Weather Duration Die Roll (23.12).
- Card Segment: OPTIONAL (24.0) See separate 4-page folder.
B. Command Phase:
- Supply Segment: On turns when weather is checked, or as indicated on the TRC, the Phasing Player checks supply for his forces (17.1). If not using the cards, the Phasing Player may declare a General Retreat (20.5).
- Recovery Segment: On turns when Weather is checked, or as indicated on the TRC, the Phasing Player may attempt to Recover Units (22.1).
- Reorganization Segment: The Phasing Player may use eligible Leaders to bring eliminated units back into play at reduced strength (22.2).
- Command Segment:
- a. The Phasing Player removes all "Out of Command" markers from his forces.
- b. The Phasing Player allocates his Command Points (6.1), placing Officers and Combat Units (within Command Range) "in Command."
- c. The Phasing Player may attempt to place formations that did not receive a Command Point 'in Command' by rolling against the Officer's Initiative Rating (6.31).
- d. "Out of Command" markers are placed on all forces not in Command (6.1)
- e. Pontoon Bridges may be reconfigured (18.34).
C. Movement Phase:
- The Command Movement Segment: The Phasing Player may move all of his forces that are in Command (or under a March Order [20.1]). Reinforcements enter at this time. Units may attempt to Repulse enemy units out of the way (9.0).
- Initiative Movement Segment: The Phasing Player can now attempt to move Combat units that are marked "Out of Command." For each Out of Command unit he wishes to move he rolls against its Initiative Rating, then moves it if it passes (roll-move, roll-move). A die-roll equal to or less than this rating permits the unit to move up to its full Movement Allowance; however, the unit is still considered Out of Command and keeps its Out of Command marker. If the die roll is greater than its Initiative Rating, the unit may not move.
NOTE: Individual units within Command Range of their Officers, whose officer already on this turn failed his Initiative check, may not themselves roll for initiative.
D. Combat Phase
Combat is resolved in a series of Steps as outlined below:
-
- LOS Step: Both players simultaneously reveal all their Units and Leaders that are within LOS (8.3) of the enemy.
-
- Cavalry Retreat Step: Defending cavalry, horse artillery, and Vedettes may Retreat Before Combat (10.2). After defending units have retreated, attacking cavalry may also Retreat Before Combat.
- 2A. Artillery Reaction Fire Step. The non-phasing Player executes bombardment (13.0). Bombardment Strength may be reduced by Counter-Battery Fire (CBF, 13.5).
- 2B. Attack Declaration Step: The attacker must declare which friendly units are attacking which enemy units (10.3).
-
- Bombardment Step: The Phasing Player executes artillery bombardment (13.0). CBF applies (13.5). Artillery that was Suppressed or Retreated in Step 2A may not bombard now.
-
- Cavalry Charge Step: The Phasing Player executes cavalry charges (14.0).
-
- Combat Step: The Phasing Player conducts attacks (10.0). Exclude the strength of defending Arty that fired in Step 2A.
-
- 2nd LOS Step: If opposing forces remain engaged (adjacent) after combat, they remain revealed. Forces no longer in Enemy LOS are again hidden (8.5).
Second Player Turn
Command, Movement and Combat Phases are resolved as described for the First Player. (If using the cards, begin with the optional Card Segment.)
A. Command Phase B. Movement Phase C. Combat Phase D. Game-Turn Marker Phase
The Game-Turn Marker is moved into the next space on the Turn Record Track, and a new Game-Turn begins.
2.2 Night Game-Turns
The first and last Game-Turn(s) of each 24-hour period are Night Turn(s). Night PM comes before Night AM. The differences between Night and Day are summarized below:
- The player turns in a Night Turn are reversed (the Second Player Turn is resolved before the First Player Turn).
- There is no Weather Segment—Weather for the night depends on the last daylight turn's weather.
- The Start Phase is different (2.2A).
- Only units under March Orders may move (20.4).
- There is a Disengagement Phase (2.2A1).
- There is no Night Combat Phase.
Second Player Night Turn
A. Start Phase
- Disengagement & LOS Segment (Night PM turns)
The Phasing Player removes his units from any EZOCs one or two hexes, not entering another EZOC. If no hex is available, the units remain engaged. Units in a town, I.P., or chateau (15.0) are not required to Disengage. Check LOS (23.14).
- Recovery Segment: All Friendly units still remaining in the Awaiting Recovery box are shifted to the Recovered Section.
- Card Segment (Night AM turns): OPTIONAL
- Count VP's for cards played, and for leaders in Towns.
- Remove used Mode Cards from play.
- Discard all cards from hand.
- Adjust decks if directed to by the scenario instructions.
- Reshuffle both decks.
B. March Order Dispatch Phase
(Night AM turns) Unless a General Retreat is declared, any one friendly Force may be sent a March Order (20.42). This March Order takes effect in the upcoming day. EXCEPTION: If a General Retreat is declared, this becomes effective immediately.
C. Night March Phase
Units with a current March Order (20.4) in effect. Movement Allowance at night is 2/3 MPs (inf/cav).
First Player Night Turn
1st Player Night Turn comprises phases A-C above, and D.
D. Game-Turn Marker Phase
The Game-Turn Marker is moved into the next space on the Turn Record Track indicating the beginning of the next turn. Check the scenario for any turn-by-turn Victory Point awards.
3.0 Stacking
3.1 General Rule
It costs one Movement Point to stack one combat unit with another. You can move through a friendly unit's hex at no extra cost. EXCEPTION: Road March (3.3). Apply stacking limits only at the end of a phase.
3.2 Stacking Limits
(3.21) Basic Stacking Rule: Any two combat units, regardless of their size, type, or formation, may stack in a hex.
(3.22) Divisional Integrity: All units belonging to the same division may stack three to the hex without a leader present. EXCEPTION: Division-level formations with their own officer counter use 3.23 instead.
(3.23) Leader Stacking Bonus: A Leader's hex may contain up to 5 units, up to 2 of which may be infantry. If the stack has Divisional Integrity, 3 of the 5 units may be infantry. If the Leader leaves the hex then the overstacked units must leave too, per rules for Retreat (12.3) and Displacement (12.36).
(3.24) Free Stacking Units: Leaders, Deployed Pontoon Bridges, and Markers do not count against the stacking limit. Up to 3 vedettes (16.0) may join any stack over and above the stacking limits noted above. EXCEPTION (16.12).
3.3 Stacking Restrictions
Units in Road March: can unstack but may not stack. Units may not move through friendly units in Road March. Units in Road March may move through friendly units not in Road March.
Pontoon and baggage trains: may not stack with any type of unit (including other train units) and if displaced, they are destroyed (18.16).
Chateaux: A chateau loses its combat effect if the hex contains more than two defending infantry units, plus any leaders and vedettes (15.21).
4.0 Zones of Control
4.1 General Rule
The six hexes immediately surrounding a Combat Unit comprise its Zone of Control (ZOC). All Combat Units and vedettes exert a ZOC at all times, even into a hex occupied by an enemy unit. Leaders, Pontoon and Baggage Trains do not have ZOCs. If a Friendly Combat Unit is in an Enemy ZOC (EZOC), the opposing units are equally and mutually affected by the other's ZOC.
4.2 ZOCs and Terrain
ZOCs extend into all terrain types except across unfrozen Rivers or into Improved Positions and Chateaux. If an unfrozen River hexside intervenes (whether the hexside is bridged, unbridged, or contains a ford), the hex is not in a unit's ZOC.
Combat Units' and Vedettes' ZOCs extend into all adjacent hexes except across River hexsides. A Vedette ZOC is identical to a regular ZOC, except it does not block enemy retreats.
4.3 ZOCs and Movement
(4.31) Stops Movement: Combat Units and vedettes may freely enter EZOCs but then may not move again until they:
- Retreat Before or After Combat,
- the enemy retreats or is eliminated,
- they Disengage during a Night Turn (2.2A1), or
- after a successful Repulse (9.21).
The term "Engage" means entering an EZOC (Glossary).
(4.32) Prevents Movement: Leaders may not enter EZOCs voluntarily unless a Friendly Combat Unit occupies the hex. A Train cannot move into an EZOC at all.
4.4 ZOCs and Combat
During the Combat Phase every Phasing Combat Unit in an EZOC must attack (10.31 for exceptions). Every enemy Combat Unit that is in a Phasing Combat Unit's ZOC must be attacked. See Retreat Before Combat (10.2) for exceptions.
4.5 Other Effects of ZOCs
- Night Disengagement (2.2A1)
- Leaders (5.3)
- Retreats (12.31)
- Lines of Supply (no effect—17.44)
- Vedettes (16.25)
- General Retreat (disengagement—20.51)
5.0 Leaders
5.1 Purpose
Leaders perform four important functions:
- They place Combat Units in Command (6.0) so that they may be moved as a formation, not individually.
- They Reorganize eliminated units (22.2).
- They facilitate the Advance After Combat of more than one Combat Unit (12.4-B).
- They facilitate Stacking (3.23).
5.2 Types of Leaders
There are three types of leader counters: Commander, Officer, and Commander-Officer.
(5.21) Commanders: Commanders have a Command Range of 4 hexes and a Movement Allowance of 10. Standing at the top of the "chain of command," they may place friendly Officers and Combat Units in Command. Each Commander has a Command Rating in brackets that is the number of Command Points he may execute in a given Command Phase. With each Command Point he can place in command one Officer plus one Combat Unit. An integrated division (3.22) counts as "one unit."
EXAMPLE: A Commander with a Command Rating of [1] may place one Officer and one Combat Unit in Command.
(5.22) Officers: Officers are the middle link in the chain of command. They are in charge of specific Formations (Corps or Divisions). An Officer commands all Combat Units that share his Command Designation. Each Officer has an Initiative Rating in parentheses that is used to determine if he will move (if not already placed in Command by a Commander.) A die roll equal to or less than his Initiative Rating puts him in Command. Officers have a Command Range of 3 hexes and a Movement Allowance of 6.
EXAMPLE: Bernadotte commanded the I Corps in 1806. All French Combat Units that bear the I Corps designation and a dark green stripe are part of Bernadotte's Formation, and may be placed in Command only by him or by a Commander.
(5.23) Commander-Officers: Commander-Officers are Commanders with a [1] or [2] rating, assigned to a specific formation. Their Command Range is 4. A Commander-Officer always has to spend his first command point to put his own formation in command.
EXAMPLE: A Commander-Officer with [2] Command Points may place his own formation in command with the first, then place another Officer plus a Combat Unit, or 2 more units of any friendly formation, with the second.
5.4 Leaders and Combat
(5.41) Advance After Combat: Leaders and all (undemoralized) infantry and cavalry units of their stack may advance one hex into a hex vacated by the enemy as a result of combat.
(5.42) Retreat and Capture: Leaders stacked with friendly combat units can always retreat with their stack. Every Leader in a retreating stack is subject to a separate die-roll:
| Die | Leader |
|---|---|
| 1-5 | retreats 1-4 hexes, per combat result. * |
| 6 | is captured (immediately removed from play). |
* If the stack is eliminated, use the table below (5.51)
5.5 Leader Capture or Displacement
(5.51) A Leader alone is subject to capture whenever adjacent to enemy combat units that exert a ZOC into the Leader's hex; or whenever he is the target of a bombardment that produces a result. As soon as this occurs, roll a die:
| Die | Leader |
|---|---|
| 1-5 | is displaced to nearest friendly-occupied hex (a path of retreat is not needed for one man) |
| 6 | is captured (immediately removed from play). |
(5.52) Replacement Officer: If a Corps officer is captured, place his counter on the Turn Track two turns in the future (if he is captured on GT 4, place him on the track for GT 6). That turn bring the leader in at the start of the Command Phase, within one hex of the friendly unit nearest to his last hex. Henceforth the officer will have one point less than the original Initiative (a "1" stays a "1"). A Commander-Officer's replacement (5.23) is an officer with an Initiative of 4. (When Commanders are captured they not replaced.)
6.0 Command
6.1 The Command Segment
During the Friendly Command Segment, the Phasing Player uses the following procedure to determine which of his Officers (and Forces) are in Command:
STEP 1: Each commander may use his Command Rating (5.21) to place in Command friendly units within his Command Range (4 hexes). With each Command Point he can place in command one Officer plus either any one Combat Unit or one stack of an Integrated Division. If an Officer is in Command, then all his units within his Command Range (3 hexes) are automatically in Command. If in Road March the entire Road March column is in command.
STEP 2: Conduct Initiative Checks (6.31) for any/or all Officers not placed in Command by a Commander.
STEP 3: After all Command Points have been allocated, the Phasing Player places Out of Command (OOC) markers on top of each Officer, unit or stack not in Command. If an entire corps is out of command, place the OOC marker on the corps officer who has failed his Initiative roll. If individual units of a corps are in command, while the rest of the corps is OOC, place in Command Markers on the units in command, and place the OOC marker on the corps officer.
6.2 Effects of Command
IN COMMAND: An Officer or Combat Unit placed in Command in this Command Segment is in Command until the next Friendly Command Segment. Units in Command may move and Advance After Combat. Trains, Commanders, and units under March Orders are always in Command.
OUT OF COMMAND: If an Officer or Combat Unit is Out of Command at the end of a Friendly Command Segment, it remains so until the next Friendly Command Segment. Out of Command Combat units suffer the following penalties:
- They may not damage or repair Spans (7.6).
- May expend their full Movement Allowance during the Initiative Movement Segment only if they pass an individual Initiative check (6.32). An officer may roll just to move himself if he didn't roll in the Command Segment.
- May NOT Advance After Combat or Bombardment
Combat Units do not have to be in Command in order to attack (10.0), Bombard (13.0), or Charge (14.0).
6.3 Initiative Checks
(6.31) Officer Initiative Checks: To conduct an Initiative check for Officers not receiving direct Command, roll the die. If the result is equal to or less than his Initiative, the Officer is in Command and all units in his Formation within Command Range (6.4) are also in Command. If the die roll was greater than the Initiative Rating, place an Out of Command marker on the Officer. An officer Out of Command because he reorganized units this turn cannot perform an Initiative check.
(6.32) Combat Unit Initiative Checks: During the Initiative Movement Segment, Out of Command units may check for Initiative. You can bypass your Corps Officers and rely upon the initiative of individual units if you wish to do so. However if you roll first for an officer's initiative, then any of his units that are in command range may not roll for initiative. If the OOC Unit passes this check it may move, but its Out of Command marker is not removed as a reminder that it may not advance after combat.
NOTE: Officers who successfully roll for Initiative are in Command—individual units that successfully roll for Initiative remain Out of Command.
EXAMPLE: Two combat units are in range of their Officer who failed his Initiative die roll. These combat units may not roll for Initiative. If the Player did not roll for the Officer, he could roll for the units in the Initiative Movement Segment.
(6.33) Demoralized: The Initiative of a Demoralized unit is always 1 less than printed (21.2).
(6.34) Divisional Initiative: The Player may choose to roll once for each integrated division (3.22), using the best initiative in the division as the whole stack's initiative.
6.4 Command Range
Commanders have a Command Range of 4, Officers a Command Range of 3 hexes. All hexes count as "one" regardless of terrain. Units belonging to the same formation in a Road March column are in Command if they are within two hexes of any other unit of their formation in Road March, on a connected road or trail, that is itself already in command. Command Range may not be traced:
- into an EZOC which is unoccupied by Friendly Combat Units;
- into an enemy-occupied hex; or
- across an unbridged and unfrozen River or Lake Hexside
EXAMPLE: Officer A belongs to I Corps. Officer B belongs to VI Corps. Ney, the Commander, is within 4 hexes of Officer A so he can use his Command Point to put that Officer in Command (note that the command range may only cross River hexsides at Bridges). Officer A then transmits Command to his four units of his corps (within 3 hexes). Ney also puts one Combat Unit of VI Corps in Command. Command Range cannot enter EZOCs. Officer B will have to roll for Initiative. If successful, his remaining 3 units are in command.
7.0 Movement
7.1 The Basics
During the Movement Phase, the Phasing Player may move all, some, or none of his units up to their full Movement Allowance (MA) in any direction, subject to terrain restrictions and the presence of Enemy units and EZOCs. A unit must be in Command, under a March Order, or must pass an Initiative check to be able to move. The Phasing Player may move units individually or as a stack. Whether moving individually or by stack, each move must be completed prior to moving the next individual unit or stack.
7.2 Movement Points (MPs)
(7.21) Each hex costs a number of MPs. The amount varies depending on the terrain in the hex and on the hexside crossed (the Terrain Effects chart). The MP costs are deducted from the Movement Allowance of the unit as it moves from hex to hex. All MP costs are cumulative. Unused MPs may not be saved up from turn to turn or loaned by one unit to another. When a unit ceases movement, all unused MPs are forfeit. EXCEPTION: If a hex has both Woods and a Chateau, ignore the Chateau cost.
(7.22) Cavalry Costs: Horse Artillery, Trains, Leaders, Cavalry and Vedettes pay cavalry costs for all terrain types.
EXAMPLES: Unit A is a Cavalry unit so must pay 4 MPs to enter a Woods hex. Unit B is infantry and only pays 2 MPs for Woods. Note that crossing a Crest hexside does not cost MPs. Unit C is not in Road March so must pay 1 MP for each road hex and +1 MP to cross a stream hexside. Unit D is already in Road March so pays only ½ MP for each road hex and ignores the +1 MP cost to cross bridges and move up Slope. Note that a unit in Road March may leave the road at any time. Unit E pays +1 MP to cross the Bridge and +1 MP to move up the Slope. Unit F is a cavalry type unit and must pay 4 MPs to enter a Marsh hex. Moving down slope costs 0.
7.3 Minimum Movement
A unit may never expend more MPs than its MA in a single Movement Phase; however, if the cost of the first hex and hexside exceeds the printed Movement Allowance of the unit, it may move into the hex and end its move for that turn.
7.4 Movement Restrictions
Once the Phasing Player has removed his hand from the unit he is moving he may not return to moving that piece again without the consent of his opponent.
A Unit cannot enter a hex occupied by an opposing unit. EXCEPTION: Cavalry Charge (14.0).
7.5 Road March
In order to benefit fully from the road, a formation would have to make a long narrow column: trains in the middle, infantry marching off to either side.
(7.51) Road March Procedure: All units (including Trains and Demoralized units) may use Road March. The player may declare Road March at any point in the unit's movement. As the Phasing Player begins to move a unit on the road, he declares that it will use the road MP cost and the unit is marked with a "Road March" marker. A unit in Road March need not remain on road hexes, but is in Road March until declared otherwise (7.56).
NOTE: There is no cost to declare Road March, and no cost to rotate the directional arrow on the Marker.
(7.52) The Road March Rate: When in Road March, a unit moving from Road to contiguous Road hex pays ½ MP and ignores other terrain costs including Spans. When not in Road March a unit moving from trail/road to connected trail/road hexes pays 1 MP per hex (ignoring all other terrain costs except Spans).
(7.53) Road March Restrictions: The restrictions below apply to combat units and trains (not Leaders and Vedettes). Units in Road March may move through and end the Movement Phase adjacent to Friendly units that are not in Road March. However, units in Road March may not:
- stack or move as part of a stack.
- move through a hex containing other units in Road March, nor may other units move through units in Road March.
- enter a hex connected by road or trail to an adjacent Friendly unit in Road March.
(7.54) Road March and Enemy Units: Units in Road March may not make a regular attack, bombard, or charge during the Combat Phase. If attacked they are not penalized but immediately remove the Road March marker. A Unit in Road March must attempt Repulse (9.0) if it enters an EZOC.
(7.55) Road March and Command: A unit in Road March is in Command if within two hexes of another unit of its formation in Command (6.4).
(7.56) Ending Road March: It costs 1 MP to remove a Road March marker voluntarily during the Movement Phase.
(7.57) Vedettes and Leaders: Vedettes and Leaders alone do not need Road March Markers. They always pay road movement rates. Vedettes and Leaders may ignore Road March restrictions and are ignored by units in Road March.
(7.58) Road Movement in Square: Units in Square (14.23) may benefit from Road Movement if moving on Roads or Trails (see Charge Combat Table, Key)
7.6 Bridges and Trestles
Bridges cross Rivers. Trestles cross Stream hexsides. The term "Span" includes both Bridges and Trestles.
(7.61) Crossing a Span: Units may only cross an unfrozen River hexside by moving over a Bridge or Pontoon (18.33). Combat Units not in Road March pay the following MPs to cross a span:
- +1 MP to cross a Bridge or Trestle
- +2 MPs to cross a Damaged Bridge (even if in Road March).
- Units in Road March, Leaders, and Vedettes never pay extra MPs to cross undamaged spans. Leaders and Vedettes do not have to be in Road March.
(7.62) Damaging Trestles: Any Combat Unit that is not in an EZOC and in Command may damage a Trestle by expending 1 MP in either hex adjoining the spanned hexside. Place a "Burnt Bridge" marker on the damaged Trestle. Damaged Trestles are treated as if they do not exist for purposes of movement, combat, or tracing supply.
(7.63) Damaging Bridges: To damage a Bridge use 7.62 and:
- Only Infantry units may damage Bridges.
- It costs 2 MPs to damage a Bridge.
- Artillery, trains, and supply lines may not cross.
When attacked across any bridge, defenders are doubled. In addition, when attacking across a damaged bridge:
- Use the CRT shifting two-columns left.
- Ar*/Dr* does not convert to Shock. Do not use Shock Table.
- Instead of "Sk" result each side reduces 1 unit; no retreat.
- Dr, Dr2, Dr3, Dr4 requires an Initiative die roll. If the lead unit passes its Initiative check, it may advance across the bridge and defender retreats 1-4 hexes. If lead attack unit fails its Initiative, reduce it and both sides remain in place.
- For retreats across a bridge (damaged or undamaged–12.33).
(7.64) Bridge Repair: Follow the procedure for damaging a Bridge (paying 2 MP) or Trestle (1 MP). Multiple repair attempts in a turn are allowed. For each attempt, roll one die:
| Die | Bridge | Trestle |
|---|---|---|
| 1-3 | is repaired | is repaired |
| 4-5 | • | is repaired |
| 6 | • | • |
(• = no effect)
Notes: If either end of the span is:
- in an EZOC—apply modifier of +1 to repair die roll.
- occupied by an enemy Combat Unit—repair not permitted.
(7.65) Using a Repaired Span: A Bridge or Trestle may be crossed by any units the moment it is repaired. It may be used for tracing Supply starting on the turn following its repair.
7.7 Other Movement Rules
Night Movement (2.2B); Night Disengagement (2.2A1); Cavalry Charge (14.0); Movement of Trains (18.11)
8.0 Hidden Forces
8.1 General Rule
All forces start the game hidden and remain hidden until revealed. Reinforcements are hidden upon entry.
8.2 Hiding Units
From each stack of units, select one of the following to cover the stack: a Leader, a Vedette, a unit with strength of "one" (those counters have a flag on their reverse sides). If none of the above are present, use a Road March Marker, a Demoralized Marker, an Out of Supply Marker, if any of the above apply; or a Hidden Force Marker. Place the selected counter on top of the stack with the flag or status marker showing.
8.3 Revealing Units—Reconnaissance
A Hidden Force is revealed:
- During the Movement Phase if in a Repulse—only units involved are revealed at the time of Repulse (9.0).
- During the Movement Phase upon entering an EZOC—consult the "Reconnaissance Table." If no Repulse is attempted, each player will reveal all Friendly LC and/or vedette units present in the hex, then cross-reference to determine whether other units will be revealed or whether the vedette(s) are eliminated.
- In the LOS Step at the beginning of any Combat Phase if in an EZOC or within LOS—both sides are revealed. All hidden units within the LOS must be revealed.
- When a unit retreats or advances after combat into an EZOC; only the adjacent units on both sides are revealed.
8.4 Determining Line of Sight (LOS)
(8.41) General Rule: The LOS is a straight line of 3 hexes from center to center. The LOS is obstructed by Blocking Hexes and Blocking Hexsides, or a hex occupied by units of either side. If any hex or hexside between the sighting unit and the target is blocking terrain, the Line of Sight is blocked. EXCEPTION: Adjacent units are always in LOS of each other. See also 23.0 for Weather effects on LOS.
(8.42) Blocking Hexes: Woods, Chateaux, Hilltops, and Town hexes are Blocking Hexes. A Slope hex blocks the Line of Sight unless the viewing unit is: 1) looking downslope through the Slope hexside; 2) on a Slope hex viewing another slope hex with no other blocking hexes intervening; or 3) on a Hilltop hex viewing a Hilltop that is not at a higher elevation.
(8.43) Blocking Hexsides: Crest and Slope Hexsides are Blocking Hexsides. The LOS is blocked if it passes through the juncture of two or more blocked hexsides or the juncture of a blocking terrain hexside and a blocking terrain hex. EXCEPTIONS: LOS for the sighting unit (only) is not blocked by:
- Crest hexsides adjacent to the sighting unit, including the vertices on both ends of the hexside, or
- Slope hexsides adjacent to a sighting unit on a hilltop hex. A unit on a hilltop can see enemy units below, but the units on lower ground can't reveal the unit on the hilltop.
- In these cases LOS is not reciprocal (also 13.34).
EXAMPLE: Artillery cannot fire over friendly units, even when on a hilltop. Blocking Terrain includes Towns, Woods, units, Slope and Crest hexes/hexsides. Hexes beyond range have no LOS.
8.5 Obscuring Hidden Forces
A Unit remains revealed as long as it stays in an EZOC, and/or sighted by an enemy LOS. At the end of the Combat Phase, all units not in LOS are re-hidden.
9.0 Repulse
9.1 Repulse Procedure
(9.11) During the Movement Phase (only) the Phasing Player may attempt to Repulse enemy units in the path of his units; if successful the enemy will retreat immediately. The Combat Units attempting Repulse must first expend the MP cost of the adjacent enemy-occupied hex (or if more than one, the one with the greatest MP cost).
(9.12) Resolving a Repulse Attempt: Both players reveal their units involved. All units that project a ZOC into the repulsing unit's hex must be repulsed as one combined strength. In order for a Repulse to succeed the Repulsing units must have 5:1 odds or greater. Repulsed units retreat in the same fashion as retreats after combat (12.3).
(9.13) Terrain Effects on Repulse: Combat Strengths on both sides may be modified by Terrain (11.1); other Combat modifiers do not apply in a Repulse.
(9.14) Repulse of Vedettes: Vedettes may not attempt Repulse and Repulses against Vedettes always succeed.
9.2 Repulse Effects
(9.21) Effects of a Successful Repulse: If the Repulse succeeds then the Repulsed enemy units immediately retreat two hexes. The Repulsing stack must enter the vacated hex (it has already paid the MP cost). If there is more than one vacated hex, the Repulsing Player chooses one. After a successful Repulse the units may continue moving to the limit of their Movement Allowance, and may attempt a subsequent Repulse. A unit may be Repulsed twice in a single turn.
(9.22) Effects of a Failed Repulse: If the Repulse is unsuccessful, both sides immediately remove any Road March markers. The Repulsing stack immediately ceases movement and must attack the same unit(s) it attempted to Repulse in the following Combat Phase, unless terrain allows units not to attack. Other Friendly units may join this attack. This attack is conducted at two odds columns less than the actual odds. No other column shifts apply.
EXAMPLE: 14 Strength Points attacking 3 would normally resolve at (4:1); after a two-column shift, the combat is resolved at (2:1).
10.0 Combat
10.1 The Combat Phase
All Combat between opposing units occurs during the Combat Phase (2.1D for the sequence). Only adjacent Combat Units may be attacked (EXCEPTION: Bombardment—13.0). A defending stack may be attacked only once per Combat Phase (EXCEPTION: a hex can be Bombarded and then attacked).
(10.11) LOS Step 2.1/D1: At the beginning of the Combat Phase both players reveal all their units and leaders that are within the enemy Line of Sight (8.4), even if there will be no Combat.
10.2 Retreat Before Combat (RBC)
(10.21) Cavalry RBC: Defending and then Attacking stacks composed only of Cavalry (plus any Leaders, Vedettes and Horse Artillery stacked with Cavalry) may elect to retreat one or two hexes out of an EZOC prior to combat. Vedettes by themselves must Retreat Before Combat (16.26). During this RBC units may not enter an EZOC—except Vedette ZOCs (16.25). A unit can take only one retreat before combat per turn. If a lone Vedette can't retreat, place it in the appropriate box as in retreat after combat (12.34). NOTE: RBC allows Cavalry to reveal the enemy force during the Combat Phase.
(10.22) Horse Artillery RBC: Horse Artillery that begins a Combat Phase alone (or with an all-cavalry stack) in an EZOC may conduct a 1-hex RBC. Horse Artillery units that do a RBC may still bombard that turn. A lone Horse Artillery unit in an EZOC of any enemy Cavalry unit may not RBC.
(10.23) Restrictions: Units in the EZOC of a cavalry unit with an equal or greater Movement Allowance may not Retreat Before Combat. Cavalry and Horse Artillery may not retreat before combat if surrounded, if stacked with infantry or artillery (other than Horse Artillery), or in a combat resulting from an unsuccessful Repulse.
(10.24) Supply and Morale: Supply and Demoralization do not affect a unit's ability to Retreat Before Combat.
(10.25) Leaders: Leaders that Retreat Before Combat do not roll for capture (5.5).
(10.26) Advance After an RBC: Enemy units may not advance into the vacated hex caused by an RBC, except at a Bridge. Cavalry defending a bridge that retreats before combat may be followed-up by enemy attackers across the bridge. (Because of its importance they would likely seize the bridge if left undefended even for less than a whole turn.)
10.3 Defining Combat
(10.31) All Engaged Units Must Attack: The Phasing Player must define all his combats before resolving them. The attacker may define his attacks freely—provided all enemy units in his ZOCs are attacked or bombarded, and all of his engaged Combat Units attack. Cavalry that retreats before combat does not count as attacking.
EXCEPTIONS:
- Units in Towns, Improved Positions, or Chateaux do not have to attack; if they attack, 15.12 applies.
- An artillery unit in an EZOC does not have to attack if other units in its hex do so (13.41).
- An artillery unit that bombarded this turn cannot join in an attack.
- A unit in Road March cannot join in an attack.
- A cavalry unit that charged this turn cannot join an attack.
- If an artillery unit bombards a hex, it frees friendly units adjacent to that hex from having to attack it (13.6)—unless other enemy units are adjacent.
(10.32) Rivers and Combat: Adjacent units that are on the opposite side of an unbridged, unfrozen River may not be attacked but may be bombarded. Adjacent units on the opposite side of a bridged, unfrozen River may attack but need not do so.
(10.33) Multi-Hex Combat
- A defending stack may be attacked by up to six enemy stacks (one in each adjacent hex).
- All of the defending Combat Units in a stack must be attacked as a single combined strength—they may not be attacked separately.
- Two or more defending hexes may be attacked as a single force if the Attacker is adjacent to all defenders.
- All attacking Combat Units in a single stack must attack as one combined strength.
- If an attacking stack is located in the ZOC of several enemy stacks, and no other Friendly stack is adjacent to the enemy stacks, it must attack all of the stacks as one attack (and the defender may choose the one applicable terrain modifier that is most beneficial to him).
10.4 Combat Procedure
The Phasing Player conducts attacks in the order he desires. Attacks are resolved one at a time, and their results fully applied before proceeding with the next attack. Follow these steps for each combat:
STEP 1: Compare the combined attack strength of the participating attacking units against the total defense strength (modified by terrain) of the defending units. This is expressed as an odds ratio (attacker to defender). Round off this odds ratio downward to conform to the next lower odds ratio on the CRT. (Retain all fractions until the odds are computed.)
EXAMPLE: 16 SPs attacking 6 SPs reduces to 2:1. 15 SPs attacking 10 would be resolved at 1.5:1 odds.
STEP 2: The attacking player locates the calculated combat odds column on the Combat Results Table and rolls the die. Cross-referencing the die result with the odds column gives the Combat Result, which is applied immediately.
STEP 3: Adjust Casualty Level Markers to reflect combat strength lost (21.1).
11.0 Combat Modifiers
11.1 Terrain Effects on Combat
The terrain in the defending hex—or on the hexside separating the defending force from the attacker—may affect Combat Strengths. Retain all fractions until the odds have been calculated. Terrain Effects on Bombardment are different (13.36). If a unit's strength is reduced to zero, its attack doesn't take place (it remains engaged).
A. Towns: If all defenders are in towns, change Ar*/Dr* results to "Shock" (12.1). Defending Infantry Units have their total Combat Strength increased by 50%. EXCEPTION: Units with an Initiative of "1" (untrained) obtain no defensive benefit from Towns. Cavalry cannot charge into towns.
B. Slopes, Streams & Trestles: If all attacking stacks are attacking across Streams or Trestles, and/or uphill across Slope hexsides, the total strength of the defending force is increased by 50%. The Defender gets the slope benefit only if defending in a hilltop and attacked from the slope hex. Cavalry units cannot Charge uphill or across a Stream or Trestle.
C. Woods hexes: The total strength of all Cavalry and Artillery attacking into or defending in a Woods hex is halved. For all units defending in Woods, change Ar*/Dr* results to "Shock" (12.1). Cavalry units cannot Charge into Woods.
D. Bridges: Units are never required to attack across a Bridge. If all Combat Units are attacking across a Bridge or pontoon over a River (frozen or unfrozen), the Combat Strength of the defending unit is doubled. If the bridge is damaged see (7.63).
E. Crests: Change Ar*/Dr* results to "Shock" (12.1).
F. Chateau: Up to 2 defending Infantry are doubled. Change any Dr result (up to Dr4) to Shock unless the defender is demoralized. Cavalry units cannot Charge into a Chateau hex. Chateau effects on combat are negated in some situations (15.21).
G. Marsh: The total of all Cavalry and Artillery strengths are halved when attacking into or defending in a Marsh. Change "Ar*" result to Shock.
H. Rivers and Lakes: Combat Units may attack across unfrozen Rivers only at Bridges or pontoons (18.3). Frozen Rivers and Lakes are treated as Streams.
NOTE: Terrain modifiers for one side are not cumulative. Always use the one best modifier available to the defender.
11.2 Combined Arms
The attacker (only) may gain a +1 column shift in Combat if he has Infantry, Artillery, and Cavalry participating in the same attack. The Combined Arms benefit is not cancelled by a defending stack of all arms. Vedettes and artillery units that bombarded this phase are disregarded. The Combined Arms bonus does not apply if any of the defenders involved are in Town, Woods, Orchards, I.P.s or Marsh; across a Bridge (across Streams OK); or in Chateaux (unless demoralized). An overrunning Cavalry unit may be considered for Combined Arms even if it is eliminated in the Charge.
11.3 Staking Guard Units
This rule applies to all Guard ("OG," "Gd.," "Gde.," but not "GC" or "YG") units on both sides.
- Once per game, a player may "stake" his Guard units in any one combat. That player receives a one-column favorable shift on the CRT for that combat. A player is never required to stake the Guard. A Guard unit can be in combat without being "staked."
- If any infantry unit of the Guard is involved in an attack (at any time) and the result is "Ae," "Ar," or "Ex," the Demoralization Levels of all Friendly Formations a) whose officers are within 10 hexes or b) that currently have no officer but have any units within 10 hexes are immediately and permanently reduced by 4. EXCEPTION: Regardless of the combat result, if the attack by the Guard demoralizes the opposing formation, then the owning player's Demoralization Levels are not reduced.
- No formation can have its morale reduced more than once per game. French cavalry corps and formations with 4 units or fewer do not have their Demoralization Level reduced.
11.4 Napoleon
If Napoleon is stacked with an engaged force, the odds for combat shift one column in his favor at the French Player's discretion. (Does not apply to Bombardments or Charges.)
EXAMPLE: Napoleon is part of a one-to-one attack, the odds shift to 1.5:1. If Napoleon is defending and the odds are three to one, reduce to two-to-one.
11.5 Other Combat Modifiers
- Failed Repulse (9.22)
- Improved Positions (15.2)
- Snowstorms, Thunderstorms, Artillery in Mud (23.0)
12.0 Combat Results
12.1 Explanation of Combat Results
- Ae: All attacking Combat Units are eliminated.
- Ar (Ar2 or 3): All attacking Combat Units must retreat 1 (2, or 3) hexes.
- Ar*/Dr*: During any Storm; across a Crest hexside; or into a Marsh, Woods, Orchard, or Town hex, treat as Shock Result. These sudden encounters occur more frequently in confined passages.
- Dr (Dr 2, 3, 4): All Defending Units must retreat 1 (2, 3, or 4) hexes. EXCEPTION: Chateaux (15.1) and attacking across damaged bridges (7.63).
- De: All defending Combat Units are eliminated.
- Ex (Exchange): All Combat units on the weaker side are eliminated; the stronger side eliminates units which total at least 50% of the (face) Combat Strength of the weaker side. See Exchange Notes below.
12.2 The Shock Table
The Shock Table itself is a printed chart cross-referencing modified Initiative against a die roll; its grid of result codes is a graphic in the original rulebook and is not reproduced in this transcription. The procedure and notes that govern it follow in full.
Sk (Shock): If you obtain a Shock Result, each player rolls one d6. On a 1, 2 add 0; 3, 4 add +1; 5, 6 add +2; to the Initiative of your best unit (the "Lead" unit) and consult the Shock Table (12.2). Victorious cavalry, that is not Demoralized, Out of Supply or Out of Command (whether attacking or defending) must advance into the vacated hex, up to the stacking limit.
Shock Notes
A. The Initiative of a Demoralized unit is 1 less than printed. B. When Artillery is alone in the hex, disregard its Initiative rating and use "1" for its Shock Combat value. C. Any overrunning Cavalry must be the lead unit (14.24). D. Shock Modifier: Increase an Attacker's Modified Initiative by 1 if the combat was resolved at 3:1 or greater on the CRT. E. 1R = Reduce one attacking and one defending unit. The owner must reduce either the strongest or the best initiative of his units involved.
Exchange Notes
A. Artillery units that did not participate in the combat, which are stacked with units that did, may be used to satisfy an "Ex" result. B. Any overrunning Cavalry unit must be the first to be eliminated (14.24). C. Compare (unmodified) face-value SPs of all units.
EXAMPLE: The weaker side has 5 SPs and the other side has four units, with 2, 4, 8, and 10 SPs. Half of 5 is 2.5 and he must lose more, so he removes the '4.'
EXAMPLES OF COMBAT: Units A-1 and A-2 attack unit T at 11 to 4 odds, which rounds down to 2-1. Units B-1 and B-2 attack unit U in the Woods. The Woods halve the cavalry unit's combat strength and converts any Ar*/Dr* results to Shock (Sk). The odds are 3.5 to 4 which rounds down to 1-1.5. Unit C attacks unit V across a Crest hexside—the odds are 9 to 4 which rounds down to 2-1. The Crest hexside will convert an Ar*/Dr* result to a Shock Result (which is in unit C's favor). Unit D attacks unit W across a Stream hexside into a Town hex. Since terrain modifiers are not cumulative, the defender must choose which benefit to use; and in this case he picks the Stream since he does not want any Ar* results converted to Sk (he would lose a Shock battle). Unit W is increased by 50% yielding odds of 6 to 6.
The two units at E attack unit X up a Slope. The defender's combat strength is increased 50% to 6. The odds are 10 to 6 (which is 1.5 to 1). The three attacking units at F would have earned the Combined Arms Shift, but it is not allowed against defenders in Town hexes. The Town increases unit Y's Combat Strength 50% to 4.5. The odds are 12 to 4.5 (2-1) and Ar*/Dr* results convert to Sk. Unit G (cavalry) attacks artillery unit Z in a marsh hex. Both of those unit types are halved attacking and defending in Marsh, so the odds are 2 to 2. Marsh converts any Ar*/Dr* results to Sk which would be in the cavalry's favor.
12.3 Retreats
(12.31) Basic Rule: On a Result of "Retreat," the owning Player must move his unit (or stack retreating together) one or more hexes (as specified by the result). A retreating Combat Unit may not cross a prohibited hexside; enter an EZOC or a hex occupied by enemy Combat Units (EXCEPTION: Vedettes–16.25); or exceed stacking limits. Friendly units do not negate EZOCs for purposes of a combat unit's retreat. A leader may retreat through an EZOC if occupied by a friendly unit. A retreating friendly unit may enter a hex occupied by a friendly unit but that unit immediately comes out of Road March.
(12.32) Vedettes and Retreat: Combat Units may retreat into the ZOCs of an enemy Vedette, or even into a hex currently occupied solely by an enemy Vedette if no other path of retreat is available (the enemy Vedette is displaced; 12.36).
(12.33) Retreat Across Bridges: Units that retreat across a Bridge or Pontoon over an unfrozen River (not a Trestle or a pontoon bridge crossing a stream) risk elimination and must roll the die: the first unit to cross the Bridge is permanently eliminated on a 6; thereafter add +1 to the die for every retreating unit that follows (i.e. a second unit is permanently eliminated on a 5 or 6). If a pontoon deployed across an unfrozen River hexside with no existing bridge or another deployed pontoon, the first retreating unit is eliminated on a roll of 4, 5, or 6, with one still added for each successive unit. The owning player chooses the order of retreat. Retreats across damaged bridges are not allowed, and any retreating units are automatically eliminated (PEU) if there is no alternate hex.
(12.34) Units Unable to Retreat Fully: If a unit cannot retreat fully it is eliminated. If any part of its retreat path is blocked only by EZOCs or the map edge, the unit is placed in the Units Awaiting Recovery (UAR) Box. If it could not retreat fully because of a prohibited hexside and/or enemy units (only), roll one die to determine which box to place it in:
| Die roll | Place unit in: |
|---|---|
| 1-3 | UAR Box |
| 4-6 | PEU Box |
Always place a reduced unit that can't retreat fully for whatever reason into the PEU.
(12.35) Path of Retreat: The unit (or stack) must end its retreat the specified distance from the starting hex — enter each hex only once. The retreat should shorten the distance to the formation's baggage train or to a friendly supply source (or both). If two or more paths are open to the retreating unit, it must move in better terrain (preferring roads and trails to a roadless Marsh, for instance).
(12.36) Displacement: If the only path available to a retreating force would cause it to exceed the stacking limits (3.2) for a hex, then one or more combat units in the hex must be displaced to make room for it. Displaced units retreat one hex, observing all restrictions governing retreat after combat. However, if the units to be Displaced cannot retreat:
- the originally retreated force is eliminated instead and will enter the UAR; and
- if the retreating force contains cavalry the displacing unit must make an Initiative check: if it fails it is eliminated; place in the UAR Box. Trains never displace (18.16).
A displaced force may displace other Combat Units if no other path of retreat is available. Displaced units may not enter EZOCs.
EXAMPLES OF RETREAT: EZOCs are indicated with diagonal lines except those of the Vedettes which have no effect against enemy retreats. The only terrain that effects retreats are unbridged Rivers—which prevent it. Zig-zag retreats are not allowed. A unit must end its move that number of hexes distant from its starting hex. It may retreat across the bridge and Displace the enemy Vedettes. At B, the unit must retreat across a bridge hexside and run the chance of elimination—the first unit across is eliminated on a die roll of 6, the other unit on a die roll of 5 or 6. Assuming both survive, they can retreat in the path indicated.
12.4 Advance After Combat
Whenever an enemy stack is eliminated or forced to retreat, the owning player may advance friendly leaders and one or more friendly units that participated in the combat—whether as attacker or defender—and occupy the vacated hex and not beyond it.
A. One Infantry Unit plus all cavalry in a given attack may advance if no leader is present (or Leader doesn't advance).
B. LEADER BONUS: If a leader is in the stack and advances, all undemoralized infantry and cavalry units may advance with him.
C. Artillery may never advance after combat. If the defenders vacate the hex as a result of bombardment, any phasing infantry and/or cavalry adjacent to that hex (with any leaders) may advance into the vacated hex—after all bombardments are concluded. A unit cannot advance if it has an unresolved combat to perform, or is Out of Command.
EXAMPLE: A stack of artillery units bombard a unit, forcing its retreat. An adjacent unit with an unresolved combat may not advance—it must attack the other enemy unit first.
D. If the enemy force occupied two or more hexes, attacking cavalry (only) may advance into the other vacated hex.
E. Combat Units and Leaders may choose not to advance. The option to advance must be exercised immediately. A unit may not be attacked, or attack again, after advancing (even if it advances next to units that have not yet resolved Combat).
F. Demoralized and Out of Command units may not advance after combat.
G. Victorious Combat Units may advance into the vacated enemy hex even if they advance from one EZOC to another.
H. Units may not violate stacking limits after an advance. A victorious overrunning cavalry unit that remains in the hex counts against stacking.
EXAMPLES OF ADVANCE: At A no leader is present so only one Infantry and all Cavalry units can advance into the defender's vacated hex. At B the leader allows all undemoralized, non-Artillery units in his stack to advance, along with all engaged Cavalry units.
12.5 UAR and PEU Boxes
(12.51) UAR: Any time a full-strength Combat Unit is eliminated due to an Ae, De, or Ex, the owning Player must determine if it could have retreated 1 hex without encountering prohibited terrain or enemy-occupied hexes. If a retreat route is open or is only blocked by EZOCs it is placed in the Awaiting Recovery box. Otherwise, the unit must be placed in the Permanently Eliminated Units (PEU) box.
(12.52) PEU: The following Combat Units are also ineligible for Reorganization, and are placed in the Permanently Eliminated Units box when lost in combat:
- Baggage and Pontoon Trains
- Already Reduced: A unit already at its Reduced Strength when it was eliminated.
- No Reduced Strength: A Combat unit with a strength of [1] has no reduced strength.
- Retreat Across Bridges: Units retreating across a bridge risk permanent elimination (12.33).
- Ae on the Charge Table
- Unable to Retreat fully—risks permanent elimination (12.34)
13.0 Bombardment
13.1 Artillery Units
In addition to their regular attack ability against adjacent units, artillery may make bombardment attacks. Bombardments are permitted by the Phasing Player during the Bombardment Step and by the non-phasing Player during the Artillery Reaction Fire Step (13.5). Artillery may Bombard or participate in regular combat in a given Combat Phase—it may not do both.
13.2 Range
Bombarding Arty must be either 2 or 3 hexes from its target, unless Bombarding over an unbridged, unfrozen River.
13.3 Bombardment Procedure
(13.31) Sequence: For each bombardment, follow these steps:
- Designate the Bombarding Units (13.32).
- Designate the Target Hex (13.33).
- Determine the Line of Sight—if blocked, the bombardment is prohibited (13.34).
- Determine the Bombardment Strength (13.35).
- Calculate the Effects of Terrain (13.36).
- Resolve on the Bombardment Table (13.37).
- Execute the Combat Results (13.38).
(13.32) Designate the Bombarding Units: Any number of artillery units may bombard a single hex as long as all the units are eligible to fire at the target hex. Artillery units stacked together may bombard different hexes. An Artillery unit may not bombard more than one enemy occupied hex, nor may it split its strength. Artillery units may not Bombard when:
- in a woods or orchard hex; they may participate in an adjacent regular combat.
- alone in an EZOC; they must attack an adjacent unit (however, see 13.5).
- the weather is Snowstorm, Thunderstorm, Duststorm, Snow, Rain, or Fog (23.0).
- in Road March.
(13.33) Designate the Target Hex: All enemy units in a hex under bombardment are bombarded as one target. A hex may not be bombarded more than once in a Combat Phase, however, a hex may be the target of a bombardment and then a regular attack during the same Combat Phase. The target must be a combat unit or leader…
- in range and in the LOS of all Bombarding units.
- not in woods, orchards, or Chateaux.
- not adjacent (EXCEPTION: enemy on the opposite side of an unbridged, unfrozen river).
- not in a Town hex at range 3.
(13.34) Artillery Line of Sight
A. Hilltop Hexes and Slope Hexsides: A Slope hex intervening between a bombarding artillery unit and its target blocks the Line of Sight unless the artillery unit is on the hilltop and is either:
- firing downslope through the Slope hexside; or
- firing on another slope hex (no blocking hexes intervening).
The target units in either case have no reciprocal LOS (8.43).
B. Crest Hexsides: Crest terrain is drawn on both sides of a given crest hexside. LOS is not blocked by a crest adjacent to the bombarding unit. A non-adjacent Crest blocks LOS.
(13.35) Determine the Bombardment Strength: The strength of all Artillery units bombarding a given target is totaled (this may include bombarding units in different hexes). The strength of any artillery units bombarding at 3-hex range is reduced by 50% (if <1 use the <1 column; otherwise round fractions down).
(13.36) Calculate the Effects of Terrain: The effects of terrain on bombardment are as follows:
- Towns: Artillery bombarding into towns are reduced by 1/3. You may not bombard into a town at 3-hex range.
- Woods and Chateau hexes: May not bombard into Woods or Chateaux or out of Woods.
- Marsh: Bombarding SPs are reduced by ½.
(13.37) Resolve on the Bombardment Table: All bombardments must be resolved and results applied during the Bombardment or Arty Reaction Fire step. Cross-reference the Bombardment Strength with the die roll and apply modifiers. During mud turns (23.0), modify the die roll by –2.
(13.38) Execute the Bombardment Results: A Bombardment affects all units in the target hex (only). A Bombardment may result in: "Dr" (12.1) or "1R" (Reduce one unit). A "1R" result means one unit in the hex is flipped to its reduced side, or an already-reduced unit is eliminated. The Bombarding Player decides which unit to reduce. The owning player may decide to remain in the hex or voluntary retreat one hex with the remaining units in the target hex. "S" (Suppressed) and "2R" (Reduce two units/steps) are other possible bombardment results. All Suppression Markers on the map are removed at the end of the next Combat Step (Step 5).
(13.39) Hold Your Ground: A Dr result on the Bombardment Table can be converted to a 1R at owning player's option. Select your "lead" unit and roll for Initiative. If successful, the lead unit suffers step loss and there is no retreat.
13.4 Artillery Units in an EZOC
(13.41) If an artillery unit is in an EZOC and stacked with a friendly infantry or cavalry, it may bombard a hex different from the one the other units attack. Artillery need not attack the adjacent enemy units as long as some other friendly unit does so. However, an artillery unit suffers all combat results incurred by the units it is stacked with.
(13.42) Regular Attacks: When alone in an EZOC, an artillery unit must attack an adjacent unit and may not bombard. It uses the regular Combat Results Table, and may combine its strength with attacking infantry and cavalry in other hexes. During Mud, Artillery units attack and defend at one-half their normal strength (rounding fractions down). Artillery units in regular combat suffer all Combat Results in the same manner as other units. If the units in their stack suffer an "Ex" result they may be used to satisfy the required losses. Artillery units may never add their strength to a regular attack via a ranged attack—they must be adjacent. The Initiative Rating of a lone Artillery unit for shock is 1 (12.2).
13.5 Counter-Battery Fire (CBF)
The effective bombardment strength is reduced by one-half the strength of any artillery in the target hex (rounding fractions down). Apply any CBF reduction before modifying the bombardment strength for weather, range, or terrain. If the target has no LOS on the bombarding unit, or is alone in an EZOC (13.42), there is no CBF reduction. EXAMPLE: an ARF by 4 SPs would be reduced to 3 if the target includes 3 SPs of artillery with a LOS. Bombardment has no effect if one-half the target artillery strength is still at least equal to the Bombarding strength.
13.6 Soak-Offs
A unit bombarded in a given turn is considered attacked.
14.0 Cavalry Charges
A cavalry charge in this game is a faster charge, where the cavalry gradually build-up speeds near 300 meters per minute. In a successful cavalry charge, the cavalry unit(s) move through an EZOC directly into the enemy-occupied hex, thereby cutting the retreat route of the overrun unit in the following Combat Step.
14.1 Which Units May Charge
All cavalry (except LC and demoralized cavalry) that have not moved during the previous Movement Phase may make a charge. A hex being charged must also be subjected to a regular attack by at least one friendly infantry or artillery during the same Combat Phase. A cavalry unit may not make a charge and conventional attack during the same Player-Turn.
14.2 Procedure
(14.21) A Cavalry Charge is resolved on the Charge Combat Table during the Charge Step. Charging cavalry may expend the full Movement Allowance during the charge step. It costs one extra MP to enter the Enemy unit's hex. This MP cost reflects the shorter range of charging cavalry. Determine the odds as in combat and roll on the Charge Combat Table.
(14.22) Restrictions: Only one charge may be made by a single stack against a given hex in one Combat Phase. Cavalry units from multiple hexes cannot charge the same hex. A Cavalry Charge may not be conducted:
- into a woods, town, chateau, or improved position
- uphill through Slope
- across a Ford, Stream, or Span hexside
- during a Mud or Night turn (14.3)
- if the Cavalry unit is in Road March
- through an EZOC (except the ZOC of its target)
- through friendly units
- by LC or demoralized cavalry.
Cavalry Charge movement is subject to all Movement Rules (7.0), with the exceptions listed above.
(14.23) Charge Results: The possible results of a Charge are Ae, Pr or Overrun:
- On an Ae result, the charging units are eliminated (PEU).
- On a Pr result, all Phasing (charging) cavalry retreat to their starting hex and reduce 1 or 2 units. The target has off-road Movement costs doubled in the following Movement Phase. Place a Square Marker on the infantry units charged. Remove the Marker at the end of their next Movement Phase.
- On an Overrun result, the cavalry unit(s) move into the enemy-occupied hex. The charging unit's ZOC extends out into all surrounding hexes. In the upcoming regular attack (Combat Step), the retreat route of the overrun unit is cut off.
(14.24) Subsequent Combat Result: The cavalry units making the charge may not add their Attack Strength to the subsequent combat. The subsequent attack is credited with cavalry for purposes of Combined Arms (11.2) even if the cavalry unit is eliminated in the Charge.
A. If the subsequent Combat Result on the Combat Results Table is Dr or De, all defending units are eliminated (UAR), if the charging cavalry unit(s) remain in the hex, and one of the attacking units may advance into the hex as usual.
B. If the subsequent Combat Result on the Combat Results Table is Ae or Ar, the cavalry unit(s) are eliminated (UAR). Opposing units may never end any Phase stacked together.
C. If the subsequent Combat Result is an Ex, the charging cavalry units are the first to be counted toward the Exchange.
D. If the subsequent Combat Result is Sk, the charging Cavalry unit is the lead unit.
E. If the Ex or Sk does not clear the hex of enemy units, the charging cavalry units are eliminated (UAR).
14.3 Charges and Weather
Charges are not permitted during Mud and Night Turns. During Snow, Snowstorm, Thunderstorm, Duststorm or Heat, add +1 to the Charge CRT die roll (23.1).
CAVALRY CHARGE EXAMPLES: Hexes marked X may not be a target of Cavalry Charge even if they contained enemy units under attack. Charges may not be conducted across Streams or Rivers, up Slopes or into Woods or Town hexes. At B the Cavalry Charge is made across two Crest hexsides which have no effect. The Cavalry unit pays +1 MP to enter the defender's hex. The odds would be 1-2 (only 50% chance of success). At C the Cavalry unit attacks at 1-1. If the Cavalry survives the charge they will remain on top of the enemy unit and will cut off their retreat. Note that in combat C, the phasing player will earn the Combined Arms shift even if the cavalry unit doesn't survive the charge.
BOMBARDMENT EXAMPLE: Artillery unit A has no eligible targets—all are blocked by friendly units or are prohibited. Bombardments cannot be made uphill against a Hilltop hex, into Woods, or across a Crest that is not adjacent to the artillery.
15.0 Fortified Places
Fortified Places are of two types. Chateaux are protected by strong walls impervious to field artillery. A simple Improved Position (I.P.) made of timber and stout beams could be thrown together in a few hours. A more elaborate dug-in redoubt could take most of a day.
15.1 General Rule
(15.11) ZOCs: ZOCs extend out of but not into Fortified Places—adjacent units must attack enemy units in Fortified Places. A unit that enters a Fortified Place adjacent to an enemy combat unit must stop moving.
(15.12) Attacking: Units in Fortified Places are not required to attack, but if they elect to attack, all adjacent enemy units must be attacked by some friendly unit.
(15.13) Advance and Retreat: Units may advance after combat into Fortified Places. Retreat into occupied Fortified Places is allowed (15.21).
(15.14) Cavalry Charges against Fortified Places are prohibited.
(15.15) Combined Arms bonus: When attacking Fortified Places the attacker receives no Combined Arms bonus.
15.2 Chateaux
(15.21) Stacking: A chateau loses its combat effects if the hex contains more than two defending infantry units; or contains any artillery, cavalry or train units. All chateau effects on combat are negated as long as they remain in the hex (4.2, 11.1F, 11.2, 13.33, 14.22). Town effects if any still apply.
(15.22) Defending: If any defending units in a combat occupy a Chateau, "Dr," "Dr2," "Dr3" and "Dr4" results from the CRT are treated as "Shock." This does not apply if the units defending in the Chateau are demoralized, or if a retreat result is obtained on the Shock Table.
(15.23) Bombardment: Artillery units may never bombard into Chateaux. They may make regular adjacent attacks.
15.3 Improved Positions
(15.31) Defending: The strengths of all infantry units defending in a completed I.P. are doubled. If an I.P. is built in a town, all combat effects of I.P. and towns apply.
(15.32) Construction Procedure: The construction hex must contain at least two infantry units that did not move during that Movement Phase. If a town hex only 2 SPs of infantry are needed. Construction is not permitted during Frost, Snow, Snowstorm, or Night March Phase, or in Chateaux or Marsh hexes. Roll on the table below at the end of the Movement Phase. If the infantry leave an I.P. under construction, remove the I.P. marker. After completion the Improved Position marker is never removed (even if unoccupied) and may be used by either side.
(15.33) Construction Table: Roll one d6.
| Die roll | Result |
|---|---|
| 1 | construction complete (invert marker) |
| 2-6 | Under Construction—roll again next turn. An I.P. under construction has no effect. |
16.0 Vedettes
Each Vedette is a regiment of around 500 men, broken-up into 50-man patrols that fan-out to cover a wide area. These fast-moving patrols were used to screen an army against enemy reconnaissance, to perform their own reconnaissance, and to protect the flanks of combat units.
16.1 Vedette Breakdown and Reassembly
A Light Cavalry unit may generate a number of Vedette (scout) units equal to its vedette number (1.42).
(16.11) Creating Vedettes: During the Reorganization Segment (only), any full-strength Light Cavalry (LC) unit may bring its corresponding Vedette units onto the map. Each full-strength LC parent unit has a number (in a circle), to indicate the number of Vedettes provided for that unit. The Phasing Player removes the LC unit from the map and replaces it with the Vedettes. The LC unit is then placed in the Full Strength Holding Box. Vedettes may move in the turn they are created. Reduced-strength units may not create Vedettes.
EXAMPLE: Marulaz's cavalry brigade has a "4" in a circle. It contains four Vedettes with a corresponding designation.
(16.12) Reassembling Light Cavalry Units: To recombine Vedettes into an LC unit, just pay the regular +1 MP cost to stack. Remove the stacked Vedettes immediately if the stack is not in an EZOC and replace them with the parent unit. The parent unit may continue moving, expending the Vedettes' remaining MPs, in command if any of its Vedettes were in command. The Vedettes of any LC unit that contains 4 or more Vedettes may stack for immediate reassembly.
NOTE: Vedette unit I.D. may be ignored. The proper number of Vedettes may combine freely to reassemble any available LC unit.
(16.13) Creating Vedettes from Mixed Type Units: Full strength Infantry units with a Vedette number may also create Vedettes during the Reorganization Segment. Flip the counter to its reduced strength side, then deploy the Vedette(s) to the same hex. Such Mixed Type units may flip back to full strength by stacking with the same number of friendly Vedettes (not in an EZOC) and removing the Vedettes from the map during the Movement Phase.
(16.14) Corps Affiliation of Vedettes [Optional Rule]: A Vedette may not be used to reassemble a unit from a different formation; only units from its assigned formation.
16.2 Properties of Vedettes
(16.21) Movement: Vedettes move like Cavalry and must be in Command or pass their Initiative die roll to move. Vedettes always pay road costs when on roads but ignore Road March restrictions and are ignored by friendly units in Road March.
(16.22) Stacking: No more than 3 Vedettes may occupy the same hex. EXCEPTION (16.12)
(16.23) Repulse: Vedettes may not attempt Repulse. Repulses against Vedettes always succeed.
(16.24) Combat: Vedettes are non-combat units—they may not attack or defend. Vedettes do not count for Combined Arms. Vedettes stacked with friendly combat units are subject to the combat result against the stack. Eliminated Vedettes may return to play through Reorganization (22.25).
(16.25) ZOCs and Retreat: Vedettes have ZOCs, but they do not block enemy retreats—units may retreat into the ZOC of an Enemy Vedette. Retreating enemy units can, if necessary, displace friendly Vedettes.
(16.26) Retreat Before Combat: Any engaged Vedette of either side that is not stacked with a friendly combat unit must Retreat during the Cavalry Retreat Step (10.2) one or two hexes. If it cannot retreat, it is eliminated (12.34). Vedettes cannot prevent enemy Forces from using Retreat Before Combat.
17.0 Supply
17.1 The Supply Segment
The Phasing Player must determine the supply status of each Friendly Combat Unit during the Supply Segment of each Weather/Recovery Turn (23.12, 2.1/B-1). Out of Supply units are marked "Out of Supply" and remain Out of Supply until the next Weather/Recovery Turn.
17.2 Out of Supply Effects
Out of Supply units suffer the effects of Demoralization (21.2), but the effects are not cumulative.
17.3 Automatic Supply
All reinforcements from their turn of entry, and all units on-map at the start of any scenario are automatically in supply until the next Weather/Recovery Turn.
17.4 Supply Lines
(17.41) Tracing a Supply Line: A Combat Unit is in supply if it can trace a Forward Supply Line (17.42), no more than 14 hexes long (not counting the unit's hex), to one of the below:
- Directly to a Friendly Supply Source (17.5); or
- To its own Formation's Baggage Train located on a road or trail hex that has a "Trunk" Line (17.43); or
- If its own Formation's Baggage Train is not in play, or if there is no dedicated baggage train (none provided in the counter mix), it can trace to the nearest Friendly Baggage Train located on a road or trail hex that has a Trunk Line.
NOTE: Supply is tracked by unit, not by stack.
(17.42) Forward Line: The Forward Supply Line (only) may traverse any type of terrain except Lake or River hexsides (unless the hexside is frozen or is crossed by an undamaged bridge or pontoon). Each counts as one hex, maximum 14 hexes.
(17.43) Trunk Lines: A Trunk Line may comprise any number of connected road and/or trail hexes leading to a Friendly Supply Source.
(17.44) Blocking Supply Lines: Forward and Trunk Lines are blocked by the physical presence of enemy combat units and Vedettes. EZOCs do not block Supply Lines.
17.5 Supply Source Hexes
Each side has Supply Source hexes that are indicated on the map by a supply symbol with an encircled code letter.
C = Coalition, A = Austrian, P = Prussian, R = Russian F = French
18.0 Baggage and Pontoon Trains
There are two types of Train units: Pontoon Trains and Baggage Trains. Baggage Trains are important for Supply; Pontoon Trains place temporary bridges. Pontoon Trains have a train side and a deployed bridge symbol on the reverse.
18.1 Properties Common to Both Trains
(18.11) Movement: Trains move automatically—they are always in Command. Trains have a Movement Allowance of 4 MPs, paying cavalry costs for movement. They may use Road March (7.5). During Mud, Thunderstorm and Snowstorm turns, Train units Movement Costs are doubled for all types of terrain.
(18.12) Movement Restrictions: Trains have the following movement restrictions:
- may not enter Slope hexes except by Road or Trail.
- may not stack.
- may not enter an EZOC.
- Baggage Trains may not cross rivers (even if frozen) or streams except via Spans and Pontoon bridges.
- Baggage Trains (and Supply Lines) may not cross damaged bridges (but may cross pontoon bridges).
(18.13) Trains and Combat: Trains do not have a Combat Strength and cannot defend or attack. They may not Retreat Before Combat.
(18.14) Trains and ZOCs: Trains have no ZOC. If a Train or deployed pontoon finds itself adjacent to an enemy combat unit it is immediately captured or destroyed. Roll one die:
| Die | Pontoon Train is | Baggage Train is |
|---|---|---|
| 1-3 | captured intact (18.35) * | captured (18.23) |
| 4-6 | destroyed | destroyed |
* If one end of a deployed pontoon is occupied by a unit friendly to the pontoon, a roll of 1 to 3 is considered no effect.
(18.15) Destroyed Trains: Destroyed Trains are removed from play (PEU). They may not be reorganized.
(18.16) Trains and Displacement: Trains may not be displaced. If the train unit's hex is the only one available for the retreating friendly unit, the train is destroyed (PEU), and the retreating unit/stack is eliminated (UAR).
(18.17) Trains and Formations: Baggage Trains may belong to specific formations printed on their counter. Pontoon Trains do not belong to any formation.
18.2 Baggage Trains
Each baggage train represents approximately 100 wagons. A Baggage Train serves to extend a unit's supply line.
(18.21) Supply: Most Baggage Trains belong to specific formations as shown by their Command Designation. Some baggage trains are generic for a given side. Each Corps baggage train can provide supply to all units in its formation within range plus one stack of units from a different formation. However, any formation or individual unit without a dedicated baggage counter (none provided in the counter mix) may trace supply to any friendly baggage train, each stack to a different baggage train.
(18.22) Lost Baggage: If a formation's baggage train is destroyed or off map, only one stack of that formation may trace supply to another friendly baggage train.
(18.23) Captured Baggage Trains: A captured baggage train is destroyed (PEU). Two VPs are awarded to the side that captures a baggage train. If an out of supply unit(s) captures an enemy baggage train, all units of the capturing side adjacent to the train remove their OOS Markers.
18.3 Pontoon Bridges
Pontoon Bridges may be deployed across Stream or River hexsides.
(18.31) Deploying Pontoon Bridges: During the Friendly Movement Phase, the Phasing Player may deploy a Pontoon Bridge by flipping the counter over onto an adjacent hexside so that it is half-way on either hex. It costs no MPs to deploy. No Friendly or Enemy units may cross a Pontoon Bridge until the Friendly Player Turn after it is deployed.
(18.32) Deployment Restrictions: A Pontoon Bridge may not be deployed:
- to extend into an enemy-occupied hex, but may be deployed into an EZOC.
- if either end of the bridge is in a slope hex—unless there is a road or trail in the hex (18.12).
- in a Snowstorm, or during Frost or Snow.
- if the Pontoon Train is marked in Road March (7.51).
(18.33) Crossing Cost: Combat Units not in Road March pay the following MPs to cross a Pontoon:
- +1 MP to cross a stream
- +2 MPs to cross a river
- +0 MPs to cross if the Pontoon Bridge is deployed at an existing Span or site of another deployed Pontoon.
Units in Road March, Leaders, and Vedettes never pay extra MPs to cross Pontoon Bridges. Trains must pay the additional +2 over river and +1 over stream.
(18.34) Reconfiguring a Pontoon Train: A Pontoon Bridge may be reconfigured back into a Pontoon Train during the Friendly Command Segment simply by flipping the unit over to its Pontoon Train side in either of the two hexes adjacent (you may reform a pontoon train at one end if the other end is in an EZOC). Pontoon Trains must be reconfigured at Step "e" of the Command Segment. Nothing may cross a Pontoon Bridge in the turn it is reconfigured into a Pontoon Train. A Pontoon Train may move in the same turn that it is reconfigured but may not re-deploy until the next turn.
(18.35) Captured Pontoon Trains and Pontoon Bridges: Leaders, Vedettes and Combat Units may freely Move, Advance After Combat, and Retreat across intact enemy Pontoon Bridges. A captured Pontoon Bridge may be reconfigured into a Pontoon Train and used again by the player who captured it.
19.0 Reinforcements
19.1 General Rule
Reinforcements enter play on the turn and hex specified in the Scenario Information and/or the TRC. Reinforcements enter during the Friendly Command Movement Segment and may move and engage freely on their turn of entry. Reinforcements may be placed under "March Order" on the turn of entry at the Player's discretion (20.3). Reinforcements enter Hidden (8.0). Reinforcements are In Command for the turn of entry and in supply until the next supply check. A light cavalry unit may enter as a combat unit or broken down into Vedettes.
19.2 Stacking and Road March
(19.21) Stacking: When more than one Combat Unit is scheduled to arrive at the same entry hex in the same turn, they may arrive stacked observing the stacking limit. If there are more arriving units than can legally stack in the hex, each subsequent stack enters on the same hex and turn, paying MPs equal to the cost of the hex for itself and for each stack that entered before it.
(19.22) Road March: Reinforcements may instead enter the map using Road March (unstacked) with an empty hex between each arriving unit. In this case the first unit to arrive pays the road MP cost of the first entry hex. Each subsequent unit or stack to enter on the same hex and turn pays one additional MP. In addition, unless otherwise indicated by the scenario, a formation's leader enters with the first stack of his formation, and the formation's baggage train enters at the end after the last arriving unit of the formation.
EXAMPLE: The second stack to enter will pay one extra MP; the third, two additional MPs (19.23).
(19.23) Excess Stacks: Stacks without enough Movement Points to enter must wait off-map until the following turn. The excess stacks of a formation still enter in Command when they arrive.
19.3 Changing Reinforcement Entry
(19.31) Blocked Entry Hexes: If the entry hex is occupied by an enemy or friendly combat unit or an enemy combat unit's ZOC the Reinforcement may instead enter in the hex nearest to the entry hex clear of combat units and EZOCs.
(19.32) Voluntary Delay: Players may voluntarily delay the entry of Reinforcements. However, no other scheduled Reinforcement may enter at this entry hex until the delayed Reinforcements have been brought onto the map (the follow-on reinforcements may enter in the same or subsequent turns). A portion of a Reinforcement force may not be delayed. Either all the units scheduled to arrive at that hex are brought onto the map, or none.
19.4 First Day Reinforcements
Approach to Battle reinforcements enter on the First Day of the game. These units are usually on-map in the Day of Battle Set up.
19.5 Alternate Reinforcements
Alternate Reinforcements are forces that could have intervened. Their arrival depends upon card play. Alternate Reinforcements appear in order of priority listed in the Scenario Information.
20.0 March Orders
Orders were carried by orderlies mounted on fast horses, usually overnight, to Officers beyond Command Range.
20.1 General Rule
A March Order allows a Force (defined in the Glossary) to move during each Friendly Command Movement Segment that the order is in effect (including during Night March Phases) regardless of Command Range. All the units under a March Order are considered in command. A Force may receive a March Order if it is:
- a Reinforcement (20.3);
- the one force selected at night (20.4); or
- the one force selected for March Order at the start of play, (once per game) if that side has a Commander on the map.
20.2 March Order Procedure
(20.21) Specify Objective Hex: The Player must secretly specify the Objective Hex on an Orders Slip when the March Order is issued. This objective must be revealed to the Enemy Player at the moment an infantry unit of that Force reaches its objective. The objective may be any town or Bridge hexside on the map. For each Force under a March Order, the Player must write down the name of the Officer or the designation of the individual unit(s) in question. A force may be assigned only one objective at a time. In a multi-hex town any hex in the town can be the objective.
(20.22) March Order Movement Restrictions: The force must move each turn at the speed of the slowest unit in the force, until it reaches its objective or the March Order is removed (20.23). The units under a March Order must take the shortest possible route (in terms of MPs) toward their Objective Hex. A Force given the March Order is not required to use road march. On the turn a Force reaches its objective, it can continue moving to the limit of its Movement Allowance; then the March Order is removed and no longer in effect.
(20.23) Forces Removed from March Orders: A unit is removed from the March Order at the moment:
- it reaches its objective hex (or as near as possible).
- at the owning player's option, if it is placed in the ZOC of an Enemy unit or vedette.
- at the Player's option, if the force is placed in Command by a Leader during any friendly Command Phase. An officer who makes his initiative may opt out of a March Order.
NOTE: If a Commander places an individual unit in command, it does not remove the March Order for the rest of the Formation.
The M.O. endures until the last unit reaches the destination or is removed. When a unit comes out of a March Order it is Demoralized for the rest of the Player Turn.
Units that reach a March Order destination are removed from the M.O. Other units under the March Order can either continue to use the M.O. or they can be removed. The units removed from a March Order can freely use their remaining MA that turn, without being constrained by the former M.O.
(20.24) Pre-Programmed March Orders (Card Play only): A force under a pre-programmed March Order at the start of the game that is subject to a Late Start Mode card cannot be removed from the March Order until its Leader awakes. Until then the Leader moves with the units of his formation.
20.3 March Orders to Reinforcements
A Reinforcement Force may be placed under a March Order (or several different March Orders) on the turn of its map entry, even if its arrival is delayed indefinitely by the Player. The number of reinforcement forces that may be placed under a March Order on a turn is limited only by the number of reinforcement forces arriving on that turn.
20.4 March Orders at Night
(20.41) Moving Units under March Orders at Night: The Movement Allowance of a Force under March Order at night is 2/3 MPs (inf/cav). Forces under a March Order are the only forces which can move during the Night March Phases.
(20.42) Changing March Orders at Night: One on-map stack or formation may be given a March Order during the Night March Order Dispatch Phase, regardless of command range restrictions. Units need not be in command for a night March Order. This March Order takes effect with the first daylight turn of the next day (2.2B). Alternatively, a player may change the objective hex in a March Order of any one of his forces, but this counts as the "one" March Order allowed.
20.5 General Retreat March Order
(20.51) The General Retreat March order differs from a regular March Order in the following ways:
- All friendly leaders and units are considered to have the order—including out of command forces;
- The Objective Hex for a given unit is the closest friendly Supply Source under friendly control, tracing the line as allowed by the rules of supply (17.41), or may be a hex specified in the Scenario Instructions;
- The order may be issued during the friendly Command Segment of any day Turn, or at the beginning of the March Order Dispatch Phase (Night AM turns) and takes effect immediately.
- The order may be cancelled at the owning player's option, after being in effect for one turn, for any undemoralized force(s) in Command and these may maneuver freely.
- Add one (+1) to the die roll for Reorganization of Demoralized forces on the turn the General Retreat is ordered.
- Reinforcements enter normally.
- The order may be issued only once per game, unless using the cards; a new General Retreat may be issued for each card.
- Units must remain in General Retreat March Order for at least 1 turn, unless they move adjacent to the enemy.
- All units move at the speed of the slowest unit in their force (20.22). EXCEPTION: Undemoralized units passing an Initiative check may opt-out of the General Retreat March Order and freely maneuver (having already passed Initiative) in the following Initiative Movement Segment.
- The text of the General Retreat Card (No. 9) is a part of the General Retreat rule; units may disengage on the turn played.
(20.52) Exiting the Map: When your units under a General Retreat March Order actually reach the mapedge hexes that are the objective(s) of the order, you can exit all, some or none. For units that have reached the objective that will remain on the map, the order is cancelled.
21.0 Demoralization
Units may become demoralized (1) if their formation reaches its Demoralization Level due to losses, (2) if the unit is Out of Supply (17.2), or (3) if it leaves March Orders (20.23).
21.1 Demoralization Levels
Each player has a Casualty Record Track to record Friendly losses. When the first Friendly Combat Unit of a Formation is eliminated, this unit becomes the "Casualty Level Marker" for its Formation (21.3). As further units are eliminated, the Owning Player adjusts this marker to reflect strength points lost by moving it a number of spaces on the track equal to each eliminated unit's full Combat Strength. A Formation becomes Demoralized at the instant its Casualty Level marker reaches or exceeds its Demoralization Level (the space printed with its Command Designation on the Casualty Track). Place a "Demoralized" marker on the formation's Officer.
NOTE: Formations with fewer than three units present at the battle can only be Demoralized by lack of Supply.
21.2 Demoralization Effects
Demoralization has the following effects:
Initiative: One is subtracted from the Initiative rating of Demoralized Officers and Combat Units any time that their Initiative Rating is referenced (Exception: Recovery, 22.12).
Movement: Demoralization has no effect on Movement—Leaders and Combat Units may use Road March and may be given March Orders.
Combat: Demoralized Units may not Advance after Combat. Demoralized cavalry may not charge. Demoralized units in Chateau hexes do not receive the benefits listed in 15.22. Remove any Demoralization from a unit when it is eliminated.
Bombardment: Demoralized Units may retreat one hex upon receiving 1R results (13.38).
Reorganization: The Phasing Player must roll for each Combat Unit in a demoralized formation (22.23-3). For a Demoralized Formation, if this die-roll is a "5" or "6" the unit is permanently eliminated (PEU). Add 1 to the die if a General Retreat will be issued in the next Movement Phase.
NOTE: As long as a unit survives at Reduced Strength, the difference between its full and reduced Strength does not count for Demoralization purposes or Victory Points.
21.3 Rallying from Demoralization
When an eliminated Combat Unit is Reorganized (22.2), that Formation's Casualty Level marker is reduced by an amount equal to the unit's full (not reduced) Combat Strength. If the unit is eliminated again later then the Casualty Level Marker should be increased by that same amount (the unit's Full Combat Strength). The moment the Casualty Marker for that Formation moves below its Demoralization Level, the Formation is recovered from Demoralization and the Demoralized Marker is removed from play. Once all other units in a Formation have recovered, the unit that was used as the Casualty Level Marker (21.1) is eligible to be reorganized.
21.4 Demoralization and Supply
Combat Units that are Out of Supply suffer Demoralization Effects. The out-of-supply Combat Units receive an Out of Supply Marker, and rally from Demoralization on the turn in which their Supply Line is reestablished. There is no additional effect upon out-of-supply units that become demoralized due to combat losses.
21.5 Demoralization and March Orders
At the end of a friendly Player-Turn, without the need of a die roll, remove Demoralized Markers from all units that were demoralized when they left March Orders that Player-Turn.
22.0 Recovery and Reorganization
Eliminated units may be reorganized at reduced strength.
22.1 Recovery
(22.11) General Rule: Recovery refers to the transfer of a Combat Unit from the Awaiting Recovery box (UAR) to the Recovered section.
(22.12) The Recovery Segment: Each turn the Weather is checked, both Player Turns will include a Recovery Segment (2.1/B2). During the Recovery Segment, the Phasing Player may make an Initiative Check for each unit in the Awaiting Recovery box. The Initiative die roll is successful if less than or equal to the Initiative Rating printed on the unit counter.
- IF SUCCESSFUL: The unit counter is flipped over to its reduced side and moved into the Recovered Section.
- IF UNSUCCESSFUL: The unit remains in the Awaiting Recovery box. Roll again in the next Recovery Segment.
(22.13) Automatic Night Recovery: At the beginning of the Friendly Recovery Segment of the Night AM Turn, the Phasing Player transfers ALL Combat Units still Awaiting Recovery to the Recovered Section at their reduced strength.
22.2 Reorganization
(22.21) General Rule: Reorganization refers to the return of Combat Units (at reduced strength) from the Recovered section of the UAR to the map.
(22.22) Procedure: Reorganization occurs in the Friendly Reorganization Segment. All units in the Recovered Section of the UAR may be placed on the map provided the necessary Leaders are available to bring them all on. Each eligible Leader may bring on two combat units (plus up to 3 vedettes) in the recovered section. The units are placed in the hex containing the Leader. If placing reorganized Combat Units in the Leader's hex would violate the Stacking Limit, the units already there may be Displaced.
(22.23) Restrictions and Penalties: Reorganization can take place in any terrain under the following restrictions:
- Leaders in an EZOC may not be used for Reorganization.
- Officers can only Reorganize units of their Formation. A Commander may Reorganize units of any Friendly Formation whose Officer is within the Commander's Command Radius.
- Units that are part of a Demoralized Formation risk elimination when they are Reorganized (21.2).
(22.24) Officers and Reorganization: An Officer does not have to be in Command in order to Reorganize. Each Officer that attempts Reorganization is marked with an Out of Command marker until the friendly Command Segment of the next Game-Turn. EXCEPTION: Reorganizing Vedettes does not require an Out of Command Marker. Officers so marked may not be part of the Chain of Command for the remainder of that turn, even if Reorganization failed. Commanders and Commander-Officers are not OOC when Reorganizing.
(22.25) Vedettes and Reorganization: If a Vedette is eliminated in combat (16.24), place it in the Unrecovered Section ("Awaiting Recovery") of the UAR. If a Vedette is eliminated during Reconnaissance it goes immediately to the section of the UAR specified on the Reconnaissance Table. Reduced-strength LC units don't have a vedette number. They cannot deploy a vedette once reduced.
23.0 Weather
23.1 Procedure
(23.11) Weather Condition Die Roll: The first player starts each day with a die roll on the Weather Table (tailored to the battle being played), to determine the initial Weather. The resulting Weather takes effect immediately.
(23.12) Weather Duration Die Roll: Roll again on "Change in the Weather" and add the result to the original Weather Die Roll to determine the number of turns that weather condition will remain in effect. Repeat these two die rolls each time the weather changes. (In some games duration is specified.)
(23.13) Effects of Weather: As indicated on the table below, the possible effects of weather are as follows:
- LOS Reduced: Line of Sight reduced to 1 hex. Units may see into adjacent hexes only.
- Bombardment: Prohibited. -2 DRM = Apply a –2 DRM to all artillery bombardment die rolls during Mud.
- Deploy Pontoons: No = may not be deployed
- Construct I.P.: Improved Positions may not be constructed.
- Charge Rolls: +1 DRM to all Cavalry Charge rolls.
- Rivers, Lakes: frozen and treated as Stream hexsides.
- Strength Reduced (rounding down): when attacking and defending. Artillery strengths are reduced for adjacent combat (only).
- Movement Cost: MPs doubled for Train and Artillery units.
- Ar*/Dr* Combat Results: Treat as Sk (Shock) results.
(23.14) Weather and LOS at Night: If the Last daylight Game-Turn was Thunderstorm or Mud, the night weather is Mud; otherwise Fair weather applies. At Night the LOS is reduced to one hex.
(23.15) Fire: Units can Move, Retreat, Repulse, and Road March through a Fire hex, without stopping. Command Range may extend through a Fire hex. The occurrence of Rain and Thunderstorms causes Fire to cease immediately.
(23.16) Thunderstorms: Thunderstorms only last for the first hour after the die roll. The next two turns are Rain plus Mud.
Weather Effects Chart
| WX Condition | Action LOS | Bombardment | Deploy Pontoons | Construct I.P. | Charge Rolls | Rivers, Lakes | Strength Reduced | Movement Cost | Ar*/Dr* Result |
|---|---|---|---|---|---|---|---|---|---|
| Snow | Adjacent | Prohibited | No | No | +1 DRM | Frozen | — | — | — |
| Snowstorm | Adjacent | Prohibited | No | No | +1 DRM | Frozen | Inf x 0.75 | Train, Art x2 | Shock |
Weather Conditions (WX) vary from game to game, and are not cumulative with Terrain Effects; use the worst that applies. DRM: Die Roll Modifier
Glossary and Index
These definitions are a part of the body of the rules. The main paragraph for a term is the case number in bold. The original booklet follows each entry with a list of every rule-number cross-reference to that term; those page-index number lists are omitted below as navigational aids rather than rules text, but every definition sentence is reproduced in full.
Artillery 13.0 Artillery pays Infantry Movement costs while Horse Artillery pays Cavalry costs. Artillery and Horse Artillery pay doubled Movement costs during Mud, Thunderstorms and Snowstorm turns for all types of terrain.
Bombardment 13.0 Artillery units may Bombard in the Bombardment Phase, using the Bombardment Table at 2-3 hex range.
Bridge 7.6 A span crossing a river.
Cavalry: Mounted combat units including Regular, Heavy Cavalry (HC), and Light Cavalry (LC).
Cavalry Charge 14.0 Any cavalry except LC may make a cavalry charge resolved on the Charge Combat Table.
Column: Includes all units that arrive on the same or consecutive turns at the same area. They arrive in a chain of units or stacks. Unless otherwise specified all corps assets (non-divisional artillery units followed by the baggage train) arrive at the end of the column.
Combat Strength: The total manpower of a Combat Unit quantified in Strength Points (SPs). One SP equals between 400 and 800 men.
Combat Units: All playing pieces except Leaders, Vedettes, Trains, and Markers. Only Combat Units may attack enemy Combat Units.
Combined Arms 11.2 An attacking force with infantry, cavalry and artillery gains a combat odds shift of one column to the right.
Commanders 5.21 & 5.23 Leaders at the highest level may place their subordinates (Officers and Combat Units) "in Command" so that they may move.
Command Designation 1.4 An Officer commands all Combat Units that share his Command Designation. The designation has two parts (usually): a Formation's Roman numeral, followed by a divisional designation. EXAMPLE: III/1 indicates III Corps/1st Division.
Command Range 6.4 The "radius of command," or distance beyond which a Leader cannot place forces "in Command." Commander's Range (4 hexes) and Officer's Range (3 hexes) can be traced through EZOCs if occupied by a friendly unit.
Command Rating 5.21 The number of Formations and individual Combat Units that a Commander may place "in Command" at one time.
Counter-Battery Fire 13.5 A reduction in the strength of a bombarding artillery unit by half the strength of artillery in the target hex.
Die Rolls: Use one six-sided die (d6) for all die rolls.
Division: Three units belonging to the same division may stack 3 units to the hex. Division I.D. is used in the Initial Set Up, and to specify regular and alternate reinforcements.
DRM (Die Roll Modifier): Number to be added to or subtracted from the die roll in specific situations.
Engage 4.3 The act of entering an Enemy Zone of Control—this requires an attack upon the adjacent Enemy units. Artillery when bombarding are not "Engaged."
EZOC: Zone of Control (see p. 24) of an Enemy unit.
Force: (a) a single stack, or (b) a Formation, excluding any out of command units. Any part of a formation in command now—or in the next Command Phase—can qualify as a force.
Formation: A group of Combat Units with an Officer that shares the same Command Designation, linked by color. French formations are of corps size; Russian and British formations are divisions.
Friendly: Friendly units are all those under the control of one player; enemy units are controlled by his opponent. Coalition Forces may include Prussian, Russian, Austrian, Swedish, British and other units. Forces Friendly to the French player include French and Polish; and until 1813, the Minor Allies—Dutch, Saxons, Württembergers, Bavarians, Westphalians, Badeners, Hessians, Italians, Swiss, Portuguese, Croats etc.
In Command 6.0 A unit or Officer within the Command Range of a Commander, or a unit within Command Range of an Officer who is in Command. The capabilities of units and Officers that are In Command are greater than those of units and Officers that are Out of Command.
Initiative Rating 6.0, 12.2, & 22.12 Used to determine whether Officers and units may move when they are not in Command and for Recovery. It is also used in Shock results.
Integrated Division: See Division.
Leaders 5.0 Commanders and Officers, necessary to Command your forces.
Line of Sight (LOS) 8.4 & 13.34 To observe enemy units. The LOS to units in clear terrain is 3 hexes. The LOS is reduced to 1 hex at Night, during Rain, Fog, Snow, or any type of Storm.
March Order 20.0 Allows a Force to move during the Friendly Command Movement Segment.
Movement Allowance 7.2 The amount of Movement Points (MPs) a unit may expend during each friendly Movement Phase. Each clear terrain hex costs one Movement Point to enter.
Officers 6.0 Leaders of a 'Formation' (Corps/division) are in charge of all units that share their Command Designation. They are the second link in the chain of command between Commanders and Combat Units.
Permanently Eliminated Units (PEU) Box 12.52 A holding area for combat units and trains that have been permanently eliminated and can no longer return to play.
Phasing Player: The Player whose Player-Turn is in progress.
Reconnaissance 8.3 When Hidden Force Markers are removed, revealing the units in a stack.
Recovery Turn 22.1 Each time weather is checked, a player may attempt to move eliminated Combat Units in the Reduced Units Box from the Awaiting Recovery Section to the Recovered section.
Reorganization 22.2 To return "recovered" units previously eliminated into play. Commanders may Reorganize any Unit in the Recovered Section while Officers may only Reorganize Recovered Units from their Formation.
Repulse 9.0 Moving forces attempt to displace enemy units out of their path. The moving force must have [5:1] odds.
Retreat Before Combat (RBC) 10.2 Cavalry may retreat prior to combat resolution as either attackers or defenders.
Road March 7.5 In order to benefit from road MP costs a unit must be in "Road March." Units in Road March may not stack and have other movement limitations.
Span 7.6 A term that includes both bridges (which cross rivers) and Trestles (which cross streams).
Square 14.23 A possible result of a cavalry charge, which forces a unit into Square until the end of its next Movement Phase, limiting its movement.
Storm: A Thunderstorm, Snowstorm, or Duststorm.
Supply Line 17.4 A Line of up to fourteen [14] connected hexes from a Combat Unit to: 1) a Supply Source, or 2) a Baggage Train on a road or trail, thence along road or trail hexes to a Supply Source. The first [14] hexes of the Supply Line are termed the "Forward" Line and the remainder, from the Baggage Train to the Supply Source, is termed the "Trunk" Line. The Trunk Line may continue for any distance to a Friendly Supply Source.
Surrounded: A unit is surrounded and may not retreat if all adjacent hexes contain enemy units, EZOCs, and/or prohibited terrain.
Train Units 18.0 Pontoon Trains and Baggage Trains have no ZOCs and cannot stack. Trains pay cavalry costs and double the normal terrain movement costs during Mud, Thunderstorm and Snowstorm. Train Units do not require Command or Initiative to move.
Trestle 7.6 A span crossing over a stream.
Unit: A Combat unit, train, or vedette.
Unit I.D. 1.4.2 The name of the unit's commanding general or designation.
Unit Type: The combat arm—infantry, cavalry, artillery, or horse artillery. Cavalry have separate terrain costs for Movement.
Units Awaiting Recovery Box 12.51 & 22.1 A holding area for combat units that have been eliminated in combat, not yet recovered or ready for reorganization.
Vedettes 16.0 Light Cavalry (LC) units can be broken-down into a number of Vedettes indicated on the unit's counter. Vedettes are non-combat units. They move like cavalry but they don't fight.
Zone of Control (ZOC) 4.0 All six hexes adjacent to a Combat Unit. A River hexside blocks ZOCs—units exert no ZOC across River hexsides (whether bridged or not).
Study Folder
The Study Folder is the second official booklet in the box (Version 1.62), transcribed in full below. Its numbering continues from the Series Rules above — section 24.0, the optional Card Instructions booklet, is a separate physical publication not included in this document. Pages 23-24 of the printed Study Folder ("Vohlers Notes to Combat Tables" and "Combat Tables") are placeholder headings pointing to the separate Combat Tables Folder player-aid; they carry no additional rules text and are not reproduced here.
Design: Kevin Zucker Development: Derek Lang, Tim Carne ORBAT Research: Andrew Hobley, Niek van Diepen, Derek Lang, Tim Carne Map Research: Paolo Scannapieco Playtesting: Eugene Rodek, Walter Vejdovsky, John Prados, Chuck Silverstein, Mark Kaczmarek, Lance McMillan, Mike Willner, Paolo Scannapieco, Alessandro Canevese, Ray Weiss Editorial: Dick Vohlers, Derek Lang, Tim Carne Graphics: Knut Grünitz (Cards), Charlie Kibler (Counters and Maps), Robert Tunstall (Box) Card Illustrations: Müller-Bohn, H.: Die Deutschen Befreiungskriege—Deutschlands Geschichte von 1806-1815, 1907. Pflugk-Hartung, J. v.: 1813-1815, Illustrierte Geschichte der Befreiungskriege, 1913. Box Cover Painting: Robert Alex. Hillingford, Wellington at Waterloo Study Folder Cover: Harry Payne (1858-1927), Napoleon and the Imperial Guard, Battle of Waterloo
Game Components:
- 2 Map Sheets 34" x 22" and 1 Map Sheet 17" x 22"
- 2 Counter Sheets: 560 die-cut playing pieces
- 2 Booklets: System Rules, Study Folder
- 17 Player Aid Cards: TRC x6, Initial Set-up x6 (French x2, British x2, Prussian x2), Casualty x2, Combat Results, Reorganization, Weather
- 2 Decks of 50 Cards each
- Adding the Cards Folder, 11" x 17"
- Combat Tables Folder, 11" x 17"
- Orders Slip Sheet/Sequence of Play
- Victory Worksheet
- List of Cards Removed from Deck
- Game Box
Contact for missing parts: [email protected]
25.0 Scenarios
Napoleon's guiding strategy has been called "The Central Position." This strategy, however, is inherently unstable, shifting suddenly if the initiative is lost.
The French forces began converging on the Sambre River (the frontier, at that time, with Belgium), and the border was sealed. On June 12th, Napoleon left Paris and joined his Center of Operations at Avesnes. On the 15th, the French Army was unleashed across the Sambre. The Coalition executed a forward concentration behind the cover of their withdrawing screens, setting the scene for the battles of 16 June.
Can the armies of Wellington (HQ Bruxelles) and Blücher (HQ Namur) be kept separated, and then defeated in detail? Or will they turn the tables and unite on Napoleon's Last Battlefield?
25.1 The Scenario Information
Napoleon's Last Gamble includes five Battle Games and two Campaign Games. Players select a game to play, and then refer to the Initial Set-up Cards (25.2) and the appropriate section, below, for the scenario information for each game:
- 27.0 LIGNY, 16 June
- 28.0 QUATRE BRAS, 16 June
- 29.0 WAVRE, 18 June
- 30.0 WATERLOO, 18 June
- 31.0 LA SOUFFEL, 28 June
- 32.0 WATERLOO CAMPAIGN, 16–18 June
- 33.0 LIGNY MINI-CAMPAIGN, 16 June
(25.11) Turn Record Card (TRC): For each Campaign day a TRC is provided, along with 3 separate TRCs for the battle games. The Game-Turn marker is placed on the turn designated as the Game Start ("DoB"). The Night 6 AM turn is one hour of gradual dawn (25.79).
(25.12) One-Day Scenarios: Players are encouraged to begin by playing any of the one-day Battle Games. The Battle of Wavre has an Historical Battle option that scores exiting French units differently (29.5). La Souffel includes an Approach to Battle scenario (31.5).
(25.13) The Campaign Games: You can choose the Ligny Mini-Campaign or the Waterloo Campaign. The Grand Campaign requires the Expansion Kit.
(25.14) Coalition Nationalities
The Coalition Player controls units of: Britain (red), King's German Legion (Hanoverian ex-patriots; dark red), Nassau (olive drab), Dutch/Belgian (green), Brunswick (blue-gray with gray stripe), Hanover (Salmon), French Royal (Aquamarine), Prussia (steel gray). At the Battle of La Souffel (25.3), Coalition Player forces are Württemberger (dark blue, red unit type), Hessian (Dark Gray), Austrian (white).
(25.15) French Player Units with Mixed Nationalities: Lefebvre-Desnoettes' Gde cavalry brigade contains Dutch and Polish Lancers. Dupeyroux's brigade of the 10th Div./III contains a regiment of Swiss troops.
(25.16) Cavalry Brigades with Disparate Vedettes: Arentschildt's, Dornberg's and Vivian's brigades in the Anglo-Allied Cavalry have one KGL vedette apiece.
(25.17) Coalition Commanders
Wellington, Prince William, and Hill are Anglo-Allied Commanders, and may not place officers or units of the Prussian Army in command nor give them a March Order. (Dutch-Belgian units—labeled "N" for Netherlands—are part of the Anglo-Allied Army.) Blücher commands the Prussian Army with similar limits.
- Non-Cooperation: Units of the Prussian and Anglo-Allied armies cannot stack together or combine in an attack. If units from both armies are adjacent to a single French stack, only one of them can be subject to 10.31. The other stacks remain "in contact."
- General Retreat declaration may apply to either the Prussian or the Anglo-Allied army, or both, at the Coalition player's option (32.42). The Coalition Player may declare General Retreat once per army per game.
- The two Coalition armies have entirely separate supply sources, labeled (P) and (A) respectively; French sources (F). Prussian units may not trace to (A) supply sources, and vice-versa.
- La Souffel: Austrian, Hessian and Württemberg units cooperate fully as part of the same formation (25.3).
(25.18) Wellington's Anglo-Allied Army. (Wellington is not required to place any particular formation in command.) British regulars, KGL, Hanoverian, Dutch-Belgians, Brunswickers, Nassauers. STRATEGIC RESERVE (ALT): The Hanoverian Reserve, French Royal Army, and 3 garrison units comprise the Strategic Reserve Corps. Wellington is the Commander-Officer (5.23) of both the Reserve and Strategic Reserve, each requiring 1 Command Point.
(25.19) Blücher's Prussian Army. Brigades in the Prussian Army are "divisions" for stacking purposes (3.22). EXAMPLE: The 8th, 30th and 1st Kurmark Ldw Regiments, part of the 9th Prussian Brigade, can stack without an officer present.
25.2 Setting Up the Scenarios
All units set-up in Supply as Hidden Forces (8.2). All reinforcements are in supply upon entry (25.5). Units may start in Road March at the owning player's option.
(25.21) Initial Set-up: The units to set-up are listed on the Initial Set-up Cards. The First Player (26.6) sets up first. The Initial Set-up specifies the location for each unit. This may be modified by Mode Cards (24.5). The units to set-up at reduced strength are listed with an ®. They are treated as having been eliminated and already reorganized. "Composition" and "Comments" are for historical interest.
(25.22) Hex Numbers: The hex numbers on the Initial Set-up cards show where units are located at the start of the scenario. Place all combat units and leaders on the map in the hexes specified. If there is no hex number listed, the unit is not placed in the PEU box, but is out of play; if ALT (25.51). The second player may adjust any one friendly unit by one hex prior to the first player turn (not in an EZOC). The set-up may include overstacked hexes. Make sure to observe stacking limits on your first move.
(25.23) Reinforcements (19.1, 25.5): Reinforcement arrival is listed on the Turn Record Card as modified by the play of Arrival Cards (24.7). If the Corps designation follows an officer's name, all units of that corps arrive on the same turn (25.53). If a division is listed, all units of that division arrive on the same turn. EXAMPLE: In the Campaign Game, von ALTEN's 3rd British Div (-) including C. Halkett, Kielmansegge, and Williamson (less Ompteda)—arrives at 3 PM on June 16.
(25.24) Pontoon Trains: Availability of pontoon trains is specified in the scenario information. Available Pontoon Trains must be set-up within [7] hexes of any friendly Commander unless otherwise specified.
(25.25) Baggage Trains: All Baggage Trains set-up within [7] hexes of any unit in their respective formation or enter as reinforcements (25.26), unless otherwise specified. Each corps has its own dedicated baggage train. In the Anglo-Allied (A-A) Army, while each division has an officer, baggage trains are assigned on a corps basis. (Corps I.D. appears on all counters.)
A-A Baggage — Divisions or Units Served
| Corps | Divisions or Units Served |
|---|---|
| I Corps | 1 Br, 3 Br, 2 N, 3 N, N Cav |
| II Corps | 2 Br, Mitchell, Cumberland |
| III Corps | 4 Br, 1 N, Anthing, Estorff |
| Reserve Corps | 5 Br, 6 Br, Brunswick |
| Cavalry Corps | Cav |
| Strategic Reserve | no baggage (18.21, 25.18) |
(25.26) Train Reinforcements:
- If a train is mentioned in the reinforcement schedule it enters as specified.
- If an entire formation is listed as a reinforcement on a single turn, the baggage and pontoon trains arrive after all combat units.
- If a formation arrives over several turns, the trains arrive at owner's choice of time.
- If part of the formation sets-up on map and part arrives later as a reinforcement, trains set up or arrive with either group at owner's choice.
(25.27) Leaders: Leaders set-up in the hex specified, or, at owning player's choice, Commanders may set-up with any Friendly force—Officers in any hex containing units of their Formation—in supply and not in an EZOC. Leaders ignore Mode Cards unless specifically mentioned. Leader cards may be played as "inapplicable" (24.35) prior to the named leader's arrival.
(25.28) Vedettes: Vedettes may be deployed at the beginning of a scenario at the owning player's choice, anywhere within three hexes of their parent unit (not in an EZOC). The second player deploys any/all of his available vedettes first, then the first player deploys. Cavalry parent units for deployed vedettes are placed in the Holding Box.
(25.29) Optional Demoralization Markers: The "basic set" of Demoralization markers was published on the "Utility Marker Sheet" in OSG's La Patrie en Danger and available separately at www.Napoleongames.com. The additional demoralization markers required for this game—along with four demoralization markers for Napoleon Against Russia—are included here on Sheet No. 1., French Units & Leaders.
25.3 Units Appearing only at La Souffel
The Württemberg, Hessen Darmstadt and Austrian troops of Prince Wilhelm's III Corps are only used in La Souffel. The French V Corps alone appears at La Souffel or may be an ALT Reinforcement for June 16th-18th (Battle or Campaign Game). See the Initial Set-up Cards.
25.4 Scenario Information Detail
The following information is provided in 27.0—33.0.
(25.41) Duration: The game ends with the completion of the last turn specified under "Duration," or may end immediately upon: Napoleon's capture (26.18); or, when all the formations of one side are demoralized or have exited. The Level of Victory still has to be determined (26.2).
(25.42) Mode Cards at Start: The number of Mode Cards to draw on the first turn only.
(25.43) Remove Cards From Deck: Remove specified number of cards from each Player's card deck (24.2). See separate list "Cards Removed From Deck" per Battle Game.
(25.44) Bonus Cards: On the second turn of each battle, each player draws a number of Bonus Cards specified for that battle. If playing the Waterloo campaign, every night at 9 PM each player draws a number of Bonus cards determined by victory level (26.5).
(25.45) Alternate Reinforcements (ALT): (25.51)
(25.46) Special Rules: Rules that apply to this battle; at start conditions and map area in play. 1815-Specific Rules (25.7) apply to all battles. EXCEPTION (31.3).
(25.47) Victory Conditions: Victory Points (26.1) are awarded for control of places on the map. Certain VP locations that do not count in a battle may be listed.
25.5 Reinforcements
Reinforcement units (19.1) are placed on the Turn Record Cards, and enter at the mapedge hex specified on the TRC. All units of the formation enter on the same turn unless listed separately, subject to card play, depending on size of formation for multi-hex forces (25.53). When a Division (or Prussian Brigade) is listed, all units with that divisional designation arrive on the same turn (25.23).
(25.51) Alternate Reinforcements (ALT): ALT Reinforcements are listed in the Scenario Information by group number. One numbered group of friendly ALT Reinforcements appears for each Alternate Reinforcements Card (No. 29) played. ALT groups must appear in order of priority starting with #1. Each time an ALT group enters, the enabling card is removed from play after being scored (32.13). ALT groups enter at reinforcement entry hexes as noted. In some cases they are accelerated reinforcements listed on the TRC, arriving early. See also transiting corps (28.35, 29.34).
If not using the cards—roll two d6 during the Command Movement Segment of every Recovery Turn: on a result of 2 or 3, you may enter the next group of Alternate Reinforcements listed; if you roll a 4–12, there is no result. If you roll a 2 or 3, your opponent can roll 2d6 to delay by one turn the alternate reinforcements; the delay is successful if he also rolls a 2 or 3.
(25.52) Hidden Reinforcements: All Reinforcements enter the map as Hidden Forces. Vedettes may enter instead of their parent LC units.
(25.53) Deploying Off-Map Reinforcements: For multi-hex forces, prior to entry, all additional stacks after the first are deployed off-map in a column (see Glossary), beginning with the leader at the front of the column, and ending with the baggage (19.23, 25.26). Reinforcements can enter in Road March at the owning player's option.
25.6 March Orders
One March Order per player may be issued prior to the start of any scenario, to any friendly force in play on the map, if a Commander of the appropriate army is on-map at the start of the scenario (20.1). Special Rules may alter the number of March Orders at start.
(25.61) Pre-Programmed March Orders: The Special Rules may specify mandatory "pre-programmed" March Orders. These orders represent historical conditions limiting the leaders' freedom of action. They can be removed according to 20.23. EXCEPTION: 32.32. One March Order can be changed at night 3 AM (20.4, 2.2B).
(25.62) Late Start Mode Card: If you want to change a pre-programmed March Order and you drew a Late Start Mode Card, you'll need to wake up first. A "sleeping" leader moves with his units. NOTE: Any kind of delay can be covered by the term "asleep."
25.7 1815-Specific Rules
(25.71) Weather Tables: Before starting play, players can opt to use the historical weather instead of the die roll. Determine Weather on the first turn of each day. Check again each Recovery turn. Weather stays the same between checks (Thunderstorms only last for the first hour, followed by 2 turns of mud-rain).
(25.72) Weather Modifiers: Roll for weather during Night turns (EXCEPTION to 23.3). On Night 3 AM and 6 AM turns, subtract 1 from the Weather roll. During the 3 PM turn, add 1; at 6 PM and 9 PM, add 2.
(25.73) No Improved Positions: There are no I.P.s in Napoleon's Last Gamble. Ignore (15.3) entirely.
(25.74) Double-Team artillery in Mud: Either player may voluntarily flip over any full strength artillery units to show their reduced side. This negates the doubling of MP costs during Mud for that unit. This movement benefit applies to all reduced strength artillery, even if reduced because of loss or reorganization. Double-team units are permanently on their reduced side. They cannot be lifted back up to full-strength. If eliminated they are PEU. Two 1-SP artillery units in a stack may be reduced to one double-team unit; the other is PEU.
(25.75) Congreve Rockets: Whinyates' unit is an artillery-type unit. It may not make Bombardment attacks. If the Combat Result of the rocket attack (or defense) is Shock, Dr, Ex, or De the Enemy units in the hex being attacked, and those in adjacent hexes if any, must pass an Initiative check or be temporarily Demoralized through the end of the current Combat Phase, after which the Demoralized unit(s) return to normal. Once used in combat, the Congreve unit is removed from play (PEU).
(25.76) Stacking in Chateaux: A chateau loses its combat effects if the hex contains more than two defending infantry units; or contains any artillery, cavalry or train units. All chateau effects on combat are negated as long as these remain in the hex (replaces 15.21).
(25.77) Grand Battery: Each Player may form a Grand Battery once per game during the friendly Combat Phase. The Grand Battery can comprise up to any 5 friendly artillery and/or HArt units of the same Army (25.18, 25.19). The Grand Battery is automatically in command for this and the following friendly player turn. All units in the Grand Battery must be within 2 hexes of at least one other unit in the Grand Battery. All units in the Grand Battery gain a +1 die roll modifier on the Bombardment Table. Units in the GB are limited to 1 hex of movement each turn. (Ignore 25.77 when not using the cards.)
(25.78) British Guards: In the Anglo-Allied Army, Adye, Maitland and Byng/1 Br are Guards units (11.3).
(25.79) Night 6 AM Turns: With sunrise at 5:28, the Night 6 AM turn uses the Day SOP, with printed Movement Allowances, and these modifications:
- There is No Command Movement Segment: All Movement during 6 AM is by Initiative. EXCEPTIONS: Units with a current March Order in effect (20.4); Commanders moving individually.
- There is NO LOS during Night. You must define attacks before revealing enemy units.
- All "Ar*" results become "Shock."
- Artillery type units may not bombard or contribute their strength to an adjacent attack; they may defend against enemy attacks.
- Cards are not drawn or played at Night 6 AM (26.5).
25.8 Team Play
In a three-player game, one assumes the role of Napoleon; Coalition Players represent Wellington and Blücher. Add any French Commander in a 4-Player game. The Commanders control their historically-associated formations (25.17).
(25.81) Communication Among Players: Players may not freely discuss their plans, tactics or strategy unless the Commanders they represent are within four hexes of each other.
(25.82) Aides-de-Camp: Written notes may be passed between Coalition players. One message may be dispatched per player every friendly Command Phase.
(25.83) Objective Hexes: Only place names, not hex numbers, may be specified as objective hexes.
(25.84) Arrival Time: Written notes are dispatched during the Friendly Command Phase and are received during a later Friendly Command Phase. Travel time between leaders:
- on the same map section—three complete Turns
- from one map to the other—6 complete Turns
(25.85) Victory: After the winning side is determined, each of the Players compares the total VPs that he obtained (or hexes his units were first to occupy for his side). He becomes C-in-C in the next battle, with choice of which side to play and a teammate.
26.0 Victory Conditions
Victory is awarded to the player or team with the most Victory Points at the end of the game. In the Campaign Game, the level of Victory is according to the ratio of each side's Victory Point total (26.23 and 32.4.)
26.1 Victory Point Awards
Victory Points are awarded for the conditions listed (26.11). If playing the Waterloo Campaign, calculate victory point awards every night at 9 PM.
(26.11) Determine VP Totals: VPs are awarded for…
a) Enemy Combat SPs Eliminated (26.12) b) Enemy Corps Demoralized (26.13). c) Captured Enemy Baggage Trains (26.14). d) Controlled Hexes (26.15) e) Total VPs of cards you have played (26.16) f) Leaders in a town through the Night (26.17) g) Captured Commanders (26.18) h) Units that have exited the map (26.31, 32.43)
(26.12) Total Combat SPs Eliminated: At the end of the Night 9 PM turn, total the losses in SPs by both sides, including the total SPs in the PEU, Unrecovered and Recovered boxes. Don't count SPs in the Full Strength Holding Box, or PEUs from previous days. Subtract the smaller from the larger total. The side losing the least SPs receives VPs as follows:
| Difference | VP Award | Difference | VPs |
|---|---|---|---|
| 0-4 | 0 VPs | 20-24 | 4 VPs |
| 5-9 | 1 VP | 25-29 | 5 VPs |
| 10-14 | 2 VPs | 30-34 | 6 VPs |
| 15-19 | 3 VPs | 35-39 | 7 VPs, etc. |
When calculating Total Combat Strength count the unit's Full Strength. EXCEPTION: For units starting the scenario at Reduced Strength, use reduced strength.
(26.13) Enemy Formations Demoralized: Each Player receives [4] VPs for each enemy Formations demoralized at the end of play. EXCEPTION: only [2] VP are awarded for demoralization when the demoralization level of the formation is 4 or less.
(26.14) Captured Baggage Trains: The Player receives [2] VPs for each Enemy Baggage Train captured (18.14).
(26.15) Control: The Player receives [4] VPs for each Enemy Supply Source he controls. Each Player also receives the number of Victory Points printed on the map for each VP Hex he controls. EXCEPTIONS:
- The Scenario Victory Conditions may specify certain VP hexes that do not apply in that scenario.
- If a player begins the game in control of an enemy Supply Source, no VPs are scored for it.
- VPs are not scored for the occupation of enemy Supply Sources by Reinforcements that enter there.
- Supply Sources are ignored where they overlap an adjoining mapedge (that is also in play).
To be considered in control of a hex, a friendly Combat Unit in Supply must physically occupy the hex, or be the last Combat Unit to have occupied or moved through it. An occupying unit that is Out of Supply at the moment it enters or moves through a hex does not control that hex. To indicate the control of a hex, place a control marker of the proper side in the hex.
(26.16) Cards: Add or subtract the VP Value of each card you have played during the game, if that card's instruction was actually used, as specified on the card. VPs of cards are tallied during Night 9 PM Card Segment (2.2A.3) before the cards are reshuffled (24.23).
(26.17) Leader in a town throughout the Night: Each player receives 1 VP for every friendly Leader in a town or a Chateau who will remain there until 7 AM.
(26.18) Capture of Commanders: A player receives a number of VPs for each captured Commander equal to that Commander's Command Rating. EXCEPTION: The game ends immediately in a Coalition Victory the moment Napoleon is captured.
26.2 Levels of Victory
At the end of the battle the total of Victory Points achieved by the two players is compared as a ratio (French: Coalition), which determines the level of victory—Marginal, Tactical, or Strategic. Divide the French by the Coalition VP total.
(26.21) Find VP Ratio:
| Ratio | Result |
|---|---|
| 1 to 2 or less | Coalition Strategic |
| 1 to 1.5 / 1 to 1.99 | Coalition Tactical |
| 1 to 1 / 1 to 1.49 | Coalition Marginal |
| 1.01 to 1 / 1.5 to 1 | French Marginal |
| 1.51 to 1 / 2 to 1 | French Tactical |
| More than 2 to 1 | French Strategic |
(26.22) When Total of VPs is Zero: Convert scores of "0" to "1" in order to calculate VP ratio.
(26.23) Levels of Victory in the Campaign Game: In the Campaign Game at 9 PM each day, the winner, Level of Victory and total VPs for each side must be recorded (26.5). If no battles occur on a given day, there are still VPs to record (26.11c–26.11h).
26.3 Exiting the Map
Either Player may choose to exit his units by playing the "General Retreat" card once per game/campaign. If not using the cards, the Phasing Player may still declare one General Retreat per Army (20.5).
In the battle games, individual units in a General Retreat move to the closest Supply Source/Exit Hex of the appropriate army (20.51). In the Campaign game (32.42-32.43) exit hexes are assigned. Friendly units may exit where an enemy unit previously exited. The exiting unit pays the Movement cost of the hex it is leaving once again. Exited leaders may not reorganize units. Units that exit the map cannot be returned to play (unless listed under ALT Reinf.) and are not considered eliminated for Victory Point purposes. Units forced to retreat off the map are eliminated (12.34).
(26.31) VP Award: If he makes a "General Retreat" the Exiting Player receives [4 VP] for exiting each friendly baggage train, and [1 VP] for every five combat units exited. EXCEPTION: The total number of VPs from exiting units may not exceed the total number of enemy combat units PEU and UAR. EXAMPLE: The Coalition player exits 25 units. The French lost 5 units, so all five VPs are counted. Wavre exit award is calculated differently (29.42). Campaign VPs for units exiting to Bruxelles (32.43).
(26.32) Exit by March Order: A force may be assigned a March Order to exit the map.
(26.33) No Award: Even if you do not declare "General Retreat," you may choose at any time to exit individual units to prevent their destruction, but unless they exit at an appropriate Supply Source or exit hex, you receive no VPs, and the exited units cannot be returned to play.
26.4 Zero Loss Award
The Player receives [2] VPs if the total of eliminated SPs in the Friendly PEU + Unrecovered + Recovered boxes at the end of the game is zero.
26.5 Bonus Cards in the Campaign Game
The campaign continues from June 16th to the 18th. A given level of victory on June 16th and 17th will allow the winner to draw (cumulative) "Bonus Cards" from the Card Deck. Score the Level of Victory during the Night 9 PM Game-Turn (32.4) of each day and then draw the Bonus Cards shown below.
Each Strategic Victory: 5 Bonus Cards per day Each Tactical Victory: 3 Bonus Cards per day Each Marginal Victory: 2 Bonus Card per day
Each player receives a minimum of 2 Bonus Cards.
(26.51) VP Cards: At the beginning of every day, when players draw a new hand of cards, the loser draws cards equal to his previous day's hand. The winner draws the number of card stipulated by his victory level, then discards down to his previous day's hand +1. Shuffle all discards back into the deck.
26.6 First Player
The first player sets-up first. The French Player is the First Player. EXCEPTION: Wavre (29.16).
27.0 The Battle of Ligny
The Last Victory, 16 June 1815
27.1 Introduction
Napoleon's sudden arrival between two enemies provided the springboard for his attack against Blücher. Failing to ensure the arrival of I Corps he lacked enough troops to prevent the Prussians getting away intact. The Emperor ended the day believing he had driven Blücher toward Namur—leaving himself a free hand against Wellington—but the knock-out blow remained undelivered. The French lost about 11,500 men; the Prussians 15,000 killed and wounded and 21 guns, plus a further 9,000 deserters (seen retreating toward Namur).
(27.11) Duration: 16 Jun., 2 PM—9 PM (8 turns). (27.12) Mode Cards at Start: 1 French, 1 Coalition. (27.13) Bonus Cards, Turn 2: The Coalition receives 3; French 3. (27.14) Pontoon Trains: none. (27.15) Counter Mix: Set aside units that appear at Quatre-Bras and at La Souffel (25.3), and unused ALT. (27.16) First Player: The French Player is first player.
27.2 Alternate Reinforcements
FRENCH
- Albert/YG, 3133
- D'ERLON, I Corps, 3115
- Gd Hussars/YG, 4-5 arty/YG, 3133
- RAPP, V Corps (-Berckheim, Rambourg) 6101
COALITION
- Cav/IV, 6108
- 13/IV, 6108
- BÜLOW, all other IV Corps units, 6108
27.3 Special Rules
(27.31) Damaged Bridges at Start: None (27.32) March Orders at Start: The Prussian Player has one (20.1). French: None. (This overrides 20.1). (27.33) Map Area in Play: Set up all units in accordance with the "Ligny" column of the Initial Set-up. This scenario uses the Ligny (S) Map, east of hex column 3100 inclusive. Move Vandamme, Dumon and Dumont over one hex to 3124 for this scenario.
27.4 Victory Conditions
VPs are earned as per 26.1.
(27.41) Control: VP Hexes that Do NOT count: none (27.42) Exit: In a General Retreat, Prussian units retreat toward the nearest exit arrow; any forces exiting toward Namur (6127) do not count for Victory purposes. Those which exit toward Liege (6108, 6113) garner Prussian VPs (26.31) unless the French player exits an equal or greater amount of French strength at the same exit hex.
28.0 The Battle of Quatre Bras
Ney at the Crossroads, 16 June 1815
28.1 Introduction
Troops of both sides converged on the battlefields after a long day's march on the 15th. The French attacked on both fronts simultaneously. The tenacious defense by the Anglo-Allieds saved the Prussians from receiving the full weight of the Armée du Nord. Losses were about 4200 or 4300 on each side.
(28.11) Duration: 16 Jun., 2 PM—9 PM inclusive (8 turns). (28.12) Mode Cards at Start: 2 French, 1 Coalition (28.13) Bonus Cards, Turn 2: The Coalition receives 3, the French 2. (28.14) Pontoon Trains: none. (28.15) Counter Mix: Set aside units that appear at Ligny and at La Souffel (25.3), and unused ALT. (28.16) First Player: The French Player is first player. (28.18) Anglo-Allied Baggage at start: Reserve Corps
28.2 Alternate Reinforcements
FRENCH
- D'ERLON, I Corps (28.35)
- Gd Hussars/YG, 4-5 arty/YG, Albert/YG, 1433
- RAPP, Grouvel/V, 15th Div./V, 1433
- 16th Div., 17th Div., Corps Arty., HArt., 1433
COALITION
- HILL, v Merlen/NC, Ompteda/3 Br (28.34), 1201
- COLLAERT, remainder of NC, 2201
- CLINTON, 2 Br., Vivian/Cav, Grant/Cav, 2201
- COLVILLE, 4 Br., Arentschild/Cav, 2201
28.3 Special Rules
(28.31) Damaged Bridges at Start: none. (28.32) March Orders at Start: One per side (20.1). (28.33) Map Area in Play: Set up all units in accordance with the "Q-B" column of the Initial Set-up. This scenario uses the Quatre Bras (S) Map, west of hex column 3100 inclusive. (28.34) Accelerated ALT Reinf: Ompteda (25.51) (28.35) Transiting Corps: D'ERLON's I Corps sets-up on the map, with NO March Order. This formation cannot be moved until play of Card No 29 (even if placed in command by a commander). The first appearance of card No. 29 (or die roll of 1 if cards are not being used) will allow all of I Corps to receive a March Order. The March Order objective will be determined by die roll:
- 1-3—I Corps has a March Order for Frasnes (2013)
- 4-6—I Corps has a March Order toward Wagnelee (3118)
It is not possible to change this objective but the March Order may be removed (20.23).
28.4 Victory Conditions
VPs are earned as per 26.1.
(28.41) Control: VP hexes that do NOT count: none (28.42) Variable VP Award: For the French Player, the VP Award for Quatre-Bras is reduced each turn depending upon its turn of (final) capture. EXAMPLE: 8 VPs if captured on the third turn (and never recaptured); 4 VPs if captured at 8 PM. (28.43) Draw: If the differential in combat strength lost (26.12) is zero, the Coalition receives 1 VP.
29.0 The Battle of Wavre
Grouchy's Blunder, 18 June 1815
29.1 Introduction
The Allies withdrew and Napoleon separated the two wings of his army, ordering Marshal Grouchy on the track of the Prussians while he pursued Wellington. Grouchy's prescribed route, through Gembloux, allowed the Prussians to retreat unmolested between the two French wings. "Grouchy was as useless to the army on that fatal day as though an earthquake had engulfed him and removed him from all participation in human affairs." –Napoleon
While Thielmann's rear-guard delayed Grouchy at Wavre, Wellington managed to cling to his ridge until the arrival of Blücher with his IV Corps (and parts of two others). After routing Thielmann's III Corps on the 19th, Grouchy's intact forces retreated toward Namur.
(29.11) Duration: 18 June, 12 Noon—8 PM (9 turns). Historical Option (29.5). (29.12) Mode Cards at Start: 2 French, 1 Coalition (29.13) Bonus Cards, Turn 2: The Coalition receives 2, the French 1. (29.14) Pontoon Trains: none. (29.15) Counter Mix: Set aside units that appear at La Souffel (25.3) and at Waterloo, and unused ALT. EXCEPTION: (29.33). (29.16) First Player: The Coalition Player is 1st player.
29.2 Alternate Reinforcements
FRENCH
- Albert/YG, 6134
- Gd Hussars/YG, 4-5 arty/YG, 6134
- RAPP, Grouvel/V, 15th Div./V, 6134
- 16th Div., 17th Div., Corps Arty., HArt., 6134
COALITION
- Sohr/Cav/II (29.34)
- 7/II, 8/II (29.34)
- PIRCH, remaining II Corps units (29.34)
- ZIETEN, I Corps (29.34)
29.3 Special Rules
(29.31) Damaged Bridges at Start: None (29.32) March Orders at Start: Each Player has the one March Order specified (20.1). In addition, the Prussian I and II Corps have pre-programmed exit March Orders (29.34). EXCEPTION: The March Order does not apply to "Stengel's group"—the 19th Inf. Rgt. and Lützow's cavalry brigade (see Set-up for I Corps). (29.33) Map Area in Play: This scenario uses the Wavre (N) Map, east of hex column 3100 inclusive. Set up all units in accordance with the "Wavre" column of the Initial Set-up. EXCEPTION: Do not set up the Prussian IV Corps. The IV Corps is listed in the Set-up for historical purposes only; they are heading to Waterloo with flags flying. Their entrance into the Waterloo battle is pre-programmed (see the Waterloo TRC). The Prussian ® column indicates units reduced ® or eliminated (E) at the start of Wavre. (29.34) Transiting Corps: All Prussian Alternate Reinforcements are present on the map. However, March Orders require them to move toward Waterloo (II Corps exiting at 3114-15; I Corps at 3109-11). The orders can only be changed by play of Card No 29. Each card No. 29 (or die roll of 2-3 if cards are not being used) will allow one group's exit March Order to be replaced with a new March Order, to any on-map destination of the Coalition player's choice—unless those units have already reached the assigned exit hex or have exited. (29.35) Additional VP Cost for ALT: If Prussian group #4 enters the game (I Corps), the Coalition Player is assessed an extra 3 VPs for that card, for a total of 6 VPs. (29.36) Blücher: The Prussian player loses -1 VP for each turn Blücher fails to exit to Waterloo after 3 PM. (29.37) Prussian Supply Source: The French Player receives no VPs for capturing S/S 6117.
29.4 Victory Conditions
The VPs are earned as per 26.1. EXCEPTION: 26.31 doesn't apply (29.42).
(29.41) Control: VP Hexes that Do NOT count: none (29.42) VP Award for Exited units: Each Player receives one Victory Point for each friendly combat unit exited (toward Waterloo) via any trail north of 3123, including Transiting Corps (29.34). No VPs are awarded for units exiting after 5 PM.
29.5 Wavre Historical Option
In this option the VP Award for exited units is per 26.31, and 29.42 is ignored. The "Sound of Guns" Card (No. 15) is removed from the French deck.
(29.51) Duration: 18 Jun., Noon—19 Jun., 11AM (29.52) Mode Cards at Start: French 2, Coalition 1 (29.53) Alternate Reinforcements: None (29.54) March Orders at Start: The French III & IV Corps each have a March Order to Wavre. The Prussian I & II Corps each have an exit March Order (29.34). (29.55) VP Award for Exited units: (26.31); 29.42 is ignored. (29.56) Prussian Supply Source: Beginning at 6 AM, 19 June, the Prussians can use 4601 as a supply source. (They may make a General Retreat toward 4601 and also may exit there.) (29.57) All Other Scenario Info: (same as 29.1–29.3)
30.0 The Battle of Waterloo
A Near-Run Thing, 18 June 1815
30.1 Introduction
Napoleon had all day on the 17th to ascertain Blücher's true location. He assigned Marshal Grouchy the task of keeping in touch with the retreating Prussians. Grouchy failed, allowing Blücher to interpose between the two French wings. Blücher had turned the tables, occupying the central position, while Grouchy wasted lives fighting at Wavre. The Prussian IV Corps began marching onto the Waterloo battlefield at 4 P.M. The Emperor staked everything on the Old Guard's final attack.
(30.11) Duration: 12 Noon—Night 9 PM (10 turns). (30.12) Mode Cards at Start: Coalition 1, French 1 (30.13) Bonus Cards, Turn 2: The Coalition receives 3, the French 2. (30.14) Pontoon Trains: Coalition 1, French 3. (30.15) Counter Mix: Set aside units that appear at La Souffel only (25.3) and at Wavre, and unused ALT. (30.16) First Player: The French Player is 1st player.
30.2 Alternate Reinforcements
FRENCH
- Albert/YG, 2234
- Gd Hussars/YG, 4-5 arty/YG, 2234
- VANDAMME, III Corps, 3120
- RAPP, V Corps (-Berckheim, Rambourg), 2234
COALITION
- STEDMAN, 1 N, 0113
- COLVILLE, 4 Br, Anthing, Estorff, 0113
- 2/81st, McKenzie/Garr, 1701
- DECKEN, HR, 1701
30.3 Special Rules
(30.31) Damaged Bridges at Start: None. (30.32) March Orders at Start: One per side (20.1). (30.33) Map Area in Play: Set up all units in accordance with the "Wat" column of the Initial Set-up. This scenario uses the Waterloo (N) Map, west of hex column 3100 inclusive. The Prussian ® column indicates units reduced ® or eliminated (E) at the start of Waterloo. (30.34) Reinforcement Notes: Lützow/I enters reduced. (30.35) Additional VP Cost for ALT: If French group #4 enters the game (V Corps), the French Player is assessed an extra 3 VPs for that card, for a total of 6 VPs. (30.36) Frischermont: Place a Coalition Roadblock in hex 2316 at start. (30.37) Prussian Supply Sources: 3109, 3111, 3114-15.
30.4 Victory Conditions
The VPs are earned as per 26.1.
(30.41) Control: VP locations that do NOT count: none.
31.0 The Battle of La Souffel
Rapp's Last Stand, 28 June 1815
31.1 Introduction
After withdrawing from the Rhine, General Jean Rapp turned to oppose an Austrian crossing of the river line. The Württembergers moved to intercept. Rapp pulled back toward Strasbourg and fought the last pitched battle of the Napoleonic Wars. The Coalition forces were repelled at a loss of 2,100 vs. 3,000 of Rapp's V Corps.
(31.11) Duration: 28 June, 2 PM—8 PM (7 turns). (31.12) Mode Cards at Start: 1 French, 2 Coalition (31.13) Bonus Cards, Turn 2: The Coalition receives 2; the French 2. (31.14) Pontoon Trains: Coalition none, French 1 (31.15) Counter Mix: (25.3) (31.16) First Player: The French Player is first player. (31.17) Baggage Trains: Each player has one baggage train that provides supply for all friendly units. (31.18) Weather: Weather is Fair throughout the day of Battle and the Approach to Battle. (31.19) Casualties: Either army becomes demoralized when friendly casualties exceed 20 SPs (21.0).
31.2 Alternate Reinforcements
FRENCH
- Berckheim, 1734
COALITION None
31.3 Special Rules
1815-Specific Rules (25.7) do not apply. EXCEPTIONS: 25.73, 27.76
(31.31) Damaged Bridges at Start: none. Bridges on the Souffel river may not be destroyed. (31.32) March Orders at Start: French, 1 (20.1); Coalition, 3 (31.33) Map Area in Play: Set-up all units on the La Souffel map in accordance with the "La Souffel" info on p. 2 of the French and Prussian Initial Set-up cards.
31.4 Victory Conditions
The VPs are earned as per 26.1. NOTE: There is no Victory Worksheet provided for La Souffel.
(31.41) Control: VP Hexes that do NOT count: None (31.42) French Exit: "General Retreat," if any, must be toward 1734.
31.5 Approach to Battle Scenario
Set-up on-map forces given under La Souffel AtB.
(31.51) Duration: 28 June, 11 AM—8 PM (31.52) Mode Cards at Start: French 2, Coalition 3 (31.53) Alternate Reinforcements: (same as 31.2) (31.54) March Orders at Start: All on-map forces are under a March Order for Soffelweyersheim (1726). The French Player may exclude any of his units, individually rolling for their initiative or not moving them. (31.55) All Other Scenario Info: (same as 31.1–31.4)
32.0 Campaign Game
Four Last Battles, 16-18 June, 1815
32.1 Introduction
The Campaign Game begins with the forces setting-up for June 16th, with each day's fighting influencing the number of bonus cards you get (26.5). Record VPs achieved each day on the Victory Worksheet.
(32.11) Duration: 16 June 2 PM through 18 June 9 PM. (32.12) Mode Cards at Start: 3 French, 2 Coalition. Mode cards have to be drawn at the start of the campaign, on the first daylight turn. Apply them as explained in 24.0. For the French, "Late Start" is in effect (see 32.34). Card No. 2 counts toward the total of French Mode cards specified in the scenario info. (32.13) Bonus Cards/Card Deck: 3 French, 3 Coalition. During Night 9 PM on 16 and 17 June, when you reshuffle the full Main Deck (24.23) permanently set aside ALT Reinforcement cards that have been played (25.51). No other cards are Removed from Deck. (32.14) Pontoon Trains: 3 with Napoleon, one with Wellington. (32.15) Counter Mix: Set aside units for La Souffel. (32.16) First Player: The French Player is 1st Player. (32.17) Reinforcements: Use the Campaign TRC for June 16th-18th; ignore Lambert's force listed at 3 PM on June 17th (Grand Campaign only). Anglo-Allied Reinforcements may enter at N0115 instead of N0131; delay CHASSE (3 NL), Estorff, Arenschildt, and/or COLLAERT (NL Cav), 10 turns if entering at N0115. (32.18) Casualty Record Track: Use the Wavre and Waterloo columns for Coalition formations not listed in the Ligny or Q-B columns (Prussian IV Corps, etc.).
32.2 Alternate Reinforcements
FRENCH
- Albert/YG, S1433
- Gd Hussars/YG, 4-5 arty/YG, S1433
- RAPP, Grouvel/V, 15th Div./V, N6134
- 16th & 17th Div., V Corps Arty., HArt./V, N6134
COALITION
- CHASSÉ, 3 N, N0131
- COLVILLE/4 Br, Ompteda/3 Br (28.34), N0131; Anthing, Estorff, STEDMAN/1N, N0113.
- 2/81st, Marsh/7 Br, McKenzie/7 Br, N1701
- DECKEN, HR, DE BERRY, Roi, N1701
32.3 Special Rules
All Special Rules from 27.3 apply.
(32.31) Damaged Bridges at Start: none (32.32) March Orders at Start: The French Player may issue March Orders to up to 2 on-map Friendly Forces, and the Coalition Player may issue 2. All Anglo-Allied reinforcements on June 17th (marked "*" on the TRC) have a pre-programmed March Order to Mont St. Jean (N1713). Similarly, all arriving units of the Prussian IV Corps have a mandatory March Order to Wavre (N5110). Only Wellington or Blücher (if within 4 hexes of the force in the Command Segment) can change a pre-programmed March Order (20.23). (32.33) Map Area in Play: Set up all units in accordance with the "Ligny" and "Q-B" columns for June 16 on the Initial Set-up. This scenario uses the complete N and S maps joined together—N overlaps S. Ignore French Supply Source N2234 when playing the Campaign. (32.34) French Late Start—Campaign Game: French Card No. 2 (Late Start) is in effect at 7 AM each day. Remove card from the deck and place it beside the map face up, to denote its enduring effect. See French Card No. 2 and follow instructions. Early Arrival cancels Late Start for the French in the Campaign Game. (32.35) Baggage: During each Reorganization Segment (22.2) of Weather check turns only, the Phasing Player may automatically reorganize one lost baggage train. The recovered Baggage Train enters as a reinforcement at any friendly Supply Source. Only a Commander or the appropriate Corps Leader may reorganize a baggage train. (The Corps baggage train need not be on the map for that Corps to recover combat units.) (32.36) Replacements: During each turn of Late Start for any commander, he may still bring in replacements. All vedettes that have been eliminated return to the map with their officer. Captured leaders remain out of play. Formations without officers get a replacement leader. (32.37) D'Erlon's I Corps: When NOT using the cards, I Corps arrival and orders are determined as follows (regardless of whether he is in command at that time).
- Roll a die at the start of the 1600 hrs turn June 16th:
- 1, Roll again:
- 1-3—I Corps has a March Order for Frasnes (2013)
- 4-6—I Corps has March Orders for Wagnelee (3218); place it in road column with head of column in hex 1924
- 2–6, No result—Roll again each turn as follows:
- 1, Roll again:
| Roll | 1700 hrs | 1800 hrs | 1900 hrs |
|---|---|---|---|
| 1 | 1-2 | 1-3 | March to Frasnes |
| 2 | 3-4 | 4-6 | March to Wagnelee |
| 3-6 | 5-6 | — | Roll again next turn |
32.4 Campaign Game Victory Conditions
The total of VPs is tallied per player each day of the Campaign at 9 PM (26.5). See the "Campaign Ratio" Section of the Victory Worksheet to determine the overall level of victory for each day of the campaign.
(32.41) Control: On the 16th ignore all Victory Point Locations and Supply Sources on the North map; on the 17th ignore ALL VP locations and S/S; on the 18th ignore all VP locations and S/S on the South map. (32.42) Coalition Exit: The Prussian objective in a General Retreat will be N6107; A-A objective, N1701. (32.43) French Exit to Bruxelles: The French player receives 2 VPs for each French unit—in supply and in command—that exits the map to Bruxelles (exiting from hex N1701 only).
33.0 Ligny Mini-Campaign
16 June, 1815
33.1 Introduction
The battles of Ligny and Quatre-Bras combined.
(33.11) Duration: 16 June 2 PM—Night 9 PM (8 turns) (33.12) Mode Cards at Start: same as 32.12 (33.13) Bonus Cards, Turn 2: same as 32.13 (33.14) Pontoon Trains: none (33.15) Counter Mix: Set aside units used in La Souffel (33.16) First Player: The French Player is 1st Player
33.2 Alternate Reinforcements
FRENCH
- LOBAU, VI Corps (accelerated, 25.51) 3033
- D'ERLON, I Corps (28.35)
- Gde Hussars/YG, 4-5 arty/YG, 1433
- RAPP, V Corps, 6127
COALITION
- HILL, van Merlen/NC, COOKE, 1 Br, 1101
- COLLAERT, remainder of NC, 2201
- 13/IV, Cav/IV, 6108
- BÜLOW, 14/IV, 15/IV, 16/IV, 6108
33.3 Special Rules
(33.31) Damaged Bridges at Start: None (33.32) March Orders at Start: Coalition 2, French 1 (33.33) Map Area in Play: This scenario uses the full South (S) Map (22" x 34") only. Set up all units in accordance with "Ligny" and "Q-B" set-up columns. (33.34) All other Scenario Information: same as 32.1, 32.31, 32.32, 32.34, 32.37.
33.4 Victory Conditions
See the "June 16th" Section of the Victory Worksheet to determine the level of victory (26.1, 26.2).
(33.41) Control: VP locations that do NOT count: None (33.42) Exit: same as 27.42
Historical Notes
Kevin Zucker
The Anglo-Allied Army of the Low Countries
Wellington's Army comprised troops of many nationalities, speaking different languages—Germans and French-speaking Belgians, Flemish, Dutch, and English.
The Germans were from Hanover and Brunswick. All the Hanoverian field battalions were in the 1st Brigade—the 3rd, 4th and 5th Brigades had Landwehr. The King's German Legion—composed of Hanover expats—had served in Spain in the service of King George III (who ruled as Duke of Hanover). The KGL troops blended veteran cadre with inexperienced and untrained men.
The Brunswick contingent contained the highest proportion of inexperienced youths, averaging just 18 years. Specht's brigade was described as "hesitant," and the Light brigade (Buttlar) was said to be "shaky."
Two Nassau units came from the German principality lying along the east bank of the Rhine opposite Koblenz. The line troops had been in the Netherlands service for a long time, commanded by a German Prince, Bernard of Saxe-Weimar. The two Landwehr battalions under Kruse, containing 30% recruits of six weeks service, had just joined the army at the beginning of June.
Belgium had just been forcibly united with the Netherlands in March, upon word of Napoleon's return to France. The unification forged between Dutch and Belgian units—many of which had fought under Napoleon the year before, and still wore their French-style uniforms—was necessarily fragile. Each Belgian battalion was brigaded with four or five Dutch battalions. The Netherlands divisions were largely raw recruits with little training and no experience. In the 3rd Netherlands Division, as many as 50% of units were militia. Because of doubts as to its steadiness this division was posted to the far end of Wellington's line.[¹] Nonetheless D'Aubreme's brigade seemed near to breaking at one point.[²]
Wellington welded this diverse force into a unified command by attaching one brigade of KGL and one of Hanoverian troops to each brigade of British regulars. Among the English Troops, 15 understrength battalions remained in Holland after the 1814 campaign; in the spring of 1815, these were shifted into Belgium and filled up with young conscripts. The cadre of 23 battalions were veterans of the Spanish campaign—the best troops available to Wellington. Veterans accounted for only about 60% of British troops. Smith's Brigade had just returned from N. America quite decimated.
The British divisions were dispersed in their cantonments and needed half a day from receipt of their march orders to get underway. It would take three days to completely assemble the entire army. The town of Nivelles was selected as the central concentration point.[³]
Footnotes: [1] Adkin, page 41. [2] Adkin, page 184. [3] Clayton, p. 137.
The Prussian Army of the Lower Rhine
Blücher's Army included veterans from the minor German states who had campaigned with Napoleon until 1813. Men raised from recently-acquired territories were of questionable reliability. About 57% of the Army were regular troops and the remainder Landwehr. The I Corps fielded 32,692 men, the II Corps 32,704, the III Corps 24,456 and the IV Corps, far away near Liege, would bring another 31,102 men. Including the park the total army strength was 124,070.
There was no question about the leadership of the army, beginning with the fire-breathing Blücher and his chief of staff, Gneisenau (who helped re-build the Prussian Army after Eylau). Had Blücher been captured at Ligny, Gneisenau—who disliked the British—might have delayed or diverted the march on the 18th.[⁴]
The Prussian Army occupied a wedge-shaped cantonment area, along the Sambre and Meuse Rivers, with two brigades at its westernmost point extending to Charleroi and Fontaine l'Eveque, to cover the hinge with the Anglo-Allied cantonments. These two brigades were to delay any advance through Charleroi long enough for the two armies to concentrate on Quatre Bras and Sombreffe—eight miles apart. Then the Anglo-Prussians would be able to oppose the French in a single body of 218,000 men. The zone between Charleroi, Marbais, and Quatre Bras was the critical wedge that the French would have to seize.
The French Armée du Nord
The 128,165 men of L'Armée du Nord, most of them veterans of at least one or two campaigns, represented less than one-quarter of the total manpower available to France. About 66,000 men of the line were held back in the depots of the regiments, and 69,000 line soldiers were serving in other field armies, along with 50,000 mobilized National Guards. In the numerous fortresses on the frontiers, 85,500 National Guards were placed in garrison alongside 108,000 second and third line troops. A further 12,000 veterans, 46,000 conscripts, and 32,000 newly-mobilized National Guards stood in reserve or were still in formation in the depots. A regiment of Swiss troops, who attacked Ligny as part of the 10th Division, was the only foreign regiment in L'Armée du Nord.
"Sensitive, insolent, undisciplined; suspicious of its chiefs, troubled by the fear of treason, and thus accessible, perhaps, to panic, but inured to and loving war; athirst for vengeance; capable of heroic efforts and furious transports, and more haughty, more exalted, and more ardent in fight than any other Republican or Imperial Army—such was the Army of 1815. Never had Napoleon under his hand an instrument of war so redoubtable nor so fragile."[⁵]
The quality and devotion of the rank and file was not matched by the skill and dedication of their generals. The years of constant warfare had taken their toll, and many great leaders did not rally to Napoleon in 1815. Among his choices to lead formations, d'Erlon lacked all initiative and Reille had never been successful against Wellington. Vandamme and Gérard were, in contrast, very experienced and capable and ranked among the top French generals. Mouton was distinguished as well. Pajol and Exelmans were skillful cavalrymen, as was Grouchy. Untried as a Marshal in command of all arms, "a long habit of passive obedience had robbed him of initiative."[⁶]
The French General Staff was working together for the first time.[⁷] At Imperial Headquarters, among the 73 officers, only 12 (17%) had as much as 8 years experience on the General Staff.[⁸] Most notably absent was Marshal Berthier, who had taken care of the details of running the army since 1796. The chief of staff's duty was to see that orders were transmitted accurately and that the army was kept supplied. Napoleon originally appointed Berthier's capable deputy, François Gédéon Bailly de Monthion, but then placed Soult over him. Soult had twice before served in that capacity, in 1794 and in Spain; nonetheless, Monthion resented his demotion,[⁹] and he failed to save his boss from several critical errors that cost France the campaign.[¹⁰]
Gone with Berthier was the wooden cabinet with many drawers full of wooden blocks representing all the regiments of both sides. Also missing from headquarters was Louis Bacler d'Albe, the chief of the Topographic Service, who had always been responsible for building and updating the situation map displayed at IHQ. "No other officer, not even Berthier, seems to us to have been associated in so close a manner with Napoleon's intellectual work. ... Bacler d'Albe constantly placed under Napoleon's eyes the strategic chessboard; in a tangible form he kept him accurately informed of the situation of the army in relation to the enemy's positions."[¹¹] D'Albe's replacement in 1815 was the topographer General Simon Bernard, assisted by Dupré and Paluchet.[¹²] One wonders whether Bacler would have allowed Napoleon to forget about Mouton on the 16th or Grouchy on the 17th.
The Emperor himself was not at his best in these warm moist days of summer. His physical condition was deteriorating, leaving him without the stamina for long hours in the saddle and nights spent dictating orders. "I had within me the instinct that things would turn out badly; not that this in any way influenced my decisions or my course of action, to be sure; but I always had that feeling lurking inside me."[¹³] Aside from making a poor choice of marshals to lead the army's two wings, he compounded this by directing Marshal Grouchy beyond supporting distance after Ligny, detaching more than one third of his army in the wrong direction, and then failing to provide further orders to that marshal during the 17th.[¹⁴] Having chosen Marshal Ney—whose great tactical skill was for defensive fights—to lead his offensive battle at Waterloo, he retired for a nap at a crucial moment. Ney conducted the mid-phase of the battle like a rear-guard action in the Peninsula, failing to provide infantry support for his spectacular cavalry charges.
Wellington's achievements in Spain loomed darkly over the heads of all Frenchmen who had fought against him. With such respect for the Allied generalissimo, each man feared a British trap over the next rise. In the end that spectre was no phantom.
Footnotes: [4] Sources agree that Wavre was chosen as their rallying point only because it was the one town all present could find on their maps. [5] Henri Houssaye, 1815, Waterloo, p. 50. [6] Clayton, Waterloo, p. 155. [7] Weller, Jac, Wellington at Waterloo. [8] These were Colonel Gourgaud, premier officier d'ordonnance, Bailly de Monthion, Chief of the general staff (directly under Soult, in a position to repair some of the damage); Baron Dentzel, in charge of prisoners of war; two Adjudants-commandants, Barons Michal and Petiet; Lefebvre and Bernard, attached to the general staff; Baron Gressot, one of the marechaux de camp of the Grand etat-major; Lt. Col. Neigre, director-general of the Grand Park, and Col. Renaud of his staff; the inspector of the Gendarmerie, Lambert; and Intendant general Daru, in charge of keeping the army supplied. [9] Clayton, Waterloo, p. 154. [10] The imputation of false motives to Soult—though suspected at the time—isn't supported by the documentary evidence. [11] Colonel Jean-Baptiste-Modeste Vachée, Napoleon at Work, p. 99. See also Chandler, Campaigns, p. 371; Baron Lejeune, Memoires, Vol. I, p. 210. [12] Tim Clayton, Waterloo, Four Days that Changed Europe's Destiny, p. 83. Napoleon and Bernard used the Ferraris map, the main source we consulted for our game maps—the map can be viewed online. [13] Clayton, Waterloo, p. 51 via Las Cases, Mémorial, VII, p. 179-82. [14] Unsuitable as a wing commander, Grouchy had commanded large cavalry forces in many battles, notably tying-up the Russians at Friedland in 1807.
Marches of Concentration, June 9–14
Napoleon ordered a general concentration of the army around Beaumont on June 9th. The left wing—I at Valenciennes and II Corps at Avenes—west of Charleroi, had between 34 and 44 miles to march. This host was positioned to threaten Wellington's communications with the North Sea coast.
On the right, III Corps occupied Rocroi, 40 miles south of Charleroi, while IV Corps, from Metz, had already departed for Philippeville on June 6. The VI Corps bivouacked around Laon, but the cavalry, forgotten by headquarters, had to force march from the pastures along the Aisne and were in a lather by the time they arrived on the 14th. Rapp's V Corps watched on the Rhine for the oncoming Austrians.
On June 9th Ziethen and General Dörnberg, who commanded the light cavalry brigade detached in front of Mons, were informed of great movements of troops towards the frontier. On the 12th General Dörnberg had forwarded to Wellington, who had transmitted it to Blücher, the information that 100,000 French were concentrating between Avesnes and Philippeville. On the 13th this same Dörnberg, who had numerous spies along the frontier, wrote direct to Blücher that an attack appeared imminent. On the 14th Pirch II announced from Marchienne that the French would attack the next day. In the evening the Prussian advance posts were thoroughly informed of the proximity of the enemy.[¹⁵]
Napoleon with his Imperial Guard remained in Paris as long as possible, finally departing en route to the army at 03.30 on June 12. His departure would announce to the whole world the commencement of the campaign. Passing through Soissons, depot for the Armée du Nord, the Emperor arrived in Laon, another important stage on the line of communications, at Noon the same day.[¹⁶] He spent the 13th at Avesnes, the Army's Center of Operations, looking to the administrative arrangements for his army's supply.
Napoleon arrived with the Guard on the 14th at Beaumont, in a heavy downpour. The army comprised two wings and a reserve—the left, soon placed under Ney, had two corps and the Guard light cavalry; the right, under Grouchy, also had two corps and an extra division of cavalry; the Guard, the Cavalry Reserve, and the understrength VI Corps stood in reserve. In comparison to the bataillons carrée of prior years, the army was weak in infantry. The Emperor entered Belgium with a little over half the numbers marshalled by his combined opponents. Unfortunately two regiments were detached at the last minute from the Young Guard while others from the VI Corps went to quell insurrections in the west.
Footnotes: [15] Houssaye, p. 64. [16] 84 miles/10 mph.
15 June, Thursday
In the morning the French advanced along four northerly routes toward crossings over the Sambre. "The left column advanced from Solre-sur-Sambre, by Thuin, upon Marchiennes; the centre from Beaumont, by Ham-sur-Heure, upon Charleroi; and the right column from Philippeville, by Gerpinnes, upon Châtelet."[¹⁷] Reille's II Corps set-out on time, on course to hit Steinmetz at Fontaine-l'Evêque.
Steinmetz with HQ at Fontaine, occupies the countryside toward Binche—the westernmost outpost of Blücher's army, seven miles west of Charleroi. He was ordered to retire to Gosselies. Zeiten, the commander of the II Corps, had his HQ at Charleroi; his second brigade, under Pirch, distributed between Charleroi, Marchiennes, Dampremy, La Roux, Chatêlet and Gilly. Seven miles by road waits the 3rd Brigade at Fleurus, under Jagow, with outposts at Farciennes and Tamines (3208 and 4307 on the Southern Extension). The 4th Brigade extends eastward along the Sambre, centered on Moustier sur Sambre (5702). "The 3rd and 4th Brigades, as also the reserve-cavalry and artillery, were to concentrate as rapidly as possible, and to take up a position in rear of Fleurus."[¹⁸] The cavalry reserve under Roeder had come forward ready to support whichever brigade was attacked.[¹⁹] The artillery reserve of the Corps at Gembloux, remained in safety in the very rear. The army is going to concentrate on the guns instead of dragging them forward too much. These dispositions by the Prussian army are all fairly evenly-spaced, four of them within five or six miles of Sombreffe. Even the two rearmost infantry brigades can concentrate at that central point, once they get on the road, in under three hours.
Bernhard of Saxe-Weimar, commanding the Nassau brigade was the first allied force at the important crossroads of Quatre Bras. He was still on his way, arriving about 15.00. The other brigade of Perponcher stood at Nivelles, with van Opstal's battery. So we have only a few posts occupied by Anglo-Allied units at the start of the Extension game.
Most of the opposing forces remain on the reinforcement tracks—Anglo-Allied units moving from the north and west, French on the south, Prussians waiting to come in on the east—three more Prussian corps, practically the whole of the Anglo-Allied army, and the entirety of the French Army waiting to come on. The French are deployed to enter at those four roads leading toward Charleroi and the other crossings of the Sambre.
The first to cross will be Reille's Corps moving up to within a few miles of Steinmetz with four divisions of infantry and some guns and cavalry.
Drouot, with the Guard cavalry and Duchand will follow, with Friant and Morand, famous as division commanders in Davout's Corps, now heading up Guard Divisions, tired after their 130-mile march from Laon.
02.30 Beaumont. The strains of reveille resounded in bivouacs across the northern tier of France. With the clatter of arms and equipment, men began to fall-in to road march columns facing the Belgian frontier. The troops had one hour to be with their battalions on the road to Charleroi.
03.30 Marcinelle (XS 1411). Domon's cavalry screen advanced through the darkness to scour the countryside, and crossed onto Belgian soil. His units went the seven miles to Marcinelle and then scouted up and down the riverbank. Pajol with his twelve regiments followed en vedette, screening the French advance. His artillery followed further back. The III Corps cavalry of Dommanget moved up front with Pajol.
04.00 Lobbes. Reille's II Corps was the only formation to reach its jumping-off point exactly at the prescribed time, attacking the bridges at Lobbes. The Prussians lacked the engineers to break the stone bridges there, hence they were barricaded and defended with artillery.
04.00 Thuin. Count D'Erlon's I Corps crossed the Sambre at Thuin, and encountered Prussian resistance at Binche. The Prussians caused delays by remaining in their positions, forcing the French to take the time to deploy, and then moving back a mile or so and repeating the procedure.
The advanced guard of the left French column supplied by Prince Jérôme's division of Reille's corps, attacked Thuin with 2 battalions, from 4 to 5 squadrons, and 3 guns. The place was occupied by the 3d battalion of the 2d Westphalian Landwehr, under Major von Monsterberg, who, after an obstinate and gallant resistance, was forced to retire upon Montigny, where he found Lieut. Colonel von Woisky, with 2 squadrons of the 1st West Prussian dragoons.[²⁰]
Jamioulx. Napoleon with the Young Guard crossed the stream en route to Marcinelle. Behind them, the Imperial Guard. The ailing Guard general, Marshal Mortier, was replaced by Drouot.
04.00 Charleroi (XS 1409). Zieten ordered his first brigade to retire on Gosselies, covered by the 2nd brigade holding the bridges at Marchienne, Charleroi, and Châtelet. The 2nd brigade was then to retire behind Gilly, while the 3rd and 4th concentrated at a position beyond Fleurus.
04.30. D'Erlon got started one hour late.
5.15 Florenne. March confusion ensued in Gérard's IV Corps when the lead division, after passing through Philippeville, lost its general, Bourmont, who defected to the allies. The IV Corps stretched back 11 miles along the road with 8 hexes between divisions.
Bourmont had mounted his horse at Florenne with all his staff—Colonel Clouet, Major Villoutreys, Captains d'Andigné, de Trélan, and Sourda—and an escort of five chasseurs. After having passed the French advance posts, he gave to a corporal of chasseurs a letter for Gérard; and rode with his officers across the frontier.
Footnotes: [17] Siborne, History of the War in France and Belgium, p. 59. [18] Siborne, History of the War in France and Belgium, p. 59. [19] Glover, Waterloo: Myth and Reality. [20] Siborne, p. 59.
06.00. Vandamme received his delayed orders and began to move. His III Corps and Mouton's VI Corps became entangled in a five-hour traffic jam.
07.00 Florenne. The IV Corps reached its start point several hours delayed.
08.00 Lobbes. After four hours, Reille had moved up through Lobbes in one long column. Jêrome's division detoured through Montigny and Marchienne, wresting the bridges from the Prussian battalions posted there. Tough fighting took place around Gosselies as General Steinmetz fell back. He was cleared out of this place by late afternoon.[¹]
Between Marcinelle and the town proper there ran a dyke about 400 meters long. The bridge connected the lower and upper parts of the town and measured eight meters wide, barricaded at both ends. The Bruxelles road ran through the upper part of the town just beyond the Place du Centre. The 9th Prussians held the village of Marcinelle. Two Battalions of the 6th Prussians (Pirch II) held the town of Charleroi. Vandamme's III Corps was supposed to be in the outskirts of Charleroi by 10 AM, but in the event his leading units only made an appearance at 3 PM. This meant that for most of the morning the only troops fighting were Pajol's cavalry of the forward screen.[¹]
10.30 Braine-le-Comte. The Prince of Orange's Chief of Staff de Rebecque ordered the Dutch/Belgian troops in Nivelles forward to Quatre-Bras.
11.00 Marchienne-au-pont (SX 0608). The II/6th Prussian infantry with two guns put up a staunch defence at the bridge, and then retired on Gilly. Marchienne only came firmly into French possession by midday, with part of Reille's Corps across the river and the others waiting.
11.00 Gilly (SX 2006). The 6th Prussian Regiment effected its retreat toward the position in rear of Gilly, hotly pursued by Pajol's dragoons, followed by the 2nd regiment of Westphalian Landwehr.
12.00 Charleroi. The Emperor arrived at the head of the Young Guard division of Duhesme, which he brought forward on discovering the delay of Vandamme, with orders to cross the bridge. The Sailors and Sappers of the guard captured the bridge, allowing the cavalry to cross and drive the Prussians out.
The French sappers of the Guard attacked at 12:30 PM and threw the barricades into the river. Pajol's cavalry again tried to storm the bridge, but were again repulsed. The sappers and the Young Guard renewed the attack, pushing the Prussians out of both the lower and upper parts of the town. After encouraging the drivers on the difficult slopes beyond the bridges, Napoleon set up his headquarters in the lower part of the town in an inn owned by a local ironmaster and ate the lunch that had been prepared for Ziethen.[¹]
Both of the advanced Prussian brigades drew-off in a north-easterly direction, Steinmetz from Fontaine l'Eveque toward Gosselies, and Pirch II from Charleroi toward Gilly. Now the pace of operations accelerated hour by hour. Napoleon ordered Pajol to detach Clary's brigade toward Gosselies and advance with the rest of the I Cav. Corps toward Gilly.
13.00 Gilly. Pajol's I Cavalry Corps reached Gilly in pursuit of Pirch II, who withdrew to the wood of Soleilmont, where he met Jagow's brigade coming up the road from Fleurus.
14.00 Abbey of Soleilmont (SX 2504). Pirch II concentrated in a favorable position with his left extending towards Châteaulineau, and a flank guard near the bridge of Châtelet.
15.00 Gilly. Grouchy and Exelmans' II Cavalry Corps joined Pajol at Gilly. They reported Pirch's brigade in a defensive position.
Quatre-Bras. Prince Bernhard of Saxe Weimar with 4,400 infantry and 8 guns occupied Quatre-Bras.
Charleroi. Vandamme reached Charleroi to find an order to pursue the Prussians along the Fleurus road. His corps continued filing over the narrow stone bridge for some time.
15.15 Charleroi. Soult dispatched orders to General Gerard to move across the Sambre at Chatêlet, but IV Corps did not appear in time to help drive the Prussians from the Soleilment woods.
16.30 Charleroi (Bellevue Chateau). Marshal Ney arrived, accompanied by a single aide-de-camp, and was given command of the I and II Corps. He first sent the two cavalry divisions of Piré and Desnoëttes (Guard LC) north along the Bruxelles road.
17.00 Gilly. Napoleon and Vandamme arrived with the III Corps at Gilly, ranged in battle formation facing the Prussian-occupied woods. Zeithen, outnumbered, withdrew toward the supporting elements of his Corps still approaching. Grouchy and Exelmans pushed on toward Fleurus.
Gosselies. Ney's cavalry skirmished with Steinmetz's brigade, which formed square and marched slowly eastward, covered by Lt. Col. Lützow's dragoons.
17.30 Gosselies. Ney reached Gosselies as Steinmetz finished evacuating the town. The Prussians drew off to the north-east along the Bruxelles road, turning right at the stream toward St. Amand. Ney sent Girard's division in pursuit of Steinmetz and halted to await d'Erlon's I Corps, sending his advanced guard, under Lefebvre-Desnoëttes, north to Frasnes.
Fleurus. Grouchy cleared the retiring Prussians out of the village.
16 June, Friday
18.00 Bruxelles. Wellington received reports delivered by Lord March informing him of the attack on the Prussians, immediately ordering his troops to break camp and move to their divisional concentration points.
18.00 Sombreffe. Blücher reached Sombreffe.
18.30 Frasnes-le-Gosselies. Ney's advance guard under Lefebvre engaged the 2nd Nassau infantry of Bernhard, just south of the village of Frasnes. Lefebvre had 1800 cavalry. The Nassauers fell back to a ridge line near Pierrepont farm on the edge of the Bossu Wood and across the road from Gemioncourt with a loss of 40 men killed and wounded. General Colbert with the Lancers of the Guard reached to within musket shot of Quatre Bras but couldn't hold the crossroads in the face of artillery fire.
20.00 Frasnes-le-Gosselies. Fearing the wood might conceal more of Wellington's army, Ney decided to bivouac rather than make an attempt on Quatre-Bras. A few kilometers south of Frasnes a mill standing on the west side of the road housed Marshal Ney's quarters for the night.
Fleurus. As Napoleon departed for his quarters in Charleroi, Grouchy's men on the right wing also went into bivouac along the road from Chatêlet.
21.00 Charleroi. Napoleon arrived to spend the night. Nearly half his army was still south of the Sambre, but he had attained the central position and would be able to strike either of the two opposing armies.
22.00 Wellington's HQ, Bruxelles. A messenger from Gneisenau reported the Prussian concentration on Sombreffe. Wellington still expected the main enemy advance toward Mons (14 miles west of Seneffe), and sent orders to I Corps to move on Nivelles and Braine-le-Comte; II Corps (2 divs) and Uxbridge to Enghien; others to Sotteghem, Granmont, Alost. Reserve to prepare to march from Bruxelles. A dispatch from Dornberg in Mons made clear that the French movement on Charleroi was not a feint.
01.00 Hôtel de Richmond, Bruxelles. The Duke of Richmond hosted a celebrated ball on the eve of the campaign. Wellington received a despatch from Constant-Rebecque, containing details of Bernhard's situation at Quatre-Bras; he ordered the Reserve Corps to march south, and the remainder of the army toward Nivelles. Wellington left the ball and returned to his Headquarters at 3:00 AM, sleeping for two hours. Completing the issue of his orders, at 7:30 AM Wellington and his staff followed the Reserve (Picton).
Through the Forêt de Soignes, the intervals between the centuries-old trees would have made possible the evacuation of Wellington's army, including gun-teams, had this proved necessary.[¹]
03.00 Quatre-Bras. Perponcher arrived at Quatre Bras with Bylant's Bde.
04.00 Charleroi. The Imperial Guard broke its bivouac and moved toward Fleurus.
Bruxelles. Wellington's Reserve troops marched south for Mt. St. Jean departing via the Chaussée Waterloo. Dornberg's KGL regiments, delayed north of Brussels, followed.
06.00 Charleroi. Soult sends an order to Ney, the first recorded instance when the capture of Quatre-Bras was specifically mentioned.
07.00 Charleroi. March Orders for the coming day were transmitted by Soult.
07.30 Bruxelles. Wellington followed the reserve, reaching Waterloo at 09.00.
08.00 Charleroi. Napoleon's orders for the French marches were still being copied when word arrived from Grouchy of Prussians concentrating on Sombreffe. Napoleon departed toward Fleurus, while his army waited: IV Corps on either side of the Sambre near Chatêlet, and VI Corps still further back. He did send orders to Ney at 08.30, but with further delays in transmission the 45,000 men of the left wing remained inactive throughout the morning.
10.00 Quatre-Bras. Wellington arrived on the battlefield.
11.00 Fleurus. Napoleon moved slowly toward Fleurus and saw for himself the Prussian Army concentrating at Ligny.
12.00 Frasnes. Ney finally received his written orders sent out at 08.30.
Quatre-Bras. After ascertaining that the situation at Quatre Bras was reasonably quiet, Wellington set off for the Prussian positions, dressed in civilian clothes, three red plumes in his two-cornered hat.
Sombreffe. Pirch's Corps arrived, on its way toward Brye.
13.00 Ligny. Pecheux's division arrived and attacked Ligny. Girard's division (attached to III Corps) attacked St. Amand, Vandamme and Gérard reaching Fleurus.
Mt. St. Jean. The Reserve Corps passed through on the march toward Quatre-Bras.
13.30 Brye. Wellington and Blücher met at the Moulin de Bussy. Wellington expressed reservations about the deployment, noting the numbers of Prussians exposed along forward slopes to enemy artillery.
At Brye, to the south of Ligny, stood the windmill of Bussy, Blücher's headquarters, and Wellington disapproved. "According to my judgement, the exposure of the advanced columns—almost the whole army—to cannonade, standing as they are so displayed to the aim of the enemy's fire, is not prudent ... I will come—provided I am not attacked myself." Fleurus was scene of fighting on the 15th, as the French III Corps pressed into the town, with Napoleon in person supervising the fight against Ziethen's Prussians, who retired by 10:00 PM. Napoleon's windmill northeast of the town, le Moulin de Maveau, bears a plaque, as does la Ferme d'En Haut in the centre of the town, where Napoleon spent an uneasy night after the battle. In Sombreffe is the rectory where Blücher established his headquarters on the 15th.[¹]
14.00 Quatre-Bras. Ney attacked the 8,000 Coalition troops that had arrived.
Ligny. Napoleon issued orders for the battle to 68,000 men in I Cav and II Cav Corps, III and IV Corps; Guard and IV Cav Corps in reserve, VI Corps awaiting orders near Charleroi. Ney at Frasnes was ordered to drive the English out of Quatre Bras and then to descend on Brye by about 18.00.
14.30 Ligny. Vandamme attacked St. Amand while Gérard undertook a personal reconnaissance of the Prussian lines and deployed Vichery and Pecheux against Ligny while placing Hulot's division on the right to support the cavalry, facing Boignée.
15.00 Sombreffe. Thielemann's III Corps arrived between Sombreffe & Mazy.
Quatre Bras. Wellington returned from his meeting with Blücher, calling him "a damned fine old fellow." Perponcher's division was under pressure. In rapid succession the Duke of Brunswick arrived at the head of his corps, Merlen's cavalry arrived from Nivelles, and then Picton's division came in behind the last of Brunswick's men.
15.15 Quatre Bras. Ney was just reading his orders of 14.00, which he interpreted to mean that he had to clear Quatre-Bras before attempting his turning movement against the Prussians. Without neutralizing the British first, his outflanking force would be exposed between two fires.
Fleurus. Marshal Soult issued further instruction to Marshal Ney, which in its vagueness seemed to confirm the hotheaded Gascon's fixation on the capture of Quatre Bras, and did not suggest the importance of his moving at least d'Erlon's corps to support the Emperor.
15.45 Frasnes. The Emperor's aide-de-camp count de la Bedoyère arrived on the Bruxelles road from IHQ with a pencilled note from the Emperor, and ordered the lead division of d'Erlon's division to change direction and march for St. Amand. The remainder of the corps followed.
16.00 Quatre-Bras. Alten's newly-arrived division attacked while Kruse's Nassau Landwehr moved up in support.
St. Amand. Lefol's division finally captured St. Amand le Château from Steinmetz's brigade. But Girard's division was unable to eject Pirch II's brigade from La Haye, Blücher himself leading Tippelskirchen's brigade that finally drove the French out with 50% casualties.
Ligny. Gérard's attack against Ligny met fierce resistance from Jagow's brigade, and some regiments took over 50% casualties before the Prussians finally pulled back across the creek.
16.10 Gemioncourt. Ney received word from d'Erlon of his change of direction. Within minutes, Colonel Forbin de Janson arrived from IHQ, but he failed to deliver the orders in the face of the Marshal's rage. Throwing caution to the wind, Ney ordered Kellermann to attack Halkett's freshly-arrived brigade with the single cavalry brigade he had to hand. This charge was lucky.
The large farmstead of Gemioncourt stands 200 yards to the east of the Charleroi high road. West of the road at this point is the sunken meadow where the 69th Regiment was scattered by the French cavalry. Wellington was nearly captured in the SE corner of Quatre-Bras on the Bruxelles Road by the French Cavalry charge. He only escaped by jumping into the square of the 92nd Highlanders.[¹]
18.00 Quatre Bras. Cooke's division arrived at Quatre-Bras along with Best's Brigade. A lull spread over the battlefield as Wellington, who now had numerical superiority, sent Brunswick and Kielmansegge to attack Bachelu on his left, while Cooke's Guardsmen drove Jérôme's men back through the Bossu Wood.
Fleurus. Napoleon was about to send the Guard into battle when a mysterious force appeared in the rear of Vandamme's Corps. A lull in the battle ensued while staff officers galloped off to identify the approaching troops.
18.30 Fleurus. Staff officers reported the approaching column to be d'Erlon's I Corps. Napoleon recommenced his attack.
Quatre-Bras. Ney finally received the dispatch, which Forbin de Janson failed to deliver earlier, containing Soult's further instructions of 15.15.
19.30 Ligny. The Guard went into action, one brigade on either flank of Gerard's IV Corps, supported by the Guard artillery and Heavy Cavalry. Within half an hour they had driven the Prussians back from the Ligny brook. They then hit Krafft's brigade, pushing it back toward Brye. As the French approached his command post, Blücher took 32 squadrons of cavalry and swept down upon the Guard, only to be beaten back by Milhaud's IV Cavalry Corps. Blücher himself was wounded and separated for the next several hours from headquarters.
21.00 Ligny. The battle was at an end and the Prussians withdrew. The Prussian commissioner at Wellington's HQ admitted to 20,900 men lost, including 8,000 missing who went to Namur. Over the course of the 15th-16th, the Prussian I Corps lost 12,711 men; 6,000 were missing. We have calculated III Corps losses as 4,860—between I and III Corps, a total of 17,571. That leaves 3,330 men as the calculated loss of the II Corps. On the French side, the toll was 11,500 men. The 7th Division was out of the campaign with over 2,000 casualties. The Young Guard lost 350 men. The Imperial Guard, VI Corps, and three Cavalry Corps lost between them 1,000 men.
Gembloux. From St. Amand the Roman Road runs towards Gembloux, overlooking the general line of the Prussian retreat, through Marbais, Tilly, Mellery and Mont-St. Guibert to Ottignies. It was to Mellery where Blücher, bruised and tired, was taken by his aide Nostitz. The French pursuit went rather more to the east, having started off towards Namur before swinging north through Gembloux to Sart-le-Walhain.[¹] In this way the Prussians broke contact in the night.
Quatre Bras. As darkness descended, Ney broke contact and drew his forces off to the south. Wellington chose not to pursue.
22.00 Genappe. Wellington reached his quarters at l'auberge du Roi d'Espagne in Genappe, where he received word of the Prussian debacle. He despatched an officer toward the east who returned about midnight to report French Vedettes near Sombreffe.
23.00 Ligny. The French followed the retiring fugitive horde of 10,000 men making its way toward Liege, but failed to discover the forces moving toward Wavre. Napoleon ordered one hard-hit division to remain at St. Amand while Grouchy would take 33,000 men to pursue the broken remnants of Blücher's army eastward. Napoleon would take the balance of the forces toward Quatre-Bras in the morning, to deal Wellington a decisive blow. Careless staff work again struck, as no one at IHQ apparently thought to dispatch an officer to ascertain the true state of affairs before Quatre Bras. Furthermore, they failed to order Grouchy to conduct any overnight reconnaissance of the fleeing Prussians. The Emperor retired to bed at Fleurus.
17 June, Saturday
01.00 Tilly. Gneisenau gave the order to retreat on Tilly and Wavre. He then rode over to his headquarters in Mellery, where he found Blücher, somewhat dazed, recovering from his fall during the charge.
03.00 Genappe. Wellington arose and immediately sent the bearer of the last dispatches toward Ligny to confirm the Prussian retreat and its direction.
04.00 Fleurus. Napoleon awoke about dawn and remembered to order Pajol's I Cavalry Corps to follow the Prussians, and then went back to sleep.
06.00 Quatre Bras. Wellington returned to the cross-roads and sat by a fire on the damp morning.
Fleurus. Napoleon arose and proceeded to a leisurely morning routine. He received a report from Pajol that the Prussians were moving toward Namur. Grouchy's cavalry had lost contact with the organized troops of the Prussians, and rain complicated their work. Napoleon shortly received word of the fiasco at Quatre Bras.
07.30 Quatre Bras. Wellington received confirmation of Blücher's retreat on Wavre.
09.00 Quatre Bras. Wellington received the first dispatch from Blücher since the retreat, enquiring of his own intentions.
10.00 Quatre Bras. Wellington opined that "as they are gone back, we must go to." He ordered his troops to withdraw toward Bruxelles. The retreat from Quatre-Bras began, covered by cavalry, horse artillery and one Congreve rocket battery.
12.00 Mazy. After capturing a Prussian horse battery and provisions column with the 4th Hussars, Pajol reported to Grouchy that the Prussians were moving supplies from Namur north towards Louvain; enemy units were turning towards Gembloux.[²¹]
13.00 Marbais. Napoleon arrived from Ligny on his way to Quatre Bras. Ney's forces were resting and reorganizing. Octave Levasseur joined the staff, arriving with Ney's horses and kit. At the same time Soult assigned Ney another officer from IHQ, Colonel Jean-Louis Crabbé who had been on the marshal's staff in the early days.
14.00 Quatre-Bras. The last of Wellington's infantry, the Guards division, pulled out just ahead of Napoleon's belated pursuit. The French lancers did not reach Quatre-Bras until they had cleared out. They overtook the British rear guard only in Genappe.
In 1815 the main Bruxelles road passed through Genappe. The lancers's attack through the town was countered by the English horse. In the confines of the narrow streets the lances were difficult to use and they received a check. The British lost 93 dead and wounded in the retreat. Before Genappe the retreat was all blunder and confusion; after Genappe it was a walk.
To the east of the main road, a side-road to Baisy-Thy leads past a very tall, distinctively shaped tree beside the small stone shrine of Saint Anne. From beneath its branches Napoleon paused to encourage his rain-sodden troops to hurry forward during the afternoon in his thwarted bid to catch the Allied rearguard.
Prince Jérome reported what the waiter at the Roi d'Espagne told him. When he was serving Wellington on the 17th, he overheard the general speak of the juncture of the two allied armies at Waterloo. Napoleon replied: "Nonsense—not for two more days."
18.00 Mt. St. Jean. Napoleon sent his IV Cav Corps toward Wellington's position. A volley from 60 guns revealed that this was indeed Wellington's chosen position: with cavalry only guarding the flank, and light forces thrown forward into Plancenoit and Hougoumont.
20.00 Gembloux. Grouchy ordered Pajol up from Mazy, and reported to Napoleon that part of the Prussian Army was moving through Sart-à-Walhain toward Wavre. Exelmans' dragoons were ordered to Sart-à-Walhain and Perwez, and the only other light cavalry available, two regiments in Maurin's division, were covering the army's right flank. "If the main mass of Prussians is retiring on Wavre, I will follow them in that direction so that they can't reach Bruxelles and to cut them off from Wellington." Grouchy sent no one to scout in the gap between Gembloux and Waterloo and failed to set-up the chain of vedette posts the Emperor had ordered.[²²]
23.00 Waterloo, Hôtel Boderglieu. The Duke spent the nights of 17 and 18 June at his HQ. "I made my campaigns with ropes. If anything went wrong I tied a knot and went on." Wellington went to bed without hearing from Blücher. At the same time, Müffling informed Blücher that Wellington had taken up a position at Mont-St.-Jean and requested assistance. Over Gneisenau's objections, Blücher stated, "We are going to join the Duke." Gneisenau feared being used by the British as a rear guard.
Footnotes: [21] Clayton, Waterloo, p. 289. Pajol had just two regiments of cavalry, the 4th and 5th Hussars. Subervie's division had been taken from him, and the 1st Hussars, detached on 15 June, still had not returned from Frasnes. [22] Clayton, Waterloo, p. 290-291.
18 June, Sunday
04.00 Maison du Roi. After spending the early twilight hours inspecting the front, Napoleon received Grouchy's 20.00 hrs. dispatch. He made no immediate reply and retired for a few hours of sleep.
06.00 Hougoumont. Wellington began to inspect his whole line, beginning west of Hougoumont and moving to the east "as if riding for pleasure ... in his comfortable civilian dress." He deployed his forces in column of companies, not in line.
08.00 Le Caillou. Over the morning repast Napoleon declared, "This affair is nothing more than eating our breakfast. We have 90 chances in our favor and not ten against us." The Emperor drafted his plan for the battle, and tardily dictated a response to Grouchy's message of 20.00, confirming Wavre as the Marshal's objective.
09.30 Wavre. Exelman's cavalry ran into the Prussian rear-guard south of Wavre. Prisoners confirmed the direction of Blücher's march toward Waterloo, and this was put into a message for Grouchy.
10.00 Maison du Roi. Napoleon received another message from Grouchy, sent at 06.00, stating that the Prussians seemed intent on joining Wellington.
10.00 Hougoumont. To the right of the Bruxelles highway lie the slopes concealing his men. The duke returned to the west of Hougoumont. Half the guard defenders of the Chateau were newly raised from the Berkshire Militia. These were the 2nd battalions as the 1st battalion were required to secure the capital from riots.[²³] Most had not seen any service.
Forces Engaged at Hougoumont[²⁴]
| Estimated time | French | Anglo-Allied |
|---|---|---|
| 11.30 a.m.—12.30 p.m. | 4,000 (7 bns.) | 1,200 (± 2 bns.) |
| 12.30—1.30 p.m. | 3,500 (6 bns.) | 9 coys. (±1 bn.) / 2,500 (5 bns.) |
| 1.30—2.30 p.m. | 2,700 (6 bns.) | 6 coys (-2 withdrawn) |
| Totals | 12,700 (24 bns.) | 2,600+ (± 4.5 bns.) |
11.00 Hougoumont. Jérôme attacks the chateau, committing greater and greater numbers, with 24 battalions in action by 2.30 p.m.
11.25 Walhain St. Paul. Marshal Grouchy was breakfasting with his staff when they heard the first salvos of the French guns at Waterloo, 15 miles away. At once General Gérard, commander of the IV Corps, demanded they march forthwith on the sound of the guns. Despite his plea, Grouchy deliberately obeyed his orders and headed for Wavre by way of Corbaix.[¹]
Had Grouchy taken General Gerard's advice, he would have arrived at the Moustier and Ottignies bridges at one or two o'clock, have crossed them without opposition, and found the road to Maransart quite undefended.[²⁵]
12.30 Walhain St. Paul. Grouchy received the 9.30 message from Exelmans confirming that the Prussians were marching against Napoleon. Grouchy immediately ordered his troops across the Dyle.
13.45 La Haye Sainte. D'Erlon's infantry attacked the British center. Papelotte farm and the Sandpit quickly fell.
16.00 Ney's Cavalry Charges. Wasteful charges against formed squares, with some infantry also joining the attack around 6 PM.
16.30 Papelotte. The exposed forward slope saw the decimation of Bylant's Brigade and of the line held by Picton's 5th Division. The original roadway had a thick hedgerow on its southern side, through which embrasures were cut for the cannon. Down the Chemin d'Ohain to the east lies the farm of Papelotte—forming, with La Haye hamlet and the Chateau de Frischermont the extreme left of Wellington's position. The massive walls of the original set of buildings show how formidable these farmsteads must have been to attack. The position was held by Saxe-Weimar's Nassauers, lost to the French at 2:30 PM, but subsequently retaken in the early evening.
Plancenoit. Plancenoit was the scene of the frantic final stage of the fighting. The fluctuating struggle for the place raged on until after dusk before the Prussians emerged victorious.
17.00 Wavre. The Ninth Brigade (Borcke's) was to have been placed in rear of the 10th and 11th as a general reserve, but Borcke, after detaching the troops to hold Basse Wavre and reinforce Zeppelin, had marched his men off towards the main army, in the belief that the whole Corps had already marched. As Borcke had made a wide detour from Basse Wavre to La Bavette, there was some reason for his misjudgment. His march was not discovered in time; so Thielemann's force was reduced by six battalions and one battery of artillery.[²⁶]
The fighting along the Dyle continued from Wavre to Limale as Grouchy attempted to find a weakness in Thielemann's III Prussian Corps, eventually getting across at Limale. During this fight, the other three corps made good their arrival on the battlefield of Waterloo. The town of Wavre itself stood mainly on the north bank of the river Dyle in 1815, with two stone bridges linking it with its southern suburb. Two long but low heights line the valley, covered in places by thick woodland, the spur on the right bank being slightly the higher, that on the left bank somewhat steeper—and thus more suited for the defence of the river and its crossings.
Along the banks of the Dyle stands Limale, scene of much hard fighting in the evening—to the north and east of the town, the scene of the successful French outflanking attack and final efforts on the morning of the 19th. The steep wooded ridges give a good idea of the terrain that obstructed the French deployment both in this area and nearer to Wavre.
Footnotes: [23] March 1815 riots against passage of the Corn Laws. [24] Adkin, p. 336. [25] Thiers, p. 161. Maransart is only one mile from Plancenoit. [26] Hyde Kelly, The Battle of Wavre and Grouchy's Retreat, p. 113.
The small winding roads north and west of Limale lead towards Chapelle-St. Lambert, the route of Blücher's march at the head of three corps (one in fact kept to a more northerly but parallel route via Rixensart and Genval) towards the distant battlefield of Waterloo. Moving on through the Wood of Paris, one reaches the point beyond Lasne where the leading formations of Bülow's IV Corps began to emerge from the trees shortly before 2 PM on 18 June. A monument to the Prussian General Schwerin, set amidst the fields west of Lasne church, marks the place where he was killed in command of a brigade of IV Corps cavalry.[¹]
Mont-St. Jean. Just beside the cross-roads in its south-west angle originally stood the single elm tree under which Wellington established his command post from about 1:30 to about 3:00 PM. At about 4:00 PM he had taken refuge in the squares of the 33rd and 69th regiments nearby. Again at 6:30 PM he was near the farmhouse of La Haye Sainte.[¹]
18.00 La Haye Sainte Captured. La Haye Sainte lies in a hollow, past the site of the sandpit east of the road (defended by the 95th Rifles). Here was the stout defence conducted by Major Baring and his battalion of the King's German Legion. Wellington spent much of the battle in this vicinity. At about 11:30 AM he was at the center of the line, and after stationing himself at his elm tree he arrived at the sandpit about 3:00 PM.[¹]
19.00 La Belle Alliance. Mythologically speaking, Waterloo comes down to one hill. Napoleon had one more turn on the wheel of destiny, and the final act was prepared. He led his troops forward. The six uncommitted Imperial Guard battalions left their position and climbed the slope east of Hougoumont.
19.30 Hougoumont. After spending the better part of the day at the elm tree the Duke returned to the east side of Hougoumont, from whence he would soon ride along the entire line ordering his troops forward in pursuit of the demoralized French.[¹]
19.40. The attack of the Middle Guard's westernmost column was met by Maitland's Guards.[¹] The British infantry succeeded in stopping the attack, then Chasse's Netherlands troops counterattacked and sent the Imperial Guard reeling back.
20.30. The Guard streamed back in chaos. The French Army slowly disintegrated under a general Anglo-Prussian assault. Napoleon attempted to stem the rout by ordering the Old Guard to form square just to the west of the Bruxelles Road, about 200 meters south of La Belle Alliance. Then, with Soult, d'Erlon, Drouot and the duty squadrons, Napoleon rode back to La Maison du Roi.
Wellington had originally selected the La Belle Alliance position on which to resist the French. His Quartermaster General, de Lancey, rejected that line as too big for an army of Wellington's size.[¹]
Waterloo. Wellington returned to the inn at 11:00 PM, ate and slept on a pallet, as one of his aides-de-camp was dying in his bed in the next room.[¹]
Genappe. By following the line of the Dyle on foot, the original bridge can be discovered—its narrowness explaining much of the panic and overcrowding that affected the fleeing French. Napoleon's hopes of rallying the army were dashed. Napoleon almost fell into Prussian hands, abandoning his travelling-coach, which could barely move through the throng, for horseback.[³]
19 June, Monday
Gossieles. Blücher stayed at the Dumont mansion overnight.
05.00 Waterloo. Wellington left for Bruxelles.
05.00 Charleroi. Exhausted from his journey through the rabble of his army, Napoleon arrived on horseback at Charleroi. He departed in a carriage to Philippeville, via Leuverval and Somzée.
09.00 Philippeville. Here was the French IV Corps staging area prior to the campaign. Napoleon still believed that "All is not lost. ... There is still time to retrieve the situation." Soult soon arrived. The Emperor stayed at the Golden Lion Inn, Room 4, departing at Noon on the 19th—in Soult's traveling carriage—and headed south for Laon where he intended to reorganize the army—infantry rallying on the butte of Laon, artillery at Le Fére, and cavalry at Soissons.
10.00 Rosieren. Grouchy was south of Rosieren on the Wavre-Bruxelles Road when he received Soult's order to retreat over the Sambre and move on Philippeville. The Prussian Thielemann, in accordance with his earlier instructions, withdrew to Louvain. Grouchy began his retreat at 11:30 AM on Namur in two columns, the III Corps and the IV Corps, with Pajol's cavalry acting as rear guard. His advanced guard (12th Dragoons) retreated through Temploux and arrived at Gembloux on 2:00 PM on the 19th, heading for Namur. They reached Namur by the Bruxelles gate one hour later, with instructions to hold the bridge over the Sambre and the Meuse Rivers. Exelmans's Cavalry Corps arrived at Namur at 7:00 PM, and continued on to Givet. At this time the main body with the trains was six miles from Temploux. Teste's Division acting as the rear guard arrived at Temploux at midnight. Vandamme's III Corps moved through Temploux and arrived in Gembloux at 5:00 AM on the 20th. Grouchy decided to continue the IV Corps's march onto Namur.
Rocroi. The long ribbon of the dusty road unwound beneath jolting carriages, as the Emperor rode south. A few bewildered watchers cheered the familiar profile.[²] In the three carriages rode the Duke of Bassano, Bertrand, Drouot, Gourgaud, Flahaut and Labédoyere.[⁴] Arriving at the posting station of Maubert-Fontaine (six miles beyond Rocroi) there were no horses available and the postmaster had to scour the nearby villages, while the Emperor and his aides de camp refreshed themselves at the Grand Turk Hotel.[³]
20 June, Tuesday
04.00 Paris. Fouché learned of the outcome of the battle. He leaked the information to selected deputies of the Chambers, and put his plan in motion.
06.00 Laon. The imperial convoy again had to wait for teams to be produced at Mézieres. As they approached Laon from the east, the first remnants of the army began arriving from the north, without weapons, ragged and bleeding. The Guard was mustering at Chivy, and would assemble 3,000 men by the 26th. The Emperor arrived at the posting station where the Reims and Marle roads crossed. On the evening of June 20th, Napoleon's suite was still in Laon at the Hotel des Postes, delayed by a lingering hope of reuniting with the vestiges of the retreating army.[³] At ten or eleven PM they continued their journey traveling through the night.[⁴]
Namur. In the morning Grouchy fought off Pirch I with the IV Corps, while the III Corps halted Thielmann near Falize. By 4:00 PM Grouchy arrived at Namur. At about 5:30 PM the Prussians attempted to storm the Bruxelles gate, losing 1300 men to the French 60. The French barricaded the gate and retreated via the Porta de France at 8:00 PM, heading for Dinant. On the 21st Grouchy with 28,000 men and 96 guns arrived at Cherlemont.
Soissons. From Laon Napoleon's coach took the route via Mons en Laonnois, Montbavin, Merlieux and Chavignon, reaching the posting station at Vaurain at the crossroads to Craonne. Then with a change of horses, the party continued to Soissons, Vertes-Feuille and Villers Cotterêts. From Villers the coaches made their way to Levignen, Nanteuil, Dammartin, Le Mesnil-Amelot and Le Bourget.
21 June, Wednesday
06.00 Paris. The final leg of Napoleon's journey passed through La Villette, arriving there at daybreak. Here they turned via the outer fortifications through the Barriere du Roule to the Rue du Faubourg St. Honoré.
Down the avenue de la grande armée, unceremoniously, clattering through the Arc de Triomphe, horseshoes hitting paving stones echoed against the engraved names of memorable victories. At the Élysée Palace the journey was finally over; a dull-eyed man got out. His face was ghastly, and he breathed with difficulty. He disappeared into a bath, then breakfasted and met the Council of State after 10 AM.[²]
Strasbourg. Rapp received news of Waterloo, and orders to retire toward the capital. His corps and Suchet's were, with Grouchy's forces, intended to form the core of a rebuilt French Army.
22 June, Thursday
Le Cateau. Following the retreating French army, Wellington moved forward into France. Grouchy was ordered to Laon via Meziéres to take command of the army.
13.00 Paris. Napoleon signed his second and final abdication.
23 June, Friday
Malmaison. The Tricolor replaced the Emperor's standard on the Tuileries. Where he had once enjoyed happier times with Josephine and daughter Hortense, Napoleon waited for permission from the new government to board a frigate for America.
Catillon. Wellington met Blücher and it was decided to move down the Oise River for Paris, masking Laon. The Prussians traveled by way of St. Quentin—Chaunay—Noyon—Compiegne, while the English followed the line Le Cateau—Vermand—Peronne—Nesle—Creil, crossing the Oise at Compiegne. The Prussians were outmaneuvered by the retreating French I Corps at Compiegne four days later.
26 June, Monday
Surburg and Seltz. Rapp skirmished with the Austrian III Corps, afterwards withdrawing south toward Strasbourg.
Soissons. Grouchy reached Reims on the 25th, continuing to Fismes and Soissons on the 26th. The Prussians ejected him from the place the same day, thence to Villers Cotterêts where they skirmished again, losing 14 guns, 150 men and 20 wagons, on the 28th. The troops continued on to Claye, finally withdrawing into the capital.
28 June, Wednesday
La Souffel. Rapp turned to face his pursuers, deploying two divisions at the bridges, keeping one in reserve. Wilhelm committed his men piecemeal as they arrived; first directing the Austrians to seize Lampertheim. When this failed to turn Rapp's flank, Franquemont's Württemberg troops struck Soffelweyersheim. Adam's cavalry broke through, with Rapp directing Merlin's division in a counter attack. He then retired into Strasbourg.
Bibliography
- Mark Adkin, The Waterloo Companion (2001)
- Alain Arcq, Wavre & Le Combat de Namur (2008)
- Tim Clayton, Waterloo, 4 Days that Changed Europe's Destiny
- Michel Conreur, de Thuin à Waterloo (1990)
- Gareth Glover, Waterloo: Myth and Reality (2014)
- Henry Houssaye, 1815: Waterloo (1905)
- Walter Haweis James, The Campaign of 1815: Chiefly in Flanders
- John Keegan, The Face of Battle (1976)
- Hyde Kelly, The Battle of Wavre and Grouchy's Retreat (1905)
- Michael V. Leggiere, Blücher—Scourge of Napoleon (2014)
- Jacques Logie, Waterloo: The 1815 Campaign (2003)
- Albert Nofi, The Waterloo Campaign (1993)
- John Codman Ropes, The Campaign of Waterloo (1890)
- William Siborne, History of the War in France and Belgium (1844)
- Andre-Charles Sonmereyn, Wavre 1815 (1990)
- L. A. Thiers, History of the Consulate and Empire of Napoleon
- Tondeur et al, Plancenoit: Les Carnets de la Campagne (2003)
- Andrew Uffindell, The Eagle's Last Triumph (1994)
- Jac Weller, Wellington at Waterloo (1967)
End Notes
- David G. Chandler, Waterloo: The Hundred Days (1980)
- Philip Guedalla, The Hundred Days (1934)
- Henry Lachouque, The Last Days of Napoleon's Empire (1967)
- Edith Saunders, The Hundred Days (1964)
Designer's Notes
Kevin Zucker
The 16th of June began with the operational achievement—though flawed—substantially complete. The opposing forces were rapidly converging toward the battlefields.
The French failures on the 15th had been due to a rider's fall in the dark. On the 16th Bourmont's defection delayed IV Corps, but it is not quite clear why immediate orders were not sent to Ney to seize Quatre-Bras. On the morning of the 17th Napoleon was paying attention to the wounded. After a battle, his exhausted troops needed rest and reorganization. On the 18th they had to wait for the claey Belgian fields to dry out. All these situations, and myriad others, are covered in the "Late Start" Card. "Asleep" is shorthand for "otherwise engaged, unaccountable delay, or lapse in command."
The game always plays differently if for no other reason than hidden movement. We molded some of the over-arching strategic problems into the cards. The withdrawal of the Prussians after Ligny is the crux of the whole campaign. Will they be able to retreat directly on Wavre? Grouchy's cavalry, on the right, only saw troops retreating in disorder toward Namur—some 9,000 men with many wagons heading south-east on this road toward Namur and the Ardennes.
The Prussian III Corps—posted on the left around Sombreffe—withdrew intact to Gembloux and set up a road-block to filter II Corps troops back to their units. Moreover the battered but defiant I Corps retreated directly through Marbais and Mont St. Guilbert. This column escorted the headquarters and Blücher himself.
If Ney's turning maneuver from Q-B had been effected, Blücher's I Corps could never have retreated that way. If the chaos had swept Blücher into the retreat eastward, Gneisenau would have followed. This we know from his own writings.
It was for Napoleon to be better informed about the British. But Wellington's forward concentration at Q-B surprised everyone; it wasn't anticipated and almost didn't happen.
Generally the VP award for units eliminated will not be more than 10 VPs; there are more VPs at stake for captured places, baggage (and cards). A player will juggle all these factors to come up with a win, without focusing too much on any one category of VPs.
Acknowledgements: Many thanks to Paul Dawson, author of Napoleon's Last Army, for help with Initiative Ratings and notes on French units.