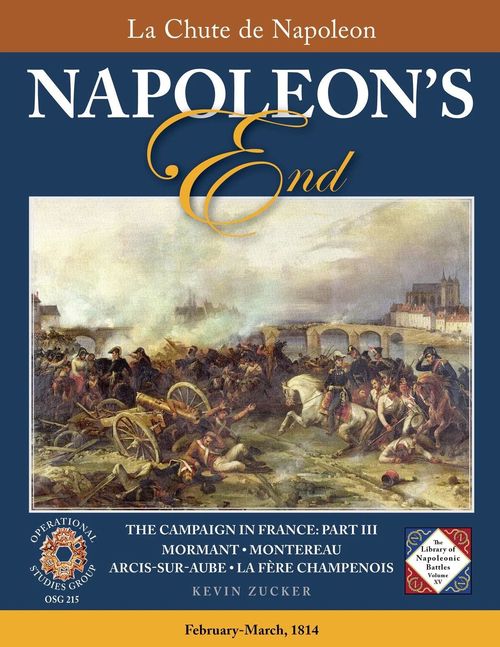
Napoleon's End
Napoleon's End Rulebook
Table of Contents
Table of Contents
- PART ONE: SERIES RULES (Version 7.38)
- 1.0 Introduction
- 2.0 Sequence of Play
- 3.0 Stacking
- 4.0 Zones of Control
- 5.0 Leaders
- 6.0 Command
- 7.0 Movement
- 8.0 Hidden Forces
- 9.0 Repulse
- 10.0 Combat
- 11.0 Combat Modifiers
- 12.0 Combat Results
- 13.0 Bombardment
- 14.0 Cavalry Charges
- 15.0 Fortified Places
- 16.0 Vedettes
- 17.0 Supply
- 18.0 Baggage and Pontoon Trains
- 19.0 Reinforcements
- 20.0 March Orders
- 21.0 Demoralization
- 22.0 Recovery and Reorganization
- 23.0 Weather
- Glossary and Index
- PART TWO: NAPOLEON'S END STUDY FOLDER (v2.09)
PART ONE: SERIES RULES (Version 7.38)
1.0 Introduction
This game is a two-player simulation of Napoleonic battles at the Grand Tactical level. You can play each game as an individual set-piece, or undertake a 'Campaign' consisting of several battles played in sequential order.
1.1 Inventory
See the Study Folder for a complete list of components. (One six sided die is needed for play, not included.) If any parts are missing, or with any rules questions, please write: Operational Studies Group, PO Box 569, Sparks-Glencoe, MD 21152, USA; e-mail: [email protected]
1.2 The Rulebooks
This rule book contains the basic rules that apply to all games in this series. The Study Folder contains Special Rules, Scenario Information, Historical Commentary, and Design Notes. All rules about the play of cards are in the optional booklet of Card Instructions (24.0).
1.3 The Map
The maps provide the playing surfaces, depicting the area where the battles occurred. A hexagonal grid overlaying the maps divides the playing surface into hexes. Each hex is 480 meters across (525 yards, 50 acres). Each hex has a four-digit code printed on it. Slope hexsides represent a rise of 50 to 100 feet or more. Crests are 20-50 feet. A hex is Woods or Marsh if one-third or more of the hex contains the terrain symbol.
1.4 The Playing Pieces
(1.41) The playing pieces are of five types: Combat Units, Vedettes (16.0), Leaders (5.0), Trains (18.0), and Markers. All combat units have a Full Strength side; most have a Reduced Strength reverse. Leaders, Vedettes and combat units with a Strength of "one" have a Flag reverse.
(1.42) How to Read the Units: The numbers and symbols printed on combat units include:
- Unit I.D.
- Command Designation (Glossary)
- Combat Strength: one SP = ± 1 battalion, 1 cavalry regt., or 1 battery
- Initiative Rating (5.22)
- Movement Allowance (7.2)
- Size: XX Division, X Brigade, III Regiment, II Battery, [X] Ad Hoc Task Force
- Unit Type (Infantry, Heavy Cavalry, Vedettes (16.0), Artillery (13.0), Horse Artillery)
- Number of Vedettes they can deploy (16.11)
Leaders show: Name; type (COMMANDER, with Command Points and Movement Allowance; or OFFICER, with Command Designation, Initiative Rating and Movement Allowance).
(1.43) Markers: Markers are placed on the map to indicate status of units or hexes. (Marker types shown: Failed Repulse, Out of Supply, Control, Demoralized, Out of Command, In Command, Pontoon Train, Baggage Train, Burnt Bridge, Turn.)
1.5 Initial Set up
Carefully punch out the units and sort them by Command Designation. Then select a scenario (see Scenario Information in the Study Folder for details). The units are placed on the map according to the Initial Set up. The First Player (stated in the Scenario Information) always sets up before the Second Player. All units start hidden (8.0). Units designated (R) are set up with their reduced side facing up. Each side may place one force under March Orders if it has a Commander on the map (20.1).
2.0 Sequence of Play
The Game is played in a series of Game-Turns, representing one hour of daylight, or 3-6 hours of night.
2.1 Day Game-Turns
Each Day Game-Turn is divided into two Player Turns subdivided into four Phases. The First Player resolves all four Phases of his Player Turn, and then the Second Player does the same. Each of the Phases must be resolved in the exact order given. After the Second Player Turn, the Game-Turn is complete and a new Game-Turn begins.
First Player Turn
A. Start Phase:
- Weather Segment: The First player rolls on the Weather table on the first turn of each day, and at other times as determined by the Weather Duration Die Roll (23.12).
- Card Segment: OPTIONAL (24.0) See separate 4-page folder.
B. Command Phase:
- Supply Segment: On turns when weather is checked, or as indicated on the TRC, the Phasing Player checks supply for his forces (17.1). If not using the cards, the Phasing Player may declare a General Retreat (20.5).
- Recovery Segment: On turns when Weather is checked, or as indicated on the TRC, the Phasing Player may attempt to Recover Units (22.1).
- Reorganization Segment: The Phasing Player may use eligible Leaders to bring eliminated units back into play at reduced strength (22.2).
- Command Segment:
- a. The Phasing Player removes all "Out of Command" markers from his forces.
- b. The Phasing Player allocates his Command Points (6.1), placing Officers and Combat Units (within Command Range) "in Command."
- c. The Phasing Player may attempt to place formations that did not receive a Command Point 'in Command' by rolling against the Officer's Initiative Rating (6.31).
- d. "Out of Command" markers are placed on all forces not in Command (6.1)
- e. Pontoon Bridges may be reconfigured (18.34).
C. Movement Phase:
- The Command Movement Segment: The Phasing Player may move all of his forces that are in Command (or under a March Order [20.1]). Reinforcements enter at this time. Units may attempt to Repulse enemy units out of the way (9.0).
- Initiative Movement Segment: The Phasing Player can now attempt to move Combat units that are marked "Out of Command." For each Out of Command unit he wishes to move he rolls against its Initiative Rating, then moves it if it passes (roll-move, roll-move). A die-roll equal to or less than this rating permits the unit to move up to its full Movement Allowance; however, the unit is still considered Out of Command and keeps its Out of Command marker. If the die roll is greater than its Initiative Rating, the unit may not move.
NOTE: Individual units within Command Range of their Officers, whose officer already on this turn failed his Initiative check, may not themselves roll for initiative.
D. Combat Phase
Combat is resolved in a series of Steps as outlined below:
-
- LOS Step: Both players simultaneously reveal all their Units and Leaders that are within LOS (8.3) of the enemy.
-
- Cavalry Retreat Step: Defending cavalry, horse artillery, and Vedettes may Retreat Before Combat (10.2). After defending units have retreated, attacking cavalry may also Retreat Before Combat.
- 2A. Artillery Reaction Fire Step. The non-phasing Player executes bombardment (13.0). Bombardment Strength may be reduced by Counter-Battery Fire (CBF, 13.5).
- 2B. Attack Declaration Step: The attacker must declare which friendly units are attacking which enemy units (10.3).
-
- Bombardment Step: The Phasing Player executes artillery bombardment (13.0). CBF applies (13.5). Artillery that was Suppressed or Retreated in Step 2A may not bombard now.
-
- Cavalry Charge Step: The Phasing Player executes cavalry charges (14.0).
-
- Combat Step: The Phasing Player conducts attacks (10.0). Exclude the strength of defending Arty that fired in Step 2A.
-
- 2nd LOS Step: If opposing forces remain engaged (adjacent) after combat, they remain revealed. Forces no longer in Enemy LOS are again hidden (8.5).
Second Player Turn
Command, Movement and Combat Phases are resolved as described for the First Player. (If using the cards, begin with the optional Card Segment.)
A. Command Phase B. Movement Phase C. Combat Phase D. Game-Turn Marker Phase: The Game-Turn Marker is moved into the next space on the Turn Record Track, and a new Game-Turn begins.
2.2 Night Game-Turns
The first and last Game-Turn(s) of each 24-hour period are Night Turn(s). Night PM comes before Night AM. The differences between Night and Day are summarized below:
- The player turns in a Night Turn are reversed (the Second Player Turn is resolved before the First Player Turn).
- There is no Weather Segment. Weather for the night depends on the last daylight turn's weather.
- The Start Phase is different (2.2A).
- Only units under March Orders may move (20.4).
- There is a Disengagement Phase (2.2A1).
- There is no Night Combat Phase.
Second Player Night Turn
A. Start Phase
- Disengagement & LOS Segment (Night PM turns): The Phasing Player removes his units from any EZOCs one or two hexes, not entering another EZOC. If no hex is available, the units remain engaged. Units in a town, I.P., or chateau (15.0) are not required to Disengage. Check LOS (23.14).
- Recovery Segment: All Friendly units still remaining in the Awaiting Recovery box are shifted to the Recovered Section.
- Card Segment (Night AM turns): OPTIONAL
- Count VP's for cards played, and for leaders in Towns.
- Remove used Mode Cards from play.
- Discard all cards from hand.
- Adjust decks if directed to by the scenario instructions.
- Reshuffle both decks.
B. March Order Dispatch Phase (Night AM turns): Unless a General Retreat is declared, any one friendly Force may be sent a March Order (20.42). This March Order takes effect in the upcoming day. EXCEPTION: If a General Retreat is declared, this becomes effective immediately.
C. Night March Phase: Units with a current March Order (20.4) in effect. Movement Allowance at night is 2/3 MPs (inf/cav).
First Player Night Turn
1st Player Night Turn comprises phases A-C above, and D.
D. Game-Turn Marker Phase: The Game-Turn Marker is moved into the next space on the Turn Record Track indicating the beginning of the next turn. Check the scenario for any turn-by-turn Victory Point awards.
3.0 Stacking
3.1 General Rule
It costs one Movement Point to stack one combat unit with another. You can move through a friendly unit's hex at no extra cost. EXCEPTION: Road March (3.3). Apply stacking limits only at the end of a phase.
3.2 Stacking Limits
(3.21) Basic Stacking Rule: Any two combat units, regardless of their size, type, or formation, may stack in a hex.
(3.22) Divisional Integrity: All units belonging to the same division may stack three to the hex without a leader present. EXCEPTION: Division-level formations with their own officer counter use 3.23 instead.
(3.23) Leader Stacking Bonus: A Leader's hex may contain up to 5 units, up to 2 of which may be infantry. If the stack has Divisional Integrity, 3 of the 5 units may be infantry. If the Leader leaves the hex then the overstacked units must leave too, per rules for Retreat (12.3) and Displacement (12.36).
(3.24) Free Stacking Units: Leaders, Deployed Pontoon Bridges, and Markers do not count against the stacking limit. Up to 3 vedettes (16.0) may join any stack over and above the stacking limits noted above. EXCEPTION (16.12).
3.3 Stacking Restrictions
Units in Road March: can unstack but may not stack. Units may not move through friendly units in Road March. Units in Road March may move through friendly units not in Road March.
Pontoon and baggage trains: may not stack with any type of unit (including other train units) and if displaced, they are destroyed (18.16).
Chateaux: A chateau loses its combat effect if the hex contains more than two defending infantry units, plus any leaders and vedettes (15.21).
4.0 Zones of Control
4.1 General Rule
The six hexes immediately surrounding a Combat Unit comprise its Zone of Control (ZOC). All Combat Units and vedettes exert a ZOC at all times, even into a hex occupied by an enemy unit. Leaders, Pontoon and Baggage Trains do not have ZOCs. If a Friendly Combat Unit is in an Enemy ZOC (EZOC), the opposing units are equally and mutually affected by the other's ZOC.
4.2 ZOCs and Terrain
ZOCs extend into all terrain types except across unfrozen Rivers or into Improved Positions and Chateaux. If an unfrozen River hexside intervenes (whether the hexside is bridged, unbridged, or contains a ford), the hex is not in a unit's ZOC.
Combat Units' and Vedettes' ZOCs extend into all adjacent hexes except across River hexsides. A Vedette ZOC is identical to a regular ZOC, except it does not block enemy retreats.
4.3 ZOCs and Movement
(4.31) Stops Movement: Combat Units and vedettes may freely enter EZOCs but then may not move again until they:
- Retreat Before or After Combat,
- the enemy retreats or is eliminated,
- they Disengage during a Night Turn (2.2A1), or
- after a successful Repulse (9.21).
The term "Engage" means entering an EZOC (Glossary).
(4.32) Prevents Movement: Leaders may not enter EZOCs voluntarily unless a Friendly Combat Unit occupies the hex. A Train cannot move into an EZOC at all.
4.4 ZOCs and Combat
During the Combat Phase every Phasing Combat Unit in an EZOC must attack (10.31 for exceptions). Every enemy Combat Unit that is in a Phasing Combat Unit's ZOC must be attacked. See Retreat Before Combat (10.2) for exceptions.
4.5 Other Effects of ZOCs
- Night Disengagement (2.2A1)
- Leaders (5.3)
- Retreats (12.31)
- Lines of Supply (no effect, 17.44)
- Vedettes (16.25)
- General Retreat (disengagement, 20.51)
5.0 Leaders
5.1 Purpose
Leaders perform four important functions:
- They place Combat Units in Command (6.0) so that they may be moved as a formation, not individually.
- They Reorganize eliminated units (22.2).
- They facilitate the Advance After Combat of more than one Combat Unit (12.4-B).
- They facilitate Stacking (3.23).
5.2 Types of Leaders
(Types: Commander, Officer, Commander-Officer.)
(5.21) Commanders: Commanders have a Command Range of 4 hexes and a Movement Allowance of 10. Standing at the top of the "chain of command," they may place friendly Officers and Combat Units in Command. Each Commander has a Command Rating in brackets that is the number of Command Points he may execute in a given Command Phase. With each Command Point he can place in command one Officer plus one Combat Unit. An integrated division (3.22) counts as "one unit."
EXAMPLE: A Commander with a Command Rating of [1] may place one Officer and one Combat Unit in Command.
(5.22) Officers: Officers are the middle link in the chain of command. They are in charge of specific Formations (Corps or Divisions). An Officer commands all Combat Units that share his Command Designation. Each Officer has an Initiative Rating in parentheses that is used to determine if he will move (if not already placed in Command by a Commander.) A die roll equal to or less than his Initiative Rating puts him in Command. Officers have a Command Range of 3 hexes and a Movement Allowance of 6.
EXAMPLE: Bernadotte commanded the I Corps in 1806. All French Combat Units that bear the I Corps designation and a dark green stripe are part of Bernadotte's Formation, and may be placed in Command only by him or by a Commander.
(5.23) Commander-Officers: Commander-Officers are Commanders with a [1] or [2] rating, assigned to a specific formation. Their Command Range is 4. A Commander-Officer always has to spend his first command point to put his own formation in command.
EXAMPLE: A Commander-Officer with [2] Command Points may command his own formation plus another formation's officer, and 2 more units of any friendly formation.
5.3 Leaders and EZOCs
A Leader may only enter an EZOC if accompanied by Friendly Combat Units or if a friendly Combat Unit is already there. A Leader may exit an EZOC during the Movement Phase but friendly units in the hex must remain there. EXCEPTION: (3.23).
5.4 Leaders and Combat
(5.41) Advance After Combat: Leaders and all (undemoralized) infantry and cavalry units of their stack may advance one hex into a hex vacated by the enemy as a result of combat.
(5.42) Retreat and Capture: Leaders stacked with friendly combat units can always retreat with their stack. Every Leader in a retreating stack is subject to a separate die-roll:
| Die | Leader |
|---|---|
| 1-5 | retreats 1-4 hexes, per combat result. * |
| 6 | is captured (immediately removed from play). |
* If the stack is eliminated, use the table below (5.51)
5.5 Leader Capture or Displacement
(5.51) A Leader alone is subject to capture whenever adjacent to enemy combat units that exert a ZOC into the Leader's hex; or whenever he is the target of a bombardment that produces a result. As soon as this occurs, roll a die:
| Die | Leader |
|---|---|
| 1-5 | is displaced to nearest friendly-occupied hex (a path of retreat is not needed for one man) |
| 6 | is captured (immediately removed from play). |
(5.52) Replacement Officer: If a Corps officer is captured, place his counter on the Turn Track two turns in the future (if he is captured on GT 4, place him on the track for GT 6). That turn bring the leader in at the start of the Command Phase, within one hex of the friendly unit nearest to his last hex. Henceforth the officer will have one point less than the original Initiative (a "1" stays a "1"). A Commander-Officer's replacement (5.23) is an officer with an Initiative of 4. (When Commanders are captured they not replaced.)
6.0 Command
6.1 The Command Segment
During the Friendly Command Segment, the Phasing Player uses the following procedure to determine which of his Officers (and Forces) are in Command:
STEP 1: Each commander may use his Command Rating (5.21) to place in Command friendly units within his Command Range (4 hexes). With each Command Point he can place in command one Officer plus either any one Combat Unit or one stack of an Integrated Division. If an Officer is in Command, then all his units within his Command Range (3 hexes) are automatically in Command. If in Road March the entire Road March column is in command.
STEP 2: Conduct Initiative Checks (6.31) for any/or all Officers not placed in Command by a Commander.
STEP 3: After all Command Points have been allocated, the Phasing Player places Out of Command (OOC) markers on top of each Officer, unit or stack not in Command. If an entire corps is out of command, place the OOC marker on the corps officer who has failed his Initiative roll. If individual units of a corps are in command, while the rest of the corps is OOC, place in Command Markers on the units in command, and place the OOC marker on the corps officer.
6.2 Effects of Command
IN COMMAND: An Officer or Combat Unit placed in Command in this Command Segment is in Command until the next Friendly Command Segment. Units in Command may move and Advance After Combat. Trains, Commanders, and units under March Orders are always in Command.
OUT OF COMMAND: If an Officer or Combat Unit is Out of Command at the end of a Friendly Command Segment, it remains so until the next Friendly Command Segment. Out of Command Combat units suffer the following penalties:
- They may not damage or repair Spans (7.6).
- May expend their full Movement Allowance during the Initiative Movement Segment only if they pass an individual Initiative check (6.32). An officer may roll just to move himself If he didn't roll in the Command Segment.
- May NOT Advance After Combat or Bombardment
Combat Units do not have to be in Command in order to attack (10.0), Bombard (13.0), or Charge (14.0).
6.3 Initiative Checks
(6.31) Officer Initiative Checks: To conduct an Initiative check for Officers not receiving direct Command, roll the die. If the result is equal to or less than his Initiative, the Officer is in Command and all units in his Formation within Command Range (6.4) are also in Command. If the die roll was greater than the Initiative Rating, place an Out of Command marker on the Officer. An officer Out of Command because he reorganized units this turn cannot perform an Initiative check.
EXAMPLE: Two combat units are in range of their Officer who failed his Initiative die roll. These combat units may not roll for Initiative. If the Player did not roll for the Officer, he could roll for the units in the Initiative Movement Segment.
(6.32) Combat Unit Initiative Checks: During the Initiative Movement Segment, Out of Command units may check for Initiative. You can bypass your Corps Officers and rely upon the initiative of individual units if you wish to do so. However if you roll first for an officer's initiative, then any of his units that are in command range may not roll for initiative. If the OOC Unit passes this check it may move, but its Out of Command marker is not removed as a reminder that it may not advance after combat.
NOTE: Officers who successfully roll for Initiative are in Command. Individual units that successfully roll for Initiative remain Out of Command.
(6.33) Demoralized: The Initiative of a Demoralized unit is always 1 less than printed (21.2).
(6.34) Divisional Initiative: The Player may choose to roll once for each integrated division (3.22), using the best initiative in the division as the whole stack's initiative.
6.4 Command Range
Commanders have a Command Range of 4, Officers a Command Range of 3 hexes. All hexes count as "one" regardless of terrain. Units belonging to the same formation in a Road March column are in Command if they are within two hexes of any other unit of their formation in Road March, on a connected road or trail, that is itself already in command. Command Range may not be traced:
- into an EZOC which is unoccupied by Friendly Combat Units;
- into an enemy-occupied hex; or
- across an unbridged and unfrozen River or Lake Hexside
EXAMPLE: Officer A belongs to I Corps. Officer B belongs to VI Corps. Ney, the Commander, is within 4 hexes of Officer A so he can use his Command Point to put that Officer in Command (note that the command range may only cross River hexsides at Bridges). Officer A then transmits Command to his four units of his corps (within 3 hexes). Ney also puts one Combat Unit of VI Corps in Command. Command Range cannot enter EZOCs. Officer B will have to roll for Initiative. If successful, his remaining 3 units are in command.
7.0 Movement
7.1 The Basics
During the Movement Phase, the Phasing Player may move all, some, or none of his units up to their full Movement Allowance (MA) in any direction, subject to terrain restrictions and the presence of Enemy units and EZOCs. A unit must be in Command, under a March Order, or must pass an Initiative check to be able to move. The Phasing Player may move units individually or as a stack. Whether moving individually or by stack, each move must be completed prior to moving the next individual unit or stack.
7.2 Movement Points (MPs)
(7.21) Each hex costs a number of MPs. The amount varies depending on the terrain in the hex and on the hexside crossed (the Terrain Effects chart). The MP costs are deducted from the Movement Allowance of the unit as it moves from hex to hex. All MP costs are cumulative. Unused MPs may not be saved up from turn to turn or loaned by one unit to another. When a unit ceases movement, all unused MPs are forfeit. EXCEPTION: If a hex has both Woods and a Chateau, ignore the Chateau cost.
(7.22) Cavalry Costs: Horse Artillery, Trains, Leaders, Cavalry and Vedettes pay cavalry costs for all terrain types.
7.3 Minimum Movement
A unit may never expend more MPs than its MA in a single Movement Phase; however, if the cost of the first hex and hexside exceeds the printed Movement Allowance of the unit, it may move into the hex and end its move for that turn.
7.4 Movement Restrictions
Once the Phasing Player has removed his hand from the unit he is moving he may not return to moving that piece again without the consent of his opponent.
A Unit cannot enter a hex occupied by an opposing unit. EXCEPTION: Cavalry Charge (14.0).
7.5 Road March
In order to benefit fully from the road, a formation would have to make a long narrow column: trains in the middle, infantry marching off to either side.
(7.51) Road March Procedure: All units (including Trains and Demoralized units) may use Road March. The player may declare Road March at any point in the unit's movement. As the Phasing Player begins to move a unit on the road, he declares that it will use the road MP cost and the unit is marked with a "Road March" marker. A unit in Road March need not remain on road hexes, but is in Road March until declared otherwise (7.56).
NOTE: There is no cost to declare Road March, and no cost to rotate the directional arrow on the Marker.
EXAMPLES: Unit A is a Cavalry unit so must pay 4 MPs to enter a Woods hex. Unit B is infantry and only pays 2 MPs for Woods. Note that crossing a Crest hexside does not cost MPs. Unit C is not in Road March so must pay 1 MP for each road hex and +1 MP to cross a stream hexside. Unit D is already in Road March so pays only 1/2 MP for each road hex and ignores the +1 MP cost to cross bridges and move up Slope. Note that a unit in Road March may leave the road at any time. Unit E pays +1 MP to cross the Bridge and +1 MP to move up the Slope. Unit F is a cavalry type unit and must pay 4 MPs to enter a Marsh hex. Moving down slope costs 0.
(7.52) The Road March Rate: When in Road March, a unit moving from Road to contiguous Road hex pays 1/2 MP and ignores other terrain costs including Spans. When not in Road March a unit moving from trail/road to connected trail/road hexes pays 1 MP per hex (ignoring all other terrain costs except Spans).
(7.53) Road March Restrictions: The restrictions below apply to combat units and trains (not Leaders and Vedettes). Units in Road March may move through and end the Movement Phase adjacent to Friendly units that are not in Road March. However, units in Road March may not:
- stack or move as part of a stack.
- move through a hex containing other units in Road March, nor may other units move through units in Road March.
- enter a hex connected by road or trail to an adjacent Friendly unit in Road March.
(7.54) Road March and Enemy Units: Units in Road March may not make a regular attack, bombard, or charge during the Combat Phase. If attacked they are not penalized but immediately remove the Road March marker. A Unit in Road March must attempt Repulse (9.0) if it enters an EZOC.
(7.55) Road March and Command: A unit in Road March is in Command if within two hexes of another unit of its formation in Command (6.4).
(7.56) Ending Road March: It costs 1 MP to remove a Road March marker voluntarily during the Movement Phase.
(7.57) Vedettes and Leaders: Vedettes and Leaders alone do not need Road March Markers. They always pay road movement rates. Vedettes and Leaders may ignore Road March restrictions and are ignored by units in Road March.
(7.58) Road Movement in Square: Units in Square (14.23) may benefit from Road Movement if moving on Roads or Trails (see Charge Combat Table, Key)
7.6 Bridges and Trestles
Bridges cross Rivers. Trestles cross Stream hexsides. The term "Span" includes both Bridges and Trestles.
(7.61) Crossing a Span: Units may only cross an unfrozen River hexside by moving over a Bridge or Pontoon (18.33). Combat Units not in Road March pay the following MPs to cross a span:
- +1 MP to cross a Bridge or Trestle
- +2 MPs to cross a Damaged Bridge (even if in Road March).
- Units in Road March, Leaders, and Vedettes never pay extra MPs to cross undamaged spans. Leaders and Vedettes do not have to be in Road March.
(7.62) Damaging Trestles: Any Combat Unit that is not in an EZOC and in Command may damage a Trestle by expending 1 MP in either hex adjoining the spanned hexside. Place a "Burnt Bridge" marker on the damaged Trestle. Damaged Trestles are treated as if they do not exist for purposes of movement, combat, or tracing supply.
(7.63) Damaging Bridges: To damage a Bridge use 7.62 and:
- Only Infantry units may damage Bridges.
- It costs 2 MPs to damage a Bridge.
- Artillery, trains, and supply lines may not cross.
When attacked across any bridge, defenders are doubled. In addition, when attacking across a damaged bridge:
- Use the CRT shifting two-columns left.
- Ar*/Dr* does not convert to Shock. Do not use Shock Table.
- Instead of "Sk" result each side reduces 1 unit; no retreat.
- Dr, Dr2, Dr3, Dr4 requires an Initiative die roll. If the lead unit passes its Initiative check, it may advance across the bridge and defender retreats 1-4 hexes. If lead attack unit fails its Initiative, reduce it and both sides remain in place.
- For retreats across a bridge (damaged or undamaged, 12.33).
(7.64) Bridge Repair: Follow the procedure for damaging a Bridge (paying 2 MP) or Trestle (1 MP). Multiple repair attempts in a turn are allowed. For each attempt, roll one die:
| Die | Bridge | Trestle |
|---|---|---|
| 1-3 | is repaired | is repaired |
| 4-5 | no effect | is repaired |
| 6 | no effect | no effect |
Notes: If either end of the span is:
- in an EZOC, apply modifier of +1 to repair die roll.
- occupied by an enemy Combat Unit, repair not permitted.
(7.65) Using a Repaired Span: A Bridge or Trestle may be crossed by any units the moment it is repaired. It may be used for tracing Supply starting on the turn following its repair.
7.7 Other Movement Rules
Night Movement (2.2B); Night Disengagement (2.2A1); Cavalry Charge (14.0); Movement of Trains (18.11)
8.0 Hidden Forces
8.1 General Rule
All forces start the game hidden and remain hidden until revealed. Reinforcements are hidden upon entry.
8.2 Hiding Units
From each stack of units, select one of the following to cover the stack: a Leader, a Vedette, a unit with strength of "one" (those counters have a flag on their reverse sides). If none of the above are present, use a Road March Marker, a Demoralized Marker, an Out of Supply Marker, if any of the above apply; or a Hidden Force Marker. Place the selected counter on top of the stack with the flag or status marker showing.
8.3 Revealing Units - Reconnaissance
A Hidden Force is revealed:
- During the Movement Phase if in a Repulse. Only units involved are revealed at the time of Repulse (9.0).
- During the Movement Phase upon entering an EZOC, consult the "Reconnaissance Table." If no Repulse is attempted, each player will reveal all Friendly LC and/or vedette units present in the hex, then cross-reference to determine whether other units will be revealed or whether the vedette(s) are eliminated.
- In the LOS Step at the beginning of any Combat Phase if in an EZOC or within LOS. Both sides are revealed. All hidden units within the LOS must be revealed.
- When a unit retreats or advances after combat into an EZOC; only the adjacent units on both sides are revealed.
8.4 Determining Line of Sight (LOS)
(8.41) General Rule: The LOS is a straight line of 3 hexes from center to center. The LOS is obstructed by Blocking Hexes and Blocking Hexsides, or a hex occupied by units of either side. If any hex or hexside between the sighting unit and the target is blocking terrain, the Line of Sight is blocked. EXCEPTION: Adjacent units are always in LOS of each other. See also 23.0 for Weather effects on LOS.
(8.42) Blocking Hexes: Woods, Chateaux, Hilltops, and Town hexes are Blocking Hexes. A Slope hex blocks the Line of Sight unless the viewing unit is: 1) looking downslope through the Slope hexside; 2) on a Slope hex viewing another slope hex with no other blocking hexes intervening; or 3) on a Hilltop hex viewing a Hilltop that is not at a higher elevation.
(8.43) Blocking Hexsides: Crest and Slope Hexsides are Blocking Hexsides. The LOS is blocked if it passes through the juncture of two or more blocked hexsides or the juncture of a blocking terrain hexside and a blocking terrain hex. EXCEPTIONS: LOS for the sighting unit (only) is not blocked by:
- Crest hexsides adjacent to the sighting unit, including the vertices on both ends of the hexside (diagram), or
- Slope hexsides adjacent to a sighting unit on a hilltop hex. A unit on a hilltop can see enemy units below, but the units on lower ground can't reveal the unit on the hilltop.
- In these cases LOS is not reciprocal (also 13.34).
EXAMPLE: Each hex on the diagram is labeled as to whether Senarmont's unit has an LOS into that hex. Note that artillery cannot fire over friendly units, even when on a hilltop. Blocking Terrain in this example is Towns, Woods, units, Slope and Crest. Hexes beyond range are indicated with diagonal lines.
8.5 Obscuring Hidden Forces
A Unit remains revealed as long as it stays in an EZOC, and/or sighted by an enemy LOS. At the end of the Combat Phase, all units not in LOS are re-hidden.
9.0 Repulse
9.1 Repulse Procedure
(9.11) During the Movement Phase (only) the Phasing Player may attempt to Repulse enemy units in the path of his units; if successful the enemy will retreat immediately. The Combat Units attempting Repulse must first expend the MP cost of the adjacent enemy-occupied hex (or if more than one, the one with the greatest MP cost).
(9.12) Resolving a Repulse Attempt: Both players reveal their units involved. All units that project a ZOC into the repulsing unit's hex must be repulsed as one combined strength. In order for a Repulse to succeed the Repulsing units must have 5:1 odds or greater. Repulsed units retreat in the same fashion as retreats after combat (12.3).
(9.13) Terrain Effects on Repulse: Combat Strengths on both sides may be modified by Terrain (11.1); other Combat modifiers do not apply in a Repulse.
(9.14) Repulse of Vedettes: Vedettes may not attempt Repulse and Repulses against Vedettes always succeed.
9.2 Repulse Effects
(9.21) Effects of a Successful Repulse: If the Repulse succeeds then the Repulsed enemy units immediately retreat two hexes. The Repulsing stack must enter the vacated hex (it has already paid the MP cost). If there is more than one vacated hex, the Repulsing Player chooses one. After a successful Repulse the units may continue moving to the limit of their Movement Allowance, and may attempt a subsequent Repulse. A unit may be Repulsed twice in a single turn.
(9.22) Effects of a Failed Repulse: If the Repulse is unsuccessful, both sides immediately remove any Road March markers. The Repulsing stack immediately ceases movement and must attack the same unit(s) it attempted to Repulse in the following Combat Phase, unless terrain allows units not to attack. Other Friendly units may join this attack. This attack is conducted at two odds columns less than the actual odds. No other column shifts apply.
EXAMPLE: 14 Strength Points attacking 3 would normally resolve at (4:1); after a two-column shift, the combat is resolved at (2:1).
10.0 Combat
10.1 The Combat Phase
All Combat between opposing units occurs during the Combat Phase (2.1D for the sequence). Only adjacent Combat Units may be attacked (EXCEPTION: Bombardment, 13.0). A defending stack may be attacked only once per Combat Phase (EXCEPTION: a hex can be Bombarded and then attacked).
(10.11) LOS Step 2.1/D1: At the beginning of the Combat Phase both players reveal all their units and leaders that are within the enemy Line of Sight (8.4), even if there will be no Combat.
10.2 Retreat Before Combat (RBC)
(10.21) Cavalry RBC: Defending and then Attacking stacks composed only of Cavalry (plus any Leaders, Vedettes and Horse Artillery stacked with Cavalry) may elect to retreat one or two hexes out of an EZOC prior to combat. Vedettes by themselves must Retreat Before Combat (16.26). During this RBC units may not enter an EZOC, except Vedette ZOCs (16.25). A unit can take only one retreat before combat per turn. If a lone Vedette can't retreat, place it in the appropriate box as in retreat after combat (12.34). NOTE: RBC allows Cavalry to reveal the enemy force during the Combat Phase.
(10.22) Horse Artillery RBC: Horse Artillery that begins a Combat Phase alone (or with an all-cavalry stack) in an EZOC may conduct a 1-hex RBC. Horse Artillery units that do a RBC may still bombard that turn. A lone Horse Artillery unit in an EZOC of any enemy Cavalry unit may not RBC.
(10.23) Restrictions: Units in the EZOC of a cavalry unit with an equal or greater Movement Allowance may not Retreat Before Combat. Cavalry and Horse Artillery may not retreat before combat if surrounded, if stacked with infantry or artillery (other than Horse Artillery), or in a combat resulting from an unsuccessful Repulse.
(10.24) Supply and Morale: Supply and Demoralization do not affect a unit's ability to Retreat Before Combat.
(10.25) Leaders: Leaders that Retreat Before Combat do not roll for capture (5.5).
(10.26) Advance After an RBC: Enemy units may not advance into the vacated hex caused by an RBC, except at a Bridge. Cavalry defending a bridge that retreats before combat may be followed-up by enemy attackers across the bridge. (Because of its importance they would likely seize the bridge if left undefended even for less than a whole turn.)
10.3 Defining Combat
(10.31) All Engaged Units Must Attack: The Phasing Player must define all his combats before resolving them. The attacker may define his attacks freely, provided all enemy units in his ZOCs are attacked or bombarded, and all of his engaged Combat Units attack. Cavalry that retreats before combat does not count as attacking.
EXCEPTIONS:
- Units in Towns, Improved Positions, or Chateaux do not have to attack; if they attack, 15.12 applies.
- An artillery unit in an EZOC does not have to attack if other units in its hex do so (13.41).
- An artillery unit that bombarded this turn cannot join in an attack.
- A unit in Road March cannot join in an attack.
- A cavalry unit that charged this turn cannot join an attack.
- If an artillery unit bombards a hex, it frees friendly units adjacent to that hex from having to attack it (13.6), unless other enemy units are adjacent.
(10.32) Rivers and Combat: Adjacent units that are on the opposite side of an unbridged, unfrozen River may not be attacked but may be bombarded. Adjacent units on the opposite side of a bridged, unfrozen River may attack but need not do so.
(10.33) Multi-Hex Combat
- A defending stack may be attacked by up to six enemy stacks (one in each adjacent hex).
- All of the defending Combat Units in a stack must be attacked as a single combined strength; they may not be attacked separately.
- Two or more defending hexes may be attacked as a single force if the Attacker is adjacent to all defenders.
- All attacking Combat Units in a single stack must attack as one combined strength.
- If an attacking stack is located in the ZOC of several enemy stacks, and no other Friendly stack is adjacent to the enemy stacks, it must attack all of the stacks as one attack (and the defender may choose the one applicable terrain modifier that is most beneficial to him).
10.4 Combat Procedure
The Phasing Player conducts attacks in the order he desires. Attacks are resolved one at a time, and their results fully applied before proceeding with the next attack. Follow these steps for each combat:
STEP 1: Compare the combined attack strength of the participating attacking units against the total defense strength (modified by terrain) of the defending units. This is expressed as an odds ratio (attacker to defender). Round off this odds ratio downward to conform to the next lower odds ratio on the CRT. (Retain all fractions until the odds are computed.)
EXAMPLE: 16 SPs attacking 6 SPs reduces to 2:1. 15 SPs attacking 10 would be resolved at 1.5:1 odds.
STEP 2: The attacking player locates the calculated combat odds column on the Combat Results Table and rolls the die. Cross-referencing the die result with the odds column gives the Combat Result, which is applied immediately.
STEP 3: Adjust Casualty Level Markers to reflect combat strength lost (21.1).
11.0 Combat Modifiers
11.1 Terrain Effects on Combat
The terrain in the defending hex, or on the hexside separating the defending force from the attacker, may affect Combat Strengths. Retain all fractions until the odds have been calculated. Terrain Effects on Bombardment are different (13.36). If a unit's strength is reduced to zero, its attack doesn't take place (it remains engaged).
A. Towns: If all defenders are in towns, change Ar*/Dr* results to "Shock" (12.1). Defending Infantry Units have their total Combat Strength increased by 50%. EXCEPTION: Units with an Initiative of "1" (untrained) obtain no defensive benefit from Towns. Cavalry cannot charge into towns.
B. Slopes, Streams & Trestles: If all attacking stacks are attacking across Streams or Trestles, and/or uphill across Slope hexsides, the total strength of the defending force is increased by 50%. The Defender gets the slope benefit only if defending in a hilltop and attacked from the slope hex. Cavalry units cannot Charge uphill or across a Stream or Trestle.
C. Woods hexes: The total strength of all Cavalry and Artillery attacking into or defending in a Woods hex is halved. For all units defending in Woods, change Ar*/Dr* results to "Shock" (12.1). Cavalry units cannot Charge into Woods.
D. Bridges: Units are never required to attack across a Bridge. If all Combat Units are attacking across a Bridge or pontoon over a River (frozen or unfrozen), the Combat Strength of the defending unit is doubled. If the bridge is damaged see (7.63).
E. Crests: Change Ar*/Dr* results to "Shock" (12.1).
F. Chateau: Up to 2 defending Infantry are doubled. Change any Dr result (up to Dr4) to Shock unless the defender is demoralized. Cavalry units cannot Charge into a Chateau hex. Chateau effects on combat are negated in some situations (15.21).
G. Marsh: The total of all Cavalry and Artillery strengths are halved when attacking into or defending in a Marsh. Change "Ar*" result to Shock.
H. Rivers and Lakes: Combat Units may attack across unfrozen Rivers only at Bridges or pontoons (18.3). Frozen Rivers and Lakes are treated as Streams.
NOTE: Terrain modifiers for one side are not cumulative. Always use the one best modifier available to the defender.
11.2 Combined Arms
The attacker (only) may gain a +1 column shift in Combat if he has Infantry, Artillery, and Cavalry participating in the same attack. The Combined Arms benefit is not cancelled by a defending stack of all arms. Vedettes and artillery units that bombarded this phase are disregarded. The Combined Arms bonus does not apply if any of the defenders involved are in Town, Woods, Orchards, I.P.s or Marsh; across a Bridge (across Streams OK); or in Chateaux (unless demoralized). An overrunning Cavalry unit may be considered for Combined Arms even if it is eliminated in the Charge.
11.3 Staking Guard Units
This rule applies to all Guard ("OG," "Gd.," "Gde.," but not "GC" or "YG") units on both sides.
- Once per game, a player may "stake" his Guard units in any one combat. That player receives a one-column favorable shift on the CRT for that combat. A player is never required to stake the Guard. A Guard unit can be in combat without being "staked."
- If any infantry unit of the Guard is involved in an attack (at any time) and the result is "Ae," "Ar," or "Ex," the Demoralization Levels of all Friendly Formations a) whose officers are within 10 hexes or b) that currently have no officer but have any units within 10 hexes are immediately and permanently reduced by 4. EXCEPTION: Regardless of the combat result, if the attack by the Guard demoralizes the opposing formation, then the owning player's Demoralization Levels are not reduced.
- No formation can have its morale reduced more than once per game. French cavalry corps and formations with 4 units or fewer do not have their Demoralization Level reduced.
11.4 Napoleon
If Napoleon is stacked with an engaged force, the odds for combat shift one column in his favor at the French Player's discretion. (Does not apply to Bombardments or Charges.)
EXAMPLE: Napoleon is part of a one-to-one attack, the odds shift to 1.5:1. If Napoleon is defending and the odds are three to one, reduce to two-to-one.
11.5 Other Combat Modifiers
- Failed Repulse (9.22)
- Improved Positions (15.2)
- Snowstorms, Thunderstorms, Artillery in Mud (23.0)
12.0 Combat Results
12.1 Explanation of Combat Results
- Ae: All attacking Combat Units are eliminated.
- Ar (Ar2 or 3): All attacking Combat Units must retreat 1 (2, or 3) hexes.
- Ar*/Dr*: During any Storm; across a Crest hexside; or into a Marsh, Woods, Orchard, or Town hex, treat as Shock Result. These sudden encounters occur more frequently in confined passages.
- Dr (Dr 2, 3, 4): All Defending Units must retreat 1 (2, 3, or 4) hexes. EXCEPTION: Chateaux (15.1) and attacking across damaged bridges (7.63).
- De: All defending Combat Units are eliminated.
- Ex (Exchange): All Combat units on the weaker side are eliminated; the stronger side eliminates units which total at least 50% of the (face) Combat Strength of the weaker side. See Exchange Notes below.
EXCHANGE NOTES
- A. Artillery units that did not participate in the combat, which are stacked with units that did, may be used to satisfy an "Ex" result.
- B. Any overrunning Cavalry unit must be the first to be eliminated (14.24).
- C. Compare (unmodified) face-value SPs of all units.
EXAMPLE: The weaker side has 5 SPs and the other side has four units, with 2, 4, 8, and 10 SPs. Half of 5 is 2.5 and he must lose more, so he removes the '4.'
Sk (Shock): If you obtain a Shock Result, each player rolls one d6. On a 1, 2 add 0; 3, 4 add +1; 5, 6 add +2; to the Initiative of your best unit (the "Lead" unit) and consult the Shock Table (12.2). Victorious cavalry, that is not Demoralized, Out of Supply or Out of Command (whether attacking or defending) must advance into the vacated hex, up to the stacking limit.
SHOCK NOTES
- A. The Initiative of a Demoralized unit is 1 less than printed.
- B. When Artillery is alone in the hex, disregard its Initiative rating and use "1" for its Shock Combat value.
- C. Any overrunning Cavalry must be the lead unit (14.24).
- D. Shock Modifier: Increase an Attacker's Modified Initiative by 1 if the combat was resolved at 3:1 or greater on the CRT.
- E. 1R = Reduce one attacking and one defending unit. The owner must reduce either the strongest or the best initiative of his units involved.
12.2 The Shock Table
(Disclosed gap: the Combat Results Table, Shock Table, Bombardment Table, Charge Combat Table and Reconnaissance Table are printed only on the game's separate Combat Tables Folder / player aid cards. They are not in either source document: the Study Folder's page 20 is a blank placeholder reading "This page has the Combat Tables". They are therefore not reproduced here, and nothing has been filled in from memory.)
EXAMPLES OF COMBAT: Units A-1 and A-2 attack unit T at 11 to 4 odds, which rounds down to 2-1. Units B-1 and B-2 attack unit U in the Woods. The Woods halve the cavalry unit's combat strength and converts any Ar*/Dr* results to Shock (Sk). The odds are 3.5 to 4 which rounds down to 1-1.5. Unit C attacks unit V across a Crest hexside; the odds are 9 to 4 which rounds down to 2-1. The Crest hexside will convert an Ar*/Dr* result to a Shock Result (which is in unit C's favor). Unit D attacks unit W across a Stream hexside into a Town hex. Since terrain modifiers are not cumulative, the defender must choose which benefit to use; and in this case he picks the Stream since he does not want any Ar* results converted to Sk (he would lose a Shock battle). Unit W is increased by 50% yielding odds of 6 to 6.
The two units at E attack unit X up a Slope. The defender's combat strength is increased 50% to 6. The odds are 10 to 6 (which is 1.5 to 1). The three attacking units at F would have earned the Combined Arms Shift, but it is not allowed against defenders in Town hexes. The Town increases unit Y's Combat Strength 50% to 4.5. The odds are 12 to 4.5 (2-1) and Ar*/Dr* results convert to Sk. Unit G (cavalry) attacks artillery unit Z in a marsh hex. Both of those unit types are halved attacking and defending in Marsh, so the odds are 2 to 2. Marsh converts any Ar*/Dr* results to Sk which would be in the cavalry's favor.
12.3 Retreats
(12.31) Basic Rule: On a Result of "Retreat," the owning Player must move his unit (or stack retreating together) one or more hexes (as specified by the result). A retreating Combat Unit may not cross a prohibited hexside; enter an EZOC or a hex occupied by enemy Combat Units (EXCEPTION: Vedettes, 16.25); or exceed stacking limits. Friendly units do not negate EZOCs for purposes of a combat unit's retreat. A leader may retreat through an EZOC if occupied by a friendly unit. A retreating friendly unit may enter a hex occupied by a friendly unit but that unit immediately comes out of Road March.
(12.32) Vedettes and Retreat: Combat Units may retreat into the ZOCs of an enemy Vedette, or even into a hex currently occupied solely by an enemy Vedette if no other path of retreat is available (the enemy Vedette is displaced; 12.36).
(12.33) Retreat Across Bridges: Units that retreat across a Bridge or Pontoon over an unfrozen River (not a Trestle or a pontoon bridge crossing a stream) risk elimination and must roll the die: the first unit to cross the Bridge is permanently eliminated on a 6; thereafter add +1 to the die for every retreating unit that follows (i.e. a second unit is permanently eliminated on a 5 or 6). If a pontoon deployed across an unfrozen River hexside with no existing bridge or another deployed pontoon, the first retreating unit is eliminated on a roll of 4, 5, or 6, with one still added for each successive unit. The owning player chooses the order of retreat. Retreats across damaged bridges are not allowed, and any retreating units are automatically eliminated (PEU) if there is no alternate hex.
(12.34) Units Unable to Retreat Fully: If a unit cannot retreat fully it is eliminated. If any part of its retreat path is blocked only by EZOCs or the map edge, the unit is placed in the Units Awaiting Recovery (UAR) Box. If it could not retreat fully because of a prohibited hexside and/or enemy units (only), roll one die to determine which box to place it in:
| Die roll | Place unit in |
|---|---|
| 1-3 | UAR Box |
| 4-6 | PEU Box |
Always place a reduced unit that can't retreat fully for whatever reason into the PEU.
(12.35) Path of Retreat: The unit (or stack) must end its retreat the specified distance from the starting hex; enter each hex only once. The retreat should shorten the distance to the formation's baggage train or to a friendly supply source (or both). If two or more paths are open to the retreating unit, it must move in better terrain (preferring roads and trails to a roadless Marsh, for instance).
(12.36) Displacement: If the only path available to a retreating force would cause it to exceed the stacking limits (3.2) for a hex, then one or more combat units in the hex must be displaced to make room for it. Displaced units retreat one hex, observing all restrictions governing retreat after combat. However, if the units to be Displaced cannot retreat:
- the originally retreated force is eliminated instead and will enter the UAR; and
- if the retreating force contains cavalry the displacing unit must make an Initiative check: if it fails it is eliminated; place in the UAR Box. Trains never displace (18.16).
A displaced force may displace other Combat Units if no other path of retreat is available. Displaced units may not enter EZOCs.
EXAMPLES OF RETREAT: The two stacks of defending units must retreat. EZOCs are indicated with diagonal lines except those of the Vedettes which have no effect against enemy retreats. The only terrain that effects retreats are unbridged Rivers, which prevent it. Zig-zag retreats are not allowed. A unit must end its move that number of hexes distant from its starting hex. It may retreat across the bridge and Displace the enemy Vedettes. At B, the unit must retreat across a bridge hexside and run the chance of elimination; the first unit across is eliminated on a die roll of 6, the other unit on a die roll of 5 or 6. Assuming both survive, they can retreat in the path indicated.
12.4 Advance After Combat
Whenever an enemy stack is eliminated or forced to retreat, the owning player may advance friendly leaders and one or more friendly units that participated in the combat, whether as attacker or defender, and occupy the vacated hex and not beyond it.
A. One Infantry Unit plus all cavalry in a given attack may advance if no leader is present (or Leader doesn't advance). B. LEADER BONUS: If a leader is in the stack and advances, all undemoralized infantry and cavalry units may advance with him. C. Artillery may never advance after combat. If the defenders vacate the hex as a result of bombardment, any phasing infantry and/or cavalry adjacent to that hex (with any leaders) may advance into the vacated hex, after all bombardments are concluded. A unit cannot advance if it has an unresolved combat to perform, or is Out of Command.
EXAMPLE: A stack of artillery units bombard a 6 [4] 4, forcing its retreat. The 5 [3] 4 may not advance; it must attack the other 6 [4] 4.
D. If the enemy force occupied two or more hexes, attacking cavalry (only) may advance into the other vacated hex. E. Combat Units and Leaders may choose not to advance. The option to advance must be exercised immediately. A unit may not be attacked, or attack again, after advancing (even if it advances next to units that have not yet resolved Combat). F. Demoralized and Out of Command units may not advance after combat. G. Victorious Combat Units may advance into the vacated enemy hex even if they advance from one EZOC to another. H. Units may not violate stacking limits after an advance. A victorious overrunning cavalry unit that remains in the hex counts against stacking.
EXAMPLES OF ADVANCE: At A no leader is present so only one Infantry and all Cavalry units can advance into the defender's vacated hex. At B the leader allows all undemoralized, non-Artillery units in his stack to advance, along with all engaged Cavalry units.
12.5 UAR and PEU Boxes
(12.51) UAR: Any time a full-strength Combat Unit is eliminated due to an Ae, De, or Ex, the owning Player must determine if it could have retreated 1 hex without encountering prohibited terrain or enemy-occupied hexes. If a retreat route is open or is only blocked by EZOCs it is placed in the Awaiting Recovery box. Otherwise, the unit must be placed in the Permanently Eliminated Units (PEU) box.
(12.52) PEU: The following Combat Units are also ineligible for Reorganization, and are placed in the Permanently Eliminated Units box when lost in combat:
- Baggage and Pontoon Trains
- Already Reduced: A unit already at its Reduced Strength when it was eliminated.
- No Reduced Strength: A Combat unit with a strength of [1] has no reduced strength.
- Retreat Across Bridges: Units retreating across a bridge risk permanent elimination (12.33).
- Ae on the Charge Table
- Unable to Retreat fully, which risks permanent elimination (12.34)
13.0 Bombardment
13.1 Artillery Units
In addition to their regular attack ability against adjacent units, artillery may make bombardment attacks. Bombardments are permitted by the Phasing Player during the Bombardment Step and by the non-phasing Player during the Artillery Reaction Fire Step (13.5). Artillery may Bombard or participate in regular combat in a given Combat Phase; it may not do both.
13.2 Range
Bombarding Arty must be either 2 or 3 hexes from its target, unless Bombarding over an unbridged, unfrozen River.
13.3 Bombardment Procedure
(13.31) Sequence: For each bombardment, follow these steps:
- Designate the Bombarding Units (13.32).
- Designate the Target Hex (13.33).
- Determine the Line of Sight; if blocked, the bombardment is prohibited (13.34).
- Determine the Bombardment Strength (13.35).
- Calculate the Effects of Terrain (13.36).
- Resolve on the Bombardment Table (13.37).
- Execute the Combat Results (13.38).
(13.32) Designate the Bombarding Units: Any number of artillery units may bombard a single hex as long as all the units are eligible to fire at the target hex. Artillery units stacked together may bombard different hexes. An Artillery unit may not bombard more than one enemy occupied hex, nor may it split its strength. Artillery units may not Bombard when:
- in a woods or orchard hex; they may participate in an adjacent regular combat.
- alone in an EZOC; they must attack an adjacent unit (however, see 13.5).
- the weather is Snowstorm, Thunderstorm, Duststorm, Snow, Rain, or Fog (23.0).
- in Road March.
(13.33) Designate the Target Hex: All enemy units in a hex under bombardment are bombarded as one target. A hex may not be bombarded more than once in a Combat Phase, however, a hex may be the target of a bombardment and then a regular attack during the same Combat Phase. The target must be a combat unit or leader...
- in range and in the LOS of all Bombarding units.
- not in woods, orchards, or Chateaux.
- not adjacent (EXCEPTION: enemy on the opposite side of an unbridged, unfrozen river).
- not in a Town hex at range 3.
(13.34) Artillery Line of Sight A. Hilltop Hexes and Slope Hexsides: A Slope hex intervening between a bombarding artillery unit and its target blocks the Line of Sight unless the artillery unit is on the hilltop and is either:
- firing downslope through the Slope hexside; or
- firing on another slope hex (no blocking hexes intervening). The target units in either case have no reciprocal LOS (8.43). B. Crest Hexsides: Crest terrain is drawn on both sides of a given crest hexside. LOS is not blocked by a crest adjacent to the bombarding unit. A non-adjacent Crest blocks LOS.
(13.35) Determine the Bombardment Strength: The strength of all Artillery units bombarding a given target is totaled (this may include bombarding units in different hexes). The strength of any artillery units bombarding at 3-hex range is reduced by 50% (if <1 use the <1 column; otherwise round fractions down).
(13.36) Calculate the Effects of Terrain: The effects of terrain on bombardment are as follows:
- Towns: Artillery bombarding into towns are reduced by 1/3. You may not bombard into a town at 3-hex range.
- Woods and Chateau hexes: May not bombard into Woods or Chateaux or out of Woods.
- Marsh: Bombarding SPs are reduced by 1/2.
(13.37) Resolve on the Bombardment Table: All bombardments must be resolved and results applied during the Bombardment or Arty Reaction Fire step. Cross-reference the Bombardment Strength with the die roll and apply modifiers. During mud turns (23.0), modify the die roll by -2.
(13.38) Execute the Bombardment Results: A Bombardment affects all units in the target hex (only). A Bombardment may result in: "Dr" (12.1) or "1R" (Reduce one unit). A "1R" result means one unit in the hex is flipped to its reduced side, or an already-reduced unit is eliminated. The Bombarding Player decides which unit to reduce. The owning player may decide to remain in the hex or voluntary retreat one hex with the remaining units in the target hex. "S" (Suppressed) and "2R" (Reduce two units/steps) are other possible bombardment results. All Suppression Markers on the map are removed at the end of the next Combat Step (Step 5).
(13.39) Hold Your Ground: A Dr result on the Bombardment Table can be converted to a 1R at owning player's option. Select your "lead" unit and roll for Initiative. If successful, the lead unit suffers step loss and there is no retreat.
BOMBARDMENT EXAMPLE: Artillery unit A has no eligible targets; all are blocked by friendly units or are prohibited. Bombardments cannot be made uphill against a Hilltop hex, into Woods, or across a Crest that is not adjacent to the artillery.
13.4 Artillery Units in an EZOC
(13.41) If an artillery unit is in an EZOC and stacked with a friendly infantry or cavalry, it may bombard a hex different from the one the other units attack. Artillery need not attack the adjacent enemy units as long as some other friendly unit does so. However, an artillery unit suffers all combat results incurred by the units it is stacked with.
(13.42) Regular Attacks: When alone in an EZOC, an artillery unit must attack an adjacent unit and may not bombard. It uses the regular Combat Results Table, and may combine its strength with attacking infantry and cavalry in other hexes. During Mud, Artillery units attack and defend at one-half their normal strength (rounding fractions down). Artillery units in regular combat suffer all Combat Results in the same manner as other units. If the units in their stack suffer an "Ex" result they may be used to satisfy the required losses. Artillery units may never add their strength to a regular attack via a ranged attack; they must be adjacent. The Initiative Rating of a lone Artillery unit for shock is 1 (12.2).
13.5 Counter-Battery Fire (CBF)
The effective bombardment strength is reduced by one-half the strength of any artillery in the target hex (rounding fractions down). Apply any CBF reduction before modifying the bombardment strength for weather, range, or terrain. If the target has no LOS on the bombarding unit, or is alone in an EZOC (13.42), there is no CBF reduction. EXAMPLE: an ARF by 4 SPs would be reduced to 3 if the target includes 3 SPs of artillery with a LOS. Bombardment has no effect if one-half the target artillery strength is still at least equal to the Bombarding strength.
13.6 Soak-Offs
A unit bombarded in a given turn is considered attacked.
14.0 Cavalry Charges
A cavalry charge in this game is a faster charge, where the cavalry gradually build-up speeds near 300 meters per minute. In a successful cavalry charge, the cavalry unit(s) move through an EZOC directly into the enemy-occupied hex, thereby cutting the retreat route of the overrun unit in the following Combat Step.
14.1 Which Units May Charge
All cavalry (except LC and demoralized cavalry) that have not moved during the previous Movement Phase may make a charge. A hex being charged must also be subjected to a regular attack by at least one friendly infantry or artillery during the same Combat Phase. A cavalry unit may not make a charge and conventional attack during the same Player-Turn.
14.2 Procedure
(14.21) A Cavalry Charge is resolved on the Charge Combat Table during the Charge Step. Charging cavalry may expend the full Movement Allowance during the charge step. It costs one extra MP to enter the Enemy unit's hex. This MP cost reflects the shorter range of charging cavalry. Determine the odds as in combat and roll on the Charge Combat Table.
(14.22) Restrictions: Only one charge may be made by a single stack against a given hex in one Combat Phase. Cavalry units from multiple hexes cannot charge the same hex. A Cavalry Charge may not be conducted:
- into a woods, town, chateau, or improved position
- uphill through Slope
- across a Ford, Stream, or Span hexside
- during a Mud or Night turn (14.3)
- if the Cavalry unit is in Road March
- through an EZOC (except the ZOC of its target)
- through friendly units
- by LC or demoralized cavalry.
Cavalry Charge movement is subject to all Movement Rules (7.0), with the exceptions listed above.
(14.23) Charge Results: The possible results of a Charge are Ae, Pr or Overrun:
- On an Ae result, the charging units are eliminated (PEU).
- On a Pr result, all Phasing (charging) cavalry retreat to their starting hex and reduce 1 or 2 units. The target has off-road Movement costs doubled in the following Movement Phase. Place a Square Marker on the infantry units charged. Remove the Marker at the end of their next Movement Phase.
- On an Overrun result, the cavalry unit(s) move into the enemy-occupied hex. The charging unit's ZOC extends out into all surrounding hexes. In the upcoming regular attack (Combat Step), the retreat route of the overrun unit is cut off.
(14.24) Subsequent Combat Result: The cavalry units making the charge may not add their Attack Strength to the subsequent combat. The subsequent attack is credited with cavalry for purposes of Combined Arms (11.2) even if the cavalry unit is eliminated in the Charge.
- A. If the subsequent Combat Result on the Combat Results Table is Dr or De, all defending units are eliminated (UAR), if the charging cavalry unit(s) remain in the hex, and one of the attacking units may advance into the hex as usual.
- B. If the subsequent Combat Result on the Combat Results Table is Ae or Ar, the cavalry unit(s) are eliminated (UAR). Opposing units may never end any Phase stacked together.
- C. If the subsequent Combat Result is an Ex, the charging cavalry units are the first to be counted toward the Exchange.
- D. If the subsequent Combat Result is Sk, the charging Cavalry unit is the lead unit.
- E. If the Ex or Sk does not clear the hex of enemy units, the charging cavalry units are eliminated (UAR).
14.3 Charges and Weather
Charges are not permitted during Mud and Night Turns. During Snow, Snowstorm, Thunderstorm, Duststorm or Heat, add +1 to the Charge CRT die roll (23.1).
CAVALRY CHARGE EXAMPLES: Hexes marked X may not be a target of Cavalry Charge even if they contained enemy units under attack. Charges may not be conducted across Streams or Rivers, up Slopes or into Woods or Town hexes. At B the Cavalry Charge is made across two Crest hexsides which have no effect. The Cavalry unit pays +1 MP to enter the defender's hex. The odds would be 1-2 (only 50% chance of success). At C the Cavalry unit attacks at 1-1. If the Cavalry survives the charge they will remain on top of the enemy unit and will cut off their retreat. Note that in combat C, the phasing player will earn the Combined Arms shift even if the cavalry unit doesn't survive the charge.
15.0 Fortified Places
Fortified Places are of two types. Chateaux are protected by strong walls impervious to field artillery. A simple Improved Position (I.P.) made of timber and stout beams could be thrown together in a few hours. A more elaborate dug-in redoubt could take most of a day.
15.1 General Rule
(15.11) ZOCs: ZOCs extend out of but not into Fortified Places; adjacent units must attack enemy units in Fortified Places. A unit that enters a Fortified Place adjacent to an enemy combat unit must stop moving.
(15.12) Attacking: Units in Fortified Places are not required to attack, but if they elect to attack, all adjacent enemy units must be attacked by some friendly unit.
(15.13) Advance and Retreat: Units may advance after combat into Fortified Places. Retreat into occupied Fortified Places is allowed (15.21).
(15.14) Cavalry Charges against Fortified Places are prohibited.
(15.15) Combined Arms bonus: When attacking Fortified Places the attacker receives no Combined Arms bonus.
15.2 Chateaux
(15.21) Stacking: A chateau loses its combat effects if the hex contains more than two defending infantry units; or contains any artillery, cavalry or train units. All chateau effects on combat are negated as long as they remain in the hex (4.2, 11.1F, 11.2, 13.33, 14.22). Town effects if any still apply.
(15.22) Defending: If any defending units in a combat occupy a Chateau, "Dr," "Dr2," "Dr3" and "Dr4" results from the CRT are treated as "Shock." This does not apply if the units defending in the Chateau are demoralized, or if a retreat result is obtained on the Shock Table.
(15.23) Bombardment: Artillery units may never bombard into Chateaux. They may make regular adjacent attacks.
15.3 Improved Positions
(15.31) Defending: The strengths of all infantry units defending in a completed I.P. are doubled. If an I. P. is built in a town, all combat effects of I. P. and towns apply.
(15.32) Construction Procedure: The construction hex must contain at least two infantry units that did not move during that Movement Phase. If a town hex only 2 SPs of infantry are needed. Construction is not permitted during Frost, Snow, Snowstorm, or Night March Phase, or in Chateaux or Marsh hexes. Roll on the table below at the end of the Movement Phase. If the infantry leave an I.P. under construction, remove the I.P. marker. After completion the Improved Position marker is never removed (even if unoccupied) and may be used by either side.
(15.33) Construction Table: Roll one d6.
| Die roll | Result |
|---|---|
| 1 | construction complete (invert marker) |
| 2-6 | Under Construction; roll again next turn. An I.P. under construction has no effect. |
16.0 Vedettes
Each Vedette is a regiment of around 500 men, broken-up into 50-man patrols that fan-out to cover a wide area. These fast-moving patrols were used to screen an army against enemy reconnaissance, to perform their own reconnaissance, and to protect the flanks of combat units.
16.1 Vedette Breakdown and Reassembly
A Light Cavalry unit may generate a number of Vedette (scout) units equal to its vedette number (1.42).
(16.11) Creating Vedettes: During the Reorganization Segment (only), any full-strength Light Cavalry (LC) unit may bring its corresponding Vedette units onto the map. Each full-strength LC parent unit has a number (in a circle), to indicate the number of Vedettes provided for that unit. The Phasing Player removes the LC unit from the map and replaces it with the Vedettes. The LC unit is then placed in the Full Strength Holding Box. Vedettes may move in the turn they are created. Reduced-strength units may not create Vedettes.
EXAMPLE: Marulaz's cavalry brigade has a "4" in a circle. It contains four Vedettes with a corresponding designation.
(16.12) Reassembling Light Cavalry Units: To recombine Vedettes into an LC unit, just pay the regular +1 MP cost to stack. Remove the stacked Vedettes immediately if the stack is not in an EZOC and replace them with the parent unit. The parent unit may continue moving, expending the Vedettes' remaining MPs, in command if any of its Vedettes were in command. The Vedettes of any LC unit that contains 4 or more Vedettes may stack for immediate reassembly.
NOTE: Vedette unit I.D. may be ignored. The proper number of Vedettes may combine freely to reassemble any available LC unit.
(16.13) Creating Vedettes from Mixed Type Units: Full strength Infantry units with a Vedette number may also create Vedettes during the Reorganization Segment. Flip the counter to its reduced strength side, then deploy the Vedette(s) to the same hex. Such Mixed Type units may flip back to full strength by stacking with the same number of friendly Vedettes (not in an EZOC) and removing the Vedettes from the map during the Movement Phase.
(16.14) Corps Affiliation of Vedettes [Optional Rule]: A Vedette may not be used to reassemble a unit from a different formation; only units from its assigned formation.
16.2 Properties of Vedettes
(16.21) Movement: Vedettes move like Cavalry and must be in Command or pass their Initiative die roll to move. Vedettes always pay road costs when on roads but ignore Road March restrictions and are ignored by friendly units in Road March.
(16.22) Stacking: No more than 3 Vedettes may occupy the same hex. EXCEPTION (16.12)
(16.23) Repulse: Vedettes may not attempt Repulse. Repulses against Vedettes always succeed.
(16.24) Combat: Vedettes are non-combat units; they may not attack or defend. Vedettes do not count for Combined Arms. Vedettes stacked with friendly combat units are subject to the combat result against the stack. Eliminated Vedettes may return to play through Reorganization (22.25).
(16.25) ZOCs and Retreat: Vedettes have ZOCs, but they do not block enemy retreats; units may retreat into the ZOC of an Enemy Vedette. Retreating enemy units can, if necessary, displace friendly Vedettes.
(16.26) Retreat Before Combat: Any engaged Vedette of either side that is not stacked with a friendly combat unit must Retreat during the Cavalry Retreat Step (10.2) one or two hexes. If it cannot retreat, it is eliminated (12.34). Vedettes cannot prevent enemy Forces from using Retreat Before Combat.
17.0 Supply
17.1 The Supply Segment
The Phasing Player must determine the supply status of each Friendly Combat Unit during the Supply Segment of each Weather/Recovery Turn (23.12, 2.1/B-1). Out of Supply units are marked "Out of Supply" and remain Out of Supply until the next Weather/Recovery Turn.
17.2 Out of Supply Effects
Out of Supply units suffer the effects of Demoralization (21.2), but the effects are not cumulative.
17.3 Automatic Supply
All reinforcements from their turn of entry, and all units on-map at the start of any scenario are automatically in supply until the next Weather/Recovery Turn.
17.4 Supply Lines
(17.41) Tracing a Supply Line: A Combat Unit is in supply if it can trace a Forward Supply Line (17.42), no more than 14 hexes long (not counting the unit's hex), to one of the below:
- Directly to a Friendly Supply Source (17.5); or
- To its own Formation's Baggage Train located on a road or trail hex that has a "Trunk" Line (17.43); or
- If its own Formation's Baggage Train is not in play, or if there is no dedicated baggage train (none provided in the counter mix), it can trace to the nearest Friendly Baggage Train located on a road or trail hex that has a Trunk Line.
NOTE: Supply is tracked by unit, not by stack.
(17.42) Forward Line: The Forward Supply Line (only) may traverse any type of terrain except Lake or River hexsides (unless the hexside is frozen or is crossed by an undamaged bridge or pontoon). Each counts as one hex, maximum 14 hexes.
(17.43) Trunk Lines: A Trunk Line may comprise any number of connected road and/or trail hexes leading to a Friendly Supply Source.
(17.44) Blocking Supply Lines: Forward and Trunk Lines are blocked by the physical presence of enemy combat units and Vedettes. EZOCs do not block Supply Lines.
17.5 Supply Source Hexes
Each side has Supply Source hexes that are indicated on the map by a supply symbol with an encircled code letter. C = Coalition, A = Austrian, P = Prussian, R = Russian, F = French
18.0 Baggage and Pontoon Trains
There are two types of Train units: Pontoon Trains and Baggage Trains. Baggage Trains are important for Supply; Pontoon Trains place temporary bridges. Pontoon Trains have a train side and a deployed bridge symbol on the reverse.
18.1 Properties Common to Both Trains
(18.11) Movement: Trains move automatically; they are always in Command. Trains have a Movement Allowance of 4 MPs, paying cavalry costs for movement. They may use Road March (7.5). During Mud, Thunderstorm and Snowstorm turns, Train units Movement Costs are doubled for all types of terrain.
(18.12) Movement Restrictions: Trains have the following movement restrictions:
- may not enter Slope hexes except by Road or Trail.
- may not stack.
- may not enter an EZOC.
- Baggage Trains may not cross rivers (even if frozen) or streams except via Spans and Pontoon bridges.
- Baggage Trains (and Supply Lines) may not cross damaged bridges (but may cross pontoon bridges).
(18.13) Trains and Combat: Trains do not have a Combat Strength and cannot defend or attack. They may not Retreat Before Combat.
(18.14) Trains and ZOCs: Trains have no ZOC. If a Train or deployed pontoon finds itself adjacent to an enemy combat unit it is immediately captured or destroyed. Roll one die:
| Die | Pontoon Train | Baggage Train |
|---|---|---|
| 1-3 | is captured intact (18.35) * | is captured (18.23) |
| 4-6 | destroyed | destroyed |
* If one end of a deployed pontoon is occupied by a unit friendly to the pontoon, a roll of 1 to 3 is considered no effect.
(18.15) Destroyed Trains: Destroyed Trains are removed from play (PEU). They may not be reorganized.
(18.16) Trains and Displacement: Trains may not be displaced. If the train unit's hex is the only one available for the retreating friendly unit, the train is destroyed (PEU), and the retreating unit/stack is eliminated (UAR).
(18.17) Trains and Formations: Baggage Trains may belong to specific formations printed on their counter. Pontoon Trains do not belong to any formation.
18.2 Baggage Trains
Each baggage train represents approximately 100 wagons. A Baggage Train serves to extend a unit's supply line.
(18.21) Supply: Most Baggage Trains belong to specific formations as shown by their Command Designation. Some baggage trains are generic for a given side. Each Corps baggage train can provide supply to all units in its formation within range plus one stack of units from a different formation. However, any formation or individual unit without a dedicated baggage counter (none provided in the counter mix) may trace supply to any friendly baggage train, each stack to a different baggage train.
(18.22) Lost Baggage: If a formation's baggage train is destroyed or off map, only one stack of that formation may trace supply to another friendly baggage train.
(18.23) Captured Baggage Trains: A captured baggage train is destroyed (PEU). Two VPs are awarded to the side that captures a baggage train. If an out of supply unit(s) captures an enemy baggage train, all units of the capturing side adjacent to the train remove their OOS Markers.
18.3 Pontoon Bridges
Pontoon Bridges may be deployed across Stream or River hexsides.
(18.31) Deploying Pontoon Bridges: During the Friendly Movement Phase, the Phasing Player may deploy a Pontoon Bridge by flipping the counter over onto an adjacent hexside so that it is half-way on either hex. It costs no MPs to deploy. No Friendly or Enemy units may cross a Pontoon Bridge until the Friendly Player Turn after it is deployed.
(18.32) Deployment Restrictions: A Pontoon Bridge may not be deployed:
- to extend into an enemy-occupied hex, but may be deployed into an EZOC.
- if either end of the bridge is in a slope hex, unless there is a road or trail in the hex (18.12).
- in a Snowstorm, or during Frost or Snow.
- if the Pontoon Train is marked in Road March (7.51).
(18.33) Crossing Cost: Combat Units not in Road March pay the following MPs to cross a Pontoon:
- +1 MP to cross a stream
- +2 MPs to cross a river
- +0 MPs to cross if the Pontoon Bridge is deployed at an existing Span or site of another deployed Pontoon.
Units in Road March, Leaders, and Vedettes never pay extra MPs to cross Pontoon Bridges. Trains must pay the additional +2 over river and +1 over stream.
(18.34) Reconfiguring a Pontoon Train: A Pontoon Bridge may be reconfigured back into a Pontoon Train during the Friendly Command Segment simply by flipping the unit over to its Pontoon Train side in either of the two hexes adjacent (you may reform a pontoon train at one end if the other end is in an EZOC). Pontoon Trains must be reconfigured at Step "e" of the Command Segment. Nothing may cross a Pontoon Bridge in the turn it is reconfigured into a Pontoon Train. A Pontoon Train may move in the same turn that it is reconfigured but may not re-deploy until the next turn.
(18.35) Captured Pontoon Trains and Pontoon Bridges: Leaders, Vedettes and Combat Units may freely Move, Advance After Combat, and Retreat across intact enemy Pontoon Bridges. A captured Pontoon Bridge may be reconfigured into a Pontoon Train and used again by the player who captured it.
19.0 Reinforcements
19.1 General Rule
Reinforcements enter play on the turn and hex specified in the Scenario Information and/or the TRC. Reinforcements enter during the Friendly Command Movement Segment and may move and engage freely on their turn of entry. Reinforcements may be placed under "March Order" on the turn of entry at the Player's discretion (20.3). Reinforcements enter Hidden (8.0). Reinforcements are In Command for the turn of entry and in supply until the next supply check. A light cavalry unit may enter as a combat unit or broken down into Vedettes.
19.2 Stacking and Road March
(19.21) Stacking: When more than one Combat Unit is scheduled to arrive at the same entry hex in the same turn, they may arrive stacked observing the stacking limit. If there are more arriving units than can legally stack in the hex, each subsequent stack enters on the same hex and turn, paying MPs equal to the cost of the hex for itself and for each stack that entered before it.
(19.22) Road March: Reinforcements may instead enter the map using Road March (unstacked) with an empty hex between each arriving unit. In this case the first unit to arrive pays the road MP cost of the first entry hex. Each subsequent unit or stack to enter on the same hex and turn pays one additional MP. In addition, unless otherwise indicated by the scenario, a formation's leader enters with the first stack of his formation, and the formation's baggage train enters at the end after the last arriving unit of the formation.
EXAMPLE: The second stack to enter will pay one extra MP; the third, two additional MPs (19.23).
(19.23) Excess Stacks: Stacks without enough Movement Points to enter must wait off-map until the following turn. The excess stacks of a formation still enter in Command when they arrive.
19.3 Changing Reinforcement Entry
(19.31) Blocked Entry Hexes: If the entry hex is occupied by an enemy or friendly combat unit or an enemy combat unit's ZOC the Reinforcement may instead enter in the hex nearest to the entry hex clear of combat units and EZOCs.
(19.32) Voluntary Delay: Players may voluntarily delay the entry of Reinforcements. However, no other scheduled Reinforcement may enter at this entry hex until the delayed Reinforcements have been brought onto the map (the follow-on reinforcements may enter in the same or subsequent turns). A portion of a Reinforcement force may not be delayed. Either all the units scheduled to arrive at that hex are brought onto the map, or none.
19.4 First Day Reinforcements
Approach to Battle reinforcements enter on the First Day of the game. These units are usually on-map in the Day of Battle Set up.
19.5 Alternate Reinforcements
Alternate Reinforcements are forces that could have intervened. Their arrival depends upon card play. Alternate Reinforcements appear in order of priority listed in the Scenario Information.
20.0 March Orders
Orders were carried by orderlies mounted on fast horses, usually overnight, to Officers beyond Command Range.
20.1 General Rule
A March Order allows a Force (defined in the Glossary) to move during each Friendly Command Movement Segment that the order is in effect (including during Night March Phases) regardless of Command Range. All the units under a March Order are considered in command. A Force may receive a March Order if it is:
- a Reinforcement (20.3);
- the one force selected at night (20.4); or
- the one force selected for March Order at the start of play, (once per game) if that side has a Commander on the map.
20.2 March Order Procedure
(20.21) Specify Objective Hex: The Player must secretly specify the Objective Hex on an Orders Slip when the March Order is issued. This objective must be revealed to the Enemy Player at the moment an infantry unit of that Force reaches its objective. The objective may be any town or Bridge hexside on the map. For each Force under a March Order, the Player must write down the name of the Officer or the designation of the individual unit(s) in question. A force may be assigned only one objective at a time. In a multi-hex town any hex in the town can be the objective.
(20.22) March Order Movement Restrictions: The force must move each turn at the speed of the slowest unit in the force, until it reaches its objective or the March Order is removed (20.23). The units under a March Order must take the shortest possible route (in terms of MPs) toward their Objective Hex. A Force given the March Order is not required to use road march. On the turn a Force reaches its objective, it can continue moving to the limit of its Movement Allowance; then the March Order is removed and no longer in effect.
(20.23) Forces Removed from March Orders: A unit is removed from the March Order at the moment:
- it reaches its objective hex (or as near as possible).
- at the owning player's option, if it is placed in the ZOC of an Enemy unit or vedette.
- at the Player's option, if the force is placed in Command by a Leader during any friendly Command Phase. An officer who makes his initiative may opt out of a March Order.
NOTE: If a Commander places an individual unit in command, it does not remove the March Order for the rest of the Formation.
The M.O. endures until the last unit reaches the destination or is removed. When a unit comes out of a March Order it is Demoralized for the rest of the Player Turn.
Units that reach a March Order destination are removed from the M.O. Other units under the March Order can either continue to use the M.O. or they can be removed. The units removed from a March Order can freely use their remaining MA that turn, without being constrained by the former M.O.
(20.24) Pre-Programmed March Orders (Card Play only): A force under a pre-programmed March Order at the start of the game that is subject to a Late Start Mode card cannot be removed from the March Order until its Leader awakes. Until then the Leader moves with the units of his formation.
20.3 March Orders to Reinforcements
A Reinforcement Force may be placed under a March Order (or several different March Orders) on the turn of its map entry, even if its arrival is delayed indefinitely by the Player. The number of reinforcement forces that may be placed under a March Order on a turn is limited only by the number of reinforcement forces arriving on that turn.
20.4 March Orders at Night
(20.41) Moving Units under March Orders at Night: The Movement Allowance of a Force under March Order at night is 2/3 MPs (inf/cav). Forces under a March Order are the only forces which can move during the Night March Phases.
(20.42) Changing March Orders at Night: One on-map stack or formation may be given a March Order during the Night March Order Dispatch Phase, regardless of command range restrictions. Units need not be in command for a night March Order. This March Order takes effect with the first daylight turn of the next day (2.2B). Alternatively, a player may change the objective hex in a March Order of any one of his forces, but this counts as the "one" March Order allowed.
20.5 General Retreat March Order
(20.51) The General Retreat March order differs from a regular March Order in the following ways:
- All friendly leaders and units are considered to have the order, including out of command forces;
- The Objective Hex for a given unit is the closest friendly Supply Source under friendly control, tracing the line as allowed by the rules of supply (17.41), or may be a hex specified in the Scenario Instructions;
- The order may be issued during the friendly Command Segment of any day Turn, or at the beginning of the March Order Dispatch Phase (Night AM turns) and takes effect immediately.
- The order may be cancelled at the owning player's option, after being in effect for one turn, for any undemoralized force(s) in Command and these may maneuver freely.
- Add one (+1) to the die roll for Reorganization of Demoralized forces on the turn the General Retreat is ordered.
- Reinforcements enter normally.
- The order may be issued only once per game, unless using the cards; a new General Retreat may be issued for each card.
- Units must remain in General Retreat March Order for at least 1 turn, unless they move adjacent to the enemy.
- All units move at the speed of the slowest unit in their force (20.22). EXCEPTION: Undemoralized units passing an Initiative check may opt-out of the General Retreat March Order and freely maneuver (having already passed Initiative) in the following Initiative Movement Segment.
- The text of the General Retreat Card (No. 9) is a part of the General Retreat rule; units may disengage on the turn played.
(20.52) Exiting the Map: When your units under a General Retreat March Order actually reach the map-edge hexes that are the objective(s) of the order, you can exit all, some or none. For units that have reached the objective that will remain on the map, the order is cancelled.
21.0 Demoralization
Units may become demoralized (1) if their formation reaches its Demoralization Level due to losses, (2) if the unit is Out of Supply (17.2), or (3) if it leaves March Orders (20.23).
21.1 Demoralization Levels
Each player has a Casualty Record Track to record Friendly losses. When the first Friendly Combat Unit of a Formation is eliminated, this unit becomes the "Casualty Level Marker" for its Formation (21.3). As further units are eliminated, the Owning Player adjusts this marker to reflect strength points lost by moving it a number of spaces on the track equal to each eliminated unit's full Combat Strength. A Formation becomes Demoralized at the instant its Casualty Level marker reaches or exceeds its Demoralization Level (the space printed with its Command Designation on the Casualty Track). Place a "Demoralized" marker on the formation's Officer.
EXCEPTION: The French player's minor ally troops that are part of a Demoralized Formation must instead pass a regular Initiative check. If this fails the unit is PEU (also 20.51-4). French minor allies include the Dutch, Saxons, Swiss, Wurttembergers, Bavarians, Westphalians, Badeners, Hessians, Italians, and all others except French and Poles.
21.2 Demoralization Effects
Demoralization has the following effects:
- Initiative: One is subtracted from the Initiative rating of Demoralized Officers and Combat Units any time that their Initiative Rating is referenced (Exception: Recovery, 22.12).
- Movement: Demoralization has no effect on Movement. Leaders and Combat Units may use Road March and may be given March Orders.
- Combat: Demoralized Units may not Advance after Combat. Demoralized cavalry may not charge. Demoralized units in Chateau hexes do not receive the benefits listed in 15.22. Remove any Demoralization from a unit when it is eliminated.
- Bombardment: Demoralized Units may retreat one hex upon receiving 1R results (13.38).
- Reorganization: The Phasing Player must roll for each Combat Unit in a demoralized formation (22.23-3). For a Demoralized Formation, if this die-roll is a "5" or "6" the unit is permanently eliminated (PEU). Add 1 to the die if a General Retreat will be issued in the next Movement Phase.
21.3 Rallying from Demoralization
When an eliminated Combat Unit is Reorganized (22.2), that Formation's Casualty Level marker is reduced by an amount equal to the unit's full (not reduced) Combat Strength. If the unit is eliminated again later then the Casualty Level Marker should be increased by that same amount (the unit's Full Combat Strength). The moment the Casualty Marker for that Formation moves below its Demoralization Level, the Formation is recovered from Demoralization and the Demoralized Marker is removed from play. Once all other units in a Formation have recovered, the unit that was used as the Casualty Level Marker (21.1) is eligible to be reorganized.
NOTE: As long as a unit survives at Reduced Strength, the difference between its full and reduced Strength does not count for Demoralization purposes or Victory Points.
21.4 Demoralization and Supply
Combat Units that are Out of Supply suffer Demoralization Effects. The out-of-supply Combat Units receive an Out of Supply Marker, and rally from Demoralization on the turn in which their Supply Line is reestablished. There is no additional effect upon out-of-supply units that become demoralized due to combat losses.
21.5 Demoralization and March Orders
At the end of a friendly Player-Turn, without the need of a die roll, remove Demoralized Markers from all units that were demoralized when they left March Orders that Player-Turn.
NOTE: Formations with fewer than three units present at the battle can only be Demoralized by lack of Supply.
22.0 Recovery and Reorganization
Eliminated units may be reorganized at reduced strength.
22.1 Recovery
(22.11) General Rule: Recovery refers to the transfer of a Combat Unit from the Awaiting Recovery box (UAR) to the Recovered section.
(22.12) The Recovery Segment: Each turn the Weather is checked, both Player Turns will include a Recovery Segment (2.1/B2). During the Recovery Segment, the Phasing Player may make an Initiative Check for each unit in the Awaiting Recovery box. The Initiative die roll is successful if less than or equal to the Initiative Rating printed on the unit counter.
- IF SUCCESSFUL: The unit counter is flipped over to its reduced side and moved into the Recovered Section.
- IF UNSUCCESSFUL: The unit remains in the Awaiting Recovery box. Roll again in the next Recovery Segment.
(22.13) Automatic Night Recovery: At the beginning of the Friendly Recovery Segment of the Night AM Turn, the Phasing Player transfers ALL Combat Units still Awaiting Recovery to the Recovered Section at their reduced strength.
22.2 Reorganization
(22.21) General Rule: Reorganization refers to the return of Combat Units (at reduced strength) from the Recovered section of the UAR to the map.
(22.22) Procedure: Reorganization occurs in the Friendly Reorganization Segment. All units in the Recovered Section of the UAR may be placed on the map provided the necessary Leaders are available to bring them all on. Each eligible Leader may bring on two combat units (plus up to 3 vedettes) in the recovered section. The units are placed in the hex containing the Leader. If placing reorganized Combat Units in the Leader's hex would violate the Stacking Limit, the units already there may be Displaced.
(22.23) Restrictions and Penalties: Reorganization can take place in any terrain under the following restrictions:
- Leaders in an EZOC may not be used for Reorganization.
- Officers can only Reorganize units of their Formation. A Commander may Reorganize units of any Friendly Formation whose Officer is within the Commander's Command Radius.
- Units that are part of a Demoralized Formation risk elimination when they are Reorganized (21.2).
(22.24) Officers and Reorganization: An Officer does not have to be in Command in order to Reorganize. Each Officer that attempts Reorganization is marked with an Out of Command marker until the friendly Command Segment of the next Game-Turn. EXCEPTION: Reorganizing Vedettes does not require an Out of Command Marker. Officers so marked may not be part of the Chain of Command for the remainder of that turn, even if Reorganization failed. Commanders and Commander-Officers are not OOC when Reorganizing.
(22.25) Vedettes and Reorganization: If a Vedette is eliminated in combat (16.24), place it in the Unrecovered Section ("Awaiting Recovery") of the UAR. If a Vedette is eliminated during Reconnaissance it goes immediately to the section of the UAR specified on the Reconnaissance Table. Reduced-strength LC units don't have a vedette number. They cannot deploy a vedette once reduced.
23.0 Weather
23.1 Procedure
(23.11) Weather Condition Die Roll: The first player starts each day with a die roll on the Weather Table (tailored to the battle being played), to determine the initial Weather. The resulting Weather takes effect immediately.
(23.12) Weather Duration Die Roll: Roll again on "Change in the Weather" and add the result to the original Weather Die Roll to determine the number of turns that weather condition will remain in effect. Repeat these two die rolls each time the weather changes. (In some games duration is specified.)
(23.13) Effects of Weather: As indicated on the table below, the possible effects of weather are as follows:
- LOS Reduced: Line of Sight reduced to 1 hex. Units may see into adjacent hexes only.
- Bombardment: Prohibited. -2 DRM = Apply a -2 DRM to all artillery bombardment die rolls during Mud.
- Deploy Pontoons: No = may not be deployed
- Construct I.P.: Improved Positions may not be constructed.
- Charge Rolls: +1 DRM to all Cavalry Charge rolls.
- Rivers, Lakes: frozen and treated as Stream hexsides.
- Strength Reduced (rounding down): when attacking and defending. Artillery strengths are reduced for adjacent combat (only).
- Movement Cost: MPs doubled for Train and Artillery units.
- Ar*/Dr* Combat Results: Treat as Sk (Shock) results.
(23.14) Weather and LOS at Night: If the Last daylight Game-Turn was Thunderstorm or Mud, the night weather is Mud; otherwise Fair weather applies. At Night the LOS is reduced to one hex.
(23.15) Fire: Units can Move, Retreat, Repulse, and Road March through a Fire hex, without stopping. Command Range may extend through a Fire hex. The occurrence of Rain and Thunderstorms causes Fire to cease immediately.
(23.16) Thunderstorms: Thunderstorms only last for the first hour after the die roll. The next two turns are Rain plus Mud.
Weather Effects Table
| WX Condition | LOS | Bombardment | Deploy Pontoons | Construct I.P. | Charge Rolls | Rivers, Lakes | Strength Reduced | Movement Cost | Ar*/Dr* Result |
|---|---|---|---|---|---|---|---|---|---|
| Snow | Adjacent | Prohibited | No | No | +1 DRM | Frozen | |||
| Snowstorm | Adjacent | Prohibited | No | No | +1 DRM | Frozen | Inf x 0.75 | Train, Art x2 | Shock |
Weather Conditions (WX) vary from game to game, and are not cumulative with Terrain Effects; use the worst that applies. DRM: Die Roll Modifier
Glossary and Index
These definitions are a part of the body of the rules. The main paragraph for a term is the case number in bold.
- Artillery 13.0: Artillery pays Infantry Movement costs while Horse Artillery pays Cavalry costs. Artillery and Horse Artillery pay doubled Movement costs during Mud, Thunderstorms and Snowstorm turns for all types of terrain. 7.22, 7.63, 10.2, 10.31, 11.1C & G, 11.2, 12.2, 12.4, 14.1
- Bombardment 13.0: Artillery units may Bombard in the Bombardment Phase, using the Bombardment Table at 2-3 hex range. 10.1, 10.22, 10.3, 11.2, 12.4
- Bridge 7.6: A span crossing a river. 4.2, 6.4, 7.51, 10.26, 10.32, 11.1D & H, 11.2, 12.1, 12.33, 12.34, 12.52, 13.2, 13.33, 17.42, 20.2, Terrain Key
- Cavalry: Mounted combat units including Regular, Heavy Cavalry (HC), and Light Cavalry (LC). 5.41, 7.22, 7.4, 10.2, 10.31, 11.1, 11.2, 11.3, 12.2, 12.36, 12.4, 13.4, 14.0, 15.2, 16.0, 19.1, 23.13
- Cavalry Charge 14.0: Any cavalry except LC may make a cavalry charge resolved on the Charge Combat Table. 6.2, 7.4, 11.4, 12.52, 23.13
- Column: Includes all units that arrive on the same or consecutive turns at the same area. They arrive in a chain of units or stacks. Unless otherwise specified all corps assets (non-divisional artillery units followed by the baggage train) arrive at the end of the column. 6.4, 19.23
- Combat Strength: The total manpower of a Combat Unit quantified in Strength Points (SPs). One SP equals between 400 and 800 men. 1.42, 9.13, 11.1, 12.1, 18.13, 21.0
- Combat Units: All playing pieces except Leaders, Vedettes, Trains, and Markers. Only Combat Units may attack enemy Combat Units.
- Combined Arms 11.2: An attacking force with infantry, cavalry and artillery gains a combat odds shift of one column to the right.
PART TWO: NAPOLEON'S END STUDY FOLDER (v2.09)
An Historical Simulation Game of Four Battles on the Seine, 1814. Napoleon's End: The Campaign in France, Part III, 17 February–25 March 1814. Scenario Information and Special Rules.
Components
- 3 Map Sheets 22" x 34" and 1 Map Sheet 22" x 40"
- 2 Counter Sheets: 560 die-cut playing pieces
- 2 Booklets: System Rules, Study Folder
- 17 Player Aid Cards: TRC x4, Initial Set-up x6 (3-Fr., 3-Coal.), Casualty x2, Combat Results, Reorganization, Weather, Fog of War x2
- Adding the Cards Folder (24.0), 11" x 17"
- Combat Tables Folder, 11" x 17"
- Orders Slip Sheet/Sequence of Play
- Victory Worksheet
- Cards Removed from Deck/Scenario Parameters
- Game Box
Not included: Optional deck of 100 cards (the "Universal Deck") is not included. The U.D. is included in copies of Napoleon's Wheel. Universal Decks can be ordered at Napoleongames.com.
Two 6-sided dice (d6) are required.
25.0 Scenarios
Guignes, 16 February 1814: After giving Blücher's Army six days of tactical lessons, Napoleon was about to teach Schwarzenberg's Army of Bohemia, unleashing 45,924 men at Guignes against Count Pahlen's Russian Advanced Guard of 4,300 men. The Bohemian Army immediately began withdrawing behind the Seine, while the Kronprinz of Württemberg was ordered to hold Montereau until his comrades were safely across upstream. Schwarzenberg continued the retreat beyond Troyes, when the Emperor's attention was diverted once again toward the Marne, with Blücher rattling sabres on the road to Paris. The Emperor's second campaign against Blücher was not successful, and time was running out.
25.1 The Scenario Information
Napoleon's End includes four complete Battle Games plus Campaign information. Players select a game to play, then refer to the Initial Set-up Cards (25.21) and the appropriate section, listed below, to find the scenario information for each game:
- 27.0 MORMANT, 17 February 1814
- 28.0 MONTEREAU, 17-18 February 1814
- 29.0 ARCIS-SUR-AUBE, 20-21 March 1814
- 30.0 FÈRE-CHAMPENOISE, 25 March 1814
- 31.0 THE SEINE CAMPAIGN, 17 Feb.–25 Mar. 1814
- 32.0 GRAND CAMPAIGN, 29 Jan.–25 Mar. 1814
25.11 Turn Record Card (TRC): TRCs are provided for each battle. The Game-Turn marker is placed on the turn designated as the Game Start.
25.12 One-Day Scenarios: Begin by playing any of the Day of Battle Games (DoB): 17 February, 18 February, 21 March, 25 March. Move on to the Approach to Battle (2-day) Scenarios (28.5, 29.5).
25.13 French Player Nationalities: Units of France (including Defrance's Gardes d'honneur recruited from the nobility) and Poland.
25.14 Coalition Player Nationalities: Units of Austria, Bavaria, Russia, Prussia and Württemberg.
25.15 Vedettes: Vedettes can be used freely with any parent unit of the same nationality, disregarding unit I.D. Colbert's Guard cav. has a French and a Polish vedette.
25.16 French Guard: French YG and OG comprise one big corps (one officer, one baggage). If NEY arrives as ALT with the YG at Fère Champenoise, then his formation comprises the ALT units that march on with him (30.2) and their baggage is the ALT YG Baggage.
Note (in-file, see the Napoleon's End Update of 26 February 2024 at the end of this file): the Update sheet restates this rule as "If Ney arrives as ALT with the YG, then his formation comprises the 12 units that march on with him and their baggage is the ALT YG Baggage." It is transcribed here as printed in the Study Folder.
25.17 Independent Units: IND units are not part of any corps. For supply of IND units (18.21).
25.18 Bordessoulle (IC) and l'Heritier (VC): These two French Officers must remain stacked with their eponymous units (if unit and leader are both in play).
25.19 Replacement Officers: To replace Commanders use any (4) Officer that is not included in that scenario.
25.2 Setting Up the Scenarios
All units in play set-up in supply as Hidden Forces (8.2). All reinforcements (25.5) are in supply upon entry. Units may start in Road March at the owning player's option.
25.21 Initial Set-up: The First Player (26.6) sets up first. The units to set-up are listed on the Initial Set-up Cards, specifying the location for each unit. Refer to the appropriate column by date for your battle. Units to set-up at reduced strength show an ®. They are treated as having been eliminated and already reorganized. A BLANK indicates a unit not available in that battle.
25.22 Hex Numbers: The hex numbers on the Initial Set-up cards show where units are located at the start of the scenario. Place all combat units and leaders on the map in play in the hexes specified. If there is no hex number listed, the unit is not placed in the PEU box, but is out of play; unless it is an ALT (25.51). The second player may adjust the set-up of any one friendly unit by one hex prior to the first player turn (not in an EZOC). The set-up may include overstacked hexes. Make sure to observe stacking limits on your first move.
25.23 Reinforcements (19.1, 25.5): Reinforcement arrival is listed on the Turn Record Card (as modified by the play of Arrival Cards, 24.7). If the formation designation follows an officer's name, all units of that formation arrive on the same turn (25.53).
25.24 Pontoon Trains: Availability of pontoon trains is specified in the scenario information. Available Pontoon Trains must be set-up within [7] hexes of any friendly Commander unless otherwise specified.
25.25 Baggage Trains: All Baggage Trains set-up within [7] hexes of any unit in their respective formation or enter as reinforcements (25.26), unless otherwise specified. Each formation has its dedicated baggage train available if the formation has three or more units in play.
25.26 Train Reinforcements:
- A train listed on the TRC arrives as specified.
- If the train's formation sets-up then see (25.25).
- If part of the formation sets-up and part arrives later, trains appear with either group at owner's choice.
- If an entire formation is listed as a reinforcement, the baggage and pontoon trains arrive after all combat units.
- If a formation arrives over several turns, the trains arrive at owner's choice of time.
25.27 Leaders: Leaders set-up in the hex specified, or, at owning player's choice: Commanders may set-up with any Friendly force—Officers in any hex containing units of their Formation—in supply and not in an EZOC. Leaders ignore Mode Cards unless specifically mentioned. Leader cards may be played as "inapplicable" (24.35) prior to the named leader's arrival.
25.28 Vedettes: Vedettes may be deployed at the beginning of a scenario at the owning player's choice, anywhere within three hexes of their parent unit (not in an EZOC). The second player deploys all available vedettes first, then the first player deploys.
25.3 Forces at a Glance
25.31 French Grande Armée
| Corps | MOR | MONT | ARC | F-C |
|---|---|---|---|---|
| II Victor | H | H | part | • |
| VI Marmont | part | • | • | H |
| IC Bordessoulle | • | • | • | H |
| VII Oudinot | H | H | H | • |
| IIC St Germain | • | • | H | ALT |
| Res Gérard |
25.32 Coalition Army of Bohemia / Hauptarmee
| Corps | MOR | MONT | ARC | F-C |
|---|---|---|---|---|
| I Gortchakoff | H | • | H | ALT |
| II Eugen | H | • | H | ALT |
| III Lambert | H | H | H | • |
| V Yermolov | ALT | ALT | H | • |
| GC Constantin | • | ALT | H | H |
| Bav Wrede |
Key: H = most or all of the formation is in play. "part" = part of formation in play; part may be ALT. • = Not in play.
25.33 Utility Markers: Burnt Bridge, Charge, Check, Construction, Control, Demoralized, Game-Turn, Improved Position, In Command, Late Start, Out of Command, Out of Supply, Reinf. Delayed, Reorganizing, Repaired Bridge, Repulse, Road Blocks, Road March, Ruins, Square, and Weather. The use of these markers is explained below or in the Series Rules.
- Casualty Level: Markers for the Demoralization Track (21.1); including some corps not in Napoleon's End.
- Late Start: If Card No. 2, Late Start, is in effect, place the Late Start marker on all unawakened Commanders.
- Reorganizing denotes Leaders unable to provide command while Reorganizing.
- Reinforcements Delayed: applies to forces that are subject to French Fog of War Card No. 24, Delay—March Confusion: 1, 2, or 3 turns delay.
- Square: Place on any infantry unit that was successfully charged to denote increased movement costs.
- Suppressed: (see Bombardment Table)
- Command Markers: During the Command Segment (B.4) place In Command markers on officers and units placed in command by commanders. Then place In Command or Out of Command (OOC) markers on officers as they check initiative. As you go, place Check markers on units beyond command range. (These will check initiative shortly; see 25.83.) When checked and initiative is gained, place a red OOC marker to indicate the unit may move up to its MA, but may not advance after combat.
25.4 Scenario Information Detail
The following information is provided in 27.0—33.0.
25.41 Duration: The game ends with the completion of the last turn specified under "Duration," or may end immediately when all the formations of one side are demoralized or have exited. The Level of Victory still has to be determined (26.2).
25.42 Mode Cards at Start: The number of Mode Cards to draw on the first turn only.
25.43 Remove Cards from Deck: Before play begins remove specified number of cards from each Player's card deck (24.2). See separate list per Battle. Scenario Parameters is a summary of all the info you need to play, for all the battles, in one place.
25.44 Bonus Cards: On the second turn of each battle, each player draws a number of Bonus Cards specified for that battle. If playing the Campaign, at the end of each battle, each player draws a number of Bonus cards determined by victory level (26.5).
25.45 Alternate Reinforcements (ALT): Formations of both sides that were nearby, available as ALT Reinforcements (25.51).
25.46 Special Rules: Rules that apply to this battle; at start conditions and map area in play. Seine-Specific Rules (25.7) apply to all battles.
25.47 Victory Conditions: Victory Points (26.1) are awarded for control of places on the map. Certain VP locations that do not count in a battle may be listed.
25.5 Reinforcements
Reinforcement units (19.1) are placed on the Turn Record Cards, and enter at the mapedge hex specified on the TRC. All units and leaders are listed separately (25.53).
25.51 Alternate Reinforcements (ALT): ALTs should be employed by mutual agreement of the players, considering the potential to impact play balance. These are listed in the Scenario Information. One numbered group of friendly ALT Reinforcements arrives for each Card No. 29 played. ALT groups must arrive in order of priority starting with #1. Each time an ALT group enters, the enabling card is removed from play after being scored (26.16). ALT reinforcements enter at a reinforcement entry hex of the same army.
If not using the cards—roll two d6 during the Command Movement Segment of every Player Turn: on a result of 2 or 3, you may enter the next group of Alternate Reinforcements listed; if you roll a 4–12, there is no result. DELAY: If you roll a 2 or 3, your opponent can roll 2d6 to delay the alternate reinforcements; the delay is for one turn if he also rolls a 2 or 3.
25.52 Hidden Reinforcements: All Reinforcements enter the map as Hidden Forces. Vedettes may enter instead of their parent unit.
25.53 Deploying Off-Map Reinforcements: For multi-hex forces, prior to entry, all additional stacks after the first are deployed off-map in a column (see Glossary), beginning with the leader at the front of the column, and ending with the baggage (25.26). Reinforcements can enter in Road March at the owning player's option.
25.6 March Orders
One March Order per player may be issued prior to the start of any scenario, to any friendly force in play on the map, if a Commander of the appropriate army is on-map at the start of the scenario (20.1).
25.61 Pre-Programmed March Orders: The Special Rules may specify mandatory "pre-programmed" March Orders. These orders represent historical conditions limiting the leaders' freedom of action. They can be removed according to 20.23. One March Order can be changed at night (20.4, 2.2B).
25.7 Seine-Specific Rules
The following Special Rules apply to all four battles.
25.71 Twilight: Semi-darkness creates exceptions to the rules of Movement and Combat. All turns marked with the diagonal shading on the TRC–and Fog turns–use the Day Sequence of Play with the following modifications:
- There is No Command Movement Segment: All Movement during the shaded turns is by Initiative. EXCEPTIONS: Units with a current March Order in effect (20.4); Commanders can move freely (individually).
- There is NO LOS during shaded turns. You must define attacks before revealing enemy units.
- All "Ar*" and "Dr*" results become "Shock."
- Arty. and HArt. may not bombard or contribute their strength to an adjacent attack; they may defend against enemy attacks as they would during daylight hours.
- Cards are not drawn or played during shaded turns.
Movement Allowance is 2/3 MPs (inf/cav).
25.72 Weather (WX): Roll one d6 to determine WX on the first turn of each day (or use Historical WX). Check again each Recovery Turn (9AM, 12 Noon, 3 PM, etc.)
- Historical WX: use the same condition for 6 turns AM and PM. EXAMPLE: 17-Feb, Frost lasts all morning.
- Fog reduces MA of all units by 1.
- Cloudy weather is the same as Fair (no effects).
All listed weather conditions apply each turn until the next WX check. Weather effects do not apply at Night. EXAMPLE: On 20-Mar. at 9AM, or on a die roll of 1, Fog applies; meaning Artillery strength is reduced by 25%; Bombardments are not allowed; Ar*/Dr* results lead to Shock; Movement Allowances are reduced by 1; and LOS is blocked (reduced to one hex).
25.73 Baggage Train Movement: All Formations must recover any units awaiting reorganization before their baggage trains move farther away from the current friendly supply source. Otherwise, if the Formation's Trunk Line (17.43) is increased, roll for each unit of the Formation still on the Reorganization Display: on a die roll of 5 or 6 move the unit to the PEU. All units that are out of supply (or lack a baggage train) upon reorganization (22.2) must also roll as above.
25.74 Ford Hexsides: Fords are treated as stream hexsides and share all the effects of stream terrain. EXCEPTION: the MP cost to cross a Ford is +2; ZOCs do not extend across Fords.
25.75 Stone Bridge: The stone bridge at Mont-1123 may not be damaged. (The Yonne bridge next to it had been blown by the French and repaired with boards.)
25.76 The Emperor: Napoleon's capture will bring about the game's end in a Coalition victory.
25.77 Small Unit Road March: All units of 3 SPs or less may move adjacent to each other in Road March, even on the same road. They do not require the extra road space of larger units. (EXCEPTION to 7.53.)
25.8 Optional Rules
May be adopted by consensus of players.
25.81 Artillery as Wheeled Units: Treat all artillery like trains, moving at cavalry costs. Artillery may not enter Slope hexes except by Road or Trail. Artillery may not cross Rivers (even if frozen), or streams, except via bridge, trestle, or Pontoon bridge. (Use with 25.82 below.)
25.82 Out of Command: Use a gray Out of Command marker to mark a unit that is Out of Command due to failed initiative, because it is either:
- within Command Range of its Officer who fails initiative roll (2.1, B-4);
- beyond his Command Range and fails its own initiative roll (2.1, C-2).
Such a unit remains Out of Command and cannot advance after Combat or move. Use a red marker to mark a unit that is beyond Range and passes its initiative roll. Such a unit remains Out of Command and cannot advance after combat but may move its full MA.
25.83 Officer Initiative: If the Officer's Initiative die roll exceeds his Initiative Rating by one, the leader, plus all of his units in Command Range may move 1 (and only 1) hex. If the die roll exceeds the Initiative Rating by more than 1, the force may not move.
25.9 Optional Rule: Roadblocks
Roadblocks may be adopted by consensus of players.
25.91 General Rule: A roadblock is several companies of infantry with an obstruction in the roadway: 1 (3) 0. It cannot move, has a combat strength of 1 and Initiative of (3) for defense only. It may never attack and simply remains in contact when adjacent to the enemy during the friendly combat phase. Neither side's units may cross a roadblocked (red arrow) hexside (although leaders may). Until the roadblock is cleared a roadblocked hexside is impassable to French and Coalition movement, retreats, pursuits and supply lines (but not Command Radius). Enemy Units may not enter a hex containing a concealed roadblock marker. Roadblocks are always immobile and "unable to retreat fully/PEU."
25.92 Roadblock Construction: Each side can construct up to 2 roadblocks at start (unless otherwise specified) and 2 each Night PM turn, at least 3 hexes from the nearest enemy unit, and within 2 hexes of a friendly infantry unit (tracing only through terrain passable to infantry). Roadblocks may only be placed on a road or trail at a "defile"—either end of a bridge, town, slope, or woods. Construction is automatic—simply place the roadblock marker with the red arrow pointed toward the blocked defile hexside, and conceal it with a friendly flag marker on top. You may build up to 2 roadblocks in a hex, each pointing to a different defile.
25.93 Reconnaissance against Roadblocks: Roadblocks are hidden from the enemy until revealed by recon (8.3) or Repulse (9.12). The roadblock is treated as "no cav" on the Reconnaissance Table. A repulse is resolved as a regular combat, with no column shift (9.22).
25.94 Roadblock ZOCs: A hidden roadblock marker has a ZOC into all adjacent hexes. A revealed roadblock marker exerts a ZOC into the two hexes on either side of its red arrow hexside only. The 5 other adjacent hexes are revealed as non-controlled when the roadblock marker is revealed. Friendly units may stack with the roadblock—their ZOCs are unimpaired.
25.95 Clearing Roadblocks: To clear an enemy road block, a friendly combat unit must attack it through the defile hexside (in either direction). A retreat or 1R result for the roadblock means it is cleared (removed). A cavalry or artillery unit cannot charge or bombard the defile, but may make an adjacent attack. The initiative of roadblocks (needed to resolve shock combat) is (3); a shock attack by a 3 or better will cause it to be cleared. A player may clear a friendly roadblock when occupied by a friendly combat unit during Movement, at a cost of 1 additional MP.
25.96 Defending a Roadblock: There are no additional terrain effects on combat for units stacked with a roadblock. The defense strength of the roadblock is added to the total combat strength defending the hex.
26.0 Victory Conditions
Victory is awarded to the player or team with the most Victory Points at the end of the game. In the Campaign Game, the level of Victory is according to the ratio of each side's Victory Point total (26.23).
26.1 Victory Point Awards: Victory Points (VPs) are awarded for the conditions listed (26.11). Calculate VP awards at the end of battle.
26.11 Determine VP Totals: VPs are awarded for…
a) Enemy Combat SPs Eliminated (26.12) b) Enemy Formations Demoralized (26.13). c) Captured Enemy Baggage Trains (26.14). d) Controlled Hexes (26.15) e) Total VPs of cards you have played (26.16) f) Leaders in a town through the Night (26.17) g) Captured Commanders (26.18) h) Units that have exited the map (26.3)
26.12 Total Combat SPs Eliminated: At the end of the battle, total the losses in SPs by both sides, including the total SPs in the PEU, Unrecovered and Recovered boxes. Don't count SPs in the Full Strength Holding Box. Subtract the smaller from the larger total. The side losing the least SPs receives VPs as follows:
| Difference | VPs | Difference | VPs |
|---|---|---|---|
| 0-4 | 0 VPs | 20-24 | 4 VPs |
| 5-9 | 1 VP | 25-29 | 5 VPs |
| 10-14 | 2 VPs | 30-34 | 6 VPs |
| 15-19 | 3 VPs | 35-39 | 7 VPs, etc. |
When calculating Total Combat Strength count the unit's Full Strength. EXCEPTION: For units starting the scenario at Reduced Strength, use reduced strength.
26.13 Enemy Formations Demoralized: Each Player receives [4] VPs for each enemy Formation demoralized at the end of play. EXCEPTION: only [2] VP are awarded for demoralization when the demoralization level of the formation is 4 or less.
26.14 Captured Baggage Trains: The Player receives [2] VPs per Enemy Baggage Train captured (18.14).
26.15 Control: The Player receives [4] VPs for each Enemy Supply Source he controls. Each Player also receives the number of Victory Points printed on the map for each VP Hex he controls. EXCEPTION: The Scenario Victory Conditions may specify certain VP hexes that do not apply in that scenario.
To be considered in control of a hex, a friendly Combat Unit in Supply must physically occupy the hex, or be the last Combat Unit to have occupied or moved through it. An occupying unit that is Out of Supply at the moment it enters or moves through a hex does not control that hex. To indicate the control of a hex, place a control marker of the controlling side in the hex.
26.16 Cards: Add or subtract the VP value of each card you have played during the game, if that card's instruction was actually used, as specified on the card.
26.17 Leader in a town throughout the Night: Each player receives ONE-HALF VP for every friendly Leader in a town or a Chateau who will remain there until 7 AM. (Round fractions down.)
26.18 Capture of Commanders: A player receives a number of VPs for each captured Commander equal to that Commander's Command Rating (also see 25.76).
26.2 Levels of Victory: At the end of the battle the total of Victory Points achieved by the two players is compared as a ratio (French: Coalition), which determines the level of victory—Marginal, Tactical, or Strategic. Divide the French by the Coalition VP total.
26.21 Find VP Ratio:
| VP Ratio | Level of Victory |
|---|---|
| 1 to 2 or less | Coalition Strategic |
| 1 to 1.5 / 1 to 1.99 | Coalition Tactical |
| 1 to 1 / 1 to 1.49 | Coalition Marginal |
| 1.01 to 1 / 1.5 to 1 | French Marginal |
| 1.51 to 1 / 2 to 1 | French Tactical |
| More than 2 to 1 | French Strategic |
26.22 When Total of VPs is Zero: Convert scores of "0" to "1" in order to calculate VP ratio.
26.23 Levels of Victory in the Campaign Game: In the Campaign Game at the end of each battle, the winner, Level of Victory and total VPs for each side must be recorded (26.5).
26.3 Exiting the Map: Either Player may choose to exit his units by playing the "General Retreat" card once per game. If not using the cards, the Phasing Player may declare one General Retreat per game (20.5, 24.91).
Exit hexes may not always be marked on the maps. Individual units in a General Retreat move to the closest Supply Source of the appropriate army (20.51). Special Rules may specify additional exit conditions. Friendly units may exit where an enemy unit previously exited. The exiting unit pays the Movement cost of the hex it is leaving once again. Exited leaders may not reorganize units. Units that exit the map cannot be returned to play. EXCEPTIONS: 29.34, 30.34. They are not considered eliminated for Victory Point purposes. (Units forced to retreat off the map are eliminated; 12.34).
26.31 VP Award: If he makes a "General Retreat" the Exiting Player receives [4 VP] for exiting each friendly baggage train, and [1 VP] for every five combat units exited. EXCEPTION: The total number of VPs from exiting units may not exceed the total number of enemy combat units PEU and UAR. EXAMPLE: The Coalition player exits 25 units. The French lost at least 5 units, so all five VPs are counted.
26.32 Exit by March Order: A force may be assigned a regular March Order to exit the map.
26.33 No Award: Even if you do not declare "General Retreat," you may choose at any time to exit individual units to prevent their destruction, but unless they exit at their own Supply Source, you receive no VPs, and the exited units cannot be returned to play.
26.4 Zero Loss Award: The Player receives [2] VPs if the total of eliminated SPs in the Friendly PEU + Unrecovered + Recovered boxes at the end of the game is zero.
26.5 Bonus Cards in the Campaign Game: The Campaign includes all four battles (AtB if any) played day-by-day in date order. Score the Level of Victory at the end of each Day of Battle (only). Each victory will allow the winning player to draw "Bonus Cards" from his card deck at the next day of battle.
- Strategic Victory: 3 Bonus Cards per battle
- Tactical Victory: 2 Bonus Cards per battle
- Marginal Victory: 1 Bonus Card per battle
Each player receives a minimum of 2 Bonus Cards.
EXAMPLE: The French Player wins a Marginal Victory at Montereau. He would draw one "Bonus Card" (plus the regular cards) on turn two of Arcis-sur-Aube. The Coalition Player would draw the minimum of 2 Bonus Cards each day.
26.6 First Player: The first player sets-up first.
27.0 The Battle of Mormant
A Fighting Rear Guard, 17 February 1814
27.1 Introduction
The French army began its counteroffensive southeast of Paris, targeting a division of Russian advanced guard troops under Count Pahlen. The outnumbered Russians were enveloped and partly destroyed, only one in three escaping. Later in the day, a French column encountered an Austro-Bavarian rearguard at Valjouan, driving it behind the Seine.
27.11 Duration: 17 Feb, 7 AM—5 PM (11 turns).
27.12 Mode Cards at Start: French 2, Coalition 3. Coalition Card No. 2 "Late Start" is in effect for the first turn. Remove Coalition Card No. 5, "Early Arrival."
27.13 Bonus Cards, Turn 2: French 3, Coalition 2.
27.14 Pontoon Trains: none.
27.15 Improved Positions: none.
27.16 Roadblocks: French 0, Coalition 2.
27.17 First Player: The French Player is first player.
27.2 Alternate Reinforcements
FRENCH
- #1. IND/Ledru-Dessarts, Ad Hoc Arty — Mor-1401
COALITION
- #1. GYULAI III/Spleny, Grimmer
- #2. III/Pfluger, Czollich, Arty
- #3. BARCLAY, YERMOLOV, Potemkin, Chrapvitzki
- #4. Richter, Scheltuchin, Gde Arty, Suchasenet
27.3 Special Rules
27.31 Damaged Bridges at Start: None.
27.32 March Orders at Start: The Coalition has a Pre-Programmed General Retreat March Order for all forces to 3534 and/or 6131.
27.33 Map Area in Play: Set up all units in accordance with the "17-Feb" column of the Initial Set-up. This scenario uses the MOR Mormant Map. NOTE: Units slated for the Montereau map ("Mont-") are not used in the Mormant DoB Scenario.
27.34 Wittgenstein: If Wittgenstein fails to awaken by 8AM he is removed from play (not captured).
27.4 Victory Conditions
VPs are earned as per 26.1.
27.41 Control: The player receives 1 VP for each complete game turn friendly units control Nangis (Mor-3523) but no more than 5VPs total per side for Nangis.
28.0 The Battle of Montereau
The Seine and Yonne Bridges, 17-18 February
28.1 Introduction
Württemberg's Corps took post in the hills north of the Seine, holding-off Victor's attacks all morning. In the afternoon the troops broke and fled toward the bridge behind them. Pajol's cavalry charged into their midst, capturing the spans over both the Seine and Yonne Rivers and seizing Montereau. Schwarzenberg began his retreat to Troyes.
28.11 Duration: 18 Feb., 7AM—7-8 PM (13 turns).
28.12 Mode Cards at Start: French 1, Coalition 1.
28.13 Bonus Cards, Turn 2: French 2, Coalition 2.
28.14 Pontoon Trains: none.
28.15 Improved Positions: Coalition 2.
28.16 Roadblocks: French 0, Coalition 2.
28.17 First Player: The French Player is first player.
28.2 Alternate Reinforcements
FRENCH
- #1. IND/Ledru-Dessarts, Ad Hoc Arty — 0101
- #2. YG/Jamin, Bigarré — 0127
COALITION
- #1. GYULAI III/Spleny, Grimmer, Pflüger, Czollich, Arty — 2634
- #2. YERMOLOV V/(-Kaisarov) — 6133
- #3. CONSTANTINE/GC — 6133
- #4. HOMBURG RES/Hirsch, Haugwitz, Fürstenw., Beigel, Klenau, Luz, Tabunscht., Arty — 2634
28.3 Special Rules
28.31 Damaged Bridges at Start: none.
28.32 March Orders at Start: Each Player has one (20.1).
28.33 Map Area in Play: Set up all units in accordance with the "18-Feb" column of the Initial Set-up. This scenario uses the MONT Montereau map. NOTE: Units slated for "Mor-" would start a 2-map Montereau DoB.
28.34 Dragons Teeth: (Mont-1122) are impassable—blocked for all purposes: command trace, LOS, ZOCs, attacks, bombardments across, retreats.
28.35 Gérard: Gérard's formation is called RES in the game even though "RES" was dropped in favor of "II Corps" after 18-February. Gérard may command II Corps and RES if Victor is removed from play.
28.4 Victory Conditions
VPs are earned as per 26.1.
28.41 Control: The player receives 1 VP for each complete game turn friendly units control hex 1124. Both 1124 and 5832 are under Coalition control at start.
28.5 Approach to Battle
28.51 Duration: 17 Feb., 7 AM—18 Feb., 7-8 PM (29 turns).
28.52 Map Area in Play: Set up all units in accordance with the "17-Feb" column of the Initial Set-up using the Mormant map joined to the Montereau map.
28.53 March Orders at Start: Oudinot (VII) and Kellermann (VIC) have a March Order with a movable destination: to move toward Prince Eugen, officer of the Russian II Infantry Corps, and to exit wherever he may exit. The Coalition has a Pre-Programmed General Retreat March Order for all forces north of the Seine; to either: the nearest Coalition exit hex, or any town or exit hex south of the Seine (Coalition Player's choice). Removal (20.23).
28.54 Control: VP hexes that do NOT count: On 17-Feb: Mont-1124, Mont-5832. On 18-Feb: Mor-3523.
28.55 All other Scenario info: (Same as 27.12—27.31 and 27.41). For the second day, Feb-18, use 28.2.
29.0 The Battle of Arcis-sur-Aube
Time Runs Out, 20-21 March 1814
29.1 Introduction
The walls were closing-in. Napoleon moved south again to interfere with Schwarzenberg's advance. Informed of the threat, the Generalissimo quickly pulled back to Troyes and Arcis-sur-Aube.
Upstream, at Plancy-l'Abbaye, a French force of 7,500 men crossed the Aube. To everyone's surprise, Schwarzenberg turned about and began concentrating his army while Wrede's Bavarians engaged at Arcis. The 20th of March was inconclusive, with the loss of 2,500 Coalition and 1,700 French troops. Napoleon prepared to pursue what he hopefully perceived as the enemy's rearguard.
In the morning light, the French advanced to behold not a rear-guard in flight, but 80,000 troops advancing in battle array. Only 48,000 of these troops were able to engage across a shrinking frontage of 10,000 yards, giving the French a chance to cross the river, losing another 1,700 killed and wounded, 3 guns and 800 prisoners; the Bavarians lost 2,300 casualties and their allies 700. Marching northeast out of Arcis-sur-Aube, the Emperor hoped to lure Schwarzenberg away from Paris by threatening his communications; this desperate ploy was exposed in a captured letter to Marie Louise.
29.11 Duration: 21 Mar., 12 N—9 PM (9 turns).
29.12 Mode Cards at Start: French 1, Coalition 3.
29.13 Bonus Cards, Turn 2: French 3, Coalition 2.
29.14 Pontoon Trains: 1 deployed (2615), 1 with l'Heritier; 1 with Schwarzenberg, 1 with Kronprinz.
29.15 Improved Positions: 3417, 3916.
29.16 Roadblocks: French 2, Coalition 2.
29.17 First Player: The Coalition Player is 1st player.
29.2 Alternate Reinforcements
FRENCH
- #1. MACDONALD, XI/Brayer, Albert, Arty. Accelerated (29.21) — 0107
- #2. GÉRARD Res/ Dufour, Hamelinaye, Souham, Arty. Accelerated (29.21) — 0107
- #3. NG/Amey — 0107
COALITION
- #1. III Au/Pflüger, Czollich. — 1634
- #2. III Ru/Paskewitsch — 6125
29.21 Accelerated Reinforcements: The above French ALT groups (#1 and #2) may arrive prior to their scheduled arrival on the TRC (4-5 PM, 21-Mar) by play of Card No. 29.
29.3 Special Rules
29.31 Damaged Bridges at Start: 0307, 0408, 1210, 3415, 6022.
29.32 March Orders at Start: Coalition: one (20.1). French: one. In addition, French Reinforcements below have a pre-programmed March Order to Arcis (3416):
- IIC (7 AM on 21-Mar)
- 5YG (10 AM on 21-Mar)
29.33 Map Area in Play: This scenario uses the Arcis-sur-Aube (Arc) Map. Set-ups are specified on the "21-Mar" column of the Initial Set-up.
29.34 Bohemian Army IHQ: Schwarzenberg's headquarters were at Pougy, an off-map town. At the start of each day (20 and 21-Mar), Schwarzenberg is off-map and enters as shown on the TRCs; or, if using the cards, he enters according to Card No. 24 when played. By midnight 20-Mar at the latest he must exit the map via movement by way of (6125), receiving ½ VP (26.17) for the overnight stay. If he fails to reach the exit hex by then he is considered captured and does not appear again.
29.35 Frimont's Cavalry Command: General Frimont was given command of a mixed force of Bavarian and Austrian cavalry. Frimont may command any Austrian or Bavarian cavalry within his command range.
29.4 Victory Conditions
The VPs are earned as per 26.1.
29.41 Control: VP Hexes that Do NOT count: none.
29.42 Refugees: All French units north of the Aube River at the end of the scenario, that have an unblocked Supply Line (17.4) to any active exit hex may be counted as part of the total of exited units (26.3). An active exit hex is where one or more French units have exited and no Coalition units have exited. All French forces without such a Supply Line count as PEU.
29.43 French Hold Arcis: If the French hold Arcis at the end of the scenario, and both ends of the bridge (3416) then any units south of the Aube with a Supply Line to an active exit hex or supply source count as exited, in addition to those north of the Aube (29.42).
29.5 Approach to Battle
29.51 Duration: 20 Mar, 9 AM—21 Mar. 9 PM (28 turns).
29.52 Mode Cards at Start: French 2, Coalition 3.
29.53 Alternate Reinforcements:
- FRENCH (same as 29.2)
- COALITION (same as 29.2)
29.54 Map Area in Play: Set up all units in accordance with the "20-Mar" column of the Initial Set-up. This scenario uses the Arcis-sur-Aube (Arc) Map.
29.55 March Orders at Start: French: one. Coalition: one (20.1). The Reinforcements below have pre-programmed March Orders to destination Rhèges (0813), remaining under the M.O. May be removed ONLY by enemy ZOCs or by arrival at the destination (20.23).
- KRONPRINZ/W (11 AM on 20-Mar.)
- GYULAI/III (1 PM on 20-Mar.)
29.56 All other Scenario info: (Same as 29.12—29.4).
30.0 The Battle of Fère-Champenoise
The Last Gasp Delaying Action, 25 March 1814
30.1 Introduction
Marmont and Mortier, with 18,884 men, were hurrying to join Napoleon. On the morning of the 25th, Marmont was attacked by Pahlen's advanced guard cavalry at Soudé Ste. Croix. The French had the advantage of numbers but assumed the Coalition infantry was close behind the cavalry.
The French soldiers managed to maintain an orderly retreat until a violent rainstorm fouled their muskets. They were steadily driven back and routed by a force of 14,889 cavalry, suffering 2,000 killed and wounded, 4,000 prisoners, 45 guns and 100 ammunition wagons.
At the same time a nearby supply convoy escorted by two French divisions of National Guards (4,300 men and 16 guns) under Pacthod, was attacked and wiped out. (Battle of Bannes.) Paris fell six days later.
30.11 Duration: 25 Mar., 8 AM—7-8 PM (12 turns).
30.12 Mode Cards at Start: French 3, Coalition 3.
30.13 Bonus Cards, Turn 2: French 2, Coalition 2.
30.14 Pontoon Trains: none.
30.15 Improved Positions: none.
30.16 Roadblocks: French 1 (1957), Coalition none.
30.17 First Player: The Coalition Player is 1st player.
30.2 Alternate Reinforcements
FRENCH
- #1. IND/Mouriez, Curely, Ad Hoc Arty — 3501
- OG/Gde Depot, VIC/Wolff — 0201
- #2. MACDONALD XI/Albert, GROUCHY; ST. GERMAIN IIC/ Jamin, Dommanget, Thiry. — 2062
- #3. NEY YG/Petit, Cambronne, Vistula, Charrière, Bauduin, Janssens, Lecamus, Leclerc, Drouot, HArt x2, L'HERITIER VC/ (less Subervie) — 2062
- #4. GÉRARD Res/ — 2062
COALITION
- #1. GC/Duka — 0138
- C/Emanuel, Denissiev — 3927
- GYULAI III/Spleny, Grimmer, Pflüger, Czollich, HArt, Arty; Res/Klenau, Luz, Reisner Arty — 0143
- #2. W/Stockmayer, Lalance, Hohenlohe, Schaefer, Misani, FAB #1, FAB #2 — 2062
- #3. RAEVSKY, GORTCHAKOV I/, EUGEN II/(-Kapustin & Stepanov) — 2062
- #4. WREDE Bav/Maillot, Vieregg, Pappenheim, Zollern, Dietz, Habermann, Res Park-a & -b — 0152
30.21 ALT Reinf: Use 25.51 if not using the cards.
30.22 ALT Reinforcements Arriving from St. Dizier: Both sides have ALT Reinf. scheduled to arrive at 2062. However, once the first ALT group enters at 2062, all remaining enemy forces scheduled to appear there are cancelled, including Temporarily Exited Coalition forces (30.34).
BACKGROUND: The Army of Bohemia stood between Napoleon and the F-C east mapedge, potentially blocking the arrival of French ALT Reinf. If Napoleon had turned back in time, at least some of the ALT Reinf. (30.2) could have intervened at Fère Champenoise.
30.3 Special Rules
30.31 Damaged Bridge at Start: none.
30.32 March Orders at Start: Coalition: one (20.1). French: Marmont and Mortier have pre-programmed March Orders to Sommesous (1241); Pacthod has a M.O. to Vatry (3641). After removal of these March Orders, the French Player may declare a General Retreat for all French forces, each unit moving toward the nearest exit hex on the west mapedge plus 0105.
30.33 Map Area in Play: Set up all units in accordance with the "25-Mar" column of the Initial Set-up. This scenario uses the Fère-Champenoise map.
30.34 Temporary Exit: Coalition units may exit at 1162 or 2062 on the east mapedge without penalty or VP benefit, and must re-enter with the next group of friendly regular or ALT Reinforcements arriving at the same location (12.34, 30.37).
30.35 Refugees: All French combat units and Baggage within 6 hexes of any exit on the west mapedge plus 0105 with an unblocked Supply Line (17.41) to that exit hex at the end of the scenario, count as part of the total of exited French units.
30.36 Abandon des Voitures: Pacthod's wagons were abandoned so that the teams could be harnessed to the guns. Guns were often doubled-teamed because of mud. The French player may voluntarily flip over any baggage train(s). This negates the doubling of MP costs during Mud and Snow for all artillery in the baggage train's formation. The horseless baggage is now immobile for the remainder of the game. It no longer functions for supply purposes (17.41); but still counts for 26.14.
30.4 Victory Conditions
The VPs are earned as per 26.1.
30.41 Control: VP hexes that do NOT count: none.
30.5 What if the French Ploughed Ahead? (Variant)
The Marshals' best bet might have been to stay on course and move aggressively ahead. In this variant Marmont and Mortier's Forces have a pre-programmed March Order to exit at 0662; Pacthod has a M.O. to exit at Aulnay (2001). (Replaces 30.32. All the remainder of 30.3 remains in effect.)
30.51 Exit Conditions: The French Player must receive ALT #2 before Marmont and Mortier's troops may exit.
31.0 The Seine Campaign
La Chute de Nápoleon: 17 Feb.—25 Mar. 1814
31.1 Introduction
The Seine Campaign Game is the "Link Game" consisting of the Montereau AtB, Arcis-sur-Aube AtB, and La Fère Champenois DoB, played successively in order.
31.11 Duration: 17 Feb., 7 AM, through 25 Mar., 6 PM.
31.12 Mode Cards at Start: Mode Cards will be drawn on the first turn of 17 Feb. (27.12), on 20-Mar (29.12) and on 25-Mar (30.12).
31.13 Card Deck: During the Night AM turn of Feb. 18 and Mar. 21, before you reshuffle the full Main Deck (24.23) return all ALT. Reinforcement cards No. 29 to the deck (25.51).
31.14 Bonus Cards, Turn 2: (27.13), (29.13), (30.13).
31.2 Initial Set-up
To start the Seine Campaign, use the Montereau AtB, 17-Feb. set-up on the conjoined Mormant-Montereau maps. At the conclusion of 18-Feb., the action moves to Arcis (29.0). GRAND CAMPAIGN: In the Grand Campaign proceed first to Napoleon Retreats (31.0). The following steps are needed to prepare for the Arcis AtB starting on March 20th-21st.
31.21 Force Structure: Assemble your forces that remain on the Montereau map. GRAND CAMPAIGN: In the Grand Campaign, units for 20-Mar will include the French survivors of the battles of 6-13 March instead of their counterparts that survived Montereau. The following forces do not play a part in the battles of 20-25 March: Remove all units and leaders of
- Austrian I Corps (except Watzel)
- French II Corps
- Pajol's Provisional Corps.
Transfer all other surviving forces of both players onto the Arc map or Turn Record Track for the Arcis AtB, according to their location on the Initial set-up for 20-Mar.
31.22 Reduced Strength Units: Listings of ® or "eliminated" on the Initial Set-up for 20-Mar. should be ignored. The actual units to be reduced or PEU will be those that are reduced or PEU at the end of play on 18-Feb. (GRAND CAMPAIGN, on 13-Mar).
31.23 Replacements: During the Start Phase for 20-Mar., all units remaining in the UAR box are automatically reorganized (at their reduced strength). Both players then invert any reduced-strength units of their choice, up to a total increase in strength of 6 SPs of infantry and 4 SPs of cavalry (in addition to any replacements received from Card No. 4). Replacements are not subject to the rules of Reorganization (22.2). Any baggage trains and vedettes that have been eliminated up to that point will also return to play. Any leaders that have been captured remain out of play. Formations without officers get a replacement leader.
31.24 Alternate Reinforcements: For 17-Feb. use ALT listed at 27.2; for 18-Feb. use 28.2; for 20 and 21-Mar use 29.2; for 25-Mar use 30.2.
31.3 Special Rules
Use Special Rules and maps for each battle in turn, beginning with the joined Mormant-Montereau maps. Special Rules only apply during days of that battle.
31.4 Campaign Victory Conditions
The running total of Victory Points in all battles played is tallied per side, and compared as a ratio. See the "Campaign Ratio" Section of the Victory Worksheet to determine the overall level of victory for the campaign.
31.5 Initial Set-up
To start the Campaign, use the 17-Feb set-up, including units on both the Montereau and Mormant maps.
31.6 Turn Record Tracks
Use all TRCs in date order: 17-18 Feb, 20-21, 25 Mar.
31.7 Team Play
In a three-player game, one assumes the role of Napoleon; Coalition Players may represent Schwarzenberg, the Kronprinz of Württemberg, Barclay and/or Raevsky. Commanders control their historically-associated formations. (These commanders are not present at all four battles.) At Fère Champenoise, a two-player French team (Marmont and Mortier) would suggest the extra burden of convincing your partner of your next move.
31.71 Communication Among Players: Players may not freely discuss their plans, tactics or strategy unless the Leaders they represent are within four hexes of each other.
31.72 Aides-de-Camp: Written notes may be passed between Coalition players. One message may be dispatched per player every friendly Command Phase.
31.73 Objective Hexes: Only named places, not hex numbers, may be specified as objectives.
31.74 Arrival Time: Written notes are dispatched during the Friendly Command Phase and are received during a later Friendly Command Phase. Arrival time:
- on the same map section—3 complete Turns
- from one map to the next—6 complete Turns
- to Off-Map formations—12 complete Turns
31.75 Victory: After the winning side is determined, each of the Players compares the total VPs that he obtained (26.11) or hexes his units were first to occupy for his side. He becomes C-in-C in the next contest, with choice of which side to play and teammate.
32.0 Grand Campaign Game
The Final Curtain: 29 Jan.—25 Mar. 1814
32.1 Introduction
The 1814 Grand Campaign requires the game equipment for three OSG titles, to include 12 battles in date order. Start by referencing the Campaign Game info:
- La Patrie en Danger (34.0) 29 Jan.-14 Feb.
- Napoleon's End (31.0) 17-18 Feb.
- Napoleon Retreats (31.0) 6-13 Mar.
- Napoleon's End (31.0) 20-25 Mar.
32.11 Duration: 29 Jan., 9 AM–25 Mar., 6 PM (22 days, 319 turns). To start the Grand Campaign, use the 29-Jan. AtB set-up; or start with any other battle setup. Playing time: about 150 hours.
32.12 Mode Cards at Start: La Patrie (34.12)
32.13 Bonus Cards at Start: La Patrie (34.14)
32.14 Pontoon Trains: Coalition: 1 with Schwarzenberg, 1 with Blücher; French: none.
32.15 Improved Positions: none.
32.16 Roadblocks: none.
32.17 First Player: The French Player is First Player.
32.2 Reinforcements & Alternate Reinforcements
Use scheduled and ALT Reinforcements for each battle.
32.3 Special Rules
Use Special Rules from each individual campaign game (La PeD 34.5, Nap Ret 31.3, etc.) during that campaign.
32.31 Remove Cards from Deck: See individual battle.
32.32 Map Area in Play: Use all maps in date order.
32.33 Casualty Tracks: Use the highest Demoralization level listed on the Casualty Tracks for a given formation.
32.4 Campaign Victory Conditions
The results of fighting will influence the number of bonus cards you get (26.5). The total of VPs is tallied per player at the end of each battle. Record VPs achieved at the end of each day of battle in spaces provided on the three different Victory Worksheets. See the "Grand Campaign" section of the Napoleon's End Victory Worksheet to determine the overall victory level.
32.41 Control: Tally at the end of each day of battle.
32.42 Limit to Award: The VP Award for a given town can only be counted once by each player. If he controls a location on the first day, the player receives no additional VPs for controlling the same location on day two.
32.43 Sudden Death: If the Coalition achieves a Strategic Victory at either Brienne or La Rothière, this brings about the end of the campaign. Sudden Death ONLY applies to these two; not the other battles.
32.5 Turn Record Tracks
Use all TRCs in date order. EXCEPT: Fismes, 4-Mar.
Napoleon's End Battlefields (Summary Table)
| Mormant | Montereau | Arcis-sur-Aube | Fère-Champenoise | |
|---|---|---|---|---|
| Map Size | 22x34 | 22x34 | 22x34 | 22x40 |
| French Force Size | 8+ Corps | 9+ Corps | 7+ Corps | 4+ Corps |
| Coalition Force Size | 8 Corps | 3+ Corps | 9+ Corps | 2+ Corps |
| Coalition Nationality | Ru., Bav. | Württ., Ru. | Au., Württ., Ru., Bav. | Württ., Ru. |
| Terrain | Woodland | Woodland, Riparian | Champagne Pouilleuse |
Napoleon's End Update (26 February 2024)
The following is the one-page "Napoleon's End Update" correction sheet, dated 26 February 2024, transcribed in full as printed. It is dated before Study Folder v2.09 (14 March 2024). Where its wording differs from the Study Folder text in Part Two above, both are shown here; the Study Folder text above is transcribed as printed.
Study Folder
25.16 French Guard: French YG and OG comprise one big corps. The Guard never has more than one leader and one baggage train. (MORTIER only appears in F-C.) In the F-C battle, if Ney arrives as ALT with the YG, then his formation comprises the 12 units that march on with him and their baggage is the ALT YG Baggage.
27.12 Mode Cards at Start: Coalition Card No. 2 "Late Start" is in effect for the first turn of 17 Feb. Remove Coalition Card No. 5, "Early Arrival." The text (for those not using the cards) is as follows:
LATE START MODE CARD 2/3 (+1) VP
None of your Commanders may move or transmit command until awakened. Roll for each Commander during the friendly Command Phase. Each Commander will awaken:
- On a die roll of 1; or
- If an awakened friendly Commander moves into or through the sleeping Commander's hex; or
- If any Enemy unit engages a friendly unit within 10 hexes of the Commander.
Roll at the start of every Command Phase. On each turn subtract 1 additional from the die. Commanders who enter during the course of the game are not subject to Late Start.
ADDENDA to Coalition Late Start Card No. 2 for 17 February: If Wittgenstein fails to awaken by 8AM he is removed from play (not captured).
"As for Wittgenstein, he retired personally and galloped on Nogent, without even stopping at Provins."
27.2 Coalition ALT Reinforcements: For balance purposes, divide into 4 ALT Groups:
- #1. GYULAI III/Spleny, Grimmer
- #2. III/Pfluger, Czollich, Arty
- #3. BARCLAY, YERMOLOV, Potemkin, Chrapvitzki
- #4. Richter, Scheltuchin, Gde Arty, Suchasenet
27.41 and 28.54 Control (add): Each player may receive no more than 5VPs per side for Nangis (Mor-3523).
NOTE: Use of ALTERNATE Reinforcements. In some scenarios, one side may have a preponderance of ALT. ALTs should be employed by mutual agreement of the players. Considering the potential to impact play balance, reduce or eliminate appropriately.
Turn Record Track, Mormant: 10 AM. NEY and the Guard troops arrive at 2201 Arcis, 21-Mar, 3 PM Kellermann arrives 0119. Sometimes it should say "Reinf" but it isn't shown on the Initial Setup card. The TRC is correct.
Initial Set-up:
- Austrian unit 128 H. Homburg is not ALT at Mormant.
- French units 82 & 83 Sorbier & Res HArt are at Mormant and Montereau.
- Austrian unit 1 Schwarzenberg sets up in 4526 21-Mar.