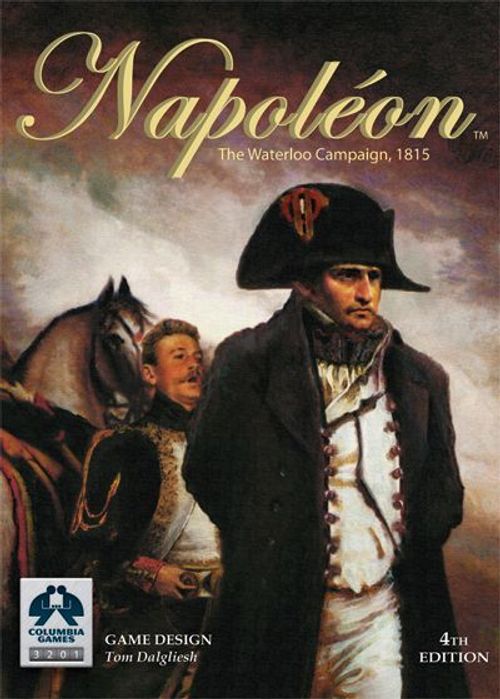
Napoléon: The Waterloo Campaign, 1815
Napoléon: The Waterloo Campaign, 1815 Rulebook
Table of Contents
Table of Contents
1.0 Mapboard
The mapboard depicts the areas of southern Belgium and northern France that were important to the Waterloo Campaign. Note these features:
Cities: three major cities (Brussels, Ghent, and Liège) and many small towns of 1815 are shown. Units (counters) are located on these cities and towns to indicate position.
Roads: the red lines connecting the towns are roads. Major roads are indicated by a thick line; minor roads by a thin line. Units move from one town to another along these roads.
Rivers: the major rivers of the region are shown in blue. These have an affect on movement, but only when defended.
Borders: the Franco-Belgian border is shown. Note also the Anglo-Prussian deployment line (small broken line).
Time Record: A record of Campaign Turns is printed on the mapboard, divided into "F" (French) or "A" (Allied) turns. The dark squares are Night turns.
2.0 Playing Units
2.1 Nationalities
The game contains 82 blocks (called units): 38 blue (French), 19 red (British/Dutch), and 25 black (Prussian). One label from the self-adhesive, die-cut sheet enclosed must be attached to the face of each unit.
| Nationality | Units | Labels |
|---|---|---|
| French | Blue | Blue/blue |
| French Guard | Blue | Blue/green |
| Prussian | Black | Gray/blue |
| British | Red | Red/red |
| Dutch | Red | Red/blue |
2.2 Fog of War
Units stand upright, labels facing the owning player. This prevents your opponent from observing the types and strengths of your units until they are revealed in combat.
2.3 Combat Value (CV)
The declining series of squares around the edges of units are combat values (CV). Some units have a top strength of 4CV, some 3CV, and some 2CV. Units begin the game with the maximum CV along their top edge when standing upright.
Starting strengths by unit type:
| Infantry | Cavalry | Artillery | |
|---|---|---|---|
| Combat Value | 3CV | 3CV | 3CV |
Unit Errata: One of the British 4CV Artillery units should be 2CV. Use a red marker or pencil to obscure the 3CV and 4CV values on this unit.
2.4 Step Reduction
A unit at 4CV can be progressively reduced to 3CV, 2CV, and 1CV as it sustains casualties, by turning the unit counter-clockwise until the current CV is the number on its top edge. A 1CV unit that takes a hit is eliminated and removed from play.
2.5 Unit Types
There are four types of units represented: infantry, cavalry, artillery, and leader. French and British units represent divisions; Prussian units are brigades, at this time roughly equivalent in size to British divisions.
3.0 Deployment
3.1 Free Deployment
The Allied player deploys first, in towns of his choice, subject to the following conditions:
- No deployment in French towns.
- British units must be deployed in towns west of the Anglo-Prussian deployment line, maximum of 5 units per town.
- Prussian units must be deployed in towns east of the deployment line, maximum of 6 units per town.
The French player deploys second in French towns of his choice with a maximum of 16 units per town.
Note: After initial deployment there is no limit to the number of units located in any town. The Anglo-Prussian deployment line does not restrict the movement or location of units once the game begins.
3.2 Historical Deployment
A historical Order of Battle (OB) for the three armies is provided on pages 7 and 8 (see Historical Order of Battle, below). Deploy units at maximum CV in the locations given.
3.3 Napoléon's Gambit
Napoléon had foreknowledge of the Allied deployment in Belgium and could have concentrated his forces anywhere along the French border. The Allies use Historical Deployment; the French have Free Deployment.
4.0 Sequence of Play
The game is played in alternate Campaign Turns, beginning with a French turn. The player taking a turn is called the Active player; his opponent is the Passive player. The French player has the first Campaign Turn to start the game. Each Campaign Turn has two parts:
4.1 Movement Phase
The Active player conducts his quota of Campaign Moves. See 5.0.
4.2 Battle Phase
All battles (if any) created by movement are resolved. See 6.0.
5.0 Movement
Players are never compelled to move. You can move nothing in your turn if you wish, but you can't accumulate moves for future use. Units may pass freely through friendly units, but they must stop and fight a battle when they move into any town containing enemy units.
5.1 Group Movement
After initial deployment, there is no limit to the number of units located in any town. All units located in a single town are referred to as a Group.
A player can move any number of units in a Group to any/all towns that are adjacent along a connecting road.
Example: With a group in Brussels, a player may move units to one or more of Alost, Ninove, Hal, Waterloo, Wavre, and Louvain.
The French player can make three (3) Group moves in one turn. The Allied player can make two (2) British Group moves and two (2) Prussian per turn.
Note: If British and Prussian units are located in the same town, moving both allies expends one British and one Prussian group move. The Allied player cannot forego his British moves for bonus Prussian moves (or vice-versa).
5.2 Movement Rates
Infantry and artillery units can only move to adjacent towns. Cavalry and Leaders can move two towns such as from Brussels to Waterloo, then to an adjacent town.
5.3 Road Limits
The maximum number of units that can move along any section of road (between two adjacent towns) in one Campaign Turn depends on its size:
MAJOR: 10 MINOR: 6
Once the maximums are met for any road section, the road is closed to further movement for that Campaign Turn except retreating and regrouping.
5.4 Rivers
The Road Limits for road sections that cross a river(s) are halved if the final destination town is occupied by one or more enemy units. That is, when attacking across a River, a maximum of five (5) units can move along a Major road, and a maximum of three (3) units along a Minor road.
Example: Ten French units can normally advance along the road from Laneffe to Charleroi. If, however, Charleroi is defended by a Prussian unit, only five units could attack along this road.
5.5 Force Marches
Players have the option to force-march any of their moving units, allowing them to move one extra town. That is, infantry and artillery can move two towns and cavalry three towns. Leader units may never force-march.
To force march, a 1d6 roll is made for each force-marching unit:
- 1-3: Unit completes move but permanently loses 1CV to stragglers.
- 4-6: Unit completes move with no penalty.
Note: when commanded by a leader, add one (+1) to the die roll.
All force marches are subject to:
- Make all normal moves before rolling for any force-marching units.
- Normal movement rules concerning road maximums, river-crossings, etc.
- Units may force-march to Attack, but never to directly Reinforce a battle.
- Units may not force march to Retreat.
- No force-marching is allowed during Night turns. Exception: See 10.1.
5.6 Night Turns
Players can make any normal move except they may not Attack nor Force-March.
Exception: Leaders may order a force-march during a Night Turn. See 10.1.
6.0 Battles
6.1 Attacking
A battle occurs when the Active player moves three (3) or more units into a town containing enemy units. Players cannot attack with less than three units. If only one or two defending units are present, they are considered to have been engaged by all attacking units and are subject to automatic Rout attrition. See 7.5.
Example: A lone Cavalry unit attacked by a force containing at least one Cavalry unit is reduced by 1CV for Rout attrition.
Battles are resolved by a series of alternate Battle Turns before the next Campaign Turn is played. The Active player is termed the Attacker; the Passive player is the Defender.
6.2 Battle Deployment
Players can set up small battles on the approximate location of a town, but larger battles should be transferred to the battle board provided. Mark the location of each battle as necessary.
The Defender deploys his units into three separate battle columns representing the Right, Left, and Center of a battle line. Units are deployed in upright mode to hide their strength and type. Any number of units may be deployed in each column, but there must always be at least one unit in each column. Any number of units may also be deployed in the Reserve behind these columns.
The Attacker now deploys his units in the same manner as the Defender. The Defender cannot alter his deployment once the Attacker begins to deploy.
Players now reveal their units in the three columns by tilting them forward face-up so that their current CV faces the opposing column. Units in Reserve (if any) are not revealed until moved into a column.
Battle Deployment Example: Four defending units (white) are deployed, one per Right and Left columns and two in the Center. Five attacking units (black) are deployed, one per column and two in Reserve.
Defender deployment (as seen by the Defender, facing the Attacker):
                                     RESERVE

          RIGHT              CENTER               LEFT
Attacker deployment (mirrored, as seen by the Attacker, facing the Defender):
          LEFT               CENTER               RIGHT

                                     RESERVE
6.3 Battle Turns
The Attacker always has the first Battle Turn. Each Battle Turn has four phases, resolved in the sequence indicated:
- Battle Morale (8.6)
- Retreats (7.0)
- Combat (8.0)
- Reinforcements (9.0)
6.4 Multiple Battles
Several battles are likely to occur at the same time. Multiple battles are fought simultaneously, except the Active player must complete his Battle Turn (all four phases) in one battle of his choice before proceeding to another.
7.0 Retreats
Moving units out of a battle constitutes a Retreat and must be done before any units move or fire this Battle Turn. Units may retreat from any battle position, but are subject to Rout attrition (7.5) if currently engaged.
7.1 Retreat Destinations
The Attacker can only Retreat to towns that are friendly occupied, or to towns that were used to start or reinforce the battle. The Defender can retreat to any towns unavailable to the Attacker, but never to (or through) a town containing enemy units. Neither player can retreat from one battle to another battle.
To clarify retreats, the Attacker may mark with coins all potential retreat destinations.
7.2 Road Limits
Along each available road, a player can, per Battle Turn, retreat two units per Major road and one unit per Minor road. Retreating across rivers has no movement effect.
7.3 Speed
Units retreat at their normal movement rate. That is, infantry and artillery units retreat to an adjacent town; cavalry/leaders may retreat one extra town but must still obey the same retreat destination rules for both the town they pass through and their final destination. Units may not force-march on retreat.
7.4 Disruption
Units that retreat are Disrupted and turned face down. Disrupted units cannot reinforce any battle until they recover, which occurs at the end of the current Campaign Turn.
Example Retreat: the Defender has eight units in a battle and wishes to retreat. Two possible retreat roads exist, one major and one minor. Each battle turn, two units can retreat up the major road and one unit up the minor road for a total of three units. It will take at least three battle turns to retreat all eight units, always keeping at least one unit in each column to avoid rout. The last three units to retreat will be subject to voluntary rout, so making them cavalry is generally the best tactic.
7.5 Routs
A rout is a forced retreat that occurs when less than three units are attacked or if all friendly units in any one battle-column are eliminated by combat fire or by voluntary retreat. A routed player must (at the instant of rout) immediately retreat all remaining units, including those in the reserve, after taking the following attrition from each unit:
- Artillery: 2CV
- Infantry: 1CV
- Cavalry: 1CV (if engaged by cav).
- Leader: no penalty.
Normal road limits (Major/10 and Minor/6) apply to Routs, except they are halved (5/3) when the road used crosses a river. Units that cannot retreat (for any reason) are eliminated.
7.6 Regrouping
When a battle ends, the Victor may Regroup, meaning he can Retreat any/all units from the battle location or Reinforce the battle location with any/all adjacent units, subject to normal retreat/reinforcement road limits (Major 2/Minor 1). Units that Regroup must do so at the instant of victory and are Disrupted. See 7.4.
8.0 Combat
Each unit may move or fire in a Battle Turn, never both. These two options apply to individual units and players can move or fire units in any order to exploit any possible advantage.
8.1 Battle Moves
Three battle moves are possible, Engage, Disengage, and Redeploy.
Engage: moving unengaged units across the center line to Engage the enemy. This might be a move from your Center to engage the opposing enemy Center, or a move from your Reserve to reinforce your already engaged Left. Units cannot engage laterally (i.e. from an unengaged Left to an already engaged Center). Artillery units can never make engage moves.
Disengage: moving engaged units to unengaged positions. The reverse of any Engage move is possible, such as from the enemy Right to your own Left. Units Disengaging from your own battle line can only move to the Reserve. Units can never Disengage and Engage in the same move.
Redeploy: moving unengaged units to unengaged positions. Lateral movement, such as Left to Center, or Center to Right, is only possible as a Redeploy move.
Battle Moves Example: Engage: White unit A advances across the middle line from the Left to engage the Black Right. Disengage: White B disengages from Black Left to own Right wing. Redeploy: White unit C could Redeploy to any one of Left, Right, or Reserve. If White C was engaged, only a Disengage move to the Reserve is possible. Obviously, if White D does not exist, then any move by C would vacate the Center and thereby create a Rout. Lateral movement, such as Left to Center, or Center to Right, is only possible as a Redeploy move.
8.2 Cavalry Moves
Infantry and Artillery can perform only one battle move per turn, but Cavalry units can make one or two battle moves per Battle Turn. For example, cavalry can Redeploy from the Reserve to the Right and then advance to Engage the enemy Left.
8.3 Battle Fire
Any unit that moves in a Battle Turn may not fire. Units in the Reserve may never fire, nor be fired at. Units that are able to fire may do so once per Battle Turn, in any order desired.
To "fire" a unit, roll one die per CV (i.e. three dice for a 3CV unit). Depending on the situation, certain numbers rolled will score hits. For F1, every "1" thrown scores one hit. For F2, every "1 or 2" thrown scores one hit. For F3 every "1, 2, or 3" thrown scores one hit.
- INFANTRY: units must be Engaged to fire and generally have F1.
- CAVALRY: units must be Engaged to fire and generally have F2. Cavalry units get F3 on the first firing turn after they engage or they are engaged, to reflect shock.
- ARTILLERY: units have two ranges. Long range allows fire at F1 into enemy units in the opposing battle column, but not when the column is engaged by friendly units at the instant of fire. When engaged, artillery units can only fire at Short range. This gives F2, but only on the first turn after being engaged. Thereafter, the guns fire at F1 until the column is no longer engaged.
8.4 Combat Losses
For every "hit" scored one enemy unit is reduced one step by rotating it (anti-clockwise) until the new lesser CV faces the opposing player. Each hit must be taken from the highest CV unit (owner's choice if ties exist) at the instant of fire. When a 1CV unit takes a hit, it is eliminated.
8.5 Squares
Infantry units (only) can form Square as a defense against cavalry. To "form square" or to "break square" is considered a Battle Move for each unit, so it may not otherwise move or fire. Units may form or break square while engaged and units in square may retreat normally. To indicate a unit is in square, stand it upright so its label is visible to both players. Squares alter the firepower of units:
- Engaging cavalry are reduced to F1, and get no shock bonus.
- Engaging Infantry are increased to F2.
- Infantry in square have F1.
- Artillery fire into squares at F2 (long range).
Targeting: if some enemy units in the same engagement are in square, and some not, the firing player must specify which formation is being targeted. Each firing unit may target the units in square or the units not in square. Hits are allocated to the strongest units within each target formation.
8.6 Battle Morale
Morale checks are the first step of Battle Turns. Engaged 1CV units (only) are subject to Morale rolls. For each engaged 1CV unit, roll 1d6:
- 1-3: Unit has Bad morale and must make a (forced) Disengage battle move.
- 4-6: Unit has Good morale and may conduct any desired battle move or fire.
Note: leaders give a morale bonus to friendly units in the same column. See 10.2.
9.0 Reinforcements
As the last step in each Battle Turn you may reinforce a battle with friendly units from adjacent towns. Reinforcements are added directly to your Reserve, where they can be used, like any other reserve units, in your next Battle Turn.
9.1 Reinforcement Limits
One or two units may reinforce along each Major road per Battle Turn. One unit may reinforce along each Minor road. Rivers have no affect on these limits. Units may reinforce along a road section regardless of how many units moved along the section during the movement phase.
9.2 Victor Bonus
Units that retreat from one battle may not reinforce another battle. However, the victorious units in a battle can (at the normal limits) reinforce another adjacent battle. See 7.4.
10.0 Leaders
Napoléon, Blücher, and Wellington are leaders. They provide movement and combat advantages. Blücher can only command Prussian units, and Wellington British units. Leaders are one-step units that are eliminated if forced to take a hit. The loss of Napoléon is sudden defeat for the French. Leaders ignore deployment or road limits.
10.1 Force-March Bonus
An activated leader (revealed face-up) in his current location provides bonus movement to friendly units in the same location. The effect is to give +1 to the die-roll of any units force-marching from that location. Hence, only natural rolls of 1 or 2 result in straggler attrition. Leaders may also order a force-march during a Night turn at normal (roll of 1–3) attrition. Leaders can move normally (one or two towns) after commanding.
10.2 Morale Bonus
A leader may be deployed in a battle and can move from one battle column to another as a battle move. They can, like cavalry, make one or two battle moves. A leader has no firepower, but provides +1 to the Morale rolls (See 8.6) of friendly units in the same battle column. Leaders do not need to be engaged with the troops in the column to provide the morale bonus.
11.0 Supply
The Allied armies have three supply bases:
- Brussels: British (1 unit)
- Ghent: British (1 unit)
- Liège: Prussian (2 units)
If the French occupy a base with at least one unit, the respective Allied army is reduced as noted above. Units removed are chosen by the Allied player at the end of each French Campaign Turn (after any battles in that turn are resolved) for as long as the occupation is maintained.
Example: the French occupy Liège and Brussels. One British and two Prussian units are eliminated at the end of every French turn.
Occupation of a base must be maintained by at least one French unit to be effective. If a base is vacated or recaptured, the attrition ceases. The French have no supply problems.
12.0 Victory
The French army is defeated when reduced to nineteen (19) units or less. The British army is defeated when reduced to nine (9) units or less. The Prussian army is defeated when reduced to twelve (12) units or less. Defeats are effective only after all battles in the current Campaign Turn are resolved. All remaining units of a defeated army are eliminated.
12.1 French Victory
The French win only if both Allied armies are defeated before time expires.
12.2 Allied Victory
The Allies win if the French army is defeated, if Napoléon is eliminated, or if the French do not win before time expires.
12.3 Stalemate
It is possible for a battle to end with draw where all three armies are defeated.
13.0 Optional Rules
13.1 Three-Player Game
Two players command the Allies: one Prussian and one British. The Allied players follow the normal rules except that each has ultimate control over their respective forces. The Allied players are forbidden from communicating with each other except during initial Deployment and Allied Night turns.
13.2 Command Control
To reflect the difficulty of coordinating the simultaneous attack of two separate armies, two groups may not attack a single group unless both attacking groups are adjacent and directly connected by road.
Example: Allied groups in Waterloo and Ligny cannot both attack a French group in Quatre Bras; one group could attack while the second reinforced the battle under normal rules. But Allied groups in Waterloo and Nivelles, because both locations are adjacent and directly connected by road, could both attack Quatre Bras simultaneously.
13.3 Corps Integrity
Within any single battle column (Left, Center, Right) only engaged Infantry units belonging to the same corps may FIRE in any one Battle Turn. Infantry from other corps may disengage or pass.
Corps designation is found in the upper left corner of the blocks. For example, British infantry forces consist of I, II, and R Corps.
Corps Integrity applies to both attacking and defending Infantry firing in any position on battleboard. Hits are still applied as normal.
Artillery and Cavalry units from any corps may intermingle and fire as normal.
Historical Order of Battle
The following is the historical Order of Battle (OB) for the three armies, used for Historical Deployment (see 3.2). Each unit is listed with its commander, unit type, starting Combat Value, and starting town.
France — Armée du Nord
Napoléon — HQ — Beaumont
Left Wing (Ney)
I Corps (d'Erlon)
| # | Commander | Type | CV | Town |
|---|---|---|---|---|
| 1 | Quiot | Infantry | 2 | Soire |
| 2 | Donzelot | Infantry | 3 | Soire |
| 3 | Marcognet | Infantry | 2 | Soire |
| 4 | Durutte | Infantry | 2 | Soire |
| — | Jacquinot | Cavalry | 2 | Soire |
II Corps (Reille)
| # | Commander | Type | CV | Town |
|---|---|---|---|---|
| 5 | Bachelu | Infantry | 2 | Soire |
| 6 | Jerome | Infantry | 4 | Soire |
| 7 | Girard | Infantry | 2 | Soire |
| 9 | Foy | Infantry | 3 | Soire |
| — | Pire | Cavalry | 2 | Soire |
Right Wing (Grouchy)
III Corps (Vandamme)
| # | Commander | Type | CV | Town |
|---|---|---|---|---|
| 8 | Lefol | Infantry | 2 | Beaumont |
| 10 | Habert | Infantry | 3 | Beaumont |
| 11 | Berthezène | Infantry | 3 | Beaumont |
| — | Domon | Cavalry | 2 | Beaumont |
| — | Dogereau | Artillery | 2 | Beaumont |
IV Corps (Gérard)
| # | Commander | Type | CV | Town |
|---|---|---|---|---|
| 12 | Pécheux | Infantry | 3 | Philippeville |
| 13 | Vichery | Infantry | 2 | Philippeville |
| 14 | Hulot | Infantry | 2 | Philippeville |
| — | Mausin | Cavalry | 2 | Philippeville |
| — | Balthus | Artillery | 3 | Philippeville |
Central Reserve (Napoléon)
VI Corps (Lobau)
| # | Commander | Type | CV | Town |
|---|---|---|---|---|
| 19 | Simmer | Infantry | 2 | Beaumont |
| 20 | Jeannin | Infantry | 2 | Beaumont |
| 21 | Teste | Infantry | 2 | Beaumont |
| — | Noury | Artillery | 2 | Beaumont |
Imperial Guard (Drouot)
| Commander | Type | CV | Town |
|---|---|---|---|
| OG Friant | Infantry | 4 | Beaumont |
| MG Morand | Infantry | 3 | Beaumont |
| YG Duhesme | Infantry | 3 | Beaumont |
| HC Guyot | Cavalry | 4 | Beaumont |
| LC Lefebvre | Cavalry | 3 | Beaumont |
| A1 St. Maurice | Artillery | 4 | Beaumont |
| A2 St. Maurice |
Cavalry Reserve (Kellermann)
| Commander | Type | CV | Town |
|---|---|---|---|
| 1C Pajol | Cavalry | 3 | Philippeville |
| 2C Exelmans | Cavalry | 4 | Philippeville |
| 3C Kellermann | Cavalry | 4 | Philippeville |
| 4C Milhaud | Cavalry | 3 | Philippeville |
French totals
| Units | CV | |
|---|---|---|
| HQs | 1 | — |
| Infantry | 20 | 51 |
| Artillery | 7 | 21 |
| Cavalry | 10 | 29 |
| Total | 38 | 101 |
Anglo-Dutch — Army of the Low Countries
Wellington — HQ — Brussels
I Corps (Prince of Orange)
| # | Commander | Type | CV | Town |
|---|---|---|---|---|
| 1Br | Cooke | Infantry | 4 | Braine-le-Compte |
| 3Br | Alten | Infantry | 4 | Braine-le-Compte |
| 2Ne | Perponcher | Infantry | 3 | Nivelles |
| 3Ne | Chassé | Infantry | 2 | Nivelles |
| — | Artillery | Artillery | 4 | Braine-le-Compte |
II Corps (Hill)
| # | Commander | Type | CV | Town |
|---|---|---|---|---|
| 2Br | Clinton | Infantry | 4 | Grammont |
| 4Br | Coleville | Infantry | 4 | Grammont |
| 1Ne | Stedman | Infantry | 2 | Grammont |
| — | Artillery* | Artillery | 2 | Grammont |
Reserve (Wellington)
| # | Commander | Type | CV | Town |
|---|---|---|---|---|
| 5Br | Picton | Infantry | 4 | Brussels |
| 6Br | Cole | Infantry | 3 | Brussels |
| 1Bk | Frederick | Infantry | 3 | Brussels |
| — | Artillery | Artillery | 3 | Brussels |
Cavalry Reserve (Uxbridge)
| Commander | Type | CV | Town |
|---|---|---|---|
| HC Somerset | Cavalry | 4 | Ninove |
| HC Ponsonby | Cavalry | 3 | Ninove |
| LC Vivian | Cavalry | 3 | Ninove |
| LC Dornberg | Cavalry | 3 | Mons |
| Ne Collaert | Cavalry | 2 | Nivelles |
* Label shows 4cv but should be 2cv.
British totals
| Units | CV | |
|---|---|---|
| HQ | 1 | — |
| Infantry | 10 | 33 |
| Artillery | 3 | 9 |
| Cavalry | 5 | 15 |
| Totals | 19 | 57 |
Allies (British + Prussian) totals
| Units | CV | |
|---|---|---|
| HQ | 2 | — |
| Infantry | 26 | 80 |
| Artillery | 7 | 23 |
| Cavalry | 9 | 26 |
| Totals | 44 | 129 |
Prussia — Armee des Niederrheins
Blücher — HQ — Namur
I Corps (Zeithen)
| # | Commander | Type | CV | Town |
|---|---|---|---|---|
| 1 | Steinmetz | Infantry | 4 | Charleroi |
| 2 | Pirch II | Infantry | 4 | Charleroi |
| 3 | Jagow | Infantry | 3 | Ligny |
| 4 | Schutter | Infantry | 2 | Gembloux |
| — | Röder | Cavalry | 2 | Gembloux |
II Corps (Pirch)
| # | Commander | Type | CV | Town |
|---|---|---|---|---|
| 5 | Tippelskirch | Infantry | 3 | Namur |
| 6 | Krafft | Infantry | 3 | Namur |
| 7 | Bause | Infantry | 3 | Namur |
| 8 | Böse | Infantry | 3 | Namur |
| — | Jurgass | Cavalry | 4 | Namur |
III Corps (Thielmann)
| # | Commander | Type | CV | Town |
|---|---|---|---|---|
| 9 | Borche | Infantry | 3 | Ciney |
| 10 | Kemphen | Infantry | 2 | Ciney |
| 11 | Luck | Infantry | 2 | Ciney |
| 12 | Stülpnagel | Infantry | 3 | Ciney |
| — | Hobe | Cavalry | 2 | Ciney |
IV Corps (Dennewitz)
| # | Commander | Type | CV | Town |
|---|---|---|---|---|
| 13 | Hake | Infantry | 3 | Liège |
| 14 | Ryssel | Infantry | 3 | Liège |
| 15 | Losthin | Infantry | 3 | Liège |
| 16 | Hiller | Infantry | 3 | Liège |
| — | Pr. Wilhelm | Cavalry | 3 | Liège |
Prussian totals
| Units | CV | |
|---|---|---|
| HQ | 1 | — |
| Infantry | 16 | 47 |
| Artillery | 4 | 14 |
| Cavalry | 4 | 11 |
| Totals | 25 | 72 |
Publishing History
- 1974: First edition published by Gamma Two Games.
- 1977: Second edition published by Avalon Hill under license.
- 1992: Third edition published by Columbia Games.