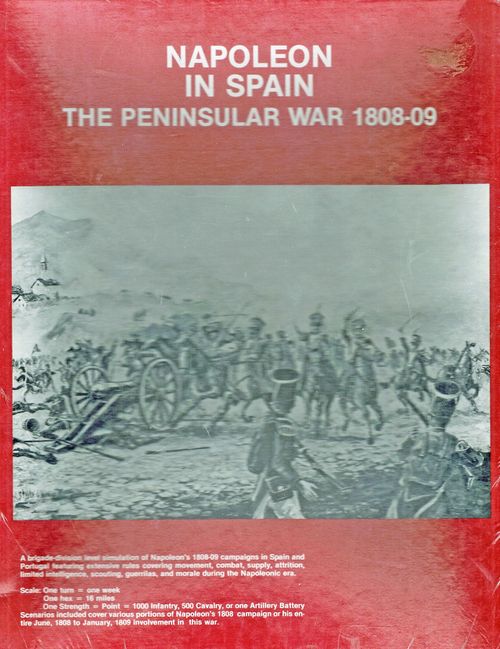
Napoleon in Spain: The Peninsular War 1808-09
Napoleon in Spain: The Peninsular War 1808-09 Rulebook
Table of Contents
Table of Contents
- A. Introduction
- B. Components
- C. The Map
- D. Counters
- E. Reference Material
- F. Sequence of Play
- G. Generation of Orders
- H. Reinforcements and Replacements
- I. Movement
- J. Forced Marches
- K. Combat
- L. Battle Resolution
- M. Pursuit
- N. Cities and Forts
- O. Supply
- P. Attrition
- Q. Fleets
- R. Guerrillas
- S. Limited Knowledge of Enemy Forces
- T. Lines of Communication
- U. Encamped Units
- V. Special Units
- W. Scenarios
- X. Cards and Tables
A. Introduction
The game simulates, at the strategic-operational level, the 1808-09 campaign in Spain, which pitted the French against the Anglo-Spanish-Portuguese coalition. The rules include some limited scenarios (playing time 1 or 2 hours) and one scenario covering the entire campaign (about 8 hours of play). All of them can be played solitaire or with two or more players.
B. Components
Map, rules, 400 counters, reference cards and 4 cards for organizing the armies.
C. The Map
- The map reproduces the political borders existing in the period 1808-14. The scale is 16 miles per hex.
- The map carries a key to the terrain features, which reads: City, Garrison Value, Major road, Fort, Minor road, Province border, Peak, Mountainous terrain, Rough terrain, Minor river, Clear terrain, Major river, Port.
- Each individual hex is identified by a number printed on the map.
D. Counters
[The counter diagram is on p. 1 of the original English rules, which are not in this copy.]
Key to reading: Front; Back; Size; Division; Initiative value; Unit; Corps/Army I.D. (Subordination); I.D. number; Brigade; Corps; Leader; Initiative; Name; Order; Army C.O.; Strength points; 1 hex movement = 1 hex of movement; Movement points; Supply Wagon; S.Ps; Depot; Combat General Supply Status; Depleted General Supply; Full strength, reduced strength; Combat fleet, transport fleet; Garrison strength points or Siege markers; Infantry S.P. Marker; Cavalry; Artillery; Dummy; Siege artillery.
Terms and symbols: x = Brigade; xx = Division; xxx = Corps; xxxx = Army.
- Counters represent land and naval units, leaders, and other things.
- Only the following counters move on the map: land and naval units, leaders, guerrillas, and dummies. The others denote only the conditions of the leaders or of the map.
- Each naval unit represents a war squadron, or a transport fleet able to carry 10 Strength Points (SP).
- Leader and unit counters show the name of the leader (and/or the subordination of the unit) and the initiative value (see section I).
- Counter colours: Blue = French; White = Spanish; Red = English; Green = Portuguese.
- SP counters are used to show how many SP a unit has. Each SP represents 1000 infantry, or 500 cavalry, or one heavy artillery battery.
- SP counters are coloured according to morale type (type 'A' = grey; type 'B' = green). Morale varies with nationality and reflects the state and training of the troops, and it affects the outcome of combat. France = 3 (grey), 2 (green). England = 4, 3. Spain and Portugal = 2, 1. Guard (all nationalities) = 5, 5.
- The number of SP each unit has is stated in each scenario. SP counters are used to keep track of that number on the organization cards. The SP counters of a single unit must all be of the same morale type (all grey or all green).
- Units occupying the same hex for an entire player-turn may freely exchange the SP they have.
- Garrison SP counters represent SP not belonging to any unit (see 12). They always have morale type 'B' and may be freely created by removing SP from a unit and leaving the garrison in the hex it occupies. They may be reincorporated into any unit (except the Guard) of their own nationality; in that case the SP are added to the unit's SP, even if this changes them from type 'B' to type 'A'. Garrison SP may be placed in any hex (except those entirely of sea).
- No more than 5 garrison SP may occupy the same hex. French control of cities and forts is represented by placing on them a garrison SP counter immediately after capture (see 12).
E. Reference Material
- The organization cards record the SP possessed by each unit.
- In the box beneath a leader's symbol are listed the units historically under his orders. Beneath each unit symbol are numbered boxes; the SP counters are placed in them, arranged so as to show the unit's current total of SP.
- The current location of each unit is simulated by placing it on the map, or on the organization card beneath a leader's symbol. If it is placed beneath a leader, it is considered to be under that leader's command, in the same hex the leader occupies. In this case, the movement of the leader is considered equivalent to the movement of the unit. A unit may be detached or moved individually, if the leader has not yet moved in the current turn. Any "free" unit may be incorporated into the force of any leader, or transferred from one leader to another (provided it is of the same nationality). Only Portuguese units may have a leader of a different nationality (English), after October 1808 (turn 17). Such actions may take place only if the leader and the units involved remain in the same hex for a whole turn.
F. Sequence of Play
- Each turn equals one real week and is divided into a French player-turn, followed by an Allied player-turn. Each player-turn is divided into the following phases:
- a. Generation of orders: the player in phase may roll one die to check whether his current Army C.O. has succeeded in creating an Order (see G.).
- b. Siege phase: siege situations are resolved (see N.).
- c. Reinforcements and replacements: arrive as specified by the rules (see H.).
- d. Movement: units (or groups of units) move one at a time. [The rest of this line is blacked out and illegible in the scan.]
- e. Combat and attrition: see K., L. and P.
- The turn ends when both players have finished their turns.
- Update the turn record and move on to the next turn. The rules of each scenario state how many turns are played.
G. Generation of Orders
- The player in phase rolls one die to check whether his current Army C.O. has produced an Order.
- For this to happen the following results are needed: Napoleon: 1-5; Murat = 1-3; Joseph = 1-2; Spanish Junta = 1-2; Wellesley = 1-4; Darlymple = 1-2; Moore = 1-3.
- An Order, once created, must immediately be assigned to a unit that is at most 16 cavalry movement points from the Army C.O. An Order may not be kept for later turns. The "line" of the Order must not cross hexes occupied by the enemy.
- An Order is used immediately, allowing the unit/leader that receives it to move in that turn without making an initiative roll (see I.1.a).
- Army C.O.s that cannot trace a Line of Communication (LOC) to their Army Depot may not issue Orders (see T.).
- After October 1808 (turn 17), Portuguese units may receive Orders from English commands.
H. Reinforcements and Replacements
- At each turn, the player in phase checks the tables on pages 17-19 of the original rules to see whether and where he receives reinforcements and replacements this turn.
- If they are provided, place them on the indicated hexes.
- All French reinforcements appear at Bayonne (2602) or Perpignan (3804). All English reinforcements arrive at hex 0102, with transport fleets. If no transport is provided in the current turn, the English player may consider the reinforcements to be part of a transport that arrived in the previous turn, within the limits of that transport's capacity. All Spanish reinforcements appear in the cities and forts (at choice) of the indicated provinces; Portuguese ones appear at Lisbon, Coimbra or Oporto. Guerrillas appear in any hex of the indicated province.
- Replacements are placed as indicated by the table (original p. 19), and their morale (except for the Guards) becomes the same as that of the unit to which they are aggregated.
- If all possible entry hexes are occupied by the enemy, reinforcements must delay their entry until the hex is liberated.
- Every 4 turns (4, 8, etc.) Spain determines its replacements for each Province. See the 'Spanish Replacements Chart'.
- Artillery replacements arrive at any leader able to trace a LOC to a friendly Depot.
I. Movement
- Units/leaders may move in three different ways (applied in this order):
- a. Orders: a unit/leader that receives an Order may move in that turn without making an initiative roll.
- b. Command radius: if the unit/leader is at most 3 cavalry movement points from the Command (Army C.O.), it may use the initiative value of the Command, not its own. This applies only to movement (not to reinforcements, retreats and battles). For this opportunity, the Command must be able to trace a LOC to its Army Depot.
- c. Own initiative: if the unit/leader is not in the conditions of a. and b., it may attempt to move on its own initiative. Two dice are rolled. If the result is equal to or less than the initiative value of the unit/leader, then that unit or those units may move this turn. This move must be made before any other roll for initiative. Such initiative rolls must also be made when attempting to Retreat before a Battle, to bring Reinforcements to a Battle, or to continue moving after a unit has been involved in combat (see J.). The initiative value of units/leaders grouped with a Supply Wagon is increased by 1 point.
- When two or more units/leaders occupy the same hex, always use the initiative value, for all the units, of the senior leader in rank. If all the leaders are of the same rank, Spanish and Portuguese (pre-October) players choose the leader with the lower initiative value; French and Anglo-Portuguese (post-October) players choose freely among the available leaders.
- Fleets, Supply Wagons, Guerrillas and Dummies may always be moved without regard to initiative. To confuse the opponent, however, false rolls may be made for the Dummies. Garrison SP may not move until they are incorporated into a unit (see E.3).
- Units (or groups) always move one at a time. Units/leaders that begin their movement in the same hex may carry out the movement phase together; otherwise, units/leaders must be moved one at a time, completing one movement before starting another.
- The player is free to move as many units as he wishes; the only limit is that if a unit is part of a group and the group, in its movement, leaves the unit behind, that unit may not continue to move alone.
- Units or groups are moved from hex to hex until their movement points are exhausted. The "cost" of points and their availability depend on the type of unit and of terrain, and on the presence of the enemy along the route. Usually one SP spends one point to enter a hex; but this may vary according to the type of terrain. Certain hex sides, moreover, cause an extra cost, as indicated in the Terrain Effects Table.
J. Forced Marches
- Except for Supply Wagons, Fleets, Guerrillas, garrison SP, Siege Artillery and Dummies, units may increase their movement point availability with Forced Marches, at the player's choice, at any moment of a group's movement. The movement point availability of all available SP may be increased (at the player's choice) by 1 to 3 PM, but this increases Attrition (see P.). Units may use this extra movement capacity only once per turn.
- No unit may ever spend more PM, for each SP type, than its normal availability plus the 3 PM of Forced Marches, if usable.
- Units or SP that cannot keep pace with the rest of the group may be left behind. For artillery this will be more difficult, since it must always be grouped with a leader (otherwise it is eliminated). This restriction does not apply to the French Guard, nor to all English artillery, which may be attached to the appropriate units.
K. Combat
- When units of one player enter a hex in which enemy units are present, a Battle takes place (except in cases R, N, L-15, K-5), which must be resolved before any other action in the game.
- If in a City or Fort hex, the defender may choose whether to fight in the open or to take refuge in the city or fort. In the latter case the attacker decides whether to Attack (a normal battle against the enemy besieged in the city or fort; see the modifications on the Combat Table), to lay Siege immediately (see N.), or not to attack at all.
- Before the battle starts, the defender may attempt to Retreat before the battle. This is one of the two cases (see Reinforcing a Battle, K.6) in which a player not in phase may voluntarily move his units. To carry out this Retreat, the leader of highest rank among the defenders (see I.2) must successfully make an initiative roll, applying the following modifiers:
- Defender in rough terrain, or with cavalry SP equal to the attacker's = +1
- Attacker entered the hex by crossing a side of mountain hex or major river = +2 (in this and the following case the +1 for rough terrain does not apply)
- Attacker entered by crossing a side of Peak hex = +3
- Retreat attempted across a major river side, or Attacker with a cavalry SP ratio of 2:1 or more, or Defender Encamped = -2
- Defender leaves behind a rearguard whose strength is such that it need not suffer automatic defeat = Free Retreat (see L.16).
- Note: besieging artillery may not make this retreat before the battle.
- If successful, the defending force may retreat into any adjacent hex (see P.5). All SP must be able to retreat into the chosen hex, otherwise they are eliminated; such a move may not cost any type of SP more than 2 PM if it crosses a river hex side. If all the hexes available for retreat are occupied by enemies, the defending force must choose a hex and attack the enemies present there, with a negative column shift on the Combat Table equal to the number of hexes it has retreated through during the current turn.
- Before a Retreat, Pursuit (see M.) and Attrition (P.5) losses may follow. Use the normal rules, bearing in mind that the Pursuit Number is equal to the number of hexes of retreat in the current turn. [The source cross-reference reads "N" here; the Pursuit section is headed M in this copy.]
L. Battle Resolution
[The section letter for this heading is hard to read in the scan. It is taken as L because the text's own cross-references (L-15, L-16) point here.]
- If the defender does not retreat, the Battle takes place.
- Add up the artillery SP of each side. Determine the losses caused by the artillery preparatory fire (see the Artillery Bombardment Table) and remove them immediately. Certain results (marked with an asterisk) increase by one point the die roll of the force that inflicts those losses in the subsequent Battle.
- Add up the infantry and cavalry SP of the attacker and divide them by those of the defender; the result (a percentage) identifies the column to be used in the Combat Result Table.
- The column to be used may be modified by Morale, leader value, terrain and Supply. See the table. These modifiers are cumulative.
- For the modifiers, always use the leader of higher rank. In case of a tie, French and English players may choose the leader they prefer; Spanish and Portuguese players must choose the worse one. If Anglo-Spanish forces coexist in the hex before the battle, use the leader value of the nation with more SP in the hex and add one to it (the Anglo-Spanish forces were poorly coordinated).
- Once the column is determined, the attacker rolls a die and obtains, on the table, 2 numbers, one of which is in parentheses.
- The number above indicates the Loss Level of the attacker; the number below indicates the Loss Level of the defender. The number in parentheses indicates the faction forced to retreat one hex, which is considered the loser.
- To determine SP losses, cross the Loss Level with the current SP strength of each arm (infantry, cavalry and artillery), for each player, on the Loss Level Chart. The number indicates the SP lost by each arm.
- After the losses are removed, the losing side immediately retreats into an adjacent hex (following the rules on Retreat before combat), and in addition suffers the losses from Attrition and Pursuit. If it must retreat into a hex occupied by the enemy, it must attack them, with its morale reduced by its Loss Level in the previous Battle (if this brings the morale to '0', the entire force surrenders and is eliminated). If the defeated side's Loss Level is 4, all its units, within the possible limits, must retreat into different hexes, and its Supply Wagons and Siege Artillery are considered captured. Attacking units must always retreat into the hex from which they attacked.
- For combat modifiers, if a force contains different morale levels, the owner uses that of the larger force in SP, or chooses in case of a tie. However, at least half of the losses suffered must be taken from the arm to which the morale value used for the modifiers belongs.
M. Pursuit
- After a battle, the cavalry SP of the winner may pursue the defeated forces in retreat. For each victorious SP in the battle hex, roll a die: if the result is less than or equal to the Loss Level of the defeated side, the loser must eliminate one SP of its choice. Modifiers to the die roll:
- For each cavalry SP in defence = +1 to a single die roll.
- Losers retreating across rivers = -1.
- Losers defending in rough terrain only = +1.
- Defenders behind a mountain hex side = +2.
- Defenders behind a Peak hex side = +3.
- Pursuit carried out by the French Guard cavalry = -1.
- Cavalry which together has morale type 'B' = +1. [The scan prints "tipo 'E'" here; read as 'B', the only morale type used in the game.]
N. Cities and Forts
- If taken by assault, the defenders in a City/Fort add to their total SP the intrinsic garrison value of the City/Fort. Losses, however, are never removed from this intrinsic garrison. These intrinsic SP are always considered morale 'B'. In assaults, both sides conduct a normal battle (applying the modifiers for the City/Fort), but they ignore all retreats.
- Cities and Forts in Spain and Portugal that are not occupied by French garrison SP are considered to have their own intrinsic garrison, whose value in SP (infantry, morale 'B') is printed on the map.
- Intrinsic garrisons are never reduced or eliminated. They count as opposing forces only when the City/Fort is in French hands (see N.1).
- If the defender's Loss Level is 4, the City/Fort is occupied and all defending units (except the intrinsic garrison) are eliminated. N.B. This is the only way in which the French can conquer a City/Fort by assault; City/Forts held by the French are conquered by eliminating the French SP defending them, without having to fight the intrinsic garrison.
- Cities and Forts may also be taken by Siege (during the Siege Phase). To lift the siege, the attacker must keep in the hex a number of SP greater than that of the defenders (including the intrinsic garrison); if the besieging force is reduced below this number, the siege is broken and must be restarted, if the besieger brings further forces. Each turn of siege must be recorded with the appropriate numbered counter. Each turn, two dice are rolled to see whether the defender decides to surrender, using the following formula:
- a. (Number of continuous siege turns + 2) divided by 4 (rounded up), plus 2, equals the Siege Number of the current turn. The roll of the 2 dice, for the defender to surrender, must be less than or equal to the Siege Number.
- b. Modifiers: -2 (to the dice) against Cities (except Saragossa).
- The same force may assault and maintain the siege in the same turn.
- To improve the efficiency of assaults and sieges, Siege Artillery may be used. For each turn in which it is used, add up the SP of the Siege Artillery present in the hex and roll 2 dice (during the Siege Phase, before the dice for the siege of that turn). If the result is less than or equal to the total SP firing, add 4 turns of siege and 1 to the assault dice for that turn.
O. Supply
- There are two kinds of supply: Combat supply (arms, ammunition) and General supply (food, equipment), which affect combat and attrition respectively.
- Units are Completely Supplied for Combat if, when a battle occurs, they are grouped with a Supply Wagon. Otherwise they are Partially Supplied for Combat.
- After each Battle, for each force in Partial Supply, roll 2 dice. If the result is greater than 8, the force becomes Out of Supply. This check is never made for forces composed entirely of cavalry.
- Units Out of Supply (marked with the 'Out of Supply' counters) remain so until they are grouped with a Supply Wagon. This status carries a -4 modifier in the column used on the Combat Result Table.
- Units may be in General Supply in two ways: a. if grouped with a complete Supply Wagon (front side) at the beginning of the Movement Phase; b. they may forage on their own, using the 'Forage Supply Table' at the beginning of the Movement Phase.
- Each complete Supply Wagon may supply one or two units of each type (without counting how many SP are formed); Brigades count as half a unit. If a Wagon is used to supply only 1 unit, it is turned over to the 'No General Supply' side only if the result of a die roll is 4-6; if it supplies 2 units, this effect is automatic.
- Use of the 'Forage Supply Table': the number indicated for the nationality, after the modifiers shown, gives the Supply Points available. Each Supply Point supplies 1 unit for a whole turn (Brigades count as half a unit). Supply Points may not be accumulated. Players may use this option before risking their Wagons; if they fail to resupply in this way, they may always resort to the Wagons.
- Any group that cannot supply at least half of its units is considered 'Without General Supply' as far as Attrition is concerned. If it can supply more than half, but not all, of its units, it is 'Short of General Supply' (see P.).
- Supply Wagons on the reverse side ('No General Supply') may not provide General Supply (though they may still provide Combat Supply) until they are taken to their Army Depot (see T.3); in that case they are immediately turned back to the front side.
- The General Supply status is determined for all units at the beginning of the Movement Phase, and remains the same for the whole turn.
P. Attrition
- Attrition is determined after the Supply status and Movement, but before Battles. All groups of units, even if they remain immobile, must carry out this check each turn (see also P.5).
- Use the Attrition Table. The number indicates the Loss Level that must be removed from the group.
- Calculate the losses for the three arms separately, making however only one die roll on the Attrition Table.
- Before a Battle, Attrition must always be checked. If the units continue to move, Attrition is checked again at the end of the movement or before the next battle, and so on.
- Units in retreat (after a battle, or before one) must carry out a special Attrition check. Each retreat hex counts as 1 PM of Forced March; these points are cumulative within the same turn, so no unit may retreat more than 3 hexes during the enemy's turn. Units that may not make Forced Marches may not retreat BEFORE the battle (except Supply Wagons, which may retreat 2 hexes), but only AFTER it. These restrictions do not apply to units reinforcing a battle.
- The General Supply status is determined only once per turn and remains the same until the next turn, as far as Attrition is concerned.
Q. Fleets
- In a few exceptions, Fleets move like land units. They may never enter all-land hexes, nor make Forced Marches, nor suffer the effects of attrition.
- Fleets have 16 PM per turn and pay 1 PM per hex.
- Transport Fleets may load up to 10 SP of any type and nationality. To load, the Fleet must be in a port containing land units, spend 3 PM, and then may continue moving. In the same turn, no more than one Fleet may transport Spanish units. To unload, the Fleet spends another 3 PM. In the turn in which they are transported, land units may not move. War Fleets may transport up to 3 SP of any type; Supply Wagons and English Depots count as 3 SP. Land units may never spend the entire turn, from beginning to end, aboard a Fleet.
- To board, units must pass the control of the initiative; and they may never board as a consequence of a retreat, either before or after the battle.
- War Fleets, if in a coastal hex, may help the defence of land units. For this, the Fleet must be at least adjacent to the attacked hex, and decide to take part. They may also take part in attacks, if the attack is on a Port (City or Fort) whose intrinsic garrison is not above 5. On open ground a Fleet counts as 5 SP of Artillery. Enemy artillery may declare, in the bombardment, its intention to target the Fleet; if it is hit with a result of '1' on the Artillery Bombardment Table, the Fleet is turned to its reduced-strength side, which is worth 2 SP of Artillery; if it is reduced again, the Fleet is eliminated. If the Port is besieged, the Fleet may decide to take part as Siege Artillery instead of normally; in this case, however, it immediately suffers return fire from the intrinsic Artillery of the City or Fort.
R. Guerrillas
- Guerrilla counters, as indicated by the Spanish Replacement Table, are special units, available only to the Spanish and Portuguese forces.
- They move 1 hex per turn; except for all-sea hexes and province-border sides, they may move wherever they like.
- They never roll for Initiative, Supply or Attrition.
- When French units enter a hex with Guerrilla counters, the other player decides whether to activate them or not. In the first case a normal Battle follows. In the second, they are ignored, and the French may not attack them.
- If a Battle takes place, the French player does not then have to roll for Attrition. The command value of the Guerrillas is '9' and their morale is type 'B'. Guerrilla units ignore losses if they are attacked by infantry across Peak, mountain or rough-terrain hex sides, or when they are in a City or Fort; and if they are attacked by cavalry across Peak or mountain hex sides, or when they are in a City or Fort. Otherwise the rules are normal, except that, when retreating, they may never enter hexes occupied by the enemy, under penalty of elimination. For forces other than Guerrillas, do not consult the Loss Level Chart, but remove 1 SP for each Loss Level. [The translation reads "forze non di Guerriglia" here; this is the printed wording, but the sense of the rule points to Guerrilla forces, so the reader should check it against the original English.]
- Whoever fights against Guerrillas never rolls for Supply.
- Units that stop to fight Guerrillas, if they win, continue moving normally (in practice they are considered never to have stopped).
- Guerrilla counters automatically destroy Supply Wagon units, Siege Artillery and Dummies if these are left without escort.
- No more than one Guerrilla counter may occupy the same hex. The Spanish Replacement Table indicates the maximum number of Guerrilla units that may exist in a given province. Once placed, they may never cross provincial borders.
- Guerrilla counters may besiege Cities/Forts, but may only attack when doing so.
S. Limited Knowledge of Enemy Forces
- The following rules always apply, unless the players agree otherwise.
- All units, except Supply Wagons (alone), Fleets and garrison SP, are kept face-down and may be shown to the enemy only in the following cases:
- a. All units (of both players) involved in a siege. The besieger may know the exact strength of the enemy (not vice versa).
- b. When enemy forces occupy the same hex (even momentarily), each player may see one enemy counter (chosen by the other player, except Supply Wagons, Fleets and SP counters). The strength and identification of a unit are revealed only if a Battle takes place, or if a cavalry force defeats enemy cavalry in the hex, in which case the winner may discover the strength and identification of the enemy units. (Besieging forces are always revealed.)
- Dummy counters may be used as normal counters, to deceive the enemy about one's real movements.
- If operating alone, Dummies are eliminated if they find themselves in the same hex as an enemy unit. If part of a Leader's force (on the Organization Card), a Dummy may be shown to the enemy in place of a real unit (see S.2.b); even in that case it is immediately eliminated.
- When no longer in the same hex as an enemy force, units are immediately turned face-down again.
T. Lines of Communication
- A LOC is considered open if it can be traced as a line of hexes from the Depot to the unit or leader in question, spending no more than 3 PM of Artillery movement along the way.
- Hexes occupied by enemy forces may not be part of a LOC, unless a friendly force not under siege occupies the same hex.
- The French Depot is represented by the Staff counter. The English Depots (and Portuguese ones, after October) are the Depot counters, unloaded at the Ports. The Spanish Depots (and Portuguese ones before October) are in all the Cities and Forts of the respective countries. Spanish Supply Wagons must always return to Depots that are also Ports.
U. Encamped Units
- Units/leaders that remain stationary for an entire turn are considered Encamped: their counters are turned over to the non-hidden side. They remain so until they attack, or until the owner decides to turn them back to the hidden side and return them to action (this requires an initiative roll).
- Supply, Attrition and combat capacity are conditioned by the fact that a unit is Encamped (see the Reference Tables).
- Units may not be Encamped in Forts or Cities.
V. Special Units
- The French National Guard may never move south of the Ebro (hexes 2205-3112).
- Independent units and leaders may be created in any hex in which there are SP that can be assigned to them. They may be created or disbanded at the player's discretion. Regular units/leaders may be created only in their own province (Spanish and Portuguese), or in the hexes occupied by the respective Army or Corps Leaders (French and English).
- The English Light Division (L) and the Legion 'Loyal' Lusitana (LL) may behave as cavalry for the screening effects mentioned in L.15. To simplify play, SP from the other English divisions may be transferred only to the Light Division.
W. Scenarios
- Scenario W.1 (June-August 1808): see pp. 9-10 of the original rules for the initial set-up and victory conditions.
- Scenario W.2 (August-October 1808): see pp. 10-11 of the original rules.
- Scenario W.3 (turns 19-30): see pp. 11-12 of the original rules.
- Scenario W.4 (the entire Spanish campaign): see pp. 12-13 of the original rules.
[The scenario set-ups and victory conditions are in the original English rules, which are not part of this scan.]
X. Cards and Tables
Reinforcements table (for the entire campaign and for the individual scenarios). Columns: Turn; Location; Unit; Inf: Infantry; Cav: Cavalry; Arty: Artillery; Supply: Supply Wagons. Replaces: replaces. Anywhere: Anywhere. [The table entries themselves are in the original English tables and are not in this scan.]
(+): all the morale 'B' infantry units of the III, II and IX Corps divisions become morale 'A' from this turn on.
Replacements table (for the entire campaign and for the individual scenarios). Dummies: Dummy counters.
- French: Supply Wagons are replaced 8 turns after their destruction or capture. Siege Artillery units are replaced after 12 turns.
- English: Supply Wagons are replaced 12 turns after their destruction or capture.
- Spanish: Supply Wagons are replaced 10 turns after their capture or destruction. Add 3 Dummy counters, anywhere, every 4 turns.
Attrition Table. Extra PM: extra PM. Ignore fractions: fractions are ignored. Die: die. The number on the table indicates the Loss Level. Modifiers to the die: Old Guard, unit that has not moved, Encamped unit, unit in City/Fort, unit without LOC: -1. Short of supplies, In Winter: +2. Besieged unit, unit without LOC: +1. Unit without General Supply: +3.
Forage Supply Table. Modifiers: rough terrain: -1/2 unit. City/Fort: +1/2 unit. Encamped unit: +1 unit. In winter: x 1/2. Besieged: x 1/2.
Modifiers to the die for reinforcing a Battle. For each PM beyond 2: -1. Exactly 1 PM: +1. Grouped with a Supply Wagon: +1. Enemy units in the same hex: -1.
Austrian Intervention table (campaign game only). Month; Corps Entered. The result is the die roll needed to trigger the Austrian intervention (spring 1809).
Legend. Column: column; percent: percentage; SPs: SP; Loss Level: Loss Level; Retreat before...: modifications to the Retreat before Combat; Pursuit: Pursuit; Siege formula: Siege formula; VS.: versus; Factors: Factors; Terrain Effect...: Terrain Effects Table (main road / secondary road / no road); Flood: Summer; Winter: Winter. h: number of additional PM needed to cross the indicated hex side; effects cumulative; n: movement not permitted.
FINE