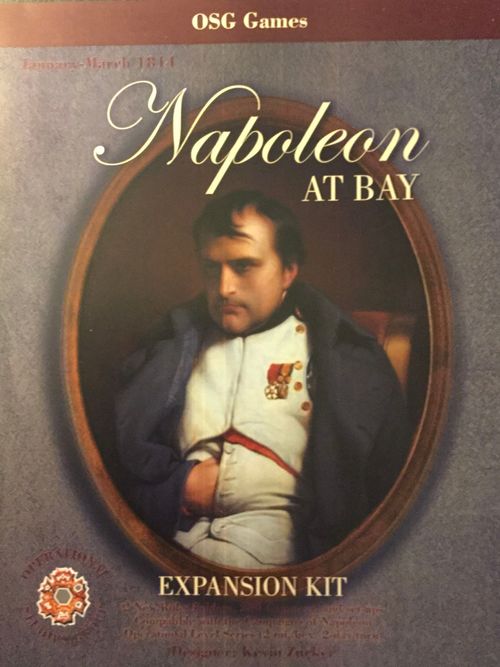
Napoleon at Bay: Expansion Kit
Napoleon at Bay: Expansion Kit Rulebook
Table of Contents
Table of Contents
- Introduction
- Game Equipment
- Game Map
- Unit and Leader Manifests
- Leader and Unit Counters
- Morale and Victory
- Combat Units and Leaders
- Battle Scenario Rules
- A. Weather
- II.b. Weather Effects on Movement
- III.b. Weather Effects on Combat
- I.a.1 Lines of Communication
- Tracing the LOC
- I.a.2. Changing the Supply Source
- Tracing Through a Friendly Army's Center of Operations
- Garrisons
- Capture of Supply Sources
- I.a.4 Replacements
- II.a. Reinforcements
- III.b.6 Terrain and Combat
- III.b.8 Retreat After Combat
- Battle Scenario Victory Conditions
- Campaign Rules
- II.b.1 Dispatch Distance
- Vedettes Out of Dispatch Distance
- Supply Distance
- I.a. Administration
- I.a. Sequence of Play—Command Phase Change
- Line of Communications
- Available Supply Sources
- I.a.1 How Administrative Points Are Received
- Army Commander AP Bonus
- How to Use the Administrative Point Tracks
- Function of Center of Operations
- I.a.2 Changing the Active Supply Source
- I.a.3 Disbanding Center of Operations
- I.a.4 Replacements
- II.a.1 Reinforcements
- Replacement and Reinforcement Schedule
- I.b. Organization Segment
- II/IIIa. In Supply
- II.b. Movement of Center of Operations
- "Flight"
- II.b.1. Movement Commands
- II.b.1. Issuing Movement Commands
- II.b.2 Extended March
- Administrative March
- Extra Cost for Exiting ZOCs
- Bridges
- Bridge Trains (Pontoons)
- Campaign Game Parameters
- Battle & Campaign Game Parameters
- How to Set Up the Game
- Optional Rules
- Three-Player Games
Introduction
[1.] This Exclusive Rules folder contains rules particular to Napoleon at Bay, part of the Campaigns of Napoleon Series 1X. These rules add to (or modify) the Campaigns of Napoleon 1X Standard Rules.
Game Equipment
[2.] The Napoleon at Bay Expansion Kit includes the following:
- Exclusive Rules folder (8 pages)
- Campaigns of Napoleon 1X Standard Rules
- One sheet of die-cut counters (280)
- Leader Manifest Cards (5)
- Unit Manifest Cards (6)
- Major Generals Organization Display (1 page)
- French Turn Record Track
- Coalition Turn Record Track
- Interface info for use with TLNB battle games (2 pp)
- Interface Turn Record Track (generic)
Other Components Required for Play
[3.] This Expansion Kit requires the use of game equipment from OSG's Napoleon at Bay. Obtain these items from a copy of any edition:
- Napoleon at Bay East and West maps
- NAB Organization Displays
- NAB Charts & Tables (ignore Attack Effectiveness)
- Two 6-sided dice (d6)
Game Map
[4.] The map is printed in two sections, West (W) and East (E). To join the maps together, either abut or overlap the edge of the west map onto the east map as appropriate.
Terrain Type of Divided Hexes
[5.] Use the prevalent terrain type in a hex (that type which fills more than half the hex). If uncertain use the type with the highest MP cost.
Unit and Leader Manifests
[6.] All Set-Up Information is presented on the Leader and Unit Manifests. The Unit Manifests specify, for each unit, the Leader's track on which to set-up and its strength. The Leader Manifest specifies the Leader's hex on the map or the superior Force Leader (see ¶115).
Leader and Unit Counters
[7.] The front field color for units is as follows: French units are blue, Prussians feldgrau, Austrians white, Russians brown, Bavarians green and Württembergers dark blue with red unit type symbol. The back of all Coalition leaders and Vedettes have the Austrian Hapsburg eagle. The backs of Coalition combat units have a smaller version of the eagle. Units of the Silesian Army have the feldgrau field, and units of the Bohemian Army have the tan field.
Morale and Victory
[8.] French morale is recorded on the Paris Morale Track. Morale may be positive, zero, or negative. If the Morale Marker moves off the negative end of the Morale Track by the end of 29-30 March, the Coalition wins the game. If this does not occur by the end of the game, or if the Marker moves off the positive end of the track, the French win. The game ends immediately when the Marker moves off the end of the Morale Track.
Effects of Morale on Attrition
[9.] If the current Morale is minus one or less, the French Player must add two to his Attrition die roll. There is no effect on Coalition Attrition.
Public Opinion in Paris
[10.] For the first Coalition Force with at least 7 SPs of infantry to move within 7 MPs of Paris—ignoring the presence of French units—the effect is to reduce Morale by one. If a Coalition Force with at least 7 SPs of infantry moves adjacent to either Paris hex, the effect is to reduce Morale by an additional two. These Morale effects are temporary and cease to modify the Morale Level when the condition causing them is removed.
Garrison Effects
[11.] French Morale is reduced by one each time a Garrison Town is occupied by an Enemy Force (see ¶103). Garrison markers are removed as long as their corresponding Garrison Town is Coalition-occupied. If all Coalition Forces evacuate the town subsequently, the Garrison automatically reappears in the town. (Vedettes cannot be left behind to prevent this.) If a Garrison Town is recaptured by the French, or re-garrisoned, French Morale goes up one.
Combat Units and Leaders
[12.] The combat units represent Divisions and Brigades, ranging in strength from 1,000 to 9,000 men. The combat unit counters always go on the Organization Displays.
Leader Ratings
[13.] The Leader counters have Initiative, Command Span, and Subordination Rating listed in that order.
Replacement Markers
[14.] Replacement Markers are used to record the levels of artillery, infantry and cavalry in the replacement pool.
[15.] The unit nationality of the unit being increased must match the nationality of the points: Prussian Replacements may not be added to an Austrian unit.
[16.] Imperial Guard (IG) replacement points may only be added to Guard units.
Battle Scenario Rules
A. Weather
[17.] There are five different types of weather, one of which must be in effect during each Game-Turn. The five types are Freeze, Snow, Mud, Rain, and Fair.
[18.] At the beginning of each Game-Turn the First Player must consult the Weather Table to determine the weather for the coming turn, noting die roll modifiers as appropriate (see ¶19), or use the Historical Weather. Place the Weather Marker in the appropriate space on the Weather Track.
[19.] If the prior turn was Mud and Rain follows, effects of both Rain and Mud apply (and are cumulative). If last turn a 'six' was rolled, add one to the die for the following weather check (see Weather Table).
II.b. Weather Effects on Movement
Fair, Frost
[20.] No effects.
Rain
[21.] Add one to the Resistance Modifier when attempting to exit Enemy ZOCs.
Mud
[22.] Add two to the die roll on the Attrition Table during Mud.
Snow
[23.] Add one to the die roll on the Attrition Table during Snow. Add one to the Resistance Modifier when attempting to exit Enemy ZOCs.
III.b. Weather Effects on Combat
Fair
[24.] No effects.
Frost
[25.] No effects.
Rain
[26.] Add one to all artillery die rolls. Subtract one from the Resistance Modifier in Pursuit.
Mud
[27.] Add two to all artillery die rolls.
Snow
[28.] Add one to all combat die rolls, including Artillery Fire. Subtract one from the Resistance Modifier in Pursuit.
I.a.1 Lines of Communication
[29.] A Line of Communications is considered established if it can be traced up to the maximum length allowed for that army over any passable terrain, to the force. In order to use the specified Administrative Point Level (see ¶51) in determining attrition, a Force must be within that distance of a possible friendly Supply Source.
The Communications Table shows which Supply Sources may be used for each Army. If a Force is further than the specified maximum distance from its Active Supply Source, it must use the "zero" column on the Attrition Table when determining attrition and may not be issued a Movement Command (see Standard Rules).
Tracing the LOC
[30.] Use the cavalry movement rate when determining the MP cost of each hex in the LOC. Exceptions: bridges add no additional MPs. Connected Primary road hexes count as ½ MP).
I.a.2. Changing the Supply Source
[31.] The Active Supply Source may be changed to another Supply Source with a LOC. Step 2 of the Administrative Segment is the only Administrative step taken in the Battle Scenarios.
Procedure
[32.] For the French and Coalition Armies to change their Active Supply Source takes one complete Game-Turn to accomplish. Flip the Supply Source Marker over (to signify that the change is underway). During the next Administrative Segment, the Supply Source Marker may be returned face-up at the newly activated supply source.
Interim Effects
[33.] During the turn the Supply Source Marker is flipped over, the Army may issue no Movement Commands and must use the "zero/No LOC" column on the March Attrition Table.
Tracing Through a Friendly Army's Center of Operations
[34.] A Coalition Army may change its Communications to go through the other Coalition Army's Center of Operations. The distance on the Administrative Point Pool in this case equals the distance between the two Coalition Centers of Opns., and then onward to the other army's Supply Source. However, the APs received are not deducted from the other army, nor determined on the column of the other army. They are deduced from their own army as usual.
Garrisons
[35.] The Active Supply Source has an intrinsic garrison. All Garrisons have a strength of one and a normal ZOC. Garrisons may not attack, and must defend as part of any other force in the hex. They must absorb the first SP lost in retreat. Garrisons have an Initiative of "1" for pursuit and for initiative comparison purposes.
Capture of Supply Sources
[36.] If the Supply Source is attacked or repulsed and the garrison is eliminated or is forced to retreat, the Supply Source is considered captured. When a Supply Source is captured, the Active Supply Source Marker is removed from play. While the Supply Source Marker is out of play, the army suffers the Interim Effects under ¶33, above.
[37.] A Supply Source Marker may be returned to play at any possible Supply Source for that Army free of enemy units (or ZOCs) during any following Admin Segment. Supply Source hexes cannot be permanently destroyed. A captured Supply Source may be reactivated as soon as the enemy forces are removed.
I.a.4 Replacements
[38.] Replacements are not used in the Battle Scenarios.
II.a. Reinforcements
[39.] Reinforcements are used in the Battle Scenarios and appear according to the Turn Record Track.
III.b.6 Terrain and Combat
(See the Terrain Effects Chart.)
Affecting Terrain
[40.] Affecting Terrain includes all Hill, Wooded Hill, Swamp (Marsh), and Primary Town hexes when the defender is in the hex, and Secondary River and Bridge hexsides attacked across. Use the "Affecting" line on the CRT. Non-affecting Terrain includes Clear, Woods, and Secondary Town Hexes. There is no cumulative benefit for hex and hexside Affecting Terrain.
Effects of Terrain on Combat
[41.] The strength of infantry units and cavalry units attacking into a Woods hex is reduced—infantry by one fourth and cavalry by one-half (round off to the nearest half point). Artillery in a woods hex may not bombard; a target unit in a woods hex may not be bombarded.
The strength of any unit attacking into or out of a Swamp (Marsh) hex is reduced by half. Cavalry defending in a Swamp is also halved.
III.b.8 Retreat After Combat
Retreat Across Rivers
[42.] A Force which retreats across an unbridged secondary river after combat loses double its normal pursuit loss (as though it were retreating through an Enemy ZOC) if the Pursuit goes at least as far as the hex adjacent to the river hexside. If a loss is already doubled due to retreat through Enemy ZOC, there is no further loss due to the river. Retreat across Primary Rivers is allowed only at bridges.
Retreat Off Map
[43.] A Force may be moved off the map during a retreat after combat if permitted by the priorities of retreat (see Standard Rules ¶176). Pursuit of such retreating Forces must end at the map edge hex (see Standard Rules ¶170). A Force may not retreat off the map if it can retreat through an Enemy ZOC or displace a Friendly unit instead.
[44.] The Force reenters the map in its following Movement Phase at the nearest map edge hex unblocked by enemy units or Enemy ZOCs, in the same manner as Reinforcements. A Force must reenter the map as near as possible to its point of exit, and closer to the nearest Friendly Supply Source if possible.
Battle Scenario Victory Conditions
[45.] The status of the Morale Track determines the victory. If French Morale is worse than at start (see French Leader Manifest, page 2), the Coalition Player wins. If French Morale is better than at the start, the French Player wins. Unchanged Morale = draw.
Campaign Rules
[46.] The following rules show how the long periods of a full campaign affected the operations of the armies. Their use entails some changes in the Standard Sequence of Play and some additional markers. These rules must be used when playing the Campaign Scenario. Most of these rules may be used if both players agree when playing the Battle Scenarios. Dispatch Distance and Supply Distance are traced for different purposes. Dispatch is traced only from the Center of Operations, while Supply is traced from a possible Supply Source or the Center of Operations. Dispatch Distance has to do with Movement Commands, while "Supply Distance" (see ¶51) has to do with Attrition.
II.b.1 Dispatch Distance
[47.] A dispatch can travel as fast as a horse and rider, about 18 hexes (36 miles) in 6 hours. At that distance it would take 24 hours to write and deliver the order, act upon it, and write and deliver the report of the outcome.
[48.] Dispatch Distance is the maximum distance a Force may be from an active Center of Operations and still receive Movement Commands. The Dispatch Distance for each Army is stated on the Communications Table. The Force need only be within Dispatch Distance during Step 1 of the Movement Procedure to benefit; it may move out of Dispatch Distance during Step 2 without consequences until the next turn.
[49.] The Dispatch Distance is traced through any passable terrain at cavalry movement costs. Exceptions: The path may not be traced through enemy units or their ZOCs (unless the ZOCs are friendly-occupied). In calculating the Dispatch Distance, primary roads are counted as ½ MP, with no extra cost for bridges.
Vedettes Out of Dispatch Distance
[50.] Vedettes that cannot trace a Dispatch Distance to a Center of Operations or Supply Source during the Administrative Segment of the Player-Turn are immediately removed from play until the Organization Segment of the next Friendly Player-Turn. They return to play as described in Standard Rules ¶210.
Supply Distance
[51.] A Supply Distance is a route of wagons moving about 10 miles per day. Horse-drawn wagons are very inefficient, and over a few days' journey all their carrying capacity has to be devoted to fodder for the teams. Supply Distance is the maximum distance a Force may be from any possible Supply Source or Center of Operations of an army and still be "in Supply" (see ¶70). Forces must be in Supply to use their army's accumulated Administrative Point Level when calculating attrition, and to receive Replacements. The Supply Distance for each Army is specified on the Communications Table.
[52.] Supply Distance is traced through any passable terrain at cavalry movement costs. Exceptions: The path may not be traced through enemy units, or through enemy ZOCs (unless the ZOCs are friendly-occupied), or across non-road hexsides into Mountain hexes. In calculating the Supply Distance, primary roads are counted as ½ MP, with no extra cost for bridges.
I.a. Administration
[53.] In order to obtain Movement Commands in the campaign game, each Army draws from its pool of Administrative Points (APs). APs are used to create Movement Commands, which the Player must provide for each force if he wants to be certain it will move. A Movement Command costs one AP (see ¶78). As many Movement Commands can be created per turn as there are APs available (provided that the Center of Operations is active), but each force may only move once per turn. In order to receive a Movement Command, Individual Forces must trace a "Dispatch Distance" (see ¶48) to the Center of Operations. This Dispatch Distance may traverse any passable terrain.
[54.] The number of Administrative Points remaining on the AP Track at the time of Movement determines the severity of March Attrition. When determining attrition, the Player finds the strength of the Force on the column headed by the AP Level showing on the AP Track at the instant of the Force's movement. The fewer Administrative Points accumulated, the greater will be the attrition. To benefit from the Army's Administrative Level when determining attrition, a Force must be able to trace Supply Distance to any possible friendly Supply Source, or to a Center of Operations with an LOC (see ¶50).
I.a. Sequence of Play—Command Phase Change
[55.] The Administrative Segment now uses all four Steps:
- Receive Administrative Points and reset the AP Marker on the Accumulated AP Track (see ¶58).
- Designate friendly Supply Source. If this is now changed from last turn, deduct one AP (¶64).
- Disband friendly Center of Operations (if desired). Deduct one AP for this (¶65).
- Add new Replacement Points to the Replacement Pool (¶66).
Line of Communications
[56.] A Line of Communication (LOC) is a line of connected, primary road hexes free of enemy units or their Zones of Control (Standard Rules ¶55). In the Campaign Game, the LOC may not depart from primary roads; in addition, the LOC runs from the Supply Source to the Center of Operations only (paying no additional MPs to cross bridges). If the LOC exceeds 80 Primary Road hexes in length, the Center of Operations is "Inactive" (see ¶63 "Function of Center of Operations"). The inactive Center of Operations may not be used when determining attrition (see ¶54). An army with an inactive Center of Operations may not add replacements to its units.
[57.] The Coalition Center of Operations must trace its LOC to an active Coalition Supply Source and the French Center of Operations must trace its LOC to an active French Supply Source (see ¶56).
Available Supply Sources
(See the Terrain Key on the map.)
I.a.1 How Administrative Points Are Received
[58.] The player must see to the provisioning of his army before it can effectively be used. The Player who fails to make the most conservative use of resources will be unlikely to win the Game. Resources such as wagons and the necessary management of their contents are represented in the game by Administrative Points. APs are an abstract measure of the current materiel condition of the troops in an army.
[59.] Administrative Points are used to create Movement Commands, (see ¶78). To receive Movement Commands a Force must be able to trace a Dispatch Distance to the Center of Operations (see ¶48).
How to Receive Administrative Points
[60.] New Administrative Points are accumulated during the Administrative Segment of the Player-Turn. The Player refers to the Administrative Point Pool and rolls two dice to determine the quantity of APs each army receives. The Coalition Player rolls once for each army. Cross-reference the Effective LOC distance (see ¶56) between the army's Center of Operations and its Supply Source with the dice roll. The number obtained from the cross-reference is the quantity of Administrative Points added to the accumulated total. If the Army has an inactive Center of Operations it receives no new Administrative Points.
Army Commander AP Bonus
[61.] If the Army Commander (Napoleon, Schwarzenberg, or Blücher), currently resides with his Army's Center of Operations, add one AP to the total received.
How to Use the Administrative Point Tracks
[62.] For each Army, use the two markers provided to indicate "Ones" and "Tens" of accumulated Administrative Points. Adjust these markers on the track to record the level as it ebbs and flows. Example: To show "Thirteen" Administrative Points, place the Tens marker in the Number 1 space, and the Ones marker in the Number 3 space.
Function of Center of Operations
[63.] An Army's Center of Operations must be active in order to issue Movement Commands (or replacements), or to receive new Administrative Points. A Center of Operations may be rendered inactive: (1) if it moved during the previous friendly Player-Turn, (2) if it has no Line of Communications, and (3) when Changing the Active Supply Source (see ¶64). This LOC may be traced only to the active Supply Source appropriate to that army. The Center of Operations should be flipped over when inactive. It may reactivate immediately when all conditions necessary for activation are met. (Exception: see ¶71, "Movement of Center of Operations").
I.a.2 Changing the Active Supply Source
[64.] The cost to change the Supply Source is one (1) AP. This takes one complete turn to effect. During that turn the Supply Source marker is flipped over to its "Inactive" side. While the Supply Source marker is flipped over, the Center of Operations is "Inactive" (see ¶63, "Function of Center of Operations"); furthermore, the Center of Operations may not be used when determining attrition (see ¶54).
I.a.3 Disbanding Center of Operations
[65.] To voluntarily disband the Center of Operations, expend one AP, remove it from the map, and place it on the Turn Record Track three Game-Turns ahead of the current turn. The Center of Operations will appear as a reinforcement that turn at the Army's Supply Source. The Center of Operations may be disbanded only during Step 3 of the Administration Segment. While disbanded, the Center of Operations is considered "inactive" (see ¶63 "Function of Center of Operations"). Commentary: The equipment necessary to generate a new Center of Operations always exists at the Supply Source. The disbanded Center of Operations is considered broken-up and its equipment either captured or distributed along the new LOC; its staff is too mobile and dispersed to be captured.
I.a.4 Replacements
[66.] Replacements of fresh and recovered troops become available for addition to the Replacement Track according to the Coalition or French Replacement Line on the Turn Record Track, adding the amounts specified to the Replacement Track. Replacements may only be added to units of the specified nationality and type. An army with an inactive Center of Operations may not add Replacements from the Replacement Pool to its units. Units which receive replacements are immobile and may not move during the ensuing Movement Phase.
II.a.1 Reinforcements
[67.] Combat units which do not begin the game in play may enter according to the Turn Record Track—Reinforcement combat units must enter under the command of a Major General or under a Reinforcement Leader arriving with them. Reinforcement units entering under the command of a Major General will be listed by unit designation and name. (Reinforcements may use the nearest friendly Supply Source regardless of the Coalition Army they belong to.)
Replacement and Reinforcement Schedule
[68.] The quantity of Replacement Points and arrival of Reinforcements are specified on the Turn Record Track. Leaders which do not begin the game on the map may be brought on later as reinforcements as specified on the Turn Record Track and the Leader Manifest.
I.b. Organization Segment
[69.] During the Organization Segment players will make adjustments to the strength and location of friendly forces on the Organization Displays.
II/IIIa. In Supply
[70.] As long as a Force begins a march within Supply Distance (see ¶51) of its active Center of Operations or any possible Supply Source of that army, that Force is regarded as "in Supply." When determining attrition for that Force a player may use the column on the March Attrition Table corresponding to the number of Administrative Points currently in the friendly Accumulated AP Track. If the Force does not begin within Supply Distance of the Center of Operations or a possible Supply Source, that Force is regarded as "out of Supply." It must use the "zero" column on the Attrition Table. Supply Distance may not be traced to the Center of Operations if it is out of LOC or inactive, or if there is no active Supply Source.
II.b. Movement of Center of Operations
[71.] The Center of Operations has a Movement Allowance of 5 Movement Points. For movement purposes, it moves like cavalry. It may not move under Initiative (thus it may not Force March), but has an automatic Movement Command similar to Reinforcements (Standard Rules ¶85).
[72.] On the turn the Center of Operations moves, Dispatch Distance and Supply Distance is traced toward its initial location, so the Center of Operations moves after all Movement Commands have been issued. In the following turn the Center of Operations is inactive, while Dispatch and Supply Distance is traced to its new location (see ¶74, "Effects of Movement").
[73.] A Center of Operations may not make an Extended March (see ¶81). It may not enter an enemy ZOC. It is never considered part of a Force, does not require a Leader, and does not count for stacking purposes. It is not subject to Attrition. A Center of Operations may enter any terrain. However, it must end its turn on a primary road hex in the distance of its March, so long as it is not making an Extended March.
[74.] If a Center of Operations moves, it is inactive until the Consolidation Segment of the next friendly Movement Phase (II.e). However, so long as it has a LOC, units in Supply Distance still get the benefit of the Accumulated Administrative Point Total when determining Attrition; they are not automatically considered out of Supply Distance simply because the Center of Operations has moved. However, an army with an inactive Center of Operations may issue no Movement Commands or replacements or receive APs.
[75.] Example: The Coalition Player moves his Center of Operations in Turn 1, and flips it to its "Inactive" / "No LOC" side. In that turn he added Administrative Points normally and issued Movement Commands. In his Administration Segment of Turn 2, he adds no Administrative Points, and issues no Movement Commands during the Movement Phase, but turns the Center of Operations back over to its "Active" (face-up) side. Thus, during his Combat Phase of Turn 2 and thereafter, the Coalition Center of Operations is active.
"Flight"
[76.] The Center of Operations may never be captured. Instead, it must "flee" when placed in an Enemy ZOC or when an Enemy Force moves into the hex it occupies. If forced to flee, it is moved five Movement Points toward any Supply Source of that army free of Enemy ZOCs, at the owning Player's choice. When displacing it ignores the presence of enemy Forces (in effect, the staff is reestablishing it further back along the LOC). Flight does count as movement; the Center of Operations is inactive on the turn after fleeing.
[77.] If the Supply Source is not in Enemy ZOCs, it retreats no farther than the Supply Source. If the Center of Operations is forced to flee and all of its possible Supply Sources are in Enemy ZOCs, its flight goes off the map. If displaced off the map, the Center of Operations may return to any possible friendly Supply Source hex during the friendly Movement Phase after the hex is cleared of Enemy ZOCs.
II.b.1. Movement Commands
[78.] Movement Commands are created and issued to the individual Forces of an Army during the Movement Command Segment (II.b.1). One Administrative Point is deducted from the Accumulated Administrative Points for each Movement Command created. Movement Commands may not be created if the Center of Operations currently has no Line of Communications. (Previously accumulated Administrative Points, in this case, are available for use after reestablishment of the LOC.)
II.b.1. Issuing Movement Commands
[79.] In order to receive a Movement Command, a Force must start the Movement Command Segment within Dispatch Distance of the Center of Operations of its army. In the case of a multi-hex Force, only the Force Leader need be within this distance. One Movement Command is expended for the Force, regardless of its total strength or the distance of its March, so long as it is not making an Extended March.
[80.] Winzingerode and Bülow. The Coalition Commanders Winzingerode and Bülow and their Forces may receive no Movement Commands or replacement points prior to 27 February. They may move under Initiative. Possible Supply Sources: W3501, E0301, E0305.
II.b.2 Extended March
[81.] Any Force activated by a Movement Command may increase the Movement Allowance of all its units by up to 4 Movement Points by immediately expending one additional AP. This increase is termed Extended March. Forces making Extended March resolve attrition only once, at the end of their combined normal and Extended March, adding up to 4 to the Attrition Die Roll (see ¶82).
[82.] When determining attrition, use the line corresponding to the total distance of the march. Then add one to the die roll for each Movement Point of Extended March taken.
Administrative March
[83.] A Force of a single leader, plus the units on his track (but no subordinate leaders), may make an Administrative March. This is a pre-programmed march over two Game-Turns. It may not include Forced or Extended March. Only one Administrative March per player may be under way at any one time.
[84.] To be eligible, the one-leader Force must be seven or more hexes away from the nearest Enemy Force throughout its route of march. Its destination, specified in advance, cannot be changed. If it comes within seven hexes of an Enemy Force it must stop and its Administrative March is terminated.
Procedure
[85.] Expend one Movement Command (this covers the entire two-turn Administrative March). Write down the exact hex of destination to be reached at the end of two marches. Move the force normally in the two Movement Phases.
Extra Cost for Exiting ZOCs
[86.] (See Standard Rules ¶122) If the adjacent Enemy force has only 1 SP, there is no additional cost to exit; if 2 SPs, the cost is +1 to exit. Cavalry pays no additional cost to exit unless the enemy hex also contains one SP or more of cavalry.
Bridges
[87.] Refer to the Bridging Summary Table. Any road crossing a Primary River hexside is a Primary Bridge. Roads crossing Secondary Rivers are Secondary Bridges. To damage or repair a bridge costs a number of MPs. A Force which expends MPs relative to bridge structure may not make an Extended March that phase.
[88.] Damaging and Repairing Bridges. A force can damage or repair a bridge during a friendly Movement Phase by expending additional MPs in a hex adjacent to the bridge hexside. These MPs do not count toward attrition. A Force repairing a bridge may not make an Extended March in the same phase.
[89.] Place a Damaged Bridge marker on the damaged bridge. For movement purposes, a damaged bridge does not exist until it is repaired.
Bridge Trains (Pontoons)
[90.] The bridge trains are assigned in the Scenario Information for each player (see ¶105). A bridge train travels with a Force, and its marker is kept on its Leader's track until it is deployed. Bridge trains have no Subordination cost and their Movement Allowance is 5.
[91.] A bridge train can be used to bridge any river, primary or secondary. A bridge train cannot be destroyed but may be damaged, repaired or captured. A bridge train cannot create its own Major General, may not retreat, and may not form part of a pursuit force. It has no Combat Strength. Deployed bridge trains are called "pontoons'" and flip to their reverse side.
[92.] Capturing Bridge Trains. A Bridge Train or pontoon may be captured when the hex is occupied by the enemy. Undeployed bridge trains are left in place on the map if the Force they are with makes a pursuit or retreat.
[93.] Pontoon Deployment. During any friendly Movement Phase a Force occupying a hex adjacent to a river hexside may expend 3 additional MPs to deploy the bridge train; place the pontoon at that hexside. These MPs do not count toward attrition. A pontoon can be used as soon as it is deployed.
[94.] Removing a Pontoon. To disassemble a friendly pontoon and remove it from the map, a friendly Leader must expend 2 additional MPs in either hex adjacent to it during the Movement Phase. These MPs do not count toward attrition. The Bridge Train is placed on the Leader's track on the Organization Display.
Campaign Game Parameters
[95.] For numerical and other factors that set the conditions for the scenario, see the Scenario Information on page 5 of the French Leader Manifest and page 2 of the Coalition Leader Manifest.
Campaign Game Start
[96.] While the Campaign can start with any Battle scenario, the information presented here is for the full Campaign game starting on 24-25 January 1814 and covering the entire 33-turn campaign.
Game End Date
[97.] The Campaign Game ends with 29-30 March 1814 regardless of start date.
Replacements at Start
[98.] The French Player starts with 3 artillery replacement points.
Administrative Point Levels
[99.] The Accumulated AP Levels show where on the Accumulated AP Track to place the AP Level Markers (x1, x10) at the start of the game. Each player will use the Attrition Table column corresponding to the number of Accumulated APs. Accumulated AP Levels are shown on the Leader Manifests (see ¶ 86).
Supply Sources at Start, 24-Jan
[100.] At the beginning of the Campaign, the French Supply Source is Paris, and the Bohemian Army Supply Source is Chaumont. For the Silesian Army, the Coalition Player may freely choose any #2 Silesian Supply Source listed on the Communications Table.
Centers of Operations
[101.] The French Center of Operation (CoO) starts active in the hex shown on the French Leader Manifest (see ¶ 86).
[102.] Both Coalition Centers of Operations start the Campaign Game Inactive, arriving as reinforcements on Game-Turn 1. Note: The Coalition player cannot spend APs on Turn 1.
Battle & Campaign Game Parameters
Garrisons
[103.] Eleven towns begin the campaign with French Garrisons. Place a Garrison Marker in each of the following towns: Pont-sur-Yonne, Nemours, Meaux, Reims, Fontainebleau, Soissons, St. Maur, Paris North, Paris South, Charenton (W0131) and Vincennes (W0230). Some garrisons are removed at the start of certain battle scenarios. (See French Scenario Information.)
Vedettes
[104.] Vedettes can be placed at start according to the rules governing their placement (see Standard Rules ¶201).
Bridge Trains
[105.] The Coalition Player receives one bridge train assigned to each of the following:
- Silesia: Blücher and Bülow
- Bohemia: Barclay
The French Player receives a bridge train on 3-Mar. Bülow's bridge train was captured (available to the French in setups for 11-Mar and 19-Mar).
Bridges Damaged
[106.] No bridges are damaged at the start of the Campaign. See Scenario Information for bridges destroyed at the start of the other scenarios.
First Player
[107.] The French player is the first player.
Reinforcements
[108.] Reinforcements are listed on the Leader Manifests and may be introduced into play by the owning Player during the Reinforcement Segment of the Movement Phase (see ¶69 and ¶114). Reinforcements which arrive during the first turn still receive the one "free" Movement Command.
Paris Morale
[109.] The Paris Morale/Public Opinion Marker begins as shown in the French Scenario Information on Page 5 of the Leader Manifest.
Victory Conditions
[110.] (See ¶45 and ¶129).
How to Set Up the Game
[111.] Select a scenario, and set-up according to the Leader Manifests and Unit Manifests. Sort by army (Silesian, Bohemian and French) and then into the following categories: Leaders, Major Generals, Combat Units, Vedettes, Pontoon Trains, Center of Ops. and Markers.
Unit and Leader Manifests
[112.] The initial placement for combat units and leaders is given on the Unit and Leader Manifests per scenario. Place all units and leaders on their respective manifests before transferring them to the Organization Displays. The set-up may include overstacked hexes. Make sure to conform to command limits by the end of your first move.
[113.] Combat units are listed on the Unit Manifests. Under the headings corresponding to the various scenario start dates you will see the leader whose track they set up on and their individual unit strengths. Combat units listed with a Leader's name should be placed on that Leader's Organization Display track to denote they are part of his Force.
[114.] If "Reinf." appears, the unit or leader in question does not begin that scenario, but is available as a reinforcement. If a unit it may be filled-up with Strength Points from available replacement points. If a gray box appears, the unit or leader is not in play in that scenario. Set-up reinforcement units and leaders on the Turn Record Track.
Organization Displays
[115.] Place the combat units on the numbered track spaces corresponding to their listed strength. (See Standard Rules ¶19, "Organization Displays".) Leader manifests may specify the name of the Force Leader or a hex on the map. Place subordinate leaders (who have a Force Leader specified) on the Force Leader's portrait to denote they are part of his force.
[116.] Example: In the 9-Feb Scenario, Ney's track contains Curial, Meunier, and Nansouty (as shown on the French Unit Manifest). Ney himself sets-up in W3436 (as shown on the French Leader Manifest).
Major Generals
[117.] Combat Units that have a separate set-up hex use Major Generals as their Leaders. Use the Major General of the appropriate type (infantry or cavalry) and designation. Example: In the 28-Jan Scenario, Milhaud sets-up on the track of Major General Cavalry 1, in hex E2643 (specified on the French Leader and unit Manifests).
Coalition Set-Up Notes
[118.] Both Coalition Centers of Operation arrive as reinforcements on 24th Jan, but don't become operational until Jan 26th.
[119.] On Feb 15th and later set-ups, Doring (Major Gen. Inf #6) must be placed within 3 hexes of the Center of Operations or on the most direct route between there and Chaumont. He need not be within 3 hexes of a Coalition force, but cannot be within 3 hexes of a French force.
Paris Reserves
[120.] The Paris Reserves represent troops in training, along with officers, instructors, and musicians responsible for processing recruits. At start, until brought into the game as reinforcements, the Paris Reserves remain off map, on their display on the French Leader Manifest (page 5). Paris Reserves as a group may be brought onto the map at the French Player's option (treat them as Reinforcements, see ¶69) at any time. If depleted (see ¶121) the units may arrive at reduced strength. Either all or none of the Paris Reserves may arrive.
Exceptions: In March, Dessarts and Henrion's divisions are removed from the Paris Reserves and appear as reinforcements (see French Leader Manifest, p. 5).
[121.] The Paris Reserves strength may be depleted for use as replacement points at the rate of one Strength Point per turn beginning on or after 10 March.
Effect on Replacements
[122.] While the Paris Reserves (other than Henrion and Dessarts) are on map, replacement points may only be accumulated, not incorporated into the strength of any unit. Once the Paris Reserves are back in either Paris hex (returned to training duty and removed from the map), then units in the field can once again receive replacement points.
Optional Rules
II.c.1. Marshal Ney
[123.] Ney has to make a second die roll if his Initiative die roll is six. The second roll is a direction-finder: 1 is between North and East-North-East (ENE), 2 between ENE and ESE, 3 between ESE and South, 4 between South and WSW, 5 between WSW and WNW, and 6 between WNW and North. He must expend 5 Movement Points moving in that direction, and the move is governed just like a retreat after combat, except that there is attrition, and the final resting place must lie on or between the specified compass points.
Marshal Victor
[124.] Napoleon was dissatisfied with Victor's performance in command of the II Corps, replacing him with Gérard on 2/18/14, and re-assigning him to command a new IIYG Corps, close under his watchful eye. The French player may follow Napoleon's lead or keep Victor with the II Corps (and Gérard with the Reserve).
The Sound of Guns
[125.] Commentary: It was customary in written orders to specify that a force should maneuver toward the sound of the guns.
[126.] This rule can be used only by a Force that failed its regular Forced March Initiative die roll and that began the Combat Phase within five hexes of an Enemy Force about to attack a Friendly Force. If successful it may expend one MP per round of combat.
[127.] Such a Force may attempt to Force March before the commencement of the second and again before each succeeding Round of Pitched Battle (see Standard Rules ¶141) until it has made a successful Initiative die roll. It must march "to the sound of the guns"—directly to the battle only.
Three-Player Games
[128.] Each Player takes one of the three armies. The two Coalition Players are limited to the exchange of one written note per Game-Turn, at the end of the Coalition Movement Phase. Allow unlimited discussion between the two Coalition Players whenever Blücher and Schwarzenberg are in the same hex or adjacent.
Three Player Victory
[129.] Austrian policy sought victory, but would have preferred a negotiated settlement. Prussia wanted Napoleon in a cage, and the Tsar wanted to march into Paris, as revenge for Moscow. Players may want to employ separate Victory Conditions for the two Coalition armies at the end of the game.
Silesian Victory: Paris Morale Marker off the Track or in the "-3" space.
Bohemian Victory: Paris Morale Marker in the "-1" or "-2" space.