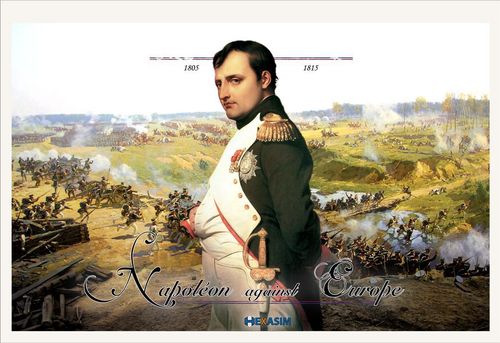
Napoleon against Europe
Napoleon against Europe Rulebook
Table of Contents
Table of Contents
- 1 Game Contents
- 2 Game Pieces
- 3 Game Map
- 4 Glossary
- 5 Turn Sequence
- 6 Cards
- 7 The Interphase
- 8 Diplomacy
- 9 Activations
- 10 Command
- 11 Stacking
- 12 Land Movement
- 13 Supply
- 14 Battle
- 15 Fortresses and Sieges
- 16 Weather
- 17 Naval Matters
- 18 Conquests
- 19 Victory
- Designer's Notes
- Scenarios
- Example of Play
- Turn Sequence (Player Aid Summary)
1 Game Contents
The game contains:
- a game board 96.5 x 68cm,
- 2 sheets of die cut counters,
- play aids,
- a rule book and scenarios,
- 110 cards,
- two six-sided dice.
2 Game Pieces
2.1 Units
Combat Units: these units represent the army corps of each Power. Each corps has:
- a combat value equal to the number of "loss steps",
- a morale value,
- a movement allowance.
A corps counter shows these values on its front (combat value, morale, movement factor); a white stripe marks a reduced unit on the back.
Some corps may have one (possibly two) stars. These corps are called Elite Corps, which may carry a combat bonus during the resolution of combat.
The corps mostly represent units of infantry; some reserve cavalry corps are also provided; they are identified by the letter C.
Some corps (units of militia, guerrilla and the "Garde Nationale") cannot exit their national territory. If they are forced to, they are immediately eliminated. Their movement allowance is shown within an orange box.
A letter E indicates that the unit enters play after the play of a specific event, the letter V after the annexation of Venise by the Kingdom of Italy. 2P marks a unit that enters when Poland includes a second province. A dot signifies that the unit cannot be rebuilt.
Special Units: these enter play through event cards and are only placed with supplied armies. They do not have a Combat Value, but have a loss step and provide a combat bonus (for example the Garde Cavalerie gives +2 to the combat, Uxbridge and the KGL each give +1). A special unit is eliminated if all the combat units of the force with which they are placed are eliminated, or following the absorption of a loss during a battle in which their bonus was used.
Depots: depots permit the extending of supply lines, reduce attrition and reinforce fortresses. The counters have two sides, mobile and fixed. Fixed depots have a half point of combat value in defence only, and only if alone; in this case they are destroyed if they lose the combat. Mobile depots are destroyed if they are alone in an enemy-controlled zone. Depots are not combat units and do not have loss steps.
Fleets: each naval counter represents a fleet and has only one loss step. On its front there is only a national flag, initiative value and movement factor. On the back is the tactical value of the fleet and the name of the admiral. Some fleets are limited in their zones of movement; their movement factors are surrounded by a circle. Some admirals may not be rebuilt if lost.
2.2 Generals
The Generals: each counter represents a notable general of the Era. Each general has an initiative value, a command capacity (that is, the number of steps that he may activate), a tactical value (in attack and in defence) and a rank in the army hierarchy.
Some generals have on their reverse side a date of entry to the game, the name of an event permitting their entry, or the name of another general who must be removed before they can enter play. For example, Brunswick is removed from play when Blucher becomes available (in 1809).
A general without units is placed in the reserve immediately and is not available until the next Budget Phase.
2.3 Markers
- Army markers: some nations have an army marker which gives advantages to the general stacked with it. France has 2 armies; Austria, Russia, Prussia, Turkey and Britain have one only.
- Control (see 3.2), National Territory, Protectorate, Alliance (see 8.1.2): status markers placed in zones or on nations.
- Round / Turn, Victory Points, Escalade: track markers.
- Unsupplied (see 13.4), Demoralised (see 14.9), Empty Fortress (see 15.5), Siege (see 15.3): state markers placed on forces or zones.
- Event reminder (see 6.2) — for example "Piège de Bayonne" — and Activation point Reserve (one per side, see 9.2).
3 Game Map
3.1 Zones
These are the zones that regulate movement on the map; they can be of several types and contain other information:
- Capital: a zone with a red city is a capital either of a major power (capital letters) or a minor power.
- Fortress: the city of a zone is fortified; there are only two levels of fortifications: fortress and citadel (Gibraltar, Mantua, Constantinople).
- Key: these zones carry the key symbol. These zones give the right to a card in the hand each game turn; certain zones benefit only one side.
- Port: a zone with a drawing of an anchor is a Port. It can be occupied by a maximum of 3 fleets.
- Maritime: these regulate naval movement.
- Frontiers: there are several types of frontiers on the map: Major Powers use a red line; Minor powers use a thick black line; provinces of major powers are black; other zones are identified by a dotted line.
On the game board, the diplomatic statuses of the minor countries for the scenarios starting in 1805 are also shown.
3.2 Control of Zones
Each zone is either controlled by a player or open to all. A zone which has neither fortress, nor port, nor city, nor enemy units is always open to all and never has a control marker.
At the beginning of the game, each player controls the zones of his national territory and of his minor and major allies.
To control an enemy zone (not a zone open to all), there must be no enemy force in the zone AND
- the enemy fortress was conquered, whether reactivated or not (see 15.4) OR
- a supplied force is present during the Conquests phase, a control flag is then placed in the zone without spending a movement point OR
- a control flag has been placed in the zone. To place a control flag in a zone without an active fortress, a supplied force must have previously spent 1 movement point or have won a battle or a Siege.
During the Conquests phase, remove all enemy markers from zones occupied by combat units belonging to the side that initially controlled the zone. For example, France has placed a control marker in Berlin; at the end of the turn, a Russian unit retakes Berlin but does not spend the necessary movement to remove the French marker; this is subsequently automatically removed during the Conquests phase.
Only supplied controlled zones count for victory, conquest or escalade.
Control of a maritime zone requires that fleets of only one side be in that zone.
4 Glossary
This glossary contains all the terms used in the following pages.
Activation Points (AP): the figure on the top of a card used to move forces and launch diplomatic actions.
Active player: the player who undertakes an action during his turn in a round of activations. His opponent is called the inactive player.
Army: a general and an army marker comprise an army. An army may contain three generals subordinated to the general commanding the army. An army benefits from a siege bonus and for crossing rivers without bridges during battles (an intrinsic engineering capacity). A general commanding an army may activate forces in adjacent zones to include them in his army. Counter-marches are easier for the units of an army. Up to 2 armies may stack in a zone. Units in an army are placed in the corresponding army box on the map with the subordinated generals. The reserve cavalry corps and the special units can only be stacked with an army. An army marker without combat units is removed from play and may be reconstituted when the power has been defeated twice. In the latter case, the units marked E are included in the next budget phase in the reserve of units for building.
Attrition: units activated out of supply, or making forced marches, or in bad weather suffer attrition tests which may eliminate loss steps.
Cavalry Superiority: the side with the greatest number of steps of reserve cavalry, of special cavalry units (cavalry of the French Guard, Russian Chevaliers Gardes and Uxbridge for Britain) and of cavalry generals benefits from this superiority. Cavalry superiority is used during interceptions, evasions and battles.
Coalition: the nations allied against the French Empire.
Command Value: the number of steps that a general may command; this number is doubled when in an army.
Continental Blockade: the blockade is in place when all the ports of continental Europe from Saint-Petersburg to Zara belong: to France, to an ally or a forced ally of France, or to a major power previously defeated and now neutral or in forced peace; minor allies of a major power follow its status. The ports of Spain and of Portugal in the War of Liberation are not taken into account if France controls all the French and Spanish fortresses adjacent to the Franco-Spanish border. Gibraltar is never taken into account. Continental Europe excludes islands (Sicily, Corsica, Sardinia) but includes Copenhagen.
Deck: all the cards of one side form its deck.
Difficult terrain: all movement in such a zone requires the expenditure of 2 or more movement points.
Escalade: The escalade level represents the more and more unconditional opposition of the European powers to France. When the level reaches 15 points, the "Punishments" cards of each side are shuffled together with the Epic cards still in play, discarded or not, to build a new draw pile.
Fog of War (optional): it is not permitted to examine the contents of enemy stacks. Only the general of a force or a single unit in a zone is visible to the enemy.
Force: on land, a force is either a combat unit without a general or a general and his units, either an army or a group of armies. At sea, forces are called squadrons and consist of one to three fleets.
Forced marches: these give extra movement points during an activation in exchange for an attrition test.
Foreign War: an event card which starts a war with an off-map foreign nation and may require the removal of units from play to be placed in the corresponding box.
Fractions: fractions are rounded to the nearest whole number; 0.5 is rounded up.
Game Turn: each turn covers a period of a year.
Initiative value: this value influences the movement capacity and the ability to intercept, evade and make counter-marches. It also represents the cost in AP to activate a force commanded by that general.
Loss Step (or step): a combat unit has one or two loss steps. The front of a unit represents it at full strength. If it suffers a loss from combat, it is turned over on to its back. If it suffers a further loss, it is eliminated. A unit without a reverse (including special units) has only one loss step; it is thus eliminated on the first loss. An eliminated unit is not returned to the player's reserve if it cannot be rebuilt.
Military reform: Austria and Prussia can undertake military reform either through the means of event cards (Holy Empire (3C), Scharnorst (45C) and Landwehr (46C)) or automatically when the power has been defeated twice. In the latter case, the units marked E are included in the next budget phase in the reserve of units for building.
Minor nations: all nations are minor with the exception of France, Britain, Austria, Russia, Prussia, Spain and Turkey, which are major powers.
National Territory: this is territory belonging to each major power at the beginning of the game, to which conquered provinces may be added.
Neutral: a neutral nation is not at war with a nation of either side. It can ally with either of the players. A neutral nation will not operate the Continental Blockade unless it has previously been defeated by France.
Permanent Card: a permanent card is replaced in the player's hand at the beginning of each turn during the card hand phase, provided that the country written on the card belongs to the player's side and its capital is not controlled by the opponent. These cards are never removed from the player's hand by an event.
Port Blockade: a fleet controlling the "Blockade" box of an enemy port.
Protectorate: minor countries permanently attached to France and which cannot be subject to Coalition diplomatic action except for events. The establishment of a protectorate gives at least one victory point to the Empire. The minor powers that can be a protectorate are: Denmark, Egypt, Naples, Portugal, Sweden, Saxony, Poland, Confederation of the Rhine and Westphalia. The Kingdom of Italy and Switzerland are already protectorates in 1805.
Reserve: each major power has a reserve wherein are placed available generals and units to build during the Budget Phase. The player always chooses freely which generals he draws from his reserve. Generals cannot be deployed from the reserve outside the Budget Phase or exceptionally following events during the activation phase.
Round: each game turn always comprises at least 6 activation rounds; a seventh round may occur if the event Winter Campaign (16C) is played.
Siege: the attack on a fortress is a Siege. A Siege is the only way to take control of a fortress and its associated zone.
Strategic Redeployment: strategic movement occurs in the interphase, allowing the movement of units over large distances.
Unit: a unit represents an army Corps and a naval counter a fleet.
Victory: the level of Victory determines whether there is an Automatic victory for either side; if the level reaches 0, the Coalition scores an automatic victory and if it reaches 20, France has attained its objective.
War of Liberation: Spain enters a War of Liberation when the Coalition player plays the card Dos de mayo (22C).
5 Turn Sequence
The game has ten turns maximum, each representing a year. Each turn has an interphase which consists principally of the budget phase and diplomatic phase, then an activation phase which consists of six rounds (seven if the Winter Campaign (16C) event is played). The fifth round is a round of bad weather and the sixth and seventh rounds of winter.
The year 1805 begins with the second round.
5.1 Interphase
5.1.1 Declaration of War Phase
Each player, the Coalition then the Empire, makes declarations of war on other powers.
Invasion of another country is not permitted during a turn unless a previous declaration of war was made at this stage.
5.1.2 Card Hand Phase
Before drawing new cards, each player can discard into the discard pile some or all of the cards in his hand or he may retain them.
Each player checks the Card Assignment Table for the number of cards he can have in his hand. Declarations of war affect the number of cards available to each player. After having received the permanent cards allowed, they then draw the number of cards to bring their hand up to full size.
5.1.3 Budget Phase
The players collect their resource points and expend them; it is not possible to retain resource points for later turns.
5.1.4 Diplomatic Phase
Each player, the Coalition then the Empire, can use a maximum of 2 cards from his hand. Each card allows him:
- to take diplomatic actions on minor or neutral major powers,
- to establish a protectorate on an allied minor power (Empire only, see 8.1.5),
- to try to stop a Foreign War (Coalition only, see 6.5),
- or play a particular event.
5.1.5 Neutral Major Power Movement Phase
Players may move any forces of the neutral, forced alliance or forced peace major powers but not make forced marches.
5.1.6 Strategic Redeployment Phase
The players may move their units over long distances under certain conditions in the following order: Turkey, Spain, Prussia, Austria, Russia, Britain and France (see 7.6).
5.2 Activation Phase
Each activation phase is divided into six identical activation rounds. Each activation round allows each side to take one action. Empire always takes the first action in each activation round.
In each round, each side may:
- play a card and use the number of AP shown on it,
- play a card as an event, but no more than one new Foreign War per year (that is, a turn) (see 6.5),
- make a one AP operation without playing a card,
- pass in his round,
- establish a protectorate over a minor eligible for this status (Empire only);
- during a winter round, attempt to end a Foreign War.
- any two rounds, take a diplomatic action on a minor power by playing a card.
5.2.1 End of the Activation Phase
At the end of the Activation phase, besieged forces suffer a final siege test.
Then forces that are:
- not supplied,
- or are besieged,
- or are demoralised,
suffer an attrition test.
5.3 Conquests and Surrenders Phase
Conquests and surrenders of major and minor powers are determined.
Destroyed fortress and demoralisation markers are removed if this is possible.
5.4 Victory Phase
The victory conditions are checked.
6 Cards
6.1 Card Decks
The Empire and the Coalition each have their own card decks.
Each deck is divided into two sets: "Epic" then "Punishments". Unless the scenario instructs otherwise, the players start with the "Epic" cards.
6.2 Description of the Cards
Each card includes at least the following:
- a card number,
- an Activation value of 0 to 3, which is used to activate forces, take diplomatic action, or provide escalade/victory points.
- an event title and its description.
Where the card title is followed by a golden star, this signifies that if the card is played as an event, it is permanently removed from play and not shuffled back into the deck. If the title is followed by a silver star, the event may be played only once during play, but the card is not removed and may be used later for its APs. If the title of the event is in blue, additional details can be found on the player aid. Markers can be placed on the turn track as a reminder of the play of that event (for example, "Piège de Bayonne").
- a note of the game phases during which the card may be used.
Some cards have other indicators:
- The abbreviation CC means this is a combat card which gives a bonus during battles (see 6.6).
- The abbreviation FW (Foreign Wars) is an event that obliges the power concerned to remove units from play and place them in the box corresponding to the card in play (see 6.5).
- Details of victory points and escalade. When a card is played as an event, the escalade and victory points are adjusted as a result.
- A red dot beside the card number signifies that the card is withdrawn from play for the 1809 scenario.
Exception: if the Coalition includes at least 5 major powers (that is Britain, Russia, Prussia, Austria, Spain and Turkey), the activation value of the Coalition cards is increased by 1 during the "Punishments" period only, with the exception of combat cards (CC) where the value remains unchanged. The marker "Grand Coalition" may be used as a reminder.
6.3 Assignment of Cards
During the card hand phase, the player retains his current cards or discards some or all.
Then each player checks the card assignment table to find the number of cards he can have in his hand. The size of the hand of each player depends on the ownership of key zones and certain events.
To be eligible for a card, a key zone (or a group of key zones) must belong to one of the nations in the alliance and not be controlled for the purposes of paragraph 3.2 by the opponent. A player cannot benefit from the key zones of a major power in a forced alliance (see 8.1.4).
Certain key zones which give a right to cards do not benefit the conqueror but deprive the owner of the benefit of the card. For example, France controls Berlin, which loses the Coalition the right to a card but does not give an extra card to France. However, the occupation of Mantua awards a card to the Coalition and France loses a card.
Previous declarations of war affect the total number of cards available to each player. For example, France declares war on Prussia in 1806, which then enters the Coalition, which receives two extra cards in the card draw for the key zones of Prussia.
During the card hand phase, the minimum size of a hand is 6 cards and the maximum size is 10 cards. The event Miseries of War (52C) permits the Coalition to exceed this limit.
For example, the Coalition controls London, Lisbon, Gibraltar + Malta and the Two Sicilies, which gives him only four cards as of right. As this number is less than the minimum of 6, the size of the Coalition player's hand is treated as 6.
The minima and maxima cease to apply after the assignment of cards phase.
The player receives the permanent card of each allied major power if the country written on the card belongs to player's side and its capital is not controlled by the opponent. He then draws cards to complete his hand from his draw pile.
"Permanent Card": a permanent card is replaced in the player's hand at the beginning of each turn during the card hand phase provided that the country written on the card belongs to player's side and its capital is not controlled by the opponent.
For example, at the start of 1813, Austria is in a forced alliance with France and the Grande Armée controls Moscow. The Coalition does not receive the permanent card of Austria nor that of Russia. Only the Coalition may benefit from the permanent cards of Austria and Russia, even if there is an alliance between Austria or Russia with France.
6.4 Use of Cards
The cards can be played during the budget phase, the diplomatic phase, the activation phase or the conquests phase.
Each card may be used in one of the following ways:
- to activate one or more forces and/or fleets (see 9),
- as an event,
- to impose a forced alliance (see 8.1.4),
- to attempt a diplomatic action (see 8.2),
- to establish a protectorate (see 8.1.5, Empire only),
- to attempt to put an end to a foreign war (see 6.5, Coalition only),
- to attempt an interception (see 12.3).
If a card is played as an event, its AP cannot be used.
If an event is in contradiction with the normal rules, the card prevails. If two events contradict each other, the last played prevails.
If there are not sufficient forces to meet the event conditions, the player must build and then lose these units during the next Budget Phase.
If a card played does not have its title followed by a golden star, it is placed in the discard pile. When the draw pile is exhausted or the "Punishments" cards become available, discarded cards are immediately reshuffled and added to the draw pile.
6.5 Foreign Wars
A notation "FW" on the card indicates a foreign war breaks out when the card is played as an event.
A "FW" means that the units noted on the card for the foreign war are placed in the corresponding box on the game map with the event card; it is always the Coalition player who chooses the units concerned. These units cannot return to play before the war ends.
A foreign war ends via the use of an event card, or by playing an operations card of any value during the diplomatic phase or in a winter activation round. The player throws a die and adds the value of the card played. On a result of 5 or more, the foreign war ends.
If the foreign war ceases, the foreign war card is removed from play permanently and the units return as reinforcements during the following Budget Phase.
6.6 Combat Cards
Events with the notation CC give a bonus during the resolution of battles and can only be used once per battle in any phase at the choice of the player.
During land battles, each side may play as many combat cards as is possible.
During naval battles, a single combat card may be played by each side.
7 The Interphase
7.1 Declaration of War Phase
Each player, the Coalition then the Empire, makes his declarations of war against neutral major or minor powers or after a forced peace period for major powers.
It is not possible to declare war on a nation later in the turn, in particular during the activation phase.
A declaration of war on a power is a declaration of war on all its allies major and minor. In addition, the power attacked joins the other side with which it is now allied. A minor power not allied to a major power becomes an ally of France or Britain if attacked.
The forces of a minor nation are immediately deployed on the map in any zone in their territory when this nation (or the major it is allied to) rejoins one side.
The first declaration of war on a neutral major power increases the escalade level by one.
7.2 Hand Building Phase
These are built according to the provisions of Rule 6.3.
7.3 Budget Phase
The budget phase (calculation, use of resources and set-up of new units) occurs in the following order: Turkey, Spain, Prussia, Austria, Russia, Britain and France.
7.3.1 Calculation of Resources
Each neutral, at war, in forced peace or in forced alliance major power has a number of resources each turn as shown on the play aid. This number can vary by reason of events or the loss of control of a key zone of national territory.
Each key zone of national territory under enemy control reduces by 4 resources the total of the power concerned but does not award them to the occupier.
Exception: if Spain is in War of Liberation, the loss of the key zone Madrid does not reduce Spanish resources by 4.
Each player may transfer resources between the allied major powers of his side; a major power cannot receive from all of its allies more than 4 resources per turn.
7.3.2 Use of Resources
Each major power may use its resources to build new units. It may also use its resources to flip back two reduced combat units in each supplied army.
The Empire manages the production of Spain and Turkey while these states are neutral. The Empire also manages the production of all major powers in forced peace or in forced alliance which have been defeated by the Coalition.
The Coalition manages the production of Prussia, Austria and Russia while these states are neutral. The Coalition also manages the production of all major powers in forced peace or in forced alliance which have been defeated by the Empire.
The costs of production of units are shown on the play aid (production table). The cost of units is expressed per loss step. The units that have two loss steps can be built on their reduced side.
Resources not used at the end of the Budget Phase are lost. Builds are limited to available counters.
Each major power that has fleets may build a maximum of one per Budget Phase; except for Britain, which may construct as many fleets as it wishes. Britain receives for free one fleet or an extra card each Budget Phase. Moreover, Britain may spend 4 resources to obtain an additional card.
7.3.3 Minor Countries
The minor nations do not have any resources. A minor neutral nation produces nothing, but its forces are deployed on the map when it is attacked.
Each player adds up the number of allied minor nation units that it controls and receives one loss step of minors per two minors; an odd number does not give any right to an extra step. For example, if a player has three minor allies with units, he receives one step of minors.
The new minor states like the Confederation of the Rhine or Westphalia, which have combat units, count as a minor and are taken into account in the same way as minors who belong to those entities. Serbians, Chouans and Tyrol count as a minor and are taken into account in the same way.
The player chooses which steps of minors to construct as he wishes. For example, in 1810 France has the following minors with units: Confederation of the Rhine, Westphalia, Hessen, Switzerland, Italy, Baden, Württemberg, Holland and Bavaria, for a total of 9: he may build 4 minor steps and chooses to reinforce the Dutch and Bavarian corps, both of which are reduced, and to build the Swiss corps previously eliminated.
The fleets of minors, once destroyed or if the minor is conquered, are permanently eliminated.
7.3.4 Set-Up of New Units
New units are placed in the following reinforcement zones: the capital or non-besieged fortresses in the national territory following the stacking rules (see 11).
Fleets are placed in zones of their national territory containing a port.
Placing of new units occurs in the following order: Turkey, Spain, Prussia, Austria, Russia, Britain and France.
It is not possible to place units in zones of their national territory which are not connected to the capital zone. For example, France has integrated into its national territory Illyria and Friuli, but may not deploy its new reinforcement units there because this part of the national territory is separated from France by Italy. For example, it is not possible for Britain to deploy its reinforcements in Gibraltar or Malta.
It is permitted to place directly into each supplied army:
- 2 loss steps including reserve cavalry to strengthen reduced units,
- 2 mobile depots,
- an unlimited number of special units,
- a maximum of 3 subordinated generals.
To create an army, one needs a general, the army marker and at least 2 loss steps deployed in a supplied zone. Steps of reserve cavalry can only be produced if the army is in a reinforcement zone. An army can only be created in the Budget Phase.
7.3.5 Placement of Generals
New generals may enter play if the year on their counter corresponds to the current interphase. They are placed in the reserve.
The generals in the reserve may be placed for free in the reinforcements zones, always with a combat unit or with supplied armies.
Generals of a major power may be placed directly on minor allied units situated in their reinforcement zone.
7.3.6 Removal of Units
During the Budget Phase, generals, units, fleets and depots (supplied or not) may be removed from the map. They are returned to the reserve and cannot be rebuilt or redeployed before the Budget Phase of the next year.
7.4 Diplomatic Phase
The players may attempt to ally with other major or minor powers according to the provisions of rule 8.
A power joining an alliance permits the player to immediately draw a number of cards equal to the number of key zones on the map.
7.5 Neutral Major Powers Movement Phase
Players may move the units of Neutral, forced ally or submitted to forced peace major power up to their base movement factor within the frontiers of their national territory.
No naval movement is possible.
The Empire moves the units of Spain and Turkey while these states are neutral or have been defeated by the coalition. The Coalition moves the units of Major Powers in other situations.
7.6 Strategic Redeployment Phase
Supplied forces of each side, with the exception of neutral powers (still neutral or after a forced peace period or in forced alliance), may move during this phase on condition they do not enter a zone:
- containing enemy units,
- containing an unbesieged enemy fortress,
- containing an enemy control marker,
- in which the force would not be supplied.
The strategic redeployments occur in the following order: Turkey, Spain, Prussia, Austria, Russia, Britain and France.
A force without a general moves with the movement factor on the counter. A force commanded by a general may double its movement factor.
An attrition test is made at the end of movement if the force exceeded its printed movement factor, but no penalties for winter or forced march are applied.
No interception is possible.
Exchanges of units are possible between generals in the same zone, including total or partial absorptions during this phase; the hierarchy rules must be followed.
No naval movement is possible during the strategic redeployment phase.
8 Diplomacy
8.1 The Possible Statuses of Nations
France and Britain do not have a status. The other nations, major powers (Prussia, Austria, Russia, Spain and Turkey) and minor powers must have one of the following statuses:
8.1.1 Neutral
The units of neutral major powers may only move during the interphase in their national territory; movement into minor allies is prohibited. Neutral minors do not deploy their units.
If a neutral minor is attacked, it immediately joins the other side. Once its neutrality is lost, a minor nation cannot recover it until the end of the game unless by an event or a forced peace.
8.1.2 Ally
A major or minor power may be allied to France or the Coalition or with a neutral major power (minors Alliance only). It is not possible for a major power to leave an alliance except by a forced peace being imposed by the other side. Exception: Spain with Dos de Mayo (22C).
A neutral major or minor power may become an ally of one side only after a diplomatic action or declaration of war by the other side.
Once an ally, a minor country may not come back to neutrality except by an event. If it is conquered, it will become an ally to the conqueror or integrate the national territory of the conqueror.
The major power controls the units of this minor nation as their own and may use the territory of the minor for supply lines.
Belonging to an alliance permits:
- being commanded for steps of major powers by allied generals, providing at least half the combat points in the force are of the general's own nationality,
- integrating combined squadrons in fleets,
- benefiting from allied territory for supply lines,
- combining key zones to increase the card hand of the side,
- sending resource points to an ally up to 4 points per Budget Phase; the same beneficiary can never receive more than 4 points per Budget Phase from all its allies.
Exception: the Empire may not send units in Spain if it is an ally as long as the Snare of Bayonne (24F) card has not been played as an event.
France and Britain can never ally with each other.
8.1.3 Forced Peace
Whenever a major power is conquered (see 18.2), it submits to a forced peace. Its unconquered minor allies submit to the same.
During the Conquests phase, the victor calculates the length of the forced peace, during the course of which the former belligerents cannot declare war (see 18.2.2).
A major power submitted to a forced peace still produces units as per 7.3.
At the end of the forced peace, the major power returns to neutrality. However, the conqueror suffers a penalty of -1 for its subsequent diplomatic actions against this power and the other side benefits from a bonus of +2.
If the winner declares war on the defeated after a forced peace, the defeated immediately receives a year's budget which is added to the current budget to produce his units and the "Punishments" cards are added to the draw pile whatever the Escalade level. The enemy bloc receives 3 free diplomatic actions with a bonus of +2, the targets of which may be neutral majors or minors, even in forced peace or forced alliance.
If a major power is defeated for a second time by the same power, the forced peace lasts to the end of the game unless an event or a forced alliance is imposed on him.
8.1.4 Forced Alliance
A forced alliance may be imposed by the Empire on a defeated Coalition major power in two situations:
- when a forced peace occurs following the defeated having played the event Drums of War (27C).
- when a major power is defeated a second time by the same major power.
The Empire player must then discard an operations card of any value during the Conquests Phase.
A forced alliance lasts to the end of the game.
Note: Austria and Prussia may rejoin the Coalition via the events Scharnhorst (46C) and Schoenbrunn (47C).
A forced alliance is a special case of neutrality. Forces of a forced ally are neutral. The choice of a forced alliance permits the Empire to play Expeditionary Corps (40F) (which is the only way to "use" some units of a forced ally).
A forced alliance allows the Empire to use the territory of the forced ally to move according to the movement rules, to stack and to use its fortresses as supply links but not as supply sources. No diplomatic action is possible on a forced ally.
If the forced alliance is broken by an event, the French units take control of the zones that they alone occupy including fortresses.
For the zones where forces of France and the Coalition cohabit, the French forces may:
- retreat immediately into a fortress which they control,
- retreat into an adjacent zone which is not controlled by the Coalition,
- or accept an immediate battle as defender with possible retreat into a fortress in the zone if one exists.
8.1.5 Protectorate
A protectorate is a minor country permanently attached to France and which cannot be subject to Coalition diplomatic action except for events.
To establish a protectorate, the minor country aimed at must be an ally of France. The Empire player must then discard a card with a minimum value of 2 during the diplomatic phase or the activation phase, or play some events.
The establishment of a protectorate gives a victory point to the Empire and increases the escalade level by one.
The minor powers that can be a protectorate are: Denmark, Egypt, Naples, Portugal, Sweden, Saxony, Poland, Confederation of the Rhine and Westphalia. The Kingdom of Italy and Switzerland are already protectorates in 1805.
8.2 Diplomatic Action
A diplomatic action aims to move a neutral country to the player's side.
8.2.1 Major Powers
The neutral major powers can only be the object of diplomatic influence during the diplomatic phase only. The major powers allied to the other side, either in a forced peace or a forced alliance, are not affected.
Exception: if Spain suffers a major or minor defeat, she may suffer an enemy diplomatic attack during the diplomatic phase or an activation round even if allied to France. If the diplomatic action succeeds, Spain becomes neutral; units of either side in Spain are redeployed as per 18.2.3. Forces of both sides cannot enter the Spanish territory anymore while Spain is neutral. This opportunity ceases after the Empire plays the "Snare of Bayonne" (24F) event.
In each diplomatic phase, each player may make only one diplomatic action against ONE major power and another one against a minor power, OR one diplomatic action against TWO minor powers.
8.2.2 Minor Powers
Minor nations which are:
- neutral,
- allied to France during the "Punishments" period,
- or allied to France and don't have at least a friendly combat step during the "Epic" period
can be the object of diplomatic influence either in the diplomatic phase or during the activation phase.
A minor country that does not satisfy the conditions above, in particular an allied nation of the Coalition or a French protectorate, cannot be the object of a diplomatic action.
8.2.3 Resolution
To perform a diplomatic action on a major or minor nation, one must play a card from one's hand; the activation value must be a minimum of 3 for a major power, 2 for a minor with units and 1 for the other minors.
The player then throws a die modified by:
- his diplomatic influence bonus shown on the diplomatic table on the play aid,
- the bonus shown on the event card played on this occasion,
- +2 if the target is a major power previously defeated by the enemy player, even using the Tilsit (26F) event,
- -1 if the target is a major power previously defeated by the friendly player, even using the Tilsit (26F) event.
If the score is 6 or more, the nation rejoins the player's side and is considered as an ally of France or Britain.
The forces of a minor nation are immediately deployed on the map in any zone in their territory when this nation (or the major it is allied to) rejoins one side.
A neutral power, major or minor, that switches sides immediately provides a number of additional cards. For example, the Coalition has 7 cards, plays a card and switches Prussia into its side. Prussia has 2 key zones, Berlin-Koenigsberg and Warsaw, and provides the right to draw two new cards.
If a minor nation allied with France switches to the Coalition, its combat units, if they are stacked with French units outside its territory, must attempt to move to the nearest Coalition zone within its movement factor's range; if none exists, then they are destroyed.
For those situated in their own territory, stacked with French units, the units of both sides are eliminated in the proportion of one for one step from each side.
The fortresses return to their original owner unless only French units occupy the zone.
For example, Bavaria allied to France joins the Coalition; the Bavarian corps is stacked with 1 French step: the latter is eliminated along with one Bavarian step. The Bavarian fortresses join the Coalition except Ulm, where a French corps is present.
9 Activations
9.1 General Rule
If a card is used for an activation, the player may spend a number of Activation Points (AP) equal to the value of the card.
The cost of activation of one fleet is one AP. The cost of activation of a force is equal to the initiative value of the commanding general. The cost of activation of a force consisting of a single combat unit without a general is one AP.
For example, a card with 3 AP permits the activation of 3 forces with generals of Initiative value 1, OR a force commanded by a general with a 1 value and a force commanded by a general with a 2 value, OR a force commanded by a general with a 3 value, OR a force commanded by a general with a 2 value and one fleet, OR all other combinations.
If a force of two Armies is constituted, the Initiative value of the commanding general increases by one point to a maximum of 3. In this case only, the Armies may swap units before the beginning of movement.
A general subordinated to an army may be activated separately from the rest of the army and then constitutes an independent force. For example, the French Player plays a card with 2 AP and activates Soult (initiative 2), who is in the Grande Armée with 3 steps, to undertake an operation while the Grande Armée commanded by Napoleon is not activated.
Once activated, a force may move, fight and make sieges up to the limit of its movement points. A lost battle halts activation.
A force must finish its operations (movements, battles and sieges) before another force can be activated in the same round. Exception: after play of the "Major Campaign" (see 12.6), the activated forces may move one after the other but may fight together if they are in the same zone within the stacking rules; this card is negated by the card "Interior Lines", as will be explained in the Battle rules below. It is always possible to activate each force one after the other.
Special Case for Armies: when the general commanding an army is activated, he may activate for free other forces not included in another army situated in adjacent zones up to the limit of his command value. Forces must not be separated from the zone of the army by a river without bridge or a mountain (with or without a pass). The adjacent forces meeting these requirements are then placed in the army and the general may start his activation with a movement factor reduced by one point.
For example, the French player activates Napoleon and his army in Ulm. Ney may not activate for free because he is separated from Napoleon by a river without bridge. However, the player may activate Marmont for free, who is placed in Napoleon's army. Napoleon then starts his activation with a movement factor reduced by one point.
9.2 Placing AP in Reserve
If all the AP points of a card have not been used, the balance may be placed in reserve and marked to this effect on the marker track.
The activation points placed in reserve can be used along with those of a later activation card or event giving APs or a one-AP operation. These AP in reserve are lost if not used by the end of the current turn.
For example, in round 2, the Coalition plays a 3 AP card but only wishes to use 1; it places in reserve the two unused AP. In round 4, it plays a 3 AP card and wishes to activate two generals with a value of 2: it thus uses one AP from the reserve. In round 5, an event gives 2 AP and only one is used to activate one fleet, the second is put in reserve. In round 6, it plays a round without cards and receives one AP; it can activate a general requiring 2 AP, it draws from the reserve leaving 1 AP, which is lost at the end of the round, which is the last of that game turn.
10 Command
10.1 Command
A general may command, that is to say have in his force a number of steps equal to his command value. Mobile depots are not taken into account.
A general can command allied minor units up to the limit of his command value and major allied units up to the limit of half, rounded down, of the number of steps of the force. Where this rule is exceeded, the player must eliminate surplus steps immediately.
A general with an army marker may command:
- a number of steps equal to double his command value,
- including 2 steps of reserve cavalry,
- and including 3 subordinated generals.
10.2 Hierarchy
Each general counter has a number which shows the place in the hierarchy of the generals of that power; 1 is the highest level.
A general of lower rank may never command a force of a general with a higher rank. It is always the general of the highest rank who commands during a battle.
Isolated corps always have a rank lower than any general whatever. The rules of hierarchy must be complied with at the end of all evasion, interception and retreat movement.
A subordinate general may stack with a higher-rank general in order to bring him reinforcement steps; at the end of his movement, the lower-ranked general goes back to the reserve or is integrated into the army.
A higher-ranked general cannot be part of an army commanded by a lower-ranked general. He cannot be absorbed but may voluntarily join the army commanded by a lower-ranked general, leave his steps and then must go to the reserve.
When allied generals are in the same force, command is determined according to the following criteria in the following order:
- the general with an army marker,
- the general with the greatest number of combat points,
- the general of the following powers: Britain or France then Austria then Russia then Prussia then Sweden then Spain and then Turkey.
10.3 Changing Generals
A general commanding a force cannot be removed except after an absorption, combination (see 12.2) or destruction of his force, or by being replaced by another general in the Budget Phase.
A general commanding an army can only be removed during the Budget Phase or by an event.
In both cases, choose a general from the reserve or promote one of the generals in the zone; the general with the highest rank is in command of the army. The sacked or dismissed general is removed from play and put into the reserve during the Budget Phase of the next year.
Certain events can lead to the permanent removal from play of generals during operations. When a general is removed by an event, the player is allowed to choose an available general from the reserve to replace him.
11 Stacking
There can only be one force of the same side in a zone at any time. The only exception is that a force may pass through a zone already containing a force of the same side.
Where this rule has not been complied with, the excess units are immediately eliminated and the generals placed in the reserve.
The units of the two sides cannot finish a round in the same zone; one of the two sides must have left the zone either voluntarily or following a retreat into another zone or into a besieged fortress. It is forbidden to enter a zone of a neutral nation.
Egypt: A force may move from Alexandretta in Turkey to Acre in Egypt (and vice-versa) by spending all of its movement factor.
12 Land Movement
12.1 General Rule
Each force, once activated, moves using the movement factors of its units. If the units have different movement factors, then use that of the slowest. For example, a French army contains 8 French steps with a movement factor of 4 and 2 Bavarian steps with a movement factor of 3; then the base movement factor will be 3 for the force.
During bad weather rounds (5th) and winter (6th and 7th), the movement factor is reduced by one point.
A force spends its movement points as provided for on the movement chart up to the limit of its movement factor increased by a forced march (see 12.3). The cost of the zone-edge terrain (rivers and mountains with or without passes...) is added to that of the zone. A force cannot spend more movement points than its enhanced movement factor. For example, a unit with a movement factor of 2 which is not forced marching cannot cross a mountain without a pass (cost: 1+2MP=3MP).
Movement occurs from one zone to another zone with a common border. It is not possible to move into a zone from another if they only have a common vertex. For example, it is not possible to move directly from Milan to Bologne. It is necessary to move into another zone (for example Mantua (Mantoue)).
It is not possible to cross a strait if an enemy fleet AT SEA is present in the corresponding maritime zone; the fleets in ports or blockade boxes are not at sea. Exception: the strait between Copenhagen and continental Europe may be crossed even if an enemy fleet at sea is present in the "Detroits" sea zone.
Rivers cause no penalty if they are crossed at the bridges noted on the map; otherwise, a penalty of one movement point applies.
A force must interrupt its movement when it enters a zone occupied by an unbesieged enemy fortress or by an unbesieged enemy force. They may continue to move if they manage to mask the enemy fortress or force the enemy force to retreat.
12.2 Combining Forces
A moving force may drop off units and pick them up, providing the hierarchy is observed. If a force absorbs all of another force commanded by a lower-ranked general, the latter is immediately put into the reserve of available generals unless the moving force is an army. Partial absorptions are permitted.
An army may absorb the units of another army if it is moving and commanded by a higher-ranked general and the non-activated army has after this operation at least 1 loss step. Two armies cannot combine in the course of movement unless as the result of a battle of a Major Campaign.
A general must not exceed his command value at any time in his activation. A general must always have at least one combat unit or he must be immediately returned to the reserve.
For example, Masséna, who has a command value of 6, is activated with 4 steps; in the course of his movement, he drops off 2 steps and absorbs 2 others commanded by Oudinot with a lower rank. Because Masséna has a higher rank but is not commanding an army, Oudinot must be placed in the reserve. If Masséna was commanding the Army of Italy, Oudinot could have remained with the army.
A force other than an army may join an army within the command and stacking rules; the army may then activate normally including the forces that have just joined it. Such a move needs 2 activation.
An activated force which enters a zone containing a friendly force which it cannot absorb must continue its movement.
12.3 Forced Marches
These permit an activated force to receive 1 to 3 additional movement points.
The declaration of a forced march and the number of additional movement points must be made before movement.
A forced march requires an attrition test for the force:
- either before the first battle, whether or not the movement points have been used,
- at the end of its movement if no battle happened.
For example, a force with a movement factor 3 calls for 3 additional movement points and fights a battle having only spent one of these; the test is made with a penalty of +3 and the force may spend its remaining 5 movement points after the battle if it is victorious.
If units with a lower basic movement factor are absorbed into the force during movement, the activated force immediately loses the corresponding movement points. For example, a force composed only of French units with a movement factor 4 calls for 3 points of forced march giving a total of 7; it then moves 2 movement points and absorbs a Baden corps with a movement factor of 3: if they had been stacked together at the start, the maximum movement factor would have been 6 (3+3), so the activated force cannot spend its 7th movement point.
12.4 Interception
If an enemy force enters a zone adjacent to friendly forces (even already occupied by a friendly or enemy force), a single non-demoralised force commanded by a general may attempt to intercept the moving force. To do this, the player must play a card with a value equal or superior to the Initiative value of the general commanding the force. Then, he rolls a die and adds the following modifiers:
- Cavalry Superiority: +1
- Initiative value lower than the active player's general: +1
- The Zone of interception is in difficult terrain: -1
If he scores 5+ then the interception succeeds. The intercepting force suffers an attrition test then moves into the zone. An interception triggers a battle where the intercepted remains the attacker; the interceptor benefits from a bonus of +1 to the combat dice.
The interceptor may leave in place some of its units within the limits of stacking.
For example, Blücher with his army attempts to intercept Davout (initiative 1) with a force of 2 infantry corps; Blücher is a cavalry general with an Initiative value of 1. Blücher must play an activation card of 1 or more and rolls a die. Blücher benefits from Cavalry Superiority and +1 is added to the dice. If the test is passed, Blücher may move into the zone with Davout and may leave behind a subordinate general with his units.
Interceptions are resolved before evasions.
12.5 Evasion
When an enemy force enters a zone containing a friendly force to attack it, the latter, if it is commanded by a general, may attempt to evade battle.
A demoralised force evades automatically, as does a force that evades into the fortress of the zone.
The player rolls a die and adds the following modifiers:
- Cavalry Superiority: +1
- Initiative value lower than the active player's general: +1
- Zone entered by the active player is in difficult terrain: -1
If he scores 5+ then the evasion succeeds. The force may retreat into an adjacent zone which is not the one entered by the active player:
- which does not contain unbesieged enemy units, or
- which does not contain an unbesieged active enemy fortress.
An evasion into an enemy controlled zone without a fortress is possible; the enemy control marker remains in place.
If the test is not passed, a battle is fought. Otherwise, the moving force may continue to move.
For example, the Archduke Jean (Initiative value of 2) enters Milan crossing the river without a bridge to attack Masséna, who without cavalry has an Initiative value of 1. Masséna benefits from a bonus of +1 (initiative difference) +1 (difficult terrain) and must score at least 3 to succeed in evasion (3+2 = 5).
12.6 Major Campaigns
A "Major Campaign" card allows the activation of several generals simultaneously to fight together if necessary while complying with the stacking rules in the battle zone before the resolution of the battle. The "Interior Lines" card allows this to be overruled.
The following special rules apply when a Major Campaign is played:
- The inactive player who declines or fails to evade loses this ability until the resolution of the battle even if other enemy forces enter his zone.
- If several forces of the active player combine in the same zone to fight a battle together, in the event of victory, the consolidated force within the stacking rules may continue its movement: the available movement factor will be the lowest residual movement factor of the forces concerned.
For example, two forces combine in a zone, the first force has 2 movement points and the second 3; the consolidated force has 2 movement points for the rest of its activation.
Interior Lines: The cards Interior Lines (15C) and Genius of Napoleon (1F) allow one to counter an enemy major campaign. The card must be played before the first battle resolution of the activation. If a force commanded by a general with a tactical defence value of 2 or 3 is attacked by several forces, they may defend separately against each of them. The order of the combats is determined by the moving player.
13 Supply
13.1 Checking Supply
Supply is checked at the moment:
- of activation of a force,
- of combat for the two protagonists,
- at the resolution of a Siege.
The unsupplied units — those of the inactive player included — receive a marker to show their status at the moment of the check until the next check where the marker may be removed.
13.2 Supply Sources
To be supplied, a force must be able to trace a supply line up to:
- The capital of its nation,
- A fortress in its national territory,
- A capital of a minor ally in the case of a fortress.
A besieged fortress has no role as a supply source.
Minor powers can use the supply sources of the major powers of their side.
13.3 Supply Lines
A supply line is comprised of a chain of links from the force to a supply source. The supply links consist of:
- An unbesieged controlled or allied fortress,
- or a fixed depot.
On land, the length of the distance between 2 links is 2 movement points. Exception: A line exists between the Alexandretta and Acre zones even though it requires a round of movement to move between the two boxes.
At sea, a supply line has unlimited length. It is traced from one port to another port, both of which are free of blockades, and which does not cross sea zones occupied only by enemy fleets which are at sea.
A moving force that causes battle while checking supply must trace its supply line from the zone from which it entered the zone of battle; it is the same for the start of a Siege.
Minor powers can use the sources and supply lines of the major powers of their side. Each major power must have its own supply line. For mixed forces, it is the nationality of the commander of the force that counts. For example, a Russian army includes 2 Prussian corps; these corps can use the supply line of the Russian army.
A supply line:
- cannot cross a zone containing enemy units unless in a battle or if they are besieged,
- cannot cross a zone containing an unbesieged enemy fortress,
- cannot cross a zone containing an enemy control marker,
- cannot cross the zone from which an enemy force has entered the zone of battle,
- cannot cross mountains without a pass because the cost in movement points will be at least 3 points.
A supply line can cross an open-to-all zone even if situated in enemy territory.
Straits do not block a supply line if the maritime zone is not exclusively controlled by the fleets of the other bloc.
13.4 Depots
These are either fixed or mobile; only a fixed depot can be part of a supply chain.
Mobile depots can be converted at any time during activation into fixed depots or by the play of events. A fixed depot can become mobile when a general brings it into his force during his activation or during his movement.
The expending of a fixed or mobile depot gives the benefit of a bonus during an attrition test if it is of the same nationality as the general commanding the force. The depot must be in the zone where the force makes its attrition test.
Only one depot must be spent per activation and per force.
13.5 The Effect of Being Out of Supply
An unsupplied force suffers the following penalties:
- A mandatory attrition test before the resolution of the first battle in the activation.
- Some combat cards cannot be played.
- Penalty in combat of -3.
- It may put in place a Siege (Siege marker 0) but it may not use the Siege Table.
- It may not be rallied if demoralised (see 14.10.4).
Note: if a supplied force joins an unsupplied force, each part of the new force keeps its supply status until the next supply check. Only the unsupplied part will suffer an attrition test if needed. In case of battle, the force is considered to be unsupplied if at least half of its steps are unsupplied.
13.6 Attrition Tests
13.6.1 An attrition test must be taken in the following cases:
- A force activated when unsupplied; the test occurs before the resolution of the first battle in the activation or at the end of the activation if no battle occurred. Note: a siege is not a battle and does not trigger an attrition test.
- A force making a forced march; the test occurs before the resolution of the first battle in the activation whether or not the forced march MPs have been used, or at the end of the activation if no battle occurred. Note: an unsupplied force making a forced march will suffer only one attrition test.
- A force making an interception or a counter-march.
- A force making a strategic redeployment greater than their basic movement factor; the test occurs at the end of movement.
- At the end of the activation phase, unsupplied forces that remain besieged or demoralised suffer an attrition test.
13.6.2 Resolution of the Attrition Test
Attrition is based on the number of steps involved and a die roll modified as shown on the attrition table. A penalty applies if the force concerned crossed at least one poor zone when the resolution of the test occurs in that zone or during the end of the activations phase.
The result is expressed in terms of steps eliminated. Only the steps activated in the test resolution zone are taken into account. Steps dropped off during movement or those in the test zone which are not activated are not taken into account and are not affected by the test.
For example, a general moves with 2 steps and ends his movement either with an army or stacked with a corps of 2 steps; only the 2 steps that moved are subject to the test.
If a force of two Armies must take an attrition test, each army makes a separate test.
If a bonus is given based on a majority of a type of step being present or at least 50%, then the first loss step must come from this type of step.
For example, a force of 6 French steps and 3 minor allied steps elect for a forced march of 3 additional movement points (Note: the movement factor will be 6 movement points including for the French because it must align with the slower basic movement factor of their allies) and cross a poor zone where they drop off 2 French steps to allow the activation of a force of 3 French steps that it absorbs. The 2 steps dropped off plus the 3 French steps already present do not count for the total, which will be 9-2 = 7 steps. The test is carried out on the "6-8" column with a bonus of -1 because the majority of the force is composed of French but with a penalty of +2 for the poor zone and +3 for the forced march for a net penalty of +4. The player rolls the dice and gets 4 + 4 = 8 with a result of 2 losses, of which the first must be a French step and the second can be a French or Allied step.
14 Battle
A battle occurs in a zone where there are two opposing forces and where the inactive player was not able, or did not wish, to evade.
Exception: the play of the card "MAJOR CAMPAIGN" allows several forces to attack in the same zone and to combine for combat, except if the other player plays the card "INTERIOR LINES", which allows him to defend one at a time against each force and even to retreat after the completion of the first battle.
The active player is called the attacker and the inactive player the defender.
Each battle is resolved following the sequence of play below:
- Counter-marches
- Computation of the odds of the forces
- Computation of the level of battle
- Computation of the morale of the force
- Combat modifiers of each player
- Resolution of the battle
- Wounding tests
- Loss application
- Retreat of the loser
- Demoralisation test
- Potential pursuit by cavalry
14.1 Counter-marches
At first, allied generals of the attacker may attempt to join the battle "marching to the sound of the guns" if they are in an adjacent zone to the battle zone; then the defender may do the same.
An army may dispatch a subordinate general and some units to attempt a counter-march.
A counter-march is not possible:
- across a mountain without a pass,
- across a strait,
- by a demoralised force, or
- to a depot without combat unit.
Player rolls a die for each force attempting a counter-march and applies the following modifiers:
- tactical value in attack (attacker) or in defence (defender) of the general commanding the force which is attempting to move. Note: if a general commanding an army is present in the battle zone, he may substitute his value.
- Battle zone is in difficult terrain: -1
The counter-march succeeds if the modified die roll is above or equal to 5.
The force then rejoins the battle zone if the stacking rules are not exceeded in the battle zone. An attrition test is made immediately on the force making the counter-march.
14.2 Computation of the Combat Odds
Each side adds the combat value of units engaged. Note: special units, mobile and fixed depots (except alone fixed depots) having no combat value, they are not taken into account.
The attacker's combat value total is divided by the defender's combat value total. This result gives the players a fractional combat ratio. This combat ratio is rounded to the nearest whole number (0.5 is rounded up).
If the final odds are at least 5/1, the weakest side is totally destroyed and the enemy generals placed in reserve.
14.3 Level of Battle
There are three levels of battle: skirmishes, minor battles and major battles based on the combat value total for the two sides.
A major battle occurs where this total is at least 22 with a minimum of 10 for the weaker side.
A skirmish occurs where this total is inferior or equal to 7.
A minor battle occurs in all other cases, including those where the combat value total is between 8 and 21. For example, if the combat value total of one side is 6 and 8 for the other, it is a minor battle, the total being between 8 and 21.
14.4 Computation of the Morale of the Force
Each side calculates the morale of the force, which is equal to the morale of the most numerous steps in the force. For example, an army has 4 steps of morale 3, 3 steps of morale 2 and 2 steps of morale 5; the morale of the army will be 3. In the case of a tie, the player chooses the morale used.
The majority of losses must be taken from units whose individual morale is equal to the morale of the force. The morale of the army influences the aftermath of battle.
Attention: if a nation has lost its capital, the morale of its forces is reduced by one point. Exception: Spain if Dos de Mayo (22C) is played. Russia has two capitals, Moscow and Saint Petersburg, and only suffers this penalty if both are lost.
14.5 Combat Modifiers
Each side adds his combat modifiers.
14.5.1 Combat Odds
The combat odds give a combat modifier for the attacker.
14.5.2 Cavalry Superiority
The side which has the greater number of steps of reserve cavalry, of special cavalry units and of cavalry generals benefits from a combat bonus of +1. For example, one side has one step of cavalry and a cavalry general and its opponent only has one step of cavalry: the first side has the superiority. If neither of the two sides had any cavalry but one had a cavalry general, the latter would have the superiority.
14.5.3 Terrain Effects
Depending on the terrain of the defender, a bonus or a penalty is awarded to either side.
14.5.4 Supply Check
Players check supply of their force in the zone of battle. An unsupplied force suffers a combat penalty.
The force of the attacker must trace its supply line from the zone from which it entered the zone of battle. For example, Thorn is controlled by the French player and is a supply link. The force of Lannes enters into the zone containing Blücher, which triggers combat. The supply line of Lannes must cross a marsh zone from which Lannes entered the battle zone. Lannes spent 3MP (2 MP for the marsh + 1 MP for the Thorn zone) to the nearest supply link (Thorn). Lannes is thus unsupplied.
14.5.5 Elite Units and Special Units
Each player may designate an Elite Corps to spearhead the assault in order to benefit from its combat modifier represented by a star: each star gives a bonus of +1 to the dice. In return, the first loss must be taken by this corps.
The player may also engage one or more special units in a battle along with the lead assault units to obtain the dice bonus noted on the counter. The first loss must be taken by the lead assault unit and the next ones by the special units engaged.
14.5.6 Generals' Effects on Battle
The general commanding a force provides a die resolution bonus equal to his tactical value, in defence or attack as is relevant.
Within an army, a subordinate general may use his tactical value. But in return, he must take a wound test (see 14.7).
14.5.7 Combat Cards
Each player plays as many cards marked "CC" as he wishes.
The attacker reveals his cards first in each phase of combat resolution.
14.6 Resolution of the Battle
Once all the modifiers are calculated, a net modifier is calculated for the two dice, each side having its own.
Each player then simultaneously throws two dice, to which he adds the total of his combat modifiers, then he reads the combat table according to the level of battle to discover the losses inflicted on the enemy.
The winner is the one who gets the highest result. In the case of a tie, if only one side gets a result followed by a (+), the enemy is defeated. In other cases, then it is the attacker who loses the battle.
In the case of a victory, the active player's force can continue its activation with its remaining MPs.
In the case of a defeat, the activation of the active player's force stops.
14.7 Wounding Generals
Each player rolls a die if he has used the tactical value of a subordinate general (see 14.5.6). On a die score of 6, he is removed from play and placed in the reserve during the next Budget Phase and is not replaced.
Note: except as the result of an event card, only a subordinate general may be wounded.
14.8 Battle Results
The number obtained is the number of enemy combat points eliminated. The choice is made by the controlling player, applying the first loss to the elite corps acting as lead assault, then a loss on each special unit committed, then the majority of losses must be taken from units whose individual morale is equal to the morale of the force including the lead assault unit (see 14.4).
A side may never inflict more losses on its enemy than its own number of combat steps.
Eliminated units are placed in the reserve.
14.9 Demoralisation
14.9.1 Demoralisation Test
EXCEPT during skirmishes, the defeated side in a battle must take a demoralisation test using one die: the force is demoralised if the modified score is greater than the morale of the force.
The morale modifiers are as follows:
- Tactical value of the general commanding the force: +#
- The difference in losses from the victor, including -1/step losses from crossing a river or mountain without a pass
- Combat card: -/+ #
For example, a Prussian army with morale 3 commanded by Blücher with a combat value in defence of 2 suffers 3 losses more. The risk of demoralisation is with a die score higher than 3-3+2 = 2.
14.9.2 Pursuit by Enemy Cavalry
The demoralisation of a defeated force is followed by a pursuit by the cavalry of the victorious force whether or not it has steps of reserve cavalry.
The victor rolls a die modified as follows:
- Tactical value of the general commanding the force: +#
- Each step of reserve cavalry: +#
- Each cavalry general: +1
Any score in excess of 6 represents the number of additional losses inflicted on the loser (which can be step losses or depots). Combat cards may also add to the loss steps of the loser.
For example, Napoleon has a tactical value of 3 and 2 steps of reserve cavalry commanded by Murat (cavalry general) demoralises Blücher; Napoleon rolls a die and scores 4 + 3 (combat value) +2 (2 steps of cavalry) +1 (Murat) = 10, of which 4 are pursuit losses (10-6).
The owner of the demoralised force allocates these losses as he wishes.
14.9.3 Effects of Demoralisation
A "demoralisation" marker is placed on the force. All forces, including Armies, which stack with this force are also demoralised.
Exception: when an army joins another army to form a single force, each army is treated separately. If they fight together, the demoralisation penalties only apply if the demoralised force has the larger number of steps.
A demoralised force may automatically evade if attacked again.
A demoralised force cannot make forced marches, interceptions or counter-marches.
If it is forced to fight and it is demoralised again, the force is entirely destroyed.
A demoralised force at the end of the activation phase suffers an attrition test.
14.9.4 Duration of the Effects of Demoralisation
It lasts to the second segment of the conquests phase unless the general is able to rally his force during a subsequent activation by making a rally test.
To attempt to rally, the force must be supplied. The general must be activated, spend 2 movement points per attempt and roll a die that must be less than or equal to its morale, which is increased by the best tactical value of the general commanding the force.
At the second segment of the conquests phase, supplied demoralized forces rally automatically. Unsupplied demoralized forces cannot rally.
In the case of a force of two Armies, each tests on its own behalf.
If a demoralised force wins a battle, it is automatically rallied.
14.10 Retreat of the Loser
If the attacker loses the battle, he must retreat into the zone from which he entered.
If the defender lost the battle after an interception, he must retreat into the zone from which he entered.
If the defender lost the battle without an interception, he may never retreat into the zone from which the attacker entered and must retreat according to the following priorities:
- An adjacent zone under friendly control or a free passage zone without enemy forces.
- An unbesieged controlled fortress of the zone.
- An adjacent zone controlled by an enemy but free of enemy units; the enemy control marker remains in place.
- An adjacent zone free of enemy fortress occupied by the enemy if odds of 5/1 apply; in which case the enemy units are destroyed.
Otherwise, all of the force is destroyed and its generals are placed in reserve.
A retreat across a river without a bridge or a mountain without a pass causes an additional step loss.
14.11 Two Armies Forces
Two armies forces follow these rules during battles:
- the combat value of the force is the sum of combat values of each army.
- the tactical value of the general commanding the force is used for demoralisation test and pursuit.
- a subordinate may be chosen in any army (except a general commanding one of the armies).
- a lead assault unit may be chosen in any army.
- the morale of the force is the morale of all steps, except for rally where each army has its own morale.
- losses may be taken on units of any army, as long as the tactical value of the general commanding the force is used for demoralisation test and pursuit.
If a two armies force must retreat, each army may retreat in a different zone.
15 Fortresses and Sieges
15.1 Fortresses
There are 2 levels of fortresses; all are at level 1 with the exception of Mantua, Constantinople and Gibraltar, which are level 2.
A fortress can contain an unlimited number of combat steps.
A force must halt its movement when it enters a zone containing an enemy fortress even if there are no steps allied to the fortress, unless it is able to "cover" the fortress for laying Siege with a number of steps at least equal to DOUBLE the value of the fortress while respecting the Stacking limits; place a Siege marker 0. The rest of the force may continue its movement and the covering force cannot make a siege attack during this round.
If an enemy force is present in the zone, it can:
- remain in place and a battle will then take place,
- retreat into the fortress (automatic evade),
- attempt to evade into an adjacent zone; some units can evade into the fortress while others evade; if this evasion fails, the units can no longer retreat into the fortress automatically except in case of a retreat.
15.2 Laying Siege
To lay Siege, there should be no combat unit friendly to the fortress in the zone containing the fortress.
The besieger must have a number of loss steps at least equal to DOUBLE of the value of the fortress while respecting the Stacking limits.
Place the besiegers on the fortress with a Siege marker to indicate that it is in progress.
To make a siege attack, a force must be supplied and spend 1 movement point per attempt on the Siege Table. Exceptions:
- if the active player wins a battle in the fortress zone, it may attempt a free siege attack without spending a movement point.
- a siege attack is free during the end of activation phase.
A besieged fortress cannot have reinforcement steps placed unless a naval supply line can be traced.
15.3 Raising a Siege
If the number of units necessary to maintain the Siege is not met, the Siege is raised and the besieger forces must redeploy to an adjacent zone within the rules of retreat and in which they can be supplied.
If a force allied to the besieged enters into the zone to attack the besiegers, the besieged do not participate in the battle and the Siege is only raised if the besieger must retreat or does not have enough troops to continue the Siege.
15.4 Resolution of a Siege Attack
The besieger consults the Siege Table, rolls a die and applies the modifiers; the results are as follows:
- Besieger repulsed: the besieger loses a loss step.
- Stable situation: no result; the Siege continues.
- Honours: the fortress is taken and the besieged force returns as reinforcements in the next Budget Phase.
- Breach: the fortress surrenders and the troops within are destroyed.
If a siege attempt was unsuccessful, place a siege marker with a value of 1 more than the previous marker (to a max of Siege 3 marker). The siege marker (Siege +0, +1, +2, +3) provides a die roll modifier for a subsequent roll on the siege combat table; the modifier is equal to the value of the siege marker. If the siege is stopped and later reestablished, a Siege 0 marker is placed on the fortified city.
If a friendly force absorbs the besieging force, the new force benefits from the current Siege marker.
15.5 Consequences
A conquered fortress is destroyed and the zone receives a flag control marker of the conqueror placed, as well as an "Empty Fortress" marker.
The conqueror may detach a loss step (which is eliminated) or spend a depot to reactivate the fortress to serve him immediately, notably by extending supply lines.
During the end of activations phase, if in supply, a conquered fortress becomes an active fortress at the service of the conqueror.
16 Weather
Rounds of activation 1 to 4 are not subject to effects of the weather. In contrast the 5th round suffers from bad weather with a movement factor reduced by one for all units.
The 6th (and 7th) winter round has the same effects as the 5th and certain event cards affect this round. Additionally, no naval movement is possible in the ice zone of the Baltic and amphibious attacks are not permitted on the map.
Attrition modifier due to winter applies only during the 6th (and 7th) round of activation, not at the End of the Activation phase.
17 Naval Matters
17.1 Activation
Cards allow the movement of fleets either through the play of an event, as for example the permanent Admiralty card, or by the use of AP. It costs one AP per fleet that you wish to activate.
17.2 Naval Movement
17.2.1 Generalities
Once a squadron is activated, it can spend its movement factor in the following manner but must respect the stacking limits at all times; each movement point allows it to:
- Enter or leave a friendly port,
- Move to another adjacent maritime zone,
- Enter an enemy blockade box or an enemy port,
- Disembark units in an enemy port whether occupied or not by enemy units.
Moving directly into an enemy port therefore costs 2 movement points, plus 1MP to make an amphibious attack if needed.
The activated squadron may not pick up other squadrons during their activation; regrouping in the previous round is required. The activated squadron can leave behind some fleets during its move.
For example, during the 2nd round, the Coalition spends 1 AP to move a Portuguese fleet to Gibraltar to join 2 British fleets; during the following round the Coalition plays "Admiralty" and may move the 3 fleets.
If fleets are in a port which is captured by the enemy, they must immediately be placed in the nearest friendly port within their movement factor. If a blockade is in place they are automatically intercepted; in the case of defeat, they finish their movement in the nearest friendly port within their movement factor; other interceptions are possible during this evacuation.
17.2.2 Stacking
A squadron cannot exceed 3 fleets.
There can only be one squadron of each side in the same maritime zone; squadrons subject to blockade or engaged in blockading are not taken into account. You can move through a zone which already contains a 3-fleet squadron but you cannot stop. They must consolidate at the end of movement if necessary to comply with this rule and eliminate any excess units.
17.2.3 The Bosphorus and Gibraltar
The squadrons of all countries may pass through the Bosphorus when Turkey is neutral. When Constantinople is controlled by a player, only the squadrons of that player and his allies may pass through the Bosphorus. Gibraltar has no influence on naval movement.
17.2.4 Geographical Restrictions
During winter no movement is possible in the Baltic beyond the ice limit. Only one Russian fleet may operate outside the Black Sea, Straits or the Baltic. The Swedish and Danish fleets may only operate in the Baltic Sea and the Straits. The Turkish and Neapolitan fleets may not go beyond Gibraltar.
17.2.5 Interception
Upon entry of a squadron by movement, the enemy squadron at sea followed by those blockading, one after the other, may attempt an interception; if a squadron succeeds, the other squadrons which could intercept take their test but not so that the squadron at sea faces more than 3 fleets in battle. Squadrons in a port may not intercept.
For example, 3 French fleets enter la Manche (the Channel) where there are 2 British fleets at sea; another British fleet is blockading Amsterdam and another Anvers: only one of the two may intercept in a row because the British squadron in la Manche cannot contain more than 3 fleets.
The player rolls a die and adds the best initiative value of the fleets of his squadron. If the result is equal to 6 or above, the interception succeeds. If no interception succeeds, the moving squadron can continue its movement or attack the squadrons in the maritime zone or blockading.
17.2.6 Evasion
When a squadron enters into a zone, an enemy squadron at sea in this zone may attempt to evade; fleets located in a blockade box cannot evade.
The player rolls a die and adds the best initiative value of the fleets of his squadron. If the result is equal to 6 or above, the evasion succeeds. In the case of failure, a battle takes place.
In the case of success, the player may:
- move his squadron into a friendly port in the same zone,
- move his squadron into an adjacent zone (except the one the active player comes from) with the risk of interception by an enemy squadron at sea.
The active player may then continue to spend its movement points. Interceptions are resolved before evasions.
17.2.7 The Blockade Boxes
Each port has a blockade box attached; entering an enemy blockade box costs 1 movement point for a squadron.
If an enemy squadron is present in the port, the enemy squadron may intercept automatically, which triggers a combat but without the subsequent protection of any fortress in that port. Exception: if the blockade is already in place, the relief by a new squadron of those blockading does not give rise to combat.
If the moving squadron is defeated, it must withdraw from the blockade box and be placed in the adjacent maritime zone. If the squadron wins the combat, the blockade is in place and the defeated squadron must retreat into the port. If the squadron in port does not wish to fight, no combat occurs and the blockade is in place.
The effects of blockade are as follows:
- automatic interception of squadrons leaving the port,
- no supply by sea.
Instead of just imposing a blockade, a squadron can enter a port occupied by an enemy squadron and a naval battle will ensue under the subsequent protection of any fortress in that port (see 17.3.3).
A squadron blockading an enemy port may intercept other squadrons in the maritime zone, which could raise the blockade as this squadron would be in the maritime zone adjacent to the port.
17.2.8 Naval Transport
Each allied or national fleet may transport:
- 2 loss steps,
- a depot,
- a general,
- and an army marker.
In the case of losses in a naval battle, these are taken first from the fleets which are not transporting troops; if their number is insufficient, each fleet loss eliminates its cargo at the choice of the player.
To transport troops, they must be in a friendly port on the route of a squadron. They must land in a port at the end of activation; if this is not done, the land units at sea are eliminated. No land movement is possible after landing.
17.2.9 Amphibious Attack
If the landing port is occupied by an enemy force or is an enemy fortress, an amphibious attack occurs.
If enemy fleets occupy the destination port, they must first be destroyed by naval battle. If the port is an enemy fortress, a naval combat between fortress and the squadron is made before the amphibious attack.
It is not possible to make an amphibious attack in either a zone that does not contain a port or during winter rounds.
An amphibious attack can consist of 2 steps maximum (unless via an event).
Battle is resolved with a -3 combat modifier for the force which landed. If defeated, the force which landed may not retreat in an adjacent zone and is destroyed.
The landing force has two siege attempts. If the zone is not conquered at the end of activation, the force is destroyed.
For example, a British force of 2 steps lands at Naples, which does not contain enemy fleets. The force makes 2 siege attacks which fail; the force is destroyed and fleets placed in the maritime zone of the port.
After the assault, the fleets may continue to spend their movement factor, with it costing a movement point to move back into the maritime zone of the port.
17.2.10 Corsairs
The event Corsairs (35F) reduces the Coalition hand by one card unless the Coalition has a fleet in the Corsairs box at the moment of the draw phase.
To place a fleet in the Corsairs box, the Coalition player must activate a fleet by spending one AP or playing Admiralty (1C) and removes it from the map during the activation phase. The fleet in the Corsairs box could later be placed in a port of national territory during an activation round by spending one AP.
17.3 Naval Combat
17.3.1 The Principle
When opposing squadrons meet and do not succeed at or attempt evasion, a naval battle follows. This occurs as simultaneous exchanges of fire between the squadrons.
Each player rolls a die for each fleet to which he adds the tactical bonus of the fleet. Each side adds its total and compares it to that of its opponent.
If the difference is between 1 and 3, the lower scorer retreats without losses. If the difference is between 4 and 7, the lower scorer loses one fleet and the others retreat. If the difference is between 8 and 11, the lower scorer loses 2 fleets and the others retreat. If the difference is greater than or equal to 12, the lower scorer is completely destroyed. The owning player chooses which fleets are lost.
For example, a squadron of 2 British fleets with admiral 0 and admiral +1 attacks one French fleet with admiral 0. The British roll one unmodified die and one with +1 added; the scores are 2 and 6+1 = 9; the French roll an unmodified die for 5. The difference of 4 results in one French fleet being destroyed.
In the case of a tie the inactive player decides whether or not to retreat. If he retreats, he is considered to have lost. If he stays a second round occurs unless the active player decides to retreat: in which case, he has lost. And so on. A naval defeat ends the current naval activation.
17.3.2 Retreat
Retreat must be into:
- a port of the same zone (both sides), which ends the activation of the phasing fleet,
- an adjacent maritime zone (inactive player) except the one the active player enters from,
- or into the zone from which the fleet moved (active player).
If the defeated fleet retreats into port, the winner may pursue for free to establish the blockade.
Retreat into a port or putting in place a blockade completes the movement of the activated fleet if defeated; if the activated fleet won the battle, it may continue its activation.
One fleet in a port which is defeated remains in port and a blockade is established.
17.3.3 Naval Combat in a Port
A naval battle may also occur in a port if the active player decides to attack the units therein. In this case, the fleets in the port cannot evade but in return receive the protection of coastal batteries if the port contains a fortress. Each level of fortress gives an additional die.
A single naval round takes place.
If the attacker loses the battle, he follows the retreat rules above unless he attacked from the blockade box of the port from which the blockade was in place before this activation; in this case, he returns to the box and continues the blockade.
If the defender loses the battle, he remains in the port under blockade; the victorious attacker remains in the blockade box or may continue his movement into another zone.
17.3.4 Loss of Admirals
Except if Nelson (10C) is played as an event, admirals don't suffer a wound test.
18 Conquests
Conquest occurs only during the conquests and surrenders phase.
18.1 Conquest of Minor Countries
A minor nation is conquered if its capital and its fortresses are controlled by the other side; control is established by the presence of a supplied unit or by the presence of a control marker able to trace a supply line.
Exceptions: The kingdom of Naples is conquered as soon as the capital Naples is controlled by the other side. Sicily becomes a minor allied to the Coalition independent from Naples. The Duchy of Poland is conquered only if France is conquered too.
If the conditions are met, the minor nation receives an "Ally" marker if it has combat units; if it has none, the conqueror chooses to place an "Ally" or a "National Territory" marker.
The combat units of the conquered minor nation as well as its fleets present on the map are destroyed.
Conquered minor nations become allies of the conquering player or are integrated into its national territory.
18.2 Conquest of Major Countries
18.2.1 Conquest
A major power is conquered if:
- All its key zones are controlled by the enemy. These zones must be able to trace a supply line for the conqueror, OR
- All its key zones except one are controlled by the enemy and the defeated does not control its capital and has no un-demoralised Armies on its national territory.
For example, France controls during the victory phase of 1809 Vienna and has demoralised the Austrian army; Austria surrenders even though it still controls Prague. For example, France is at war with Prussia and controls Warsaw and Berlin; Napoleon has destroyed the Prussian army and as a result does not need to control Koenigsberg to cause the surrender of Prussia.
Exception 1: Spain, if the Dos de Mayo (22C) event is played; Spain is conquered only if Madrid and all of the ports of the Iberian Peninsula with the exception of Gibraltar are controlled by the Empire.
Exception 2: Drums of War (27C) card; this allows a major power to disregard the conditions of surrender and continue the struggle.
Exception 3: Tilsit (27F) card; this card may impose peace on a major power without conquest.
Exception 4: only the key zone of London is taken into account for the conquest of Britain.
18.2.2 Peace Conditions
The defeated major power must suffer the peace conditions as follows:
- a forced peace is imposed on the defeated major power and its unconquered minor allies,
- the victor receives an additional card in the next card draw or 4 resources in its budget,
- if France is victor, it imposes the Continental Blockade; whether the event Continental Blockade (25F) has been played or not, on all the ports of the defeated major power and its minor allies until it once again joins the Coalition.
The conquering player and its allies may annex 3 provinces (4 following the event Drums of War (27C)) of the defeated power or an unconquered minor ally and integrate them in its national territory. The victor chooses the provinces. A conquered province receives a "National Territory" marker of the conqueror and is integrated into its national territory.
Provinces containing key zones CANNOT be chosen; if there are no other available provinces, the victor deducts 4 resources per province from the next budget of the defeated. Exception: although it contains a key zone (Warsaw), Mazovia may be annexed by France to create Poland.
A still unconquered minor ally to the defeated power may replace a province; the minor becomes an ally of the conqueror or is integrated into its national territory.
The conqueror may divide up provinces between powers of his side. For example, the Empire has just defeated Austria and decides to allocate Tyrol to Bavaria in order to create the Kingdom of Bavaria.
The provinces chosen must after the conquest be adjacent to the national territory of the conqueror or one of its minor or major allies; the annexations may be used to expand minor allies or regional groupings such as the Kingdom of Italy or the Confederation of the Rhine, Westphalia or Bavaria (see complete campaign special rules).
Exception: Marie Walewska (22F) and the creation of Poland, which becomes a minor nation with combat units under a French protectorate.
18.2.3 The Effects of Peace on the Major Powers
The units of the conqueror may choose to remain in the territory of the defeated or leave it. In the latter case, the units are simply placed in the nearest frontier zone in terms of movement points containing a fortress, at the choice of the owner; no attrition test is taken.
Control markers of both sides are removed.
All the forces previously allied to the defeated nation which are in that nation's national territory are placed in the frontier zone that is nearest in movement points containing a fortress at the choice of the owner; no attrition test is taken.
For example, France has just defeated Austria and the Russian army is at Brunn: this army is moved to Brest-Litovsk. Napoleon and the Grande Armée, which are in Vienna, are repositioned in Ulm.
Note: if from a minor nation, they may remain as they become an ally of the conqueror and it is thus enemy territory.
The forces belonging to the defeated nation which are in its national territory are placed in key zones without attrition; a total reorganisation of forces is possible with changes to the general commanding an army where appropriate.
As long as the forced peace lasts, the conqueror may cross the territory of the defeated nation and station troops there, or supply lines without relying on the links of defeated fortresses. During this period, a force of the defeated and a force of the victor may be in the same zone.
At the end of this period, the conqueror must evacuate the national territory. If it does not, its units are destroyed.
Duration of forced peace: The conqueror and his allies cannot declare war on the conquered nation and vice versa for a period of one die-roll divided by 2 and rounded up.
For example, France has just defeated Austria and integrated Venetia into Italy, the Tyrol into Bavaria and Rome, always a minor ally of Austria, into the Empire. France rolls a die and scores 3, so 2 complete years of forced peace.
19 Victory
When the Victory level reaches 20 points, the Empire has won the game.
The victory points are obtained as shown on the play aid; they go up and down according to the situation on the map. For example, France puts in place a protectorate over Naples and scores a victory point; later, the Coalition re-conquers Naples, which removes from France this victory point as it has not re-conquered Naples and reinstated the protectorate.
The Coalition scores an Automatic victory when the Victory level reaches 0.
In the case where neither the Empire nor the Coalition scores an Automatic victory:
- The Coalition scores a victory if it controls all the key zones of the national territory of France.
- France scores a victory if it controls every key zone of its national territory and the Mantua zone.
If neither of these applies, the game ends in the defeat of the two sides.
Designer's Notes
Napoleon against Europe is my second game on the imperial era after Le Grand Empire published by Pratzen Editions and reappearing in another version published by Compass Games under the title Nations in Arms.
Why make a new strategic game on the period of the Napoleonic wars?
Le Grand Empire, in seeking to be exhaustive at this scale with lots of chrome and detail in its treatment of the operational campaigns, suffers, and this is to be expected, from the inconvenience of having to collect several players and to have a lot of time to play.
The aim of the new game is to concentrate on the grand strategy and place the two players in the position of the leaders of the two major blocs of this era with their preoccupations over ten years all in a reasonable playing time; two quick players can complete a full game in ten hours.
The Coalition and notably Britain wished to fight French hegemony on the continent and removed France from Antwerp. In contrast, Napoleon wanted to seat his dynasty on the throne, any retreat being seen as the beginning of decline.
I translated these objectives by means of the victory track where the highest level (20) represents the recognition by the other powers of the new dynasty. To achieve this goal, Napoleon must always be moving forward and upwards against all the powers who are astonished by his ambition; this sentiment is represented by the Escalade level.
The downward spiral is already in action, explaining why Napoleon could not be content with what he "acquired" but had always to be challenging.
We also worked a lot on the elements that award victory points to reflect the fact that Napoleon sought to put in place the Continental Blockade by attaching Spain to his alliance and seeking victory over Russia.
We note that many strategic games fail because the French Player can or seeks to avoid engaging in the Spanish quagmire or the vast spaces of Russia. In this game except in exceptional cases, the Emperor must face this choice.
The Napoleonic era is full of individual situations, and this is why to maintain a level of rules accessibility, we have used the "card driven" games system as in that excellent game "For the People II".
The cards permit us to bring together all the individual events and the rhythm of operations and the abilities of both sides, notably by creating two game periods and two individual decks. The players will seek to optimise their activation points to achieve their objectives.
We also decided to abandon the traditional hexes for zones, which appear to use better adapted to the grand strategic scale; the number of zones nevertheless permits an operational approach showing the importance of lines of communication.
We have built a naval module with all its historical importance, notably in the first part of the game, and in the course of play tests we have not failed to see several eagles in London!
The economic aspect is reflected in the game by the event cards and in the simplified production phase which reflects the war effort of each of the powers.
We recommend to both players to persevere in what was a long-term struggle; Napoleon must not be deluded by his capacity to win battles and his operational advantages as being the key issues, and the Coalition must wait with patience the period of the "Punishments" where his best cards and generals allow a return in strength accentuated by a Spain that is afire!
Last, we have designed a 2-player game and not a multi-player game because we see the Napoleonic wars as a struggle between Napoleon and Britain supported by its historical allies or by events on the continent.
We leave you now to "veiller au salut de l'Empire"!
Scenarios
Note on setup: unnamed fleets are randomly drawn; unnamed generals are chosen by the owner.
20.1 Introductory Scenario: 1815 or the Hundred Days
Start of the scenario: 1815 – operations phase – 2nd round; France plays first.
End of the scenario: end of the operations phase 1815.
Cards: The draw of each player is made up of the following cards:
- Empire: 1, 2, 3, 6, 8, 13, 19, 27, 28, 29, 31, 32, 43, 47, 50
- Coalition: 1, 4, 5, 11, 12, 14, 15, 16, 25, 28, 29, 30, 31, 32, 35, 39, 42, 43, 54
France draws 6 cards and the Coalition draws 8 cards.
Diplomacy and control: France has only Naples as an ally; she no longer controls Piedmont (Austria), Gênes (Austria), la Toscane (Austria) and les Flandres (Britain). The Coalition consists of Britain, Russia, Prussia, Austria and Spain and controls the minor nations as noted on the play aid.
Generals: for each power, remove the following generals: France must remove Lannes, Masséna, Marmont, Mac Donald and Saint Cyr and the Villeneuve fleet. Austria must remove Charles. Prussia must remove Brunswick. Britain must remove Moore and the Nelson fleet. Russia must remove Bagration, Benningsen and Koutouzov.
Special rules: The Chouans force is automatically supplied in the provinces of Poitou and of Bretagne or, failing that, the source must be a controlled port with a British depot. France may receive as replacements 2 loss steps per army in each round where the army is activated except during the winter round.
Victory Conditions: The Coalition wins if they have conquered France and France does not have an undemoralised army OR if Napoleon is removed from play. France wins the game if France is not conquered and it possesses at least one un-demoralised army. In other cases, it is a draw.
Set-Up: Coalition then Empire
France:
- Bourgogne: one corps
- Gascogne: one corps
- Languedoc: one corps
- Marseille (Provence): one corps GN.
- Provence: Suchet, Armée d'Italie, 2 corps.
- Champagne or Picardie: Napoleon, Grande Armée, Ney, Jérôme, Garde, cavalry reserve, 3 corps, special unit Cavalry Garde, a mobile depot.
- Metz (Lorraine): one corps and one general
- Lille (Nord): one corps.
- Paris (Ile de France): Davout with 2 corps and one corps of GN.
- Berry: one corps
- Strasbourg (Alsace): a general and 2 corps.
- Naples (Neapolitan): Murat and the Naples corps.
- 3 fleets: one in a Mediterranean port and two in the Atlantic or in la Manche.
Spain:
- In zones adjacent to France in Spain: 1 mobile depot, 2 corps and a general.
- Madrid: 1 corps and a general.
- One fleet in a Spanish port.
Russia:
- In the Polish provinces: Barclay de Tolly, 1st Army, 3 corps, cavalry reserve, 1 mobile depot, 1 subordinate general.
- In Prussia Orientale: a general with a command value of 6 with the Garde corps and 2 corps, 1 mobile depot.
- One fleet in a port of the Black Sea and one in the Baltic.
Britain:
- Anvers (Flandres): one reduced corps and a depot.
- Bruxelles (Flandres): Wellington, Armée de la Péninsule, Clinton, 2 British Elite corps and one Dutch corps, Hesse corps, special units Uxbridge and KGL, a mobile depot.
- Poitou (France): the Chouans corps.
- Britain: one corps and a general with a militia unit.
- Place 9 British fleets to blockade the French fleets.
Prussia:
- Clèves: Kleist and 2 corps with a mobile depot.
- Liège (Flandres): Blucher, Armée de l'Elbe, Yorck, 3 corps, 2 Landwehr corps and 1 mobile depot.
- Mayence (Palatinat): Bade corps.
- Magdebourg (Prussia): a general and 2 corps.
Austria:
- Munich (Bavaria): Schwarzenberg, Armée d'Allemagne, Ferdinand, Grenadiers corps, 2 corps, Landwehr corps, Wurtemberg corps and cavalry reserve.
- Ulm (Bavaria): a general with an Austrian corps and one Bavarian corps.
- Zurich (Switzerland): a general and one corps.
- Turin (Piedmont): one corps.
- Milan (Lombardie): Bellegarde, 3 corps and a mobile depot.
- Florence (Toscane): a general and 2 corps.
20.2 Complete Campaign 1805-1814
Start of the scenario: 1805 – operation phase – 2nd round; France plays first.
End of the scenario: Victory phase 1814.
Victory Marker: box 5. Escalade Marker: box 0.
Cards: France, Britain, Austria and Russia are at war and have their permanent cards. At the beginning of the scenario each side will have 7 cards including the permanent cards. Remove from the decks of France and the Coalition the cards with the title "Punishments", which will be added later. Shuffle the cards and deal at random the stated number of cards to constitute the initial hand of each side.
Special rules:
-
Austrian forces must besiege the fortresses of Mantua and Ulm. As long as this condition is not met, no other Coalition action may be undertaken (naval, diplomatic etc.). This obligation disappears if any French forces enter or cross a zone of the national territory of Austria.
-
Creations of States: The Empire may create new states during the game which give it victory points; these new states automatically have the status of protectorate: the Confederation of the Rhine, Westphalia and Poland. Their units enter the reserve and must be built later except if a card says otherwise. The zones which contain a symbol of one of the states may be incorporated in them during the Conquest Phase of each turn.
a) Westphalia requires the playing of the "Napoleonic Europe" card; its capital is Kassel.
b) The Confederation of the Rhine requires the playing of the "Triumph of Erfurt" card; its capital is Erfurt. The Empire must have as allies at least 6 minor nations which have the "Confederation of the Rhine" symbol.
c) Poland or the Grand-Duchy of Warsaw may be created in two different ways; its capital is Varsovie. Either by playing the "Marie Walewska" card as noted in Rule 18.2, or if the French Player obtains in peace conditions the province containing Varsovie and at least one other province containing the symbol of Poland. Poniatowski and one Polish corps are placed in the reserve of units to be built and generals; they are available in the next Budget Phase. When the third Polish province is added to Poland, the second Polish corps is placed in the reserve of units to be built.
d) The Kingdom of Italy is in place at the start of play and includes Lombardie and Romagne, to which Vénétie may be added subsequently: the capital of Italy is Milan. When Vénétie joins the Kingdom of Italy, a second Italian corps is added to the available units.
e) The Empire may also create the Kingdom of Bavaria by annexing the Tyrol. It gives the Empire an extra card during the hand phase.
Set-Up: Neutrals, Coalition and France. Remove units and generals with a code "E" or "V" or "2P" and all those with an entry date after 1805 along with special units.
France:
- Lille: Napoleon, Grande Armée, Davout, Murat, 4 Elite Corps, 2 corps, Garde (back of counter), reserve cavalry and 1 mobile depot.
- Hanovre: an Elite Corps.
- Hollande: Marmont and a reduced Elite Corps.
- Milan (Lombardie): Masséna, Armée d'Italie, 2 corps with one reduced and one Italian corps with a mobile depot.
- Toscane: Gouvion St Cyr with one corps and a mobile depot.
- Brest (Bretagne): an Elite Corps and 2 fleets of which one is Ganteaume.
- Rochefort (Gascogne): one corps and 1 fleet Missiessy.
- Toulon (Provence): 1 corps and 1 fleet.
- Cadix (Spain): 1 fleet Villeneuve.
- Amsterdam (Hollande): one Dutch corps on its reduced side counter and the Dutch fleet.
- Bade: Wurttemberg corps reduced side.
- Bavaria: Bavarian corps reduced side.
- Place with these units 3 generals chosen from the reserve and a mobile depot.
Austria:
- Salzbourg (Austria): Mack, Armée d'Allemagne, Ferdinand, 3 corps, a reduced reserve cavalry corps and 1 mobile depot.
- Venise (Vénétie): Charles, 4 corps of which one is reduced and 1 mobile depot.
- Innsbruck (Tyrol): Jean and one corps.
- Budapest (Hongrie): a general with one corps and a mobile depot.
Russia:
- Brest-Litovsk (Russia): Buxhowden with the Garde corps and one corps.
- Vilna (Russia): Benningsen, with one corps and a mobile depot.
- Lublin (Poland): Koutouzov, Ist army, 2 Elite Corps.
- Moscou (Moscovie): one corps.
- Saint-Pétersbourg (Carélie): a general and one corps with one fleet.
- Kiev (Ukraine): Tormassov and one corps.
- Sébastopol (Crimée): 1 fleet.
- Odessa (Ukraine): one militia unit.
Prussia:
- Magdebourg (Prussia): Armée de l'Elbe, Brunswick, Ruchel, 2 corps and a mobile depot.
- Breslau (Silésie): Hohenlohe with one corps and a mobile depot.
- Berlin (Brandebourg): one reduced corps.
- Varsovie (Poland): one reduced corps.
Spain:
- Madrid (Nouvelle Castille): Castanos and one corps.
- La Corogne (Galice): Blake with one reduced corps and one fleet and a mobile depot.
- Cadix (Andalousie): 1 fleet Gravina.
- Carthagène (Murcie): La Romana with one corps and one fleet.
Turkey:
- Constantinople (Turkey): a general and the Janissary corps with one fleet.
- Adrianople (Turkey): a general and the Nizami Cedid corps.
- Deploy the 4 feudatory corps (corps marked with a F) in the fortresses of their respective provinces.
Britain:
- Londres (Britain): a general, militia corps and an Elite Corps with a mobile depot.
- Manche: 1 fleet.
- Amsterdam (blockade): 1 fleet Keith.
- Brest (blockade): 2 fleets of which one is Cornwallis.
- Golfe de Gascogne: 1 fleet Stirling.
- Cadix (blockade): 2 fleets of which one is Nelson.
- Golfe du Lion: 1 fleet.
- Atlantique Sud: 1 fleet Collingwood.
- Lisbonne (Portugal): one Portuguese corps and one Portuguese fleet.
- Naples (Neapolitan): one Neapolitan corps and one Neapolitan fleet.
- Stockholm (Sweden): one Swedish corps and one Swedish fleet.
20.3 Campaign 1809-1814
Start of the scenario: 1809 – operation phase 1st round; only the Coalition may play during this round; France then starts its 2nd round.
End of the scenario: Victory phase 1814.
Units removed from play: France must remove the Villeneuve fleet. Austria must remove general Mack. Prussia must remove general Brunswick. Britain must remove general Moore and the Nelson fleet. Russia must remove general Koutouzov. Removed generals may return to play via an event.
Spain must remove all its fleets. The Danish, Neapolitan and Portuguese fleets are eliminated. Remove British and Russian special units. Prussian landwehr corps are in the reserve.
Victory level: 15. Escalade: the Escalade rules do not apply as the game is in the period of the Punishments.
Cards: the Epic and Punishments cards form a single deck; the following cards must be removed for each side: Empire: 4, 5, 7, 9, 11, 12, 14, 15, 16, 17, 18, 20, 22, 23, 24, 25, 26 and 27. Coalition: 6, 10, 17, 18, 19, 20, 21, 22, 24 and 27.
France has 9 cards including numbers 29 and 36 and the permanent card of France. The Coalition has 7 cards including numbers 9 and 42 and the permanent cards of Britain and Austria. The Austrian permanent card has been played as an event and remains only for its activation points.
Events in play: Continental Blockade and the War of Liberation.
Political situation: France has instituted the following protectorates: Denmark, Poland (Posnanie and Mazovie), Saxony and Naples as well as the Confederation of the Rhine and controls Hanovre and the Frioul as well as the province of Prussian Magdebourg. France controls the following Spanish provinces, fortresses included: Galice, Nouvelle Castille, Vieille Castille, Aragon, Catalogne, and Leon except for Ciudad Rodrigo. Bavaria has annexed the Tyrol to create the Kingdom of Bavaria.
Britain is allied to Spain and Austria. Prussia is in a forced peace with France until the end of the year 1810 then in forced alliance. Russia and Turkey are Neutrals.
Set-Up: Neutrals, France and Coalition.
France:
- Ulm: Masséna and two Elite French corps.
- In Bavaria to the south of Wurtzburg: Davout, an Elite French corps, one French corps and one Bavarian corps with a mobile depot.
- Stuttgärt: Oudinot with one Wurtemburger corps and one corps of the Confederation of the Rhine.
- Strasbourg: Napoleon, Grande Armée, Lannes, one French corps, Infantry of the Garde, cavalry of the Garde, Reserve cavalry and 1 mobile depot.
- Hambourg: one Danish corps.
- Dresde: a French general with a Saxon corps and a Hessian corps.
- Trieste: Marmont and one reduced French corps.
- Venise (Italie): Eugène, one reduced French corps and one Italian corps, 1 mobile depot.
- Florence: Murat with one Neapolitan corps.
- Porto: Soult and an Elite French corps.
- Saragosse: a general with one corps and one reduced corps.
- Barcelone: Suchet and an Elite corps and a mobile depot.
- Madrid: Joseph, Armée d'Italie, Ney, an Elite corps, one corps and a mobile depot.
- Bordeaux: one French corps.
- Varsovie: Polish corps.
- Lille: one corps of the Garde Nationale.
- Paris: one French corps.
- Anvers: one reduced French corps.
- Brest (Bretagne): 2 fleets of which one is Ganteaume.
- Rochefort (Gascogne): 1 fleet Missiessy.
- Toulon (Provence): 1 fleet.
- Amsterdam (Hollande): one reduced Dutch corps and the Dutch fleet.
Austria:
- Salzbourg (Austria): Charles, Armée d'Allemagne, Hiller, 3 corps, corps de Reserve, Grenadiers, Reserve cavalry and 1 mobile depot.
- To the south of Salzbourg towards Venise: Jean, 3 corps and 1 mobile depot.
- Prague: a general and two corps.
- Cracovie: Ferdinand, two corps and a mobile depot.
- Tyrol: corps Tyrol.
Russia:
- Riga (Livonie): a general with one corps.
- Moscou (Moscovie): Barclay de Tolly, Ist Army, a general, reserve cavalry and two Elite Corps, and a mobile depot.
- Saint-Pétersbourg (Carélie): Benningsen, Garde corps, one corps and one fleet.
- Kiev (Ukraine): Tormassov and two corps.
- Odessa (Ukraine): a general, one corps, one militia unit and one fleet.
Prussia:
- Berlin (Prussia): Armée de l'Elbe, Blücher, a general, 2 corps and a mobile depot.
- Breslau (Silésie): a general with one reduced corps.
Spain:
- Valence (Valence): a general, one reduced corps and one militia corps.
- Seville (Andalousie): a general with one corps and one militia corps with a mobile depot.
- Cadix (Andalousie): a general and two militia corps.
- Ciudad Rodrigo (Leon): La Romana with one corps.
Turkey:
- Constantinople (Turkey): a general, one corps and one fleet.
- Adrianople (Turkey): Grand Vizir, Turkish army, corps Janissaires, corps Nizami cedid, one corps and a mobile depot.
- Place the 4 feudatory corps in the fortresses of their respective provinces.
Britain:
- Londres (Britain): one militia corps.
- Lisbonne (Portugal): Wellington, Armée de la Péninsule, Beresford, an Elite Corps, one reduced corps, one Portuguese corps and a mobile depot.
- Portsmouth (Britain): an Elite Corps and one fleet.
- Manche: 1 fleet.
- Amsterdam (Blockade): 1 fleet Keith.
- Brest (blockade): 2 fleets one of which is Cornwallis.
- Rochefort (Blockade): two fleets Stirling and Calder.
- Mer du Nord: 1 fleet.
- Toulon (Blockade): 1 fleet.
- Méditerranée Centrale: 1 fleet.
Example of Play
The aim of this booklet is to illustrate the main rule mechanisms via a comprehensive example of play of the great campaign of 1805-1814. It is by no means intended to give optimal play strategies for either side. It is up to you to do better!
France has its permanent card "The Genius of Napoléon" (3) and randomly draws from the "Epic" deck the cards "Soldiers of Year 2" (1), "Persia" (3), "Schulmeister" (2), "Cavalry of the Guard" (2), "Turning Movement" (2), and "Continental Blockade". France places his mobile depot unit with Napoleon and chooses from the generals' reserve Soult, who goes to the Grande Armée, and Lannes and Ney, who go to the Armée d'Italie.
The Coalition has his permanent cards "Admiralty" (3), "Holy Russia" (2) and "Holy Empire" (2). To complete his hand, he randomly draws from the "Epic" deck "Wound" (2), "Nelson" (3), "Major Campaign" (3) and "Tyrol" (2).
1805 — the activation phase starts with the second French round.
2nd round: The French Player chooses to play the Persia card, which has 3 activation points, but he only uses 2 to activate Marmont in Hollande; the last point is put in reserve for later use. Marmont's mission is to collect the scattered forces in the north of Europe and move them to Bavaria. At the start of activation, Marmont declares a forced march for 3 additional MP. The force has a base movement factor of 3 (due to the Dutch corps, which is slower) for a total of 6 MP.
Marmont moves into Hanover to pick up the Elite French corps. As he may not enter Hesse, which is neutral in 1805, he then moves to Berg to invade Thuringe, an ally of Austria, where he spends an additional MP to take control, ending his movement with the Bavarian corps at Wurtzburg. Following the forced march, Marmont must make an attrition test; only the 4 steps (3 French steps and 1 Dutch) which were moved with Marmont are taken into account, not the Bavarian step. The modifiers are +3 (3 MP of forced march) and -1 because the force is composed of 50% French steps. Marmont rolls a 5 modified to 7 for a "1*" result; Marmont rolls a die and scores a "3" so no extra loss. The VIth French corps is reduced, as the first step loss must be taken by a French unit.
It is the Coalition's turn to activate: he chooses the Tyrol card to activate the Austrian general Charles and to comply with the special rules of the scenario, which prohibit Coalition activation while Mantoue and Ulm are not besieged or French forces have entered Austria. Charles does not require a forced march and thus has 3 movement points, which is enough to enter the marsh around Mantoue (2 MP) and make a siege attack (1 MP) on the citadel since he has 7 steps, which is more than double the value of the citadel (2). Charles rolls a die on the Siege Table modified by his offensive tactical value (+1) and by the penalty of the fortress (-2): he scores a 6 -1 = 5, which is the "stable" result; the Siege continues and a Siege marker +1 is placed in the zone.
3rd round: The French Player chooses an operation without playing a card for 1 AP, to which he adds the AP stored in reserve, to activate Gouvion Saint-Cyr at Florence, who requires no forced march and thus has 4 MP. Gouvion Saint-Cyr moves to Rome (2MP) and begins a first siege attack: the French general has his offensive tactical value (+2) and rolls a die equal to 2 + 2 = 4 with the "stable" score; a Siege marker "+1" is placed on Rome. Gouvion Saint-Cyr decides to spend his last movement point for a final siege attack, for which the modifier is already +3 (tactical bonus of +2 and +1 for the Siege marker). The French general scores a 3 +3 = 6, which is "Honours": the fortress surrenders and the French general decides to expend his mobile depot unit immediately to reactivate his supply line to his supply source, Florence, with a view to a future campaign on Naples.
The Coalition player activates the Austrian Armée d'Allemagne to besiege Ulm; he chooses the Nelson card with its 3 activation points necessary to activate the brilliant general Mack! Mack requires a forced march of 1 MP and enters Munich. Mack spends 1MP to control the zone and thus maintain the supply line with Salzbourg. Mack then moves into the Ulm zone and uses his last MP to make a Siege attack: Mack has an engineer bonus on his army marker; he scores 6 +1 = 7, which is "Honours". The fortress surrenders and Mack spends his mobile depot unit to reactivate it to his advantage. Mack checks for attrition and rolls a die (1), which is modified by +1 (1 MP of forced march). 2 on the 6-8 column indicates no loss.
4th round: This is the last round of good weather and the Emperor decides to use the "Genius of Napoléon" card as an event, which allows him to make a forced march without attrition, giving him a movement factor of 4+3 = 7 MP.
Napoleon leaves one corps facing Britain and marches on Ulm via Soissons, Metz, Strasbourg and Bade (6 MP). Mack, facing this danger, attempts to evade. Napoleon plays the "Turning Movement" card! Mack rolls the dice and scores a "6", which in good weather would be sufficient to evade, but because of the "-3" penalty from Turning Movement, the attempt fails and Mack must face battle.
Mack calls on Jean in the Tyrol to make a counter-march to reinforce him; Jean scores a 4 +1 (defensive bonus of Jean) = 5 and is able to join the Armée d'Allemagne. An attrition test modified by "+1" (the number of MP spent to join the battle) is undertaken; Jean scores 3+1 = 4 so no loss. As Jean's rank (3) is superior to Mack's, Jean immediately goes to the reserve.
Napoleon has a total combat value of 13 and Mack has 9, giving odds of 1:1. The French morale is 5 and that of the Austrians 3. Even if the total combat value of both sides is 22, this is not a major battle because one side has only a total of 9. So this is a minor battle and each player rolls 2 dice on the column 8-21.
Mack has no modifiers. Napoleon has the following bonuses: his offensive bonus = +3; Cavalry Superiority = +1 (2 steps of reserve cavalry and Murat against 1 step of Austrian reserve cavalry); offensive bonus of Soult as subordinate general = +2; Elite Corps designated as lead assault = +1; for a total of +7!
Napoleon rolls 2 dice and scores 8+7 = 15, giving a "4C" result. Mack replies and scores 6, which is "1". Napoleon wins the battle and loses a step of elite infantry from his lead assault unit. Mack loses 4 steps, of which one is a step of reserve cavalry. Soult rolls 3 for his wound test and escapes unharmed.
Mack must make a morale test: his morale of 3 is reduced to 0 because of the difference in losses, and he thus automatically fails; a demoralisation marker is placed on his army and a pursuit is launched by Napoleon. Napoleon scores 5, modified by the offensive tactical value of the Emperor (+3), 2 steps of reserve cavalry (+2) and Murat, a cavalry general (+1), for a total of 11, which is 5 additional losses for Mack, whose army is totally destroyed. The units, markers and generals are placed in reserve and can be rebuilt in the next Budget Phase.
Napoleon, having won the battle, then at no MP cost launches a siege attack on Ulm; he scores a 4+3 (Offensive tactical value of Napoleon) +1 (Army marker) = 8, which is a Breach: the fortress surrenders and Napoleon chooses to expend one of his mobile depots to reactivate Ulm.
Napoleon, having won the battle, may continue his activation and spends his last movement point to enter Munich, where there is an Austrian corps protecting the Austrian lines of communication; this corps has no general and thus cannot evade. Napoleon has 12 steps against 2 and automatically destroys the Austrian force and takes control of the zone.
The Coalition decides to play the Holy Russia card to advance the Russian forces towards Vienne. The Russian army of Koutouzov is activated and a forced march of 3 MP is called for to give MPs of 6 in total. Firstly, Buxhowden and the 2 corps at Brest Litovsk are picked up by the Russian army with 1 MP; the 5 remaining points are spent to reach Leopoldstadt. An attrition test must be made by Koutouzov and his 8 steps score 3 +3 (3MP of forced march) +2 (poor zone crossed) -1 (force composed exclusively of Russians) = 7, which is "1*". The Coalition loses a step from one of the corps of Buxhowden and rolls another die (2), which does not generate an additional loss.
5th round: Napoleon, having destroyed the Austrian army, must capture Vienne to cause the surrender of Austria, and this despite the bad weather round which reduces the MF of all forces by a MP. Cautiously, Napoleon opts for an operation without a card, which provides the AP sufficient to activate the Grande Armée. Napoleon calls for 1 MP of forced march and, with his MF reduced from 4 to 3, finally gets 4 MP.
Napoleon enters Salzbourg (1MP), spending a movement point to make a siege attack which succeeds with a die of 3 +4 = 7 (Honours). Napoleon decides to reactivate the fortress by spending his last mobile depot to maintain his supply line with Ulm, which is 2 MP away. Napoleon continues his movement and enters Vienne, which is besieged with his last movement point. Napoleon scores a 4 +4 = 8, which results in a breach. Vienne surrenders and an "Empty Fortress" marker is placed on Vienne with a French control marker in the zone, which is freely available after a successful siege. The siege operations counting as movements, the Attrition Test is resolved at the end of the last siege. The Grande Armée has 12 steps and scores 4 +1 (1 MP of forced march) -2 (force composed exclusively of French) = 3, which is "1*". Napoleon rolls an extra D6 and scores 5, which is a second loss step; the Emperor decides to eliminate his non-elite corps.
The Coalition plays its Major Campaign card, which permits the activation of three forces with the ability to combine for combat. Charles is activated first and seeks 3MP of forced march, giving him a maximum possible MF of 2+3=5. The Coalition player hesitates between attempting to cut the supply line of the Grande Armée at Salzbourg and joining the Russian army at Vienne. He opts for the second strategy to benefit from a numerical superiority. Charles lifts the siege of Mantoue and moves his force to the south of Vienne, and at that instant Napoleon decides to attempt an interception in that zone and plays an operations card with a value equal to his initiative (1): he chooses the "Soldiers of Year 2" card and rolls a die score of 3 +1 (Cavalry Superiority) +1 (better initiative) = 5, which allows him to succeed in the interception. Napoleon rolls for attrition but suffers no losses.
A battle commences with Charles in the role of the attacker and Napoleon with an additional bonus of +1 thanks to the interception. Charles resolves his attrition test before anything else with his force of 7 steps and, expending his mobile depot for supply, scores a 6 -2 (mobile supply depot expended) +3 (forced march of 3 MP) -2 (operating entirely in his national territory) = 4, which is a single loss which eliminates the reduced Austrian corps.
It is a minor battle between the force of Charles, which has morale of 2 because its capital Vienne is controlled by France, and that of Napoleon with morale of 5. The combat odds are 1:2 with a penalty of "-1" for Charles, who uses his offensive bonus of "+1" for a net modifier of 0. Napoleon has his defensive tactical value (+3), an interception bonus (+1), Cavalry Superiority (+1), defensive tactical value for Davout (+3) and a reduced Elite Corps in lead assault (+1) for a total of +9.
Charles scores 8, which is "1+", destroying the reduced Elite French corps, and Napoleon has 7+9 = 16, which is "4+C". Charles is defeated and must take a demoralisation test; the morale of Charles is 0 (2 + 1 for the offensive tactical value of Charles – 3 the difference in losses) and he is automatically demoralised. Davout does not suffer a wound following his involvement.
Napoleon rolls for pursuit and scores a 2, modified by the offensive tactical value of the Emperor (+3), 2 steps of reserve cavalry (+2) and Murat, cavalry general (+1), for a total of 8, being 2 additional losses for Charles, after which the force is totally destroyed; Charles is placed in the generals' reserve.
Koutouzov, wary of events, decides to retake control of Vienne with his movement factor reduced to 2MP because of poor weather. Napoleon does not intercept. Koutouzov spends his second movement point to remove the French control marker and detaches a loss step in the fortress to reactivate it; the non-elite corps of Buxhowden is destroyed.
The Coalition has a third activation; it hesitates between reinforcing the Russian army with the last Austrian corps at Budapest and attempting to chase the French from Rome with the Neapolitan corps. He decides on the latter. It is a skirmish; combat value of each side is 2 for a total of 4 (Column 1-7). The Coalition has no modifier and Gouvion Saint-Cyr his defensive tactical value of "+1". Morale has no effect in this type of battle because demoralisation is not possible after a skirmish. The Coalition scores a 6 for a result of "0" and the French 7+1 = 8 for "0+". Neither side suffers losses, but because of the "+" result it is the French who win the battle; the Neapolitan corps must retreat to Naples and halt its activation because of the defeat.
6th round: Napoleon decides to play the Schulmeister card as an event; the card is then permanently removed from the game because it has a star on it. France moves the Russian army at its base movement factor of 2 MP because of winter and places it in the zone north of Budapest. Then Napoleon enters Salzbourg to leave Davout and an Elite Corps to watch the lines of communication, then into Vienne making a siege attack that succeeds on a 2 +4=6 giving Honours. Napoleon does not reactivate the fortress and takes control of the zone for free.
Not having the Winter Campaign card, the Coalition realises that the surrender of Austria is imminent unless he can retake Vienne or cut the supply line of the Grande Armée, because only a supplied zone is taken into account in the Victory Conditions. The Coalition decides to play its permanent card Admiralty for the 3 AP, two of which activate Koutouzov, who goes for a forced march of 2 MP to increase his total to 4MP. The Russian army moves to Budapest and joins the Austrian corps, which is allowed because the majority of steps remain Russian, then marches on Vienne to engage in battle with Napoleon.
The Coalition army must first have an attrition test and scores a 2+2 (Winter) +2 (2MP of forced march) = 6, which is a loss which is taken from the Austrian corps because the Russian bonus was not able to be used; note that the Austrian mobile depot could not be used because it is not of the nationality of the commander of the force — Russian in this case!
Napoleon has only a total combat value of 7 against 7 for the Austro-Russians; it is thus a minor battle. French morale is 5 and that of the Coalition, 4.
Koutouzov scores a 10+1 (Offensive tactical value of Koutouzov) +1 (Offensive tactical value of the subordinate general Buxhowden) +1 (elite unit as lead assault) = 13, which is a score of "3". Napoleon scores 8 and benefits from his defensive tactical value (+3), Cavalry Superiority (+1), the defensive tactical value of Soult (+1) and uses the Garde as lead assault (+2), giving a total of +7 for a score of 15, which is "4C". The Grande Armée defeats the Coalition army at the cost of the destruction of the Garde and an Elite Corps; there are only 4 steps left with the Emperor. The Russian army must destroy its lead assault Elite Corps, the last step of Austrians, and reduce its second Elite Corps. Neither Soult nor Buxhowden are wounded in the fighting.
Koutouzov must take his demoralisation test; his morale is now 4+1 (Offensive bonus) -1 (difference in losses), giving 4. He scores 3, which is less than or equal to his morale, and thus remains in good order; he retreats to the province east of Vienne from which he has come.
There remains an AP for the Coalition, which decides to activate the British fleet of Ball patrolling in the Golfe du Lion. This fleet enters the blockade box of Toulon to blockade the fleet of Emériau; the latter decides to intercept the British fleet — this is automatic in the blockade box. A naval battle ensues; each fleet rolls a die modified by its combat value. Ball scores a 3+2 = 5 and Emériau a 2+0 = 2; the difference is +3 in favour of Ball, who wins the battle but does not sink Emériau, who is blockaded in Toulon and can be intercepted if he attempts to leave; he needed a score differential of 4 to sink the French fleet!
The activation phase completes; no Siege is in progress requiring resolution and no final attrition test, as there are no demoralised or besieged forces.
The players note that Thuringe is under French control; Napoleon decides to give it the status of ally of France and place the corresponding marker. The Papal States (Papauté) is also under French control and the Emperor decides to integrate it into the Empire: a National Territory marker is placed in Rome, the aim being to make Rome a French supply source where new units can be deployed in subsequent reinforcement phases.
Finally, Napoleon receives the surrender of Austria because he controls Vienne (Vienne) and has destroyed the Austrian army, thus avoiding having to control Prague, the second key zone of Austria, and imposes the following peace conditions:
- the Austrian ports are part of the Continental Blockade during the forced peace between France and Austria.
- France decides to annex the Tyrol and thus create the Kingdom of Bavaria, which gives it an additional card during all subsequent draws. Then France chooses to annex Venetia (Vénétie) to complete the Kingdom of Italy, which allows him to place a second Italian corps in the reserve of units to be built. Finally, France annexes Frioul and integrates it into the Empire; a National Territory marker is placed in Trieste; Trieste becomes a French supply source, but reinforcements cannot be deployed there as this territory does not connect to the national territory containing Paris.
The duration of the forced peace is determined by rolling a die, which gives a score of 3 divided by 2 and rounded up for TWO years of forced peace. All the "Empty Fortress" markers are removed and the fortresses reactivated at no cost in favour of the controlling player. The French forces decide not to remain in Austria and are immediately redeployed to the nearest friendly fortress, which is Ulm. It only remains for the Russian army to redeploy to Neminov, the nearest fortress by number of MP.
The 1805 turn ends and France scores an additional victory point for having defeated Austria (6) and the Escalade level goes up a notch (1).
1806
Declaration of war phase: Coalition states it has no declaration and then Empire abstains for the turn. This means that it will not be possible to declare war on a neutral major or minor nation during the turn to come!
Card hand phase: Each player can discard the cards he has. France decides to retain Cavalry of the Guard and is obliged to retain Continental Blockade. The Coalition decides to retain its Wound card.
Empire has as a right its permanent card The Genius of Napoleon because it holds Paris and may take 7 other cards (representing the conquest of Austria, Mantoue, Kingdom of Bavaria, Bordeaux, Lyon, Antwerp and Madrid). Having chosen to keep Cavalry of the Guard and having to keep Continental Blockade, he then draws from the deck 5 new cards and gets: Lasalle's "Brigade infernale" (2), "Foul weather" (2), Triumph of Erfurt (3), Talleyrand (3) and Sound of the guns (2).
The Coalition has the right to the British permanent card because he controls Londres and the Russian permanent card because he controls Moscou; he may have 5 other cards (Lisbon, Saint-Petersburg, Odessa+Kiev, Gibraltar+Malta, the Two Sicilies). As the Coalition retained the Wound card, he draws from the deck 4 new cards: Bombardment of Copenhagen (2), Spanish Galleons (2), Intrigues (1) and City (3).
Budget Phase: Even the neutral major powers (Turkey, Prussia and Austria) may produce new units. Empire decides the production of Turkey and Coalition that of Prussia and of Austria. Wounded generals and those with an arrival date of 1806 are now available.
Turkey chooses to build an army (2) at Constantinople and one corps of infantry (2). Spain reinforces the reduced corps at La Corogne (1) and builds its last corps of infantry at Madrid (2); the last point is lost. Prussia builds its Elite Corps at Magdebourg (3); the normal cost increases from 1 to 1.5 because of the star present on each step of the corps. The two reduced corps of Varsovie and of Berlin are raised to full strength (2). Austria builds its army (2) at Vienne with Command being given to Charles with 5 corps of infantry (10).
Russia must reinforce the army saved from the disasters of the preceding Campaign, which has only 3 steps. The Tsar decides to reinforce the reduced Elite Corps (1.5), build a mobile depot (0.5) and 5 corps of infantry (10), of which 2 are in Vilna with Benningsen and 3 with the army of Koutouzov.
Britain builds one fleet (5) and one non-elite corps of one step (1), which is placed in Londres. It uses its special rule to draw an additional card rather than receive one free additional fleet; it draws the "Winter Campaign" card (3). Britain has 3 minor allies with combat units: Sweden, Naples and Portugal, which give Coalition the right to 1 step of minor powers reinforcement; having lost no minor steps and no units being available in the reserve, this reinforcement is lost.
France cannot reinforce the Grande Armée because only reduced units (maximum of 2) can be reinforced and the army has only the reserve cavalry corps and an Elite Corps, both of which are at full strength. Napoleon chooses to play the Cavalry of the Guard card, which is removed from play, and places the corresponding special unit in an Army. France builds 3 Elite Corps (9) and 2 infantry corps (4), which are placed with the generals at Liège and Strasbourg. France also builds 2 mobile depots (1), which are placed in an Army. France has minor allies with combat units — the Kingdom of Italy, Switzerland, Bavaria, Bade, Württemberg and Netherlands — for a total of 6, which gives it the right to 3 steps of minor power reinforcements. France chooses to complete the Dutch corps (1 step), build the second Italian corps (1 step) and the Bade corps (1 step).
Diplomatic phase: A maximum of 2 cards may be played by each side during this phase.
The Coalition chooses to play the Bombardment of Copenhagen card on Egypt, which has a maritime border: he scores 4 on the die and the attempt to suborn Egypt is a failure. The card is removed from play and the Escalade level increases by a point (2).
The Coalition looks for new allies on the continent after the surrender of Austria; he plays the card Intrigues to attempt to influence Prussia. He notes that this card is powerful because normally it requires a 3AP card to make a diplomatic action on a major power! Britain has a diplomatic bonus +2 on Prussia and a specific bonus +2 with the card; he rolls a die and scores 2+2+2 = 6, the attempt is successful and Prussia joins the Coalition, which immediately receives two additional cards from the deck (Berlin+Koenigsberg and Varsovie). The forces of the minor allies of Prussia (Saxony and Hesse) are placed on the map.
France acts after Britain; it cannot counteract the British diplomacy. Napoleon attempts to influence Egypt with the "Talleyrand" card. France scores 3 +2 (card) +1 (French bonus with Egypt) = 6; Egypt enters into a French alliance and France receives an additional card for Le Caire.
Neutral Major Power Movement Phase: Players decide not to move forces of Austria and Turkey, who are neutrals.
Strategic Redeployment phase: Castanos with his two corps moves to Léon up to the limit of his movement factor (3), avoiding an attrition test. The Hessian corps and the Prussian corps at Berlin join the Armée de l'Elbe at Magdebourg while Hohenlohe leaves Breslau to join the Saxon corps at Wittemberg.
The Russian army of Koutouzov decides to double its movement factor (it requires a general for this to be possible) to move as quickly as possible to the theatre of operations in Prussia, moving to the south west of Vilna. An attrition test is required but neither the penalties for winter nor forced march apply; as a result, the modifiers are those of the Russian army (-1), national territory (-2) and a poor zone (+2). The force has 10 steps and scores a 2-1 = 1, no loss. Benningsen advances to Koenigsberg.
France moves the Grande Armée to Wurtzburg, where the reinforcements of Liège and Strasbourg join it. The Armée d'Italie moves to Mayence and picks up the Bade corps; obligatory attrition tests cause no losses. The Dutch corps joins the Armée d'Italie. The Brest corps moves to Reims and the Toulon corps to Florence.
The Campaign of 1806 can now start…
Turn Sequence (Player Aid Summary)
Interphase
Declaration of War Phase — Each player, Coalition then Empire, makes declarations of war on other powers. The other major powers do not make declarations of war. Invasion of another country is not permitted during a turn unless a previous declaration of war was made at this stage.
Card Hand Phase — Each player can discard into the discard pile some or all of the cards in his hand or he may retain them. Each player checks the Card Assignment Table for the number of cards he can have in his hand. Declarations of war affect the number of cards available to each player. They then draw the number of cards to bring their hand up to full size.
Budget Phase — The players collect their resource points and expend them; it is not possible to retain resource points for later turns.
Diplomatic Phase — Each player, Coalition then Empire, can use a maximum of 2 cards from his hand. Each card allows: to take diplomatic actions on minor or neutral major powers; to establish a protectorate on an allied minor power (Empire only, see 8.1.5); to try to stop a Foreign War (see 6.4); or play a particular event.
Neutral Major Power Movement Phase — Players may move any forces of the neutral major powers but not make forced marches.
Strategic Redeployment Phase — The players may move their units over long distances under certain conditions in the following order: Turkey, Spain, Prussia, Austria, Russia, Britain and France (see 7.6).
Activation Phase
Each activation phase is divided into six identical activation rounds. Each activation round allows each side to take one action. Empire always takes the first action in each activation round. In each round, each side may: play a card and use the number of AP shown on it; play a card as an event but no more than one new Foreign War per year (that is, a turn); make a one AP operation without playing a card; pass in his round; establish a protectorate over a minor eligible for this status (Empire only); during a winter round, attempt to end a Foreign War; any two rounds, take a diplomatic action on a minor power by playing a card.
End of the Activation phase — At the end of the Activation phase, besieged forces suffer a final siege test. Then forces that are: not supplied; or are besieged; or are demoralised — suffer an attrition test.
Conquests and Surrenders
Conquests and surrenders of major and minor powers are determined. Destroyed fortress and demoralisation markers are removed if this is possible.
Victory
The victory conditions are checked.