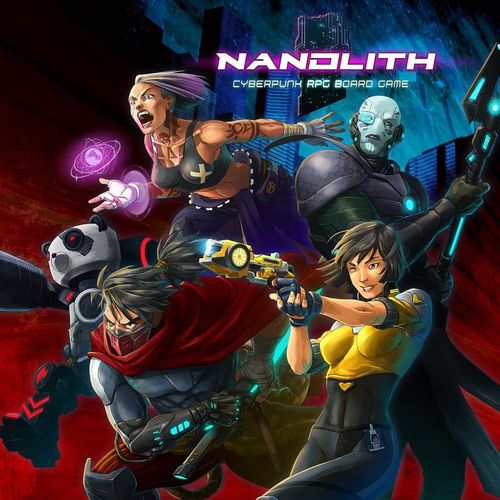
Nanolith
Nanolith Rulebook
Table of Contents
Table of Contents
Aim of the Game
In Nanolith, you will experience the epic story of the four protagonists as they embark on a quest through a dystopian cyberpunk world riddled with hate, betrayal and surveillance. The aim of the game is to recover the characters' lost memories and put a stop to the mighty Babel Corporation.
There are essentially two game modes.
Encounter Mode
In the Encounters, you will have to win cinematic battles on tactical maps. You will use your Action Dice to activate Skills. And you will gain Stress to unleash almighty Nanoshocks that will wipe your enemies off the Encounter Map. You will find that each Encounter is unique and comes with its own Special Rules that create a completely different flow and new Victory Conditions.
Campaign Mode
In the Campaign Mode, you will explore large-scale illustrations ("Lobbies") in search of hidden clues reminiscent of an escape game. You will be able to level up and enter Shops to purchase Weapon Upgrades and Body Augmentations. You will also find choose-your-own-adventure stories where you will have to make decisions for your characters, as well as multi-page comics that will lead you to the next Encounters. All of this happens during the City Phase, when you can unlock and access new parts of Neo-Eden.
Basic Concepts
Roles of the Four Characters
Each character in Nanolith plays an important tactical role, just like in an MMORPG. Ashitaka is the group's tank, drawing in enemies to keep the other characters alive. Vaa-Lith's job is to wipe enemies off the Encounter Map and cause as much Damage as possible. Cora is excellent at completing mission objectives and has a wide range of Skills. Ada heals the other characters and activates powerful supporting Skills. Combining each character's strengths is one of the most important tactical challenges in Nanolith.
Nanoshocks
Once characters have accumulated enough Stress, they gain powerful Nanoshocks. These immense powers are absolutely essential for the characters to survive in the cruel world of Nanolith. But great power comes at a price. Whenever you perform a Nanoshock, you will wound yourself and will then have less time to complete the Encounter. So use your immense powers wisely!
Always Make Decisions to Your Advantage
In Nanolith, players are always allowed to make decisions to their advantage (e.g. when choosing the spaces to which their characters or enemies are to be displaced, when choosing the specific end space of an enemy movement). In fact, players are encouraged to always make the best possible decision for their tactical situation.
Undoing Moves
As long as the players have not rolled the dice, drawn a card or done any other step to randomise the game, they can undo their last moves as they like (take back Stress, undo Nanoshocks, etc.). The option of undoing moves has a natural limit in terms of each player's memory.
Action Dice
In Nanolith, six-sided dice are used to activate Skills, Cards and Special Spaces on the Encounter Map. When the Action Dice are placed in the Inactive Index, this is referred to as "activating a character."
Skill Cards
Each character has a unique set of Skill Cards. These are activated by certain dice combinations (as in Yahtzee) and open up various tactical options. You can select Active Skills from a wide range of Skills at the start of each Encounter. You can also activate Inactive Skills during an Encounter, but this will make your enemies more powerful.
Setup
General Setup
Prepare the Storybook and the Encounterbook. Assign the players to different characters, then remove the Start Skills, Character Cards, Weapon Cards and Start Items from the game box and distribute them among the characters. The Weapon Cards and Skill Cards assigned to each character are listed on the back of the Character Cards. You can distribute the Start Items among the characters as you wish.
Set up the Round Tracker, Round Token, Reinforcement Tokens, red and yellow Cubes, Deck of Hidden Cards, Item Cards and dice.
Follow the instructions in the Storybook to set up the individual scenarios.
Enemies, tokens, characters, doors and other scenario-relevant components must be placed on the space (or, in the case of doors, on the side line of the space) on which the corresponding illustration of the component is located.
Please note: Sometimes several components of the same type must be placed on one space. If this is necessary, the setup illustration is followed by an "x2".
Overview of a Character Card
Players find all the relevant game information to play the Character on the front of the Character Card. The back of the card contains setup information for the start of the game, tactical advice on playing the character and some fluff.
The front of the Character Card shows the character's name and role, their Defense Values, their Armor Values, their Basic Combat Value for Close Combat and Ranged attacks, their Basic Combat Value for Hacking attacks, and their Nanoshock Action.
Note: Nanolith is always played with all four characters. It is not possible to play the game with fewer characters. If you play Nanolith with less than four players, divide the characters equally among the players.
Character Preparation
Place the Character Card on the Player Board alongside that character's Weapon Card and Start Skills. The Weapon Cards and Skill Cards assigned to each character are listed on the back of the Character Cards. Skill Cards are placed below the Player Board. Start Items are placed somewhere near each Player Board. Weapon Cards are placed in the area reserved for a small card on the Player Board; the Character Card is placed in the area reserved for a large card on the Player Board.
Place a red Damage Cube on the Zero Space of the Damage Index on the Player Board. The Zero Space is the leftmost space on the Index. As long as the Damage Cube remains on this space, the character has 0 Damage Points. Each character can take up to 10 Damage Points. Once a character has taken 10 Damage Points – the Damage Cube reaches the skull – that character is immediately given the "Unconscious" Status Effect.
Place a yellow Stress Cube on the Zero Space of the Stress Index. The Zero Space is the leftmost space on the Stress Index. As long as the Stress Cube remains on this space, the character has 0 Stress Points.
Place a red Nanoshock Cube on the rightmost space of the Stress Index, which is also known as a "Zero Space". You will notice that the Stress Index has two Zero Spaces: one for the Stress Cube and another for the Nanoshock Cube.
Each character can gain up to 6 Stress Points at the start of the Encounter. Once a character has gained 6 Stress Points, that character gets a Nanoshock. We will explain Nanoshocks further below.
Place the round Nanoshock Token on the Player Board with the grayed-out side face up.
Note: There is a Nanoshock Cube and a Nanoshock Token. Both have different functions.
Place 5 Action Dice (Blue D6) and some Combat Dice (Red D8) near each character's Player Board.
Encounter
Round Overview
Nanolith is played in Rounds, which are counted on the Round Tracker. There are several parts to each Round.
Here is an overview:
- Character Turn 1.1. Status Phase: This is the phase where Effects are resolved, Action Dice are rolled and the Round is set up. 1.2. Character Action Phase: In this phase, the characters are activated one after the other.
- Enemy Turn 2.1. Spawn Phase: This is the phase where new enemies enter the Encounter Map. 2.2. Enemy Action Phase: All enemies activate in this phase.
Character Turn
1.1 Status Phase
During the Status Phase, the following happens in the order described below:
- This step is skipped in Round 1 of each Encounter. The Round Tracker is moved one space forward and Reinforcement Tokens (RT) are placed in the Reinforcement Pool. The number of RT to be placed depends on the Round the characters are in. In Rounds 2 and 3, place 1 RT in the Reinforcement Pool. In Rounds 4 to 6, place 2 RT in the Reinforcement Pool. In Rounds 7 to 9, place 3 RT in the Reinforcement Pool.
- All characters move the yellow Stress Cube back 2 spaces on their Stress Index (to the left towards the Zero Space). If the Stress Cube is already on the Zero Space (the leftmost space on the Stress Index), nothing happens.
- The characters resolve any Status Effects they have been given (Poisoned, Hacked, Bleeding, etc.). The Status Effects used in Nanolith are explained later in this book.
- Now all players roll the 5 Action Dice for their characters and place them next to their Player Board. They can use these dice to perform actions in the Character Action Phase. Each time a 1 is rolled, the relevant character gains 1 Stress Point (move the Stress Cube 1 space to the right on the Stress Index for each 1 rolled).
- Unless otherwise indicated for a specific Encounter, the Initiative Token can be assigned to any character chosen by the players. That character will keep the Initiative Token for the entire Round.
The player holding the Initiative Token will be the first player to start their Action Phase in that Round. After that, the players are free to choose the order in which the other characters perform their actions.
The Initiative Token is relevant at the end of the Enemy Spawn Phase, because excess Reinforcement Tokens are then converted into Stress for the player holding the Initiative Token.
1.2 Character Action Phase
Characters can perform several of the following actions – in any order – during their turn:
- Movements
- Card and Skill Activations
- Attacks
- Interactions
- Free Actions
- Nanoshock Actions
In order for the players to perform an action with their character, they must place an unused Action Die in the Inactive Index on the Player Board. This will activate the character. The section of the Character Action Phase in which a character performs actions is referred to as "Activation." Characters can activate multiple times (as long as they have enough Action Dice for the activation) and can perform any type of action any number of times and in any order.
Action Dice Value
All characters (except for Sidekick) have 5 Action Dice that they can roll in the Status Phase and then use in the Action Phase to perform actions. This number of Action Dice is referred to as the "Action Dice Value". At the start of the game, all characters (except for Sidekick) have an Action Dice Value of 5. Sidekick's Action Dice Value is 0.
Basic Rules for Sequence of Activation and End of Activation
While one character is activating, no other characters are allowed to activate. The only exception is when you spend Action Dice to perform a Nanosync. However, this does not count as an action (even though it may cause Stress and generate Reinforcement Tokens in the Reinforcement Pool).
A character can end their activation at any time, but then that character will not be able to perform any more actions in that Round.
A character can perform any number of Free Actions and Nanoshock Actions during their activation. The number of actions allowed for each character is limited only by the number of Action Dice at their disposal. There is no limit on the variety of actions (e.g. movements, interactions, attacks) that a character can perform during their activation.
As long as a character has enough dice, they can essentially do whatever they want.
Also: The characters do not have to use up all Action Dice on their turn.
Once a character has finished their activation, the players can choose any other character to activate. When all characters have completed their activation, the Character Action Phase ends and the Enemy Spawn Phase begins.
Movements
In order to move around the Encounter Map, a player must place any unused Action Die in the Inactive Index on the Player Board. Then the player can move their character up to as many spaces as the number of dots shown on the die. If the player uses a die with 4 dots, for example, their character can move 4 spaces.
Players can always move less than the amount of pips on the used action die. It's fine to spend a die with 5 pips and only move the character 1 space, for example. Any points in excess of the movement will be lost.
Nanolith only allows orthogonal movements. The characters cannot move through red lines or yellow lines.
The characters can move through enemies or characters without any penalties, unless indicated otherwise by the Enemy Special Skills (on the Enemy Card).
The maximum model limit for each space is 4 normal models (20 mm base) or 1 large model (40 mm base). Fully occupied spaces can be crossed without any penalties, but models cannot end their movement on full spaces. The only exceptions to this rule are "integrated movements" (see below).
Example: Vaa-Lith uses one of his Action Dice with 4 pips to move 4 spaces away from his starting space.
Integrated Movements and Displacement
Integrated movements are those triggered by a Skill, Item, Enemy Skill, Nanoshock Action, Nanosync Skill or similar. Integrated movements can be ended on fully occupied spaces for the time being. Once the action triggering the integrated movement has been resolved, the character will be displaced within a range of "A1" if no room has been freed up in the space entered.
"A1" means "Adjacent 1." This includes all spaces that are diagonally or orthogonally one space away. The "A" ranges are the only exception to the orthogonal rule for all ranges, movements, etc.
Any spaces containing a Blocked Token cannot be briefly entered in this way with an integrated movement.
Example: If an integrated movement (e.g. forward movement triggered by Ashitaka's "Rush" Nanoshock Attack) ends on a space that is already full, the character moved into the full space will be displaced to a space within a range of "A1" after the action ends. Valid spaces for displacement are any space within that A1 range that is not full; invalid spaces are any that remain full.
Activating Cards and Skills
Activating Cards
As each Encounter progresses, the players will pick up Item Cards and obtain Quest Items.
The players will either have to activate these by paying an Action Cost (e.g. weapons or Skills), or the text on the card will explain how and when it can be used.
Characters can hold up to 4 Item Cards and any number of Quest Cards at a time. Once an Item Card has been used, it is immediately shuffled back into the Item Deck. This does not apply to Start Items. Start Items are turned face down and set up again after the Encounter. They will remain with the players throughout the campaign.
Overview of an Item Card: the name of the Item; the Action Cost for the Item; the type of Item (there are three different types of Item Cards: Start Items, Items and Quest Items); and the rules text for the Item Card.
Start Items
The characters are given 3 Start Items at the start of their first Encounter. These remain in the characters' possession and are not discarded when used.
They are just turned over to indicate that they cannot be used again in that Encounter. Start Items are not included in the maximum of 4 Item Cards that each character can hold in their inventory at any given time.
Start Items can be converted into higher-level Start Items in Shops. This requires High-Frequency Nanopotential. Once players have purchased a higher-level Start Item, the lower-level Start Item is removed from the game. For example, you cannot hold the "Nano-Heal Lv. 1" and "Nano-Heal Lv. 2" Start Items at the same time. Please also refer to the Campaign Mode Rules below.
Skill Cards
In Nanolith, each character has their very own Special Skills that can be activated by certain dice combinations. The dice combinations are Double, Triple and Straight.
As always in Nanolith, all costs are minimum amounts and Skills can also be activated by higher Action Dice with the same dice combination. You cannot create certain dice combinations by combining lower values (see example).
Example: Cora has a Special Skill called "Go get Them!", which can be activated with two 3s. However, this Skill could also be performed with two 4s, 5s or 6s. The most important thing is the correct combination of dice (in this case, at least two dice with the same number of pips, which must be 3 or more).
You cannot achieve the two 3s by combining one die with 3 pips, one die with 1 pip and one die with 2 pips. Dice combinations have to be actual doubles, triples or rows.
Overview of a Skill Card: the name of the Skill; the Action Cost for the Skill; the Effect of the Skill (the exact Effect caused by each Skill Card is described on the card; the Effect must be resolved after the card is activated); and the Nanosync Skill associated with the Skill Card, which is indicated below its Effect.
Example Skill Card – Provoke (Ashitaka, Level One Skill, Nanosync): Ashitaka gets Skill Tokens. During the Enemy Action Phase but before target selection, Ashitaka may discard one token to choose one enemy per token. He then counts as the closest target for those enemies until the end of this round. This Skill may be activated only once per Character Action Phase. Discard all Skill Tokens at the start of the Status Phase.
Nanosync Skills
Nanosync Skills allow the characters to boost each other's Skills according to the rules presented below.
The character shown on the Nanosync can spend any die from their Action Dice Pool to unlock the Nanosync Effect of the Skill for the character currently performing the Skill. The supporting character can do this even though it is not their turn. This does not count as an action, but it may cause Stress or generate a Reinforcement Token in the Enemy Reinforcement Pool.
Nanosyncs are declared – and their cost is paid – after the Action Dice used to activate the Skill Card have been placed and all resulting consequences (e.g. Stress, Nanoshock) have been resolved, but before the Effect of the Skill Card is resolved.
Nanosync Effects may occur even after the Effects of the Skill Card have been resolved.
Example: Ashitaka performs a Skill called "Provoke" during his activation. As Ada's portrait is displayed in the Nanosync Profile on the Skill Card, once Ashitaka has placed the Action Dice in the Inactive Index of his Player Board and resolved all consequences (gained Stress, placed Reinforcement Tokens), Ada is free to decide whether or not she wants to Nanosync with Ashitaka to boost his "Provoke" Skill.
Ada has already completed her activation, but she has not spent all of her dice, so she chooses to place a die with 1 pip in her Inactive Index to increase the number of Skill Tokens that Ashitaka gains from 3 to 4. Ada spends the last die, which means that 1 Reinforcement Token has to be placed in the Reinforcement Pool (more on that later). Once this has been done, Ashitaka gains 4 Skill Tokens for his Nanosync-enhanced "Provoke" Skill Card.
Exchanging Skill Cards
As the campaign progresses, the characters will gain other Skills in addition to their Start Skills. At the start of an Encounter, each character can choose up to 3 Skill Cards to start the game with. These are referred to as "Active Skills."
Unequipped Skills are called "Inactive Skills." If a character has purchased additional Skill Cards with Nanofragments but has not equipped them, they can exchange an Active Skill for one of these other Skill Cards whenever they like during their Activation.
If a character wishes to turn an Inactive Skill Card into an Active Skill, they must place 1 Reinforcement Token in the Reinforcement Pool and can then add the Inactive Skill to their Active Skills. They can never have more than 3 Active Skills. Characters can turn Active Skills into Inactive Skills for free at any time during their Activation.
Skill Card Effects that last until the end of the Encounter will remain in effect even if the Skill Card that caused the Effect becomes inactive.
Example: Ada would like to activate her "BSS weapons training" Skill. As she has already 3 Active Skills equipped, she deactivates her "MedKit" Skill (by removing it from below the Player Board) and exchanges it for the "BSS weapons training" Card. Activating the Skill Card costs 1 Reinforcement Token, so Ada places 1 Reinforcement Token in the Reinforcement Pool.
Skill Tokens
Skill Tokens act as a reminder for activated Skill Effects that can be used at specific times (as indicated on the Skill Card).
Skill Tokens are discarded as indicated on the associated Skill Card (e.g. after they have been used, at the start of the Status Phase or at any other time noted on the Skill Card). If no time is specified on the Skill Card, the Skill Tokens are not discarded.
The players can use Skill Tokens to help them remember even if they are not noted on a Skill Card.
Note: If the text of a Skill Card triggers an attack ("Immediately attack …" etc.) the players do not need to spend further Action Dice. The cost of the attack is already included in the cost of the Skill Card.
Example: Ada performs "Sik Gas Injection", and the Skill Card states that a character in her line of sight and within a range of 6 (or Ada herself) gains a Skill Token. The character who gains this Skill Token can use it at any time during their Activation to obtain +1 Combat Die for their next attack. Ada decides to give this Skill Token to Vaa-Lith so that he can potentially inflict more Damage when he activates.
Attacks
All characters (except for Cora) start the game with a weapon equipped, which enables them to perform an attack. Weapons are considered equipped when their weapon cards are in the corresponding section of the character's Player Board.
To perform an attack, players have to take the following steps:
- Make sure the target is within range and in the character's line of sight.
- Determine the Action Cost and spend the necessary Action Dice.
- Determine the Combat Value.
- Roll the Combat Dice and determine the Damage.
- Mark the Damage on the relevant Enemy Card or Damage Index.
1. Range of Attack and Lines of Sight
The range of an attack is indicated after the Range Icon in the Combat Profiles of enemies and weapons. An attack can hit any space that is as many spaces away as the amount indicated after the Range Icon or fewer spaces away than that amount.
Example: The Combat Profile for Ashitaka's Neo-Katana contains the Close Combat Icon, which means that attacks performed with this weapon are Close Combat Attacks. Close Combat Attacks usually have a range of "A1". Vaa-Lith's spear, Canopus, is a Ranged Weapon, as indicated by the Ranged Icon, and has a range of 4.
Range Icon
All ranges are counted orthogonally in Nanolith.
The only exception are ranges preceded by an "A". This "A" means "Adjacent" and includes all spaces counted orthogonally or diagonally. This means that an attack with a range of "A1" hits all 8 spaces around the starting point of the attack. An attack with a range of "A2" hits all adjacent spaces, as well as all spaces that are diagonally and orthogonally adjacent to those spaces, etc.
Lines of Sight
Lines of sight are the imaginary lines that could be drawn from any corner of a starting space to any corner of the target space.
The following rule applies to lines of sight in Nanolith: If you can draw a continuous imaginary line from any corner of the space in which the character is located to any corner of the target space, the line of sight is valid.
The line of sight and movements of characters and enemies are blocked by red lines, which mostly represent walls and similar terrain. However, corners marked in red can be cut if the line of sight exceeds the corner. If the line of sight ends on one of these red corners, the line of sight is invalid.
Yellow lines block the movement of characters and enemies, but not their line of sight. Yellow lines represent elevations or transparent areas on the Encounter Map.
Example: Vaa-Lith can't see the Bio-Mutant on one Special Space, because his line of sight would cross a red line. His line of sight is therefore invalid. However, he can see another Bio-Mutant, because he can draw a continuous line of sight from one corner of his space to a corner of the space in which that Bio-Mutant is located.
Example: Cora can see a Security Droid, because her line of sight only crosses a yellow line. Yellow lines block the movement of characters and enemies, but not their line of sight or attacks (except for any attacks that have to be performed within a range of 0). Cora can see the Security Droid despite a nearby red line, because her line of sight only runs along the corner of the red line without crossing it. A line of sight can be established across these corners.
Sight Blocker Spaces
If the line of sight of a character or enemy touches or crosses a Sight Blocker Space, their line of sight is considered invalid. Enemies cannot establish a line of sight out of or through Sight Blocker Spaces. You can imagine a Sight Blocker Space as having a red line along each of its edges, with one exception.
Enemies can enter or leave Sight Blocker Spaces without restriction. Characters cannot enter or leave Sight Blocker Spaces.
2. Calculating and Paying Action Costs
If you want to activate something in Nanolith (e.g. a card, weapon or Skill), you always have to pay its Action Cost.
To do this, the player places an Action Die – with a number equal to or higher than the Action Cost of the card to be activated – in the Inactive Index of the Player Board.
Note: There is a general rule in Nanolith: All costs are minimum amounts. You can always pay more. Any points in excess of the Action Cost will be lost.
In addition, multiple Action Dice can be combined to pay the Action Cost for an action. However, this only applies if the Action Cost does not contain a dice combination.
Example: Vaa-Lith wants to activate Canopus. The Action Cost for Canopus is 5. Vaa-Lith places two Action Dice (with which he has rolled a 2 and a 4) in the Inactive Index of his Player Board. The sum of the two dice is 6. As you can always spend more than the required minimum cost in Nanolith, this move is legal. The surplus point is lost. Of course, if Vaa-Lith had rolled a 6 with a single die, he could have activated Canopus by placing just one die in the Inactive Index.
3. Determining Combat Value
If a player wants to perform an attack with their equipped weapon, they have to add up the number of Combat Dice for the relevant type of attack as shown on their Character Card ("Basic Combat Value") and the number of Combat Dice for their weapon ("Weapon Combat Value"). The sum of these two values is referred to as their "Combat Value" (CV).
Combat Value (CV) is the combination of Weapon Combat Value (WCV) and Basic Combat Value (BCV). It is the value that is commonly used to perform an attack on an enemy after activating a weapon.
There are four different types of attack in Nanolith: Close Combat Attacks, Ranged Attacks, Nanoshock Attacks and Hacking Attacks.
An enemy has a specific Defense Value for each type of attack.
Immunities to Types of Attack
In some cases, enemies will have an "X" instead of a number as their Defense Value for a specific type of attack. This means that the enemy is immune to that type of attack. It cannot be damaged by that type of attack. The type of attack is always indicated in the Combat Profile of the weapon or enemy.
Different Combat Value
Most of the time in Nanolith, players will attack enemies with their Combat Value (CV). However, there are some situations where players will need to use their Basic Combat Value (e.g. when characters are disarmed or when performing Hacking Attacks without a weapon).
We can therefore differentiate between three different Combat Values in Nanolith:
Basic Combat Value (BCV): Basic Combat Value is used to perform attacks without a weapon. This is the case with either an Unarmed Attack or a Hacking Attack.
These two types of attack always have an Action Cost of 4.
In an Unarmed Attack, a character engages in hand-to-hand combat using their Close Combat Value on their Character Card within line of sight and a range of A1.
In a Hacking Attack, the character uses the Hacking Combat Value on their Character Card, to attack the enemy within line of sight and a range of 6.
Weapon Combat Value (WCV): Weapon Combat Value is never used on its own to perform attacks, but it may be used in combination with Skills and other features of the game.
4. Rolling the Dice & Determining Damage
Players can roll as many Combat Dice (Red D8) as indicated by their Combat Value. Each die that shows a number equal to or higher than the enemy's Defense Value for the weapon's type of attack is counted as 1 Damage Point.
When an enemy has taken as much Damage as its Life Points (the number shown in the red heart on the Enemy Card), the enemy is eliminated; its standee is then removed from the Encounter Map and placed back in the Spawn Pool.
If any Skills, Upgrades or other Effects allow dice to be re-rolled, the first roll is ignored. (Exception: The Effects of a 1 (Stress, Reinforcement Tokens, etc.) are always taken into account.)
Attacks on Multiple Models
Whenever more than one model is hit by an attack action in Nanolith, a separate attack roll is carried out for each model. In Nanolith, there are no attack rolls that count for multiple enemies or characters.
Example: Ashitaka uses his Nanoshock Skill ("Rush") to move 6 spaces, attacking all enemies he encounters during his movement. The 6 spaces are occupied by a total of 4 Bio-Mutants. Ashitaka now rolls 3 dice for each Bio-Mutant (the CV for his Nanoshock Attacks) and determines the number of Damage Points inflicted on each enemy separately.
Armor
Enemies and characters can have different amounts of Armor against different types of attack. This is indicated in the top corner of their Defense Value for each type of attack. Each point of Armor reduces the total Damage rolled with the Combat Dice against the enemy or character by 1.
Example: Ada attacks the Spawn (Lv. 1) with her Nanopulsar. She rolls 2 Combat Dice for this attack. The result is a 2 and a 6. As this is a Ranged Attack, Ada hits the Spawn once, because the Spawn has a Defense Value of 6 for Ranged Attacks. However, as the Spawn has 1 point of Armor against Ranged Attacks, the total Damage of the roll is reduced by 1 and the Spawn takes 0 Damage Points. If Ada had hit the Spawn twice, it would have taken 1 Damage Point.
Hacking Attacks
As with any other attack, characters use the Basic Combat Value shown on their Character Card to perform attacks. As with any other attack, the Basic Combat Value can be modified by weapons (Weapon Combat Value), Skills or Items.
Hacking Enemies
When performing a Hacking Attack on enemies, the normal Combat Rules apply with the following modifications: Hacking Attacks can always be performed on enemies within a line of sight and a range of 6 (i.e. up to 6 spaces away). Hacking Attacks on enemies have an Action Cost of 4.
Hacking Other Targets (Hacking Profiles)
In Nanolith, the players will often have to hack Consoles or Doors. For this purpose, all hackable Items in Nanolith have a special Hacking Profile and a few Special Rules apply.
To hack an Item, the character first has to pay the required Action Cost indicated in the Profile. In addition, the character must be within the specified range of the target (for Consoles, this is always 0, i.e. in the same space). Then successful Hacking Attacks have to be performed against the Defense Value of the Console or Door. Consoles and Doors have a Damage Index. For each point of damage, the character places a red Cube in the Damage Index of the Console or Door.
When this Index has been completely filled, the Profile Effects must be resolved. Once a Door has been hacked, it is removed from the Encounter Map. It is also worth noting that some Hacking Profiles have the "Force Success" Icon (see below).
Hacking Attacks on Consoles are always performed within a range of 0. Doors can be hacked from spaces within a range of A1 or 0 from the space containing the Door along its edge.
Doors are depicted by standees. Consoles are represented by Tokens.
Special Rule: Force Success
When hacking targets with a separate Hacking Profile, the "Force Success" Special Rule applies because the "Force Success" Icon appears in the Profile. The hacker can then damage the target through reckless manipulation even if a Combat Die doesn't reach the Defense Value shown in the Profile. The hacker can turn any unsuccessful roll with one of the Combat Dice into a success if the hacker inflicts the amount of Damage indicated in the Force Success Icon on himself or herself.
Each unsuccessful roll can be turned into a success once in this way. It is therefore not possible to force more successes than the number of dice rolled in the Hacking Attack.
Example: Cora attempts to hack a Door. She is within a range of A1 from the space containing the Door along its edge. This means that she is within legal range to hack the Door. As she has no weapon or Skill that might increase the number of Combat Dice at her disposal for Hacking Attacks, she uses the two Combat Dice shown on her Character Card. She attacks the Profile with her BCV.
Cora rolls a 2 and a 6. As the Door has a Defense Value of 5, Cora inflicts 1 Damage Point. As the Profile supports the "Force Success" Special Rule, Cora is allowed to inflict 2 Damage Points on herself to turn an unsuccessful roll into a success. The Door then takes a total of 2 Damage Points.
Interactions
In Nanolith, it is possible to interact with Tokens, people and Items on the Encounter Map. These objects have an Interaction Profile, where the Interaction Cost, Interaction Range and Interaction Effect are listed. To perform an interaction, the character has to spend an Action Die at least equal to the Interaction Cost stated in the Interaction Profile within the specified range of the object. The character then resolves the Interaction Effect.
Jump Points
Jump Points are special links between spaces that allow otherwise insurmountable terrain to be traversed and hard-to-reach points to be accessed by the characters. If a character spends an Action Die equal or higher to the Interaction Cost printed on the Jump Point, the character can move along the Jump Point to the connected space.
If a space with a Jump Point contains an "X" instead of an Interaction Cost, a character or enemy cannot use the Jump Point from that space. Any such side of the Jump Point will not be counted as a Jump Point for enemies when selecting their targets (see below).
Enemies can otherwise cross Jump Points for free, but they must end their movement on the other side of the Jump Point.
Important: Jump Points are used as an interaction and not a movement. This means that a movement cannot simply continue through a Jump Point with the same Action Die; another die has to be spent to activate the Jump Point.
Example: Ada moves 1 space onto a Jump Point. To perform this movement, she uses an Action Die with 5 pips, because she has rolled a lot of good dice in her Status Phase. However, she can only move 1 space onto the Jump Point before ending her movement and spending another die to activate the Jump Point. This is because crossing a Jump Point counts as an interaction, not a movement, and the Interaction Cost cannot be paid with the die that took the character to the space with the Jump Point.
Special Spaces
In various Encounters, special interactions apply to areas of the Encounter Map marked as Special Spaces. Any character standing on a space marked with a Special Space Icon must observe the Special Rules that apply to those spaces.
The relevant rules can be found in both the Storybook and the Encounterbook. The wording is exactly the same in each book; the rules are only printed twice for the sake of clarity.
There are also Special Space Areas. These are larger sections of the Encounter Map in which the relevant Special Rules apply to each individual space in the whole area.
Special Space Areas are shaded and boxed elements in the Encounterbook. All shaded and boxed spaces are subject to the Special Rules applicable to the relevant Special Space Area.
Free Actions
Free Actions are those which a character can perform without spending any Action Dice. Any number of Free Actions can be performed by a character during their activation.
Free Actions also frequently appear in Victory Conditions and Special Rules.
Picking Up Items from the Encounter Map
At any point during their turn, characters can remove an Item Token within a range of 0 (i.e. in the same space as the character) from the Encounter Map and then draw an Item Card from the Item Card Deck. Each character can hold up to 4 Item Cards (excluding Start Items) and any number of Quest Cards in their inventory at a time.
Any cards drawn from the deck are simply placed near the character's Player Board. These cards are treated as open information (as is pretty much everything else involving the characters).
Picking up Item Cards from characters or trading them during their turn, characters can pick up an Item Card from another character located within a range of 0 to A1 (in an orthogonally or diagonally adjacent space) and in the character's line of sight as a Free Action or can trade with another character within a range of A1.
These actions can also be performed with unconscious characters.
Both used and unused Item Cards can be traded in this way.
Nanoshock and Stress
Nanoshock Actions and Stress
Nanoshock Actions are the characters' special powers. They are listed on each Character Card. These special powers can be unleashed in the form of Nanoshock Actions – your secret weapon in the fight against Babel.
But before we look at Nanoshock Actions, we need to get to grips with the concept of "Stress."
Stress
There are nano-machines integrated into each character's body. Their current condition is indicated by "Stress". When these nano-machines are subjected to heavy loads, they run hot and even overheat. This is referred to as "Nanoshock".
But how do you get Stress?
Stress Factors
In Nanolith, there are three Effects that generate Stress for the players:
- Rolling a 1 with a character's Action Dice or Combat Dice
- Spending Action Dice
- Manipulating Action Dice
Rolling a 1
Whenever a player rolls the dice for their character and gets a 1, their character gets 1 Stress Point.
Even if a die is re-rolled (e.g. due to a Weapon Upgrade) after showing a 1 on the first roll, the rolling character's Stress Cube must be moved 1 space to the right before the die is re-rolled. In other words, you cannot avoid Stress by re-rolling.
The characters get Stress regardless of whether they roll a 1 with a Combat Die (Red D8) or an Action Die (D6).
Example: Cora rolls her 5 Action Dice during the Status Phase. Her rolls include two 1s, so she moves her Stress Cube 2 spaces to the right along the Stress Index.
Spending Action Dice
At the start of the Action Phase, all Action Dice are next to the Player Board. Whenever a character wants to perform an action, the player places the required number of Action Dice in the Inactive Index of the Player Board, starting with the leftmost space.
Whenever an Action Die is placed in a space of the Inactive Index with the Stress Icon (the yellow exclamation marks), the player gets 1 Stress Point.
Note: Sidekick's Inactive Index instead has a "Download" space, letting Sidekick download 1 Program Card from any enemy on the Encounter Map.
Manipulating the Action Dice
The characters can give themselves Stress to manipulate their Action Dice.
Action Dice can be manipulated to increase or decrease the amount rolled by 1. This can be done for each Action Die once per Character Action Phase.
Each of these manipulations gives the relevant character 1 Stress Point. This means it is possible to generate 5 Stress Points with 5 Action Dice without even performing an action.
Action Dice can only be manipulated within the number range of 1 to 6. In other words, a 6 cannot be converted into a 1 and a 1 cannot be turned into a 6.
Example: Ashitaka wants to play his "Oath" Skill. To do this, he needs at least two 3s. At the start of his activation, he rolls the following with his Action Dice: 2, 4, 5, 2, 6. Ashitaka takes the two dice showing a 2 and increases them both by 1. As a result, he gets 2 Stress Points. Now he has effectively rolled the following: 3, 4, 5, 3, 6. He can spend both 3s to activate "Oath".
Nanoshock
The first time the Stress Cube reaches the rightmost space of a character's Stress Index (the space next to the Nanoshock Cube), that character gets their first Nanoshock.
Follow these steps to get a Nanoshock:
- Place the yellow Stress Cube on the Zero Space to the left of the Stress Index.
- The character takes 2 Damage Points. To do this, move the red Damage Cube 2 spaces to the right on the character's Damage Index.
- Flip the Nanoshock Token on the Nanoshock space of the Player Board to its "Active" (colored) side.
- Move the red Nanoshock Cube 1 space to the left on the Stress Index.
Nanoshock Cube
The Nanoshock Cube always marks the last space of the Stress Index. The Stress Cube cannot be placed on the space in which the Nanoshock Cube is located or to the right of the Nanoshock Cube.
Whenever the character gets a Nanoshock, the Nanoshock Cube moves 1 space further to the left.
As a result, the Stress Index gets smaller and smaller – and Nanoshocks become more and more frequent – as each Encounter progresses.
Nanoshock Action
Once a character has gained a Nanoshock Token, the character can flip the Token at any time during their Action Phase – without spending any more Action Dice – and perform the Nanoshock printed on their Character Card. This is known as "performing a Nanoshock Action."
These are very powerful Skills that will often save your life. But beware: Every time you trigger a Nanoshock, the Stress Index will decrease and the character will then take Damage more often.
Nanoshock Attacks
Whenever an attack is triggered by a Nanoshock, this is known as a "Nanoshock Attack". Nanoshock Attacks follow slightly different rules than normal attacks:
- Nanoshock Attacks always use a character's full Combat Value (CV) (i.e. the combined dice for their Basic Combat Value (BCV) and Weapon Combat Value (WCV)).
- Nanoshock Attacks always use all Weapon Upgrades for the weapon in use, as if the Weapon Upgrades had an "A" (Automatic Weapon Upgrade) printed instead of an Action Cost. This means that even if a character can normally only activate an Upgrade by spending additional Action Dice, the character can use that Upgrade for free for each roll of the Combat Dice resulting from the Nanoshock Attack.
- Enemies have to use their Nanoshock Defense Value to defend themselves against Nanoshock Attacks.
Example: Ashitaka attacks a Bio-Mutant with his Nanoshock Action ("Rush"). This action unleashes an attack on all enemies in a straight line, and each attack is a Nanoshock Attack. On the one hand, this means that all enemies will have to use their Nanoshock Defense Value against this attack; on the other hand, it means that every Upgrade on Ashitaka's weapon will be used as if it had no Action Cost and activated automatically.
Even though an Action Cost of 2 is printed on Ashitaka's Start Upgrade (Action Cost: 2; Text: +1 Combat Die), it will be used for all actions associated with that Nanoshock Attack as if it activated automatically.
This means that one more Combat Die will be used for each attack performed during this Nanoshock Action. All enemies hit by the attack will have to use their Nanoshock Defense Value.
So, Ashitaka will use 3 Combat Dice to attack each Bio-Mutant (Lv. 1) with a Defense Value of 4.
Cora and Sidekick
Cora is accompanied by a robot that can enter the game as a character in its own right when Cora uses a Skill called "Go get 'em!". Sidekick can move around, download enemy programs and execute the enemy programs he has downloaded.
He does all of this with Cora's Action Dice, but the actions are resolved as if performed by Sidekick's standee (determining line of sight, counting spaces for movements, determining range, etc.).
Cora has a Weapon Card called "Sidekick" that lists the robot's traits.
Overview of Sidekick: Sidekick's Life Points and Armor; Sidekick's Defense Profile; and Sidekick's Skill (downloading programs) – Download 1 Program Card from any enemy on the Encounter Map.
Moving Sidekick
Whenever Cora spends an Action Die to move, she can also move Sidekick up to a number of spaces equal to the number shown on the die. In other words, no separate dice have to be used to move Sidekick.
Performing Interactions with Sidekick
Sidekick cannot perform any interactions – with one exception: Sidekick can use Jump Points in the same way that he can move with Cora. In other words, Cora can move both herself and Sidekick over a Jump Point for a die showing the appropriate number of pips.
Downloading Programs
Sidekick can download programs from enemies on the Encounter Map using the Skill indicated on the "Sidekick" Weapon Card. The programs that enemies bring into an Encounter are indicated in the "Program ID" section of their Enemy Card. Enemies never use these programs themselves; they can only be used by Sidekick. The programs specified on the Enemy Cards are placed face up next to the Enemy Cards when creating the Enemy Initiative.
In order to successfully download a program, Cora must perform a Hacking Attack on the program's Hacking Profile and inflict at least 1 Damage Point. As we saw when hacking Consoles and Doors, the "Force Success" Special Rule also applies when downloading Program Cards as indicated in their profile.
The Hacking Attack on the Program Card Profile doesn't have to be purchased with an Action Die; it is obtained for free when Sidekick's Weapon Card Skill is activated.
Sidekick doesn't have to be on the Encounter Map for Cora to use the Skill indicated on the "Sidekick" Weapon Card.
Example: Cora wants to download the "Laser" program held by the enemy Security Droid. To do this, she spends 2 Action Dice showing a double of 2 or more and activates Sidekick's Card Skill (see "Sidekick" Weapon Card). Sidekick doesn't have to be on the Encounter Map to perform this Skill.
Cora performs a Hacking Attack on the Program Profile without spending any more Action Dice. Cora has 2 Combat Dice as her Basic Combat Value for Hacking Attacks. She rolls a 3 and a 4. As both numbers do not reach the Defense Value indicated in the Profile (the program has a Defense Value of 5), she uses the "Force Success" Special Rule and turns an unsuccessful roll into a success. She takes 2 Damage Points, as indicated under "Force Success" in the program's Defense Profile. The program has now been downloaded successfully, and Sidekick can use it until the end of the Encounter.
Using Programs
As long as Sidekick is on the Encounter Map as a standee, Cora can use Sidekick's programs for the specified Action Cost as if they were the robot's own Skills. Sidekick can hold up to 4 programs at a time. Once an Encounter has been completed, Sidekick can permanently save the programs in exchange for Nanofragments (see Leveling Up and Campaign Mode). Otherwise, they will be discarded after the Encounter.
Overview of a Program Card: the name of the program; the Action Cost for the program; the Program ID; the Hacking Profile for downloading the program; and the program's rules text.
More on Sidekick
Sidekick never counts as a character for the Victory Conditions. Apart from that, he is treated as a character (especially for enemy activations).
Once Sidekick has been eliminated, he must be removed from the Encounter Map. He will automatically lose any programs that haven't been permanently saved on his hard drive (see below). Otherwise, he can be reintroduced to the Encounter Map without penalties using Cora's "Go get 'em!" Skill.
If Cora falls unconscious while Sidekick is on the Encounter Map, Sidekick remains on the Encounter Map but cannot be activated or used in any way. However, he can still be targeted by enemies.
Sidekick cannot perform any actions apart from moving, crossing Jump Points and resolving Program Cards (e.g. he cannot pick up any Item Cards, perform Hacking Attacks or perform Skills).
Sidekick is immune to all Status Effects (Bleeding, Poisoned, etc.).
Enemy Turn
The enemy turn consists of two phases: the Spawn Phase and the Enemy Action Phase.
1. Spawn Phase
This is where new enemies are placed on the Encounter Map or Boss Cards are drawn for Bosses.
2. Enemy Action Phase
This is where enemies activate and Boss Card Effects are resolved.
The Spawn Pool
At the start of each Encounter, the Storybook instructs the players to create the Spawn Pool. This is the total allocation of enemies available for the Encounter. If an enemy type is no longer available in the Spawn Pool (e.g. because it is already on the Encounter Map), it can no longer come into play from the Spawn Pool. Once an enemy has been eliminated, it returns to the Spawn Pool and can then re-enter the Encounter Map as a reinforcement.
Enemy Cards and Enemy Classes
Before we get into the flow of the enemy turn, we should take a look at an Enemy Card, which lists all the important information about the enemy type.
Overview of an Enemy Card: the enemy name; the Program ID of the program to be downloaded by Sidekick; the enemy class (Standard, Special or Boss); the enemy's Special Skills; the enemy's Combat Profile; the enemy's Defense Value and Armor; the damage zones of each standee; the enemy's Maximum Damage; and the enemy illustration.
Enemy Classes
There are three classes of enemy: Standard, Special and Boss. The class is indicated below the enemy's name. The first part of the name gives you an indication as to how you can envisage the enemy. The second part indicates the enemy class.
You should always pay attention to the enemy class, as some Skills only affect certain enemy classes.
Enemy Special Skills
The players should always read through the Enemy Special Skills before starting each Encounter, because they often require significant tactical changes to be made.
When enemies are paralyzed, their Special Skills are inactive and can be ignored.
If Cora uses her "Mindhack" Nanoshock Action to move enemies and perform attacks with them, the enemies she controls do not have their Special Skills.
Damage Zones
Instead of placing Damage Tokens on the Encounter Map, you can put them on the edges of the Enemy Card by the number that matches the number shown on the standee that has taken the Damage.
Maximum Damage
Once an enemy has taken the Maximum Damage indicated on its Enemy Card, it is eliminated from the Encounter Map and returned to the Spawn Pool.
Spawn Phase
The most important tool in the Spawn Phase is the Reinforcement Table, which is found in each Encounter. This indicates which and how many enemies come into play.
Auto-Reinforcements
First, the number of enemies of the specified type, as indicated in this section, enter the Encounter Map from the Spawn Pool.
Place these enemies off the Encounter Map during the Reinforcement Phase. Later on, bring them onto the Encounter Map along with the Extra Reinforcements.
Extra Reinforcements
Extra Reinforcements are purchased for Reinforcement Tokens. Extra Reinforcements can only be purchased with Reinforcement Tokens accumulated in the Reinforcement Pool.
Reinforcement Tokens enter the Reinforcement Pool in one of two ways:
- Whenever a character places his or her last Action Dice in the Inactive Index, a RT is placed in the Reinforcement Pool.
- Whenever an enemy rolls a 1, one RT is placed in the Reinforcement Pool.
So, based on a Reinforcement Table, you would purchase a Bio-Mutant (Lv. 1) for 2 RT until there are no more RT in the Reinforcement Pool or until there are no more Bio-Mutants (Lv. 1) in the Spawn Pool.
The enemies come into play in the order indicated in the Reinforcement Table, from top to bottom. Enemies of the top type continue to be purchased for accumulated RT until there are no more standees for that enemy type in the Spawn Pool. Only then can enemies of the next enemy type be purchased from the Spawn Pool.
Important: All RT accumulated in the Reinforcement Pool must have been used by the end of each Enemy Spawn Phase.
If the stipulated Extra Reinforcements have been purchased and there are still excess RT remaining in the Reinforcement Pool, these RT will be removed from the Reinforcement Pool and the player holding the Initiative Token will get as many Stress Points as excess RT have been removed from the Reinforcement Pool. This may cause the player holding the Initiative Token to gain one or more Nanoshocks or even fall unconscious.
If the players are supposed to place RT in the Reinforcement Pool during a Round but all 12 RT are already in the Reinforcement Pool, they do not place any further RT in the Reinforcement Pool.
Once the reinforcements specified in the Reinforcement Table have been collected, the enemies are placed one after the other on the Spawn Points found on the Encounter Map. For this purpose, a D6 is rolled for each standee and the enemy is then placed on the corresponding Spawn Point.
If a space is full, the D6 has to be rolled again, unless the enemy is a large model (40 mm base). A large model may be placed in the space and all other models (including large models) will then be displaced to adjacent spaces in light of sight (within a range of A1) at the discretion of the players.
Conversely, small enemies can be placed within a range of A1 in line of sight from any Spawn Points that are already occupied by a large model.
Once all enemies have been placed and all Boss Cards have been drawn, the Enemy Spawn Phase ends and the Enemy Action Phase begins.
Enemy Action Phase
Enemy Initiative
Bosses are the first to activate. The Effects and Profiles shown on their Boss Cards are resolved in the order in which they have been drawn. Any Bosses that do not have a Boss Card Deck activate according to the Profile on their Enemy Card.
After that, all other enemy types activate according to the position of their Enemy Card. The enemy type whose Enemy Card is on top of the other Enemy Cards is the first to activate.
The players are free to choose the arrangement of the Enemy Cards at the start of each Encounter. If more enemy types are added over the course of an Encounter, their Cards are placed below the existing Enemy Cards.
The models of each active enemy type activate in order of their standee numbers. The lowest numbers start the turn.
Each enemy standee (regardless of whether it is a Boss, a Special Enemy or a Standard Enemy) must have completed its activation before the next enemy standee can activate.
So, the Enemy Initiative can be summarized as follows:
- Bosses activate first.
- Then all enemy types activate one after the other according to the placement of their Enemy Cards (Enemy Initiative).
- Within each enemy type, the standees with the lowest number activate first in ascending order. Once a standee has completed its activation, the next enemy standee activates, and then the next one, etc.
- This is followed by the next enemy type, and so on.
Enemy Profiles and Their Activation
When enemies activate, they run through their Enemy Profile.
Overview of an Enemy Profile: the first icon indicates the type of attack (Close Combat, Ranged, Nanoshock or Hacking Attack). This is followed by the enemy's range of movement, its range of attack and its number of Combat Dice.
1. Target Selection
First of all, an enemy selects its target according to the following criteria:
- The enemy attacks the character closest to it (see below).
- If several characters are the same distance away, the enemy will attack the character that has taken the most Damage.
- If this value is also the same, the enemy will attack the character that has the lowest Defense Value for that type of attack.
- If this value is also the same, the players can choose which character is attacked.
Determining the Range for Target Selection
The ranges used for selecting targets are measured as an imaginary movement made by the enemy. When selecting the target, the players check how many spaces the enemy would have to move to reach its target. However, they do not perform this movement when selecting their target (hence it is referred to as an "imaginary movement").
Enemies target the character to which they need to move the lowest number of spaces in this imaginary movement.
When counting this imaginary movement for target selection, enemies ignore any Jump Points. They keep counting the spaces on the other side of the Jump Point as if the path between the Jump Points were completely clear. When the enemies cross the Jump Points during their actual movement, however, they will still have to end their movement on the other side. In this way, you can render enemies on the Encounter Map harmless (you can "kite" them) by positioning the characters well.
Enemies don't need a valid line of sight ("line of sight contact") for the imaginary movement performed during target selection.
Yellow and red lines block the imaginary movement performed during target selection. However, there is an exception for yellow lines and Ranged Attacks: An enemy performing a Ranged Attack will ignore the first yellow line between itself and the character.
Once the character closest to the enemy has been determined in this way, the movement is performed to the selected target.
2. Performing Movements to the Target
After selecting the target, enemies can move as many spaces as their Movement Value indicates.
Enemies performing Close Combat Attacks always try to move into the space occupied by their target.
Enemies whose Combat Profile specifies Ranged, Hacking or Nanoshock Attacks try to remain at maximum firing distance from their targets and may even move away from the target in the process. In any case, however, enemies try to perform their attacks. It is ultimately down to the players to decide how an enemy moves towards the target and are free to choose the best possible option for them.
Jump Points in Enemy Movements
Enemies ignore the additional cost of crossing Jump Points while moving to a target. They move over the Jump Points as if there were no obstacle. As soon as they have crossed over, however, enemies end their move and remain on the other side of the Jump Point.
Like characters, enemies can only use one-sided Jump Points in one direction (they cannot move over the side of a Jump Point that shows an "X" instead of a number).
3. Rolling the Dice & Determining Damage
Once an enemy has moved into range of his target, it rolls as many Combat Dice as indicated in its Profile, trying to match or exceed the Defense Value of the targeted character. Each successful roll inflicts 1 Damage Point on the character.
Whenever an enemy rolls a 1 with one of its dice (even during the character turn, e.g. due to Cora's Nanoshock Action), the players have to place 1 RT in the Reinforcement Pool.
When a character's Damage Cube reaches the last space of their Damage Index, that character is marked as "Unconscious". Other characters can use Item Cards ("Nanophoenix") to revive the character. Until then, the character will be skipped during the Character Phase in the next Rounds and will not be able to perform any actions.
As soon as a character comes back into play after being revived (e.g. through the "Nanophoenix" Item Card), they can immediately return to the game fully healed. If the character fell unconscious in a previous Round, they can also immediately roll their Action Dice again and use them in the same Round.
Examples of Enemy Activations
Example 1: In this example, the Security Droid selects Cora as its target. This is because Cora is 3 spaces away and Ashitaka is 4 spaces away. Cora is the closest character.
Jump Points are ignored when selecting the target. The fact that the Security Droid has to end its movement after crossing the Jump Point doesn't stop it from firing a Laser Volley at Cora. To do this, the Security Droid rolls 3 Combat Dice against Cora's Defense Value for Ranged Attacks.
Example 2: The Bio-Mutant selects Cora as its target, because she is the closest character. However, the Bio-Mutant has to end its movement after crossing the Jump Point. As its Close Combat Attack has a range of A1, it can no longer attack Cora. She is 2 spaces away and not within a range of A1.
Example 3: Ashitaka and Cora are the same distance from the Bio-Mutant. If several characters are the same distance away, the enemy will target the character that has taken more Damage. Let's say Ashitaka has taken 2 Damage Points and Cora is still unharmed. Ashitaka would then be selected as the target for the attack.
If both characters had taken 2 Damage Points, the Bio-Mutant would attack the character that has a lower Defense Value for its type of attack (Close Combat in the Bio-Mutant's case). As Cora has a lower Defense Value for Close Combat Attacks than Ashitaka, she would be the target. If, for some reason (e.g. a Special Rule for the Encounter, an activated Skill), Cora and Ashitaka had the same Defense Value for Close Combat Attacks, the players would be allowed to choose the character to be targeted.
Large Enemies
There are slightly different rules for models with a large base (40 mm diameter):
Whenever a large model ends its movement on a space containing one or more small models, it displaces the small models to one or more spaces within a range of A1. The players can decide where to displace the small models.
This also means that a Close Combat Attack performed by a large model will always result in the target being displaced, because models performing Close Combat Attacks always try to move to within a range of 0 from their target.
If a Spawn Point is blocked by a large model, the dice are not rerolled for enemies entering the Encounter Map; instead, the enemies are displaced to a space within a range of A1.
Large enemies cannot be displaced – with one exception: In the Enemy Spawn Phase, if all Spawn Points are occupied and the only way to get a large enemy onto the Encounter Map is to displace another large enemy, then that large enemy can be displaced.
Boss Cards and Boss Activation
Unlike Standard Enemies, many Bosses in Nanolith not only activate according to the rules presented above, but also receive a Boss Card Deck that dictates what the Boss does during its activation. However, there are also Bosses in Nanolith that activate through their regular Enemy Card – and there are even Bosses that activate using special Enemy Cards. You will find the relevant rules for those Bosses in the Special Rules for the Encounter. However, most Bosses activate using Boss Cards.
Overview of a Boss Card: the name of the Boss Card; the Enemy Special Skill Icon; the card action sequence; and flavor text.
Use of Boss Cards
Boss Cards usually come into play through the Reinforcement Table. They are drawn during the Enemy Spawn Phase.
However, it is important to note that Boss Cards that have just been drawn are not resolved in the Enemy Spawn Phase, but in the Enemy Action Phase.
As Bosses always activate before Standard Enemies and Special Enemies, Boss Cards are resolved from top to bottom at the start of the Enemy Action Phase.
- If a Boss Card features an Enemy Special Skill Icon, the first rule to be implemented for that Boss is the one referring to the Special Skill Icon. The rules for Boss Special Skills can be found in the Encounterbook and the Storybook under the Special Rules for the Encounter in question.
- After that, the first action sequence is performed for the Boss. If this is a Profile, the Boss is activated with the specified Profile according to the standard rules for enemy activations. Based on the Profile, the Boss may combine traits of different enemy types (e.g. Close Combat Enemies, Ranged Enemies) in its Boss Deck.
While some Bosses will have completed their activation after the first action sequence, other Bosses have another action sequence at the bottom of their Boss Card. If this is the case, the next action sequence must be resolved as well.
- Similar to the first action sequence for the Boss, the second action sequence may either contain a Profile or a running text. If it contains a Profile, proceed as you would with Standard and Special Enemies. If it is a running text, simply follow the rules printed on the Card until all Effects have been resolved.
The players are allowed to read through Boss Card Decks before fighting a Boss.
Paralysis and Boss Cards
Bosses that activate through a Boss Card Deck may be affected by the "Paralysis" Effect. If this happens, the Boss skips the actions specified on its Boss Card. If the Boss Card contains the Special Skill Icon, however, this is still resolved.
Important: Characters' Skills are very often related to Standard Enemies. Bosses are neither Special Enemies nor Standard Enemies. Skills aimed at Standard Enemies cannot be used on Bosses or Special Enemies.
Multiple Boss Card Decks in an Encounter and Their Initiative
If several Bosses are activated through Boss Card Decks in an Encounter, the players will find their Initiative on the back of the Cards. In such cases, the Boss Card Deck with Initiative 1 will activate before the Boss Card Deck with Initiative 2, and so on.
Boss Cards and "Provoke"
Each Boss Card states whether or not Ashitaka can use his "Provoke" Skill to divert the Card towards himself.
Damage Index for Bosses
Many Bosses in Nanolith have a Damage Index printed in the Encounterbook. Usually, a cube is placed on the start space of the Damage Index at a certain time before or during the Encounter.
As soon as damage is dealt to the Boss, players are required to move the cube on the Index one space to the right for each point of damage dealt to the Boss.
You therefore (usually) do not need to use Damage Tokens in Boss fights.
Note: Some Bosses cannot be wounded from the beginning of the scenario. So don't be surprised if you are only asked to place the cube on the start space of the Damage Index during the course of the Encounter.
Status Effects
Over the course of the Nanolith campaign, the players will encounter enemies that not only inflict Damage, but can also give the characters very unpleasant Status Effects. While some of these Effects are placed on the Player Board as Effect Tokens (Hacked, Poisoned, Bleeding, Unconscious, Paralyzed), Shock is an immediate Effect.
Effect Tokens can be removed by certain Skills (e.g. Ultra Heal, MedKit), while Shock must be resolved immediately as the result of an attack. However, the "Unconscious" Effect Token can only be removed by the Nanophoenix.
There is a maximum number of Effect Tokens for each Effect ("Effect Token Maximum"). This is specified in the relevant Encounters and in the rules here. Characters can never have more Effect Tokens on their Player Board than the maximum number of Effect Tokens specified for that Effect. Any excess Effect Tokens are not placed on the Player Board.
Unconscious (Effect Token Maximum: 1)
"Unconscious" is an Effect that only characters can get. This happens when their Damage Cube reaches the rightmost space of their Damage Index.
When a character falls unconscious, the corresponding Unconscious Token is placed on their Player Board.
The Unconscious Token can only be removed by the "Nanophoenix" Item Card / Start Item Card.
An unconscious character cannot perform any kind of actions (e.g. movements, interactions).
When a character falls unconscious, their Damage Cube, Stress Cube and Nanoshock Cube are immediately moved to the corresponding Zero Spaces and all Effect Tokens are removed from the character's Player Board.
When a character falls unconscious, all Skill Tokens are removed from their Player Board and from their Skill Cards. If the character has placed any Skill Tokens on Enemy Cards, these are not removed. If other characters have obtained any Skill Tokens due to a Skill activated by the character that is now unconscious, those Skill Tokens are not removed either.
If a character uses a Skill whose Effects apply until the end of an Encounter and that character subsequently falls unconscious, the relevant Effects will continue to apply until the end of the Encounter.
Unconscious characters can never take Damage, Stress or Nanoshocks.
Unconscious characters are immune to all other Status Effects.
Unconscious characters can never be the target of a Skill or Nanoshock performed by the other characters, nor can they be targeted by enemies.
If a character falls unconscious while activating, they immediately end their activation (exception: "Rush" and "Falling Stars" Nanoshock Actions) and can no longer activate.
If Ashitaka or Vaa-Lith fall unconscious while performing their Nanoshock Actions, they can still perform any remaining attacks resulting from them (see Nanoshock examples).
If a character has not yet activated in the Round in which they fall unconscious, or if a character has fallen unconscious in a previous Round, they may roll their Action Dice and activate during the Round in which the Unconscious Token is removed.
Paralyzed (Effect Token Maximum: 1)
"Paralyzed" is an Effect that only enemies can get. When an enemy is given this Effect, a Paralyzed Token is placed on the corresponding Damage Zone of its Enemy Card.
Paralyzed enemies are not activated during the Enemy Action Phase. In other words, they do not execute their Combat Profile, move around the Encounter Map or perform any attacks. They do absolutely nothing. Instead, the Paralyzed Token is simply removed from their Enemy Card when it would have been their turn to activate.
Shock
"Shock" is an Effect that only characters can get.
Shock is not marked by a Token; it is resolved immediately. There is therefore no Effect Token Maximum for this Effect.
When an enemy inflicts Shock on a character, the character's Nanoshock Cube is moved 1 space to the left on the Stress Index. If this causes the Nanoshock Cube to hit the Stress Cube, the character takes 2 Damage Points and the Stress Cube is placed on the Zero Space. However, the character is not allowed to turn over their Nanoshock Token. A character cannot get a Nanoshock from the Shock Effect.
A character can get the Shock Effect any number of times during a Round.
Poisoned (Effect Token Maximum: 4)
"Poisoned" is an Effect that only characters can get.
When a character gets the Poisoned Effect, a Poisoned Token is placed on their Player Board.
During the Status Phase, poisoned characters take as many Damage Points as the number of Poisoned Tokens on their Player Board.
Bleeding (Effect Token Maximum: 1)
"Bleeding" is an Effect that only characters can get.
When a character gets the Bleeding Effect, a Bleeding Token is placed on their Player Board.
As long as a character has a Bleeding Token on their Player Board, that character uses the Bleeding Defense Profile specified in the Encounter instead of the Defense Profile on their Character Card.
Hacked (Effect Token Maximum: 4)
"Hacked" is an Effect that only characters can get.
When a character gets the Hacked Effect, a Hacked Token is placed on their Player Board.
As long as a character has at least 1 Hacked Token, they can't do anything other than try to remove it.
Removing Hacked Tokens: The character uses any Action Die to perform a Hacking Attack (BCV) on the Hacked Token. The Hacked Token has a Defense Value of 6.
If the Hacking Attack is successful, remove ALL of the character's Hacked Tokens.
If the Hacking Attack fails, remove 1 Hacked Token and perform an attack on the closest character with the Hacked Profile.
You will find the Hacked Profile in the relevant Encounters featuring this Effect.
Until a character has removed all Hacked Tokens, they can't perform any other actions; all they can do is try to remove the Hacked Tokens as described above. The character can do this as many times as they have Action Dice available.
Once all Hacked Tokens have been removed, the character is free to use any remaining Action Dice.
As long as a character has at least 1 Hacked Token, they cannot perform any Nanosyncs or manipulate Action Dice.
Campaign
As you saw in the Press Start Rulebook, there is more to Nanolith than just battles. As you make your way through the Nanolith campaign, you will explore many more features of the game. The two books you will need to play the game, the Storybook and the Encounterbook, are closely linked.
Encounterbook and Storybook
Story & Encounterbooks
The story of Nanolith is told in two books: the Storybook, in which instructions, open texts and hidden texts will form the narrative basis for your journey through the realms of Neo-Eden; and the Encounterbook, in which various comics, Encounter Maps and double-sided setting illustrations ("Lobbies") bring the world of Nanolith visually to life.
The two books are easy to navigate, as they contain clear instructions to read certain passages and perform certain actions. These indicate which page should be opened in which of the two books.
It is important to read the information in the correct order so as not to lose your way in the two books.
For example, if the Storybook says, "Read the Intro, Setup Instructions and Victory Conditions on this page, then turn to pp. 14-15 of the Encounterbook", it is important that you first read the texts and instructions in the Storybook instead of immediately turning to the specified pages of the Encounterbook.
Open and Hidden Texts
The players can and should read all texts on the pages they open in the Encounterbook. These texts often contain Special Rules that are important for understanding how an Encounter works.
In the Storybook, however, a distinction is made between unencrypted and encrypted (defragmented) texts. Any texts with a combination of letters and numbers in the left margin are referred to as "Defragmented Texts".
These texts can only be read when a Quest Item (see "Hidden Cards and Quest Items" below) with the corresponding Defragmentation Code is held by the players and the players can interact with the Quest Item on the relevant Lobby page (see "Interactions with the Lobby"). All other texts in the Storybook are considered open information and should be read by the players when they are instructed to open the relevant page in the Storybook.
Lobbies
Save Points
As the Nanolith campaign cannot be played in one go, there are various Save Points spread throughout the game. Whenever you see the Save Icon in the Story- or Encounterbook, this denotes a Save Point. You can resume the game from these Save Points at any time. Save Points are always located at points of the game where Damage, Effects and Statuses (e.g. Unconscious) are negated.
When the players reach a page of the Storybook or Encounterbook featuring the Save Icon, they must reset all Damage and Stress to 0, discard all Effects, recover all Start Items (by flipping the card), discard all Skill Tokens and do everything else it takes to return their characters to their starting condition.
The characters can keep any Item Cards they have collected but not yet used. Start Items and other Item Cards and Quest Cards can be freely traded between the characters at Save Points at any time, unless the card text dictates otherwise.
You can use Save Points to activate or deactivate Skill Cards as you wish. You can also level up your characters in various ways at points featuring the Save Icon.
Game Over
You might not always complete an Encounter on your first try. Don't worry – it's not the end of the world! If any of the Game Over Conditions are met during an Encounter, the players can immediately resume the game – fully healed – at any Save Point in the campaign. The characters can keep any Item Cards they may have collected in the failed Encounter.
Game Over Conditions are always specified in the Victory Conditions.
Lower Difficulty Level
If you find an Encounter too difficult, you are free to adjust the campaign difficulty level. If this is the case, play Nanolith just like before with the following exception: Whenever enemies roll a 1, no RT is placed in the Reinforcement Pool.
Exit Icon
Lobbies featuring an Exit Icon can be exited by the players at any time. You can take the exit to access the City Map and begin the City Phase. If a Lobby does not have an Exit Icon, it cannot be exited.
Riddles
At various points throughout the game, you will come across the enigma Icon. This refers to points in the game that you will have to overcome by using your powers of deduction to solve a riddle.
If you get stuck, turn to the indicated page of the Rulebook. There you will find a hint or even the solution.
Important: Enigma Icons always refer to the chapter in which they are found. A riddle will never take you to any passages outside of your current chapter.
Nanostories
As you explore the Lobbies, you will stumble upon various "Nanostories". These are choose-your-own-adventure stories that will give you an even more vivid experience in the world of Nanolith. By playing these short stories, you will obtain Nanosync stickers that reflect how the characters relate to one another. These dynamics will be shaped by the decisions you make in the Nanostories.
It normally takes 5 to 10 minutes to read a Nanostory. Nanostories are depicted on Mission Tokens and in Lobbies using a dedicated icon.
Comics
You will sometimes come across comics that interrupt the flow of an Encounter or the Nanolith campaign (similar to cut scenes in video games). Whenever you are prompted to read a comic, turn to the indicated page of the Encounterbook and remember to read the box at the end of the comic. There you will see which page of the Encounterbook or Storybook you have to open to resume the game.
Hidden Cards and Quest Items
You will obtain Hidden Cards over the course of the campaign. Whenever this happens, look for the card with the specified code in the Deck of Hidden Cards and give it to any character.
Hidden Cards are often – but not always – Quest Items.
Quest Items
These cards expand the world of Nanolith and move the campaign forward.
Overview of a Quest Item: the name of the Quest Item; the Quest Item ID; the Persistent Icon; the illustration; the Defragmented Files reference; flavor text; and other card effects.
Persistent Icon
This icon determines whether or not a card has to be discarded at the start of the City Phase (see below). If a card has a Persistent Icon, it will remain with the characters beyond the City Phase. Don't discard it until a text prompts you to do so.
Defragmented Files
Quest Items open up access to previously encrypted sections of the Storybook. Each Quest Card specifies the Lobby in which the relevant section can be found.
Other Card Effects
Some Quest Items will allow you to perform additional actions or place Mission Tokens on the City Map.
Neo-Eden and the City Phase
The Neo-Eden City Map forms the "Over-Lobby" in the game. From this illustration, you can access all other Lobbies in Nanolith via Mission Tokens.
Once the characters enter the Neo-Eden City Map, you begin the City Phase. When this happens, do the following:
- Discard any Quest Cards that do not feature the Persistent Icon, stick the specified Mission Tokens on the appropriate spaces of the City Map or perform the Effects indicated on Quest Items that begin with "During the City Phase…".
- Return all of the characters' Item Cards (except for Start Items) to the Item Deck. If 3 or more cards are discarded in this way, one character in the group may obtain 1 Nanofragment (see "Leveling").
- Choose a selectable Mission Token (any of the stickers placed on the City Map) and turn to the designated page of the Storybook.
Example: In the first chapter of Nanolith, the group found the Nano-Accumulator and Hitome's Amulet. Hitome's Amulet features the Persistent Icon, which means that it cannot be discarded. The Nano-Accumulator, on the other hand, does not feature the Persistent Icon and has to be discarded. Hitome's Amulet comes with a set of instructions that have to be resolved during the City Phase. The players place the specified Mission Token on the City Map.
Then the players discard all Item Cards (except for Start Items). As they discard 4 Item Cards, they obtain 1 Nanofragment. They decide to give this extra Nanofragment to Vaa-Lith.
Now the players select one of the Mission Tokens stuck on the City Map and turn to the indicated page of the Storybook. This ends the City Phase.
Mission Token
Mission Tokens are the stickers the players place on the Neo-Eden City Map during the City Phase (see above). Each Mission Token shows a name and links to a specific page of the Storybook; selecting one of the Mission Tokens stuck on the City Map and turning to its indicated page is how the players choose which thread of the campaign to pursue next.
Upgrading Characters
After completing an Encounter, the characters will be rewarded with Quest Items, Nanofragments, Nanosync Tokens and sometimes High-Frequency Nanopotential.
Divider Cards, Conscious Memories, Unconscious Memories and Bonus Skills
Nanofragments are the main currency that players can use to upgrade their characters. Whenever the game says that the players obtain Nanofragments, the players can peel the specified number of Nanofragments from the sticker sheet and stick them on the Divider Card for their specific characters.
This Divider Card separates each character's Unconscious Skills from their Conscious Skills.
The players will obtain Skill Cards over the course of the campaign, but these Skills will remain unconscious until they are made conscious using Nanofragments (see below for Costs, etc.) As long as these Skills are unconscious, they are collected in the "Unconscious" part of the Character Card Box. Once they have been made conscious with Nanofragments, they can be placed on the "Conscious" side of the Character Card Box. Only "Conscious" Skills can be activated before or during an Encounter.
At the same time, Divider Cards are used to store Nanofragments obtained during the campaign. Whenever a character obtains Nanofragments, they must be stuck on the "Unconscious" side of their Divider Card.
Once a character uses Nanofragments to level up anything, the Nanofragment sticker is removed from the "Unconscious" side and stuck on the "Conscious" side.
This process will cause a sticker to be placed on a space containing the code X1, X2, X3 or X4 once for each character over the course of the campaign. Once a sticker has been placed on this space, the relevant character will obtain a Bonus Skill that you can find as Hidden Card X1, X2, X3 or X4 in the Deck of Hidden Cards.
Character Deck Boxes can also be used to store Character Cards, Weapon Cards, collected Items and other things between games.
There is also a divider card in the game for High-Frequency Nanopotential. All High-Frequency Nanopotential that players receive during the campaign is collected on this card. Stick the corresponding sticker on the unlabeled side of the divider card when you receive the potential and stick it on the labeled side as soon as you spend it. This card can be kept in the character box of any character.
Leveling Up with Nanofragments
The players can use Nanofragments in each area of the game marked with the Disk Icon (usually Lobbies and the City Map) to level up as described below.
Important: You can not only level up in Shops; many of the Upgrades presented in the game are available in each Lobby and sometimes even in comics.
It is also worth noting that stickers cannot be added to any Upgrade Slots that already contain a sticker. Each slot reserved for Skills, Defense Values or Combat Values can only be used once.
This rule does not apply to Weapon Upgrades (see below).
Here are the most important ways to level up the characters:
Obtaining New Skill Cards
To make an unconscious Skill Card conscious costs the character 2 Nanofragments. This will bring the Skill Card from the Unconsciousness side of the Character Card Box to the Consciousness side of the Character Card Box. Conscious Skills can be activated before or during an Encounter. Unconscious Skills can not be used by the characters.
Lowering Skill Costs
The dice combinations required to activate Skills can be lowered once per Skill. The type of dice combination must remain the same (e.g. a double 5 could be lowered to a double 4, or a straight of 3, 4, 5 could be reduced to a straight of 2, 3, 4). The corresponding dice stickers are then stuck onto the sleeved cards. This type of Upgrade costs 1 Nanofragment.
Lowering or Increasing Numerical Values on Skills
Each number marked on a Skill can be increased or decreased by 1 over the course of the campaign. The corresponding sticker is then stuck onto the card. This type of Upgrade costs 1 Nanofragment.
Saving Programs
After each Encounter, Sidekick can save downloaded programs on his hard drive. If he does this, he does not have to discard the Program Card. He can keep it until he wants to overwrite or delete the program. Sidekick can hold up to 4 programs at a time. Any other Program Cards must be discarded. Saving a program costs Cora 1 Nanofragment.
Improving Line of Sight and Range
To place the "Any space on the Encounter Map" sticker to the corresponding space on the skill card, the players have to spend 2 Nanofragments.
Example: A player could use 1 Nanofragment to reduce the "MedKit" Skill Cost from two 2s to two 1s. In addition, MedKit's healing powers could be increased from 3 Damage Points to 4 Damage Points. Likewise, the number of Effect Tokens removed by MedKit could be increased from 1 Token to 2 Tokens. Each of these Upgrades costs 1 Nanofragment and can only be used once over the course of the entire campaign.
The "line of sight and range of 6" limit can be pasted over with the "any space on the Encounter Map" sticker. Using this sticker costs 2 Nanofragments.
Weapon Upgrades and Body Augmentations
These two forms of leveling up are not always available to players; they are unlocked through special events or in Shops.
You will find many other ways to purchase Upgrades in Shops. The relevant costs and the number of Upgrades available for purchase are indicated in each Shop itself.
You will usually be limited to a certain number of Upgrades or Cards in each case, but the rules presented in the Encounterbook or Storybook will offer sufficient information as to how often certain Upgrades can be purchased and for how many Nanofragments.
Weapon Upgrades
If you find Weapon Upgrades over the course of the game (e.g. in Shops or elsewhere in the Storybook), you can purchase them for the cost specified in each case. If you purchase any Weapon Upgrades, the corresponding stickers are stuck onto the free Weapon Upgrade Slots on the Weapon Cards. The following applies to Weapon Upgrades (as opposed to all other Upgrades): New Upgrades can be pasted over slots already containing stickers at any time.
Upgrades sold in Shops are sometimes limited to a certain quantity. This is indicated by text above the Upgrades or boxes next to the Upgrades, which have to be ticked off once an Upgrade has been purchased. Once all boxes have been ticked, the Upgrade can no longer be purchased.
There are two kinds of Weapon Upgrades: Automatic Weapon Upgrades and Weapon Upgrades which need to be activated by paying their corresponding Action Cost. If a Weapon Upgrade has an "A" instead of an Action Cost, this Upgrade will activate for free every time the Weapon Card is activated. If the Upgrade has some Action Cost, the player needs to pay these additional costs after activating the Weapon Card to benefit from the Weapon Upgrade during his Attack Action.
Body Augmentations
A character's Defense Value can be upgraded in Shops. Each Defense Value Upgrade sticker displayed in a Shop can only be purchased once per Shop. It is also worth noting that Defense Values can only be increased by 1 during the course of the campaign. The costs of such Upgrades are indicated in each Shop.
High-Frequency Nanopotential
This particular type of Nanofragment is only unlocked under special circumstances. It is a concentrated form of immensely powerful Nanopotential. This rare form of Nanopotential can be used to purchase various things:
Shop Upgrades
In some chapters, you can spend High-Frequency Nanopotential to increase the range of products available in Shops. The exact rules can be found in the Storybook at the relevant points in the game.
Upgraded Start Items
In some cases, more powerful Start Items can be purchased in Shops. These Start Items can be purchased for the listed price and are only available in limited quantities. The exact costs and quantities can be found in the relevant Shops.
Once a higher-level Start Item has been purchased by the players, the old Start Item with the same name is removed from the game and can no longer be used.
Example: The players purchase a Start Item called "Cool-Down Lv. 2" in Naboo's Shop. Now they have to remove "Cool-Down Lv. 1" from the game. In future Encounters, they will only have access to the higher-level Start Item ("Cool-Down Lv. 2").
Before purchasing a higher-level Start Item, the players must have purchased the Start Item from the immediately preceding level. For example, you cannot purchase "Nano-Heal Lv. 3" before purchasing "Nano-Heal Lv. 2".
Tip: The electrostatic vinyl stickers of Nanolith are reusable and can be removed from cards or pages in the Encounterbook without damaging the material.
We recommend applying the stickers to the non-sleeved card when levelling up the characters and only then inserting the card into the sleeve.
Nanosync Tokens
Nanosync Tokens are mainly unlocked through Nanostories.
Certain choices made by the characters will cause the relationships between them to grow stronger. To show this, the players are given Nanosync Tokens for their specific character. When the group enters a room marked with a Disk Icon, Nanosync Tokens can be stuck onto an empty Nanosync Space on a Skill Card.
You do not have to spend any Nanofragments to stick Nanosync Tokens onto Skill Cards.
Each character can hold on to a Nanosync Token for as long as they like before using it. Once a Nanosync Token has been stuck onto the corresponding space of a Skill Card, this unlocks the Nanosync Skill for that Skill Card. Until a Nanosync Token has been placed there, that Nanosync Skill will remain inactive and cannot be used.
Nanoshock Examples
Cora – Mindhack
"Mindhack" enables Cora to move up to 3 enemies within a line of sight and a range of 6 and to perform attacks with them. Each enemy can be moved once and can perform one attack. These movements and attacks do not count as enemy activations. In addition, all Enemy Special Skills are inactive for the duration of those movements and attacks. If Cora loses her line of sight to the enemies while moving them, this does not have any effect on "Mindhack". All that matters is that Cora can see the enemies – and that they are within range – at the start of her Nanoshock Action.
Example: Cora selects three Bio-Mutants as the targets for her Nanoshock Action, because several nearby Security Droids are not in her line of sight and cannot be selected as targets.
She moves one Bio-Mutant next to the space occupied by a Security Droid. Then she attacks the Security Droid with 3 Combat Dice (see Bio-Mutant Combat Profile). She rolls a 1, 7 and 8. As the Security Droid has a Defense Value of 5 for Close Combat Attacks (see Defense Profile for Security Droid Lv. 1), the Security Droid takes 2 Damage Points. Cora also has to place 1 Reinforcement Token in the Reinforcement Pool, because the enemy has rolled a 1 during its attack.
Then Cora moves a second Bio-Mutant to the space occupied by another Security Droid. She rolls her 3 Combat Dice and inflicts 1 Damage Point. She also places a third Bio-Mutant on a space occupied by three Security Droids and attacks one of them, inflicting 2 Damage Points in the process. Then she declares the end of her Nanoshock Action.
Ashitaka – Rush
"Rush" enables Ashitaka to hit all enemies in any spaces that are part of a straight-line movement. This means that he also hits all enemies located in the space from which he starts his Nanoshock Action, as well as the enemies in the space where he ends his "Rush".
As his "Rush" movement is an integrated movement, it follows the Special Rules for integrated movements: During "Rush", Ashitaka can briefly enter a fully occupied space (4 small models or 1 large model) and perform his attacks in that space. If Ashitaka opens up a space by eliminating an enemy over the course of these attacks, he must be placed in that space. If the space is still fully occupied after his attacks, he will be displaced to any space in his line of sight and within a range of A1.
Blocked spaces cannot be entered in this way. Red or yellow lines cannot be crossed either.
"Rush" cannot hit other characters (as with all attacks performed by the characters).
If Ashitaka falls unconscious during a "Rush", the player can resolve all attacks associated with the Nanoshock Action before Ashitaka is set as "Unconscious". For these remaining attacks, Ashitaka will not get any more Stress Points if he rolls a 1. According to the rules for the Unconscious Effect, any Nanoshock Tokens obtained must be discarded immediately after performing the Nanoshock Action.
Example: Ashitaka decides to take advantage of the highly favorable positioning of his enemies by declaring a "Rush" Nanoshock Action in a straight line towards a Blocked Token. As part of this Nanoshock Action, he attacks several Bio-Mutants and Security Droids standing along that line.
Ashitaka is already wounded. He has 8 Damage Points and 2 Stress Points.
Ashitaka charges forward. As the last space is fully occupied, the players initially place the Ashitaka standee in a space located in his line of sight and within a range of A1. If any room is freed up in the last space of his movement during the attack, Ashitaka must be placed in that space instead.
Ashitaka cannot attack an enemy behind a Blocked Token barricading a fully occupied space.
Ashitaka starts his attacks. He attacks a Bio-Mutant first. Ashitaka can roll 3 Combat Dice for this attack: 1 because of his Character Card (BCV), 1 because of his Weapon Card (WCV) and 1 because Weapon Upgrades are automatically activated for all Nanoshock Attacks (even if they otherwise have an Action Cost).
When attacking the Bio-Mutant, he rolls a 1, 4, and 6. As the Bio-Mutant has a Defense Value of 4 for Nanoshock Attacks, it takes 2 Damage Points. Ashitaka gets 1 Stress Point for the 1 he has rolled.
Then Ashitaka attacks a Security Droid. He rolls a 4, 5 and 1. As the Security Droid has a Defense Value of 5 for Nanoshock Attacks, the enemy takes 1 Damage Point. Ashitaka gets another Stress Point for this attack.
Next up is another Bio-Mutant. Ashitaka rolls a 4, 6 and 8. The Bio-Mutant is eliminated, removed from the Encounter Map and placed in the Spawn Pool.
The next attack hits another Security Droid. Ashitaka rolls a 1, 6 and 8. The Security Droid takes 2 Damage Points. Ashitaka gets 1 Stress Point. As a result, the Stress Cube reaches the Nanoshock Cube on the Stress Index and Ashitaka gets another Nanoshock.
Since Ashitaka takes 2 Damage Points from the Nanoshock, he falls unconscious during his Nanoshock Action. However, he can still perform the remaining attacks for this Nanoshock Action (but he will not get any more Stress for any 1s rolled). In addition, he cannot get any more Nanoshocks from the following attacks.
Ashitaka performs his remaining attacks on the last two Security Droids. He fails to eliminate them. The players place him in the space with Ada, because she is carrying the "Nanophoenix" Start Item.
Ada – Ultra Heal
Ada can perform her Nanoshock Action without a line of sight and within any range. "Ultra Heal" enables her to heal Effect Tokens or Damage Points, but never both in the same Nanoshock Action. "Ultra Heal" cannot hit enemies or unconscious characters.
Example: Ada has just got a Nanoshock during her activation. She decides to use it immediately. She flips the Nanoshock Token to its grayed-out side and starts healing. As lines of sight and ranges are irrelevant, we only need to look at the Player Boards in this example.
Ada heals 3 Damage Points on Ashitaka, 1 Damage Point on Vaa-Lith, 1 Damage Point on Cora and 1 Damage Point on herself. She has distributed her 6 points and her Nanoshock is over.
Vaa-Lith – Falling Stars
Vaa-Lith's Nanoshock Action hits all enemies in the selected space.
No line of sight is required for "Falling Stars." It can be performed in any space on the Encounter Map.
A separate attack roll is required for each enemy located in the selected space.
If Vaa-Lith falls unconscious during his Nanoshock Action, he can still perform any remaining attacks associated with the Nanoshock Action. He will not get any more Stress, Damage or Nanoshocks during those attacks.
Example: Vaa-Lith selects a space containing three Security Droids and a Bio-Mutant as the target for his Nanoshock Action. Vaa-Lith rolls 4 Combat Dice for each attack: 2 dice because of his Character Card (BCV) and 2 dice because of his Weapon Card (WCV). These dice form his Combat Value (CV). As this is a Nanoshock Attack, the enemies defend themselves with their Nanoshock Defense Value.
Vaa-Lith is already heavily wounded and has 5 Stress Points.
His first attack is performed on the Bio-Mutant. He rolls a 1, 4, 5 and 7. The Bio-Mutant takes 3 Damage Points and is eliminated. Vaa-Lith gets 1 Stress Point and falls unconscious as a result. Nevertheless, Vaa-Lith is allowed to perform the remaining three attacks on the three Security Droids. He will not get any more Stress, Damage or Nanoshocks for those remaining attacks.
Icon Reference
The Rulebook closes with a legend of the pictogram icons used throughout the Storybook, Encounterbook and component cards:
- Action Dice
- Reinforcement Point
- Combat Dice
- Enemy Special
- Range
- Enemy Life
- Line of Sight
- Program ID
- Close Combat
- Force Success
- Shooting
- Defragmented Files
- Nanoshock Attack
- Persistent
- Hacking
- Lobby
- Armor
- Combat Encounter
- Nanoshock
- Nanostory
- Stress
- Shop
- Character
- Nanofragments
- Damage
- High Frequency Nanopotential
- Unconscious
- Enigma
- Nanosync
- Special Space
- Action Cost
- Spawn Point