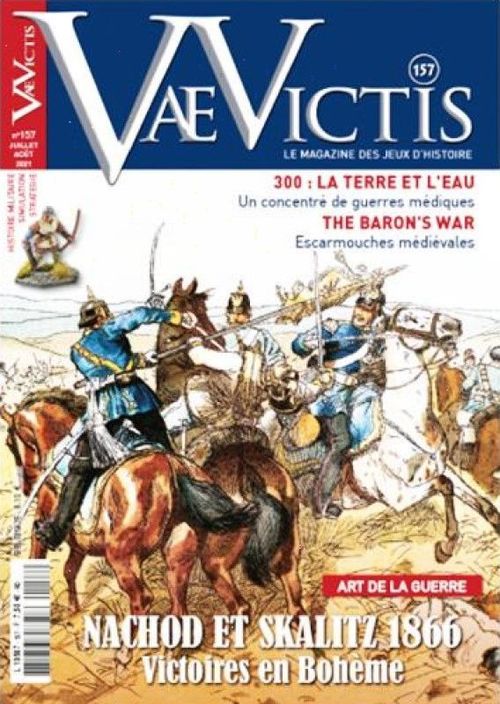
Nachod et Skalitz 1866
Nachod et Skalitz 1866 Rulebook
Table of Contents
Table of Contents
- 1 - OVERVIEW
- 2 - MORALE TEST
- 3 - STACKING
- 4 - FACING/ORIENTATION
- 5 - ZONE OF CONTROL
- 6 - SEQUENCE OF PLAY
- 7 - COMMAND PHASE
- 8 - INITIATIVE
- 9 - OPERATIONS PHASE
- 10 - RALLY
- 11 - THE BATTLE OF NACHOD
- 12 - THE BATTLE OF SKALITZ
- 13 - JOINING THE TWO BATTLES
1 - OVERVIEW
1.1 - GAME SCALES
A game turn represents one hour of real time. The night turns are indicated in dark blue.
One hexagon represents approximately 750 metres.
One elevation level represents approximately 100 metres.
A steep slope corresponds to a difference of at least two levels between two adjacent hexagons.
A ravine corresponds to two hexagons of the same level separated by a hexagon side of a lower level.
The units are regiments (and sometimes battalions); 1 combat point represents approximately 700-800 fantassins or 500-600 cavaliers.
1.2 - TYPES OF COUNTERS
1.2.1 - Commanders-in-chief
These counters have several numbers. The first is their reaction value, the second their initiative value, and the third number their movement capacity (expressed in Movement points, MP). A Roman numeral indicates the corps commanded by this commander.
1.2.2 - Formation commanders
They command brigades in the case of the Austrians and divisions (or brigades) in the case of the Prussians. Their counters indicate a command value, combat bonus and movement capacity. A Roman numeral indicates the formation's parent corps.
1.2.3 - Combat units
A counter is characterised by its denomination and its parent unit (coloured band) for the drawing of markers.
Exception: the centralised units for the entire corps have no coloured band and are called independent units.
Light infantry units are identified by a horn symbol.
Units have three values: combat, morale (which also represents the number of step losses a unit may suffer) and movement.
The cavalry units with a star next to their combat value are heavy units.
For the artillery units, a fourth number indicates the unit's range in hexagons.
The disorganised combat units are flipped over to their back side.
1.2.4 - Activation markers
The formation markers are drawn at random and allow the activation of formations. At the start of each turn, players have available both the markers of the formations already present on the map and those arriving as reinforcements that turn.
1.3 - ROUNDING
All fractions are rounded down to the next whole number unless indicated otherwise.
2 - MORALE TEST
When a morale test is required, the player rolls 1d6. If the result is 6 or more, the test is successful. If it is less than 6, it is a failure.
* The morale test modifiers are:
- +morale of the unit
- +1 if the unit occupies a terrain with level 2 protection or more.
- +1 if the unit is stacked with its formation commander or the Commander in Chief
- +1 for a unit of the Prussian Guard
- +1 for a unit of light troops in a town, village or wood
- +1 for a unit of Austrian artillery
- -1 for each step loss.
- -1 if an enemy is present on the unit's flank, even without attacking.
- -1 if the unit is out of command
- -1 if its formation is demoralised
And for the rally tests only:
- +1 if the formation commander or Commander in Chief is adjacent
- -1 if the unit is within range and in the line of sight of the enemy artillery.
3 - STACKING
Units from the two different sides cannot be in the same hexagon at the same time.
* Each player may stack up to two infantry units (including light troops) or two artillery units or three cavalry units in a hexagon.
It is possible in these stacks to replace a single unit with one artillery unit or two light troops units without exceeding three units.
Exception in a town/village hexagon: the infantry (excluding light troops) cannot have more than 2 step losses present and the artillery cannot have more than 2 step losses.
Stacking rules are not taken into account until the end of a unit's movement (i.e. a unit may cross a hexagon that already contains friendly units).
Commanders do not count for stacking.
4 - FACING/ORIENTATION
Each combat unit must be oriented toward a hexagon side. The three hexes facing the unit are its front hexes; the three others are its flank hexes.
Exception: A non-artillery unit in a village or a town does not need to be oriented. The six hexes that surround it are all front hexes.
Units stacked in the same hexagon must have the same facing, artillery included.
A unit may change facing as often as desired and at any time during its movement.
A unit may change facing during an advance or a retreat after combat.
An artillery unit may change its facing by one hex side before firing a barrage, but not before carrying out defensive fire. If the artillery unit is stacked with other units, they must also change facing.
5 - ZONE OF CONTROL
Every combat unit exerts a zone of control (ZoC) in its front hex.
* A unit does not project a ZoC across a terrain toward which it may not go or across a steep slope in the upward direction only.
5.1 - PROPERTIES OF ZOC
A unit that enters an enemy ZoC stops its movement.
It is prohibited to go directly from one enemy ZoC to another enemy ZoC during its movement phase.
Leaving an enemy ZoC costs half the movement points of a unit that is in command and not disorganised in addition to the cost of access to the hexagon and all the movement points for a unit that is out of command and disorganised.
Disorganised cavalry cannot enter an enemy zone of control. Other types of units can.
A ZoC cuts lines of command (see 7.2 and 9.1.2) unless the hex is occupied by a friendly unit.
A unit that retreats after combat to an enemy ZoC containing no friendly units suffers a step loss.
5.2 - PROPERTIES OF THE FLANKS
The three flank hexagons of an enemy unit exert no ZoC, do not prohibit movement and a unit that retreats to a flank hex of an enemy unit after a combat result suffers no penalty.
6 - SEQUENCE OF PLAY
The battles are played in a fixed number of turns, defined by the scenario. Each game turn includes several phases. The turn ends at the end of the Rally Phase and the Turn Marker is moved forward one space.
A - Command phase (see 7)
- Move the commanders in chief
- Check lines of command to the Commander in Chief
- Initiative (see 8)
B - Operations phase (see 9)
Players activate the formations one after another, following the activation sequence below:
- Activate the formation commander
- Check unit command status
- Artillery unit(s) barrage fire
- Move units (including artillery units that have fired)
- Combat
The operations phase finishes when all the activation markers have been drawn.
C - Rally phase
7 - COMMAND PHASE
7.1 - MOVEMENT OF THE COMMANDERS IN CHIEF
The commanders in chief present on the map may move, beginning with the Prussians. This is the only moment in the turn when they may move.
To be able to move, a Commander in Chief must pass a reaction test. The player rolls 1d6 and adds the Reaction Value of the Commander in Chief. If the result is 6 or more, he may move. Otherwise, he remains where he is.
Exception 1: if the Commander in Chief is 3 hexagons or fewer from an enemy unit, he may move automatically without taking a reaction test.
Exception 2: if the Commander in Chief enters as reinforcement, he may move automatically without taking a reaction test.
A Commander in Chief may move 6 cavalry movement points. He cannot enter a hex adjacent to an enemy unit unless the hex is occupied by a friendly unit.
7.2 - CHECK LINES OF COMMAND TO FORMATION COMMANDERS
To be able to direct a Formation Commander, the Commander in Chief must be able to trace a line of command (LoC) of 6 cavalry movement points to him. This LoC may not pass through an enemy ZoC unless the hex is occupied by a friendly unit.
If a Formation Commander cannot be reached by a LoC, an Out of Command (OOC) marker is placed on his counter and his whole formation is considered Out of Command.
If there are several commanders in chief from the same side in a battle, each one only commands the formations that are affiliated with him on the order of battle.
8 - INITIATIVE
Each player rolls 1d6 and adds to the result the initiative value of his Commander in Chief. The player with the higher result wins the initiative for the turn. In the case of a tie, the Prussian has the initiative.
The player who has won the initiative chooses a Formation marker from those available (see 1.2.4). This formation will act first during the operations phase. All the remaining markers are placed in an opaque container.
If one side has no Commander in Chief, the initiative goes to the other side. If neither side has a Commander in Chief, all the markers are returned to the container: neither player has the initiative.
* If there are several commanders in chief from one side during a battle, the player rolls 1d6 for each Commander in Chief present, modifies the number by his initiative, and takes the best result. If he wins the initiative for the turn, only one formation of this Commander in Chief may be chosen to be activated first.
9 - OPERATIONS PHASE
Formations act in turn. The first to act is the one chosen during the initiative phase.
Once it has completed its operations, the players choose a formation marker at random from the opaque container to determine the next formation to be activated. The players continue in this way until all the formation markers have been drawn, then they move on to the rally phase.
When a formation is activated, the player follows the sequence outlined below:
Activation phase
- Activate commander
- Check units' command status
- Barrage fire by artillery units
- Move units (including the artillery units that have fired)
- Combat.
9.1 - ACTIVATION OF THE COMMANDER AND CHECKING UNITS' COMMAND STATUS
9.1.1 - Commander Activation
If the Formation Commander is commanded by his Commander in Chief, the commander is automatically activated.
If the commander is under an OOC marker, he must take an activation test. The player rolls 1d6 and adds the formation commander's command value. If the result is 6 or more, the formation may act normally and the OOC marker is removed from the commander. Otherwise, the formation remains out of command, all its units are out of command and the commander may not move during the movement phase.
9.1.2 - Command of the units
A unit is in command if it can trace a LoC of 6 cavalry MP, not passing through an enemy ZoC unless that hex is occupied by a friendly unit, to its Formation commander - providing the latter does not have an OOC marker.
A unit that cannot trace this line is out of command.
9.1.3 - Independent (Detached) Units
Independent units have no formation commander.
2 An independent unit can only be activated once per turn and during the activation of any formation.
An independent unit is in command if it has a LoC with the activated formation commander or the Commander in Chief.
9.1.4 - Out of command units
A Commander in chief may directly command, for the entire turn, a number of units out of their own Formation Commander's command, equal to his reaction value (independent units are included in this limit). These units must be in command range of the Commander in chief (6 cavalry MP). These units are considered to be in command and act as such once their formation is activated.
* If there are several commanders in chief from the same side during a battle, each Commander in Chief only commands the troops that are assigned to him on the order of battle.
An out of command unit cannot enter an Enemy ZoC. It can only move half of its movement potential, while trying to get closer to and without moving away from its formation commander.
9.2 - ARTILLERY BARRAGE FIRE
Artillery units have a fire range that extends 3 or 4 hexagons (as indicated on the counter) through their front hexes.
Artillery units may only fire once per activation phase.
An artillery unit may change facing by one hex side before firing. The units stacked with it change their facing in the same direction.
Artillery fire may reach any hex within range and in its line of sight.
9.2.1 - Line of sight
Town, village and wood hexes, and hexes containing a friendly or enemy unit block lines of sight (LoS). They do not block it if the LoS only passes along the edge of such a hex and if the adjacent hex is free of any obstacles.
This type of hexagon also blocks the LoS in the same manner if it is situated on a lower level than the artillery unit but is on the same level and adjacent to the target.
A level of elevation blocks the LoS if it is:
- higher than that of the artillery unit and of the target;
- higher than that of the target and the same as that of the artillery unit;
- higher than that of the artillery and the same as that of the target.
A level of elevation does not block a LoS if it passes along the hex side and if the adjacent hex is free of obstacles.
* A LoS is never blocked if an artillery unit and the target are adjacent.
Note: Bombardment against an adjacent hex is impossible across a steep slope.
9.2.2 - Barrage fire procedure
Barrage fire may only target one unit. If the target hex contains more than one unit, the player must choose which unit he is targeting.
* If a hexagon contains several artillery units of the player carrying out the barrage fire, the units fire separately.
The player rolls 1d6 on the Combats Table and applies the result in the same way as a normal combat, with the following exceptions:
- barrage fire causes no retreat after combat (see 9.4.6);
- * modifiers of the hex sides (river, ravine) are not taken into account (except the difference in elevation level);
- * the commander's bonus modifier is not taken into account.
9.3 - MOVEMENT
Units and formation commanders move one by one by spending the number of movement points (MP) indicated on the Terrain Table.
A unit may exceed stacking limits while crossing hexagons as long as they are respected at the end of the unit's movement.
Movement points cannot be accumulated from one turn to another.
9.4 - ARRIVAL OF REINFORCEMENTS
To simulate the arrival of a column moving by road, each unit (excluding formation commanders) that enters as a reinforcement after the first unit spends the terrain cost for the first hex multiplied by the number of units that have already entered.
Therefore, it may take formations more than one turn to enter the map.
* The reinforcement formations are considered to be in command.
* The Commander in Chief enters as reinforcement during his own movement phase.
* If several Prussian units arrive as reinforcement by the same hexagon in the same turn, the artillery units are always the last to enter as reinforcement (this may require them to enter on the following turn if they don't have enough MP).
Historical note: in 1866, the Prussians always placed their artillery at the end of the column which often brought them into the battle at the end and with a mixed result. They finally learned their lesson and in 1870 the artillery was fully engaged from the beginning of the combats.
9.5 - COMBAT
A formation's combats take place once all its movements are completed.
Combats are resolved in the order chosen by the attacker, following the sequence below:
- Declaration of all the assaults
- Resolution of assaults:
- Defensive fire
- Attack
9.5.1 - Assault declaration
Only infantry (including light infantry), cavalry and formation commanders may participate in an assault.
A unit may only assault enemy units in its front hexes.
An assault is never obligatory (i.e.: a unit may have enemy units in its front hexes and not assault).
* If an assaulted hex contains several units, they are all attacked.
* A unit may assault several front hexes without necessarily attacking all of them. The combats take place separately; the player divides his combat value among the various attacks (reminder: it can attack with a combat value of 0). If there is an advance after combat, it only occurs once all the unit's combats have been resolved.
Any enemy unit with an attacking unit in one of its front hexes may participate in defensive fire if it is not already engaged in another combat.
Several units may assault the same hex. In that case, the attacking player may choose to declare a coordinated assault (see 9.5.2). Otherwise, each assault is treated separately.
9.5.2 - Coordinated assault
* If several units of a Formation Commander's formation or independent units assault the same enemy hexagon, and if he is stacked with one of these units, he may attempt a coordinated assault. The player rolls 1d6, adds the Formation Commander's command value (+1 for the Austrian player if he only engages infantry units from a single hex in clear terrain). If the result is 6 or more, the combat will be a coordinated assault. Otherwise, each unit combats normally and separately.
Faced with a coordinated assault, the defending unit must share its combat value among all the combatting units, keeping in mind that it can combat with a value of 0.
A unit of light troops only provides its d6 bonus for a single defensive combat in which its combat value is used.
A Prussian infantry unit only provides its d6 bonus for the Dreyse needle gun for the defensive combats in which its combat values are used (i.e. a combat at 0 gives no bonus). This bonus is cumulative with the previous one.
An artillery unit adjacent to the attacker only provides its d6 bonus for a single defensive combat in which its combat value is used.
The surviving attacking units attack at the same time, adding up their combat values.
A coordinated assault among attackers who are in adjacent hexes separated by a steep slope or an escarpment is impossible.
Important: for units stacked in the same hexagon and that declare an assault on the same hexagon, a coordination test (and therefore the presence of a commander) is required for the units to be able to attack together.
9.5.3 - Assault Resolution
Assaults are resolved one by one beginning with the defensive combat, followed by the attack.
A - Defensive combat
Each assaulted unit must defend itself, once per assault, following normal combat resolution (see 9.4.3) with the following distinctions:
- if the attacker is attacking through a flank hex, the combat value of the unit in defence is divided by two (reminder: a unit in a town or village only has front hexes).
- if the defending unit is assaulted by several units in a coordinated assault, it must divide its combat value among all the attacking units (reminder: it may combat with a combat value of 0). In this case, only the combat value used against a unit attacking the flank is divided by two.
- * similarly, if a stack of defending units is assaulted by several units in a coordinated assault, all the units of the stack must divide their combat value among all the attacking units.
- * Apply to the defensive combat all the modifiers listed in the Combat Table except the hex side modifiers linked to terrain (river, ravine)
- the terrain value of the attacking unit is always considered to be 1.
A unit that suffers several assaults defends itself each time.
The results of defensive combat are applied before resolving the attacks.
Example of defensive combat: a defender in clear terrain with a combat value of 5 is attacked by three enemies, including one at the flank, in a coordinated assault (a commander is present and had a successful coordination die roll). During his defensive combat, he can either concentrate his 5 points against one of the frontal enemies, or attack the first with 3 and the second with 2, or 2 on the first, 1 on the second and 2 which becomes 1 on the flank; he will attack the others with 0.
If the commander had failed his coordination roll, the attacker should have chosen a first attacking unit with defensive combat against it alone, then if he survives, an assault. If the assault fails, a new combat would occur with a second unit then a third in the case of failure.
B - Attack
Units that can still attack do so.
Assault example: Continuation of the defensive combat example. After the defensive combat, two attackers remain with combat values of 6 and 7, attacking the front hexes. As indicated, a commander is present (with +2 combat bonus) and passed his coordination test. The two attackers add up their values: 6+7 = 13. This value is divided by the clear terrain protection value of 1 for a result of 8, which is the maximum column, plus 5 on the die and another 2 for the commander. The result is automatically D+1. The defender's counter is turned over and a "1 loss" marker is placed on top. If the defender had been in a village with a terrain protection of 2, the combat value would have been divided by 2, for a result of 6 plus 2 to the die roll for the commander bonus.
9.5.4 - Retreat before combat
* A unit may retreat one hexagon (and up to 2 for cavalry facing infantry) instead of engaging in defensive combat if the unit has MP greater than or equal to those of its attacker(s).
A unit (except units of light troops) that retreats and has as many but not more MP as the attacking unit(s), become disorganised or suffers a step loss if it was already disorganised.
A unit that retreats may change facing by one hexagon side.
Retreat may not occur in Enemy ZoC unless there is a friendly unit there. If there is a friendly unit and the stacking limits have been exceeded, the retreating unit continues its movement until it finds a hexagon that fulfils the stacking and facing conditions. All the units in the hexes it crosses then become Disorganised if they weren't already. If they were, nothing changes for them.
One of the attacking units may occupy the evacuated hexagon like for an advance after combat.
9.5.5 - Combat procedure
The attacker takes the combat value of his unit and divides it by the terrain value of the targeted unit's hex (reminder: for defensive combat, this value is always 1). He then adds or subtracts any possible column modifiers listed below the Combat Results Table. This figure gives the column to be used on the Combat Results Table.
The player rolls 1d6, applies any possible die roll modifiers listed below the Combat Results Table. The results are applied immediately.
9.5.6 - Artillery and defensive combat
An artillery unit on its own in a hex is automatically eliminated if the unit assaulting it survives defensive combat.
* Once and only once per activation, an artillery unit's combat value may be added to that of a unit of its formation that suffers an assault to resolve the defensive combat (and therefore shared among different attackers), if the artillery unit is not itself attacked. For this to happen, the attacking unit(s) must be at half range and in its line of sight.
The artillery unit may not change its facing before this defensive support.
9.5.7 - Combat results
– : nothing happens and the war continues.
T: The unit tests its morale. If it is successful, nothing happens. If it fails, the unit is disorganised and follows the result D.
D: the unit is Disorganised and is flipped to its back side. The unit retreats one hex (see 9.5.7) unless the result was occasioned by an artillery barrage or if it is in a town or village. If it was already disorganised, it remains so and suffers a step loss as well (place a Loss marker on it, see 9.5.10).
D+1: same result as above with an additional step loss for one unit of the stack, excluding artillery.
* The result D or T applies to all the units stacked in the same hexagon that participated in the combat (except artillery) but each unit takes its own morale test.
9.5.8 - Retreat after combat
A unit that must retreat must do so toward its map edge, indicated in the scenario.
A unit that retreats into an enemy ZoC with no friendly unit present suffers a step loss.
A unit may retreat through several hexagons containing friendly units until it reaches a hex that satisfies stacking and facing restrictions.
All the units in the hexagons that were crossed in this way become Disorganised if they weren't already. If they were, nothing new happens to them.
A unit that cannot retreat suffers a step loss.
An artillery unit of the defender that is stacked with a friendly unit that retreats is immediately eliminated.
Retreats are managed by the owning player, according to the following priorities:
- avoiding enemy ZoC;
- toward the terrain that costs the fewest MP.
A unit may always change facing by one (and only one) hexagon side after a retreat following combat.
9.5.9 - Advance after combat
When a defending unit retreats as a result of combat, one of the attacking units must advance into the vacant hex.
If several units participated in the assault (coordinated assault) and one of them is a cavalry unit, that is the unit that must advance.
A unit may always change facing by one and only one hex side following advance after combat.
A unit never advances after combat following defensive combat.
An artillery unit never advances after combat.
ZoC rules are ignored for advance after combat.
9.5.10 - Step losses
A unit that suffers a step loss has the appropriate marker placed on it (-1).
A unit that has received as many step losses as its moral value is eliminated.
9.5.11 - Cavalry charges
A cavalry unit must get itself into order and charge in order to attack an enemy unit. Therefore it may only move 3 MP during its movement if it wants to attack.
It defends as if it were an infantry unit.
A cavalry unit always becomes disorganised after the resolution of an attack, no matter the result. If the result of the Defensive Combat has already made it disorganised, it does not suffer any additional losses.
Exception: if the attacked unit retreats before combat (9.5.4), the cavalry unit is not disorganised after its attack.
A disorganised cavalry unit cannot attack. It defends normally.
9.5.12 - Commanders in chief and combat
A Commander in Chief provides no combat bonus.
A Commander in Chief always retreats if he is stacked with a unit that retreats after combat.
A Commander in Chief may advance if he is stacked with a unit that advances after combat.
A Commander in Chief is automatically eliminated if the units with which he is stacked are eliminated.
2 After a barrage fire whose result is anything other than "-", and if the Formation Commander is stacked with the targeted unit, the player rolls 2d6. On a 2 or 12, the Commander in Chief is eliminated.
During an enemy movement phase, if the Commander in Chief finds himself alone in a hexagon and adjacent to an enemy unit, he is immediately replaced on the closest friendly unit in terms of MP.
9.5.13 - Formation commanders and combat
A Formation commander stacked with a unit in defence for attack may add his combat bonus to the die roll.
A Formation Commander may try to organise a Coordinated assault (see 9.5.2).
In both the above cases, the Formation Commander is considered to be participating in the combat.
A Formation Commander does not supply his combat bonus to artillery fire.
A Formation Commander always retreats if he is stacked with a unit that retreats after combat.
A Formation Commander may advance if he is stacked with a unit that advances after combat.
A Formation Commander is automatically eliminated if the units with which he is stacked are eliminated.
* After a combat in which a Formation Commander participated or after a barrage fire whose result is anything other than "-", and if the Formation Commander is stacked with the targeted unit, the player rolls 2d6. On a 2 or 12, the Formation Commander is eliminated.
An eliminated Formation Commander's counter is immediately turned over to its "Aide de Camp" side and is placed on any unit of the formation still in play.
The Aide de Camp becomes the new commander of the formation.
If an Aide de Camp is eliminated, the counter is replaced on any unit of the formation that is still in play on the following turn.
2 During an enemy movement phase, if a Formation Commander finds himself alone in a hexagon and adjacent to an enemy unit, he is immediately replaced on the closest friendly unit in terms of MP.
10 - RALLY
10.1 - RALLY TEST
During the rally phase, a disorganised unit may try to reorganise itself. It must take a morale test, remaining disorganised if it fails, or is flipped to its initial side if it passes.
A rally test may not be attempted if the unit is in the ZoC of an organised enemy unit.
Step losses may never be recovered.
10.2 - DEMORALISED FORMATIONS
Once a formation reaches its demoralisation threshold given in the scenario, the formation moves to a demoralised status.
* The units of a demoralised formation cannot voluntarily enter the ZoC of an enemy unit.
During their movement phase, the units of a demoralised formation must move closer to their map edge or else not move at all if this is not possible.
The units of a demoralised formation suffer an additional penalty of -1 for their morale tests.
* Independent units are never demoralised.
11 - THE BATTLE OF NACHOD
On 27 June 1866, the V corps of the Prussian 2nd Army came out of the Carpathians and entered Bohemia. It had to ensure a bridgehead beyond the narrow pass that arrived at Nachod.
The Austrian VI corps received the order the day before to block the passes that led to the mountains. But when they approached the area on the morning of 27 June, the head Prussian elements were already through.
Note: Listed on the back of the Austrian VI corps activation markers are the names of the brigades of the IV corps (Brandestsein, Archduke Joseph, Fleischbaker and Pöckh). These will only be used with the next volume for the battles of Trautenau and Soor. The same applies for the Austrian cavalry counter of the Prince of Prussia.
11.1 - SPECIAL RULES
11.1.1 - Duration
Beginning of the battle at 07.00
End of the battle on 1d6 ≥ 3 starting at 16.00 at the end of each turn (add +1 to the die each turn).
11.1.2 - Demoralisation thresholds
| Formation | Steps | Demor | VP |
|---|---|---|---|
| Austrian VI corps | |||
| Waldsätten brigade | 6 | 3 | 1 |
| von Hertweck brigade | 6 | 3 | 1 |
| von Rosenzweig brigade | 6 | 3 | 1 |
| von Jonak brigade | 6 | 3 | 1 |
| 1st Reserve Cav Div | 6 | 4 | 1 |
| Independent units |
The independent units do not suffer the effects of demoralisation but reaching their demoralisation threshold counts in the determination of VP.
11.1.3 - Line of retreat
Prussians: eastern edge
Austrians: western edge
11.2 - PLACEMENT
Prussian Army
- Steinmetz: Bilowec (1420)
9th Division
- von Löwenfeld: Nachod (1318)
- 17th Brigade - 37th IR: Bilowec
- 17th Brigade - 58th IR: Nachod
- 5th jägers: Nachod
Wunck cavalry brigade
- 8th Dragoons: 1217
Austrian Army
1st Reserve Cavalry Division
- Holstein: Kleny (0910)
- 4th Cuirassiers Ferdinand: Kleny
- 6th Cuirassiers Prince of Hesse: Kleny
- Art 5-6/VI: Kleny
11.3 - REINFORCEMENTS
Prussian Army
- 7.00: Art V-3 enters by Bilowec (1420)
- 9.00: Wunck + 1st Uhlans + 8th Dragoons: enter by Bilowec
- 11.00: von Kirchbach + 19th Brigade 6th Grenadiers + 19th Brigade 46th IR + 20th Brigade 47th IR + 20th Brigade 52nd IR enter by Bilowec
- 12.00: Art V-1 + Art V-4 enter by Bilowec
- 13.00: 18th Brigade - 7th Grenadiers enter by Bilowec
Austrian Army
- 7.00: Ramming: path by 0105; 10th uhlans Clam-Gallas: route by 0115
- Brigade von Jonak (HQ + all the units except Jägers): route by 0115
- Brigade von Hertweck (HQ + 4 units): route by 0117; Brigade von Rosenzweig (HQ + 4 units): path by 0109; Art 7-8/X + Art 5-9-10/X: path by 0105
- 8.00: Brigade Waldsätten (HQ + 4 units): path by 0105; 14th jägers: route by 0115
- 10.00: 9th Cuirassiers Stadion + 11th Cuirassiers Emperor F-Joseph + 4th Uhlans Emperor F-Joseph + 8th Uhlans Emperor of Mexico: route by Trzebeschow (0801)
11.4 - VICTORY CONDITIONS
11.4.1 - Victory points
The following locations award VP to the controlling player:
- Klény: 2 VP
- Wisokow: 1 VP per hex.
- Nachod: 2 VP
- Wenzelsberg: 1 VP
A location is controlled if all its hexagons were last occupied by a friendly unit and if none of the hexagons is both in enemy ZoC and free of friendly units. If it is not possible to trace a continuous line of hexes excluding enemy units of ZoC without a friendly unit present toward the friendly map edge, the control of the location awards VP to neither its owner nor his adversary.
Each side receives 1 VP for every 2 enemy step losses.
Each demoralised enemy formation grants the number of VP indicated on the table. At the end of the game, if a unit cannot trace a continuous line of hexes excluding enemy units or ZoC without a friendly unit present toward the friendly map edge, it is taken prisoner and eliminated. Take this into account in the determination of the demoralisation threshold.
At the end of the game, the players calculate their victory points and the lower score is subtracted from the higher score.
11.4.2 - Victory level
5 VP or more: Major victory
From 2 to 4 VP: Minor victory
1 VP or fewer: Draw.
12 - THE BATTLE OF SKALITZ
The Prussian V corps severely defeated the Austrian VI corps the previous day at Nachod. Exhausted by an entire day of foot travel and combat, the Prussian troops were not able to pursue the defeated enemy and bivouacked in place.
The Austrian VIII corps was sent to cover the VI corps retreat and block the Prussians despite the fact they were down a brigade which had stayed far back to cover the route to Moravia.
In the morning, the Prussians continued with their advance toward the west.
12.1 - SPECIAL RULES
12.1.1 - Duration
Beginning of the battle at 10.00
End of the battle at 17.00
12.1.2 - Demoralisation thresholds
| Formation | Steps | Demor | VP |
|---|---|---|---|
| Austrian VIII corps | |||
| Fragnern brigade | 6 | 3 | 1 |
| Schulz brig | 6 | 3 | 1 |
| Kreyssern brig | 6 | 3 | 1 |
| 1st Reserve cav div | 6 | 3 | 1 |
| Independent units | 6 | 3 | 1 |
| Prussian V corps |
The independent units do not suffer the effects of demoralisation but reaching their demoralisation threshold counts in the determination of VP.
12.1.3 - Line of retreat
Prussians: eastern edge
Austrians: western edge
12.2 - PLACEMENT
Prussian Army
- Von Steinmetz: Wisokow (1115)
- Art V-1 + Art V-2: 1116
9th Division
- Von Löwenfeld + 17th Brigade 37th IR + 17th Brigade 58th IR (1 loss): 1315
- Art V-3: 1316
- 18th Brigade 7th Grenadiers + 5th jägers: 1011
10th Division
- Von Kirchbach + 19th Brigade 6th Grenadiers: 1114
- 19th Brigade 46th IR + Art V-4: 1115
- 20th Brigade 47th IR + 20th Brigade 52nd IR: 1214
Cavalry brigade Wunck
- Wunck + 1st Uhlans: 1014
- 4th Dragoons: 0909
- 8th Dragoons: 0809
11th Division - Brigade Hoffmann
- Hoffmann + 22nd Brigade 38th fusiliers + 22nd Brigade 51st IR: S1013
- Art VI-3: 1014
Although dependent on the Prussian VI corps, the 11th division is commanded by the Commander in Chief of the V corps for this battle.
Austrian Army
- Leopold: 0805
- 10th uhlans Clam-Gallas: 0507
- 3rd uhlans Archduke Charles: 0708
- Art 7-8/IX: 1007
- Art 5-9-10/IX: 0806
- Detachment from the Josefstadt garrison: 0805
1st Reserve cavalry division
- Holstein + 4th Uhlans Emperor F-Joseph + 11th Cuirassiers Emperor F-Joseph: 1507
- 4th Cuirassiers Ferdinand + 6th Cuirassiers Prince of Hesse + Art 5-6/VI: 0903
- 8th Uhlans Emperor of Mexico + 9th Cuirassiers Stadion: 0904
Brigade Fragnern
- Fragnern + 15th IR Nassau: 1007
- 77th IR Toscane + Art 1/IX: 1107
- 5th jägers: 1207
Brigade Schulz
- Schultz + 8th IR Gerstner + Art 2/IX: 0606
- 74th IR Nobill: 0605
- 31st jägers: 0806
Brigade von Kreyssern
- von Kreyssern + 21st IR Reischach + Art 4/IX: 0907
- 32nd IR Este: 1006
- 24th jägers: 0806
12.3 - REINFORCEMENTS
Prussian Army
- 11h: Brigade of large cavalry (HQ + 3 units): 1611
Austrian Army
- None
12.4 - VICTORY CONDITIONS
12.4.1 - Victory points
The following locations award VP to the player that controls them:
- Klény: 1 VP
- Skalitz: 1 VP per hex.
- Trzebeschow: 1 VP
In addition, the Austrian player receives 2 VP if he controls the 2 hexes of Skalitz at the end of the 13.00 turn.
A location is controlled if all the hexagons were last occupied by a friendly unit and if none of these hexagons is both in Enemy ZoC and with no friendly unit present. If it is not possible to trace a continuous line of hexes excluding enemy units of ZoC with no friendly units toward the friendly map edge, the control of the location does not award VP to either the owner or his adversary.
Each side receives 1 VP for every 2 enemy step losses.
Each demoralised enemy formation counts for the number of VP indicated in the table. At the end of the game, if a unit cannot trace a continuous line of hexes without enemy units or ZoC without a friendly unit present toward the friendly map edge, it is taken prisoner and eliminated. Take this into account in the determination of the demoralisation threshold.
At the end of the game, the players calculate their victory points and the lower score is subtracted from the higher score.
12.4.2 - Victory level
5 VP or more: Major victory
From 2 to 4 VP: Minor victory
1 VP or fewer: Draw.
13 - JOINING THE TWO BATTLES
We invite players to connect the two days of combat. The results of the first day can influence the orders that the Austrians will have to follow the second day.
13.1 - DETERMINATION OF VICTORY CONDITIONS
At the end of the first scenario, the Austrian player rolls 1d6 with the following modifiers:
- Major German victory at the battle of Nachod: -2;
- Minor German victory at the battle of Nachod: -1;
- Minor Austrian victory at the battle of Nachod: +1;
- Major Austrian victory at the battle of Nachod: +2.
If the result is 5 or more, Benedek orders to continue the movement to control the outlet of the Carpathians: the victory conditions of the second day remain those of the battle of Nachod.
If the result is 4 or less, Benedek orders the retreat on Josefstadt: the victory conditions of the second day become those of the battle of Skalitz.
The units of the Austrian VI corps (except the reserve cavalry division and the Clam-Gallas Uhlands) must leave by the western edge of the map and the Austrian player loses 1 VP for each of these units still on the map starting from the 12.00 turn.
In both cases, cumulate the VP of both days to determine the victory level. The victory level thresholds remain the same when cumulating the VP:
- 5 VP or more: Major victory
- from 2 to 4 VP: Minor victory
- 1 VP or fewer: Draw.
The demoralisation thresholds of the formations award VP for each day of battle as soon as they are crossed. They remain the same each day, even if a formation suffered losses on the first day. Any formation that becomes demoralised during the second day gives VP (even if it isn't initially present in the scenario of Skalitz). Any formation that is demoralised on the first day remains so on the second but does not award any additional VP for this second day.
13.2 - SEQUENCE BETWEEN THE 2 DAYS
Regardless of the victory conditions of the second day, at the end of the first day, the units in enemy ZoC that are in hexagons of protection level 1 must move to exit the enemy ZoC. This movement occurs under the same conditions as a retreat after combat. Moreover, for the player that lost the battle, the unit takes a morale test and becomes disorganised if it fails (no additional step loss if it is already disorganised). The player that lost the combat begins the retreat, the Austrian in the case of a tie.
Then, if the victory conditions of the second day are those of the scenario Skalitz, the Austrian troops on the map may move at a rate of twice their movement capacity without moving closer to the eastern edge of the map and avoiding enemy ZoC. There is no penalty for leaving a ZoC.
Finally, the second day of combat begins on the 04.00 turn (night).
13.3 - NIGHT TURN
Units only have half their movement capacity.
It is prohibited to enter an Enemy ZoC.
Combat is prohibited.
Artillery fire is only possible against adjacent hexes.
13.4 - REINFORCEMENTS
13.4.1 - Prussian Army
- 4h: Brigade Hoffman (HQ + 3 units) + Art V-2: route arriving in 1420
Note: historically, the brigade arrived the previous night around 22.00 but this span of time is not included in the game.
- 11h: Brigade of large cavalry (HQ + 3 units): 1611
13.4.2 - Austrian Army
- 4h: Garrison Josefstadt (HQ + 4 units): route by Trzebeschow (0801)
- 5h: Leopold + Brigade Schultz (HQ + 4 units): route by Trzebeschow
- 6h: Brigade Kreyssern (HQ + 4 units): route by Trzebeschow
- 7h: Brigade Fragnern (HQ + 4 units): route by Trzebeschow
- 8h: Art 7-8/IX + Art 9-10/IX + Art 5/IX + 3rd Uhlans Archduke Charles: route by Trzebeschow
The 10th uhlans Clam-Gallas depends on the VIII corps as soon as it enters the game, in terms of demoralisation threshold.
The 1st reserve cavalry division may be commanded by any corps Commander in Chief.