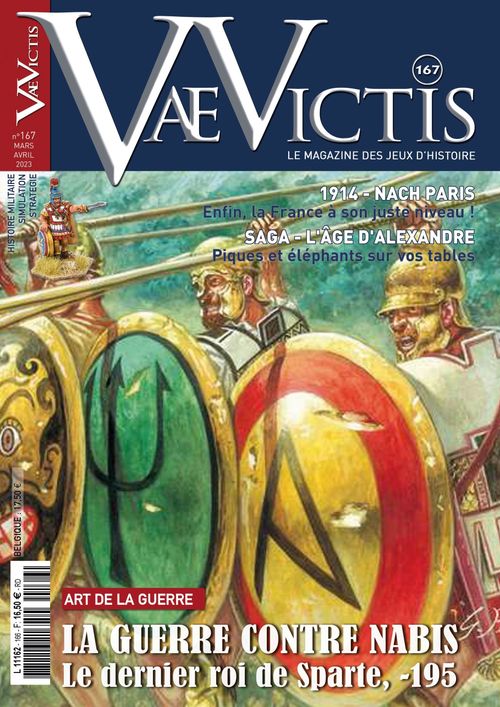
Nabis, le dernier Spartiate 195 av. J.-C.
Nabis, le dernier Spartiate 195 av. J.-C. Rulebook
Table of Contents
Table of Contents
0 - General Rules
The game is designed for two players, each controlling one of the two opposing armies. However, it can be played solitaire or with several players (by distributing the contingents of each side among the players).
0.1 - Abbreviations
- Hex = Hexagon
- SP = Strength Point
- MP = Movement Point
- LOS = Line of Sight
0.2 - Game Scale
A game turn represents half an hour of real time. A hex on the map corresponds to about 200 meters. A strength point represents 200 men.
0.3 - Dice
The game requires the use of two six-sided dice (referred to as d6) and one ten-sided die (referred to as d10). In the case of the latter, 0 means zero and not 10. The ten-sided die is used to resolve shooting and mêlées and to make rally checks.
The six-sided dice are used to determine initiative.
1 - Leaders & Commanders
1.1 - Contingent and Army Commanders
There are two types of leaders: contingent leaders and army commanders (see 7.0).
1.2 - Leader Characteristics
The leaders have the same characteristics. Each leader possesses:
- a background color (nationality);
- a bonus (die roll modifier);
- an activation rating (an abstraction used to determine order of activations);
- a command radius;
- a movement allowance expressed in MPs.
Additionally:
- The color code beneath a contingent leader's command range may be used to identify contingents more easily.
2 - Combat Units
2.1 - Unit Descriptions
The combat units are each identified by:
- a name corresponding to a nationality (e.g., Argos) or to a quality (e.g., Hastati);
- a background color (nationality);
- a type (weapons class);
- a combat strength expressed in SPs (number of men);
- a quality (the fighting ability of the men belonging to that unit);
- a movement allowance expressed in MPs;
- a color code placed beneath the unit's quality, which can be used in certain scenarios to identify contingents more easily.
Some units also have an asterisk * indicating that they have the ability to shoot missiles. Their actual ranges of shooting are noted on the Shooting Chart. All of these characteristics are indicated on the counter illustrations.
2.2 - Types of Units
Each unit's type has an impact on how it can be utilized effectively (see the Mêlée Chart). There are a number of different types of units (not all are necessarily present at each battle):
- Hoplites and heavy infantry (Ho);
- Legionaries (Lg);
- Peltasts (Pe);
- Javelinists, slingers and light infantry (Ja);
- Archers (Bowmen) (Ar);
- Heavy cavalry (Ca);
The figure on the counter indicates whether the unit is on foot or mounted. Troops on foot are called infantry units, and mounted troops are called cavalry units.
2.3 - Levels of Fatigue and Disorganization
As a result of mêlées or shooting, units may become fatigued. Use the reverse side of the counter to indicate this state.
Units may also become discouraged or routed as a result of mêlées or shooting. Use markers to indicate these states.
2.3.1 - Levels of Fatigue
Hence a unit may be:
- fresh (front of counter);
- fatigued (back of counter).
2.3.2 - Levels of Disorganization
Whether fresh or fatigued, a unit may be in one of the following states:
- Valiant (no marker);
- Discouraged ("découragé" marker);
- Routed ("déroute" marker).
3 - Facing
All units, except routed units, must comply with the facing rules (indicating which direction the unit is facing). Facing affects movement, shooting and mêlées. Units must be oriented so as to face one of their six hex angles.
3.1 - Infantry and Cavalry
These units have two front hexes, two flank hexes and two rear hexes.
3.2 - Leaders
Facing doesn't apply to them.
3.3 - Routed Units
These units have no facing, neither front nor flank nor rear.
4 - Zones of Control
The concept of Zones of Control is not used in this game.
It is not necessary for a unit to stop when moving adjacent to an enemy unit. All that is required is the payment of the extra movement costs to change facing and to leave the hex (see 8.2 and 8.3).
It is always possible, during movement or as the result of a mêlée, to enter or retreat into the front hex of an enemy unit (even when leaving the front hex of another enemy unit). There is an extra cost in MPs to do so (see 8.3).
5 - Stacking
5.1 - General Rules for Stacking
Stacking in a hex is limited to 9 SPs (i.e., there must be less than 10 SPs in a hex), plus any number of leaders.
Stacking is checked only at the end of movement. It is thus possible for a unit to move through (i.e., to traverse) another friendly unit during movement.
Note: If a fatigued unit in a stack is resting, but would cause the stack to exceed the stacking limit by becoming fresh again, it must remain fatigued (see 11.2).
A leader's counter must always be stacked with a combat unit at the end of his movement. An army commander can be stacked with any combat unit of his army; a contingent leader can only stack with a unit of his contingent.
5.2 - Specific Stacking Rules
5.2.1 - Stacking Restrictions
A unit is only allowed to stack with units having the same name and type.
Examples: the two following units of Laconians Pe 4*-4-4 may stack together. This is allowed since they are the same type (Pe) and have the same name (Laconians) and the total of their SPs is 8 (i.e., less than 10). On the other hand, stacking a unit of Laconians Pe and a unit of Argos Pe together is not allowed, because although they are the same type of unit they don't have the same name. Lastly, a unit of Argos Pe and a unit of Argos Ho can't stack together because, although they have the same name, they are not of the same type.
5.2.2 - Specific Rules for Certain Battles
Some scenarios alter the basic stacking rules. These special cases are dealt with in the specific rules for those scenarios.
5.2.3 - Stacking and Facing
When an unrouted unit moves to stack with another unit, it automatically assumes the facing of that unit. Two stacked units must always have the same facing.
5.2.4 - Stacking and Movement
A unit intending to stack with another unit (either above or beneath it, at the player's choice) or a unit leaving a stack of units must expend one additional movement point to do so. Once stacked, the units can move together without extra cost, as if they were a single counter, but only if they remain stacked for their entire movement (same starting hex, same movement path, same ending hex). They can change their stacking order freely during movement, but not after they have stopped.
5.2.5 - Effects on Shooting and Mêlées
When calculating the die roll modifier for unit quality, use the weakest quality rating of all units in the stack when defending, but the best quality rating when attacking.
When several units with shooting capability are stacked, only the top unit in the stack can shoot. In mêlées, however, total the SPs of all units in the stack.
If a unit becomes stacked with other units as a result of a mêlée and is attacked there during the same activation phase, it does not participate in the new mêlée but does suffer all the consequences of it (see 10).
When involved in retreat or advance after mêlée, stacked units must retreat or advance together (unless prevented by the stacking limit, in the case of retreat).
Clarification: Some of the units in a stack may retreat into a hex already containing friendly units, but only up to the stacking limit. If the remaining units from the original stack are forced to remain in place, they suffer the loss of one extra level of disorganization (see 10.5).
5.2.6 - Discouragement and Rout
If stacked units rout, they can rout together or they can separate, at the owner's choice.
While stacked, two units are considered as a single counter for rally attempts (a single die roll is made, using the highest quality rating of the stacked units; see 12.3).
A routed unit can stack with an unrouted unit if this does not contradict the stacking rules of the scenario. In such a case, there is no quality test by the traversed unit as normally required by 12.2.3.
6 - Sequence of Play
The battles in the series By the Edge of the Sword: Antiquity last for the number of turns specified in each scenario.
Each game turn consists of five phases referred to as Phases A through E. Each scenario specifies which side is the attacker and which side is the defender; this concept is important only for the activation of archers (Phase B).
Phase A - Command Check and Resting Units
Both players check that their units are within the command radius of their contingent leader or army commander. Units that are not within command radius are out of command for the remainder of the game turn. Place a "non commandé" ("out-of-command") marker on them. All other units are in command for the remainder of the game turn.
Each player places "au repos" markers on units that he hopes to allow to rest during that turn (see 11.2).
Phase B - Archer Shooting (see 9)
If either player has archer units, he can choose to have them shoot in this phase (without moving them), if and only if they are not adjacent to enemy units. If present, they can shoot in the following order:
- the defending player executes his archer shooting and immediately applies the results;
- the attacking player executes his archer shooting and immediately applies the results.
Note: Only archers can shoot in this phase. All other units with shooting capability, whatever their type, can't shoot.
Clarification: out-of-command units can't shoot (see 7.4).
Phase C - Initiative and Leader Activation (see 7)
As a general rule, the leaders of the two sides are activated based on their activation rating, starting from the lowest rating and ascending to the highest. Players take turns activating their leaders when both sides have leaders with the same activation rating (see the example).
Clarifications:
- If several leaders of the same army have the same activation rating, the player who controls them chooses the order of their activation;
- If a number of leaders of both armies have the same activation rating, start by activating a leader belonging to the attacking player, then alternate activations between the players as far as possible (see the example).
However, this order of activation may be modified by the concept of initiative. Each player rolls two d6 and adds the bonus of his army commander. They then compare the results:
- C.1. If the results are equal: neither player has the initiative. The leaders of the two armies are activated normally, alternating activations, in ascending order of their activation ratings;
- C.2. If the difference is between 1 and 3: the player with the higher result obtains the initiative and immediately activates one of his leaders of his choice. Then return to activation in ascending order of activation ratings. (The leader who was activated first can't be activated a second time);
- C.3. If the difference is between 4 and 7: the player with the higher result obtains the initiative and activates one of his leaders of his choice. Then he chooses any enemy leader (even the army commander), which its owner must activate immediately. Then return to activation in ascending order of activation ratings. (The leaders activated first can't be activated a second time);
- C.4. If the difference is 8 or more: the player with the higher result obtains the initiative and activates one of his leaders of his choice. Then he chooses any enemy leader (even the army commander), whom its owner must activate immediately, and one other enemy leader (even the army commander), who can't activate at all during the turn. Place an "inactif" ("inactive") marker on this leader. Then return to activation in ascending order of activation ratings. (The leaders activated first can't be activated a second time.)
Phase D - Movement and Combat (8, 9 and 10)
The players proceed to activate their leaders in the order determined in Phase C. An active leader's units can move and engage in combat. When all leaders have been activated, the movement and combat phase is over.
For each activated leader, the owning player (he is called the active player; his opponent is called the inactive player) proceeds in the following manner:
-
D.1 Movement of the leader and of his in-command units within the limit of their movement allowance.
-
D.2 Ranged shooting by in-command units of the active player which have shooting capability and are not adjacent to an enemy unit.
-
D.3 Declaration of mêlées against adjacent enemy units.
-
D.4 Resolution of mêlées in the order desired by the active player. Resolve each mêlée in the following sequence (see the detailed sequence in 10.3):
- Defensive shooting by units of the inactive player that have shooting capability, targeting an enemy unit that is attacking them by mêlée.
- Offensive shooting by units of the active player that have shooting capability, targeting an enemy unit that they are attacking by mêlée.
- Mêlée.
The effects of each of these three steps are applied immediately.
-
D.5 Movement by out-of-command units, if desired, up to half their movement allowance (rounded up) in the direction of their leader. They can't engage in shooting or mêlée (see 7.4).
Phase E - Rally (see 11 and 12)
In the following order:
- Fatigued units with an "au repos" marker (see 11.2) are turned to their "fresh" side;
- Discouraged and routed units may make rally tests;
- Routed units that failed their rally test must make a rout move;
- The turn is then over and the turn marker is advanced one box.
Example for Phases C and D
Battle of Sparta, Turn 2. The command check is made during Phase A. Then the initiative die roll is made. The Roman player rolls 2d6 and obtains a 9, to which he adds a 2 point bonus for the army commander, Flaminius, for a total of 11; the Spartan player rolls 2d6 and obtains a 3, to which he adds 0 for the bonus of the army commander, Nabis, for a total of 3. The difference between the two results is 8, which matches case C.4 above, and the Roman player gains the initiative.
Therefore, the Roman player can immediately activate a leader of his choice. He chooses Pretor III and may activate and engage in combat with all units of his contingent, depending on their status (see the abilities of in-command and out-of-command units in 7). The Roman player then designates Pythagoras as the leader whom the enemy player must activate first, and Gorgopas as the one who can't be activated during the current turn (place the "chef inactif" marker on Gorgopas).
The Spartan player activates Pythagoras and may move all units of his contingent, depending on their status, and may engage in combat with them.
Then players resume the normal order of activations according to the activation ratings of the leaders. Nabis is the only leader with an activation rating of 0. Any army commander can move all units of his army that are within his command range of 4 hexes, depending on their status, and may engage in combat with them.
Next come the turns of the remaining leaders with a rating of 1. There are still two Roman leaders who have that rating. Since the Roman player is the attacker, he selects Pretor I first; then Pretor II. Those leaders may, in that order, activate and move all units of their contingents, depending on their status, and may engage in combat with them.
Next come the turns of the remaining leaders with a rating of 2. There are none, Pythagoras has already been activated.
Next come the turns of the remaining leaders with a rating of 3. There is still one Roman leader with that rating. Since the Roman player is the attacker, he activates Flaminius. Since he is an army commander, he may move all units of his army that are within his command range of 4 hexes, depending on their status, and engage in combat with them.
7 - Command
A contingent's leader commands only the units listed in the scenario as belonging to his contingent. These contingents can also be identified by color code to facilitate identification of certain units (see the Scenarios). An army commander can activate any units of his army so long as they are located within his command range.
7.1 - General Rules
A leader can move only when he is activated. The leader must end his movement stacked with a unit of his contingent (or of his army if he is an army commander).
If all units of his contingent have been eliminated, a contingent leader (not an army commander) is removed from the game and considered killed. If he leaves the map with the last unit of his contingent, he is considered unharmed (neither wounded nor killed) even if that unit was routed.
Exception: when an army commander activates a unit which is stacked with its contingent leader, then that contingent leader must move with the unit in question. Thus it can happen that a contingent leader may move twice in a turn. However, if the army commander is stacked with a contingent leader's unit, and that contingent leader activates that unit for shooting, mêlée, rallying, or placing an "au repos" marker on it, he cannot move that unit.
7.2 - Command and Units
A combat unit is in command for the entire game turn if, during the command check in Phase A, it is located within the command radius of its contingent leader or an army commander. For example, a command radius of five hexes means that there can be, at most, four hexes in the interval between the unit and that leader (do not count the hex the leader is in). This radius is never affected by the presence of enemy units or by any type of terrain. In all other cases, a combat unit is considered out of command.
Activation:
- When a contingent leader is activated (see 6.C), all units of his contingent can undertake actions. However, they undertake actions differently depending on whether they are in command or not (see 7.3 and 7.4);
- When an army commander is activated, all units of his army that are within his command radius can undertake actions. They undertake actions differently depending on whether they are in command or not (see 7.3 and 7.4);
- It is therefore possible for combat units to undertake actions several times in a turn, once during the activation of their contingent leader and again during those of one army commander;
- A unit that is out of command can't undertake the actions permitted to a unit that is in command, but if it is within the command radius of an army commander it can undertake actions allowed for out-of-command units a second time (see 7.4).
Clarification: During his activation, a leader can activate all the units within his radius of command, but they must be moved before his own movement.
7.3 - In-Command Units
During the activation of its leader (or of an army commander if the unit is within his command radius), an in-command combat unit can undertake actions in the following order during Phase D:
- move up to the limit of its movement allowance;
- shoot, if it has that capability and is not adjacent to an enemy unit;
- possibly carry out offensive shooting and initiate mêlée, if it is adjacent to an enemy unit.
Units entering play as reinforcements are always in command for their first activation.
7.4 - Out-of-Command Units
During the activation of its contingent leader, an out-of-command unit can do one of the following:
- move up to half of its movement allowance (rounded up) toward the leader of its contingent. The unit must end its move closer to its leader than it was at the beginning of its move; or,
- not move at all.
A unit that is out of command can't shoot or initiate mêlée (Phases B and D). However, it can shoot defensively if it is attacked by mêlée, and it can defend normally.
7.5 - Wounding or Death of Leaders
As a result of shooting or mêlée, a leader can be wounded or killed (see results on the Shooting and Mêlée Charts). The status of the unit with which the leader is stacked can also have an effect:
- if the unit with which a leader is stacked is destroyed as a result of mêlée, the leader is immediately killed by the enemy unit which caused its elimination;
- if the unit with which a leader is stacked is destroyed as a result of shooting, the leader is immediately placed with the nearest unit of his contingent (or the nearest unit of his army, for an army commander). If the unit with which he is stacked is surrounded, or if there are no other units in his contingent on the map, a leader is considered killed (see 7.1);
- if the unit with which a leader is stacked routs, the leader accompanies it in its rout movement. He can't leave the unit until his next activation;
- if a routed unit, accompanied by a leader, is eliminated because rout movement is not possible and the unit is completely surrounded, the leader is automatically killed;
- if a routed unit accompanied by a leader routs off the map, and is thus eliminated, that leader is placed on the nearest unit of his contingent (or the nearest unit of his side in the case of an army commander). If no unit is available, the leader is removed from the map and is considered safe and sound (no victory points are scored for his loss).
7.5.1 - Wounding of a Leader
Place a "chef blessé" ("leader wounded") marker on the counter. The leader's new abilities are listed on the marker and are applied immediately. A further wound will cause the death of the leader in question.
7.5.2 - Death of a Leader
Immediately remove the leader's counter from the game.
7.6 - Leader Replacement
Replacement of leaders takes place immediately. Proceed as follows:
- when a leader is wounded, place a "chef blessé" ("leader wounded") marker on his counter;
- when a leader is killed, use the reverse side of the counter as a replacement for the leader. The replacement leader is immediately placed on any unit of his contingent. If all units of the contingent have been eliminated, the replacement leader does not enter the game;
- if a replacement leader is killed, an identical counter replaces him (simply record the victory points and reuse the counter already in place);
- when an army commander is killed, the counter is removed from the map.
Clarification: When a replacement leader enters the game after the death of a leader, he will not have the same activation rating as the original leader. He must be activated immediately after the currently activated leader has completed his Phase D, except, of course, when the leader he is replacing has already been activated (in such a case he will be activated in the normal order during the next turn).
8 - Movement
8.1 - General Rules
An activated leader and the combat units that he commands can move by expending all or part of their movement allowance. Entering a hex costs the moving unit a specific number of movement points (MPs). The costs of terrain are given on the Terrain Chart.
Movement points are not cumulative from one turn to another. Movement of one unit or stack must be completed before starting that of another unit or stack. Movement can only be made through one of a unit's two front hexes. Exception: this restriction does not apply to leader counters or routed units. See also 8.3 for Disengagement and retreat.
Units must be in compliance with the stacking rules at the end of movement (no illegal stacking at the end of movement).
So long as the stacking limit is obeyed, a move of one hex without changing facing is always allowed, no matter what the terrain cost is, unless that type of terrain is prohibited to that unit type (i.e., unless the Terrain Chart lists it as "NA").
Combat units and leaders cannot leave the map voluntarily.
8.2 - Facing Change
A unit can change its facing at the beginning, during, or at the end of movement at the cost of one extra movement point per hex angle. A change of facing within a hex is considered movement under the rules, especially with reference to the shooting modifiers (see the Shooting Table).
Specific case: A Ja type unit may change facing for free, at no cost in extra movement points.
When a unit changes facing without leaving its hex, this counts as movement in the rules, which affects shooting modifiers (see the Shooting Table).
A change of facing in the front hex of an enemy combat unit costs one extra movement point per hex angle, in addition to the cost of the facing change.
Remember: leaders and routed units have no facing.
8.3 - Disengagement and Retreat
A unit or leader located in a front hex of an enemy unit must spend one extra movement point to leave the hex, in addition to any cost for changing facing if necessary.
A unit can always retreat one hex (i.e., move backwards into one of its rear hexes), whether adjacent to an enemy unit or not, without changing facing. It must obey the stacking limit but can ignore the terrain cost unless that kind of terrain is prohibited to that unit type (i.e., unless the Terrain Chart lists it as "NA"). This move costs the unit's entire movement allowance and is an exception to rule 8.1. Out of command units can use this rule as long as the movement gets them closer to their leader.
9 - Shooting
9.1 - General Rules for Shooting
Shooting is never obligatory. Only those units with shooting capability can shoot; they can shoot only through their front hexes.
A unit or stack can be the target of only one shooting attack per activation. Different types of units are not allowed to combine their shooting against the same target.
If two units with shooting capability are stacked together (see 5.2), only the top unit can shoot.
Shooting occurs in Phase B (Archer shooting) and in Phase D (Movement and combat). As a result, some units may be able to shoot more than once in a turn.
Shooting in Phases B and D.2
Shooting is not allowed if the shooter is adjacent to any enemy unit or to its target. Exception: a unit can shoot at an adjacent enemy unit or stack in one of its front hexes if mêlée with that unit is not possible; i.e., if it is across a hexside which prohibits mêlée.
Shooting in Phase D.4 (Offensive and Defensive Shooting)
Shooting is not allowed unless the shooter is adjacent to its target. Offensive shooting is reserved for units which will initiate a mêlée, or are stacked with a unit which will initiate a mêlée, and defensive shooting is reserved for units which will be the target of an enemy mêlée. Defensive shooting by a unit can only target an enemy stack which will initiate a mêlée against it, and the target must be in one of the shooter's front hexes.
9.2 - Line of Sight
Shooting requires the existence of a line of sight (LOS) between shooter and target. The line of sight is checked from the center of the shooting hex to the center of the target hex. It can be blocked by some types of terrain (see the Terrain Chart) or by other units (friendly or enemy). A hexside of a hex containing either blocking terrain or a unit does not in itself block a line of sight. It is always possible to shoot into a hex of blocking terrain, but not through such a hex.
Ignore the obstacle when determining LOS, if:
- the shooter and the target are both at a higher level than the obstacle;
- the shooter is at a higher level than the target and the obstacle, and the obstacle is halfway between the shooter and the target, or closer to the shooter;
- the target is at a higher level than the shooter and the obstacle, and the obstacle is halfway between the shooter and the target or closer to the target.
Specific case: units of Ar type have the ability to shoot over other units (friendly or enemy). Thus only terrain can block shooting by archers.
9.3 - Shooting Procedure
Shooting, in whatever phase, is executed as follows:
- select the target stack;
- select units which will shoot at that target (units activated at the same time may combine shooting if they are of the same type. See 9.1. Use the range of the unit that is farthest from the target);
- check the line of sight;
- roll 1d10 and resolve the shooting using the Shooting Chart, applying the modifiers indicated (for all units if several are shooting at the same time; for example, if three units are shooting at a single target, and one of those units has moved, that unit's movement suffices to cause a -1 die roll modifier, etc.);
- apply the results to the target. If the target is a stack of units, only the top unit in the stack suffers the result.
The maximum ranges for shooting are shown on the Shooting Chart.
10 - Mêlées
10.1 - General Rules
Mêlée is never obligatory.
For mêlées, reference to a stack may indicate either one unit or a stack of units located in the same hex and complying with the stacking limit. All units in a stack must attack the same target stack.
A mêlée can occur only where opposing units are adjacent to each other.
Only routed stacks and out-of-command stacks are unable to initiate mêlée (however, they can defend themselves when attacked).
A unit can be attacked by mêlée only a single time during the activation of an enemy leader (Phase D).
10.2 - Determination of Mêlées
During each leader's activation phase (Phase D), the active player decides which mêlées he wishes to initiate. The active player is called the attacker, and the inactive player is called the defender.
An attacking stack can only initiate a mêlée through one or both of its two front hexes. If it chooses to initiate a mêlée, it must attack the enemy stacks situated in both of its front hexes unless the enemy stack in one of those hexes is being attacked by other friendly stacks in the same Phase D activation. Several stacks can attack a single enemy stack, and conversely one stack can attack up to two enemy stacks.
The attacker must declare all mêlées before resolving any of them:
- he places a "Mêlée" marker on each enemy stack that he must attack in the current activation.
- once declared, each mêlée must be resolved. A mêlée can't be cancelled because of the results of other mêlées during the same Phase D activation. However, the attacker may modify the allocation of stacks participating in mêlées at any time, so long as all the defenders marked with a "Mêlée" marker are attacked in the current Phase D activation.
10.3 - Sequence of Steps in a Mêlée
Each mêlée is resolved, and its results applied, in the order desired by the attacker. He removes the "Mêlée" marker from the defending stack after each combat.
A mêlée is resolved in the following sequence:
- specify the attacking and defending stacks;
- execute defensive shooting by the top unit in each defending stack (if it has shooting capability) against a stack attacking it in mêlée;
- execute offensive shooting (not mandatory) by the top unit in each attacking stack (if it has shooting capability) against one stack which it is attacking in mêlée;
- determine the die roll modifiers linked to terrain (see the Terrain Chart) for the defender's hex. Take the combination most advantageous for the defender where there are several attackers and one defender, or several defenders and one attacker;
- determine the die roll modifier linked to the strength ratio (the odds ratio between attacking and defending SPs). Always round the strength ratio in favour of the defender (see the Mêlée Chart);
- determine the die roll modifier linked to the types of stacks engaging in mêlée (see the Mêlée Chart);
- determine the die roll modifier linked to the quality of stacks engaging in mêlée (see the Mêlée Chart);
- determine any other die roll modifiers (see the list on the Mêlée Chart).
10.4 - Results of Mêlées
Results are listed on the Mêlée Chart. The results are applied immediately after each mêlée and in the order of effects indicated on the Mêlée Chart. Results are obtained by rolling a d10 and adding or subtracting the applicable modifiers listed on the charts. All units in a stack suffer the same result.
10.5 - Retreat After Mêlée
The result of a mêlée may require the defenders or attackers to retreat one hex (an R result on the Mêlée Chart). Traversing a friendly unit during this retreat is not allowed. When retreat is impossible (for example: due to the stacking limit or the edge of the map), the defender can remain in place and suffer an extra level of disorganization instead (see 5.2.5).
Clarification: if the unit was valiant, it becomes discouraged. If it was already discouraged, it becomes routed. If it was already routed, it is eliminated.
When retreating, a stack can change its facing by one hexside. There is no required direction of retreat due to the chaos of battle, and therefore a unit can retreat into any available hex (it is even possible to retreat forward). However, a unit which retreats into one of its own front hexes loses an additional level of disorganization as a penalty. There is no penalty for retreating into a flank or rear hex.
10.6 - Advance After Mêlée
The Mêlée Chart lists the cases in which an attacker is required to advance after mêlée and those in which a defender has the option to advance but is not required to do so (exceptions: see 12.1). If there are several stacks participating in the mêlée, the owner chooses which stack will advance. It is not mandatory that all units in the advancing stack join the advance, but all advancing units must be from the same stack. Units advancing after mêlée must comply with the stacking limit. A leader can advance after combat only if the unit with which he is stacked also advances. A stack that advances after mêlée can change its facing freely.
11 - Fatigue
Fatigue is tracked separately for each unit in a stack. Due to shooting or mêlée, a unit may suffer a change of status from "fresh" (front of the counter) to "fatigued" (back of the counter). The counter is turned over to indicate this change of status. A fatigued unit which suffers a further "fatigued" result remains fatigued with no additional effect.
11.1 - Effects of Fatigue
The effects of fatigue are indicated by the numerical ratings of the unit printed on the back of its counter.
11.2 - Resting Units
To be placed "au repos" ("resting"), it doesn't matter whether a unit is in command or out of command (see 7.2). To rest a unit, the player places an "au repos" marker on it at the beginning of the turn, during Phase A. A player can place as many units as he wishes "au repos" during the same turn. He can place discouraged units "au repos", but not routed units (they must first be rallied).
In order for a unit to regain its "fresh" status, it must remain "au repos" for an entire game turn. To rest a unit:
- it must not be adjacent to an enemy unit either at the beginning or at the end of that turn. An enemy unit which becomes adjacent to it while moving but then continues moving away has no effect. Clarification: when determining whether a unit can be placed "au repos", note that two opposing units separated by an impassable hexside are still considered adjacent, so they are not allowed to be placed "au repos";
- it must not be the target of any shooting, even ineffective shooting, or any mêlée, during the turn;
- it must not move during the turn;
- it must not cause the stack to exceed the stacking limit (see 5.1) upon returning to a "fresh" state.
If these conditions are fulfilled, the marker is removed and the unit is turned over to its "fresh" side during Phase E of that turn. The unit then regains its full capabilities for the following turn.
On the other hand, if the unit moves, is the target of shooting or mêlée during the turn or would exceed the stacking limit by becoming "fresh", the "au repos" marker is immediately removed. In Phase E, the unit would then remain on its "fatigued" side.
Returning a discouraged unit to its "fresh" side still leaves it discouraged.
12 - Discouragement & Rout
The status of a unit with respect to fatigue (fresh or fatigued) does not affect its level of disorganization (valiant, discouraged, or routed).
12.1 - Discouragement
- a unit may become discouraged as the result of shooting or mêlée. When this occurs, the player places a "découragé" ("discouraged") marker on the unit;
- a unit which is already discouraged, but still fresh, remains discouraged but becomes fatigued if it receives a new discouraged result;
- a unit which is already discouraged, but also fatigued, will rout if it receives a new discouraged result;
- a unit which is already discouraged, whether fatigued or not, simply becomes routed (not eliminated) if it receives a rout result;
- a discouraged unit is penalized when involved in shooting or mêlée (see the Shooting and Mêlée Charts). Also, it can no longer advance after a victorious mêlée.
12.2 - Rout
12.2.1 - Becoming Routed
A unit may become routed as the result of shooting or mêlée (a Dr result on the Mêlée Chart or a rout result on the Shooting Chart). The player places a "déroute" ("routed") marker on the unit, which must immediately retreat two hexes in a straight line towards the map edge indicated in the scenario. The two-hex retreat is automatic, without being affected by terrain costs. The routing unit is not allowed to pass through an enemy unit during its two-hex retreat. If the routing unit violates the stacking limit in the second hex it enters, it is eliminated.
Clarification: thus a unit which suffers a Dr + R result is eliminated after applying the Dr result, but before applying the R result, if it is in violation of the stacking limit in the second hex it enters.
12.2.2 - Rout Movement during Phase E
During Phase E, each unit that is already routed must expend its entire movement allowance by moving in the direction of the map edge indicated as its rout direction in that scenario. This move is made by the most direct path, coming closer to the indicated map edge with each hex entered. If anything is in its way (including an enemy unit) that could cause its elimination or block its path, a unit is allowed to divert its path by one or more hex "columns", if possible, so as to continue its rout movement.
12.2.3 - Restrictions on Routs
Traversed units:
- a unit is allowed to traverse (pass through) a friendly unit when becoming routed or during its Phase E rout movement. When this happens, the owning player rolls a d10 and the result is compared to the quality of the unit being traversed. If the die roll is higher than its quality, that unit immediately routs also (see 12.2.1). If the traversed unit was already in a routed state, it simply makes a rout move without having to make a quality check with the d10;
- a traversed unit which routs will wait to make its rout move until the unit that caused its rout finishes its own rout move. If, during its own rout move, the traversed unit then traverses the unit which has just traversed it and caused it to rout, the latter doesn't make a d10 check or another rout move.
The other restrictions on routs are as follows:
- a routed unit, whether fresh or fatigued, which receives a "discouraged" result must make a further two-hex move in its rout direction and remain in a routed state. If it is unable to execute this movement, it suffers an additional level of disorganization and is thus eliminated;
- a routed unit, whether fresh or fatigued, which receives an R (Retreat) result must make a one-hex move in its rout direction. If this is not possible, it suffers an additional level of disorganization and is thus eliminated;
- a routed unit, whether fresh or fatigued, which receives another rout result is eliminated;
- a routed unit can no longer attack and can move only in Phase E;
- a routed unit that leaves the map is eliminated.
12.3 - Rally
- rally occurs in Phase E, after any "au repos" markers have been removed and the rested units have been returned to their fresh side, and just before rout movement;
- rally is only possible if the unit is not adjacent to an enemy unit. Clarification: when determining whether a unit can rally, note that two opposing units separated by an impassable hexside are still considered to be adjacent, so they are not allowed to rally;
- rally is attempted by rolling a d10 for each unit that needs to be rallied;
- the rally attempt succeeds if the modified die roll result is less than or equal to the quality of the unit, otherwise it fails;
- an unmodified roll of 0 on the d10 automatically results in a successful rally attempt.
Modifiers:
- if the unit is fatigued: use the quality on the back of the counter (see 2.3.1);
- if the unit is routed: +1;
- if the unit is stacked with or adjacent to its contingent leader: subtract the contingent leader's bonus;
- if the unit is stacked with or adjacent to an army commander: subtract the army commander's bonus;
- if a unit could benefit from the bonus of both its contingent leader and an army commander, only the more favorable bonus of the two is used (they are not cumulative).
Effects of rallying:
- a discouraged unit which rallies becomes valiant again and can be refaced freely (remove the "découragé" marker);
- a routed unit which rallies becomes discouraged and can be refaced freely (turn the "déroute" marker over to its "découragé" side);
- once all rally attempts have been completed, units that remain routed must make a rout move (see 12.2.2).
Combat Example from Vol. 1 Game (Issos)
The source gives this worked example from the first volume of the series (Issos), reproduced as printed.
B. Archer shooting: During Phase B, the 2 Persian Ar units shoot at Philotas' 3 Ca units in hex 1319, at a range of 2 and 3 hexes.
- No modifiers for clear terrain
- +1 because the total number of SPs (8) is more than 7
- -2 because the target is a stack of Ca units
- Total: -1
The Persian player rolls a 9 on the d10. The final result is 8 after applying the modifiers, and the top unit in the Ca Philotas stack is discouraged (place the marker beneath it to indicate that only this unit in the stack is discouraged), with the combined range of fire being 3 hexes.
D. Movement and combat: When Philotas is activated:
- D.1: Philotas, 1x Ca Philotas (4 7 6) and 1x Ca Philotas (2 6 6) advance into hex 1320.
- D.2: no action is possible.
- D.3: the Macedonian player declares a mêlée against the 2 Persian Ca units in hex 1420.
- D.4: 1. Defensive shooting. Modifiers: no modifier for Ford 1 terrain; -1 because only the top unit of the stack can shoot and its value is 4 SP; -2 because the target is a stack of Ca units. Total: -3. The Persian player rolls a 6 on the d10. The final result is 3 after applying the modifiers. There is no effect on the leader or on the Macedonian units.
- D.4: 2. Offensive shooting: no action is possible.
- D.4: 3. Mêlée. Modifiers: force ratio of 6 against 8, or 1 to 2: 0; modifier for unit types, Ca against Ja: +3; modifier for unit quality: +1 (attacker = 7 is superior to defender = 3); other modifiers: Philotas +2. Total: +6. The Macedonian player rolls a 7 on the d10. The final result is 13 after applying the modifiers. The combat result is D + R: the stack of 2 x Persian Ja units is discouraged (place the marker on top of the stack to indicate that the whole stack is discouraged) and recoils into hex 1521 without changing facing. The Macedonian player advances the Macedonian stack into 1420 and changes its facing by one hexside to the left so as to face the two Persian Ar units and the 2 Persian Ja units.
13 - Scenarios
"Someone was asking why Sparta was without walls. Agesilaus pointed to the citizens covered with their armor: Here, he said, are the ramparts of the Lacedaemonians." Plutarch, Moral Works, Apophthegms of the Lacedaemonians
13.1 - Introduction
Nabis, the last of the Spartans is the second game in the series Au Fil de l'Epée Antiquité. It is dedicated to the attack on Sparta by the Roman army of Flamininus.
13.2 - Special Rules
13.2.1 - Deployment Information
Contingents are noted in UPPERCASE, contingent commanders are noted in italics, and the army commander is underlined. Players may place freely in hexes. Listed units with the same name but different PF. Stacking of several combat units is not authorised for the set-up.
Editor's note: the printed text of this paragraph is garbled in the source PDF ("Listed units with the same name but different PF" does not complete a sentence). It is transcribed as printed.
13.2.2 - Citadel
The Sparta Citadel hex is one hex, forbidden to all leaders and all units of both sides. Only Nabis can enter this hex to take refuge there. To do this, he must be adjacent to the citadel before its activation and spend all his movement points to enter it. Once in this hex he can no longer be attacked, wounded or killed, but he can no longer command any unit.
13.2.3 - Neighborhoods of Sparta
The city of Sparta is divided into four districts (Pitane, Limna, Mesoa, Kynosoura), made up of hexes of town appearing around their name. These districts only matter for victory conditions:
- a district is "controlled by the Spartans" if no valiant Roman unit occupies one of the hexes of this district;
- a district is "cleansed by the Romans" if no valiant Spartan unit occupies one of the hexes of this neighborhood.
13.2.4 - Sparta Fire
During the Battle of Sparta, Pythagoras set fire to certain areas of Sparta to slow down the advance of the Romans under the effect of the smoke. To account for this, during each activation of Pythagoras, the Spartan player can automatically discourage up to two Roman units, including a maximum of one of type Lg or Ho, which would be in a hex of town and within the radius of 5 hexes of the Pythagoras pawn. Discouragement can be applied to a unit already discouraged (see 12.1).
This action occurs at the end of the activation, after all the movements and combats of the Pythagoras contingent have been carried out, and brings in compensation 1 VP to the Roman player.
If Pythagoras is killed, the replacement leader loses this ability.
13.2.5 - Roman Legion
Units belonging to a legion (Equites, Velites, Hastati, Principes and Triarii) follow a number of special rules:
- Shooting: Lg units carry a Pilum marker at the start of the game which gives them a temporary shooting capacity. Lg units must use their pilum before performing their first offensive mêlée (Offensive shooting/D4.2). They don't have to, but can do so if attacked in mêlée (Defensive shooting/D4.1). Once the shot has been fired and resolved, the Pilum marker is removed and the Lg unit will no longer be able to shoot.
- Triarii: Triarii Ho units cannot enter a hex adjacent to an enemy unit, regardless of how fatigued or disorganized it is, before a Lg unit in their contingent is routed. The constraint is lifted once and for all, for a given contingent, on the first rout of a Lg unit of this contingent.
13.2 - Battle of Sparta, 195 BC
Note: the source prints "13.2" twice (once for the special rules above and once for this scenario). Both are kept as printed.
13.2.1 - Starting Positions
Units are listed by contingent. Units are oriented freely by each player, starting with the attacking player.
Flamininus army (attackers). Rout to the southern edge of the map (row of hex xx20).
- Flamininus in 0617 (army commander, underlined)
First group of legions:
- Pretor I in 0517
- Velites I in 0515 and 0615
- Hastati I in 0416 and 0517
- Principes I in 0318 and 0418
- Triarii I in 0320 and 0420
- Equites I in 0617
Second group of legions:
- Pretor II in 0918
- Velites II in 0916 and 1016
- Hastati II in 0817 and 0918
- Principes II in 0719 and 0819
- Triarii II in 0520 and 0620
- Equites II in 1018
Third group of legions:
- Pretor III in 0215
- Velites III in 0213 and 0314
- Hastati III in 0115 and 0215
- Principes III in 0117 and 0217
- Triarii III in 0119 and 0219
- Equites III in 0316
Spartan army (defenders).
- Nabis in 1005 (army commander, underlined)
Lacedaemonians:
- Gorgopas in 0209
- Spartans in 0109 and 0209
- Périèques in 0310 and 0410
- Hilotes in 0511 and 0610
- Laconians in 0905, 1005 and 1106
Mercenaries and Argians:
- Pythagoras in 1211
- Cretans in 0911, 1011 and 1313
- Mercenaries in 0912, 1012, 1113 and 1211
- Argos Ho in 1609
- Argos Pe in 1510
13.3.2 - Duration and Victory Conditions
Note: the source heading reads "Durée et conditions de victoire" (French). Translated here; the source also has no printed heading for 13.3.1 and 13.3 as such, so they are not reproduced.
The game lasts 8 turns.
Victory points (VP):
- 1 VP per unit of quality 4 or less eliminated;
- 2 VP per unit of quality 5 or 6 eliminated;
- 3 VP per eliminated quality 7 unit;
- 3 VP for an enemy contingent leader killed.
For the Roman only:
- 1 VP per cleared district (i.e. 3 VP at most, because if all four are cleared, there will be a decisive victory, see below);
- 1 VP at the end of the game per hex, if a valiant Roman combat unit occupies the Heptagon;
- 2 VP at the end of the game per hex, if a valiant Roman combat unit occupies the Temple of Apollo or the Sanctuary of Artemis (i.e. 4 VP maximum);
- 1 VP for one or two Roman units discouraged following a fire caused by Pythagoras (see specific Sparta Fire rule).
For the Spartan only:
- 2 VP per district controlled by the Spartan at the end of the game (i.e. 8 VP maximum);
- 2 VP per turn, except for the end game turn, if a Spartan combat unit occupies the Heptagon at the end of the turn;
- 5 VP at the end of the game if a Spartan combat unit occupies the Heptagon;
- 4 VP at the end of the game per hex, if a Spartan combat unit occupies the Temple of Apollo or the Sanctuary of Artemis (i.e. 8 VP maximum);
- 3 VP if a Roman Triarii unit was discouraged or routed by shooting;
- 5 VP if the Roman player has engaged an attacking Triarii unit in a mêlée.
Note: in the source layout the last Spartan item sits in the column break; it is placed in the Spartan list because it reads as a Spartan bonus against the Triarii restriction in 13.2.5.
Victory:
The game ends immediately with a decisive Roman victory:
- A- if Nabis is injured or killed;
- B- if the four quarters of Sparta are cleared by the Romans.
The game ends immediately with a decisive Spartan victory:
- A- if Flamininus is killed.
The game ends at the end of a turn if:
- Major victory: at the end of the 8th round, major victory of the side having scored 8 VP or more than its opponent.
- Minor victory: at the end of the 8th round, minor victory of the side having scored the most VP.
Note: the source prints "Victoire mineure" (French) for the minor victory line; translated here.
13.4.3 - Variant
All specific rules and information from A1 to A3 remain valid, with application of the following variants (one or the other or both).
- Variant Reduced Roman army: Remove Third Group of Legions from play.
- Variant Free Placement of Spartans: After deploying Roman troops, the Spartan player freely deploys his units north of the Magoulitsa River.
Note: the source refers to "A1 to A3", which are not reproduced in this document (the earlier volume's scenario conventions); the variants are transcribed as printed.
Charts and Tables
Levels of Fatigue and Disorganization
| Initial Status | Event | Final Status | Reference |
|---|---|---|---|
| Fresh - Valiant | Fatigued | Fatigued - Valiant | 11. |
| Fresh - Valiant | Discouraged | Fresh - Discouraged | 12.1 |
| Fresh - Valiant | Routed | Fresh - Routed | 12.1 |
| Fresh - Discouraged | Fatigued | Fatigued - Discouraged | 11. |
| Fresh - Discouraged | Discouraged | Fatigued - Discouraged | 12.1 |
| Fresh - Discouraged | Routed | Fresh - Routed | 12.1 |
Terrain Chart
| Terrain | Infantry, Leaders | Cavalry | Effect on shooting | Effect on mêlées |
|---|---|---|---|---|
| Clear | 1 | 1 | PE | PE |
| City | 2 | 2 | -2 | -1 |
| Temple, Tower, Sanctuary | 2 | NA | -3/0¹ | -2 |
| Fortification | +2 | NA | -3/0¹ | -3/+1¹ |
| Path | 1² | 1² | PE | PE |
NE: no effect; NA: not allowed.
1: The first figure applies for a shot or a mêlée from the outside to the inside, the second for a shot or a scrum from the inside to the outside.
2: If the movement takes place from one hex of path to another hex of path, negates the effects of other lands except for the additional costs of changing levels.
Note: always take the combination most favorable to the defender if there are several attackers and a single defender, or if there are several defenders and a single attacker.
Specific cases: see the specific rules for each battle.
Note: the "PE" entries are printed this way in the source chart and are transcribed as printed. The chart's own legend defines "NE" as no effect, so these cells most likely mean no effect; this is not changed here.
Shooting Table
| Range | 1 hex | 2 hexes | 3 hexes | 4 hexes + |
|---|---|---|---|---|
| Ar | 5.6 | 7/- | NA | NA |
| Lg, Pe, Ja | 6/7 | NA | NA | NA |
1 hex: adjacent; NA: not allowed.
Shooting modifiers (all modifiers are cumulative):
- Terrain effect (see the Terrain Effect Chart);
- -1 if the shooter (or the total SPs of all shooters) has less than 7 SP (ex: 4 SP of archers = -1 DRM);
- +1 if the shooter (or the total SPs of all shooters) has more than 7 SP;
- Remark: there is no modifier if the shooter total is exactly 7 SPs;
- -1 if the target stack totals 3 SPs or less;
- +1 if the target stack totals 8 or 9 SPs;
- -1 if the target is a unit of type Lg or Ho;
- -2 if the target is a unit of type Ca;
- -1 if the shooter (or one of the shooters) has moved during the current activation except Lg;
- -1 if the shooter (or one of the shooters) is discouraged.
Note: if several units combine their shooting against the same target, resolve the shooting using the column corresponding to the range of the unit farthest from the target.
Results: The top unit of the target stack (see 9.3) suffers the result when the die roll on a d10 is equal to or higher than the number shown on the Shooting Chart.
- the first number is the result needed to discourage the target unit (see 12.1);
- the second number is the result needed to rout the target unit (see 12.2.1).
Note: if there is only one number on the chart, it is the result needed to discourage the target unit. See 12 for the cumulative effects of "discouraged" results.
Effects on Leaders: A roll of 9 on the d10 when firing (before applying modifiers) requires a check for possible wounding or death of any leaders stacked with the target stack. Roll the d10 a second time for each leader in the stack: on a result of 0 to 6 there is no effect; on a 7 or 8 the leader is wounded; on a 9 he is killed.
Mêlée: Modifiers for Unit Types
| Att./Def. | Lg | Ho | Pe | Ja | Ar | Ca |
|---|---|---|---|---|---|---|
| Lg (Legionary) | 0 | +1 | +3 | +2 | +2 | +1 |
| Ho (Heavy infantry) | 0 | 0 | +2 | +1 | +2 | +1 |
| Pe (Peltasts) | -1 | -1 | 0 | +2 | +2 | 0 |
| Ja (Javelinists) | -2 | -2 |
Lg Legionary, Ho Heavy infantry, Pe Peltasts, Ja Javelinists, Ar Bowmen, Ca Heavy cavalry.
Note: when there is a combined attack (with several stacks of attackers or defenders), select the type of stack most favorable to the defender (i.e., either the worst attacker or the best defender, with reference to the chart above).
All modifiers are cumulative up to plus or minus 7.
Modifiers for strength ratio (always round totals in favor of the defender):
- 2/1 or greater: +2
- 1/1: +1
- 1/2: 0
- 1/3: -1
- Lower than 1/3: -2
Modifiers for unit quality:
- when the attacker's quality is higher than the defender's: +1
- when the attacker's quality is lower than the defender's: -1
Clarification: when there is a combined attack (several attacking stacks or several defending stacks), choose the best quality from the attacking units or the best quality from the defending units.
Other modifiers:
- Terrain effect (see the Terrain Chart);
- Add or subtract the difference between the bonuses of all leaders of both sides that are involved in the combat;
- -2 if the attacking stack (or one of its units) used offensive fire except Lg;
- +2 if the defending stack is attacked through a flank hex;
- +3 if the defending stack is attacked through a rear hex;
- +4 if the defending stack is attacked through a rear hex AND a flank or front hex;
- -1 if one of the attacking units is discouraged;
- -2 if all attacking units are discouraged;
- +1 if one of the defending units is discouraged;
- +2 if all defending units are discouraged or if at least one of them is routed;
- +5 if all defending units are routed.
Clarification: the +5 against a routed defender can't be added to other modifiers for facing (since routed units don't have facing).
Mêlée Chart: Results
| Modified die roll | Defenders | Attackers |
|---|---|---|
| -7 to -4 | Advance possible | D + R |
| -3 to 0 | NE | F + R |
| 1 to 3 | F | R |
| 4 | NE | NE |
| 5 to 6 | R | Mandatory advance |
| 7 to 9 | F + R | Mandatory advance |
| 10 to 13 | D + R | Mandatory advance |
| 14 to 16 | Dr + R | Mandatory advance |
1d10 (0 = zero, not 10) plus or minus modifiers up to + or -7. The results are applied to all units in the stacks involved, in the order indicated above.
Example: a unit which suffers a Dr + R result must first apply the Dr (including all of its restrictions) and then apply the R (with all of its restrictions).
- NE = no effect;
- R = retreat one hex (see 10.7);
- Dr = rout (retreat two hexes, see 12.2.1);
- D = discouraged (see 12.1);
- F = fatigued (see 11).
Discouraged units can't advance after combat, whether they are attackers or defenders.
Note: see also Rules 11 and 12 for the cumulative effects of "fatigued" and "discouraged" results.
Effects on Leaders: When several leaders are in the same stack, each leader must be checked separately for any combat results which may affect them.
- an unmodified 9 on the d10 in a mêlée requires a check for possible death or wounding of leaders in the defending stack;
- an unmodified 0 on the d10 in a mêlée requires a check for possible death or wounding of leaders in the attacking stack.
In both cases, roll the d10 again: on a result of 0 to 6 the leader is unharmed, on a 7 or 8 he is wounded, on a 9 he is killed.
Note: the source's result list cross-references "see 10.7" for retreat, but the retreat rule is printed as section 10.5 in the text. The cross-reference is transcribed as printed.