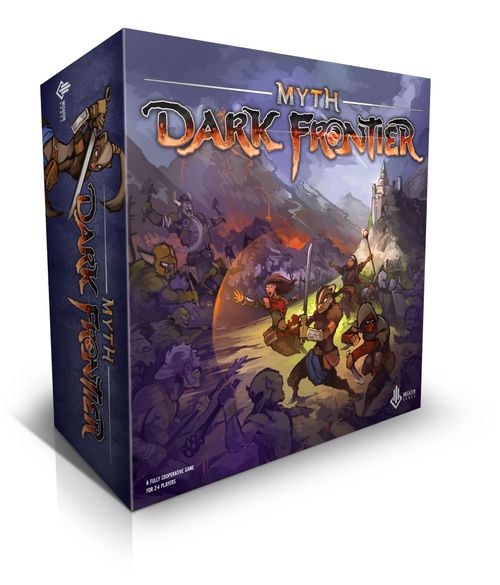
Myth: Dark Frontier
Myth: Dark Frontier Rulebook
Table of Contents
Table of Contents
Object of the Game
Players win the game by either defeating the boss or completing the final objective. They lose the game if Farrenroc is reduced to zero stability.
Game Components
- 1 Rulebook
- 1 Farrenroc Tile
- 50 Encounter Cards (10 for each: Farrenroc, Ruins, Dungeon, Village, and Sanctuary)
- 15 Miniatures (10 Farrenroc City, 1 City Base, and 4 Heroes)
- 1 Game Board
- 15 Quest Cards
- 3 Conquest Track Tokens
- 4 Hero Cards
- 1 Prayer Reference Card
- 6 Spell Cards
- 25 Enemy Tokens (20 Minions, 4 Captains, 1 Boss)
- 22 Damage Tokens (5 3-Damage Tokens, 17 1-Damage Tokens)
- 6 Structure Tokens
- 1 Objective Board
- 20 Hero Action Cards
- 12 Objective Tokens (4 Hope, 4 Supply, 4 Influence)
- 30 Resource Tokens (10 Hope, 10 Supply, 10 Influence)
- 10 Hero Tokens (6 Prayer, 3 Fury, 1 Shadow)
- 5 Enemy Action Cards
- 6 Ten-Sided Dice
- 5 Custom Six-Sided Fate Dice
- 1 Enemy Sheet
- 16 Objective Cards (12 Objectives and 4 Final Objectives)
Myth Dark Frontier can be played with Myth monster miniatures. Visually enhance your play experience with these dynamic figures.
Setup
Players perform the following steps in order when setting up the game:
-
Set up the Game Board: Place the game board in the center of the table. Place the objective board and the Farrenroc tile near the game board.
-
Choose Heroes: Each player chooses 1 hero, then collects the hero card and action cards associated with that hero. Follow any additional setup instructions found on the back of the chosen hero card. Each player places their corresponding hero figure on the Farrenroc tile.
-
Choose Enemy Army: Players choose 1 enemy sheet to use in the game. (In the base game, this will always be the Orcneas enemy sheet.) Set the enemy sheet near the game board.
Enemy Components: Collect the corresponding enemy action cards and enemy tokens.
- Follow the setup instructions on the back of the enemy sheet.
- Place 1 conquest tracker on the top-left circle space of each conquest track on the enemy sheet.
- Shuffle the enemy action deck and place it facedown near the enemy sheet.
-
Objective Decks: Divide the objective cards into three decks by type: influence, supply, and hope. Set the final objectives aside.
- Shuffle the influence objectives, and place 1 faceup in the influence objective space. Place the remaining influence objectives back into the box. Then, each player places 1 influence objective token in a different objective location that matches up to the amount of players in game (depicted as a flame icon in the objective area), and the location on the influence objective card.
- Repeat the previous step exactly for the supply and hope objectives. If the location type on a revealed objective matches the location of an objective already in play, place that objective card back in the box and reveal a new one. There should be only 1 objective card in each objective card space, each with a different objective location type.
- Return all unused objective tokens to the box.
-
Final Objective Cards: Shuffle the final objective cards and place 1 facedown near the objective board. Return all unused final objective cards to the box without looking at them.
-
Prepare Card Decks and Token Pools: Divide the following tokens and cards by type:
- Encounter Cards: Shuffle each location's encounter deck separately, and place them separately in a common area near the game board.
- Quest Deck: Shuffle the quest cards to create the quest deck, and place it facedown near its location on the game board. Reveal the top card of the quest deck, and place it faceup on top of the deck. This is the active quest.
- Resource Pool: Gather all resource tokens corresponding to all three types (hope, influence, and supply), and create a single resource pool near the area of the game board labeled Farrenroc Resource Reserves.
Sequence of Play
Each round, players complete phases in the following order. All steps in a phase must be completed in the listed order before continuing to the next phase of the round. Players continue resolving rounds this way until the game ends. (See "End of Game" below).
1. Planning Phase: Players determine enemy actions and choose hero actions.
- Enemy Action Step: Players take the top 3 enemy action cards and randomly place 1 facedown adjacent to the Morning, Day, and Night action deck spaces on the game board.
- Hero Action Step: Each player chooses 1 of their action cards and places it facedown in each action deck space. After all actions are chosen, players separately shuffle each action deck and return it to its corresponding action deck space near the game board.
2. Action Phase: Players resolve all action cards in each action deck in the following order:
- Morning Action Step: Players draw the top card of the morning action deck and resolve it. (See "Action Cards" below.) After resolving the first card of an action deck, the next card is drawn and resolved. Each player resolves their own action card as it's revealed. Players collectively resolve enemy action cards.
- Day Action Step: Players repeat the process explained above to resolve the day action deck.
- Night Action Step: Players repeat the process explained above to resolve the night action deck.
3. Prepare Phase: Players refresh cards, stand up defeated heroes/delayed minions, and reset enemy action cards.
- Prepare Effects Step: Resolve all prepare effects on cards and components in play.
- Resource Step: Gain 1 resource of any type for each structure in play.
- Refresh Step: All players refresh exhausted asset cards.
- Revive Step: All defeated heroes and delayed minions are turned upright. Defeated heroes are returned to the Farrenroc tile.
- Reset Step: Players shuffle all used enemy action cards and place them facedown under the unused enemy action cards. Players place all their used actions back in their hands.
End of Game
After the siege begins (see "The Siege" below), players can win the game by either defeating the boss or completing the final objective (if revealed). However, they will lose the game if Farrenroc is destroyed by losing all its stability.
Game Round Rules
This section provides expanded rules for each phase of the game round described previously.
Planning Phase
The planning phase is when players discuss strategy and coordinate their actions for the turn. In addition to planning their actions, players must also determine enemy actions for the turn (see "Determining Enemy Actions" below). Players will not know which enemy action cards will be resolved during a turn. After enemy actions have been determined and all players have chosen and placed their actions, each action deck is shuffled separately and returned to its action deck space facedown near the game board.
Action Cards
Hero Actions
Each hero action card corresponds to a particular action type, described here. These cards are used by heroes to plan their turn. Each action deck may contain only one of a single hero's action cards. For more information on the Action Phase, see "Action Phase" below.
Travel A player resolving this action may move their hero into an adjacent area.
Battle A player resolving this action may attack a single enemy rank by rolling 1 10-sided die per enemy of that rank (see "Enemies" below) in their area. For each die result that equals or exceeds the enemy rank's defense (target number), the player deals 1 damage. Each damage dealt this way may be assigned to any enemy of the target enemy rank in the attacking hero's area. Defeated enemies are placed in the out-of-play area. Each die result equal to or lower than the enemy rank's attack value deals 1 damage to the active hero.
If the defense and attack value are the same, and that number is rolled, both the hero and the enemy receive damage.
If the hero cannot or chooses not to resolve a battle, they gain 1 influence.
Quest A player resolving a quest action may attempt a quest, only if they are in a quest location area. If the hero is not in a quest area (or if they choose not to resolve a quest action), they gain 1 hope.
Encounter A player resolving this action must draw and resolve an encounter card based on the location in their area.
Fortify A player resolving this action may place 1 structure in their area. The amount of structures in play cannot exceed six. Structures may not be built in special locations: Farrenroc, Lairs, or Outland. If the hero cannot or chooses not to build a structure, they gain 1 supply.
Each action card has a hero symbol, and a mandatory action (highlighted in a gray bar on the card) and optional actions below it.
Enemy Actions
Each enemy type has its own set of action cards. These cards are used to determine how the enemy acts during each turn. Each action deck may contain only one enemy action card.
March The march action type moves minions toward objective areas and/or Farrenroc. When resolving a march, players resolve the following steps for each area containing 1 or more minion tokens:
- Resolve an assault on Farrenroc (see "Assaults" below) and each area containing a structure.
- Each minion in a non-objective structureless area moves 1 area, following priority. (See "Enemy Movement" below.) Resolve minion movement in this order: 1 Resolve First, 2 Resolve Second, 3 Resolve Third.
Each enemy action card also includes a Darkness (mandatory) fate ability and a Siege Action (mandatory).
Assaults: Each time players resolve an assault, roll 1 10-sided die for each enemy token in the assaulted area, and determine which enemy rank in that area has the highest attack value. If at least one die result is less than or equal to that enemy's attack value, the assault succeeds.
The results of a successful assault depend on the assaulted area.
- If the area contains a structure, that structure is destroyed.
- If the assaulted area is Farrenroc, reduce Farrenroc's stability by 1.
- If an assault is triggered in an area with no enemy tokens or structures, the assault is ignored.
After resolving an assault, delay each minion in the assaulted area, regardless of the results.
Delayed Minions
Only enemy minions can be delayed. When a minion is delayed, its token is turned over to its delayed side. Optionally, if you are using miniatures, lay a delayed minion on its side. Delayed minions are essentially ignored by all game effects, except for the following:
- A delayed minion may still be targeted by hero effects.
- Delayed minions still count against the number of minions allowed in an area.
When a hero resolves a battle action card, they may automatically defeat all delayed minions in their area before resolving the battle action step of the card.
Scheme
When this enemy action type is resolved, players resolve steps in the following order:
- For each quest location containing an enemy captain, players resolve the active quest's scheme effect.
- Each captain not in a quest area moves 1 area toward the nearest quest area or Farrenroc, whichever is closer. If there is a tie, the captain moves toward Farrenroc. If a captain is in Farrenroc, he does not move.
- Place 1 defeated captain in a random Outland location. (See "Random Outland Locations" below.) Skip this step if no captains have been defeated.
Conquest: The enemy sheet contains three conquest tracks: despair, devastation, and corruption. Each conquest track corresponds to a resource and objective type, as follows:
- Despair vs. Hope
- Devastation vs. Supply
- Corruption vs. Influence
These tracks include 10 spaces each, with conquest ability spaces appearing at different intervals on the track. The conquest markers track the conquest levels throughout the game.
If a conquest marker enters a conquest ability space, players must immediately resolve that conquest track's ability. When moving the conquest marker multiple spaces, players fully resolve each conquest ability before continuing to move the conquest marker. The first time any conquest marker reaches the last space on the track, the siege begins. (See "The Siege" below.)
If players are required to raise a conquest track by one or more spaces when the conquest marker is already on the last space, they must immediately resolve that conquest track's siege ability. Each time a conquest track is raised the siege ability is only triggered once, regardless of how many raises were required.
Despair — Players follow these steps when resolving a despair action:
- Raise the despair track by 1 for each hope objective location containing at least 1 minion. If no hope objective tokens remain in play, raise the despair track by 1.
- Each hero spawns 1 minion on a different hope objective location in play, and rolls 1 non-darkness fate die in the fate dice pool for each missing hope objective simultaneously. The minion(s) spawn in the location corresponding to the fate die result(s). For each fate die that cannot be rolled, increase the despair track by 1.
Devastation — Players follow these steps when resolving a devastation action:
- Raise the devastation track by 1 for each supply objective location containing at least 1 minion. If no supply objective tokens remain in play, raise the devastation track by 1.
- Each hero spawns 1 minion on a different supply objective location in play, and rolls 1 non-darkness fate die in the fate dice pool for each missing supply objective simultaneously. The minion(s) spawn in the location corresponding to the fate die result(s). For each fate die that cannot be rolled, increase the devastation track by 1.
Corruption — Players follow these steps when resolving a corruption action:
- Raise the corruption track by 1 for each influence objective location containing at least 1 minion. If no influence objective tokens remain in play, raise the corruption track by 1.
- Each hero spawns 1 minion on a different influence objective location in play, and rolls 1 non-darkness fate die in the fate dice pool for each missing influence objective simultaneously. The minion(s) spawn in the location corresponding to the fate die result(s). For each fate die that cannot be rolled, increase the corruption track by 1.
Spawning Enemies
To spawn a minion, a player places that minion in the designated area. Spawned minions are always placed 1 token at a time and are taken from the supply of out-of-play enemies near the enemy sheet. If the designated area already has 3 minions when a spawned minion would be placed, the players resolve an overrun.
Running Out of Minions
If players are required to spawn one or more minions when none remain in the out-of-play enemy supply, the players must resolve the following:
- Discard 1 resource of the players' choice for each minion that could not spawn.
- If players were unable to discard 1 or more resources for the previous effect, reduce Farrenroc's stability by 1.
A single spawning effect will reduce Farrenroc's stability by 1 only, regardless of how many resources the players are unable to discard.
Overruns
An overrun occurs when 1 or more minions would be spawned in an area that already contains 3 minions or exceeds 3 minions after the spawn effect. When an overrun occurs, players either must discard 1 resource of the players' choice or the overrun minion(s) are placed one area closer to Farrenroc. If a resource is discarded place the overrun minions out of play.
Each time an overrun occurs in an objective location, players must immediately raise the corresponding conquest track by 1.
An overrun can be triggered only once per area per spawn effect.
Example: The two minions in the Outland area cannot enter the Village because it is full, so they move to the Ruins, which is the next area closest to Farrenroc.
Enemy Movement
Enemy movement is resolved exactly like hero movement. Minions cannot end their movement in an area already containing three minions. When one or more minions would move into an area already containing three minions, the minions being moved "hop" over the area containing three minions and end their movement in the next area closest to Farrenroc.
During enemy movement, more than three minions may end their movement in Farrenroc. After resolving all enemy movement, if more than three minions occupy Farrenroc, remove all excess minions so that only three remain, then reduce Farrenroc's stability by 1.
If any enemy is instructed to move to a location that they are already in, they do not move.
Enemy Movement Priority
When determining minion movement, enemies always take the shortest path toward their destination: the direction with the fewest areas to move through. Minions always move toward the closest location that contains a structure, an objective, or Farrenroc. When there are several valid destinations, send minions to the highest priority based on the following order:
- Farrenroc
- The objective location corresponding to the highest conquest track
- Structures
If there is a tie between multiple objectives or multiple structures when resolving enemy movement, players choose where the enemy moves.
Determining Enemy Actions
During the planning phase, the players must determine which enemy action cards will be resolved during the action phase. This is done without players knowing which enemy action cards are chosen. To determine enemy action cards, players draw the top 3 enemy action cards without revealing them and then place 1 facedown on each of the 3 action deck spaces on the game board starting with morning, then day, then night.
Choosing Hero Actions
Each player must choose 3 of their action cards, 1 for each of the 3 action space decks. Players may discuss strategies among themselves and coordinate which of their actions will work best with other players' actions. After choosing an action card, the player places the chosen action card facedown on one of the action decks. After each player has placed all 3 of their chosen action cards—one in each action deck—each action deck is shuffled and returned to its action deck space on the game board.
Action Phase
During the action phase, players collectively resolve each action deck in the following order:
- Morning actions
- Day actions
- Night actions
Players resolve each card, one at a time, in a single action deck before moving to the next deck. Based on the preceding list, the lowest-numbered deck that still contains unresolved action cards is referred to as the active action deck. To resolve an action deck, one player draws the top card of the active action deck and then performs one of the following:
- If the action card drawn is a hero action, the player that controls the hero resolves the action card.
- Or, if the action card drawn is an enemy action card, immediately resolve it.
To resolve an action card, the player resolving it performs each step of the action card in order, top to bottom. Each step of an action card that is highlighted in a gray bar is mandatory and must be resolved, while each step of an action card not within a gray bar, is optional, and may be resolved if the player (or players) choose. Note that optional steps must still be performed in order. Each action card must be completely resolved before drawing the next action card.
If a fate ability appears as one of the steps of the action card, the mandatory and optional rule still applies. Fate abilities can be resolved only if a matching fate symbol is in the fate pool. After resolving a fate ability, the player must roll a fate die in the fate pool with the matching symbol and, keeping the new result, return it to the fate pool. When resolving an action card, each fate ability on that card can be triggered only once. Enemy action cards have mandatory fate abilities which are always triggered and resolved, regardless of whether the ability actually takes effect.
When resolving a step of an action card that contains a bold action type (Enemy Action Cards), that corresponding action type is fully resolved. Any siege steps of an action card are ignored until the siege has begun.
When resolving enemy actions that target areas, players always start with Farrenroc and work their way outwards, so the center-most enemies are resolved first.
After resolving a hero action card, that card is placed faceup in the controlling player's area to signify that action is now a used action. After resolving an enemy action card, it is placed faceup next to the enemy's unused actions to signify these are used actions.
Prepare Phase
During the prepare phase, players refresh exhausted cards, each defeated hero and delayed minion is stood up, and players must reset the enemy action cards.
Prepare Effects Step Many components have Prepare Phase effects. Those effects are resolved now, one at a time, in any order chosen by the players.
Resource Step Each structure in play produces one resource of the players' choice. During this step, players place 1 resource of their choice in Farrenroc's reserves for each structure in play.
Refresh Step Players refresh all exhausted asset cards. Some asset cards require players to exhaust them to use the corresponding effect. Exhausted asset cards cannot be exhausted again until they are refreshed during this step.
Revive Step When a hero is defeated or an enemy minion is delayed, the corresponding figure is tipped over (or minion token is flipped to the delayed side) to signify this. During this step, all tipped over figures are turned upright and enemy tokens are flipped back over to their non-delayed side. Defeated heroes are placed in Farrenroc after being turned upright and are no longer defeated.
Reset Step To reset the enemy action cards, players shuffle all used enemy action cards and place them facedown under the unused enemy action cards. Then, players place all their used actions back in their hands with their unused actions. All hero actions are now ready to be used for the next round.
Additional Rules
Following are additional rules needed to play the game.
Rerolling Dice
Many effects in the game allow players to reroll dice. Each die can be rerolled only once, regardless of how many effects would provide additional rerolls.
Game Board
In addition to the reference information and card deck areas, the game board contains the map. The map is composed of locations.
Locations
Locations have three important pieces of information on them.
- Objective Token Location: Objective tokens are placed here.
- Location Name: Reference to determine possible objective and quest areas.
- Number of Players: The flame icons located at the bottom-right of the location are used for placing objective tokens during setup only. If the player number meets or exceeds the flame icon total (and the location name matches the objective card), then that area is a valid location for objective tokens.
The basic location types are Sanctuaries, Dungeons, Villages, and Ruins. The special location types are Outlands, Farrenroc, and Lairs.
There are four different types of basic locations (Dungeons, Ruins, Sanctuaries, and Villages). In addition to these basic locations, there are three special locations (Farrenroc, Lairs, and the four Outlands).
When a hero resolves an encounter action, they draw an encounter card from the deck that corresponds to their location, which is indicated by the image of the location on the back of the card. Structures can be built in basic locations only, never in special locations. Outland & Lair areas do not have encounter cards.
Farrenroc
The center location of the map is Farrenroc, which is the most crucial location for the heroes. If Farrenroc's stability is reduced to zero, the players immediately lose the game. Stability is an abstract measure of the city's ability to stand against the Darkness, represented by the Farrenroc city miniature. Each time Farrenroc's stability is reduced, players remove and discard pieces of the miniature equal to the stability reduction.
The first point of stability loss removes the piece numbered 10, then 9, then 8, etc. Each time stability is lost another part of the miniature is removed. When only the base remains, the players lose.
Farrenroc's stability can be reduced a number of ways, including:
- Assaults
- Each time a hero is defeated
- After enemy movement, if more than 3 minions occupy Farrenroc, remove excess minions
- Effects that force players to discard resources exceeding Farrenroc's reserves
- Conquest and/or siege abilities
- Card effects
Objectives
Objectives represent key strategic points for both heroes and enemies. Enemy minions spawn in objective locations, and heroes can attempt objective actions in objective locations. If heroes manage to complete all three basic objectives before the siege begins, they reveal the final objective, which provides an additional win condition.
Basic Objective Cards
Basic objective cards are divided into three types that correspond to the three types of resources in the game; hope, influence, and supply. Each objective card lists the objective action—the action required by the heroes to complete the objective—which is usually accompanied by a resource cost. In addition, each objective card lists a type of location associated with that objective. These locations are considered objective locations.
When an objective is claimed, the hero claiming the objective removes the corresponding objective token from their area and places it near the corresponding objective card. When an objective card has a number of objective tokens near it equal to the number of heroes, that objective is immediately completed. When an objective is completed, the players discard that objective card. If it was the third objective completed, they immediately reveal the final objective.
Objective Tokens
Each type of objective card corresponds to a collection of objective tokens. These objective tokens are used to mark locations on the board in which heroes can attempt to complete the objective. Remember, all three objectives must take place in different locations, so each area may contain only one objective token.
Final Objective Setup
When revealing final objectives that require multiple areas, players only need to visit and successfully resolve a number of areas equal to their player count. These areas are represented by the number of flames in the area designated by the final objective card.
Final Objective
Final objectives represent the final way players can thwart the enemy boss without directly confronting him. Players can reveal the final objective only by completing all three regular objectives. When the final objective is revealed, it is placed faceup near the enemy sheet, and the siege begins (see "The Siege" below). Once revealed, the final objective is treated exactly like an objective card with special rules which are found on the card. If players complete the final objective, they immediately win the game.
Fate Pool
The fate pool is a collection of fate dice that are rolled at the start of the game. The fate symbols on the fate dice are used to trigger fate effects during the game, and each die in the fate pool is considered to be available. Players may choose whether or not to trigger optional fate effects if a matching die is in the fate pool, but all mandatory fate effects (Enemy Action Cards) must be resolved if there is at least one available matching symbol in the fate pool.
When a fate symbol is used to trigger a fate effect, that fate die is rerolled after fully resolving the fate effect then returned to the fate pool.
The fate symbols are: Rage, Guile, Nature, Arcane, Faith, and Darkness.
Resources
The game includes three types of resource tokens: Supply, Hope, and Influence.
Resources that have not been collected by the heroes are kept in a collective pool near the game board. Each time a hero gains one or more resources, he takes the appropriate number and type and places it in Farrenroc's reserves on the board. When the heroes spend (optional) or discard (mandatory) resources, they remove the appropriate number and type from the reserves and place them back into the resource pool.
Each time the players are forced to discard resources exceeding the amount of that type in the reserves, players must discard as many resources as possible and reduce Farrenroc's stability by 1.
Skill Tests
Heroes are sometimes required to perform skill tests, usually as a result of encounter cards, quest cards, and conquest effects. Each time a hero is called to resolve a skill test, they perform the following steps in this order:
- Gather a number of dice equal to the hero's skill that matches the required skill test. Heroes always roll a minimum of 1 die for skill tests.
- Roll the dice.
- Compare the dice results to the skill test's target number. Each die that equals or exceeds the target number is a success.
- If the hero rolls one or more successes, the skill test is successful, and the hero resolves any "success" effects and ignores any "fail" effects. If they did not roll any successes, the hero resolves any associated "fail" effects and ignores any "success" effects.
The four hero skills are Tactics, Intellect, Cunning, and Spirit.
Quest Deck
The quest deck is used by both heroes and enemy captains. Quest cards list a particular location type that indicates where that quest can be attempted. This is referred to as the quest location. Quest cards also contain a scheme effect that is resolved each time an enemy captain resolves a scheme action in a quest location.
At the start of the game, and each time an active quest is resolved, the top card of the quest deck is revealed and placed faceup on top of the deck. This is referred to as the active quest, and it is the only quest that heroes and enemy captains can interact with.
Each time a hero resolving a quest action successfully completes a quest, players resolve the reward on the active quest and then discard it. Each time an active quest is resolved, players receive the reward in the green box, reveal the next card in the quest deck, and place it on the top of the deck as the new active quest. If a quest skill test is failed then the players suffer the fail results in the red box, and this quest remains the active quest.
If there are no quests in the quest deck, shuffle the discarded quests and create a new quest deck.
Each quest card lists the quest title and flavor text, the required skill and target number, success results, fail results, the scheme effect, and the quest location.
Scheme Effects
Each time a scheme enemy action card is resolved, players resolve the active quest's scheme effect for each quest location containing at least one captain.
Encounter Cards
Each location has an associated encounter deck. Encounter cards represent the people, jobs, events, and equipment that heroes may encounter during their journey. When a hero resolves an encounter action, he draws an encounter card from the deck that matches their location's image.
When a player draws an encounter card, he refers to the skill test first, if any. If a skill test is present, that player immediately performs the required skill test.
If an encounter card does not have a skill test, players automatically resolve the encounter's "success" effect instead of performing a test.
When a hero gains an encounter card, he places it faceup next to his hero card. Encounter cards gained this way are referred to as assets. A hero may have only three assets at one time. If a hero gains an asset while he already has three assets, they may choose one of their assets to discard to gain the new asset.
The different types of encounter cards are identified by the following traits:
- Ally (Asset): These encounter cards represent invaluable aid given to the heroes by allies.
- Item (Asset): Similar to ally assets, items represent useful tools that the heroes can equip to make them more powerful.
- Event: Events are not gained as assets and are discarded after being resolved.
- Burden: Burden events are gained like assets, but they are not assets and never count against the number of assets that a hero may have. Each player can have any number of burdens in addition to their normal three assets. Additionally, a player cannot discard a burden unless the card's effect allows them to.
Using Assets
Asset cards that can be exhausted to perform an action may be exhausted at any time unless the asset card specifies otherwise. So remember to use these powerful tools even if it is during another player's action or an enemy's action.
After resolving an encounter card or discarding an asset, that encounter card is discarded faceup next to its corresponding discard pile. If players need to draw an encounter card and none remain in the draw pile, immediately shuffle the discard pile and place it facedown to create a new draw pile.
Some assets are exhausted upon use. When a card is exhausted, that card is turned 90º to indicate it cannot be exhausted again that round to trigger its effect. All exhausted cards are readied during the prepare phase.
Muster
When resolving a muster effect, players spawn minion tokens by rolling one fate die for each muster simultaneously. This can only be done with non-darkness fate dice. For each die that cannot be rolled discard one resource from the reserve. Locate the Outland or Lair area associated with the fate die result and place the minion tokens in the matching area.
Damage and Healing
Each damage a target suffers reduces its vitality by 1. Damage tokens are used to track this damage. When a target suffers damage equal to or exceeding its vitality, it is defeated.
Defeated enemies are placed near the enemy sheet with the rest of the out-of-play enemy tokens. If the boss is defeated, the players immediately win the game.
When a target heals any amount of damage, they discard that many damage tokens from the corresponding enemy token or hero card.
Defeated Heroes
When a hero is defeated, they immediately resolve the following steps in this order:
- Discard all damage tokens.
- Reduce Farrenroc's stability by 1.
- Lay the defeated hero figure on its side.
While a hero is defeated, they may not resolve any actions during the current round. When a defeated hero's action card is revealed during the action phase, that card is returned to the defeated hero but is not resolved. Any effects that target heroes cannot target or affect defeated heroes. Defeated heroes still count against the total number of heroes in the game for any relevant game effects.
During the revive step of the prepare phase, the defeated hero's figure is turned upright, placed in Farrenroc, and is no longer defeated.
Enemies
Three types of enemies can enter play during a given game: one boss, up to four captains, and up to twenty minions. All these enemy ranks make up a single enemy army. Only one enemy army is used in each game. Each enemy army contains the following ranks:
- Boss: This is the leader of the enemy army. If the heroes defeat him, they immediately win the game. The boss enters play only during a siege.
- Captain: These are the boss's trusted officers, and they are formidable foes. Captains are sent out to perform nefarious schemes on the boss's behalf. While defeating a captain can relieve some pressure, there are always more waiting to serve their master.
- Minions: Each army contains a fixed number of minions, which are used to hold valuable objectives for the Darkness, while also swarming and befouling the lands. Heroes must constantly fight back these tides in order to save Farrenroc.
Enemy Sheet
All pertinent information about the different ranked enemies in a single army can be found on the enemy sheet that corresponds to that army's boss. The enemy sheet lists, for each enemy rank: name, vitality, attack value, defense value, and special ability.
Conquest Tracks
Each enemy sheet has three conquest tracks that represent the enemy army's preparedness for the coming siege. Each time a conquest track raises, the conquest marker on the corresponding track is moved the indicated number of spaces counter-clockwise toward the Siege icon on the track.
Each conquest track corresponds to a different objective type:
- Despair: As the people of Farrenroc lose hope due to the enemy army's advance, they step closer and closer to absolute despair, as represented by this track. This track corresponds to the hope objective cards.
- Devastation: This track represents the enemy army's despoiling of the lands surrounding Farrenroc, making it harder for the city to gather its much-needed supplies to survive the siege. This track corresponds to the supply objective cards.
- Corruption: Loyalties dissolve in the face of annihilation, and this track represents the Darkness's corrosive influence on the desperate people of Farrenroc and its surrounding lands. This track corresponds to the influence objective cards.
Next to each conquest track is a conquest ability and siege ability. Each track also contains conquest ability icons and a single siege icon. Each time a conquest marker enters or passes through a space containing a conquest ability, the players immediately resolve the conquest ability associated with that track. However, if a conquest marker enters or passes through a space containing a conquest ability due to the conquest track being reduced, the ability is not triggered.
The Siege
When the enemy army is finally prepared to march on Farrenroc, or the heroes have drawn too much attention to themselves, the siege begins. This represents the end game and raises all the stakes.
The siege begins the first time a conquest marker enters a siege icon space or when the final objective card is revealed. When the siege begins, do not resolve the siege ability associated with it. Players must immediately perform the following actions:
- Place the boss in a random Outland location by rolling one non-darkness fate die in the fate pool. If all dice are darkness, the boss appears in the darkness location.
- Discard all remaining objective tokens in play, and discard all other objective cards. If the final objective has been revealed do not discard it.
Until the siege begins, players ignore all siege effects on game components. However, after the boss has been placed, and for the rest of the game, any siege effects will take effect.
A conquest track that has already reached the siege icon cannot be reduced.
If a conquest marker enters a siege icon space on its conquest track and the siege has not yet begun, the siege immediately begins. If the siege has already begun and a conquest marker reaches a siege ability, or the siege marker is already on the siege ability when that conquest track raises, players immediately resolve that track's siege ability.
Glossary
Action Deck: Players assign actions to three action decks during the planning phase: morning, day, and night. Each action deck includes hero and enemy actions and is shuffled and, later, resolved independently from the others.
Action Card: Action cards activate heroes and enemies. Each action card corresponds to a specific action type.
Action Type: Each action card is associated with an action type. Each action type is governed by a set of rules. When an action type appears in bold in an action card's ability text, that corresponding action is resolved.
Active Action Deck: The lowest-numbered action deck containing at least one unresolved action card, using this numbering system: 1. Morning actions, 2. Day actions, 3. Night actions.
Active Quest: At the start of the game, and after an active quest is resolved, players reveal the top card of the quest deck and place it faceup on top of that deck. This is the only quest that enemy captains and heroes can interact with.
Area: A single hex on the board. Areas are broken up into location types, and each location is an area. A single area can hold any number of enemy tokens, but can never contain more than three minion tokens.
Assault: An assault is resolved when enemies attack structures or Farrenroc. To resolve an assault, roll 1 10-sided die for each enemy token in the assaulted area, and determine which enemy rank in that area has the highest attack value. If at least one die result is less than or equal to that enemy's attack value, the assault succeeds. The result of a successful assault depends on the assaulted area. If the area contains a structure, that structure is destroyed. If the assaulted area is Farrenroc, reduce Farrenroc's stability by 1. If an assault is triggered in an area with no enemy tokens or structures, the assault is ignored. After resolving an assault, each minion in that area is delayed.
Attack Value: The target number for enemies to either deal damage to heroes during a battle or successfully assault structures.
Basic Location: The game includes four basic location types: village, sanctuary, dungeon, and ruins. Each has an associated encounter deck and may serve as objective locations. Structures may be built in basic locations only—not special locations.
Battle Action: During a battle action, a hero chooses one rank of enemy in their area and rolls 1 10-sided die per enemy of that rank in their area. For each success, they can assign 1 damage to any enemy of the targeted enemy rank in their area. Otherwise, they gain 1 influence.
Boss: Each enemy army is led by a boss, who the heroes can defeat to win the game. The boss enters play immediately when the siege begins.
Captain: Each enemy army includes at least four captains. This rank of enemy is more formidable than a minion, but they will usually focus on scheming, rather than swarming Farrenroc or attacking heroes.
Conquest Marker: Each conquest track has a single conquest marker that tracks how close the enemy army is to sieging Farrenroc. Each time a conquest marker passes through a conquest ability icon or siege icon, players resolve the associated effects.
Conquest Track: Each enemy sheet contains three conquest tracks: despair, corruption, and devastation. These tracks represent the enemy army's progress toward sieging Farrenroc.
Cunning: A hero skill that represents subterfuge, deception, and quick reflexes.
Damage: Each damage a target suffers reduces its vitality by 1. When a target suffers damage equal to or exceeding its vitality, it is defeated. Damage may be healed through certain game effects.
Defeated: When a hero is defeated, their miniature is placed on its side, and they cannot resolve any action cards that round. A defeated hero still counts as a hero when resolving any effect that scales with the number of heroes. A defeated hero stands up during the prepare phase, is placed in Farrenroc, and is no longer defeated. A defeated enemy is returned to the out-of-play enemy supply near the enemy sheet. When a boss is defeated, the players immediately win the game.
Defense: This stat determines how difficult an enemy is to damage. During a battle action, each die that a hero rolls equaling or exceeding an enemy's defense deals 1 damage.
Delayed: Only enemy minions can be delayed. When a minion is delayed, its token is flipped over to its delayed side. A delayed minion may still be targeted by hero effects but is ignored by enemy action card effects targeting minions. Delayed minions still count against the number of minions in an area. When a hero resolves a battle action card, they may defeat all delayed minions in their area before resolving the battle action.
Discard: Encounter cards are placed in discard piles next to their respective draw piles. Action cards are discarded faceup in their respective areas, in front of a hero player or next to the enemy sheet. Discarded resources are returned to the resource pool. If players are forced to discard resources exceeding Farrenroc's reserves, they discard as many as they can and then reduce Farrenroc's stability by 1.
Enemy: Each token listed on an enemy sheet is considered an enemy. Each enemy army contains three ranks of enemies: minions, captains, and a boss.
Encounter Action: When resolving an encounter action, a hero must draw a card from the encounter deck that corresponds to their current location.
Encounter Card: Each location type has a corresponding encounter deck that heroes draw from when resolving an encounter action.
Exhaust: When a card is exhausted, it is tilted 90º to indicate that it cannot be exhausted again to trigger its effect. Exhausted cards are readied during the prepare phase.
Farrenroc: The main city heroes are charged to protect. Farrenroc is located in the center of the map. If its stability is reduced to zero, the heroes lose the game.
Farrenroc Reserves: The pool of resources that players have collected during the game, available for spending or discarding to pay for game effects. Spending resources is always optional, but discarding resources due to game effects is always mandatory. Any time players are forced to discard one or more resources exceeding the number of resources in the reserve, players discard as many resources as they can and then reduce Farrenroc's stability by 1.
Farrenroc Tile: When enemies or heroes would move into or out of the center Farrenroc area, place them or remove them from this tile instead.
Fate Ability: Any ability that appears on a card with a fate symbol preceding it is a fate ability. These abilities can be resolved only by spending a matching fate symbol from the fate pool. The timing of these abilities is defined by the ability itself. Fate abilities on action cards are resolved when they appear in the order of steps, and each one may be resolved only once. After resolving a fate ability, the fate die that was spent to pay for it is rerolled and added back to the fate pool.
Fate Pool: The fate pool is a collection of fate dice rolled during game setup. Each fate die shows a fate symbol faceup that may be used to trigger various abilities throughout the game. When a fate symbol is used, that fate die is rolled and returned to the fate pool to show that the new fate symbol result is available to use for a future ability.
Hope: One of the three resources that Farrenroc needs to survive against the siege. Hope represents morale, determination, and willpower.
Influence: One of the three resources that Farrenroc needs to survive against the siege. Influence represents inspiration, leadership, and diplomacy.
Intellect: A hero skill that represents intelligence and arcane knowledge.
Lair: The lair location represents an enemy stronghold. When encountering a lair, a player draws and resolves an enemy encounter card.
Location: There are four basic location types: sanctuary, dungeon, ruins, and village; and three special location types: Farrenroc, Lairs, and four Outland locations.
Map: The portion of the game board that contains a different location in each area.
Minion: Enemy minions represent the bulk of the enemy army. Minions spawn throughout the game, and if too many minions are in play, Farrenroc will begin to lose stability.
Muster: When resolving a muster effect, players spawn minion tokens by rolling 1 fate die for each muster simultaneously. This can only be done with non-darkness fate dice. For each die that cannot be rolled discard 1 resource from the reserve.
Objective Action: This area of the objective card lists the action the hero must resolve in an objective location to complete the objective.
Objective Location: A location type that matches the area type listed on a particular objective card. Each objective card has at least one area type associated with it, and that area type is referred to as that objective card's objective area.
Objective Card: Each enemy army has a corresponding objective deck, which consists of 16 cards: 4 hope objectives, 4 supply objectives, 4 influence objectives, and 4 final objectives. If all 3 objectives are completed and the final objective is completed, the players immediately win the game.
Objective Token: Three types of objective tokens correspond with three types of objectives: hope, supply, and influence. Objective tokens are placed in objective locations to represent objectives in play, or near the objective card to represent progress on the active objective.
Overrun: An overrun occurs when 1 or more minions would be spawned in an area that already contains 3 minions. When an overrun occurs, players must discard 1 resource of the player's choice or the overrun minion(s) are placed one area closer to Farrenroc. Each time an overrun occurs in an objective location, raise the associated conquest track by 1. An overrun can be triggered only once per area per spawn effect.
Quest Action: When resolving a quest action in a quest location, a hero resolves the active quest card. If the hero cannot or chooses not to resolve this action, they gain 1 hope instead.
Quest Location: A location that matches the area type listed on the active quest card. Heroes may attempt quests only while in a quest location, and captains can resolve a quest card's scheme effect only while in a quest location.
Raise: Each time a conquest track raises, players move the conquest marker on the corresponding conquest track toward that track's siege icon as many spaces as indicated by the game effect. Each time a conquest marker enters a conquest ability space on a conquest track due to the track being raised, players resolve the associated conquest ability.
Refreshed: When an exhausted card is refreshed, it is returned to its original orientation and may be exhausted again to gain its effect.
Resource: The three types of resources in the game: hope, influence, and supply, are collectively referred to as resources. Any resources collected by the heroes are placed in the reserves. Any resources not yet collected are kept in the resource pool, out-of-play.
Siege: The stage of the game where the boss is present on the board. All game effects that take place during the siege are ignored until the siege begins.
Skill: Each hero has four skills with a number associated to each. Skills include Tactics, Cunning, Intellect, and Spirit. The number associated with the skill represents the number of dice rolled when performing a skill test matching that skill. Different game effects can modify a hero's skills.
Spawn: To spawn a minion, a player places the designated number of minions in the designated area. Spawned minions are always placed one figure at a time and are taken from the supply of out-of-play enemies near the enemy sheet. If the designated area already has three minions when a new minion would spawn, the players resolve an overrun. If players need to spawn one or more minions when none remain in the out-of-play enemy supply, players discard 1 resource of their choice for each minion they could not spawn. If this number of resources exceeds what is available in the reserves, reduce Farrenroc's stability by 1.
Special Location: The game includes three types of special locations: Farrenroc, Lairs, and Outland locations. These are the only locations in the game that do not fall under the four basic location types.
Spend: If players spend a fate symbol for an effect, they reroll that fate die and return it, with the new result, to the fate pool. Spent resources are returned to the resource pool. Players may never spend resources in excess of Farrenroc's reserves.
Spirit: A hero skill that represents willpower and charisma.
Stability: This is the measure of Farrenroc's survivability against the Darkness. If Farrenroc is reduced to zero stability, the players lose the game. Each time players are forced to discard resources exceeding Farrenroc's reserves, they discard as many resources of that type as they have and then reduce Farrenroc's stability by 1. Each time Farrenroc's stability is reduced, players remove 1 piece from the Farrenroc miniature.
Structure: When resolving a fortify action, a hero can build 1 structure in his area, as long as it is a basic location. Structures produce 1 resource of the players' choice during the prepare phase.
Supply: One of the three resources that Farrenroc needs to survive against the siege. Supply represents general provisions, food, and building supplies.
Tactics: A hero skill that represents military prowess and tactical strategy.
Target Number (TN): Generally, when rolling dice, any 10-sided die rolled that equals or exceeds a target number is considered a success. For skill tests, the target number is always listed next to the skill icon required for the test. Enemy assaults are treated differently, as the die results need to be less than or equal to the enemy's attack value to succeed.
Travel Action: When resolving this action, a hero may move into an adjacent area.
Unused Action: An unused hero action card that has not been assigned to an action deck this round is kept in a player's hand, or facedown on the table. An unused enemy action card that has not been assigned to an action deck this round is kept facedown next to the enemy sheet.
Used Action: An action card that has already been fully resolved this round and placed faceup in a hero's play area; or, in the case of enemy action cards, next to the enemy sheet.
Vitality: A target's vitality represents how much damage they can withstand before becoming defeated. When a target suffers damage equal to or exceeding its vitality, it is immediately defeated.
Quick Reference
Phase
- Planning Phase — Hero and Enemy cards are assigned to action spaces and each action space is shuffled separately.
- Action Phase — Resolve each action card in each action space in the following order: Morning, Day, Night.
- Prepare Phase — Resolve prepare effects; Revive delayed minions and defeated heroes; Gain resources; Refresh assets; Shuffle used enemy action cards and place them under the unused enemy action cards.
Stability Loss
| Effect | Stability Lost |
|---|---|
| Assault | 1 |
| Unable to discard resources | 1 |
| More than 3 minions in Farrenroc | 1 |
| Each hero defeated | 1 |
| Card effects | ? |
| Conquest or Siege effects | ? |
Overrun (Place all the minions first then resolve these steps per area that contains an Overrun)
- Can only happen once per area per spawn.
- Overruns in objective areas raise the corresponding conquest track by 1 per objective area that is overrun.
- Overruns in an area besides Farrenroc also require the players to discard 1 resource of their choice or move each overrun minion 1 area closer to Farrenroc. If a resource is discarded, place the overrun minions out of play.
- Overrun by movement into Farrenroc reduces its stability by 1 only and then discard every minion over 3 into the supply.
If an overrun occurs in an area, the players must either discard 1 of these resources... or move the overrun minions 1 area toward Farrenroc.
Muster
- For each muster that must be performed, take 1 fate die from the fate pool that is not darkness. Roll these dice simultaneously and place minions into the Outland and Lair areas matching the fate die results.
- For each fate die that cannot be rolled because there is not enough fate dice without darkness, raise the lowest conquest track a number of times equal to the missing number of fate die.