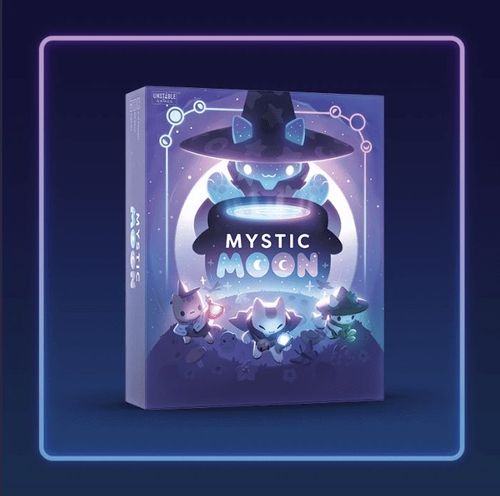
Mystic Moon
Mystic Moon Rulebook
Table of Contents
Table of Contents
What's in the Box
- 20 double-sided Star Power tokens (1 / 3 Star Power)
- 20 double-sided Star Power tokens (5 / 10 Star Power)
- 27 Potion cards
- 12 Zodiac cards
- 9 Alchemy cards
- 56 card sleeves
- 1 Ingredient Bag
- 1 Witch's Hat
- 6 Witch's Huts
- 66 Basic Ingredient tokens
- 14 Rare Ingredient tokens
- 4 Wild Ingredient tokens
- 4 Frog tokens
- 4 Poisonous Mushroom tokens
- 4 double-sided Fate tokens
- 18 Gold tokens
- 12 Crystal tokens
- 6 Sludge tokens
- 5 Garden tiles
Setup
Start by having each player choose a Witch's Hut. Your Witch's Hut shows your unique Talent on the left and your Cauldron on the right. Place your Witch's Hut in front of you, leaving space to the right of it for your Satchel and space underneath it for your Potion Book where you will collect Potion cards throughout the game.
Next, you'll set up the Elder Witch's Shop. Place 3 of each Basic and Rare Ingredient token in separate piles within reach of all players. These are the Ingredients for which you can trade at the Elder Witch's Shop.
There are dedicated compartments in the game box where you can store the 24 Ingredient tokens for the Elder Witch's Shop to make setup easy next time you play. You will store all other Ingredient tokens (as well as Frog tokens) in the Ingredient Bag.
Shuffle the Potion deck and place it face down near the piles of Ingredient tokens, then flip the top 4 cards of the Potion deck face up to the right of the Potion deck. These Potion cards feature Recipes that you may learn at the Elder Witch's Shop.
Mix the remaining Basic and Rare Ingredient tokens in the Ingredient Bag with the Wild Ingredient tokens and Frog tokens. Pull tokens from the Ingredient Bag until you have 2 Basic Ingredient tokens, and add those 2 Basic Ingredient tokens to your Satchel. Once each player has 2 Basic Ingredient tokens in their Satchel, return any Rare Ingredient, Wild Ingredient, and Frog tokens that you pulled to the Ingredient Bag.
Take the Garden tiles, each of which has 1 light arrow and 11 dark arrows that denote 12 Garden locations, and stack them face up in numerical order, using the numbers on the back of the tiles. Align the light arrows, and ensure the tile labeled "1" is on the top of the face-up stack. Then, place the stack of Garden tiles in the center of the play area, leaving space around it for tokens. Randomly pull and place one token from the Ingredient Bag in front of each of the Garden locations, starting at the light arrow and moving clockwise.
Finally, place the Poisonous Mushroom tokens and Star Power tokens in piles within reach of all players. Poisonous Mushrooms will allow you to sabotage other players. Star Power is used as both a currency and a representation of your score throughout the game. You'll find two sets of Star Power tokens: the first set represents 1 Star Power on one side and 3 Star Power on the other, and the second set represents 5 Star Power on one side and 10 Star Power on the other.
If playing with the Curse of the Zodiac Expansion, shuffle the Zodiac deck and place it face down within reach of all players (which means the Recipe side will be face up). Flip the top card of the Zodiac deck and place it to the right of the deck; this is the Rising Sign. Then, have each player take a Fate token and place it cursed side up in their play area to indicate they are cursed. See page 10 for more details about playing with this expansion.
If playing with the Secrets of Alchemy Expansion, shuffle the Alchemy deck and place it face up near the Elder Witch's Shop. Then, place the Gold tokens, Crystal tokens, and Sludge tokens in piles within reach of all players. See page 11 for more details about playing with this expansion.
Once you have completed setup, the play area should look something like the setup diagram in the rulebook.
Before starting the game, give each player a Star Power token representing 10 Star Power, and give the Witch's Hat to the player who most recently brewed a concoction; this player goes first, and gameplay proceeds clockwise.
How to Play
Mystic Moon is played over 5 rounds. Each round, you will enter the Garden to gather Ingredients, visit the Elder Witch's Shop to learn Recipes and trade Ingredients, and return to your Hut to brew Potions that reward you with Star Power. Once you are finished, the moonlight will cause new Ingredients to bloom in the Garden before the next witch arrives.
On your turn, you will perform each of the following steps in order:
1. Enter the Garden
Surrounding the Garden, you will find the Ingredients you need for potion-making. To enter the Garden, place the Witch's Hat on one of the marked locations in the Garden. Take each Ingredient in the Garden at that location as well as at both adjacent locations and add them to your Satchel.
If you placed the Witch's Hat at a location in the Garden with a Glyph, you may activate that Glyph and resolve the corresponding effect:
- Draw 1 Ingredient
- Gain 1 Star Power
- Gain 2 Star Power
2. Visit the Elder Witch's Shop
When visiting the Elder Witch's Shop, you will have the opportunity to learn Recipes and trade Ingredients. You may learn Recipes and trade Ingredients multiple times on your turn if you have the Star Power and Ingredients required, and you may do so in any order.
To learn a Recipe, pay the cost indicated on the top-left corner of the corresponding Potion card by moving that amount of Star Power from your play area to the Star Power token piles. Place that Potion card in your Potion Book, then immediately flip the top card of the Potion deck face up to fill the empty space in the Elder Witch's Shop. If at any time your Potion Book would have more than 3 Potion cards, return one to the bottom of the Potion deck.
When you visit the Elder Witch's Shop, if all 4 Potion cards indicate a cost of 5 or more Star Power, you may move those Potion cards to the bottom of the Potion deck, then flip the top 4 cards of the Potion deck face up.
To trade Ingredients, exchange 2 of the same Ingredient from your Satchel with 1 Ingredient of your choice from the Elder Witch's Shop. The Elder Witch's Shop can never contain more than 3 of the same Ingredient. Any time the Elder Witch's Shop would contain more than 3 of an Ingredient, return the excess Ingredient(s) to the Ingredient Bag.
Before leaving the Elder Witch's Shop, you must ensure you have no more than 10 Ingredients in your Satchel. If you have more than 10, discard Ingredients (by returning them to the Ingredient Bag) until you have 10 remaining.
3. Return to Your Hut
If you have the Ingredients and have learned the Recipes you need, it's time to brew some Potions! To brew Potions, you'll use Ingredients in your Satchel to form puzzles in your Cauldron that match Recipes on the Potion cards in your Potion Book.
Your Cauldron consists of three columns, each of which can hold 3 Ingredients. When adding an Ingredient to your Cauldron, choose a column and add an Ingredient from your Satchel to the lowest open slot in that column. If your Cauldron is full, you may not add more Ingredients to it. Once you have finished adding Ingredients to your Cauldron, brew any Potions you were able to make (see page 8 for more details about brewing Potions).
If you see a dotted circle in a Recipe, this indicates you need a slot in your Cauldron between the Ingredients shown. If you need to place an Ingredient above an empty slot, you must first fill that slot with an Ingredient from your Satchel (or a Crystal).
4. Bloom New Ingredients Around the Garden
At the end of your turn, the moonlight will cause new Ingredients to bloom in the Garden. Starting at the Witch's Hat and proceeding clockwise, randomly pull tokens from the Ingredient Bag and place them at every second location in the Garden.
Each location in the Garden may only have up to 3 tokens. If you would add a fourth token to a location, return it to the Ingredient Bag instead. When you get back to the Witch's Hat, remove the Witch's Hat and pass it to the player on your left.
Once each player has taken their turn, the round ends, and the moon advances to its next phase. Remove the current Garden tile from the top of the stack and return it to the game box, then the first player will start their next turn and the new round will begin. If five rounds have passed (and you would remove the final Garden tile), the game ends!
How to Win
The player with the greatest total Star Power at the end of the game wins and is given the title of Supreme Witch! In the event of a tie, the tied player with the most Ingredients remaining in their Satchel is the winner. If that still does not resolve the tie, you may have to resort to an old-fashioned game of Stone, Parchment, Shears.
Brewing Potions
If you want to be the Supreme Witch, you are going to need to brew some Potions. To successfully brew a Potion, the Ingredients in your Cauldron must match the Recipe on a Potion card in your Potion Book, and each Ingredient can only be used in one Potion.
The Recipes for some Potions may be rotated to fit better with other Recipes when brewed in your Cauldron, while the Recipes for other Potions must be brewed in a fixed orientation.
- Rotatable Orientation
- Fixed Orientation
You will only brew Potions once per turn; however, you may form a puzzle using multiple Recipes in your Cauldron to brew several Potions at once, or even use the same Recipe multiple times!
You may use Wild Ingredients in place of any Ingredient when brewing a Potion.
Each Potion that you brew grants you a magical effect and rewards you with Star Power. Once you have brewed your Potions, take the following steps:
- Gain the Star Power reward for each Potion you brewed. If your Cauldron contains a Poisonous Mushroom, return it to the corresponding token pile and lose 1 Star Power for each Potion you brewed.
- Resolve the effects of each Potion you brewed, in the order of your choice.
- Return each Ingredient in your Cauldron (including any Ingredients not used in a Recipe) to the Ingredient Bag.
The rulebook's worked example shows brewing Big Snack, Poisoner's Aid (twice), and Invisibility Ink together. In that example, you will gain 12 Star Power (4 from brewing Big Snack, and 8 from brewing Poisoner's Aid twice). Resolve the effect of Big Snack once and the effect of Poisoner's Aid twice before finally removing all 9 Ingredients from your Cauldron and returning them to the Ingredient Bag. Because you did not brew Invisibility Ink, you do not gain any Star Power from it or resolve its effect.
Many Potions let you gain Ingredients or cause others to lose Ingredients, or sometimes both! Potion effects may include, but are not limited to the following:
- DRAW: Pull Ingredients at random from the Ingredient Bag and add them to your Satchel.
- DISCARD: Choose Ingredients from your Satchel and return them to the Ingredient Bag.
- SALVAGE: Return Ingredients used to brew a Potion to your Satchel.
- STEAL: Take Ingredients from another player's Satchel and add them to your Satchel.
Interpreting the Zodiac
When playing with the Curse of the Zodiac Expansion, you start the game cursed. As long as you are cursed, you will face a different disadvantage each round. After you successfully lift your curse, you instead get to enjoy a new advantage each round.
The curses and blessings are connected to the cards in the Zodiac deck, each of which has 3 aspects:
- Recipe: Each Zodiac card displays a Recipe on the back side (which is visible when the deck is face down). When you are brewing Potions, you may use the Recipe displayed on the top card of the Zodiac deck to brew a special Potion that lifts your curse. If you do, flip your Fate token to the blessed side to indicate you are no longer cursed.
- Curse: The front side of each Zodiac card has a punishing rule at the top (denoted by a symbol). As long as you remain cursed, you must follow the rule at the top of the Rising Sign.
- Blessing: The front side of each Zodiac card also has a beneficial effect at the bottom (denoted by a symbol). After you lift your curse (and for the remainder of the game), you may use the effect at the bottom of the Rising Sign.
At the start of each round, when a new Garden tile is revealed, the first player will also reveal the next Rising Sign by flipping the top card of the Zodiac deck and placing it on top of the previous Rising Sign. This introduces a new Zodiac curse and blessing that replaces the previous one, while also revealing a different Recipe on the top of the Zodiac deck.
If you do not successfully lift your curse before the end of the game, you cannot be declared the Supreme Witch. If you are cursed when the game ends, return all of your Star Power to the Star Power token piles. Your final score is 0 Star Power. Don't let this be you.
Performing Alchemy
With the Secrets of Alchemy Expansion, you'll be able to use Alchemy to convert Ingredients into new materials such as Gold and Crystals. When you visit the Elder Witch's Shop, you will encounter Alchemy cards, each of which displays a Formula and Products. You may perform Alchemy while visiting the Elder Witch's Shop by discarding the required Ingredients indicated in the Formula of the top card of the Alchemy deck, then collecting the Products listed on the card. You'll add Gold and Crystals you collect to your play area, and you'll immediately place Sludge you collect in the Garden.
If at any time you would collect a material and there are no tokens left in the corresponding token pile, you cannot collect that material.
When you perform Alchemy, you will also acquire the Alchemy card you used for later use. Place it next to your Potion Book, below your Witch's Hut. You may only have one Alchemy card in your play area at a time, and if you acquire a second one, you must return one of them to the bottom of the Alchemy deck. If you have an Alchemy card in your play area when you visit the Elder Witch's Shop, you may choose to either perform Alchemy using the top card of the Alchemy deck or the Alchemy card in your play area.
You may perform Alchemy multiple times when visiting the Elder Witch's Shop, using different Formulas or the same Formula multiple times, as long as you have the Ingredients required.
You can produce different materials using Alchemy, each of which you'll use in a unique way.
- GOLD: Gold you have collected can be spent to reduce the cost of learning Recipes (or hoarded to give you a Star Power boost at the end of the game). When learning a Recipe, you may spend Gold to reduce the cost of the Recipe by 3 Star Power for each Gold spent, then return that Gold to the corresponding token pile.
At the end of the game (before determining the winner), use the table below to determine how much Star Power each player gains based on the amount of Gold they each have. You may only gain Star Power from Gold if you have at least one Gold.
| Number of players with more Gold than you (you have the most Gold!) | Star Power gained |
|---|---|
| 0 | 7 |
| 1 | 4 |
| 2 | 2 |
| 3 | 0 |
In the event of a tie, two or more players can receive the same Star Power gain.
- CRYSTALS: Crystals enhance the value of Potions you brew. When adding Ingredients to your Cauldron, you may also add Crystals you have collected. When you brew with a Crystal in your Cauldron, gain 1 Star Power for each Ingredient that was used in a Potion, then return the Crystal to the corresponding token pile.
When you brew with multiple Crystals in your Cauldron, resolve each one individually. Crystals do not count as Ingredients.
In the rulebook's worked example, you are brewing Invisibility Ink with a Crystal in your Cauldron. When gaining Star Power, you gain 5 Star Power for Invisibility Ink and an additional 3 Star Power for the Crystal (one for each Ingredient used in Invisibility Ink).
- SLUDGE: Sludge is a toxic byproduct of some Alchemy. When you collect Sludge, immediately add it to a location in the Garden. At the end of your turn, return 1 Ingredient from each location in the Garden with a Sludge, then return each Sludge to the corresponding token pile.
Components
Witch's Hut: Your Hut displays your unique Talent that you can use throughout the game and your Cauldron for brewing Potions. To the right of your Hut is your Satchel where you will keep your Ingredients, and below your Hut you will form your Potion Book, where you keep Recipes you have learned from the Elder Witch and can now brew.
Potion cards: Potions are how you turn raw Ingredients into potent effects and mystical Star Power. Each Potion card shows a specific Recipe of Ingredients you must add to your Cauldron. You may form a puzzle by using multiple Recipes (or even the same Recipe multiple times) if you want to brew several Potions at once.
Reminder: Some Recipes on Potion cards have a symbol indicating the Recipe may be rotated, while the Recipes on other Potion cards must be brewed in a fixed orientation.
Each Potion card indicates:
- The cost to learn that Recipe from the Elder Witch
- The Recipe you can use to brew that Potion
- The Star Power reward for brewing it
- An effect you may use immediately after brewing it
Poisonous Mushroom tokens: Poisonous Mushrooms are your tool for a bit of light sabotage. Brewing certain Potions allows you to drop one into another player's Cauldron to disrupt their plans and lose them Star Power. When you add a Poisonous Mushroom to another player's Cauldron, choose a column and add it to the lowest open slot in that column, like you would an Ingredient.
You may only ever have one Poisonous Mushroom in your Cauldron at a time. If another one would be added to your Cauldron, return it to the corresponding token pile instead.
Ingredient tokens: Ingredients are the magical materials with which you'll fill your Satchel and brew your Potions. There are three types of Ingredients:
- Basic Ingredients: Common resources that form the foundation of potion-making.
- Rare Ingredients: Harder to find materials that have been soaked in moonlight and are required for more powerful Potions.
- Wild Ingredients: Ingredients so magical they can be used in place of any other Ingredient.
Ingredient Bag: The Ingredient Bag holds numerous Ingredients (and the occasional Frog). Throughout the game, you'll pull Ingredients from the Ingredient Bag to populate the Garden, or in some cases, add them directly to your Satchel.
Frog tokens: Frogs hide among the Ingredients in the Garden (and in the Ingredient Bag). When you interact with Ingredients, you might end up with a Frog familiar instead! Here are a few times when this rule might apply:
- When you enter the Garden, you may end up taking a Frog with your Ingredients.
- When you draw Ingredients, you may end up drawing a Frog instead.
- When you return Ingredients from the Garden to the Ingredient Bag, you may end up returning a Frog among them.
Any time you add a Frog to your Satchel, immediately steal an Ingredient from another player and return the Frog to the Ingredient Bag.
Garden tiles: Each Garden tile displays a different phase of the moon which corresponds to a round in the game. The Garden tiles feature 12 marked locations at which you can enter the Garden to collect Ingredients. Some locations in the Garden have a Glyph that grants you a special bonus when activated, and the locations of these Glyphs change with each phase of the moon.
Witch's Hat: The Witch's Hat shows the location at which you enter the Garden on each of your turns. This location determines which Ingredients you'll gather, whether you can activate a Glyph, and where to add Ingredients that bloom around the Garden at the end of your turn.
Star Power tokens: Star Power is the magical currency that you'll use to learn new Potions from the Elder Witch. It also represents your score to determine who is the Supreme Witch at the end of the game. As you gain Star Power, you will keep track of your total using the two different sets of double-sided Star Power tokens. The first set represents 1 Star Power on one side and 3 Star Power on the other; the second set represents 5 Star Power on one side and 10 Star Power on the other.
Zodiac cards (Curse of the Zodiac expansion): Each Zodiac features a unique rule that affects you while you are cursed and a new effect you may use when you are blessed. Each round a new Rising Sign will appear dictating what curse is active and what blessing you can access. On the back of each Zodiac card is a Recipe you may use to brew a Potion that lifts your curse.
Fate tokens (Curse of the Zodiac expansion): You will start the game with the cursed side of your Fate token face up to indicate you are cursed. If you manage to brew a Potion that lifts your curse, you'll flip your Fate token to the blessed side to indicate you are no longer cursed (and can start enjoying the blessings of the Zodiac). If you don't lift your curse by the end of the game, you cannot become the Supreme Witch and are unable to win the game.
Alchemy cards (Secrets of Alchemy expansion): When visiting the Elder Witch's Shop you will be able to perform Alchemy. Each Alchemy card specifies a Formula and the Products you will collect when you perform that Alchemy.
Gold tokens (Secrets of Alchemy expansion): Alchemy often produces Gold, a coveted material that you may spend to help you learn Recipes or keep to gain Star Power at the end of the game.
Crystal tokens (Secrets of Alchemy expansion): Some Alchemy will produce Crystals, a powerful material which you may add to your Cauldron to increase the amount of Star Power you gain when brewing Potions.
Sludge tokens (Secrets of Alchemy expansion): Frequently, Alchemy will also produce Sludge, a harmful material that is a blight upon the Garden, withering away the Ingredients that bloom there.