Myrmidons
Myrmidons Rulebook
Table of Contents
Table of Contents
Material
The base game contains 12 myrmidon pieces (2 each of 6 different types), a 6x7 checkered board and a cotton case. This is all you need to play the game.
If you wish to try other combinations of myrmidons, you can purchase the Myrmidons Expansion, which contains 28 additional pieces (2 each of 14 new different types). See 'Expansion' at the end of the rulebook.
The Myrmidon Piece
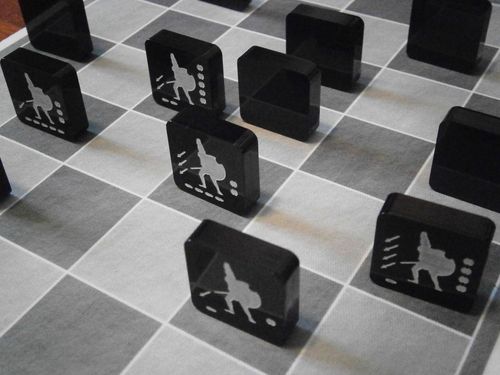
A Myrmidon piece is a thick block that shows a picture of a myrmidon warrior. Each myrmidon has different values of attack, defense and movement capacity.
The left area of the piece - next to the sword - shows the sword value (attack). The right area - next to the shield - shows the shield value (defense). The bottom area (below the feet) shows the maximum movement capacity. All values range from 1 to 5. With the exception of the Commander, the three values add up 9 points for each myrmidon. Commanders have a value of 1 for each of the three abilities.
Myrmidon example: sword 3, shield 2, movement 4.
The Commander (1-1-1).
Notice that when a block is placed standing up, only her owner can see the values, but the opponent can't.
Setup
Split the pieces in two groups of 6 so that both players have the same type of pieces (equal teams).
Now place the board between the players, so that the shortest side is in front of each player.
Each player then places her army on the board by deploying one piece on each square on her first row standing up, so that only she can see the values of her myrmidons.
Notice that there are 720 different starting combinations for each army, which means more than half a million different setups.
There cannot be more than one myrmidon on the same board cell during the game.
Rules
The initial player is determined randomly. Players take alternate turns during the game.
On her turn, a player must either move one of her myrmidons or give an order with her Commander.
Moving a Myrmidon
A myrmidon can move up to as many spaces as its maximum movement capacity ('feet' value) in any direction (orthogonal or diagonal), without jumping over other pieces. It will 'fight' with an enemy myrmidon if it ends its movement on the same space. In order to resolve the fight both players reveal the values of the myrmidons involved in it:
-
If the attacking myrmidon has a 'sword' value equal or higher than the defending myrmidon's 'shield' value, the defending myrmidon is removed from the game.
-
If the attacking myrmidon has a lower 'sword' value than the defending myrmidon's 'shield' value, the attacking myrmidon is placed on the previous space (the attack is repelled).
After resolving the attack, both pieces are placed standing up again, so only their owners can see the values.
Variant: If you don't like memory games, keep the revealed pieces facing up, so both players can see the values. Many players prefer this variant.
Diagram captions from the rulebook: "A myrmidon attacks." "If the sword value is equal or higher than the defender's shield then the defender is removed and the attacker occupies its place." "But if the attacker's sword value is lower than the defender's shield value, the attacker is repelled to the previous space."
Notice that the Commander can be captured by any piece, as the value of its shield is 1.
Giving an Order with your Commander
When giving an order with your Commander, you can move as many myrmidons as you wish at once in the same direction (in any order), as long as they are adjacent (even diagonally) to your Commander at the start. The Commander is moved, too. Attacking rules apply as normal, but in case an attacking myrmidon loses a fight, it is repelled to the previous space, together with all the myrmidons along the line behind it. Notice that this action may reveal the position of your Commander!
Example: The Commander (green) and 3 units surrounding it move in the same direction. The Commander and two other units move one space diagonally, and the third unit moves 4 spaces in the same direction. One of them engages in a fight. If it loses, it will be repelled to the previous space and the Commander behind it will be repelled too.
Goal and Game End
You win by achieving at least one of these goals:
-
Eliminating the opponent's Commander.
-
Eliminating 4 of the opponent's pieces.
-
Having one of your pieces on your opponent's back rank (the row closest to him) at the start of your turn.
Expansion
If you've purchased the expansion, you can use the additional blocks in several ways (upon agreement):
-
Split all the blocks in two equal teams. Each player then secretly chooses 5 myrmidons from her team plus the Commander (so the armies can be different).
-
Both players agree on the combination of myrmidons so both armies are equal.
-
Place all blocks except the Commanders facing down. Each player takes 5 of them randomly.
-
You can also use 12 myrmidons per team, instead of 6 (by placing them in the 2 first rows).
Strategy Tips
The Commander is very powerful if used properly. But never attack with a group of myrmidons so that the Commander can be directly attacked after the move.
The Chelone Formation (turtle) allows you to move 4 myrmidons at once without revealing your Commander.
As a fight is won with a sword value higher or equal than the opponent's shield value, offensive play is recommended.