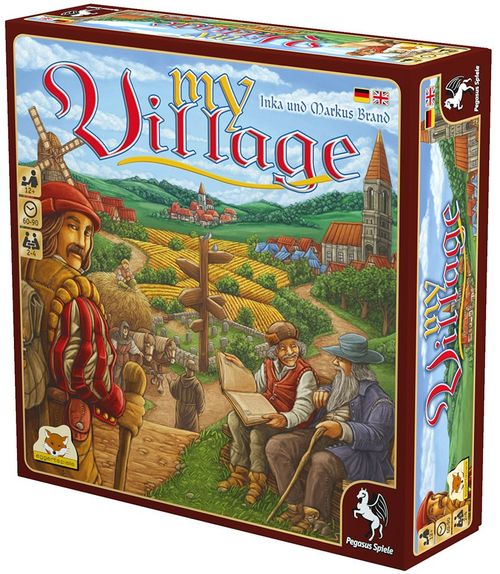
My Village
My Village Rulebook
Table of Contents
Table of Contents
Components
- 1 main board
- 4 village boards
- 4 headmen (1 of each player color)
- 4 time markers (1 of each player color)
- 12 standard dice: 8 white dice, 3 black dice, 1 gray rat die
- 1 rat
- 1 scoring note pad
- 58 story point markers (31 of value 1, 14 of value 2, 13 of value 5)
- 70 black markers
- 4 day laborer tiles
- 4 grim reapers
- 1 starting player hand (palm side / back side)
- 4 "2/12"-value tiles
- 4 overview cards (Overview: Preparation phase / Overview: Taking your turn)
- 104 village cards:
- 4 church cards
- 12 monk cards
- 4 council chamber cards
- 4 meeting place cards
- 8 field cards
- 19 travel cards
- 20 craft building cards
- 33 customer cards
Setup
-
Place the main board in the middle of the table.
-
On the main board, place the gray rat die onto its space next to the graves. Place the rat onto the space of the rat track that corresponds to the number of players.
-
Place the story point markers (values 1, 2 and 5), the 4 day laborer tiles and the 70 black markers below the main board as a general supply.
-
Sort the village cards by type and place them around the main board as the general card display. Since the game will take up a lot of space on your table, the following setup example is meant to keep the required space as small as possible. However, depending on the table space you have available, you may arrange the cards differently.
General Note: Placing a card "face down" means: you can see the dark-rimmed side of the card (usually with a black banner). Placing a card "face up" means: you can see the light-rimmed side of the card (usually with a white banner).
- Church cards: Place the 4 church cards face down to the left of the main board. Arrange them in any order and form a column in which the cards overlap and the top half of each card is visible.
- Council chamber cards: Place the 4 council chamber cards face down to the left of the church cards. Arrange them in any order and form a column in which the cards overlap and the top half of each card is visible.
- Meeting place cards: Place the 4 identical meeting place cards as a face-down stack above the council chamber cards.
- Monk cards: Each of the 12 monk cards has a symbol in its bottom right corner. There are 3 monks with a quill, 4 monks with a goblet and 5 monks with a rosary. Form a face-up stack for each symbol and shuffle each stack separately. Then place these 3 stacks face down to the right of the meeting place cards.
- Field cards: Place the 8 identical field cards as a face-down stack to the right of the monk cards.
- Customer cards: Shuffle the 33 customer cards and place them as a face-down stack onto their space on the main board. Then draw 6 cards and place them face up in 3 rows of 2 cards each to the right of the main board (as indicated by the 3 wooden arrows). These 6 customer cards form the customer display.
- Travel cards: Each of the 19 travel cards has a letter in its bottom left corner. There are 4 cards of each of the letters A, B, C, D and 3 cards of the letter E. Form a face-down stack for each letter, shuffle each stack separately and place these 5 stacks in a row from A to E on the upper right side of the customer cards (on the same level as the field cards).
- Craft building cards: There are 5 types of craft buildings (each showing a specific good): stables (horse), brewery (beer), smithy (plow), office (scroll) and wainwright (wagon). Sort them by type and put them in a row beneath the travel cards. For each type of craft building, form a face-down column in which the 4 cards of that type overlap (in any order) and the top half of each card is visible.
Before you start: a few important annotations
The black markers. The black markers are universal markers. They are used to mark a variety of things. On the light-rimmed side of many cards you can find octagon spaces. Each of these octagon spaces can hold 1 black marker. Depending on the kind of card, this marker may represent a good (for example a scroll) or mark something as activated or used.
On the village boards, black markers represent:
- villagers of a certain profession
- coins in the money barn
- descendants in the school
The areas of your village. In the course of the game, you will add cards on the sides of your village board to develop your village. Each of these cards must be placed in the appropriate profession area:
- Religion area (church, monks)
- Council area (council chamber, meeting place)
- Harvest area (fields)
- Travel area (travel cards)
- Crafts area (craft buildings)
- Market area (customers)
The village board is laid out as follows: the Religion area and Council area are on the left, the main house, money barn, story tree and school are in the middle, and the Travel area, Crafts area and Market area are on the right, with the bridge and Harvest area also present.
5 of these profession areas have an octagonal space for a villager of their specific profession: Abbot, Councilman, Traveller, Craftsman, Merchant.
Important: A profession area is only considered active if its villager is present (i.e. a black marker is on its villager space). Only then are you able to add new cards to that area and use those cards' actions and benefits. The harvest area is the only one that is always considered active, as it has no space for a villager.
Time as "currency" and the grim reaper. The main "currency" in this game is time and most actions consume it. Whenever you must pay time (every hourglass represents one unit of time), move your time marker on your life time track forward (clockwise) the appropriate number of cloud spaces.
If you move your time marker past the bridge (which is not a cloud space and is therefore skipped), place your grim reaper onto your time marker. Move the grim reaper along with your time marker until your turn is completely finished. This is to indicate that one of your villagers passes away at the end of your turn (see Check whether one of your villagers passes away).
Story points. Story points are prestige points that are not safe yet. Story points are represented by single pages with a brown number, whereas prestige points are represented by books with a red number. Each time you gain story points, take them as markers from the supply and place them onto the story tree of your village board.
Playing the Game
The game is played over several rounds. Each round consists of a Preparation phase and an Action phase.
Preparation phase
At the beginning of each round, the starting player (the owner of the starting player hand) must carry out the following 2 steps:
- He places 1 story point onto the palm of the starting player hand, irrespective of how many story points are already on it. (If the hand has its back side up, he must flip the hand first.)
- Then he takes all the white and black dice and rolls them. These rolled dice form the dice pool for this round's Action phase.
Example: In a 3-player game, Mike is the starting player. He begins the round by adding 1 story point to the palm of the starting player hand and then rolling the 8 dice (6 white and 2 black). These 8 rolled dice form the dice pool for this round's Action phase.
Action phase
Beginning with the starting player and then in a clockwise direction, each player takes one turn by removing exactly 2 dice from the dice pool and immediately using the sum of their pips to activate one or more banners (see Taking your turn below).
In a 3- or 4-player game, the action phase ends after each player has taken one turn.
In a 2-player game, the action phase ends after both players have alternately taken 2 turns each.
After the Action phase has ended, check if the game end has been reached. (The game end is reached as soon as a certain overall number of villagers have passed away — see End of the Game.) If the game end has not been reached, a new round begins with the Preparation phase.
Taking Your Turn
When it is your turn, you must carry out the following 3 steps in this exact order:
- Create your banner value
- Activate banner(s)
- Check whether one of your villagers passes away
After that, your turn ends.
I) Create your banner value
Choose exactly 2 dice from the dice pool. (The more players that have taken their turn before you, the fewer dice are available in the dice pool.) Remove the 2 chosen dice from the pool and sum up their shown pips. The result is your banner value.
Note: Your banner value is always the sum of the 2 dice, you cannot use the value of only one die while ignoring the other or use both values separately.
The colors of your chosen dice (white and/or black) have no influence on your banner value. However, the black dice are plague dice and have an undesirable side effect: for each black die that you choose, you must immediately pay 2 time (by moving your life time marker 2 cloud spaces forward on your life time track). If you choose 2 black dice, you must pay 4 time, of course.
However, you can change the value of each of your 2 chosen dice in the following ways:
a) For each coin (i.e. black marker on your money barn) that you return to the supply, you can increase or decrease the value of a die by 1 (to a minimum of "1" or a maximum of "6").
b) For each black marker that you return to the supply from your meeting place (provided you have acquired one on an earlier turn), you can turn a die to a value of your choice (between "1" and "6"). See Meeting place cards for details.
Example: It is Mike's turn and he would like to create a banner value of "3". He must remove exactly 2 dice from the dice pool to do this. He could choose the white "1" and the black "2". But he does not want to pay 2 time for that black die. Instead, he chooses the white "1" and the white "4" and pays 2 coins to decrease the "4" to a value of "2". Now, the white "1" and the white "2" add up to the banner value of "3".
II) Activate banner(s)
Activating a banner lets you perform its specific banner action. Only via banner actions can you add cards to your village, generate coins, produce goods or the like. After you have created your banner value, you must use it in one of the following ways:
a) activate exactly 1 black banner that shows that banner value, OR b) activate 1 or more white banners of your village that show that banner value, OR c) activate the black "?" banner in your village.
a) Activate 1 black banner
All cards in the general display (except the customer cards) show a black banner. In addition, the starting player hand and the steward's office on the main board show black banners.
- Each of these black banners includes 1 or 2 banner values.
- In addition, most of them include a time cost (hourglasses).
- Some of them also include an additional cost (goods/coins).
You may now activate exactly one of these black banners if you meet all of the following requirements:
- The banner value of your 2 dice matches the banner value (or one of the two values) shown in the banner exactly.
- You must be able to pay the time and any additional costs shown on the banner. (In the case of coins, return the required number of black markers from your money barn to the supply. In the case of goods, return black markers from the appropriate goods spaces of your village cards to the supply.)
- Also, if it is the black banner of a card, there usually are further banner activation requirements depending on the kind of card (see below).
Activating the black banner of a card from the general card display. By activating the black banner of a card in the general card display, you add this card to your village. Besides matching the banner value and paying the time and additional costs, there are usually further banner activation requirements you must meet. Among other things, these requirements may include having the villager of the desired type present (i.e. the respective profession area is active) or being limited to one card per type.
The details of each card type can be found in its own section (see The Village Cards). If there are further banner activation requirements for the card, you find a summary of those in the silver boxes.
Example: If you want to add the following council chamber to the council area of your village, your council area must be active (i.e. you must have a black marker on your councilman space) and you may not already own a council chamber (because each player may only have 1 council chamber in his village). Only if you meet these requirements are you allowed to activate the council chamber's black banner.
If you match the banner value and meet all requirements, take the chosen card from the display. Then pay its time cost by moving your time marker forward accordingly. Afterwards, pay the additional cost (if any) by returning the appropriate black markers from your village to the supply.
Finally, perform the banner action shown beneath the black banner. The black banner actions of all cards include an icon which simply means: flip the card to its light-rimmed side and place it in the appropriate area of your village. Most banner actions also include a card-specific action. For details of each card's banner action see its section under The Village Cards.
Example (continued): After you have activated the black banner of this council chamber (by matching the banner value of "3" and paying 4 time), you receive 2 coins (i.e. you place 2 black markers from the supply onto your money barn). Then you flip the council chamber card to its light-rimmed side and place it in your council area.
Activating the banner of the starting player hand. By activating the black banner of the starting player hand, you become the starting player of the next round. To activate it, you only need to match the banner value of "4" or "10". There are no further costs or requirements.
When you activate it, take the hand and all the story points on it. Place these story points onto your story tree and place the hand in front of you, flipping it to its back. You will be the starting player of the next round and will then carry out the preparation phase of that round (including flipping the hand to its palm side again).
Important:
- In a 3- or 4-player game: you are not allowed to activate the starting player hand (and thus take the story points on it) if you are the starting player yourself.
- In a 2-player game: on your first turn of a round, you are not allowed to activate the starting player hand if you are the starting player yourself. However, on your second turn of a round, you are allowed to activate the starting player hand even if you are the starting player yourself.
- The hand can never be taken by any player while it shows its back side!
Activating the banner of the steward's office. By activating the black banner of the steward's office, you attract customers to your village, who you can serve with goods on later turns.
To activate the steward's office, you must match the banner value of "4" or "10". Then you choose 1, 2, 3 or 4 customer cards from the customer display next to the steward's office and place them face up in a row next to your village's market area (in any order).
The number of cards you take determines the price you must pay:
- If you take 1 card, pay 1 time.
- If you take 2 cards, pay 2 time.
- If you take 3 cards, pay 1 coin and 2 time.
- If you take 4 cards, pay 1 coin and 3 time.
Then, bring the display next to the steward's office up to 6 cards again by revealing the required number of cards from the face-down customer card stack. If the stack should run out, the customer display is not filled up anymore.
Important: Adding customers to your market neither requires you to have your merchant present nor any goods.
Each customer card in your market area stays there until it is served. You serve a customer by activating its white banner with the appropriate banner value (see section b below). As long as it has not been served, a customer card is not worth any prestige points.
Example: Mike activates the black banner of the steward's office and chooses 3 cards from the customer display, which he places in his market area. Since he chose 3 cards, he must pay 1 coin and 2 time. Afterwards, he refills the customer display with the top 3 cards from the customer card stack.
b) Activate 1 or more white banners of your village
Many of the cards that you add to your village (with their light-rimmed side up) show white banners (only the monk and travel cards do not). Also, there are 2 white banners on your village board: the play banner and the school banner.
- Each white banner includes 1 or 2 banner values (in the case of cards, this is the same value as on the dark-rimmed side).
- Some customer cards include a question mark as banner value (which means they can be activated with any banner value).
- Some white banners include a time cost (but never more than 1 hourglass).
- Customer cards also include an additional cost in goods.
Instead of activating 1 black banner on your turn, you may activate 1 or more white banners that are all part of your village and for which you meet the following requirements:
- Each white banner that you activate must match the banner value that you created with your 2 dice exactly (or show a question mark).
- You must be able to pay the individual costs of each banner you activate (time and additional costs).
- You can only activate the banner of a card if its profession area is active (i.e. the villager of that profession is present).
If you activate more than 1 white banner, you can do so in any order. There is only one exception: if you activate the white banner of your meeting place, it must be the very last banner that you activate on your turn. You are not allowed to activate any banner more than once per turn.
To make sure that you do not miss anything, always activate white banners one after another by completely resolving the costs and actions of one banner before moving on to the next.
Activating the white banner of a card in your village. By activating the white banner of a card, you perform its banner action. Remember, besides matching the banner value and paying the time and additional costs of that card, its profession area must be active (i.e. there must be a black marker on its villager space). Then perform the banner action shown beneath the banner of that card. In most cases, this is the same action as the card specific action which you performed when you added the card to your village (sometimes with slight modifications). For details of each card's banner action see its section under The Village Cards.
Activating the play banner. When you activate your white play banner, place 1 story point from the supply onto your story tree. There are no further costs or requirements.
Note: The 2 banner values on the play banners are different for each player. These values correspond to the banner values of the craft buildings and are intended to give each player a slightly different preference.
Activating the school banner. By activating the banner of your school, you can train descendants to replace villagers that have passed away.
- If your school is empty when you activate the school banner, place 1 black marker from the supply onto the left octagonal space of your school. There are no further costs or requirements.
- If there is already a black marker on the left octagonal space when you activate the school banner, you can choose to either: a) move the present black marker to the right octagonal space, OR b) pay 1 time and place it onto an empty villager space of your choice.
- If there is a black marker only on the right octagonal space when you activate the school banner, you can choose: a) either place a new black marker from the supply onto the left octagonal space, OR b) pay 1 time and place the black marker from the right octagonal space onto an empty villager space of your choice AND in addition place 2 story points onto your story tree.
- If both octagonal spaces are covered when you activate the school banner, pay 1 time and place either the black marker from the left space onto an empty villager space of your choice OR do so with the black marker from the right space (which also gives you 2 story points).
Example: The banner value that Mike created with his 2 chosen dice is "3". He decides to use this banner value to activate several white banners in his village that show a banner value of "3". First he activates the white banner of his school. Since there is already a black marker on the left octagonal space of his school, he decides to move that marker to the empty councilman space of his council area by paying 1 time. As his council area is now considered active again, he then activates the white banner of his council chamber (which also has a banner value of "3") by paying 1 time. For this, he receives 2 coins. Finally, of the customer cards in his active market area, he activates the white banner showing a question mark by returning 2 scrolls (2 black markers) from his office to the supply. This customer is now served and so Mike flips the card to its dark-rimmed side and places it beneath his market area. If he had a wagon in his village, Mike could now also serve the customer showing a banner value of "3/11". But since he does not have a wagon, he finishes his turn.
c) Activate the black "?" banner
Instead of activating 1 black banner or any number of white banners with the banner value you have created, you can activate the black "?" banner on your village board. It does not matter which 2 dice you remove from the dice pool to activate it (but you must remove 2 dice and may not activate any other banner).
When you activate the black "?" banner, pay 1 time. Then move your headman along the path to the next space.
- If your headman is on the main house when you activate the banner, move the headman to the space with the coin. For this you immediately receive 1 coin.
- If your headman is on the space with the coin when you activate the banner, either move your headman back to the main house OR move it to the space showing 3 story points. If you choose the latter, place 3 story points from the supply onto your story tree.
- If your headman is on the space showing 3 story points when you activate the banner, move the headman back to the space with the coin (and collect 1 coin again).
Important: Each time you move your headman back to the main house, immediately take all the story points currently placed on your story tree and put them on your main house. Only story points placed on your main house are considered safe and count as prestige points at the end of the game.
III) Check whether one of your villagers passes away
After you are completely finished activating banners, check whether one of your villagers passes away:
If you did not move your time marker past the bridge during your turn, your turn ends.
If you did move your time marker past the bridge during your turn (and thus have placed your grim reaper onto it), one of your villagers passes away and so you must carry out all of the following steps in this order:
-
Remove your grim reaper from your time marker and place your grim reaper back onto the bridge. (The time marker remains where it is.)
-
Choose any one of your villagers. (Important: black markers in the school are not considered villagers.) Remove that villager from its villager space and place it onto a coffin space of the main board. (Important: do not place it back in the supply.)
The coffin spaces of the main board are divided into chronicle spaces and anonymous grave spaces. If there is a free chronicle space of the deceased villager's profession (there are 2 spaces of each profession), place that villager onto this chronicle space. For this, you receive immediately 1 or 2 story points that you must place onto your story tree right away. Otherwise, place your deceased villager onto the free anonymous grave space that shows the lowest digit. (These digits have no other purpose than to make it easier for you to count the number of deceased villagers.)
-
Take the gray rat die and roll it. Then move the rat on the rat track as many spaces forward as the die shows. If the rat ends up on a gray or red space of the rat track, leave it there. Your turn ends immediately.
However, if the rat reaches the rat invasion space, its movement ends there. Now, each player (including you) has to deal with a rat invasion. Each player counts the number of story points on his own story tree and immediately returns half of them (rounding down) to the supply. Once players have dealt with their rat invasion, place the rat back onto the space of the rat invasion track that corresponds to the number of players. Then, your turn ends.
Note: Since the roll of the gray die can move the rat up to 6 spaces, the color of the spaces of the rat track gives a clue as to whether it is possible for the rat to reach the rat invasion space on the next roll. When the rat is on a gray space, it cannot reach the rat invasion space on the next roll. When the rat is on a red space, it could very well reach the rat invasion space on the next roll.
Example: In a 3-player game, Mike has just finished activating several white banners in his village. Now he checks whether his grim reaper sits on top of his time marker (because he had moved it past the bridge during this turn). Since his grim reaper does sit on his time marker, he first places it back onto the bridge. Then he decides that his merchant will pass away and so removes it and places it onto the second blue chronicle space. For this, he immediately receives 1 story point from the supply, which he places onto his story tree. Afterwards, he rolls a "5" with the gray rat die. Since the rat is already 4 spaces before the rat invasion space, the "5" is more than enough to take the rat straight to the rat invasion space. Therefore, each player must return half of his story points from his story tree to the supply. As Mike has 5 story points on his story tree, he returns 2 of them to the supply. Tom, who has only 1 story point on his tree, keeps that 1 story point and Kate, who has 8 story points on her tree, must return 4 of them. Afterwards, the rat is placed back onto the 3-player starting space of the rat track and Mike's turn ends.
The Village Cards
Craft building cards
There are 5 types of craft buildings, each of which produces a specific good: stables (horse), brewery (beer), smithy (plow), office (scroll) and wainwright (wagon).
Of each type there are 4 buildings. No player may own more than 1 building per type in his village. (So even in a 4-player game, each player would be able to acquire all 5 types if he wanted to.)
The only difference between the buildings of the same type is their partly different banner values. When you want to add a certain type of craft building from the card display to your crafts area, you may choose any card of its column (whose black banner you must activate in order to add it, of course).
Further banner activation requirements (most craft buildings):
- Your craftsman must be present
- You may not already own that type of craft building
Banner action: Flip the card and add it to your crafts area. Then place 1 black marker from the supply onto an empty goods space on the light-rimmed side of this card.
White banner action: Place 1 black marker from the supply onto an empty goods space of this card.
Field cards
There are 8 identical field cards, of which you can own as many as you want. The main purpose of fields is to generate coins. The harvest area of your village is the only one without a villager space. It is therefore always considered active!
Banner action (black banner): Take 1 coin (by placing 1 black marker from the supply onto your money barn). Then flip the card and add it to your harvest area.
On its light-rimmed side, each field card has 1 space for 1 plow. At any point during the game, you may move a plow (black marker) to that plow space (either from your smithy or your guild council). You are not allowed to move a plow from one field card to another. A plow that you place on a field card remains there as long as you want. (It is still considered a regular plow that you may use as payment whenever an additional cost demands a plow.)
White banner action: Take 1 coin (by placing 1 black marker from the supply onto your money barn). If there is a plow (black marker) on the plow space of this field, take 1 coin in addition. (Do not return the plow to the supply for this.)
Customer cards
To add customer cards to your market area, you must activate the black banner of the steward's office on the main board (see Activating the banner of the steward's office).
Reminder: Adding customers to your market area neither requires you to have your merchant present nor any goods.
However, only by serving a customer (i.e. activating its white banner in your market area) do you gain its prestige points.
Further banner activation requirements: Your merchant must be present (for the black banner used by the steward's office).
Banner action: Flip the card and place it beneath your market area (forming a served customer stack).
Each customer card's white banner requires paying goods to serve it — for example, 1 good of any type, or 2 scrolls — and can be activated with a specific banner value or (on some cards) with any banner value.
Travel cards
Travel cards give prestige points at the end of the game. The travel cards come in 5 stacks (each marked with a letter from A to E in the bottom left corner). The dark-rimmed side of each card in the same stack is identical. However, the light-rimmed side of the cards may differ in prestige point value and additional costs. Therefore, when activating the black banner of a travel card, you never quite know what you will get.
When adding travel cards to your travel area, you must do so in alphabetical order: starting with "A" and later continuing with "B", then "C" and so on. You may not have more than 1 card of each letter. Once you add the card of letter "E", you cannot travel anymore. Also, the stack of the "D" cards includes a card with a chapel (worth 8 prestige points). If you have this card in your travel area, your travels end as well (i.e. you cannot add an "E" card).
To travel, take the top card of the stack of the appropriate letter and activate its black banner as usual. Then flip it and add it to your travel area. Travel cards have no white banner on their light-rimmed side (and thus cannot be activated). Instead, some of them have a gray banner in their upper right corner that shows coins, beer or time. This gray banner only becomes relevant when you continue to travel (by adding the card of the next letter): then, the costs shown on this preceding gray banner must be paid in addition to the usual costs for activating the black banner of that next travel card.
Further banner activation requirements:
- Your traveller must be present
- You must add the cards in alphabetical order and may not have more than 1 card of each letter
- If your last added card shows a gray banner with a cost, you must pay that cost when you add the next travel card
- If you added the "D" card showing the chapel, you may not add an "E" card at all
Example: To continue travelling, Mike wants to add the top card of the "C" stack to his travel area. To do so, Mike must not only match the banner value of "7", pay 2 time and pay either 1 wagon or 2 coins, but must also pay 1 beer (because the "B" card in his travel area shows a gray banner with 1 beer).
Church cards
There are 4 church cards, each with a unique benefit:
- The sanatory church (prevents rat invasions)
- The cloister church (already has 1 monk)
- The trading church (attracts additional customers)
- The travel church (gives a benefit when travelling)
To add a church to your religion area, choose any card from the church card column and activate its black banner as usual. No player may add more than 1 church to his village.
Further banner activation requirements:
- Your abbot must be present
- You may not already have a church
The light-rimmed side of the churches do not show a white banner. Instead they give a unique permanent benefit. Important: You can only use this unique permanent benefit if your abbot is present.
Sanatory church: Twice per game, you can avoid a rat invasion for your village (while the other players have to deal with it as normal). When a rat invasion occurs, you may choose to place a black marker from the supply onto a free octagonal space of this card. If you do, you avoid losing any story points during that rat invasion. If both octagon spaces are covered, you cannot avoid rat invasions anymore (the markers simply mark the spaces as used).
Trading church: When you activate the black banner of the steward's office in order to attract customers to your market area, first reveal the top card of the customer stack on the main board and add it to the customer display (bringing it to 7 cards). Then add 1 of these cards to your market area (free of charge), before choosing any other customer cards for which you pay the usual costs (i.e. you could take up to 5 customer cards: 1 free of charge and 4 as usual). Afterwards, bring the customer display back up to 6 cards.
Travel church: After you have activated the black banner of a travel card and had a look at its light-rimmed side, you can decide to place it back at the bottom of its stack and instead draw the next travel card from the same stack. That card, however, must be added to your travel area. Afterwards, shuffle the stack from which you drew the card. (You can use this benefit once per letter.)
Cloister church: This church already comes with a monk (church window) that counts towards the total number of church windows you have at the end of the game (see Monk cards).
Banner action: Flip the card and add it to your religion area.
Monk cards
Monk cards are added to your church and provide an immediate one time special banner action. Also, at the end of the game, they give prestige points according to how many of them you have. However, you are not allowed to have more than 6 monks in total.
The monk cards are displayed in 3 stacks. To add a monk to your church, choose the top card of any stack and activate its black banner as usual.
Monk cards have no white banner on their light-rimmed side, but rather show the back nave of the church as well as a church window with the shadow of a monk. Once they have been added to your village, their only purpose is to keep track of their number. Therefore, arrange them on the left side of your church in an overlapping row, in which the window of each card is visible.
At the end of the game, you receive prestige points for your total number of church windows (according to the table in the upper left corner of your village board).
Important: If you have the cloister church, you may only add a maximum of 5 monks to it (because you already start with 1 church window).
Further banner activation requirements:
- Your abbot must be present
- You must have a church
- You may not already have 6 church windows
Different monk cards have different banner actions, for example:
- Place the number of story points shown (2 or 3) onto your story tree, then flip the monk card and add it to your church.
- Immediately activate the black "?" banner on your village board once (i.e. pay 1 time and move your headman 1 space along its path), then flip the monk card and add it to your church.
- Immediately activate the white banner of your school once (just as if you had chosen it as your activation action). You may not activate any other white banners. Then flip the monk card and add it to your church.
- Immediately activate the black banner of the steward's office once (just as if you had chosen it as your activation action). However, you may only take 1 or 2 customer cards from the customer display (paying the usual costs). Then flip the monk card and add it to your church.
Each of these banner actions comes with an additional cost of 3 units total (comprising any combination of goods and/or coins), or a specific combination such as 2 horses, 2 coins, or 1 horse and 1 coin, depending on the card.
Important: If you have the trading church, you can use its benefit here as well (adding 1 card to the display and taking 1 additional card free of charge) when activating a monk that grants the steward's office action.
Meeting place cards
There are 4 identical meeting place cards, of which each player can only own one.
The meeting place cards provide more flexibility when creating banner values. They also come with a "2/12"-value tile that can be added to any white banner in your village.
Further banner activation requirements:
- Your councilman must be present
- You may not already own a meeting place
- If you activate several white banners (of the banner value "2/12") on your turn, you may only activate the meeting place as the very last one
Banner action (black banner):
- Take one "2/12"-value tile from those next to the meeting place cards in the display and place that tile beside any white banner of your village (card, school or play banner).
- Then place 1 story point from the supply onto your story tree.
- Then flip this card and add it to your council area.
- Finally, place 1 black marker from the supply onto an empty octagonal space on the light-rimmed side of this card.
When choosing 2 dice to create your banner value, you may return black markers from this card to the supply. If you return 1 marker, you may turn one of your chosen dice to a value of your choice (between 1 and 6). If you return 2 markers, you can turn both dice to any value.
White banner action:
- If you like, move your "2/12"-value tile, placing it beside any white banner of your village.
- Then place 1 story point from the supply onto your story tree.
- Finally, place 1 black marker from the supply onto an empty octagonal space of this card.
If your "2/12"-value tile is placed beside a white banner, you can also activate that banner with a banner value of "2" or "12". However, you must still pay the costs shown on the actual banner.
Example: You may activate this banner by using a banner value of either "2", "3" or "12" and paying 1 time.
- Each player may only own one "2/12"-value tile.
- If the "2/12"-value tile is placed next to a "2/12"-banner, it has no effect.
- If you serve a customer on which the "2/12"-value tile is placed, place the tile onto your meeting place afterwards. In all other cases, the tile remains where it is until you move it via the banner action of your meeting place.
Council chamber cards
There are 4 council chambers, each with a unique feature:
- The monetary council (generates coins)
- The area council (gives prestige points for certain village cards at game end)
- The population council (gives prestige points for living villagers at game end)
- The guild council (produces wild goods)
In order to add a council chamber to your council area, choose any card from the council chamber card column and activate its black banner as usual. No player may add more than 1 council chamber to his village. You may have 1 council chamber and 1 meeting place in your council area, irrespective of which you added first.
Further banner activation requirements:
- Your councilman must be present
- You may not already have a council chamber
Monetary council — banner action (black): Take 2 coins (by placing 2 black markers from the supply onto your money barn). Then flip the card and add it to your council area.
Monetary council — white banner action: Take 2 coins (by placing 2 black markers from the supply onto your money barn).
Area council — banner action: Flip the card and add it to your council area. Then place 1 black marker from the supply onto an empty octagonal space on the light-rimmed side of this card.
Any black markers that you place on the spaces of this card remain there until the end of the game. At the end of the game, you receive 1 additional prestige point for each card in your village whose octagonal space on this council has been covered with a marker. This applies to: travel cards, craft buildings, served customers (not-served customers in your market area do not count), church and monks, and fields.
Area council — white banner action: Place 1 black marker from the supply onto an empty octagonal space of this card.
Population council — banner action: Place 1 black marker from the supply onto an empty octagonal space of this card.
Population council — white banner action: Place 1 black marker from the supply onto an empty octagonal space of this card.
Any black markers that you place on the spaces of this card remain there until the end of the game. At the end of the game, you receive 4 prestige points for each living (present) villager of your village whose octagonal space on this council has been covered with a marker.
Guild council — banner action: Place 1 black marker from the supply onto an empty octagonal space on the light-rimmed side of this card.
The black markers on this card are wild goods. Whenever you have to pay a good as an additional cost (for example a horse), you can return a marker from this card to the supply instead. You can also place markers from this guild council as plows onto plow spaces of your field cards.
General Notes
- As you add cards to your village, you will require more and more table space. Especially on the right side of your village board, it can be helpful to reduce the needed space by arranging the cards in an overlapping row.
- Important: If the profession area of a card is not active (because the villager of that profession is not present), its banner cannot be activated. However, any black marker already placed on an octagonal space is valid (even if its profession area is no longer active). For example, produced goods can be used even if the craftsman is not present anymore. Also, at the end of the game, you get the prestige points of a card in any case, no matter whether its profession area is active or not.
- If you activate a white banner that allows you to place a black marker for which you have no free octagonal space left, you do not place that marker.
- When you activate a banner, you can always choose to forfeit its banner action in part or in full.
- Cards that you add to your village (and the prestige points on them) are safe. They cannot be removed in any way from your village, nor are you allowed to remove them deliberately. The customer cards are the only ones that must move within your village (from the market area to the served customer stack) in order to be worth any prestige points.
- All cards in the game are limited in number. If there is no card of a specific type left in the card display, you cannot get it.
- The story points, black markers and day laborer tiles are not limited in number. If you run out of these components, use a suitable replacement.
- You may not keep your story points hidden.
End of the Game
Depending on the number of players, the game ends at the end of the round during which a certain overall number of deceased villagers has been reached:
- A 2-player game ends when at the end of the round at least 9 coffin spaces (chronicle + anonymous grave spaces) of the main board are filled with black markers.
- A 3-player game ends when at the end of the round at least 14 coffin spaces of the main board are filled with black markers.
- A 4-player game ends when at the end of the round at least 18 coffin spaces of the main board are filled with black markers.
Once the game has ended, determine each player's total number of prestige points. Use the included note pad to write down the prestige points in each category to make the calculation of the total score easier.
Each player scores prestige points in the following categories of his village:
- Church area: Prestige points of a church + prestige points for the total number of church windows (according to the table in the upper left corner of each village board).
- Council area: Prestige points of a meeting place + prestige points of a council chamber.
- Harvest area: 1 prestige point for each field card.
- Travel area: Prestige points of each travel card.
- Served customers: Prestige points of each card in the served customer stack (customers that have not been served are not worth any prestige points).
- Saved story points on the main house.
- Day laborers: Minus 5 prestige points for each day laborer tile.
- Starting player hand: 1 prestige point for the player owning the starting player hand (any story points on the starting player hand are ignored).
Story points on the story trees, coins and goods are not worth any prestige points (but count as a tie-breaker).
Example: At the end of the game, Mike's village looks like this: he has the cloister church and a total of 4 church windows = 14. He has the area council on which he placed 3 black markers. For each card of the categories that he marked (travel area, served customers, church area), he receives 1 prestige point: 2 travel cards = 2, 5 served customer cards = 5, 1 church card + 3 monk cards = 4; total = 13. Also he has a meeting place. He has 1 field = 1. He has 2 travel cards = 8. He has 5 served customers = 14. He has 7 story points on his main house = 7. He has no day laborer tile = -0. He has the starting player hand = 1. Total prestige points = 58.
The player with the most prestige points wins the game.
In the case of a tie, each tied player sums up:
- the number of coins he has left
- the number of goods he has left (including wild goods, but excluding any other black markers)
- the number of story points he has left on his story tree.
Whoever has the highest total of these things wins. If this still does not break the tie, the victory is shared.