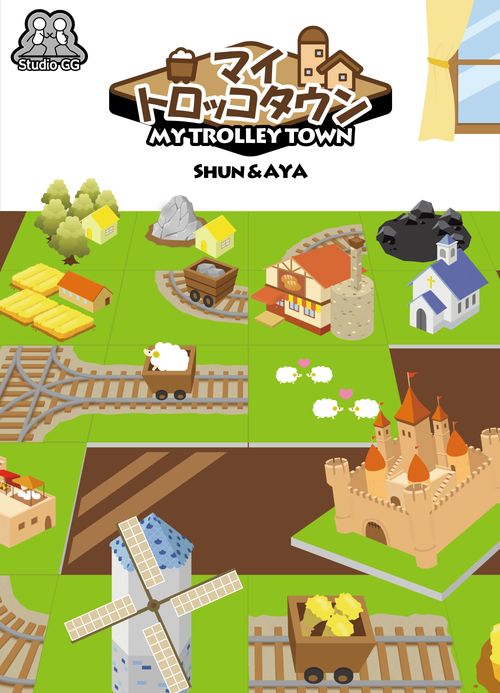
My Trolley Town
My Trolley Town Rulebook
Table of Contents
Table of Contents
Objective
This game is a tile-placement, miniature-garden game. At the start of the game your town consists only of a "Forest" and a "Mountain". From there, using the wood and stone they produce, you acquire tiles placed on the central board, build them, and develop your own town.
Produce resources, process them and convert them into victory points, and build the most wonderful factory town of all!
Components
- Rulebook: 1
- Building list: 1
- Game board: 1
- 60-point stickers: 1 sheet (includes 4 spares) - red 60, blue 60, yellow 60, black 60. Stick each on one side of the victory point marker of the same color.
- Wooden pieces
- Resource pieces: 120 in total - green (wood) 25, gray (stone) 20, yellow (wheat) 25, black (coal) 20, white (sheep) 30
- Victory point markers: 4 (red, blue, yellow, black)
- Round marker: 1
- Tiles: 132 in total
- Transport routes: 44 (16 straight, 28 curve). The back of each is a three-way junction (switch).
- Initial buildings: 8 (4 Forest, 4 Mountain)
- Basic buildings: 21 - Field 6, Charcoal Kiln 4, Meadow 4, Bakery 3, Ranch 3, and the Rebuild tile 1. The back of each basic building is gray.
- Special buildings: 58 - A: 22, B: 24, V: 12. Each type has a different back.
- Start player marker: 1
How to Read the Tiles
Types of tiles
- Transport routes
- Basic buildings (the back is gray)
- Special buildings: A, B, V (each type has a different back)
- Other (initial buildings, Rebuild tile)
Reading a building tile
- Name
- Construction cost: paid when building the tile.
- Resource spaces: show the maximum number of resources that can be on the tile.
- Contents of the effect: for example, on a tile showing "3 wheat", you gain 3 wheat.
- Timing of the effect:
- Immediate
- On production
- On construction
- On transport start
- On processing
- At game end
Examples of tile effects
(See the building list or the icon quick reference on the back cover for details.)
- An effect showing a drawn item means gain it (gained resources are placed on top of the tile). For example: gain 1 wheat; gain 2 victory points.
- An effect showing resources on the left of an arrow and resources or victory points on the right means convert the left into the right. For example, "wheat + coal -> 6 victory points": pay 1 wheat and 1 coal, and gain 6 victory points.
Setup (1)
Participating players sit around the table and arrange things as follows.
- Place the player markers matching the number of players on the 0 space of the victory point track, with the side without a sticker face up. When you gain victory points, advance your marker.
- Place the transport routes face up, matching the picture. The back of every transport tile is a three-way junction. Some are stacked as three-way junctions.
- Place all the basic buildings face down, matching the picture, then turn the top tile of each stack face up. Note: place the Field in 2 places, 3 tiles each. Use the Rebuild tile only in a 4-player game.
- Each participating player takes the "Forest" and "Mountain" tiles that show a house of the same color, and places them in front of themselves so that their edges touch. This house color is your player color.
Setup (2)
- Gather the resource pieces in several groups in positions easy for every player to reach.
- Decide the start player (by rock-paper-scissors or similar) and give them the start player marker.
Setting up the special buildings
- Split special building V into 2 piles and place 6 tiles each face up.
- Place the round marker on round 1.
- Shuffle special building A, and stack them all face up on the left side.
- Shuffle special building B, place them all face up on the right side, and place them one at a time from the top onto the left (in the building slots).
- Some of the A and B special buildings carry a star mark. These tiles are for players who are a little used to the game, so for a first play it is recommended to place them under the Mountain card pile so that they hardly appear during the game.
Quick Overview of the Game
In this game, everyone starts with a "Forest" and a "Mountain". From each, you use the wood and stone produced to acquire new buildings and transport routes, connect tiles, and expand your own town.
By transporting what you produce and processing it, you can gain victory points. Develop your factory town the most, and gain more victory points than anyone else!
- Start with the Forest and Mountain.
- Use wood and stone to build buildings and transport routes.
- Move resources via transport routes to a processing tile, and process one resource into another (for example, convert wood into coal).
- Move the resources gained from processing or production to other buildings, and convert them into victory points (for example, convert 1 wheat and 1 coal into 6 victory points at the Bakery).
Flow of the Game
In this game, you aim to gain the most victory points over 4 rounds. The flow of the game is shown below. (The rules for the 1-player game are in the Solo Play section.)
Flow of a round
In each round, perform four phases in order: "Production", "Construction", "Transport" and "Processing". All players act simultaneously except in the "Construction" phase.
- Production: Each player executes the production effect of every tile they own once.
- Construction: Starting with the start player and proceeding clockwise, take "turns". When all players have passed, the Construction phase ends. On a turn, choose and perform one of the following three:
- Build 1 building
- Build or upgrade transport routes as many as you like
- Pass (your turn will not come around again for the rest of this round)
- Transport: Each player moves resource pieces on their own tiles as many times as they like according to the transport rules. (There are expert rules that each player may adopt.)
- Processing: Each player executes the processing effect of every tile they own as many times as possible.
Preparing the next round
- Pass the start player marker to the player on your left.
- Move the round marker.
- Turn the top tile of each basic building face up.
The final (4th) round
In the final round only, the Transport and Processing phases can be repeated as many times as you like.
End of the game
After the 4th round ends, the game ends. The player with the most victory points is the winner.
Production Phase
In the "Production" phase, each player executes the on-production effect of every building they own once. In most cases this means placing resources on top of the tile. Note, however, that you cannot place more resource pieces on a tile than the number of resource spaces drawn on the tile.
Examples:
- Large Farm (shows 2 empty spaces): there are 2 empty spaces, so 2 wheat are produced.
- Wasteland (shows 1 empty space): there is 1 empty space, so 1 is produced. In this case, you may choose either wood or stone.
- Field (shows no empty space): there is no empty space, so nothing is produced.
Some buildings gain victory points, such as the "Spinning Shop". For the Spinning Shop, you gain 2 victory points for each sheep on top of this tile (the sheep stay on the tile). If 2 sheep are on it, you gain 4 victory points.
When you gain victory points
When you gain victory points, advance your own victory point marker on the victory point track by that amount. The marker is in your player color (the color of the house on your Forest and Mountain). For example, a player with the blue house moves the blue player marker.
Construction Phase
In the "Construction" phase, players take turns starting with the start player. The player whose turn it is chooses and performs one of the following three:
- Build a building
- Build transport routes
- Pass
Turns proceed clockwise and continue for as many rounds of turns as needed until all players have passed.
Building a building
The player whose turn it is chooses one face-up building tile on the board and pays its construction cost.
- Example: the Meadow costs 1 wood and 1 stone. Remove 1 wood and 1 stone from the top of your own tiles. Resources paid as a construction cost may be paid from the top of any tile you like.
- The acquired tile must be placed so that it touches your own tiles along an edge. Tiles cannot be placed in a separated location or in a position that touches only at a corner.
- If a building has an immediate effect, apply that effect immediately. Example: as soon as you build the Meadow, place 2 sheep on the Meadow's spaces.
- When you build special building A or B, and an empty space appears, replenish buildings toward the round marker. If you built the top tile of a Mountain pile (in the special building piles), the next tile becomes available for construction as it is.
- If the left side becomes empty, slide the tiles to the right; if the right side becomes empty, slide the tiles to the left. (Example: slide special building B to the left to fill the space.)
Since only the top tile of each basic building pile is face up, generally only one tile of each can be built per round. A basic building that another player has already built and that has only face-down tiles left cannot be built.
However, only in a 4-player game, the "Rebuild tile" is used. When this tile is face up on the board, you may build it to flip one face-down basic building face up and build it. Like the other basic buildings, the Rebuild tile is turned face up at the start of the next round if it is face down. In a 4-player game, the Rebuild tile can be used once per round.
Building transport routes
The player whose turn it is can pay construction costs and build or upgrade (single track to three-way junction) transport routes as many as they like.
- Building a transport route: Pay either 1 wood or 1 stone to build a single-track transport route. The tile can be rotated and placed in any direction. The places where it can be placed are the same as for buildings (touching along an edge). You can also build a three-way junction directly by paying any combination of 2 wood and stone.
- Upgrading a transport route: By paying 1 wood or stone, you can upgrade (flip) an already built single-track route into a three-way junction. At this time, you cannot upgrade in a way that makes a previously connected path no longer connected. (Example: a path that originally ran from the bottom to the right is no longer connected after the upgrade, so it is not allowed.)
Pass
If you have finished the construction you want to do and do not want to build anything more this round, you may "Pass". A player who has passed will not have their turn come around in the "Construction" phase for the rest of the round (that is, it is a hard pass). When all players have passed, the "Construction" phase ends.
Transport Phase
In the "Transport" phase, each player may move the resources on the tiles in their own field along the transport routes as many times as they like.
When doing so, they must follow these "Transport" rules:
- "Transport" can only move along transport routes. (Even between adjacent tiles, resources cannot be moved if there is no transport route between them.)
- The destination tile needs an empty space to place the resource.
- The resources that can be placed on the destination tile are only those related to that tile. (Used as materials, output as processed goods, etc.)
Examples:
- If you lay a transport route like this (Forest - route - Charcoal Kiln), then in the "Transport" phase you can transport the wood on the Forest to the Charcoal Kiln.
- If the transport routes are connected, you can pass through buildings on the way.
- Where buildings are adjacent but not connected by a transport route, you cannot pass.
Resources that can be placed on a tile
- Field: wheat only
- Charcoal Kiln: wood and coal only
- Restaurant: wheat, coal and sheep only
You can pass through a tile, but the only resources that can be placed on it are those drawn in its effect.
Expert rules
Depending on preference, each player may adopt the following rule:
- Resources not related to a building cannot pass through that building tile.
Example: wheat cannot pass through the Forest. With the expert rules, in a case like this (Field - route - Forest - route - Bakery), wheat cannot be transported to the Bakery.
Notes:
- Because the expert rules can be adopted per player, a single player can adopt them alone as a handicap for experienced players.
- The expert rules are difficult, so if you feel it is too much, you may quit midway. In that case, declare it to the other players and play with the basic rules from then on.
Processing Phase
In the "Processing" phase, each player executes the "on-processing effect" of every tile they own as many times as possible.
Note: "On-processing effects" are mainly written with arrows, converting the resources on the left into the resources or victory points on the right. This conversion is executed as many times as possible.
Examples:
- Charcoal Kiln (wood -> coal), with 4 wood on it: all of it becomes coal.
- Bakery (wheat + coal -> 6 victory points), with 2 wheat and 1 coal: pay 1 wheat and 1 coal, gain 6 victory points, and 1 wheat remains.
- Restaurant (wheat + coal + sheep -> 12 victory points), with 2 wheat and 2 coal: there are no sheep, so nothing happens.
Preparing the Next Round
When the "Processing" phase ends, the round ends and the game moves on to the next round. Pass the start player marker to the player on your left.
When advancing the round, move the round marker to the position of the next round. At this time, the special building B tile that was jumped over is put at the very bottom of the Mountain pile of special building B. The space on the left of the round marker that is thus freed is filled by moving the top tile of special building A to the right-hand space.
In other words, as the rounds advance, the number of tiles out in the A and B building areas changes.
Also, if the top tile of each basic building is face down, turn it face up. Turn face-down basic buildings face up. Those that no longer exist are left as they are.
Final (4th) Round
In the final (4th) round, you may perform the "Transport" phase and the "Processing" phase as many times as you like. These are processed in the same way as the normal "Transport" and "Processing". When all players have finished as much "Transport" and "Processing" as they wish, the game ends.
End of the Game
The game ends after the 4th round. Apply the effects of buildings that give victory points at game end, and the player with the most victory points wins the game. In the case of a tie, share the victory.
Example: for the "Ranch", at game end you gain 3 victory points for each sheep on top of the Ranch, and if there are 8 sheep, you additionally gain 6 victory points (30 points in total).
Other Rules
When you go around the victory point track
When your victory point marker goes all the way around the victory point track and returns to 0, flip it over to the side with the 60-point sticker. If your victory point marker is flipped, the value of the position on the victory point track plus 60 is that player's victory points. If you exceed 120 points, indicate it by, for example, placing a resource piece on top.
When transport routes or resource pieces run out
Transport routes and resources are treated as unlimited. If you run out of transport routes or resource pieces, substitute something else and continue the game.
Solo Play Rules
Solo setup
In solo play, as in a 2-4 player game, take the initial "Forest" and "Mountain" tiles and set up the special buildings. However, choose 7 basic buildings in total from the 5 kinds "Field", "Charcoal Kiln", "Meadow", "Bakery" and "Ranch", and place them face up on the board. The 7 may be chosen freely. The "Rebuild tile" is not used.
Examples:
- Balanced: 2 each of "Field" and "Meadow", 1 each of "Charcoal Kiln", "Bakery" and "Ranch"
- Wheat-focused: 4 Fields, 1 Charcoal Kiln, 2 Bakeries
- Sheep-focused: 4 Meadows, 3 Ranches
Flow of play
As in a 2-4 player game, perform the four phases "Production", "Construction", "Transport" and "Processing" in order.
End of a round
At the end of each round, before preparing the next round, remove 1 tile from special building V and 2 tiles from special building A and B from the game. The player may choose the tiles to be removed from among the visible tiles. After this, replenish special buildings A and B, then prepare the next round.
End of the game
As in a 2-4 player game, perform the end-of-game processing, and according to the victory points finally gained, you receive the following title.
| Victory points | Title (Japanese original) |
|---|---|
| 40 | Rookie (かけだし) |
| 60 | Full-fledged (いっちょ前) |
| 70 | Not bad at all (なかなかやるな) |
| 80 | Amazing (これはすごい) |
| 100 | ...! (Incredible) (…!(絶句)) |
| 120 | Are you a god? (神ですか) |
Icon Quick Reference
Timing of effects
- Immediate
- On production
- On construction
- On transport start
- On processing
- At game end
Resource and victory point icons
- Wood (green)
- Stone (gray)
- Wheat (yellow)
- Coal (black)
- Sheep (white)
- Any resource
- Any different resources
- Victory point
Other icons
- Surrounding tiles (the surroundings include diagonals; this means the 8 spaces around)
- Surrounding buildings
- Surrounding buildings with wheat drawn in the effect column
- Surrounding buildings that have a processing effect
- Surrounding buildings with mutually different resources drawn in their effect column (note: any resource or any different resource icon is not taken into account)
- Buildings directly connected by a transport route
- Move resources on any tile onto this tile
- Trigger the on-production effect of surrounding buildings (except wood / stone)
- Each time a surrounding building's on-processing effect gains victory points, gain +1 victory point
- When building a building in the surroundings, the cost is reduced by 1 wood or 1 stone (the cost cannot become 0)