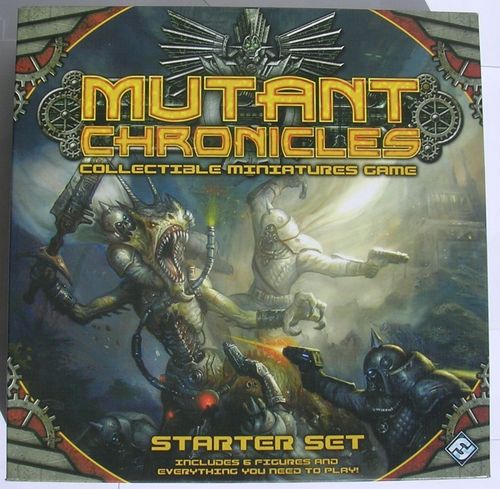
Mutant Chronicles Collectible Miniatures Game
Mutant Chronicles Collectible Miniatures Game Rulebook
Table of Contents
Table of Contents
- Starter Set Contents
- Description of Components
- Preparation
- Start of the Game
- Preparing a Tournament
- Flow of a Round
- On Your Turn
- Move Action
- Terrain
- Attack Action
- Damage and Destruction
- Combined Attacks
- Guard Action
- Special Abilities
- Using Command Cards
- Victory in the Game
- Alternative Victory
- Reinforcements
- Epic
- Collection Data
- Keywords
Starter Set Contents
- Rulebook
- 6 painted miniatures: Ezoghoul, Necromutant Desecrator, Technomancer, Freedom Trooper, Martian Banshee Sergeant, Elite Ranger
- 52 unit cards (unit files)
- 46 command cards
- 2 order reserve cards
- 30 order tokens
- 8 dice
- 40 wound tokens
- 10 victory zone tokens
- double-sided battlefield card
Description of Components
This section describes the listed components and their roles in the game in more detail.
Miniatures
Miniatures let you track the battlefield and the position of your units on it. The color of the base shows the unit's rank (Gold, Silver or Bronze). The unit's name is stamped on the underside of the base, which helps to match the miniature to the unit card. The base of each unit also shows the set data and the unit number.
Unit Cards
Unit cards are needed so that the player always has to hand the statistical data of his fighters (speed, health, attack dice and command symbols) and a description of their special properties. The information is presented in the following format:
Anatomy of a unit card
- Unit name: The unit's name lets you match the card to the miniature.
- Faction: The symbol tells which faction of the world the unit belongs to.
- Portrait: An image of the unit.
- Rank: This is the unit's rank symbol (Gold, Silver, Bronze).
- Command symbols: Compare these symbols with the symbols on command cards to understand whether this unit can play a given card. To play a command card, a unit must have on its unit card all the command symbols shown on the command card.
- Attack dice: Shows how many dice of which types the unit rolls in an attack. It also notes whether the unit can reroll dice in an attack.
- Health: This is the initial (also the maximum) health level of the unit. If the total number of wounds received by this unit equals or exceeds the unit's health, the unit is destroyed.
- Game text: The key qualities and special properties the unit has are collected here, as well as the unique actions available to the unit.
- Size: One or two hexes show whether the unit's base is single or double.
- Collection data: Set symbol, unit number, rarity.
- Traits: These are the unit's traits. Some game effects interact with a unit's traits.
Command Cards
Command cards represent special skills or maneuvers that your units can employ at certain moments of the battle.
Anatomy of a command card
- Name: The name helps the player identify the command card.
- Faction symbol: Shows which faction the command card belongs to.
- Command symbols: Compare these symbols with those on the unit's card, and you see whether the unit can play this card. To play a card, the unit must have on its card all the command symbols shown on the card.
- Restrictions: The first part of the text says when and under what conditions the card can be played. Command card restrictions are set in italics.
- Effect: The second part of the text explains the card's effect.
- Buyback price: Some command cards have a buyback price, which allows you to return them to your reserve after use.
- Buyback symbol: The infinity sign says that the card can be bought back.
- Rank: The rank value of the card (Gold, Silver, Bronze), which matters when building an army.
- Collection data: Set symbol and card number.
Order Reserve Cards
During the game these cards hold the order tokens that your army has not yet given. At the start of a game round you put all the order tokens available to you onto such a card, and take them off it as you give orders. (The card also has an area for used orders: "Used Orders".)
Order Tokens
These tokens are given to the units of your army during the game, allowing those units to take certain actions from among the four listed: move, attack, guard and use an ability. There are Bronze, Silver and Gold order tokens.
Dice
There are eight dice, two of each of four colors. These dice are used in combat. The dice are designed and made with the following aim:
- Red die: light strike attack (melee).
- Yellow die: heavy strike attack (melee).
- Green die: light ranged attack.
- Blue die: heavy ranged attack.
As a result, strike attacks deal more damage than ranged ones, but do not shine with high accuracy. Light attacks are slightly more accurate than heavy attacks of the same type, but cause less damage.
Wound Tokens
These tokens record the damage received by your units. When a unit is wounded, insert into the slot on the unit's base a token with the number of wounds it has received. The token is replaced by another when the unit receives new wounds or heals old ones. When the total number of wounds equals the unit's health or exceeds it, the unit is destroyed.
Victory Zone Tokens
Victory zones are objects of strategic importance that determine the development of the battle when playing the tournament format. At the start of the game seven zones are distributed over the battlefield in random order, and during the fight they give victory points and special abilities to the army that holds the zones. (Example token: "Command Bunker: If one of your units is holding the Command Bunker at the end of a round, you may recover one of your used Bronze or Silver command cards.")
The Battlefield Card
This is the map on which your battles will take place. The map's features:
- Deployment zone (purple): Units of one army start the game in these positions.
- Hindering terrain (yellow): Hinders movement.
- Cover (green): Gives protection from attacks.
- Victory zone (red): In the tournament game, victory zone tokens are placed here.
- Walls: Block the line of attack (LOS) and movement.
- Nodes (hex centers): Needed for tracing the line of attack ("center to center").
Preparation
To start playing Mutant Chronicles you must assemble an army. For your first army-battle, called a Skirmish, we recommend two armies built for Skirmishes from the components of the Mutant Chronicles starter. Find the listed components and divide them as suggested below. These are the armies that will fight in your first game.
Algeroth
- Necromutant Desecrator (Gold)
- Ezoghoul (Silver)
- Technomancer (Bronze)
- Gold Order token
- Silver Order token
- Bronze Order token
- Command cards: Dark Aura (Gold), Acid Flow (Silver), Instill Terror (Bronze)
Capitol
- Elite Ranger (Silver)
- Martian Banshee Sergeant (Silver)
- Freedom Trooper (Bronze)
- Gold Order token
- Gold Order token
- Bronze Order token
- Command cards: Decoy (Gold), Command Hijack (Silver), Rapid Fire (Bronze)
(Card names in this section are translated from the Russian text.) Note that each army has three Gold, three Silver and three Bronze components. This structure must be observed in each Skirmish. When you begin building your own armies you will field a different number of units, other cards and tokens, but the principle of keeping three components of each of the three ranks will inevitably hold.
Since humans and demons are mortal enemies, you cannot include demon units (factions Algeroth and Ilian) in an army of a human faction (Bauhaus, Capitol or Brotherhood). And conversely, human units cannot end up in an army of demons.
Unique Characters
Units marked with a bullet symbol before the name are unique characters. An army may contain only 1 unique character of the same name. If the unit's name has no such symbol, an army may contain up to four units of that kind. Unique characters can also be recruited into an army only from one faction. So if Archinquisitor Nikodemus of the Brotherhood serves in your army, you cannot take unique characters from Bauhaus, Capitol or Algeroth.
Start of the Game
You have chosen one of the proposed armies or created your own, and your opponent has chosen or created his force, and now you are ready to play. By agreement or by lot, decide on which sides of the field your armies will stand. Lay out the battlefield card on a flat surface between you and your opponent.
Then determine the "First Player." He is the first to deploy his army and acts first in all subsequent rounds, unless game effects take this initiative away from him.
When the First Player is determined, he chooses a deployment zone and places the units of his army anywhere in that deployment zone. Then the other player places the units of his army in the other deployment zone. After that both players lay in front of themselves their order reserve cards, near their deployment zones but not on the battlefield itself. The available orders are placed on these cards. Command cards can be laid next to the order reserve, face down. You may look through your command cards, but your opponent must not know what command you are preparing until you play the card.
That is, in fact, all. You can play!
Preparing a Tournament
A game at the Skirmish level is the fastest and simplest format of Mutant Chronicles. Thanks to this, the Skirmish is ideal for learning the game by beginners. As new units appear at your disposal, it will become harder and harder to get by with Skirmishes alone. Those who want a longer, harder game with large armies have a direct road to the Tournament.
Building an Army
In Mutant Chronicles, the army you have assembled strongly affects how the game goes. In one game your army will be fast and maneuverable, in another slow but extremely armored, and in a third the army of the Brotherhood will defend your interests, relying on mystical Knowledge. There are plenty of possibilities, and all decisions remain with you alone.
Remember that an army for a Skirmish consists of 3 Gold, 3 Silver and 3 Bronze components? When you go to a Tournament, forget this rule. Here, when creating an army, the 10/10/10 scheme is used, i.e. one player's army may contain 10 Gold, 10 Silver and 10 Bronze components. As with the 3/3/3 scheme, you can use any combinations of units, orders and command cards as long as you do not exceed the limit of 10 (and only 10) items of each rank.
As in a Skirmish, you may choose only one copy of a unique character for your army, and unique characters cannot be recruited for your army from different factions. There may be no more than four copies of any non-unique unit in an army, and you may take no more than three command cards of one kind.
Units from human and demon factions cannot be combined in one army.
Tournament Brotherhood Army (example)
Gold:
- Archinquisitor Nikodemus
- Keeper of Knowledge x4
- Divine Inspiration (command card) x1
- Gold Order x4
Silver:
- Chief Inquisitor x4
- Teleportation (command card) x1
- Silver Order x5
Bronze:
- Inquisitor x4
- Guard of the Furious Elite x2
- Mortification of the Flesh (command card) x2
- Prayer of Steel (command card) x1
- Bronze Order x1
(Unit and card names are translated from the Russian text.)
Victory Zone Tokens
Another significant difference of the Tournament from the Skirmish is the use of victory zones and their tokens in Tournaments. After you and your opponent have decided who starts where, and have chosen the First Player, this player takes the victory zone tokens and shuffles them. Then he lays seven random tokens face down on the seven victory zones of the field. When all units of both armies are placed on the field, the victory zone tokens are revealed and can at any moment begin to influence the course of the battle. More information on victory zones is on page 28.
Flow of a Round
These rules assume you are playing against one opponent, whereas Mutant Chronicles can be played not only as a duel. Rules for multiplayer matches can be found at www.fantasyflightgames.com.
The game of Mutant Chronicles is divided into rounds. In a round the players take turns. On his turn a player gives two orders to two units of his army. An order, depending on its rank, gives a unit up to three actions.
At the start of the first round the right to move goes to the First Player. He must give an order to any of his units and carry out with it the number of actions it is entitled to. Then another unit of the First Player's army receives and carries out a second order in the same way. The player's turn ends when both orders have been carried out.
After that the right to move passes to the next player, and he gives orders to two of his different units, carrying out with them as many actions as the given orders allow. After the two order tokens go to the used pile after their orders are carried out, it is again the turn of the First Player.
As a general rule, a player cannot give an order to a unit that already received an order this round (although there are units and command cards that circumvent this rule). Also remember that a player gives orders only to units under his control. During a round the players trade turns, handing out orders to two units each turn, until one of two things happens. A player inevitably runs out of order tokens, or runs out of units that have not yet received orders this round. When this happens the player has passed and no longer gets the right to move.
When one player has passed, the other player may keep taking his turns until he passes too. When both players have passed, the round is over. At the end of the round both players return the used order tokens from the used pile to the reserve, count victory points (see p. 28) to understand whether a victory has already been won, and then begin a new round. The First Player remains the First Player for the whole game, unless a game effect deprives him of the initiative.
On Your Turn
On your turn you give two orders to two different units. You may give any order from your reserve to any non-activated unit of your army. The number of actions of a unit activated by an order depends on the rank of the order with which the unit is activated.
- Gold Order token – 3 unit actions.
- Silver Order token – 2 unit actions.
- Bronze Order token – 1 unit action.
Remember that the rank of an order determines only the number of actions given to the unit. You are not obliged to give an order of a particular rank only to units of the same rank.
An action lets your activated unit choose from four available options:
- Movement
- Attack
- Guard (Defense)
- Use of a Special Ability
Each order given allows each of these actions to be made only once. For example, you gave a Gold order to a unit and it received the right to three actions. The unit moves, attacks and uses an ability. That is all correct. But even a Gold order does not give the unit the right, say, to move and attack twice, or to use three special abilities in one activation. Also you may not interrupt one action with another, i.e. you cannot, for example, begin to move, attack, and then finish the movement.
You always have the right to decline an action if you wish. A skipped action is lost.
Move Action
When moving a unit on a single base, simply move the unit a number of hexes equal to or less than the unit's speed. The base speed of every unit is 4, but this value is changed by special abilities, command cards and the keywords of units.
A unit may pass through friendly units, but not through enemy units, and it must end its movement in a free hex.
SPEED = 4. The base speed of units in the game is 4. When a figure makes a movement, it can pass up to 4 hexes.
Movement of a Unit on a Double Base
The base speed of a unit on a double base is 4, like an ordinary unit. To move a double unit one hex:
- move one half of the unit (you decide which) into a hex adjacent to that half of the unit;
- shift the second half into the hex that the first one has just vacated.
Other Movement Options for Double Units
It is possible simply to move both halves of the unit in one direction, preserving the relative position of the halves. Such movement is allowed if the unit does not pass through other units and no part of it goes through a wall. During such movement of a non-flying unit (see p. 32) the movement stops if either half of the unit enters cover or hindering terrain.
Terrain
The Mutant Chronicles map shows four types of significant terrain objects: open terrain, walls, cover and hindering terrain.
Open terrain does not affect movement and does not block LOS (line of attack, "line of sight").
Hindering terrain does not block LOS, but hinders movement. A unit entering a hex of hindering terrain stops at once. On the map, hindering terrain hexes are outlined in yellow. Every time a moving unit enters a hex marked on the map as hindering terrain, the unit's movement action ends immediately.
Walls are marked on the map with a solid black line. Walls completely block LOS and movement, and only flying units (p. 32) fly over walls.
Cover does not block LOS, and affects movement in the same way as hindering terrain. Cover, meanwhile, reduces by 1 the damage dealt to a target standing in cover. Cover is outlined on the map in green.
Example: Alakhai the Cunning stands in cover. Mitch Hunter attacks Alakhai the Cunning, rolling two damage symbols on the dice. Cover reduces the damage by 1, so Alakhai the Cunning takes only 1 point of damage.
Attack Action
To attack with an activated unit, carry out the following steps in order:
- trace the line of attack;
- indicate the target;
- assign supporting units;
- roll the combat dice;
- determine the accuracy of the attack;
- count the damage;
- deal the damage.
1. Line of Attack
An attack is possible if a line of attack (LOS) is traced between your unit and its target. LOS is a straight line from the center of the hex occupied by your unit to the center of the hex occupied by the target unit, along which nothing interferes. In the center of every hex there is a dot, a node, which makes tracing LOS easier.
Friendly and enemy units and walls interfere with tracing LOS, that is, block LOS.
If another unit occupies a hex, that whole hex blocks your LOS. If the straight LOS passes through any part of an occupied hex, LOS is blocked and attacking is not possible. Hex borders do not block LOS when it runs strictly along the border.
(Diagram: targets, walls block LOS, an ally blocks LOS, the attacking unit.)
If you activated a double unit, it may attack if, without obstructions, a straight line can be traced to the center of the target's hex from the center of either of the two hexes it occupies. And in the reverse situation, when your unit attacks a double unit, you may trace LOS from the center of the hex occupied by your unit to the center of either of the two hexes occupied by the target. To determine the accuracy of an attack (see p. 19) by a double unit or against a double unit, take the center of the hex from which the LOS was traced, and count the number of hexes to the target. Incidentally, when determining cover (p. 15), the terrain type of the hex in which the target stands is always applied.
(Diagram: a double-based attacker has LOS to the target although one hex is blocked by a wall. As long as there is LOS from one of the hexes occupied by the attacking unit, the attack is possible.)
Important: the direction in which a unit faces does not affect LOS. Units see and aim in all directions.
When you plan an attack with one of your units, you may trace as many LOS as you like to any potential targets, and only then indicate the target.
2. Indicating the Target
When you have finished tracing LOS, simply point to this or that enemy unit on the field: that is the target of your attack. You cannot indicate a friendly unit as the target of an attack. If you indicate a double unit as the target of the attack, you must clarify exactly which hex the attack is aimed at. And when you attack with a double unit, you clarify from which hex the attack begins.
There are command cards and special abilities that allow dealing damage not only to the target of the attack, but also to other units. However, in such situations these other units are not considered the target of the attack. In game terms, the "target" is the unit you indicated as the target at this step.
Targeting Hexes and Units
Since LOS is traced between hexes, not units, when indicating the target you choose not a target unit but a target hex. This is important to take into account, because in the game the terrain influences the attack. A neighboring unit in the game must always be a different unit, that is, the second half of a double unit is not considered a neighboring unit with respect to its first half. Also remember that you cannot indicate an empty hex as the target of an attack.
3. Assigning Supporting Units
When you perform an attack action, other non-activated units may join the attack of the activated unit if they have LOS to the target. The details of a combined attack are covered on p. 21.
4. Rolling the Combat Dice
At the next step you roll the dice. The type and number of combat dice are individual for each unit; this data is given on the unit card.
The symbols on the unit card show which set of dice is rolled in the attack. Command cards and special abilities can increase this set.
Reroll symbol. Some units have, on their cards next to their dice, from one to several reroll symbols. This is the reroll symbol. When the dice have been rolled, you may reroll one die for each reroll symbol on the attacking unit's card. These are rerolls. Rerolls are made one at a time. For example, if your unit's card has two rerolls, you may reroll one die, and if you again do not like the values rolled, make a second reroll of the same die. Or you like the result of the first reroll, and you can use the second reroll for another die. You have the right not to use rerolls at all if you like all the results of the original roll.
After a reroll you have no right to use the result of the first roll of the rerolled die.
5. Determining the Accuracy of the Attack
The farther the target, the harder it is to hit. In Mutant Chronicles this idea is embodied in the concept of accuracy. The accuracy of your attacks is determined by the combat dice.
On each face of a die there is a number, the accuracy value, and damage symbols, from 0 to 2. The accuracy of an attack equals the highest accuracy value rolled on a single die (if several dice together give the highest number, you still apply only one value). Note that the absence of a damage symbol means that this die rolled 0, and the absence of an accuracy value means zero accuracy rolled on the die.
An attack hits if the accuracy equals the distance to the target or is higher. If the accuracy is less than the distance to the target, the attack ends in a miss. Counting the distance on the map, count hexes along the shortest path from your unit to the target.
Example: a Bauhaus unit rolls 2 blue dice and 1 yellow, and they show accuracy values 0, 4 and 6. The accuracy of the attack is 6. This attack can hit a target 6 hexes from the attacking unit.
6. Counting the Rolled Damage
On a miss no damage is dealt and the attack action ends. On a hit, the damage is counted.
The rolled damage from an attack equals the total number of damage symbols on the attack dice.
For example, the Captain of the Venusian Rangers attacks a unit four hexes from him with two blue dice, which show accuracy values 5 and 3. 5 ensures a hit, and the damage symbols on both dice are summed.
There are special abilities that allow a player to distribute damage between the target and other units. In that case the player must declare how he will divide the rolled damage.
Note: in a combined attack (see p. 21) the damage symbols are added only for those units whose attacks hit (i.e. gave sufficient accuracy values).
7. Dealing the Final Damage
In the game there are plenty of ways to boost or cut the rolled damage of an attack. For example, the keyword "Armor" (see p. 32) reduces damage. After all these effects have been applied to the rolled damage, the target receives the final damage.
Example: Alakhai the Cunning attacks Archinquisitor Nikodemus, who has the keyword "Armor 1", reducing the rolled damage of an attack by 1. Alakhai hits, and the rolled damage of his attack is 3. The final damage dealt to Archinquisitor Nikodemus is 2.
When damage is dealt to a unit, a wound token is added to its base, showing the final damage received. Damage accumulates. The more wound tokens a unit collects, the worse for it. When a unit has received so many wound tokens that the total damage from them equals or exceeds its health value, the unit is destroyed.
Note: there are special abilities that spread damage to other units besides the target. So, damage cannot be dealt to units belonging to the same army as the unit that carried out this attack.
Damage and Destruction
When a unit receives final damage, this is recorded on its base with wound tokens. When a command card or special ability orders a unit healed by one or several points of health, remove from the unit as many tokens as needed so that the sum of their values equals the amount of health restored (to record a unit's damage accurately you will have to use different combinations of tokens or replace one with another).
The starting (also maximum) health of a unit is shown in the upper left corner of its card; when there are no wound tokens on the unit, that is its health. If the total amount of damage received by the unit equals its health or exceeds it, the unit is destroyed. Destroyed units are removed from the field, forming a "mass grave" (destroyed pile). If the destroyed unit had an order, this order goes to the used pile.
Players earn victory points (see p. 28) by destroying enemy units:
- Bronze unit = 1 victory point
- Silver unit = 2 victory points
- Gold unit = 3 victory points
Combined Attacks
An activated unit often attacks alone, i.e. carries out a personal attack. However, other non-activated units may join the attack. Such an attack is called combined.
Supporting Units
To join an attack legitimately, a unit must hold the target on LOS and must not have an order given to it.
(Diagram: Unit A attacks unit B, and units C and D support the attack. Unit E cannot support the attack, because its LOS to the target is blocked by friendly units, and unit F received an order earlier in the round and therefore also cannot join the attack.)
At the step "assigning supporting units" (step 3 of the attack action), you name those units that will join the attack. These will be the supporting units. You must give an order (from the reserve of available orders) to each supporting unit; command cards and special abilities count supporting a combined attack as an "attack action". If you cannot or do not want to spend an order on a supporting unit, the unit will not be able to join the attack.
Supporting units cannot use any special abilities (see p. 25) when taking part in a combined attack. Only the activated unit may use special abilities in the normal way.
Valuable thought! Since a supporting unit can only join the attack and gets no additional actions from the order, it is best to give supporting units Bronze orders. Silver and Gold orders can be used, but then you lose their additional actions.
Accuracy and Damage of a Combined Attack
The "roll the dice" step in a combined attack begins with the roll of the activated unit, and then all supporting units roll dice as if each of them were carrying out a separate attack.
The damage symbols from each accurate attack (an attack with sufficient accuracy) are summed into the total damage of the combined attack. Any unit that misses because of low accuracy adds no damage.
(Example diagram: Unit A attacks unit B, and units C and D support the attack. Between A and the target there are 2 hexes. A rolls dice, getting accuracy 2 (its attack is accurate) and 2 damage symbols. Between C and the target there are 3 hexes, and its combat roll gives accuracy 3 (an accurate attack) and 3 damage symbols. Finally, unit D is separated from the target by 4 hexes. Its roll gives accuracy 1, and that is a miss. Although D rolled 4 damage symbols, they are not added to the damage from the attack. Adding up the damage of the two accurate attacks in this combined attack, the player gets rolled damage of 5.)
Even if the unit leading the attack misses, the damage from accurate attacks of supporting units is added to the total damage of the combined attack.
Remember that the rolled damage of a combined attack is summed before any effects that reduce damage take effect. In the game this can be extremely important.
Guard Action
When you give an order to a unit, you may spend an action from this order to put the unit on guard. Place the order token with its guard side up next to the unit. The unit has taken up guard.
Giving a unit a Gold or Silver order, you can carry out its other available actions, for example movement or attack, and then use the remaining action to put the unit on guard. But when a unit has taken up guard, it can no longer carry out other actions within this activation.
Effect of a Guard Order
If an activated enemy unit moves into a hex to which the unit on guard has LOS, the guarding unit may attack the moving enemy unit. In other words, a guard order allows a unit to attack during the opponent's turn, or to counterattack.
A counterattack goes through the same steps as an ordinary attack, but a counterattack can only be personal. Guarding units cannot join other units in combined attacks, and other units cannot support a unit's counterattack. Special abilities and other game mechanics count a counterattack as an attack action, but not as carrying out an order.
A unit on guard can interrupt the movement of an enemy unit in order to counterattack it at any moment. When the movement is interrupted, the turn stops and the guarding unit checks whether it has a clear LOS. If there is LOS, the counterattack can be made. If there is no LOS, movement continues until it is interrupted again or completed.
After rolling the dice for the counterattack, flip the order token to its other side: the unit leaves guard.
Taking Up Guard at the End of a Round
At the end of a round, when players take their used orders back into the reserve, they may leave on the field all or any of the guard orders, so that the units continue to hold guard at the start of the next round.
The player who will act first in the next round makes the decision for himself whether to remove his guard order or leave it, then the other player does so.
During the next round, units standing on guard cannot receive new orders, since they keep their orders.
Example of Guard
So, it is Mikhail's turn. He gives a Gold order to a Bauhaus unit. His opponent Fyodor earlier gave an Algeroth unit a guard order. With his first action Mikhail moves the unit 2 hexes, as shown in the diagram. This hex is on the LOS of the Algeroth unit. Fyodor could conduct a counterattack now, but decides not to.
Mikhail continues the movement, bringing his Bauhaus unit one hex closer to Fyodor's Algeroth. (The Algeroth unit's line of attack is highlighted in green.)
Fyodor decides that this is enough and declares a counterattack. If the counterattack does not destroy the Bauhaus unit, Mikhail will be able to finish the movement and continue the unit's activation, using the two other actions from the Gold order he gave.
Special Abilities
In the text of the unit cards in our game there are three different types of effects. As you get acquainted with different units, you will understand which effects best suit one or another strategic scheme. Fine-tuning the make-up of an army for specific combat tasks is one of the most interesting aspects of Mutant Chronicles.
The simplest of the effects is the keyword, a widespread type of effect. Typical examples of keywords are "Flying" and "Armor 1". You will find the full list of keywords and their meaning on p. 32.
Ability. The second type of effect. A unique effect fully described on the card of the owning unit. Abilities tell when to apply them, how they are activated and what they then do. So, the Martian Banshee has the ability: "Elusive. The Martian Banshee takes no damage from green dice." This is an example of an ability.
The third effect we call a unit action. A unit action is highlighted in bold in its name. A unit action requires spending actions received from the order with which the unit was activated. To use a unit action you must activate the unit and spend the number of actions (from this activation) stated in the card text. After the cost, the effect of the unit action is described: it explains when and how it affects the game.
Example. The text of the High Technomancer's card reads: Aura of Corruption - 2 Actions: deal 1 damage to all adjacent enemy units. If the High Technomancer is given a Gold order, he can spend 2 of the 3 actions this order gives on Aura of Corruption.
Using Command Cards
On p. 10 we said that players can include command cards in their armies. These cards influence the battle and can turn the tide of the fight.
You may play one command card on each player's turn. For example, on your first turn you play the first card, the second in the first turn of your opponent, the third on your second turn. Such freedom in using cards is given to each player: in one and the same turn both opponents may each play one command card.
Each command card sets out exactly when during a turn it must be played. For example, the card "Dark Aura" is played "after the chosen unit has finished a move action".
The command card also explains its effect on the game. Take the same "Dark Aura": "This unit may not take any more move actions this turn. All adjacent enemy units are dealt 1 damage and may be moved (by you) up to 2 hexes."
Command Symbols and the "Chosen Unit"
A command card is always played by some unit, which the card text calls the chosen unit. It is the chosen unit that brings into play the special effect described on the card. To play a command card, the chosen unit's card must have all the command symbols shown on the command card.
Example: to use Dark Aura, 2 Algeroth symbols are required. Alakhai the Cunning has three such symbols. Consequently, Alakhai the Cunning can become the chosen unit for Dark Aura.
Buyback
Some command cards have a buyback price, expressed as a number of order tokens in the lower right corner of the card under the infinity sign. After playing a command card with a buyback price, you may remove from your reserve to the used pile orders of the number and rank matching the buyback requirements. This gives you the right to put the played card on the used orders pile and take it back into your hand at the end of the round together with the orders. If you decided not to buy the card back, or cannot afford it for lack of orders, the card goes to your discard pile of cards and cannot be bought back. Cards that cannot be bought back have no buyback symbol and no buyback price.
Played Command Cards
After playing a command card (without buyback), set it aside, creating a discard pile of command cards. A command card that has ended up in this discard pile cannot be bought back and cannot be used in the game, unless a unit's action or ability, or the effect of another command card, pulls it out of the discard pile.
Victory in the Game
At the end of each turn, before returning orders, each player counts victory points to understand whether he has not already won the battle. As soon as one player has reached the victory threshold, he wins. Each level has its own victory threshold.
- Skirmish: 9 victory points
- Tournament: 30 victory points
- Epic: 150 victory points
If both players have reached the victory threshold, the player with the greatest number of victory points wins. If the number of victory points of both players is the same, the winner is the player who is due to act first in the next round (if the game were to continue).
Victory points come from three sources.
First, victory points are given for destroying each enemy unit.
- Bronze unit = 1 victory point
- Silver unit = 2 victory points
- Gold unit = 3 victory points
If a destroyed unit returns to the battle through game effects, it does not give the player who destroyed it victory points until it is destroyed a second time.
Second, victory points are given for victory zones that your army holds at the end of the round. Holding a victory zone means that one of your units stands on the whole victory zone or on part of it, and there is no enemy on it. Each zone brings as many points as is shown next to the zone itself on the map. Besides victory points, victory zones give the armies holding them in-game advantages. These advantages are written on the tokens themselves. Remember that victory zones are not used in a Skirmish.
Third, there are command cards that under certain circumstances can be played to increase your number of victory points.
The total point value of the enemy units you destroyed, the victory points from held victory zones and from command cards are summed to reach the victory threshold.
(Diagram: An Algeroth unit holds this victory zone, and at the end of the round Mikhail receives 1 victory point for it. In another victory zone, Algeroth and Bauhaus units stand at the same time. An enemy unit must not be in the victory zone, otherwise you do not get points for holding it. So it turns out that neither side holds the zone, and neither Mikhail nor Fyodor gets points at the end of the round.)
Alternative Victory
Besides accumulating victory points there are two other paths to victory.
- Capitulation. Your opponent surrenders, you win.
- Rout. Destroy all the enemy's units and win a convincing victory. Even if you did not reach the victory threshold, you no longer have an opponent!
Reinforcements
It is possible to build an army that will not fit into the deployment zone at the start of the game in its entirety. If that happens, fill the deployment zone to the maximum, and move the remainder of the army slightly off the map, behind the units placed on the field. These extra units become your reinforcements. As space in the deployment zone is freed (units will move away or perish), you must immediately fill each empty hex with a unit from your reinforcements. As soon as the opportunity arises, put reinforcements on the field. If there is more than one unit in reinforcements, you may choose which figures to place on the field first, if the choice matters.
When placing reinforcements on the field you do not use order tokens, and these units have the right to receive an order from you right there.
Epic
Besides the Skirmish and the Tournament, Mutant Chronicles has the Epic, in which an army is assembled from 90 Gold, 90 Silver and 90 Bronze components. The full list of rules and guidelines for epic battles is on the website www.fantasyflightgames.com.
Collection Data
In Mutant Chronicles the following symbols are used to denote the rarity of units (they can be found on the miniature's base and on the unit card): star = rare, diamond = uncommon, filled circle = common, and open circle = very uncommon (extremely uncommon).
Keywords
Here is the promised list of keywords and their effects.
Melee: such units do not attack those who stand farther than 1 hex from them. In addition, a unit with Melee cannot support combined attacks.
Armor: Armor is always followed by a numerical value (Armor 1 or Armor 2, for example). If a unit has Armor, the rolled damage of an attack against it is reduced by the Armor value of this unit.
Example: the Robot Prototype is equipped with Armor 1. An enemy attack on this unit has scored 3 points of rolled damage. Armor 1 reduces the rolled damage by 1, and a wound token with 2 points of damage is put on the Robot Prototype's base.
Grapple: any enemy unit adjacent to a unit that has Grapple cannot move, and when attacking can only hit the unit with Grapple. If a unit stands between several enemies with Grapple, it may choose which of them to hit.
Infiltrate: Infiltrators do not provoke a counterattack by their movement. (That is, an Infiltrate unit cannot be targeted by an enemy unit that is on guard.)
Accuracy: Accuracy is always accompanied by a value (Accuracy +2, for example). This value is added to the accuracy value of any attacks of the unit with Accuracy.
Flying: units with Flying ignore walls and enemy units when moving (they fly over these obstacles), and on entering a hex with hindering terrain they do not end their movement. Flying does not affect aiming or LOS. Flying units on double bases have no right to end their movement on top of walls or other units.
Armor Piercing: attacks made by a unit with Armor Piercing are not subject to the effect of Armor.
Speed/Slow: in the game most units have a speed of 4. The keyword Speed increases the base value, and Slow decreases it. The numbers that follow these words denote the unit's base speed. For example, a unit with Speed 5 has a base speed of 5, a unit with Slow 3 has a base speed of 3.
Dodge: Dodge is always followed by a numerical value (Dodge 1, 2, etc.). If a unit has Dodge, you increase the value required to make an accurate ranged (i.e. not from an adjacent hex) attack on this unit by the Dodge value of this unit. Dodge does not work against attacks from adjacent hexes.
Example: The Martian Banshee has Dodge 1. Alakhai the Cunning attacks it from 3 hexes away from the Martian Banshee's position. Dodge 1 makes hitting harder by 1; to hit the unit, Alakhai the Cunning must roll an accuracy value of 4, not 3.