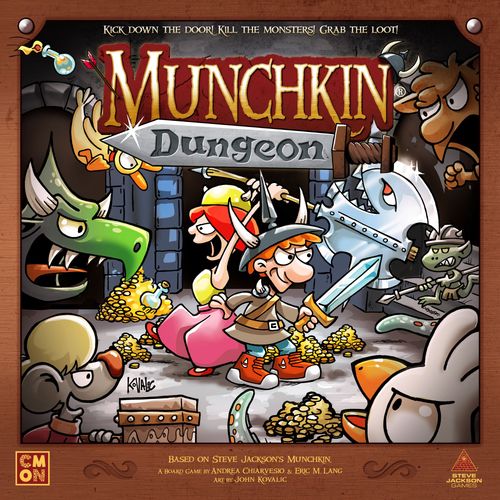
Munchkin Dungeon
Munchkin Dungeon Rulebook
Table of Contents
Table of Contents
Components
- 2 Super Munchkin Dashboards
- 2 Super Munchkin Figures
- 5 Hero Dashboards
- 5 Hero Figures
- 5 Roaming Monster Figures (lvl 2)
- 10 Monster Rooms Cards
- 12 Empty Rooms Cards
- 5 Roaming Monster Figures (lvl 3)
- 6 Boss Cards
- 2 Boss Figures
- 5 Counter Bases
- 6 Fight Dice
- 1 Dungeon Board
- 60 Loot Cards
- 60 Threat Cards
- 5 Fame Trackers
- 16 Threat Tokens
- 5 Level Trackers
- 62 Coin Tokens
- 12 Potion Tokens
- 35 Damage Tokens
- 18 Shame Tokens
Basic Concepts
Hero Dashboard
Keep track of your Hero's important information such as Level, Health, Powers, and their currently equipped Loot!
Class: Every fantasy Hero needs one!
Level: Keeps track of your Hero's current level and the new abilities that come with them.
Starting Dice and Life: At the beginning of your adventure, this is your Hero's Health and the number of dice they can roll during a fight. This number increases as your Hero levels up.
Hero Powers: Shows your Hero's Powers that can be activated during a fight.
Level-Up Cost: The number of Coins you must spend to reach the next level.
Weapon and Armor Slots: Place your Hero's currently equipped Weapon and Armor Loot here. Their Effects will help you fight Monsters. Your Hero can only have 1 of each Weapon and Armor Loot type equipped at a time, but can change their equipped Loot at any time (even during other players' turns) EXCEPT during a fight!
End of the Game Fame Points: The higher your Hero's level at the end of the game, the more Fame they will receive.
Dungeon Board
Every adventurer needs a DUNGEON. This is yours, and this is how it works:
Level: The Dungeon is divided into 3 levels, defined by their color and number. The deeper you go, the stronger the foes you will face, and the higher the Rewards you will gain.
Clearing the Room Reward: If you were able to defeat all the Monsters in your room, you will receive the Clearing the Room Reward depending on your level on the Dungeon Board.
Fame-O-Meter: You can get Fame from Rewards, Loot, or different Effects on cards. Keep track of your Fame using the Fame-O-Meter.
Threat Pool: All Threat tokens you gather for entering different Rooms stay here and can be used against you.
Boss Lair: The Boss awaits in the deepest parts of the Dungeon for those brave enough to fight it.
Monster Rooms and Rewards: You will find Monsters in Rooms marked with the monster icon. The deeper the level of the Dungeon Board, the stronger the Monster. Each Monster Room has a different Reward for defeating its inhabitant.
Dungeon Entrance: Your adventure starts here.
Available Loot Area: Rewards often involve getting new Loot from the Available Loot Area. Always keep 4 Loot cards displayed face up in this area, drawing a new one as soon as one slot empties.
Empty Rooms: You won't find any Monsters living in these Rooms, but that doesn't mean they are completely safe! Each Empty Room has a different Effect: some offer an immediate Reward for entering, but all of them add Threat tokens to the Pool.
Monster Graveyard: This is where defeated Monster figures lay down to rest.
End of the Game Fame Points: Different Loot cards give you different amounts of Fame to be added to your total Fame at the end of the game.
Loot Cards
Name: The name of the Loot card.
Type: Indicates whether the Loot is an Armor, Weapon, or Item.
Effect: Each Loot card has a different Effect. The Effect of Items and equipped Weapons and Armor will influence your Hero during combat.
Sweet, sweet Loot! You collect Loot (marked with a lock icon on the Board) when you win a fight, or maybe as part of another card's Effect. Loot cards are divided into 3 different types: Weapon, Armor, and Item. Weapons and Armor can be equipped on your Hero Dashboard, while Items can be hoarded and assist you in times of need.
Room Cards
Empty Room
- Name: The name of the Room.
- Coins: As soon as your Hero enters a new Room, you immediately receive a certain amount of Coins.
- Effect: Each Empty Room has a different Effect.
- Threat Value: As soon as your Hero enters a new Room, you immediately add the listed amount of Threat tokens to the Threat Pool.
Monster Room
- Power: Monsters have different Powers to help them during a fight!
- Health: The amount of Health this Monster has.
- Attack Dice: How many dice this Monster rolls against your Hero.
- Monster Room Sign: Indicates there's a Monster in this room. Look out!
- Room Level: The level of the Monster Room and where it should be placed on the Dungeon Board.
Boss Room
- Boss Stage: Bosses have 3 different stages, meaning they must be defeated 3 times, and will only get stronger and angrier until that happens!
Threat Cards
- Threat Cost: How many Threat tokens you must spend to play the Threat card.
- Name: The name of the Threat card.
- Type: Indicates whether the Threat is a Monster or an Event card.
- Effect: Threat Events have different Effects that must be resolved immediately. Follow each card's instructions. Many Effects can last a whole turn or until a specific condition is met.
- Power: Threat Monsters have different Powers to help them during a fight.
- Attack dice: How many dice this Threat Monster rolls against your Hero.
- Health: The amount of Health this Threat Monster has.
Setup
We know you're EAGER to kick open doors and fight Monsters, but setting up the game correctly comes first. Fortunately, it's not complicated. Just do the following:
A. Place the Dungeon Board in the middle of the table within reach of all players. (And yes, before you ask, I am bound by the rigid tracts of our ancient board-gaming order to tell you to place the game board on the table.)
B. Choose 1 Boss, take its 3 Boss cards and place them on the Boss Lair on the Board in ascending number order, with the first card faceup on top. Place the corresponding Boss figure on top of the cards.
C. Time to fill the Dungeon! Separate the Monster Room cards by level. Then, randomly select the Roaming Monsters that will fill your Board, placing their cards and figures on each Monster Room of corresponding level on the Board. Place all unused Empty and Monster Room cards and Roaming Monster figures back in the box. (Regarding the obviousness of this directive, please reference the parenthetical of point A above. Thanks.)
D. Once the Monster Rooms are filled with Roaming Monsters, place the Empty Room cards on the remaining Rooms of the Dungeon, once again on their corresponding levels of the Board.
E. Super Munchkins might appear during the game, and you must be prepared: keep the Super Munchkin Dashboards and figures close to the Board, within reach of all players.
F. Shuffle the Loot cards and reveal 4 of them, placing 1 in each slot in the Available Loot Area. Leave the Loot Deck close to the board, with enough room for a discard pile.
G. Shuffle both the Threat Monster and Threat Event cards together to create the Threat Deck. Place it facedown next to the board, within reach of (you guessed it!) all players, with enough room for a discard pile.
H. Create separate pools for Coins, Potions, Damage, Shame, Dice, and Threat tokens.
I. Each player then sets up their play area. Choose your Hero, take the corresponding Hero Dashboard and figure, and attach a counter base in your choice of color. Place the Fame Tracker of the same color on the 0 slot of the Fame-O-Meter, and your Hero at the Dungeon Entrance. Place your Level Tracker on Level 1 on your Hero Dashboard. Finally, take 1 Coin and 1 Potion, keeping them close to your play area.
J. You are now ready to kick some doors and grab some Loot! But first, you must go through the ancient rite of choosing the first player: You are free to compete against each other to decide who the first player will be. We recommend choosing the one who tells the worst joke or the one who best imitates the Large Angry Chicken.
Ok, NOW you are ready to kick open some doors.
Welcome to Munchkin Dungeon!
Goal of the Game
Welcome, dear player, to Munchkin Dungeon! As you are no doubt a canny strategist, I'll assume you'd like to know the GOAL OF THE GAME (as alluded to in the subheading up there).
IN SHORT, you have to kick open doors, fight Monsters, collect Loot, and level up. Why go through all the trouble? Well, aside from the fact that this is clearly a satire of medieval fantasy tropes that hews closely to obvious genre conventions, your goal is to become the most FAMOUS dungeon looter ever!
As such, the player with the most FAME at the end of the game wins.
Know Your Monster
In Munchkin Dungeon, there are 3 different types of Monsters:
- Roaming Monsters live in Monster Rooms on the Dungeon Board and are divided into Level 2 and Level 3 Monsters.
- Threat Monsters are smaller Monsters that don't live in a specific Room in the Dungeon. They only appear on Threat Monster cards and can be played in any Room, so they don't have a specific Level.
- Bosses are big, strong, and give a lot of Fame. They have their own figure and 3 different Boss cards. Unlike Roaming Monsters, being defeated only makes them angrier and stronger. (More on Bosses on pg. 10.)
Gameplay
All right, time to find out how the fantasy-board-game sausage gets made. Starting with the first player, you're going to alternate taking turns in clockwise order until EITHER one of you reaches 20 Fame Points on the Fame-O-Meter OR the Boss is defeated for the third time (heh, good luck, friends), ending the game.
Player Turn
During a turn, the Active Player will perform these 4 phases in order:
- KICK OPEN THE DOOR
- GET IN TROUBLE
- RESOLVE THE ROOM
- LOOT & REST
During your turn, the player on your left is the designated Monster Player. They'll make the rolls and decisions for the Monsters. You hate them. Never forgive them for this betrayal.
1. Kick Open the Door
In this phase, you, also known as the Active Player, advance your Hero through the Dungeon, starting at any of the Level 1 Rooms and continuing along the available connections (stairs!) between Rooms until you decide to stop and face your Threats OR until you find another Hero or a Roaming Monster.
You're obligated to move at least once on your turn (so no hunkering down for a quick power nap!). You cannot jump across Rooms, so you must move 1 Room at a time, resolving its Effects before moving on to the next. Whenever your Hero enters a Room, you immediately take its Rewards, such as Coins, tokens, or other thing-a-ma-jigs. Then, add Threat tokens to the Threat Pool on the Dungeon Board as indicated by the Room card.
Pushing Your Luck
The more Rooms you enter during your turn, the more Threat tokens you add to the pile. Passing through several Rooms in the Dungeon is all fun and games until these tokens come back to haunt you.
Whenever you enter a Room with another Hero or a Roaming Monster, you must stop. Finding another Hero usually has no further consequences, but Roaming Monsters are always asking for a fight, and you must deliver it.
Whatever your encounter is, it leads you to the next phase, and that means it's time to Get in Trouble (told you it was coming back to haunt you).
EXAMPLE 1: It's Regina's first turn and her Warrior is at the Dungeon Entrance. She starts her adventure at the Farm Villa, which has 1 Coin she collects, and 2 Threat tokens she adds to the Threat Pool. She could stop, but she wants to push her Warrior's luck and go deeper into the Dungeon, so she follows the stairs to the Tournament Hall. This new Room adds 2 more tokens to the Threat Pool and no Coins are gained. She could keep moving until she finds a Roaming Monster and is forced to stop and fight, adding new Threat tokens to the Pool for each Room she passes by, but she decides this is enough adrenaline for the first example, and stops.
2. Get in Trouble
In this phase, all the Rival Players (meaning everyone who is not the Active Player) can play Threat cards to hurt you (or at least try to!) and prevent you from Clearing the Room (more on the Clearing the Room Reward on pg. 10).
Starting with the player on your left (who is both the Monster Player AND a Rival Player. How dare they?) and going clockwise, each Rival Player may play 1 Threat card at a time, spending tokens from the Threat Pool to pay the card's cost, and repeating until their evil minds are satisfied. Rival Players are free to openly discuss the most punishing, low, and heartless combination of Threat cards and Threat tokens (as if you weren't by their side listening to every horrible thing they say.)
If a Threat Event card is played, its Effect is resolved immediately.
If a Threat Monster card is played, place it near the Active Player's Room. The Monster will join the fight during the Resolve the Room phase.
EXAMPLE 2: There are 4 tokens in the Threat Pool and Robert plays a Threat Monster card: 2,783 Orcs, spending 3 Threat tokens from the Pool. It's now Marie's turn and there's only 1 Threat token left in the Pool. She plays Enraged!, which allows her to move 1 Roaming Monster following the stairs on the Board. The Harpy is right below Regina's current Room, so Marie decides to move it to join the fight. Things are not looking good for Regina!
3. Resolve the Room
If there are no Roaming Monsters in the Room and no Threat Monsters were played, skip this step and go to "Loot & Rest."
In this phase, you must fight all the Monsters in your Hero's Room. This includes any Threat Monsters played during the previous phase.
Monster Fightin' 101
A. The Active Player (that's you!) rolls the number of dice indicated on their Hero Dashboard (according to their current level and their equipped Loot cards). For every reroll icon you have (gained by level or Loot), you can reroll a single die once.
You can spend Potion tokens to roll extra dice (one die for each token you spend).
B. All Monsters (Roaming and Threat) share a single dice pool and will attack you at the same time. The Monster Player rolls the total dice for all Monsters at once.
Fight Dice
- Blank: Nothing happens. Womp womp.
- Sword: Each generates 1 Hit.
- Shield: Each prevents 1 Hit.
- Lightning bolt: For each Lightning bolt, the Active Player may choose 1 Item or equipped Weapon or Armor, or 1 of their Hero Powers from the Dashboard to activate. Each Power can only be activated once during each fight.
The Monster Player may spend Lightning bolt symbols to activate Monster Powers (Roaming and Threat). As with the Hero, each Power can only be activated ONCE during a single fight.
C. Unblocked Hits are simultaneously inflicted as Damage: You may split the Damage your Hero deals among the Monsters you're fighting as you wish. If the Damage dealt is equal to or greater than a Monster's Health, that Monster is defeated. If you inflict Damage to a Monster, but not enough to defeat it, that Damage has no effect! You must defeat Monsters in one go or they will fully heal themselves by the end of the phase. For each Damage your Hero receives after a fight, take 1 Damage token from the supply and place it on top of 1 Heart on your Hero Dashboard (only covering the ones available according to your level). If, based on your current level, you don't have any more Hearts to cover, it is YOU who have been defeated. (So humiliating...)
EXAMPLE 3: Regina is facing 2,783 Orcs plus an Enraged Harpy with her Level 1 Warrior. She rolls 3 dice and has 1 reroll. Regina rolls the dice and the results are 3 Lightning bolts! She has only 2 Hero Powers to activate. She rerolls the 3rd die and gets a Sword!
By activating both her Hero Powers, she is getting 5 total Hits (2 from Quick Attack, 2 from Berserk, 1 from her Sword roll) and takes 1 Damage for using Berserk. In order to improve her odds of winning, Regina decides to spend a Potion token to roll 1 extra die: she rolls a Shield! It's Marie's turn to roll the dice for the Monsters.
EXAMPLE 4: Marie rolls a total of 5 dice: 3 for the Orcs and 2 for the Harpy (the original single die plus the Enraged! additional die), and gets Sword + Sword + Shield + Lightning bolt, and 1 blank. Thanks to the Harpy's ability, it also gets an automatic Sword. Since neither the Orcs nor the Harpy have Powers that can be activated with Lightning bolt, the Monsters have scored 3 Swords and 1 Shield.
EXAMPLE 5: Regina's Warrior deals 4 Damage to the Monsters (5 Hits from her attack minus 1 Shield from the Monster roll). Both the Orcs and the Harpy have 2 Health, meaning Regina managed to defeat them all in one go! But she still takes the Damage from the Monster roll: 2 Hits (3 Swords minus the Shield she rolled thanks to the Potion she spent). She covers 2 more Hearts on her Hero Dashboard, 1 already being covered by a Damage token for using Berserk, leaving her Warrior with only 1 Heart left! Tough fight, but she prevails!
Defeated Heroes
If your Hero was defeated, take them back to the Dungeon Entrance. You get 1 Shame token for being defeated, but you can still continue your adventure and get revenge!
You will re-enter the Dungeon fully healed, so discard all Wound tokens from your Hero Dashboard. Thankfully, your Loot, level, and Coins remain untouched, and your recently Defeated Hero will still perform the Loot & Rest phase.
Defeated Monsters
After you defeat a Roaming Monster, place its figure in the Monster Graveyard. But don't think the Monsters will remain there for long! You can only keep 2 Roaming Monsters in the Graveyard at any time. If a 3rd one is about to be added, the 2 Roaming Monsters who were there respawn and go back to their respective Monster Rooms on the Dungeon Board. The 3rd Monster stays in the Graveyard.
Undefeated Roaming Monsters stay in their Room (and remember, they fully heal themselves!).
At the end of the Resolve the Room phase, all Threat Monster cards (both defeated and undefeated) are discarded.
Fighting the Boss
If your Hero enters the Boss Lair, you've gotta fight THE BOSS. Its Powers are listed on the Boss cards. The Boss Battle works like every other fight, with the following additions:
- The Boss Lair generates no Threat points, but Rival Players can still play Threat cards against you.
- If you defeat the Boss (bravo!), you gain 8 Fame points on the Fame-O-Meter. Discard the Boss card you just defeated. The next player to fight the Boss will face a much tougher version (the new card on top of the pile)!
- If you are defeated by the Boss, you get 1 Shame token (and all your friends at the table can make fun of you).
- Unless defeated in one go, the Boss will fully heal itself, and its Boss card will remain there waiting for the next opponent.
- After fighting the Boss, your Hero goes back to the Dungeon Entrance, no matter the outcome.
4. Loot & Rest
In this phase, you collect the Loot for defeating Monsters, have the opportunity to level up, and acquire new equipment.
Rewards
For each defeated Roaming Monster, collect the Reward shown on its corresponding Monster Room slot on the Dungeon Board.
If, after Resolving the Room, you've defeated ALL the Monsters you faced, or if you didn't face any Monsters to begin with, you collect the Clearing the Room Reward related to that Room level, indicated on the Dungeon Board. You collect this bonus even if you were defeated, as long as you successfully Cleared the Room.
Resting
Now you can level up your Hero by spending the number of Coins indicated on your Hero Dashboard. If you have enough Coins, you can level up multiple times during a single Loot & Rest phase. Move your Level Tracker to your new level. Each new level has new benefits, like extra Hearts, rerolls, and/or more dice in combat!
If you have fewer than 4 Threat cards in your hand, it's time to fill your hand back up to 4. Your turn is OFFICIALLY OVER. The player next to you in clockwise order becomes the next Active Player, and you can finally get revenge on them.
EXAMPLE 6: Regina defeated the Harpy, a Roaming Monster. The Reward, as shown on the Dungeon Board, is 2 Coins she immediately collects. Since she defeated all the Monsters in her Room (Roaming and Threat), she has also Cleared the Room! She collects the Reward for Clearing a Level-2 Room: 2 Fame (she moves her token 2 spaces on the Fame-O-Meter) and 1 Loot card (drawn from the Available Loot Area). The Alpha Gamer Helmet is there for the taking, and Regina could use an Armor Loot, so she takes and equips it. Finally, because she Cleared the Tournament Hall, she gets 3 Coins due to the Room's special Effect.
EXAMPLE 7: Regina has a total of 8 Coins. Time to seriously level up her Warrior! She spends 2 Coins to level up from 1 to 2, 2 Coins to reach Level 3, and 3 Coins to level up to Level 4! Her Warrior now has 1 extra die to roll in combat and 1 extra Health. At the end of the game, she will also gain 2 Fame for reaching Level 4. Since she was the 1st player, she still has all her 4 Threat cards, and doesn't need to fill her hand. It's Robert's turn!
End of the Game
Some philosophers would say nothing truly ends because nothing truly begins. This game, on the other hand, ends IMMEDIATELY as soon as EITHER a player reaches 20+ Fame Points on the ol' Fame-O-Meter OR the Boss is defeated for the 3rd time.
Scoring and Winning
At the end of the game, players score Fame for the level they reached on their Hero Dashboards (as seen above) and additional Fame for all the Loot they own (as seen on pg. 4). Players also LOSE 1 Fame for each Shame token they have.
After everyone tallies up their Fame (everybody say it with me now), THE PLAYER WITH THE MOST FAME WINS THE GAME!
In case of a tie, the tied player with the fewest Shame tokens wins. In case of a further tie, the tied player with the most combined Coins and Potions left wins. In case of a FURTHER tie (once again, following the rigid tracts of our ancient board-gaming order), the winner is the one who, between the tied players, most dramatically imitates the Plutonium Dragon being defeated.
EXAMPLE 8: By defeating the Plutonium Dragon, Regina reaches 24 Fame on the Fame-O-Meter, ending the game. Players now add their scores:
Marie has 18 Fame on the Fame-O-Meter by the end of the game. She earned a good Loot collection, scoring another 23 Fame! She has 1 Shame token, giving her a total of 40 Fame points. Robert has 18 Fame on the Fame-O-Meter, plus 25 Fame from his Loot cards, minus 1 for his single Shame token. His total is 42. Regina has 24 on the Fame-O-Meter, plus 20 Fame from her Loot cards. She has 2 Shame tokens, so her total is also 42! She and Robert are tied, and Robert wins for having fewer Shame tokens.
Summary
Rules Summary
On Your Turn
1. Kick Open the Door
- Move down the Dungeon following the stairs, adding Threat tokens to the Threat Pool, and collecting the Rewards for each Room you decide to go through. Stop when you meet another Hero or a Roaming Monster (or before that, if you feel like it).
2. Get in Trouble
- Opponents may spend Threat tokens to play Threat cards, 1 at a time, in clockwise order from the Active Player. They stop when they've run out of Threat tokens, 0-cost Threat cards, or when they feel sufficiently entertained.
3. Resolve the Room
- Roll your dice. Roll extra dice by spending Potion tokens. Apply rerolls according to the information on your Hero Dashboard (your current Level and equipped Loot cards).
- The Monster Player rolls the dice for all the Monsters at once.
- Resolve the fight.
4. Loot & Rest
- Collect Loot from defeated Monsters.
- Collect the Clearing the Room Reward, if any.
- Rest: Spend Coins to level up and, if needed, refill your hand to 4 Threat cards.
Dealmaking Munchkin Dungeon: Variant Rules
In this variant of Munchkin Dungeon, players can make deals at any point in the game. They can exchange Coins and Loot.
Everything can be the object of a deal: "I'll give you 2 Coins if you don't play Enraged! against me this turn." "Oh, I'll give you 3 Coins if you play it against him, instead!" Payments must be made immediately. However, promises of doing something in the future (to play or not to play a certain card, moving or not moving yourself or a Roaming Monster in any direction) are not binding...