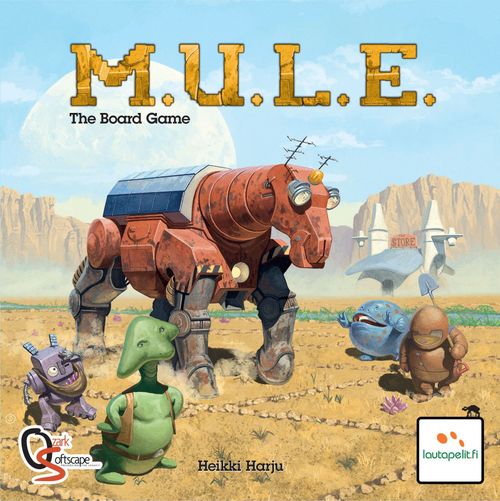
M.U.L.E. The Board Game
M.U.L.E. The Board Game Rulebook
Table of Contents
Table of Contents
- Objective of the Game
- Three Ways to Play This Game
- Game Components
- Set-up — Beginner Game
- Set-up — Tournament Game
- Turn Sequence
- 1. Expansion
- 2. Development
- Action Rounds and Actions
- Buy a M.U.L.E. in the White Zone
- Refit a M.U.L.E. in the White Zone
- Buy a M.U.L.E. in the Red/Blue Zone
- Refit a M.U.L.E. in the Red/Blue Zone
- Refit M.U.L.E.s on Two Adjacent Lands
- Move a M.U.L.E. to Any Other Land
- Assay Any Two Lands
- Hunt the Wampus: gain $10 if successful
- Gamble at the Pub: gain $5, end Phase
- M.U.L.E. Production in The Store
- 3. Usage and Spoilage
- 4. Production
- 5. Pricing
- 6. Market
- 7. Ranking
- 8. Personal Events
- Game End and Winning
- Miscellaneous Rules and Principles
- Questions and Answers
- Strategy Tips
- Optional Rules
- Colonist Cards and Special Talents (designer recommends)
- Random Land Placement (designer recommends)
- Variable Number of Game Turns (designer recommends)
- More Game Turns (designer recommends)
- Secret Bidding in Land Auctions (designer recommends)
- Land Auctions before Land Grant (designer recommends)
- More Predictability
- More Land Auctions
- Single Action Round per Turn
- Declaring Buyers and Sellers
- Colonists Preferred over The Store in Auctions
- Sequence of Play Summary (Reference Card)
Objective of the Game
M.U.L.E. (abbreviated from "Multiple Use Labor Element") is a warmhearted game of cut-throat capitalism where Players (also called "Colonists") are settling the remote Planet Irata on behalf of a Galactic Federation. They claim plots of land and install mechanical robots (M.U.L.E.s) to work on them. M.U.L.E.s produce Goods that Colonists can use, stockpile or (hopefully) sell for profit.
There will be unexpected surpluses and shortages of different Goods, causing market prices to fluctuate. Players must plan ahead while maintaining flexibility to change their plans as conditions change. The player with the biggest amount of Galactic Dollars (money) in the end wins and is declared the First Founder of the Colony.
Three Ways to Play This Game
Beginner Game
Recommended for your first game(s) of M.U.L.E. It is nearly the same as the Tournament (yes, including Crystite), but the set-up is a little more forgiving and leaves out some rules that are easier to grasp after playing the game at least once. The Set-up for the Beginner Game is shown on pages 6-7.
Tournament
The complete set of rules and a flexible starting point, recommended for experienced players who seek challenge and hard decisions. Additional rules introduced in Tournament are shown in Yellow Boxes (see the margin of this page for an example). The Set-up for Tournament is shown on pages 8-9.
Optional Rules
Introduces different ways to customize the game once you have played with the Tournament rules several times. Suggestions for Optional Rules can be found on pages 22-23.
NOTE Brown Sections of this Rulebook, such as this one, contain rules that only apply when using Tournament rules. Skip these sections if you are playing the Beginner Game.
Component List
Large Components
- Rulebook — 1
- Game Board — 1
- Player Boards — 4
Cards
- Lucky Event Cards — 12
- Unlucky Event Cards — 9
- Production Cards — 24
- Land for Sale Cards — 8
- Player Species Cards — 8
- Package From Home World cards — 6
Wooden Counters
- 1-Food Counters — 40
- 5-Food Counters — 4
- 1-Energy Counters — 40
- 5-Energy Counters — 8
- 1-Smithore/M.U.L.E. Counters — 70
- 5-Smithore Counters — 8
- 1-Crystite Counters — 30
- 5-Crystite Counters — 12
- Auction Tracker — 1
Punchboards and Stickers
- $1 Counters — 32
- $5 Counters — 24
- $10 Counters — 24
- $50 Counters — 24
- $250 Counters — 2
- Sequnce of Play Summaries — 4
- River Tiles — 4
- Plains Tiles — 24
- Low Mountain Tiles — 8
- High Mountain Tiles — 8
- Meteor Crater Tiles — 2
- Ranking Tokens — 8
- Buyer/Seller Tokens — 4
- Sheet of M.U.L.E. Stickers — 1
Game Components
The Game Board
is divided into "Planet Irata" and "The Store" sections. Planet Irata is a map, used to set up the Land Tiles that Colonists claim during the game. The central square of Planet Irata symbolizes the location of The Store. The right side of the Board zooms the view inside The Store and has four trade posts for different Goods, the Price Track for those Goods and four small houses that are used for Ranking the Colonists, also called the Ranking Track.
Player Boards
are distributed to players, one for each. They are used to keep track of everything the players own. Player Boards contain a smaller map grid for claiming Lands, four Stocks for storing Goods and a picture of a Colonist species.
Land Tiles (Lands)
represent plots of land that Colonists can claim to produce Goods. There are four basic Land types present on Planet Irata at the beginning of the game: Rivers, Plains, Low Mountains and High Mountains. In addition, Meteor Craters can enter play later through a Production Card effect.
Each Land has Production Values for the four Goods in the game, except Rivers which only have Production Values for Food and Energy. Production Values can range from zero (X) to three (three dots), depicted by colored icons on the four sides of the Land. Each Land can be used to produce only one type of Good at a time, which can be changed during the game. Only a Land with a M.U.L.E. installed to work on it and having sufficient Energy may produce Goods.
All Plains and Mountains have two sides: a Public Side and a Secret Side. Only the Secret Side shows their Crystite Production Value, while the Public Side has a Question Mark (?) in its place. The Secret Side of a Land can only be viewed by Assaying the Land or by trying to produce Crystite on it (which will be explained later in the rules). Rivers and Meteor Craters only have a Public Side.
Goods Counters
represent the four Goods in the game: Smithore, Crystite, Food and Energy, each with their own unique function:
Smithore is a metal that cannot be used by players directly, but can be sold to The Store. The Store uses Smithore to manufacture M.U.L.E.s. Since players need M.U.L.E.s to produce all their Goods, they must sell Smithore to The Store to increase their production. High Mountains, Meteor Craters and to a lesser extent Low Mountains are well-suited for producing Smithore. Smithore cannot be mined on Rivers.
Crystite is a luxury mineral with a highly volatile price. It is not needed for anything on Planet Irata, but can be exported to other worlds for great profits (unless stolen by Pirates – you have been warned!). Both Plains and Mountains may harbor variable Crystite deposits, but this information is initially hidden on the Secret Sides of the Land Tiles.
Crystite can be discovered by either Assaying a soil sample from the Land or by trying to produce Crystite on it and hoping to succeed by dumb luck. Meteor Craters always contain high amounts of Crystite. Like Smithore, Crystite cannot be mined on Rivers.
Food is needed by players to take Development Actions, such as Assaying Lands or Installing/Refitting M.U.L.E.s. Rivers are best-suited for producing Food.
Energy is needed to power M.U.L.E.s. The only exception to this rule are M.U.L.E.s that produce Energy: they do not use Energy themselves. Plains are ideal for producing Energy.
Event Cards and Production Cards
are drawn during each Game Turn, containing personal news, major colony-wide events and "fun" planetary disasters. Some of these events also serve as equalizers, making it hard for one player to dominate the game.
Hand Cards
are held by Players and used at their discretion. There are two kinds of Hand Cards in the game: Package From the Home World! and Land for Sale! The latter are used under Tournament rules only.
Colonist Cards
are available as an Optional Rule under Tournament rules. They add Special Talents to the Colonist species. Each species is featured in two color schemes to enable two Colonists to play that species simultaneously.
Ranking Tokens
are used to track the Colonists' wealth on the Ranking Track. Ranking affects play order in some Phases. It also affects how different random events affect the Colonists, usually to the advantage of Low-ranking Colonists. Each Ranking Token is featured in two color schemes, matching the Colonist Cards.
Buyer/Seller Tokens
may be used to indicate that a player has already Bought or Sold a Good during an Auction and therefore can no longer do the opposite in the same Auction.
The Auction Tracker
is used to track progress of the Market Phase from one Auction to another. It is also used to mark which Land is being sold in a Land Auction when playing with Tournament rules.
Galactic Dollars (Money)
are used to Buy and Sell Goods with The Store and between Colonists. The player with the biggest amount of Dollars in the end wins!
Turn Sequence Summaries
show the sequence of Phases in each Game Turn for quick reference during play. The reverse side of the Turn Sequence Sheet can be used by Players to signal that they have finished a Phase (e.g. Development Phase) or an Auction.
Set-up — Beginner Game
For Your First Game(s) of M.U.L.E.
1. Game Boards & Sequence of Play
Open the Game Board on the middle of the table. Each player picks one Player Board featuring a Colonist species, (do not pick Humanoid or Flapper if you want the players to be equal) and one Turn Sequence Summary sheet.
2. Planet Irata
Select randomly the following Lands to be placed on Planet Irata:
| Land Type | Quantity |
|---|---|
| Plains | 18 |
| Low Mountain | 6 |
| High Mountain | 6 |
Some Lands will be left over: this is intentional. Put all of them except Rivers and Meteor Craters back into the box without looking at their Crystite production values.
Turn all the Lands you picked so that their Public Side is showing, (the side with a (?) symbol). Shuffle the Lands on the table and place them on Planet Irata (still with their Public Sides up), one Land per square, into squares showing the same type of Land. Note that River locations are left empty in the Beginner Game, as all players already start with a River Land. The center square (The Store) is also left empty.
When setting up Lands, check that their Public Sides are up.
3. Event Cards
Shuffle the Lucky and Unlucky Event cards into separate decks and place them next to the Board, face down.
4. Production Cards
Separate the four (4) The Ship is Back! cards from other Production Cards. Pick one random The Ship is Back! card and (without looking at it) put it on the table in front of you, face down. Put the other three The Ship is Back! cards back into the box (without looking at them).
Shuffle the other 20 Production Cards and deal five (5) of them on top of the one The Ship is Back! card you just separated, face down (without looking). This deck of six (6) cards is the deck of Production Cards that will be used in the game. Place it next to the Board, face down.
Put the remaining Production Cards back into the box (again, without looking at them).
5. Price Track
Place four different Goods counters on the Price Track to mark the starting Price of each Good. All Prices start at minimum values: 5/3 for Smithore, 6/4 for Crystite, 3/1 for Food and 3/1 for Energy.
6. The Store
Place the following amounts of Goods into their respective trade posts within The Store:
| Goods & M.U.L.E.s | 3 Players | 4 Players |
|---|---|---|
| M.U.L.E.s | 12 | 12 |
| Smithore | 4 | 8 |
| Food | 6 | 8 |
| Energy | 6 | 8 |
Note: The Store example in the adjacent picture is showing the set-up quantities for 4 Players.
7. Players
Pick Ranking Tokens representing the Colonists featured on the Player Boards. Shuffle the Tokens and place them in random order on the Rank Track to form the initial Ranking.
Place one River Land on each Player Board, on any square showing a riverbed (both squares are equally good). Place a M.U.L.E. counter on the River and rotate it so that the green icons are facing up: this Land is now producing Food.
All players start with the following:
| Items | Quantity |
|---|---|
| Food | 4 |
| Energy | 3 |
| Money | $30 |
| Package from Home World! Card | 1 |
| Buyer/Seller Token | 1 |
8. Money and Other Counters (Beginner)
Place all Money not belonging to Colonists, the Auction Tracker, the Meteor Crater Tiles and all extra Goods counters as neutral stacks somewhere near the Board, within easy reach of all players.
Set-up — Tournament Game
For the Full M.U.L.E. Board Game Experience
1. Game Boards & Sequence of Play
Open the Game Board on the middle of the table. Each player picks one Player Board featuring a Colonist species, (do not pick Humanoid or Flapper if you want the players to be equal) and one Turn Sequence Summary sheet.
2. Planet Irata
Select randomly the following Lands to be placed on Planet Irata:
| Land Type | 3 Players | 4 Players |
|---|---|---|
| River | 3 | 4 |
| Plains | 18 | 18 |
| Low Mountain | 6 | 6 |
| High Mountain | 6 | 6 |
Some Lands will be left over: this is intentional. Put all of them except Meteor Craters back into the box without looking at their Crystite production values.
Turn all the Lands you picked so that their Public Side is showing, (the side with a (?) symbol in all Lands except Rivers). Shuffle the Lands on the table and place them on Planet Irata (still with their Public Sides up), one Land per square, into squares showing the same type of Land. The center square (The Store) is left empty.
When setting up Lands, check that their Public Sides are up.
3. Event Cards
Shuffle the Lucky and Unlucky Event cards into separate decks and place them next to the Board, face down.
4. Production Cards
Separate the four (4) The Ship is Back! cards from other Production Cards. Pick one random The Ship is Back! card and (without looking at it) put it on the table in front of you, face down. Put the other three The Ship is Back! cards back into the box (without looking at them).
Shuffle the other 20 Production Cards and deal six (6) of them on top of the one The Ship is Back! card you just separated, face down (without looking). This deck of seven (7) cards is the deck of Production Cards that will be used in the game. Place it next to the Board, face down.
Put the remaining Production Cards back into the box (again, without looking at them).
5. Price Track
Place four different Goods counters on the Price Track to mark the starting Price of each Good. All Prices start at minimum values: 5/3 for Smithore, 6/4 for Crystite, 3/1 for Food and 3/1 for Energy.
6. The Store
Place the following amounts of Goods into their respective trade posts within The Store:
| Goods & M.U.L.E.s | 3 Players | 4 Players |
|---|---|---|
| M.U.L.E.s | 12 | 12 |
| Smithore | 4 | 8 |
| Food | 5 | 6 |
| Energy | 5 | 6 |
Note: The Store example in the adjacent picture is showing the set-up quantities for 4 Players.
7. Players
Pick Ranking Tokens representing your Colonists. Shuffle the Tokens and place them in random order on the Rank Track to form the initial Ranking.
All players start with the following, (and without any Lands or M.U.L.E.s):
| Items | Quantity |
|---|---|
| Food | 4 |
| Energy | 2 |
| Money | $30 |
| Package from Home World! Card | 1 |
| Land for Sale! Card | 1 |
| Buyer/Seller Token | 1 |
Colonist Cards with Special Talents are available as an Optional Rule: players pick one Colonist Card and place it on their Player Board, overriding the default Species. You may agree that the player who gets to pick their Colonist first starts as Rank 1, the next as Rank 2, and so on.
8. Money and Other Counters (Tournament)
Place all Money not belonging to Colonists, the Auction Tracker, the Meteor Crater Tiles and all extra Goods counters as neutral stacks somewhere near the Board, within easy reach of all players.
Turn Sequence
A game of M.U.L.E. is divided into Game Turns. Each Game Turn is further divided into eight Phases. This section describes each of these Phases, with examples in page margins. The Phase order is also listed in the Sequence of Play Summary sheets for quick reference.
NOTE: Red Sections of this Rulebook, such as this one, contain reminders of important rules that can be easy to overlook.
1. Expansion
Expansion Phase begins with Land Grant, in which each Colonist claims a free Land. Land Grant is repeated on Turn 1. When using Tournament rules, colonists may initiate Land Auctions after Land Grant to gain even more Lands (see Land Auctions below).
Land Grant
Starting from the Lowest Ranking Player and proceeding in reverse Rank order, each Colonist claims (picks) one Land of their choice from Planet Irata, for free, and places it on their Player Board. Players are not allowed to look at the Secret Side of the Land when claiming it.
Do not look at the Secret Side of a Land when claiming it.
Planet Irata is divided into three Zones: White Zone, Red Zone and Blue Zone, defined by the border color of the squares. The same Zones are also depicted on the Player Boards. A claimed Land must always be placed on an empty square on the Player Board that matches the Zone of the square the Land was taken from on Planet Irata. A player cannot claim a Land unless he has an empty square in a matching Zone on his Player Board.
In addition to Zone restrictions, River Lands can only be placed on the two squares of the Player Board depicting a river bed, just above and below the central square (The Store). This restriction only applies to Rivers: Plains and Mountains on the White Zone can also be placed on these two river bed squares. The Store square in the middle is not in any Zone and cannot be used for placing Lands.
Once placed on a Player Board, Lands can never be voluntarily moved. The facing of a Land (that is, the orientation of the colored icons on its sides) is meaningless when claiming and placing the Land on a Player Board. The facing will be changed when a M.U.L.E. is placed to work on it, (which will be explained in section 2. Development).
In the late stages of the game there may not be enough Lands left for everyone. In this case, it is entirely possible that some or all players are left without a Land in Land Grant.
Second Land Grant on Turn 1
On the first Game Turn only, Land Grant is repeated. That is, on the first Turn, once everyone has picked one Land, they also pick a second Land in the same play order.
Land Grant Example (Beginner Game): In the first Land Grant Phase, Ranking is, from the Highest Rank to the Lowest: Packer, Leggite, Spheroid and Mechtron. As the lowest Ranking Colonist, Mechtron picks his Land first and places it on his Player Board, followed by Spheroid, Leggite and finally Packer.
Packer picks a Plains tile from the Red Zone, so she must place it on one her squares with a red border. Packer already had a River tile on the White Zone from the set-up and she decides to place the Plains tile next to it.
TIP: When choosing the Land to claim, consider that:
- Lands on the White Zone require less Food to Develop than lands on the Red Zone or the Blue Zone (See 2. Development).
- It takes less Food to Refit two M.U.L.E.s on any two adjacent Lands, regardless of their Zones. (See 2. Development.)
- In a Tournament, having Adjacent Lands that produce the same type of Good increases production. (See 4. Production.)
Land Auctions (Tournament only)
After all Land Grants, starting from the Rank 1 Colonist, any player(s) may play one Land for Sale! card if they still have one. Once played, the Land for Sale! card is discarded.
The Colonist playing the card places the Auction Tracker on any unclaimed Land on Planet Irata and opens bidding for it. The opening bid must be exactly $8. After the opening bid (and each subsequent bid) each Colonist can, in clockwise order, either raise the bid by exactly $2 or Withdraw. Withdrawn players are not able to make further bids in the same Auction. Bidding continues until the highest bidder claims the Land.
The Colonist who wins the Land Auction pays his bid (to the neutral money stacks) and places the auctioned Land on his Player Board, following the placement rules described under Land Grant.
Land Grant Example (Tournament): If the previous example had been the first Land Grant in a Tournament, Packer would not have had the River from the set-up. Instead, there would have been a second round of Land Grant, conducted in the same play order. In subsequent turns (that is, turns other than Turn 1), players pick only one Land during Land Grant.
Land Auction Example (Tournament): After Land Grant, Mechtron (as the Highest Ranking Colonist) must decide first whether he plays a Land for Sale! -card. He decides to do so, selects a Land from the Blue Zone of Planet Irata and places the Auction Tracker on it. Mechtron's opening bid must be exactly $8.
Bidding continues clockwise, with each player either raising the bid by exactly $2 or Withdrawing. In the end, Mechtron is the highest remaining bidder and must pay what he bid: $22. Mechtron picks the Land and places it on any square on the Blue Zone of his Player Board.
After the Land Auction is complete, any other player could also decide to play one Land for Sale! -card, or save it for later.
2. Development
In the Development Phase, colonists can Buy, Re-fit and Move M.U.L.E.s to manage production on their Lands, Assay Lands to discover hidden Crystite deposits and either Hunt the Wampus or Gamble at the Pub to earn Money. In the beginning of the Development Phase, before any player has taken any Actions, some players may be eligible to play a Package from the Home World! card, if they have one. If multiple players play this card, their pre-condition (no other player having a smaller stock) is checked only once, before any such card takes effect.
Action Rounds and Actions
There can be up to three (3) Action Rounds in a Development Phase, each with up to two (2) Actions per Player.
Colonists take turns to perform Action Rounds, starting with the Rank 1 Colonist and ending with the Lowest Ranking Colonist. However, if The Store has six (6) or fewer M.U.L.E.s in its Corral in the beginning of Development Phase, this order is reversed.
Before taking an Action, the Player must first pay its Food Cost by moving a corresponding number of Food units from their Food Stock to their "Food Usage" box. No more than two (2) Food can be used by a Player in one Action Round. Players without Food must Pass.
In one Action Round, each Player can do one of the following:
- Take 1 or 2 Actions that cost 1 Food each
- Take 1 Action that costs 2 Food
- Pass, costing no Food and ending his Development Phase
Within these constraints, Colonists can take any combination of Actions described below in one Action Round, in any order. Development Phase ends when all Colonists have either Passed, Gambled at the Pub or completed three (3) Action Rounds.
Buy a M.U.L.E. in the White Zone
Start by paying the current Dollar price of a M.U.L.E. to The Store, (The Store sells M.U.L.E.s at the same Price as Smithore). After paying both the Food cost of the Action and the Dollar cost of the M.U.L.E., take a M.U.L.E. counter from The Store and place it on one of your empty Lands in the White Zone.
Rotate the Land where you just placed the M.U.L.E. so that the icons representing the type of Good you want to produce are facing up, towards the top of the Player Board. M.U.L.E.s can only be installed to work on Lands, one M.U.L.E. per tile (Players cannot "store" them in their stocks).
- M.U.L.E.s have the same Dollar Price as Smithore.
- Colonists cannot produce their own M.U.L.E.s.
Refit a M.U.L.E. in the White Zone
Refitting a M.U.L.E. means changing the Good that an existing M.U.L.E.s is producing. It costs no Dollars to Refit a M.U.L.E. Simply rotate the Land so that the icons representing the type of Good you now want to produce are pointing up.
Buy a M.U.L.E. in the Red/Blue Zone
This is the same Action as "Buy a M.U.L.E. in the White Zone", except for the higher Food Cost on the two outer Zones.
Refit a M.U.L.E. in the Red/Blue Zone
This is the same Action as "Refit a M.U.L.E. in the White Zone", except for the higher Food Cost on the two outer Zones.
Refit M.U.L.E.s on Two Adjacent Lands
This is the same Action as "Refit a M.U.L.E. in the White Zone", except for the higher Food Cost and the fact that you can Refit any two (2) of your existing M.U.L.E.s that are Adjacent to each other, to produce any Goods (same or different), regardless of their Zones.
Move a M.U.L.E. to Any Other Land
Move any one of your existing M.U.L.E.s to one of your empty Lands. When you take this Action, you can also choose the type of Good the M.U.L.E. will produce in its new Land. The Food Cost of this Action is not affected by Zones.
Assay Any Two Lands
Privately inspect the Secret Sides of any two Lands, one by one, on any Player Board or on Planet Irata. You can Assay one Land before deciding which Land you will Assay next. Put each Land back to the square you took it from, with its Public Side up. You must try to remember what you saw: that is, you are not permitted to look at the Secret Sides of these Lands afterwards without taking another "Assay 2 Lands" Action. Zones have no effect on the Food cost of this Action.
Hunt the Wampus: gain $10 if successful
You try to catch the Mountain Wampus. Draw one Lucky Event Card and look at the icon on the top right corner of the card. If you see a symbol of the Wampus, you catch him. The Wampus gives you the contents of his treasure chest to go free: take $10!
However, seeing a "No Wampus" symbol instead means he got away and you get no treasure. All other effects of the Event Card are ignored and the card is discarded. If you catch the Wampus, you cannot hunt him again this turn.
Gamble at the Pub: gain $5, end Phase
You take your time gambling in the colony pub - and win! Take $5. This is also your last Action and ends your Development Phase. (Note that Passing also ends your Development, but unlike "Gambling" it costs no Food and you do not get to take $5.)
Development Example 1: Action Rounds. This example illustrates an entire Development Phase with three Colonists. There are 10 M.U.L.E.s in The Store in the beginning of the Development Phase, which is more than half of its maximum stock. Therefore, the Highest Ranking Colonist (Gollumer) acts first.
Action Round 1: Gollumer (Rank 1) Assays 2 Lands. He looks at the Secret Side of one of his own Lands first, then the Secret Side of a Land on Planet Irata. This costs him 1 Food. As his second Action he Buys a M.U.L.E. to the White Zone, costing him 1 Food and $7 for the M.U.L.E. Gollumer sets the M.U.L.E. to produce Food, so he rotates its Energy icons to point up.
Mechtron (Rank 2) decides to Hunt the Wampus, costing 1 Food. Mechtron draws an Event Card, sees the Wampus on the top-right corner and collects $10. Mechtron declares that he will take no other Action on this Action Round.
Packer (Rank 3) decides to Buy a M.U.L.E. to the Blue Zone. This Action costs her 2 Food. She picks a M.U.L.E. counter from a M.U.L.E. Pen in The Store, pays its Dollar Price and places it on her empty Land on the Blue Zone. Packer rotates the Land so that its Smithore icons point up to indicate Smithore production.
Action Round 2: Gollumer Refits 2 M.U.L.E.s on Adjacent Lands, costing 2 Food. He changes one M.U.L.E. on a Plains tile to produce Food instead of Energy, rotating the tile so that its Energy icons point up. He also Refits another M.U.L.E on an adjacent Land (currently producing Energy) to produce Crystite, turning the (?) symbol to point up. In the next Production Phase this tile will be flipped over to its Secret Side, (but not before).
Mechtron has Food left but decides to save it for the future and Passes.
Packer does not have any Food left in her Stock, so she must also Pass.
Action Round 3: Gollumer Gambles at the Pub and takes $5.
Since everyone has either Passed or Gambled at the Pub, the Development Phase is over. Regardless of these criteria, Development Phase would have ended after Action Round 3.
Development Example 2: Food Cost. This example illustrates how Gollumer paid his Food costs during the previous Development Example 1 by moving Food to his Food Usage box: Round 1 shows 1 and 2 Food used; Round 2 shows 3 and 3 Food used; Round 3 shows a Pass.
Action Round 1: 1. Buy a M.U.L.E. in the White Zone. 2. Assay Any Two Lands.
Action Round 2: 3. Refit M.U.L.E.s on Two Adjacent Lands.
Action Round 3: 4. Gamble at the Pub.
Development Example 3: Assay Any Two Lands. The Public Side of a Land showing (?), an X (zero Smithore) and three Food pips flips to reveal its Secret Side: three Crystite pips, X (zero Smithore) and three Food pips. Similarly, a Mountain Land's Public Side flips to its Secret Side to reveal its true Crystite value.
M.U.L.E. Production in The Store
If at any time during Development Phase there are empty pens in the M.U.L.E. Corral of The Store, the Store immediately uses whatever Smithore it has to build new M.U.L.E.s until all its M.U.L.E. pens are full or The Store runs out of Smithore.
The Store produces M.U.L.E.s by flipping over Smithore counters in its stock onto their M.U.L.E. side and moving them to fill any empty pens in the Corral. Each M.U.L.E. pen can house two M.U.L.E.s and must do so if possible. One Smithore unit converts to one M.U.L.E. M.U.L.E.s can never be converted back to Smithore.
Development Example 3: M.U.L.E. Production in The Store. The picture below illustrates what happened in the Smithore trade post of The Store during Development Example 1. In the beginning of the Development Phase The Store had 10 M.U.L.E.s and 5 units of Smithore in stock.
A. Before any Actions were taken, The Store immediately used two Smithore to manufacture two M.U.L.E.s to fill its empty pens in Corral.
B. During the Action Rounds, The Store made two new M.U.L.E.s to replace the ones it sold to Gollumer and Packer.
C. Since all M.U.L.E. pens were full at the end of Development, the remaining one Smithore was left in The Store.
3. Usage and Spoilage
In Usage and Spoilage Phase, each Colonist removes the Food they used in their previous Development Phase and the Energy that will be needed to power their M.U.L.E.s in the coming Production Phase. After Usage, any Goods with excess Stocks are subject to Spoilage.
TIP: Colonists conduct their Usage and Spoilage simultaneously. However, you may initially want to do it one player at a time until everyone has learned how to do it correctly on their own.
Usage
Food Usage equals the Food you played into your "Food Usage" box during the Development Phase. Remove the contents of this box now.
Energy Usage equals your number M.U.L.E.s producing any Good other than Energy. Remove this number of Energy units from your stock now.
TIP: Some players find it helpful to place the consumed Energy units on top of their energy-using M.U.L.E.s before removing them.
If you have a Shortage of Energy (that is, you did not have enough Energy to pay for Energy Usage), you must flip over a number of M.U.L.E.s equal to your Shortage. You may choose which M.U.L.E.s you flip, except those producing Energy. M.U.L.E.s that have been flipped produce nothing in the next Production Phase, nor do they contribute to Economies of Scale in Production (Tournament rules only). You must consume Energy if Energy is available. You cannot choose to save it.
M.U.L.E.s producing Energy do not use Energy.
Spoilage
Food Spoilage: After Usage, Every Other (½, rounded down) Food remaining in your Stocks are spoiled and removed. Fractions are rounded down (for example, a player with 5 Food in their Stock after Usage has 2 of them spoiled).
Energy Spoilage: After Usage, Every Fourth (¼, rounded down) Energy remaining in your Stocks are spoiled and removed. Again, fractions are rounded down (for example, if a player has 3 Energy in their Stock after Usage, none are spoiled).
Overstock Spoilage: Finally, all your Stocks exceeding 12 units are spoiled and removed. This applies to all Goods, including Smithore and Crystite. Overstock Spoilage is counted only after normal Food and Energy Spoilage.
- Always remove any Used and Spoiled units to the neutral counter piles outside the Board - never put them into The Store.
- Goods in The Store are never spoiled.
Usage and Spoilage Example.
Starting point: Leggite has 2 Food in her Food Usage box and 15 Smithore, 7 Crystite, 1 Food and 9 Energy, in her Stocks.
Usage: Food Usage: Leggite's Food Usage equals the 2 Food she has in her Food Usage box. Energy Usage: Leggite has 6 M.U.L.E.s, 2 of which are producing Energy. Therefore, her Energy Usage is 4.
Spoilage: Food Spoilage: Leggite has 1 Food remaining in the her Stock: not enough to cause Spoilage. Energy Spoilage: Of the 5 Energy remaining in Leggite's Stock, 1 is Spoiled. Overstock Spoilage: Finally, Leggite's 3 Smithore that are in excess of 12 units are Spoiled.
After Usage and Spoilage, Leggite has 12 Smithore, 7 Crystite, 1 Food and 4 Energy in her Stocks.
4. Production
In Production Phase, each Colonist produces Goods on Lands where they have M.U.L.E.s installed, provided they were not flipped over due to Shortage of Energy or due to a Production Card effect, (which will be explained below).
TIP: Colonists conduct Production simultaneously. However, you may initially want to do it one player at a time until everyone has learned how to do it correctly on their own.
Draw a Production Card
Start the Production Phase by drawing one Production Card for the whole Colony, (not one per player). Read its effects aloud and apply them for this Game Turn (only). Some Production Cards modify the Production Values of all Lands. These modifiers cannot drop the Production Value of a Land below zero (0).
Count Base Production
Each Colonist counts their Base Production for each Good by summing up the modified Production Values of their Lands producing that Good (and equipped with M.U.L.E.s that have not been flipped over).
Lands where Crystite was produced for the first time (and that still have a M.U.L.E. installed and not flipped over after applying the Production Card effect) are now permanently turned over to show their Secret Side.
After counting your production, take the Goods you just produced from the neutral stacks outside the Board and put them to their corresponding Stocks on your Player Board. If you had any M.U.L.E.s flipped over due to Energy Shortage, flip them back up after taking your production.
Add Economies of Scale (Tournament only)
After counting Base Production, add Economies of Scale bonus to your production where applicable, as follows: each Path between two Adjacent Lands that have M.U.L.E.s producing the same Good (and are not flipped over) provides one additional Good of the same kind. Economies of Scale are unaffected by Zones, Production Values or Production Value modifiers, even if one or both of the connected Lands have zero Production Value for the Good being produced.
Economies of Scale gives +1 to production per Path between two Adjacent Lands producing the same Good, (not +1 per Land.)
When "The Ship is Back!" Production Card is drawn, it signals that the Game will end in the Ranking Phase of this Game Turn. See section "Game End and Winning".
Production Example 1: Base Production. Production Card Acid Rain Storm! has been drawn, which modifies Food Production Values by +2 and Energy Production Values by -2.
Smithore Base Production is 0. No M.U.L.E. is producing Smithore.
Crystite Base Production is 5. Leggite is producing Crystite on four plots with Production Values 1+0+1+3=5.
Food Base Production is 5. The Production Value of River is 3, modified by a +2 Production Card effect. Leggite's second Food-producing M.U.L.E. has been flipped over and produces nothing.
Energy Base Production is 2. The Production Values of the two Energy-producing lands are each modified by a -2 Production Card effect. Hence, the two Lands produce 1+1=2 Energy.
Production Example 2: Economies of Scale. In Tournament, Economies of Scale would be added to Base Production.
Economies of Scale bonus for Crystite is 4: there are four Paths between the Lands producing Crystite.
Economies of Scale bonus for Food is 0: The Path does not provide any Bonus because one of the M.U.L.E.s is flipped over.
Economies of Scale bonus for Energy is 1: there is one Path between two adjacent Lands producing Energy.
5. Pricing
On the left side of The Store is the Price Track. It shows the possible Price range and the current Price of each Good in The Store. During set-up, one counter was placed on the bottom of each lane of the Price Track to mark the starting Prices. Every step of the Price Track has two Prices associated with it:
The higher of the two Prices is The Store's Sell Price. The Store sells Goods and M.U.L.E.s to Colonists at this Price.
The lower of the two Prices is The Store's Buy Price. The Store buys Goods from Colonists at this Price.
In the Pricing Phase (and only in the Pricing Phase), The Store checks how many steps the Price of each Good changes on the Price Track, based on the following Pricing Rules.
Summaries of these Pricing Rules are also printed on the trade posts of The Store for easy reference during play.
Smithore and M.U.L.E. Prices increase by one step for every completely empty M.U.L.E. pen in The Store. Each M.U.L.E. pen can house two M.U.L.E.s and must do so if possible. A partially empty M.U.L.E. pen does not affect pricing. The Prices decrease by one step for each surplus Smithore unit in The Store, (which is possible only if all the M.U.L.E. pens are full).
Crystite Price varies randomly. Look at the bottom right corner of the most recently drawn Production Card to see the The Store's Buy Price for Crystite on this Turn. If the Pirate Ship! Production Card was drawn, the Price remains unchanged.
Food Price increases by one step for each unit of Food that any Colonist's Food Stock is below four (4). Shortages of all Colonists are added together. It decreases by one step for each unit of Food in The Store. Add these effects together to calculate the net effect to Price.
Energy Price increases by one step for each unit of Energy that any Colonist's Energy Stock is below their number of M.U.L.E.s (regardless of what the M.U.L.E.s produce). Shortages of all Colonists are added together. It decreases by one step for every unit of Energy in The Store. Add these effects together to calculate the net effect to Price.
Food and Energy can have both positive and negative modifiers affecting their Pricing simultaneously.
Deduct all the (-1) modifiers from all the (+1) modifiers affecting the Pricing of these Goods. The result is the net total number of steps that the Price counter of that Good moves on the Price Track, either up (positive total) or down (negative total).
Pricing Example. The illustration shows the situation in The Store in the beginning of Pricing Phase.
Smithore Pricing: Because there are 3 completely empty M.U.L.E. pens in The Store, the Price of Smithore increases by +3 steps from $8/6 to $11/9. The partially empty pen does not affect pricing.
Crystite Pricing: Crystite Price for this Turn is taken from the latest Production Card, which reads "4" on its bottom right corner. The new Buy Price of Crystite is therefore $4.
Food Pricing: Players have 1, 2, 3 and 7 units in their stocks. The total number of Food units that any Colonist's Stock is below 4 is therefore +6 (3+2+1=6), (the fact that some players may have more than 4 units in their Stocks has no impact to Pricing). The Store has 1 unit in stock, which also causes a -1 modifier to the price. The net effect to the Price of Food is 6 − 1 = +5 steps. Since the Price Track for Food only has two steps remaining above its current Price, the Price of Food increases +2 steps to $9/7: to its maximum.
Energy Pricing: All players have more Energy in their Stocks than they have M.U.L.E.s laboring on their Lands, which means there are no effects that would cause the Energy Price to increase. The Store has 5 units, which causes a -5 modifier to the Price of Energy. However, since the Price Track for Energy only has one step remaining below the current Price, Energy price drops that one step to $3/1, the minimum price of Energy.
6. Market
In the Market Phase, Colonists can buy or sell Goods (but not M.U.L.E.s) with other Colonists and with The Store.
The Four Auctions
Market Phase is split into four Auctions that are always conducted in the same order: Smithore, Crystite, Food and Energy. You may move the Auction Tracker on the area below the Price Track to show which Good is being auctioned.
Buying or Selling
Colonists may trade the Good being Auctioned with each other and with The Store. They can freely choose who they trade with, regardless of Prices offered. Trading is always voluntary. Buying and selling happens simultaneously. Players also act simultaneously. Deals are considered complete and irrevocable once Goods have changed hands.
A Colonist can either Buy or Sell one kind of Good during an Auction, not both. By the act of buying or selling a Good, a Colonist declares herself as either Buyer or Seller of that Good for the rest of that Auction. You may use the Buyer/Seller Tokens to mark player Stocks to indicate that a Player has become a Buyer or a Seller of that Good during its Auction.
The Store sells Goods to Colonists at its Sell Price (as long as it has Goods in stock) and buys them at its Buy Price. Players may agree any Prices when trading with each other: they do not even have to be within the price range shown in the Price Track.
All Crystite sold to The Store is shipped off-planet immediately after the Crystite Auction and removed from The Store. The Store does not hold any stocks of Crystite.
Priority to Buy
Even though all trading is simultaneous, if there are any conflicts regarding who can buy a Good from The Store first, the Lowest Ranking Player has the first Priority to Buy as many Goods as she wants before anyone else, then the next player above her in Rank, and so on, in reverse Rank order. No priority order is needed for selling Goods.
TIP: The following procedure can be used if no-one wants to sell first or if someone is just stalling: during an Auction, any player has the right to start a countdown from 10 to 0, taking roughly one second per number. If no deals are made during this countdown, that Auction is over. If any deal is made during this time, the countdown is interrupted but can be restarted from 10 if needed.
One Colonist can either Buy or Sell during an Auction (Market for one type of Good), but not both.
When selling to The Store, place the sold Goods into the relevant trade posts in The Store. Likewise, when buying from The Store, take the Goods you bought from these trade posts.
Market Example. This is an example of a full Market Phase, proceeding from Smithore Auction to Energy Auction.
Smithore Auction: Leggite announces that she wishes to sell 3 Smithore to the Store at its current Buy Price ($3). However, Packer offers to buy 2 of those units for $4 each and Leggite agrees. After trading with Packer, Leggite decides she does not want to sell her third unit to The Store, after all. Since no-one else wants to buy or sell Smithore, the Smithore Auction is declared closed.
Crystite Auction: No-one has any Crystite in their Stocks, (the Store never has Crystite unless a player just sold it there during the same Auction). Since there are no buyers or sellers, Crystite Auction is declared closed.
Food Auction: Spheroid sells 2 Food units to Packer for $6, after which he proceeds to sell 1 Food unit to The Store at its Buy Price ($5). Both Leggite and Mechtron offer to pay $6 for it to Spheroid, but Spheroid prefers to sell it to The Store: she takes $5 and places 1 Food to The Store. After this, both Leggite and Mechtron want to buy the unit that Packer just sold to The Store. Leggite has Priority to Buy from The Store because her Ranking is lower than Mechtron's. Leggite pays the "The Store Sells" price ($7) and takes the unit from The Store. The Store has no more Food left. Spheroid offers to sell one unit to Mechtron for $14, which he grudgingly accepts. No more Food trade takes place, so the Food Auction is closed.
Energy Auction: The Store has a large stock of Energy, but none of the players are interested to buy or sell any of it. Energy market is closed and the whole Market Phase along with it.
7. Ranking
In the Ranking Phase, all players count their Galactic Dollars and announce their wealth. The Ranking Tokens are then rearranged on the Ranking Track to reflect the new order of wealth: the wealthiest player becomes the new Rank 1 Colonist and the poorest player becomes the Lowest Ranking Colonist. If the Colonists' wealths are tied, the Colonist whose Rank was higher on the previous Turn remains higher.
If The Ship is Back! Production Card was drawn in the previous Production Phase, the game ends now and the Highest Ranking Player wins (see Game End and Winning below).
Ranking Example. After the first game turn, players reach the Ranking Phase and everyone counts their Money: Mechtron has $30, Packer has $25, Spheroid has $25 and Leggite has $8.
Mechtron becomes the Rank 1 Colonist. Spheroid remains at Rank 2 because he was higher than Packer in previous Ranking. Packer becomes Rank 3 and Leggite becomes Rank 4, the Lowest Ranking Colonist.
8. Personal Events
In the Personal Events Phase, Lucky or Unlucky Events can happen to individual Colonists, either aiding or hindering their game.
Lucky Event
Rank 1 Colonist starts the Personal Events Phase by drawing one Lucky Event card. He looks at the card and gives it to another Player of his choice but he cannot receive it himself. The target player reads the card aloud and follows its instructions. Any Money or Goods gained through the Lucky Event are taken from the neutral stacks, not from The Store or any Player.
Some Event Cards have an effect that scales based on the number of Lands the target player has on their Player Board: a small or no effect with 1-4 lands and a larger effect with 5+ lands.
Unlucky Event
The player who received the Lucky Event card then draws an Unlucky Event card and gives it to another player of his choice. The target of the Unlucky Event card reads the card aloud and follows its instructions. Any Money or Goods lost through the Unlucky Event are paid to the neutral stacks, not to The Store or any Player.
After both Event Cards have been played, put them face up into their separate discard piles. If either one of the Event Card decks becomes exhausted, shuffle the discard pile of the exhausted deck to re-create it.
Event Cards must always be given to another Colonist.
TIP: Despite being called Lucky and Unlucky, Personal Events are actually not driven by luck under default rules, but by Players' Ranking and their judgment of other Players' relative strength. Together with the Ranking system, they serve to keep the game balanced. However:
- If your group prefers Players not doing the targeting, you may try the more luck-based Alternative Personal Event System described under Optional Rules instead.
- If your group prefers to skip Personal Events Phase altogether, you may also opt to do so.
Personal Events Example.
Lucky Event: Packer is the Highest Ranking Colonist (Rank 1). She therefore begins the Personal Events Phase by drawing a Lucky Event Card: "Your M.U.L.E. won the colony tap-dancing contest!" (Effect to target Colonist with 1-4 Lands: +$5; 5+ Lands: +$10). Packer can choose the target of the Event (but not himself). Packer decides to target Mechtron, making a big number of his generosity. Mechtron has fewer than 5 lands and therefore receives $5 from the bank. He dutifully pretends gratitude.
Unlucky Event: Since Mechtron was the target of the Lucky Event, he gets to draw and target the Unlucky Event Card: "Your mining M.U.L.E.s have deteriorated from heavy use and cost $5 each to repair!" (Effect to target Colonist: $5 per your Land in Smithore and Crystite production). This Unlucky Event only hurts Colonists who have developed mining M.U.L.E.s. There are two other players who have built one mining M.U.L.E. at this early stage of the game. Mechtron decides to give this card to Leggite because out of these two players, Mechtron slyly thinks that losing $5 would hurt Leggite more. He also hopes he doesn't need to ask Leggite for a favor any time soon...
Game End and Winning
Once a The Ship is Back! Production Card has been drawn, the game will end in the next Ranking Phase. Conduct the Production and Pricing Phases normally. In the Market Phase of the Final Turn, Colonists sell all their Goods to The Store at its Buy Prices.
The Colonist with the largest amount of Money in the last Ranking is declared the First Founder and wins the Game!
Colony Success and Retirement (Tournament only)
Beating other Colonists is not enough to guarantee you a comfortable life in the galactic frontier. Your retirement also depends on the success of your Colony as a whole.
To see what your future life and retirement in Irata amount to, sum up the total wealth of all Colonists and compare the result with the Colony Success Table (scaled for a 7-turn Tournament).
Colony Success Table (7-turn Tournament)
| Colony Total $: 4 Colonists | Colony Total $: 3 Colonists | Your Retirement |
|---|---|---|
| 1800 or more | 1350 or more | Overall, the Colony delighted the Federation with your exceptional achievement. Your retirement will be luxurious! |
| 1550 - 1799 | 1162 - 1349 | Overall, the Colony succeeded... extremely well. You can now retire in elegant estates! |
| 1300 - 1549 | 975 - 1161 | Overall, the colony succeeded. The Federation is pleased by your efforts. You will live comfortably! |
| 1050 - 1299 | 787 - 974 | Overall, the Colony was a success. You have met the minimum standards set by the Federation, but your life will not be easy! |
| 800 - 1049 | 600 - 786 | Overall, the Colony survived... barely. You will be living in tents. Few trading ships will come your way! |
| 550 - 799 | 412 - 599 | Overall, the Colony failed... The Federation will no longer send trade ships. You are on your own! |
| 549 or less |
Miscellaneous Rules and Principles
The following principles are applied throughout the game, unless a specific exception has been written elsewhere in the rules:
When the game instructs you to do something, carry it out to the extent possible. Ignore the rest.
Example: if a Colonist loses $10 and he only has $5, he loses the $5 he has. The rest of the effect is ignored.
If the rules do not state a specific play order, the lowest-ranking Player involved decides it.
Example: During Usage and Spoilage, two Players wish to see which M.U.L.E.s the other player flips over due to lack of Energy before deciding the same for themselves. The lower-ranking Player decides the play order.
Fractions are rounded down
Example: Mischievous Glac-Elves - Unlucky Event
Player property is public
Example: When asked, players must tell truthfully how much Money or how many units of each Good they have.
Questions and Answers
General
What if we run out of Goods counters or Money? You still receive the quantities you would receive if there were enough counters. Write the excess units on a piece of paper.
Expansion
Do I have to pick a land in the Expansion Phase? Yes. You have to pick a land if one is available and you have an empty place on the same Zone on your Player Board.
Are the Red Zone and the Blue Zone different from each other? Other than being located on different sides of the map, no.
Development
Can I sell a M.U.L.E. or a Land to another player or to the Store? No, you cannot (unless you develop your own rules for it...)
How do I permanently flip a Land to have it's Secret Side up? The only way to permanently turn a Land to have its Secret Side is up is to claim the Land and set a M.U.L.E. to produce Crystite on it.
What is a good Production Value for Crystite? Crystite Production Values very between 0 and 3. Average Crystite Production Value is 1.25, so values of 2 and 3 are very good. Plains and all Mountains have the same odds for finding Crystite.
What is the difference between having zero Production Value and having no Production Value for a Good? Rivers have no Production Values for Smithore and Crystite. Therefore, no M.U.L.E. can be set to produce those Goods on Rivers. If a Land has zero production value for a Good, a M.U.L.E. can be set to produce that Good there, possibly even producing something through Production Card effects or Economies of Scale.
What are the odds for catching The Wampus? There are 12 Lucky Event Cards, of which 4 show The Wampus. Therefore, the odds of catching a Wampus are 1 out of 3.
Usage and Spoilage
Do I have to use Energy to power a M.U.L.E. on a Land that has zero Production Value? Yes. Your M.U.L.E.s will consume Energy whether you want or not (except M.U.L.E.s producing Energy).
Production
When producing Crystite for the first time on a Land, do I flip it over to its Secret Side if the Radiation! Production Card caused me to lose or flip over the M.U.L.E. working on it? No, you do not.
Do I receive the Economies of Scale bonus if a Production Card such as Radiation! or "Pest Attack!" causes me to lose or turn over a M.U.L.E. working on the linked Adjacent Land? No, you do not.
Do I receive the Economies of Scale bonus if the Adjacent Lands are different type (e.g. plains and mountain)? As long as the Lands have a Path connecting them and M.U.L.E.s producing the same type of Good, you are entitled to the bonus.
Will the "Pest Attack!" Production Card affect the player on Rank 3 if neither Rank 1 nor Rank 2 have lands that would have produced Food? No, they will not. After the first Production Phase, Pest attack can only affect players on Rank1 or Rank 2.
Pricing
Do the prices of M.U.L.E.s or Goods change immediately as the stock levels change in The Store? No, prices only change once per turn in the Pricing Phase, not at any other time such as Development Phase or Market Phase.
Events
If the Event Card or Production Card I picked has no effect, do I still play it and does it still count? Yes. All Event Cards and Production Cards must be played and are considered played even if they have no effect on a Colonist.
Game End and Winning
Do Lands and M.U.L.E.s have value in the last Turn when the winner is determined? No, unless you have agreed in advance to use the "Land and M.U.L.E. Value in Ranking" -Optional Rule, (see the Optional Rules section).
Strategy Tips
- Lands acquired early in the game are much more valuable than those acquired late because you get to produce Goods on them longer - assuming you also have the Money and the Food to install M.U.L.E.s on them.
- Placing Lands in square formations enables you to make the best use of the Economies of Scale bonus: you get a total +4 bonus for having four Lands producing the same type of Good in a square formation.
- Always try to ensure (at almost all costs) that you have at least two Food in your Stock after the Market Phase, so that you are able to install a M.U.L.E. on the new Land you are going to claim next turn. Having a solid supply of Food supply also ensures that you can adjust your strategy when something unexpected happens.
- If you cannot afford to buy a M.U.L.E. but have extra Food, try Hunting the Wampus to earn some cash.
- When planning your Development Actions, pay attention to what the other Colonists are producing and consuming. Then try to anticipate how Prices in The Store are going to change in the next Pricing Phase.
- Do not Sell when Prices are low and you do not need the Money. You only get higher in Ranking. Prices could go up later: the stocks in The Store might get used up or even burned if Fire in The Store! is drawn.
- Give Unlucky Events to players who are winning and Lucky Events to players who are not. If you receive an Unlucky Event, take it as a compliment!
Optional Rules
Colonist Cards and Special Talents (designer recommends)
This Optional Rule is featured under the Tournament Set-up rules. Special Talents enhance variety and role-playing in your games if you don't mind that some species may be more powerful than others.
Random Land Placement (designer recommends)
Set up all lands on Planet Irata in random locations, either including or not including Rivers to this randomization. We recommend this option if you want to see a more diversity in what Lands get picked and developed in the first few Game Turns.
Variable Number of Game Turns (designer recommends)
If you think that players should not know when exactly the game ends, do the following: in the set-up, take one card less when forming the initial Production Card deck (e.g. 5 instead of 6 Production Cards). Instead of placing a The Ship is Back! to the bottom of this deck, take two additional Production Cards and shuffle them with one The Ship is Back! card. Place these three cards to the bottom of the deck.
More Game Turns (designer recommends)
If you think the game is just a little bit short and want to play longer with a large production, just add 1 or 2 Production Cards to the deck. That is, instead of 6 normal Production Cards and 1 The Ship is Back! card, you start the game with 7+1 or 8+1 Production Cards.
Secret Bidding in Land Auctions (designer recommends)
The Colonist playing a Land for Sale! card may decide that that instead of following the normal, public bidding procedure, all players hide the Money tokens they wish to bid in their hands and reveal them simultaneously. In case of a tie, the lowest ranking tied player wins.
Land Auctions before Land Grant (designer recommends)
In this variant, Land for Sale! -cards must be played just before Land Grant. If you use this rule, playing Land for Sale! cards is not allowed on the first Game Turn. This rule enables any player to force interesting Lands (such as Meteor Craters) on Auction before they get picked for free by lower ranking players.
More Predictability
M.U.L.E. is a market speculation game where rewards are coupled with risk. If you want more predictability, try the following changes:
Development Phase: Draw and reveal the Production Card already in Development Phase, at the beginning of Action Round 3. The Production Card will take effect at the beginning of Production Phase, as usual.
Production Phase: Production Cards that have an altered effect on Game Turn 1 (Pest Attack! and Radiation!) use the "Effect on Game Turn 1" only, on all Game Turns.
Personal Events Phase: Skip the Personal Events phase. Lucky Event cards are only used for Hunting the Wampus.
More Land Auctions
If you like the cash drain and expansion speed effects that Land Auctions bring to the game, you may agree to give one more Land for Sale! card to every player, especially if you play with More Game Turns. If you run out of these cards, use counters placed on top of a card to count them.
Single Action Round per Turn
There is only one Action Round in Development. Maximum six (6) Food can be used by each Colonist's single Action Round.
Declaring Buyers and Sellers
Before each Market, players have to declare themselves either as Buyers or Sellers (at least for Food and Energy). They do this by simultaneously showing one side of a Buyer/Seller Token. Once declared, players are only allowed to Buy or Sell this Good during the Auction, or do nothing. That is, if you declared yourself a Seller you are not forced to Sell, but you are not allowed to Buy that Good in this Auction.
Colonists Preferred over The Store in Auctions
If a player offers to Buy or Sell any Good at a price that at least matches the price offered by The Store, other players must trade with her before they can trade with The Store. Players can still choose which players they trade with, or to trade with no-one at all.
Alternative Personal Event System
If you do not like an Event System where players choose who gets each Event, we recommend this system. All Event Cards have a diagram like this in their upper left corner. The highlighted number shows which player, based on their Rank, receives the Event Card in a 3 or 4-player game. Draw one Lucky Event and one Unlucky Event card and look at the top left corner of these cards. The targeted player reads the card aloud and follows its instructions.
Inherent Land and M.U.L.E. Value in Ranking
In addition to Money, count each Land to be worth $10 in Ranking and each M.U.L.E. to be worth $5. Either agree to count these values in all Ranking Phases, or only in Game End.
Sequence of Play Summary (Reference Card)
This condensed reference is printed on the reverse of the Turn Sequence Summary sheets, for quick reference during play.
1. Expansion — Order: Low to High. Land Grant: Claim one Land. Repeat on Turn 1. After all Players are done with Land Grant (Tournament): Land Auctions — you may play one Land for Sale! card. Order of Land for Sale! card play: Highest Rank to Lowest.
2. Development — Order: High to Low. Reverse if M.U.L.E. Corral ≤ 6. Before Actions: may play Package from The Home World! Play up to three (3) Action Rounds. In each Action Round, do one of the following: take 1 or 2 Actions that cost 1 Food each; take 1 Action that costs 2 Food; Pass at no cost, ending your Phase. Actions: Buy/Refit a M.U.L.E. in the White Zone; Buy/Refit a M.U.L.E. in the Red/Blue Zone; Refit M.U.L.E.s on Two Adjacent Lands; Move a M.U.L.E. to Any Other Land; Assay Any Two Lands; Hunt the Wampus (gain $10 if successful); Gamble at the Pub (gain $5, end Phase).
3. Usage and Spoilage — Order: Simultaneous. Usage: Remove all Food in your Food Usage box. Usage: Remove Energy for each M.U.L.E. producing Smithore, Crystite or Food. Spoilage: Remove Food for each remaining pair of Food. Spoilage: Remove Energy for each remaining set of four Energy. Overstock Spoilage: Remove all Smithore/Crystite/Food/Energy Stocks over 12.
4. Production — Order: Simultaneous. Draw a Production Card and apply its effects. Count Base Production of Goods: Smithore, Crystite, Food, Energy. Add Economies of Scale (Tournament).
5. Pricing — Order: Simultaneous. Adjust Price Track: Move Smithore/Crystite/Food/Energy price counters.
6. Market — Order: Simultaneous. Conduct Auctions for Goods: Auction order Smithore, Crystite, Food, Energy. In all Auctions, lower-ranking Colonists have the priority to buy from The Store before other, higher-ranking Colonists.
7. Ranking — Order: Simultaneous. Rank Colonist based on their wealth, measured by Money.
8. Personal Events — Order: Special (see Personal Events section). Lucky Event: Rank 1 Colonist draws and targets...