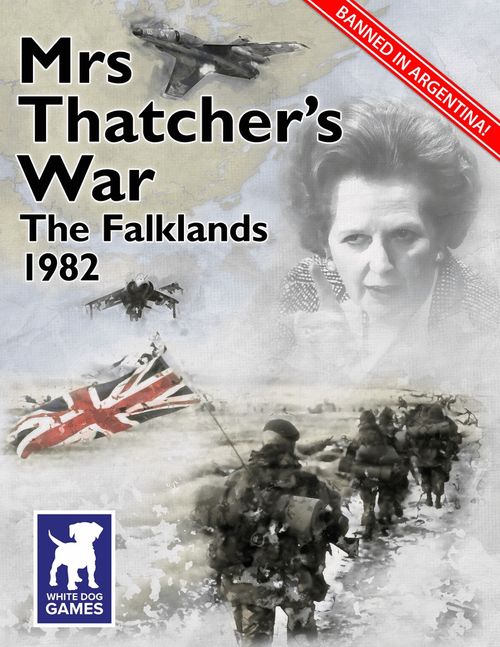
Mrs Thatcher's War: The Falklands, 1982
Mrs Thatcher's War: The Falklands, 1982 Rulebook
Table of Contents
Table of Contents
- 1.0 Introduction
- 2.0 Game Equipment
- 3.0 Setup
- 4.0 Appreciate the Situation
- 5.0 Grupos Phase
- 6.0 Task Force Phase
- 7.0 Argentine Air Assets Phase
- 8.0 British Air Assets Phase
- 9.0 Argentine Junta Plan Phase
- 10.0 Air Battle Procedure
- 11.0 Ground War Phase
- 12.0 Logistics Invasion Phase
- 13.0 Specific Headlines List
- 17.0 Unit ID and Game Abbreviations
- Charts and Tables
- Weather Table (4.1.1)
- SAS Raids (4.2)
- STUFT (4.4)
- British Sub Attack (6.1)
- Stanley-Based Exocet Fire (6.2.2)
- Supply Ground Forces (6.3)
- Task Force Engagement Table (6.4)
- Junta Plan Roll (9.2)
- Argentine Reaction (9.3)
- ABRT: Air Battle Results Table (10.8)
- San Carlos Air Strike (11.2)
- Ground Combat (11.7)
1.0 Introduction
1.1 In General
A. Mrs. Thatcher's War is a strategic solitaire (one player) game on the 1982 Falklands War between Britain and Argentina. The player plays the forces of Great Britain, against the Argentine forces of General Galtieri. It is not a detailed historical simulation, but was designed as a fun and challenging game that illustrates the general strategic course of the war and highlights important historical themes. It is the third and final title in my British Wars Trilogy for White Dog Games.
B. The unusual stroke sign (/) is used in the Trilogy in place of a traditional decimal point to evoke old-fashioned British pounds and shillings prices, although decimalization was already eleven years old at the time of the Falklands war. All spelling and usage in this game is British wherever possible, as befits the subject matter. The name Malvinas (for the Falklands) occurs in Argentine sources. Ironically this term is derived from the French port of Saint-Malo, named after a Welsh saint.
C. Finally, does one use Argentinian or Argentine? The latter better reflects Spanish Argentina, and is more common among Falkland Islanders. So I use Argentine as both noun and adjective.
JW Note: I changed the numbering to the system I use when I reformat and revise rules, and changed the spelling to the American version (apologies to the designer).
1.2 Abbreviations
| Abbr | Meaning |
|---|---|
| ABRT | Air Battle Results Table |
| AS | Air Sector(s) |
| DRM | Die Roll Modifier |
| OOS | Out of Supply |
| RP | Repair Pool |
| SP | Strength Point |
| SZ | Sea Zone |
| TEZ | Total Exclusion Zone |
| TRT | Turn Record Track |
2.0 Game Equipment
This game comes with:
A. One 11" x 17" color map of East Falkland (one sided) B. One 8½" x 11" color Strategic Map of the South Atlantic (one sided) C. One 8½" x 11" color Charts and Tables sheet (one sided) D. One 8½" x 11" black/white Player Aid Card (two sided) E. One sheet of 88 one-sided color playing pieces (units) F. One 16-page full color rules booklet G. One six-sided die (You need three, or just roll the one three times.)
2.1 The Map
2.1.1 Strategic Map
The smaller map portrays the region of the South Atlantic around southern Argentina and the Falklands. Off the main land, six SZs can be occupied by hostile Grupos, land-based Argentine Air Force units which will send planes to fight you over the Islands, but which you can distract and challenge with your ships. Other boxes on this map show the location and availability of certain units, and the amount of ground support each side can bring to bear against enemy aircraft flying over the Falkland Islands proper.
2.1.2 East Falkland Map
A. The larger map portrays the northern half of the island of East Falkland, where most of the ground war took place. It is divided vertically into five large regions called air sectors (AS), representing strategic control of the regions by aircraft. B. Superimposed on the map, and so technically underneath the AS, are three tracks (yellow, brown and green) called Ground Paths. C. Each colored square on a path is called a camp. These boxes mark the position of ground units, as British forces move east from the San Carlos Landing Zone to their ultimate objective, Stanley. D. Control of an AS (by Britain or Argentina) affects the ability of ground units in that area to advance from camp to camp (11.4). E. The term camp in Falklands English comes from Spanish campo for countryside. It means any area outside Stanley. It also has the more restricted meaning used in the game: a huge fenced-off sheep's pasture, given a name to distinguish it from others. Some Falklands dialect words come from Argentine Spanish. Gamers looking at the map should try to say Bombilla as 'bom-BEE-zha' (the 'zha' sounds like French je as in je t'aime) and Rio Gallegos as 'Rio ga-ZHAY-gus.' And while it is not Spanish and plays no role in the game, Choiseul Sound (south of Swan Inlet House on the big map) is pronounced Chisel Sound. The island being contested in the game is East Falkland, although some locals refer to it as East Falklands. Finally, and most pedantically, the country as a whole is pronounced FALK-land islands and not Falkland IS-lands. The stress is on Falk.
2.2 The Turn-Record Track
The Turn-Record Track (TRT) on the East Falkland map shows 20 boxes, numbered 0 to 19. Except for the zero box, these all represent the 19 numbered Game Turns ("turns"). Most turns simulate three days: Turn 1 is 25-30 April 1982 (so five days there), while Turn 19 is 21-23 June 1982.
2.3 The Units
The units represent the armed forces that fought in the Falklands War. The units are differentiated by nationality, type and strength, as represented by their various printed numbers and symbols.
2.4 Air Units
A. Air units represent small groups of aircraft or planes. B. Red units are British; light blue units are Argentine. C. Air units are marked with a number in the corner, indicating the unit's Strength Points (SPs) in battle (9.5). D. British air units represent pairs of Sea Harriers (V/STOL carrier-based, fighter-bombers). E. The Argentines had a bevy of ground-based planes including US-built Douglas A-4 Skyhawks, Israeli Daggers (a knockoff of the French Mirage V), the French Dassault Mirage III, British Canberras, Italian Aermacchi MB-339 light attack aircraft (often misspelled as Aeromacchi), and France's state-of-the-art Super Étendard, also often misspelled as Entendard).
2.5 Naval Units
A. British naval units consist of two aircraft carrier units (Hermes and Invincible) and two escorts. In addition, the British have one STUFT supply unit at sea (4.4). B. Argentina has ten Grupos (5.0) which are actually Air Force units but are listed here because they interact with British naval forces. There are two Argentine warships, Belgrano and 25 de Mayo (6.1).
2.6 Ground Units
Ground units are always marked with flags or artillery icons, representing a wide diversity of force sizes and capabilities.
2.7 Sequence of Play
The game consists of 19 turns, starting on Turn 1 (25-30 April 1982) and ending on Turn 19 (21-23 June 1982). Each turn, perform the listed phases in the precise order in the Detailed Sequence of Play.
2.8 No Air Triangles
In fog or squalls weather (4.1), aircraft may not fly, thus no air activity occurs. Therefore, skip any rule, or rules section, marked with a blue (black) No Air Triangle if the current turn's weather is fog or squalls. (They are all of 7.0, 8.0, 9.0, and 10.0, 11.1, and 11.2.)
3.0 Setup
A. Find the ten Argentine ground units, six with flags, three Patrols, and one Minefield. Place the three blue star units (BIM 5, RI 4 and RI 7) in the Stanley round box. B. Take the FT Merc unit (with the red star) and place it in Darwin, faceup. Take all six white star Argentine ground units, place them facedown, randomly, one each in the Cerro Montevideo, Douglas Station, Teal Inlet, Top Malo House, Goose Green, and Fitzroy Camps. (These Camps are marked with an Argentine flag.) C. On the TRT, place the Game Turn marker and the British SAS unit in the 1 box. Place the BBC News marker in the 15 box. D. Next, take the Exocet marker and roll a die:
- On a 1, place the Exocet in the 4 box.
- On a 2, place it in the 6 box.
- On 3-6, place it in the 5 box.
- This is how many Exocet missiles are in Argentina's arsenal. E. Place one Argentine Grupo marker each in the Rio Grande, Rio Gallegos, Santa Cruz, and San Julian SZs of the Strategic Map. F. Place the six remaining Grupo markers in the Argentine Mainland box. Also place the Argentine warships, Belgrano and 25 de Mayo in the Argentine Mainland box. G. Place each of the two Argentine Pucara units, marked with a yellow PU box, on the big map in one of the Airstrip boxes (Pebble Island and Goose Green, one Pucara on each Airstrip). A Pucara unit functions in the game as a ground unit (11.3.3). This neat little plane was designed as a counter-insurgency tactical bomber. (Leave it to Argentina to design aircraft specifically to attack their own people!) H. Keep units not yet available for play in the cardboard box which comes with the game (or another container if you have the Ziploc version). These are: Three Heli (helicopter) units; the British KLF unit; the Pope; the Chilean Radar unit; the Diplomacy marker; the British STUFT naval unit; the Gurkhas; the Iwo Jima ship; the British Welsh Gds and Scots Gds ground units; and the Target AS marker. I. On the Strategic Map, place the British and Argentine Ground Support markers in the zero boxes of their Ground Support tracks. J. Place the Weather marker in the Fair Weather box (to start). K. Place all remaining British ground forces (40 Cdo, 42 Cdo, 45 Cdo, 2 Para, 3 Para, the RA Artillery unit, and the B&R unit) in the Ascension Island round box on the Strategic Map. L. Place six HH British Harrier (air) units, including Morgan, in the Total Exclusion Zone (TEZ) round box on the Strategic Map. M. Place four HI British Harrier (air) units, including Ward, in the TEZ. N. The seven remaining Harrier units are placed faceup in Ascension Island and are out of play for the time being (13.17). O. Place all British naval forces (Invincible, Hermes, and two escorts) in the TEZ. P. Place the 16 Argentine planes in the Argentine Mainland box, facedown; keep them distinct and separate from the Grupos units there. Argentine planes in the Mainland box should be placed facedown and drawn randomly, as some of them have different strengths. Q. Play starts with Turn 1.
4.0 Appreciate the Situation
4.1 Weather
4.1.1 In General
A. Use the Weather Table on the Strategic Map, and focus on the part corresponding to the current turn.
Example: On Turn 1, use the Turn 1-7 Weather Table.
B. Roll two dice to obtain the current turn's Weather, putting the Weather marker in the appropriate Weather box. Place its No Air side up if this is a No Air turn (2.8).
Example: It is Turn 9, so use the Turn 8-15 Weather Table. The roll of two dice is a 7. This marks the current weather as rain/snow.
4.1.2 Skip a Turn on Gales
A. A gales roll means winter storms render naval and air activity impossible: skip the rest of the turn. Move the Game Turn marker to the next turn at once, then start that turn with a new weather roll. B. If the STUFT and/or SAS markers are on a turn skipped because of gales, move them to the next turn. Discard the Diplomacy marker, and the Pope, if on the current turn box.
4.2 SAS Raids
A. The SAS marker represents the Special Air Service, Britain's elite special ops commandos. If the SAS marker is on the TRT in the current turn box, move it to the TEZ round box. B. If the SAS marker is on East Falkland or in the TEZ box (including as the result of the action just taken in the preceding paragraph), you have the option of launching an SAS Raid immediately. If you do take the option, choose one of the following raids and carry it out at once:
4.2.1 CD Raid Argentine Airstrip
A. If there is a Pucara at Pebble Island or Goose Green Airstrip, pick one to raid, and roll a die.
- Raiding Pebble Island succeeds on a 1-4 and fails on 5-6.
- Goose Green succeeds on a 1-2 and fails on a 3-6. B. If you succeed, discard the one Pucara. C. Regardless of success, roll a Saving Throw (4.3).
4.2.2 Conduct Operation Mikado
A. You can try to raid Argentina's main land stock of Exocets only once per game. Roll a die. On a 1, the mission succeeds: roll a second die and reduce the Exocet total by that many (possibly reducing the Exocet total to zero). B. Regardless of success, roll a Saving Throw (4.3) with two dice.
4.2.3 Reece
A. Pick any facedown Argentine army, then roll a die. B. Success is on a 1-4, failure on a 5-6. C. If successful, flip the unit to its faceup side. D. Either way, roll a Saving Throw (4.3).
4.2.4 Combat Role
You can send the SAS in as a ground unit to assist in combat. Place the SAS (strength: 3) in any British ground unit stack on East Falkland (no Saving Throw). It remains part of that stack till you send it on another mission in this step on a later turn.
4.2.5 Spoofing
A. You can send the SAS to spoof (mislead) the Argentine Air Force. Roll a die to select a SZ, then turn any Grupos there facedown. B. The Grupo cannot send planes (7.0) this turn, but it can be attacked by British ships (6.3). C. Then roll a Saving Throw (4.3).
4.3 SAS Saving Throw
A. After an SAS Raid, roll a die and count that many turns ahead. Place the SAS marker in the resulting turn box. B. The SAS cannot be used it again till it returns to the TEZ (4.2). C. If the Saving Throw would return the SAS after Turn 19, discard it instead.
4.4 STUFT
The STUFT unit represents commercial vessels pressed into service to carry military supplies and equipment. Its game purpose is to transport vital helicopter units, to speed up the ground advance across the island. Historically, most of the helicopters were lost at sea when the Atlantic Conveyor was sunk by an Argentine Exocet on 25 May 1982.
A. At this point, if the STUFT marker is in the current turn box, remove it from the game and roll a die. Check the result below. B. If Argentina has at least two Exocets on the TRT, apply a +2 die roll modifier (DRM) and reduce the Exocet total by one.
| Roll | Result | Helicopters Received |
|---|---|---|
| 1-3 | No damage | 3 |
| 4 | Significant hit | 2 |
| 5 | Disastrous hit | 1 |
| 6+ | Catastrophic hit | 0 |
C. Discard destroyed helicopters. D. Surviving helicopters can be added to existing stacks of British ground units on East Falkland (no more than one per Path). Stacks with helicopters move more quickly (11.4.1).
4.5 Diplomacy
4.5.1 In General
The Diplomacy marker may be placed on the TRT by a Headline (13.0), or else at the player's own initiative in a Diplomatic Feint (4.5.2).
4.5.2 Diplomatic Feint
A. The player may make a Diplomatic Feint if the Diplomacy marker is not already on the TRT. B. Place the marker on the current turn box, and raise the BBC News number (4.6) by 3. C. Diplomatic Feints help to keep public opinion on your side, but be aware that they limit your ability to wage war (11.6.2).
4.6 BBC News (Morale)
The BBC News marker moves on the TRT, and serves as a gauge of public opinion (both at home and abroad). It has certain effects depending on Headlines (13.0), and it also affects ground combat (11.7.2).
5.0 Grupos Phase
5.1 Grupos
Grupos are ground-based naval and air force formations, shown in this game projecting their air power over the South Atlantic. Their Roman numerals are unit designations and have no game effect.
A. If any Grupos are in the Argentine Mainland box, roll two dice and place one such Grupo into each corresponding SZ. A roll of a 1 puts the Grupo in the Comodoro Rivadavia SZ; a roll of a 2 puts the Grupo in the Puerto Desado SZ; and so forth. B. If there is only one Grupo in Argentina, roll only one die. C. If there are no Grupos, no roll is needed.
Exception: On Turn 10 (Argentina's National Day) the player then chooses two SZs and places one Grupo from the mainland in each one (obeying the two per zone limit). If not enough Grupos are available, move three Harriers to the British Repair Pool (RP) for each unavailable Grupo. (Argentine pilots are giving maximum effort!)
D. At this point, if all ten Grupos are in SZs, and there is at least one British Army stack (11.4) in a camp on East Falkland, the player must flip one such stack (11.4) to its Out of Supply (OOS) side.
5.2 Two Grupo Maximum
No more than two Grupos may occupy a SZ; any die roll that would put a third Grupo into a SZ has no effect. Do not reroll; that Grupo stays in Argentina.
6.0 Task Force Phase
The British have four ships which can fight Argentine Grupos: two aircraft carriers (HMS Hermes and HMS Invincible) and two generic escorts representing frigates, destroyers, and assault ships.
6.1 Argentine Ships and British Subs
A. If any Argentine ships (the cruiser Belgrano or the carrier 25 de Mayo) are in SZs, the British may use a submarine to torpedo one of them. There are no sub counters, but you must move one escort currently in the TEZ to the TRALA box (to show a diversion of resources). Then pick one Argentine target and roll a die. You can only try this once a turn.
- On a 1-4, the target evades the British submarines (no effect). It remains in its SZ and can be attacked again by sub next turn.
- On a 5-6, the target ship is sunk. Discard it and roll two dice; move BBC News down that many spaces (toward zero) for shocked world opinion. The other Argentine warship must retreat to the mainland. B. Argentine warships can only be attacked by sub. Their presence at sea deters you from attacking Grupos in their SZ (6.4).
6.2 Man the Gun Line off Stanley
6.2.1 Escort to Naval Gunfire Support
If Mount Kent (Brown Path, Camp #3) is British-held, the British may select one escort ship from the TEZ box to send to the Naval Gunfire Support box (in AS E on the East Falkland map). See 11.7 for the naval gunfire this provides to British ground combat inside AS E.
6.2.2 Stanley-Based Exocets
If there a British ship in the Naval Gunfire Support box inside AS E (6.2) and Argentina also has at least one Exocet on the TRT, roll a die.
- On a 1-3, no attack is made; proceed to Supply Ground Forces (6.3).
- On a 4, reduce the Exocet total by one. An Exocet attack was made, but it failed.
- On a 5-6, reduce the Exocet total by one; the Exocet missile struck a target in the Naval Gunfire Support box. In this case, roll a second die and subtract it from the BBC News level on the TRT, and move the escort to the TRALA box.
6.3 Supply Ground Forces
A. The player may now use the Royal Navy to supply British forces in East Falkland. If British troops are at San Carlos, you may take any British escorts units from the TEZ box to place in the San Carlos round box. If you plan to land at San Carlos later this turn (12.3), move the two escorts from the TEZ box to the San Carlos Landing Zone at this time. B. The effects (# stacks of ground units to flip to OOS side) of these escorts is below; see 11.4 for implementation.
| # Escorts | # OOS Stacks |
|---|---|
| 0 | 2 |
| 1 | 1 |
| 2 | 0 |
C. For purpose of this rule, a stack that was already OOS before the escorts were sent to San Carlos may be counted as having been flipped OOS.
Example: If a British stack at Douglas Station is already OOS, and you send one escort, the stack at Douglas Station counts as the one stack you must flip, so no additional stacks need be flipped.
6.4 Attack Grupos
A. Use the Royal Navy and its Harriers to attack Grupos. Take any British ship units from the TEZ box and place them in any SZs next to the Grupos to be attacked. B. Each ship must have a designated target before rolling for any of them. C. Do not place a ship in a SZ containing an Argentine warship (6.1). D. For each carrier sent to attack Grupos, also place three attached Harrier units (HI for Invincible; HH for Hermes) in the same SZ. If a carrier operates fewer than three attached Harriers, it may not attack a Grupo. These planes cannot be used later in the turn. E. Consult the Task Force Engagement Table, rolling three dice (apply a +5 DRM for any Chilean Radar present) for each ship against its chosen target. Apply the result on the table.
6.5 Exocet Hits Carrier
A. A British carrier can only be sunk by an Exocet hit. This can happen only if the only British ship in the SZ is a carrier. If there is an escort in the SZ, then a smaller vessel takes the Exocet hit instead (6.6). B. If (on a roll of 3-5 on the Task Force Engagement Table) the British ship sunk by Exocet is a carrier, discard the carrier and reduce BBC to zero. Next, all British planes attached to that carrier are removed from the game for the time being (the HI Harriers if Invincible is sunk; the HH Harriers if Hermes is sunk). C. Half of that set, rounded down, are permanently discarded. Do not discard the Ace (10.4) attached to that carrier. The remainder are placed at Ascension Island, facedown. Those facedown Harriers will be 'inherited' by the USS Iwo Jima if/when it enters service (6.7).
Design Note: Escort counters are never discarded; a drop in the BBC News level reflects a loss of ships. The Argentines sank two destroyers (Sheffield and Coventry) and two frigates (Ardent and Antelope), with some 32 dead. Public opinion failed to grasp that the role of escorts is to take damage so as to avert greater damage falling upon the troop ships or carriers. Argentine pilots usually fired at the first target they saw, rather than search for supply ships enabling the Task Force 8,000 miles from Britain. The result in the end, was Argentina's defeat.
6.6 Notional Carrier Escorts
The Engagement Table assumes that all carriers have some sort of escorts, smaller than the big escorts shown as counters. A roll of a 6-7 indicates damage to these notional escorts and not to the carrier itself. For game purposes, the carrier itself is not damaged, but is still driven back to the TRALA box after an unsuccessful clash with Argentine Grupos.
Clarification (for 6.5 and 6.6): If you strictly follow the procedure, if you have an escort in the same SZ that attacks a different target and you elect to resolve that combat first, it instructs you to send the escort to TRALA, effectively leaving the Carrier unescorted in its part of the following engagement against the other Grupo. This was not the intent; the carrier is escorted if it was escorted at the start of the phase. Read this rule (and the Task Force Table) as instructing you to send ships to TRALA at the end of all engagements. Naturally, if you have an escort and a carrier in the same SZ, I would conduct the carrier combat first and send it to TRALA and then conclude by doing the escort combat.
6.7 Deploy Iwo Jima
A. If USS Iwo Jima (13.11) is at Ascension, place it and all facedown Harriers at Ascension, on the TRT five turns ahead.
Example: If this catastrophe happens on Turn 12, the Iwo Jima and its Harriers are placed on the Turn 17 box.
B. If USS Iwo Jima is not at Ascension, the Harriers wait at Ascension until the Iwo Jima event (13.11) is rolled.
7.0 Argentine Air Assets Phase
(No Air Triangle: skip this section entirely if the weather is fog or squalls.)
7.1 Determine Target Sector
A. The Target Sector indicates which AS is considered strategically most important this turn by the Argentine junta. It is determined by observing the five AS delineated on the big map by dotted white lines. B. The Target Sector is:
- AS with the most British ground units (not including helicopters and the KLF), or, if none,
- AS E (around Stanley).
- If there is a tie for 1, then the tied AS closest to Sector E is the Target Sector. If still tied, choose randomly between them. C. Move the Target AS marker to that part of East Falkland.
7.2 Special First Turn Rule
On Turn 1 only, place one randomly selected Argentine aircraft unit, faceup, in each AS on the big map (total: 5).
7.3 Grupos Deploy Air Forces
7.3.1 Procedure
A. Roll a die. The result determines which of the six SZs has priority. Each Grupo on the Strategic Map now deploys two Argentine planes on East Falkland, faceup, starting with the first priority Grupo. See the example (7.3.2). B. Each SZ on the Strategic Map connects to its corresponding AS on East Falkland, except for Rio Grande, which connects to the current turn's Target Sector (7.1). Each plane is randomly chosen from the Argentine Mainland box (cup).
Play Note: If there are insufficient planes available on the Argentine mainland to fully comply with the orders below, place as many Argentine planes as you can, in the order given, until you run out.
7.3.2 Example
A. On the Strategic Map there are four Grupos: two in Santa Cruz, one in Rio Gallegos, and one in Rio Grande. Roll the die to see which SZ has first priority this turn; the result is a 5. This means the first planes deployed will come from Rio Gallegos. B. The first SZ, Rio Gallegos, corresponds to AS E. It has one Grupo so draw two planes (two A-4s) to go into the AS E box. Next is Rio Grande, which reinforces the Target Sector (now Sector A); its one Grupo sends two random planes (a Donadille, and a Mirage) to fly to the Sector A box. C. Next, cycle back up to Comodoro Rivadavia, where there are no Grupos; so move on to Puerto Deseado. No Grupos there either. Next comes San Julian, another uneventful SZ with no Grupos. D. Finally, arrive at Santa Cruz, which reinforces Sector D. Here you find two Grupos, so you reach into the cup and pull out four random planes (two A-4s, the Aermacchi, and the Super Étendard) to place in the Sector C box. The next SZ is Rio Gallegos, which you've already checked, so you are done.
7.4 Abort Skyhawks in Rain/Snow (Optional Rule)
Argentina's outdated version of the A-4 Skyhawk had no radar, and could not find the Falklands unless the weather was perfect.
On turns when the weather is rain/snow, remove all Argentine A4 planes from East Falkland after randomly placing them in this phase, and put them back in the Argentine Mainland cup. The effect is the A4 planes turn back unless the weather is fair (4.1).
8.0 British Air Assets Phase
(No Air Triangle: skip this section entirely if the weather is fog or squalls.)
8.1 Launch Harriers!
The British can now take every British Harrier air unit from the TEZ box and send them on missions over East Falkland. To do so, place each plane in any Sector Box.
8.2 Stacking
There is no limit to the number of planes (from either side) that can be placed or located in a single Sector Box.
Play Note: Be aware that if a carrier unit is sent to a SZ or to the TRALA, its associated aircraft remain in the TEZ, and are available for these air missions, unless the rule says otherwise (e.g., 6.4).
9.0 Argentine Junta Plan Phase
(No Air Triangle: skip this section entirely if the weather is fog or squalls.)
9.1 Argentine Roundel Planes
Elite Argentine planes are designated with the blue-white-blue Air Force roundel. These planes are liable to redeploy from their current positions on East Falkland at this time based on orders from the Argentine Junta.
9.2 Junta Plan Roll
Roll one die for the Argentine Air Attack Plan:
| Roll | Plan |
|---|---|
| 1 | Army Plan (9.2.1) |
| 2-3 | Navy Plan (9.2.2) |
| 4 | Air Force Plan A (9.2.3) |
| 5-6 | Air Force Plan T (9.2.4) |
9.2.1 The Army Plan
Army General Galtieri has strategic influence this turn, and seeks to protect his forces around Stanley.
All Roundel planes on East Falkland move immediately to AS E.
9.2.2 The Navy Plan
Navy Admiral Anaya acquiesces in the current plan.
Leave Argentine planes where they are.
9.2.3 Air Force Plan A
Brigadier Lami Dozo, the Air Force chief, uses his assets more aggressively.
All Roundel planes on East Falkland move to AS A, if there are British ground forces on East Falkland; otherwise, they move to the Target AS.
9.2.4 Air Force Plan T
Lami Dozo pursues a compromise plan.
All Roundel planes on East Falkland move to the Target AS.
9.3 Argentine Reaction
A. Roll a die to determine a sector to which to move all eligible planes:
| Roll | Result | Sector |
|---|---|---|
| 1-2 | ¡Puerto Argentino! | E |
| 3-4 | ¡Putos ingleses! | A |
| 5-6 | ¡Objetivos de oportunidad! | Target |
B. If the Donadille Ace is on East Falkland, but not in AS A, E, or the Target AS, move him into the sector just rolled. He may move through British Aces. C. Also, any Argentine planes in uncontested sectors (with no Harriers) move into the sector just rolled; but the weakest two planes in each sector (player's choice if tied) must remain in the sector to preserve air superiority (10.12). If there are no such planes, and no Donadille, skip this step.
9.4 Battles
As the result of deploying and moving British and Argentine planes, some sectors may now contain planes of both sides. Air battles must now occur in all such sectors (see 10.0 and Sequence of Play, Step G).
10.0 Air Battle Procedure
(No Air Triangle: skip this section entirely if the weather is fog or squalls.)
10.1 General Rule
A. Air battles occur between British and Argentine planes when both sides' planes coexist in the same sector box. Battle involves only air units and ground support (10.3). B. Air battles must occur if planes from opposing sides are in a sector box, even if this means that one side is attacking at poor odds. The player chooses the order in which air battles are fought. C. Each battle always follows these steps in order (from 10.2 to 10.12).
Play Note: Success in an air battle usually means that you forced the enemy planes to turn back and head for home.
10.2 Determine Sides
In this phase, the British planes are the attackers and the Argentines are the defenders.
Example: British forces have landed at San Carlos and have advanced to Letterbox Hill, Bombilla Hill, and Camilla Creek House. Air control in Sector A is vital (to protect the escorts at San Carlos, which keep the British ground forces supplied), but many British planes will be deployed over Sector B, in preparation for British ground attacks on Douglas Station and Darwin. In Sector A, Argentina deploys first, placing Donadille, one A4 and one Aermacchi (three planes total). The British respond with four Harriers. As Argentina set up first, the British are the attackers.
10.3 Call for Ground Support
A. When an air battle occurs, either side, or both, will call on ground support to improve its odds. B. The Argentines receive +1 level of ground support per Argentine ground unit (including flipped or hidden armies) in the AS, including Stanley for Sector E. C. The Argentines also get +1 level of ground support if there is a Pucara unit at an airstrip in that AS (this affects Sectors A and B only). D. The British receive +1 level of ground support per British-held civilian settlement (left) in the AS; +1 if they have Naval Gunfire Support (Sector E only; see 6.2); and +1 if there are any British ground forces anywhere in the AS (no matter how many). E. Raise the markers on the Ground Support Tracks accordingly. They are reset to zero at the end of every battle (10.10).
Example (continued): The Argentines have no ground units in Sector A, but they still have one Pucara at Pebble Island. This raises Argentine ground support one level from 0 to 3. The British have lots of ground troops in Sector A, which also raises their ground support one level from 0 to 4.
10.4 Ace Reaction
Both sides' Ace pilots may now react.
10.4.1 British Ace Reaction
The British have two Ace units: Ward and Morgan. These Ace planes can now be moved to any AS, even if they have already fought. If an AS contains Argentina's Donadille Ace unit, then no British Ace unit may leave, enter, or pass through that sector at this time.
Example (continued): Because Donadille is already in Sector A, he will not be moving. Both British Aces are in Sector B, but they cannot move to Sector A because Donadille is there, so they do not move either.
10.4.2 Donadille
If the Donadille Argentine Ace pilot unit is on East Falkland, he will join the battle if the Argentine attacker (including Donadille) would have an advantage (over 100%) in the battle, or if the British attacker has a disadvantage (under 100%) in the battle.
Play Note: He cannot enter, leave, or pass through any AS containing a British Ace (10.4.1).
10.5 Total Strength Points
A. Each side in the battle now totals its own SPs in that Sector Box. B. Each air unit has a number (in its corner) to indicate the unit's strength. These numbers are totaled, and then the current ground support factors are added.
Example (continued): Argentina's planes (Donadille, the A4 and the Aermacchi) have 11 SPs, adding three ground support for an Argentine total of 14. The four attacking British Harriers have 28 SPs, plus four ground support for a British total of 32.
10.6 Calculate Odds
Divide the total attacker SPs by the total defender SPs to obtain a percentage result. Round the result down to the nearest percentage expressed by a column on the Air Battle Results Table (ABRT). Any ratio under 50% uses the < 50% column.
Example (continued): The attacking British are the larger force (at 32) so they outnumber the Argentines (at 14) by a factor of 2.29. This rounds down to 200%, so the battle is fought on the 200% column.
10.7 Determine Results
Roll a die and cross-index the roll with the relevant ABRT column to see the final result of this battle.
Example (continued): The roll is a 3, which means an exchange result (10.8).
10.8 Battle Results and Elimination
A. When any Argentine or British unit is eliminated, it is placed in its country's RP. B. The ABRT results are:
| Result | Explanation |
|---|---|
| AE | Attacker Eliminated: All attacking units are eliminated; the defender wins the battle. If the Argentines are the winners, and the Donadille Ace is in the winning Argentine stack, discard one defeated (random) British Harrier; it is shot down. |
| ABO | Attacker Breaks Off: The attacker's units break off (retreat, 10.9) and the defender wins the battle. |
| ABO-P | Attacker Breaks Off/Pursuit: The attacker's units break off (retreat, 10.9) and the defender wins. The defender may now pursue the losers (10.11). |
| DE | Defender Eliminated: All defending units are eliminated; the attacker wins the battle. If the Argentines are the winners, and the Donadille Ace is in the winning Argentine stack, discard one defeated (random) British Harrier; it is shot down. |
| DOG | Dogfight: The initial attack is parried as the defender launches a bold counterattack. Refight the battle with the original attacker as the defender. Roll a die on the 100% column of the ABRT. Ignore the real odds, and reset any existing ground support to zero. Apply that final result to the battle. |
| DBO | Defender Breaks Off: The defender's units break off (retreat, 10.9) and the attacker wins the battle. |
| DBO-P | Defender Breaks Off/Pursuit: The defender's units break off (retreat, 10.9), and the attacker wins. The attacker may now pursue the losers (10.11). |
C. If both sides' SP forces in an exchange are exactly equal, the battle is a draw: both sides' planes are all eliminated and no one wins.
Example (concluded): Argentina has the smaller force (11 SPs of planes) so the whole Argentine force is sent to the RP. The British must lose enough units to equal or exceed 11 SPs, so the British lose two Harriers (14 SPs) to their RP, since 14 is the smallest number that can be removed that equals or exceeds 11. The other two British planes in Sector A remain to establish air superiority (10.12).
10.9 Breaking Off
10.9.1 In General
An ABO (ABO-P) or DBO (DBO-P) result compels the attacker or defender (respectively) to retreat from the sector box where the battle took place.
10.9.2 Retreat Direction
A. Planes always retreat one sector box; British planes retreat to the right (toward Stanley) while Argentine planes retreat to the left (toward San Carlos). The sector box entered by retreating planes is called the Refuge Sector Box. B. If there is no Refuge Sector Box (i.e., the plane has to retreat to the left of San Carlos, or to the right of Stanley) then the retreating plane is eliminated (10.8). The battle is over (go to 10.10). C. A Refuge Sector Box may contain plane(s) hostile to the retreating plane(s). This is the case if hostile planes were there already before the battle and/or if the winning side's planes pursued the retreating planes into the box (10.11). In this event, a new battle is immediately fought there; the retreating side is the defender. D. If the Refuge Sector Box contains no planes hostile to the retreating planes, either ones that were already there or ones that entered the box because of pursuit, then the battle is over (go to 10.10).
10.10 Reset Ground Support
At the end of every battle, reset both Ground Support markers to zero.
10.11 Pursuit
A. An ABO-P or DBO-P result, in addition to forcing a normal retreat, may allow the winner to pursue the retreating units into the Refuge Sector Box (10.9.1), where another battle between the two sides will be fought at once. The pursuing force is the new attacker, regardless of odds. This is considered a follow-up to the original battle, so reset ground support (10.10) before the new battle. B. A pursuit result can cause another pursuit. The two sides could chase each other all over East Falkland as the result of a chain reaction of pursuits leading to multiple battles.
10.11.1 British Player Pursuit
A. If the player wins an ABO-P or DBO-P result and the Argentines retreat, the player may elect to pursue the retreating Argentines into the Refuge Sector Box with any or all planes that just won the battle. A new battle is fought right away in the Refuge Sector Box, with the British as the attacker. B. Argentine planes already in the box before the retreat/pursuit simply join in the one big battle. Go to 10.3.
10.11.2 Argentine Pursuit
A. If the Argentines win an ABO-P or DBO-P result and the British retreat, the Argentine reaction depends on the situation. The victorious Argentines may pursue the retreating British into the Refuge Sector Box with all but two of their planes. (From the previous battle, the weakest two Argentine planes remain in the original battle sector, player's choice if tied.) B. If this move of Argentine planes would outnumber British planes in the Refuge Sector Box by 200% or more in SPs, the move must be made. C. Otherwise, all Argentine planes remain where they are and no pursuit occurs. If the Argentines do pursue, then a new battle is fought (as above) but with the Argentines as the attackers. Go to 10.3.
10.12 Air Superiority
A. After all air battles are over, if one side only has any planes in an AS, that side has air superiority in that AS. This will affect airstrikes in San Carlos (10.13), helicopter movement (11.4.1), yomping (11.4.2), ground combat (11.6.2), and amphibious landing (12.3). B. An Argentine Pucara in a sector neither establishes Argentine air superiority nor blocks British air superiority.
11.0 Ground War Phase
Skip this entire phase if British ground units have not yet landed at San Carlos on East Falkland (12.3).
11.1 Supply Effect
A. If the BBC News level is 7 or lower, flip one faceup stack of British ground units in a camp on East Falkland (player's choice) to its OOS side. (Morale has dropped!) B. If it is an air turn, and the British do not have air superiority (10.12) in at least three AS, one faceup stack of British ground units in a camp on East Falkland (player's choice) must also be flipped to its OOS side.
11.2 San Carlos Air Strikes
(No Air Triangle: skip this section if the weather is fog or squalls.)
A. If Britain does not have air superiority in AS A, and there are any British escorts (6.3) in the San Carlos Landing Zone box, Argentina now attacks those escorts. B. Roll a die and add the number of Grupo units (5.1) currently in all SZs on the Strategic Map. Consult the San Carlos Air Strikes Table; implement results using the escorts at San Carlos (only), the BBC News marker, and any random Grupos at sea.
Example: There are two escorts in San Carlos to supply British forces on East Falkland. Argentina has air superiority in Sector A, so this draws an automatic response from Lami Dozo's air force. Since the current weather is rain/snow, Argentina attacks. There are currently six Grupo units at sea (one in Rio Grande, two in Puerto Deseado, two in San Julian and one in Rio Gallegos). The roll is a 4, which added to the Grupos yields 10: the highest, and worst, possible result! Retreat both your escorts from San Carlos to the TRALA box, and watch your BBC News level drop by 10 as news of this disaster spreads.
11.3 Ground War Paths
A. Between San Carlos and Stanley are three paths, each a series of colored boxes (camps). There is a Yellow Path, a Brown Path, and a Green Path. B. Each camp has a small circled number; the numbers decrease as one nears Stanley. Ground units move from one camp to the next smaller-numbered one as they move across the island. (Movement is explained in 11.5).
Example: On the Green Path, a British unit in Darwin (Camp #11) next moves to Goose Green (#10), not to Teal Creek (#9), even though Teal Creek looks closer.
C. Activity on the three paths is carried out in any order the player prefers.
11.4 British Army Stacks
A stack includes all British army units on a single path. Except in the San Carlos round box, stacks are not divisible; you cannot leave units behind on a path. All British units on a path must always be stacked in the same camp box, always the lowest-numbered British-controlled camp box on that path.
11.5 British Ground Movement
A. The ability of faceup British forces to advance toward Stanley is determined by supply, air superiority, weather, and friendly helicopters. British ground units may not advance into Stanley itself (to avoid civilian casualties). B. There will never be more than three British stacks, one per path on the map (11.1). C. The number of faceup British stacks which can actually move, depends on how many are supplied (6.3). D. There are two kinds of ground unit movement: helicoptering (moving by helicopter) and yomping (moving on foot).
11.5.1 Helicoptering
A. A supplied stack of British ground units in an AS can helicopter if all conditions are met:
- The British stack has a helicopter unit in it;
- The weather this turn is fair or rain/snow;
- The British have air superiority (10.12) in every AS and camp where the stack is attempting to move out of, by helicopter. B. A helicoptering stack can advance as far (into consecutive lower numbered camps) as it wants to, until it enters a block (see 11.5.3). Then the stack must immediately stop to deal with the block. The player then gets to conduct his move on the next path, if possible.
11.5.2 Yomping
A. If a supplied stack of British ground units does not meet the requirements for helicoptering, then it must yomp. (This includes its helicopter unit, if any.) B. A yomping stack may advance up to two camps, but it must stop advancing when it enters a block, so it can deal with the block. C. A stack cannot yomp if Argentina has air superiority (10.12) in the sector where it begins its move. (Essentially, it is pinned down.) D. Any camp in an AS under Argentine air superiority (10.12) constitutes a block. E. A stack containing the KLF unit may yomp up to three camps, but its move is still impeded by a block. F. When yomping, a mountain camp (e.g., Sussex Mountains or Verde Hills) may constitute a block (11.5.3).
11.5.3 Blocks
A. A block is any camp containing an Argentine ground unit (flipped or unflipped), or any camp located in an AS containing an Argentine Pucara unit (at an airstrip), or containing any Argentine planes (10.12). B. If a British stack is yomping (11.5.1) and it enters a mountain camp, roll a die. On a 1-2, it ends its move and returns to the camp it entered from. The player may ignore this result, but only by taking supplies from another path. Flip one British stack on another path to its OOS side. (That stack must be supplied, and must not have moved already.) C. The first stack can then continue moving normally and, if the mountain camp contains hostiles, make contact (11.6). D. If the current weather is fog or squalls, then this is a No Air turn and Argentine aircraft and Pucaras do not serve as blocks.
Example: There are two Argentine planes in Sector D. A British stack with helicopter occupies Top Malo House Camp (Brown Path, #6). The British stack can helicopter forward, but upon entering Centre Brook, it must stop because it encounters a block: Centre Brook is in Sector D, which has Argentine planes in it. The stack enters Centre Brook and stops. The player then proceeds to action on the next path (if any).
11.6 Contact With Hostiles
A. If a British stack enters a camp occupied by Argentine ground forces, flip the Argentine unit to its faceup side (if it's not faceup already). B. If the unit is a:
- Mine Field: If the Argentine unit is a Mine Field, discard the Mine Field marker. The British stack also ceases movement for that turn if it was yomping. (Helicopters can fly over mine fields.)
- Patrol: If the Argentine unit is a Patrol, there is a small skirmish. Discard the Patrol marker and roll a die; on a 1-3, the British stack ceases movement that turn. On any other roll, the stack may keep moving (helicoptering or yomping) if otherwise able to do so.
- Combat Unit: If the Argentine unit is a combat unit (marked with an Argentine flag), then the British stack ceases movement for the turn and ground combat ensues (11.7).
11.7 Ground Combat
When British and Argentine ground units occupy the same camp, ground combat occurs. Total the SPs for each side, adding the result of one die roll. The side with the higher overall total wins the battle (11.7.3). If tied, the defender (the one already in the camp) wins.
11.7.1 Royal Artillery
The British RA unit has a printed strength of 1-5m. Its strength is 5 when attacking a mountain camp (with the mountain icon in it), and 1 in all other combats.
11.7.2 Combat Modifications
A side's own total rises or falls by the factors listed in Ground Combat Modifiers Table. Certain factors do not apply if the weather is fog or squalls (as no planes are flying).
Example: The Argentine BIM 5 (strength: 18) occupies Tumbledown near Stanley. Attacking from Two Sisters are the British 42 Cdo, 45 Cdo, the Welsh Guards, the SAS, and the Blues and Royals (total strength: 20). The British have Naval Gunfire Support (+3). Neither side has planes (so no advantage). The weather is Fair (no effect). The BBC is at 10 (no effect). But the Pope is touring (-2 from the British).
11.7.3 Ground Combat Results
A. If the Argentines win the battle, the British stack retreats one camp toward San Carlos, ending its move for the turn. Reduce the BBC News number by five. B. If the British win the battle, raise BBC News by three (five if there is a settlement there, 10.3), and then check the Argentine unit. C. If the Argentine unit has a blue star, it is part of the Stanley garrison; it retreats one camp (back toward or into Stanley). D. If the attacking Argentine unit has a blue star, it retreats two camps.
Example: An Argentine in Two Sisters, attacking Mount Kent, retreats to Tumbledown if its attack fails.
E. If the Argentine unit has a red or white star, remove the Argentine unit from the game permanently. It has surrendered. F. If the British victory was at Goose Green, and there is an Argentine Pucara aircraft at the Goose Green Airstrip, discard the Pucara.
Example (continued): Before the die rolls, the total factors are 21 for the British and 18 for the Argentines. The British roll a 2 and the Argies roll a 5, for an overall total of 23 British and 23 Argentine. The British assault on Tumbledown is stymied. The British stack moves back to Two Sisters until the next turn; reduce the BBC level by -5 as public opinion reacts with outrage.
11.8 Naval Gunfire Support
If the British have an escort ship in the Naval Gunfire Support Box (located in AS E; 6.2), and the Mount Kent Camp (marked with a radio antenna) is British occupied or is behind British lines, then the British may add three to the stack in all ground combat taking place inside AS E.
11.9 Ring Fitzroy!
Immediately upon British control of Swan Inlet House (with the telephone icon), if there is a facedown Argentine ground unit at Fitzroy, flip it faceup.
12.0 Logistics Invasion Phase
12.1 Victory
If all three camps adjacent to Stanley (Wireless Ridge, Tumbledown, and Mount William) are British-controlled at this point in the turn, then Argentine morale breaks and the war is over. You won.
12.2 Last Turn Defeat
If, at this time, it is Turn 19 and you have not won, then the game ends and you lose. Between the failure to capture vital objectives, mounting casualty totals and global public opinion turning against you, there is no option but to petition the United Nations for a peaceful solution which will end up letting the dictatorships of the Third World enforce Argentina's claims.
12.3 Operation Sutton: Landing at San Carlos
12.3.1 In General
A. Once per game, at this point in the turn, the British may land ground forces at the San Carlos Landing Zone. This opens the ground portion of the war: the yomp from San Carlos across East Falkland to Stanley. B. The landing may only be conducted if:
- There are two British escorts at San Carlos (6.3).
- The current turn's weather is other than fair. (The landing force needed bad weather, or at least cloud cover, to impede Argentine air reconnaissance. The clouds lifted after the forces were ashore.)
- If the current weather is rain/snow, the British must also have air superiority in Sector A (10.12).
- It must be Turn 7 or later. (You cannot land any earlier than Turn 7. And the later you land, the less time you have to win the game.)
12.3.2 Conducting the Landing
Perform these actions:
- Move all British ground units from Ascension Island and place them in the San Carlos Landing Zone.
- Roll a die and place the STUFT naval unit that many turns ahead on the TRT (4.4). Add three to the BBC News level.
- Place the Gurkhas, Welsh Gds, and Scots Gds units in Ascension Island. (They will come in later; see 13.1 and 13.22.)
Play Note: Ground units cannot move out of San Carlos until the next turn (11.5).
12.4 Reset
A. Turn faceup any British stack which is currently OOS. B. Do the same for any Grupos flipped earlier this turn (4.2.5). C. Move all units in the TRALA box back to the TEZ box. D. Move all British ships and planes in SZs and at San Carlos also move to the TEZ box at this time. They will be ready for action next turn.
12.5 Admiral Anaya
A. If two Argentine warships are on the map, either at sea or in port (the Argentine Mainland box), roll one die per ship and move it to the resulting SZ. If the die roll was doubles, place (or leave) both ships in the Mainland. B. If only one Argentine warship is on the map, roll one die for it, and place the ship in the designated SZ (or the Mainland):
| Roll | Place in |
|---|---|
| 1 | Comodoro Rivadavia |
| 2 | Rio Gallegos |
| 3 | Rio Grande |
| 4-6 | Mainland |
C. Finally, see if there are any Argentine ships at sea. If so, flip only one faceup stack of British ground units in a camp on East Falkland (but not in San Carlos) to its OOS side (player's choice).
12.6 Argentine Parts Shortage
If there are currently more than three Argentine planes in the RP, select the lowest strength unit (player's choice if tied) and place it off-map in the Discard Pile. Donadille and Roundel units may only be selected if they are the only ones available; try again if possible.
12.7 Repair
British and Argentine units in their respective RPs may now return to active use. Returning British units are placed in the TEZ box; returning Argentine units are placed facedown in the Argentine Mainland or randomly in the cup.
12.7.1 British Crew Advantage
The player may now move one British plane from the RP to the TEZ box regardless of weather.
12.7.2 Fair
If the current weather is fair, all planes still in their respective RPs return to use.
12.7.3 Rain/Snow
If the current weather is rain/snow, all planes still in their respective RPs return to use except for one (random).
12.7.4 Fog
If the current weather is fog, two planes (random) still in each RP return to use; all other planes remain there.
12.7.5 Squalls
If the current weather is squalls, all planes still in their RPs remain there and do not return to service this turn.
12.8 Political Factors
A. Remove the Pope and the Diplomacy marker if they are in the current turn's box on the TRT. B. Remove the Chilean Radar unit from the map, if it is there.
12.9 News Headlines
If the game continues, roll on the Headlines Table. Roll a die, adding the current turn number. The modified die roll determines the cluster of events that occur this turn.
Example: A roll of a 5 on Turn 10 yields a result of 15.
12.10 Air Scramble
A. All British planes in SZs and sector boxes must now be moved to the TEZ (Total Exclusion Zone) Box. B. All Argentine planes in sector boxes must now be moved to the Argentine Mainland (cup).
12.11 End of Turn
The turn is now over. Advance the Game Turn marker to the next turn and go back to 4.0.
13.0 Specific Headlines List
13.1 Ayo Gurkhali!
A. This event occurs if there are British ground forces in Camps on East Falkland. B. The first time this event is rolled, move the Gurkha unit from Ascension Island to any stack of British ground units in East Falkland. C. Each subsequent time it is rolled, Argentine troops are panicked by outlandish rumors of Gurkha brutality (which the British, wisely, did nothing to dispel). D. If there is a blue star Argentine army in a camp adjacent to the British Gurkhas, retreat the Argentine Army one camp, or back into Stanley, as necessary. E. Argentine forces already in Stanley do not retreat in this case.
13.2 Operation Algeciras
Argentine saboteurs sneak into Spain, plotting to blow up British ships at Gibraltar.
Roll two dice; on a 2, reduce the BBC News level by ten; all British ships in the TEZ must also move immediately to the TRALA box and are inactive next turn. Can only succeed once per game.
13.3 Black Buck Air Raid
Vulcan bombers from Ascension Island bomb Stanley Airport to degrade the Argentine garrison's supply lines.
A. Roll a die and increase the BBC News number by that amount. B. In addition, if the roll is a 5-6, retreat one of the blue star Stanley garrison units one camp, chosen randomly from those outside of Stanley. If all Blue Star Argentines are in Stanley, retreat one randomly into the Broken Morale box.
13.4 EEC/NATO Allies
Britain's partners were deeply divided over the Falklands War.
Roll one die and apply the result:
| Roll | Result |
|---|---|
| 1 | French President François Mitterrand tightens arms embargo. Discard one Argentine DM or SÉ plane (player's choice). |
| 2 | Irish Taoiseach Charles Haughey rambles on about British imperialism. Roll one die and raise the BBC News total at his antics. |
| 3 | Italy's coalition rejects economic sanctions. Return one random Argentine plane from the Discard Pile to the Argentine mainland. |
| 4 | New Zealand's PM Robert Muldoon sends supplies and aid to Britain. Increase BBC News by three. |
| 5 | West German Chancellor Helmut Schmidt backs Britain. Remove the Diplomacy marker from the map, if it is there. |
| 6 | US President Ronald Reagan tightens economic sanctions. Discard any one non-Roundel A4 plane (player's choice). |
13.5 Wets Undermine Mrs. Thatcher
Moderate elements in cabinet challenge the PM on Falklands policy.
Subtract three from BBC News.
13.6 Fleet Street Demands Results
Public opinion, goaded by the media, wants to see visible progress in the war.
A. If the San Carlos Landing Zone is not yet British-controlled, you fail. B. If Darwin is British controlled but you do not control Fitzroy, you fail. C. And if Goose Green is British controlled but you control fewer than one camp adjacent to Stanley (Wireless Ridge, Tumbledown or Mount William), you fail. D. If you fail, roll a die and subtract it from BBC News. E. If you do not fail, roll a die and add it to BBC News.
13.7 Viva Argentina!
A. This event does not occur if Britain has air superiority (10.12) in Sector E. B. All blue star Stanley garrison Argentine armies (RI 7, BIM 5 and RI 4) advance one box west toward San Carlos (or out of the Broken Morale Box into Stanley).
- An army already on a path advances one camp on that path.
- An army still in Stanley advances onto the #1 box of a path. Choose each army and each path randomly if more than one is available of each. There can never be more than one blue-star army from Stanley on a given path.
- An army thus advancing cannot advance into a camp already occupied by other Argentine units (even if facedown).
- If an advancing Argentine enters a British occupied camp, then ground combat occurs immediately (11.5) with the Argentines as the attackers. However, if the British stack contains the Gurkha unit, then no Argentine unit may advance into that camp. (They were terrified of the Gurkhas.)
13.8 US Sends Mixed Signals
Factionalism between the pro-British Secretary of State Alexander Haig, and the pro-Argentine UN Ambassador Jeane Kirkpatrick, infuriates British Foreign Office mandarins and baffles world opinion.
Roll one die for each faction.
- If Haig's roll is higher, add his roll to BBC News.
- If Kirkpatrick's roll is higher, subtract her roll from BBC News.
- In case of a tie, use Haig's roll. (Reagan breaks the tie.)
13.9 Argentine Surface Action
British ships are diverted to deal with fishing vessels fitted out as spy ships, or to interdict blockade runners smuggling supplies to the occupied Falklands.
One British escort ship must move to the TRALA box. It cannot be used next turn.
13.10 Sub Threatens Carriers
The Argentine submarine San Luis is reported in the area.
Move one British carrier (your choice) from the TEZ box to the TRALA box. It cannot be used next turn.
13.11 USS Iwo Jima
A. This can only happen once. B. Place the Iwo Jima at Ascension Island. C. If a British carrier has been sunk (by Exocet, 6.5), place the Iwo Jima on the TRT, five turns later. It then arrives as a reinforcement in the TEZ and flies the dead carrier's surviving planes (facedown at Ascension Island; flip them faceup and stack them with the Iwo Jima). D. If the Iwo Jima ever does arrive at Ascension, add five to BBC News at once. It functions from that point on as a normal British carrier.
13.12 Collision
Roll one die.
- On a 6 remove one British Harrier (your choice) from the game. It has been mysteriously lost at sea.
- On any other roll, move the Harrier to the RP instead; it cannot be used next turn.
13.13 Shady Arms Dealers
Britain's enemies work behind the scenes to arm Argentina.
Roll one die and apply the result:
| Roll | Result |
|---|---|
| 1 | Brazil's João Figueiredo smuggles arms from communist Cuba to fascist Argentina. British player chooses two SZs and immediately places one Grupo from the Mainland box in each one (if enough Grupos are available). |
| 2 | Israel's Menachem Begin takes revenge on the UK for WWII Jewish policy. Return one lost Dagger (DG) from the Discard Pile to the Argentine RP. |
| 3 | Libya's Col. Gaddafi: Roll a die; on a 6, add one Exocet to the Argentine total. |
| 4 | Pro-Argentine Peru smuggles in equipment for the Argentine Air Force. Any one (random) Argentine plane that was lost to the Discard Pile is now put back in the Argentine Mainland. |
| 5 | Apartheid South Africa sends arms and intelligence to Argentina. Advance one random blue star Argentine unit (as in 13.7), but raise BBC News by five due to the backlash against Argentina among African and other Third World countries. |
| 6 | Soviet Union trades satellite photos for Argentine wheat. Move one random British ship from the TEZ box to the TRALA box. |
13.14 Pinochet's Revenge
A. If the Headlines die roll was even, the British may move any three Argentine Roundel planes (from anywhere, player's choice) to the Argentine RP. B. If the die roll was odd, then if there is any SZ containing at least one Argentine Grupo, the British may place the Chilean Radar marker there (your choice). The marker adds five to any die rolls for British ships attacking Grupos in that SZ next turn (6.4).
13.15 Papal Visit
A. Roll one die and place the Pope marker that many turns ahead. Whilst the Pope is on the TRT, see 11.7.2 for his effect on Ground Combat. B. This event may only happen once.
13.16 Argentine Discipline
Roll one die to randomly select one Argentine blue star army.
- If it is outside Stanley (13.7), it retreats one camp toward (or back into) Stanley.
- If the selected army is already in Stanley, it retreats to the Broken Morale box.
- If it is already in the Broken Morale box, it stays there.
13.17 Sidewinder
Ground-based Harriers are modified to carry US-built AIM 9L Sidewinder air-to-air missiles at sea.
Roll a die, and move that many faceup Harriers on Ascension Island to the TEZ, as long as their corresponding carrier (Hermes, Invincible, or Iwo Jima) is not sunk.
13.18 Peace Plan
The UN makes another peace proposal.
The player must choose:
- To reject the peace offer, reducing the BBC News number by three, or
- To agree to waste time discussing it, placing the Diplomacy marker on the next turn box on the TRT.
13.19 By-Election Tests Tories' Popularity
Add the number of civilian settlements (10.3) under British control to the BBC News level (minimum zero; maximum seven).
13.20 BBC Leaks MoD Secrets
A. Roll a die. On 6, Argentina exploits confidential Ministry of Defence information leaked by the BBC. B. Roll another die to randomly determine one of the three British stacks on East Falkland and flip the stack. It cannot move next turn. C. If there are no British forces on East Falkland outside the San Carlos Landing box, then move one British ship from the TEZ to the TRALA box instead.
13.21 Kelper Logistics Force
If the British control any settlements (10.3), you may deploy or move the KLF unit. Place it in any stack of British ground units (or you may move it to a different British stack, if already on the map).
13.22 Buckingham Palace
Politicians order the Scots and Welsh Guards (at Ascension Island; fresh off public duties, i.e. parades at Buckingham Palace) into battle.
A. This may successfully occur only once, and only if the British have landed at San Carlos, and there are currently no British forces in the San Carlos Landing Zone itself. B. Place the Scots and Welsh Guards units in one or two British stacks of your choice, subject to these restrictions:
- The Scots and Welsh may be placed on any stack of British ground units, or in two different stacks if you prefer.
- For each unit (Scots or Welsh) landing, roll a die for that unit and add the number of British-controlled ports anywhere on the map (marked with anchors, e.g., Teal Inlet or Darwin).
- Then subtract the number of British planes in the AS where the ground unit is being deployed.
- If the total is positive, subtract the total from the BBC News level.
Historical/Design Note: The rule assumes that the more ports you control, the more of a logistical nightmare it is sending these troops to the front line by ship.
17.0 Unit ID and Game Abbreviations
| Abbr | Meaning |
|---|---|
| A4 | A-4Q Skyhawk (US manufacture, McDonnell Douglas) |
| AM | Aermacchi MB-339A (Italian manufacture) |
| B&R | The Blues and Royals (3 Troop and 4 Troop; armored) |
| BBC | British Broadcasting Corporation |
| BIM | Argentine Marine Battalion |
| CB | Canberra B.Mk62 (British manufacture, English Electric) |
| Cdo | Commando (Royal Marines or Argentines) |
| DG | Dagger (Israeli knockoff of the Mirage 5, Israel Aircraft Industries) |
| DM | Dassault Mirage IIIEA (French manufacture, Dassault) |
| EC Solari | Equipo de Combate Solari (Combat Team Solari) |
| Gds |
Charts and Tables
From "Mrs. Thatcher's War - Charts and Tables (revised and reformatted) v1.1", the companion sheet to the revised rules.
Weather Table (4.1.1)
| Weather | Turns 1-7 | Turns 8-15 | Turns 16-19 |
|---|---|---|---|
| Fog (No air operations) | 2-3 | 2-4 | 2-4 |
| Fair | 4-6 | 5-6 | 5 |
| Rain/Snow | 7-8 | 7-8 | 6-7 |
| Squalls (No air operations) | 9-10 | 9-10 | 8-9 |
| Gales | 11-12 | 11-12 | 10-12 |
SAS Raids (4.2)
May conduct if SAS marker is on East Falkland or in TEZ.
| Type | Conditions | Success | Failure | Saving Throw |
|---|---|---|---|---|
| CD Raid Argentine Airstrip | Pucara at Pebble Island or Goose Green Airstrip | Pebble Island: 1-4; Goose Green: 1-2 — discard 1 x Pucara | Pebble Island: 5-6; Goose Green: 3-6 | 1D6 |
| Operation Mikado | 1 x game | 1 — roll for # Exocets lost | 5-6 | 2D6 |
| Reece | Any facedown Argentine army | 1-4 — flip faceup | 5-6 | 1D6 |
| Combat Role | — | See 4.2.4 | — | None |
| Spoofing | Roll for SZ | See 4.2.5 |
Saving Throw: Roll and put SAS that many turns ahead.
STUFT (4.4)
Roll if in current turn and remove from game.
| Roll | Result | Helicopters Received |
|---|---|---|
| 1-3 | No damage | 3 |
| 4 | Significant hit | 2 |
| 5 | Disastrous hit | 1 |
| 6+ | Catastrophic hit | 0 |
If 2+ Exocets on TRT, +2 DRM and remove 1 x Exocet.
British Sub Attack (6.1)
- Belgrano and/or 25 de Mayo is in a SZ.
- Move escort from TEZ to TRALA.
- May do once per turn.
| Roll | Result | Other |
|---|---|---|
| 1-4 | No effect | Ship remains in zone. |
| 5-6 | Sunk | Roll 2D6, subtract from BBC News. Other ship moves to mainland. |
Stanley-Based Exocet Fire (6.2.2)
- British ship in the Naval Gunfire Support box inside AS E.
- At least one Exocet on the TRT.
| Roll | Result |
|---|---|
| 1-3 | No Attack |
| 4 | Attack Failed: Reduce Exocets by 1 |
| 5-6 | Success: Roll die to reduce BBC News, escort to TRALA |
Supply Ground Forces (6.3)
Use if landing at San Carlos Landing Zone.
| # Escorts | # OOS Stacks |
|---|---|
| 0 | 2 |
| 1 | 1 |
| 2 | 0 |
Task Force Engagement Table (6.4)
See 6.4 for conditions.
| Roll | Results |
|---|---|
| 3-5 | British Ship Sunk by Exocet: -10 BBC News; -1 Exocet; Place British ship in TRALA Box (unless it is an unescorted carrier, see 6.5); If < 2 Exocets, treat result as No Contact (8-9). |
| 6 | British Escort Sunk by Bombs: -8 BBC News; Place British ship in TRALA Box (even if it is a carrier, see 6.6). |
| 7 | British Escort Damaged by Bombs: -6 BBC News; Place British ship in TRALA Box (even if it is a carrier, see 6.6). |
| 8-9 | No Contact: Place British ship in TRALA Box (no other effect). |
| 10 | Argentine GRUPO Driven off by British Carrier: If carrier is firing, place GRUPO in mainland and if possible move one random Argentine plane from mainland to RP; if escort is firing, no effect on GRUPO; Place British ship in TRALA Box. |
| 11-15 | GRUPO retreats under British AA Fire: Place GRUPO in Mainland, and move one random Argentine plane from mainland to RP, if possible; Place British ship in TRALA Box; +1 BBC News. |
| 16+ | Chaff Deflects Exocet Into Ocean: Place GRUPO in mainland, and move one random Argentine plane from mainland to RP, if possible; Place British ship in TRALA Box; +5 BBC News; -1 Exocet; If < 2 Exocets, treat result as No Contact (8-9). |
Junta Plan Roll (9.2)
| Roll | Plan |
|---|---|
| 1 | Army Plan (9.2.1) |
| 2-3 | Navy Plan (9.2.2) |
| 4 | Air Force Plan A (9.2.3) |
| 5-6 | Air Force Plan T (9.2.4) |
Argentine Reaction (9.3)
| Roll | Result | Sector |
|---|---|---|
| 1-2 | ¡Puerto Argentino! | E |
| 3-4 | ¡Putos ingleses! | A |
| 5-6 | ¡Objetivos de oportunidad! | Target |
ABRT: Air Battle Results Table (10.8)
Attacker SPs as % of Defender SPs.
| Die Roll | < 50 | 50 | 65 | 100 | 150 | 200 | 300 | 400 |
|---|---|---|---|---|---|---|---|---|
| 1 | AE | AE | AE | AE | DOG | DOG | DOG | EX |
| 2 | AE | AE | ABO-P | ABO-P | DOG | DOG | EX | DBO-P |
| 3 | AE | ABO-P | EX | ABO |
San Carlos Air Strike (11.2)
Roll 1D6 + # GRUPOS at sea.
| Roll | Results |
|---|---|
| 1 | Rapier AA missiles devastate attacking Argentine planes: Remove 2 random GRUPOS from any SZ(s) to the mainland. +2 BBC News. |
| 2 | British ground fire repels weak Argentine effort: Remove 1 random GRUPO from any SZ to the mainland. +1 BBC News. |
| 3-4 | Neither side has the advantage: No effect. |
| 5-6 | Argentine pilots are a match for the RA: Reduce BBC News by 5-6 (modified roll). |
| 7-9 | British frigates are damaged or sunk: Reduce BBC News by 7-9 (modified roll) and retreat 1 escort from San Carlos Box to TRALA Box. |
| 10-16 | British frigates sunk: Reduce BBC News by 10-16 (modified roll) and retreat all escorts from the San Carlos Box to TRALA Box. |
Ground Combat (11.7)
Each side rolls 1D6, applying modifiers below. High result wins. Ties go to defender. See 11.7.3 for combat results.
Ground Combat Modifiers (11.7.2)
| Mod | Side | Condition |
|---|---|---|
| +1 | Argentine | Pucará in the AS (No Air) |
| +2 | Both | Side with air superiority in the AS (No Air) |
| +1 | Both | Defender in mountains |
| +3 | British | KLF unit is in a British stack |
| +3 | British | Naval gunfire support (11.7) |
| +2 | British | Weather is fog |
| +2 | British | BBC News >= 16 |
| +1 | British | Weather is squalls |
Ignore a modifier marked (No Air) if there are no air operations (fog or squalls).
Headlines Table (12.9)
Roll 1D6 + Turn #. Numbers in the results refer to Rule 13 subsections.
| Roll | Results |
|---|---|
| 2-3 | 8, 2, 18, 7, 12, 4 |
| 4-5 | 3, 13, 9, 20 |
| 6-7 | 10, 18, 14, 8, 4 |
| 8-9 | 17, 11, 12, 20, 5 |
| 10-11 | 3, 18, 13, 17, 7, 12 |
| 12-13 | 10, 8, 21, 1, 19 |
| 14-15 | 4, 20, 1, 17, 14, 15, 5 |
| 16-17 | 7, 21, 13, 6, 3, 22, 9 |
| 18-19 | 22, 17, 16, 1, 12, 19 |
| 20-21 | 22, 21, 4, 14 |
| 22-23 | 3, 13, 12, 5, 16 |
| 24 | 21, 7, 6, 20, 12 |
Turn Record Track
| Turn | Dates | Turn | Dates |
|---|---|---|---|
| 1 | 25-30 Apr | 11 | 28-30 May |
| 2 | 1-3 May | 12 | 31 May-2 Jun |
| 3 | 4-6 May | 13 | 3-5 Jun |
| 4 | 7-9 May | 14 | 6-8 Jun |
| 5 | 10-12 May | 15 | 9-11 Jun |
| 6 | 13-15 May | 16 | 12-14 Jun |
| 7 | 16-18 May (See 12.3.1) |
Tracks
- Weather Track: Fog (No Air), Fair, Rain/Snow, Squalls (No Air), Gales (Skip Turn).
- Exocets: 0, 1, 2, 3, 4, 5, 6.
- Argentine Ground Support Track: 0, 3, 5.
- British Ground Support Track: 0, 4, 7, 9.