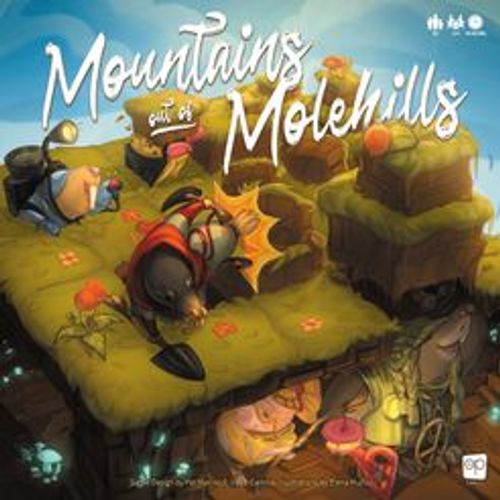
Mountains out of Molehills
Mountains Out Of Molehills Rulebook
Table of Contents
Table of Contents
Overview
Players: 2-4. Ages 9+. 45-60 minutes.
It is important to know that from a Mole's perspective, every Mountain is made up of individual Molehills. The more Molehills in a Mountain, the more valuable it is!
Components
- 1 Double-Sided Aboveground Board
- 1 Double-Sided Underground Board
- 4 Board Frame Pieces
- 120 Molehill Pieces, 30 In Each Color
- 1 Rock Die
- 1 Rock Token
- 4 Mole Character Standees With Bases
- 4 King Of The Hill Tokens
- 1 Scorepad
- 120 Movement Cards
Set Up
- Remove all the game pieces from the box.
- Each player selects a Mole from the supply and all the Molehill pieces of their color. Return unused Moles and Molehills to the box. (Before your first game, remove the protective film from the Mole Standees.)
- Take the King of the Hill tokens numbered from 1 up to the number of players, shuffle them, and randomly deal one face up to each player. These tokens determine the turn order. Return unused tokens to the box.
- Place the box bottom in the center of the table, leaving space for the card draft described in Part 1 - Card Drafting.
- Place the 4 support pieces in the corners of the box bottom as shown.
- Place the Underground board (dirt pattern) on top of the organizer tray in the box bottom as shown. (See below for player and play grid details.)
- Place the Aboveground board on top of the supports as shown. (See below for player and play grid details.)
- In turn order, players place their Mole on the Underground board in an unoccupied corner space, remembering to use the correct size grid for the player count. Each player can choose which direction to have their Mole's nose face. A Mole's nose always indicates their direction of forward movement.
- Each player then places 1 of their Molehill pieces on the Aboveground space directly over their Mole.
- Shuffle the Movement cards and create a face down draw pile.
- Place the Rock token and Rock die near the game board.
- Give the scorepad to the player who most recently dug a hole. They will track points during the game.
Player and Play Grid Details
- 3 & 4-Player Game: In a 3-player game the 5x5 area on the play grid is used, and in a 4-player game the full 6x6 area is used.
- 2-Player Game: In a 2-player game, the reverse side of the play grid is used.
Gameplay
Mountains Out Of Molehills is played over 6 rounds. Each round consists of 3 parts:
- Part 1 - Card Drafting
- Part 2 - Planning & Movement
- Part 3 - Scoring/End of the Round
Part 1 - Card Drafting
In a central area of the table, lay out 5 face up Movement cards per player to form the draft selections. Starting with the first player and proceeding in turn order, according to the King of the Hill tokens, players take turns choosing one of the face up Movement cards to add to their hand. Once drafted, a Movement card should be kept hidden in a player's hand.
Take turns drafting cards until each player has collected a total of 4 Movement cards. Discard the remaining cards from play. For more details on how each Movement card works, see the Movement Cards section below.
Do not replace cards after they are drafted. The pool of available cards will get smaller during this phase.
Top Tunneler Tip - Card Drafting: If there is a card in the draft you need to get out of a tight spot or to create a good scoring opportunity, you may want to draft it first even if it won't be the first action you take! This is especially true if there are only 1 or 2 of that card available in the drafting pool.
Part 2 - Planning & Movement
Planning
After the Card Drafting phase, it is time for players to plan their Mole's actions. Moles cannot see well in the Underground darkness, so they must have a plan for how they want to move!
To create a plan, each player simultaneously stacks their 4 Movement cards face down on the table in front of them in the order they want to activate them (this does not have to be the order in which the cards were drafted). Players should place their King of the Hill token on top of their cards to indicate when they are finished Planning.
Important - Planning Actions: These actions will be resolved from top to bottom and cards cannot be rearranged after this step.
Movement
When all players have confirmed they are ready, the order of the Movement cards may not be changed or looked at to remember what is coming.
Following the turn order of the King of the Hill tokens, each player reveals their topmost Movement card and resolves the action depicted on it. After each player has completed their action, players reveal their next action and resolve them in the same turn order. Repeat this until all players have resolved all 4 of their Movement cards.
Top Tunneler Tip - Movement: If you have a card that lets you move and turn and you are facing an edge or another Mole, you can 'cancel' the movement by moving first, towards the obstacle and then turning. While you won't get to add any Molehills, you might be in a better position for your next action!
Edges of the board: Moles cannot move beyond the edges of the play area designated for the player count. If a Movement card would cause a Mole to move off the edge of the board, any remaining forward movement is ignored.
- Example 1: A Mole is one space away from the edge of the board it is facing. A Move 2 Movement card would cause the Mole to move 1 space forward to the edge of the board and then stop.
- Example 2: A Mole is on an edge space and facing the edge. Playing a Move 1 and U-Turn Movement card gives a player the choice to U-Turn first and move 1 space away from the edge, or to move first, cancelling the movement because of the edge, and then to U-Turn in the starting space.
Bumping into another Mole: Moles are polite and wait their turn. If another Mole blocks your path, any remaining forward movement is ignored.
Making Mountains by Adding Molehills
When players move their Mole Underground they place a Molehill of their color on the corresponding space on the Aboveground board. Any Mole will tell you, "The best Mountains are built from the ground up!" Add a Molehill to the bottom of a Mountain (as the Mole is pushing dirt up from Underground).
Molehills are not added when a Mole rotates. Only add a Molehill when a Mole moves into a new space.
If a Mole plays a Movement card that would add more Molehills than they have in their supply, they may first remove Molehills of their color from the top of any Mountain(s) until they have enough Molehills to complete the movement. If they do not have any Molehills on a Mountain top, or do not wish to remove their Molehills, then they complete the full movement placing Molehills on the first available Mountains until they run out.
Hitting a Rock: Running into a Rock will cause a Mole to become disoriented. When a Mole would move into the Rock space, they replace that 1 space of movement by turning in the direction shown on the die (Left, Right, or U-Turn). Any remaining movement is carried out as normal after rotating.
- Example: A Mole is 1 space away from the Rock, facing towards it. The Rock shows a right-facing arrow. The Mole uses a Move 3 Movement card, moving forward 1 space, then for the second movement it hits the Rock turning to the right. This leaves 1 more space of forward movement, which it takes facing in the new direction.
Top Tunneler Tip - Using the Rock: Rocks can be useful for blocking where you think an opponent might go, but you can also use them to redirect your own path if you need to change course.
Movement Example:
- Pete is located in B-6, showing Molehills present at the start of his turn. He plays a 2 spaces forward card.
- After moving 2 spaces forward, Pete lands in D-6 and adds 1 Molehill to each new space he entered (C-6 and D-6.)
Important - Maximum Height: Mountains can only stack so high before they begin to Topple over. As Moles gain more experience, the maximum height increases. The scorepad shows the maximum height for each round. If a Mountain exceeds the maximum height, it Topples!
Topple Rules
When a player causes a Mountain to Topple they choose a direction and spread the Molehill pieces, one piece per space, in that direction, starting from the bottom Molehill in the Mountain and working towards the top.
The bottom Molehill, which was added when the Mole moved into the affected space, remains on the same space. The second lowest Molehill in the pile is placed on TOP of the Mountain in the first adjacent space and so on, moving in a straight line away from the starting tile.
If the Toppling Mountain reaches an edge of the board before all the Toppling Molehill pieces have been placed, the remaining pieces are returned to their owner's supply.
A Movement or Topple may trigger multiple Topple effects. In this case, completely resolve each Topple that was triggered before moving to the next one. Start with the first Topple caused by the Mole, and all resulting Topples from it, then move on to any additional Topple caused by additional Mole Movement.
Top Tunneler Tip - Topple: Lay the Mountain sideways in the direction you want it to Topple. Pull Molehills starting from the bottom and place them on top of each Mountain and empty space as you move toward the edge of the board.
Part 3 - Scoring/End of the Round
Scoring
At the end of each round, players tally up their points. A player scores points for every Mountain they control. The Moles look up from Underground to see who controls a Mountain. If the Molehill at the base of the Mountain is their color, they control it regardless of what other colors may be stacked above it.
Players earn one point for each Molehill piece in the Mountains they control, regardless of color. This includes the base Molehill.
- Example: A Mountain with a gray Molehill at the base, and a red, green, and 2 more red Molehill pieces above it (from bottom to top) is worth 5 points for the gray player, as there are five Molehills in the Mountain and the bottom one is gray.
Important - Removing Molehills: Molehills should NOT be removed from the board during scoring, as Mountains will continue to grow and change during the next round.
After scoring the 6th and final round, proceed to 'End Game Scoring.'
King of the Hill
Players now select turn order for the next round. The player with the most Molehill pieces on the TOP of Mountains gets to choose their turn order first, followed by the player with the second most, and so on.
A player chooses their position by taking any numbered King of the Hill token that has not already been chosen by another player in this phase.
In the event of a tie, the tied players choose their position based on their turn order in the current round (the player who was 2nd would choose before the player who was 3rd if those players were tied).
Top Tunneler Tip - King of the Hill: Going first will give you an advantage in selecting Movement cards, and making the first move. However, having the last Movement action can provide an opportunity to take control of Mountains right before scoring occurs!
Reset
All players discard their used Movement cards. If it is not the 6th round, begin a new round with Part 1 - Card Drafting.
End Game Scoring
After scoring the 6th round, players add their scores from each of the rounds together. The player with the highest total is the winner!
If there is a tie, the player who has the most Mountains with 5 Molehills in their control at the end of the game is the winner. If there is still a tie, compare the Mountains of 4, 3, 2, and 1 Molehills until the tie is broken. If the tied players have the same number of Mountains in all heights, the players share the victory.
Movement Cards
The diagrams in the manual illustrate how each Movement card is resolved. The diagrams mark the Mole's nose. Each time a Mole enters a new space, 1 Molehill is added to the base of the Mountain. If a Mole only turns, no Molehill will be added.
- Move 1, 2, or 3 Spaces Forward: The Mole moves 1, 2, or 3 spaces in the direction its nose is pointing.
- Turn Left or Right: The Mole rotates its nose 90 degrees to the left or right on its current space (player's choice).
- U-Turn: The Mole turns to face its nose in the opposite direction on its current space.
- Move 1 and Turn Left: Before or after moving 1 space, turn the Mole 90 degrees as shown on the card.
- Move 1 and Turn Right: Before or after moving 1 space, turn the Mole 90 degrees as shown on the card.
- Move 1 and U-Turn: Before or after moving 1 space, turn your Mole to face the opposite direction.
- Place or Relocate the Rock: Place the Rock token on any empty space on the Underground board. Roll the Rock die and place it on the Rock token, to show which direction a Mole hitting the Rock will turn. The Rock remains in this space until it is moved by another Rock card.
- Peek Aboveground: The Mole remains in its current space Underground, but is considered to have peeked Aboveground. This causes the Mountain above to Topple, regardless of its height. Follow the Topple Rules above.
Hint: It can be helpful to hold the turning cards over a Mole to ensure it turns the correct direction (either left or right) as shown on the card.