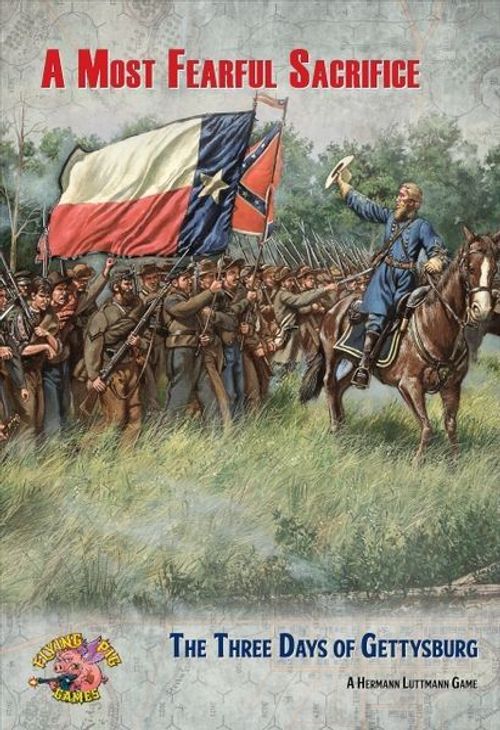
A Most Fearful Sacrifice: The Three Days of Gettysburg
A Most Fearful Sacrifice: The Three Days of Gettysburg Rulebook
Table of Contents
Table of Contents
- The Battle of Gettysburg July 1-3, 1863
- A) Game Components
- B) Sequence of Play
- C) Advance Game Turn Marker Phase
- D) Command Decision Phase
- E) Preliminary Bombardment Phase
- F) Card Draw Phase
- G) Activation Phase
- H) Fire Combat
- I) Movement
- J) Assault Combat
- K) Rally
- L) The End Phase
- M) Entrenchments
- N) Overnight Game Turns
- O) Skirmish Order
- P) Hex Groups
- Q) Victory Determination
- Comprehensive Example of Play
- Designer's Notes
The Battle of Gettysburg July 1-3, 1863
Early on July 1st, 1863, Union Brigadier General John Buford's 1st Reserve Cavalry Division is deployed to the west of the town of Gettysburg in response to the report of unidentified Confederate infantry in the area. All morning long, the Rebels have been advancing against the troopers and pressure has been steadily increasing. Finally, I Corps commander Major Gen. John Reynolds arrives on the scene and rides up to the Lutheran Seminary, where Buford was directing the battle from its cupola. Reynolds called up to him, "What goes, John?". Buford responds by pointing to the long lines of advancing Confederates and said, "The Devil's to pay!". Reynolds then asked, "Can you hold?", to which Buford responded, "I reckon I can." Reynolds ends the exchange with, "Let's ride out and see all about it". And with that rather mundane brief conversation begins one of the most important and iconic military engagements in history – the Battle of Gettysburg.
"Chaos is merely order waiting to be deciphered" — Jose Saramango
A) Game Components
1. Game Scale: 1 Hex = approximately 250 yards; 1 SP = 100 men; 1 Turn = 1 Hour; Unit Counters = one or more regiments/batteries.
2. Unit Counters: Each unit counter represents a various number of regiments/batteries belonging to a particular brigade. The exact number of counters and their sizes is structured so players can replicate the brigade's actual historical deployment at various times during the Battle of Gettysburg. However players are of course still free to deploy units as they wish. The unit information is laid out on the counter as follows:
a. Corps Affiliation: The Roman numeral shown on the left side of the colored banner across the top of the counter is the Corps formation to which the unit belongs. For example, "II" would be the 2nd Corps. A unit's Corps affiliation is very important information for unit activation purposes.
b. Brigade Name: In the middle of the colored banner is the name of the unit's Brigade commander.
The Brigade Name of a group of units is one of the most important pieces of information in the game. It is utilized throughout the game, such as during activation, upon certain Events being enacted, etc. It is the binding identity for its component unit counters.
c. Division Code: The two-letter code on the right side of the colored banner is the unit's Division commander. For example, "AY" would be Ayres' Division. In addition, the banner of each Division in a Corps has a unique background color. For example, Pickett's Division has all green banners. Note that some Artillery units have a brown banner and no Division Code. These are Corps Reserve Artillery units and are not affiliated with any Division.
d. Number of Brigade Counters: The number of red asterisks (*) on the right side of the counter indicates the total number of counters that make up that Brigade. This is important when activating a Brigade so that players know that they've accounted for all the counters in the Brigade's formation. For example, O'Neal's Brigade of Rodes' Confederate Division of II Corps has a total of three counters.
e. Unit Type: The large graphic in the middle of the counter is a depiction of the unit's appearance on the battlefield and indicates its type.
- Infantry units have a group of soldiers.
- Artillery units show a cannon and artillerist. Also shown on the counter is a list of the actual battery names that make up the unit.
- Horse Artillery is the same as regular Artillery but with an additional horse graphic. In this game, the only two Horse Artillery units are the Tidball Union units of Buford's Division.
- Cavalry comes in two sub-types. Dismounted Cavalry is presented like Infantry and Mounted Cavalry shows troopers mounted on horses.
f. Strength Points (SP): The black number at the bottom left of the counter is the unit's Strength Points (SP). Artillery units also have a letter code listed next to the number to indicate the type of cannons they possess (R, S or M). The SP value represents the number of men or guns the counter represents. This SP value can be temporarily reduced if the unit has a Shaken marker assigned to it. In this case, the unit's SP value will be reduced by one (-1 SP).
g. Cohesion Rating (CR): The red number at the bottom right of the counter is the unit's Cohesion Rating (CR). This is an abstract measure of the unit's elan, experience and training. This is a very important value for a unit and it can fluctuate throughout the game depending on circumstances. It can only be increased through an Event Card effect or when a unit is in Entrenchments (see section M). It will be reduced temporarily due to two conditions: a Shaken Marker reduces the unit's CR by one (-1 CR) as long as the marker is assigned to it; and if the unit does not have Unit Support (see below) at the time it needs to test its CR, the unit's CR is reduced by one (-1 CR). A unit's CR can never be greater than "6" nor lower than "0", regardless of accumulated modifiers.
Counter types shown: Infantry, Artillery, Horse Artillery, Cavalry.
Unit Support
A unit taking a test that requires a reference to its Cohesion Rating is considered to have Unit Support if the following conditions apply:
- Another unit from the same Division is adjacent to the testing unit and that other unit is not itself Shaken or in a Woods or Town hex (but see Brigade exception below).
- The testing unit itself cannot be in a Woods or Town hex (but see Brigade exception below).
- The unit is in a hex with a "Hasty Works" or "Breastworks" marker. Presence of friendly units is irrelevant in this case.
- Artillery units derive Unit Support from any adjacent Infantry/Dismounted Cavalry unit (only) that is not itself Shaken or in a Woods or Town hex.
- Artillery units never provide Unit Support to any unit.
- Broken units attempting to return to the map during the Rally Step automatically have Unit Support.
- Important Brigade Exception: A non-Artillery unit that is stacked with or is adjacent to another unit from the same Brigade always has Unit Support, regardless of the above listed cases. This does not apply to Artillery units. Note that Brigades that contain only one counter can never qualify for this exception.
The concept of Unit Support is vitally important to proper game play. It is a simple yet critical mechanism to show that units need the physical and, more importantly, morale support of nearby friendly (and familiar) units. Note also that the Unit Support and Shaken effects apply throughout the game and are fluid. They can change in mid-turn and will affect the unit's CR at each moment that the value must be referenced. Keep this in mind when deploying your units!
For example, if the Confederate "5-3" unit from Davis' Brigade (Heth's Division of III Corps) is hit by Fire Combat while in a Clear hex and it is adjacent to a unit from Archer's Brigade, its CR would remain at "3" as long as Archer's unit is not Shaken or in a Woods or Town hex (Archer and Davis both belong to Heth's Division). If Archer's unit was in a Woods hex, then Davis' "5-3" unit would be reduced to a "5-2". If, however, the adjacent unit in the Woods was a "6-2" unit also from Davis' Brigade, then the testing unit would remain a "5-3" (both units belong to the same Brigade and thus always support one another).
h. Fresh and Battleworn Sides: The front of Infantry and Artillery unit counters is the unit's full-strength side and is referred to as its Fresh (FR) side. The back of the counter is the unit's reduced-strength side and is referred to as its Battleworn (BW) side. A unit's BW side is indicated with a white triangle on the bottom left of the counter and the unit's graphic has fewer or different figures. Units may be flipped from their FR to their BW sides (and vice-versa) during the course of the game.
i. Mounted and Dismounted Sides: Cavalry units have a Mounted side (with the horse rider graphic) and a Dismounted side (with a foot soldier graphic).
- Dismounted Cavalry is treated in all ways as Infantry except as noted in the rules (they are armed with carbines, may not attack in Assault Combat and have a special ability to withdraw before Assault Combat).
- Mounted Cavalry may use their higher Movement Allowance when under an Attack or Maneuver Order. In addition, this unit may conduct up to two Attacker Breakthroughs in one step. However, it may not issue Fire Combat.
- Important: For all other game purposes, both the Dismounted and Mounted sides of a cavalry unit are treated as also being on their Battleworn sides. So whether Mounted or Dismounted, Cavalry that takes a Depletion (DP) Cohesion Test result cannot flip over - it must instead take a Break Test.
Be aware that once a unit is flipped to its Battleworn side, it's pretty much stuck on that side for the rest of the game. The only way to flip it back to its Fresh side is through the successful use of the "Rally 'Round the Flag" Event Card and during a Bivouac "Muster" action.
3. Shaken Markers: These markers are used to designate when a unit receives a Shaken (SH) result. Place the marker under the affected unit. If more than one unit in a stack is Shaken, simply flip the marker over to its "All Units Shaken" side and place it under all the relevant units. A Shaken unit has both its SP and CR reduced by one.
The Evolution of a Unit Counter
Example: XII Greene GE
- Fresh: 10-4
- Fresh + Shaken: 9-3
- Battleworn: 5-3
- Battleworn + Shaken: 4-2
- Battleworn + Shaken + another Depletion/Shaken Result: 4-2 (but must roll on the Break Test Table)
4. Miscellaneous Markers: The remaining counters are various markers used for tracking game mechanics and effects. These are described in greater details later in these rules and in specific scenarios.
5. Game Cards: There are a number of different playing cards used for various game functions.
a. Corps Activation Cards: Each Corps in the game has a Corps Activation card with the leader's name on the top and the Corps' Roman numeral designation. Beneath this information is the leader's Command Rating and his Command Table.
b. Division Activation Cards: Every Division in the game has a Division Activation card set up in the identical manner as the Corps Activation card but with the addition of the Division's two-letter code. These cards do not go in the Card Draw Pile but rather on the appropriate Corps row of their Command Display.
c. Special Activation Cards: There are two Union Special Activation Cards. These are treated in all ways as if they are Corps Activation Cards, but they actually represent other types of independent formations.
d. Event Cards: These cards have the title of the event at the top, followed by an indication of whether the player can hold the card for later use or must use it immediately. The body of the card has the details of how to use and resolve the card.
e. CIC Cards: Each side may have one or more CIC cards in play, depending on the scenario. When this card is drawn, the player holds it and may use it for only one of the special actions listed on the card. It is discarded after using that special action.
f. Fog of War Card: This card requires a roll of two black/white dice and players will implement the listed result on the card's table.
g. Friction of War Cards: These cards will have an effect on the next card drawn from the Card Draw pile. They are entered into play as per the scenario instructions.
h. Replacement General Card: Whenever a Corps leader becomes a casualty, his regular Corps Activation card is replaced by his corresponding Corps Replacement General card. These cards are left to the side and within easy reach of the owning player so they can be introduced when needed.
Card types shown: Corps Activation, Division Activation, Special Activation, Event, CIC, Fog of War, Friction of War, Replacement General.
6. Map: The two game maps depict the entirety of the Gettysburg battlefield and are overlaid with a numbered hex grid to regulate movement and firing ranges. There is a North and a South map and hex numbers are often indicated with an "N" or "S" prefix when necessary to identify the map section on which the hex is located. Each hex has one or more terrain features in it as displayed by the map's graphics. Please refer to the Terrain Effects Chart on the player aids for a full description of each type of hex. Note that in the case of Woods and Marshes, if the graphic touches the center of the hex, the entire hex is considered to be that type of terrain (even if it does not fill out the hex).
Note that each hex is color-coded to represent each of the many Elevation Levels, which is important for determining Line of Sight in particular. There are also Elevation Numbers scattered throughout the map to assist players in determining the elevation of each hex. Though this may seem a bit confusing or intimidating at first glance, the color coding is quite logical (moving from the stream beds as dark green and then brightening to the hilltops as yellow). A measured and careful analysis of the way the terrain flows will make the entire picture much clearer and ease the determination of relative elevation between hexes.
7. Player Aids: Each player has one foldout player aid card that summarizes important aspects of game play. It contains a Summary of Play, Combat Results Table, Combat Events Table, Close Fight Table, Terrain Effects Chart and Orders of Battle. Players should be able to play the game using only these cards after a few games.
8. Command Displays: Each player also has a Command Display for their side which shows the organization of their Corps and Divisions. This is used to set the Division Priorities each turn. This display also holds the Broken Box, Crushed Box and Hex Group Boxes. The Union display also has a copy of the Tyler and Buford Division Activation Cards shown so players can activate those divisions (via a CIC or Event Card) without having the actual cards in front of them (as they may still be in the draw pile).
9. Dice: There are 6 six-sided dice provided, with each player getting a set of one black, one white and one red die.
The term "Rebel" is used throughout the game as another (shorter) way of referring to the "Confederate" side. These two titles are synonymous.
B) Sequence of Play
A Most Fearful Sacrifice is played in a sequence of Game Turns, the actual number of which is determined by the scenario being played. Each Game Turn represents about one hour of time and is broken down into a series of consecutive Phases. Each Phase must be completed before proceeding to the next Phase. A Game Turn is played following the standard Sequence of Play:
- Advance Game Turn Marker Phase
- Command Decision Phase
- Preliminary Bombardment Phase
- Card Draw Phase
- Activation Phase a. Order Step b. Fire Combat Step c. Movement Step d. Assault Combat Step e. Rally Step
- End Phase
C) Advance Game Turn Marker Phase
At the start of each Game Turn (except for the first Game Turn of the scenario), players will move the "Game Turn" marker one space forward on the Game Turn Track which is located on the game map (so for example, from the 2:00 pm turn to the 3:00 pm turn). At the conclusion of the last Game Turn of the scenario being played, the game ends and players will assess their Victory Point totals to determine the winner.
Each Game Turn may introduce new units to either or both sides (i.e., reinforcements) and may even bring into play a new Friction of War card (see below). Before the game even starts, players should place reinforcement units, corresponding Activation Cards and any scheduled Friction of War cards near the Game Turn Track so that when the reinforcements need to enter the game, players will readily know which new cards and counters to bring into the game.
D) Command Decision Phase
During the Command Decision Phase, each player will be making his plans for the upcoming turn by setting up the card population that will appear in the Card Draw pile for this Game Turn. Each player will be allowed an assigned pool of cards every Game Turn per the scenario instructions. This pool can change during the course of the scenario. Cards from both sides are then shuffled together into a common draw pile from which cards are drawn one by one and acted upon as they are drawn.
-
At the start of the Command Decision Phase, the players lay out the Division Activation cards for each Corps involved in the current scenario in order of priority on their Command Display. The Division card placed in Division Priority #1 (DP#1) is the most likely division to be activated in the turn, the Division in the DP#2 slot has a decent chance to be activated and the third (last) division will probably not be activated with this Corps card. Both players do this simultaneously and secretly for all of their involved Corps and Divisions. The Union player does not need to perform this step for the Buford Division or for the Tyler Army Reserve Artillery as they have their own activation cards.
-
Players then need to determine which of their fifteen Event Cards will be placed in the Card Draw Pile. This involves a number of steps, as follows.
a. Extra Preliminary Bombardment: Players first secretly decide if they wish to have one or more extra Artillery Brigades participate in the upcoming Preliminary Bombardment Phase (note that each player will automatically get one Artillery Brigade to activate in that phase). Players take all their Event Cards, shuffle them up, and then randomly and secretly discard one Event Card for each Artillery Brigade they wish to add to the Preliminary Bombardment Phase. Players place these discarded cards to the side in order to keep track of how many Artillery Brigades are being added to the phase (but do this without looking at those cards and without the opposing player seeing how many cards are being discarded). No more than four cards can be discarded for this purpose. These discarded Event Cards will not otherwise be available for use this Game Turn but will be returned to the pool of cards for next turn.
b. Key Event Cards: After deducting any cards for the Preliminary Bombardment Phase per the above procedure, players then look at and review their remaining available Event Cards. They each secretly select two of those cards and place them into the Card Draw pile (the opposing player should not see them). These are termed Key Event Cards and are guaranteed to be in the pile and available for drawing during the upcoming turn.
Key Event Cards should represent those events that the player is planning to exploit in the upcoming turn. But remember that even with these pre-selected Key Event Cards, there still is no guarantee of when they will be drawn during the turn or if they will be outright cancelled by a Friction of War Card.
c. Finally, both players then take their remaining available Event Cards and shuffle them up. They then randomly draw a number of cards per the scenario instructions, less one card for each card put aside in step 3 above for the Preliminary Bombardment Phase (and also less some additional cards to change the arrival of Reinforcements during the Tattered Flags scenario). These cards are then placed into the Card Draw pile (neither player may see the identity of these cards) along with the player's Key Event Cards from above. All remaining Event cards are removed from the game for this Game Turn (only) and placed aside. They will become available for selection again next Game Turn. Neither player may look at these excluded cards.
Example: It's the Command Decision Phase. The Rebel player decides that he wants both Carter and Dance's Artillery Brigades to fire during the upcoming Preliminary Bombardment Phase so as to support a planned general offensive launched by II Corps. He automatically gets to fire one Artillery Brigade for free during that phase so to activate a second Artillery Brigade he must discard one of his Event Cards. He grabs all of his Event Cards, shuffles them up and then discards one random card to the side. He will use this card to activate Dance's Artillery Brigade during preliminary bombardment. He checks over his remaining fourteen cards and picks the "Rebel Yell" and "For Dixie!" cards as his two Key Event Cards for immediate placement into the Card Draw pile. The scenario being played calls for 2 Key Event Cards and 3 Random Event Cards. Because he set aside one card to activate an extra Artillery Brigade, he only gets 2 Random Event Cards. He randomly draws two of the remaining Event cards to place into the Card Draw pile along with his two Key Event Cards (without looking at them). He then removes all the remaining Event cards from the game for this turn. The card he placed aside to activate the extra Artillery Brigade is also placed out of play after Dance's Artillery Brigade is activated in the upcoming Preliminary Bombardment Phase, along with their one free brigade. The Rebel player announces that he has discarded one Event Card and thus can fire another Artillery Brigade. He chooses Dance's brigade (he could not choose Carter again) and conducts Fire Combat with each of those three artillery units.
This system attempts to reward proper advance planning for the player who has set up his artillery strikes ahead of time. During the course of normal activations, the player can reposition their artillery as needed. It is now imperative for players to place their artillery brigades in hexes where they have sweeping fields of fire. A player needs to decide if they are going to use their guns conservatively or place artillery in positions where men "die by their guns" (Cushing and Latimer come to mind).
E) Preliminary Bombardment Phase
Important: This is a variation to the original Special Artillery Activation Phase that is found in previous versions of the Blind Sword system and The Devil's To Pay game designs. Veteran players should pay special attention to this change.
-
Each player, starting with the Union player, will take a turn conducting a Fire Combat action (only) with each unit of one designated Artillery Brigade. Remember that an Artillery Brigade consists of all those Artillery units with the same Brigade Name.
-
The Union player conducts Fire Combat procedures with each eligible Artillery unit of the selected Artillery Brigade (only) and resolves that fire using normal procedures.
-
Then the Confederate player does the same with any one of his Artillery Brigades.
Note that only Fire Combat can be conducted in this phase – Movement and Rally is not allowed.
-
If either player discarded one or more Event Cards during the Command Decision Phase, then they may conduct a round of Fire Combat with a different Artillery Brigade for each such discarded Event Card.
-
If both players did so then they alternate firing Artillery Brigades (starting with the Union player) until one player has no further units to fire. Then the other player, if he has more Artillery Brigades that he can activate, does so one brigade at a time.
-
An Artillery Brigade may only fire once during this phase regardless of how many Event Cards were discarded.
Note that an Artillery unit that fires during the Preliminary Bombardment Phase is not prevented from activating later in the turn as part of a normal activation or due to an Event Card. Yes, that includes being able to conduct Fire Combat again as well.
Example: Continuing the example from the Command Decision Phase, the Confederate player has secretly discarded one of his Event Cards while the Union player did not. It is now the Preliminary Bombardment Phase and the Union player decides to choose Wainwright as his Artillery Brigade and conducts eligible Fire Combat with all seven of that brigade's units. After resolving that fire, the Confederate player then picks Carter's Artillery Brigade and fires all three of those units. Both players have now fired with their one free brigade. The Rebel player announces that he has discarded one Event Card and thus can fire another Artillery Brigade. He chooses Dance's brigade (he could not choose Carter again) and conducts Fire Combat with each of those three artillery units.
F) Card Draw Phase
Players draw the next card from the top of the draw pile to determine how the game proceeds. If there are no more cards left, then go to the End Phase.
-
The Card Draw Pile: The heart of the game is the Card Draw pile. At the start of every Game Turn, Corps Activation, CIC, Event, Fog of War and sometimes Friction of War cards from both sides are all shuffled together into the draw pile. The actual makeup of the draw pile is defined by the scenario being played. Players will draw one card at a time to either activate formations or resolve an event of some kind. The drawn card is given to the owning player if it's a Union or Confederate Corps Activation, CIC or Event Card or it is immediately resolved by both players if it is a Fog of War or Friction of War Card. Each type of card is enacted differently. After the drawn card is acted upon and completed, place it in a discard pile adjacent to the Card Draw pile and a new card is drawn (if there is one).
-
Card Draw Procedure: The Union player should draw the cards on odd-numbered Game Turns and the Confederate player on even-numbered Game Turns. The drawing player looks at the card: if it belongs to the opposing player, she must immediately hand it over to that player; if the card belongs to her, she can keep it hidden from the opposing player until it is enacted. This means that if the player draws her own "Hold" Event Card, the opposing player will not know what card she is holding until it is used in the game.
The developers have deemed to call this mechanic the "Harrison Effect", named after Longstreet's spy in the novel Killer Angels. It very abstractly simulates the acquisition of information about the enemy via captured orders, interrogation of POW's, etc.
-
Event Cards: When an Event Card is drawn, it is given to the owning player for resolution as described on the card itself. Event Cards are resolved either immediately (labeled "Play Immediately") or can be held by the player (labeled "Hold") to be resolved at a future eligible time during this same Game Turn.
a. Play Immediately: The card must be played and resolved immediately after being drawn. If it cannot be played it is discarded with no effect or used for its Default Event (see below).
b. Hold: These cards may be played immediately (if otherwise eligible), held onto and then played when eligible or used for a Default Event (see below). If held and not played by the end of the turn, they are placed back into the Event Card pool with no effect.
c. Default Event: If the player draws an Event Card that he cannot or will not use at the time (if "Play Immediately") or assumes he will have no future use for (if "Hold"), he may instead decide to use the card for its Default Event. If so used, this will allow the player to choose any one of his unit counters (on the map or entering this turn) and either conduct a Minimum Movement with the unit (see I-2i) or issue Fire Combat with it. In both cases, normal Movement or Fire Combat eligibilities and resolution procedures apply and the unit may Engage. Note that this decision must be made immediately – you cannot use a "Hold" card at the end of the Game Turn for its Default Event after you have held it but not used it.
Important: the Default Event is a key aspect in the use of Event Cards and is another new concept for veteran Blind Swords players to be aware of.
Event Cards present constant opportunities for both sides to conduct various actions throughout the Game Turn. They not only represent the chaotic nature of 19th Century warfare but also provide the players with the chance to spring planned surprises on each other. Some cards actually cover a multitude of possible events. For example, the "The Colonel is Down!" card represents not only an officer casualty, but also a perceived enemy threat (real or not), friendly fire and other occurrences that would cause a unit discomfort. The Default Event can be extremely important, as you may need that one extra fire or that one extra hex at a key moment of the game and that small ability may override the effect of the event.
Example: The "Rebel Yell!" Event Card is drawn and it is given to the Confederate player. This is a "Hold" card and he could play it immediately or wait. He decides to hold the card for later in the turn and by doing so he cannot now use it for its Default Event. Finally, he sees his opportunity and before the next card is drawn, he says "Wait!" and plays the "Rebel Yell!". He has a "6-4" unit within two hexes of a Union held hex and he decides to play the card on this unit. He moves it one hex, it takes Engagement Fire (remembering that the unit's CR is now boosted to "5" if it also has Unit Support) and assuming it survives, the unit enters Assault Combat. The unit will also get an additional bonus of a two-column shift right in the ensuing combat for using the Event Card.
-
Fog of War Card: When the Fog of War Card is drawn, either player rolls their black and white dice to get a number from 11 - 66 and then consults the Fog of War Table on the card itself. The indicated result is applied immediately.
a. Battlefield Chaos: The named side in the result is the affected player (ex: "Union Battlefield Chaos" will affect a Union unit). The opposing player to the affected player places the corresponding "Battlefield Chaos" marker on top of any enemy-occupied hex of his choosing. All units under the marker in that hex are then frozen. Frozen units may not be activated in any way, move in any manner by using an Event Card nor can they use Minimum Movement (I-2i). They also may not issue Defensive Fire (I-5) nor utilize a Firefight result (FF) from Fire Combat. They may only defend themselves normally in Assault Combat. These units are also ignored by enemy units for purposes of determining Engagement (I-4). Each unit in the hex is subject to this effect for the entire Game Turn unless the unit in question Skedaddles or is Broken. At the end of the Game Turn or if the hex becomes empty, remove the marker. Other friendly units entering the hex are placed on top of the marker and are unaffected by it.
b. Wayward Movement: The named side in the result is the affected player (ex: "Wayward Rebel Movement" will affect a Confederate unit). This result applies to any unit counter from the affected side as chosen by the opposing player. The opposing player then can move the chosen unit one hex (regardless of MP cost) as long as the movement is otherwise legal per the normal Movement rules. Note that any eligible Engagement Fire is then resolved normally if the unit is moved adjacent to an enemy unit.
c. Fortunes of War: The named player will take a "Fortunes of War" marker and hold it. He may discard the marker at any time during the turn to force a re-roll of any single dice roll (of one or two dice) for any reason by himself or his opponent. The resulting re-roll must be applied. If the re-roll option is used, the "Fortunes of War" marker is discarded. The marker may be held indefinitely, even from turn to turn.
d. Strategic Options: The named player may immediately choose one of three options:
- Forced March – You may activate all component units of any one full Division (or portion thereof), including any Division Artillery units, that is a Reinforcement this turn (only) and has not already activated. In other words, the units are still off map and have not activated for any other reason. These units may enter the game immediately and be moved as if they are under a Maneuver Order and as a Division Group activation.
Note: Buford and Tyler are Special Activation Cards and are always listed as part of the Corps leader casualties in the scenarios because they have their own cards in the draw pile, like Corps commanders.
-
Corps Activation Cards: When a Corps Activation card is drawn, the owning player will roll one die and refer to the Corps Activation card's Command Table. This result will tell the player which units can activate.
a. If the die result is printed in red that means that only one Brigade from the Division Activation Card located in the Division Priority #1 (DP#1) slot will activate. No second die roll is made in this case on the Division Activation Card (see G-1).
b. If the die result is not in red, then a second die roll will be made and is cross-referenced with the relevant activated Division Activation card(s).
- DP#1: The activated Division Activation Card is the one located in the DP#1 slot on the Command Display for the drawn Corps Activation Card.
- DP#1 + DP#2: The activated Division Activation Cards are the two that are located in the DP#1 and DP#2 slots on the Command Display for the drawn Corps Activation Card.
- See Division Activation Cards (G-1) for details.
c. There is also an entry on the Corps Activation card referring to a particular Artillery Brigade.
- If the entry says "One Hex of …", only units from that named Artillery Brigade that are all located in the same hex can activate.
- If the entry just has the name of the Artillery Brigade, then all units of that Brigade may activate, regardless of hex location.
- These artillery units activate along with any other units that are being currently activated.
d. If the entry is "No Orders", then there are no activations for this Corps. Discard the card with no effect.
e. If a Command Table die roll for a Corps Activation card is ever modified below "1", treat it as "1". This can occur from some Event Cards.
-
Both sides can have one or more CIC Cards and whether or not they are included is determined by the scenario being played. When a CIC Card is drawn, it is given to the owning player and held by that player. Players may discard a held CIC Card at any eligible time to do one of the special CIC Actions listed on the card. Some CIC cards have a choice of two special actions while others have only one action available. The special actions are:
Note: The Union player has three special CIC Cards ("Reynolds", "Hancock" and "Army of the Potomac Leadership") that are used in some scenarios and have a limited CIC ability.
-
Friction of War Card: There are two Friction of War cards available and one or more of these can be introduced into the game as instructed by the scenario being played. Simply place cards into the draw deck per the scenario. When a Friction of War Card is drawn, it is placed near the cup as a reminder that the next card drawn will be affected in some way. How the next card is resolved depends on the actual type of card drawn:
a. Event, Friction of War, CIC or Fog of War Card: The drawn card is cancelled and discarded with no possible effect (including a Default Event).
b. Corps Activation Card: The formation may activate but the activation dice rolls are automatically a "1" for the first roll and, if necessary, another "1" result for the second die roll. This cannot be re-rolled by any effect or card!
The Friction of War Card represents the physical degradation of the battlefield and the psychological disintegration of the participants. As the battle proceeds, the accumulated casualties, damage, smoke, mayhem and overall confusion accelerates and makes effective battle planning for both sides even more problematic than it is already.
- In all the above cases regarding any drawn cards, discard the card into the discard pile only after it is fully resolved.
G) Activation Phase
The Activation Phase is conducted only by the units that are activated per the die results on the drawn Corps Activation Card. No other units conduct actions in this phase. The owning player will identify the activated units and proceed through one or more of the phase's steps in order to conduct actions with those activated units.
-
Division Activation Cards: If the Corps Activation card's die roll entry is not printed in red, then the player will make another die roll and cross-reference that die roll result on the Division Activation Card(s) identified by the Corps Activation Card results (DP#1 and sometimes DP#2).
a. Command Table Die Roll: One die is rolled on the Division Activation Card's Command Table. If two Divisions are activated, use the same die roll result for both divisions. The Division Activation Card in DP#1 is activated in its entirety first and then the Division Activation Card in DP#2. The Command Table results are applied as follows:
No Orders: No units are activated.
- One Brigade -or- One Hex of Artillery: The player may activate only one Brigade of his choice from the Division or all Artillery units from the listed Artillery Brigade that are stacked in the same hex (this includes all Artillery units arriving as Reinforcements at the same hex).
- One Brigade + One Hex of Artillery: The player may activate only one Brigade from the Division plus all Artillery units from the listed Artillery Brigade stacked in the same hex (including all Artillery units arriving as Reinforcements at the same hex).
- Division Group + One Hex of Artillery: The player may activate all units of the Division but each Brigade must be assigned the same Order (see G-2). In addition, all Artillery units from the listed Artillery Brigade stacked in the same hex (this includes all Artillery arriving as Reinforcements at the same hex) may also activate.
- Division Group + Artillery Brigade: The player may activate all units of the Division but each Brigade must be assigned the same Order (see G-2). In addition, all Artillery units from the listed Artillery Brigade may also activate (regardless of where they are located).
- Division By Brigade + Artillery Brigade: The player may activate all units of the Division but may give each Brigade of that Division its own Order and activate it separately. Players may opt to substitute the Division Group result (above) instead if they would rather have the Division operate in unison with one Order. In addition, all Artillery units from the listed Artillery Brigade may also activate (regardless of their location).
Important Note: Recognizing the difference between Division, Corps and Army Artillery units is very important to how they activate. Division-level Artillery units can only activate when their Division Activation Card is active; Corps-level Artillery units can only activate when their Corps Activation Card is drawn; Army-level Artillery units (Union only) can only activate when their Army Artillery Reserve Activation Card is drawn. This makes the two armies' artillery arms quite distinct in that the Union army has only one Division Artillery formation (Tidball) while all the remaining artillery is Corps and Army Reserve Artillery. The Confederate army has both Division and Corps Artillery formations but they are decidedly smaller than their Union counterparts. So the Union Artillery will tend to activate fewer times but with greater punch while the Rebels will get more, albeit less powerful, activations.
-
Order Step: The active player identifies which Infantry/Cavalry Brigade/Division is being activated (referred to as the Active Formation from now on) and which Artillery units (if any) are being activated. This is determined by the die roll on the Command Table. Then the player assigns and announces one of three Orders to be applied to the Active Infantry/Cavalry Formation (but this does not apply to any activated Artillery units, see below). The Order's abilities and limitations apply to each and every Infantry/Cavalry unit in the Active Formation. If an entire Division is activated with only one Order, then all Infantry/Cavalry units of that Division are governed by that one Order. The Order given to an Active Formation allows its units to conduct certain actions but also prevents them from doing other actions. The three Orders are:
a. Attack: This order is used to close with the enemy and conduct combat.
- Units may issue Fire Combat
- Movement allowance is 5 MP (8 MP for Mounted Cavalry units)
- Units may Engage enemy units
- Eligible units may attack using Assault Combat
- Rallying is not allowed
Important: Veteran Blind Swords players should note the increase in the Attack Order movement rate from 4 MP to 5 MP.
b. Defend: This order is used to consolidate and rally troops. It also steadies units so they can deliver disciplined volley fire at the enemy.
- Units may issue Fire Combat and they receive a one-shift-right column benefit
- Movement allowance is only the Minimum Move (2 hexes on a Major Road/Lane or 1 hex otherwise)
- Units may Engage enemy units
- Units may not attack in Assault Combat
- Units may Rally.
The impetus for handling artillery in this more restrictive fashion is quite simple. These handicaps are a streamlined way to simulate the time and logistical planning required to unlimber a battery, get it properly supplied and then deployed to issue fire on the enemy. The same applies for the reverse procedures, when a battery of guns needs to limber up and speed off to another position. These time-consuming elements are handled with this one abstracted mechanic.
Important: Again for veteran Blind Swords and The Devil's To Pay players, note that this is a new artillery mechanic. Artillery units are activated along with a Brigade or Division (not during a special Artillery Phase as in the other games). Artillery can only do one of three actions during an activation – fire, move or rally. So more careful planning is required to safeguard and utilize your artillery to the best advantage.
- Fire Combat Step: Units with an Attack or Defend Order, along with any activated Artillery units, may now issue Fire Combat (see that section for more details). Resolve each combat to its conclusion. Place an "Artillery Fired" marker on Artillery units that issued Fire Combat.
Important Note: Be aware that Fire Combat is conducted before Movement and Assault Combat! Also note that issuing Fire Combat does not prevent an Infantry unit from moving in the Movement Step nor from attacking in the Assault Combat Step (assuming it is under an Attack Order, of course). So units must be positioned for firing one turn in advance.
-
Movement Step: All Infantry/Cavalry units, regardless of their Order, may conduct Movement. The exact distance moved and the ability to Engage is dependent on the actual Order assigned. See the Movement section for details on how to move units. Only activated Artillery units that do not have an "Artillery Fired" marker on them can move during the Movement Step. Place an "Artillery Moved" marker on Artillery units that conducted movement.
-
Assault Combat Step: Only units that are under an Attack Order and that are currently adjacent to an enemy unit may now conduct Assault Combat. See the Assault Combat section for details on how to resolve this combat. Artillery units may not attack using Assault Combat (but do defend normally when assaulted).
-
Rally Step: Shaken Infantry/Cavalry units (those with a "Shaken" marker) that have a Defend Order may Rally. In addition, any Broken units belonging to the Active Formation may also Rally. Artillery units that do not have an "Artillery Fired" or "Artillery Moved" marker may Rally. See Rally, section K.
Example: The Sedgwick Corps Activation Card (VI Corps) is drawn and handed to the Union player. He has his Division Activation Cards deployed on the Command Display as follows: DP#1 = Wheaton; DP#2 = Wright; DP#3 = Howe. He rolls a die on the card's Command Table and he rolls a "6". This activates both DR#1 and DR#2 and all of Tompkins' Artillery Brigade. Since the result on the Corps Activation Card was not in red, a second die is rolled against the Command Tables of Wheaton's Division Activation Card (DP#1) and Wright's Division Activation Card (DP#2). The die roll is a "4" and applying this result to both Division Activation Cards yields a "Division Group" entry for Wheaton and a "One Brigade" entry for Wright.
Wheaton would normally be activated first but the Union player wants to pummel the Rebs with some artillery fire first. He activates Tompkins' Artillery Brigade and three of his units issue Fire Combat while the other two units move 8 MP to get into better positions. When that is all resolved, the Union player then activates Wheaton's Division (which he must activate before Wright's division). His division is under a "Division Group" activation so all his units activate together and under one Order. He gives them an "Attack" Order and they engage the Rebels that were just fired upon by Tompkins' artillery. Then Wright's Division is activated but he can only activate one Brigade. He picks Torbett's Brigade and gives it a "Defend" Order so he can remove the two units' "Shaken" markers by using a Rally action. The entire activation for Sykes' Corps is now finished.
Note that Tompkins' Artillery Brigade could also have activated in between the two Union divisions or even after both divisions had activated.
H) Fire Combat
Eligible units can conduct Fire Combat throughout the Game Turn at various points in gameplay. However, a unit may only resolve one Fire Combat for each separate case of eligibility. Artillery units can fire during the Preliminary Bombardment Phase; Activated Infantry/Dismounted Cavalry units under an Attack or Defend Order may fire during the Fire Combat Step, as can activated Artillery units; Inactive units can issue Fire Combat during the opponent's Fire Combat Step (with a Firefight Cohesion Test result); Inactive units can also issue Defensive Fire during the opponent's Movement Step; and units can fire with the use of some Event Cards or through the Default Event. Mounted Cavalry may never issue Fire Combat. An eligible unit wishing to issue Fire Combat must select one eligible enemy-occupied target hex within Range and Line of Sight.
- Range: The firing player counts the number of hexes between the firing unit and its intended target hex, including the target hex itself. He then consults the Weapon Ranges Table and cross-references the distance measured with the type of unit firing: Infantry (which used muskets), Dismounted Cavalry (which used carbines), Smoothbore Artillery (S), Rifled Artillery (R) or Mixed Artillery (M). The number listed on the chart is the maximum distance in hexes the actual range can be to achieve the Range Category on the top of the table (either Effective or Long). Fire Combat is not allowed further than the Range listed under Long Range. Artillery units firing at an adjacent target unit always use the Canister Range Category.
For example, an Infantry unit firing at a target two hexes away is firing at Long Range (which is also the maximum distance that an Infantry unit can fire). Smoothbore Cannons firing at six hexes would also be at Long Range. Mixed Cannons firing at three hexes would be at Short Range.
- Line of Sight (LOS): If the firing unit has a target hex within Range and the target is two or more hexes away the firing unit must also be able to "see" that target hex. To determine LOS, draw an imaginary line from the center of the firing unit's hex to the center of the target unit's hex. The LOS can be Blocked, in which case the proposed Fire Combat cannot be made or Obscured, in which case the Fire Combat can occur but with modification. In the cases listed below, intervening means appearing between the firing hex and the target hex and also touching the LOS at any point (even along a hex edge). Also any reference to units means units from either side.
LOS Notes: Dealing with LOS may look complex but it's actually pretty logical and your first instinct of whether a unit can see another unit will be usually be correct.
The relative Elevation Level of the firing units, target hex and any intervening hexes is important when determining LOS but the exact Elevation Level is not. So these LOS rules are based on a basic observation – is the Firing Hex higher than, lower than or at the same Elevation Level as the Target Hex? This will be the basis for all LOS determinations.
Also note that the reason units from both sides Obscure an LOS is not only because firing artillery needed to be careful not to hit their own troops (and very often artillery could not so readily tell friend from foe) but also because troops of both sides throw up dust clouds and smoke while maneuvering and fighting.
a. Firing hex and target hex are at the same elevation
- Intervening Town, Woods and Units that are at the same level as both the firing and target hexes will Block the LOS.
Note: For ease of reference, all hexes mentioned in the upcoming Line of Sight and Fire Combat examples are located on the North Map.
Examples: Fire from hex 1313 to hex 1315 is blocked by the Woods in 1314. If a unit is in 1823, then it blocks fire from 1722 to 2124. Fire from 2526 to 1831 is Blocked by the Woods in 2327 because the LOS passes through that hex and all relevant hexes (firer, target and intervening terrain) are at the same elevation.
- Intervening Town, Woods and Units that are lower than both the firing and target hexes will Obscure the LOS.
Important Note: there is a separate column shift modifier (see H-4) on the CRT for firing over intervening terrain and for firing over an intervening unit. These two situations have a cumulative Obscuring effect if both cases apply.
Example: Firing from hex 2526 to hex 2032 is Obscured by all the intervening Woods hexes on the lower elevations (but note that only one column shift is applied for Obscured LOS for all those cases, not one shift for each case). If a unit from either side is in 2930, then it Obscures fire from 2927 to 2931.
- Any intervening hex's Elevation Level, whether occupied by terrain and/or units or not, that is higher than both the firing hex and the target hex will Block the LOS.
Example: Firing from hex 2226 to hex 2127 is Blocked by the higher elevation in 2126 and 2127. Firing from 3513 to 3523 is Blocked by hex 3516.
b. Firing unit at lower elevation than the target hex
- Intervening Town, Woods and Units that are lower than both the firing hex and the target hex –or– that are lower than just the target hex will Obscure the LOS.
Example: A unit firing from hex 1212 to hex 1615 would be Obscured by the intervening Woods since they are lower than both the firer and target. A unit firing from 1218 to 1615 with a unit in hex 1417 (which is at the same level as the firing unit) would be Obscured by that unit since it is lower than the target hex.
- Any intervening hex's Elevation Level, whether occupied by terrain and/or units or not, that is higher than both the firing hex and the target hex –or– is at the same level as the target hex will Block the LOS.
Example: A unit cannot fire from hex 1718 to 1723 because hex 1722 is higher than both the firer and target. A unit firing from 1819 to 1823 is Blocked by hex 1822 because it's the same level as 1823.
- If an Artillery unit is firing, an intervening friendly unit (only) that is adjacent to the target hex will Block the LOS. Elevation levels are irrelevant in this case.
c. Firing unit at higher elevation than the target hex
- Intervening Town, Woods and Units that are lower than both the firing hex and the target hex –or- that are lower than just the firing hex will Obscure the LOS.
Example: A unit firing from hex 1615 at hex 2413 is Obscured by the Woods in 2313. If a unit is in 2113 the LOS would be Obscured by that as well and applies an additional column shift. A unit firing from 1522 to 2222 is Obscured by the Woods in 2122 as they are lower than the firing unit and at the same level as the target hex.
- Any intervening terrain elevation, whether occupied by terrain and/or units or not, that is higher than both the firing hex and the target hex –or– that is at the same level as the firing hex will Block the LOS.
Example: A unit firing from hex 1715 to 1514 is Blocked by hex 1615 because it is higher than both the firer and target. A unit firing from hex 1423 to hex 2117 is Blocked by 1522 due to it being at the same elevation level as the firer.
- If an Artillery unit is firing, an intervening friendly unit (only) that is adjacent to the target hex will Block the LOS. Elevation levels are irrelevant in this case.
Important Note: Be aware that units on lower elevation terrain can only fire at higher targets if those targets are at the "edge" of the hill or ridge. By the same token, units on a higher elevation need to be at the "edge" of the hill or ridge in order to shoot down at lower targets. This is due to the elevations on this map being presented as "wedding cake" style hills and ridges. This is done for simplicity as is absence of any "blind zone" rules. Once players get acquainted with these aspects of the map, you will be able to resolve many LOS issues rather quickly.
-
Strength Points (SP) Firing: If the target hex is within Range and LOS, then total the number of SP firing from the firing hex. Consult the Combat Results Table (CRT) and find the column containing the total SPs firing.
a. Minimum SP: A firing unit must have at least 1 SP in order to issue Fire Combat. A modified SP total of "0" or less means the unit may not fire.
b. Maximum SP: The "10+" column is the highest starting column firing units can attain regardless of the actual number of SP firing. Important Exception: Devil's Den (hex S2522) only allows a maximum starting column of "5".
c. Multiple Firing Units at Same Target: All units (regardless of type) firing from the same hex at the same target hex must combine their SP into one total. In the case of Artillery units, the same rule applies but be aware that if these units are at different Range Categories and/or have different Gun type modifiers, the firing player will need to apply the most detrimental category and/or modifier to the entire Fire Combat.
d. Multiple Firing Units at Different Targets: Units stacked in the same hex may fire at different targets than other firing units in that hex. Each such Fire Combat is calculated and resolved separately from the others.
e. Coordinated Fire: A player may have two or more units in two adjacent hexes (only) combine their SP into one Fire Combat total if all such involved units are from the same Brigade. Each participating unit must be eligible to issue the fire and the same penalties apply as per Multiple Firing Units at Same Target rules (above). A maximum of two adjacent hexes can be involved in any one Fire Combat in this manner.
Important Note: The "10+" column is the highest starting column that can be achieved (exception: the Devil's Den hex only allows a maximum starting column of "5"). So essentially all SP greater than 10 are wasted. This is to reflect in a simple way the practical limitations of unit frontages and the ability to bring guns to bear on a target efficiently.
- Column Shifts: The firing player calculates the starting column on the CRT equal to the number of SP firing. He then adjusts left and/or right from that column per the Fire Combat Column Shift Table. If there are multiple units firing, apply any unique shifts that each one would contribute and accumulate them all to get a net shift. Do not apply shifts per unit – apply an applicable shift to the entire SP total if any single unit qualifies. In the case of different shifts for the same characteristic, use the worst applicable shift for the firer.
For example, if all units in a stack are firing at "Long Range", only a single "<-2" shift applies. If all units in a stack are firing at "Short Range" except for one that is firing at "Long Range", the entire attack applies the "<-2" shift for the Long Range. In the case of two types of "Canister" being fired, use only the least-beneficial shift for the entire fire.
-
Final CRT Column: After applying any shifts, the final resulting CRT column is the one used for the Fire Combat resolution. If the column shifts end up to the left of the "1" column, the fire is resolved on the "1" column anyway. Adjustments to the right of the "*****" are resolved on that column.
-
Fire Combat Resolution: The firing player will roll all three dice. The black and white dice will give a two-digit number from 11 to 66 with the black die number read first and the white die number second (don't touch the red die – you'll need that later). This black/white number is then cross-referenced with the final CRT column being used (as determined above). The result entry is the type of Cohesion Test that the targeted unit(s) must take, as follows (listed from worst to best result for the firing units):
- NE = No Effect
- E = Easy Cohesion Test
- R = Routine Cohesion Test
- T = Tough Cohesion Test
- S = Severe Cohesion Test
- C = Critical Cohesion Test
-
Cohesion Test: The red die is now used to determine the result of the Cohesion Test caused by the Fire Combat. This red die result is applied individually to every unit in the target hex.
Veterans of the Blind Swords system should take note that the concept of the Lead Unit is not used in this system. The Fire Combat result is applied individually to each and every unit in the target hex and each such unit will apply that roll against its Cohesion Rating to achieve a result specifically applied to that unit.
a. Consult the Fire Combat Cohesion Test Table and find the column that corresponds to the type of Cohesion Test required (Easy, Routine, etc.).
b. Take the result of the red die and add the testing unit's CR to the roll. This is the Cohesion Test Total. Keep in mind that each unit in the target hex must test separately but using the same red die result. Units in the same hex could therefore end up with different effects from the same fire.
Important Reminder! A unit's CR value can be affected by a Shaken marker and sometimes an Event Card. But most often it is the Unit Support status will reduce a unit's CR and this aspect of the system is easily overlooked. Review the "Unit Support" rule of the Cohesion Rating section (A-2-g) each time a unit needs to refer to its CR.
c. Combat Events: Check the black/white die roll. If it is a "doubles" result (ex: "22"), then also check the Combat Event Table and cross-reference the exact "doubles" that were rolled with the current combat situation that applies. With Fire Combat, this will be the first column ("Firing Unit Roll"). Find the entry that is entered there and if it applies, then add the indicated additional result to the normal result from the CRT to the affected unit(s).
For example, a Union Artillery unit is conducting Fire Combat against a stack of Confederate infantry and artillery units. The Union player rolls a "33" on the black/white dice roll and a "4" on the red die, which yields a "NE" result. But due to the "doubles" roll, players must also check the Combat Events Table under the "Firing Unit Roll" column. Cross-referencing the "33" row with that column, we see that an ammo caisson has been hit and explodes! Both the Rebel infantry and artillery unit must each immediately take a Panic Test (see H-10).
Important: Veteran players of The Devil's To Pay! should note that this "doubles" mechanic replaces the one used in that game. There is no more additional modifier to take into account. Instead, the actual doubles rolled may generate direct additional effects.
Optional Rule: If players would rather omit the Combat Events mechanic for the purposes of simplicity, just treat a "doubles" result as any other rolled result. Apply the normal CRT result as indicated on the table only.
d. The indicated Cohesion Test result is applied to the testing unit. If there are any choices offered, the owning player of the testing unit makes the decision. The results are read as follows:
  X = the unit applies the indicated result only.
  X / Y = the owning player chooses either the left side result (X) or the right side result (Y) to apply to the unit.
  X (Y) = the unit must do the left side result (X) and the owning player may also choose to do the right side result (Y) if he wishes.
  X + Y = the unit must do both results.
Example: A result of "SH / SK1" is read as "The unit is Shaken or it must Skedaddle one hex". A result of "SH (SK1)" is read as "The unit is Shaken and may also Skedaddle one hex if it wishes". A result of "SH + SK1" is "The unit is Shaken and must also Skedaddle one hex.
e. The actual result codes (for X and Y above) are as follows:
  NE = no effect on the target unit.

  FF = the target unit may Firefight. This is done by the targeted unit (only) issuing Fire Combat back at the original firing unit (only), if otherwise eligible. This is resolved immediately using normal procedures and may even result in a string of Firefight results (there is no limit to how many consecutive FF results can be resolved)

  SH = the target unit is Shaken. Place a "Shaken" marker under the unit. If the unit is already Shaken, then remove the "Shaken" marker and apply a DP result instead (see below).

  SK# = the target unit must Skedaddle (in other words, it is retreating) the number of hexes indicated. See the detailed explanation of Skedaddling below. If a unit is in a hex with a "Breastworks" marker, the owning player may decrease the SK result by one. (For example, an SK2 will become SK1; an SK1 result will become no Skedaddle).

  DP = the target unit is Depleted and must flip over to its Battleworn side while also removing any "Shaken" marker it might have. If already on its Battleworn side, the owning player must immediately roll one die on the Break Test Table (see below) and apply the indicated result.
8. Skedaddling: When a unit gets a "SK" result, it is essentially forced to retreat. This is handled as follows:
a. The distance retreated is given as the number of hexes that must be moved - do not count the normal MP cost of the hex terrain entered.
b. There is no Disengagement movement penalty when conducting a Skedaddle (see Movement rules).
c. The retreating unit may never enter the same hex as an enemy unit.
d. A retreating unit may not stop in a hex that will be cause it to be overstacked. If that is the case, it must continue retreating per the normal Skedaddle parameters until it enters a hex that will not be overstacked.
e. The retreating unit must increase the distance between itself and the enemy unit that caused the Skedaddle result with each hex retreated, unless impossible to do so due to enemy units or the map edge. If such is the case, then it need not increase the distance but may instead maintain its distance from the enemy that caused the result.
f. In general, when two hexes are equivalent choices, Union units should retreat toward the Eastern side of the map. Confederate units from II Corps should retreat to the North edge while all other Rebel units should retreat to the West edge of the map.
g. The retreating unit cannot Engage an enemy unit unless it is impossible to avoid such a move. In that case, it may move adjacent to the enemy unit but will immediately apply an "SH" result in each such hex entered. Note that no Defensive Fire is issued by the enemy unit in this circumstance (see Movement section) – the Shaken result reflects that fire.
h. If the retreating unit has no choice but to move off the map, apply an "SH" result on the unit in the last hex before it leaves the map. Then use the Off-Map Movement procedure (see Movement rules).
i. A retreating Artillery or Mounted Cavalry unit may move through any number of Rock Creek hexsides or Woods, Rocky, Rocky Woods or Marsh hexes, but it is given an "SH" result at the end of the retreat.
j. If a retreating unit cannot possibly continue moving per the above parameters (for example, it is surrounded by enemy units) then it is immediately and automatically Broken (do not take a Break Test).
k. A Skedaddling unit that enters a hex with other friendly units during its retreat causes each of those friendly units to take a Panic Test (see below).
- Break Tests: Whenever a unit is already on its Battleworn side and is required to apply another Depleted (DP) result, it must take a Break Test. Roll one die on the Break Test Table (on the Player Aid) and compare the die roll result to the unit's CR. Apply the result indicated. If the unit is Broken by that test, it is removed from the map and placed in the Broken Box. Then any other friendly units that are in the same hex as the now-Broken unit must immediately roll on the Panic Test Table (see below) and apply the result.
It is important to note that a unit is not automatically eliminated from the game if it gets a DP result while on its Battleworn side. Instead, it must take a Break Test in every case to see if it is in fact Broken and removed from the game. The only exceptions are when a unit must Skedaddle but finds it impossible to retreat and with the CRUSHED result in Assault Combat. In these the units are automatically Broken with no Break Test being taken.
- Panic Tests: A Panic Test means the owning player rolls a die and compares it to the testing unit's CR. Check the Panic Test Table (on the Player Aid) for the effect, which is applied immediately. And yes - this can cause a chain of Panic Tests! Units are required to take a Panic Test in two circumstances:
a. If a Skedaddling unit enters a hex with other friendly units during its retreat, each of those friendly units must take a Panic Test after the Skedaddling unit completes its retreat movement. Note that this does not apply to other retreating units that are also Skedaddling from the same combat result nor does it apply to units in the same hex with the Skedaddling unit when it first receives its SK result.
b. All units in the same hex as a unit that becomes Broken or Crushed must each take a Panic Test.
Fire Combat Example: The Confederates have advanced and taken a foothold on the western spur of McPherson's Ridge. Davis' Brigade is positioned with its "5-3" in hex 2227 and the "6-2" in hex 2327. Opposing them is an ad-hoc force consisting of a "3-4" dismounted cavalry unit from Devin's Brigade in hex 2325 and the "7-5" from Meredith's Iron Brigade in hex 2426. The Rebel player has drawn the Hill Corps Activation Card and he rolls a die, getting "5". That means that the DP#1 Division is activated and that is Heth. The Pegram and McIntosh Artillery Brigades would also be activated but McIntosh is not as yet in the game so nothing happens with that unit. The Rebel player now refers to Heth's card and rolls another die, getting another "5". This is cross-referenced on his card and the result indicates that Heth can do a Division Group activation and also activate one hex of Garnett's Artillery Brigade. Garnett is not yet in the game either, so nothing happens with his unit. The Rebel player puts Heth's Division under a "Defend" Order. Davis' men are the only units within range of the enemy so during the Fire Combat Step they open fire. The Rebel player first has the "5-3" unit fire on the Union dismounted cavalry. He starts the combat on the "5" column of the CRT. Applicable column shifts are: Long Range (<-2), Defend Order (1->) and Target is Dismounted Cavalry (<-1). That is a net shift of "<-2" and puts the combat on the "3" column. The Rebel player rolls all three dice and gets black "2", a white "3" and a red "6". He reads the "23" row and the result is "NE". He then goes to the Fire Combat Cohesion Test Table and checks the red die total – "6" (die roll) + "3" (the CR of the cavalry reduced by one for not having Unit Support). This is a net result of "9", which shows a result of "NE (FF)". That means the cavalry can fire back immediately. Except – the troopers cannot fire at Long Range (their carbines can only fire one hex) so nothing further happens. The Rebel player then resolves his next Fire Combat and the "6-2" takes a shot at the Union unit in 2327. The starting column on the CRT is "6-7" and the shifts are: Long Range (<-2), Defend Order (1->), Firing Over Woods (<-1) for the 2427 hexside. That is a net shift of "<-2" and moves the combat to the "4" column. This time the Confederate player rolls much better, getting a black/white roll of "62" and a red die of "1". This is an "R" result (Routine Test) and the net Cohesion Test row is "5" (die roll of 1 + CR of 4 since Meredith has no Unit Support). The Cohesion Test result is "SH (SK1)". The Union unit is given a "Shaken" marker and it must decide if it also wishes to Skedaddle one hex away. The Union player opts to retreat the unit into hex 2425 which is a sheltered depression, contains no other Union unit (which would have forced a Panic Test by that unit) and where he can possibly safely Rally the unit in a future activation. The Rebel player then fires Pegram's Artillery units at other Union units.
I) Movement
Regardless of an Infantry/Cavalry unit's Order, it will be allowed to conduct movement. The actual number of Movement Points a unit can spend depends on the Order assigned. For Artillery units, they always have the same movement allowance.
Remember again that whether units conducted Fire Combat or not is irrelevant to their ability to move.
-
Moving Units: Each unit is moved individually. Moving units that start stacked in the same hex are still each moved one by one. Units are moved hex by hex and expend Movement Points for each hex entered.
-
Movement Points (MP): Each Order dictates the number of Movement Points units can expend to traverse hexes during the step. The player simply deducts the cost of the hex terrain from the unit's available MP as it moves into each hex. If a unit has insufficient MP to pay for a hex it wishes to enter, then it may not enter that hex. The cost in MP for each hex depends on the hex's terrain type. All hexes cost 1 MP except as noted below.
a. Woods, Rocky and Rocky Woods hexes = 2 MP. However, Artillery and Mounted Cavalry must stop their movement upon entering a Woods, Rocky and Rocky Woods hex unless they are following a Road. They may leave the hex during a following activation but again must stop upon entering such a hex.
b. Marsh = 3 MP. Same Artillery and Mounted Cavalry restrictions as with "a" above.
c. Cross Up Slope hexside = +1 MP to cross. This cost applies when the unit moves through the Slope hexside and travels from a lower elevation hex to a higher elevation hex. The cost is in addition to the normal cost of the entering the next hex. Note that moving down a Slope hexside does not cost any additional MP.
d. Cross Up Steep Slope = +2 MP to cross. This cost applies when the unit moves through the Steep Slope hexside and travels from a lower elevation hex to a higher elevation hex. The cost is in addition to the normal cost of the entering the next hex. Note that moving down a Steep Slope hexside does not cost any additional MP.
e. Cross Rock Creek Flowing Stream hexside = +2 MP to cross. This costs 2 MP in addition to the normal cost of the entered hex.
f. Cross Other Flowing Stream hexsides = +1 MP to cross. This costs 1 MP in addition to the normal cost of the entered hex. Note that crossing a Dry Stream hex does not cost any additional MP.
Major Roads are graphically wider than Lanes. But just so there is no confusion, here is a list of the road paths that are Major Road hexes:
NORTH MAP: 4002 -> 3200; 3200 -> 3335; 1600 -> 1635; 1004 -> 2309; 1702 -> 1009; 1009 -> 4012; 1016 -> 1516; 1018 -> 4017; 1028 -> 4021; 1028 -> 2535; 2423 -> 2823; 2535 -> 3028; All Gettysburg Town hexes (as detailed on the TEC).
SOUTH MAP: 1335 -> 1933; 1933 -> 2035; 1933 -> 2535; 1933 -> 1826; 1826 -> 2316; 1021 -> 4035; 3230 -> 4026; 1017 -> 4017; 1616 -> 1611; 2316 -> 2011; 2516 -> 3000; 3616 -> 3902; 1012 -> 2400; 1410 -> 3008; 1002 -> 1903; 2000 -> 2101; 3205 -> 3904; 3800 -> 3900.
i. Minimum Movement: There is a minimum movement allowed of 2 hexes along any Road or 1 hex in all other terrain. A player can always have a unit use this rather than the normal MP costs. However, stacking limits can never be violated in any case (see below). This also applies with Default Event movement (F-2c) and the unit may Engage in that case. However, see F-3a for the Battlefield Chaos exception.
Important Terrain Note: Crossing a normal Elevation Line along a hexside that does not also includes a Slope or Steep Slope graphic does not cost any additional MP to cross. For example, moving from hex 2111 to hex 2011 or from hex 3007 to hex 2907 does not cost additional MP. These height changes are gentle enough that they don't hinder a unit's movement.
-
Stacking Limit: Only a certain total number of SP may be stacked in the same hex at the end of any unit's movement. Any number of SPs may pass through a hex, but the SP allowance cannot be exceeded when a unit ends in a hex. The maximum SPs allowed in a hex is 20 SP, with some exceptions:
- Town hexes (Gettysburg) = 10 SP or any single counter of any SP size.
- Special Major Road March Order eligibility = 10 SP or any single counter of any SP size.
- Artillery Units in Marsh, Woods, Rocky or Rocky Woods terrain = 10 SP. These may be stacked and combined with Infantry/Cavalry units up to the normal 20 SP allowance, but only 10 SP can be from the Artillery units.
- Devil's Den (hex #S2522): 10 SP, of which only 5 SP may be Artillery.
Note that there is no "one unit" minimum for Artillery units in Marsh/Rocky/Rocky Woods nor for the Devil's Den limitations. These are absolute SP maximums. Note also that in order to use the Special Major Road March Order bonus movement rate (1/2 MP per hex), the 10 SP limit may not be exceeded in any single hex along the Major Road if two or more units are there. If the limit is exceeded, the cost of the other hex terrain is used.
-
Engagement: When a unit moves adjacent to any enemy unit, this is called Engagement. This is an important concept in the game, as engaging an enemy means the unit is committed to a close combat with the enemy, which can take the form of short-range firefights and/or actual assaults. In either case, the unit is entering a danger zone.
a. Infantry and Cavalry units may only voluntarily move adjacent to an enemy unit if they are under an Attack or Defend Order. If under a Maneuver Order, they must remain at least two hexes away from all enemy units (i.e., leaving one intervening hex).
b. Artillery units may never voluntarily move to within two hexes of an enemy unit (meaning they must remain at least three hexes away). Artillery may begin their movement from a closer distance (or remain where they are if they opt not to move) but must move away to the proper distance if they do move at all. Note that artillery moving away from an adjacent enemy and thus entering a hex two hexes away from that enemy is not a new Engagement – artillery may increase the distance freely.
c. Units that are Skedaddling ignore the above Engagement restrictions except as noted under the Skedaddle rules (H-8g).
-
Defensive Fire: Immediately after an active unit Engages (moves adjacent to) one or more enemy-occupied hexes, each of the enemy units in those hexes may issue Fire Combat at the moving unit in its current hex, if eligible. An enemy unit is eligible to issue Defensive Fire if it meets all normal Fire Combat eligibility requirements and it is itself not currently Engaged by a second (non-moving) opposing unit. Those enemy units so Engaged cannot issue Defensive Fire at the currently moving unit.
Picture this as if the stationary enemy hexes are being pinned and/or distracted by the other units friendly to the moving unit. They are essentially drawing attention and fire away from the moving unit. Players will immediately recognize this as a viable and important tactic in how they sequence their moves.
a. Defensive Fire is not performed if a unit retreats next to an enemy unit due to a Skedaddle Cohesion Test result. Instead, the retreating unit automatically suffers an "SH" result for each such hex entered.
b. Defensive Fire does not apply in the case of Attacker Breakthrough movement (see J-12).
c. There is no limit to how many Defensive Fires a unit may issue in a turn. A unit may opt to not issue Defensive Fire if it wishes (but note that if the moving enemy remains adjacent, the non-firing unit is still Engaged with the enemy and thus ineligible to issue Defensive Fire later on).
d. If the moving unit does not Skedaddle or become Broken from the Defensive Fire, it may continue moving with no penalty. If it again enters a hex adjacent to an enemy unit (even this same one) then it will again be subject to Defensive Fire.
e. All normal Fire Combat rules apply, including the implementation of a possible "Firefight" result (FF), so the moving unit could issue fire back in that case. Also, the units issuing Defensive Fire can do so individually or by using the Coordinated Fire (H-3e).
f. Units affected by a "Battlefield Chaos" marker may not issue Defensive Fire.
Example: The Rebels have occupied hexes N1822 and N1922 and the Union player needs to slow down the advance. He decides to move a unit into hex N1921 to challenge the Confederates. As soon as he moves there the Rebel player issues Defensive Fire with both units, resolving their fire in any order. Assuming the Union unit does not Skedaddle or become Broken, then it has successfully "pinned" the two Rebs and the Union player could move another of his units into hex N1821 without any Defensive Fire being issued against it.
Note that Defensive Fire is the price that is paid for maneuvering your unit up to the enemy and challenging them. It encompasses both actual defensive fire and approach fire. Players can exercise some clever tactical maneuvering when advancing on the enemy by carefully executing the right sequence of engagements so as to "tie-up" the enemy with pinning forces and thus provide your assault forces with an un-harassed attack zone. The concept of Engagement is an important one in this design. Moving adjacent to the enemy is essentially locking the unit into close combat with that opponent. This does not necessarily represent melee combat. It can take the form of short-range firefights, probing attacks and yes, even actual bayonet charges. In any case, it is a stressful, dangerous and lengthy process to engage the enemy and even more so to extricate a unit once so entangled (see Disengagement below).
-
Disengagement: If a unit is adjacent to an enemy hex and wishes to move away (at any time during its normal move and regardless of its destination) it may do so but the first hex it enters will cost two additional Movement Points (+2 MP). This applies even if the moving unit is still adjacent to the same enemy (note that this may mean the moving unit will pay this movement penalty plus take Defensive Fire again!) This movement penalty does not apply to Minimum Moves, Skedaddling units, Withdrawal Before Combat or Skirmish Screen Withdrawal.
-
Off-Map Movement: Units may be voluntarily moved off the game map from any map-edge hex. It costs 1 MP to move off the map regardless of the exiting hex terrain. Place the unit just off the map adjacent to the exit hex, keeping a "Shaken" marker if it has one. The unit can only then re-enter the map as a Reinforcement and the exit hex is treated as the unit's entry hex (see below).
Note that this does mean that the entry hex can be shifted if enemy occupied, in the same manner as a normal Reinforcement (see below).
-
Reinforcement Movement: Units that are scheduled to arrive during a Game Turn as Reinforcements are placed just off-map at the start of that turn, next to the hex on which the units are arriving. If more than one unit is arriving, make a stack of any size - the normal stacking limit is ignored while off map.
a. When the Reinforcing units' Brigade or Division is activated, these units may be moved onto the map with the designated entry hex as the first hex of movement. Off-map units that do not get activated for movement remain off map and do not participate in the game.
b. Arriving units use the terrain MP cost of the entry hex. This includes treating the unit as using Road movement if the entry hex is a Lane or Major Road.
c. If the assigned entry hex is enemy-occupied, the Reinforcements are delayed one full Game Turn. Then, when again activated for movement, they can be entered onto the map through the map-edge hex nearest the original entry hex that is not enemy-occupied (owning player's choice if more than one hex qualifies). The "nearest" is judged by counting connected map-edge hexes, regardless of terrain.
Note that Reinforcing units move from their off-map stack onto the entry hex normally – it does not matter how many units moved before them. They are not lined up "in road column" as in many other games. This is done basically for simplicity and to speed up play. If players want to instead line up units off map and calculate the "phantom" hexes moved through, please do so at your convenience.
-
Cavalry Units: Cavalry units have two sides to their counters, representing the troopers either being mounted on their horses or dismounted and fighting as open-order infantry.
a. Mounted Cavalry may use the higher allowance of Movement Points when under an Attack or Maneuver Order. However, Mounted units may not issue Fire Combat but they may conduct a special Withdrawal Before Combat move (see J-4) before Assault Combat.
b. Dismounted Cavalry is treated in all ways as Infantry except that it may not attack in Assault Combat (it may defend normally). In addition, Dismounted Cavalry may also conduct a special Withdrawal Before Combat move before Assault Combat (but not as far as Mounted Cavalry).
Movement Example: It's the 2:00 pm turn and Pender's Division is arriving this turn. During the Card Draw Phase, the Pender Division Activation Card is activated. After the Command Table dice rolls are made it is determined that only one of Pender's Brigades can activate. The Rebel player chooses Lane's Brigade of two units. They are both placed off map next to entry hex S1635 and the player chooses a "Maneuver" Order for them. She moves the 9-4 unit first and notes that it has a Movement Allowance of 8 MP. It enters hex 1635 for ½ MP, then 1734 for ½ MP and then wants to enter 1733 but Brockenbrough's Brigade is sitting in that hex. Because the total SP in the hex would be over 10 SP, Lane's unit can't use the Major Road March Order rate and must spend 2 MP to enter 1733 (1 MP for the Clear hex and +1 MP for going up a Slope hexside). It then continues onto 1833 for ½ MP -> 1832 for ½ MP -> 1931 for ½ MP -> 2032 for ½ MP and then hex 2132 for ½ MP. The unit has so far used 5 ½ MP to this point. The Rebel player then moves the unit into hex 2232 for 2 MP due to the Woods. She'd really like to get the unit down into the valley but the unit can't move another hex without exceeding the 8 MP movement allowance. She then moves Lane's other unit (the 8-4) in the same manner but continues along the road to hex 2133 and then enters the Woods at hex 2233 for the full movement allowance.
c. Cavalry units on either counter side are always Battleworn – they do not have a Fresh side.
d. If a Cavalry unit wishes to change from Mounted to Dismounted or vice versa, it must do so at the start of its Movement and it will cost half (rounded up) of its starting Movement Point allowance (i.e., using the allowance of the side it was on before the change). The unit may then continue with the movement normally, using the remaining Movement Points.
J) Assault Combat
Activated units under Attack Orders and which are currently Engaged with an enemy unit may initiate Assault Combat. In addition, some Event Cards allow Assault Combat attacks as well. An eligible
a. One eligible attacking hex (the Assault Hex) may attack one adjacent target hex (the Defending Hex). A single Defending Hex can only be the target of one Assault Hex per Assault Combat Step.
b. Attacking units so committed cannot change their target hex later in the step (even if the Defending Hex no longer has an enemy unit in it).
c. Artillery units and Dismounted Cavalry units may never be part of an Assault Combat attack but may defend normally.
d. Attacking units stacked in the same Assault Hex may each assault a different eligible Defending Hex. The attacking player must make it clear how the attack is being split up in this case, using the "Assault" markers if necessary.
e. Not all units in the Assault Hex need participate in Assault Combat – the active player must clearly identify units which are not attacking a particular hex.
Important: Veteran "Blind Swords" players should note that the concept of a "Lead Unit" does not exist in this version of the system. Players of "The Devil's To Pay" players will note that this step is somewhat different than that game and should pay special attention.
-
Attack Declaration: The active player declares all his Assault Combat attacks for this phase. He may use the "Assault" markers provided as a reminder if there are numerous assaults.
-
The Assault Hex vs. the Defending Hex: Each Assault Combat is structured around one Assault Hex attacking one Defending Hex.
-
Attack Support: Additional active units in hexes adjacent to a declared Defending Hex can also join the Assault Combat against that same Defending Hex. These supporting units, if eligible (see below), can contribute their SP to the Odds SP Advantage and Enveloped columns shifts (only) and they may possibly help exploit any success with Attacker Breakthrough.
So conceptually, the units in the Assault Hex are leading the attack and are the spearhead of the assault. Attack Support units are joining in and adding to the "weight of numbers" of the attack. Note again that only units that are currently part of the activated formation may provide Attack Support.
a. Eligibility: Attack Support units may not be adjacent to a different enemy-occupied hex unless that enemy hex is the declared target of a different Assault Combat. If that other enemy-occupied hex is being attacked, then the Attack Support units may participate. If it is not being attacked, they prevent the potential Attack Support units from joining the attack.
This situation is determining whether the potential Attack Support units are being "pinned" by other enemy units or not. If those enemies are unencumbered, they can prevent the support units from participating just by their presence. But if they are being actively attacked by another friendly unit, then they cannot interfere with the currently resolved attack and that frees these friendly units to provide Attack Support. This can be a key tactical consideration for the players, where a "soak-off" attack can be launched to prevent enemy units from interfering with the main attack. It is also a way that the system simulates the importance of linear warfare tactics during this period.
b. Units may only provide Attack Support for one Assault Hex per step. Again, use the "Assault" markers to help note who is supporting whom.
Attack Support Example: The Union player has all three units of Lockwood's Brigade under an Attack Order and lined up in hexes S1605 (7-2), S1504 (6-2) and S1404 (5-2). There are Battleworn Rebel units from Steuart's Brigade opposite them – the 5-3 in S1604 and the 4-3 in S1503. The Union player needs an effective assault on the 5-3 and hopes to turn that flank, so she announces as Assault Combat attack from hex S1605 (the Assault Hex) at S1604 (the Defending Hex). In order to make the attack really strong, she wants to add in the 6-2 from hex S1504 as the Attack Support (wanting the 2:1 odds that this gives her with 13 SP to 5 SP). But the Confederate unit in hex S1503 is adjacent to the Union 6-2 and would thus prevent it from being able to offer Attack Support. In order to get that good flank attack, she must also declare an Assault Combat with her 5-2 against the Rebel 4-3 unit. By doing so, the Union 6-2 is now free to provide Attack Support against hex S1604.
-
Assault Combat Resolution: After all the Attack Declarations are made and Attack Support units identified, the attacking player resolves the Assault Combat attacks in any order he wishes. Each separate combat is resolved to conclusion before proceeding to the next declared combat. Each combat begins with the Withdrawal Before Combat option.
-
Withdrawal Before Combat: Any Cavalry, Horse Artillery and/or Sharpshooter (SS) units (only) in the Defending Hex may opt to automatically withdraw before the combat begins. Mounted Cavalry units may immediately move up to three hexes away from the attacking unit(s); Dismounted Cavalry, Horse Artillery and Sharpshooters units may move up to two hexes away. Withdrawing units must increase the distance from their attackers with each move in the same manner as a retreat move. Note however that this is not the same as a Skedaddle result – it will not cause a Panic Test. Also note that this is not Disengagement, so there is no additional MP cost. If this withdrawal leaves the Defending Hex empty of any units, the attackers may conduct Attacker Breakthrough normally (see below).
-
Assault Combat Strength: The SP values of all declared attacking units in the Assault Hex (only) are added together to determine the starting SP column used on the Combat Results Table. Note that this does not include units in the Attack Support hexes! Remember that the "10+" column is the greatest SP column that can be achieved at the start. Important Exception: Devil's Den (hex S2522) only allows a maximum starting column of "5". The actual column used in the combat, however, can change due to column shifts (see below).
-
Defending Hex Combat Strength: All units in the Defending Hex have their SP added together to determine their start column in this combat. As with the attackers, the actual column used in the combat can change due to column shifts.
-
Column Shifts: Both players then find the starting columns for their unit(s) on the CRT (as determined above). They then adjust left and/or right from that starting column per the Assault Combat Column Shift Table (in the same manner as Fire Combat). After making any shifts, the final resulting CRT column is the one used for the Assault Combat resolution. If the column shift ends up to the left of the "1" column or the right of the "* * * * *" column, use those end columns. Some shifts require further explanation:
Optional Rule: If players would rather omit the Combat Events effect for simplicity, you can just treat a "doubles" result as any other result. Simply apply the normal CRT result as indicated on the table.
-
Attacker Breakthrough: If at the conclusion of an Assault Combat there are no units remaining in the Defending Hex (for any reason), then the attacking units may conduct an Attacker Breakthrough.
a. No more than 10 SP (or one unit of any number of SP) may immediately enter the Defending Hex. These units may come from the Assault Hex and/or the Attack Support hexes unless the Attacker Support units would have to cross an Up Slope, Up Steep Slope or Railroad Cut hexside. If the units from an Attack Support hex must cross either of those types of hexsides, then they cannot participate in an Attacker Breakthrough.
Note that units from the Assault Hex can cross Up Slope, Up Steep Slope and Railroad Cut hexsides when making an Attacker Breakthrough. The restriction only applies to Attack Support units conducting an Attacker Breakthrough.
b. No Defensive Fire is allowed against units that are conducting Attacker Breakthrough.

c. Attacker Breakthrough units (only) may then immediately conduct another Assault Combat attack against one adjacent enemy-occupied hex using normal procedures. Note that only these units can attack, so there is no Attack Support available. Normally, only one Attacker Breakthrough is allowed per Assault Combat Step. But Mounted Cavalry units may conduct up to two Attacker Breakthroughs per step.

d. Reduce the number of allowed Attacker Breakthroughs by one if a Close Fight result is being resolved.
Note that multiple Attacker Breakthroughs can be conducted by attacking Mounted Cavalry or as allowed by a Combat Event result (J-10). By the same token, some Events reduce the number of allowed Attacker Breakthroughs.
Assault Combat Example (all hexes are on the North map): The struggle over the Kuhn's Brickyard VP hex (2515) has reached its climax as the Rebels send O'Neal's Brigade to assault the Union defensive position on the heights above the brickyard in hex 2514. The position is held by two units of Coster's Brigade which have been devastated by enemy fire and are each on their Battleworn sides (5-1 and 1-1). The Confederates have O'Neal's "10-3" unit in hex 2415 and his "4-4" unit in 2414 and both have "Shaken" markers as a result of previous Defensive Fire that they suffered. When the Reb player gets the Ewell Corps Activation Card, she has Rodes as her DP#1 card and she is able to activate one of Rodes' Brigades. She gives O'Neal's Brigade an Attack Order. Both units first issue Fire Combat at Coster's hex and roll miserably, getting an "NE" on both shots. She then announces that O'Neal's 10-3 unit is assaulting hex 2514 and thus the Assault Hex is 2415 and the Defending Hex is 2514. She then also designates Attack Support from hex 2414 (which can participate as there are no other Union units adjacent to it). The Confederates have a total of 9 SP (10 SP but -1 SP for the "Shaken" markers). This starts the assault on the "8-9" column of the CRT. The Rebs get the following column shifts:
a) "1->" for the CR advantage of CR 2 to CR 1 (the unit's CR 3 is reduced to CR 2 for the "Shaken" marker and note that the unit has Unit Support from its other Brigade unit, despite them both being Shaken; the largest Union defender is the "5-1" and its CR remains at "1" since it is also supported).
b) "2->" for having 2:1 odds (12 SP to 6 SP; the Rebs get 9 SP from the Assault Hex and 3 SP from the Attack Support hex).
That's a net shift of "3->" and puts the Rebels on the "* * " column of the CRT.
The Union player starts his defenders on the "6-7" column and they get a "1->" for being attacked Up Slope from the Assault Hex. So the Union player will use the "8-9" column.
Both sides roll their black and white dice simultaneously – the Confederates roll a "25" which is an "R" result and the Union roll a "32", which is an "E" result. The players go to the Assault Combat Results Matrix and cross reference an Attack result of "R" with a Defender result of "E" and this produces a "D:SK1" net result. This means the two Union units must retreat one hex and they split up, with one moving to hex 2614 and the other to 2615. The victorious Rebels can now do an Attacker Breakthrough and decide to do so. The Confederate player has to use the 10-3 unit to breakthrough because the Attack Support unit cannot do so due to the Up Slope hexside. She moves the 10-3 unit into hex 2514 (which is the maximum Attacker Breakthrough allowance anyway). The Confederate unit could now conduct another immediate Assault Combat against either of the just-retreated Union units in either hex 2614 or 2615 but the player decides not to push it too much and ends the Assault Step. Also note that there is no Defensive Fire allowed against the Attacker Breakthrough unit.
K) Rally
During the Rally Step, only Brigades with a Defend Order along with any activated Artillery units that did not move or fire, may conduct Rally. In addition, Broken Infantry units (only) belonging to the active formation may attempt to get back into the game. Rally allows a Shaken unit to remove that marker, a Broken unit to return to the game or any unit to build Hasty Works.
-
Shaken units that are not adjacent to an enemy unit may remove their "Shaken" marker automatically. If adjacent to an enemy unit, the unit cannot Rally.
-
Broken Infantry units (only) may attempt to return to the game from the Broken Box. Broken Artillery and Cavalry units and any Crushed units may never Rally. The owning player rolls one die for each Rallying unit and compares the die roll result against the Rallying unit's Battleworn-side CR (not its Fresh CR!). Apply as follows:
- Die roll less than CR or a natural die roll of "1": The unit may return to the map with its Battleworn side face up and with a "Shaken" marker placed on it. Deploy the unit adjacent to any other friendly unit in its Brigade or if none, adjacent to any other friendly unit in its Division or if none, adjacent to any friendly unit in the same Corps. The Rallied unit cannot be placed adjacent to an enemy unit. Note that if you roll a "1", the unit will Rally successfully, regardless of its CR.
- Die roll equal to or greater than CR: The Rallying unit remains Broken and stays in the Broken Area.
Important: Remember that Broken units are always considered to have Unit Support, so use their Battleworn CR as printed on the counter.
- Units that did not remove a "Shaken" marker and did not just enter the game from the Broken Box may build a "Hasty Works" marker (see M-1) in their hex if they are not currently adjacent to an enemy unit. Note that units may not build a "Breastworks" marker during a normal Rally Phase (see Overnight Turns).
L) The End Phase
This is the last phase of the Game Turn.
-
Held Event Cards: If either player is still holding any "Hold" Event Cards they may play any eligible cards. If both players have eligible cards, then the Confederate player plays one first, then the Union player, and players continue to alternate until all eligible cards are played. Remember that these cards cannot be used as Default Events.
-
Victory Determination Step: If this phase completes the last Game Turn of the scenario, then players will count their Victory Points per the scenario instructions to determine a winner. If not the last Game Turn of the scenario, then play advances to the next Game Turn's Advance Game Turn Marker Phase.
M) Entrenchments
The building of Entrenchments covers both Hasty Works (units throwing up quickly constructed cover consisting of whatever they could find in the area) and Breastworks (much more formidable and planned defensive structures and trenches). Mounted Cavalry units may not build Entrenchments.
-
Hasty Works: A unit may place a "Hasty Works" marker in its hex if it is eligible to Rally (see section K) and does nothing else during the Rally Step. The marker may also be built if the unit elects Build Entrenchments during an Evening or Deep Night Game Turn and does nothing else. Simply place the marker in the hex.
a. A "Hasty Works" marker increases the CR of all units occupying that hex by one (+1 CR) for all purposes.
b. A unit always has Unit Support while in a Hasty Works hex.
c. The "Hasty Works" marker remains in the hex as long as a friendly unit occupies it. As soon as the hex is empty of at least one friendly unit, the marker is immediately removed.
-
Breastworks: A unit may place a "Breastworks" marker in its hex only during an Evening or Deep Night Game Turn and only if a "Hasty Works" marker is already in the hex. Simply flip the "Hasty Works" marker over to its "Breastworks" side.
a. A "Breastworks" marker increases the CR of all units occupying that hex by two (+2 CR) for all purposes.
b. If a unit in Breastworks gets any SK result, the player may decrease the SK result by one. For example, an SK2 will become SK1; an SK1 result will become no Skedaddle.
c. A unit always has Unit Support while in a Breastworks hex.
d. The "Breastworks" marker remains in the hex for the entire game and will benefit any occupying units – friendly or enemy. It cannot be removed.
Note that the Entrenchments benefits apply to a unit even when it is attacking from a space with a "Hasty Works" or "Breastworks" marker. This is justified by the fact that such units are psychologically emboldened by their secure position and they are physically protected by the cover when amassing for the attack.
N) Overnight Game Turns
During the two Grand Battle scenarios, gameplay will continue throughout the nighttime hours and then into the next day. There are four different types of Overnight Game Turns and each has special rules that pertain to play.
-
Dusk: The 9:00 pm Game Turn is a Dusk game turn. The following rules changes are made during this game turn (only):
a. Line of Sight is reduced to a maximum of one hex (i.e., into an adjacent hex). Therefore, no Fire Combat can occur beyond one hex.
b. Units not using Road movement double the regular Movement Cost of all other terrain types moved through (for example, a Clear terrain hex costs 2 MP to enter). Units moving along Major Roads and Lanes use the regular Road Movement costs and procedures.
c. Reduce all unit's CR's by one (-1 CR) for all purposes. This includes units in the Broken and Crushed boxes.
-
Evening: The 10:00 pm – 1:00 am Game Turn is the Evening turn. The following rules changes are made during this game turn (only):
a. Place only Corp Activation and CIC Cards into the Card Draw Pile (Event, Fog of War and Friction of War Cards are not used).
b. Normal Command Table die rolls are made but no Order is assigned to the Division/Brigades. Activated units may only conduct either Movement, Build Entrenchments or enter Bivouac.
c. Units may conduct Movement but with restrictions. Units may not Engage enemy units. Units not using Road movement must double the regular Movement Cost of all other terrain types moved through (for example, a Woods terrain hex costs 4 MP to enter).
d. After finishing any movement greater than the Minimum Move allowance, each unit must take an Exhaustion Test. Roll one die against the unit's CR.
- Die roll equal to or less than CR: No effect
- Die roll greater than CR: Apply SH result
e. Units that do not conduct Movement may Build Entrenchments.
f. Units that do not conduct Movement or Build Entrenchments may enter Bivouac (see below).
g. At the conclusion of the Evening turn, replace the current "Day" marker with the next "Day" marker near the Game Turn Track.
Note that removing a "Bivouac" marker simulates the formation breaking camp. This takes time to do and is the cost of entering Bivouac in the first place and gaining the benefits of doing so.
d. If a Division did not enter Bivouac during either the Evening or Deep Night turns, give the Division Activation Card a "Formation Fatigued" marker (on the back of the "Bivouac" marker) at the end of the Deep Night turn. A fatigued Division means that the Division's Command Table die rolls are always reduced by one for the remainder of the Game Day. Remove the marker if the Division goes into Bivouac.
-
Dawn: The 6:00 am Game Turn is a Dawn game turn. The following rules changes are made during this game turn (only):
a. Remove all "Bivouac" markers from Division Activation Cards that have them. Divisions that have such markers removed may not activate at all this Game Turn. Flip the Division Activation Cards face down as a reminder – do not assign these cards a DP slot this turn. In addition, these units suffer a "<- 1" column shift when issuing Fire Combat during this turn.
b. Line of Sight is reduced to a maximum of one hex (i.e., into an adjacent hex). Therefore, no Fire Combat can occur beyond one hex.
c. Units not using Road movement double the regular Movement Cost of all other terrain types moved through (ex: a Clear terrain hex costs 2 MP to enter). Units moving along Major Roads and Lanes use the regular Road Movement costs and procedures.
d. Reduce all unit's CR's by one (-1 CR) for all purposes. This includes units in the Broken and Crushed boxes.
-
Bivouac: During the Evening and Deep Night Game Turns (only), players may place Divisions into Bivouac status if they do not move or build Entrenchments.
Bivouac status represents a special nighttime rally - the units are setting up camp and by so doing attempting to improve their condition by recovering stragglers, treating the injured, having a meal and resting.
a. When a Corps Activation Card is drawn, the owning player may declare that he is placing one or more Divisions of that Corps into Bivouac. If so, he places a "Bivouac" marker on any of those Divisions that will enter Bivouac (regardless of their Division Priority number).
b. Only Divisions that have not conducted Movement or Build Entrenchments during that same Game Turn may be placed into Bivouac.
c. After any activated Divisions have finished their Movement or Build Entrenchments actions, the player will resolve Bivouac Actions for those Divisions so marked in order of their Division Priority.
d. If the Division has a "Formation Fatigued" marker, you may freely remove it.
e. Bivouac Actions: These are Rally, Revive and Muster. Each unit of the Division may only conduct one of the allowed actions and only if they are at least three hexes from an enemy unit. If within two hexes of an enemy, they may not conduct any Bivouac Actions.
  - **Rally:** If the unit has a "Shaken" marker, the marker may be removed. A unit in the Broken Box may attempt to return to the map. This procedure is identical to the procedure used during Rally (section K-2).
  - **Muster:** A unit on its Battleworn side may attempt to flip back to its Fresh side. Roll a die against the unit's Battleworn-side CR:
    - Die roll less than CR: The unit is flipped back to its Fresh side.
    - Die roll equal to CR: The unit is flipped back to its Fresh side but is given a "Shaken" marker.
    - Die roll greater than CR: The unit remains on its Battleworn side.
  - **Revive:** An infantry unit (only) in the Crushed Box may attempt to return to the map. Artillery and Cavalry units may not Revive. Roll a die against the unit's Battleworn-side CR (as with Rally, this unit has Unit Support):
    - Die roll less than CR: The unit is placed into the Broken Box.
    - Die roll equal to CR: The unit remains in the Crushed Box.
    - Die roll greater than CR: The unit is removed from the game permanently – place the unit counter back into the game box and it cannot be Revived for the remainder of the game.
6. If a Division does not enter Bivouac during either the Evening or Deep Night turns, give the Division Activation Card a "Formation Fatigued" marker at the end of the Deep Night turn. This penalizes the Division Command Table die roll by "-1" for the entire next day. It is only removed if the Division does enter Bivouac during the next set of Overnight Turns. Exception: This does not apply for any Division that only arrives as a Reinforcement during the Deep Night turn (it is assumed they got their rest before entering the map).
O) Skirmish Order
Some Union units (only) begin certain scenarios in Skirmish Order. These are marked with an "S" in the scenario setup and represent units that were deployed in loose order to harass and slow down the advancing enemy. These units have some special abilities and restrictions.
-
Fire Combat Target: Skirmish Order units that are targeted by enemy Fire Combat cause a "<-1" column shift on the CRT.
-
Assault Combat: Units in Skirmish Order may not attack in Assault Combat. If they defend in Assault Combat, they do so normally.
-
Engagement: Enemy units moving adjacent to the Skirmish Order unit are not considered to be Engaging the enemy. Therefore, any restrictions to Engagement or penalties for Disengagement are ignored.
-
Defensive Fire and Skirmish Screen Withdrawal: The Skirmish Order unit may issue Defensive Fire normally when an enemy unit moves adjacent or it may immediately withdraw and move up to two hexes away from the moving enemy unit but without a Disengagement penalty (note that this is not Skedaddling and thus will not cause Panic Tests). If this option is used, the "Skirmish Order" marker is immediately removed from the unit and the unit returns to normal. The moving enemy unit may then finish its movement with any remaining Movement Allowance unless it was forced to Skedaddle or was Broken by the skirmisher's Defensive Fire.
-
If a Skirmish Order unit is attacked in Assault Combat, it must lose its "Skirmish Order" marker immediately and will then defend normally.
-
The Union player may voluntarily remove the marker from the unit when it is activated at no cost.
P) Hex Groups
Players may, at any time that a hex becomes too cumbersome due to the number of counters in the hex, replace all the units in that hex with a Group Marker. Simply take all the units and markers in that hex from the map and put them in any box of the Hex Group Display. Then place the associated lettered marker on the map hex to represent those units. Players may switch back and forth, placing Hex Group markers and placing back actual units as is convenient for them.
Q) Victory Determination
Each scenario details exactly the victory conditions needed to win or lose. Each has its own unique conditions that revolve around a combination of casualties inflicted, hexes controlled or sometime other unique circumstances. Player will determine victory after the last turn of the scenario per those specific instructions. Note that all victory conditions are cumulative unless otherwise stated. So for example, in the case of Victory Points awarded for enemy units destroyed, a player that also eliminates an entire brigade of the enemy's will receive Victory Points for each unit in that brigade that is Broken or Destroyed plus the player also gets the indicated bonus Victory Points for destroying an entire enemy brigade on top of that. Note that an entire Division is Shattered if at least 75% of its component units – regardless of SP size or type – are Broken or Destroyed. Again, this VP reward is cumulative with the other two destroyed units VP rewards. For example, if a Division has 10 units in it and 7 are Broken/Destroyed, these VP are not earned. However, if 8 units are Broken/Destroyed then the player would be awarded these points.
This cumulative, geometric-growth VP award system is designed to force players to act in a more realistic manner with the lives and well-being of their troops. Players cannot wantonly throw away their cardboard warriors because there is no real cost for doing so – these procedures force the players to act more cautiously and realistically.
Comprehensive Example of Play
This example begins with the 9:00 am turn for the scenario An Unexpected Encounter (scenario #4). Die roll results will be listed in order of black-white-red. For example, if a player rolls 4-3-3 on the CRT, then that would be a 4 on the black die, 3 on the white die and 3 on the red die. The example below is not meant to show preferred play techniques but rather is demonstrating game flow and mechanics.
Command Decision Phase
Scarlett is playing the Union side and she first places the Wadsworth Division Activation Card into the DP#1 slot of Reynolds' I Corps display. She then decides not to discard any Event Cards for Extra Preliminary Bombardment (since she only has one Artillery Brigade in the game – Tidball). She then picks the Fast Courier and Good Ground cards as her Key Event Cards. She randomly draws six more Event Cards from her deck and adds the two Key Event Cards, placing these eight Union Event Cards into the draw pile. Rhett is playing the Confederates and he places the Heth Division Activation Card into the DP#1 slot of Hill's III Corps display. He also only has one Artillery Brigade in the game (Pegram). Therefore, he simply picks his two Key Event Cards - Redeployment and For Dixie! – and adds six more random Event Cards and places those eight cards into the common card pile. The Card Draw Pile now contains sixteen Event Cards (eight from each side), the Fog of War Card, Reynolds Corps Activation Card (Union I Corps), Buford Division Activation Card (Union I Cavalry Division), Hill Corps Activation Card (Confederate III Corps) and Reynolds CIC (Union CIC). These twenty-one cards are shuffled together by Rhett and placed within reach of himself and Scarlett.
Preliminary Bombardment Phase
The Union gets first shot during this phase. Scarlett only has Tidball's Artillery Brigade to activate so she has Calef's 4R unit in hex 2227 fire at the Rebel stack in 1831 on the "4" Combat Results Table (CRT) column. She rolls 4-5-2 and cross indexing this on the CRT gets a result of "E". Moving to the Fire Combat Cohesion Test (FCCT) and checking the "E" column, she adds "+2" (the red die) to the Cohesion Rating (CR) of all the Rebel units in the hex. Results are therefore a "4" for the infantry and a "5" for the artillery units, so each unit gets a "SH/SK1" result. This means that Rhett can choose either a Shaken (SH) or Skedaddle of one hex (SK1) for each unit. He chooses to take the SH result on all the units in the hex and puts an "All Units Shaken" marker in the hex.
The Confederates can now fire and Rhett checks his available Artillery Brigade (Pegram). The Zimm unit in 2032 fires at the Union stack in 2227. The roll is 2-4-2, which is no effect (note that the dismounted cavalry in the hex applies a one column shift left to the fire even though they are not the only unit in the hex). The two Shaken batteries of Marye and Brander also fire at hex 2227 on the "6-7" CRT column (it would be "8-9" but they are both Shaken and thus reduced by 1 SP each). The fire is resolved on the "5" column since again the targeted units contain dismounted cavalry. The roll is 6-6-4 and the result is "T". Moving to the FCCT, the net result is "8" (red die roll "4" + CR of "4") for both units and therefore an "SH/SK1" effect. Scarlett can choose either result and elects the SH result for the artillery so they can remain at McPherson's farm and keep dueling the Reb guns, so she places a "Shaken" marker on the artillery. With the dismounted cavalry, she decides to use the SK1 result and retreat the 4-4 to hex 2226 since cavalry does not have a Battleworn side and she wants to shelter them for now. Because Rhett rolled a 6-6 doubles on his black/white dice, he also consults the Combat Event Table (CET). He cross references the "Firing Unit Roll" column with the "66" row and sees that his guns are reloading at the double quick and can fire again at any hex! He decides that they will fire again at the same hex (which now contains only Calef's guns) and he rolls 6-5-1. Checking the "6-7" column on the CRT reveals a "S" result and the FCCT result is "DP (SK3)" (the red die of "1" plus the artillery unit's CR of "3", which was modified by –1 CR due to being Shaken, yields the "4" row result). The "Shaken" marker is removed and the unit is flipped to its Battleworn side. Scarlett chooses to not apply the SK3 result as well and has the battery hold the position. Rhett continues with the last unit from Pegram's Artillery Brigade. The Ellet/McGraw unit fires at Devin's stack in hex 1826, again applying a one column left shift due to the dismounted troopers. On the "6-7" column the roll is 4-1-2 which is an "R" result and the FCCT yields "SH/SK". Scarlett chooses to retreat both units of troopers to hex 1825 to stay in good order.
Card Draw Phase
Scarlett will be drawing the cards because it is an odd-numbered game turn (Game Turn #1). The drawn cards are listed below in the order drawn (C = Confederate card; U = Union card) with the subsequent action taken described in detail.
Redeployment (C): Rhett chooses the first option on the card as most of the units of Heth's Division are chained together in adjacent hexes (note that neither Brockenbrough nor the artillery units are eligible for this event). He moves the brigades of Davis and Archer forward. Archer is moved to hexes 2128 and 2229. Davis advances to 1828 with the Shaken 6-2 unit (leaving the "All Units Shaken" marker with the artillery units and placing a "Shaken" marker on the moving unit) and stacks the other two units (the 6-2 and the 5-3) in 1927.
Rally 'Round the Flag! (C): Rhett plays this event on Davis' 6-2 in 1828 and removes "Shaken" marker.
Fog of War: Scarlett rolls the black and white dice and gets a "4-6", which gives the Confederate player some strategic effects choices. Unfortunately for Scarlett, no Reinforcements for either side are arriving this game turn and there is only one Union Division Activation Card in play, so this card has no effect this turn.
Good Ground (U): Scarlett plays this on hex 2227 (McPherson Farm) and places the Union "Good Ground" marker in that hex.
Rebel Yell! (C): The card is given to Rhett who decides to play it on Archer's 6-4 in 2229 and moves it to hex 2228 to assault McPherson's Farm. The Union artillery unit then immediately issue Defensive Fire and the dice roll is 1-4-3, which yields no effect. The players now resolve an Assault Combat. Archer will be on the "*****" column (the starting column is "6-7" and then its "2->" for Rebel Yell, "2->" for having a CR two higher than the artillery, "3->" for 3:1 odds and "3 ->" for attacking lone artillery). Calef will end up on the "5" column ("2->" for Good Ground and "1->" for Archer attacking up a slope). Scarlett decides to exercise the horse artillery's Withdrawal Before Combat option and retreats the battery two hexes to hex 2325. However, this move also immediately removes the "Good Ground" marker. Archer then has an Attacker Breakthrough (ABT) and moves into the vacated farm hex. Note that the Union unit is not allowed Defensive Fire when the Rebel unit takes its ABT move. Rhett then decides to assault the 2-4 of Gamble in hex 2126 as part of the ABT. Knowing the odds are long from the previous assault, Scarlett retreats the 2-4 before the combat to hex 2124 (locally to the rear which is east for the Union and must increase the distance from the assaulting unit by the most hexes). Archer cannot do another ABT (only one per Assault Combat unless Mounted Cavalry) and stays at McPherson Farm.
Command Confusion (U): Scarlett doesn't show this card to Rhett and holds it to be played on one of Heth's brigades later in the turn.
Vague Orders (U): Scarlett secretly holds this card as well to be played on Hill later in the turn.
Fast Courier (U): Scarlett plays this on Wadsworth and activates his Division (she wants to bring up Cutler's units faster). A "1" is rolled on the Wadsworth Division Activation Card and a "-1" is subtracted, which still yields a "1" since no activation roll can be lower than "1". This allows the activation of one of Wadsworth's Brigades. Scarlett chooses Cutler, assigns a Maneuver Order for the Order Step, skips the Fire Combat Step (as there are no eligible targets) and then for the Movement Step moves the units towards the guns using Lanes and Major Roads (and the Major Road March Order rate). Cutler's 9-3 ends at hex 2324 and the 6-3 is at 2325.
Seeing the Elephant (C): Since the Union has no units with a printed CR of "1" or "2", Rhett uses the card as a Default Event to move Archer's other 6-4 from hex 2128 to 2127, opting not to engage the enemy just yet.
Command Confusion (C): Rhett again uses this card as a Default Event and changing his mind from last card, decides this time to move Archer's 6-4 from 2127 to 2126 to engage the Union units. There it takes Defensive Fire from the 2-4 unit in 2026. Scarlett's dice roll is 5-6-3, which yields an "E" result. This is an "NE" on the FCCT ("4" is Archer's CR + "3" on the red die = "7"). Note that the Union 4-4 in hex 2226 cannot issue Defensive Fire because it is engaged with the Rebel 6-4 in 2227.
Reynolds CIC (U): Scarlett uses this card to activate Buford's Division. A "1" is rolled on the Buford Division Activation Card, which enables him to activate one Brigade of troopers (either Gamble or Devin) and one hex of Tidball's horse artillery. Scarlett chooses to activate Gamble and during the Order Step his Brigade is given a Defend order. During the Fire Combat Step, the 4-4 unit in hex 2226 fires at Archer's unit in hex 2227. The firing unit is on the "5" column ("4" SP and then "1->" for the Defend Order) and Scarlett rolls 5-1-2, which is an "R" test. Checking the FCCT, Archer has a choice of SH or SK1 and Rhett decides to take the Shaken result in order to hold the farm. Gamble's 2-4 in 2026 fires at Archer's unit in 2126 and rolls 5-1-4 on the "3" column (again, "1->" for the Defend Order). The result is "E" which becomes NE. During the Movement Step, Scarlett is reminded that units under a Defend Order may only make a Minimum Move. She moves the 2-4 from 2124 to hex 2225 to support Calef's two guns. The 4-4 moves to 2125 to clear a LOS to McPherson Farm and put pressure on Archer's flank unit. Note again that this move does not trigger Defensive Fire since the 6-4 is engaged and that Minimum Movement is not affected by the Disengagement move penalty. This ends Gamble's activation. Tidball now activates one hex of units and Scarlett opts to have Calef 2R unit fire at McPherson's Farm and she rolls a 5-5-5. The result is "E" which becomes "NE" on the FCCT. But checking the CET due to the doubles, a 5-5 is a sturdy fence and if a SK result had come up, Archer's unit would ignore it.
Buford Division Activation (U): Scarlett rolls on the Buford card again and gets another "1". This time the one hex of Tidball is activated first and Calef's two guns fire at McPherson's Farm again and roll 1-1-1, which is "NE". But the doubles roll means checking the CET. This indicates that the target unit must SK1 if enemy units are nearby. So obviously the Rebs are worried about Gamble's troopers moving onto Archer's open flank and the unit conducts an SK1 to hex 2228. Gamble's Brigade is now selected again for activation and is given a Defend Order. Gamble's 2-4 and 4-4 combine fire since they are adjacent to each other and from the same Brigade. Scarlett rolls 4-6-6 on the "8-9" column ("1->" for the Defend Order). This yields a "T" result and a "SH/SK1" result on the FCCT (remember that Archer's unit only has a CR of "3" because it does not have Unit Support). Rhett opts to take the SK1 and retreats the unit to 2127 to stay in good order and keep the brigade together. During the Movement Step, Scarlett moves the 4-4 that just fired in to 2126, where it suffers Defensive Fire from the just retreated Rebel unit. The roll is 1-4-1, which is an "NE". She then moves the 2-4 from 2225 to 2226.
Rally 'Round the Flag! (U): Scarlett plays this event on Tidball's unit in hex 2325 in an effort to get it back to its Fresh (full strength) side. She needs to roll a "1" or "2" for it to succeed, but she rolls a "4" so this event has no effect.
For Dixie (C): Rhett chooses to play this right away on Davis' 6-2 in hex 1927 as he preps for an assault in this area. He places the "For Dixie!" marker on the unit.
Reynolds I Corps Activation (U): Scarlett rolls a die on the card and gets a "3" – she can activate the divisions located in slots DP#1 and DP#2 along with Wainwright's Corps Artillery Brigade. A great card pull if more of I Corps' units were on the map, but for now she can only activate Wadsworth's Division. She then rolls on Wadsworth's Division Activation Card (located in the DP#1 slot) and rolls another "2" – she can only activate one Brigade, which is fine as Cutler is the only brigade from this division on the map. During the Orders Step, she gives Cutler an Attack Order as she plans on engaging Archer's brigade. There is no Fire Combat Step so the Movement Step is next. The 6-3 is moved to hex 2126 to provide support for the advance of the 9-3. Because Archer's unit in 2127 is already pinned by Gamble's 4-4 in hex 2126, no Defensive Fire is issued. The 9-3 then advances to McPherson's Farm and receives Defensive Fire from Archer's other 6-4 in hex 2228. The roll is 5-4-1 on the "5" column (remember that the Rebel unit is Shaken) and an "R" result is achieved. On the FCCT, this will be a "4" row result (again, the unit is Shaken and thus has a CR of "3" but it does have Unit Support). This nets an "SH (SK1)" result. Cutler's unit is Shaken and Scarlett may choose to also retreat it one hex, but she opts to hold the hex instead. However, due to the unit now being Shaken, during the Assault Combat Step she decides not to assault the Rebel position.
Hill Corps Activation Card (C): Scarlett hands the card to Rhett and as she does so, she announces that she is playing the Vague Orders Event Card that she has been holding (unbeknownst to Rhett). This card will decrease the activation rolls for the Hill Corps and any Division Activation die rolls by one. However, Rhett rolls a "1" anyway, which is a "red result" and will allow only the activation of one brigade and one hex of Pegram artillery. Since this is the lowest category on Hill's card, the Vague Orders card has no real effect. During the Orders Step, Rhett orders Davis' Brigade forward with Attack orders. But Scarlett has yet another trick up her sleeve as she plays the Command Confusion card she's been holding. She rolls a "2" and Davis has to be given a Defend Order! During the Fire Combat Step, the two units in hex 1927 combine their fire at Long Range against the dismounted cavalry in 2026 on the "6-7" column but Rhett rolls 2-5-2 for no effect. Units can still engage under Defend Orders so during the Movement Step the 6-2 in 1828 moves to 1827 and the other 6-2 is moved to 1926. There the Confederate unit suffers Defensive Fire from 2-4 and Scarlett rolls 4-3-6, which yields NE (FF) on the FCCT (the Reb unit is a "2" CR + 1 CR for the "For Dixie!" marker + 6 on the red die). Because of the Firefight result, the 6-2 can return fire. Rhett rolls a 1-6-6 which produces another NE (FF) result! The two units are locked into a vicious close-range firefight. The troopers return fire on the "2" column with a 5-6-4 which is an "E" but a NE on the FCCT and that ends the exchange. Davis' 5-3 then moves to 2027 (and again, no Defensive Fire as the three adjacent Union units are engaged). One hex of Pegram artillery can activate and Rhett moves the 8S unit from 1730 to 2230 to pour fire onto McPherson's Farm next turn.
Rebel March Fatigue (U): Scarlett uses this card for its Default Event since Hill has already activated for the Rebs and they've already used their Redeployment card. She has Cutler's 9-3 fire at Archer's 6-4 in hex 2228 on the "8-9" column and rolls a 4-6-3. This is the "T" column and the result is an "SH(SK1)". Archer must take the Shaken result and since the unit is already Shaken, the marker is removed and the unit is flipped over to its Battleworn side. Rhett decides to also do the optional SK1 and retreats the badly damaged unit to hex 2328 to get it out of the line of fire.
The Colonel is Down! (C): Rhett plays this card on Cutler's 9-3 unit. He rolls a "3" and because the unit is Shaken (making its CR a "2") the Zouaves' colonel is KIA! The 9-3 is already Shaken so this result will flip the unit to its Battleworn side and the Shaken marker is removed.
Faulty Fuses (U): Scarlett is going to hold this card just in case Rhett plays a Default Event on that 8S artillery unit he just moved into firing position.
Redeployment (U): Scarlett uses this card as a Default Event to move Gamble's 2-4 from hex 2226 to 2227 and help support the defense of McPherson's Farm.
Good Ground (C): This is the last card out in the deck. Rhett decides to fire those smoothbore cannons at McPherson Farm and soften up the position for next turn. But Scarlett has one last trick and plays her hidden Faulty Fuses on Rhett! This will shift the Rebel fire an extra two columns to the left. This puts the artillery fire on the "4" column (two shifts for the Faulty Fuses and another because the dismounted cavalry is now in the hex, providing a screen for the infantry). The dice roll is 6-2-1 which yields an "R" result. Cutler is on the "3" row and thus gets a "SH(SK2)". The units gets a "Shaken" marker and may also retreat two hexes, which Scarlett does as she is worried about losing a unit this early in the fight. Cutler retreats to hex 2325. Gamble's unit is on the "5" row, which is a "SH(SK1)" result. Scarlett has a really tough call here as the troopers will now be Shaken as well but she needs someone to hold the farm. With the troopers withdrawal ability, she should be able to save them if charged but their situation is precarious. She reluctantly leaves them at McPherson's Farm and prays that the Iron Brigade can come to the rescue early next turn! But Rhett "doesn't give a damn" as the fighting has just begun.
End Phase
No player has any cards left to play so the turn ends.
Designer's Notes
Thank you so much for purchasing and playing A Most Fearful Sacrifice! It has been quite a long, grueling process to get this project tested and finished … but it was indeed a labor of love. I have to first thank the individuals you see listed as the Game Developers and Testers. This group of gentlemen is the most dedicated, talented, and valuable team of gamers with which I have ever worked. They have been tireless in their efforts to test every aspect of this design and their contributions and observations have made this a much better game than I could have created on my own. So my utmost thanks to all of them! I also want to thank Mark Walker and Flying Pig Games. They are a terrific company for which to design and Mark is a wonderful guy who has also become a good friend over the years.
I know many of you are saying … "Why another Gettysburg game?". Well, honestly … why not? This is the iconic American Civil War battle and when taken in its entirety, it is a fascinating study in command, strategy, and tactics. It also tells some of the most heroic - and most tragic - stories to emerge from the annals of military history. The conduct of the battle and the myriad possibilities of how it could have evolved are fascinating topics to explore in a wargame. Overall, the consequences of the Battle of Gettysburg and its reverberating effect on the conduct of the remainder of the American Civil War cannot be understated and thus it has drawn warranted attention in the gaming world.
Ultimately, the decision to do the entire battle was an easy one to make. We felt that we had a good core system with The Devil's To Pay, which is essentially an upscaling of the Blind Swords system. But I did not want to do just an expansion to that game (which covers only the first day of the battle) for a number of reasons. Such an expansion's footprint would have to be quite large in order to cover both the second and third days of the battle. In addition, the extra rules required to handle a multi-day battle would essentially have made the expansion larger than the original game. No – we needed one epic design to handle all three days and that's what we set out to do.
The system used for A Most Fearful Sacrifice is basically the same as used in previous games in the Blind Swords family, but because of the grander scope of the battle I needed to re-design the activation system or the game would take way too long to play. Thus was born the idea of converting from chit-pull to card-draw mechanics. Not only is it microseconds faster to draw a card than pull a chit, but more importantly, actual game information can be included on a card and this results in a huge time saver – no more hunting for a rule or event effect on a chart or in the rulebook. Also, by switching to activating units by Corps, this cuts down severely on the number of cards that need to be drawn. Instead, an extra layer of player decision making was incorporated into the concept of the player needing to set up each Corp's "Division Priority". This certainly adds an additional element of command and speeds up gameplay at the same time. Other mechanics were also re-designed and tweaked to maintain just as much "crunchy" detail as before but with less effort. All in all, we feel that Black Swan is the ultimate ACW grand-tactical game system, and we hope you agree.
Finally, we've designed thirteen scenarios of varying scopes so that players can explore every portion of the Battle of Gettysburg in detail. There are small and medium scenarios covering just snippets of the battle's narrative (and these obviously require shorter swaths of playing time) or you can experience all three days in a "grand battle" extravaganza so players can explore all the strategic options for both sides. However you choose to experience this game, we hope that you ultimately enjoy it. Once again, thank you for your kind support and good gaming!
Hermann