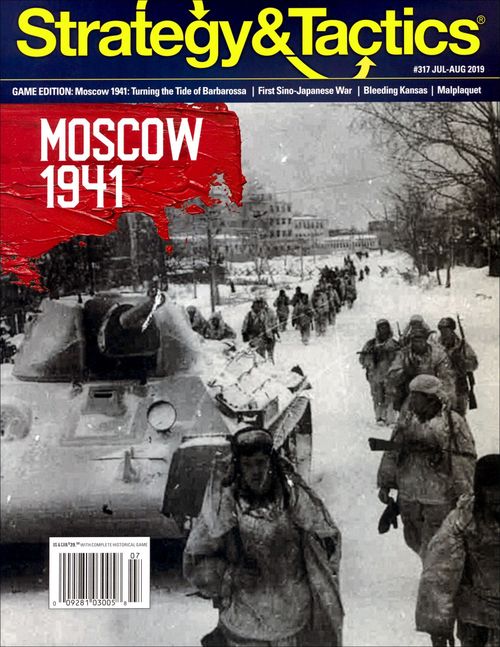
Moscow: The Advance of Army Group Center, Autumn 1941
Moscow: The Advance of Army Group Center, Autumn 1941 Rulebook
Table of Contents
Table of Contents
- 1.0 Introduction
- 3.0 Sequence of Play
- 4.0 Movement
- 5.0 Zones of Control
- 6.0 Disengagement
- 7.0 Overrun
- 8.0 Combat
- 9.0 Supply
- 10.0 Armor
- 11.0 Air Power
- 12.0 Soviet Untried Units
- 13.0 Moscow Defensive Ring
- 14.0 Soviet Reinforcements
- 15.0 Rasputitsa and Snow Weather
- 16.0 How to Win
1.0 Introduction
1.1 Background
Moscow: The Advance of Army Group Center, Autumn 1941 is a simulation of the campaign by the Germans to capture Moscow from the Soviets from October 1941 until January 1942. This game's system is a progeny of the foregoing Leningrad game published by Decision Games (2010) with some slight differences (such as the stacking limit). Players who are familiar with the Leningrad game will be able to play this game with only a perusal of these rules where they are specifically relevant to this game.
1.2 Abbreviations
| Abbr | Meaning | Abbr | Meaning |
|---|---|---|---|
| CRT | Combat Results Table | SOP | Sequence of Play |
| EZOC | Enemy Zone of Control | TRT | Turn Record Track |
| MA | Movement Allowance | VP | Victory Point |
| MP | Movement Point | ZOC | Zone of Control |
1.3 Setup
1.3.1 Soviet
A. The Soviet player sets up first.
B. Set aside the 32nd, 78th, 93rd, and 238th infantry divisions (Siberian divisions), whose counters are a darker brown than the rest of the Soviet units. Setup instructions follow those for other Soviet units.
C. Place all remaining Soviet units in a wide mouth cup or bowl. All units will be randomly drawn and placed with their untried side up (the side with the U). Neither player will know the strength of each unit until they are attacked or conduct an attack (12.1).
D. The Soviet player does not designate the hex a unit will be placed, until after randomly picking a unit from the cup. He cannot look at the combat strength of the unit.
E. Soviet stacking is limited to two units per hex in all the instructions below. Normal stacking applies at the end of the first Soviet Movement Phase.
F. The Soviet player must place two units in each of the front-line hexes on the right (east) side of the front line. No front line hex can be left vacant.
G. Remaining Soviet infantry units can be placed anywhere east of the frontline and west of hex row 20xx (inclusive).
H. Soviet armor, mechanized, and cavalry units must be placed east of hex row 20xx. They cannot be placed in the frontline.
I. Place the Siberian divisions on the Turn Record Track (TRT), one in each turn box for Turns 3-6 (containing Reinf: S). Randomly place one unit in a different turn box, untried side face up, and without knowing the specific unit that is placed in each box. These units are revealed when they attack or are attacked (12.1) after they have entered the map.
Play Note: The Soviet player will not know the actual combat strength of each Soviet unit placed on the map, but generally the Soviet tank and halftrack units are stronger than the Soviet infantry units (although this is not always strictly true).
Designer's Note: Contrary to the prevailing myth that dozens of Soviet Siberian divisions were rushed to the defense of the Moscow front during Operation Typhoon, only four divisions (32nd, 78th, 93rd, and 238th) transferred to the Moscow region (and only two of these divisions were primarily Siberian). Most of the other so-called Siberian divisions were, in fact, transferred to other sectors, such as the Leningrad sector.
1.3.2 German
A. The German side sets up second.
B. All German land units begin the game on the map. There are no German reinforcements or replacements.
C. German units must be set up on the left (west) side of the solid yellow front-line border that is printed on the map.
D. The German side may place its units in any hexes on the German side of the border, as desired. Units must comply with the stacking restrictions (4.6).
E. The three German air units are set off to the side of the map to be used during play.
F. The 2nd SS is printed as a black game piece. This merely serves to identify it as a different unit than the other German 2nd Division; it has no special rules associated with it despite its unique color.
2.0 Equipment
A complete game includes these rules, one 22 × 34 inch map, and one counter sheet of 176 game pieces.
2.1 The Map
The game map represents the terrain on which the campaign was fought. A hexagonal grid is superimposed on the map to regulate movement and positioning of the playing pieces.
2.2 Terrain Effects Chart
The Terrain Effects Chart (TEC) summarizes how the terrain features on the map affect movement of the various playing pieces. The movement cost indicates the amount of movement that is required of each unit when entering the indicated terrain feature.
Errata: Light Woods line, movement for all units is 2 MP, delete ½ MP Armor/Mech.
2.3 The Combat Results Table
The Combat Results Table (CRT) is the primary means for resolving combat. Players will consult the CRT and use the Column Shifts Chart to determine the number of shifts that will affect the final combat odds.
Errata: The result for the 4-1 column, Die Roll 6 line, should read 2/-.
2.4 The Game Pieces
A. The playing pieces represent the actual military units that took part in the historic campaign. There are two types of playing pieces: Combat units (called units) and German air units.
B. There are up to six items of information on the front and back faces of a combat unit, depending on the type, status and nationality of the unit; these include:
| Attribute | Explanation |
|---|---|
| Attack Strength* | Strength used when attacking. |
| Defense Strength* | Strength used when defending. |
| Movement Allowance | The green number printed within a white hex symbol. |
| Unit Type | Armor, mechanized, infantry and cavalry. |
| Unit ID | Historical unit identification. |
| Unit size | XX: Division, X: Brigade. |
| Untried Status | Soviet units only. |
*For German units, the combat strength serves for both attack and defense strength.
2.4.1 Sample German Ground Unit
[Component diagram (front and back) omitted.]
2.4.2 Sample German Air Unit
[Component diagram (front and back) omitted.]
2.4.3 Sample Soviet Ground Unit
[Component diagram (front and back) omitted.]
2.4.4 Unit Types
[Unit type diagrams (Infantry, Cavalry, Armor/Panzer, Mechanized) omitted.]
2.5 Combat Strength
Combat Strength is the combat capability of a German unit when attacking or when defending. German units are only printed with a single combat strength number, and this represents both its attack and defense strength.
2.6 Attack Strength and Defense Strength
A. Attack strength is the combat capability of a Soviet unit when it is attacking. Defense strength is the basic power of a Soviet unit when it is defending.
B. The Column Shifts Chart indicates how the combat odds of attacking and defending units of both nationalities are affected.
2.7 Movement Allowance
A. A unit's movement allowance (MA) is the basic number of hexes that a unit may move during its own Movement Phase of each turn. This ability is expressed in terms of movement points (MPs) that are printed as a green number within a white hexagon on each unit. Differing amounts of MPs are expended to enter different types of terrain on the map.
B. Infantry and cavalry units are treated as infantry for movement purposes.
2.8 Unit Identifications
A. Unit IDs have no effect on play and are included for historical interest only.
B. There are two German brigades with a military designation of 123. This is intentional, the two units represent the same division that was deployed in two different locations historically.
2.9 Scale
Each turn represents one week and one hex represents about 20 miles.
3.0 Sequence of Play
3.1 In General
A. Players take turns moving their units and making attacks. The order in which they conduct these actions is described in the Sequence of Play (SOP) outline below.
B. One completion of the Sequence of Play is called a game turn.
C. Each game turn ("turn") consists of two player turns (German and Soviet).
D. Each player-turn consists of distinct phases that must be played in the order listed:
3.1.1 The German Player-Turn
A. German Movement Phase
- The Germans may move some or all of their units and conduct overruns (7.0).
- The Germans may move as many or as few units or stacks of units as desired.
- Each unit or stack of units must finish their movement/overruns prior to moving another unit/stack.
B. German Combat Phase
- The Germans may attack adjacent Soviet units.
- The Germans may perform these attacks in any desired order (regardless of the order units were moved), applying the results immediately as each attack is resolved.
C. German Air Interdiction Phase
- The Germans may place any previously uncommitted air units anywhere on the map in a hex intended for interdiction.
- If all German air units have been used during previous phases of this same turn, this phase is omitted.
3.1.2 The Soviet Player-Turn
A. Soviet Movement Phase
- The Soviets may move some or all of their units and conduct overruns.
- The Soviets may move as many or as few units or stacks of units as desired.
- Each unit or stack of units must finish their movement/overruns prior to moving another unit/stack.
B. Soviet Combat Phase
- The Soviets may attack adjacent German units.
- The Soviets may perform these attacks in any desired order (regardless of the order the units moved), applying the results immediately as each attack is resolved.
C. Game Turn Indication Phase
- Interdicting air units are removed from the map, and the turn is complete.
- Advance the Game Turn marker to the next box on the TRT.
3.1.3 Other Turn Info
A. These six steps are repeated for each of the 13 turns or the Germans capture Moscow (16.0.A).
B. At the end of the thirteenth turn, the game ends, and the victor is determined.
3.2 Turn 1 Special Rules
A. The following rules are in effect during Turn 1 only.
B. Soviet stacking is limited to two units per hex. Normal stacking applies at the end of the first Soviet Movement Phase.
C. Instead of the normal 2-MP cost for overrun, German units expend only one additional MP to conduct an overrun (7.0). This MP cost is in addition to the cost of the terrain in the defending unit's hex.
D. German units do not pay disengagement MP costs.
E. German attacks and overruns receive a four-column shift to the right. The two left column shifts for overruns still apply.
4.0 Movement
A. Each unit has an MA that represents the basic number of hexes that unit may move in a single Movement Phase.
B. Each side moves only its own units during the Movement Phase of its player turn.
C. Combat may not occur during this phase, although overrun (a form of movement and combat) may occur during the Movement Phase.
D. Units move one at a time, or in stacks of up to four units, hex-by-hex in any direction or combination of directions that the moving player desires.
4.1 Movement Limit
A. A unit may never exceed its MA. Units are never forced to move during their Movement Phase.
B. Units may never lend or accumulate unused MPs.
4.2 Movement Costs
A. The number of MPs a unit must spend to enter a hex depends on the type of terrain in the hex.
B. The cost to enter a clear terrain hex is 1 MP.
C. The cost to enter other hexes, however, may be higher or lower. These costs are specified on the TEC.
D. When a unit enters a hex through a road hexside, it pays only the cost for moving one hex along the road regardless of the type of terrain entered. Conversely, a road has absolutely no effect on movement if it is entered through a non-road hexside.
4.3 Minimum Move
Regardless of terrain, a unit may move into a hex adjacent to the hex in which it begins its Movement Phase by expending all its MPs. This includes units conducting an overrun in the first hex they move into.
Exceptions: Disengagement (6.4) and Blocked Movement (4.4).
4.4 Blocked Movement
A unit may never enter or pass through a hex containing an enemy unit.
4.5 Stack Movement
A. More than one unit may move together at the same time. As long as they begin the Movement Phase in the same hex, up to four friendly units may move together as a stack during the Movement Phase.
Exception: Disengagement (6.0).
B. A stack moves at the rate of the slowest unit in the stack.
C. A unit of a stack may split off from a stack at any time during the Movement Phase.
D. The unit that split off from the stack may continue its movement (temporarily halt the remainder of the stack) until it has expended all its MPs (or the player wishes to end its movement).
E. The remainder of the stack then continues its movement normally.
F. As many units from the stack may split off as desired.
Example: The German 12th and 251st Divisions start their Movement Phase stacked together in hex 1510. They move as a stack to hex 1611, expending 2 MPs. At that point the German player stops moving them as a stack, moving the 12th Division to hex 1710 and then 1810, expending an additional 4 MPs. The 12th has now expended 6 MPs (2 for the hex the stack entered and 4 when moving by itself. Next, the German player then moves the 251st Division to hex 1711 and then on to hex 1812. The 251st ends its movement, also having expended all of its MA.
4.6 Stacking Limit
A. A maximum of four units, regardless of their type, may occupy the same hex.
B. The stacking limit applies only at the end of the Movement and Combat Phases.
C. If the stacking limit is violated at those times, the enemy player selects the unit(s) to be destroyed (so that only four units remain in the hex).
4.7 Zone of Control
A. Generally, a unit must stop upon entering a hex that is within the zone of control (ZOC) (5.0) of an enemy unit.
B. When a unit enters a hex directly adjacent to an enemy unit, the moving unit must immediately stop and move no further than that phase (unless the unit subsequently disengages).
C. The presence of another friendly unit in a hex does not negate an enemy zone of control (EZOC) for purposes of movement.
D. A unit may leave an EZOC only through disengagement (6.0), or because of combat (8.0), or an overrun (7.0).
4.8 Movement Restrictions
A. A unit may not leave the map, and if forced to retreat off map, it is eliminated.
B. All rivers are assumed to be bridged where they are crossed by a road symbol, but this is only relevant for purposes of calculating MP costs.
C. Rivers do not prevent the movement of any unit.
D. Land units can only cross a lake hexside if there is a road symbol across that lake hexside. Units crossing a lake hexside must be able to use the road movement rate.
5.0 Zones of Control
A. The six hexes adjacent to a combat unit are called the zone of control (ZOC) of that unit. All combat units exert a ZOC.
Example: A unit projects a ZOC into all six adjacent hexes.
B. Friendly ZOCs inhibit movement of enemy units and may affect an enemy's ability to retreat its units and trace supply.
C. A unit exerts a ZOC into all types of terrain, except across all-sea or all-lake hexsides.
D. If a friendly unit is in an EZOC, all enemy units exerting their ZOCs into the hex also are within the friendly unit's ZOC. There is no added effect when more than one of a player's units exert a ZOC into a hex.
6.0 Disengagement
A. Under certain conditions, a friendly unit may disengage from an EZOC hex during its Movement Phase by paying an extra MP cost (in addition to the terrain cost of the hex it is entering).
B. Units may be disengaged singly or in stacks, but there must be friendly combat unit remaining in the hex at the instant of disengagement.
Example: If the German player wished to disengage from hex 2416, three of the units could move out of the hex at a cost of +3 MPs into hex 2315 and/or 2316. The units could not move directly into hex 2415 or 2417 as that would require the units to move directly from one EZOC to another EZOC, however three of the units could move as a stack into hex 2315 and if the player wished, could then move into hex 2415 at a total cost of 3 MPs. The units could also move out of 2416 individually if desired. In either case, the units would be free to reenter an EZOC once they have entered hex 2315 or 2316.
6.1 Disengagement Cost
German infantry and all types of Soviet units pay an additional +3 MPs to disengage and may only ever disengage from the hex in which they begin their Movement Phase.
6.2 German Panzer Disengagement Cost
A German mechanized or armor unit pays only +2 MPs each time it disengages, and it may disengage at any time during its Movement Phase.
6.3 Detachment Left in Contact
There must be a friendly combat unit remaining in the hex at the instant of disengagement.
Example: A player could, disengage two units from a three-unit stack, move another unit into the original hex, and then disengage the original third unit from the original stack.
6.4 Disengagement Restriction
No unit in the game may disengage by directly entering another EZOC.
Exception: Units conducting an overrun can overrun an enemy occupied hex in a ZOC of units friendly to the overrun units and then, if the overrun is successful, advance after combat into the hex, however the overrunning force cannot move any further during that Movement Phase.
Example: The 18th and 20th Panzer Divisions could conduct an overrun into hex 2515. If the overrun is successful, one of the two divisions could move into hex 2515 but could not move further during that Movement Phase. However during the Combat Phase, either or both divisions could then attack either hex 2514 and/or 2516, and if they clear the hexes, then advance into those hexes.
7.0 Overrun
A. Overrun is a form of combat which occurs during the Movement Phase. Overrun cannot be conducted during the Combat Phase.
B. A unit or stack of units which conducts an overrun may continue to move and overrun, depending on the result of the overrun and whether the unit(s) have enough MP remaining after the overrun.
C. At any point during the Movement Phase, a unit (or stack of units) may overrun an enemy unit (or stack of enemy units) in an adjacent hex.
D. The overrunning units expend +1 MP (7.3) and possible disengagement MP cost; then conduct an attack against the defending units (8.0).
E. If the overrun is successful, at least one unit must advance into the defender's hex.
7.1 Overrun Penalty
The initial combat-ratio is shifted two columns to the left (2L) when resolving an overrun.
7.2 Disengagement and Overrun
A unit may disengage and overrun in the same Movement Phase.
7.3 Overrun Movement Cost
An overrun costs 2 MPs in addition to the cost of the terrain in the defending unit's hex.
Exception: During Turn 1, an overrun costs all German units only 1 MP (in addition to the cost of the terrain in the defending unit's hex).
7.4 Stack Overrun
A. A stack of up to four friendly units may participate in the same overrun.
B. The units must begin the Movement Phase stacked in the same hex and must be moved together as a stack.
C. The units may be moved independently after the overrun was resolved.
7.5 Overrun Procedure
A. An overrun is conducted against all enemy units in one hex.
B. There is no limit to the number of separate overruns that may be conducted against the same enemy unit(s) or the same hex in a single Movement Phase.
C. Units cannot overrun across lake hexsides, even if a road crosses the hexside.
7.6 Successful Overrun
A. If the overrun enemy unit(s) are eliminated or retreat, the overrun is successful.
B. The friendly unit(s) that executed the overrun must absorb any loss called for by the resolution of the overrun (8.9).
C. At least one overrunning unit must be advanced into the vacated hex.
D. If the defending units retreat two hexes, the attacker has the option to advance into the two hexes vacated by the defending units (at no additional MP cost).
7.7 Unsuccessful Overrun
A. If the enemy unit(s) is neither eliminated or retreated, the overrun is unsuccessful.
B. If the overrun is unsuccessful, the overrunning unit(s) may either absorb any loss or retreat (8.9).
C. If the overrunning unit(s) retreat, their movement is over for that Movement Phase.
D. If they do not retreat, their movement may continue (including additional overrun attempts).
E. A defending unit may never advance after an overrun even if the phasing units retreat.
7.8 Retreated Units During an Overrun
A. Because units and hexes can be subjected to multiple overruns during a Movement Phase, unit(s) that retreat during the current Movement Phase into a hex subject to an overrun add their combat strength to the defense of that hex.
B. This is different than the exception in 8.2.
8.0 Combat
A. During the Combat Phase, the phasing side may initiate attacks between one or more of its units and any adjacent enemy unit(s).
B. Attacks are declared one at a time.
C. It is not required to declare all desired attacks at once, however, once an attack is declared, that attack must be resolved fully before declaring an additional attack.
D. Attacks are conducted using the Combat Results Table (CRT) and the following procedures.
E. Combat is voluntary, units are not required to attack adjacent enemy units.
F. Units may attack across a lake hexside if the hexside is crossed by a road. Treat the terrain in the defending hex as a marsh hex.
8.1 Attack Requirement
A. A unit must be in the ZOC of an enemy unit to attack it.
B. No unit may attack more than once, nor may a unit defend more than once during a single Combat Phase.
C. All friendly units in the ZOC of a single enemy occupied hex may participate in an attack on that hex.
8.2 Defense
Defending units in a hex must be attacked as a group. Units in a hex under attack must defend with a combined strength.
Exception: Units that retreat into a hex and then undergo an attack in the same Combat Phase do not add their strengths to those of other units in the hex (although they do if undergoing an overrun during the Movement Phase). If the defending unit(s) suffer an adverse combat result (loss or retreat), the previously-retreated units in that same hex are automatically eliminated.
8.3 Coordinated Attack
A. More than one hex may be attacked as a single defending force. Use the terrain in the defender's hexes that is most beneficial to the defender.
B. All attacking units must be adjacent to all defending hexes to conduct a single coordinated attack.
Example: The 18th, 9th, and 20th Panzer Divisions can combine their combat strength and attack hex 2416 and 2316 as one attack, as all attacking units are adjacent to both defending hexes. The 3rd Panzer Division cannot participate in the attack because it is not adjacent to both hexes.
8.4 Combat Strength Application
A. A unit's full strength must always be used whenever it conducts an attack.
B. A unit may not divide part of its strength to conduct additional attacks.
C. Multiple units in the same hex, may attack separate enemy occupied hexes.
8.5 Combat Resolution
For each attack:
A. The attacker totals the attack strength of all units involved in an attack.
B. The defender totals the defense strength of all units being attacked.
C. The attacker then divides the total attack strength by the total defense strength of the defending unit(s).
D. The resulting comparison is called the initial combat ratio.
Example: The attacker has a total strength of 8 and the defender has a total defending strength of 4. The initial combat ratio is 2-1 (8 ÷ 4 = 2).
E. Locate the column heading on the CRT that corresponds to the initial combat ratio.
F. Consult the Column Shifts Chart for any shifts left or right from that initial ratio. These shifts produce the final combat ratio.
G. The attacker then rolls one six-sided die (1d6) and cross-indexes the result with the final combat ratio column.
H. Apply the result immediately, before going on to any other attacks.
I. When conducting an overrun the attacker may complete the movement of the overrunning units.
J. When all attacks have been conducted, the phasing side player announces the end of the Combat Phase.
8.6 Attack Declaration
A. The attacker must announce which units are involved in an attack against specific defending units.
B. The attacker may resolve attacks in any desired order.
C. Untried Soviet units must be specified as participating before their strengths are revealed.
D. Soviet untried units are revealed after an attack is declared. If the Soviet player is attacking, first designate all attacking units and the hex or hexes being attacked. After designating attacking and defending units, then reveal all untried units. The Soviet player may not call off the attack, nor designate different attacking or defending units. If the Soviets are defending, untried units are revealed when the Soviets totals their defending strength (after the Germans have totaled their attacking strength).
8.7 Maximum and Minimum Odds
A. If the initial combat ratio is higher (or lower) than the highest (or lowest) odds column shown on the CRT, use the initial combat ratio as the basis for computing the final combat ratio.
B. If the final combat ratio is higher (or lower) than the highest (or lowest) column shown on the table, it is simply treated as the highest (or lowest) column available.
Example: If the final combat ratio is 11:1, the player would use the 10:1 ratio column.
8.8 Rounding Off Odds
When calculating odds ratios, the combat ratio is always rounded in favor of the defender.
Example: If units with a strength of 11 attack units with a defense strength of 4, the combat ratio is rounded to 2:1.
8.9 Combat Results
A. The abbreviations on the CRT indicate how the attacking and defending units are affected by that attack or that overrun.
B. A unit will be unaffected (a dash), eliminated (E), or given the option to retreat or accept losses because of an attack or an overrun.
C. There are two possible loss results: 1 or 2.
D. A result of 1/- or -/1 means that one affected unit must lose one step, or all affected units must retreat one hex. The player whose unit is affected may elect to retreat (8.10) or take the step loss instead.
E. A result of 2/- or -/2 means that affected unit(s) must lose two steps, all retreat two hexes, or lose one step and all retreat one hex. A player who chooses to retreat units one hex and take a one step loss must take the step loss first. The German player may distribute two step losses to two different units (one step per unit) or eliminate a full-strength unit.
F. Some results affect both players, such as 1/1 or 2/1 and are called split results.
- Each side applies its own losses, with the defender applying its losses first.
- If any attacking units remain in their original hexes after all results have been applied, they may advance after combat if the defending hex is vacant (requiring no move point cost).
- The defender may never advance in a split result.
G. A result of E/- or -/E means that all affected units are eliminated.
H. All German units have two steps, and all Soviet units have one. A German unit may be flipped over to absorb a one-step loss. A Soviet unit would be eliminated whenever it suffers a step loss.
I. Eliminated Soviet infantry units (except the four Siberian divisions) should be placed in some type of cup or bin. They may enter the game again as reinforcements (14.0).
8.10 Retreats
A. Units are retreated (by their owner) one at a time, never in stacks, in any order the owner chooses.
B. Multiple units from the same stack may retreat into different hexes.
8.11 Retreat Path
A. Units may retreat only into safe hexes. If there is no safe hex available, or if a unit retreats off the map, the retreating unit is eliminated.
B. A hex is safe if:
- By entering the hex, a retreating unit increases the distance in hexes between it and the nearest enemy unit that caused the retreat. If the enemy unit has retreated as well, the distance is measured from the enemy unit's original hex.
- There are fewer than four other friendly units in the final hex of the retreat (4.6).
- The retreated hex is not in an EZOC. The presence of a friendly unit in a hex negates the EZOC in that hex for purposes of retreat.
C. Whenever possible, a unit must retreat into a vacant safe hex before a hex that is occupied by a friendly unit.
8.12 Advance After Combat
A. When any hex is vacated because of combat or overrun, as many as four victorious participating units may advance into each hex.
B. A victorious attacking unit is one that has not retreated.
C. A victorious defending unit is one that suffered no loss or retreat during that combat. See 7.7 for defending units and unsuccessful overruns.
D. Advance after combat is an option which must be exercised immediately before resolving further combat or overruns in that phase.
E. A unit is only forced to advance after combat as the result of a successful overrun, otherwise it is optional (7.6).
F. Victorious unit(s) may occupy one or both hexes vacated because of a two-hex retreat.
G. A unit may advance into an EZOC hex (even when advancing directly from an EZOC hex).
H. Retreats and advances do not require the expenditure of MPs.
I. If all enemy units are eliminated in the hex (prior to retreat) advancing units may advance only one hex.
9.0 Supply
A. For a unit to move and attack at its full potential, it must be in supply. A unit is in supply if a line of supply can be traced between that unit and a supply source.
B. Supply for movement is determined the moment a unit begins to move.
C. Supply for combat and overrun is determined at the time the combat is declared.
D. A line of supply is traced from the unit to a supply source hex or a road hex connected to a supply source by an uninterrupted series of road hexes.
E. The supply line may be up to 5 MPs in length from the unit to the supply source or road hex.
F. Trace supply lines using the infantry MP cost. Exception: When tracing along a road or through a city hex, use the Armor/Mech MP cost.
9.1 Movement Effects
A. An unsupplied unit's MA is halved, dropping all fractions.
B. The unit retains either its full or halved movement allowance throughout the phase, regardless of whether it moves out of or into supply during the same phase.
9.2 Combat Effects
If any units involved in an attack or an overrun are unsupplied, the combat ratio is shifted two columns. Shift left (2L) for unsupplied attacking units and right (2R) for unsupplied defending units.
9.3 Line of Supply
A line of supply consists of a continuous, connected line of hexes, none of which may be occupied by or in an EZOC. A line of supply may be traced into and through a hex in an EZOC if that hex is occupied by a friendly unit.
Example: The German 197th Infantry Division is out of supply (it is surrounded by EZOC).
Example: The 197th Division is in supply due to the 252nd Division cancelling out the EZOC in hex 1909.
9.4 Supply Sources
9.4.1 Soviet
Any town and/or city on the Soviet side of the starting front line (marked on the map) is a supply source for all Soviet units (unless that hex was last-occupied by a German unit).
9.4.2 German
Any town and/or city on the German side of the starting front line is a supply source for all German units (unless that hex was last occupied by a Soviet unit).
9.5 Air Units
Air units affect enemy lines of supply (11.0).
10.0 Armor
The combat ratio is affected by the presence of an armor/panzer unit participating in combat or overrun.
10.1 Armor Column Shift
A. When an armor (not mechanized) unit is involved in combat or overrun, the owner receives a favorable column shift.
B. The owner receives only one column shift for armor regardless of the number of armor units in involved.
C. For an attacker to receive the shift, the defender must occupy a clear terrain hex (ignore rivers).
D. Defending armor always receives this shift unless the City Exception (10.2) applies.
10.2 City Exception
The German side does not receive the column shifts for German armor when defending in a city.
11.0 Air Power
A. The German player has three air units that may be used to affect combat, overrun, Soviet movement, and Soviet supply.
B. The German player may place an air unit on a German unit which is attacking or being attacked. The air unit must be placed before revealing any Soviet untried units or rolling the die.
C. When used to interdict, the air unit is placed on a hex during the Air Interdiction Phase.
D. A maximum of two air units can be used to interdict a single hex.
E. All three air units can be used to affect a single combat.
11.1 Column Shift
A. The combat odds are shifted one column in favor of the German side for each air unit involved in a combat.
B. Air units may not attack by themselves and are never affected by results on the CRT.
C. Air units never count against stacking limits.
11.2 When Air is Allocated
Air units are allocated to combat before Soviet untried units are revealed.
11.3 Air Interdiction
A. An interdicting air unit doubles the MP cost of a hex for Soviet units and Soviet supply lines.
B. The cost is quadrupled if two air units interdict the same hex.
C. Soviet units which begin their Movement Phase in an interdicted hex pay double (or quadruple, if two air units are there) the MP cost for the first hex they enter.
11.4 Air Commitment
Each air unit may be used only once per turn. After an air unit is used, it is committed. Place it off to the side of the map until the following turn (when it may be used again).
12.0 Soviet Untried Units
12.1 In General
A. All Soviet units start play with their attack and defense strengths unknown to either side.
B. To indicate this, the units are placed with their untried face (U) showing.
C. The units are then randomly placed on their setup hexes and on the TRT as reinforcements.
12.2 Revealing Strength
The strengths of untried units are revealed only after an attack or overrun has been announced. The combat or overrun may not be canceled or reallocated once the untried units have been revealed.
13.0 Moscow Defensive Ring
A. Any German attack across any Moscow defense ring hexside (printed as a border around Moscow and its nearby hexes) provides a shift in favor of the defending Soviet units.
B. This is only applicable if all the attacking German units are attacking that hex across a Moscow defense ring hexside.
C. If any German units are attacking that same hex but across a hexside without a Moscow defense ring hexside symbol, the shift does not apply.
Example: The Soviets would receive the 1L shift for the Moscow defensive ring as all attackers are attacking across a Moscow defensive ring hexside.
Example: If the Germans attacked with all adjacent units, the Soviets would not receive a 1L shift.
14.0 Soviet Reinforcements
A. In addition to the forces that the players start the game with, the Soviets receive reinforcements during the Movement Phase of each turn.
B. The Soviets receive one infantry reinforcement from among the Soviet infantry units that have been eliminated.
Exception: The four Siberian divisions are set aside if eliminated, they are not placed in the eliminated infantry units bin (8.9).
C. Randomly draw one unit from the eliminated Soviet infantry units bin (8.9) and place the unit with its untried side up. Neither player may see the other side until it participates in combat.
D. If a turn occurs when there are not eliminated Soviet infantry units, then the Soviets do not receive any reinforcements during that turn.
E. Each Soviet reinforcement enters the map in supply.
Historical Note: Because of the severe Soviet weather (and the unpreparedness of the Germans for winter weather), the German player does not receive any reinforcements.
14.1 Entry on the Map
A. When a Soviet reinforcement enters the map, it pays the MP cost for the first hex as it enters the map.
B. A Soviet reinforcement may only enter via the east edge of the map and only along a road hexside that is not occupied by any German units.
C. A Soviet unit may enter the map within an EZOC.
14.2 Blocked Entry Hexes
If a reinforcement unit's only entry hexes are occupied by enemy units or are already stacked with four friendly units, it may enter in the nearest unoccupied non-road hex anywhere on the east side of the map (of the Soviet player's choice).
14.3 Delaying Reinforcements
A. The Soviets may not hold back any reinforcements eligible to enter the map during a turn for entry during a subsequent turn.
B. If a Soviet reinforcement cannot enter the map, it is lost forever.
C. Reinforcements do not accumulate from turn to turn. Only one reinforcement enters the map per turn.
14.4 Moscow Penalty
If Moscow is occupied by a German land unit, no Soviet reinforcements may enter until a turn when Moscow is not occupied by a German land unit.
15.0 Rasputitsa and Snow Weather
A. Starting with Turn 2, the Soviet player rolls one die to determine if rasputitsa (mud) or snow weather is in effect during that turn.
B. Check the TRT to determine the range that is required to cause rasputitsa or snow to be in effect during that turn, although rasputitsa or snow occurs automatically in some turns.
15.1 Rasputitsa
During rasputitsa weather, the following is in effect:
A. The printed MA of all German units is halved (round any fractions up) for the duration of that turn.
B. All attacks suffer an automatic one-column shift penalty (regardless of which side is attacking) for the duration of that turn. This shift is in addition to all other normal column shifts.
15.2 Snow
During snow weather, the following is in effect:
A. The printed MA of all units (both sides) is reduced 1 MP. Exception: The MA of the four Siberian divisions is not reduced during snow weather game turns.
B. All German attacks suffer an automatic two-column shift penalty for the duration of that turn. This shift is in addition to all other normal column shifts.
16.0 How to Win
A. If at the end of any turn, one or more German units occupy Moscow, the German player automatically wins a strategic victory. If this does not occur, victory is determined after Turn 13.
B. Determine victory by calculating in victory points (VPs).
C. There are two levels of victory: tactical and strategic.
D. Total the VPs earned by each player and subtract the Soviet VPs from the German VPs. Compare that number to the schedule in 16.3 to determine the victor and the level of victory.
16.1 Victory Points for Casualties
The Soviets receive VPs for reduced or eliminated German units at the end of the game.
| VPs | Type |
|---|---|
| 1 | per reduced infantry unit |
| 3 | per eliminated infantry unit |
| 4 | per reduced mechanized unit |
| 5 | per reduced armor unit |
| 12 | per eliminated mechanized unit |
| 15 | per eliminated armor unit |
16.2 Adjacency to Moscow
The German player receives 30 VPs per hex adjacent to Moscow occupied by a German land unit. The occupying units must be in supply for the VPs to be earned.
16.3 Victory Determination
Subtract the Soviet VP total from the German VP total to determine the victor.
| Difference | Level |
|---|---|
| ≥ 31 | German Strategic |
| 1 to 30 | German Tactical |
| -20 to 0 | Soviet Tactical |
| ≤ -21 | Soviet Strategic |
16.4 Play Balance
If both players wish to play the German side, each writes down a VP bid to play the German side; the winning bid (higher number) represents additional VPs awarded to the Soviet player when the game ends.