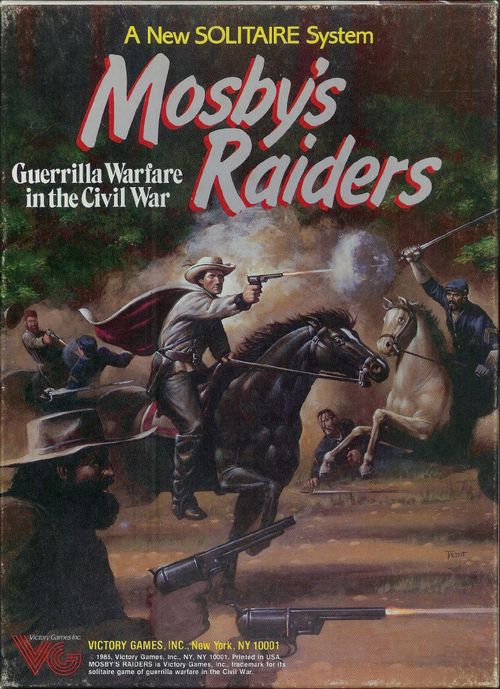
Mosby's Raiders: Guerilla Warfare in the Civil War
Mosby's Raiders: Guerilla Warfare in the Civil War Rulebook
Table of Contents
Table of Contents
Components and Terms of the Game
Your copy of Mosby's Raiders should include the following components:
- Rule Book and Commentary.
- A 22" x 32" map.
- A set of 193 game pieces.
- 120 Action and Event cards.
- A plastic stand.
- A six-sided die.
- A counter tray.
[2.1] Rule Book and Commentary
The rules needed to play Mosby's Raiders are contained in the rules section of this booklet; in addition, section 8.0 contains the optional rules. The commentary section contains historical notes, designer's notes, as well as examples and explanations of the Action and Event cards.
The simplest way to learn to play is to read the examples found in the Commentary section to become familiar with typical actions of the game. Afterward, while reading the rules, the examples in the Commentary section can be followed again.
[2.2] The Map
The game map shows a part of northern Virginia, eastern West Virginia, southern Maryland, and the District of Columbia — the terrain in which Mosby's guerrilla band operated. The map is divided into spaces that allow movement and placement of the pieces. The Terrain Key on the map identifies the map's various features. All tables, classifications, and keys are printed on the map and are explained in the rules below.
[2.3] Game Pieces
There are two types of pieces in Mosby's Raiders: Units, which represent the forces that took part in the fighting, and markers, which represent characteristics and features present on the battlefield and on the map's tables and special boxes.
(The rule book prints charts of the Union and Confederate unit counters and the game markers here; render them as counter charts rather than prose when illustrating this section.)
[2.4] Game Terms
Action: A specific activity carried out by Mosby's guerrilla band or by Union units. Mosby can carry out six Actions: Scout, Move, Combat, Demolish, Kidnap, and Disband. Union units can carry out one type of Action: Move (combat is a result of movement for Union troops).
Scout: An attempt by Mosby's guerrilla band to scout an adjacent space behind Union lines, or one containing a deactivated Union unit, to identify what type of units are present in that space.
Demolish: The destruction by Mosby's guerrilla band of railroad lines, depots, and bridges behind Union lines. The Union wagon train can also be demolished by Mosby.
Disband: The dissolution of Mosby's guerrilla band, either voluntarily or due to the loss of a combat.
Skedaddling (Disbanding before combat): The voluntary disbanding of Mosby's guerrilla band before a Union force attacks. Mosby may be wounded while carrying out this action.
Operations: Actions carried out by Mosby's guerrilla band while no Union units are activated.
Phases: Once one or more Union units have been activated, the Phases begin. Mosby's guerrilla band and the Union units alternately carry out one action per unit per Phase.
Performance Points: A way of determining the effectiveness of Mosby's activities. These points are gained and lost through Mosby's Actions and through Event cards. Ten Performance Points equal one point of Notoriety (if Mosby's Performance Points must be reduced, one point of Notoriety can be exchanged for ten Performance Points).
Space: A city or location on the map. Most spaces are circles with the names of cities and locations printed on them. Large concentrations of Union troops are hexagons. Movement is carried out between adjacent spaces along roads and tracks.
Adjacent: A space is considered adjacent to another if the two are connected by a road or track. Note that railroad lines do not connect spaces.
Behind Union Lines: Spaces with a blue circle or hexagon around them mark the boundaries of the Union lines at the start of the game. Any space within the Union lines may contain Union units. The Union lines at the start of the game lie east of the line running from Rappahannock Station to Great Falls, and north of the line running from Paris (Ashby's Gap) in the west to Lovettsville and along the Potomac River. Event cards can extend the Union lines, and their new position then becomes a permanent feature on the map for the rest of the game.
Mosby's Confederacy: Spaces with grey circles, which formed the core from which Mosby drew his raiders. Mosby begins each turn on one of these spaces that has not been devastated, is not within Union lines, and is not occupied by a Union unit.
Large Union Troop Concentration: Spaces with a blue hexagon. These are large Union groupings that can send an unlimited number of combat units in pursuit of Mosby's guerrilla band. Additional large concentrations can appear as a result of Event cards.
Status of a Space: When Mosby scouts or enters a space, or when a Union unit is activated behind Union lines, a "revealed" marker is placed on the map. The reverse side of the marker is used when Union lines are extended due to an Event card, or when Union lines are restored.
Setting Up the Game
To begin play, carefully separate the pieces and sort them by type. Cut out the Action and Event cards, shuffle them carefully, and set them aside. Take the large Mosby counter and insert it into its plastic stand. Next, examine the Union unit counters; on the back of each counter is either the letter "S" (for start) or a number used to determine when that counter enters play. Place the units marked "S" in a container (a box or a cup will do) and place the rest of the Union counters on the Union Reinforcement Track according to their reinforcement number.
Place the Game Turn, Union Awareness, Performance, and Notoriety markers on the lowest-numbered space of their respective tracks. Place the Initiative marker in its box on the map. Place an intact-bridge marker on the following spaces: Union Mills, Occoquan, Dumfries, Alexandria, Farmwell Station, and Harpers Ferry. Finally, place all remaining counters in the counter tray.
Now you are ready to begin play.
Winning the Game
The player faces a race against the clock to make Mosby as famous as possible. The more active Mosby becomes, the more Union troops will be drawn into the fray in what the player hopes will be a failed attempt to stop him. These Union troops will not be available to fight against Robert E. Lee and the Army of Northern Virginia.
The player receives Performance Points for destroying Union installations, eliminating enemy strength points, kidnapping Union leaders, etc. For every 10 Performance Points received, Mosby's Notoriety rises by 1 point (in fact, each Performance Point is 1/10 of a Notoriety point). Notoriety never falls below 1. If Performance Points must be lost, a point of Notoriety can be exchanged for 10 Performance Points.
EXAMPLE: Mosby has a Notoriety of 6 and 2 Performance Points. He loses a combat and a strength point, meaning a total loss of 7 Performance Points. The Notoriety marker is lowered to 5 in exchange for 10 Performance Points, and the loss of 7 Performance Points is subtracted, leaving a total of 5. If Mosby gains 5 Performance Points on the next turn, the Notoriety marker rises to 6 and the Performance marker is left at 0.
The Performance and Awareness summary on the map indicates the number of Performance Points the player receives for Mosby's guerrilla band's actions. In addition, Event cards can increase or decrease these Performance Points.
[4.1] Victory
The game lasts 8 turns. At the end of the eighth turn, Mosby must have a Notoriety of 9 to win. Performance Points do not count. Note that it is possible for Mosby to reach a Notoriety of 9 or more before turn 8. But play must continue until the end of the eighth turn, since Events can cause Mosby to lose Performance Points.
[4.2] Defeat
There are 4 ways to lose a game:
- Mosby dies: If Mosby is killed, the game ends immediately and the player loses. If Mosby is already wounded and receives a second wound on a casualty check, he is considered dead. The "Mosby Escapes" Action card negates a wound result on a casualty check.
- Lack of Notoriety at the end of a turn: At the end of each turn, Mosby's Notoriety must equal or exceed the number of the turn that has just ended. If his Notoriety is lower than the turn number, the player loses and the game ends. For example, at the end of the fifth turn, Mosby must have a Notoriety of 5 or more.
- Notoriety of 8 or less at the end of the game: If Mosby's Notoriety is 8 or less at the end of the eighth turn, the player loses.
- Total devastation of Mosby's Confederacy: If every space of Mosby's Confederacy has been devastated, lies within Union lines, or is occupied by Union combat units at the end of a given turn, the player loses. If, at the end of the last turn, the player has a Notoriety of 9 and Mosby's Confederacy is completely devastated, the player still wins.
Sequence of Play
Each game of Mosby's Raiders consists of a maximum of 8 turns, though the game may be shorter if the player loses earlier. Each turn consists of a complete play sequence. An abbreviated version of the Sequence of Play appears on the map to assist the player.
The Sequence of Play
A. PREPARATION PHASE
- Place Union units in the pool: If Mosby's Notoriety is 2 or more, the Union may receive reinforcements. Check the reinforcement track and take the Union counters in the boxes with a number equal to or lower than Mosby's current Notoriety. Place these counters in the pool. Then return to the pool the blank counters, pickets, couriers, and supply wagons that were removed from the game the previous turn; these units are placed in the boxes of the Union Unit Holding Box when they are removed from the map. Union combat units that have been eliminated are not reused.
- Determine the Union Awareness level: Look up Mosby's Notoriety level on the Union Awareness Table. The number above it will be the Union Awareness level for the current turn; place the Awareness marker in the corresponding circle of the Union Awareness Table.
- Placing Mosby within Mosby's Confederacy: Place the Mosby counter on any space within Mosby's Confederacy that is not behind Union lines, is not occupied by a Union unit, and has not been devastated.
- Movement of Union units outside Union lines: Move every unit outside Union lines one space each, determined randomly. If a Union unit enters the space containing Mosby, check its activated side. If it is a combat unit, make a casualty check and remove the Mosby counter regardless of the result; the turn ends immediately and Mosby loses 5 Performance Points. If Mosby dies, the player loses the game. If it is a non-combat unit, remove it from the map and receive one Performance Point if it is a courier or a sutler's wagon.
- Recruiting Mosby's guerrilla band: Look up Mosby's current Notoriety on the Recruitment Table and roll the die: the result is the strength of Mosby's guerrilla band for that turn. Place the appropriate strength marker in the Guerrilla Strength box on the map edge. If Mosby receives no strength points, the turn is considered over.
- Draw Action cards: Check the bottom row of the Recruitment Table to determine how many Action cards Mosby receives this turn. The number of cards received depends on whether Mosby is healthy or wounded.
B. MOSBY'S OPERATIONS
The player may next carry out Actions of any type with Mosby's guerrilla band, in any order desired, subject only to the restrictions inherent in each Action (see section 6.0). These Actions are: Scout, Move, Combat, Demolish, Kidnap, and Disband. Continue carrying out actions until one of the following two things occurs:
- Mosby's guerrilla band disbands, in which case the turn is considered over.
- If Mosby's Actions activate one or more Union units, the Phases begin and the Phase sequence described below is followed.
If all Union units become deactivated or are eliminated, play returns to Mosby's Operations. If other Union units are activated again, play returns to the Phases. It is possible to switch between the Operations sequence and the Phases sequence, and back again, several times in the same turn.
C. PHASE SEQUENCE
-
Determine Initiative: Decide which side has the Initiative by a die roll or by an Action card. Initiative is determined only once, and the side that wins it keeps it until the Phases end. Place the Initiative marker (with the Mosby side or the Union side face up, as appropriate) in the Initiative box on the map. a) Play a "Gain the Initiative" Action card, or b) Roll the die and consult the Initiative Table.
You may not roll the die to determine Initiative and then play the "Gain the Initiative" card if you don't like the table's result. One method or the other must be chosen to determine who holds the Initiative.
-
Union Activation Check: Using the Activation procedure (see 7.2), determine whether any further Union units become activated. a) Determine which spaces, both inside and outside Union lines, may be subject to activation. Place activation-check markers on these spaces to help you remember them. Activation checks are only made for spaces that are currently adjacent to already-activated Union combat units (if the units in those spaces activate, no new checks are made for spaces adjacent to them) and for deactivated Union units that share a space with an activated Union combat unit. b) If there are deactivated units in any of the spaces determined above, make an Activation check for each unit.
-
Carry out Actions: Mosby and the Union units take turns carrying out actions. Mosby may carry out any of the six actions available to him, or may pass. Union unit actions follow the procedure detailed in section 7.0; Union units never pass. a) The side with the Initiative carries out one action per unit in the Phase. b) The other side then carries out one action per unit.
Note that during the Phases, Mosby or an activated Union unit may move into the same space and engage in combat as a single Action.
The Phases end as soon as one of the following conditions is met:
- If Mosby's guerrilla band's strength is reduced to 0, loses a combat, or disbands, the turn ends immediately.
- If all activated Union units become deactivated or are eliminated, the Phases end. Play returns to the Mosby's Operations sequence.
D. END OF TURN
When the turn ends, check Mosby's current Notoriety. If it is equal to or greater than the Game Turn number, the game continues. (If turn 8 has just ended and Mosby's Notoriety is 9, the player wins the game.) If Notoriety is lower than the turn number, the player loses the game. If the game continues, carry out the following actions:
- Turn all Union counters back to their deactivated side.
- Discard all Action cards except Permanent ones.
- Remove the Mosby counter and the guerrilla-strength marker from the map.
- If Mosby was wounded during this turn, keep the Mosby-wounded marker in the Mosby Status box for the following turn. If not, remove that marker.
- Advance the Game Turn marker one space on the Game Turn Track.
Return to the Preparation Sequence and continue playing.
[5.1] Action Cards
Action cards give Mosby advantages during the Game Turn — extra movement, combat modifiers, automatic scouting, etc. These cards can be played during the Event card step of the Preparation Sequence, during Mosby's Operations, or during the Phases.
The Commentary section describes the effects of the various Action cards.
During step 6 of the Preparation Sequence, Action cards are received. First check the Recruitment Table under Mosby's current Notoriety to determine the number of cards received. There are two rows, for Mosby healthy and Mosby wounded; draw cards according to Mosby's status for the coming turn. The player may hold a maximum of 6 Action cards in hand.
When the player already holds several Permanent Action cards and must draw new cards in a Preparation Sequence, they may draw the number of cards indicated by the table, but once these new cards have been examined, they must discard the surplus until they are left with the maximum limit of 6 cards in hand.
Permanent Cards: There are five Permanent cards in the deck. When these cards are received, they may be kept in hand indefinitely. These cards are used as soon as situations arise for which they are suited. At the end of the turn, these cards may be kept, with the player discarding the rest. If Mosby is wounded, the player must immediately discard one Permanent card. If the player holds several, the player decides which one to give up.
How to Play Action Cards: Action cards may be played during the turn whenever desired (though it is worth checking the Commentary section for the restrictions on each card). They can also be played in combination. For example, if the player holds the "Pistol Tactics" card (a Permanent card) and the "Surprise Attack" card, both can be played simultaneously to gain a +3 modifier on a combat die roll. The player would then discard the "Surprise Attack" card, but keep "Pistol Tactics." When an Action card is played, the player must discard it after use (unless it is a Permanent card). At the end of the turn, the player discards all Action cards except the Permanent ones.
[5.2] Event Cards
Event cards describe happenings beyond Mosby's control. Some of these cards help Mosby, granting him Performance Points under certain conditions, increasing the strength of his guerrilla band, or affecting the current Union Awareness level. Other cards cause him to lose Performance Points, decrease the strength of his guerrilla band, or involve Union actions against him. The effects of the Event cards are summarized in the Commentary section. However, see 7.8 for details of the Union Wagon Train.
During step 7 of the Preparation Sequence, the player rolls the die and draws the number of Event cards indicated by the roll, without looking at them. They are then examined one at a time and the effects of each card are resolved. Some cards will cause the premature end of the turn; in that case, place the remaining Event cards you have not yet seen back on top of the deck without looking at them.
Telegram from General Stevenson to General Sheridan: "Mosby has now concentrated his guerrillas in our rear and has begun operations such as burning railroad trains, robbing passengers, and without cavalry I am powerless to prevent it. At the same time it poses a threat to all your supply trains." (Memoirs, p. 324)
Actions
A unit carries out activities in steps called Actions. Each Action is a separate entity and must be completed before the unit in question can carry out another Action. A unit must satisfy all the requirements detailed for an Action before carrying it out; if the unit does not satisfy these requirements, it may not carry out the Action.
Mosby's Operations: During Mosby's Operations, Mosby may carry out any of the six actions described in this section. As long as no Union unit is activated, play is in the Mosby's Operations sequence. When one or more Union units are activated because of an Action, play moves to the Phases. It is important to carry out Union Activation checks at the proper moments. When carrying out an Action, be sure to make whatever Activation checks that Action requires. The description of the Actions below indicates when these Activation checks must be made (the map also offers a summary of this).
Actions during the Phases: During the Phases, every activated unit must carry out an Action; only Mosby has the option to pass. The side holding the Initiative carries out its Actions first, and then the other side does so. The player chooses which Action Mosby will carry out in a given Phase. Union unit Actions are carried out according to the rules detailed in section 7.0. Each activated Union unit carries out one Action per Phase.
"Strategy is just another name for deception, and it can be practiced by any commander." — John Mosby
[6.1] The Scout Action
A Scout Action may only be carried out by Mosby's guerrilla band, and consists of an attempt to determine what type of Union unit occupies an adjacent space behind Union lines, or to find out the combat value of a deactivated Union unit (whether inside or outside Union lines) without entering that space. The adjacent space must be "unrevealed" (that is, it must not contain a "revealed" space-status marker), must contain one or more deactivated Union units, or may combine both conditions. An adjacent space may be scouted as many times as desired.
Scouting Procedure: Follow these steps in strict order:
- If you play an Action card that allows Mosby to scout a space without rolling the die (a card such as "Local Information"), the space is examined automatically.
- A. If the space in question is within Union lines and has not been scouted or entered, place a "Revealed" space-status marker on it. Then draw a Union unit from the pool, look at it, and place it with its deactivated side up. If it is a blank unit, set it aside in the Union Units Holding Box.
- B. If the space contains a "revealed" space-status marker and deactivated Union units, you may examine the Union units. Do not draw another Union unit, since the unit in the space has already been revealed. After examining them, place those units with their deactivated side up in the space in question.
- C. If the Union units are outside their lines, you may examine them and place them back in the space with their deactivated side up. No status marker is placed on a space outside Union lines.
- If you do not have an Action card allowing an automatic scout, you must roll the die. At this point you may play Action cards that modify the die roll result (such as the "Scout" card). Compare the modified die roll result with the current Union Awareness level.
- A. If the result is greater than the Union Awareness level, the scouting attempt succeeds. You may examine the space, as indicated in step 1.
- B. If the result is equal to or less than the Union Awareness level, the scouting attempt fails and a Union Activation may occur (see below). If the Union unit(s) do not activate, you may examine the space as indicated in step 1.
Union Activation: Union Activation is checked only if the Scout attempt fails. Follow the procedure given in section 7.2 to determine whether the Union unit(s) activate. If this occurs, a Phase sequence begins. If the unit(s) do not activate, the space may be examined as described above, then the Union unit(s) are placed in the space in question with their deactivated side up.
[6.2] The Move Action
A unit moves from one space to an adjacent space to which it is connected by road or track. Railroad lines do not connect spaces. Movement during Mosby's Operations sequence differs from Movement during the Phases.
Mosby's Operations: When no Union units are activated on the map, Mosby and his guerrilla band may move as desired. To do this, simply take the Mosby counter and move it from one connected space to another. There is no limit to the number of spaces that may be entered this way; however, movement must stop if an unrevealed space within Union lines is entered, or a space containing Union units, and an Activation check must be made immediately. If no Union unit is activated, you may examine the unit(s) in that space and then continue moving or carry out any other Action in that space, such as combat, kidnapping, and so on. However, if a Union unit is activated, play moves to the Phase sequence.
Movement during the Phases: The normal movement rate of a unit during the Phases is 3 spaces per Move Action. The player may choose to move Mosby's guerrilla band fewer than 3 spaces if desired, or not move it at all in order to carry out an Action other than movement. If the player holds the "Fast Horses" card (a Permanent card) or the "Spur the Horses" card (a normal Action card), the player may move one extra space; see "Movement Limitations" below. When moving Mosby's guerrilla band, the player decides which space to move it to.
Union units also have a normal movement rate of 3 spaces per Phase. The spaces they enter are determined by the Union Movement Table; a Union unit may move 4 spaces if a 6 is rolled on the die roll made for that unit on that table. The movement of Union combat units differs from that of picket guards, couriers, and sutler's wagons. (See 7.3 for more details.)
If Mosby's guerrilla band is behind Union lines, it may move to any space that has been previously revealed (that is, a space containing a "revealed" marker) and that contains no Union unit. No Activation check is needed for this space.
Entering an unrevealed space: If Mosby's guerrilla band enters a space behind Union lines that has not been previously scouted or revealed, it must stop temporarily to make an Activation check for that space, whether this occurs during the Mosby's Operations sequence or during the Phases.
- If the Activation check does not activate any Union unit, place a "revealed" marker on the space, draw a Union unit from the pool, and look at it. If it is a blank counter, place it in the Union Units Holding Box. If the unit is a picket guard, courier, or supply wagon, it is eliminated (also place it in the Units Holding Box) and Mosby gains one Performance Point if it is a courier or a supply wagon. If it is a combat unit, place it in the space in question with its deactivated side up. In any case, Mosby's guerrilla band may continue moving.
- If the Activation check results in the activation of a Union combat unit, the Phase sequence begins or continues. If the activation causes the Phase sequence to begin, Initiative must be checked; if Mosby wins the Initiative, he has the option of using a Move Action or remaining in the space and engaging in combat, but if the Union wins the Initiative, then combat must be engaged. If the Activation occurs during the Phases (that is, during Mosby's Move Action), Mosby must stop in the space to engage in combat (see 6.5 below).
Confederate troop movement — entering an occupied space: If a moving unit enters a space occupied by an activated enemy unit, it must stop. If Mosby's guerrilla band enters a space containing only activated non-combat units (pickets, couriers, or supply wagons), those units are eliminated; no Activation checks are made, Mosby gains whatever Performance Points are due him, and he may continue moving. However, if the space contains one or more activated Union combat units, Mosby's guerrilla band must stop and must engage in combat.
If Mosby's guerrilla band enters a space containing deactivated Union units, an Activation check must be made for each unit. If one or more units activate, then Mosby must stop and the Phases begin or continue. If no Union unit activates, the player may examine the units and Mosby's guerrilla band may continue moving or engage in combat. If Mosby's guerrilla band ends its movement in a space with deactivated Union units, the player may examine those units and may choose whether or not to engage in combat.
Union units that end their movement in a space with Mosby's guerrilla band must stop and engage in combat once all Union units have completed their movement.
Whenever a unit enters a space occupied by an enemy unit, the moving unit is considered the attacker and the other the defender.
Entering a space with a large Union troop concentration: If Mosby's guerrilla band enters a space containing a large Union troop concentration, whether during Mosby's Operations or during the Phases, an Activation check must be made for the troop concentration occupying the space. Space-status markers are never placed on hexagons occupied by large troop concentrations.
Combat after Movement: During the Phases, combat is a function of movement if Mosby's guerrilla band and one or more Union combat units end up in the same space at the end of movement. See 6.5 for more details.
Movement Limitations: Several factors limit unit movement.
- Movement must always be between spaces connected by road or track, never by railroad.
- The Potomac River is the only terrain feature that affects movement during the Phases. Movement across the Potomac along a track is unaffected. However, a unit crossing the Potomac along a road must use its entire Move Action to cross from one bank of the river to the other. The unit stops on one side of the river and moves across in the following Phase using its normal movement allowance. This limitation applies only during the Phases, never during Mosby's Operations.
- Mosby's guerrilla band may move one extra space along a track using the "Fast Horses" Action card (a Permanent card). If the guerrilla band is not using a track, it may not move that extra space. The "Spur the Horses" Action card may be played at any time to gain one extra space of movement. The "Fast Horses" and "Spur the Horses" cards can be combined to gain additional movement (that is, two extra spaces).
- The "Cannon" Action card (a Permanent card) reduces Mosby's movement allowance by two spaces during the Phases. The player may discard the Cannon at any time, cancelling the movement penalty. This movement penalty can also be cancelled by other Action cards that provide additional movement.
- Union combat units may move one extra space if a 6 is rolled on the die during the Phases, on the roll that determines their movement. Union units do not need to be moving along a track to gain this bonus. Picket guards, couriers, and supply wagons never receive a movement bonus. See the Union Movement Table and 6.3 for more details.
- A kidnapped leader reduces Mosby's movement allowance by one space during the Phases (see 6.3).
- Demolished bridges never affect movement during the game.
[6.3] The Kidnap Action
There are two Union leader counters, Colonel Dulaney and General Stoughton, which are placed on the map by the appearance of Event cards. Once placed on the map, they become possible victims of a kidnapping by Mosby's guerrilla band. There are two Event cards for each leader. When the first card appears, the player places the corresponding counter on the map and leaves it there until the second card appears, at which point the counter is permanently removed from the map. In this way, Mosby has a limited amount of time to kidnap the leader in question.
Kidnapping may only be attempted by Mosby's guerrilla band, which must occupy the same space as the leader in order to kidnap him. A kidnap attempt may only be made while the leader is on the map.
Kidnapping Procedure: Follow the steps in the order given:
- Turn the Union leader counter over and place the marker with the "kidnapped" side up, placing it under the Mosby counter.
- Increase Union Awareness by 2 (to a maximum of 5).
- Make Activation checks for the units already in the space when the kidnapping occurs (but not for those occupying adjacent spaces), and make one more Activation check for the large troop concentration occupying the space, if any. If any Union unit is activated, the Phase sequence begins, or continues if it had already begun.
Movement Restrictions: If the kidnapping does not activate a Union unit, continue with Mosby's Operations. If the kidnapping activates an enemy unit, the Phase sequence begins; Mosby's movement allowance is reduced by 1 while the kidnapped Union leader is with the guerrilla band (this reduction is in addition to that of the Cannon Action card). Freeing the leader cancels this movement penalty.
End of the kidnapping: As soon as Mosby's guerrilla band enters a space outside Union lines, the kidnapped leader's counter is immediately removed from the map. The movement restrictions end and Mosby gains 10 Performance Points (that is, 1 Notoriety point).
Escape of a kidnapped leader: Once he has been kidnapped, a leader has a chance to escape. If Mosby's guerrilla band disbands behind Union lines, the leader escapes. Likewise, if the guerrilla band loses a combat within Union lines, the leader also escapes and the turn ends immediately. In both cases, Mosby receives no Performance Points. The Union leader may also be freed voluntarily by Mosby.
If a kidnapped leader escapes or is freed, his counter is removed from the map. Mosby may not attempt to kidnap that leader again. The player will ignore the second Event card for that leader in this case, though they will not draw another card in its place.
[6.4] The Demolish Action
Demolition is an Action that only Mosby's guerrilla band may carry out, and only when it occupies a space containing a target eligible for demolition. Demolition targets include depots, bridges, and railroad lines behind Union lines (bridges and rail lines outside Union lines may not be demolished), as well as the Union Wagon Train (which enters play via an Event card). If Union lines are extended by playing an "Extend the Front" Event card, any railroad line with a space-status marker may be demolished.
There are no special requirements to succeed at demolishing a bridge, depot, or railroad line. As long as the requirements noted above are met, demolition in the space occupied by Mosby's guerrilla band always succeeds. See 7.8 for demolition of the Union Wagon Train.
Note that demolition always occurs in a space. Railroad lines between spaces are not destroyed. Also, if more than one railroad line runs to a space, all the railroad lines are considered demolished (but Mosby receives Performance Points for the demolition in the space, not for the number of railroad lines).
Demolition Procedure: Follow the steps in order:
- If the target of the demolition is a railroad line, place a destroyed-railroad-line marker in the space. If it is a bridge or a depot, flip the corresponding marker over so the destroyed side is showing. If it is the Union Wagon Train, flip the marker over so the destroyed side is showing and remove it at the end of the turn.
- Move the Performance Points marker on the corresponding Performance Point Track. The Performance Points earned for demolishing bridges, railroad lines, and the Union Wagon Train are detailed in the Performance and Awareness Summary on the map. The Performance Points for depots are detailed on the back of each marker.
- Increase Union Awareness by 1 (to a maximum of 5).
- Make Activation checks for the units in the space where the demolition occurs. Likewise, make Activation checks for every unrevealed space and for spaces containing deactivated Union units, within Union lines, that are adjacent to the space where the demolition occurs. If there are deactivated units in a space outside Union lines that is adjacent to the demolished space, make Activation checks for those units. If the demolition occurs in a space that contains or is adjacent to a large troop concentration, make an Activation check for it. If no Union unit is activated, continue with Mosby's Operations; if an enemy unit is activated, the Phase sequence begins, or continues if it had already begun.
Effects of Demolitions: A space containing a demolished target is not affected in any way for movement purposes. Bridges and railroad lines remain destroyed (that is, their markers remain on the map with the destroyed side up) until an Event card ("Repair All Bridges" or "Repair the Railroad Lines") forces the player to repair them. When either card appears, the targets in question are considered repaired and may be demolished again. Depots and the Union Wagon Train can never be repaired.
Assault on the Manassas Junction depot. "The enemy complains that we do not fight fair; the same complaint was made by the Austrians against Napoleon." — John Mosby
[6.5] The Combat Action
There are three occasions during the game when combat can occur. During the random-events step of the Preparation Sequence, Mosby must fight if he occupies the same space as a Union combat unit placed on the map by an Event card. During Mosby's Operations, combat is a separate Action (that is, Mosby can move into a space containing a Union unit and, if it does not activate, may engage it in combat). During the Phases, combat may be a separate Action or a function of movement. In the Phases, if a unit enters a space containing an activated enemy combat unit, it must engage that unit in combat.
Combat during Mosby's Operations: Mosby's guerrilla band may engage in combat during Mosby's Operations by entering a space occupied by one or more Union units. An Activation check must be made for each Union unit in the space; if no unit is activated, the player may examine those units and decide whether Mosby's guerrilla band attacks them. If it decides to do so, those units must be flipped over. Non-combat units are eliminated without a fight and cause no Activation checks. Mosby's guerrilla band must attack all Union units in a space as if they were a single force. Deactivated Union units are activated by combat.
If the Activation check activates one or more Union units in the space, the Phase Sequence begins immediately. Depending on who wins the Initiative and which other Union units are activated, the player may decide not to fight if Mosby wins the Initiative. For example, if several Union combat units are activated, the player may wish to move Mosby during that Phase, assuming he won the Initiative, instead of engaging in combat.
Combat during the Phases: When Mosby's guerrilla band enters a space occupied by an activated Union combat unit, or activates a combat unit by entering a space, it must stop and engage in combat. Union units that are not activated may be examined by the player, who has the option of engaging in combat or not. Remember that an Activation check must be made when Mosby enters an unrevealed space behind Union lines, and if a Union combat unit is activated, Mosby must stop and engage in combat.
See 7.3 and 7.7 for details about Union non-combat units, and 7.8 for details about the Union Wagon Train.
Union combat units that end their movement in a space with Mosby's guerrilla band must engage in combat. Combat is not resolved until all activated Union units have finished their movement. If several Union combat units end their movement in the same space as Mosby's guerrilla band, combine their combat factors for the fight. It is possible for Mosby's guerrilla band to end its movement in a space with one or more Union units that are not activated, and for one or more activated Union combat units to then arrive during their movement Phase and enter the same space. In this case, combat occurs only between the activated Union units and Mosby's guerrilla band: deactivated Union units do not take part in the combat.
If Mosby's guerrilla band attacks, it must attack all Union units in a single space as if they were one combined force. If Union units are the attackers, only the units activated in the space attack. A unit or units that move(s) into a space occupied by the enemy is always considered the attacker, and the other side the defender.
Combat Procedure: All combats, whether they occur during Mosby's Operations or during the Phases, follow these steps in strict order:
- Check the Union units taking part in the combat to find their combined strength.
- If Union units are the attackers, Mosby's guerrilla band has the option to disband at this point (this is called skedaddling) before combat is resolved. The guerrilla band does not have this option if it is the attacker. If it disbands:
- A. Make a casualty check for Mosby. If Mosby is killed by receiving a second wound, the game ends immediately (see "Mosby Casualty Check" below).
- B. Mosby loses two Performance Points and his counter is removed from the map.
- C. Move each of the units that occupied the same space as Mosby one space at random and then deactivate them. All remaining Union counters are deactivated in the spaces they occupy. The turn has ended.
- If Mosby does not disband, combat must be resolved. Find the combat odds and the die-roll modifiers as follows:
- A. Divide the attacker's strength by the defender's strength (dropping fractions) to determine the attacker-to-defender combat odds.
- B. Check the Combat Odds Modifier Charts to find the die-roll modifier for the combat odds. Use Mosby's chart if he is the attacker, or the Union's chart if Mosby is the defender.
- C. Check the Union Reaction Chart to find the die modifier due to Union awareness of Mosby. Add Mosby's current Notoriety and the Union Awareness level together and look up the modifier under that total.
- D. If the player holds Action cards in hand that give Mosby die-roll modifiers, they must be played now. Several cards may be played if desired. In addition, the "Hide" Action card may be played at this point (see the Commentary section for more details).
EXAMPLE: Mosby has a strength of 5 and is in a space containing an activated Union unit with a strength of 2. If Mosby is the attacker, the odds are 2 to 1 (a +1 die modifier would apply according to the Mosby Odds Modifier Chart). If the Union unit is the attacker, the odds would be 1 to 3 (a +2 modifier would apply according to the Union Odds Modifier Chart).
Assuming Mosby's current Notoriety is 3 and Union Awareness is 3 (giving a total of 6), a +1 modifier must be applied according to the Union Reaction Chart.
- Roll the die to resolve combat, applying the modifiers defined in step 3 to the result. Consult the Combat Results Table to determine the result.
- If the player holds any Counterattack Action cards, they may play one or more of them to resolve combat again if desired. The same modifiers from step 3 apply to each combat (any Action card discarded on the first attack may not be used again). Counterattack cards may continue to be played until they run out or the player decides not to counterattack any further.
- Apply the combat results (see below for more details).
- A. If Mosby wins the battle, he receives Performance Points as specified in the Performance and Awareness Summary.
- B. If Mosby wins the battle, Union Awareness increases by 1 (to a maximum of 5).
- C. If Mosby loses, the turn ends. Subtract the Performance Points for losing the battle, for losing guerrilla-band strength points, and for Mosby being wounded (see below). If a kidnapped leader is with the guerrilla band, he escapes and is removed from the game. The Mosby counter is removed from the map.
- D. If a 1 is rolled on the die during an attack or counterattack (ignoring modifiers), a casualty check must be made for Mosby. On a result of 1 or 2, Mosby is wounded. Place the Mosby-wounded marker in the Mosby Status box for the following turn; if Mosby receives a second wound, he dies and the game ends immediately. Mosby being wounded does not end the turn, though losing a battle does.
- If Mosby is still activated, make an Activation check for each deactivated unit in the same space where the combat occurred. Likewise, make an Activation check for each adjacent space that is unrevealed, behind Union lines, or that contains deactivated units. Continue with the Phases. Note that the Activation check in this step is in addition to the normal Activation checks made during the Phases. If you run out of space-status markers or Union units in the pool, you must immediately restore the Union lines (see 7.1).
A correspondent near Upperville, Virginia: "From January 1st to October 1st, by a rough count, Mosby has killed and captured 69 Yankees for every man he has lost." (Gray Ghosts, Vol. 2, p. 137)
Combat Results: The results marked in blue on the Combat Results Table apply to the Union units in the combat, and the results in grey apply to Mosby's guerrilla band. The results are described below:
D: Disband: Mosby's guerrilla band disbands involuntarily after losing the battle. The turn ends; subtract two Performance Points for losing the battle.
D1, D2: Disband and lose 1 or 2 guerrilla-band strength points: In addition to the effects described above for involuntary disbanding, Mosby loses 5 Performance Points for each strength point lost.
R: Retreat: The Union units involved in the combat must retreat one space. If the Union units were the attackers, they must retreat to the spaces from which they entered the space occupied by Mosby. If Mosby was the attacker, outside Union lines, the Union units must retreat one space by the most direct route toward their lines (a large troop concentration is considered part of the Union lines); if several routes are possible, determine which is chosen by a die roll. If Mosby attacks within Union lines, retreat each unit one space at random.
Place a retreat marker on the Union units. The marker remains on the units for one Action (in fact, it takes one Action for the units to regroup). Retreat markers have no further effect. Union units are still considered activated and can activate adjacent units; Mosby must stop if he enters a space occupied by retreating units and engage them in combat.
Mosby receives Performance Points for winning the battle. He gains one Performance Point plus a number of Performance Points equal to the original strength of the Union unit(s). For example, if Mosby forced a retreat of Union units with a combined strength of 5, he receives 6 Performance Points (1+5=6).
R1, R2, R3: Retreat and lose 1, 2, or 3 strength points: The Union unit(s) retreat as specified above and must lose strength points. In addition to gaining Performance Points for winning the battle, Mosby receives 3 more points for each Union strength point eliminated. Note that Union units can never lose more strength points than they possess.
If several Union units are involved in the combat, strength-point losses must be divided as evenly as possible among the units, if this is possible. Otherwise, determine which units lose strength points at random by a die roll.
When a Union unit loses strength points, place a strength-point marker under the unit to indicate its new combat strength (unless it is eliminated, in which case it is removed from the map). Eliminated units are kept in the Eliminated Unit Box on the map until the game ends; they are never returned to the pool during the Preparation Sequence of a new turn. Blank counters, pickets, couriers, and supply wagons are placed in the Union Unit Holding Box. They are returned to the pool during step 1 of the Preparation Sequence of the following turn.
Mosby Casualty Checks: There are four occasions during the game when a casualty check must be made for Mosby:
- A casualty check of this kind must always be made whenever a 1 is rolled on the die (before modifiers are applied) during combat. Resolve the combat normally and then make the casualty check.
- If Mosby's guerrilla band disbands before a combat (skedaddle), a casualty check must be made.
- If the "Mosby Trapped" Event card is drawn, a casualty check must be made.
- During step 4 of the Preparation Sequence, a casualty check must be made if a Union combat unit enters the space occupied by Mosby due to its random movement. The turn ends regardless of the result.
To make a casualty check, roll the die. On a result of 1 or 2, Mosby is wounded. A result of 3 to 6 has no effect.
If the "Mosby Escapes" Action card is played, the casualty check is avoided. Note that the die may be rolled for a casualty check before the card in question is played. However, if Mosby is wounded and on the following turn the player draws the Mosby Escapes card, it cannot be played to remove a wound acquired previously.
If Mosby is wounded, the player must immediately discard a Permanent Action card (if one is held in hand) and loses 5 Performance Points. Place the Mosby-wounded marker in the Mosby Status box on the map. Mosby remains wounded for the rest of the current turn and for the entirety of the following turn. In that following turn, the Mosby-wounded column of the Recruitment Table is used to determine how many Action cards are received. The Mosby-wounded marker is removed at the start of the turn after that.
Mosby may be wounded during a combat but still win it. A wound does not immediately end a turn, though the turn does end if Mosby's guerrilla band loses a combat.
If Mosby is already wounded and receives another wound on a casualty check, he dies. The game ends immediately and the player loses.
[6.6] The Disband Action
Disbanding is an Action of Mosby's guerrilla band in which its members split up and scatter in different directions to keep Union forces from attacking them. Whenever the guerrilla band disbands, the turn ends.
Disbanding during Mosby's Operations: To disband during Mosby's Operations, remove the Mosby counter from the map and the turn ends immediately.
Disbanding during the Phases: The player may disband Mosby's guerrilla band at any time during the Phases, as long as it does not occupy the same space as an activated Union unit that is about to engage it in combat (see, however, disbanding before combat, below). If there are activated units on the map when the disbanding occurs, they are deactivated in the space they occupy.
"The truth is," said John Alexander, himself a ranger, "we were a bunch of undisciplined men. During... my service, I learned four commands — form up and count off, march, close ranks, and charge."
"There was another movement," he added, "with which we were not entirely familiar, a command known technically as 'skedaddle,' but I never heard that order given. The Rangers seemed to know instinctively when that movement was appropriate, and never waited for the order itself." (Rebel, p. 101)
Disbanding before combat (Skedaddling): Mosby's guerrilla band may disband when it is about to be attacked by Union forces, but not when it is the attacker. Disbanding before a battle with Union forces nearby is more dangerous. To disband before battle:
- Make a casualty check for Mosby (see 6.5 for details). If Mosby dies, the game ends.
- Remove the Mosby counter from the map and subtract 2 Performance Points.
- Activated Union forces that were in the space where the disbanding occurred move one space at random. If a kidnapped Union leader is with Mosby, he escapes when the guerrilla band disbands. All other activated Union units are deactivated in the spaces they occupy. The Game Turn ends.
Activation and Union Actions
[7.1] Union Lines and Space-Status Markers
The original Union lines are printed with blue circles and hexagons on the map and include the spaces to the north and east of those lines. In addition, there are spaces that can become part of the Union lines when an "Extend the Front" or "Place Large Union Troop Concentration" Event card appears.
Extending the Union Lines: When an "Extend the Front" card appears, roll the die and consult the Extend Union Lines Table. The number tells you which spaces become part of the Union lines for the rest of the game; the spaces where the extended Union lines can appear are marked on the map with a number. If the lines must be extended again and a result comes up that was already rolled previously, roll again until a new result is obtained. Place a space-status marker (with the ● side up) on each space that becomes part of the new Union lines.
Note that only the spaces listed on the Extend Union Lines Table become part of the Union lines. If a 6 is rolled on the die, only the spaces along the Manassas Gap railroad line become part of the Union lines, not the spaces to the south and east of the rail line.
If the Mosby counter is in a space within Mosby's Confederacy that becomes part of the Union lines due to an Event card, draw a Union unit from the pool and look at it. Blank counters and pickets are eliminated immediately and placed in the Union Unit Holding Box; couriers and supply wagons are also eliminated, and Mosby receives Performance Points for their elimination. If a Union combat unit is drawn, combat occurs immediately. If Mosby wins that combat, he receives Performance Points, and the Union unit is returned to the pool.
Large Union Troop Concentration: When a "Place Large Union Troop Concentration" card appears, place one of the Troop Concentration markers on the appropriate space. These spaces are marked with small Union flags. Those spaces then become part of the Union lines for the rest of the game. Remove any space-status markers that may be present in those spaces.
Union Units: Every space within Union lines contains at least one unit (if a blank counter is drawn, it is considered a unit). Spaces with a Troop Concentration, whether printed on the map or marked by a Troop Concentration marker placed by an Event card, contain an unlimited number of Union units. All other spaces contain only one Union unit. Note that Union units never begin the game on the map; they are revealed through scouting, by entering spaces, and through the activation of Union units.
Space-Status Markers: Space-status markers help keep track of which spaces within Union lines have been revealed or not. Status markers are placed when Mosby scouts or enters a space, or when a Union unit is activated in a space.
Status markers are never placed on spaces containing Troop Concentrations, nor on spaces outside Union lines (unless those spaces become part of the Union lines due to an Event card). If a Union unit moves at random into a space with no status marker, no marker is placed on that space.
Restoring the Union Lines: When all the status markers have been placed on the map and another one is called for (whether due to an Event card, a scouting attempt, Mosby entering a space, or the Activation of a Union unit), the Union lines must be restored. In the exceptionally rare case that every Union unit has been drawn from the pool and another one is called for, the Union lines must also be restored. This must also be done if an Event card that says "Restore Union Lines" appears. Restoring the Union lines does not end the turn.
To restore the Union lines, do the following:
- All deactivated Union units, except Troop Concentration markers, are removed from the map and returned to the pool; ignore the strength-point markers of combat units that have lost points in battle, and place those units intact in the pool. In addition, all pickets, couriers, and supply wagons on the map (not in the Union Unit Holding Box) are returned to the pool. Eliminated combat units are not returned to the pool. Demolished depots, bridges, and railroad lines remain on the map.
- Remove all status markers that are within the original Union lines, and set them aside. Status markers placed due to the appearance of a Front-Extension card are flipped to show their ● side and remain on the map.
"At first they believed that our attacks were carried out by the farmers and cripples seen during the day plowing their fields and tending their livestock, who formed bands at night, raided their camps, and scattered at dawn. But when they went looking at night through the houses for these invisible enemies, they usually found these old farmers in bed, and when they returned to camp, they often found that we had paid them a visit in their absence." — John Mosby
[7.2] Activation of Union Units
Union units activate at different stages during each turn. There is no limit to the number of times a unit may be activated during a turn. The Sequence of Play and the description of each Action determine the moments at which Activation can occur. There is also an Activation Summary printed on the map.
To help keep track of which spaces need Activation checks, place Activation markers on each of them and make the checks space by space, removing the Activation marker and placing a status marker if appropriate.
Activation Checks: Actions by Mosby's guerrilla band can cause Union units to activate. To make an Activation check, roll a die for each Union unit in a space and compare the result to the current Union Awareness level. If the result is greater than the Awareness level, the unit remains deactivated. If the result is equal to or less than the Awareness level, the unit activates.
Turn the unit over and look at it. If it is a blank counter, it is removed from the map (placed in the Union Unit Holding Box) and play continues with Mosby's Operations or the Phases, as appropriate. If it is a Union unit, whether a combat unit or a non-combat unit, play moves to the Phases. Once activated, a unit remains in that state until it is deactivated, is eliminated, or the turn ends.
Deactivated units remain with the side showing their hidden strength face down and may not be examined, unless a successful scout is made or their space is entered. (Remember that if the space is within Union lines and does not have a "revealed" status marker, there is a unit in it.) The identity of each unit thus remains secret until it is revealed.
During Mosby's Operations, Activation checks are made under the following circumstances:
Scouting: If Mosby fails a scouting attempt, Activation checks are made for the unit(s) in the space that was being scouted (6.1).
Movement: If Mosby enters a space within Union lines, Activation checks are made for the unit(s) in that space (6.2). Note that when Mosby enters a space containing a Troop Concentration, an Activation check must be made for that Troop Concentration.
Kidnapping: If Mosby kidnaps a Union leader, an Activation check is made for the units in the kidnapping space, and another for the Troop Concentration in that same space. (6.3)
Demolition: If Mosby carries out a demolition in a space, Activation checks are made for the unit(s) in that same space. Then Activation checks are made for all adjacent spaces within Union lines, for all deactivated units occupying those spaces, for deactivated units in adjacent spaces outside Union lines, and for Troop Concentrations adjacent to the space where the demolition occurred. (6.4)
Combat: Deactivated Union combat units that are attacked by Mosby and survive are automatically considered activated, and Activation checks are made at the end of combat for any deactivated Union unit in the space where the combat occurred, for all adjacent spaces within Union lines and the deactivated units in them, for deactivated units in adjacent spaces outside Union lines, and for Troop Concentrations in the same space as the combat or in spaces adjacent to it.
Activation Checks during the Phases: The Activation checks outlined above are also made during the Phases. In addition, Activation checks are made in every Phase as described in step 2 of the Phase Sequence (see 5.0).
Deactivation: Activated Union units deactivate in several ways. When a unit deactivates, turn it over so its deactivated side is showing. Units deactivate in the following ways:
- During Movement: A moving Union unit deactivates when a 1 is rolled on the die on the Union Movement Table. In that case, the unit deactivates immediately in the space it occupies. Turn that unit over to show its deactivated side. If a unit deactivates in a space containing a Troop Concentration, remove the counter from the map and return it to the pool.
- Mosby Hides: If the "Hide" card is played for the guerrilla band, all activated units will eventually deactivate. Union units keep moving each Phase (Mosby must pass each Phase) until a combat unit enters the space where Mosby is; while moving, Union units can cause additional Activation checks. If a non-combat unit enters the space occupied by Mosby, it is not eliminated and continues moving in the following Phases; a non-combat unit does not cause Union units to deactivate. Once a combat unit enters the space occupied by Mosby, first complete the movement of the rest of the activated Union units. Then move all activated units one space at random, placing them with their deactivated side up.
- Mosby Disbands during the Phases: If the Disband Action is chosen for Mosby, the turn ends and Union units deactivate in the spaces they occupy. Units in spaces containing Troop Concentrations are returned to the pool.
- End of Turn: At the end of each turn, all Union units deactivate in the spaces they occupy. If the turn ends because Mosby's guerrilla band disbands before combat (skedaddling), activated Union units move one space at random.
Union Non-Combat Units: Supply wagons, pickets, and couriers deactivate like other Union units. In addition, they are removed from the map and returned to the pool when they enter a space containing an activated Union combat unit or a Troop Concentration. If they enter the space occupied by Mosby, they are eliminated (except if Mosby is hiding; see above); there is no combat and no Activation checks are made, and they are removed from the map and placed in the Union Unit Holding Box. The Union Wagon Train follows the procedures described in 7.8. Couriers, supply wagons, and the Union Wagon Train never cause the activation of other Union units. Pickets can cause the activation of Union combat units (see 7.7).
[7.3] Union Movement
Union units move only during the Preparation Sequence and during the Phases; never during Mosby's Operations. If an activated Union combat unit enters the space occupied by Mosby during its movement, it stops and engages in combat, once the rest of the activated Union units have finished their movement.
In a Phase, all Union non-combat units (pickets, couriers, and supply wagons) move first, before the combat units move. The player may move the units within each group in whatever order desired.
Movement Procedure: Choose the Union unit to be moved and roll a die. Consult the Union Movement Table. The first column determines the movement of Union combat units and the second that of non-combat units. Roll a die for each activated Union unit on the map and complete its movement before moving on to another unit.
Summary of Union unit movement:
(A movement summary table is printed on the map; consult it directly.)
[7.4] Random Union Movement
Union units must move randomly on certain occasions. During the Phases, when a unit is moving toward Mosby, or away from him, as a result of a die roll on the Union Movement Table, it will sometimes find that it has more than one equidistant path to follow. The player must assign numbers to the paths the unit can take and roll a die; the unit moves along the path with a number matching the die roll.
Union units will also move at random as instructed by Events, or before deactivating. Every space on the map has a road or track marked with the number 1 in a circle. Roll the die and count clockwise from that road or track the number rolled on the die. The last road or track counted is the direction in which the unit moves. Normally, this procedure only moves the unit one space, but on occasion it will have to move three spaces, in which case the die is rolled for each space to be moved.
EXAMPLE: An activated Union unit is in Washington, D.C. and must move one space at random. The die is rolled and the result is 5. Starting with the road numbered "1" (the one leading to Fort Slocum), count clockwise, finishing the count on the track leading to Fort Runyon. The unit moves to that space.
If this procedure is found too cumbersome, alternatives exist. If there are two paths leaving a space, "even" numbers can be assigned to one and "odd" to the other. If there are 3, one can be assigned "1" or "2", another "3" or "4", and the third "5" or "6".
[7.5] Union Combat
Union units engage in combat as defined in 6.5. Remember that Activation checks are made at the end of every combat for all deactivated units and Troop Concentrations in the space where the combat occurred, and for all adjacent Union units, unrevealed spaces within Union lines, and Troop Concentrations. This Activation check is in addition to those that occur during the Phases.
[7.6] Union Reinforcements
The Union receives more units as Mosby's Notoriety increases. Separate the Union units according to the reinforcement number printed on them at the start of the game. Units with an "S" on their activated side are placed in the pool at the start of the game. The other units are placed, according to the numbers printed on them, in the boxes of the Union Reinforcement Track.
The Union receives reinforcements as Mosby's Notoriety rises above 1. In step 1 of the Preparation Sequence, check Mosby's current Notoriety. Take the Union units from the Reinforcement Track that are in boxes with a number equal to or lower than Mosby's Notoriety and place them in the pool. Once all reinforcements have been placed in the pool, the Union no longer receives reinforcements for the rest of that game.
EXAMPLE: At the end of the first turn, Mosby's Notoriety is 1. Therefore, the Union receives no reinforcements for the next turn. At the end of the second turn, Mosby's Notoriety is 3. The Union receives reinforcements from boxes 2 and 3 of the Union Reinforcement Track.
"One afternoon at a private residence near Aldie, he (Mosby and his band) found a (Union) staff officer carrying messages from Hooker to Pleasonton and captured him. The messages thus intercepted revealed that Hooker was seeking a gap through the mountains at Aldie and requesting that Pleasonton occupy the place, and that a reconnaissance in force toward Warrenton and Culpeper was planned. The entire number of Union divisions was also noted, thus allowing the Rebels to estimate the strength of the army marching against them." (Gray Ghosts, vol. 1, p. 198)
[7.7] Union Non-Combat Units
Pickets, couriers, and supply wagons are non-combat units and move differently from combat units (see 7.3). If Mosby's guerrilla band enters a space occupied by a deactivated non-combat unit, an Activation check is made for that unit. If the unit activates, the Phase sequence begins; if it does not activate, the player looks at it and then eliminates it.
If Mosby's guerrilla band wins the Initiative and occupies or enters a space containing a non-combat unit, it is removed from the game. No combat occurs and no Activation checks are made. If there are no other activated Union units, the Phases end immediately and play continues with Mosby's Operations.
When Mosby enters a space containing both deactivated combat and non-combat units, Activation checks are made for each unit. If both types of units activate, Mosby eliminates the non-combat unit if he wins the Initiative; if the Union wins the Initiative, the non-combat unit is returned to the pool and the combat unit attacks Mosby. If the non-combat unit activates and the combat unit does not, Mosby eliminates the non-combat unit if he wins the Initiative; otherwise — the Union wins the Initiative — the non-combat unit moves first. If the combat unit activates and the non-combat unit does not, the Phase Sequence begins or continues; the non-combat unit is eliminated if Mosby remains in the space and wins the combat, but if Mosby leaves the space, the non-combat unit remains in it. In any case, if the non-combat unit is a picket and it activates, it activates all remaining units in the space when its turn comes to carry out its Action.
The Union Wagon Train is also a non-combat unit. See 7.8 for more details about this unit. There are also a number of false (blank) Union units. When Mosby's guerrilla band enters or scouts a space with a false unit, it is removed and placed in the Union Unit Holding Box on the map.
During the Events step, if a "Union Sweep" card is drawn, a combat unit must be used for the sweep. Non-combat units drawn from the pool are returned to it, and units keep being drawn until a combat unit appears.
Pickets: Pickets are units representing a single man or a small group of soldiers, so they have no combat factor. When a picket enters a space containing one or more deactivated Union units, the picket is removed immediately and all units present are activated. If the space contains activated units, there is no further effect — the picket is simply removed. If the space contains a Troop Concentration, a combat unit in the space activates and the picket is removed. If a picket is activated in a space containing other deactivated Union units, it activates those units when its Action comes up, and it is then removed from the game. Mosby receives no Performance Points for eliminating pickets.
Supply Wagons: Supply wagon units represent a single wagon belonging to a Union sutler who sells his goods at extortionate prices to gullible, desperate Union soldiers; these units have no combat factor. When a wagon enters a space containing an activated Union combat unit or a Troop Concentration, it is removed from the map and returned to the pool; there are no further effects. Mosby receives 1 Performance Point for eliminating a supply wagon. Supply wagons never activate other Union units.
Pursuit of a Union wagon.
Couriers: Courier units represent a single man carrying documents, orders, etc.; they have no combat factor. When a courier enters a space containing an activated Union combat unit or a Troop Concentration, its counter is removed from the map and returned to the pool; there are no further effects. Mosby receives 1 Performance Point for eliminating a courier. Couriers never activate other Union units.
Couriers, pickets, and supply wagons are placed in the Union Unit Holding Box when eliminated. These units always return to the pool at the start of the following turn. Non-combat Union units that are removed from the map for entering a space containing activated combat units or Troop Concentrations are returned directly to the pool.
[7.8] The Union Wagon Train
The Union Wagon Train enters the game via an Event card. As explained below, the procedure for the Wagon Train differs from other game mechanisms. After all other Event cards have been resolved, the turn begins with the Phases. If the turn ends due to an Event action, the Wagon Train is removed from the map and never appears again in that game. Initiative is determined for the Phases to establish which side carries out an Action first. Since the Wagon Train is a non-combat unit, it does not cause Activation checks while it moves within Union lines. While the Wagon Train does not cause Activation checks, Mosby's Actions can still cause them.
Wagon Train Movement: The Wagon Train is placed in the Harpers Ferry space. The Wagon Train moves one space per Phase along the shortest, most direct route toward Middletown, and is removed from the map the Phase after it arrives there. If there are two spaces the Wagon Train could enter, a die roll determines which one it moves to. Mosby's guerrilla band moves normally during the Phases.
Once the Wagon Train is in the same space as Mosby, it stops moving. If Mosby's guerrilla band leaves the space, the Wagon Train resumes its movement, one space per Phase.
Union Escort: Two Union combat units escort the Wagon Train. These units are not placed on the map unless they activate. Once activated, the escort combat units remain with the Wagon Train and move with it even if forced to retreat in combat; an escort unit will try to rejoin the Wagon Train and continue moving with it (it will not pursue Mosby's guerrilla band). If the Wagon Train is destroyed, the escort units become free to pursue Mosby's guerrilla band like any other Union combat unit. When activated, the escort units must be combat units; any false units, couriers, pickets, and supply wagons drawn from the pool for this purpose are returned to it.
Wagon Train Procedure: If Mosby's guerrilla band is in the same space as the Wagon Train, follow this procedure:
- Make Activation checks for the escort units. An Action card (such as Local Guide) can be played to negate these checks.
- A. If no unit activates, Mosby may use the Demolish Action to destroy the Wagon Train in the following Phase. Increase Union Awareness by 2 (to a maximum of 5), gain 5 Performance Points, and then make Activation checks for the two escort units, for deactivated units in adjacent spaces, for adjacent spaces within Union lines, and for adjacent Troop Concentrations. If no Union unit is activated, the Phases end; play continues with Mosby's Operations.
- B. If one or both escort units activate, proceed to step 3 of the Phase Sequence (Carry out Actions) and continue normally with the Phases.
- If at any point Mosby's guerrilla band is in the same space as the Wagon Train and there are no activated Union units in it, he may destroy it using the Demolish Action. Union Awareness is increased by 2 (to a maximum of 5), 5 Performance Points are gained, and Activation checks are then made for the two escort units, for deactivated units in adjacent spaces, for adjacent spaces within Union lines, and for adjacent Troop Concentrations. If no Union unit is activated, the Phases end; play continues with Mosby's Operations.
Note that a series of Activation checks must be made for the Union escort units. These checks must be made when Mosby's guerrilla band and the Wagon Train first meet in a space, during the Phases, after combat (if it occurs), and after the Wagon Train is demolished.
If Mosby decides to attack the escort units, he must attack both units, whether both are activated or not. If Mosby is the defender, he is only attacked by the Union units activated in the space he occupies.
Once the Wagon Train is destroyed, both escort units become free to pursue and attack Mosby normally. If one or both units remain deactivated, they are still placed on the map and can be activated by other actions of Mosby's guerrilla band.
Optional Rules
The following rules are entirely optional and may be used separately or in combination, as the player sees fit. They have been included to give Mosby's Raiders greater variation, complexity, and difficulty.
[8.1] Advanced Victory Conditions
In the normal game, a Notoriety of 9 is needed at the end of the game to win. With this option, a Notoriety of 10 is needed for a marginal victory, and higher levels are needed for a more decisive victory. Level 10 has been extensively playtested and is considerably harder to achieve than level 9. If this new level is still too easy for the player, it can be raised to 11 (or more!) if considered appropriate.
The Notoriety marker has a "+10" printed on its reverse to allow for tracking Notoriety levels above 10. On the tables, use the column for 10 when Notoriety is above that figure. The Union Awareness level and the number of turns in a game do not change.
Victory Levels
Notoriety of 10 (Marginal Victory): The player has succeeded in increasing Union apprehension about the security of the rear areas, and has drawn significant numbers of troops away from the Army of the Potomac.
Notoriety of 11 (Tactical Victory): Federal couriers and wagon drivers live in a state of perpetual fear of the player's raids. A large proportion of the Union Army's cavalry has been brought to the area to suppress the guerrilla band's activities. Additional infantry brigades have been detached to protect the rail lines.
Notoriety of 12 (Substantial Victory): A quarter of the Army of the Potomac's cavalry is occupied searching for the player. The Union high command feels harassed and desperate.
Notoriety of 13 (Decisive Victory): The commander of the Union army in the Shenandoah Valley has been forced to cancel offensive operations in this campaign due to the destruction caused by the guerrilla band in his rear. Large numbers of Union troops have been detached to northern Virginia to watch all possible targets. Attrition in the Army of the Potomac is serious.
Notoriety of 14 or more (Overwhelming Victory): The guerrilla band's activities have prolonged the Confederacy's life by several months. The Union army has been unable to leave the Shenandoah Valley to threaten Lee's rear. Federal cavalry bands sweep the area without result, attempting to capture the guerrillas. The Army of the Potomac is practically blind for lack of cavalry.
[8.2] Additional Events
Events are one of the most enjoyable elements of Mosby's Raiders. If the player wants them to occur more often during the game, simply add "2" to the die roll for Event cards in the Preparation Sequence, step 7. Thus, a result of "4" on the die would mean that 6 Event cards will be played that turn. Unless a "6" is rolled every turn, there will be enough cards for the whole game.
[8.3] Changes to the Action Cards
The Hide card has no effect: When the Hide card is used, there is a chance that the Union unit(s) entering the space will find Mosby. After the Union Action in which one or more units enter the space where Mosby is, roll a die. If Mosby's space is within Union lines, the Union discovers him on a result of 1-2; if it is outside Union lines, they discover him on a result of 1. When he is discovered, the Hide card has no effect, and the Union unit(s) that entered the space attack Mosby immediately (unless they are non-combat units, in which case they are eliminated normally). If the search die roll fails, the Hide card applies its normal effects.
Hiding the Cannon: When the Permanent Cannon card is drawn, the player may do as he wishes with it. He may carry it with him, or he may hide it in any non-devastated space of Mosby's Confederacy. Mark the cannon's location with a blank marker or note it on a sheet of paper, and set the Cannon card aside. The cannon remains in the space until Mosby's guerrilla band enters it to retrieve it. To do so, simply remove the marker and take back the Action card.
The cannon is eliminated if it is hidden in a space that becomes devastated. If a Union unit enters the space where the cannon is hidden, roll a die; on a result of 1-2, the cannon is discovered and eliminated.
[8.4] Railroad Line Repair
At the end of every turn, roll a die for each space containing a destroyed-railroad-line marker; on a result of 1 to 3, the railroad line is repaired, and on a result of 4 to 6, it remains destroyed. If the railroad line is repaired and the space contains a status marker with the revealed side up, flip it to its ● side. In this way, that space has been garrisoned again. The Repair Railroad Lines Event card continues to be used as in the Basic Game.
[8.5] North of the Potomac
In the basic game, there is little incentive to venture north of the Potomac, whereas historically there were good reasons to do so. To simulate this, the following rules may be used:
Performance Point Reward: Starting with turn 5 inclusive, the player receives 1 Performance Point for every space north of the Potomac that he reveals. Placing "revealed" markers on such spaces before turn 5 provides no Performance Points. In addition, spaces north of the Potomac that are adjacent to Union Troop Concentrations provide one additional Performance Point (meaning a total of 2 Performance Points for such spaces).
Restrictions: The player may not voluntarily disband north of the Potomac. This includes normal disbanding and disbanding before combat (skedaddling). If this optional rule is used in the game, remove the "Lee Needs Information" Event card before starting the game.
[8.6] Demolition Failures
In the basic rules, demolition is always automatic, as long as the target's space is occupied and an Action is available. With this optional rule, a die must be rolled and the result consulted on the Demolition Table below, to determine whether the demolition attempt succeeds. If so, the target is destroyed as in the Basic Game; if a failure is recorded, the target is not destroyed and the player has spent an Action. When a failure occurs, the Union Awareness level must be increased as if the target had been destroyed, and all Activation checks must be made just as if the mission had succeeded. In other words, the demolition procedure does not change at all, except for the result.
[8.7] Interrogation of Non-Combat Units
During Mosby's Operations only (that is, never during the Phases) the player has the option of interrogating each non-combat unit he eliminates. To do so, roll a die on the Interrogation Table and apply the result. Performance Points are still received for couriers and supply wagons, though a low die roll may penalize this reward.
[8.8] Entering Unrevealed Spaces
In the Basic Game, the player examines Union units when entering a space within Union lines, or one containing deactivated units. In this variant, when Mosby enters an unrevealed space, an Activation check is made as usual. If the unit activates, a Union unit is drawn from the pool and placed in the space with its activated side up, and the Phases begin or continue. If the Activation check does not activate the unit, a space-status marker is placed with its ● side visible, but a Union unit is not drawn. Mosby must scout the space to find out the identity of the unit. If the space contains deactivated Union units that do not activate when Mosby enters the space, the player may not examine those units unless Mosby carries out a Scout Action.
If Mosby enters an "unrevealed" space again, an Activation check is made for the (unknown) unit in it. The unit occupying the space can also be activated normally by other adjacent Union units. In fact, Mosby must enter a space and scout it to determine the identity of the Union unit occupying it. Once a unit is activated, flip the status marker over so its "revealed" side is visible.
[8.9] Depot Contents
In the Basic Game, depots were simply demolished, and the player received Performance Points. With this option, depots can contain useful items that can be taken from the depot upon leaving the space. Performance Points are still received as in the Basic Game. When demolishing a depot, roll a die and consult the Depot Demolition Table below:
Mosby attacks with his "Pistol Tactics."
Commentary
John Singleton Mosby
By Eric Lee Smith
"It was then (spring of 1862) that I saw Mosby for the first time, and his appearance was quite ordinary. He was thin, nervous, and must have stood about five feet nine or ten inches. A slightly curved neck was not without a certain grace. His chin was prominent, his lips thin with a smile that seemed sardonic; his eyes under his brown felt hat were intelligent, sparkling, and glanced curiously in both directions. He wore a grey uniform and his only weapons were two revolvers at his belt; he had no liking at all for the saber. His voice was soft and he smiled often. He rarely sat still for more than ten minutes. Such was his appearance then. No one would have noticed anything special about him apart from his gaze. His eyes sometimes flashed in a way that seemed to indicate there was something in that man, something waiting for the chance to show itself..." (Wearing of the Gray, p. 104)
John Singleton Mosby was born in 1833 into an old Virginia family that could trace its arrival on the continent to the year 1650. It was neither a powerful nor a disreputable family. They were solid middle-class planters, with a few slaves and some interest in local affairs. Mosby was a sickly child, small and frail, destined to die of consumption, according to the family doctor. Because of his frailty, he despised sports, and so was not very popular with the other boys at school. By the time he entered university in 1850, he had outgrown his childhood illnesses, but he still harbored a deep hatred for those who used their strength to bully others.
John Mosby was a lawyer by profession, though he began studying law in an unusual way. While at the University of Virginia, he had a violent confrontation with the campus bully, as a result of which the bully ended up with a bullet in the neck and Mosby in jail. While behind bars, Mosby began reading law books he borrowed from his defense attorney. He was convicted of "unlawfully" shooting his opponent, and was sentenced to a year in prison and a $500 fine. He remained in jail for almost a year and was pardoned by the governor when 300 friends and family members signed a clemency petition. Mosby went on studying law and passed the bar exam in Virginia. He would surely have become a country lawyer had the war not broken out.
Like Robert E. Lee, Mosby sympathized with the Unionists before the war, but when the moment of truth came, he too volunteered to defend his home state.
Colonel Mosby in his dress uniform.
In July 1861 he enlisted as a soldier in the 1st Virginia Cavalry, under the command of the dashing Jeb Stuart. Mosby was deeply impressed by Jeb Stuart's personality and modeled his own uniform and manner of command after Stuart's. His first contact with battle came at the First Battle of Bull Run, when Stuart's cavalry carried out the decisive counterattack that won the day for the Southerners. Mosby's company remained in reserve for most of the battle, but at the end took part in the pursuit of the retreating Union army, which greatly excited Mosby.
The routine, drill, and discipline of military life bored Mosby enormously. So as soon as he could, in March 1862, he volunteered to act as a scout for his hero, Jeb Stuart. Stuart accepted him because Mosby had impressed him with his cool intelligence and great strength of character. He performed outstandingly as a scout. Stuart's most famous success, the "Ride Around McClellan," can be directly attributed to Mosby. During McClellan's Peninsula Campaign, Mosby discovered that the Union right flank was completely exposed and suggested to Stuart that a cavalry raid could be carried out in the rear of the Union lines. Stuart loved the idea, and thus the famous raid actually took place.
Formation of the Guerrilla Band
In late December 1862, after having served as Stuart's scout for almost a year, Mosby requested permission to recruit his own band of partisans and operate behind enemy lines in northern Virginia. Stuart had come to rely heavily on Mosby's reports, but gave way because it was nearly time to return to winter quarters. The Union Army was established on the Rappahannock, preparing to begin the Chancellorsville offensive, so Mosby's initiative would have immediate results if it succeeded. With an initial group of only 9 men, he used his inexhaustible energy and keen intelligence to create chaos behind Hooker's army. On nights when it poured rain and darkness was complete, when no normal man would be out in the open, Mosby's band would appear, causing trouble. Using surprise attacks and their knowledge of the terrain, Mosby and his men attacked larger Union forces and won. They became famous almost immediately.
After a few weeks, the Union began imposing punishments on Confederate sympathizers accused of helping Mosby, and public opinion began turning against the guerrilla leader. Confederate sympathizers were ultimately won over by Mosby, regardless of the punishments, thanks to a spectacular exploit. On the dark night of March 8, 1863, Mosby and 29 raiders, including a Union deserter named Ames who knew the layout of the Union outposts, penetrated enemy lines near Centreville. They arrived undiscovered at Fairfax Court House and kidnapped Brigadier General Edwin Stoughton. Mosby personally pulled Stoughton out of bed, yanking off the blankets and giving him a slap on the buttocks. Taking other prisoners and several horses, they left Fairfax and evaded pursuit.
News of the Fairfax raid spread like wildfire through the Confederate and Union lines. General Stuart wrote a report on the raid that was read to every cavalry unit of the Army of Virginia. Newspapers, both North and South, picked up the story. Needless to say, Stoughton's military career was over and Mosby's reputation was cemented. News of the Fairfax raid brought Mosby more volunteers and more help from the local people. It was this event that made possible his later, far more significant successes.
During the spring following the Fairfax raid, Mosby increased his level of activity thanks to his newly expanded manpower. He captured pickets, derailed trains, burned bridges, caught couriers, and generally made life very unpleasant for the troops stationed in that area. What had once been a quiet, safe posting for Union soldiers in northern Virginia became dangerous because of Mosby. Mosby's increased activity forced the Union to respond. For every man Mosby had, the Union needed 50 to cover every potential target. Mosby was becoming a source of attrition that prevented the full commitment of available forces to the fight against Lee.
Later Successes
During the remaining two years of the Confederacy's existence, Mosby and his band carried out countless exploits. He was so active that it is practically impossible to compile a complete record of his raids. One of his most humorous adventures, in late September 1863, was the capture of Colonel Dulaney, an aide to the hated Union governor of Virginia installed by Lincoln. Dulaney's son was a member of Mosby's band and guided him to his father's house in Alexandria. The colonel personally opened the door when Mosby knocked, and was taken prisoner immediately. On leaving Alexandria, the raiders nearly burned down the Cameron Run bridge entirely.
In another famous raid, in early October 1864, Mosby and his band ambushed a train at the Duffield's Depot, west of Harpers Ferry. They derailed the train and the locomotive exploded in a blaze of steam and embers. They then took everything of value on the train, including the passengers' money and jewelry, and set the cars on fire. In a strongbox they found $170,000, which constituted the pay for Sheridan's troops. The consequences of the raid were tremendous. Union authorities suspected the paymasters were involved in the affair. They confined the paymasters to their quarters and added extra escorts to watch over them. Conspiracies were seen where none existed.
Mosby's largest raid took place on August 13, 1864, near Berryville, south of Harpers Ferry, when with 300 raiders he assaulted a wagon train of 325 wagons with 900 guards. Mosby attacked at first light, opening fire with a cannon, then charging and putting the escort troops to flight. He captured 250 prisoners, including seven officers, between 500 and 600 horses, and 200 head of cattle. Mosby had two killed and three wounded. As always, his tactic of surprising the enemy had won the battle before it began.
There was a deep and long-standing hatred between Mosby and the Union cavalry general George Armstrong Custer. Custer was an officer devoted to tradition who could not stomach Mosby's guerrilla tactics. In September 1864, to clear the area of guerrillas, Custer began executing Mosby's men when he captured them. Mosby would not tolerate this and received Lee's consent to respond in kind. He captured 27 of Custer's men and had them draw lots to determine the seven who would die in reprisal for the execution of the seven raiders Custer had executed up to that point. He hanged three of them within sight of Union lines, three others were shot, and the seventh escaped. Mosby then sent a letter directly to General Sheridan telling him that he would treat prisoners with consideration unless the Union continued its executions, in which case he would do the same. The executions stopped.
Mosby was "mortally wounded" three times, but recovered from each wound and returned to active service in full vigor. He was wounded for the first time in a battle near Annandale on August 24, 1863. The raiders had the upper hand until Mosby was seriously wounded in the side and thigh, at which point his troops withdrew with him. He returned to action in late September. He was wounded a second time on September 14, 1864, while joking in front of a Union regiment, prancing about on his horse. His uniform, cape, and plume made it very obvious who he was, and a Federal bullet found its mark. It broke the stock of his revolver before lodging in his groin. He barely managed to stay on his horse and escape. Using crutches, he returned to command his troops three weeks later.
The time Mosby came closest to dying and being captured occurred on December 21, 1864, when a Union detachment surprised him having dinner with his family, saw him through a window, and a soldier shot him. The bullet entered Mosby's abdomen five centimeters below the navel. Mosby crawled to the house's bedroom and had the presence of mind to remove his tunic, which was the only thing showing his rank, and hide it under a piece of furniture; he then fell to the floor and pretended to be dying. The commander of the Union detachment, a certain Major Douglas Frazar, entered the room and inspected the wound. He said it was fatal, but his judgment was not very sound, since he was drunk at the time. In any case, they left Mosby for dead, without realizing who he was and without making sure he had actually died. Needless to say, Mosby recovered after convalescing at his parents' house. During the Civil War, men wounded by gunshot were called "goners" and were rarely attended to because that type of wound was invariably fatal. Mosby survived three wounds of that kind.
After the War, in the Service of His Country
Mosby's guerrilla band was a great nuisance to Union forces in Virginia from January 1863 until the end of the war. Some historians consider that Mosby's band alone helped prolong the Confederacy's life by several months, largely due to his successes in the Shenandoah Valley. They believe his actions prevented the Union from leaving the valley and cutting the railroad line to Richmond, Lee's vital supply line. Whatever the strategic outcome, there is no doubt that Mosby was an extremely effective guerrilla leader who cost Federal forces a great deal of time, effort, and money, for nothing in return.
After the war, Mosby returned to his career as a lawyer and, like Robert E. Lee, became a figure favorable to reconciliation between North and South. Unlike Lee, however, Mosby went so far as to join the Republican Party and support Grant's candidacy for the presidency. Southerners, led by demagogues full of hatred, turned against Mosby and made him an outcast in his own land. He never returned. He kept supporting what he considered right, as he always had. He later served as American consul in Hong Kong, in 1878, during the Hayes administration. Ordinary people accepted these poorly paid posts as a way to become millionaires through theft and bribery. But not Mosby, who arrived in the East as if he were the B&O Railroad itself. He refused to accept bribes and denounced consuls who did. His actions provoked a major crisis in the American Diplomatic Corps, and many powerful men tried to remove Mosby from his post before he caused too much damage. Mosby weathered every storm, and the reform movement he started eventually cleaned up the Diplomatic Corps.
When one reads accounts of Mosby's activities and the Union response, one finds a striking resemblance to the modern "wars of liberation" in Vietnam, Algeria, the Chinese Revolution, and to the partisans in France, Yugoslavia, and the Soviet Union during World War II. Mosby and his men were archetypal guerrillas.
Mosby outlived all his opponents and almost all his friends. He died in 1916, after a long life as a lawyer — and a short period as a guerrilla.
Designer's Notes
By Eric Lee Smith
Our first solitaire game, Ambush! (with its Move Out! and Purple Heart modules), published by Victory Games, Inc., is our most successful board game to date. Solitaire games, though difficult to design, are very popular among players. So we have committed to publishing an entire line of solitaire games, the second of which is Mosby's Raiders.
The theme for a solitaire game is critical. First, you need a situation where the player controls a few units, so as not to be burdened with details; in a solitaire game, all the burden of the work falls on one player. Second, you need a situation where the side the player "controls" is the more disadvantaged, or at least the more active side in the battle. In this way the "mute" system versus the "live" player will produce a balanced game. Third, you need a situation that is interesting in its own right. I chose Mosby and his band of partisans because they satisfied all three requirements. Mosby also had many other attractions: Mosby was the most famous guerrilla of the Civil War era, the technology used was relatively primitive (no aircraft, missiles, etc.), and it is easy to identify with Mosby as a person, rather than as an anonymous regiment or other military unit.
One of the first decisions a designer faces is the distance scale to use for the map. For Mosby's Raiders, the decision was easy, since I wanted to cover the entire area in which Mosby operated regularly. The second problem is finding a source map. I went to the New York Public Library and found the maps actually used by Union Generals Butterfield and Halleck, as well as many other maps from that period. These maps were full of errors, misspellings, and distortions. From a group of about six maps, I compiled the one used in the game.
To simplify the movement of the counters and allow for a more rational Union movement system, I chose from the start to use spaces, rather than the more traditional hex grid. With a hexagon there are always six possible paths out for movement, but with spaces I could limit the paths to historical routes and simplify the number of options for both the Union and the Confederate side.
Another decision I had to make early in designing a game is the number and type of counters to use. At first I allowed Mosby's raiders to split up, using more than one counter, as they did historically in late 1864 and 1865. However, I decided to limit the game's scope to the earliest part of Mosby's career (for reasons of the game's time scale), thereby eliminating this unnecessary complication. The rest of the counter mix fell into place easily. I designed a mix of Union units, types, and strengths that have remained virtually unchanged since day one. The decision to use counters of various shapes and a plastic stand to hold the Mosby counter was inspired by our game Pax Britannica, reworked and adapted directly for Mosby's Raiders.
The sequence of play is original, but is related to the one used in Ambush!. As in Ambush!, Mosby's Raiders naturally divides into two "modes": Operations and Rounds. This two-part turn structure provides a variable time scale, so that you feel you are "getting something done" with time during Operations while still having the detail for movement and combat in the Rounds. The two-level system, combined with a system that doesn't force you to do things in the same order every turn, is the heart of the game.
The hardest design problem I had to overcome was how to make the Union side react in a logical way. The Union Activation system was the key idea. This simulates fairly well the erratic effects of guerrilla activity, where people have no idea what is happening or where. The Union movement system was developed gradually and was more complicated at first. I polished it over time into the form you see now. The systems for Union Awareness, Activation, and Movement mesh together fairly well into a reasonably accurate simulation of what happened historically, while still keeping the game enjoyable.
Using cards as one of the main "engines" to drive the game was another early idea. Cards allow for chance in the game and add surprise — critical elements in a solitaire game. The Event cards are based on historical events drawn from my research, and are used to provide logical Union actions at the strategic level. The Action cards are based on tactics developed by Mosby and used historically, and add a level of control over the game system for the player.
Once Mosby's Raiders was designed, we began internal testing and testing with playtesters. The playtesters in particular did very well, since they played the game more than I did, raising questions and contributing many elements that appear in the final game. Balancing the game was difficult, and it took most of the playtesters several games before achieving their first victory. The published game is balanced, but you can also lose early on.
Mosby's Raiders is a unique design made above all for my own satisfaction. This is not a slavish simulation of history, but it is a good representation of what happened. I have tried to give the game color and excitement without being trivial or conventional. I hope I have succeeded, and that you enjoy playing the game as much as I enjoyed designing it.
Sources
The principal sources used in designing the game, for the biography of John S. Mosby, and for the historical notes accompanying the Event and Action cards are listed below:
Mosby with Stuart.
- The Civil War Dictionary by Mark M. Boatner III (New York: David McKay Company, Inc., 1959)
- The Common Soldier in the Civil War, Volume Two: The Life of Johnny Reb by Bell Irvin Wiley (New York: Gosset & Dunlap, originally published 1943)
- Gray Ghosts and Rebel Raiders by Virgil Carrington Jones (Covington, GA: Mockingbird Books, 1956)
- Memoirs of Colonel John S. Mosby, edited by Charles Wells Russell (Millwood, NY: originally published by Kraus Reprint, 1981; Indiana University Press, 1959)
- Rebel: The Life and Times of John Singleton Mosby by Kevin H. Siepel (New York, NY: St. Martin's Press, 1983)
- Wearing of the Gray by John Esten Cooke, originally published 1867 (Indiana University Press, 1959)
Examples of Play
Demolition, Combat, and "Hide."
SITUATION: It is turn four. The Union Awareness level is 2, Mosby's Notoriety is 4, and Mosby's guerrilla band has a combat factor of 2. Mosby is healthy, so the player has four Action cards in hand (Local Guide, Spur the Horses, Ambush!, and Hide). There is one deactivated Union unit on the map, in the Bristoe Station space. We are in Mosby's Operations and the player decides to demolish the bridge at Union Mills. He could move to Greenwich and scout the Bristoe Station space to find out which Union unit occupies it, since the player doesn't remember which one it is, but instead decides to take a shorter route through Manassas Junction.
SCOUTING: The player moves Mosby to Groveton and scouts Manassas Junction. He decides not to play an Action card and instead rolls the die. The result is a "2," which equals the Union Awareness level, so the scouting attempt on the space fails. A "revealed" marker is placed on the Manassas Junction space, a Union unit is drawn from the pool, and placed in the space without looking at it. An Activation check is then made for that unit, and a "4" is rolled, so the unit does not activate since that result is greater than the Union Awareness level. Since the unit did not activate, the player may look at what unit it is. He examines it and sees that it is a supply wagon. He places it with its deactivated side up in the space.
MOVEMENT: The player moves Mosby to Manassas Junction and makes an Activation check for the deactivated supply wagon. The die result is "3" and the unit does not activate. Since there are no combat units in the space, the supply wagon is eliminated and placed in the Union Unit Holding Box. Mosby gains 1 Performance Point. No further Activation checks are made because the supply wagon is a non-combat unit.
The player then plays the "Local Guide" card, which lets him enter Union Mills without making Activation checks. The card is discarded after being played. A "revealed" status marker is placed on Union Mills, a Union unit is drawn from the pool, examined, and placed in the space with its deactivated side up. It is a combat unit with a combat factor of 2. So far, the player has managed to reach his objective without activating any Union unit.
DEMOLITION: The player uses the Demolish Action to destroy the bridge, flipping the bridge counter over to show its demolished side. Mosby receives 5 Performance Points for the demolition. In addition, the Union Awareness level increases by 1, for a new total of 3. Activation checks must then be made for Union Mills and for the adjacent spaces eligible for such a check.
Activation-check markers are placed on Centreville, Fairfax Station, and Bradley, since these spaces are adjacent to Union Mills, and another marker on Union Mills. No marker is placed on Manassas Junction, because the Union unit there has been eliminated, nor is an Activation check made for Bristoe Station because it is not adjacent to Union Mills.
The player rolls the die for Centreville and gets a "4," so no unit activates there. He then rolls for Fairfax Station and the result is a "2," so a unit activates in that space. The player draws a unit from the pool, examines it, and sees it is a combat unit with a combat factor of 4, and places it in the space with its activated side up. Next the die is rolled for Bradley and the result is a "6" — no unit activates there. The last Activation check is for Union Mills and the result is a "1," so the combat unit of factor 2 that was there activates, placed with its activated side up. Since there are now activated Union units on the map, play moves immediately to the Phase sequence.
SITUATION: It is turn four. The Union Awareness level is 2, Mosby's Notoriety is 4, and Mosby's guerrilla band has a combat factor of 2. Mosby is healthy, so the player has four Action cards in hand (Local Guide, Spur the Horses, Ambush!, and Hide). There is one deactivated Union unit on the map, in the Bristoe Station space.
ACTIONS: Mosby has the Initiative and decides to move, playing the "Spur the Horses" card to increase his movement factor to 4 spaces. The player moves Mosby through Manassas Junction, Groveton, Gainesville, and ends the move at Haymarket. The "Spur the Horses" card is discarded after being played.
Now it is the Union units' Action turn. The picket moves first; the player rolls a "3" on the die on the Movement Table, so the picket must move toward the nearest Union unit, entering Union Mills. Since the unit in that space is already activated, the picket is removed and placed back in the pool (had the unit in Union Mills been deactivated, the picket would have activated it). Next the combat units move. The player rolls a "1" for the combat factor-4 unit at Fairfax Station, so that unit deactivates; since it is in a space with a Troop Concentration, it is removed from the map and returned to the pool. The result for the combat factor-6 unit occupying Occoquan is "5," so it moves 3 spaces along the most direct route toward Mosby's guerrilla band, entering Fairfax Station and Union Mills and ending its movement at Manassas Junction. The result for the combat factor-2 unit at Union Mills is "6," so it moves through Manassas Junction, Groveton, and Gainesville to Haymarket, where Mosby is.
PHASES: First it must be decided which side has the Initiative. The player rolls the die and gets a "6" on the Initiative Table, so Mosby wins the Initiative for the Phases. (If the player had a "Gain the Initiative" card in hand, he could have played it, automatically gaining the Initiative without needing to roll the die.) Activation checks must then be made for spaces adjacent to activated Union units. If there were deactivated units in the same spaces as activated units, Activation checks would also have to be made for those deactivated units.
Activation-check markers are placed at Fairfax Court House, Springfield Station, Pohick Church, Occoquan (these spaces are adjacent to Fairfax Station, which must also be checked since it contains a Troop Concentration that can send an unlimited number of Union units), and markers at Centreville and Bradley (adjacent to Union Mills). The Activation checks do not activate units at Fairfax Court House, Springfield Station, Fairfax Station, or Centreville. Units activate at the remaining spaces. The unit drawn for Pohick Church is a blank (false) counter and so is placed in the Union Unit Holding Box; the unit at Occoquan is a combat unit with a combat factor of 6 and is placed with its activated side up in that space; the unit corresponding to Bradley is a picket, also placed with its activated side up in that space. "Revealed" status markers are placed on the spaces where units have activated.
At the start of the next Phase, Activation checks are made for units adjacent to, or in the same spaces as, activated Union units. The only space that must be checked is Bristoe Station, adjacent to the combat factor-6 unit occupying Manassas Junction. The die result is a "3," so the unit activates; it turns out to be a combat unit with a combat factor of 3.
Now Mosby carries out an Action. He could keep moving, away from Union lines, or he could move to Gainesville to attack the retreating Union unit. However, since the remaining Union units could reach that space and achieve 4-to-1 combat odds, the player decides to play a "Hide" card and pass.
HIDE: The Union unit that retreated spends its Action regrouping and therefore does not move (remove the retreat marker). A "4" is rolled for the combat factor-6 unit at Manassas Junction, which moves through Groveton and Gainesville and enters Haymarket. The factor-3 unit that was at Bristoe Station rolls a "3" and moves through Greenwich and Gainesville and enters Haymarket. Since at least one Union unit has entered the space occupied by Mosby, all Union units move one space at random and deactivate.
COMBAT: Since the Union unit has moved into the space occupied by Mosby, it must attack him. Both sides have a combat factor of 2, so there is no modifier from the Union Odds Modifier Table. Mosby's Notoriety and the Union Awareness level add up to 7, giving a +1 modifier on the Union Reaction Table. In addition, the player decides to play an "Ambush!" card, which grants another +2 modifier. The total modifier for the die roll is +3. The die comes up "2," which modifies to a final result of "5." The Union unit must retreat and loses one combat factor (a strength-1 marker is placed under the counter to reflect its new combat factor). Mosby gains 6 Performance Points (3 for winning the combat — 1 + 2 for the Union unit's combat factor — and 3 for eliminating one Union combat factor). A "retreat" marker is placed on the Union unit and it is moved back to Gainesville, the space from which it entered Haymarket. Union Awareness increases by 1, to a total of 4. The Phase has ended.
RANDOM MOVEMENT: First the die is rolled for the combat factor-3 unit and the result is a "6." Counting from the road marked with a 1 leaving Haymarket that leads to Gainesville, the count ends on the road leading to Gainesville, so the unit moves to that space and then deactivates. A "2" is rolled for the factor-6 unit, and counting along the roads ends on the one leading to White Plains; the unit moves to that space and then deactivates. Finally, the die is rolled for the unit that had retreated to Gainesville and a "4" is rolled; the unit moves to Groveton and then deactivates. Since there are no more activated Union units on the map, the Phases end and the player resumes Mosby's Operations.
Kidnapping, Combat, and Disbanding.
SITUATION: It is turn five. The Union Awareness level is 3 and Mosby's Notoriety is 6; Mosby's guerrilla band has a combat factor of 5. Mosby is healthy and the player holds 5 Action cards (Scout, Pistol Tactics, Mosby Escapes, Counterattack, and French Dulaney). One of the Event cards that appeared during the Preparation Sequence was "Colonel Dulaney," so his counter occupies the Alexandria space. There are no other Union units on the map. During Mosby's Operations, the player decides to kidnap Colonel Dulaney.
SCOUTING AND MOVEMENT: The player decides the best way to enter Alexandria is to move Mosby to Gum Spring, then through Chantilly, Fairfax Court House, Annandale, and then into Alexandria. Mosby scouts Chantilly from Gum Spring; the Scout card provides a +1 modifier to the die. The result is a "3," which modified becomes 4, so the scouting attempt succeeds. A "revealed" marker is placed on Chantilly, a unit is drawn from the pool (it turns out to be a combat unit with combat factor 4), and placed with its deactivated side up in the space. Mosby then enters the Chantilly space; for the Activation check, the die result is "5," modified to "6" by the Scout card, so the unit does not activate.
KIDNAPPING: The player kidnaps Colonel Dulaney and turns his counter over to show the "kidnapped" side, then places it under the Mosby counter. Union Awareness increases from 2 to 5. An Activation check is then made for the Union Troop Concentration and a "5" is rolled (the Scout card cannot be used because the player is already in the space in question). A unit is drawn from the pool and placed with its activated side up in the space; it is a combat unit with a combat factor of 1. The Phase sequence begins.
FIRST PHASE: The player rolls a "5" on the Initiative roll, so Mosby has the Initiative for the Phases. Activation checks are made for the spaces adjacent to Alexandria, placing Activation-check markers at Fort Runyon, Bailey's Crossroads, and Vernondale. The check for Fort Runyon results in a "6," so there is no activation; the check for Bailey's Crossroads results in a "1," but the unit drawn from the pool is a blank (false) counter (a "revealed" marker is placed on the space and the blank counter goes to the Union Unit Holding Box); the check for Vernondale results in a "4," but the unit is a supply wagon (a "revealed" marker is placed, and the unit is placed in the Vernondale space).
Feeling fairly confident, the player decides to attack the combat unit; the odds are 5-1, giving a +4 modifier; the combined Notoriety and Awareness level, 11, gives no modifier. However, the "Pistol Tactics" card gives another +1 modifier, for a total modifier of +5. The die result is "2," which modified becomes "7." The Union unit is eliminated and Mosby gains five Performance Points (2 for winning the combat — 1+1 for the Union combat factor — and 3 more for eliminating one Union combat factor). Since the Union Awareness level is already 5, it does not increase.
Mosby enters the Fairfax Court House space; a new Activation check is made for the Union Troop Concentration (no scouting is needed because the player already knows the space contains an unlimited number of Union units). The result is "3" (modified to "4" by the Scout card), so no unit activates. Next, a successful scout at Annandale reveals a blank counter in that space; the player places a "revealed" marker on the space and puts the blank counter in the Union Unit Holding Box. Mosby moves to Annandale.
Playing the "French Dulaney" card lets him enter Alexandria without making an Activation check; the card is removed after being played. The player has managed to reach his objective without activating any Union units.
Activation checks must then be made for Fort Runyon and Alexandria. The results are "1" and "3," activating two units: a combat unit with factor 3 is drawn for Fort Runyon and a combat unit with factor 2 for Alexandria. Now it is the Union's Action turn.
The die is rolled for the supply wagon first and the result is a "3" — the unit moves to Alexandria and is removed from the map, returned to the pool. A "1" is rolled for the Fort Runyon unit, which deactivates in that space (it is removed from the map and returned to the pool). A "3" is rolled for the combat unit at Alexandria, so it remains there as the attacker to engage in combat.
The odds for the Union unit are 1-3 (with a +2 modifier), so the player has a total modifier of +3 (including the +1 modifier from the "Pistol Tactics" Action card). The die result is "2," modified to "5," so the Union unit must retreat and loses one combat-factor point (Mosby gains 6 Performance Points: 3 for winning the combat [1+2 for the Union combat factor] and 3 for the eliminated combat factor); the Union unit, now with a combat factor of 1, retreats randomly and ends up at Bailey's Crossroads (place a "retreat" marker on the unit).
This combat causes still more Activation checks (marked with an "A" in the illustration) for Fort Runyon and Alexandria. A combat unit of factor 4 activates at Fort Runyon and a blank counter at Alexandria.
SECOND PHASE: Activation checks are next made (marked with a "B" in the illustration) for every space adjacent to activated Union units. Washington, D.C., Falls Church, Alexandria, and Fort Marcy are adjacent, and another check must also be made for Fort Runyon. Luck is against the player, since every space activates a unit. A combat unit of factor 7 appears at Falls Church, one of factor 2 at Washington, another of factor 1 at Fort Marcy, a blank counter at Fort Runyon, and a courier at Alexandria. A "revealed" marker is placed on Falls Church.
THIRD PHASE: Hoping to get away from the Union combat units, the player decides to move this Phase. But first he removes the courier from Alexandria; this is not combat, it simply happened to be in the wrong place at the wrong time. The kidnapped leader reduces Mosby's movement factor to 2. The player moves to Vernondale and then to Pohick Church, making an Activation check upon entering the latter space (with a +1 modifier, from the "Scout" Action card) resulting in a "6." A "revealed" marker is placed on the space and a Union unit is drawn from the pool, examined, and then placed in the space with its deactivated side up. It turns out to be a combat unit of factor 3.
Now it is the Union's movement turn. The units at Washington and Fort Runyon deactivate in their spaces, rolling a "1" for both, and are returned to the pool. The unit at Falls Church moves three spaces toward Mosby, ending its movement at Vernondale. The combat unit of factor 1 at Bailey's Crossroads regroups. The combat unit of factor 1 that was at Fort Marcy also moves three spaces toward Mosby, also ending at Vernondale.
Activation checks are made at the start of this Phase for Fort Marcy, Fort Runyon, Alexandria, and Springfield Station, resulting in the activation of a combat unit of factor 4 at Springfield Station (a "revealed" marker must be placed on that space), a combat unit of factor 3 at Alexandria, a blank counter at Fort Marcy, and a courier at Fort Runyon.
Deep within enemy lines, with 16 combat factors converging on him (and 3 more in the same space he occupies), the player decides, rather than fighting his way out (which would activate more Union units), to disband. Colonel Dulaney "escapes" and is removed from the map. Union units deactivate in the spaces they occupy; those in a space with a Troop Concentration are returned to the pool, the rest remain on the map. The player loses no Performance Points, since he wisely disbanded during his Action in the Phase. The turn ends and the kidnapping has failed.
The Union Wagon Train
SITUATION: The Wagon Train enters play via Event cards. It is placed at Harpers Ferry. Mosby wins the Initiative in the Phases; Mosby's guerrilla band (with a combat factor of 4) catches up with the Wagon Train at the Winchester space. Activation checks are made for each Union escort unit, resulting in the activation of one of them, with a combat factor of 2.
Mosby decides to pass this Phase. The Union escort unit must attack, and in this case loses the combat, so it must retreat. (Had Mosby decided to attack, he would have had to attack both escort units.) A new Activation check is made for the other escort unit at the end of combat; if there were other deactivated Union units adjacent to Winchester, Activation checks would also have to be made for them.
If the second unit activates, Mosby must defeat it in combat before he can destroy the Wagon Train. If this second unit does not activate, Mosby can automatically destroy the Wagon Train using the Demolish Action. In this case, Union Awareness increases by 2 and a new Activation check is made for the second escort unit due to the demolition. Whether or not this unit activates, the Phases continue, since the first escort unit is still activated.
Summary of the Action Cards
Note on this section: in the source rulebook, each card's name is printed only as part of the card's own graphic art, not as a text heading, and that art did not survive into the digital text this translation was made from. Card names below have been identified from cross-references elsewhere in the rules and examples; the one card whose name could not be identified this way is presented under a plain functional description rather than a guessed title.
Permanent Cards
Permanent cards are kept by the player indefinitely and are only discarded voluntarily, unless Mosby is wounded, in which case the player must immediately give up one Permanent Action card of his choosing.
Cannon: All combat die rolls receive a +1 modifier, whether Mosby is the attacker or the defender. Mosby's guerrilla band's movement is reduced by two spaces during the Phases (no effect during Mosby's Operations); the "Fast Horses" or "Spur the Horses" Action cards can be played, together or individually, to increase the guerrilla band's movement allowance. This card is lost if Mosby's guerrilla band disbands before a combat (skedaddle) or loses a combat. Number of cards: 1.
Historical Notes: "On May 19, Mosby sent Fount Beattie to Stuart with a request for a mountain howitzer... by the 29th he already had his cannon: a light 2⅝-inch-bore gun, made in Richmond, but captured from the Yankees the previous year at Ball's Bluff... The locomotive hit the loosened rails and derailed, coming to a stop on solid ground, helplessly hissing steam. As the infantry escort jumped from the train, firing into the woods, Chapman sent a volley of grapeshot into the cars and Mosby ordered his men forward. The effect was instantaneous: the infantrymen nearly trampled one another trying to reach the pines on the other side of the track. Chapman scored a hit on the locomotive's boiler, so that the escaping steam made an infernal noise. In a moment the attackers placed bales of straw in strategic spots, setting the train on fire and carrying off what they could in the meantime, including several barrels of fresh shad bound for the front. A few sacks of Union mail were taken, hastily loaded onto the howitzer's caisson, and with the gun ready, the men prepared to make their escape." (Rebel, pp. 87-88)
Fast Horses: Mosby's guerrilla band's movement is increased by one space during the Phases, but to receive this bonus the guerrilla band must move from one space to another along a pike (turnpike road). Movement along a pike can occur at any point during the Phase. Number of cards: 1.
Historical Notes: Good horses were hard to come by in the South during the war, since almost every horse was requisitioned for the army's cavalry and artillery. Mosby's men equipped themselves with whatever they could find and gradually improved their mounts with horses captured from the Union. Horses were valuable property, so the guerrilla band appropriated every one it found.
Scout: All Scout actions receive a +1 modifier, whether during the Phases or Mosby's Operations. In addition, during Mosby's Operations, this card grants a +1 modifier to all Activation checks for deactivated Union units in spaces Mosby's guerrilla band enters. However, if Mosby is already in a space with Union units, this card cannot be applied to Activation checks. Number of cards: 1.
Historical Notes: During the war, several individuals with exceptional scouting skills volunteered to help Mosby. Many of the men in Mosby's guerrilla band came from the northern Virginia area, and knowing the terrain, they were invaluable as scouts.
Pistol Tactics: All combat die rolls receive a +1 modifier, whether Mosby's guerrilla band is the attacker or the defender. Number of cards: 1.
Historical Notes: "I believe I was the first cavalry commander to discard the saber as a useless thing, relegating it to museums. A squadron of cavalry charging with sabers impressed my men about as much as one charging with corncobs... I believe my unit achieved maximum efficiency as a cavalry force because the men were well armed with two revolvers each, and their charges combined the effect of fire with shock." (Memoirs, pp. 284-285)
(unnamed permanent card — Notoriety/Initiative bonus): If Mosby's Notoriety is 4 or more, this card gives a +1 modifier to Initiative rolls while held. If Mosby's Notoriety is 3 or less, the card has no effect, but can be kept until it can be used. Number of cards: 1.
Historical Notes: "I respectfully suggest," added General Halleck, "that Sheridan's cavalry be required to fulfill this objective [guarding the rail line while repairs were carried out] before being sent on any other mission. The two small regiments under General Augur's command have been attacked so many times by Mosby's band that they are terrified and useless for that purpose." (Rebel, p. 122)
Non-Permanent Cards
These cards can be played at any time during the Event sequence, Mosby's Operations, or the Phases. Once used, the player must discard them immediately. Any number of cards may be played at once if desired. At the end of a turn, the player must discard all non-permanent Action cards.
Ambush!: When Union combat units are the attackers, Mosby's guerrilla band receives a +2 modifier to the combat die roll. This card has no effect if Mosby's guerrilla band is the attacker. Number of cards: 2.
Historical Notes: "On the morning of July 6th, while still encamped near the Potomac, word reached us that a considerable Union cavalry force was at Leesburg. I immediately hurried to meet them. At Leesburg I learned they had left for Aldie, so I took the road toward Ball's Mill, finding the Union troops at Mount Zion Church (near Aldie), routing them completely, with losses of 80 killed and severely wounded among officers and men, besides taking 57 prisoners... my losses were 1 killed and six wounded, none of them serious." (Memoirs, p. 276)
Counterattack: When this card is used, the player may roll the die a second time to determine the result of a combat. This card can be played whether Mosby's guerrilla band is the attacker or the defender. When determining the modifiers for the new combat, non-permanent Action cards used in the previous combat must be ignored (Permanent cards may be used again). The new combat result must be applied, even if it is worse than the previously produced result. These cards can be played as often as desired, discarding them as they are played, until they run out or the player no longer wishes to fight again. Number of cards: 6.
Historical Notes: "Determined to take the risk, I ordered a counterattack, to which my men responded immediately. The Yankees never imagined we would take the initiative; terrified by my men's shouts, they scattered, fleeing in every direction. We pursued them for seven or eight miles along the pike." (Memoirs, p. 194)
(unnamed card — Union Awareness reset): This card can be used after a Mosby Casualty Check has been made, whether due to combat or an Event card, as long as Mosby was not killed (in which case the game ends). The Union Awareness level is immediately reduced to 1 (not reduced by 1). Number of cards: 2.
Historical Notes: "News that Mosby had been wounded spread quickly. It ran through the camps around Washington, and search parties hurried out after the reward that would be theirs if they found the guerrilla chief alive or dead. They did not stop searching as the rumors grew, and it seemed what would be found was a corpse rather than a dangerous guerrilla. The newspapers announced Mosby's death, even giving details, and filled their columns with stories about his colorful career." (Gray Ghosts, vol. 2, p. 11)
French Dulaney: This card allows Mosby's guerrilla band to enter Alexandria without making Activation checks for the Troop Concentration located there. This card cannot be played if there is an activated Union combat unit in the Alexandria space. Number of cards: 1.
Historical Notes: "A week later he slipped into Alexandria with half a dozen men and managed to kidnap the aide to the federal governor of Virginia, a certain Colonel Dulaney, who made the mistake of going to answer his own door when Mosby knocked. Dulaney's son, French, was among the men accompanying Mosby at that moment. After the elder Dulaney was escorted by Mosby in person to Libby Prison in Richmond, in a letter to his wife Pauline, Mosby recounted the meeting between father and son: 'It was rather an amusing scene, the interview between Colonel Dulaney and his son. As we were about to leave, the colonel sarcastically told his son that he had an old pair of boots he could take, since he had heard they were quite scarce in the Confederacy, to which his son, raising his leg — which was clad in a fine cavalry boot, freshly stolen from a supply wagon — asked him if that seemed sufficient.'" (Rebel, p. 99)
Gain the Initiative: This card automatically gives the Initiative to Mosby's guerrilla band during the Phases. This card must be played instead of rolling the die to see who has the Initiative (that is, you cannot roll the die and then play the card). If the Phases end and play returns to Mosby's Operations, another Gain the Initiative card must be played or the die rolled again should the Phases begin anew. Number of cards: 7.
*Historical Notes: Mosby seemed to have a sixth sense telling him when and how to begin combat. He would often simply charge directly at the Yankee soldiers, scattering them with shouts and revolver fire. Other times he was cunning and would surround the enemy; then a swift surprise attack made all resistance useless. The Yankees rarely managed to seize the Initiative from Mosby.
Hide: This card lets Mosby's guerrilla band hide in the space it occupies, except in a space containing a Union Troop Concentration. During the Phases, Mosby's guerrilla band must pass in order to remain hidden once this card has been played. Union units keep moving normally during the Phases, activating other units. Once at least one Union combat unit enters the space occupied by Mosby, Union movement ends for that Phase. During the following Phase, every Union unit moves one space at random and deactivates. The Phases end immediately, and the player may continue carrying out Actions during Mosby's Operations.
This card can be played whether Mosby is alone in a space or there are one or more Union combat units in the same space as the guerrilla band. The combat procedure can even be started and carried through to step 3D (that is, before rolling the die to resolve combat) before playing the card. This card cannot be used once the die has been rolled to resolve a combat. Number of cards: 5.
Historical Notes: Northern Virginia, during the Civil War, was a patchwork of small farms, separated from one another by small woods and streams. There were many possible hiding places and Mosby used them very well. He could often conceal where his guerrilla band was, even when they had ventured deep behind enemy lines, which caused great anxiety for the Union command.
Local Guide: Using this card, Mosby's guerrilla band can enter a space without making Activation checks for the space or for deactivated units located in it. If the space has not been previously scouted or entered, a "revealed" marker is placed on it, a Union unit is drawn from the pool, examined, and placed deactivated in the space. (A blank or non-combat unit is placed in the Union Unit Holding Box; Mosby will receive Performance Points if it is a courier or supply wagon.) If the space contains deactivated Union units, the player may examine them as well. This card can be played during Mosby's Operations or during the Phases. Number of cards: 6.
Historical Notes: "Near the Union outpost lived a man named Ben Hatton, who traded with the camps and knew them quite well. So, around midnight, we stopped at his house a mile from the outpost, and he told us he had been there that afternoon — I suppose to buy coffee and sugar. Ben was appointed guide to lead us to the enemy's rear. When we reached that point, I decided to dismount, leave the horses, and attack on foot. Ben had completed his mission, and since he was not a combatant, I did not want to expose him to unnecessary danger, so we tied the horses to trees and two of my men stayed with Ben to guard them." (Memoirs, p. 153)
Local Information: Using this card, Mosby's guerrilla band can automatically scout an adjacent space. No Activation checks are made. If that space has not been previously scouted or entered, a "revealed" marker is placed on it, a Union unit is drawn from the pool, examined (if it is a blank counter it is placed in the Union Units Holding Box), and placed deactivated in the space. If the space contains deactivated Union units, the player may examine them. This card can be played during Mosby's Operations or during the Phases. Number of cards: 6.
Historical Notes: The people of northern Virginia passed a constant stream of information to Mosby about the location of Union units and their activities. They did so knowing that by helping Mosby they were putting themselves and their property in danger. Union authorities could be brutal in their reprisals.
Mosby Escapes: Using this card negates a Mosby Casualty Check on any occasion such a check must be made. The card can be played before or after rolling the die for that check. Number of cards: 4.
Historical Notes: "Union Captain William Boyd immediately headed toward the Hathaway house. Surrounding the place, his soldiers searched every room but the only thing they found was a warm bed, parts of the guerrilla's uniform, and his very nervous wife. They kept searching without finding anything, and at last moved away from the house... Shortly after they left, the little guerrilla (Mosby), in his boots and underwear, dropped down from the branch of a tree near one of his bedroom windows and climbed back into bed." (Gray Ghosts, Vol. 1, p. 196)
Surprise Attack: This card gives a +2 modifier to the combat die roll, whether Mosby's guerrilla band is the attacker or the defender. After combat is resolved, a Mosby Casualty Check must be made immediately (in addition to any check that must be made if a "1" was rolled on the die). Playing the "Mosby Escapes" card negates one of the Casualty Checks. Number of cards: 3.
Historical Notes: John Mosby was reckless in battle. He was always at the front, making his presence known to both his men and the enemy. He risked his life to save a situation or win a battle. Such heroics came at a cost, as Mosby was wounded often. He received three bullet wounds, was thrown from his horse, and suffered other injuries during the war.
(unnamed card — triple unrevealed-space entry): Playing this card, Mosby's guerrilla band may enter up to three Union-occupied spaces without making Activation checks for the Union units in those spaces. In addition, the guerrilla band may move through spaces containing activated Union units without combat occurring.
During Mosby's Operations, any three spaces desired may be entered. A "revealed" marker is placed on spaces that have not previously been scouted, entered, or activated, drawing Union units from the pool for those spaces (blank counters go to the Union Units Holding Box; couriers, pickets, and supply wagons are eliminated if there is no Union combat unit in the space, and placed in the Box). In addition, the player may examine any deactivated Union unit in the spaces entered. However, if any Action of Mosby's guerrilla band activates a Union combat unit before all three spaces have been entered, the card is discarded immediately and its effects are ignored.
During the Phases, all three spaces must be entered during the same Move Action. Space-status markers are placed as needed, as described above. If one or more Union combat units enter the space occupied by Mosby's guerrilla band during its Action, combat is then mandatory, but only with those units that entered the space occupied by Mosby during that Phase. Number of cards: 1.
Historical Notes: "After a few weeks of life as a partisan, I contemplated a bolder enterprise than any I had yet undertaken, and fortunately I received help from a completely unexpected quarter. A deserter from the 5th New York Cavalry, named Ames, came to see me. He was a sergeant in his regiment and came in full uniform. I never cared to learn what his reason for deserting had been. The report he gave me on troop dispositions and gaps in the picket line matched what I already knew and disposed me in his favor. But my men were suspicious of his good faith and thought he had really come to trap me with a good story. At first I did not accept him with full confidence but kept him on trial. Ames passed every test, and until he was killed I never had a more faithful follower." (Memoirs, pp. 168-169)
Spur the Horses: Playing this card allows Mosby's guerrilla band to move one extra space during the Phases. Several of these cards can be played in the same Phase, and they can be combined with the permanent Fast Horses card. Number of cards: 6.
Historical Notes: Every one of Mosby's men became an excellent horseman, if he was not one already. They rode tirelessly, and were trained to fight from the saddle, each soldier armed with at least two revolvers. Their fast horses, their mastery in riding them, and their knowledge of the terrain made Mosby's guerrilla band almost impossible to catch in a pursuit.
(unnamed card — apparent-strength bluff): Playing this card has the effect of increasing Mosby's guerrilla band's combat factor by 1 for the purpose of determining the combat odds. Number of cards: 4.
Historical Notes: John Mosby and the great Southern cavalry leader Nathan Bedford Forrest were experts at deceiving their opponents, making them believe they had more men than they actually possessed. These deceptions often involved making a great deal of noise, marching troops back and forth in front of the enemy, and other subtler tricks. The strength of Mosby's guerrilla band was rarely known and was generally overestimated.
(unnamed card — attacker's charge bonus): This card provides a +2 modifier to a combat die roll for a combat in which Mosby's guerrilla band is the attacker. It cannot be used when Union units are the attackers. Number of cards: 2.
Historical Notes: "Just then I saw two riders in blue on the pike, so with my squadron I began galloping downhill to capture them. But when we were halfway there, we discovered a rather considerable cavalry force that had just dismounted; I tried to stop, but my horse was much too excited and galloped at full speed with no control at all. However, that cavalry force was caught completely by surprise by our sudden charge; their pickets had not fired and were so startled it seemed as if we had dropped from the sky. They did not wait to see how many of us there were. Panic seized them. Without stopping to saddle their horses or fight on foot, they scattered in every direction." (Memoirs, p. 159)
Summary of the Event Cards
Guerrilla Reinforcement — Notoriety threshold: If Mosby's Notoriety is equal to or greater than the number printed on the card, the guerrilla band receives 1 extra strength point. Place the marker indicating Mosby's guerrilla band's combat factor in the appropriate box. Number of cards: 3.
Historical Notes: Mosby never knew how many men would show up when he called for a raid. Men often came covering great distances, over bad roads and in even worse weather. They would generally arrange to meet at a well-known place such as a church, a town, or a crossroads, and then prepare for the raid.
(unnamed card — Performance Point bonus): Mosby immediately gains 2 Performance Points. Number of cards: 1.
Historical Notes: "Suspense grew in Maryland and northern Virginia, and in the midst of all this terror of invasion, a small romantic episode became known... The Star, a Washington newspaper, was first to report it, announcing that a group of men and women from Washington had gone on a picnic to Falls Church, just seven miles from the White House, and that in the midst of the fun they were surprised by some twenty of Mosby's men, who told them not to be afraid, danced a number with the ladies, after which they headed to the wagons and devoured the delicacies that had been brought along for the occasion. Then they disappeared, arrogant and brave, leaving a feeling of excitement in more than one female heart." (Gray Ghosts, vol. 2, p. 24)
Colonel Dulaney / General Stoughton (Leader appearance): There are two cards for each of these Union leaders. When the first one appears, the leader's counter is placed in the indicated space (Fairfax Court House for General Stoughton and Alexandria for Colonel Dulaney). The leader remains on the map until he is kidnapped or until his second card appears. A kidnapped leader who escapes or is freed due to a battle is removed from the map (ignore his second Event card, though that card still counts toward the total number of Event cards played that turn). When a leader's second card appears, assuming he has not been kidnapped, his counter is removed from the map; he cannot be kidnapped for the rest of the game. Number of cards: 4 (2 for each leader).
Historical Notes: "The Confederate guerrilla John Mosby, who at that time was attacking Federal patrols and outposts in the vicinity (of Fairfax Court House), learned of a gap in the picket line between Chantilly and Centreville, and on the night of March 8, 1863, slipped through it with 29 of his men. In the midst of thousands of Union soldiers he pulled Brigadier General Edwin H. Stoughton out of bed and escaped the town with him and 32 other prisoners, as well as 58 horses. As Jeb Stuart affirmed, this was an act without parallel in the war... and it meant the end of Stoughton's career as a soldier." (Generals in Blue, p. 482)
Extend the Front: Roll the die and consult the Extend Union Lines Table. Place status markers (with the ● side up) on the spaces indicated by that table; if that result has already come up previously, roll again until a new result is obtained. These spaces become part of the Union lines for the rest of the game. During the Preparation Sequence, Mosby cannot be placed in a space containing a status marker.
If Mosby is in one of the spaces that becomes part of the Union lines, a Union unit is drawn from the pool and examined. Blank counters and pickets are eliminated and placed in the Union Units Holding Box; couriers and supply wagons are also placed in that box, and Mosby receives one Performance Point for the eliminated unit. If a Union combat unit is drawn, combat is resolved immediately (there is no surprise modifier). If Mosby loses the combat, the turn ends; if Mosby wins, the Union unit is returned to the pool and play continues with the Event sequence or begins with Mosby's Operations. Number of cards: 5.
Historical Notes: The Union lines in the Washington, D.C. sector were in constant flux as the fortunes of war changed for the Union Army. During this period, the Union gradually extended its control over northern Virginia territory. Major Southern advances often broke this control and even returned territory to Confederate control for some time. However, even when the front lines were stable, the disputed area was so wide that it was impossible to maintain a continuous front. Mosby, among others, could thus pass behind enemy lines and even cross the Potomac without being discovered.
(unnamed card — B&O raid, Notoriety threshold): If Mosby's current Notoriety is 6 or more, he receives two Performance Points. In addition, Union Awareness increases by 1 (to a maximum of 5). Number of cards: 1.
Historical Notes: "Jeb Stuart had sent Gilmor a message to cut the B&O line, thereby preventing the arrival of Union troops from the West, and the guerrilla chief immediately made a swift sortie from the Shenandoah Valley to accomplish his objective... the first train he encountered was an express that had left Baltimore at six o'clock the previous evening. Aboard were convalescent soldiers from the hospitals around Alexandria, as well as some notable figures, including members of the Maryland legislature and former Indiana senator Jesse D. Bright. The guerrillas made good work of the train, and just in time, because just as they were leaving a column of troops appeared coming from the West." (Gray Ghosts, vol. 2, p. 34)
(unnamed card — Notoriety-scaled Performance points): If Mosby's Notoriety when this card appears is 5 or less, he receives one Performance Point. If Notoriety is 6 or more, he receives 2 Performance Points. Number of cards: 1.
Historical Notes: "Elizabeth Bacon, wife for just over two months of the dashing young General George A. Custer, wrote to her parents something she had heard at a dinner: 'a story was told at the table about one of the members of Mosby's band — it might have been the man himself — who had arranged to meet a girl outside the city and had given her a lock of his hair to deliver to Lincoln with his regards, telling her that within 10 days they would dine together.'" (Gray Ghosts, vol. 2, p. 51)
Lee Needs Information: If it is turn 4 or later, Mosby gains 2 Performance Points for every space north of the Potomac that has a "revealed" marker at the end of the turn. Mosby earns these points by scouting or entering these spaces, or by causing Union units to activate in them. Number of cards: 1.
Historical Notes: Gathering information was one of Mosby's most important duties, and he excelled at it. His reports were always accurate and precise, and Generals Lee and Stuart relied heavily on them. Occasionally, Mosby was asked to obtain some specific piece of information, especially when a major advance or troop deployment was being planned.
(unnamed card — Awareness reduction): Union Awareness is reduced by 1 (to a minimum of 1). Number of cards: 1.
Historical Notes: Along with Stonewall Jackson, General James Longstreet was Lee's great corps commander, and was in command of nearly all the infantry. Twice during the war, Longstreet's corps was sent to other theaters of operations, once to North Carolina and the second time as far as Tennessee for the Battle of Chickamauga.
Mosby Trapped: A Mosby Casualty Check must be made. The "Mosby Escapes" Action card can be used to negate this check, either before or after rolling the die to see if Mosby is wounded. Number of cards: 1.
Historical Notes: "There were 57 prisoners (from the North) counted, among them Major Forbes and the man who would later become chaplain, Humphreys. Among the dead were a captain and a lieutenant, and scattered across the field were 37 wounded, 10 of them too seriously hurt to be moved. Mosby had had one man killed and 6 wounded, escaping himself by a hair's breadth when during the fighting Forbes came at him and ran his saber through his coat." (Gray Ghosts, vol. 2, p. 83)
Depot: Place all depot markers with their intact side up and select one at random, without looking at its demolished side; place this marker in the space indicated on the card (depot locations are marked on the map). If Mosby destroys the depot, he receives the number of Performance Points shown on the marker's demolished side. The depot remains in that space for the rest of the game, even if destroyed. A depot can never be repaired. Number of cards: 6.
Historical Notes: A depot, during the Civil War, normally consisted of a small, lightly fortified compound near a rail line, a navigable waterway, or a main road. Garrisons for these sites ranged from veteran units to green recruits or old men armed with hunting shotguns, depending on how far they were from the front. These depots were crucial for keeping the armies supplied with a steady flow of food and munitions, and were therefore important targets for Mosby and his men.
Place Union Troop Concentration: Place one of the Troop Concentration markers on the map space indicated on the card (these spaces are marked on the map with a small Union flag). The space becomes part of the Union lines for the rest of the game (if it was not already part of them). It acts as a space with a Union Troop Concentration for all game purposes. Number of cards: 4.
Historical Notes: Brigades assigned to the northern Virginia area were considered by the troops, generally speaking, a "soft" posting and, by the officers, a thankless job with no chance of promotion. Starting in 1863, the lives of all these Union men were considerably enlivened thanks to Mosby's activity, and many officers met an early death instead of a long assignment with no promotions.
(unnamed card — press coverage): Mosby gains the number of Performance Points printed on the card. Note that two of these cards require Mosby to have a minimum Notoriety in order to receive the Performance Points. Number of cards: 3.
Historical Notes: Mosby was quite keen on making sure his successes and his men's exploits were known in the newsrooms on both sides. This was due first to his peculiar charm and personality, which he modeled after the figure of Jeb Stuart. Other guerrilla bands were just as effective as Mosby's, but none had Mosby's flair for the dramatic, his charisma, and his "touch."
Repair the Railroad Lines: Remove all destroyed-railroad-line markers from the map. Railroad lines in those spaces can be demolished again by Mosby's guerrilla band. Number of cards: 3.
Historical Notes: Railroad lines were the arteries of the Union and Confederate armies. Without them, long campaigns were impossible, so they became priority targets for Mosby. As the war dragged on, Union engineering officers and their repair crews got better at making use of twisted rails and burned ties. Even so, it took time, money, and resources to repair the damage done by the guerrillas.
Repair All Bridges: All demolished-bridge markers are placed back with their intact side showing. These bridges can be blown up again by Mosby's guerrilla band. Number of cards: 2.
Historical Notes: Bridges, like railroad lines and depots, were priority targets for Mosby and his men. Most bridges were made of wood, though a few were made of stone; they were normally well guarded and difficult to blow up. Those that were destroyed were usually repaired quickly, given how important they were for Union troop supply and movement.
(unnamed card — remove Devastation): All Devastation markers in Mosby's Confederacy are removed. These markers are removed even if there are Union units in the same spaces that contain the markers. Number of cards: 2.
Historical Notes: The Loudoun Valley was the area from which Mosby drew most of his men and supplies, and from which he normally operated. It was a fertile valley with prosperous farms, dotted with small villages. Union forces devastated most of the valley in punishment for Mosby's exploits, but the people of the valley rebuilt their barns and houses and kept supporting the guerrilla leader.
Restore Union Lines: All Union units are removed from the map and returned to the pool (except Troop Concentration markers that appeared via Event cards). Union units in the Eliminated Unit Box, or in the Union Units Holding Box, are not returned to the pool. Status markers placed by "Extend the Front" Event cards are left on the map, with their ● side up. All other status markers are removed from the map. Number of cards: 3.
Historical Notes: Mosby kept his scouts continually watching the Union lines in northern Virginia; changes in the disposition of Union forces happened often, so constant vigilance was necessary. Southern farmers also helped Mosby by giving him information about troop movements in their neighborhood.
(unnamed card — place Devastation): Place a Devastation marker in every space of Mosby's Confederacy that is occupied by a Union unit (unless there is already a Devastation marker in that space). During the Preparation Sequence, the Mosby counter cannot be placed in a space containing a Devastation marker. Number of cards: 2.
Historical Notes: (Telegram from General Sheridan to General Halleck) "I shall soon begin to devote myself to Mosby. Up to now I have made no attempt to finish him off, since it would have required using 10 men for every one of his, and because I have made him the scapegoat for the destruction of private rights. There will now be intense hatred toward him in this part of the valley, which has become almost a desert. I shall soon go into action in Loudoun County and let them know there is a God in Israel." (Memoirs, p. 333)
(unnamed card — disease attrition): Mosby's guerrilla band loses one combat factor (there is no effect on Notoriety or Performance Points). If the guerrilla band only has one combat factor, it disappears and the turn ends immediately. Number of cards: 1.
Historical Notes: "Immunization and acclimatization gradually reduced the presence of disease, but throughout the conflict, epidemics and illness incapacitated many soldiers. Joseph Jones, one of the leading Confederate medical authorities, estimated that, on average, every Southern soldier was wounded or fell ill six times during the war, and that there were five times as many cases of illness as of wounds. He calculated that for every soldier killed in combat, three died of disease." (The Common Soldier, book 2, p. 244)
(unnamed card — desertion attrition): If Mosby's guerrilla band has a combat factor of at least 2, that factor is reduced by 1. Number of cards: 2.
Historical Notes: Service in a guerrilla band was something most infantry soldiers envied. Many deserted their units to join Mosby, Gilmor, or McNeill, draining strength from the army that needed them at the front. Many generals petitioned to have the guerrilla band suppressed, since it cost them troops, though the final result of these petitions was always a reduction in the number of guerrillas, never their total disappearance.
(unnamed card — "the Burning," Notoriety threshold): If Mosby's current Notoriety is 6 or more, he loses 2 Performance Points. Number of cards: 1.
Historical Notes: "It was then that the Secretary of War, Stanton, ordered the most severe reprisal yet decreed regarding the rail line. Every house within five miles of the line — that was not needed for our purposes, or did not belong to persons friendly to our side — was burned. The area was completely depopulated of Southerners. Men suspected of helping Mosby were arrested and jailed in Washington, while women and children were sent north or south." (Gray Ghosts, vol. 2, p. 127)
(unnamed card — Awareness reset): Union Awareness is reduced to 1 (not reduced by 1). Number of cards: 1.
Historical Notes: Northern Virginia was the principal theater of operations and was therefore under the constant gaze of the press and the Union public. Failures in the East were inevitably followed by public scandal, which led to the reorganization of the command structure in the theater, often with disastrous results. This did not change until Grant's arrival in 1864.
(unnamed card — Notoriety threshold, Performance bonus): If Mosby's current Notoriety is 3 or more, he receives 2 Performance Points. Number of cards: 1.
Historical Notes: "In a message to headquarters, Union cavalry leader Alfred Pleasonton proposed a new method for finishing off Mosby. His plan consisted of finding out how much Hooker was willing to spend to secure the guerrilla's services. It is an opportunity for him, Pleasonton explained, and he could now give us valuable information while confusing the enemy. Where this general got the idea that Mosby could be bribed is something the historical record does not explain." (Gray Ghosts, vol. 1, p. 197)
(unnamed card — Notoriety-scaled Performance loss): If Mosby's Notoriety is 4 or less, he loses two Performance Points. If his Notoriety is 5 or more, he loses 1 Performance Point. Number of cards: 1.
Historical Notes: "A message was sent to Mosby saying that women and children were going to be sent on certain trains. His reply was that the death of women and children did not seem to him any more terrible than the death of men." (Memoirs, p. 332)
Union Sweep: Roll a die for every Union unit on the map (activated and deactivated). On a result of 1, 2, or 3, the unit is removed from the map and placed in the pool. On a result of 4, 5, or 6, the unit remains in the space it occupies. The die is not rolled for Troop Concentrations, nor for status markers, Union leader markers, depots, or the Union Wagon Train. Number of cards: 1.
Historical Notes: Military units are not static entities, but organisms in constant flux. Units were forever changing location, receiving reinforcements or losing men to attrition. Often, the entire Union army in Virginia underwent a reorganization in which changes to command and troop dispositions were drastic.
(unnamed card — Union raiding column): Roll a die and find the result on the card. Take a Union combat unit from the pool and place it activated in the corresponding space of Mosby's Confederacy (return non-combat units to the pool until a combat unit appears). Also place a Devastation marker in the indicated space. During the Preparation Sequence, the Mosby counter cannot be placed in a space containing a Devastation marker.
If the space contains the Mosby counter, combat is resolved immediately, applying a -2 modifier for Union surprise. If Mosby is not in that space, the Union unit moves 3 spaces at random; place a Devastation marker in every space of Mosby's Confederacy the unit enters (a space can only hold one Devastation marker). If, during its movement, the unit enters a space containing the Mosby counter, combat is resolved immediately with the -2 surprise modifier.
After moving the three spaces, the unit is removed and returned to the pool. Number of cards: 8.
Historical Notes: "Major General Wesley Merritt's work in Loudoun could almost be compared to Sherman's in Georgia. Nearly every barn, every stable or hayloft had been razed. Between five and six thousand head of cattle had been killed or requisitioned, and about 500 horses had been taken. Hams were taken and hog carcasses were burned or thrown into the mud. Houses were plundered, if not burned. For days columns of thick black smoke could be seen, as fires burned, sometimes fanned by the breeze. Before Merritt left, smoke and the smell of burnt meat filled the air of the Loudoun Valley. Mosby's men attacked small groups of Union soldiers where they could, but generally avoided a pitched fight, occupying themselves chiefly with saving the cattle. The animals were driven to areas that had already been razed, or into hiding." (Rebel, p. 133)
The Union Wagon Train: Place the Wagon Train marker at Harpers Ferry. Two Union combat units accompany the Wagon Train as escort (they are not placed on the map until they activate). Once the Event step is finished, the turn begins with the Phases. The Wagon Train moves one space per Phase toward Middleburg and then leaves the map the following Phase. When the Wagon Train and Mosby's guerrilla band are in the same space, the Wagon Train stops moving until the guerrilla band leaves the space. The Wagon Train can be destroyed with the Demolish Action. See section 7.8 of the Rules for all details concerning the Wagon Train.
Mosby and his men attacking a wagon train.
Number of cards: 1.
Historical Notes: "When the wagon train appeared, I discovered it was guarded by 600 infantry and 100 cavalry. A small skirmish followed between their cavalry and part of my men, in which the Union cavalry was put to flight, taking 8 prisoners and several horses from them, while also suffering some casualties. But on advancing against the infantry, my men were repulsed, with 1 killed. Although we had not captured the wagon train, a major objective had been achieved — the dispatch of a large detachment to guard their line of communications. After this event, only one more large wagon train was sent to General David Hunter, with even greater protection, and this supply line was later abandoned." (Memoirs, p. 274)
Sequence of Play (Player Aid)
The rulebook closes with a condensed restatement of the Sequence of Play (section 5.0 above), evidently meant as a quick-reference player aid. Its content matches the Sequence of Play already given in full earlier in this document, so it is not repeated a second time here.