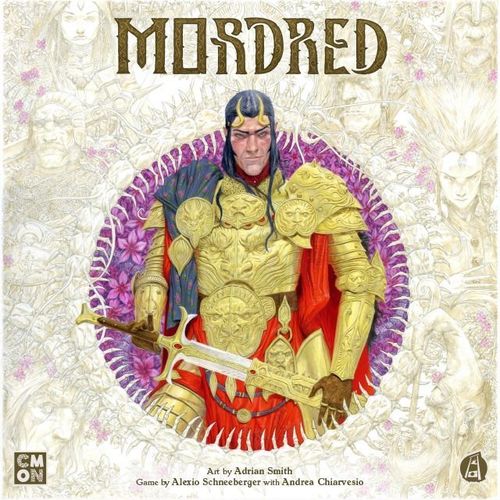
Mordred (2025)
Mordred (2025) Rulebook
Table of Contents
Table of Contents
Components
Figures
- 3 Patron figures: Mordred, Morgana, Merlin.
- 4 Warrior figures: Sir Blackhart, Lady Britomart, Lady Elaine, Sir Grildrim.
- 13 Human figures: 1 Chieftain, 3 Sorcerers, 9 Warriors (three sculpts, three of each).
- 13 High Elf figures: 1 Chieftain, 3 Sorcerers, 9 Warriors.
- 13 Hobgoblin figures: 1 Chieftain, 3 Sorcerers, 9 Warriors.
- 13 Tunnel Dwarf figures: 1 Chieftain, 3 Sorcerers, 9 Warriors.
- 4 Monster figures: Baavan Shi, Nightmare, Clurikon, Mist Lord.
Boards and Other Components
- Chaos disc, double-sided, and the Cauldron of Knowledge.
- Britain board.
- Lost Lands board.
Cards and Tokens
- 4 Nation boards (1 per player).
- 16 Action tokens (4 per player).
- 4 Time markers (1 per player).
- 4 Colored bases for Warriors (1 per player).
- 48 Battle cards (12 per player).
- 20 Spell cards (5 per player).
- 3 Patron cards.
- 4 Warrior cards.
- 4 Monster cards.
- 9 Fate cards.
- 11 Chaos cards.
- 9 Region cards.
- 8 Battle tokens.
- 90 Favor tokens (3 colors).
- 6 Stronghold tokens (3 colors).
- 3 double-sided Lost Lands tiles.
Setup
Preparing the Game Board
- Place the Britain and Lost Lands boards next to each other in the middle of the table. This is the game board. At the start of the game, fold the Lost Lands board in half.
- Place the chaos disc so that all players can reach it. Place the Cauldron of Knowledge in the middle of the chaos disc, text side up.
Note: for your first game we recommend using the War mode on the chaos disc.
Choosing Nations
-
Each player chooses a nation and receives, according to their choice: 1 nation board, 4 action tokens, 1 time marker, 1 Chieftain figure, 3 Sorcerer figures, 9 Warrior figures, and 1 colored base for a Warrior.
-
Each player receives 5 Spell cards and takes them into hand. The player also receives a Battle deck of 12 cards. After shuffling it, the player draws 7 Battle cards into hand. In total, each player's starting hand consists of 12 cards.
-
Take the time markers and randomly stack them on the Monster events of the chaos disc (the monster symbol), to the right of the chaos line. The top marker determines the active player.
Preparing Decks and Reference Cards
- Shuffle the Fate deck and place it next to the board.
- Shuffle the Chaos deck and place it next to the board.
- Shuffle the Monster deck and place 2 cards face up next to the board.
- Place the 3 Patron cards, in the chosen side up, next to the board.
Note: for your first game we recommend using the base sides of the Patron cards (with the white text background).
- Place the 4 Warrior figures and their corresponding cards so that all players can reach them.
Placing on the Game Board
- Each Region card determines the starting position of a Patron, a Monster or a Nation. Shuffle the Region deck and carry out the following actions in order:
A. Take 1 Region card for each Patron. Place its figure and its 2 corresponding Favor tokens on the indicated territory. Then place one of that Patron's Stronghold tokens in the zone marked with a number.
B. Take 1 Region card for each Monster. Place this Monster's figure on the indicated territory.
C. Each player takes 1 Region card and places on the indicated territory the Chieftain figure, 1 Sorcerer figure and 1 Warrior figure of their nation.
Note: in a two-player game, each player takes one additional Region card and places on the indicated territory 1 Sorcerer figure and 1 Warrior figure.
D. Return all Region cards to the box.
-
Take 3 Favor tokens of each Patron and place 1 token on each of the remaining empty zones on the Britain board, in random order.
-
On each territory of the folded Lost Lands board, place randomly 1 Stronghold token of a Patron together with its 2 Favor tokens.
-
Stack the remaining Favor tokens so that all players can reach them.
-
Set aside the 3 Lost Lands tiles. They will come into play later.
Key Terms
Territories
Territories are areas of the game board over whose control the nations fight. Patrons exert influence over territories, and in some of them Monsters may dwell. Territories without Monsters or squads are considered unoccupied.
Territory Limit
At the end of a player's turn, any territory may hold no more than 2 nations and no more than 4 squads of one nation.
Adjacent Territories
Adjacent territories share a common red border. Territories connected by sea routes are also considered adjacent. After the Chaos has come, territories with a Stronghold of one Patron are considered adjacent to each other, which allows squads to move between them.
Territory Control
A player controls a territory if, at any moment of the game, the number of his squads on it exceeds the number of squads of any other player. If the squads are equal, the territory is controlled by no one.
Strongholds
Strongholds are the mystical bastions of the Patrons, allowing teleportation between Britain and the Lost Lands. A territory is considered to have a Stronghold if its token lies on the border of that territory or inside it.
Example (caption to the map on page 6): Morgana's Stronghold lies on the border between the territories Elmet and Malahaut. All game effects that apply to territories with a Stronghold also apply to all squads in them.
Effects on Cards
Icon of a Favor token: Favor tokens of any Patrons in any combination, unless stated otherwise.
Squads
One figure represents one squad.
- Chieftain. Each nation has only 1 Chieftain figure. The Chieftain allows players to place squads on a territory with him. The Chieftain's squad cannot be removed from the game board.
- Sorcerer. Each nation has 3 Sorcerer figures. Sorcerers are able to cast spells. The number of Spell cards available to play depends on the number of your Sorcerers on the game board. They also have unique combat abilities.
- Warrior. Each nation has 9 Warrior figures. Warriors are the key squads for controlling territories.
- Champion. Champions are special squads that any player can summon by means of sorcery. Each player may have no more than 1 Champion figure. When a Champion is killed, his figure is sent to the player's reserve and may later be placed on the board only by the Gather action. Each Champion has a unique ability that can bring the nation closer to victory.
Note: when resolving card effects, all Champions count as Warriors, except for effects "place" and where stated otherwise.
Chaos Disc
The chaos disc tracks the duration of the game, and with the time markers it determines the active player. When all time markers have crossed the Chaos line for the first time (see p. 14), Chaos comes; when all time markers have crossed the Chaos line twice, the game ends. The chaos disc also determines the events that take place on the game board, which correspond to the images on each sector (see p. 12).
Cauldron of Knowledge
The Cauldron of Knowledge is placed in the middle of the chaos disc. Before Chaos comes, during Fate events, 1 of 2 Fate cards is placed on it. At the moment Chaos comes, the Fate cards from the Cauldron of Knowledge are resolved.
Time
Actions performed by players require a expenditure of time (the time icon). For each time the player spends, his time marker advances along the chaos disc by 1 sector clockwise. The more significant the action, the more time it takes.
How to Play
Turns
Players take turns, performing one action per turn. The player whose time marker is behind all others on the chaos disc is the active player. If several time markers are behind the others and on the same sector, the active player is the one whose marker is higher.
Note: when several players resolve effects, the one who is furthest ahead on the chaos disc resolves first.
On his turn, the active player must choose and perform one of the following actions:
- March (move squads).
- Gather (move the Chieftain and place squads).
- Sorcery (play Spell cards from hand).
Each time the active player moves his time marker off any sector on the chaos disc, leaving that sector empty, he activates its event (see p. 12). This event must be resolved by him before the turn passes to another player.
If at the start of the active player's turn all of his action tokens have been used, they are returned to the supply.
Actions
The player performs an action by placing an action token on the corresponding cell of his nation board. After performing the action, depending on the time spent, the player moves his time marker clockwise on the chaos disc by the corresponding number of sectors, taking into account all changes to the cost.
Note: performing actions that already have an action token in their cell costs +1 time for each such token.
Example (caption to the illustration on page 7): the active player may perform the March action at its normal cost. The Gather action will cost +1 time, and the Sorcery action will cost +2 time because of the action tokens placed in their cells on previous turns.
Caption to the illustration on page 7: a player may remain active for several turns in a row. The illustration above shows that the player controlling the humans has made 3 turns in a row.
Player Actions
March
The active player moves any number of squads to adjacent territories. Squads moved together are called a group (even if the group consists of 1 squad). In one March action, squads may cross several territories with different groups. The same squad may be moved several times during one March action.
Cost: 1 time for each group of squads moved to an adjacent territory. The total cost of a March action must not exceed 6 time, taking into account the penalty for action tokens in the March cell.
Note: when moving squads, players may ignore territory limits (for example, when moving 8 squads at once). The important thing is that at the end of the March, each territory holds no more than 2 nations and no more than 4 squads from each of them.
Example of a March
- Peter plays the humans. In Garlot he has 2 Warriors and 1 Sorcerer, and in Monsalvat a Chieftain.
- He moves his 2 Warriors from Garlot to Monsalvat.
- He moves 1 Warrior and the Chieftain from Monsalvat to Elmet.
- Then he moves 1 Sorcerer from Garlot to Cornwall by sea.
- The total cost of this March action is 3 time. Peter moves his time marker forward 3 sectors.
Gather
The active player may move his Chieftain to an adjacent territory. Then he must place squad(s) from his reserve on the territory with the Chieftain, observing the territory limit (no more than 4 squads of one nation).
Cost: 1 time for each squad placed.
Note: when performing the Gather action, moving the Chieftain costs no time.
Example of a Gather
- Peter plays the humans. In Elmet he has 1 Warrior and a Chieftain.
- He chooses the Gather action, placing 1 action token in the corresponding cell, in which an action token already lies.
- Then he decides to move his Chieftain to Malahaut. After this he places 2 Warriors and 1 Sorcerer, observing the territory limit.
- Since Peter moved the Chieftain (0 time), and his Gather cell already had 1 action token (1 time), and he placed 3 squads (3 time), this Gather action costs 4 time. Accordingly, Peter moves his time marker forward 4 sectors.
Sorcery
The active player must play Spell cards from hand in a number not exceeding the number of his Sorcerers on the game board. Spells are of 2 types:
- One-time (the Spell card is discarded after it is applied).
- Permanent (the Spell card is placed next to the nation board and affects the game constantly).
Cost: the sum of all time values shown on each Spell card played.
Note: Sorcery cannot be performed if, at the end of this action, the territory limit would be violated.
Example of Sorcery
- Peter plays the humans. In Malahaut he has 1 Sorcerer, and one more Sorcerer is in Cornwall.
- Peter chooses the Sorcery action, playing "Teleportation" and "Summon Champion".
- Using the "Teleportation" spell (cost 2 time), he moves his Sorcerer from Cornwall with Mordred's stronghold to the corresponding stronghold in the Lost Lands. Then Peter places a Warrior on the Lost Lands territory and takes 2 Favor tokens from it.
Text of the "Teleportation" card (one-time, cost 2), upper half: move 1 of your Sorcerers from a territory with a Stronghold to a territory with a Stronghold of the same Patron in the Lost Lands region. Place 1 Warrior on that territory and take the Favor token from it.
Example of Sorcery (continued)
- Using the "Summon Champion" spell (cost 2 time), Peter replaces the Warrior in Monsalvat with the figure of Sir Blackhart, returning the Warrior to his reserve. Then he places the Blackhart card next to his nation board.
- This Sorcery action costs 4 time. Accordingly, Peter moves his time marker forward 4 sectors.
Text of the "Summon Champion" card (one-time, cost 2), upper half: replace 1 of your squads on the game board with an available Champion. Place his card next to your nation board. The replaced squad is returned to reserve. Lower half: place one of the available Champions on any territory. Place his card next to your nation board.
Text of the Sir Blackhart card: if Blackhart is killed, place him on any unoccupied territory or a territory with your squads. Then place 1 Warrior there.
Chaos Disc Events
When the last time marker leaves a sector on the chaos disc, leaving it empty, the active player resolves the event of only that sector on which this marker originally stood.
Then, if this time marker crossed a sector with the War icon, the War event must be resolved for each such sector (see p. 13).
Note: effects that move time markers outside your turn do not cause an event to be resolved, with the exception of War.
Monsters
The active player moves each Monster on the game board by the indicated movement value and, where possible, resolves its effect. The order in which Monsters move is determined by the active player.
Note: if an effect says to place an action token in a cell of your nation board and the player has none left, nothing happens.
Patrons
The active player, in any order, moves each Patron to an adjacent territory without a Patron. After this, he places on the territories with Patrons 2 Favor tokens of the corresponding type.
- Favor of Mordred.
- Favor of Morgana.
- Favor of Merlin.
Fate
- Before Chaos comes. Take 2 cards from the Fate deck. Choose 1 card, resolve its upper effect and discard it. Then place the second card face down on the Cauldron of Knowledge.
- After Chaos comes (see p. 14). Take 2 cards from the Chaos deck. Choose 1 card and resolve it. Then place the second card at the bottom of the deck.
War
When squads of 2 nations are on the same territory, they enter into battle. Only 2 nations may fight for control of one territory. The results of these battles are determined during the War event, when players conduct all battles. Only one battle may be fought in one territory. The order in which battles are fought is determined by the active player.
Note: the effects of some cards may lead to new battles on new territories. The result of these battles must be determined during the current War.
For a War event to occur, a time marker does not necessarily have to leave a sector with that event's icon. If the last time marker crosses a sector with the War icon, the War event occurs immediately after the event of the sector it originally stood on has been resolved. Several Wars may occur at once. In that case, resolve them one after another.
Example (caption to the illustration on page 13): Peter completes an action costing 3 time and moves his time marker forward, leaving the sector of the Fate event and passing through the War sector. Now he must resolve the Fate event, and then immediately resolve the War event.
Battle Result
Only the players involved in the current battle may resolve battle cards. Battles are fought in turn.
For each of your squads in the current battle, you may place 1 battle card face down in the corresponding area on your nation board. Depending on the type of squad, the melee or sorcery effects apply.
- Warriors and Champions: use only the melee effects on the battle card. When resolving card effects, all Champions count as Warriors, unless stated otherwise.
- Chieftains: use only the melee effects on the battle card. Some effects apply only when resolved in the Chieftain's area.
- Sorcerers: use only the sorcery effects on the battle card.
The result of a battle is determined as follows:
-
Players, starting with the one furthest ahead on the chaos disc, choose and lay out their battle cards face down. If both players are on the same sector of the chaos disc, the one whose time marker is lower (i.e., further ahead) starts first.
-
Both players reveal their cards and, starting with the one furthest ahead, resolve the sorcery effects on the battle cards.
-
Players count their attack and defense values, applying to them the effects that can change them, and then compare the results:
- If the player's defense value is greater than or equal to the opponent's attack value, nothing happens and the player loses no squads.
- If the player's defense value is less than the opponent's attack value, the player loses squads according to the difference between the values, choosing which squads are killed. A player cannot lose more squads than there are on the territory.
Note: players never lose their Chieftains. If the Chieftain is the last squad of yours on the territory and there is undistributed damage, place the Chieftain figure, ignoring further damage. Lying Chieftain figures are not counted when controlling a territory.
-
Discard all revealed battle cards and mark the territory with a battle token. Squads may not be moved into or placed on a territory marked with this token, but they may be moved out of it. Removing squads from a territory may affect its control at the end of the War event.
-
Continue fighting battles on other territories until the results of each of them have been determined.
End of War
After the results of all battles have been determined, the War ends. Remove all battle tokens from the board. All players, including those who did not take part in the battles, check the territories with Favor tokens. If a player:
- has the largest number of squads on a territory, he controls it and receives all Favor tokens from that territory;
- controls neighboring territories with Favor tokens between them (i.e., on the border or by sea route), he receives all these tokens.
After the players have sorted out the Favor tokens, raise all lying Chieftain figures. Each player draws Battle cards until he has 7 cards in hand. If the Battle deck runs out, shuffle the discard pile to form a new deck, and continue drawing cards.
The Onslaught of Chaos
Chaos comes when one of the following conditions is met:
- All time markers have crossed the Chaos line once.
OR
- All Favor tokens on the 3 islands of the Lost Lands have been taken.
From this point, territories with a Stronghold of one Patron are considered adjacent to each other, which allows squads to move between them.
Note: Blackhart may now be placed on Lost Lands territories by the effect of his ability.
When Chaos comes, perform the following steps in order:
- Unfold the Lost Lands board, with all squads and Strongholds on this board remaining in their places.
- Take all Fate cards from the Cauldron of Knowledge and turn them face up, without changing the order of the cards in the deck. Then resolve the Chaos effects on all cards one by one.
- Shuffle the Lost Lands tiles without looking and place them randomly in the slots on the Lost Lands board. Their effects apply to the territory on which they were placed.
- Move each Patron, horizontally, to the territory opposite its Stronghold in the left part of the Lost Lands board, placing in each of them 2 Favor tokens of the corresponding type. After this, take from the supply 2 Favor tokens of each type and place 1 token at random in each of the 6 zones along the borders between Lost Lands territories.
- Turn the Cauldron of Knowledge over. From this moment, when resolving a Fate event, players take cards from the Chaos deck, and when resolving spells they apply Chaos effects.
End of Game
The game ends when one of the following conditions is met:
- The last time marker crosses the Chaos line for the second time. Resolve the last War event and end the game.
- The supply of Favor tokens of one of the Patrons runs out. The player who is furthest behind on the chaos disc places a battle token on the next War sector in front of his time marker. Upon completion of this War, the game ends.
Players count all their Favor tokens, adding to them the bonuses of the Patron cards.
The player with the greatest total number of Favor tokens becomes the winner.
In the event of a tie, the contender with the largest number of squads on the board becomes the winner. If a tie occurs again, the contender whose time marker is furthest behind wins.
Game Modes
Patron Favor (reverse side of the Patron cards)
Each of the 3 Patrons grants power to the players who have earned their favor. The Patron cards show the required number of Favor tokens. When this number is reached, the player gains the Patron's power. Using it does not cost Favor tokens; however, if, upon losing tokens (due to events, spells, battles, etc.), their number becomes less than required, the player loses access to this power until he again earns favor.
War Mode (12-sector disc)
A tense conflict between players, with more opportunities for decision-making.
Blitz Mode (10-sector disc)
A dynamic game in which skillful strategy is the key to victory.
Quick Reference
Player Actions
The player whose time marker is furthest behind all others on the chaos disc (or furthest ahead in case of a tie) is the active player and must perform one of the listed actions:
- March: move any number of your groups of squads to adjacent territories. Several moves are allowed. Cost: 1 time for each move. The total cost of a March must not exceed 6 time.
- Gather: you may move your Chieftain to an adjacent territory. Then you must place squad(s) from your reserve on the territory with your Chieftain. Cost: 1 time for each squad placed.
- Sorcery: play Spell cards in a number not exceeding the number of your Sorcerers on the game board. Cost: the sum of all time values on each Spell card played.
Actions cost +1 time for each action token already placed in the cell of the action being performed.
Territory limit: 2 nations per territory, 4 squads of one nation.
Chaos Disc
If the last time marker crosses a sector with the War icon, the War event occurs immediately after the event of the sector it originally stood on.
- Monsters: the active player moves each Monster on the game board by its movement value and, where possible, resolves its effect.
- Patrons: the active player, in any order, moves each Patron to an adjacent territory without a Patron. After this he places 2 Favor tokens of the corresponding type on each territory with a Patron.
- Fate: before Chaos, take 2 cards from the Fate deck, choose 1, resolve its upper effect and discard it; place the second card face down on the Cauldron of Knowledge. After Chaos, take 2 cards from the Chaos deck, choose 1 and resolve it; place the second card at the bottom of the deck.
- War: battles take place in turn on all possible territories. Only 1 battle may be fought per territory. The order of battles is determined by the active player. After the War ends, all players, including those who did not fight, check which territories they control, and receive the Favor tokens inside and between these territories (that is, on the borders or by sea routes). Remove all battle tokens from the board. Each player draws Battle cards until he has 7 in hand.
The Onslaught of Chaos
Chaos comes when all time markers have crossed the Chaos line once, or when all Favor tokens on the 3 islands of the Lost Lands have been taken.
When Chaos comes:
- Unfold the Lost Lands board.
- Take all Fate cards from the Cauldron of Knowledge, turn them face up without changing the order of the cards in the deck, and resolve the Chaos effects on all of them one by one.
- Shuffle the Lost Lands tiles without looking and place them randomly in the slots on the Lost Lands board. Their effects apply to the territory on which they were placed.
- Move each Patron horizontally to the territory opposite its Stronghold in the left part of the Lost Lands board, placing 2 Favor tokens of the corresponding type in each of them. Then take from the supply 2 Favor tokens of each type and place 1 token at random in each of the 6 zones along the borders between Lost Lands territories.
- Turn the Cauldron of Knowledge over. From now on, when resolving a Fate event, players take cards from the Chaos deck, and when resolving spells they apply Chaos effects.
End of Game
The game ends when one of the following occurs: the last time marker crosses the Chaos line for the second time (resolve the last War event, then end the game), or the supply of Favor tokens of one Patron runs out (the player furthest behind on the chaos disc places a battle token on the next War sector in front of his time marker; the game ends when that War is over).
Victory: players count all their Favor tokens, adding the bonuses of the Patron cards. The player with the most Favor tokens wins. In a tie, the contender with the most squads on the board wins. If that is also a tie, the contender whose time marker is furthest behind wins.