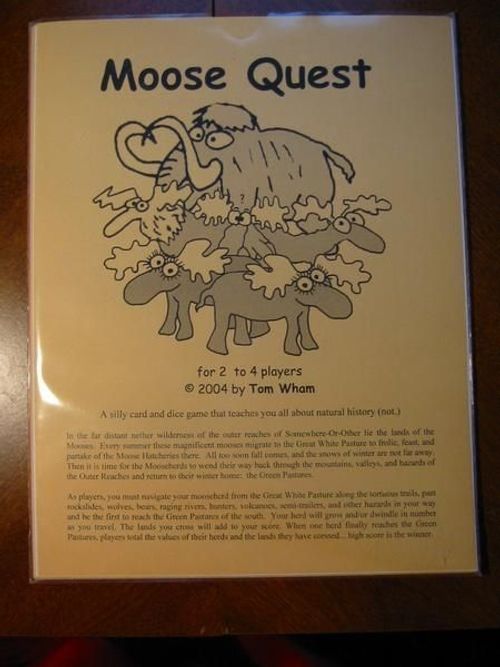
Moose Quest
Moose Quest Rulebook
Table of Contents
Table of Contents
The Playing Pieces
Your Moose Quest game should contain:
- These Rules
- Three decks of Moose Quest cards: Moosehaps (30), Moose Lands (30), and a Moose Deck consisting of 40 cards.
You must provide: 3 or more six-sided dice (the ones represent Moose Symbols).
Prepare for Play
Shuffle each of the three decks and place them face-down in the center of the table. Special attention must be given to the Moose Lands Deck. You must sort out the Green Pastures (card #32) before you shuffle. Place the Green Pastures face-down in the center of the table. Then shuffle the remaining lands and place them, face-down, on top of it. The Green Pastures is the destination of all herds, and the game ends when a player crosses (scores) it.
Each player now rolls three dice. Moose symbols are 1's. Low roll is first player. The first player now takes the Moose Deck and deals 5 Mooses (4 cards with 4 or 5 players) to each player and puts the remaining deck back in the center of the table to form a draw pile. The Mooses dealt out form the players' starting Moose Herds. Your Moose Herd is kept face-up on the table in front of you.
Hint: The next three sections of the rules describe the decks and the cards. You may skip ahead to the Sequence of Play to get going and refer to this information later as you begin play.
The Moose Deck
Leadership: the number of stars represents the herd's ability to fight off predators. A herd's leadership ability is always the total of the stars on all Mooses in the herd. When a herd encounters predators, the leadership value is added to the combat dice roll.
Point Value: what the moose is worth at the end of the game.
The Moose Deck consists of 40 mooses, one third of which are moms. At the beginning of the game, the deck is shuffled and 5 cards are dealt to each player (4 cards with 4 or 5 players). The remaining deck is the draw pile. As Mooses are lost during play, place them in a discard pile next to the Moose Deck. When the deck is exhausted, reshuffle the discards to form a new draw pile. If the Moose Deck is empty and there are no discards, a player may draw no new mooses.
Typical Moose cards show a point value and leadership (stars) in the upper corner, a detailed scientific illustration, and a name with an important info line. Examples printed on the rules page are:
- Moosemaster — "Keeps the Herd out of trouble."
- Moosemendicant — "Is it a Beggar?"
Moosehaps
The 30 Moosehap cards are assorted good and bad events, some you play on yourself or others, and some that just happen immediately. The deck is shuffled and placed face down in the center of the table. When Moosehaps are used, put them in a face up discard pile near the deck. If the deck becomes exhausted, reshuffle the discards to form a new deck.
When to Draw a Moosehap
While a player is either Moving or Feeding his herd, he will be rolling three dice. If any two faces come up the same (i.e. Two 6's or two Moose symbols, etc.) that player draws a Moosehap card from the top of the deck. Each Moosehap drawn must be immediately looked at. If it says Play Now!, the drawing player must act on the card right away and then continue with his or her turn. If the card says Keep Till Used, place the card face down in front of you and finish your turn. Moosehaps are never placed in the temporary holding area.
If a player rolls three of a kind during a Move, he draws a Moosehap card AND gets a free draw from the Moose Deck! If you roll three mooses (ones) during a Feed, you draw a Moosehap AND you get a free draw from the Moose Deck, and then you get three more draws from the Moose Deck because you were feeding!! This doesn't happen very often.
Keepers
Many of the Moosehaps say Keep Till Used. Keep these face down (or face up if you wish) in front of you. At the end of your turn, you may play any ONE Moosehap, either on yourself, or against another player. NOTE: the Snowstorms and Magic Moose Grass may be played out of turn, and do not count as your Moosehap play at the end of your turn.
Typical Moosehap Cards
The rules page shows these example cards:
- Moose Hatchery (Play Now) — "Draw a card from the Moose Deck for every Mom in your herd."
- Wolves (Keep till used!) — "Attack herd," Leadership ★★★★. Play on an opponent.
Moose Lands
Moose Lands represent the long and arduous trek your herd must take to get from the summer feeding grounds to the Green Pastures. If you are not get too greedy, each time your herd crosses a land, it is worth points towards winning the game. Try to go too far in a turn, and you could lose all lands you crossed that turn.
Before play begins, sort through the Moose Lands and find the Green Pastures (card #32). Place it face down in the center of the table to start the deck. Shuffle the rest of the cards and place them face down, on top of the Green Pastures. If for any reason, lands are discarded, they are placed, face down, under the bottom of the deck. Do not make a discard pile for Moose Lands. Crossing the Green Pastures card causes the game to end. Placing discards under it, makes it difficult to tell just exactly when the end will come. There is no discard pile for the Moose Lands deck, if a Moose Land is discarded, it is placed face down under the Deck.
The type face of the numbers on the cards give you an indication of what you are up against. The sort of hollow type face is usually kind or neutral. The solid black numbers can be bad or neutral, and the numbers dripping blood are dangerous.
When moving a herd, a player turns up the top land card (if one is not already face up) and places it on top of the Moose Lands deck. He or she must roll a number on the dice that equals or exceeds the value of the land card for the herd to cross that land. If the player succeeds in crossing the land, he or she immediately acts on any Event that is keyed to that land (i.e. Add or Lose a moose, end turn, etc.) The land is then set aside in a temporary holding area and the next card on the land deck is turned face up. The moving player may continue to cross lands until he or she decides to quit (and score winnings) or he or she makes a roll insufficient to cross a land.
If a player rolls a number on the dice that does not equal or exceed the value of the current Moose Land, his herd has failed to cross (the Event on the card does not occur). The turn ends and he or she loses all items (lands and dice) that have been set aside in the temporary holding area. Lands lost in this way are placed face down under the Moose Land deck.
Typical Moose Land Cards
Each land card shows a land value (the roll needed to cross), a name, and an event if there is one, with the rules for the event when the land is crossed. The example on the rules page is:
- Glen (Timeless), land value 2.
- Beaver Valley (Deadly Traps!), land value 5 — "Lose 1 Moose (your choice) if crossed on an odd number."
Sequence of Play
When it is your turn, take the following actions in the order listed:
- Turn up the top card on the Moose Lands deck. If the top card is already face up, skip this phase.
- Either FEED your herd, or MOVE your herd. You cannot do both. If you Feed, you roll the dice one time. If you Move, you may continue to cross lands until you decide to quit, or you fail to cross a land.
- PLAY A MOOSEHAP card on an opponent or on yourself (one that says "Keep Till Used".) You may only play ONE Moosehap at this time, no matter how many you've got saved up. You may elect to skip this phase. Discard any Moosehap card played after it is resolved.
- When your turn is over, play proceeds to the player on your left.
Feeding
If you choose to FEED, the herd stays in place and no attempt is made to cross the face up land on the Moose Lands Deck. Roll three dice. For each ONE (Moose Symbol) you rolled, draw a card from the Moose Deck and add it to your face up herd.
If you rolled no ONES (Moose Symbols), your feeding failed. If you roll two dice of the same number, draw a Moosehap card. If the card says Play Now!, do so (this does not count as your Play A Moosehap which occurs at the end of your turn).
If you roll three of a kind (but not Moose Symbols) while feeding, add a Moose to your herd and draw a Moosehap. If you were lucky enough to roll 3 ONES (Moose Symbols) while feeding, you will score three Mooses from the dice, and an extra one for three of a kind... in other words draw four Moose Cards and add them to your herd and then take a Moosehap.
Once you have finished feeding, you may play a Moosehap, and then play passes to the left.
Moving
Before you decide to move your herd, make sure the top card on the Moose Lands deck is turned face up. The number printed on that card is the number you must equal or exceed by the roll of the dice. Printed beneath the number is any "event" keyed to that land. This event only happens if you successfully cross the land.
Once you have decided to move, roll the dice. If the resulting total equals or exceeds the number printed on the Moose Land, your herd has successfully crossed that land. Once you cross a land, you must act on any event keyed to that land. When the event is resolved, place the crossed land in a special temporary holding area to the side of your herd. Do not score that land until you end your Move. If the event added a Moose to your herd, do it now.
If you rolled two or three of a kind, read the Moosehap and act on it only if it reads Play Now! otherwise put the Moosehap in front of you for later use.
Setting Aside a Moose Symbol
If you roll a ONE (Moose Symbol) while moving, you may count it as a one towards crossing the land, or you may set it aside in the holding area (along with the crossed land). If you set a die with a ONE (Moose Symbol) aside, it does not count for movement. A Moose Symbol that has been set aside in your temporary holding area may not be used in attempts to cross additional lands on that turn.
Example: Jim is rolling to cross the Dread Marsh (value 5, lose a moose if you cross on an odd number). He rolls a 2, a 4, and a Moose Symbol (a one). If he does not set aside the Moose Symbol, his roll would be a 7, an odd number, and he would lose one moose (his choice...see card #38). If he sets the Moose Symbol aside in his holding area, his roll becomes a 6. Crossing the Dread Marsh on an even number and not losing a moose. However, he may no longer roll the set aside die on this turn, and may only roll two dice if he wishes to cross the next Moose Land.
Ending Your Turn by Choice
After crossing a land and turning up the next land on the Moose Lands deck, you may elect to end your turn. If you do so, draw a card from the Moose Deck for each Moose Symbol (ONE on a die) that you have set aside, and place it in your face up herd, and move all the lands you crossed this turn from the temporary holding area to your scoring area.
Ending Your Turn by Failure
If you fail to roll a number that equals or exceeds the face up land on the top of the Moose Lands deck, your turn is over. You lose any Moose Lands and Moose Symbols that you have set aside in the temporary holding area. Place any Moose Lands lost in this manner face down on the bottom of the Moose Lands deck (this makes it difficult to know when the game will end). You may now play one Moosehap if you wish, and then play passes to the left.
Battle
At times, either through events keyed to lands crossed or having an opponent play a Moosehap on you, your herd will be attacked by predators. These include the Smilodon, Grizzerbears, Cougars, lots of Wolves, and some Wild Dogs. Like the mooses in your herd, predators have a leadership value (in stars).
In a battle, the predators are controlled by the player to the left of the player taking his or her turn or the player who played the predators if they were on a Moosehap card. Each player rolls three dice and compares the totals. If the predators roll higher, a moose will be lost. If the Herd rolls higher, there is no damage.
Leadership: When predators attack, compare the number of stars in the herd with the number of stars listed for the predator. The difference between these numbers is the amount added to the combat dice roll.
Example (part 1): A herd of three Moms (3H), a Mendicant (2), a Moosemess (1), and a Mildmoose (3), would have a Leadership Rating of 3. They're facing a pack of Wolves (HHHH). The difference is one. So, one is added to the dice roll made by the wolves.
Losses: If the result is a tie or the Moose player rolls higher, the battle is over. If the Predator player's total exceeds the Moose player's total, the Moose player must lose ONE Moose (his or her choice) whose point value equals or exceeds the difference between the two totals. If the difference is more than the largest moose in the Moose Herd, the Moose player just loses his or her largest moose. No more than one moose may ever be lost in a battle.
Example (part 2): The Predator player rolls a 2, 4, and 5 for a subtotal of 11 plus 1 for leadership to total 12. The Moose player rolls a 3, 3, and 4 for a total of 10. The Moose player loses by 2 points and must lose a Moose of at least that value. The best choice would be the Mendicant (2 points with no stars).
All battles last for only one round. After the Moose and Predators have rolled dice and extracted losses (if any) the battle is over.
If You Lose Your Last Moose
Sometimes it happens. One disaster after another hits your miserable herd until, suddenly, it's gone. The moment this happens you must pick any one land that you have scored and place it face down under the Moose Lands deck. Then immediately draw a new moose from the Moose Deck. (If this happens, I recommend feeding on your next turn.) The value of the land you discarded does not matter, you get one moose for the one land card! If you have no scored lands to discard in this manner, too bad, your herd is extinct and you are out of the game.
Ending the Game
The game ends as soon as a player has crossed the Green Pastures. No more Moosehaps may be played. The game is then over and each player counts up his score.
How to Win
Counting Score: All Mooses are worth the number printed at the top of the card. Moose Lands are worth the large number you needed to roll to cross. Finally, a couple Moosehaps, the Girdle of Moosepower and the Wooly Mammoth are worth points. The player with the highest total score wins the game!
If you have time, write these scores down, and play one more game. The real winner is the player with the best score over two games.
Special Cards
Moosemage
The Moosemage is a magic using fellow with amazing abilities. He may cast one magic spell during or after your turn. The two spells he knows are listed below. Once he has cast a spell, rotate the Mage upside down (still face up). At the beginning of your next turn, flip the Mage right side up again. The Moosemage may not cast another spell if he is upside down. He may however, participate in a battle.
- Re-Roll: If you don't like a dice roll, you may pick up all the dice that you rolled and try again. You must keep this result. You may only re-roll dice that you roll and you may not use this power in combat.
- Summon Skunks: Before a battle with predators, roll a die - if you roll an even number, the skunks frighten the predators away. There will be no battle.
Moosemedium
The Moosemedium has clairvoyant powers, that allow him to see into the future of your herd. When your Herd moves, you may choose to use the power of the Medium to look at the top 2 Moose Land cards and choose the one you want to travel. The other card goes face down on the bottom of the deck. This is very handy for getting past large obstacles.
NOTE: If you choose to use this power, your turn ends after the attempt on that land.
Interstate 666
This is a special Moose Land. It is the only land you may cross even if you don't roll equal to or higher than the number. But, in order to do so, you must lose a Moose (your choice) for each pip on the die less than 15. Obviously, you don't want to cross if your entire herd would die. But you might consider losing a Moose or two or three if you gain net points. The decision is up to you.
Lose a Random Moose
There will be times in the game when you are required to lose a random Moose. If you have more than six mooses, divide them into two parts and go even/odd, then roll for the Moose to be lost. I leave it to you to decide how to choose. Sometimes we just roll dice to see which moose is lost, and other times we grab our herd, shuffle it, and let someone draw the unfortunate Moose.
Card Inventory
The Moose Deck contains 40 Mooses:
- 13 Moosemoms (5H)
- 1 Moosemaster (7HH)
- 5 Musclemooses (6)
- 5 Moosemaulers (4)
- 3 Moosemages (1H)
- 3 Moosemediums (1H)
- 5 Mildmooses (3)
- 2 Moosemesses (1)
- 3 Moosemendicants (2)
The Moosehap Deck contains 30 cards:
- 4 Moose Hatcheries
- 1 Hoof in Moose Disease
- 1 Hazardous Human Hunters
- 1 Loco Weed
- 1 Yuck Worms
- 1 Magic Mooswings
- 1 Moose Armour
- 1 Moose Blessing
- 1 Girdle of Moosepower
- 1 Flash Flood
- 2 Snowstorm
- 1 Thunderstorm
- 1 Huge Enormous Trap
- 3 Wolves attack herd
- 2 Grizzerbears attack herd
- 1 Very Large Grizzerbear attacks herd
- 1 Wild dogs attack herd
- 1 Smilodon attacks herd
- 1 Wooly Mammoth
- 3 Magic Moose Grass
- 1 Perfeck Day
The Moose Land values are:
- Two 3s
- Four 4s
- Three 5s
- Four 6s
- Four 7s
- Three 8s
- Three 9s
- One each of: 2, 10, 11, 12, 13, 14, 15