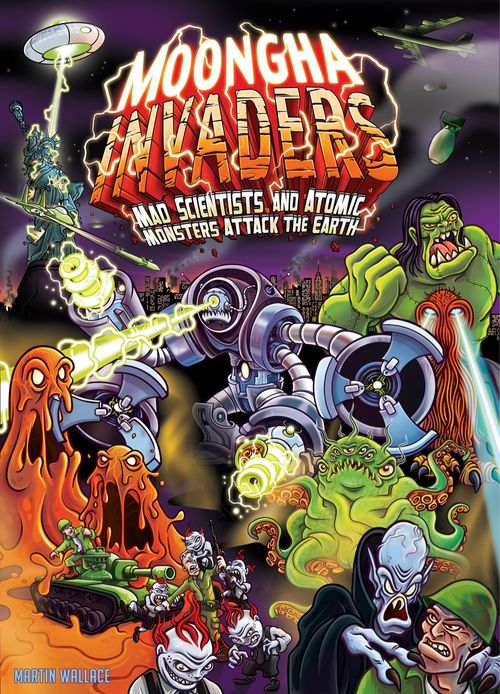
Moongha Invaders: Mad Scientists and Atomic Monsters Attack the Earth!
Moongha Invaders: Mad Scientists and Atomic Monsters Attack the Earth! Rulebook
Table of Contents
Table of Contents
Overview of the Game
'Moongha Invaders' is for three to four players and should take around ninety minutes to play. The game will last either eight or nine turns, depending on the number of players. It may end before then if a player manages to get all twenty of his rubble pieces on to the board.
You have control of a number of different types of monster and you use the side of the board closest to you to track their status and health.
At the start of each turn a random number of actions are made available. Three of these actions relate to your monsters, allowing you to create, move and attack with them. There are two human related actions, allowing the placement of heroes and military units.
You create your monsters by acquiring orange tokens. Once you have enough you place your monster on the board. However, at first it remains unnoticed by the humans and so a 'Hidden' counter is used to mark its position. While hidden a monster is safe from the military and other monsters, allowing it to build up its strength to launch a massive attack. Other players can attempt to discover your hidden monsters with heroes.
Only three monsters are powerful enough to damage cities, which are the Bloob, Moogre, and Mechoor. When you attack a city with one of these monsters you place rubble pieces to mark the amount of damage you have inflicted.
Your monster will become revealed if it attacks or is discovered by a hero, at which point it can be attacked by military units, such as infantry and armour.
At the end of the game you will score points depending on how many rubble pieces you have in each city. You also score additional points for certain cities that were secretly allocated to you at the beginning of the game, depending on how much damage they have received. You may also score points for having Drakoor pieces on the board and for having killed other monsters with your Moogre.
Components
Four rule books – English, French, German, Italian.
One map board.
Player Pieces
There are four sets of player pieces, made up of:
- Twenty rubble pieces
- One Pass marker
- Mechoor, Moogre, Spectoor, Kiddoo, Shaggoo (one each), and Drakoor x 4, Bloob x 3
- Twelve Hidden Monster counters
- Twenty-five orange Create/Heal action tokens
- Five purple Move/Hide action tokens
- Thirty white Attack action tokens
Hero and Military Pieces
- Five Heroes
- Eight Infantry
- Five Armour
- Two Jet-fighters
- One A-Bomb
- Twelve dice
Board Pieces
- Twelve City tiles
- One First Player marker
- One Turn marker
- Twenty brown rubble pieces
Starting the Game
Each player needs to select a set of pieces. You should sit so that one side of the board is in front of you. The side closest to you is where you will keep track of your monsters. You should now place your Hidden Monster counters in the Monster boxes of the same type, and your monster pieces in front of your position.
Place the twelve City tiles face-down and mix them up. If there are four players then each player draws two tiles randomly. If there are three players then each player draws three counters randomly. You should look at the tiles you have drawn but keep them secret from the other players. These are the cities that you have an interest in and would prefer to see undamaged at the end of the game. Place the remaining tiles back in the box without examining them.
Place all of the remaining pieces by the side of the board. These should comprise of military pieces, heroes, orange, purple and white Action tokens, and black Rubble pieces.
Randomly determine the first player by rolling the dice. Give that player the First Player marker.
Place the other game marker on the first space of the Turn track.
The Board
The board shows twelve cities, each connected to certain other cities by lines. Tokyo and Los Angeles are also connected to each other by a special long-distance connection, shown separately on the board.
Each player uses the row of the board closest to him as the Player Monster Display, tracking the status of his monsters. The board also has an Available Actions Display and a Turn track.
Each Monster box on the Player Monster Display shows:
- The number of orange Create/Heal tokens required to create this monster.
- Its damage capacity.
- Its movement allowance.
- Its attack strength, which is the number of dice rolled for each white Attack token you expend.
- A symbol showing whether the monster can damage cities.
Damage capacity is shown in a different coloured box for Drakoor, to remind you that Drakoor can only suffer damage as the result of an attack by another Drakoor or a hero. Drakoor cannot be hurt by other monsters or military units.
Playing the Game
The game lasts for either eight or nine turns, depending on whether there are four or three players. It is also possible for the game to end early if one or more players manage to place all of their rubble pieces, or all of the brown rubble pieces are placed on the board – see below for more details.
Each turn consists of the following phases:
- Determine available actions.
- Player actions.
- End of turn.
Each phase must be completed before the next phase is embarked on.
Phase One: Determine Available Actions
There are six Action boxes which will have a certain number of action tokens and pieces placed in them. A set number of tokens and pieces are always made available, as indicated in the Action boxes. Then the dice are rolled to determine which additional tokens and pieces are added to these.
The first box holds those orange action tokens that are available. An orange action token is used to either create or heal a monster. If there are three players then place seven action tokens in this box. If there are four players then place ten action tokens.
IN THE FIRST TURN ONLY DOUBLE THIS NUMBER, so that either fourteen or twenty tokens are placed in the box.
The second box holds those white action tokens that are available. A white action token is used to allow a monster to attack. The number of action tokens that should be placed in this box is determined by the present turn number. The value in the white circle in the present turn box indicates how many tokens should be placed in this box, e.g. in the first turn two action tokens should be placed here.
The third box holds those purple action tokens that are available. A purple action token can be used to either move or hide a monster. The number of tokens that should be placed here depends on the number of players. If there are three players then place one token here. If there are four players then place two tokens here.
The fourth box holds hero pieces. Place one hero piece (does not matter which one) here. If there are no more hero pieces available, i.e. they are all on the board, then the player who presently holds the first player marker must select one hero piece from the board to be removed and placed in this box.
The fifth box, referred to as Military One, holds military pieces. Place one infantry piece here. If there are no more infantry pieces available then the first player must select one infantry piece from the board to be removed and placed in this box.
The sixth box, referred to as Military Two, also holds military pieces but none are placed in here initially.
The first player must now roll a number of dice to see which additional tokens and pieces are placed in the Action boxes. The number of dice that should be rolled depends on the present turn number. The value in the die symbol in the present turn space indicates how many dice should be rolled, e.g. in the fifth turn six dice should be rolled.
EXAMPLE: It is the fifth turn in a four player game. The set action tokens and pieces have been added to the Action boxes. The first player now rolls six dice. This results in one extra Attack token and two extra Move/Hide tokens being placed in their respective boxes. One infantry and one armor are added to Military One and one armor to Military Two.
Once the dice have been rolled they should be placed in the Action boxes that match their values, i.e. all '1's would be placed in the first box, while all '2's would be placed in the second box, and so on. Each die placed in a box will result in an extra token or piece being added to that box. E.g. each die in the second box will result in an extra Attack token being placed there. The number of tokens in the game is a limit on the number that can be placed, so it may be the case that you cannot place the correct number.
If there are not enough hero pieces available to place in the fourth box then the first player selects the required number of hero pieces from the board to place here.
There are four different types of military pieces, infantry, armor, jet fighters, and the A bomb. The type of pieces that should be placed in Military One and Two depends on how many dice are placed in each box. Each box has a line of military pieces that tells you the progression in which they are placed. If there is only one die in Military One then you would place one additional infantry piece here. If there were three dice in this box then you would place one infantry, one armor, and one jet fighter. If there were three dice in Military Two then you would place one armor, one jet fighter and one A bomb here.
As with heroes, if an infantry or armor piece is not available then the first player selects which pieces from the board will be removed to satisfy the requirements of these boxes.
If there are more dice than the progression allows for then you cycle back to the beginning of the sequence. If a military piece is not available, and none are on the board, then you skip that piece and go on to the next one. E.g. if there were six dice in Military Two then you would place three armor, two jet fighters, and one A bomb. If there are no military pieces available to satisfy the demands of either Military One or Two then that demand will not be met, so it will be impossible to place all of the pieces required. The demands of Military One should be dealt with before that of Military Two.
Phase Two: Players Take Their Actions
This is the main phase of each turn.
Going clockwise from the first player each player performs one action. All actions with the exception of the 'pass' action require you to take one token or one piece from one of the six Action boxes and use/place it according to the rules. This process is repeated until all players have passed in succession.
There are three monster related actions, which are:
- Create or heal monster (orange action token).
- Attack (white action token).
- Move or hide monster (purple action token).
There are two human related actions, which are:
- Place a hero (action box four).
- Place one military unit (from either Military box One or Two).
And finally,
- Pass action.
These actions will now be described in detail.
Action One – Create/Heal Monster
If you take one Create/Heal token from the first Action box then you have a choice. You can either place it in one of your Monster boxes, which will go towards creating that monster, or you can place it back in the general stock and remove one damage cube from a monster. If you place it to create a monster it can only be placed in a box that has a monster piece in it.
To create a monster requires a number of Create/Heal tokens, as indicated in the top right-hand corner of the monster box. If after placing the token in the box the number of tokens is equal to the number required to create the monster you MUST place the monster on the board immediately. Otherwise your action ends and play passes on to the next player.
When you place a monster on the board you take the Hidden counter for that monster and place it in a city of your choice. There is no limit to the number of monsters that can be placed in a city. You can have as many of your monsters as you like in a city. After placing the counter you remove all of the Create/Heal tokens from the monster box in question and return them to the general stock.
EXAMPLE: Simon takes a Create/Heal token and places it in his Mechoor Monster box. The number of tokens in the box is now three, which is not enough to create the monster. The next time Simon places a Create/Heal token in this box he must place his Hidden Mechoor counter on the board.
THE BLOOB – The creation rules for the Bloob are a little different from the standard ones. The first Bloob you create will require three tokens. Once you have one Bloob on the board you have the option to create more Bloobs at a lower cost. If you have two tokens in your Bloob monster box then you can place a Hidden Bloob counter in a city that either contains another one of your Bloobs or is connected to a city that contains one of your Bloobs (does not matter if it is hidden or revealed). If you choose not to place a Bloob counter then you must place another token in the box to be able to create the next Bloob. Once you do so you still have the choice to place it anywhere but all of the tokens from the box will be returned to the general stock.
DRAKOOR – The token cost to place a Drakoor on the board depends on how many Drakoors you already have in play. Each Drakoor piece you already have on the board increases the cost of placing the next one. Thus the first Drakoor will require one token, while the second one will require two tokens. As Drakoors can be killed the cost of placing more Drakoors can go down as well as up.
Action Two – Attack
If you take a white Attack token then you choose one of your Monster boxes to place it in. To be able to place this token in a Monster box at least one counter or piece related to that monster must be on the board (it does not matter whether the monster is hidden or revealed).
When you place the token you have the choice to leave it there or attack with that monster. You can store as many Attack tokens as you like in a Monster box. Once placed in a box they cannot be moved to another box, they will only be removed when that monster attacks or is killed. Storing Attack tokens is generally a good thing as it means that when your monster does attack it will be that much more powerful. However, you have to be careful not to delay too long as if your monster is revealed and killed you will lose all of the tokens placed so far. If you decide to attack with your monster then you can expend some or all of the tokens presently in the Monster box. If your monster is hidden, i.e. it is represented by the Hidden counter on the board, then it immediately becomes revealed. Remove the Hidden counter and replace it with the matching monster piece. The Hidden counter should be placed back in the Monster box.
The number of dice that you will roll in the attack depends on the attack strength of the monster, which will be between one and three. The number in the white circle indicates how many dice per token you roll, e.g. Moogre will roll two dice for each token you expend.
Before rolling the dice you must declare the target of your attack. Your options are to:
- attack another monster,
- attack the humans,
- attack the city itself.
You cannot split your attack between different targets.
After declaring the target of your attack you roll the dice. Every die roll of four or more is a 'hit'. Every die roll of three or less is a 'miss'. One hit inflicts one damage on the target.
Note that in ALL cases hits are registered on a roll of four or more, both for monsters and humans, and all hits result in one damage being inflicted.
Monster vs Monster Combat
If you decide to attack another monster then you indicate which monster you wish to attack. It must be a monster in the same city, it must be revealed, and it cannot be one of your own colour.
Each hit that you score against the monster results in one brown rubble piece being placed in that monsters box. If the amount of damage inflicted reaches or exceeds its damage capacity (the value in the black box) then that monster is destroyed. The monster piece should be removed from the board and given back to the owning player, who can create it again in later actions. The only exception to this rule is if the monster is killed by Moogre, (see below). Any Attack tokens in the Monster box are also placed back in the general supply. Any Create/Heal tokens are left in the Monster box.
MOOGRE – Moogre is not an entirely bad monster and earns victory points for destroying other monsters. If you destroy a monster with your Moogre piece then instead of placing the monster piece back in its Monster Box you place it in your Moogre Monster Box. At the end of the game you will score victory points equal to the damage capacity of the monster, even if your Moogre has been destroyed.
SHAGGOO – Shaggoo is a sly monster and can attack a monster that is hidden. You reveal your Shaggoo and the monster it is attacking, so it does not matter if you do not hit the monster. Shaggoo can attack a Drakoor, which will reveal it, but it cannot inflict damage on it.
EXAMPLE: The yellow player decides to attack the Mechoor piece belonging to the red player. He cannot choose to attack the Bloob piece as it is hidden. Two Attack tokens are expended, resulting in four dice being rolled. Two hits are scored, so two brown rubble pieces are placed in Mechoor's monster box. Mechoor has already suffered four damage and so is destroyed. The yellow player takes the Mechoor piece and places it in his Moogre Monster box, where it will score him six victory points at the end of the game. Note that the infantry piece in the city does not take part in the combat.
THE BLOOB – As soon as the Bloob suffers three points of damage one of its pieces should be removed from the board, which should be the one being attacked. If there is another Bloob piece of the same colour as the initial target in the same city then any further damage will be inflicted against this Bloob, even if it is hidden. If there is no other Bloob piece in the city then any additional damage has no effect.
DRAKOOR – A Drakoor piece can only be damaged by another Drakoor or a hero (see below for more details). Drakoor can be attacked by Shaggoo, which will reveal Drakoor, but no damage can be inflicted.
Monster vs Humans Combat
You can choose to attack the heroes and military pieces in a city.
Before you can do so all armor pieces in that city will fire at you. Choose another player to roll for these pieces. Each armor piece rolls three dice.
If your monster survives you then roll your dice. Each hit will eliminate one hero or military piece. If there are a variety of pieces in the city then armor must be removed first, then infantry, and finally heroes.
If after your attack there are any surviving infantry pieces left then each piece will return fire. Two dice are rolled for each infantry piece.
Monster vs City Combat
Only three monsters are powerful enough to damage a city, Mechoor, Moogre, and The Bloob. This fact is indicated by the exploding city symbol in each of these monsters' boxes.
When you attack a city you follow the same procedure as if you were attacking humans. After eliminating any and all hero and military units in the city each additional hit results in one damage being inflicted against the city.
For each such hit you place one of your own rubble pieces in the city. A city can suffer a maximum of eight damage. Any additional damage scored against it does not register and is in effect wasted.
EXAMPLE: The red player takes one Attack token and places it in his Mechoor Monster box. He can now choose to attack with his Mechoor piece, which he decides to do. He has four Attack tokens in all in the Monster box and decides to expend all of them. The armor piece attacks first and scores two hits, resulting in two black rubble pieces being placed in the Mechoor Monster box. The red player now rolls twelve dice (four lots of three). He rolls six hits. The first three hits have to go against the hero and military pieces in the city, resulting in their removal. The remaining three hits go against the city, resulting in the player placing three of his red rubble pieces there.
THE BLOOB – If you choose to attack with your Bloob then you can make an attack in every city that you have a Bloob piece. You can choose to attack with some or all of your Bloob pieces, so you could choose to keep one or more hidden if you wished. Each Bloob that you attack with attacks with the same strength, e.g. if you expended two Attack tokens then each Bloob would roll two dice. Each Bloob can choose its own target, so you could attack a monster in one city while targeting the city itself somewhere else. You resolve each attack separately and in an order of your choosing.
EXAMPLE: The yellow player takes one Attack token and places it in his Bloob Monster box. He has two Bloobs on the board, one in Rome and the other in Tokyo. He can now choose to attack with none, one or both of these pieces. He decides to attack with both. He has three tokens in all and decides to expend all of them. He rolls three dice for each Bloob. The Bloob in Rome fails to score a single hit, which means the infantry piece fires back, rolling two dice. This results in one hit against the Bloob. As the Bloob had suffered two damage earlier in the game this results in the Bloob piece being removed from the board. The Bloob in Tokyo scores one hit.
Action Three – Move or Hide a Monster
If you take a purple Move/Hide token then you must use it immediately to move or hide one of your monsters (it cannot be stored for use later in the game). You must move or hide one of your monsters that is presently on the board.
Each monster has a movement allowance, as shown in the purple circle. This is the maximum number of connections that the monster can move along in one action. A monster must always move along the black connecting lines.
A monster cannot end up in the same city that it started from, nor can it visit the same city twice.
A monster can move through a city that contains other monsters and human pieces.
Los Angeles and Tokyo are connected to each other.
EXAMPLE: The green player takes a Move/Hide token and decides to move Moogre from New Delhi. He can move him to any of the ticked cities. Alternatively he could leave it in New Delhi and replace the piece with the corresponding Hidden counter.
If you choose to hide your monster rather than move it then you remove the piece from the board and replace it with the matching Hidden counter.
SPECTOOR – If you have your Spectoor piece or Hidden counter on the board then you perform this action twice. This means you could move the same monster twice or move two different monsters. You could also move a monster once and then hide it or hide two different monsters. Spectoor's ability can be used on itself.
Action Four – Place a Hero
If you take a hero piece from the Hero Action box then you place it in one city of your choice on the board.
After placing it you must attempt to reveal every monster in that city. You roll one die against each hidden monster, including your own. A result of four or more means the monster has been revealed. Remove the Hidden counter and replace it with the matching monster piece.
If there is already one or more heroes in the city before you placed your hero then you roll one extra die for each additional hero piece, e.g. if there was already one hero in the city then you would roll two dice for each hidden monster, requiring only one success to reveal that monster.
Each hero in the city must make one attack against any revealed Drakoors in the city. Roll one die for each hero piece. Each hit (4+) will destroy one Drakoor. The active player decides after rolling the dice which Drakoors will be the target of the attacks. This may result in a player having to remove one of his own Drakoor pieces, i.e. you cannot choose not to inflict damage.
Finally, any military units in that city must now attack. The active player decides which military pieces will attack which revealed monsters, even ones that were already revealed at the start of the turn. See below for rules on military pieces attacking monsters.
EXAMPLE: The blue player takes a hero piece from the Hero Action box and places it in London. There are two hidden monsters in the city. There is also a hero that was placed in an earlier turn and one infantry piece. As there are now two hero pieces in the city the blue player rolls two dice against each hidden monster. With both rolls one of the dice is more than three, which means both monsters are revealed. The owning player takes off the Hidden counters (placing them back in the respective Monster boxes) and replaces them with the matching monster pieces.
The two heroes can now attack the Drakoor that has been revealed. The blue player rolls one die for each hero. One of the die rolls is a '5' which is enough to destroy the Drakoor. It is removed from the city and placed to one side. A matching Hidden counter is also placed to one side. The infantry piece now attacks Spectoor. Two dice are rolled, with one hit being scored, which is not enough to kill it.
All armor and infantry pieces remain in the city after the attack. Monsters do not get to fight back.
If you select a jet fighter you choose a revealed monster of your choice to attack. You roll four dice. Hits are scored normally. However, every '1' you roll results in one point of collateral damage being inflicted on the city, which means placing black rubble pieces there to mark this.
The 'A' bomb is an exception to the rules. First you remove all heroes and military pieces from the city that you have chosen to drop it on. You then roll eight dice against each monster in the city, whether revealed or hidden, e.g. if there were two monsters you would roll one lot of eight dice against one of them and then roll another set of eight dice against the second one. A monster that is hidden remains so, even if it takes damage. After rolling against monsters you roll the eight dice one more time, but this time the hits are scored against the city, each one resulting in a black rubble marker being placed there. Remember that a city can only have a maximum of eight rubble markers in it, so any surplus hits are wasted. After the attack you return the A bomb to the stock of other military pieces.
The rules concerning what happens when a monster is destroyed have already been covered in the section on monster vs monster attacks.
Action Five – Place Military
As an action you can take one military piece from either Military One or Two and place it in a city of your choice.
If there are any revealed monsters in that city then you must attack with both the piece you just placed AND any armor and infantry pieces already in the city.
You declare before rolling any dice which monsters will be attacked. A military piece can only make one attack against one monster.
Each armor piece allows you to roll three dice.
Each infantry piece allows you to roll two dice.
EXAMPLE: The green player takes an armor piece from Military Two and places it in Paris. This piece and the previously placed infantry piece can now attack. The player decides to use both pieces against the Bloob. Five dice are rolled and four hits are scored. Three hits destroys the Bloob and the fourth hit is wasted, it is not inflicted on Moogre.
Action Six – The Pass Action
Rather than taking a token or piece you can place your Pass marker in an Action box of your choice. This is regarded as passing. However, you can still perform actions in later turns.
If you already have your Pass marker in an Action box then you can remove it and perform that action. This also counts as passing, even though you have carried out an action. When you take your Pass marker from an Action box you take the necessary token or piece from the stock and use it as you would do if you had taken it directly from the box. E.g. if you removed your Pass marker from the Create/Heal Action box then you would take an orange Create/Heal token from those in the stock and use it as if you had taken it from the box. If you take your marker from Military Box One then you take an infantry piece and place it on the board. If you take your marker from Military Box Two then you take an armor piece and place it on the board. In both latter cases if no piece is in the stock then you select one from the board to take and place. As placing or removing the Pass marker counts as a pass action then if all players use their Pass marker in one form or other then the turn will end at the end of the turn of the last player to place their marker.
Phase Three: End of Turn
Once all players have passed in succession, and this includes placing or taking their Pass token, then phase two ends and phase three begins.
Remove any remaining tokens and pieces from the Action boxes.
If one or more players have placed all twenty of their rubble pieces then the game ends and victory points are calculated.
The game will also end at the end of a player's turn if they have placed all twenty of their rubble pieces on the board OR at the point where all of the brown rubble pieces are on the board. Note that in the latter case if damage were inflicted sufficient to destroy a monster then it should be assumed there are enough rubble pieces to record that damage, at which point the monster is removed from play and any brown rubble pieces are returned to the available stock.
Otherwise the turn marker is moved along the Turn Track one space. The first player should pass the First Player marker on to the player to his left, who now becomes the new first player.
End of the Game and Scoring Points
With four players the game will end after eight turns.
With three players the game will end after nine turns.
Players now total the number of victory points they have scored. Points are scored for the following:
- City tiles
- Damage inflicted on cities
- Drakoors
- Moogre
City Tiles
Each City tile will score a number of points depending on the amount of damage inflicted against that city, as follows:
- 0-2 damage – 5 VPs.
- 2-7 damage – 3 VPs.
- 8 damage – 0 VPs.
Damage Inflicted on Cities
Look at each city individually. The player who has the most rubble pieces in a city scores 4 VPs. If two or more players are tied for the most rubble pieces then they each score 2 VPs and no player scores points for having the second highest number of rubble pieces. The player who has the second highest number of rubble pieces in the city scores 1 VP. If there is a tie for second then none of the tied players score points. Note that brown rubble pieces also figure when calculating scores, so if there were four brown rubble pieces and three red rubble pieces in a city the red player would score 1 VP.
Drakoors
Each Drakoor piece on the board, whether hidden or revealed, will score points depending on the number of other monsters in the city. Each Drakoor scores 3 VPs less one point for every other monster in that city (including your monsters), down to a minimum of zero VPs.
Moogre
Each monster destroyed by your Moogre scores you VPs equal to the damage capacity of that monster. It does not matter whether your Moogre is still on the board or has been destroyed.
The player with the highest victory point total is the winner.
In the case of a tie the tied player who has rubble pieces in the most cities is the winner. If there is still a tie then the tied player with the most monsters on the board is the winner. If there is still a tie then the player who has the most rubble pieces on the board is the winner. After that I think you should call it a tie.
The Monsters
KIDDOO is the monster side-kick. If you attack with a monster in a city that also contains your Kiddoo piece then you can attack with Kiddoo as well. Kiddoo always gets to attack first, even before armor fires. Kiddoo can either expend attack tokens or make just one attack, i.e. Kiddoo always gets to roll at least one die, even if there are no attack tokens in its monster's box. Kiddoo can still attack on its own like a regular monster. Kiddoo can also attack alongside Moogre against another monster.
The DRAKOOR do not want to be noticed, they just want to lurk in the shadows snacking on the odd human. The cost in orange tokens to place a Drakoor is one plus one for each such monster you already have on the board. It may be that you have orange tokens in your monster box ready to create the next Drakoor when one is destroyed on the board. Even though this might mean you have enough orange tokens to place the next Drakoor you must still take an orange token to be able to perform the action. When a Drakoor is destroyed any white attack action tokens in the monster box should be removed and placed back with the stock.
A Drakoor cannot be damaged by the military or other monsters. Only a hero or another Drakoor can destroy a Drakoor.
At the end of the game you score three victory points for each Drakoor you have on the board, less one for each monster (including your own) in the same city.
SPECTOOR is the brainy one, with the ability to control the other monsters. If you take a purple action token and you have your Spectoor on the board (it does not matter whether it is hidden or revealed) then you double the move/hide action. You can move the same monster twice or move two different monsters. Similarly, you can hide two monsters or move a monster and then hide it, or hide a different monster. Spectoor can use its power on itself.
SHAGGOO likes to sneak up on other monsters and attack them. You can attack another monster, even if it is hidden. When you do both monsters are revealed. Shaggoo can attack a Drakoor, thus revealing it, but it will not be able to damage it. Note that the target monster is still revealed even if you do not do any damage.
The first BLOOB you create will require three orange tokens. After that you can create Bloobs for two orange tokens if they are placed in the same city as another one of your Bloobs or a connected city. If you create a Bloob using three orange tokens then you can choose to place it anywhere, but you have to expend all three tokens even if you place it with or connected to another of your Bloobs. Every three damage will destroy one of your Bloobs. Only the Bloob under attack suffers damage, so any excess hits are wasted. When you attack with your Bloobs you can attack with each one on the board at the same time. Each white attack token allows each Bloob to roll one die in attack.
MOOGRE scores victory points for destroying other monsters. If your Moogre destroys a monster then you place the monster piece in your Moogre monster box. At the end of the game each monster Moogre has destroyed will earn you points equal to the damage capacity of each monster. Moogre does not have to have survived for you to score these points.
MECHOOR does exactly what it says on the tin – it knocks things down.