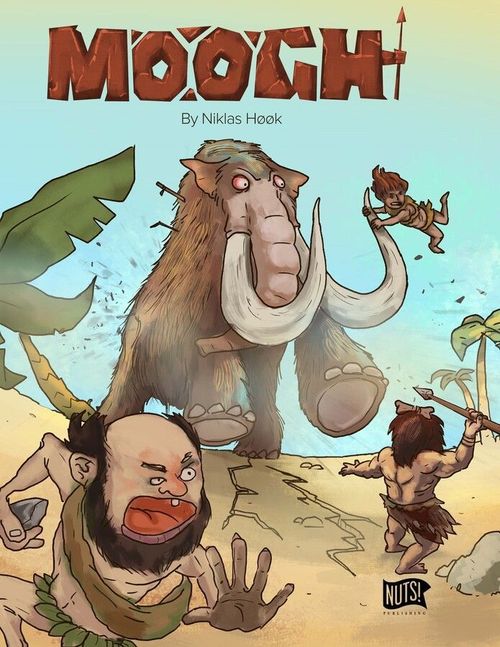
MOOGH
MOOGH Rulebook
Table of Contents
Table of Contents
Components
10 Traps, 8 Action cubes, 3 Action discs, 12 Rage tokens, 1 Turn marker, 17 Idea cards, Rulebook & Scenario book, 8 Bone dice, 4 Beast cards, 8 Beast action cards, 10 Item cards, 3 Health dice, 1 Turn start card, 23 Turn order cards, 4 Player aids, 24 Savage Point tokens, 4 Leader cards & 4 Sidekick cards, 16 Beast & Cavemen standees and 16 bases, 5 Map boards.
Game Overview
Tribes of cavemen and cavewomen are joining forces. To decide who should lead the new combined tribe, they will hunt down big beasts and the most savage team may then claim the leadership of the tribe - if they survive the hunt. With your tribe, try to be clever, anticipate, take your actions and throw dice in order to take down the big beasts.
Game format
You can play either in a campaign, or in skirmishes. If you choose the campaign format, play the scenarios from the Scenario booklet in order (and follow the special rules explained in the Scenario booklet). If you choose the skirmish format, play the scenario of your choice. No campaign rules will apply. Whether in campaign or in skirmish, you can play any scenario solo, cooperative or competitive (see Solo and Cooperative play).
Difficulty
Each scenario may be played either in Tracker, Hunter or Predator mode. If you are just discovering the game, we advise you to play in Tracker mode. As soon as you feel more daring, you can experiment with the Hunter mode! And if you are bold enough, then Predator mode might be for you.
Hunter and Predator modes. The difference between the Tracker mode and the Hunter or Predator modes is outlined in the setup (there may be more beasts, tougher creatures and/or beasts with more life points in Hunter and Predator mode), and lies in the fact that the beasts will activate more often. Brace yourselves, this won't be easy. When you play in the Hunter or Predator difficulty mode, you must, for each beast, shuffle its extra turn order card (with an extra-turn symbol) with the basic turn order cards. This way, beasts activate more often. The difference between Hunter and Predator modes is that in Hunter mode, each caveman and cavewoman starts with a rage token. In Predator mode, they do not.
Competitive play
From here on, we will detail how to play competitively. The general rules are the same for competitive, cooperative and solo games, so read these rules no matter the way you want to play. If you are looking for cooperative or solo-specific rules, see Solo and Cooperative play.
End of the game
The end of the game depends on the play you choose. In competitive play, the game ends immediately if:
- you have fulfilled the objective(s) of the scenario.
- the objective(s) of the scenario cannot be fulfilled anymore (for example, if you must kill a big beast but it runs away from the board).
- there is only one remaining tribe (the other tribes have lost all of their cavemen and cavewomen).
Winning conditions
When the game ends, check these conditions to determine who the winner is:
- If there is only one remaining tribe, this tribe wins!
- If the objectives of the scenario have been fulfilled, or if at least one beast was killed, the tribe (among the remaining ones) which has the most savage points wins!
- If the objectives of the scenario have not been fulfilled and no beasts were killed, everyone loses.
In case of a tie, the tribe with the most cavemen and cavewomen still alive wins. If there is still a tie, the tribe with the most uninjured characters wins. If a tie still cannot be resolved the tied tribes share their victory and rule together.
Setup
- Choose your tribe members according to the number of players:
- 2 players - each of you chooses and controls a tribe (one leader and one sidekick).
- 3 and 4 players - each of you chooses and controls a leader.
- 4 players (2vs2) - each team chooses a tribe (one player controls the leader, and the other the sidekick).
- Then, each of you places their cavemen and cavewomen uninjured side faceup in front of them. Each of you takes a cube - in the color of your tribe - for each of your cavemen and cavewomen.
- Set up the board in the center of the table, as indicated in the scenario.
- Place the standees for the beasts as indicated in the scenario.
- Take the beast action cards corresponding to the beasts in play and place them next to the board. Choose the faceup side of each card at random. Finally, place an action disc on the bottom left space of each card - unless the scenario specifies a higher starting rage level. In that case, place the disc on the indicated row, on the leftmost space. Place a health die (red die) on the health icon of each beast action card. It must show the value indicated in the scenario. This is the beast's health.
- Take the beast cards corresponding to the beasts in play and place them next to the board as well.
- Take the turn order cards for each beast, caveman and cavewoman in play. Remember to take an extra turn order card for each beast if you play in Hunter or Predator mode. Place them in a random order, following the turn start card. Place the turn marker below the turn start card.
- Starting with the last caveman or cavewoman in the turn order, and continuing until the first one, place your cavemen and cavewomen on the board. To do this, look at the scenario you are playing and place them anywhere in the area colored in green. You cannot place your caveman or cavewoman in a space where another one is already standing.
- Place a supply of rage tokens and savage point tokens within reach. Place the bone dice near them.
- Shuffle the idea cards and place three of them faceup on the table.
How to Play
The game is played in rounds, alternating between players and the beasts. Every round is divided into three phases:
1. Appeasement phase
Ignore this phase during the first round.
- Roll a die for each beast to see if its rage changes.
- [chevron]: Decrease the beast's rage level once. This does not trigger an action.
- [cross]: Increase the beast's rage level once. This does not trigger an action.
- [bars]: Nothing happens.
- Move the first card of the turn order (either a beast card or a caveman/cavewoman card) to the end of the row.
2. Programming phase
This phase is simultaneous. All of you play it at the same time.
- Take your action cube(s) and place a cube on each of your cavemen/cavewomen. To do this, place it on the colored space between two icons.
The two icons linked by your cube are the actions your character will attempt in the next phase.
3. Action phase
At the beginning of the round, the turn marker is always on the leftmost card.
- The caveman/cavewoman or beast corresponding to this card takes their actions.
- If it is a caveman or cavewoman, carry out 0, 1 or the 2 actions linked by their action cube. You may carry them out in any order, and none of them is mandatory (see Cavemen & Cavewomen Actions below).
- If it is a beast, perform its actions (Actions of the Beasts). They are mandatory.
- Move the turn marker to the following card in the turn order. The caveman/cavewoman or beast corresponding to this card takes their actions, and so on until every character and beast has played. Then, a new round begins.
Cavemen & Cavewomen Actions
When it's your turn to carry out your actions, you may perform 0, 1 or the 2 actions linked by your action cube in any order. There are two kinds of actions: basic actions (Move and Think), and bold actions (every other action). When you perform a basic action, you simply perform the action, without any conditions. When you perform a bold action, you have to roll one or several dice in order to see if you succeeded or not.
Reading an action: the icon indicates which action you're performing. The number is how many dice you roll when performing the action (for example, 6 dice). You need to obtain the symbol shown (in the red splash) on at least one die to succeed in your action. Any extra symbol rolled isn't taken into account. If you do not roll any of the indicated symbol, the action fails and nothing happens. If there is a "-1" icon, subtract one die to your action for every space between you and your target.
Cavemen & cavewomen cards
Each card shows: leader icon, leader skill, tribe color, actions, placeholder for your action cube, caveman picture. The uninjured side and the injured side each have a placeholder for your action cube; the injured side has a reminder of the leader skill.
Adjacency
Adjacency will come up a few times throughout this rulebook. You are considered adjacent to something when you are orthogonally or diagonally adjacent. Both are always considered valid.
Move (basic action)
Run towards the beast like the intrepid hunter you are, or run away if the beast seems too angry!
This is a basic action. No dice roll is needed. Move your character up to two spaces. When you move them, place them in any adjacent space. You cannot move to a space containing a boulder, a cliff, another caveman/cavewoman or a beast. You cannot exit the board either.
If you are standing on a beast, you can move to any space adjacent to the beast.
Think (basic action)
Take the time to observe your environment and make something out of it.
This is a basic action. No dice roll is needed. Draw two idea cards and choose one that you reveal and add to the other idea cards. Discard the one you did not choose. Then choose one of the idea cards. If you meet its conditions, apply its effects.
Ideas are shared, so do not discard the card you've just used, leave it with the other idea cards.
Rest
Even seasoned hunters need some rest when fighting such creatures!
You must already be injured. If you obtain a symbol indicated in the red splash, you rest and heal yourself. Turn your character card to its other side.
Heal
With this recipe, a dying saber-tooth tiger would be back on its legs!
You must be adjacent to an injured caveman or cavewoman. If you obtain a symbol indicated in the red splash, you heal them. Turn the card of the character you've just healed to its other side. This character immediately benefits from a free action of their choice, chosen from the actions they can perform.
Make a Trap
No need to run to your death. If you place this trap there, this might be as effective as any spear.
You must be adjacent to at least one empty space. If you obtain a symbol indicated in the red splash, you make a trap. Place a trap token on an empty space adjacent to your character.
If a beast moves onto a trap:
- Its turn immediately ends.
- Get 1 savage point.
- Reduce the beast's health by 1.
- Increase the beast's rage by 1 (move its action disc up one space).
- The beast performs the action on which its action disc landed (see Actions of the Beasts).
- Remove the trap token from the board.
If a caveman or cavewoman moves onto a trap, they get injured (see Being Injured) and you remove the trap token from the board.
Stab
Try to hit your fierce opponent with all your strength.
You must stand adjacent to the beast you are trying to hit. Look at how many dice are associated with this action, and then:
- Add 1 die to your attack for each weak spot shown on the beast card at the location you are attacking from (see Around the Beast).
- Subtract 1 die from your attack for each defense the beast has. They are shown on the beast action card, on the line where the action disc is as well as on the beast card at the location you are attacking from (see Around the Beast). You must subtract both.
If you obtain a symbol indicated in the red splash, you hit the beast!
- Get savage points for your successful hit (see Savage Points).
- Reduce the beast's health by 1.
- Increase the beast's rage by 1 (move its action disc up one space).
- The beast performs the action on which its action disc landed (see Actions of the Beasts).
Stab example. Your caveman is standing behind the beast. He is attacking from a corner, which is represented by the highlighted space on the beast card. This space is part of the red area. Therefore, he benefits from a weak spot, which means he should roll an extra die. But the beast's rage is at 2, so the beast has an extra defense. You roll 4 dice, as indicated in your action, because the weak spot (+1 die) and the defense (-1 die) cancel each other. You obtain [bars], [chevron], [chevron], [cross] so you hit the beast! You get 1 savage point, the beast loses 1 health, its rage increases by 1 and it performs the action the action disc landed upon (the down-pointing triangle icon, Move Backward).
Throw
Grab the sharpest thing around and throw it at your prey.
You must be able to see a beast in a straight line from where you are, orthogonally or diagonally. Look at how many dice are associated with this action, and then:
- Subtract 1 die from your attack for each defense the beast has on the line where the action disc is. Do not take into account the defense and weak spots on the beast card.
- Subtract 1 die for each space between your caveman/cavewoman and the targeted beast. Do not subtract anything if you are adjacent to the beast.
If you obtain a symbol indicated in the red splash, you hit the beast! (Same effects as a successful Stab: get savage points, reduce the beast's health by 1, increase its rage by 1, and the beast performs the action on which its action disc landed.)
Climb
Climb onto the beast to find its weakest spot! But be careful. If the beast shakes, you are going down!
You must stand on a space adjacent to a beast. You must also check on the beast card that you are not standing on a space where it's impossible to climb from (see Around the Beast).
If you obtain a symbol indicated in the red splash, you climb on top of the beast! If there was already a caveman/cavewoman on top of the beast, exchange their position with your caveman/cavewoman.
If you are standing on top of a beast, you may only perform move and stab actions.
Sedate
Your knowledge of herbs is impressive. You can easily calm any beast with this concoction... If you can hit the beast with it.
You must be able to see a beast in a straight line from where you are, orthogonally or diagonally. Look at how many dice are associated with this action, and then:
- Subtract 1 die for each space between your caveman and the targeted beast. Do not subtract anything if you are next to the beast.
- This is not an attack, so do not take into account any defense or weak spots.
If you obtain a symbol indicated in the red splash, you sedate the beast!
- If the beast's rage is above 2, reduce it by 1. Move its disc to the icon directly below. This way, you will lower the defenses of the beast and make it easier to damage.
- This does not trigger an action of the beast.
Taunt
If you can draw its attention, maybe it can trample a person or two...
Same targeting as Sedate (see a beast in a straight line, orthogonally or diagonally; subtract 1 die for each space between you and the beast, none if adjacent; not an attack, so no defense or weak spots). If you obtain a symbol indicated in the red splash, you taunt the beast!
- Rotate the beast 90 degrees towards your character.
- If you were directly behind the beast, choose which way you rotate it.
- This does not trigger an action of the beast.
Other Important Rules
Savage points
In a competitive game, you need them to win. Show your strength and gather as many as possible! Each time you earn a savage point (SP), take an SP token and keep it with you. It is shared with your whole tribe.
Here are the different ways to earn SPs:
- When you hit a beast, earn one SP.
- When you hit a beast from above, earn an additional SP.
- When you hit a beast while being in front of it, earn an additional SP. You cannot earn this bonus with a trap.
- When you deal the lethal blow to a beast, earn two additional SPs.
- When one of your cavemen or cavewomen gets injured, earn one SP.
Being injured
At the beginning of each game, your cavemen and cavewomen start uninjured (their illustration has no blood on it).
If your character was uninjured when they take an injury:
- Flip their card injured side up. Reposition their action cube immediately, anywhere you want.
- Take a rage token and place it near the injured character.
- Earn one SP for the heroic act.
If your character was already injured when they take an injury, they are knocked out and removed from the game. Your tribe still earns one SP for their bravery.
Rage tokens
When a caveman or cavewoman gets injured, they get a rage token. Each character may not carry more than one rage token at any time.
You can discard a rage token in order for your character to do one of these things:
- Re-roll all of your dice.
- Move up to two spaces for free during your turn.
- Try to save themselves. If your character would be knocked out, roll a die. If you get a [bars], ignore the injury. Otherwise, your character is knocked out.
- Try to stay on top of a beast. If your character would be sent flying away, roll a die. If you get a [bars], your character stays on the beast. Otherwise, they are sent flying away (see Shake).
Leader skills
Each tribe leader has a passive skill, written on their card. Make good use of it.
Terrain
Some elements on the board have effects.
- Bushes. Successful attacks from bushes do not increase the beast's rage. Bushes are not obstacles.
- Water / Mud. Each step you take into water or mud is difficult. Every time you enter a space containing water or mud, roll a die. On a [cross], your movement ends immediately. Beasts are not affected by water and mud.
- Tree. Cavemen and cavewomen are not affected by trees. They can stand on a space with a tree. On the other hand, trees are obstacles for beasts. They cannot stand on a space with a tree.
- Boulder. Boulders are obstacles for cavemen/cavewomen and beasts. They cannot stand on a space with a boulder.
- Huts. They are used in some scenarios. They are not obstacles.
- Cliff. Cliffs represent a shift between a lower (bottom) and a higher (top) elevation. A caveman/cavewoman cannot move from the bottom to the top. A caveman/cavewoman cannot voluntarily move from the top to the bottom and if they are so involuntarily pushed, they are knocked out. Beasts can move from the top to the bottom but if they fully move from the top to the bottom, they immediately die. Try to work that to your advantage!
The Beasts
Size
During your hunts, you will encounter both small beasts and big beasts. Each scenario will tell you which beasts you have to defeat in order to reach the end. It's pretty easy to recognize the beasts: small beasts take up one space on the board, while big beasts take up four spaces (2x2).
Orientation
At the beginning of the game, place the standee of each beast and their respective beast card in the same orientation. This means the beast card must be oriented so it faces the same edge of the board as the beast's standee. This will make it much easier to see where weak spots and additional defense apply, as well as which spaces are impossible to climb from.
Every time a beast turns, turn its beast card in the same direction.
Anger
The beasts may have different versions of themselves. Not all of them, though. Usually, a calm beast is easier to defeat than an angry beast. But both types will have their rage increasing when they are injured, so be careful either way.
There is also a nice small Moogh. This one is not a huge threat. But if you are playing with kids, you may want to replace a beast with the small Moogh to make the game easier.
Health
Each beast has a beast action card. The scenario you're playing tells you with how much life each beast starts with. Place a health die (red die) on the health icon of each beast action card. It must show the number indicated in the scenario.
Every time a beast suffers damage (by being hit or walking into a trap), lower the die's value by one. When a beast loses their last health point, they are killed. Remove them from the game along with their turn card(s).
Defense
When you perform an attack on a beast, roll 1 less die for each defense the beast has.
- For a throw, take into account the defense indicated on the beast action card, on the row of the action disc.
- For a stab, take into account the defense on the beast action card, just like a throw, plus the defense indicated on its beast card at the spot you are attacking from (see Around the Beast).
Top
When your character climbs on top of the beast, move it onto the beast card. On the beast's back, there are weak spots. When you perform a stab from the top of the beast, you benefit from these weak spots, so you will roll more dice, with a better chance of hitting the beast.
When you are on top of a beast, you can only perform move and stab actions. If you perform a move, you can move to any space adjacent to the beast on the board. If the beast moves while you are on top of it, your character stays and moves along with it.
There can only be one character at the top of a beast. When you climb on top of a beast, if there was already a character on top of it, place them in the position your caveman or cavewoman came from. In other words, you swap the positions of the two characters.
Rage
The beast's rage determines how many actions it will take on its turn and how much defense the beast has. This is all indicated on the left and right of the line the action disc is on.
When you have to increase the beast's rage, move its action disc onto the space directly above it. When you have to decrease the beast's rage, move its action disc onto the space directly below. If you moved the action disc because you hit the beast, then it immediately performs the action on which the disc landed.
Maximum rage - If the beast is already at its maximum level of rage and you hit it, move its action disc one step to the right and the beast immediately performs the action on which the disc landed.
Around the beast
When you want to stab a beast or climb on top of it, the space you are standing on is very important. Depending on where you are, you might benefit from bonuses (weak spots), the beast might have extra defense points (defense), or it might be impossible to climb on top of the beast.
Look at the beast card to see whether any of the above applies. Big beasts are surrounded by twelve adjacent spaces, while small beasts have eight adjacent spaces. All these adjacent spaces are indicated on the beast card.
Each beast has four sides. The front side and back side include the corner spaces, which is why these spaces have the same color on the beast card. A symbol in a space on the front side of the beast applies to any space on the front side. A symbol on the left side applies to any space on the left side, and so on.
Action resolution
When it's a beast's turn to play, it will perform actions. The amount of actions it performs depends on its level of rage. On the right of the card, on the row the action disc is on, the number of arrows determines the number of actions the beast will perform this turn.
Each time the beast has to perform an action, move the action disc one step to the right and perform the action corresponding to where the disc is now (see Actions of the Beasts). If the beast has to perform several actions, perform them in order, one after the other.
When the action disc is on the rightmost space and you need to move it to the right, place it on the leftmost space of the same row.
Actions of the Beasts
When it's a beast's turn to perform an action (move its disc one step to the right), or when a beast gets injured (move its disc one step up), the beast performs the action on which the action disc has landed.
Obstacles - They are different if you are looking from a beast's point of view, or from a character's point of view. For beasts, obstacles are boulders, big beasts, trees and the bottom of cliffs. For characters, obstacles are boulders, cliffs, beasts (any size) and other characters.
Move Forward
The beast moves forward as many spaces as there are arrows. If it encounters an obstacle, then its movement stops.
Any caveman/cavewoman or small beast in the moving beast's path is pushed to the closest side. Push it orthogonally if there are no obstacles on the space it is pushed to. If the space is occupied by an obstacle, move it to the nearest free space of your choice.
When a caveman/cavewoman or small beast is pushed into an obstacle, it gets injured.
If a caveman/cavewoman or a small beast is pushed by a small beast, roll a die. On a [bars], they are pushed to the right. On a [chevron] or [cross], they are pushed to the left.
If a beast moves entirely out of the board, it has escaped. It then leaves the game.
Example - movement of a beast. Here, the beast should move three spaces forward. Because of the boulder, it will only move two spaces. The caveman in the path of the beast is pushed to the left of the beast (it is pushed to the closest side of the beast). Since there is a second boulder, the caveman gets injured and you choose to move him to the right of the boulder. Because of the injury, flip his card to the injured side, and earn one savage point and one rage token.
Move Backward
This works the same way as Move Forward, but the beast goes backward, without turning around.
Seek Freedom
The beast tries to find an escape route to flee!
In order to determine which path the beast will follow, look for any obstacles. For each direction the beast could take, except backward (forward, left and right), count the number of spaces without obstacles from the beast to the edge of the board.
As big beasts take four spaces, each direction has two rows to take into account. To count the number of spaces without obstacles in a direction, only take into account the row with the nearest obstacle from the beast.
The beast turns to face the direction of the longest path without obstacles on it. If this path is on the left or right, turn the beast. If it is forward, leave the beast as it was. If there is a tie among the longest paths, the beast cannot decide and makes a U-turn instead.
Example - Seek freedom. Here, the Moogh has obstacles forward, on its left and on its right. The beast should turn left or right, since there are two free spaces before an obstacle, and there is only one forward. But as the beast cannot decide, it turns backwards and hopes there will be a path out that way.
Look for a Target
This action works the same way as Seek Freedom, except that the beast will turn to face the closest caveman or cavewoman instead of the closest path to escape. If the beast can't see any target, it makes a U-turn. If there is a tie for closest target in front of the beast and on its side(s), it will not turn. However, if there is a tie for closest target to its right and left side, roll a die. On a [bars], the beast turns to the right. On a [chevron] or [cross], the beast turns to the left.
Trample a Target
When several icons are together, start resolving the bottom-most icon. Here, the beast looks for a target first, and then it moves forward two spaces.
Attack
For each attack icon, the beast attacks once. When the beast attacks, roll one die to determine which section the beast attacks. Look at the beast card to see if the symbol rolled corresponds to the front of the beast, to its sides or to its back. Each caveman/cavewoman or beast standing on an attacked spot takes an injury.
Bite
Any caveman or cavewoman adjacent to the beast and standing in the space in front of it (or any of the two spaces in front of the big beast) takes an injury.
Claw
Any caveman or cavewoman adjacent to the beast and standing in a corner around it takes an injury.
Tail Swipe
Any caveman or cavewoman adjacent to the beast and standing in any of the three spaces at the back of it (or any of the four spaces at the back of the big beast) takes an injury.
Shake
If there isn't any caveman or cavewoman on top of the beast, nothing happens.
But if there is a character at the top of the beast, they are sent flying away. On the right of the beast action card, on the row the action disc is on, the number of arrows determines how many spaces away the character is thrown.
To determine in which direction the character is thrown, roll a die. On a [bars], they are thrown to the right of the beast. On a [chevron], they are thrown to the left. On a [cross], they are thrown in the direction the beast is facing. There are always two possible rows (in any direction) from the top of a big beast. The character's controller chooses which row to take. If the character encounters an obstacle (i.e. a boulder, a cliff, a beast or another caveman) or reaches the end of the map, they stop and become injured. Then, move the character to the nearest free space.
Remember you can avoid being thrown away by using a rage token and succeeding the roll (on a [bars]).
Make a U Turn
The beast turns in the opposite direction.
Make a Random Turn
Roll a die. On a [bars], the beast turns right. On a [chevron], it turns left. On a [cross], it doesn't turn. It stays on the same space in each case.
Sleep
The beast is either confused or really relaxed. It does nothing.
Solo Play
End game
When playing solo, the game ends immediately if:
- you have fulfilled the objective(s) of the scenario.
- the objective(s) of the scenario can't be fulfilled anymore (for example, if you must kill a big beast but it runs away from the board).
- you exceed the time limit.
Winning conditions
If you have fulfilled the objective of the scenario, you win! In any other case, you lose.
Setup
Only the parts differing from the usual setup are listed below. Otherwise, set the game up as usual.
- Choose your tribe members depending on the difficulty level:
- Hunter mode - take four cavemen/cavewomen. One of them may be a leader, the others must be sidekicks.
- Predator mode - take three cavemen/cavewomen. One of them may be a leader, the others must be sidekicks.
- You may not play in tracker mode.
- Then, place your cavemen and cavewomen faceup in front of you uninjured side up. Take a cube - of any color - for each of your cavemen and cavewomen.
Appeasement phase
When playing solo, there is a time limit you should not exceed. Otherwise the sun sets, the beasts flee, and you lose the game. During the appeasement phase (the first phase), place a savage point on the turn start card. Ignore this on the very first turn. If a beast has fled on the previous turn, place three savage points on the turn start card instead of one.
When you have placed a savage point this way, check how many savage points are on the turn start card. If there are as many or more points as the time limit indicated in the scenario you are playing, the game ends and you have lost. Otherwise, start a new turn as usual.
There are no other changes in the rules for the solo play.
Cooperative Play
This plays exactly the same way as the solo play, except that step 2 of the setup depends on the number of players, and not on the difficulty chosen (you can only choose between Hunter and Predator mode, though):
Choose your tribe members depending on the number of players around the table:
- 2 players - take one leader each.
- 3 players - take one leader and two sidekicks in total.
- 4 players - take one sidekick each.
Then, each player places their cavemen and cavewomen faceup in front of them uninjured side up. Each of you takes a cube in the color of your character. Nothing else changes.
Player Aid Summary
Round phases: 1. Appeasement (roll a die for each beast to see if its rage changes; move the first turn order card to the end of the row; Solo/Coop: put 1 SP on the Turn start card, 3 SP if a beast fled). 2. Programming (place a cube on each of your cavemen/cavewomen to choose their actions). 3. Action (resolve the turn order cards from left to right; a character performs their actions; a beast performs as many actions as there are arrows on its level of rage).
Resolving actions: roll as many dice as indicated on the action. If there is the -1 symbol on your action, subtract 1 die from your action for each space between you and your target. You succeed in your attempt if you roll at least one symbol shown.
Resolving attacks: when performing a stab action, add a die for each weak spot modifier. Subtract a die for each defense on the rage level of the beast (when stabbing or throwing) and on the location you are attacking from (when stabbing only). In case of success: get savage points for your successful hit; reduce the beast's health by 1; increase the beast's rage by 1; the beast performs the action on which its action disc landed.