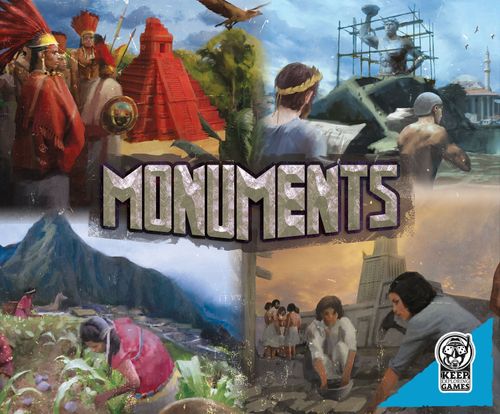
Monuments
Monuments Rulebook
Table of Contents
Table of Contents
Components
Game board and monuments
- 1 game board (a world map of continents and islands)
- Colossus of Rhodes monument, in 5 pieces (Standard, Deluxe and Super Deluxe editions)
- Lighthouse of Alexandria monument, in 5 pieces (Standard, Deluxe and Super Deluxe editions)
- Tikal monument, in 5 pieces (Standard, Deluxe and Super Deluxe editions)
- Machu Picchu monument, in 5 pieces (Standard, Deluxe and Super Deluxe editions)
- 2 island and water overlay hexes
Cards
- 4 player boards
- 40 action cards
- 8 solo action cards
- 20 personal bonus cards
- 4 score cards
- 2 solo score cards (AI Easy)
- 32 common bonus cards
- 4 ability cards
- 48 quest cards
- 10 solo quest cards
Tokens and pieces
- 25 wood tokens
- 25 sheep tokens
- 25 metal tokens
- 25 food tokens
- 25 weapon tokens
- 25 bridge/ferry tokens
- 2 horse tokens
- 3 workshop tokens
- 3 farm tokens
- 1 first player crown
- 10 special and 1 normal D6 dice
- 1 score pad
Per player
- 15 workers
- 3 forts
- 3 towns
- 3 factories
- 3 air forces
- 3 navies
- 3 armies
Story
You are the leader of a powerful civilization. In this core game, you can choose between:
- The Greek, starting in Europe
- The Egyptians, starting in Africa
- The Maya, starting in North America
- The Incas, starting in South America
Starting with only three workers and two resources, it is your goal to make your civilization as great as possible. Building your great Monument is the fastest way to score Victory Points (VP), but in order to do so you will need to expand, spend resources and even sacrifice workers. Before you set up the game, choose from these two game modes. Whichever mode you choose, know that the goal of the game is to collect the most VP, not to finish your Monument first! Players can very well win the game with an incomplete Monument. But these two options let you tailor the game to the likes of your player group.
In Abundance mode, players should have no trouble finding all the land they will need without the need to attack each other. Choose this mode if you enjoy the civ-building more than the combat and conquering options. It makes battling each other optional, but still very well possible. We recommend this mode for playing with children, families, and first-time players.
In Scarcity mode, there are fewer options to find and conquer uninhabited islands. This will ultimately lead to a higher chance of players attacking each other in order to take control of the 12th land hex that leads to the ability to build the final layer of their Monument. Choose this mode if you don't mind the military strategy that comes with this. We recommend this mode for more competitive families, groups of friends and players who have played the game more often.
When looking at the game board, notice that every continent's mainland has 9 hexes that produce resources and one Monument hex. Islands also produce resources. Sea hexes do not produce anything. So if a hex does not have a resource icon, it is a sea hex, even though part of it may depict land.
Set-up
Place the game board on the table. Have every player choose a civilization. When playing with 2 players, we recommend using Greece and Egypt. You can also play with the Maya and Incas. With 3 players, always use Greece, Egypt and the Incas. When a civilization is not in play, its continent is also not in play. Players cannot enter any of the hexes of a continent which is not in play. Now, depending on the game mode you chose, the only difference in set-up will be the number of islands in play.
2 players, using Greece and Egypt
Abundance mode: Use Madagascar(1), Greenland(2) and the UK(3).
Scarcity mode: Use Madagascar(1) and Greenland(2). Block off the UK(3).
2 players, using Maya and Inca
Abundance mode: Use Greenland(2), Easter Island(4), Hawaii(5) and Cuba(6).
Scarcity mode: Use Greenland(2), Easter Island(4) and Hawaii(5). Block off Cuba(6).
3 players
Abundance mode: Use Madagascar(1), the bottom half of Greenland(2), the UK(3), Cuba(6), Easter Island(4). Block off the top half of Greenland(2) and Hawaii(5). Create a new island between Africa and South America as pictured(7).
Scarcity mode: Use Madagascar(1), the bottom half of Greenland(2), the UK(3), Cuba(6), Easter Island(4). Block off the top half of Greenland(2) and Hawaii(5).
4 players
Abundance mode: Use all islands. Create a new island between Africa and South America as pictured(7).
Scarcity mode: Use all islands.
If playing with fewer than 4 players, remove the quest cards and common bonus cards that have the '3+ players' (if playing with 2 players) and/or the cards that have the '4+ players' icon from the game.
The common bonus card shown on this page comes into play with 2+ players (and can be retrieved when a player builds the 3rd layer of their Monument).
Player set-up
Hand every player their civilization game board (1), a set of 10 action cards (2) and the five pieces of their monument (3). The Greek will build the Colossus of Rhodes, the Egyptians will build the Lighthouse of Alexandria. The Incas will build Machu Picchu and the Maya will build Tikal.
Remove all quest cards with a [blue solo icon] symbol, these are only used in solo mode. Hand every player 2 starting quest cards (4). Everyone chooses one and discards the other. Remove all other starting quest cards from the game. Separate the remaining quest cards into three decks with different backs (0-1, 2-3, 4-5) and shuffle them. Place them next to the game board (5). If a quest deck runs out, reshuffle the discarded quest cards if possible. If there aren't any, there aren't any quests available for that level.
Randomly give each player a scoring card (6) and a personal bonus deck (7). Place the scoring card on your player board. Place the personal bonus deck face down on your player board, the '5' on the bottom, the 'set-up' on top. Draw the 'set-up' card and take the buildings and units listed (8). (You can leave them in your player tray if you have the Deluxe edition.)
Place the buildings and units you don't get aside (9). You can unlock these over the course of the game. You can then discard the 'set-up' card to the bottom of the deck.
Hand players an ability card which they place on their player board (10).
Each player places 3 workers on their monument spot on the game board (11). Every player also places 2 resources on the board of a hex of their choice (12). Both resources need to be placed on a hex that produces that type of resource (we recommend you place a resource on 2 of the 3 hexes you can reach from your monument hex without building a bridge).
Sort the common bonus cards per level and place these in 5 piles next to the quest cards, face down (13). Place all resources and the weapons and dice next to the board as well (14). Players will use the action cards with the red side facing towards them.
Choose a starting player. Give that player the first player marker (15). This player will remain the first player for the entire game, but everyone will play an equal number of turns.
Monument costs
| Layer | Hexes | Wood | Food | Metal | Sheep | Workers |
|---|---|---|---|---|---|---|
| 1 | 3 | 1 | 0 | 0 | 1 | 1 |
| 2 | 5 | 1 | 1 | 1 | 1 | 1 |
| 3 | 8 | 2 | 2 | 1 | 2 | 1 |
| 4 | 10 | 3 | 2 |
Unit and building costs
| Unit | Cost | Move | Power (Land) | Power (Sea) | Controls Hex | Controls Resource |
|---|---|---|---|---|---|---|
| Worker | - | 1 | 0 | 0 | Yes | Yes |
| + Weapon | 1 metal | 1 | 1 | 0 | Yes | Yes |
| Navy | 1 metal, 1 food | 2 | 0 | 3 | Yes | No |
| Army | 1 sheep, 1 food | 1 |
* 1 empty - 2 with 1 or 2 passengers. Getting in pushes boat to center sea hex. Getting out pushes boat to shore and puts passengers on shore.
Goal of the game and flow of play
The first player starts the game by performing one of the options listed below. After the player has done that, play continues clockwise. The game ends after the round in which one or more players build the 5th layer of their monument is completed. Therefore, it is possible for multiple players to finish their monument. When the game ends, the player with the most victory points (VP) wins. This is not necessarily the player that triggers the end of the game. VP are counted at the end of the game, and are awarded – by default – as follows:
- 6 VP per completed layer of monument
- VP from the gathered Layer 5 bonus cards for those who finished building their monument
- 1 VP per 3 resources controlled
- 1 VP per 2 workers on the board
- 1 VP per land hex controlled
- 1 VP per 3 military power
- 1 VP per upgraded card
- 1/2/3 VP per completed quest card
- 0/-1/-2 VP per uncompleted quest card
Each player has a personal score card that gives a bonus to one of these elements, and a minus to another one of these elements. The scoring elements are listed on the score card in this order, however some players will have an extra scoring line for bonus or minus VP.
Here is an example of a score card: This player scores 1 VP per 4 resources they control instead of the default of 1 VP per 3 resources. However, they will score an extra VP per land area they control at the end of the game.
In a turn, a player can either
- Play one of their 10 action cards. Execute its action, then discard it to a pile in front of them. If a card is not upgraded, use the red side. If it has been upgraded, use the green side.
- Take all previously discarded action cards back on hand. Make sure to retrieve them with the right side (red or green) up.
Most game play concepts will be explained within the section of the relevant action card.
Action cards
Upgrade an action
All action cards have a red side and a green side. You start the game playing the red side. Each card shows the action you can perform and also the cost to upgrade on the red side. By upgrading, an action card becomes better, as seen on the green side. When upgrading an action card, you play the upgrade card, pay the resources listed on the card you wish to upgrade – not the upgrade an action card, unless you are upgrading that card. Flip the upgraded card from red to green. From now on, you play the green side of this card. You can upgrade either a card from your hand or from your discard pile. Always discard your played action cards with the side played face up, and pick them up like this again, so you always know which cards you have or have not upgraded. If you upgrade an action card, you get one resource discount on future upgrades.
Example: you wish to upgrade the Production card. You play the upgrade a card action, pay 2 sheep, and flip over the Production card to its green side. It doesn't matter if the Production card is in your hand or in your discard pile when you upgrade it. From now on, when producing, you get to produce on three tiles instead of on two.
Movement
Beside taking quest cards, this is the only action you can perform in your very first turn. Each unit has a certain amount of movement points as listed on the player boards. Your workers can move a single hex at a time. With this card, you can move 2 units up to their maximum movement points. Note that no playing pieces can move on or over a monument hex of any other player. Workers and armies cannot cross rivers, unless there is a bridge built or they use a ferry. Workers can carry one resource with them when they are moving. Other units cannot carry resources, with the exception of the horses, which are specific to one personal ability. Horses can carry up to 2 resources.
All player pieces move from the inside of a hex to the inside of another hex. An unlimited amount of player pieces of a single player can occupy a hex. You cannot move a player piece to a hex which is occupied by a player piece of another player, you need to use the Attack card for this. When using a movement to move a worker or an army onto a ferry, that same movement point will push the ferry into the center of the sea hex which it borders. If you wish to place 2 workers/armies on a ferry, only the second army/worker entering the ferry will push it to the center of the bordering sea tile. When moving the ferry, it can move 1 hex when empty, or 2 hexes when occupied by 1 or 2 workers/armies. You need a movement point to push the ferry to the border between a land and a sea tile, and then unload the workers/armies on that tile. Therefore, workers/armies can never be on a ferry bordering a land and a sea tile; they will either be on a land tile, or on the center of a sea tile in a ferry. Ferries are explained in more detail in the 'ferry' section of the 'build a building' action.
When upgraded, you can move 3 units up to their maximum movement points. Note that you can never move the same unit twice in one turn with this action card. Note: You can never move on or over a hex with a light blue border in the base game.
Production
This card is how you gain resources. Note that in this game, resources will always remain on the board until they get spent. Workers on the same hex as a resource control this resource, and the player that owns these workers can use and spend these resources. When carrying out the produce action, you can select up to two land hexes on the board. Every worker and factory you have there will produce the resources of that hex. Every worker will produce one resource. A factory will produce one resource, or two resources if at least one worker is present on that hex. These limits always apply:
- Although there is no maximum to how many workers can be on one hex, you can only produce a maximum of three resources per hex per produce action. This limit also applies to factories involved.
- A maximum of 5 resources of any kind can be on a hex at any time. You cannot produce a number of resources on a hex that will result in more than 5 resources on that tile.
When upgraded, you can select up to three hexes to produce resources. Remember that you are selecting hexes, not workers. You can have up to 6 (red side) or 9 (green side) workers producing resources with one action, provided that they are equally divided across 2 or 3 hexes respectively and each of those hexes have space for 3 new resources. You cannot select the same hex twice with this action.
Card text, red side: "Produce on up to two tiles." Green side: "Produce on up to three tiles."
Build a building
With this action, you can either build a town, fort, factory, bridge or ferry. When you do, spend the resources needed that your workers are controlling, then build the building on (town/fort/factory) or next to (bridge/ferry) a hex that one of your workers is controlling. The location you spend the resources from is not related to the location you build a building. You can find a summary of the different buildings on your player board. You can also repair a building that has been damaged by a previous battle with this action card.
Card text, red side: "Build a building, or repair one with a discount of 1 resource." Green side: "Build a building with a discount of 1 resource or repair one with a discount of 2 resources (to a minimum of 1)."
Buildings
Fort: A fort costs 1 metal and 1 wood, and is a defensive building. It has a power of 2, which is useful when the hex it is on is under attack. A fort can't be moved after it is built.
Town: A town costs 1 sheep and 2 food. Its primary use is to place new workers onto the board, as explained in the populate action. It also has a power of 1. A town can't be moved after it is built.
Factory: A factory costs 2 sheep. It produces resources even when workers aren't present. It produces one resource of the kind of hex it is on whenever you select its hex with the produce action. It produces two resources of the kind the hex it is on whenever you select its hex and there is at least one of your workers present on that hex. Note that you can't spend any resources from a hex on which no workers are present.
Bridge: A bridge costs a single wood and is built between two hexes. Usually you build it over a river, so that workers and military units can cross the river. Bridges are not owned by any player, so every player can use all the bridges on the board. Note that the bridge and the ferry use the same component, placed in a different way.
Ferry: A ferry, not to be confused with a navy, costs a single wood and is built on the side of a hex bordering a body of water (a lake, sea or ocean – not a river). Like a bridge, it is not owned by any player, so every player can use all the ferries on the board. However, a player controls a ferry when it has at least one unit on it, or the ferry is bordering a hex that this player controls. A ferry is used to transport workers and armies across lakes, seas and oceans. A ferry can fit up to two workers and/or armies. With the move action, you can place a worker or army from the hex the ferry is bordering into the ferry. You can also move a second unit into the ferry if you wish. Then you automatically move the ferry to the center of the water hex it is bordering. From now on, you move the ferry instead of the workers/armies on board. A ferry moves 1 water hex when it is empty, or 2 hexes when it has one or two passengers. Whenever you reach a land hex where you wish to disembark your unit(s), you use one movement point to push the ferry from the center of the water hex to the border with the land hex, and then automatically disembark your unit(s) there.
Figure captions: "This is how a ferry gets placed when a player builds one – on the side of a hex." "The ferry is now on the center of a sea hex with 2 workers on board." "The ferry has reached its destination and the two workers have disembarked."
When you have your build a building card upgraded, you get a discount of one resource of your choice on the building. This is to a minimum of 1 resource you have to pay, so you can't use it to build a bridge or ferry for free.
With this action, you can also repair a damaged building instead of building a new one. The cost of repairing a building is the same as building one, with a discount of one resource. Once upgraded, the repair cost can be discounted by two, with a minimum cost of one resource to repair a building. You can only repair your own buildings and only with a worker in that same hex.
Populate
This is how you will gain new workers. Populating requires (at least) two workers to be in a town of yours. By playing this action, you can place one worker from your supply in one town with at least two workers. When upgraded, you can place up to two workers from your supply in two different towns with at least two workers in each.
Card text, red side: "Place a worker in one of your towns with at least 2 workers already in it." Green side: "Place a worker in up to two of your towns with at least 2 workers already in it each."
Build a layer of your monument
Now that you can move your units, gain resources, build buildings and get more workers, you are ready to build your monument! Although players can win the game by building 3 or 4 layers of their monument by the end of the game, it really is the biggest source of victory points and the core of the game. Here is how you build your monument:
First, you always check the requirements and costs for the layer of the monument you are trying to build on your player board. You start with the first layer, working your way up to the fifth layer. In order to build a layer, first you need to control a number of land hexes. Your monument hex does not count as a land hex. As seen in the table on the top right side of your player board, your workers, navy, army and air force can control areas. However, navy can only control sea hexes, so they are not useful here. Therefore you need workers, armies and air force on at least 3 land hexes in order to be able to build your first layer of your monument.
Card text, red side: "Build the next Layer of your Monument. See other side." Green side: "Build the next Layer of your Monument with a discount of 1 resource (not a worker)."
Note: the hex your monument is on never counts as a land area you control for the purpose of building a new layer of your Monument!
This scales up to 12 land hexes needed in order to finish your monument. When you control the number of land hexes as required, you then need to spend a number of resources as listed in the table. For the first layer you only need a wood and a sheep. For the fifth layer, you need to spend 3 copies each of the 4 resources. Remember you can only spend a resource if you have a worker in that hex controlling it. Finally, you need to sacrifice a number of workers as listed in the last column. One worker for the first layer, up to three workers for the final layer. Those workers perish in the process of building this massive monument for you. Return these workers to your supply.
When these three requirements are met, you can build the next layer of your monument on your monument hex! When you have built this, you get not one, but two bonuses! First of all, you get to choose a common bonus. When building your first layer, you can choose any of the 'Layer 1' common bonuses that are still available. When building your second layer, you can choose any of the 'Layer 2' common bonuses still available, etc. Place this bonus on your player board. This bonus is now active for the rest of the game.
Note: each common bonus card shows either one or two cards on the bottom. If it shows one, each player may only have one copy of this card. If it shows two cards, a player is allowed to choose this same bonus a second time over the course of the game.
In this example, after having built the first layer of their Monument, this player gets to choose one of three personal bonuses as listed on the left card. They choose the second option, and place 2 wood on a forest where they have a worker, and one metal on a mountain on which they have a worker.
This player chooses the common bonus on the right hand side. This gives their workers a movement of 2 instead of 1. If they so wish, this player can choose this bonus card again in another layer later in the game if available, because it shows 2 cards on the bottom part.
You also get to choose a one time, personal bonus. Draw the next card from your personal bonus deck, corresponding to the layer you just built. So when you build your first layer, draw the 'Layer 1' card. You can choose one of the options on it, and execute it. Then discard this bonus card to the bottom of the deck. If you decide to build a building, you need to build it on a hex you control. If you choose to receive new workers, you need to place these on a town you control (or your Monument hex if you don't have a town yet). If you get resources, you may place these on any hex(es) where you have at least one worker. The resource(s) must match the production of that hex, so you need to place wood on a forest, etc. If you gain a military unit, you must replace a worker with this unit.
So to summarize, when building a monument
- Check if you control the number of land hexes required
- Spend the resources required
- Sacrifice the number of workers required
- Build the next layer of your monument
- Choose a common bonus card matching the layer
- Choose a personal bonus matching the layer
Remember that once a player builds the 5th layer of the monument, play continues until all players have had an equal amount of turns, after which the game ends. When a player builds the fifth layer of their monument, they don't get to choose a personal bonus, but they do get to choose a common 'Layer 5' bonus that scores a number of victory points.
When you have upgraded this card, you get a discount of one resource when building a layer. Note that workers are not resources.
Card text, red side: "Build the next Layer of your Monument. See other side."
Train a military unit
Card text, red side: "Train one military unit (only if you have the common bonus card that allows this)." Red side, upgraded (bottom of card): "Train one military unit (only if you have the common bonus card that allows this) and get a free weapon." Green side: "Train one military unit (only if you have the common bonus card that allows this) and get a free weapon."
At the start of the game, you cannot build military units. You first need to have the common bonus card 'you are now allowed to train military units', which can be found in each layer of the common bonus cards. Military units are navy, army and air force. Weapons can also be forged with this action. You can train one military unit or forge one weapon at a time with this action.
By training a navy, army or air force, you remove a worker from the board, going back into your supply. You spend the resources as listed, then place the corresponding military unit on the hex you took the worker from. When building a navy, you place it on a neighboring water hex instead. Note that military units control areas and are used to attack other players, but do not control or carry resources.
Navy
You use navies for control of the seas. It costs a metal and a food to train a worker to be a navy. A navy can move up to two sea hexes per activation, and has a power of 3 on a sea hex. It can attack ferries, navies and air force on sea hexes. It cannot attack targets on land, unless you play the civilization with that personal ability.
Army
You use armies for control of the lands. It costs a sheep and a food to train a worker to become an army. An army can move one land hex per activation. It has a power of 3 on a land hex. When it is on board of a ferry, it has a power of 1. It can attack workers, armies, air force, forts, towns and factories on land. While it is on board of a ferry, it can attack ferries, navies and air force on sea hexes.
Air force
Whilst navies and armies excel at sea and land areas respectively, you can use an air force to control both. It costs a wood and a food to train a worker to become an air force. It moves up to two hexes at a time, and can fly over both land and sea hexes. It has a power of 2 regardless of land or sea area. It can attack workers, armies, air force, forts, towns and factories on land, and ferries, navies and air force on sea hexes. You can only build air forces after you have built layer 3 of your Monument. (They weren't invented before that time.)
Weapons
You can forge a weapon for 1 metal. When you do, you can assign this weapon to a worker. Place the weapon underneath this worker. This worker now has a power of 1, and can attack and defend in battle. It can still control and carry resources. When a worker with a weapon dies in battle or gets sacrificed, you lose the weapon. If it gets trained to be another military unit, you can reassign the weapon to another worker. A worker can only have one weapon. Navy, army and air force already have weapons and cannot get extra power this way.
When you have upgraded the train a military unit card, you can train a navy, army or air force and get a free weapon in the process.
Attack
Card text, red side: "Move unit(s) from one area to a bordering area with enemy unit(s) and or building(s) and engage in battle." Red side, upgraded (bottom of card): "Move unit(s) from one or more areas to one (the same) bordering area with enemy unit(s) and or building(s) and engage in battle." Green side: "Move unit(s) from one or more areas to one (the same) bordering area with enemy unit(s) and/or building(s) and engage in battle."
When you get the 'allowance to train military units' bonus card and have trained military units, you can attack other players! In order to attack another player, you need to have all your attacking unit(s) together on a neighboring hex. Even units with a movement of more than 1 need to be adjacent to the target hex in order to instigate an attack. You can attack a hex with at least one unit belonging to another player (worker, navy, army, air force, fort, town, factory). When attacking, you first declare your attacking units, which should be able to access the hex you wish to attack. Note that apart from air force units these units cannot cross rivers without a bridge. A navy unit can't attack a land hex (unless you have the personal ability that says you can), but armies sitting in a ferry adjacent to a land hex can attack that hex. Armies and workers without a ferry can't attack a sea hex from a land hex. Air force can attack any hex regardless of terrain type. Land/sea units can also attack an airplane, and the other way around.
When you declare attackers, you count the number of power the attackers have combined. The terrain type of the hex you are attacking is what counts here, not the terrain type on the hex you are attacking from. So if you attack from a sea hex onto a land hex with an air force, your total power is 2. Similarly, the player who is under attack declares defenders. That player simply adds up the power of all units and buildings on the hex that is under attack. So if this player has a fort, a town and two workers there, their power is 2+1+0+0=3. Next, both players roll the special dice to determine the result of the attack. Each die has three sides with 0 pips, two sides with 1 pip and one side with 2 pips.
In order to actually make any attack at all, the attacker needs to roll at least 1 pip on the combined dice. If this player rolls no pips, the attack fails and even defending units or buildings without power will not fall.
In our example, let's say the attacker rolls 1,1 for a total of 2 pips. The defender rolls 0,0,1 for a total of 1 pip. The attacker wins the attack. This results in three things:
The defender divides damage
The defender has to take one power worth of damage for every pip the attacker rolled on any defending units or buildings. Units get killed, buildings get damaged. When a unit is killed, it returns to the players supply. When a building gets damaged, it will be turned on its side. If you have the Standard Edition of the game, you can indicate a damaged building by placing a weapon token on it. It loses all of its properties and needs to be repaired with the build a building action before it can be used again. As with building, you need a worker there to repair it.
Damage is always rounded up when a defender doesn't have unit(s) matching that number of damage. So if a player only defended with an army, worth 3 power, but lost the battle by 1 pip difference, this player has to kill the army anyway.
In our example, the defender has to take 2 points worth of damage, so the defender decides to damage a fort.
The attacker divides damage
The attacker has to take one power worth of damage for every pip the defender rolled on any attacking units. In our example, this was 1, so the attacker has to remove their airplane from the board.
If at the end of the damage assignment, the attacker still has at least one unit left, the attacker moves this unit / these units onto the hex where the defender failed to defend. The attacker has to move at least one unit to this hex, this player can decide to leave other units at the hex the attacker came from.
Retreat and take over
The defender retreats all other units. The defender may move all remaining units to a neighboring hex without any units or buildings belonging to another player. If there is no possibility to retreat, the units get killed instead. Land units can only retreat to adjacent land areas or across a bridge over a river. Any buildings not damaged in the battle will remain where they are, but can't be used if another player controls the hex they are in. Workers that retreat cannot take resources with them.
In our example, the defender doesn't have to retreat because the attacker doesn't have any units left. The fort is damaged and can be repaired by the defender on a later turn by using the 'Build a building' action card. Once you have upgraded the attack card, you can start an attack with units being in any number of adjacent hexes to the target hex instead of the same adjacent hex.
Figure captions: "Start of the attack." "Result of the attack. Once you have upgraded the attack card, you can start an attack with units being in any number of adjacent hexes to the target hex instead of the same adjacent hex."
Draw quest cards
Card text, red side: "Draw 2 Quest cards. Keep at least one, discard the rest." Red side, upgraded (bottom of card): "Draw 3 Quest cards. Keep at least one, discard the rest." Green side: "Draw 3 Quest cards. Keep at least one, discard the rest."
Quest cards are a great way to score some extra victory points. But beware, many quest cards also give you minus points if you take them but don't complete them by the end of the game! You start the game with a starting quest, and when you take this action, you can draw two quest cards from the deck. You have to draw from the deck corresponding to the number of layers of your monument you have already built. Out of these two, you have to keep at least one, so you can keep one or both. Place these face down in the 'quests in progress' field on your player mat.
A quest card shows you one or multiple tasks you have to fulfill at any point during the game. It also shows you how many victory points you get for completing the quest during the game, and how many victory points you lose at the end of the game if you did not complete it.
You can turn in a completed quest at any point during the game during your own turn. Simply flip it, show other players that you have accomplished everything it asks, then place it face down on the 'completed quests' field on your player board. You will then score the victory points it gives you at the end of the game.
You can still complete quest cards from earlier layers of monument built, but you can't draw new ones from those decks. So if you are at monument layer 4, you have to draw from layer 4-5, but you can complete starting quests and those from layers 0-1, 2-3 and 4-5.
If you finish a quest and your Monument is still at one of the levels as indicated on the back of that quest card, you produce a bonus resource of your choice. You can place this on the board anywhere matching the production of the resource, and where you have at least one worker.
When upgraded, you can draw 3 quest cards and keep at least one. There is no limit to the number of completed or uncompleted quests you can have.
Remember to reshuffle the discard piles into new draw piles when the draw piles run out.
Trade
Card text, red side: "Trade resources with the supply, 2:1. May execute this up to two times." Red side, upgraded (bottom of card): "Trade resources with the supply, 1:1. May execute this up to two times." Green side: "Trade resources with the supply, 1:1. May execute this up to two times."
And finally, when you don't have the resources you need, you can trade with the bank. Spend two of the same resources you control, then take any one resource from the bank and place it on a hex you control. This hex does not need to produce this type of resource normally. You may do this twice for one action. You can pick different resources the second time. When upgraded, you only have to spend one resource in order to receive one from the bank. You can do this twice.
Game end
As soon as one player builds the fifth layer of their monument, it means that this is the last round of the game. Play progresses until the last player before the starting player has had a turn. So if the player before the starting player builds their fifth layer, the game immediately ends after their turn ends.
Remember that when a player builds their fifth layer of their monument, they don't get to draw a personal bonus, but they do get to draw a common 'Layer 5' bonus that scores a number of victory points.
Each player uses their own score card to calculate their points for the different aspects of the game. Here are the different ways for scoring further explained:
- VP per Monument Layer: Simply multiply the VP this grants you by the number of layers you have built. If you built the fifth layer, also add the common 'Layer 5' bonus card.
- VP for resources: Count the resources you(r workers) control and divide this by the number listed. You round down if needed. So if you get a VP per 3 resources and you control 5 resources, you receive 1 VP.
- VP for workers: Count the number of workers you control on the board and divide by the number listed. Round down if needed.
- VP for land area controlled: Count the number of land areas you control. Use the table on your player board to see which units control land areas if needed (workers, army and air force do).
- VP for military power: Add up the power of your workers with weapons, navy, army, air force, towns, forts and ferries if you currently occupy any. If applicable, check where they are currently located. Use the table on your player board to see how much power a unit has. An army on land has a power of 3, but an army in a ferry has a power of 1. Divide your total military power by the number listed on your scoring card. Always round down if needed.
- VP for upgraded action cards: You have 10 action cards, and now you count the number of them that you have in your hand or discard pile with the green side up, meaning you upgraded it over the course of the game.
- VP for completed quests: Count all the VP listed on your completed quests and add them up.
- Negative VP for uncompleted quests: Count all the negative VP listed on your quests in progress and add them up. This will add up to 0 or a negative number.
- Personal scoring bonuses and penalties: Some players have an additional line on their scoring cards, yielding them additional VP or less VP. Add this up according to the other scoring lines (always round down).
Then add everything up. And the player with the most VP wins the game!
In case of a tie, the player with the most layers of their monument built wins. If still tied, the player with the most military power wins. The final tiebreaker is the amount of resources controlled. If still tied, the victory is a shared one!
Solo rules Monuments
Components
- 8 action cards for the AI
- 2 score cards for the AI
- 10 quest cards
- 1 normal D6
Introduction
We have designed the solo rules for Monuments as such, that you take on one opponent of artificial intelligence (AI). We have tried to control this AI as much as possible, but we wanted to keep things simple. Therefore, the golden rule for playing Monuments solo is:
- Any time the AI could make more than one potential move, when taking the rules into account, choose the option that you think is best for the AI. When in doubt, don't overthink this.
All of the rules for playing Monuments multiplayer still apply. We'll only list the rules that change for solo mode here.
Goal of the game: To end the game with more points than the AI.
Set-up
First, choose a difficulty level. We recommend 'easy' for your first game. The solo rules as described here are valid for all difficulty levels, with the exception of these boxed areas, that only apply for certain difficulty levels.
Set up the abundance mode for 2 players. You can choose between Europe + Africa or the America's as in the multiplayer game. You can also choose which civilization you play and which will be played by the AI.
For yourself, set up all components as usual, but use the vanilla score card. Set up the common bonus cards for 2+ players.
For the AI, set up the score card as chosen by the difficulty level. Pick up the 8 AI action cards. Set aside the movement card. Shuffle the other 7 cards, red side up, and add the movement card to the top of the deck. This will be the draw pile for the AI. This way, you can always see the next action of the AI.
The AI does not get a personal bonus deck and does not have to put any units aside.
Follow all other multi-player rules for setting up the AI, but don't give the AI or yourself an ability. Set up two resources in any one hex closest to the monument hex of the AI.
Set up the quest decks by removing the quest cards with the [red crossed-out solo icon] symbol. Add the cards with the [blue solo icon] symbol.
Give the AI one starting quest card, then draw two and keep one for yourself. Discard the other. Set up all other components as in a multiplayer game.
Gameplay
The AI starts the game, and you will finish the game, so both players get an equal amount of turns. When it is your turn, you can play all actions as you would do in a multiplayer game. If a building from the AI gets damaged, it gets destroyed instead and goes back into the supply of the AI. In the solo game, you cannot upgrade your quest action card. You also cannot pick the bonuses on the personal bonus cards that give you extra quest cards.
When it is the turn of the AI, you draw the top card from the action deck of the AI and play its action, then discard it. All actions are described in detail below, but here are a few general remarks:
- When an action card has multiple options, you start at the top. If you can execute this action, do so, and discard the card. If you can't, execute only the second action, and so on.
- If you can't execute any action on a card, discard it and end the turn of the AI.
Hard and insane mode: if you can't execute any action on a card, discard it and immediately draw the next one.
- In most cases, one of the action cards will tell you to shuffle the discard pile and draw pile and make a new draw pile. Sometimes, you will play the last action card of the draw pile without this command. In this case, on the next turn of the AI, simply reshuffle the discard and draw piles and make a new draw pile.
- When you make this new draw pile, if the top card tells you to reshuffle the deck, immediately shuffle this deck again so that the top card is not a reshuffle card.
- As described in the introduction, when following all the rules below, there are usually still multiple options for the AI for actions such as movement and production. Just make the move that is in the best interest of the AI, there is no need to think too heavily about this.
Production
This card can be upgraded, and works in the exact same way as in the multi-player game. The AI does not care about types of resources, only the amount of resources. So when you decide which hexes to produce on for the AI, just look at the hexes that can produce the highest amounts of resources. As a reminder, a worker or factory produce one resource, and a factory with a worker produces 3 resources. You can at most produce 3 resources per hex per production action, and there is a maximum of 5 resources per hex at a time.
Movement
This card can be upgraded, and works in the exact same way as in the multi-player game. Use these rules for determining AI movement:
- First, make sure that if the AI has one or multiple towns, each town has two workers in them.
- Spread out workers and military units as much as possible, so that you maximize the amount of hexes the AI controls.
- Prioritize moving to hexes closest to the player, so that you minimize the opportunities for the player to gain 'free' hexes on the continent of the AI.
- Prioritize moving to islands with the navy and air force units, unless you have ferries with workers you can move there. In that case, see if you can move navy and air force units to empty spaces on the continent of the player.
Population
This card can be upgraded, and works in the exact same way as in the multi-player game. When you have a choice which town to populate, choose the town that makes it easiest for the new worker to move to a hex that the AI doesn't control yet.
Special
This card can be upgraded, and replaces the train military card, and part of the build a building card. First, check the number of bridges the AI has built. If this number is 0 or 1, build a bridge if the AI controls at least one resource. Spend this resource, and build a bridge on the home continent of the AI at a place that makes it easiest for the units of the AI to reach the rest of its continent. Then, discard this action card.
Spend resources from hexes with 1 worker on them if possible, then prioritize hexes closest to the player.
If the AI has built 2 bridges, check the number of ferries the AI has built. If this number is 0 or 1, build a ferry if the AI controls at least one resource. Spend this resource, and build a ferry on the home continent of the AI closest to a worker that can sail to an island. Then, discard this action card.
If the AI has built 2 bridges and 2 ferries, then the AI starts training military units. It does not need the common bonus card in order to train military units. Roll a D6. On a 1 or 2, train an air force. Train a navy on a 3 or 4, and train an army on a 5 or 6. Replace a worker with this military unit.
Prioritize training navy and air force units close to islands, unless the AI has ferries with workers you can move there. In that case, see if you can train navy and air force units close to empty spaces on the continent of the player. Prioritize training army units close to the player for both defensive and offensive purposes, and use them to claim empty hexes too.
When this card is upgraded, also hand a weapon to a worker closest to the player that doesn't already have a weapon when you execute the train a military unit command.
If the AI has 2 bridges, 2 ferries, and all military units already on the board, set this card aside and draw the next card.
When you reshuffle the deck, check to see if the AI still has all of its military units on the board. If it doesn't, shuffle this card back into the deck.
Upgrade a card
Only the 4 previously explained action cards can be upgraded. The first time you draw this card, upgrade the movement card. The second time you draw this card, upgrade the production card. The third time, upgrade the population card, and the fourth time, upgrade the special card. If the card you need to upgrade is in the draw pile, find it, upgrade it, and reshuffle the deck. After you have upgraded a card, discard this action card.
After all cards have been upgraded, resolve the second command instead. Move one unit, following the rules as discussed in the 'movement' action. Then, grab all action cards in the discard pile, draw pile, and this card, and shuffle them. Make a new draw deck. If the top card then tells you to reshuffle the deck, immediately reshuffle until the top card does not tell you to reshuffle the deck.
Build a building
If the AI doesn't have any buildings on the board, build a town. If the AI has at least one building on the board, but not yet all buildings, roll a D6. On a 1-2-3, build a town. On a 4-5 build a fort. On a 6, build a factory. Building a building for the AI costs any 2 resources. If you roll a building that isn't available in the supply, roll again until you get a result that you can build.
When building a town, prioritize hexes that have 2 workers on them, and then look at hexes that have 1 worker on them and are closest to the largest amount of unoccupied hexes. When building a fort, prioritize hexes closest to the player. When building a factory, prioritize hexes that have one worker on them, and then choose a tile that produces metal or wood. If you already have a factory on metal or wood, choose the other type for the second factory.
Spend resources from hexes with 1 worker on them if possible, then prioritize hexes closest to the player. Buildings from the AI cannot get damaged, but will be destroyed instead.
If the AI has all their buildings already on the board, set this card aside and draw the next card. When you reshuffle the deck, check to see if the AI still has all of its buildings on the board. If it doesn't, shuffle this card back into the deck.
Draw quest card
Draw a single quest card from the quest deck corresponding to the current level of Monument of the AI. Do not look at this card and place it face down on a stack with the starting quest of the AI. These quest cards will be scored at the end of the game. The AI only scores positive VP for quests that they achieved, they do not score negative VP for uncompleted quests. Keep in mind that you, the player, may not upgrade your quest card, and also may not choose bonuses on personal bonus cards that award quest cards.
Build your Monument
This card serves three functions. You will always start by checking the first command. Check the table below corresponding to the difficulty level you play. This will tell you the number of hexes, resources and workers the AI needs per layer of Monument. This works in the same way as for the player, but the AI can pay any type of resource instead of specific resources.
| Easy & Normal | Number of areas | Number of resources | Number of workers |
|---|---|---|---|
| Layer 1 | 3 | 2 | 0 |
| Layer 2 | 5 | 4 | 1 |
| Layer 3 | 7 | 7 | 1 |
| Layer 4 | 9 | 10 | 1 |
| Layer 5 | 11 | 12 | 2 |
| Hard & Insane | Number of areas | Number of resources | Number of workers |
|---|---|---|---|
| Layer 1 | 2 | 2 | 0 |
| Layer 2 | 4 | 4 | 0 |
| Layer 3 | 6 | 6 | 0 |
| Layer 4 | 8 | 9 | 1 |
| Layer 5 | 10 | 10 | 1 |
The AI then builds their next layer of Monument, and randomly discards a common bonus card from the corresponding layer of Monument. They also get a personal bonus:
| Layer | Personal Bonus |
|---|---|
| 1 | All workers have +1 movement |
| 2 | 2 workers |
| 3 | 3 resources |
| 4 | 1 special unit |
| 5 | One random 5th layer common bonus card |
Spend resources from hexes with 1 worker on them if possible, then prioritize hexes closest to the player. Sacrifice workers from hexes with towns with more than 2 workers on them if possible. If not, sacrifice workers from tiles without towns with more than 1 worker on them, and otherwise, sacrifice them from hexes closest to their towns.
If you can build the next layer of Monument, do so and discard this card. If you can't, check the second command. Attack the player if able. The AI will only attack the player if he has a higher power than the player. Following all multi-player battle rules, the AI would need to have its attacking units adjacent to the player. Treat this action the same as the upgraded action from the attack action card of the player, so that the AI can commit units from multiple adjacent hexes to the battle. After the attack, discard this card.
If the AI can't build a layer of their Monument and cannot attack the player, move one unit, following the rules as discussed in the 'movement' action. Then, grab all action cards in the discard pile, draw pile, and this card, and shuffle them. Make a new draw deck. If the top card then tells you to re-shuffle the deck, immediately reshuffle until the top card does not tell you to reshuffle the deck.
Game end
The game still ends when someone builds the 5th layer of their Monument. The AI started the game, so you will have the last turn. Use your score card to count your points. Use the score card of the AI to calculate the points for the AI. Reveal all of the quest cards of the AI and determine which goals they have achieved. These goals need to be fulfilled at the end of the game. So for instance, if the AI needs a specific number of resources, it needs to have these at the end of the game. The only exceptions are the quest cards with battles. These may be fulfilled during the game. If you find yourself having trouble remembering the battles during the game, take note of the battles that occurred during the game as they happen, so you can check these with the quest cards at the end of the game. Then compare scores, the one with the higher score wins!