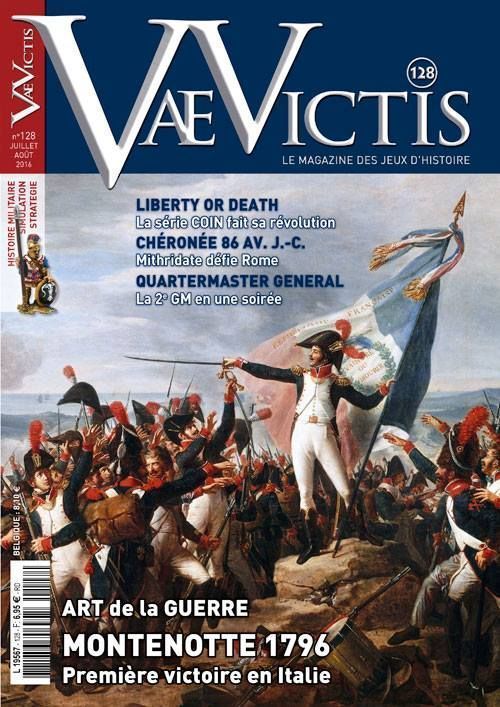
Montenotte 1796
Montenotte 1796 Rulebook
Table of Contents
Table of Contents
- 1 - Presentation
- 2 - Glossary
- Unit counters
- 3 - Morale and Fatigue
- 4 - Sequence of Play
- 5 - Weather Phase
- 6 - Command Phase
- 7 - Initiative Phase
- 8 - Action Phase
- 9 - Movements
- 10 - Reconnaissance
- 11 - Battles
- 11.1 - Declaration of a battle
- 11.2 - March to the sound of the guns
- 11.3 - Tactical position
- 11.4 - Calculation of the ratio
- 11.5 - Terrain modifier
- 11.6 - Manœuvre modifier
- 11.7 - Morale modifier
- 11.8 - Other modifiers
- 11.9 - Combat results
- 11.10 - Application of results
- 11.11 - Pursuit and end of the combat
- 12 - Reinforcements Phase
- 13 - Supply Phase
- 14 - End of Turn Phase
- 15 - Scenario
- Tables
- Quick Reference Sheet
- Notes on this transcription
1 - Presentation
The game scale is one turn per day; 1 strength step represents approximately 1,000 infantry (fantassins) or 500 cavalry (cavaliers). 6 km separate the centres of two hexagons (hex.).
The map (format A3) represents the historical theatre of operations with a pre-printed hexagonal grid to regulate movement. The units represent divisions or their equivalent as well as detached brigades. Game play requires the use of two six-sided dice, noted as "D6". The counters provided represent combat units, their generals, and markers indicating strength, activation and status.
2 - Glossary
- Activation marker: marker displaying the name of a force; allows for activation of the force when drawn.
- Active player: the player of whom one of the forces is activated and can carry out certain actions.
- Alert zone: each unit projects an alert zone around it at a distance of 1 MP for the infantry and 2 MP for the cavalry (0 hex minimum); this alert zone allows for a reaction to an enemy unit's entry in the zone.
- Cohesion: indicates the value of the combat unit (training, experience, motivation).
- CP (Command points): a general has available a number of CP equal to his command potential.
- Decoy: false "force" counter deployed on the map and played in parallel with a real force to deceive the adversary regarding his intentions; this counter can neither react nor carry out actions other than movement; it is automatically revealed by a successful reconnaissance.
- Detached brigade: combat unit detached from a division.
- Division: combat unit commanded by a division general (including Austrian "columns").
- Division general: a general who commands a division and is subordinate to the general-in-chief.
- Force: marker that replaces a general, division or a detached brigade on the map; they themselves are placed on the game help.
- General-in-chief: the general who commands all the other generals of his army.
Unit counters
The unit counter diagram in the rules is labelled as follows.
- Front: name of general; cohesion; formation; size of unit (XX: division; X: brigade); movement capacity.
- Back: "The Unit is out of supply" (the counter is turned to this side when the unit is out of supply, see 13.6).
3 - Morale and Fatigue
3.1 - Morale cursor
The morale cursor (see game help) is a scale on which to place a marker corresponding to a division. This marker moves up or down according to victories and defeats in combat or after certain events (see scenario). A division that has not acted during the turn recovers a morale point, never exceeding square "0" (see also 14.2 Return to order).
3.2 - Demoralisation
A division whose morale is less than or equal to 0 (cohesion plus cursor ≤ 0) is demoralised. A demoralised division cannot be part of the same force as a non-demoralised division. When a demoralised division is activated, it automatically moves with its full MC more than 4 MP away from all enemies and closer to one of its supply hexes.
A demoralised division beginning its activation phase 5 MP or more from the nearest enemy can remain in place to gain a notch on the morale cursor at the end of the turn (see 14.2 Return to order and 3.1 Morale cursor).
3.3 - Fatigue
There are three possible states of fatigue for forces: non fatigued, level 1 and level 2. The fatigue level of a force increases when it carries out a special movement or when it combats (see 9.2, 9.3 and 11.11). A force's fatigue status has several effects:
- Fatigue 1: penalty in combat, certain special unauthorised movements, immediate attrition test with a modifier of +1 (see 8.5).
- Fatigue 2: attack is impossible, penalty in combat in defence, no movement possible (including reaction), immediate attrition test with a +2 modifier (see 8.5).
4 - Sequence of Play
The game is played in several turns of a day, each divided into phases which must be executed in the following order:
- Weather determination (Chapter 5)
- Roll on the weather table.
- Command phase (Chapter 6)
- Verification of the LoC of the General-in-chief;
- Use of the CP of the General-in-chief to command his subordinate generals;
- Fusions and divisions of forces, creation and incorporation of detached brigades.
- Initiative phase (Chapter 7)
- Initiative test of the generals in chief;
- Choice of the force to activate.
- Action phase (Chapters 8 to 11)
- Random activation by drawing a force marker and the actions of this force;
- Any reactions of the adversary.
- Strategic movement phase (see Chapter 9)
- Strategic movements;
- Possible forced marches.
- Reinforcement and supply phase (Chapters 12 and 13)
- Placement of the planned reinforcements on the map according to the instructions of the scenario;
5 - Weather Phase
During the weather phase, the player from the French camp rolls 1D6.
- 1-4: Nice weather: no modification of the various rules.
- 5-6: Rain: the combat units have -1 MP and cannot recover morale points via rest.
6 - Command Phase
The two players conduct this phase simultaneously.
6.1 - General-in-chief
Begin by checking the LoC of the General-in-chief. For a general-in-chief to have a valid LoC, he must be able to trace a continuous line of route hexagons to a supply depot or an edge of the map displaying the depot symbol corresponding to his nation, free of all enemy units.
If he has a valid LoC, he can spend CP to command and supply forces. The cost in CP to command a force depends on the distance between it and the General-in-chief (the General-in-chief's hex is not counted): 1 CP per 4 MP. Each force stacked with the General-in-chief or contained within his own force costs only 1/2 CP.
If he does not have a valid LoC, the counter is turned to its verso ("The commander does not have a valid LoC") and the forces he commands become isolated.
6.2 - Division general
There are 3 possible statuses for a division general:
- Commanded and supplied: the General-in-chief has a valid LoC and has spent CP to command the division general's force (division general counter on its recto).
- Commanded and isolated: the General-in-chief does not have a valid LoC but has spent CP to command the division general's force (division general's counter on its recto).
- Not commanded and isolated: the General-in-chief has not spent CP for this general's force (division general's counter on its verso: "The general is uncommanded and isolated").
6.3 - Combat units
Divisions have the same status as their division general with whom they are always stacked. Detached brigades have the same status as the division general to whom they belong, if they are 4 MP or fewer from this general. Otherwise, they are uncommanded and isolated.
6.4 - Effects of an "uncommanded" status
- An "uncommanded" force must test its initiative to act with its full movement capacity (see 8.3 and 9.1) and declare a combat. [Precision: this may lead to two tests during an activation.]
- An "uncommanded" force may march to the sound of the guns with a +1 die roll modifier in the initiative test.
Note: the effects of an isolated status are explained in 13. Supply.
6.5 - Force
6.5.1 - Overview
"Force" counters are generic markers deployed on the map in place of units and their generals. The latter are placed on the game help in the "force" square that corresponds to the "force" marker chosen to represent them. There is one "force" marker per general and one per detached brigade (the latter are identified). The counter of the division or detached brigade is placed on the game help on the Strength Points (SP) counter.
6.5.2 - Stacking
Stacking is not limited. Nevertheless, when several forces are stacked on the map:
- If there is no General-in-chief, the forces remain stacked and cannot fuse.
- In the presence of the General-in-chief, forces may fuse: commanded force counters are placed in the square of the General-in-chief's force (see 6.5.3) and his force alone remains on the map.
- Generals-in-chief may be alone in their force.
6.5.3 - Fusion and separation of force, creation of detached brigades
During the command phase, players can freely proceed with fusing forces, respecting 6.5.2.
To separate a force, forces in the General-in-chief's square on the game help are repositioned on the map, stacked with the General-in-chief's force. This separation may take place during the actions phase.
To create a detached brigade, the player takes the SP marker of the detached brigade that corresponds to the division and places it on the game help on the number corresponding to the SP chosen (no more than half the SP of the division) on the SP counter of detached brigades, and removes this number of SP from the division. The force counter of the detached brigade is deployed on the map on the hexagon that corresponds to the division's force.
To recover a detached brigade, begin the command phase with the forces corresponding to the division and its detached brigade stacked on the same hex. The player adds the SP of the brigade to the SP of the division, then removes the SP marker of the detached brigade from the game help. Finally, he removes the detached brigade's strength counter from the map.
7 - Initiative Phase
The activation markers of the forces are divided into two groups:
- Place the markers of the uncommanded forces on the "uncommanded" square on the game help;
- Place the markers of commanded forces in the container;
- Keep in hand the force corresponding to the General-in-chief (choice of one for the Coalition).
Each player declares whether or not he wishes to take the initiative and attempt to play his general-in-chief's force first (or that of the general-in-chief previously chosen by the Coalition).
If both players want the initiative, they each roll 1D6 and add the initiative value of the General-in-chief; the higher result wins the initiative. If only one player wishes to take the initiative, he rolls 1D6 and must get a result less than or equal to the initiative value of his General-in-chief.
In the case of a tie or a failed initiative test, the activation markers of the generals are also placed in the container. Otherwise, only the marker corresponding to the player who did not win the initiative is placed in the container.
Finally, the "Inertia" marker is added to the container.
8 - Action Phase
8.1 - Overview
The players proceed to the activation of forces by drawing markers previously placed in the container. When the "inertia" marker is drawn at random, the uncommanded force markers are added to the container.
Each force may only act once per turn. The activation marker of a force that has acted thanks to the activation of its General-in-chief (case of a fused force) is ignored.
8.2 - Actions of an activated force
An activated force may undertake one or more of the following actions, depending on its movement capacity (see 9.1):
- Movement (see Chapter 9);
- Rapid march (see Chapter 9);
- Reconnaissance (see Chapter 10);
- Combat (see Chapter 11).
The actions of an activated force may provoke the reactions of an inactive enemy force:
- Movement (see Chapter 9);
- Reconnaissance (see Chapter 10);
- Blocking of reconnaissances (see Chapter 10).
During a combat, the forces of the two players located up to 2 MP may attempt to join the combat via a march to the sound of the guns (see Chapter 11).
A detached brigade is activated when the activation marker that corresponds to the force of its division general is drawn at random. Decoys are activated according to the player's choice when one of their markers is drawn. The Sardinian units are all activated when the marker corresponding to General-in-chief Colli's force is drawn.
8.3 - Uncommanded forces
An uncommanded force must pass an initiative test by its general, or a cohesion test in the case of a detached brigade, to be able to move with its full movement capacity and carry out reconnaissance. If it fails, it is limited to a simple movement action at half of its movement potential, rounded down.
If the initiative test is successful, an uncommanded force other than a detached brigade may declare combat by passing a new initiative test. [Note: there is no new test if it hasn't moved.] An uncommanded detached brigade may never declare a combat.
8.4 - Reaction conditions
For an inactive force to be able to react, an active force must carry out actions in its alert zone and the general of the inactive, non fatigued force must pass an initiative test. A decoy can never react.
Exception: any force may take an initiative test (or a cohesion test in the case of a detached brigade) in the aim of moving away from the active force, respecting rule 9.3.
8.5 - Determination of attrition
For any force (whether it is active or inactive) after a movement, after any event that increases its level of fatigue by 1 (whether or not the force is active), as well as at the end of an activation if the force has not acted, the player rolls 1D6 and adds the following modifiers:
- 1 to 4 SP: -1
- 5 to 8 SP: 0
- 9 to 12 SP: +1
- 13 to 16 SP: +2
- 17 to 20 SP: +3
- 21 SP or more: +4
- Morale ≥ 5: -1
- Morale ≤ 0: +2
- Fatigue level 1: +1
- Fatigue level 2: +2
- The force has not acted: -2
- Out of supply: +2
For every multiple of 6 points, the force suffers a loss. The losses for out of supply forces are doubled and possibly tripled if they are also adjacent to the enemy.
Example 1: a force with 9 SP, morale 3, fatigue 0 carries out a simple movement and declares a combat. It rolls 1D6 and adds +1 for the 9 SP. The result is 4 + 1 = 5: no attrition. After the combat (during which the force lost 1 SP), the force gains 1 level of fatigue and re-rolls 1D6 +1 (for fatigue). The result is 5 + 1 = 6. The unit loses 1 SP.
Example 2: a force with 15 SP, morale 5, was just activated for the first time and finishes its activation without fatigue. The player rolls 1D6 and adds +2 for 15 SP but subtracts 1 for the morale of 5. The result is 4 + 2 - 1 = 5, the force does not suffer attrition.
9 - Movements
9.1 - Movement capacity of a force
The MC of a force corresponds to the weakest MC of one of its units.
- A commanded force has its full MC at its disposal.
- An uncommanded force has available half of its MC, rounded down, but can have its full MC if its division general passes an initiative test, while still limited by the marches and actions it may carry out (see 8.3).
- A force constituted of only a General-in-chief has 5 MP.
- A decoy has between 2 and 5 MP, as the player chooses.
The determined MC allows for the carrying out of movements by paying for each hexagon a force penetrates during the course of its movement. The cost in MP is indicated on the terrain table (see Tables).
9.2 - Special movements
9.2.1 - Rapid march
A commanded, non fatigued force can move two hexes on a road for each MP spent, at a cost of one increased level of fatigue for the whole of the movement, with a maximum of 2 MP spent in rapid march. It is possible to engage in combat afterward.
9.2.2 - Strategic movement
During the strategic movement phase (see 4.5 [sic; the sequence of play is Chapter 4, step 5]), any commanded, non-fatigued force can carry out a second movement if it does not move adjacent to an enemy force. This second movement occurs on a road only, with the MP determined in 9.1 and at the cost of an increase of 1 fatigue level.
9.2.3 - Forced march
A commanded force that has carried out a strategic movement may carry out a third movement after the strategic movements if it does not move adjacent to an enemy force. This third movement occurs on a road only, with the MP determined in 9.1 and at a cost of an increase of 1 fatigue level.
Example: A French commanded force begins its activation 1 hex to the southwest of Savona. It carries out a normal movement and reaches Carcare, taking an attrition test. During the strategic movement phase, since it is at a distance from enemies and not fatigued, the force carries out a strategic movement and reaches Millesimo without entering a hex adjacent to an enemy force. It is therefore fatigued (fatigue 1) and takes a new attrition test. During the forced march phase, it moves one last time to Ceva. It gains a fatigue level (2) and takes a final attrition test.
9.2.4 - Minimum movement
During the first movement of the turn, a force can always carry out a movement toward a non-prohibited hex whose cost is greater than the MC determined in 9.1. This minimum movement costs an increase of 1 fatigue level.
9.3 - Reaction movements
Depending on the movement of the force(s) of the active player, the inactive player's forces may carry out a reaction movement from a hex following rule 8.4. This movement may just as well be toward as away from an active force. In any case, the cost of this movement can only be 1 MP.
10 - Reconnaissance
Any active force may carry out reconnaissance on the enemy forces present in the alert zone at a cost of 1 MP. To increase its chances of success, it may spend additional MP to obtain a bonus of +1 on the reconnaissance die roll per MP spent.
A force of the inactive player can carry out reconnaissance, in reaction to any action of an active force in his alert zone, on this active force at no cost in MP. Rule 8.4 must be respected.
The player that carries out the reconnaissance rolls 1D6 and adds the modifiers below before consulting the reconnaissance table:
- Per MP spent in bonus (active force only): +1;
- Cavalry reconnaissance: +2;
- Austrian infantry reconnaissance (Croatian): +0;
- French or Sardinian infantry reconnaissance: -2.
Reconnaissance table
| Die roll result | Reconnaissance result |
|---|---|
| 0 to 4 | None |
| 5 or more | Type of force (brigade, division, army or decoy) |
| 6 or more | Strength at ±50% margin of error |
| 7 or more | Strength at ±25% margin of error |
| 8 or more | Strength at ±10% margin of error, identification of the units of the force |
Results are cumulative. Therefore, a result of 7 gives the type of force and an estimate of its strength at about 25%. The margin of error indicated is then chosen by the reconnoitred player. He can increase or decrease his strength within the limits of the margin of error.
Example: a French force containing Stengel's cavalry begins its activation phase at Carcare and declares a reconnaissance on a Coalition force (Argenteau with 7 SP) at Cairo by spending 1 MP. It spends 1 additional MP to get a +1 bonus. The total bonus is +1 (MP bonus) +2 (cavalry) = +3. The die roll is 4, +3 = 7. The adversary announces that he has here a division with 9 SP, having slightly exaggerated its strength to discourage the French from attacking. In reaction to the reconnaissance, the Coalition successfully tests Argenteau's initiative to carry out reconnaissance himself. The die roll is 3, modified by 0 (Austrian infantry), which gives no information.
11 - Battles
11.1 - Declaration of a battle
An active force that is commanded or respects rule 8.3 may declare a combat against one or more forces stacked in an adjacent hexagon by spending 1 MP. The active force is called the principal attacker; the defender's force or stack of forces are called the principal defender. If several of the defender's forces are stacked together, they must all be attacked together. Adjacent commanded forces may join the battle at their owner's choice. Then each player tests the initiative, or cohesion if need be, of all his uncommanded forces adjacent to the principal defender's hex, with a modifier of -2. A force that passes its test may participate in the combat as the player chooses; if it fails the test, the adversary chooses.
Precision: if the principal defender is in a mountain hex, the adjacent forces that wish to participate in the combat must be connected to the principal defender's hex by a road.
11.2 - March to the sound of the guns
Forces of both players that are located up to 4 hexes from the defender's hex can individually attempt to march to the sound of the guns. To do so, they must pass an initiative test by the general commanding the force, or a cohesion test with a +1 modifier for a detached brigade. A force that marches to the sound of the guns can provoke reactions if it crosses into the alert zone of an enemy force.
- Forces marching to the sound of the guns must be able to reach the defender's hex with 2 MP at the most.
- The two players may march to the sound of the guns by rapid march if the general's initiative is 3 or more; the force gains a fatigue level.
- For more clarity, the forces marching to the sound of the guns are left in the last hex they crossed adjacent to that of the principal defender.
- Any force that has marched to the sound of the guns immediately tests its attrition.
Examples of play
We are in the second turn.
- Initiative phase: Bonaparte and Beaulieu are vying for the initiative. The French player rolls a 3 and adds 5 for a result of 8. The Austrian rolls a 4 and adds 3 for a total of 7. Bonaparte therefore wins the initiative and activates his own force: force A (Napoleon, Laharpe, 8 SP, morale +0) in 0713.
- Activation phase: he carries out a normal march of 1 MP and arrives adjacent to an Austrian force (d'Argenteau, 7 SP, morale +0) at Montenotte. The Austrian player attempts to react and to retreat: he rolls 1D6 and gets a 3, which is greater than d'Argenteau's initiative: it is a failure. The French player declares a combat against his strength by spending 1 MP. After testing his attrition, the battle begins.
The principal attacker is force A with Napoleon and Laharpe, whose morale is 4 (basic cohesion) + 0 (morale modifier) = 4. The principal defender is d'Argenteau, whose morale is 3 (basic cohesion) + 0 (morale modifier) = 3. There is no force adjacent to the defender's hexagon.
Test the marches to the sound of the guns: two forces could participate, a French force at Cairo (Masséna, 6 SP) and a force of Vukassovitch's brigade (3 SP). Each player rolls 1D6: the French player under the initiative of Masséna and the Coalition under the cohesion of Vukassovitch. Masséna gets 2, the Austrian gets 5: only the French division marches to the sound of the guns.
Masséna needs 2 MP to arrive at the defender's hexagon via a hexagon opposite the principal attacker: this is therefore a flank march. The value of his SP is 1.
- The ratio modifier is 8 (Laharpe) + 6 (Masséna) versus 7 (d'Argenteau), or 2 to 1, for a result of +2.
- The morale modifier is 4 (Laharpe's morale) - 3 (d'Argenteau's morale) = +1.
- The manœuvre modifier is 2 (2 forces commanded by Bonaparte) + 2 (the general in chief and a division general have a tactical bonus) + 1 (a force carried out a flank march) - 1 (a force commanded by d'Argenteau) = 4, divided by 2 = +2.
- The terrain modifier is -2 (difficult terrain).
The total is +3. The French player rolls 2D6 and scores a 10, to which he adds 3, for a result of 13. This is a decisive victory.
Continued from the battle example (page 9 of the printed rules): d'Argenteau loses 20% of his strength (1 SP) and 2 morale levels. His force retreats 2 hexes.
The French losses are a basis of 5% + 5% because the victor did not have the terrain advantage, so 10% of the 14 SP: loss of 1 SP for Laharpe, but the morale increases by 2 levels for the two French divisions that are engaged. All the forces gain one level of fatigue and take an attrition test.
For the French player, each force takes the test independently, then they are stacked on the hex of the principal defender, at Montenotte.
The French player tests for pursuit: he rolls 1D6 under the initiative of Bonaparte and gets a 4; the test is successful. He then rolls 1D6, to which he adds +2 because he has more than 13 infantry SP. He gets a 3, + 2 = 5, divided by 2 and rounded down, for a result of a loss of 2 SP.
d'Argenteau therefore suffers 2 additional losses and loses another morale level. The morale cursor of his division is now at -3: d'Argenteau's column is demoralised. The Austrian player also loses 2 chariots (1 chariot for each loss during the pursuit).
Finally, the French player earns 2 victory points for a decisive victory, and the Sardinian morale decreases 1 point because the Austrian column is demoralised.
Tactical positioning and ratio calculation (example)
Laharpe's division (6 SP) is the principal attacker in a combat against Provera (4 SP). Sebottendorff (7 SP) and Colli (12 SP) marched to the sound of the guns; Sérurier (7 SP) and Masséna (6 SP) were adjacent to the principal defender.
- Sebottendorff is a flank force that marched to the sound of the guns. Each of his SP counts as 1.
- Colli is a reinforcement force that marched to the sound of the guns. Each of his SP counts as 0.5.
- Masséna is an adjacent reinforcement force. Each of his SP counts as 1.
- Sérurier is an adjacent flank force. Each of his SP counts as 1.5.
The ratio is therefore 6 (Laharpe) + 6 (Masséna) + 11 (Sérurier) against 4 (Provera) + 7 (Sebottendorff) + 6 (Colli), or 23 against 17, or 3 to 2. The modifier is +1.
11.3 - Tactical position
Tactical positioning of the players' forces depends on their arrival hexagons:
- A force of the inactive player that enters the defender's hex by one of the three hexes opposite the attacker's hex is called a reinforcement force.
- A force of the inactive player that enters the defender's hex by a hex adjacent to the attacker's is called a flank force.
- A force of the active player that enters the defender's hex by the attacking hex or an adjacent hex is called a reinforcement force.
- A force of the active player that enters the defender's hex by one of the three hexes opposite the principal attacker's hex is called a flank force.
11.4 - Calculation of the ratio
Each player calculates the total of his SP engaged in the battle as follows:
- Each SP of the principal attackers and defenders counts as 1 SP.
- Each SP of a reinforcement force counts as 1 SP.
- Each SP of a flank force counts as 1.5 SP, rounded up.
- Each SP of a reinforcement force that marched to the sound of the guns counts as 0.5 SP, rounded down.
- Each SP of a flank force that marched to the sound of the guns counts as 1 SP.
Divide the attacker's total SP by the defender's total SP to get a ratio in the form of 1/1, 1.5/1, etc. This ratio is rounded in favour of the force with numerical superiority. The following table gives the ratio modifier:
| Ratio | Modifier |
|---|---|
| 1 vs 4 | -4 |
| 1 vs 3 | -3 |
| 1 vs 2 | -2 |
| 1 vs 1.5 | -1 |
| 1 vs 1 | 0 |
| 1.5 vs 1 | +1 |
| 2 vs 1 | +2 |
| 3 vs 1 | +3 |
| 4 vs 1 | +4 |
11.5 - Terrain modifier
The defender indicates the terrain modifier(s) of the hex of the principal defender. These modifiers are described on the terrain table (see Tables), which indicates which terrains can be accumulated. If there are several possible combinations of terrain, the defender chooses which modifier(s) he will apply.
11.6 - Manœuvre modifier
Each player calculates his manoeuvre value:
- 1 point per engaged division, up to the number equal to the command value of the General-in-chief if he is present, or 1 if he is not [exception: Masséna can command Laharpe's division in addition to his own in combat];
- 1 point if Bonaparte or Masséna is present as General-in-chief of the combat;
- 1 point if at least one division general has a tactical bonus;
- 1 point if at least one force is a flank force.
Subtract the value of the defender from that of the attacker, divide the result by 2 and round up, or to Bonaparte's advantage if he is present. The quotient gives a modifier between -2 and +2.
Example: Bonaparte and Laharpe are attacked in their hexagon by Beaulieu, Argenteau and Sebottendorff, as well as by Provera, carrying out a flank march. The attacker has 3 (number of divisions engaged) + 1 (flank force) = 4. The defender has 1 (1 division engaged) + 1 (at least 1 division general has a tactical bonus) + 1 (Bonaparte commands) = 3. The manoeuvre modifier is 4 - 3 = 1, divided by 2 = 0.5, rounded to 0 due to Bonaparte's presence.
11.7 - Morale modifier
Each player determines his morale level in the following manner:
Among the forces of the attacker and the principal defender only, each player chooses the unit that will provide its morale.
Then, subtract the defender's morale from that of the attacker to get a positive or negative modifier between -2 and +2.
Example: the attacker has 2 divisions with morale 3 and 5. He chooses the one with morale 5 for the combat. The defender has a division with morale 3 and one with morale 4. He prefers to preserve his best troops and chooses the division with morale 3. The morale modifier is 4 - 2 = +2.
11.8 - Other modifiers
- Defender during pillage (see 13.4): +2
- Principal attacker fatigued: -1
- All attackers fatigued: -2
- Principal defender with fatigue marker 1: +1
- Principal defender with fatigue marker 2: +2
11.9 - Combat results
The attacker rolls 2D6 and adds the above modifiers, then consults the combat results table (see Tables). The table gives the percentage of the strength of the vanquished who are out of combat, as well as the losses or gains in morale. The losses of the victor are determined as follows:
- Base: 5%;
- Per unfavourable ratio modifier: +5%;
- Victor without the terrain advantage: +5% (Precision: a terrain modifier of 0 gives no terrain advantage; the attacker never has the terrain advantage).
If the modified result is between 6 and 8, the battle is undecided. The losses of the two adversaries are 5% + 5% x terrain modifier.
To facilitate calculations, a second table indicates the corresponding number of SP lost depending on the strength and the percentage of losses suffered, but the players can choose to calculate more precisely by rounding to the nearest number.
In any case, the losses may not exceed half the enemy's SP, rounded down.
Example 1: The French player just won a defensive battle. The terrain modifier was -1 and the ratio modifier was +1 in favour of the Austrian. The French therefore had the terrain advantage, but the unfavourable ratio increased the losses by 1 x 5%, or total losses of 10%.
Example 2: The result of a battle at Cosseria is "indecisive". The terrain modifier was -2. The losses for each player are 5 + 2 x 5 = 15%. The French only had 3 SP and suffers no loss; the Coalition had 10 SP and should suffer 2 losses. However, losses may not exceed 3 (French force) / 2 = 1.5, rounded to 1.
11.10 - Application of results
The two players reduce the SP value of their units by inflicting the first loss on the unit that gave its morale modifier. Then, the other losses are distributed freely by the two players among the units that participated in the combat. Note that no unit can be destroyed if another unit has at least 2 SP.
Then, the vanquished player must retreat one hex for each morale point lost, with a minimum of 1 hex. The retreat is counted from the defender's hex. The first hex of retreat is:
- For the attacker: the hex of the principal attacker or the hex adjacent to him;
- For the defender: one of the three hexes opposite the principal attacker.
A hex containing one or more enemy forces cannot be used to retreat. Beyond the first hex, the retreat must bring the unit closer to its supply point.
Exception: if a fort is present in the hexagon, the Coalition can withdraw there. If he is the defender in the battle, his adversary can then advance and stack with the enemy force in the fort.
If the vanquished is out of supply, he is eliminated (see 13.6).
The victor then concentrates the forces that participated in the battle in the defender's hex. In the case of an indecisive battle, the defenders are stacked with the principal defender, and the attackers are stacked with the principal attacker.
Finally, the two players move the morale cursors of the divisions engaged in the battle on the game help to show the rises and falls in morale incurred by the battle results.
11.11 - Pursuit and end of the combat
The totality of the forces that combatted increases their level of fatigue by 1 and the attrition tests are immediately carried out.
Then, the victor may attempt to pursue the defeated. To do this, he must declare a pursuit and test the initiative of the general commanding his forces (if there is no "General-in-chief", the general commanding the principal force in 11.1). If the test is successful, the pursuit takes place.
The victor rolls 1D6 and adds:
- +1 per 5 infantry SP;
- +1 per 2 cavalry SP in clear terrain;
- -1 per 2 enemy cavalry SP in clear terrain;
- +1 per unit of the vanquished with a "fatigue 2" marker;
- -1 per unit of the victor with a "fatigue 2" marker.
The result, divided by 2 if the forces of the vanquished are not demoralised (rounded down but at least equal to 1 if the result is positive), gives the losses inflicted on the vanquished during the pursuit. For every 2 losses, the overall morale of the forces of the vanquished is reduced by 1 point. For each loss inflicted on an Austrian division, the division also loses 1 chariot (see 13.2).
12 - Reinforcements Phase
12.1 - Austrian reinforcements
The Austrian player has 4 reserve brigades that he can call up in reinforcement. During the reinforcement phase, the Austrian player can spend one of his reinforcement markers and add 3 SP to an Austrian division located up to 4 MP from an edge of the map displaying the supply symbol.
12.2 - Replacements
Replacements take place once a week, during turns 4 and 11.
At the beginning of the replacement phase, each player rolls on the replacements table. The Coalition player rolls a die for each army. The modified die roll result gives the number of SP received in replacement for the totality of the concerned army.
Replacements serve to reinforce the commanded infantry units. It is possible to exceed a force's initial number of SP.
| Die | Replacements (SP) |
|---|---|
| 1 | 1 |
| 2 | 2 |
| 3 | 2 |
| 4 | 3 |
| 5 | 3 |
| 6 | 4 |
Modifiers: French and Sardinian: -1. Austrian: +1.
13 - Supply Phase
13.1 - Overview
During the supply phase, check whether or not the isolated units can be supplied by their own means. There are several methods.
13.2 - Chariots (Austrians only)
The game help of the Coalition includes a chariot counter. An Austrian division begins the game with its "chariot" marker on square 6. Once a division general is "isolated", he must use his chariots to supply his division: the Coalition player moves the division marker to the inferior square on the chariot counter. A detached brigade from his stacked division or 4 MP from his division general is also "supplied". Once the division general has been commanded and supplied by the General-in-chief, the division marker is repositioned on square 6 of the chariot counter.
Designer's note: certain armies of the period (Austrian, Russian notably) marched with impressive supply trains that could nourish the army for about 6 days.
13.3 - Forage (French only)
Generals and combat units may move to a "supplied" status depending on the richness of the terrain surrounding them. Terrain is divided into 3 categories according to its ability to supply troops:
- Rich (clear terrain hexagon containing a field): a rich hexagon can supply up to 10 SP.
- Normal (clear terrain): a normal hexagon can supply up to 5 SP.
- Poor: the other terrains do not supply units.
13.4 - Pillage (everyone)
All armies may pillage villages and towns to gain supply. A combat unit or an isolated force passing in a village or town may, as the player chooses, pillage the area in order to move to a "supplied" status. Pillage costs victory points. If the player decides not to pillage, he must take a morale test. If the test result is less than or equal to the morale, the pillage does not take place. If the result is greater than the morale, the unit pillages the area.
Modifiers:
- The French forces add 2 to their die roll.
- If at least one general is present in the hex, he subtracts 1 (or 2 if he has a tactical bonus) from the die roll, as the player chooses.
Designer's note: the armies of the time could engage in undesired pillages because they were harmful to the support the population could provide.
Effects of pillage
- A village allows for supply of up to 5 SP.
- A small town can supply up to 10 SP.
- A large town can supply any number of SP.
- Pillage affects VP and Sardinian morale (see scenario).
- A unit or force committing to pillage ceases its activation phase and has no alert zone. It receives a "Pillage" marker until its next activation.
- If a force with a Pillage marker is "main defender" in a combat, then its opponent adds +2 to its combat dice (see 11.8). The reminder is on the marker.
- Fatigue markers are reduced by 1 (the fatigue markers "1" are therefore removed). [Placement note: in the printed layout this line falls in the column after 14.2; it is placed here as the last effect of pillage, to which it belongs by its wording. See the disclosed fixes at the end.]
13.5 - Sardinian supply
Sardinian forces isolated at Alba, Cherasco, or any village, town or city from Coni to Cosseria and not besieged by French forces are supplied.
13.6 - Out of supply forces
An isolated force that cannot be supplied by 13.2, 13.3, 13.4 or 13.5 is considered "out of supply". The divisions and detached brigades of an out of supply force are turned over to their backside to indicate this status (cohesion -2 and MC/2).
13.7 - Effects of an "out of supply" status
- If an "out of supply" force loses a combat while it is attacked alone or stacked with other "out of supply" forces, it is eliminated.
- An "out of supply" force in a fort surrenders at the end of the following turn if a non-decoy enemy force is stacked with it.
- An "out of supply" force suffers more attrition (see 8.5).
14 - End of Turn Phase
14.1 - Verification of victory conditions
The players verify the automatic victory conditions indicated in the scenario. If the conditions are met, the game ends immediately and the victor obtains a strategic victory.
14.2 - Return to order
Divisions that did not act during the turn can strengthen themselves and recover a notch on the morale cursor, without exceeding 0. For those that are supplied without a pillage marker, the player then rolls 1D6. If the result is less than the division morale, it recovers 1 SP.
Designer's note: recovery of stragglers.
14.3 - End of turn
If neither camp has won an automatic victory, the turn marker is moved forward to the following square on the counter and a new turn begins. When the final turn is played, verify the victory conditions to determine the victor.
15 - Scenario
15.1 - Set-up
Commanders are in italic.
15.1.1 - French
- Bonaparte, Masséna (6 SP, morale -1): Savone.
- Brigade Joubert (3 SP): 2 hexes from Albenga on the road to Savone.
- Laharpe (3 SP, morale 0): 2 hexes from Savone on the road to Gênes.
- Brigade Pijon (6 SP): Voltri; Augereau (8 SP, morale -1): 2 hexes from Savone on the road to Albenga.
- Sérurier (8 SP, morale -1): 2 hexes max around Ormea.
- Stengel (6 SP, morale 0): Albenga.
15.1.2 - Coalition
Austrian morale markers are placed on the 0 square of the morale cursor.
- Colli, Vitale (5 SP), Dichat (2 SP), Brempt (4 SP), Bellegarde (3 SP): in Ceva.
- Provera (5 SP): in Millesimo.
- Colli (3 SP): in Cosseria.
- Dellera (2 SP): in Mondovi.
- Beaulieu, Sebottendorff (5 SP): 2 hexes from Voltri on the north trail.
- Argenteau (8 SP): at Dego; Vukassovitch (3 SP): 2 hexes from Acqui on the road to the sea.
- Pittoni [von Kerpen force marker] (5 SP): 1 hex around Gênes.
- Cavalry brigade Chobinin (2 SP): in Novi.
15.1.3 - Coalition reinforcements
See chapter 12.
15.2 - Special rules
- During the first turn, Beaulieu has the initiative.
- Control of Coni: to capture Coni the first time, the French player must leave at least 6 SP of infantry in the hex. During the supply phase of the following turn, if the Sardinian morale modifier is -2 and there is no Coalition force less than 3 hexes from Coni, the town is captured.
- Orméa: as long as the Sérurier division can trace a LoC of 4 MP or less toward Orméa, it is automatically supplied.
- Sardinian morale: the morale of the Sardinians is managed separately on the designated counter. Their morale evolves according to actions that move the marker. The squares indicate a modifier between -4 and +2 that give the morale modifier for the whole of the Sardinian forces. When the Sardinian morale falls to 0, French victory is immediate.
Modification of Sardinian morale
- Per major defeat suffered: -1
- Per decisive defeat suffered: -2
- Per 2 SP lost: -1
- Per demoralised Austrian division: -1
- Loss or recovery of Carcare, Millesimo, Cairo, Dego, Acqui, Mondovi, Alba: +/-1
- Loss or recovery of Ceva, Cherasco: +/-2
- Loss or recovery of Coni: +/-3
- Per major victory: +1
- Per decisive victory: +2
- Per village, town or city that is pillaged (except Voltri, Genoa, Novi): respectively -1, -2 and -4
Starting morale: 20, max 25. See counter on game help. (For the modifier table, see Tables.)
15.3 - Victory conditions
The French player automatically wins when the Sardinian morale falls to 0.
On the other hand, the players maintain a VP counter:
- Base: 10 VP.
- Each major victory FR/CO: +1 VP / -2 VP.
- Each decisive victory FR/CO: +2 VP / -3 VP.
- Each major/decisive defeat for Bonaparte: -3 / -5 VP.
- French control of 2 hexes around Carcare: +2 VP.
- French control of Genoa: +10 VP.
- For each demoralised/rallied Austrian division: +3 VP / -2 VP.
- For each demoralised/rallied French division: -5 VP / +3 VP.
- For each village, minor or major town that is pillaged by the French: -1 / -2 / -4 VP.
- For each village, minor or major town that is pillaged by the Austrians: +1 / +2 / +4 VP.
If the points fall to 0, it is an immediate victory for the Coalition.
If neither camp wins an automatic victory, the VP at the end of the game determine the winner:
- 1-5 VP: Strategic victory for the Coalition
- 6-15 VP: Major victory for the Coalition
- 15-20 VP: Marginal victory for the Coalition
- 21-25 VP: Draw
- 26-30 VP: Marginal victory for the French
- 31-35 VP: Major victory for the French
- 36+ VP: Strategic victory for the French
Tables
Terrain effects
| Terrain | Forage | Movement | Combat |
|---|---|---|---|
| Plain/Normal | Normal: 5 SP | – | – |
| Plain/Fields | Rich: 10 SP | 1.5 MP off road | – |
| Hills | Nothing | 2 MP off road | -2 if defender |
| Mountain | Nothing | Impossible off road | -3 if defender |
| Village | Pillage: 5 SP | Other terrain | Other terrain |
| Town | Pillage: 10 SP | Other terrain | -1 uncombinable |
Movements table
| Type of movement | Made after | Conditions | Status after movement |
|---|---|---|---|
| Simple movement | – | No | – |
| Fast march | – | Non fatigued; 2 hexes/MP; only on road | Fatigue +1; can fight after |
| Strategic movement | Simple movement | Commanded/non fatigued; => 2 MP from enemy; only on road | Fatigue 1 |
| Forced march | Strategic movement | Commanded/non fatigued; => 2 MP from enemy; only on road | Fatigue 2 |
Sardinian morale
Modifier by position on the Sardinian morale track (starting morale 20, max 25; the French win immediately at 0):
| Morale | Modifier |
|---|---|
| 0 | French victory |
| 1-5 | -3 |
| 6-10 | -2 |
| 11-15 | -1 |
| 16-20 | 0 |
| 21-23 | +1 |
| 24-25 | +2 |
Note: the printed track gives the modifier range as "-4 and +2"; the lowest printed value on this table is -3.
Combat results table
| Dice | Losses Att | Losses Def | Morale Att | Morale Def | Result |
|---|---|---|---|---|---|
| 0 | 25% | ** | -3 | +2 | Decisive Defeat |
| 1 | 20% | ** | -3 | +2 | Decisive Defeat |
| 2 | 20% | ** | -2 | +1 | Major Defeat |
| 3 | 15% | ** | -2 | +1 | Major Defeat |
| 4 |
- * = Base 10% + 5% per point of terrain modifier.
- ** = Base 5% + 5% if the victor is outnumbered + 5% if the victor is without the terrain advantage.
The result labels are printed across the paired dice rows (0-1, 2-3, 4-5, 6-8, 9-10, 11-12, 13-14).
Percentage of losses suffered
Number of SP lost, by manpower and percentage of losses suffered:
| Manpower | 5% | 10% | 15% | 20% | 25% | 30% | 35% | 40% |
|---|---|---|---|---|---|---|---|---|
| 1 | 0 | 0 | 0 | 0 | 0 | 0 | 1 | 1 |
| 2-3 | 0 | 0 | 0 | 0 | 1 | 1 | 1 | 1 |
| 4-5 | 0 | 0 | 1 | 1 |
Quick Reference Sheet
The printed quick-reference sheet (the last page of the rules) repeats the Sequence of play (Chapter 4), the attrition modifiers (8.5), the ratio modifiers (11.4), and the reconnaissance rules and table (Chapter 10). Those are transcribed in full in their chapters above.
Notes on this transcription
Changes and judgment calls, all disclosed:
- Obvious spelling slips in the printed English were corrected, with no change to rule text: "Strengh" (Strength), "Montain" (Mountain), "wether" (whether), "automaticaly" (automatically), "tarce" (trace), "ennemy" (enemy), "defensor" (defender), and "incited" (incurred, in 11.10).
- The French heading "Exemples de jeu" is rendered as "Examples of play". A French sentence fragment that repeats the English tactical-positioning example is omitted as a duplicate.
- "NdC" in 14.2 is rendered as "Designer's note", as the printed note is the designer's.
- The line "Fatigue markers are reduced by 1..." appears in the printed layout after 14.2. It is placed here as the last effect of pillage in 13.4, since its wording matches the pillage marker effects. If it belongs to end-of-turn recovery instead, it should move to 14.2.
- 9.2.2 cites "4.5", which does not exist. The reference is to step 5 of the Sequence of play, and the text says so in brackets.
- 15.2 gives the Sardinian morale range as "-4 and +2", but the morale table's lowest modifier is -3. Both are kept as printed.
- The victory bands in 15.3 overlap at 15 ("6-15" and "15-20"). They are kept as printed.
- Counter artwork, the game-help counter sheet and the morale cursor scale are not transcribed beyond the labels printed in the text. The credit block is omitted.