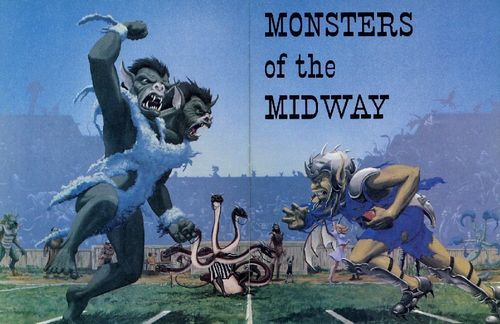
Monsters of the Midway
Monsters of the Midway Rulebook
Table of Contents
Table of Contents
Description of Components
MONSTERS OF THE MIDWAY consists of the following components: A playing field measuring 20 hexes by 14 hexes, with end zones on both ends 2 hexes in width; a cardboard sheet containing 240 player counters, 5 football counters, 2 ball-marker counters, and several blank counters; a scoreboard with a down indicator and a display to record the number of plays remaining in the game; a draft chart; and the rules booklet you are reading.
The Counters: Each player counter contains a picture and the name of the player, plus a letter designating that player's size and a number indicating that player's movement factor. Equal numbers of counters are printed in contrasting colors so players on one team can be distinguished from those on the other.
The Draft
Before a game can begin, each coach (human player) must draft a team using the draft chart which accompanies these rules. (Of course, teams which were previously created can be used.) Each monster type has a point value indicating the "cost" of acquiring one creature of that type. Every team must contain 10 players — no more, no less — and must be built using no more than 210 points.
General Rules
-
Unless otherwise specified in any rules which follow this one, all basic rules of football apply to MONSTERS OF THE MIDWAY.
-
The team in possession of the ball has four downs (plays from scrimmage) in which to score a touchdown or a field goal. Under no circumstances may a team obtain a first down while it is on offense.
-
Each team must have six players on the field for every play. Offensive formations must include three players who start on the line of scrimmage (one of them being the one who snaps the ball to begin a play from scrimmage) and three players in the backfield (one of whom must receive the snap). Any player in the offensive backfield can receive a snap, run with the ball, attempt a forward pass, or hand off the ball to another member of the offense. A lateral (essentially a forward pass in a sideways or backward direction) is treated as a forward pass for game purposes.
Defensive formations can be of any configuration desired by the coach, with no restrictions on how many players must be on the line or in the backfield.
-
The duration of a game is 25 plays, including kickoffs, punts, and field goal attempts but not including point-after-touchdown attempts.
-
Each hex on the field represents a distance of 5 yards; the end zones are 10 yards deep, and the midfield line is 50 yards from each goal line. "Hash marks" are two hexes in from both sides of the field; if a ball carrier is tackled in either of the two hex-rows at the edge of the field, the ball is spotted on the hex just inside the hash mark on that side of the field.
Movement
Each play of the game consists of one or more movement phases. A player's movement factor represents the maximum number of hexes that counter can be moved during one phase.
No player can move into an occupied hex unless that player is attempting to block, tackle, or intercept/defend against a forward pass. Once a player enters an occupied hex to attempt one of these maneuvers, movement for that counter during that phase is ended.
At the start of a play from scrimmage (any play except a kickoff or a point-after-touchdown attempt), all offensive players must take a -2 penalty to their normal movement factors (down to a minimum of 1). This applies only to the offensive movement phase immediately following the snap of the ball.
There is no cost in movement factors for a player who throws a forward pass, or for a player who either gives or receives a handoff.
Starting the Game
After both coaches have drafted players to fill out their rosters, a coin toss is conducted to determine which coach gets to choose first from among the options available at the start of the game. The winner of the coin toss can either choose to receive the kickoff, or can pick which end zone his or her team will defend. Note that the team defending the north end zone will have the wind at its back for the duration of the game. The wind advantage gives that team an increased range on all kicks (kickoffs, punts, field goal attempts) of one hex more than normal.
The Kickoff
On any kickoff, the ball is placed directly behind the kicking team's 40-yard line. The kicking team must position one player (the kicker) directly behind the ball. The other players on both teams can be placed anywhere their coaches desire, as long as all members of the receiving team are on the side of the 50-yard line nearest that team's goal line.
On the first movement phase of the kicking team (just after the ball is kicked), all players on that team receive an addition of +2 to their normal movement factors, because they are able to get a running start.
With two exceptions, all kickoffs travel 12 hexes. In addition, a direction modifier is applied after the 12-hex distance is counted off. The path of the kickoff is determined by the kicking team coach, and the 12-hex distance must be counted in a continuous line that never moves laterally or backward. The ball is placed in the hex at the end of this path, and the kicking team coach then rolls d6. The ball is moved to the hex indicated by this roll, which will be one of the six hexes adjacent to the end of the 12-hex path. (See diagram on field.)
If a halfling is the kicker, the kicking team coach has the option of adding a maximum of 2 hexes distance to the kick, before the direction modifier is applied.
If the kickoff travels into the end zone, the receiving team must receive or recover the ball before declaring a touchback. If the kickoff ends up beyond the end zone, an automatic touchback is declared and the receiving team takes possession of the ball on its 20-yard line. If the kickoff lands out of bounds on either side of the field, the kicking team is penalized one hex (five yards) and must kick over.
A kickoff can be received (caught on the fly) by a member of the receiving team that moves into the hex containing the ball during the receiving team's first movement phase following the kick. A successful reception is determined as for a pass reception attempt (see charts and tables). On a regular kickoff, there will be no defenders (members of the kicking team) in the hex; on an onside kick, a defender may well be present. If a successful reception is not made by the first member of the receiving team eligible to make such an attempt, the ball is considered a fumble that must be recovered (see charts and tables).
Onside kick: An onside kick may be attempted on any kickoff. The ball will initially travel a number of hexes equal to a roll of d6, with no direction modifier applied after the kick itself (as with a regular kickoff). If the ball does not cross midfield, it cannot be recovered by the kicking team. Any number of players from either team may move into the hex containing the ball. Any and all members of the receiving team who are eligible to recover the kick can attempt to do so before any kicking team members (if eligible) can try to recover it.
If neither team recovers the kick after one phase of movement and recovery attempts, the kicking team coach rolls d6 and applies a direction modifier, thereby determining a new hex where the ball is now located. If the result of a direction roll carries a short kick past midfield, the kicking team then becomes eligible to recover the ball. If the direction roll takes the ball back toward the kicking team's goal line and across midfield in that direction, the kicking team can still recover the ball since it had originally traveled the required 10 yards.
The kicking team coach can apply the distance modifier for a halfling kicker on an onside kick as well as a regular kickoff. The coach must declare whether the halfling's modifier will be used, and if so whether it will be one hex or two, before the die roll is taken to find the distance of the kick.
When an onside kick has been taken and neither team has recovered the ball, members of either team can attempt to block opponents, to prevent them from having a chance at recovering the kick, instead of making recovery attempts. This blocking maneuver cannot be used by either team on a regular kickoff.
Regular kickoff sequence:
- Move ball 12 hexes (plus modifier for halfling kicker, if applicable); then roll d6 direction modifier to determine where kick lands.
- Move kicking team counters (+2 to movement factor in first phase after kickoff only).
- Move receiving team counters. If any members of the receiving team are able to move into the hex containing the ball, roll to see if a reception is made. If a reception attempt fails, roll d6 for direction modifier to determine new location of fumbled kickoff.
- Move kicking team counters and attempt to recover loose ball (if applicable) or tackle kick receiver (if possible).
- Move receiving team counters, attempting to either recover the kick, block for the ball carrier, or advance the ball upfield.
- Continue alternating movement phases until a ball carrier is determined and a ball carrier either scores or is tackled.
Onside kickoff sequence:
- Kicking team declares halfling modifier to be used (if applicable); then roll d6 to determine distance of kick and move ball the required number of hexes toward the receiving team's goal line.
- Move kicking team counters. If the ball has landed beyond midfield, kicking team members may attempt to recover the kick.
- Move receiving team counters and attempt to recover the kick.
- If neither team recovers the kick after one movement/recovery phase, roll d6 for direction modifier to determine the new location of the ball.
- If the ball is recovered, that action ends the movement/recovery phase of the recovering team. The team without the ball can then move and attempt to tackle the ball carrier.
- Continue alternating movement/recovery phases until a ball carrier is determined and that ball carrier either scores or is tackled.
Blocking and Tackling
Blocking and tackling are both related to size. Each monster type is defined as size S (small), M (man-size), L (larger than man-size), or G (giant). The Size Modifier chart (see charts and tables) lists adjustments to be made to the blocking or tackling die roll depending on the size of each combatant.
All blocks are attempted at the end of the offensive movement phase. Regardless of a blocker's movement factor, only one block can be attempted by any blocker in a single phase.
To attempt a block, an offensive player must move into a hex occupied by a defensive player. The offensive team coach then rolls d6 and applies the Size Modifier (if any) to the result, referring to the "Blocking and tackling results" chart to find the outcome of the attempt. Two blockers (but not three or more) can occupy the same hex if there is a defensive player also present in that hex. If a defender is being blocked by two players, the offensive coach decides the order in which blocks will be attempted. Only one block must be made; the coach can call off the second attempt if the first one succeeds or if he decides not to make the second attempt.
A result of "Blocker injured for game" means that counter must be removed from the field immediately and cannot be used for the rest of the game. An injured blocker can (and should) be replaced by a substitute that comes in at the start of the next play — not the next movement phase.
A result of "Blocker injured for next play" means that counter must be removed for the remainder of the current play and all of the next play. The injured blocker can be replaced at the start of the next play by a substitute and can re-enter the game one play later.
A result of "Blocker defeated" means the defensive player is not affected by the blocking attempt and can function as usual on the following defensive movement phase.
A result of "Neutralize" means the defensive player has been partially immobilized, and cannot move for the following movement phase but can attempt a tackle in an adjacent hex.
A result of "Successful block" means the defensive player can neither move nor attempt a tackle for the following movement phase.
Results of "Defender injured" are treated the same as for "Blocker injured."
On any rushing play or on a pass play after the receiver has caught the ball and started to run with it, defensive players can attempt to tackle the ball carrier from an adjacent hex. Tackles can also be attempted by defenders in the same hex as the ball carrier. No hex can be occupied by more than one would-be tackler unless it is the hex containing the ball carrier.
Unlike blocks, tackles do not have to take place at the end of a movement phase. A defensive player may attempt a tackle once and only once during each set of offensive and defensive movement phases. A tackling attempt can be made by a defender during an offensive movement phase any time the ball carrier moves into a hex adjacent to the defender. A tackling attempt can also be made at the end of a defensive movement phase by any would-be tackler that is adjacent to the ball carrier and did not try to tackle that ball carrier in the preceding offensive movement phase. Exception: If the ball was handed off from the previous ball carrier to a new one during the preceding offensive movement phase after a defender attempted a tackle, that defender may try to tackle the new ball carrier at the end of the current defensive movement phase.
If more than one would-be tackler is in the hex containing the ball carrier, or if multiple tacklers are in different hexes adjacent to the ball carrier, the defensive coach decides in which order the tackles are attempted. The coach may elect to call off any possible remaining tackle attempts at any time.
On any tackling attempt, the defensive coach rolls d6 and applies the Size Modifier and then reads the result from the chart.
A result of "Ball carrier injured for game" or "Ball carrier injured for next play" is treated the same as for injuries received in blocking.
A result of "Ball carrier tackled" means the offensive player is stopped at that point and the play is over.
A result of "Ball carrier slowed" means the tackler has made contact, causing the ball carrier to lose 1 or 2 (depending on the result) from its movement factor for the next offensive movement phase.
A result of "Miss" means the tackler did not succeed; the ball carrier can proceed as if no tackle had been attempted.
Results of "Tackler injured for next play" and "Tackler injured for game" are treated the same as other injury results.
Blocking example (diagram omitted): If this is the start of an offensive movement phase, the coach could send blockers B-1 and B-2 against defenders D-1 and D-2, hoping to at least neutralize each of them. Another strategy would be to send B-1 and B-2 to block in the hex occupied by D-1, while sending the ball carrier (BC) a way from the direction of D-2. Then, if either of the blocks against D-1 succeeds, BC has plenty of running room and D-2 will probably be too far away to catch him.
Plays from Scrimmage
On any play from scrimmage, the offense has four basic play choices: a rushing play, a forward pass, a punt, or a field goal attempt. The sequence described below is followed before each play from scrimmage is run:
- Offense sets up in formation (three players on line, three in backfield).
- Defense sets up in formation.
- Offense may shift formation or send one player in motion. This player can move laterally or away from the line of scrimmage up to the limit of its movement factor.
- Defense may adjust, moving any or all players up to the limit of their movement factors but not crossing the line of scrimmage.
- Offense snaps ball to begin play. There cannot be more than two open hexes between the center and the receiver of the snap, and the direction of the snap must always be away from the line of scrimmage. Snaps are always considered "complete" and cannot be fumbled, regardless of how many hexes they travel.
Rushing Plays
The player who receives the snap can try to advance the ball by rushing. At any place on the field during a rushing play, the ball carrier can hand off to a teammate occupying an adjacent hex, at no movement cost to either player. The handoff can occur when either or both of the players involved have not begun their movement for that phase, or when either or both of them have begun but not completed their movement for that phase. Two players can be moved simultaneously only if they are brought to adjacent hexes and a handoff takes place immediately thereafter.
Following a reception by either team on a passing play, the ball carrier may hand off to a teammate just as if the play was a rushing play. Handoffs cannot be fumbled.
Passing Plays
By their nature, forward passes are more complicated than rushing plays. The procedure for a passing play is as follows:
-
A ball carrier can only throw a forward pass at the start of an offensive movement phase, and only if that player type is permitted to throw passes. A pass can be thrown immediately after a player receives the snap from center. Throwing a pass is done at no cost in movement factors. The ball can travel a number of hexes equal to or less than the monster's Range rating, in any direction desired by the offensive coach.
-
The offensive coach places the ball in the hex designated as the target area of the pass.
-
Offensive team conducts all movement desired, with players attempting to either block an opponent (if a pass had not just been thrown), move into position to catch the pass, or obstruct the path of a defensive player that might try to intercept the pass. If an offensive player occupies the same hex as the ball at the end of its movement, that player may attempt a reception after all movement for both teams in the phase has been completed. Only one intended receiver can occupy a hex at one time. Only linemen (players who line up on the line of scrimmage) can be receivers. If any player in the offensive backfield crosses the line of scrimmage before a pass is thrown, the play must be a rushing play; a pass can no longer be thrown on that play.
-
Defensive team conducts all movement desired, with one or more players perhaps moving into position to attempt an interception or a tackle. If a defensive player occupies the same hex as the ball, that player can attempt an interception (if the ball is loose) or a tackle (if a reception has been previously made by the offense).
-
Continue alternating movement phases until one of the following events occurs: (a) The pass falls incomplete; (b) The offense makes a reception and scores or is tackled; or (c) The defense makes an interception and scores or is tackled.
5a. A pass is incomplete, and the play is over, if no player reaches the hex containing the ball in the movement phase immediately following the throwing of the pass. A pass is also incomplete when any eligible offensive receiver attempts a reception and fails, as long as the ball is not immediately intercepted. One teammate may occupy the same hex as the intended receiver, but only one reception attempt may be made by the offense on any pass play. This is the only case when two teammates can occupy the same hex at the same time, if they are not both blockers.
5b. A pass is complete when the intended receiver makes a catch. Any and all defensive players in the same hex as the receiver immediately after the catch is made can attempt to tackle the receiver. If the receiver has a blocker in the same hex and at least two defensive players are also present in the hex, the offensive coach designates which defensive player the blocker is taking on. That defender cannot attempt a tackle if the block is successfully executed, but any other defender(s) present can try to tackle the receiver, ignoring the presence of the occupied blocker. If no defender is present in the same hex when a catch is made, the play from scrimmage continues with alternating offensive and defensive movement phases, until a touchdown or a tackle occurs. A tackle cannot be attempted from an adjacent hex against a receiver that has just caught the ball.
5c. A pass can be intercepted if at least one defender is in the same hex as the intended receiver and the ball, and the offensive player fails to make a reception. The defender(s) can then roll for a reception, taking multiple attempts in any order desired by the defensive coach. If any defender makes the catch, the ball is intercepted and may be advanced toward the opposing team's goal line, with the former defensive team now becoming the offensive team and continuing the play by taking a movement phase immediately following the interception. If more than one defender was in the hex with the ball just before an interception, the ball carrier must be moved to a different hex than the blocker(s) at the first opportunity, since a ball carrier cannot occupy the same hex as any of its blockers. The play continues until the ball carrier scores a touchdown or is tackled.
General rules on pass plays: If they are beyond the line of scrimmage, offensive players may not attempt blocks during the movement phase after the ball is thrown.
A pass may not be thrown if the ball carrier has advanced beyond the line of scrimmage.
A pass may be thrown in any direction, including laterally or backward. However, a lateral or backward pass must result in a reception or be treated as a fumble; an "incomplete" lateral or backward pass does not end a play.
Scoring
A touchdown is scored when an offensive or defensive player enters the opponent's end zone while carrying the ball, or when (as with a pass into the end zone or a fumble recovery in the end zone) a player gets possession of the ball while in the end zone. It is worth six points.
A point after touchdown is scored by kicking the ball through the goal-post uprights after a touchdown. Any player on the team that just scored a touchdown can attempt an extra-point kick. The point is automatic for a halfling kicker; otherwise, a result of 1-5 on a roll of d6 indicates success. The team that was just scored upon can try to block any kick which would otherwise be successful, as long as that team has at least one uninjured size L or size G player available. The defensive coach designates an eligible player as the would-be blocker, and rolls d6; on a result of 6, the block succeeds. After a blocked kick, the offensive coach rolls d6; a result of 6 means the blocker was stunned and cannot play on the ensuing kickoff.
A two-point conversion is set up like a play from scrimmage, with the ball spotted on the dark-outlined hex nearest the opponent's end zone. The team that just scored a touchdown can try to score two more points by advancing the ball into the end zone. Any recovery of the ball by the defense, such as a fumble recovery or an interception, stops play immediately. In all other respects, this play is run exactly as a play from scrimmage. Neither type of point-after-touchdown attempt counts as a play, for purposes of determining the length of the game.
A field goal can be attempted on any play when the ball is within range of the opponent's goal posts (see charts and tables). A field goal attempt must be announced as such by the coach of the kicking team. The kick is taken from one hex behind the line of scrimmage, and the goal posts are located at the rear of the end zone. With a regular play from scrimmage, the kicking team must place three players on the line of scrimmage. The kicker is set up in the hex directly behind the spot where the ball will be snapped to. There must be a holder positioned on the hex the ball will be snapped to; the snap can be to any one of the three hexes behind the ball. Once both formations are set up and the ball is snapped, the kicking team coach rolls on the "Field goal success" chart to determine the outcome of the attempt.
If the kick is good, the defending team can roll to block the kick, providing an eligible blocker (size L or G) is in the formation. The chance for a successful block, and the chance of an injury to the blocker, are the same as for a point after touchdown.
If the block fails, the kicking team is awarded three points. If the block succeeds, the coach of the blocking team rolls d6 and applies the result as a direction modifier, starting from the hex the ball was kicked from. The loose ball can be recovered (as a fumble) and advanced by the recovering player. If the kicking team recovers the fumble and does not score a touchdown on this play, the blocking team is awarded possession of the ball at the spot where the ball carrier was tackled.
A defensive player can score a safety (two points) by tackling the ball carrier in the offensive team's end zone. The team scored upon then must kick off or punt the ball to the opponents, starting from its own 20-yard line (instead of the 40, as with a regular kickoff).
Punting
A punt, unlike a field goal, does not need to be announced ahead of the play. As with all other plays from scrimmage, the offensive team must have three players on the line of scrimmage at the start of the play.
The ball must be snapped back to the punter, who cannot be more than four hexes behind the ball. The punter cannot move or kick the ball during his team's initial movement phase, but it can be the first action the team performs in its next movement phase. A player is not eligible to punt after having moved from his original position.
If a defensive player moves into the hex containing the punter before the ball has been kicked, the punt is blocked. The same procedure as for a blocked field goal is followed regarding ball location and recovery — except that the punter cannot recover a loose ball in the first phase following the successful block.
If a punt attempt is not blocked, the punting team coach must indicate the path the ball will follow when kicked (toward a sideline, straight downfield, or something in between). One of the blank counters can be used to illustrate the line along which the punt will travel. The kicking team coach then rolls 2d6 to determine how many hexes (2-12) the ball will travel along that line during the current movement phase.
After the ball is punted, any offensive team members who have not already moved in the current phase may do so. The defensive team then has an opportunity to start converging on the spot where it looks like the ball is coming down. In the next offensive movement phase, the punting coach rolls d6 and adds the result (1-6) to the path followed after the first (2d6) result, then applies a direction modifier to determine the hex where the punt comes down.
If possible, a receiving team player may move into the hex where the ball will land and attempt a reception. A punt reception is executed the same as a pass reception. If a player fails an attempted reception, a fumble has occurred and the direction modifier is used from the point where the punt came down, in order to determine the new location of the ball.
The receiver may choose to let the punt hit the ground instead of trying to catch the ball. If this is the case, the kicking team coach rolls d6. This result is the number of movement phases (beginning with the current one) in which direction modifiers will be applied if no player recovered the loose ball in the previous phase. Example: The punt comes down without a reception being attempted. The kicking team coach rolls "3" on d6, meaning that he will apply direction modifiers on three successive movement phases (to simulate the ball bouncing from place to place) if the ball is not recovered in the meantime. He takes the first direction-modifier roll immediately, and each succeeding one (up to the limit) at the start of each succeeding offensive movement phase.
If the receiving team recovers a loose ball after a punt hits the ground, the recovering player can attempt to advance the ball. If the punting team recovers a loose ball, the play is stopped and the receiving team is awarded a first down at that spot on the field.
It's a punt: The offensive coach has just designated B as the last hex on the path traveled by the kick. He will now roll d6 for a direction modifier to determine exactly what hex the ball falls in to. If the direction modifier is anything but a 1 or 2 and defender D-1 has a movement factor of at least 3, he can move into the hex with the ball and try to catch it. [Diagram omitted.]
Fumbles and Fumble Recovery
A fumble occurs on any attempted reception of a kickoff, a punt, or a lateral if the reception fails. A fumble does not occur if the reception of a forward pass fails; the pass is simply incomplete. A fumble cannot occur on a rushing play, or as the result of a tackle on a ball carrier. When a fumble takes place, the coach of the team that did not fumble applies a direction modifier to determine the location of the ball for purposes of attempting a recovery.
If two opposing players enter or occupy a hex in order to attempt a fumble recovery, the offensive player will roll first for possession if the ball is located on the offensive team's side of the line of scrimmage. The defense will roll first if the fumbled ball is located on the defensive side of the line of scrimmage. The only exception to this rule, as noted under "Punting," is that a punter cannot attempt a "fumble recovery" on a blocked punt in the movement phase immediately after the block occurs.
Charts and Tables
Blocking and Tackling Results
| Modified d6 roll | Blocking attempt | Tackling attempt |
|---|---|---|
| -2 | Blocker injured for game | Ball carrier injured for game |
| -1 | Blocker injured for next play | Ball carrier injured for next play |
| 0 | Blocker defeated | Ball carrier tackled |
| 1 | Blocker defeated | Ball carrier tackled |
| 2 | Blocker defeated | Ball carrier tackled |
| 3 | Neutralize | Ball carrier tackled |
| 4 | Neutralize | Ball carrier slowed (-2) |
| 5 | Neutralize | Ball carrier slowed (-1) |
Size Modifiers
Applied to the blocking or tackling d6 roll. Offense size runs down the left; defense size runs across the top.
| Offense \ Defense | S | M | L | G |
|---|---|---|---|---|
| S | 0 | -1 | -2 | -3 |
| M | +1 | 0 | -1 | -2 |
| L | +2 | +1 | 0 | -1 |
| G | +3 | +2 | +1 | 0 |
Fumble Recovery Table
| Players in hex | Recovery on d6 roll of |
|---|---|
| 1 | 1-5 |
| 2 | 1-4 |
| 3 | 1-3 |
| 4 | 1-2 |
| 5+ | 1 |
Field Goal Success
| Distance of kick | d6 roll to make |
|---|---|
| 3-4 hexes | 1-5 |
| 5-6 hexes | 1-4 |
| 7-8 hexes | 1-3 |
| 9-10 hexes | 1-2 |
| 11-12 hexes | 1 |
Halfling kickers add +1 to the d6 result.
Pass Reception (or Interception)
| Opponents in hex | d6 roll for success |
|---|---|
| 0 | 1-4 |
| 1 | 1-3 |
| 2 | 1-2 |
| 3 | 1 |
Adjust the d6 result by the amount of the player's receiving modifier, if any.
Draft Chart
MONSTERS OF THE MIDWAY Draft Chart. Columns: Pts. (point cost), Player type, Mv (movement factor), Sz (size), QB range (quarterback throwing range), QB Rec. mod. (quarterback receiving modifier), Magic.
| Pts. | Player type | Mv | Sz | QB range | QB Rec. mod. | Magic |
|---|---|---|---|---|---|---|
| 5 | Brownie | 3 | S | 3 | +3 | Mirror image |
| 10 | Bugbear | 2 | L | 0 | — | none |
| 40 | Centaur | 5 | L | 8 | — | none |
| 10 | Dwarf | 1 |
Note: the Satyr row's Mv, Sz, QB range and QB Rec. mod. entries are blank on the printed chart as scanned.
Magic
Certain player types have magic abilities (which may or may not correspond to abilities the same monsters have in the AD&D rules). Whenever a magic ability is used, it must be put into play at the beginning of the player's movement phase; in other words, a player cannot take normal movement and then employ a magic ability in the same phase. However, a player can use a magic ability and then move later in the same phase.
Mirror Image: This spell will last for four movement phases after it is cast or until the actual caster is contacted physically by another player. At the start of the caster's movement phase, the coach of that player rolls d6 and divides the result by two (round up) to yield a number from 1-3. This is the number of mirror images created by the spell. After the number is determined, the coach of the casting player selects this number of blank counters, including one blank with an "X" on the underside that will represent the actual player. All of the blank counters are placed on the field. Each of the images must be adjacent to at least one other blank counter, and all of the images must "mirror" the movement of the caster. (Exception: If an image positioned between the caster and another image is taken out of the play, the remaining counters need not be moved adjacent to each other, but the image(s) remaining must still mirror the caster's movement for as long as the play lasts. If a defensive player occupies the hex between two non-adjacent blank counters, the defensive coach can decide which counter will be revealed on a tackling attempt.) If a mirror image is forced to run out of bounds, that counter is removed from play, but the action can continue as long as the counter representing the caster does not leave the field. If an opposing player comes into contact (in the same hex) with a mirror-image counter or is in an adjacent hex (as on an attempt to tackle), the blank counter is turned over to see if the actual caster has been contacted. If so, an attempt to block or tackle that player is made as usual. If not, the blank counter is simply removed from play, and the opposing player that made contact cannot perform any more action until the next movement phase. Should a mirror-image counter come into contact with an opposing player by virtue of mirroring the caster's moves, that counter is removed from the field, and in this case the opposing player can still make a blocking or tackling attempt in that movement phase. A mirror-image counter cannot carry the ball, receive a pass, recover a fumble, block, or tackle. This spell cannot be cast before the ball is snapped.
Mirror image example (diagram omitted): The defensive coach knows there are three mirror images on the field, but he doesn't know where the real ball carrier (BC) is. If the offensive coach moves BC in the indicated direction, all three images (M-1, M-2, and M-3) must follow the same route from where they are located. In this case, no mirror image will run into a defender (and have to be removed). But this path takes both M-2 and M-3 into easy (two hexes away) tackling range for defender D-1. If D-1 tries to tackle one of them, he'll find out it isn't there. If D-1 guesses right and is able to move four hexes to get to the spot occupied by BC, he can end the play by making a successful tackle.
Lightning Bolt: This spell must be cast at the beginning of the caster's movement phase and the results are immediate. The bolt will never miss and can be directed at either the ball or a player. If directed at the ball, the lightning bolt makes the ball dead — literally. The play is nullified but counts as a play, just as if an incomplete pass had occurred. If the bolt is directed at a player, the target player will fall to the ground stunned and must leave the game for the remainder of the current play and all of the next play. A lightning bolt cannot cause a fumble and cannot bring about a change of possession unless the casting of the bolt causes a play to end, and a change of possession would have occurred at that point anyway.
Change Self: This spell lasts for up to two movement phases. It allows the caster to change into any of the following creatures, complete with that creature's abilities: bugbear, gnoll, goblin, hobgoblin, orc, or kobold. Abilities include size and movement factor, plus any special abilities (see following section) possessed by that creature type. The change can be cancelled at any time prior to the expiration of the spell if so desired, as long as the cancellation takes place at the start of the caster's movement phase.
Invisibility: This spell lasts for one movement phase. At the start of the caster's movement phase, when the spell is cast, a blank counter is placed in the hex where the player went invisible. An invisible player cannot be blocked or tackled, but can perform as a blocker or tackler if the opportunity presents itself. At the beginning of the movement phase following the casting of the magic, the player reappears on any unoccupied hex within range of the player's last visible position. If the player reappears in a hex adjacent to an opposing player, the opponent can attempt to block or tackle that player before the newly visible player is able to move.
Lycanthropy: A lycanthrope (werebear) can change form at will, as many times as desired during a game but always at the beginning of that player's action in a movement phase. In human form, the player is a normal man; in were form, the player is larger (but slower) and would perform better as a blocker or tackler than a human would.
Special Abilities
Certain player types have special (non-magical) abilities. Dwarves and gnomes are able to block size G players as if they themselves were giants, with no penalty for their small size. Elves are treated as size S creatures when a block or a tackle is attempted against them. Goblins and kobolds are treated as size M creatures when a block or tackle is attempted against them. Minotaurs are treated as size G creatures when used as blockers.
A hobgoblin will always cover or chase any elf on the opposing team, regardless of what the original formations looked like. (If there is more than one elf on the opposing team, the hobgoblin will go after the closer one.)
Kobolds and orcs cannot be knocked out of the game because of injury; treat a result of "Injured for game" as "Injured for one play."
Treants are treated as size G creatures when a block is attempted against them, and are treated as size G with an extra modifier of -1 to the die roll when a tackle is attempted against them.
Ettins are ferocious but stupid: Any time an ettin starts a movement phase adjacent to a teammate, the coach of the ettin's team rolls d6. A result of "6" indicates that the ettin will make a block or tackle attempt against his teammate. If this attempt succeeds, the teammate can take no further action in the current movement phase.