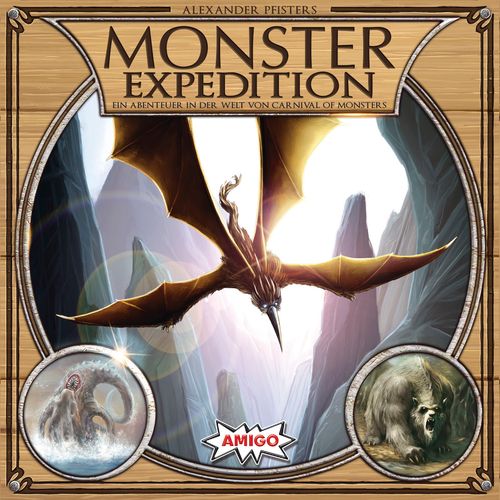
Monster Expedition
Monster Expedition Rulebook
Table of Contents
Table of Contents
Components
- 60 Expedition Cards
- 53 Monsters
- 6 Starting Monsters
- 1 Monster Trader
- 12 Supply Camps, 4 sets of:
- 1 Camp in the Aerie
- 1 Camp in the Depths
- 1 Camp in the Enchanted Forest
- 1 Game Board (showing the die faces)
- 8 Hunting Dice (black)
- 1 Enchanted Forest Die (green)
- 1 Depths Die (blue)
- 1 Aerie Die (yellow)
- 36 Crest Tokens — 4 Hunting Parties with 9 Crests each
Monster and Camps In Detail
Monster card:
- Monster Level (top left)
- Region (top right)
- Symbiosis Symbol
- Ability
- Victory Points
- Caged Victory Points
Camp card:
- Player Set
- Side showing (A/B)
- Equipment Level
- Camp Improvement
- Arrow pointing to next Level
Goal & Setup of the Game
-
Place the game board in the middle of the table. Put the box lid next to it upside down to roll the dice into.
-
Start the wilderness display by placing the six starting monsters and the monster trader next to the board.
-
Shuffle the remaining cards together and create a face-down draw deck. The number of cards in the deck depends on the number of players:
- 2 players: 27 cards
- 3 players: 35 cards
- 4 players: 41 cards
- Put the remaining cards aside in a face-down reserve deck for now.
-
Reveal the top three cards from the draw deck and add them to the wilderness display. You now have ten cards in the wilderness display.
-
Sort the supply camps into player sets I, II, III, and IV.
- The wildest player goes first and takes Set I, the player to their left takes Set II, and so on. If there are fewer than four players, put the remaining sets back in the box. You're not going to need them for this game.
-
Place your three camps in front of you so that side A is showing and the underlined equipment level is at the top of the card.
-
Each player picks a Hunting Party and takes their nine coats of arms.
-
Get all the dice ready.
Playing the Game
A game of Monster Expedition is played over several rounds. During each round, you all take turns one after the other. At the start of your turn, decide which region you want to go hunting monsters in. Your camp's equipment level determines how many dice you can use. Bank dice one after the next to get a lucrative hunting value, then use that value to capture monsters and cages. At the end of your turn, use matching dice to improve your camp.
The starting player goes first, then turns are taken going clockwise. On your turn, carry out the following four phases in order:
- Phase 1: Pick a camp
- Phase 2: Hunt monsters
- Phase 3: Improve your camp
- Phase 4: Refill the wilderness display
Phase 1: Pick a camp
Choose one of your three camps to start your expedition from and push it up a bit. The equipment level printed at the top of the camp card determines which dice you can use. Take these dice from the supply.
Example: Julia decides to start her hunt from her camp in the Aerie. She takes the yellow Aerie die and two black hunting dice from the supply.
Phase 2: Hunt Monsters
Roll all your dice and pick one of the numbers showing on them. Bank all of the dice showing that number by putting them on the game board.
Example: Julia rolls her three dice. They show a 1, a 3 and a 4. Julia decides to bank the 3.
You then get to choose whether you want to reroll the remaining dice or end your monster hunt. If you decide to continue rolling, take the remaining dice and reroll them. Then, bank all dice of one number again. However, you can only pick a number you haven't banked yet that turn. Keep rolling until you decide to stop hunting or until you have banked all your dice on the board.
Note: When you stop hunting, put any dice you haven't banked back in the supply.
Misthrow: If you roll only numbers you have already banked, this counts as a misthrow. You can't take out any dice. Instead, you lose your highest banked die. Put it back in the supply. If you have more than one highest die, you lose only one of them.
After a Misthrow, you choose whether to continue rolling or stop hunting.
Example: Julia has already taken out a 3 and a 6. Unfortunately, she rolls another 6. That's a misthrow, so she has to put her banked 6 back in the supply. She decides to continue and rolls an 8. She banks the 8 and ends her hunt.
Determine Your Hunting Value
Once you have decided to stop hunting, add up the values on your banked dice. This is your hunting value.
You can spend your hunting value to capture any combination of monsters and cages.
Note: You can only spend your hunting value to capture monsters that match the region of your chosen camp (from Phase 1 of your turn). There is one exception to this rule: The Draco Chelonia. Since this monster roams all regions, you can capture it no matter which camp you've chosen.
Monsters
Each monster has a monster level. To capture a monster from the wilderness display, you must spend points from your hunting value equal to its monster level.
Place the monster next to your camps face up. Do not refill the wilderness display just yet.
Cages
The backs of all the cards in the draw deck have cages printed on them. In addition to catching monsters from the wilderness display, you may exchange your hunting value for cages from the draw deck, in any combination you can afford.
Cages always have a cost of 10.
You can buy cages no matter which camp you've picked. When you buy a cage, take the top card from the draw deck and put it in front of you, face down. You may look at the monsters in your cages at any time, but don't show them to the other players. They stay face-down in front of you for the rest of the game. You cannot use the abilities or effects of caged monsters, and they will earn you fewer victory points at the end of the game than monsters you have captured from the wilderness display.
(Example: a monster worth 5 VP as a monster is worth only 3 VP as a caged monster.)
The Monster Trader
The monster trader allows you to buy six cages for a hunting value of 40, no matter which camp you picked. Take the top six cards from the draw deck and put them in front of you face down as cages.
Don't take the monster trader card from the wilderness display: it always stays there.
Example: Julia has rolled a hunting value of 11. She can now choose to buy either a cage or the Vertikalwespe.
Example: Later in the game, Oliver rolls a hunting value of 20. He can now buy two cages, one cage and the Meeresgleiter, or the Medusamorph, for example.
Important: When you are done capturing monsters and cages, any leftover hunting value points you have not spent are lost—you cannot save them for the next turn.
Phase 3: Improve your camp
After the monster hunt, take another look at the dice you have banked on the game board.
Each camp has a certain dice value you'll need to improve it. This value is printed in the middle of that camp card. Each 1 you have banked allows you to improve your Aerie camp, each 2 improves your camp in the Depths, and each 3 lets you improve your Enchanted Forest camp once. The dice colors and the camp you picked don't play a role in this.
For each improvement, you get to rotate the corresponding camp up one level in a clockwise direction, so the new equipment level is at the top of the card. This may change the number of dice you'll have available for your next expedition.
If you improve your camp for the fourth time, turn over the card and place it back in front of you so that the underlined equipment level is at the top of the card.
Example: One of the dice Julia banked is a 3, so she improves her Enchanted Forest camp one level.
Note: You use your banked dice both to determine your hunting value and for camp improvement.
You can improve each of your camps seven times over the course of the game. After that, any further improvements for that camp are ignored. When you improve a camp to its final level, you immediately get two cages from the draw deck.
Some camp levels (and monster abilities—see next page) have a bonus improvement value printed on them. A player can improve that camp to the next level whenever any player scores a die with that value.
Note: It's not enough for a player to simply bank the necessary dice in Phase 2: Hunt monsters. Improvements only take effect in Phase 3: Improve your camp. So, if a banked die is lost due to a misthrow, you won't be able to use it to upgrade your camp.
First, the active player checks if they can make any improvements. Then all the other players take turns checking if they can use a bonus improvement.
Example: After Julia has finished her regular improvements, Oliver can use her dice for a bonus improvement, rotating his Enchanted Forest camp to the next level.
Phase 4: Refill the wilderness Display
If you gained at least one cage during your turn, refill the wilderness display back up to ten cards. It doesn't matter if you got the cage from the draw deck or if you stole it from another player (see: Monster Abilities).
To refill the wilderness display, turn over cards from the draw deck and add them to the display until there are 10 cards there again.
Crests
When you refill the wilderness display, put one of your crest tokens on each newly revealed card. These tokens remain in place until someone takes that monster or the game ends.
If you catch a monster with a token on it, return the token to its owner.
If there are any monsters with crest tokens left in the wilderness display at the end of the game, the owners of those tokens take these cards as cages.
Monster Abilities
Monsters don't just earn you VP, they also have helpful abilities you can use. These can either be ongoing abilities that help you for the rest of the game, or single-use effects.
Note: You can't use the abilities or effects of monsters in cages!
Ongoing Abilities
Ongoing abilities go into effect the moment you catch a monster from the wilderness display and place it in front of you, until the end of the game. Monsters can have the following ongoing abilities:
- Misthrow improvement: Once per turn, on a misthrow, you may improve your matching camp immediately. It doesn't matter if it's your turn or another player's.
- Bonus improvement value (a pictured dice value): You may improve your matching camp if the active player scores the pictured dice value. This ability is carried out in Phase 3: Improve your camp.
- Symbiosis symbol: Some monsters have a symbiotic relationship with other monsters, which you can use to help catch them. For each set of three different colored symbiosis symbols you have, you may add one additional hunting die during each expedition you undertake.
Some monsters are especially adaptable, as you can see from the split symbiosis symbol. They act as "wild" symbiosis partners, i.e., you can use them as any symbiosis symbol. You can even have more than one of them in your set.
Fan out your sets of three monsters in front of you to mark them as sets. You may rearrange your sets at any point during the game.
Example: You get three additional hunting dice, one for each symbiosis set.
Note: No matter what equipment level your camp is at and how many symbiosis sets you have, you can never use more than eight hunting dice at the same time.
Single-Use Effects
Some monsters have effects that are carried out immediately—and only once—as soon as you take the monster from the wilderness display. Single-use effects are marked with the Immediate symbol.
- Steal a random cage from another player. Remember to refill the wilderness display during Phase 4: Refill the wilderness display.
- Immediately improve your matching camp to the next level.
The End of the Game
When the draw deck is used up, complete the current round so that each player has played the same number of turns. Then, the game ends. If needed, use cards from the reserve deck for cages or to refill the wilderness display during the last round.
If the reserve deck runs out, too, don't refill the wilderness display anymore. You can still buy cages, though: Simply make a note of the cages you buy at this stage. They're worth 1 VP each at the end of the game.
When the game ends, take any monsters bearing your coat of arms tokens from the wilderness display and place them in front of you, face down, as cages.
Add up all the victory points on your monsters and your cages.
Example: At the end of the game, Oliver counts his points. First, he adds together all the victory points from the face-up monsters he has in front of him. Their sum is 15 points (2 + 2 + 3 + 2 + 4 + 2). He also has five face-down cages in front of him. These earn him a total of 8 points. Oliver's total score is 23.
The player with the most victory points wins the game! If there is a tie, the one whose camps have collectively reached the highest equipment level wins. If there is still a tie, you have more than one winner.
Solo Variant
You're an adventurer setting up camp on the small island of Solinsula. To impress the Royal Monstrological Society, you must master ten challenging expeditions there.
Follow the usual rules of the game with the following exceptions:
Setup
Create a face-down draw deck of ten cards and pick any set of supply camps. You may pick a different set for each of the expeditions.
Phase 2: Hunt Monsters
If you buy cages, always take them from the reserve deck, not the draw deck.
Phase 4: Refill the Wilderness Display
At the end of each round, reveal one card from the draw deck and add it to the wilderness display. Always add only one card, regardless of whether or not you have taken any cages that round (instead of refilling the display to 10 cards when you take a cage). Due to this rule, the wilderness display can have more than ten cards in it.
Monster Abilities
For the single-use effect Steal a random cage from another player, take a cage from the reserve deck instead.
Winning and Losing
Each expedition has a victory condition you must fulfill before you can move on to the next expedition.
You win immediately when you meet the victory condition, even if it is in the middle of your turn.
You lose immediately if there are 13 cards in the wilderness display or if you can't reveal any more cards from the draw deck when you're required to.
The expedition is too hard? If you fail at an expedition, you may improve one of your camps by one level before you try again.
Expedition 1
You set up camp on the island of Solinsula. However, the island is overrun by monsters threatening your camps. Keep the monsters in check!
Victory Condition: The wilderness display has no more than eight cards in it and you have at least one cage.
Expedition 2
Your research team needs your help to be able to study the monsters in the Enchanted Forest better.
Victory Condition: There are no monsters from the Enchanted Forest in the wilderness display (Draco Chelonia doesn't count). Also, you need to have a total of at least seven monsters from the Enchanted Forest and/or cages.
Example: Han wins the expedition: There are no monsters from the Enchanted Forest in the wilderness display. He also possesses five monsters from the Enchanted Forest and two cages.
Expedition 3
The Royal Monstrological Society asks you to study the behavior of monsters in cages on Solinsula.
Victory Condition: You have at least six cages.
Expedition 4
A member of the Royal Monstrological Society is en route to inspect your camps.
Victory Condition: At least two of your camps are at the highest equipment level.
Expedition 5
Your supply shipment was shipwrecked, so it's a lot harder to improve your camps.
Victory Condition: You have at least six cages.
Special Rule for Expedition 5: To improve a camp with dice showing 1, 2, or 3, you need to score two dice showing the number at the same time. Other methods of improvement are not affected.
Example: Han needs a 1 and another 1, or alternatively a 7 as usual, to improve his Aerie camp.
Expedition 6
Monsters have spread all over the island and are threatening your camps again.
Victory Condition: There are no more than seven cards in the wilderness display and you have at least one cage.
Expedition 7
This time, your research team is especially interested in monsters from the Depths, so they ask you to catch some—for science!
Victory Condition: There are no monsters from the Depths in the wilderness display (Draco Chelonia doesn't count). Also, you need to have a total of at least seven monsters from the Depths and/or cages.
Expedition 8
The monster trader has a special offer for you.
Victory Condition: Visit the Monster Trader at a discounted hunting value of 35.
Expedition 9
Your success on Solinsula is growing. As a token of their appreciation for your deeds, the Royal Monstrological Society sends you special equipment crates to make hunting easier. The Monster Trader is also very interested in your crates and offers you special deals in exchange.
Victory Condition: There are no more than seven cards in the wilderness display and you have visited the Monster Trader at least once.
Special Rules for Expedition 9:
- If your banked dice contain sets of 1, 2, and 3, you get two crates for each set after rolling the dice (use coat of arms tokens to represent these crates). The dice still count towards your hunting value and camp improvements.
- You can use these crates to reduce either the monster level or the Monster Trader's value by 5 points for each crate, starting on the turn when you received them.
- You may use more than one crate on the same monster or the Monster Trader at the same time.
- It's possible to reduce the monster level to zero or below. This allows you to catch monsters that aren't even in the region of your chosen camp.
- Remove the Monster Trader from the wilderness display after you've visited them once.
Expedition 10
Solinsula is to become a trading post for the Royal Monstrological Society! They ask you to catch all the monsters there to make the island habitable.
Victory Condition: There is not a single card in the wilderness display.
Special Rules for Expedition 10:
- Create a face-down draw deck of twelve cards.
- Use the special rules for crates from Expedition No. 9. However, they now reduce the monster level or the Monster Trader's value by 10 points each.
- Remove the Monster Trader from the wilderness display after you've visited them once.