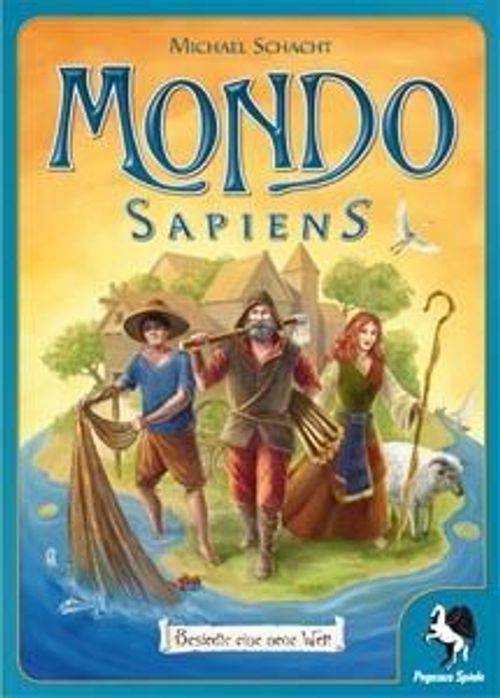
Mondo Sapiens
Mondo Sapiens Rulebook
Table of Contents
Table of Contents
Game Contents
- 8 World Boards (two-sided)
- 145 Landscape Tiles (two-sided): Water, Forest, Meadow (front side and back side)
- 1 Volcano Chip
- 4 Bonus Chips
- 12 Village Tiles (3 of each of 4 player colors)
- 8 Building Tiles
- 1 Pad with Score Sheets (two-sided)
- 1 Timer
Note: To set the timer, turn it one complete turn, then back to the desired number of minutes.
- 1 Building Card
3 Game Levels
You can play Mondo Sapiens on three different levels. We will describe the game for beginners first, followed by the advanced rules, and finally, the sophisticated version for experts: Beginner Game, Advanced Game, Expert Game.
Quick Start: If you are already familiar with Mondo, you can acquaint yourself with Mondo Sapiens quickly. Simply play the first turn according to the Beginner rules, the second turn with the Advanced, and the third with the Expert rules.
At the end of these instructions, you will find bonus rules for Solo Play.
Beginner Game
Game Set-Up
Place all landscape tiles, either side up, unsorted in a loose group in the middle, easily reachable by all players. Select and sort the round Bonus Chips with the following values, according to the number of players (2 players, 3 players, 4 players), and stack them accordingly. Place the stack so that it's easily reachable by all players.
Each player places 1 World Board with the Number 1 in the upper right hand corner in front of himself. In addition, each player takes 1 Score Sheet and 1 Pen (not included).
Place the Volcano Chip and the Timer close at hand, off to the side. You do not need Village and Building Tiles in the Beginner Game. Simply place them back in the box.
Tip: Some spaces on your World Board are slightly highlighted. This is not significant for the Beginner Game.
Game Play
A game is comprised of 3 turns. At the beginning of each turn, set the timer for 7 minutes. Place the timer so that all players can see the time remaining. One player counts down, "3…2…1…go!" While he's counting down, all players scramble the landscape tiles (hereafter just tiles). At "go!" all the players cease shuffling the tiles, and the turn begins.
Placing Tiles
Now all players simultaneously look for the tiles they want to place on their boards. The first tile can be placed on any space of your choice. Every subsequent tile must abut at least one edge of one or more previously laid tiles.
The orientation of the tiles may be chosen freely. (That is, the illustrations may face sideways or upside down, as well as right-side up.) You should arrange the tiles so that the tiles match the landscapes on the edges of neighboring tiles or the border of the board: meadows to meadows, water to water, etc. Nevertheless, placing tiles so that one or more edges do not match is allowed! Each two neighboring edges which do not agree, count as 1 misconnection. Also, each edge that doesn't match the adjacent edge of the border of the board counts as 1 misconnection.
You should also place streets so that they connect to the streets on neighboring tiles as much as possible. Important: If an edge with a street borders an edge without a street (or the border of the board), it does not count as a misconnection! (Landscapes which do not match, do still count as misconnections.)
Tip: All streets end only on meadows and run only in the shape of a curve.
Example: Tiles A, B, and C are placed correctly. Between B and C, as well as between C and border D, are misconnections, but they are permitted. There is no misconnection between A and B. Tile E may not subsequently be played as depicted, because it does not abut any edges of the previously played A, B, and C tiles.
Further Placement Rules
- Each player may use only one hand for looking for and placing tiles.
- You may move the tiles in the middle of the table, but may not dig around wildly in them.
- Turning over tiles is permitted, because the front and back sides are always different. You may choose freely which side to place on your board.
- You may have no more than 1 tile in your hand at any time.
- You may place the tile in your hand either on your board or back.
- You may not remove, rotate, or move a tile you have placed on your board.
- You may only place tiles on open spaces, not on top of one another.
Jumping Out
You can jump out of the current turn at any time, as long as the timer hasn't run out. You may do so even if you have empty spaces on your board. In order to jump out, simply take the topmost Bonus Chip and place it in front of you. Thereafter, you may not act in that turn!
End of the Turn
A turn ends as soon as all players have jumped out or the timer has run out. If the timer has run out, you must end all actions. You may not take anything else (including a Bonus Chip) nor place anything else. If you have a tile in your hand when the timer runs out, put it back. If you have a Bonus Chip in your hand, you may keep it and place it in front of you. Now, you take score.
Scoring
Each player figures out how many points he has accumulated. Simply go down the front side of the score sheet from top to bottom and enter the points as appropriate. Use Column A for the first turn, Column B for the second, and Column C for the third. (You do not need the back side of the score sheet in the Beginner Game.)
- Each worker (fisherman, shepherd, lumberjack) is worth 1 plus point.
- Each enclosed and mistake-free landscape is worth 2 plus points. Exception: Water landscapes score no points. Note: The little island on the left border of the board naturally counts as a landscape and is worth 2 plus points! Landscapes which include the border of the board count as enclosed on that border. Tip: Landscapes are not separated by streets.
- Each tile with a street is worth 1 plus point. Each street segment on the border of the board counts also 1 plus point. For each connected street (including the border of the board) you receive 1 minus point (for construction costs).
- For a Bonus Chip, you receive plus points equal to the number on it.
- The player with the most active volcanos receives 1 minus point for each of these volcanos. If several players are tied for the most, they each receive the appropriate minus points. Inactive volcanos are ignored on the first turn (see Next Turn).
- For each empty space you receive 1 minus point. For each misconnection you receive 1 minus point. Empty spaces do not cause misconnections, and therefore count as no more than 1 minus point.
All other illustrations on tiles or the border of the board like ships, coaches, fields, etc., are ignored in the Beginner Game.
Example: Katherine has 5 workers (1 fisherman, 3 shepherds, 1 lumberjack) and therefore receives 5 plus points. Her board contains, in total, 6 enclosed and mistake-free landscapes: 4 forests (including the island on the border of the board) and two meadows. She receives 12 further plus points for them. Two landscapes are both enclosed, but are not mistake-free. Other landscapes also contain mistakes. One meadow is not enclosed. The water brings no points.
Katherine has 5 tiles with streets, as well as 1 street segment on the border of the board. She receives 6 points for them. She must subtract 3 points for the 3 connected streets, so in total she receives 3 plus points for her streets. The ship and the coach are ignored. For her Bonus Chip, Katherine receives 2 plus points.
On to scoring volcanos: Katherine has 5 active volcanos. (The two inactive volcanos may be ignored in the first turn.) Peter, her fellow player, has 6 active volcanos on his board. Peter receives 6 minus points, Katherine, on the other hand, receives none.
Katherine receives 1 minus point for the empty space and a further 4 minus points for the 4 misconnections. There are no minus points given for the unconnected streets.
Next Turn
The player who received the most points in the turn just scored gets the Volcano Chip. If there is a tie for the most points, the Volcano Chip is applied to all of them. In the next turn, this player (or players) have their inactive volcanos scored as if they were active volcanos!
In the previous example, if Katherine had had the Volcano Chip, she would have had 7 volcanos in total: 5 active and 2 inactive. She would then have had more volcanos than Peter and would have received 7 minus points.
Place all the tiles and Bonus Chips back in the middle, as at the beginning of the game. Reset the timer to 7 minutes, and start the next turn as before.
End of the Game
After 3 turns, add up the points in Columns A, B, and C. The player with the most points wins the game. In the case of a tie, there are multiple winners.
Advanced Game
The rules of the Beginner Game apply with the following changes and additions:
Game Set-Up
Each player receives a set (marked by the same-colored back side) of three different village tiles (hereafter, simply villages). Place your villages face up on the 3 corresponding spaces on the left side of your world board.
Game Play
At the beginning of each turn, set the timer to 7 minutes as usual. During the turn, you may place your own villages on the right-hand part of your world board, like normal tiles. Placing a village is not mandatory; you may refrain from doing so.
Scoring
The scoring for workers differs from the Beginner Game. There are now three separate scores for fishermen, shepherds, and lumberjacks. You only receive the points for them if you have placed the appropriate village. For the moment, turn over your score sheet to the back side and enter your score for the villages in the top three rows:
- Fishermen's village: Each fisherman is worth 1 plus point.
- Shepherds' village: Each shepherd is worth 1 plus point.
- Lumberjacks' village: Each lumberjack is worth 1 plus point.
The appropriate worker is always depicted on a village once, also worth 1 plus point. If you haven't placed a village, you receive no points for the corresponding worker.
Bonus: The player with the most points of each kind of workers (e.g., fishermen) receives 3 plus points as a bonus. If multiple players tie for having the most, they each receive 3 bonus points. Circle the "+3" on the score sheet. There is never a bonus for having 0 points.
Now add up all the points for all 3 villages, turn the score sheet back to the front side and enter the sum there in the topmost space. Continue with the scoring as usual. Disregard the rest of the spaces on the back side of the sheet. They aren't required in the Advanced Game.
Example: Peter has placed 4 fishermen (including fishermen's village), for which he receives 4 points. Katherine has 6 fishermen (including fishermen's village). Katherine receives 6 points for that, as well as 3 bonus points because she has the most points from fishermen. So, in total, she gets 9 points.
Katherine has 3 shepherds, but no shepherds' village. She receives no points. Peter has placed his shepherds' village and 1 additional shepherd, so that gives him 2 points. In addition, he receives 3 bonus points for having the most points from shepherds (even though Katherine played more shepherds).
Neither Katherine nor Peter placed a single lumberjack, but Katherine, at least, built her lumberjacks' village, while Peter did not. Katherine receives 1 point for that, plus 3 bonus points; Peter gets nothing.
Next Turn
Be sure that you have first put your villages back on their spaces before you put the rest of the tiles back in the middle!
Expert Game
The rules of the Beginner Game and the Advanced Game apply with the following additions:
Game Set-Up
Put the building card so that it's in easy reach of all players. Shuffle all 8 building tiles (hereafter, just buildings), and place them to the side, face down. Turn over as many buildings as there are players (e.g., 3 buildings in a three-player game), and place them face up on the building card. Important: Put the building card somewhere where the buildings won't accidentally be mixed up with the rest of the tiles during the game!
Game Play
At the beginning of each turn, set the timer to 7 minutes as usual. During the turn, you may take at most 1 building and place it on your board. You may only take the building when there are at least 3 tiles (including villages) on your board. There is no requirement to take a building; you may refrain from doing so.
Scoring
Turn over your score sheet to the back side. First, score the workers and villages as in the Advanced Game, bonus included. Then enter the points for the buildings placed as well as those for the stilt house on the left border of the board (see Explanation of the Buildings, below). All illustrations on tiles and also on the border of the board (ships, coaches, etc.) may be relevant to this scoring.
Next Turn
Be careful to put back your villages and buildings before you put the rest of the tiles back in the middle! Shuffle all 8 buildings again, and then, again, turn over the same number of tiles as there are players.
Explanation of the Buildings
Coach Station — Each coach on the same street as the coach station is worth 1 plus point.
Lighthouse — Each ship on the same (enclosed and mistake-free) water landscape as the lighthouse is worth 1 plus point.
Hunting Lodge — Each wild boar on the same (enclosed and mistake-free) forest landscape as the hunting lodge is worth 1 plus point.
Mill — Each agricultural field in the same (enclosed, mistake-free) meadow landscape as the mill is worth 1 plus point.
Stilt House — On the border of Board 1 at the top left is a stilt house. Each island in or on the same water landscape as the stilt house is worth 1 plus point. A stretch of land counts as an island if and only if it is composed of enclosed and mistake-free landscapes, and completely surrounded by water. If a stretch of land includes the outer edge of the border of the board, it does not count as an island.
That which awards 1 plus point is always depicted on the buildings once, also worth 1 plus point. If you haven't placed a building, you receive no points for the corresponding illustration.
Bonus: The player with the most points of one kind of illustrations (e.g., coaches) receives 3 plus points as a bonus. If multiple players tie for most, each receives 3 bonus points. Circle the "+3" on the score sheet. There is never a bonus for having 0 points.
Tip: Pay attention to the fundamental difference between villages and buildings in the scoring. Villages always count for all the tiles on your table. Buildings only count for the specific landscape in which or for the particular street on which it stands.
Total all the points on the back side of the score sheet, turn the sheet over, and enter the sum there in the topmost space on the front side. Then continue the scoring as usual.
Example: Peter placed a hunting lodge in an enclosed and mistake-free forest landscape with a total of 3 wild boars. He receives 3 points for them. Wild boars in his other forests bring no points.
No second hunting lodge was turned over, so no other player can receive points for wild boars. Consequently Peter has the most points for wild boars and receives the 3-point bonus for the scoring of wild boars, thus getting 6 points in total.
Example: The top meadow landscape does not count as an island, because it includes the outside edge of the border of the board. The meadow underneath it counts as an island, because it is completely surrounded by water. It is worth 1 point for the stilt house.
The ship is not worth a point towards the lighthouse, because it is in another water landscape.
Other World Boards
The four different world boards provide more variety to the game. Each board has a particular characteristic and varied degrees of difficulty. In principle, all players should always use boards with identical numbers. Note: You can of course change the number of the board after any given turn.
In the Expert Game, additional building scorings for Tavern and Windpump are associated with particular boards (see below).
Tavern — At the upper left of Boards 2 and 3 is a tavern. Each wine barrel on the same street as the tavern is worth 1 plus point.
Windpump — At the bottom right of Board 4 is a windpump. Any lake on the same meadow landscape is worth 1 plus point. A lake is an enclosed and mistake-free water landscape, completely surrounded by land. If a water landscape includes the outer edge of the border of the board, it does not count as a lake.
Bonus: 3 bonus points are also provided for the tavern and the windpump.
Solo Game
So you want to play Mondo Sapiens, but there's no one to play with at the moment? Then just play alone! The rules of the Beginner Game apply with the following changes:
Game Set-Up
The Bonus Chips and the Score Sheet are not needed; put them in the box. The Volcano Chip counts in the solo game, so put it next to your board.
Now take at random 2-3 tiles (depending on the world board). Use only tiles with streets and without volcanos (neither active nor inactive). If you draw tiles without streets or with volcanos, replace these with other tiles until you have 2-3 appropriate tiles. Place them, street side face up, oriented at random, on the 2-3 spaces of the board which are slightly highlighted.
Mix the remaining tiles well. They should not be presorted. Then choose a degree of difficulty and set the timer accordingly:
- Easy — 10 Minutes
- Moderate — 6 Minutes
- Hard — 5 Minutes
Placing Tiles
All placement rules apply in the solo game! You may freely choose next to which of the 2–3 starting tiles you place your first tile, and also for each succeeding tile, you may decide anew next to which tile you place it.
Scoring
The solo game is not about collecting plus points, but as few minus points as possible. You receive no plus points, neither for workers nor for landscapes. But all minus points count as usual for empty spaces, misconnections, or volcanos, in which each volcano automatically counts as 1 minus point, active or inactive. If you have 1 or 2 connected streets, you score no minus points for them. If you have more than 2 connected streets, each further connected street counts as 1 minus point.
You win the game if you do not exceed the following numbers of minus points:
- Easy — 3 Minus Points
- Moderate — 2 Minus Points
- Hard — 1 Minus Points
The solo game consists of only 1 turn. (Of course, you can play as many games in a row as you like.)
Variants
Handicap — If particularly experienced players are at the table, you can ask them to take on this handicap to equalize play. You play without the volcano chip. Instead, every player with a handicap receives 1 minus point for each active volcano they have. The players without a handicap receive no minus points for volcanos. Inactive volcanos bring no minus points. You can increase the handicap further by making inactive volcanos also worth 1 minus point each.
Shorter Time — Experienced players may shorten turns to 6 or even 5 minutes.
Children — If children younger than the recommended age are playing, use the Beginner Game with longer turns, and simplify the scoring.
Hidden Time — Place the timer so that no one can see the time remaining.
Further variants may be found on the Internet at www.mondo-game.com
Tips
- Before playing, look over the different tiles at your leisure. They depict 1 or 2 landscapes in different combinations, but not all possible combinations do exist. There are no tiles with 3 landscapes.
- All streets end only on meadows and run only in the shape of a curve.
- If you get stuck, move on to another spot. The tile you're looking for could already be on another player's board.
- Sometimes it makes sense to place tiles with misconnections, when the points gained outweigh the penalties.
- When the timer is about to run out, it's sometimes better to leave one or another space empty and grab a higher-value Bonus Chip.
- As soon as you have some experience, pay more attention to your fellow players in order to see when you've got a good chance at a bonus.
- In the Expert Game, it can be sensible to concentrate on a couple of villages and buildings to have a better chance at picking up bonus points.