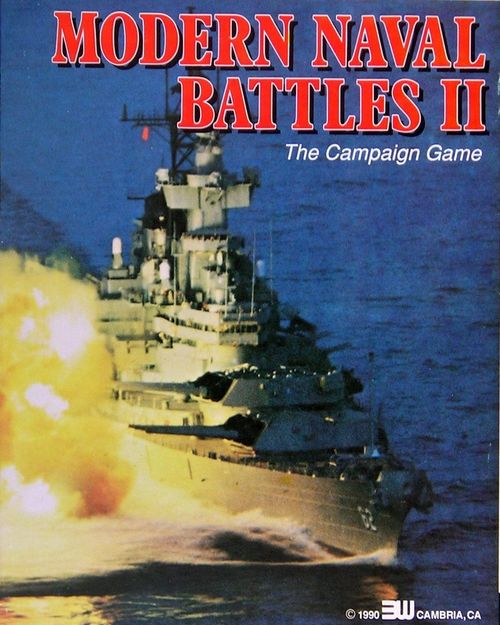
Modern Naval Battles II: The Campaign Game
Modern Naval Battles II: The Campaign Game Rulebook
Table of Contents
Table of Contents
- 1. Introduction
- 2. Components
- 3. Definition of Terms
- 4. Outline of Play & How to Win
- 5. Prepare for Play
- 6. Campaign Game Sequence of Play
- 7. Battle Turns
- 8. Non-Combatant Ship Types
- 9. Naval Missions
- 10. Using the Victory Point Track
- 11. Campaign Game Victory
- 12. Advanced Game Rules
- 13. Optional Rules
- 14. Larger Campaigns
- Strategy Tips and Reminders
- Quick Reference: Integrated Sequence of Play
- War Zone Mission Tables
- Special Circumstances Die Table
1. Introduction
Cold War Naval Battles V: The Campaign Game is an expansion for the Cold War Naval Battles series of card games. In this expansion kit, naval warfare is no longer fought between Task Forces comprised of random nationalities. Now it's head-to-head warfare in real Naval Zones between Allied and Soviet fleets as they perform Missions in their efforts to obtain 'sea-superiority.'
Note that The Campaign is a great two-player or two-team game between an equal number of players.
Important: you must have a copy of Cold War Naval Battles (a.k.a. 'the basic game') in order to use the additional material in this expansion kit. You'll also need expansions II and III (Action! and Reinforcements!) to get the full flavor of the Campaign Game. Expansion IV (The Air Module) can also be added in, if desired, as can Expansion VI with innumerable additional ships to choose from.
2. Components
Cold War Naval Battles V: The Campaign Game consists of the following parts:
- This rules booklet
- 18 Non-Combatant Ship cards (Civilian on one side, Military on the other)
- 8 Flag Officer cards
- 7 War Zone Displays (each can accommodate two players)
- 36 one-sided markers
- 28 back-printed counters
2.1 Assembling the Pieces
You will want to make multiple copies of the last page of this rules booklet. It has two templates on it and each can be used for keeping score during a game.
Make one copy each (front and back) of the two sheets of Non-Combatant Ship cards. Cut them apart and set them aside.
Make one copy each of the three sheets of a dozen markers each (front only). Cut them apart and set them aside, too.
Likewise, make one copy of the two-sided sheet of Flag Officer cards. Cut them apart and set them aside with everything else.
The sheet with the counters shows both their fronts and backs (side-by-side). These should be carefully mounted, front to back, on some thin paper, like cardboard, before being cut apart and stored in a zip-lock bag (to keep 'em fresh – that's a joke, people). Thus, after you cut them apart, they should be two-sided 'flippy' counters for the various Tracks used in the game.
The seven War Zone Displays each consist of two pages. Tape them together so that they both face the same way and the numbered Point Tracks are on the outside edges. That is, so that the Mission Table page is on the left side and the page with the map on it is on the right side.
2.2 Supplemental Rules Booklet
Unlike previous CWNB Expansions, this rules booklet supplements the one you're using from any of the previous levels of the game. Where there are any contradictions, the information in this rules booklet always takes precedence.
3. Definition of Terms
In The Campaign Game, there are certain key terms that must be understood. Make yourself familiar with them:
Advantaged Player: This is determined for each War Zone by the location of the War Zone Status marker. A player is the Advantaged Player if the War Zone Status marker resides in any of his Edge, Advantage, or Dominance columns. The Soviet player is always considered the Advantaged Player when the marker is in the Even column. The other player in that War Zone is known as the 'Disadvantaged Player.' Essentially, the Advantaged Player in each War Zone 'goes first.'
Allied: This is the side in the game representing all of the nations opposing communist bloc expansion, in particular the NATO (North Atlantic Treaty Organization) countries. Their color in the game is blue.
Mission: An assigned objective from which 'Mission Points' are awarded based upon a player's level of success in achieving that objective. Note that these Mission Points are awarded in addition to those points scored for sinking enemy ships.
Points: The score that is earned by performing Missions and sinking enemy ships. If not 'spent,' they are 'banked' and become 'Victory Points.'
Refit: The repair (removal) of Damage cards from ships not committed to battle during the current Campaign Game Turn.
Soviet: This is the side in the game representing the various communist bloc countries, in particular the Soviet Union (Russia) and its Eastern European allies. Their color in the game is red.
Victory Points: 'Banked' points saved at the end of a Campaign Game Turn that are counted toward winning the game.
War Zone: An ocean, sea, or group of seas that were potential 'hot spots' at the height of the Cold War.
4. Outline of Play & How to Win
A Campaign Game of Cold War Naval Battles is played over a number of Campaign Game Turns (up to nine), during which players are assigned Missions, teammates can discuss strategy and transfer cards to one another, decide which ships will go into battle and which will 'return to port' and Refit, and then conduct a prescribed number of Battle Turns.
Each Battle Turn is the same as a series of two standard Player Turns from Cold War Naval Battles (i.e., one Soviet and one Allied) as per the CWNB Rule 6, Sequence of Play.
Points are awarded based upon a player's success in conducting his Mission and/or thwarting his opponent's Mission, plus the usual points received by both sides for sinking enemy ships.
Each player places a 'x1' and a 'x10' ("times one" and "times ten") Point counter on their respective appropriate boxes on each player's Campaign Game Point Track. The amount of points that players begin the game with are indicated at the top of the War Zone Display.
For example, in the South Pacific War Zone, the Allied player begins with 80 Points, and so places the blue 'x1' marker in his '0' box and the 'x10' marker in the '80' box. The Soviet player begins with 100 Points and so would place the red 'x1' marker in his '0' box and then flips the 'x10' marker over to its '+100' side and places that in the '00' box.
When a player has 73 points, then his 'x1' marker will be in the '3' box and the 'x10' marker will be in the '70' box. When a player has 128 points, then his 'x1' marker will be in the '8' box and the 'x10' marker will be flipped over to its '+100' side and placed in the '20' box (indicating 100 + 20). Players should get used to adding and subtracting with these Point markers; they'll make play a lot easier.
Game Aid markers are kept handy (enough are provided on the sheet to support up to four War Zones; if you have more than that many in play at once, you'll need to print another set of them).
Important: Remove all of the 'Additional Ship' cards from the Action deck (unless you are using Optional Rule 13.5). They are not used in The Campaign Game. Instead, ship reinforcements are 'purchased' with Points.
These preparations made, play is ready to begin with Step 1 of Campaign Game Turn 1.
5. Prepare for Play
Players divide themselves into two teams of equal size. (Note that The Campaign Game is an ideal 2-player version of CWNB.) One side is the 'Soviet' team and the other is the 'Allied' team.
One set of CWNB Action cards can facilitate up to six players (i.e., three 'War Zones') at a time. We strongly recommend that the CWNB II Action Cards Expansion be included. If you have more than three War Zones in play simultaneously (i.e., you have more than six players), you'll need to print out an additional set of Action cards for every two or three War Zones in play. A Draw Pile is reshuffled whenever it is exhausted and also when a new Campaign Game Turn is set up.
In addition to the Ship cards from the basic CWNB game, be sure to have all of the Expansion Set III ships available for play. The Campaign Game requires numerous ships from both sides to choose from when organizing their Task Forces.
5.1 Procedure
Players are paired opposite each other across a rectangular table. Each pair of opponents are assigned a War Zone (such as the Persian Gulf, North Atlantic, etc.) and are given the appropriate War Zone Display to place between them to one side (with the Allied player sitting closest to the Map; thus the War Zone Display will be off to the Soviet player's left and the Allied player's right side). Players then perform the following:
Place a War Zone Status marker on the word 'Even' on the Missions Chart on its red (Soviet Advantaged) side.
Place a Battle Turn counter and an appropriate Campaign Game Turn marker (see 5.2) on their respective tracks on 'Turn 1.' The Battle Turn counter should start on its red side to indicate that the Soviet player is the 'Advantaged Player' and will be taking the first Battle Turn. You may flip it on future Campaign Game Turns to remind you when the Allied player is the 'Advantaged Player.'
5.2 Game Length
Important: Players must agree before starting the game as to how many Campaign Game Turns will be played (there is no 'set number,' but the maximum game length is nine Campaign Game Turns).
Four or Five Campaign Game Turns is right for an average length Campaign Game. Also, see The Campaign Game Optional Rules (13.1) for playing with a variable end-game turn. When this has been decided, select the appropriate Campaign Game Turn counter to help you remember when or how you agreed to end the game and place it in the '1' box on the Campaign Game Turn track.
6. Campaign Game Sequence of Play
With setup complete (5.1) and the game length agreed upon (5.2), the first Campaign Game Turn is ready to commence in each active War Zone. Note that all of the action in each War Zone should be conducted concurrently.
Each Campaign Game Turn follows this Sequence of Play:
A. Determine Player Missions. The Advantaged Player (3) in each War Zone throws a die and cross-indexes the result on its Mission Table using the column where the War Zone Status marker is located. This will yield the Missions for both sides in that War Zone for the current Campaign Game Turn.
The Allied Mission is listed first (in blue), versus the Soviet Mission that is listed underneath (in red). Missions in double-lined, shaded boxes and bold print are 'Urgent Missions' and use the boxed Point Values in their Mission Summaries (that are listed below the Mission Table).
Missions are described in greater detail in Rule 9.
B. Determine Special Conditions (Optional). See Campaign Game Option Rule 13.2. All players roll at this time. At the beginning of each Campaign Game Turn after Missions are determined, each player rolls a die to see if his Mission will be conducted under 'Special Conditions.' A result of '1' through '4' means that no Special Conditions apply. A result of either '5' or '6' indicates that the player will consult his side of the Special Conditions Table on the War Zone Display. He then rolls another die and applies its outcome to the Special Conditions table to determine the exact Special Condition that will be applied during that Campaign Game Turn. The explanations for the various Special Conditions are given in Rule 13.2.
C. Battle Preparations. This is a loosely structured 'free flowing' step where all players simultaneously prepare for their upcoming Battle Turns. During this step, all of the items below should occur in, roughly, the order listed. This step should not last longer than 10 minutes (except during the first Campaign Game Turn, where players must purchase their initial Task Forces).
-
Team Summits. If there is only one player on each side, this step can be skipped. If not, the two teams may want to separate so that they may then exchange information and discuss strategies without the other team hearing. Players should inform their teammates of their impending Missions with an eye towards how particular Ship and Action card purchases and transfers will optimize each player's chances for success in their respective War Zones.
-
Purchase Cards & 'Bank' Victory Points. On the first Campaign Game Turn only, players receive an allotment of 'At Start Buy Points' as indicated on the Mission Summaries on each War Zone Display. Those points are used to purchase the Ship and Action cards to begin play with. These values represent the designer's appraisal of the balance of forces in those areas during this time period. Cards are purchased as described below.
Should there be a conflict over who gets to purchase Action cards before whom, go in order from the player with the fewest Points 'Banked' to the player with the most Points 'Banked;' i.e., the 'winning' player goes last.
On all subsequent Campaign Game Turns, players can only spend the points on their Point Track (earned during the previous turn) if they want to purchase any Ship or Action cards this turn. These will be added to those Ship and Action cards remaining from the previous turn and will be added to that player's Task Force or card hand.
All unspent points are 'Banked' as Victory Points. That is, they are noted on a separate piece of paper (you can make a copy of the last page of this rules booklet, it has two tables for this). This is where the totals for each team determine which side has won the war (and, specifically, which players contributed to either victory or defeat).
Thus, all Point Tracks will be reset to zero at this time. That is because all points will be accounted for: either in purchasing new Ship and/or Action cards or in being 'Banked' as Victory Points at this time.
Purchase Costs. The Purchase Costs are indicated on each War Zone Display and reproduced here. All Ship cards purchased on the First Campaign Game Turn have a Purchase Cost equal to their Point Value. On every other Campaign Game Turn, all Ship cards have a Purchase Cost of double their Point Value.
Draw Card Costs (Action cards) – Buy Cost on Campaign Game Turns:
| Card Types | Turns 1 & 2 | Turns 3 & 4 | Turns 5 & 6 | Turns 7+ |
|---|---|---|---|---|
| ECM, Evasive Maneuvers, Crash Dive, Bounce, Jink, or Mine Sweeper | 1 | 2 | 3 | 4 |
| Air Cover, ASW | 2 | 4 | 6 | 9 |
| Land Based Air Strike*, Land Based ASW, Land Based Air Cover, Carrier Crew Efficiency, Damage Control, or Mission Briefing | 4 | 6 | 9 | 14 |
| Gun*, Missile*, Torpedo*, or Minefield Attack* | 1/2 Value (round each down) | 1/2 Value (round each down) | 1/2 Value (round each down) | 1/2 Value (round each down) |
| Retreat, Surprise*, Air-to-Air Refueling | 6 |
Purchase Limitations: There are certain card purchase limitations as listed below:
- There is no limit on the number of Ship cards that may be purchased each turn. Only Ship cards not in play, and Action cards not already in a player's hand, may be purchased. Sunk ships may not be purchased or return to play in any way.
- No more than five (5) Action cards total may be purchased by each player each Campaign Game Turn (exceptions: see 13.2.6 and 13.2.9). Note that the Action Card Costs Chart also indicates that there is a further Purchase Limit of one per Campaign Game Turn for certain types of Action cards. A maximum of one (1) of each type may be purchased per Campaign Game Turn unless denoted above by an asterisk (*).
- Additional Ship, Non-Combatant, Tactics, and Bad Luck cards may not be purchased.
-
Purchase Restrictions. A player may never spend Banked Points to purchase Ship and/or Action cards, nor may these cards ever be 'cashed in' for points (even when the game ends).
-
Hand adjustment and Draw. Each player's card hand is set as described in Rule 7.1, Step 1 below. Players may transfer cards to their teammates, either Ship cards from their Task Force or Action cards from their hand (and those can be either new purchased cards or ones held over from the previous Campaign Game Turn). Any player on a team can be the recipient of any number of transferred cards (exception: see 13.3). Transfers should be arranged during Step C.1, the Team Summits.
-
Battle Commitment. Each player takes the ships in their Task Force and secretly divides them into two piles that all players will reveal to each other simultaneously.
This step can be done concurrently by all players if they're honest enough not to look at their opponent's Task Force set up before completing their own. If that's not the case, then the Disadvantaged Player in each War Zone should set up their Task Force first.
One pile will have face-up ships; these are the ones from that Task Force that are being committed to battle that Campaign Game Turn to perform their Mission and hinder the enemy Task Force opposing them from performing their Mission.
The other pile will have face-down ships; these will sit out the current Campaign Game turn and 'return to port' for a 'Refit.' After being revealed, slide this pile of ships halfway under the owner's Point Track as a reminder of their status. They cannot perform or suffer any attacks during the ensuing Battle Turns and will score points and become repaired after the Mission Winner is determined (see 7.2).
Third, the Disadvantaged player may pre-position any desired Area Defense cards, face-up, in front of his Task Force to meet the onslaught of the Advantaged Player's first Battle Turn by playing these Action cards from his hand. Note that each of these cards does count as part of the Disadvantaged Player's initial hand (from the first step, above); these cards are not replaced at this time. By playing Area Defenses at this time, the Disadvantaged Player will have to conduct his first Battle Turn 'short handed.'
D. Conduct Battle Turns. See Rule 7.
7. Battle Turns
Battle Turns for each player in each War Zone are conducted as the normal Cold War Naval Battles Sequence of Play (6) from the other rules booklet.
Each War Zone conducts four alternating Battle Turns per player (exception, see Optional Rule 13.2), with the Advantaged Player (3) in that War Zone going first. Important: All Battle Turns must always be resolved, even if one of the Task Forces is eliminated!
Players may not aid or support each other in any way during the Battle Turns.
Important: Players must keep their Point Tracks current during the Battle Turns. That is, any points earned for sinking enemy ships or from achieving a Mission Goal should be reflected immediately upon that player's Point Track. When the Mission has a 'Point Pool,' be sure that no more points are awarded from it than it has!
Designers' Note: During the Battle Turns, think of each War Zone as its own separate two-player, four-turn mini-game of Cold War Naval Battles.
7.1 First Battle Turn Preparations
Before the Advantaged Player conducts the first Battle Turn, both players in each War Zone must prepare their card hands and Task Forces for battle by performing these three steps:
First, players readjust their hand sizes (keeping in mind any Mission Hand Size modifiers that might be in effect). If a player has too many cards in hand, excess cards must be discarded at this time. If a player has too few cards, the balance needed to fill the hand is drawn off the top of the Draw Pile with the Advantaged Player drawing first (as per 5.1 in the Standard Game Rules). When all of the War Zones sharing the same Action card deck have completed this step, shuffle the Draw Pile and Discard Pile together one last time and 'cut' it so that each War Zone has its own roughly equal size Draw Pile, then proceed to the next step.
Second, players set up their Task Forces as per Rule 5.2 in the CWNB rules booklet. Note that submarines can be placed as desired (either in Active or Passive mode) at the start of a Mission. Flag Officers (see 13.4), too, are also placed if desired (and available) at this time.
Non-Combatants may be added to any row of a Task Force (though they're usually safest in the Third Row) when conducting the second step preparing for the first Battle Turn (7.1).
7.2 Concluding the Battle Turns
When the Battle Turns in each War Zone are completed, perform these 'housekeeping' steps in the strict sequence below:
-
Both players may set aside one card (if desired) from their hand for use during the next Campaign Game Turn. All remaining Action cards in a player's hand are discarded.
-
Score Final Mission Points. These would be from 'Point Pool' Points that are awarded at the conclusion of the Battle Turns. Note: Players do not score Points for their own ships that survived the mission!
-
Adjust the War Zone Status Marker by one column in favor of the player who scored the most points this Campaign Game Turn (which should be reflected at this time on each player's Point Track). Do not move this marker if the score is tied.
-
Then both players score points for ships that remained 'in port.' Ships that stayed in port score Points equal to their point value less the value of all the Damage cards attached to them. Note that Crippled ships score zero points.
Many Missions indicate that ships in port only score 1/2 their point value; this means 1/2 value, rounded up, per ship. So, a ship that scores 1/2 its points that has a Point Value of 10 points and had 3 damage would score 4 points (10 – 3 = 7, and half of 7, rounded up, is 4).
Important: the maximum number of Points a player can score for ships in port during a single Campaign Game Turn cannot exceed the total Points earned that turn from the Mission and for sunk enemy ships. Essentially, the best that ships in port can do for your score is to double the Mission Points you earned that turn.
For example, a player earns 25 Mission Points this turn, plus another 13 for sinking enemy ships. Even though he placed 56 points' worth of ships 'in port' prior to that Mission, they will only earn him an additional 38 (25 + 13) Points; the remaining 18 points are disregarded and lost.
After these Points are added to a player's Point Track, repair all of the damage from those ships. That is, discard their damage cards and flip them back from their 'Crippled' sides. (Exception, see 13.2.7, Port Strike.)
-
Reset the Battle Turn Marker to the Advantaged Player '1' Box.
-
If the game is not over, begin a new Campaign Game Turn. If the last Campaign Game Turn has just been completed, see Rule 11 (Campaign Game Victory).
8. Non-Combatant Ship Types
Non-Combatants are generic ships printed back-to-back with a 'Military' vessel on one side (representing military troop transports and supply ships) and a 'Civilian' vessel on the other (representing larger, slower, or otherwise more unwieldy civilian freighters and tankers).
Because they have variable Hits to Sink ratings, Non-Combatants are selected randomly when assigned for a Mission (just shuffle them up and deal out the correct number without looking at them).
At the end of the Battle Turns, after any final Mission Points are scored (note that their Point Value is 'SB' for Scenario Based), all Non-Combatant ships are returned to the unused pile and become available for future Missions. If more Non-Combatants are required than are available, use the CWNB Player Order cards as additional '4' Hits to Sink rated Non-Combatants of the appropriate type.
Note: the Allies have LPH – Helicopter Landing Ships (e.g., the Iwo Jima and Guam) that also double as Military Transports when they are committed in a War Zone where the Allies are conducting a Military Escort Mission. That is, they also score the indicated number of Mission Points (in addition to Points if sunk). If they survive the Mission, they are not removed from play, but remain in that Allied player's Task Force (until transferred or sunk).
9. Naval Missions
Each Campaign Game Turn commences with each side in a War Zone receiving their 'Mission' for that Campaign Game Turn. Basically, a Mission gives each player an opportunity to score 'Mission Points' for performing actions consistent with that Mission. These Mission Points are in addition to those Points normally scored for sinking enemy ships.
Mission Terminology
Mission Player: The Mission Player is the player who has that Mission. The other player is the Non-Mission Player.
Urgent Mission: This is a Mission deemed urgent by the High Command of that side (and one you'd better go all-out to win, as the stakes are higher).
Scenario Based: Missions are marked 'SB' where the point value is determined by the scenario.
Land Targets: These must be imagined as important nearby installations or bodies of troops and/or equipment that naval forces can attack. Important: each attack against Land Targets (i.e., fired 'off the board') does count against a player's Fog of War allotment (6.1.A.2 in the CWNB Rules booklet)!
Reminder Markers: Many Missions will modify a side's Fog of War die rolls and hand size for the duration of that Mission. When this occurs, place one of the handy Reminder markers in front of that player and remove it at the end of all the Battle Turns for that Mission.
9.1 General Mission Rules
Some Missions are in bold print inside double-bordered, shaded boxes on the Mission Table; these are designated as 'Urgent.' These Missions are worth more points as indicated by the adjacent values in boxes on the Mission Summaries on each War Zone Display.
Evasive Maneuvers cards (8.31 in the CWNB rules booklet) cannot be used as a Point Defense against an attack upon a Civilian Non-Combatant. Also, a Task Force that includes any of these ships may not Retreat. These rules are printed on the Civilian Non-Combatant ship cards as a reminder.
Some Missions may vary the size of a player's hand above or below seven cards for the duration of that entire Campaign Game Turn as indicated on the individual Mission Summaries.
Some Missions may modify a player's Fog of War die rolls for the duration of that entire Campaign Game Turn as indicated on the individual Mission Summaries.
Some Missions create a 'Pool' of Points (the 'Point Pool') that will be divided between the two competing players in that War Zone at the conclusion of that Campaign Game Turn's Battle Turns. One player scores Mission Points from the Point Pool according to the Mission Summary; the other player receives all of the Points left unclaimed by the first player. Neither player can earn more of these Mission Points than those that are available in the Point Pool. Points scored for sinking enemy ships are independent of the Point Pool.
In addition, score the Damage Value of all Gun Attacks fired at Land Targets after the enemy Task Force is eliminated or while it is Retreating. Note that these 'shore bombardment' Mission Points are separate from the Point Pool and the total Points earned from them may not exceed the Point Pool value!
9.2 Military Escort vs. Raid
The Military Escort Mission Player scores the indicated number of Mission Points for each Military Non-Combatant ship that survives (less the value of any Damage cards it might have) through the end of all the Battle Turns. Penalties and restrictions are as indicated beneath that War Zone's Mission Table.
The Raiding Mission Player scores the indicated number of Mission Points for each Military Non-Combatant ship sunk by the end of all the Battle Turns. Penalties and restrictions are as indicated beneath that War Zone's Mission Table.
9.3 Civilian Escort vs. Raid
The Civilian Escort Mission Player scores the indicated number of Mission Points for each Civilian Non-Combatant ship that survives (less the value of any Damage cards it might have) through the end of all the Battle Turns. Penalties and restrictions are as indicated beneath that War Zone's Mission Table.
The Raiding Mission Player scores the indicated number of Mission Points for each Civilian Non-Combatant ship sunk by the end of all the Battle Turns. Penalties and restrictions are as indicated beneath that War Zone's Mission Table.
9.4 Sea Superiority vs. Sea Superiority
Both Players score Mission Points from the indicated Point Pool. In the case of a tie (where the Point Pool is split evenly), any odd amount is lost (i.e., splitting 45 Points 'evenly' gives each side 22 Points). The 'Mission Winner' is the player who scored the most points for sinking enemy ships and for the enemy Retreating during the Mission.
Important 'Active Submarine' Rules: During each player's Dive! Dive! Step (6.1.A.5 in the CWNB Rules booklet), instead of submarines going from Active to Passive, it's the other way around; that is, any Passive submarines in that Task Force become Active. If a player has the Sneak Attack Tactic card in play, his Task Force is exempt from this rule, but his Submarines must become Active when they attack (i.e., they function normally for submarines in lieu of almost always being in Active mode due to this rule).
9.5 Sea Superiority vs. Holding Action
The Sea Superiority Mission Player scores the indicated number of Mission Points at the end of each of the Holding Action Mission Player's Battle Turns in which the Holding Action Mission Player's Task Force is eliminated (note that his Passive submarines are considered 'eliminated' for this purpose). Bonuses and Retreat Restrictions are as indicated beneath that War Zone's Mission Table.
Carrier Strike Missions require the Mission Player to commit at least one Aircraft Carrier to battle that Campaign Game Turn (i.e., it must be set up as part of his Task Force; see 7.1). Similarly, Submarine Strike Missions require at least one submarine capable of launching missiles. If that player cannot (or will not) commit at least one of that required ship type to battle, then adjust the War Zone Status Marker by one column against that player and re-roll for a new Mission (on that new column) for that War Zone.
The Holding Action Mission Player scores the indicated number of Mission Points at the end of each of his own Battle Turns in which his Task Force has not been eliminated (note that his Passive submarines are considered 'eliminated' for this purpose). Penalties and restrictions are as indicated beneath that War Zone's Mission Table.
9.6 Invasion vs. Holding Action
The Invasion Mission Player scores the indicated number of Mission Points from the Mission Point Pool at the end of each of his own Battle Turns for each of his surviving Military Non-Combatant ships (less the value of any Damage cards they might have) if the enemy Task Force is eliminated (note that his Passive submarines are considered 'eliminated' for this purpose).
The Holding Action Mission Player scores all of the Mission Points unclaimed from the Invasion Mission Player's Point Pool. Penalties and restrictions are as indicated beneath that War Zone's Mission Table.
9.7 Carrier Strike vs. Engage
The Carrier Strike Mission Player scores the indicated number of Mission Points from the Point Pool for each successful Carrier Air Strike against Land Targets. (Successful Surprise Attack Carrier Air Strikes against Land Targets score double points.) Penalties and Retreat restrictions are as indicated beneath that War Zone's Mission Table. Note: Land Targets are not protected by a friendly Retreat card. Note that Carrier Crew Efficiency, Mission Briefing, and Surprise Attack cards will greatly improve your scoring chances in this Mission.
The Engage Mission Player scores all the unclaimed Mission Points from the Carrier Strike Mission Player's Point Pool. Bonuses and Retreat restrictions are as indicated beneath that War Zone's Mission Table.
9.8 Submarine Strike vs. Engage
The Disadvantaged Player may set up (7.1) with his submarines in Passive mode.
The Submarine Strike Mission Player scores Mission Points from the Point Pool equal to the total Damage Value of all his submarine-launched Missile Attack cards fired at Land Targets. (Successful Surprise Attacks against Land Targets score double points.) Penalties and Retreat restrictions are as indicated beneath that War Zone's Mission Table. Note: Land Targets are not protected by a friendly Retreat card.
Crash Dives (8.36 in the CWNB Rules booklet) are still allowed and are performed normally.
Important: The Submarine Strike Mission Player may only take submarines on this Mission. No surface ships are allowed in his Task Force this Campaign Game Turn!
The Engage Mission Player scores all the unclaimed Mission Points from the Submarine Strike Mission Player's Point Pool. Bonuses and Retreat restrictions are as indicated beneath that War Zone's Mission Table.
10. Using the Victory Point Track
Points are added to a player's Point Track throughout each Campaign Game Turn (including during the Battle Turns). They are added for enemy ships that are sunk and for friendly ships that are not committed to battle (i.e., 'back in port' for a 'Refit'). Points are also awarded for successfully performing Mission activities such as having Non-Combatants survive or striking Land Targets.
Points are subtracted from a player's Point Track when spent to purchase Ship and Action cards or when 'Banked' into Victory Points (6.C.2) – at which time they are added to their team's Victory Points (see 11).
Procedure: Each time points are added to or subtracted from a player's Point Track, adjust the 1s and 10s markers accordingly to reflect the new Point Total. When Points are 'Banked,' reset the Point Track to zero and add those Points to the team's Victory Point total (which is recorded on the Victory Point Record Sheet). Important: 'Banked' Points (i.e., 'Victory Points') can never be 'withdrawn' and spent later. 'Banked' Points are 'for deposit only' into Victory Points.
11. Campaign Game Victory
At the end of the agreed-upon final Campaign Game Turn, all players 'Bank' any points remaining on their Point Tracks. Afterward, Bonus Points are awarded to one side or the other in each War Zone. Simply look at where the Advantage marker rests and cross-index that with the 'End' row on the Mission Chart. That will indicate which side scores how many end-game Bonus Points for their overall performance in that War Zone.
No Campaign Game can ever exceed nine Campaign Game Turns in length! At the completion of the ninth Campaign Game Turn, the game is automatically over.
The scores are then totaled up and a winning side is determined. Individual player victories can be assessed from the various War Zone scores, but the game is won or lost by the entire team.
Important: Unlike in the standard Cold War Naval Battles Card Game paradigm, players do not score Points for their surviving ships at the end of the game!
The team with the higher score wins the game. To determine how they affected the 'war,' subtract the other team's score from theirs and consult the table below:
| Type of Victory | Point Difference | 'Historical Description' |
|---|---|---|
| Pyrrhic | 1 to 40 | Hope that your land forces did better than your navy. |
| Tactical | 41 to 80 | Your side gained the upper hand at sea, but not enough to influence the larger war on the land. |
| Marginal | 81 to 120 | Your side has some influence upon the success of your land forces and will receive some concessions at the peace table. |
| Decisive | 121+ | Largely due to your efforts, the war was won and your side made significant gains in readjusting the balance of power. |
12. Advanced Game Rules
All Advanced Game Rules from whatever version of Cold War Naval Battles you're using should be used in The Campaign Game.
13. Optional Rules
All Cold War Naval Battles Optional Rules remain optional in The Campaign Game. Exception: the Team Game (13.2), obviously, cannot be used in the Campaign Game. We highly recommend using the Tactics and Bad Luck cards, in particular.
In addition, you may select any or all from among the following Campaign Game Optional Rules to use:
13.1 Variable End Turn
If you don't know 'how long the war will last' (i.e., what the last Campaign Game Turn will be), it can be determined randomly. Simply roll a die at the end of each Campaign Game Turn beginning on Turn 3 (or 2 for a shorter game, or 4 for a longer game – again, you'll have to agree upon this before commencing play and select the appropriate Campaign Game Turn counter). If the result is '6' or greater, the game has ended.
Each Campaign Game Turn after the agreed-upon turn number, add one (+1) to the die roll.
So, for example, you've agreed upon Turn 3 to start rolling for the end game (i.e., it would end that turn on a roll of '6'). On turn 4 you would add one (+1) to the End Game die roll (i.e., it would end that turn on a roll of '5' or '6'). On turn 5 you would add two (+2) to the End Game die roll; on turn 6 you would add three (+3), and so on.
13.2 Special Conditions
The Special Conditions Table on each War Zone Display is used as described in Step B of the Sequence of Play (Rule 6). The explanations for the various Special Conditions are:
13.2.1 Bad Weather. This Special Condition affects both Task Forces. All Intercept, Air Cover, Air Defense, Air Strike (Carrier, Land Based, and Bomber), plus ASW To Hit, and Fog of War die rolls, are reduced by one (–1).
If both players roll Bad Weather, then no Air Strikes or ASW operations are allowed at all and the Fog of War die rolls are reduced by two (–2). In this case, a Carrier Strike Mission would be re-rolled without the one column shift penalty.
Keep a Weather Effects Reminder chit between the opposing Task Forces affected to remind them of this status during this Campaign Game Turn. Turn it sideways so that both sides can read it.
13.2.2 Close Range Battle. The Disadvantaged Player may not set up any Area Defense cards during the Prepare for Battle Step, nor can the Advantaged Player during his first Battle Turn. Put a pink Reminder marker near the Battle Turn Track and remove it at the completion of the first Battle Turn.
13.2.3 Long Battle. The number of Battle Turns for each side in this War Zone is increased by one (+1). This is cumulative with any other Special Condition the other player might roll that affects the number of Battle Turns in this War Zone during this Campaign Game Turn. Put a dark green Reminder marker near the Battle Turn Track and remove it at the completion of this Campaign Game Turn.
13.2.4 Long Range Battle. The number of Battle Turns for each side in this War Zone is increased by one (+1). This is cumulative with any other Special Condition the other player might roll that affects the number of Battle Turns in this War Zone during this Campaign Game Turn.
13.2.5 Nearby Air Bases. This Campaign Game Turn's Mission is being conducted close to your air bases on land. As a result, you may add one (+1) to all of your Chance to Hit die rolls for your Land Based Air Strike, Air Cover, ASW, and Bomber Strike cards (only non-Land Based activities do not receive this benefit). Place an appropriate colored Reminder marker in front of you for the duration of this Mission.
13.2.6 Prepared. All your damaged ships are immediately repaired and available for active duty this Campaign Game Turn (if desired). In addition, you may purchase up to seven Action cards this turn (instead of the usual five).
13.2.7 Port Strike! You may conduct an immediate attack upon the enemy's 'home port' in this War Zone. You may either:
- Conduct a special 'Air Strike' against each and every ship (including submarines) the opponent has in that War Zone. On a roll of '1,' that ship is hit and sunk (unless it is only Crippled, see 12.7 in the CWNB Rules booklet). Enemy ships sunk in this manner score Points immediately which must either be spent or 'Banked' during the next Step. Action cards may not be played to modify the attack rolls or their outcomes. Large ships are sunk when hit, they are not merely 'Crippled.'
- Designate that the enemy 'port facilities are damaged' and hence can make no repairs to ships that remain there during this Campaign Game Turn.
- Designate that the enemy 'port is being mined and harassed' and hence any enemy ships that remain in port this Campaign Game Turn will only score half the Points they otherwise would. (Note that if the enemy ships are already only scoring half their value because of their Mission this turn, it is halved again to only one-quarter of their value, but all fractions are still rounded up for each ship.)
13.2.8 Priority. A gift from the Top Brass allows you to purchase up to three of your Action cards this turn for half price (rounded up for each card). However, you may not transfer any cards to other War Zones this Campaign Game Turn.
13.2.9 Rushed. You may not trade (give or receive) any Ship cards this Campaign Game Turn and may only purchase a maximum of three Action cards (instead of the usual five). In addition, you may only purchase a maximum of one Ship card (except on the first Campaign Game Turn, of course, where you must purchase your entire starting Task Force).
13.2.10 Short Battle. The number of Battle Turns for each side in this War Zone is decreased by one (–1). This is cumulative with any other Special Condition the other player might roll that affects the number of Battle Turns in this War Zone during this Campaign Game Turn. Put a red Reminder marker near the Battle Turn Track and remove it at the completion of this Campaign Game Turn.
13.3 Transfer Limitations
You'll need to envision a bit of geography for this, but card transfers between War Zones are only unlimited between adjacent War Zones. War Zones that are farther away have a more restricted capacity as shown in the tables below. This transfer limit works in both directions, so if I can send you 3 cards, you can also send me 3 cards during that same Campaign Game Turn.
To determine which Table to use, roll a single die. Use the first Table on a result of '1' or '2,' the second Table on a result of '3' through '5,' and the last Table on a result of '6.'
Gap: the three War Zone distance charts (Panama Canal closed / Suez Canal open for the first table; Panama Canal closed / Suez Canal closed for the second; Panama Canal open / Suez Canal open for the third) are printed on page 33 of the source PDF and were not transcribed in this file. Their numeric matrices (U = unlimited; # = number of cards; # / # = Allied / Soviet distance, Allies may use the Panama Canal) must be added from that page before this section is complete.
Note from the source: when a player transfers their Flag Officer card to a teammate, that counts as a card transfer under these limits; the receiving player then has the Flag Officer in their War Zone.
13.4 Flag Officers
Each team starts with one Flag Officer in each War Zone in play. During the Battle Commitment Step (C.4), each player may designate one committed surface ship as the 'Command Ship' for his Task Force by placing a Flag Officer card underneath it (flush to its right side) so that its text can be read in both directions.
- Submarines may not be designated as a Command Ship.
- A Task Force cannot have more than one Flag Officer present.
During Battle Turns: The surface ship with the Flag Officer functions as a Command Ship only while it is not sunk, crippled (12.7), or critically damaged (12.5). If it is sunk, crippled, or critically damaged, it no longer functions as a Command Ship. In addition, if the Command Ship is sunk, the Flag Officer is removed from play for the remainder of the game.
When a Task Force has a 'functioning' Command Ship:
- During that player's Adjust Formation Step (A.3), an additional ship move may be made (moving the same ship twice is permitted).
- At the end of that player's Adjust Ordinance Step (C.2), one non-Bad Luck card just drawn may be immediately discarded and replaced.
When a Task Force has/had a Command Ship this Campaign Game Turn but it is no longer 'functioning:'
- The above two benefits are lost.
- No ships may be moved during that player's Adjust Formation Step (A.3).
- It costs one Fog of War allotment to place an Area Defense card for that fleet and all its Area Defenses must be placed face-up.
Designers' Note: If your Flag Officer is thus removed from play, perhaps a teammate will transfer their Flag Officer card over to you. Note that does count as a card transfer when using Transfer Limitations (13.3), and then that player won't have a Flag Officer in their War Zone!
13.5 Friction of War
To simulate the 'friction of war' (that is, those fateful things that cannot be predicted that occasionally affect one's plans in battle), shuffle the Additional Ship cards back into The Deck. They do not perform their Basic Game duty of awarding players 'free ships,' but instead become 'jokers' that players may use as follows:
- Each Additional Ship card may be played to re-roll any single die. The decision to make this re-roll occurs after all the die roll results engendered from that single platform or card are known but before the next platform, card, or other activity takes place. Note that a single die can be re-rolled any number of times (depending on how many Additional Ship cards are played back-and-forth to keep re-rolling it) and only the final result is the one that applies. Note that 'Jink' and 'Bounce' cards are played in lieu of a die roll, hence those 'attacks' cannot be 're-rolled.'
- Each Additional Ship card may be played to simply add 2 Points to that player's Point Track. (Yes, these Points are counted towards determining the Mission 'winner' for that turn, see 7.2.)
- Can be 'Banked' for 5 Victory Points at the same time that ships in port are scored (7.2.4). (No, these points are not counted towards determining the Mission 'winner' for that turn.)
- May order the presence (or absence) of a Flag Officer in each specific active War Zone.
- Allow a re-roll for Special Conditions (see 13.2) for either side.
If an Additional Ship card is the one kept between Campaign Game Turns (see 7.2.1), it may be played to:
- Purchase a single ship for its Point Value (instead of the usual double cost) during that step (6.C.2).
- Can be used to make unlimited card transfers to and from that player's War Zone (with every other War Zone) that Campaign Game Turn.
14. Larger Campaigns
Since there are seven War Zones, you could get a large campaign going with as many as 14 to 16 players (two competing in each War Zone, plus an Overall Commander for each side, see 14.1). Each Action card deck from Cold War Naval Battles plus Expansion Kit II: Action can provide enough mini-Draw Piles to accommodate three War Zones (four if you stretch it). So to pull off a Campaign Game with more than that many War Zones going at once, you will want to make a second set of Action cards to divvy up among 5th through 7th War Zones.
Try to mix experienced and beginning players on each team so that the veterans can help the rookies with their Ship and Action card purchases and transfers.
Only one set of Ship cards is shared among all the War Zones. Thus, the same ship cannot appear in two different locations during the course of the game. Make sure that you have at least the CWNB III: Reinforcements Ship cards printed out and in your stockpile before commencing. Adding in the CWNB VI: Sister Ships would also be a good idea.
Each group of three War Zones should be seated at a standard 6' x 2.5' rectangular table with the Allied players seated on one side and the Soviet players on the other. Each table can share one complete set of Action cards.
14.1 Overall Commanders
As an optional position on both teams, one additional player may be designated that team's Overall Commander (i.e., the Commander-in-Chief of Naval Forces for that side). The player does not command any specific War Zone (although that player should fill in if another teammate has to leave for a moment to answer the phone or go to the bathroom or something).
It is the responsibility of the Overall Commander to make all of the team's final decisions during the Battle Preparations Step (C), where the Overall Commander's orders must be obeyed by the rest of the team. Specifically, the Overall Commander:
- Leads the Team Summit (C.1) and defines that team's overall strategy for the game.
- May transfer the players on that team between War Zones.
- May order players on that team to purchase and/or transfer specific Ship and/or Action cards.
During the Battle Turns, the Overall Commander can go to his teammates while they're fighting the battles in their respective War Zones and kibitz as much as desired – offering suggestions, noting certain activities or events, or giving news about how the war is going in the other War Zones, and so forth. But the Overall Commander may not issue any orders at this time! The player's decisions regarding their play during the Battle Turns are final.
Strategy Tips and Reminders
The Cold War Naval Battles Campaign Game is different from the Standard Game in many important respects. It is a superior two-player game, but really comes into its own with team play. Because of the many new concepts in the Campaign Game, we offer you the following useful advice:
Choosing a Side to Play. Allied and Soviet navies each offer their own advantages and disadvantages. The Allies, of course, have those large fleet carriers, battleships, and Aegis cruisers. These specialized, high Point Value ships will, by their very cost and nature, tend to keep an Allied Task Force small but efficient. The loss of any of these ships, however, can be devastating. The Allies also enjoy the superior Los Angeles class submarines.
Soviet forces have lots and lots of low-cost ships. Their Slava class cruisers provide good Air Defense and some other Soviet cruisers are so large that they are practically battleships! The Kiev class carrier is a fine all-around ship due to its many platform ratings. Soviet submarines are more numerous – an important advantage later in the game when there are usually few submarines left and the demand for them is high.
Choosing a War Zone to Play. Some War Zones are simply more vital than others. These are the ones whose Mission and End Game Points are higher. Obviously, you will want your best players in the high-Point War Zones while the newer players will have every bit as much fun playing for slightly lower stakes in the other War Zones. War Zone Point Value groupings break down as follows:
- Highest: North Atlantic and Mediterranean
- Middle: North Sea and Persian Gulf
- Lowest: South Pacific, Sea of Japan, and Indian Ocean
Using Certain Action Cards. In a Campaign Game environment, certain Action cards take on added significance as described below:
Surprise is always devastating when combined with a Bomber Strike, and remains an important tool for nailing your opponent's Third Row Ships with a submarine attack. In the Campaign Game, never miss a chance to launch Surprise Mission Strikes against Land Targets and rack up the double points.
Early Warning Systems is an excellent face-down Area Defense card. Often, however, you will want to save it as a Point Defense in anticipation of a specific Surprise Attack your opponent might be waiting to unleash.
Air-to-Air Refueling is useful for keeping that Bomber Strike, Land Based ASW, or Early Warning System card working for you.
Intelligence is the 'card play' card. It is awesome in both attack and defense. If you're the Advantaged Player but have a defensive Mission (Escort, Holding Action, or Engage), playing this on your first turn to discard some of your opponent's offensive power is an excellent tactic. Conversely, if you're attacking, playing this card will reveal the defenses your opponent is holding and thus help direct your attacks. As a 'defense card' that negates Special (blue) cards, Intelligence will stop an enemy's Retreat, Damage Control, Carrier Crew Efficiency, Intelligence, and Air-to-Air Refueling (or even the play of an Additional Ship card, if Optional Rule 13.5 is being used). In other words, it can ruin your opponent's plan!
Battle Commitments and Refits. This is a vitally important part of the game. New players commit all their ships every Campaign Game Turn, and that is a mistake. Learn the value of leaving some ships at home to Refit each Mission and not only get them 'fixed,' but score a few points in the process.
Learn how many ships you need for the attack or defense vs. the likely enemy Task Force for each of the various Missions. This military principle is called Economy of Force. Ask yourself, "Will this ship earn me more points if I Refit it or commit it to battle?" Damaged ships, especially, should stay back and get fixed. Sometimes, you may find the best thing to do is to surrender the Mission and send out no ships and wait until next turn for a better opportunity.
Bad Luck cards will see you keeping more ships in port or you playing a Retreat card more often than you might to make much-needed repairs. There's nothing worse than a Secondary Explosion ripping apart a Non-Combatant or a vital submarine!
Occasionally, an important ship will become damaged that simply must go out on the next Mission. At times like this, you would consider purchasing a Retreat card and fixing that ship via that card during the Battle Turns.
Tactics cards can often help during Missions, but since they are not always transferable once played they are not always in the right War Zone at the right time.
Escort Missions. To best protect your Non-Combatants, keep them in your Core Group (i.e., Third Row), but know that the rare minefield attacks can make an overstuffed Third Row very vulnerable! Minefield Attack cards are a good way to deal with a large enemy Task Force, particularly when it's escorting a flock of Non-Combatants. Sure, Minefield Attacks are random, but they're particularly effective if used during an early Battle Turn so that additional damage from a Bad Luck: Secondary Explosion might just finish off a ship it leaves wounded.
If you can keep your first two rows of ships afloat for four turns, you can pretty much protect your 'transports' with Evasive Maneuvers, ECM (against submarine missile attacks, in particular), and Air Cover.
If a Bomber Strike hits, you may want to sacrifice some of your Non-Combatants, especially if it is early on in the game, since your warships still have a lot of duties to perform in upcoming Missions. Damage Control becomes extremely precious in a Campaign Game because of the need to keep ships alive for future Missions, particularly saving submarines that would otherwise be sunk.
Raiding Missions. Air Defense becomes a vital fleet supplement, as Surprise air Strikes will get by every time if you don't have a good line of 3+ value Air Defense shots. Remember that most Carrier Strikes and Air Cover ratings improve when using the Air Module, but their Air Defense ratings tend to drop!
You will need all of the subs and planes you can get to be a successful raider. Subs should mix torpedo and missile attacks so that one type of Area Defense card doesn't stop an entire barrage. You might want to leave all of your surface ships in port to avoid giving the enemy targets to shoot at, but of course that will weaken your offensive potential as well; it can be an interesting trade-off.
Land Based Air Strikes are also a good way to sink 'transports.' Don't be too tempted to take down more vulnerable enemy Picket (First Row) ships; your opponent scores big points for every Non-Combatant that gets through. Surprise Attacks and Mission Briefings can greatly supplement your chances while raiding.
Card Purchases. On turn one, try to spend all of your At Start Points (most of which should be spent on the long-term capital investment of Ship cards). You will never get so many ships this cheap again since their buy cost doubles starting on turn two.
Every turn you should make some Action card purchases. If you are the Disadvantaged Player, you will want to buy some defenses to blunt your opponent's first attack on you. Offensive Missions (Raid, Superiority, Strikes, and Invasions) require specialty cards to help in the attack. The other Mission types require specialty cards to aid in defense. Shop carefully.
Superiority Missions. A balanced Task Force will best afford you the opportunity to take advantage of whatever Action cards you might draw during this Mission. An Intelligence card will often prove your best friend when seeking sea superiority.
There are some key match-ups between Action cards and Missions, such as picking up a Surprise Attack and Crash Dive card for a Submarine Strike, or a Carrier Crew Efficiency and maybe a Mission Briefing for a Carrier Strike. Your play experience will teach you these combinations.
Remember, if you're making Air Strikes, try to make as many as possible during a single turn to 'swamp' the enemy's air defenses and help ensure that some of your attackers will get through. Remember, if you cannot obtain the cards you need from teammates, you'll have to purchase them yourself. Avoid sending out your big Point Value ships unescorted by a screen of smaller frigates and destroyers.
Holding Action Missions. There are two theories for conducting this Mission. The first is to choose only smaller ships that you're best able to 'afford to lose' (because you're very likely to do exactly that – lose them). Submarines are the hardest ships to root out, but they cannot remain Passive without forgoing the Mission Points, and scoring those points is the whole purpose of this exercise. So, use submarines on this Mission with care.
The other school of thought is to commit your biggest ships and grapple with the enemy unto death. Big ships, after all, are naturally harder to sink, even when they are vulnerable as Picket and Escort ships (i.e., in the First and Second Rows) as they will be on this Mission. In either case, if you can take an equal number of enemy ship Point Values down with you, it will have all been worth it.
Invasion Missions. Eliminate the defending ships first, foremost, and fast! You can't score the big points for this Mission until the enemy Task Force is completely neutralized. Once the enemy Task Force is gone, protect yourself from Air Strikes and throw every Gun Attack you can get your hands on at the beaches (i.e., vs. 'Land Targets'). You'll need all the best cards and some luck to score well on this Mission.
Carrier Strike Missions. It is usually best to bring two (Allied) or three (Soviet) carriers on this Mission if you can scrape them up. You've got to claim that Point Pool or it goes to your opponent, so don't be too tempted to attack his Task Force until after you've got at least the majority of the Point Pool's points safely on your Point Track.
Submarine Strike Missions. Naturally, you will want to buy Missile Attack cards prior to commencing this Mission, but some Torpedo Attack cards will also be useful for keeping the enemy's fleet at bay. If your opponent committed a carrier to help his ASW Attacks against you, then use your torpedoes to nail the carrier. Don't forget that a Surprise Attack will score you double Mission Points!
Engage Missions. When engaging Submarine Strikes, you'll need ASW to grapple with the enemy and ECM cards to use as Point Defense to protect your vulnerable Land Targets. A carrier can be useful, as will submarines with their torpedoes to engage the enemy subs. Submarines are also useful when engaging an enemy Carrier Strike Mission as a direct threat to the carriers themselves. Stopping a Carrier Strike Mission is hard, and often you will have to get your points by destroying enough enemy ships to offset the enemy's Mission Points scored beating up your 'Land Targets.'
Quick Reference: Integrated Sequence of Play
Campaign Game Turn (Rule 6)
- Determine Player Missions.
- Each player determines Special Conditions (13.2).
- [Free flowing]: Team Summit; Purchase Cards & 'Bank' Unspent Points; Transfers; and Battle Commitments.
- Conduct Battle Turns.
Battle Turns (Rule 7)
- Players adjust hands to correct size; reshuffle and reset the Draw Pile.
- Reset Battle Formations including Flag Officers (13.4), Carrier Based Squadrons (Air Module), and Submarine status.
- Disadvantaged Player may place face-up Area Defense cards.
First (Advantaged) Player's Turn
A. Prepare for Action
- Clear the Decks! Discard any 'Retreat,' 'Area Defense,' and/or 'Carrier Crew Efficiency' cards you played during the previous turn.
- Roll your Fog of War (remember to apply all modifiers).
- Adjust Formation by moving one ship one row (or 0 / 2 moves if a Flag Officer was / is present).
- Dive! Dive! Your submarines may (in some cases, must) change their status at this time.
- Ship Ahoy! (Skipped in the Campaign Game)
- Play a Retreat card and conduct repairs (then skip step B, General Quarters, and go down to step C, Ship Shape).
B. General Quarters!
- Battle Stations! Lay out all of your attacks for that turn (expending Fog of War as you go).
- Incoming! Resolve all your attacks as follows: Gun, Missile, Torpedo, and ASW Attacks first. Minefield Attacks next. Air Combat is last in the following order: Intercept (Air Module), Air Cover, Air Defense, Air Strikes.
C. Ship Shape
- Work the Hangers (Air Module). Readjust carrier-based Squadrons.
- Adjust Ordnance. Discard unwanted Action cards. If you did not play any this turn, you must discard at least one.
- Resupply by drawing your hand up to size (remember to apply modifiers).
- Fortunes of War: apply the results of the first two Bad Luck cards you just drew (the rest are ignored and discarded).
Second (Disadvantaged) Player's Turn: Identical to the First Player's Turn; play until all (usually four) Battle Turns are completed.
End of Battle Turns (7.2)
- Players may set aside one card from their hand for use during the next Campaign Game Turn.
- Score final Mission Points.
- Adjust War Zone Status marker.
- Score points for and repair all ships left 'in port.'
- Reset the Battle Turn marker.
- Game over or advance the Campaign Game Turn marker and begin a new Campaign Game Turn.
War Zone Mission Tables
(Transcribed from the War Zone Display sheets. Each table is a 7-column Mission grid with rows keyed to die rolls 1–2, 3–5 and 6. Summaries list the Point values; a boxed value is the Urgent Mission value.)
Format: each Mission cell is "Allied Mission vs. Soviet Mission" as printed (Allied in blue, Soviet in red). Cells printed in shaded double-bordered boxes are Urgent Missions. In the Mission Summaries, the first number is the normal Point Value and the number in brackets is the Urgent value. Die rolls are grouped as printed on each sheet: 1–2, 3–5, and 6.
Indian Ocean War Zone
| Die Roll | Soviet Dominance | Soviet Advantage | Soviet Edge | Even | Allied Edge | Allied Advantage | Allied Dominance |
|---|---|---|---|---|---|---|---|
| 1–2 | Engage vs. Submarine Strike | Engage vs. Submarine Strike | Sea Superiority vs. Sea Superiority | Raid vs. Military Escort | Civilian Escort vs. Raid | Carrier Strike vs. Engage (Urgent) | Civilian Escort vs. Raid (Urgent) |
| 3–5 | Raid vs. Military Escort (Urgent) | Raid vs. Military Escort | Raid vs. Military Escort (Urgent) | Military Escort vs. Raid | Military Escort vs. Raid | Military Escort vs. Raid | Invasion vs. Holding Action (Urgent) |
| 6 | Engage vs. Submarine Strike | Engage vs. Carrier Strike (Urgent) |
Indian Ocean Mission Summaries
- Military Escort vs. Raid. Escort Player: score 9 [13] minus damage for each of the 2 [4] Non-Combatant ships that survive. Penalties: –1 from hand size and Fog of War*. Retreat Restrictions: Allowed once. Raiding Player: score 9 [13] for each Non-Combatant sunk.
- Civilian Escort vs. Raid. Escort Player: score 8 [12] minus damage for each of the 2 [4] Non-Combatant ships that survive. Penalties: –1 from hand size and Fog of War*. Retreat Restrictions: No retreats allowed while any Non-Combatants are afloat. Raiding Player: score 8 [12] for each Non-Combatant sunk.
- Sea Superiority vs. Sea Superiority. Both Players: Point Pool = 30 [45]. Mission winner scores 2/3 of Pool; loser scores 1/3. Tie splits Pool evenly. If loser is completely eliminated, winner scores entire Pool. Submarines must become active during each Dive! Dive! Step (6.1.A.5). Bonus: Allies +1 and Soviet +1 to hand size and Fog of War. Retreat Restrictions: Opponent immediately scores 2 [3] points per ship and submarine in retreating Task Force.
- Sea Superiority vs. Holding Action. Sea Superiority Player: score 8 [15] at the end of each Battle Turn if the enemy fleet is considered "eliminated" (see below). Bonuses: +1 to hand size and Fog of War. Holding Action Player: score 8 [15] at end of each Battle Turn if your fleet is not considered "eliminated" (see below). Penalties: Can only commit up to 3 [4] ships. –1 from hand size and Fog of War*. While Passive, your subs are considered "eliminated." Ships in port only score 1/2 their Point Value (round up, per ship). Retreat Restrictions: Your Task Force is considered "eliminated" during a Retreat.
- Submarine Strike vs. Engage. Submarine Strike Player: Point Pool = 22 [38]. Score the Damage Value of all Missile Attacks launched from Submarines (only) vs. "Land Targets**." Penalties: You are not allowed to take any Surface Ships on this Mission. Submarines only! Ships in port only score 1/2 their Point Value (round up, per ship). Retreat Restrictions: No points can be scored from Pool while Retreating. Engage Player: Score all unclaimed Pool Points at the end of the scenario. Bonus: May use Point Defense (only) ECM and Early Warning Systems cards to protect "Land Targets."
- Carrier Strike vs. Engage. Carrier Strike Player: Point Pool = 32 [48]. Score 8 [12] for each successful Carrier Air Strike against "Land Targets**." Retreat Restrictions: No points can be scored from Pool while Retreating. Engage Player: Score all unclaimed Pool Points at the end of the scenario. Bonus: May use Point Defense (only) Air Cover and Early Warning Systems cards to protect "Land Targets."
* = Die rolls results that are less than '1' are treated as '1.' ** = Score double points per successful Surprise Attack against Land Targets.
Mediterranean War Zone
| Die Roll | Soviet Dominance | Soviet Advantage | Soviet Edge | Even | Allied Edge | Allied Advantage | Allied Dominance |
|---|---|---|---|---|---|---|---|
| 1–2 | Holding Action vs. Invasion (Urgent) | Holding Action vs. Sea Superiority (Urgent) | Sea Superiority vs. Sea Superiority | Military Escort vs. Raid | Military Escort vs. Raid (Urgent) | Military Escort vs. Raid | Carrier Strike vs. Engage (Urgent) |
| 3–5 | Holding Action vs. Sea Superiority | Raid vs. Military Escort | Raid vs. Military Escort (Urgent) | Sea Superiority vs. Sea Superiority (Urgent) | Carrier Strike vs. Engage | Invasion vs. Holding Action (Urgent) | Invasion vs. Holding Action |
| 6 | Engage vs. Submarine Strike (Urgent) |
Mediterranean Mission Summaries
- Military Escort vs. Raid. Escort Player: score 13 [17] minus damage for each of the 4 [6] Non-Combatant ships that survive. Penalties: –1 from hand size and Fog of War*. Retreat Restrictions: Allowed once. Raiding Player: score 13 [17] for each Non-Combatant sunk.
- Civilian Escort vs. Raid. Escort Player: score 10 [14] minus damage for each of the 5 [7] Non-Combatant ships that survive. Penalties: –1 from hand size and Fog of War*. Retreat Restrictions: No retreats allowed while any Non-Combatants are afloat. Raiding Player: score 10 [14] for each Non-Combatant sunk.
- Sea Superiority vs. Sea Superiority. Both Players: Point Pool = 60 [90]. Mission winner scores 2/3 of Pool; loser scores 1/3. Tie splits Pool evenly. If loser is completely eliminated, winner scores entire Pool. Submarines must become active during each Dive! Dive! Step (6.1.A.5). Bonus: Allies +3 and Soviet +2 to hand size and Fog of War. Retreat Restrictions: Opponent immediately scores 3 [5] points per ship and submarine in retreating Task Force.
- Sea Superiority vs. Holding Action. Sea Superiority Player: score 12 [20] at the end of each Battle Turn if the enemy fleet is considered "eliminated" (see below). Bonuses: +2 to hand size and Fog of War. Holding Action Player: score 12 [20] at end of each Battle Turn if your fleet is not considered "eliminated" (see below). Penalties: Can only commit up to 3 [4] ships. –1 from hand size and Fog of War*. While Passive, your subs are considered "eliminated." Ships in port only score 1/2 their Point Value (round up, per ship). Retreat Restrictions: Your Task Force is considered "eliminated" during a Retreat.
- Submarine Strike vs. Engage. Submarine Strike Player: Point Pool = 30 [50]. Score the Damage Value of all Missile Attacks launched from Submarines (only) vs. "Land Targets**." Penalties: You are not allowed to take any Surface Ships on this Mission. Submarines only! Ships in port only score 1/2 their Point Value (round up, per ship). Retreat Restrictions: No points can be scored from Pool while Retreating. Engage Player: Score all unclaimed Pool Points at the end of the scenario. Bonus: May use Point Defense (only) ECM and Early Warning Systems cards to protect "Land Targets."
- Carrier Strike vs. Engage. Carrier Strike Player: Point Pool = 50 [80]. Score 10 [16] for each successful Carrier Air Strike against "Land Targets**." Retreat Restrictions: No points can be scored from Pool while Retreating. Engage Player: Score all unclaimed Pool Points at the end of the scenario. Bonus: May use Point Defense (only) Air Cover and Early Warning Systems cards to protect "Land Targets."
* = Die rolls results that are less than '1' are treated as '1.' ** = Score double points per successful Surprise Attack against Land Targets.
North Atlantic War Zone
| Die Roll | Soviet Dominance | Soviet Advantage | Soviet Edge | Even | Allied Edge | Allied Advantage | Allied Dominance |
|---|---|---|---|---|---|---|---|
| 1–2 | Engage vs. Submarine Strike (Urgent) | Holding Action vs. Invasion (Urgent) | Engage vs. Submarine Strike | Sea Superiority vs. Sea Superiority | Military Escort vs. Raid | Submarine Strike vs. Engage (Urgent) | Carrier Strike vs. Engage |
| 3–5 | Holding Action vs. Invasion | Holding Action vs. Sea Superiority | Sea Superiority vs. Sea Superiority (Urgent) | Military Escort vs. Raid (Urgent) | Sea Superiority vs. Sea Superiority (Urgent) | Military Escort vs. Raid | Invasion vs. Holding Action (Urgent) |
| 6 | Raid vs. Military Escort (Urgent) |
North Atlantic Mission Summaries
- Military Escort vs. Raid. Escort Player: score 12 [15] minus damage for each of the 4 [6] Non-Combatant ships that survive. Penalties: –1 from hand size and Fog of War*. Retreat Restrictions: Allowed once. Raiding Player: score 12 [15] for each Non-Combatant sunk.
- Civilian Escort vs. Raid. Escort Player: score 9 [12] minus damage for each of the 5 [7] Non-Combatant ships that survive. Penalties: –1 from hand size and Fog of War*. Retreat Restrictions: No retreats allowed while any Non-Combatants are afloat. Raiding Player: score 9 [12] for each Non-Combatant sunk.
- Sea Superiority vs. Sea Superiority. Both Players: Point Pool = 60 [90]. Mission winner scores 2/3 of Pool; loser scores 1/3. Tie splits Pool evenly. If loser is completely eliminated, winner scores entire Pool. Submarines must become active during each Dive! Dive! Step (6.1.A.5). Bonus: Allies +2 and Soviet +1 to hand size and Fog of War. Retreat Restrictions: Opponent immediately scores 3 [5] points per ship and submarine in retreating Task Force.
- Sea Superiority vs. Holding Action. Sea Superiority Player: score 10 [18] at the end of each Battle Turn if the enemy fleet is considered "eliminated" (see below). Bonuses: +2 to hand size and Fog of War. Holding Action Player: score 10 [18] at end of each Battle Turn if your fleet is not considered "eliminated" (see below). Penalties: Can only commit up to 3 [4] ships. –1 from hand size and Fog of War*. While Passive, your subs are considered "eliminated." Ships in port only score 1/2 their Point Value (round up, per ship). Retreat Restrictions: Your Task Force is considered "eliminated" during a Retreat.
- Submarine Strike vs. Engage. Submarine Strike Player: Point Pool = 32 [45]. Score the Damage Value of all Missile Attacks launched from Submarines (only) vs. "Land Targets**." Penalties: You are not allowed to take any Surface Ships on this Mission. Submarines only! Ships in port only score 1/2 their Point Value (round up, per ship). Retreat Restrictions: No points can be scored from Pool while Retreating. Engage Player: Score all unclaimed Pool Points at the end of the scenario. Bonus: May use Point Defense (only) ECM and Early Warning Systems cards to protect "Land Targets."
- Carrier Strike vs. Engage. Carrier Strike Player: Point Pool = 36 [60]. Score 9 [15] for each successful Carrier Air Strike against "Land Targets**." Retreat Restrictions: No points can be scored from Pool while Retreating. Engage Player: Score all unclaimed Pool Points at the end of the scenario. Bonus: May use Point Defense (only) Air Cover and Early Warning Systems cards to protect "Land Targets."
* = Die rolls results that are less than '1' are treated as '1.' ** = Score double points per successful Surprise Attack against Land Targets.
North Sea War Zone
| Die Roll | Soviet Dominance | Soviet Advantage | Soviet Edge | Even | Allied Edge | Allied Advantage | Allied Dominance |
|---|---|---|---|---|---|---|---|
| 1–2 | Engage vs. Submarine Strike | Engage vs. Submarine Strike | Sea Superiority vs. Sea Superiority | Sea Superiority vs. Sea Superiority (Urgent) | Engage vs. Submarine Strike | Invasion vs. Holding Action (Urgent) | Military Escort vs. Raid (Urgent) |
| 3–5 | Raid vs. Military Escort (Urgent) | Holding Action vs. Sea Superiority (Urgent) | Engage vs. Submarine Strike (Urgent) | Military Escort vs. Raid | Civilian Escort vs. Raid (Urgent) | Carrier Strike vs. Engage | Invasion vs. Holding Action |
| 6 | Holding Action vs. Invasion (Urgent) |
North Sea Mission Summaries
- Military Escort vs. Raid. Escort Player: score 10 [13] minus damage for each of the 3 [5] Non-Combatant ships that survive. Penalties: –1 from hand size and Fog of War*. Retreat Restrictions: Allowed once. Raiding Player: score 10 [13] for each Non-Combatant sunk.
- Civilian Escort vs. Raid. Escort Player: score 8 [12] minus damage for each of the 5 [7] Non-Combatant ships that survive. Penalties: –1 from hand size and Fog of War*. Retreat Restrictions: No retreats allowed while any Non-Combatants are afloat. Raiding Player: score 8 [12] for each Non-Combatant sunk.
- Sea Superiority vs. Sea Superiority. Both Players: Point Pool = 45 [60]. Mission winner scores 2/3 of Pool; loser scores 1/3. Tie splits Pool evenly. If loser is completely eliminated, winner scores entire Pool. Submarines must become active during each Dive! Dive! Step (6.1.A.5). Bonus: Allies +1 and Soviet +1 to hand size and Fog of War. Retreat Restrictions: Opponent immediately scores 2 [3] points per ship and submarine in retreating Task Force.
- Sea Superiority vs. Holding Action. Sea Superiority Player: score 10 [18] at the end of each Battle Turn if the enemy fleet is considered "eliminated" (see below). Bonuses: +2 to hand size and Fog of War. Holding Action Player: score 10 [18] at end of each Battle Turn if your fleet is not considered "eliminated" (see below). Penalties: Can only commit up to 3 [4] ships. –1 from hand size and Fog of War*. While Passive, your subs are considered "eliminated." Ships in port only score 1/2 their Point Value (round up, per ship). Retreat Restrictions: Your Task Force is considered "eliminated" during a Retreat.
- Submarine Strike vs. Engage. Submarine Strike Player: Point Pool = 26 [40]. Score the Damage Value of all Missile Attacks launched from Submarines (only) vs. "Land Targets**." Penalties: You are not allowed to take any Surface Ships on this Mission. Submarines only! Ships in port only score 1/2 their Point Value (round up, per ship). Retreat Restrictions: No points can be scored from Pool while Retreating. Engage Player: Score all unclaimed Pool Points at the end of the scenario. Bonus: May use Point Defense (only) ECM and Early Warning Systems cards to protect "Land Targets."
- Carrier Strike vs. Engage. Carrier Strike Player: Point Pool = 40 [60]. Score 10 [15] for each successful Carrier Air Strike against "Land Targets**." Retreat Restrictions: No points can be scored from Pool while Retreating. Engage Player: Score all unclaimed Pool Points at the end of the scenario. Bonus: May use Point Defense (only) Air Cover and Early Warning Systems cards to protect "Land Targets."
* = Die rolls results that are less than '1' are treated as '1.' ** = Score double points per successful Surprise Attack against Land Targets.
Persian Gulf War Zone
| Die Roll | Soviet Dominance | Soviet Advantage | Soviet Edge | Even | Allied Edge | Allied Advantage | Allied Dominance |
|---|---|---|---|---|---|---|---|
| 1–2 | Sea Superiority vs. Sea Superiority | Holding Action vs. Sea Superiority (Urgent) | Military Escort vs. Raid | Sea Superiority vs. Sea Superiority | Sea Superiority vs. Sea Superiority | Military Escort vs. Raid (Urgent) | Sea Superiority vs. Holding Action |
| 3–5 | Holding Action vs. Sea Superiority | Sea Superiority vs. Sea Superiority | Raid vs. Military Escort | Civilian Escort vs. Raid (Urgent) | Military Escort vs. Raid | Carrier Strike vs. Engage | Invasion vs. Holding Action (Urgent) |
| 6 | Holding Action vs. Invasion (Urgent) |
Persian Gulf Mission Summaries
- Military Escort vs. Raid. Escort Player: score 11 [14] minus damage for each of the 3 [5] Non-Combatant ships that survive. Penalties: –1 from hand size and Fog of War*. Retreat Restrictions: Allowed once. Raiding Player: score 11 [14] for each Non-Combatant sunk.
- Civilian Escort vs. Raid. Escort Player: score 8 [12] minus damage for each of the 5 [7] Non-Combatant ships that survive. Penalties: –1 from hand size and Fog of War*. Retreat Restrictions: No retreats allowed while any Non-Combatants are afloat. Raiding Player: score 8 [12] for each Non-Combatant sunk.
- Sea Superiority vs. Sea Superiority. Both Players: Point Pool = 45 [60]. Mission winner scores 2/3 of Pool; loser scores 1/3. Tie splits Pool evenly. If loser is completely eliminated, winner scores entire Pool. Submarines must become active during each Dive! Dive! Step (6.1.A.5). Bonus: Allies +1 and Soviet +2 to hand size and Fog of War. Retreat Restrictions: Opponent immediately scores 2 [3] points per ship and submarine in retreating Task Force.
- Sea Superiority vs. Holding Action. Sea Superiority Player: score 8 [14] at the end of each Battle Turn if the enemy fleet is considered "eliminated" (see below). Bonuses: +1 to hand size and Fog of War. Holding Action Player: score 8 [14] at end of each Battle Turn if your fleet is not considered "eliminated" (see below). Penalties: Can only commit up to 3 [4] ships. –1 from hand size and Fog of War*. While Passive, your subs are considered "eliminated." Ships in port only score 1/2 their Point Value (round up, per ship). Retreat Restrictions: Your Task Force is considered "eliminated" during a Retreat.
- Submarine Strike vs. Engage. Submarine Strike Player: Point Pool = 26 [50]. Score the Damage Value of all Missile Attacks launched from Submarines (only) vs. "Land Targets**." Penalties: You are not allowed to take any Surface Ships on this Mission. Submarines only! Ships in port only score 1/2 their Point Value (round up, per ship). Retreat Restrictions: No points can be scored from Pool while Retreating. Engage Player: Score all unclaimed Pool Points at the end of the scenario. Bonus: May use Point Defense (only) ECM and Early Warning Systems cards to protect "Land Targets."
- Carrier Strike vs. Engage. Carrier Strike Player: Point Pool = 50 [80]. Score 10 [16] for each successful Carrier Air Strike against "Land Targets**." Retreat Restrictions: No points can be scored from Pool while Retreating. Engage Player: Score all unclaimed Pool Points at the end of the scenario. Bonus: May use Point Defense (only) Air Cover and Early Warning Systems cards to protect "Land Targets."
* = Die rolls results that are less than '1' are treated as '1.' ** = Score double points per successful Surprise Attack against Land Targets.
Sea of Japan War Zone
| Die Roll | Soviet Dominance | Soviet Advantage | Soviet Edge | Even | Allied Edge | Allied Advantage | Allied Dominance |
|---|---|---|---|---|---|---|---|
| 1–2 | Engage vs. Carrier Strike | Raid vs. Military Escort (Urgent) | Sea Superiority vs. Sea Superiority (Urgent) | Civilian Escort vs. Raid | Sea Superiority vs. Holding Action | Sea Superiority vs. Holding Action | Invasion vs. Holding Action (Urgent) |
| 3–5 | Holding Action vs. Sea Superiority | Holding Action vs. Sea Superiority | Raid vs. Military Escort | Sea Superiority vs. Sea Superiority | Carrier Strike vs. Engage | Military Escort vs. Raid (Urgent) | Carrier Strike vs. Engage |
| 6 | Holding Action vs. Invasion (Urgent) |
Sea of Japan Mission Summaries
- Military Escort vs. Raid. Escort Player: score 11 [16] minus damage for each of the 2 [4] Non-Combatant ships that survive. Penalties: –1 from hand size and Fog of War*. Retreat Restrictions: Allowed once. Raiding Player: score 11 [16] for each Non-Combatant sunk.
- Civilian Escort vs. Raid. Escort Player: score 7 [12] minus damage for each of the 3 [5] Non-Combatant ships that survive. Penalties: –1 from hand size and Fog of War*. Retreat Restrictions: No retreats allowed while any Non-Combatants are afloat. Raiding Player: score 7 [12] for each Non-Combatant sunk.
- Sea Superiority vs. Sea Superiority. Both Players: Point Pool = 45 [75]. Mission winner scores 2/3 of Pool; loser scores 1/3. Tie splits Pool evenly. If loser is completely eliminated, winner scores entire Pool. Submarines must become active during each Dive! Dive! Step (6.1.A.5). Bonus: Allies +2 and Soviet +1 to hand size and Fog of War. Retreat Restrictions: Opponent immediately scores 2 [3] points per ship and submarine in retreating Task Force.
- Sea Superiority vs. Holding Action. Sea Superiority Player: score 8 [13] at the end of each Battle Turn if the enemy fleet is considered "eliminated" (see below). Bonuses: +2 to hand size and Fog of War. Holding Action Player: score 8 [13] at end of each Battle Turn if your fleet is not considered "eliminated" (see below). Penalties: Can only commit up to 3 [4] ships. –1 from hand size and Fog of War*. While Passive, your subs are considered "eliminated." Ships in port only score 1/2 their Point Value (round up, per ship). Retreat Restrictions: Your Task Force is considered "eliminated" during a Retreat.
- Submarine Strike vs. Engage. Submarine Strike Player: Point Pool = 25 [42]. Score the Damage Value of all Missile Attacks launched from Submarines (only) vs. "Land Targets**." Penalties: You are not allowed to take any Surface Ships on this Mission. Submarines only! Ships in port only score 1/2 their Point Value (round up, per ship). Retreat Restrictions: No points can be scored from Pool while Retreating. Engage Player: Score all unclaimed Pool Points at the end of the scenario. Bonus: May use Point Defense (only) ECM and Early Warning Systems cards to protect "Land Targets."
- Carrier Strike vs. Engage. Carrier Strike Player: Point Pool = 32 [56]. Score 8 [14] for each successful Carrier Air Strike against "Land Targets**." Retreat Restrictions: No points can be scored from Pool while Retreating. Engage Player: Score all unclaimed Pool Points at the end of the scenario. Bonus: May use Point Defense (only) Air Cover and Early Warning Systems cards to protect "Land Targets."
* = Die rolls results that are less than '1' are treated as '1.' ** = Score double points per successful Surprise Attack against Land Targets.
South Pacific War Zone
| Die Roll | Soviet Dominance | Soviet Advantage | Soviet Edge | Even | Allied Edge | Allied Advantage | Allied Dominance |
|---|---|---|---|---|---|---|---|
| 1–2 | Raid vs. Military Escort | Raid vs. Military Escort | Engage vs. Submarine Strike | Sea Superiority vs. Sea Superiority | Carrier Strike vs. Engage | Invasion vs. Holding Action | Sea Superiority vs. Holding Action |
| 3–5 | Holding Action vs. Invasion (Urgent) | Holding Action vs. Sea Superiority | Military Escort vs. Raid | Raid vs. Military Escort | Military Escort vs. Raid (Urgent) | Submarine Strike vs. Engage | Invasion vs. Holding Action (Urgent) |
| 6 | Engage vs. Submarine Strike | Engage vs. Carrier Strike |
South Pacific Mission Summaries
- Military Escort vs. Raid. Escort Player: score 11 [13] minus damage for each of the 3 [5] Non-Combatant ships that survive. Penalties: –1 from hand size and Fog of War*. Retreat Restrictions: Allowed once. Raiding Player: score 11 [13] for each Non-Combatant sunk.
- Civilian Escort vs. Raid. Escort Player: score 8 [12] minus damage for each of the 4 [6] Non-Combatant ships that survive. Penalties: –1 from hand size and Fog of War*. Retreat Restrictions: No retreats allowed while any Non-Combatants are afloat. Raiding Player: score 8 [12] for each Non-Combatant sunk.
- Sea Superiority vs. Sea Superiority. Both Players: Point Pool = 30 [45]. Mission winner scores 2/3 of Pool; loser scores 1/3. Tie splits Pool evenly. If loser is completely eliminated, winner scores entire Pool. Submarines must become active during each Dive! Dive! Step (6.1.A.5). Bonus: Allies +1 and Soviet +1 to hand size and Fog of War. Retreat Restrictions: Opponent immediately scores 2 [3] points per ship and submarine in retreating Task Force.
- Sea Superiority vs. Holding Action. Sea Superiority Player: score 11 [16] at the end of each Battle Turn if the enemy fleet is considered "eliminated" (see below). Bonuses: +1 to hand size and Fog of War. Holding Action Player: score 11 [16] at end of each Battle Turn if your fleet is not considered "eliminated" (see below). Penalties: Can only commit up to 3 [4] ships. –1 from hand size and Fog of War*. While Passive, your subs are considered "eliminated." Ships in port only score 1/2 their Point Value (round up, per ship). Retreat Restrictions: Your Task Force is considered "eliminated" during a Retreat.
- Submarine Strike vs. Engage. Submarine Strike Player: Point Pool = 22 [38]. Score the Damage Value of all Missile Attacks launched from Submarines (only) vs. "Land Targets**." Penalties: You are not allowed to take any Surface Ships on this Mission. Submarines only! Ships in port only score 1/2 their Point Value (round up, per ship). Retreat Restrictions: No points can be scored from Pool while Retreating. Engage Player: Score all unclaimed Pool Points at the end of the scenario. Bonus: May use Point Defense (only) ECM and Early Warning Systems cards to protect "Land Targets."
- Carrier Strike vs. Engage. Carrier Strike Player: Point Pool = 55 [65]. Score 11 [17] for each successful Carrier Air Strike against "Land Targets**." Retreat Restrictions: No points can be scored from Pool while Retreating. Engage Player: Score all unclaimed Pool Points at the end of the scenario. Bonus: May use Point Defense (only) Air Cover and Early Warning Systems cards to protect "Land Targets."
* = Die rolls results that are less than '1' are treated as '1.' ** = Score double points per successful Surprise Attack against Land Targets.
Special Circumstances Die Table
From the Campaign Game Turn sheet of the source PDF. Roll 1d6; the column for the player's side gives the condition (see 13.2).
| Die Roll | Allied | Soviet |
|---|---|---|
| 1 | Port Strike | Bad Weather |
| 2 | Bad Weather | Nearby Air Bases |
| 3 | Prepared | Port Strike |
| 4 | Nearby Air Bases | Bad Weather |
| 5 | Short Battle | Rushed |
| 6 | Bad Weather | Close Range |