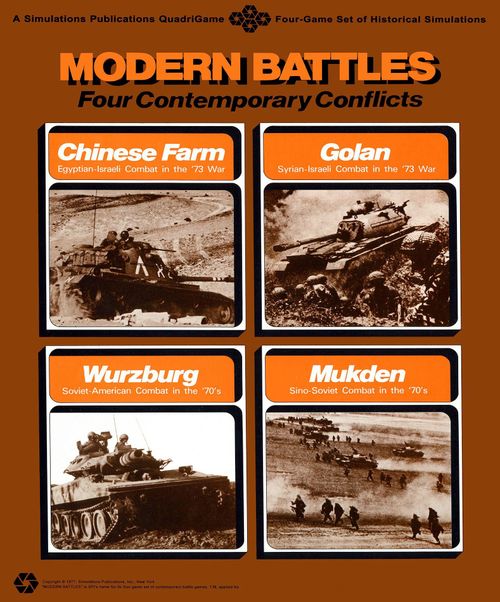
Modern Battles: Four Contemporary Conflicts
Modern Battles: Four Contemporary Conflicts Rulebook
Table of Contents
Table of Contents
- 1.0 Introduction
- 2.0 Game Equipment
- 3.0 Setting Up the Game
- 4.0 Sequence of Play
- 5.0 Movement
- 6.0 Zones of Control
- 7.0 Combat
- 8.0 Artillery
- 9.0 Air Power
- Charts and Tables
- Errata (QuadriGame Errata, as of 19 Sept. 1976)
- Chinese Farm Exclusive Rules
- 10.0 Introduction
- 11.0 Suez Canal
- 12.0 Egyptian Special Rules
- 13.0 Surface to Air Missiles (SAM's)
- 14.0 SAM Suppression
- 15.0 Reinforcements
- 16.0 Exiting the Map
- 17.0 Victory Conditions
- 18.0 The Scenarios
- 19.0 Game Notes
- Golan Exclusive Rules
- 10.0 Introduction
- 11.0 Fortified Hexes
- 12.0 Israeli Anti-Tank Ditch and DMZ Line
- 13.0 Surface to Air Missiles (SAMs)
- 14.0 SAM Suppression
- 15.0 Reinforcements
- 16.0 Exiting the Map
- 17.0 Allocation of Israeli Ground Support Points
- 18.0 Syrian Restrictions
- 19.0 Victory Conditions
- 20.0 The Scenarios
- 21.0 Game Notes
- Mukden Exclusive Rules
- 10.0 Introduction
- 11.0 Terrain Modifications
- 12.0 Reinforcements
- 13.0 Exiting from the Map
- 14.0 Guerrillas
- 15.0 Combat Results Table Selection
- 16.0 Supply
- 17.0 Paratroops
- 18.0 Gunboats
- 19.0 Anti-Tank Units
- 20.0 Nuclear Weapons [Optional Rule]
- 21.0 Scenarios: How to Set Up and Play the Game
- 22.0 Game Notes
- Wurzburg Exclusive Rules
- 10.0 Introduction
- 11.0 Helicopters
- 12.0 River Crossings
- 13.0 Reinforcements
- 14.0 Exiting From the Map
- 15.0 Nuclear Weapons [Optional Rule]
- 16.0 Scenarios
- 17.0 Constructing Your Own Scenarios
- 18.0 Game Notes
1.0 Introduction
The Modern Battles Game System is an operational simulation of modern-day warfare. Each game in the system represents a clash between two important military powers of the present. The Playing Pieces represent the actual units which participated or might participate in the battles, and the map represents the actual terrain over which those units fought, or may fight.
Two rules folders are provided. The first contains Standard Rules, which are common to all the games in the Modern Battles system. The second folder contains Exclusive Rules for each game in the system, and the Initial Deployment and Reinforcement Rules.
The game has been designed to insure maximum playability and maximum reality (in that order). In order to achieve these goals, the physical components, as well as the game rules, have been designed to make the game easier to understand and play. The components include a smaller, more compact playing map, never more than a hundred playing pieces, and standardized rules.
The standardization makes it easier for the gamer to go from one game to another within the series. It also enables the games' designers to concentrate on the realism aspect of the games. (The standardization generally takes care of any playability problems.)
2.0 Game Equipment
2.1 The Game Map
Each of the 22" x 17" mapsheets portrays the battle area. A hexagonal grid is superimposed over the terrain features on the mapsheet in order to regularize movement and positioning of the playing pieces.
To make the map lie flat, back-fold it against the creases. Small pieces of masking tape may be used at the corners of the map to hold it taut.
2.2 Charts and Tables
Various visual aids are provided for the Players in order to simplify and illustrate certain game functions. These are the Combat Results Tables, the Terrain Effects Chart, and the Reinforcement Charts.
2.3 The Playing Pieces
The cardboard pieces represent the actual military units that took part in the historical battles, or that are stationed in the areas portrayed in the hypothetical battles. The numbers and symbols on the pieces represent strength, movement capability, and type of unit represented by the piece. These playing pieces will hereafter be referred to as "units."
2.31 How to Read the Units
Non-Artillery Unit (labelled on the printed example): Unit Size; Unit Designation; Attack Strength; Defense Strength; Movement Allowance (printed example: Attack 4, Defense 3, Movement 12, shown as 4-3-12).
Artillery Unit (labelled on the printed example): Unit Size; FPF Strength; Barrage Strength; Range Allowance; Movement Allowance; Defense Strength (printed example: Barrage 3, FPF 1, Range 11; Unit Size X; Movement 1, Defense 9, shown as 1-9).
Unit Types (as printed): Infantry (example 2-2-3); Artillery (example 5-1-7 with Defense 1-9 shown); Mechanized Infantry (example 2-3-12); Armor (example 6-4-12); Parachute (example 2-2-4).
Unit Sizes:
- II = Battalion
- III = Regiment
- X = Brigade
Unit Designations: Units may be identified by a single number or by a two-part designation. In two-part designations, the number to the right is the unit's superior formation. This may be either a division or brigade; brigades may be identified by an abbreviation of their commander's names. Battalion-sized units are numbered consecutively within the division, when the division is the superior formation shown. As a general rule, there are three battalions per brigade, and three brigades or regiments per division.
2.32 Definition of Terms
Attack Strength is the relative strength of a non-artillery unit with regard to attacking other units, expressed in terms of Attack Strength Points.
Defense Strength is the relative strength of a unit with regard to defending against the attacks of Enemy units, and is expressed in terms of Defense Strength Points.
Barrage Strength is the relative strength of an Artillery unit when attacking Enemy units, and is expressed in terms of Barrage Strength Points.
Final Protective Fire (FPF) Strength is the relative ability of an Artillery unit to add to the Defense Strength of Friendly units, and is expressed in terms of FPF Strength Points.
Movement Allowance is the maximum number of clear terrain hexes through which a unit may be moved in a single Movement Phase; each such hex requires one Movement Point of the Movement Allowance. More than one Movement Point may be expended for some hexes.
Range Allowance is the maximum number of hexes from the hex of an Artillery unit using its FPF or Barrage Strength (exclusive), to the defending unit's hex (inclusive).
2.4 Game Scale
Each hexagon on the mapsheet represents approximately one mile of real terrain from side to side. Each Game-Turn is the equivalent to 12 hours of real time.
2.5 Parts Inventory
A complete game should include the following parts:
- One 22" x 17" Game Map
- One Standard Rules Folder
- One Exclusive Rules Folder
- One Sheet of Charts & Tables
- One Set of Die-Cut Counters (100 pieces)
- One Folio (Folio edition only)
If any of these parts are missing or damaged, please write to Customer Service, Simulations Publications, Inc., 44 East 23rd Street, New York, New York 10010.
Questions regarding the rules of the game (stated in a "Yes or No" or multiple choice manner) will be answered, if accompanied by a stamped, self-addressed envelope.
3.0 Setting Up the Game
The cardboard Playing Pieces should be punched out of the Unit Counter Sheet. The differently colored units represent forces of opposing sides. The mapsheet should be unfolded and then back-folded against the creases to make it lie flat. Players should determine which side each will play.
The Players then consult their respective Initial Deployment Charts. These charts tell the strengths of each unit which is in play (on the map) during the First Game-Turn. Unit values are listed as follows: Attack Strength - Defense Strength - Movement Allowance. For Artillery units: Barrage Strength - Final Protective Fire Strength - Range Allowance/Defense Strength - Movement Allowance. Units may be assigned specific set-up hexes or Players may be instructed to choose the set-up hexes for their units, in which case one Player or the other will be instructed to "deploy first." After all the units in the Initial Deployment have been set up, all remaining units should be placed aside and brought into play according to the Reinforcement Schedule.
The Scenario Special Rules indicate which Player is the First Player. The Scenario Victory Conditions tell how the game is won. Play proceeds according to the Sequence of Play for the number of Game-Turns specified in the Scenario.
4.0 Sequence of Play
This game is played in successive Game-Turns, composed of alternate Player-Turns. During each Game-Turn the Players maneuver their units and resolve combat in sequence, according to the following outline and within the limits provided by the rules which follow. At the conclusion of the last Game-Turn, the Victory Conditions are consulted and a winner is determined.
4.1 Sequence Outline
The Game-Turn
The Game-Turn is divided into a First Player-Turn and a Second Player-Turn. The Player whose Player-Turn is currently in progress is termed the Phasing Player. The activity which may take place during each Phase is outlined below.
-
Special Weapons Interphase. In Mukden and Wurzburg this Phase is used to implement the Nuclear Weapons Rules. In Chinese Farm and Golan this Phase is used to implement the SAM Suppression Rules.
-
First Player-Turn
A. Movement Phase. The Phasing Player may move all, some or none of his units as he desires within the limits and restrictions of the rules of Movement, Zones of Control, Terrain Effects and Exclusive Rules of the game. The Phasing Player may bring Reinforcements onto the map as allowed by his Reinforcement Schedule and the Reinforcement Rules. The non-Phasing Player may not move his units.
B. Combat Phase. The Phasing Player uses his units to attack the non-Phasing Player's units. The Phasing Player may order his attacks in any order he desires. Each attack follows the subsequence following where appropriate.
a. The Phasing Player states the number and strength of his attacking ground units.
b. The Phasing Player allocates Barrage Strength Points (if he wishes) from both Artillery Units and Ground Support Points.
c. The non-Phasing Player allocates Final Protective Fire Strength (if he wishes) from non-adjacent Artillery units and Ground Support Points.
d. The Combat differential (total attacking strength minus total defending strength) is calculated, the die is rolled and the indicated result (see Combat Results Table) is immediately applied.
During the Combat Phase neither Player may move his units, except when called for as a result of combat.
-
Second Player-Turn. The Second Player now becomes the Phasing Player and executes Movement and Combat in the sequence described above.
-
Game-Turn Record Interphase. One Player should keep track of the Game-Turns elapsed on scratch paper, making a mark as each Game-Turn passes and the next begins.
5.0 Movement
General Rule: During the Movement Phase, the Phasing Player may move as many or as few of his units as he desires. The units may be moved in any direction or combination of directions.
Procedure: Units are moved one at a time, tracing a path of contiguous hexes through the hex grid. As each unit enters a hex the unit pays one or more Movement Points from its Movement Allowance.
Cases:
5.1 Movement Restrictions and Prohibitions
5.11 Movement may never take place out of sequence. A Player's units may be moved during his own Movement Phase. During the Combat Phase, a unit which is either attacking or defending may be called upon to advance or retreat after Combat is resolved. During the Enemy Player's Movement Phase, and during both Player's Combat Phases, except when advancing or retreating as a result of Combat, Friendly units must not be moved.
5.12 A Friendly unit may never enter a hex containing an Enemy unit.
5.13 A unit may never expend more Movement Points than its total Movement Allowance in any one Movement Phase. A unit may expend all, some or none of its Movement Points in any one Game-Turn, but unused Movement Points may not be accumulated until another Movement Phase or transferred to another unit.
5.14 A unit may never exit an Enemy controlled hex during any Movement Phase. An Enemy controlled hex may be left only during a retreat or advance as a result of Combat (unless otherwise noted in the Exclusive Rules).
5.15 Once a unit has been moved and the Player's hand taken from the piece, it may not be moved any further during the Player-Turn nor may it change its move without the consent of the opposing Player.
5.16 There are no supply rules (unless otherwise noted in a specific game's Exclusive Rules). Units are considered to be "in supply" at all times. Isolation has no effect on Movement or Combat.
5.2 Effects of Terrain
5.21 A unit must expend one Movement Point to enter a clear terrain hex. To enter other types of hexes, a unit must expend more than one Movement Point. When the Terrain Effects Chart calls for a Movement Point expenditure to cross a terrain hexside, this cost is in addition to the terrain cost for entering the hex.
5.22 A unit which moves from one road hex directly into an adjacent road hex through a road hexside expends only 1/2 Movement Point, regardless of other terrain in the hex.
5.23 A unit which moves from one trail hex directly into an adjacent trail hex through a trail hexside expends one Movement Point, regardless of other terrain in the hex.
5.24 A unit may not enter a hex if it does not have sufficient Movement Points remaining to pay the Movement Point cost to enter the hex itself and the hexside being crossed.
5.3 Effects of Other Friendly Units
5.31 A Friendly unit may move through hexes occupied by other Friendly units (at no extra Movement Point cost), but may not end the Movement Phase stacked in the same hex with another Friendly unit. Stacking is prohibited.
5.32 There is no limit to the number of Friendly units that may pass through a single hex in one Game-Turn.
5.33 Friendly controlled hexes never interfere with Friendly movement.
6.0 Zones of Control
General Rule: The six hexagons immediately surrounding a hex constitute the Zone of Control (ZOC) of any unit in that hex. Hexes upon which a unit exerts a Zone of Control are called Controlled Hexes and inhibit the movement of Enemy units: All units must cease movement when they enter an Enemy controlled hex.
Cases:
6.1 Effects on Movement
6.11 All units exert a Zone of Control at all times, regardless of the Phase or the Player-Turn, during the entire Game-Turn. The presence of Zones of Control is never affected by other units, Enemy or Friendly.
6.12 Units do not pay any additional Movement Points to enter an Enemy-controlled hex.
6.13 There are only two ways to exit a hex in an Enemy Zone of Control: Either by retreat or advance as a result of combat, or by removal of the Enemy unit exerting the Zone of Control as a result of combat.
6.14 Zones of Control extend into all types of terrain hexes and across all types of terrain hexsides (except those prohibited to movement).
6.2 Multiple Zones
6.21 If there are both Enemy and Friendly Zones of Control cast over a given hex, they have no effect on each other; both Zones co-exist and the hex is mutually controlled by both Players.
6.22 There is no additional effect when more than one unit casts its Zone of Control onto a given hex.
6.23 Obviously, if a given unit is in an Enemy controlled hex, the Enemy unit is also in its controlled hex. The two units are equally and mutually affected.
7.0 Combat
General Rule: Combat between adjacent opposing units is mandatory. Artillery units (8.0) are the only units which may attack units to which they are not adjacent. See also Airpower Rules (9.0) for Ground Support Air Strength Points.
The Phasing Player is termed the Attacker; the other Player the Defender, regardless of the overall strategic situation.
Procedure: Total the Attack Strength, Barrage Strength and Ground Support Strength of all attacking units involved in a specific attack; total the Defense Strength and the Final Protective Fire of all units which are the object of a specific attack. Subtract the total Strength of the defending units from the total Strength of the attacking units. The result is the Combat Differential expressed in Points. It may be either a positive or a negative number.
Consult the Combat Results Table (Active or Mobile) under the appropriate Combat Differential Column (adjusting for Terrain), roll the die, and then apply any Combat Results immediately, before resolving any additional attacks that are being made in the same Combat Phase. Example: If thirteen Strength Points were attacking a unit with four Strength Points in a town hex, the Combat Differential would be +9. Because the defender is in a town hex, before resolving the attack, the attacker shifts two columns to the left (from the +9-11 column to the +4-5 column).
Having determined the proper column on the Active Combat Results Table (7.63), the attacker rolls the die. The result indicates a line which is cross-indexed with the proper column. The intersection of line and column yields a Combat Result. This should be immediately applied to the involved units, before going on to resolve any other combat. Separate combats may be resolved in any order that the attacker wishes, so long as all combats are resolved during that Combat Phase.
Cases:
7.1 Which Units Attack
7.11 Every non-Phasing unit that has a Phasing unit adjacent to it must be attacked by some Phasing unit during that Combat Phase. The Phasing Player may resolve these attacks in any fashion desired, as long as all adjacent units are attacked within the requirements of rule 7.2.
7.12 All of the Phasing Player's units which end the Movement Phase in an Enemy controlled hex must attack some Enemy unit during the ensuing Combat Phase. The Phasing Player may choose which units will attack each defending unit, as long as all adjacent Friendly units participate in an attack.
7.13 A defending unit may be attacked by as many as six adjacent units, with possible additional Artillery Barrage Strength (see 8.0) and Ground Support (see 9.0).
7.14 No unit may attack more than once per Combat Phase, and no Enemy unit may be attacked more than once per Combat Phase.
7.15 Non-Artillery units may only attack if in a hex adjacent to the defending unit(s).
7.2 Multiple Unit and Multi-Hex Combat
7.21 If a Phasing Player's unit is in the Zone of Control of more than one Enemy unit, it must attack all those adjacent Enemy units which are not engaged by some other attacking unit.
7.22 Units in two or more different hexes may combine their Combat Strengths and attack a single hex, if all the attacking units are adjacent (or are within range of) the Enemy occupied hex.
7.23 Attacks may involve any number of attacking or defending units. For the attacks to be resolved as a single combat, however, all the attacking units must be adjacent to all the defending units, with the addition of barraging artillery units, which need not be adjacent.
7.3 Combat Strength Unity
A given unit's Attack and Defense Strengths are always unitary. That is, a unit's Strength may not be divided among different combats, either for attack or defense.
7.4 Effects of Terrain
7.41 Defending units, only, benefit from the terrain in the hex they occupy and/or that hex's perimeter hexsides. Terrain in hexes occupied by attacking units has no effect on combat.
7.42 The effect of terrain (on combat) has been integrated into the Combat Results Table. After establishing the Combat Differential Column, the Player will shift to the left from this column, the number of columns specified on the Terrain Effects Chart, for the terrain which the defending unit occupies.
7.43 Terrain benefits for combat are not cumulative. A defending unit always benefits only from the most advantageous terrain. Example: A unit in rough terrain behind a river hexside would benefit from the rough terrain only.
7.44 When two or more defending units are being attacked in a single combat and are on two different types of terrain, each having a different effect on the Combat Differential, then the entire attack is modified by the terrain most favorable to the defender.
7.5 Diversionary Attacks
7.51 In making a series of attacks, a Player may allocate his attacking units so that some attacks are made at "poor" Differentials, so that adjacent attacks may be made at more advantageous Differentials (by allotting most of the attacking force to the major objectives). These attacks are known as diversionary or holding attacks.
7.52 The Phasing Player may never voluntarily reduce the Differential of any given attack. That is, he may never voluntarily shift to the left of his Combat Differential Column.
7.6 Combat Resolution
7.61 There are two different Combat Results Tables in the Modern QuadriGame; each reflects a separate attitude and approach to battle in accordance with an overall strategic goal. The Active Combat Results Table indicates a willingness to accept losses in order to destroy Enemy units and perhaps achieve a breakthrough in the Enemy front. The Mobile Combat Results Table represents a general desire to preserve units and suffer a minimum of casualties, pushing back the Enemy rather than destroying him.
7.62 At the beginning of his Combat Phase, the Phasing Player must select which Combat Results Table he will use to resolve all of the Combats in that Phase. The Phasing Player may not use both the Active Combat Results Table and the Mobile Combat Results Table to resolve combat in the same Phase.
Scenario instructions often contain special rules regarding the use of the Combat Results Tables. The instructions will generally indicate the conditions under which a Player may or may not, or must use the Active Combat Results Table.
7.63 Active Combat Results Table (See separate sheet.)
7.64 Mobile Combat Results Table (See separate sheet.)
In each scenario Players are assigned a number of Turns during which they may use the Active Combat Results Table. They don't have to use this CRT, but if they elect to do so they must use it for the full number of Turns that it is allotted to them. These Turns must be consecutive.
7.65 Explanation of Results
- D1, 2, 3 or 4 = Defender Retreats the indicated number of hexes (1, 2, 3, 4). Each Player retreats his own units. He must retreat his units in accordance with the Retreat Rules (see 7.7). Units may not retreat across prohibited hexsides (see Terrain Effects Chart).
- A1 = Attacker Retreats one hex.
- Br = Both the Attacker and Defender must retreat one hex. The Defender retreats first. (Note: this means that if the Defender is surrounded by units or Zones of Control, it is eliminated). The Attacking units then retreat.
- Ae = Attacker Eliminated. Defender may advance into the hex.
- De = Defender Eliminated. Attacker may advance into the hex.
- Ex = Exchange. All of the defending units are eliminated first, then an equal or greater number of the Attacking Strength Points are lost. For example: A unit with a Defense Strength of 2 is attacked by Enemy units with Attack Strengths of 3 and 4, and an Ex is rolled. The defending unit is removed from the board; then the attacking unit with the Attack Strength of 3 is removed from the board. The remaining attacking unit may advance into the hex. Note that all exchanges take place using the printed Defense Strength and the printed Attack Strength of the units involved. Non-adjacent attacking Artillery units are never affected by exchange results.
- Ax = All defending units are retreated one hex, then a number of attacking Strength Points equal to or greater than the Defense Strength of the defending unit(s) are lost. Note that this loss is calculated in the same manner as a normal exchange result, except that the defending unit is retreated rather than eliminated.
7.7 How to Retreat
When the Combat Result requires a Player's unit(s) be retreated, the Owning Player must immediately move those units the indicated number of hexes away from their combat position. This movement is not normal movement and is subject to the following restrictions. If the unit is unable to retreat within these restrictions, it is eliminated instead.
7.71 In retreating a unit may initially leave an Enemy controlled hex; thereafter it may not enter an Enemy controlled hex. Friendly units do not negate Enemy Zones of Control for purposes of retreat.
7.72 A retreating unit may not cross a prohibited hexside (see Terrain Effects Chart).
7.73 Where possible a retreating unit must retreat into and through vacant hexes. If no other route is available, the retreating unit may move through Friendly occupied hexes, displacing every Friendly unit whose hex it moves into or through (see 7.8).
7.74 In all cases the retreating unit must terminate its retreat the Combat Result-indicated number of hexes away from its former combat position. If it cannot, and can retreat only a portion of the number of obligated hexes, it is eliminated in the last hex to which it is able to retreat. The retreat path (see 7.91) terminates in the hex a unit is eliminated in.
7.8 Displacement
7.81 If Friendly units occupy hexes in the only possible retreat route available to a retreating unit, those Friendly units are displaced (moved out of their hexes) by the retreating unit. The displaced unit is moved one hex (by the Owning Player) as if it were itself retreating. Then the retreating unit enters the vacated hex and, if necessary, continues its retreat. The retreating unit may displace as many units as necessary to retreat the indicated number of hexes.
7.82 If the displacement would cause any of the displaced units to be eliminated, the retreating unit is eliminated instead. Displaced units can themselves displace other Friendly units in a sort of chain reaction of displacement, if that is the only permitted path of displacement open to them. A unit may be displaced more than once per Combat Phase, if that is the only alternative. Displaced Artillery units which have not yet engaged in combat, may not fire during that Combat Phase. Units may not displace other Friendly units if they have other paths of retreat open to them.
7.83 If a retreating unit displaces a unit in a hex which the Phasing Player had intended to Barrage Attack, the attack against that hex may not take place. Of course, the displaced unit may be Barrage Attacked in its new hex.
7.9 Advance After Combat
7.91 Whenever an Enemy unit is forced to retreat (or is eliminated) as a result of combat it will leave a path of vacant hexes behind it called the Path of Retreat or Retreat Path (this includes hexes vacated pursuant to 7.75). Any or all Friendly victorious units which participated in the combat and were adjacent to the retreated unit are allowed to advance along the Enemy Path of Retreat.
Editor's note: rule 7.91 refers to "7.75", which does not appear in the printed Standard Rules text as scanned (the 7.7 sequence ends at 7.74). It is transcribed as printed.
7.92 The advancing victorious units may cease advancing at any hex along the Path of Retreat.
7.93 Advancing victorious units may ignore Enemy Zones of Control.
7.94 Only victorious units which were adjacent to the retreating unit during the combat and participated in that combat may advance. Non-adjacent Artillery units may not advance after combat.
7.95 An advancing unit may not stray from the Path of Retreat.
7.96 The option to advance must be exercised immediately before any other combat resolution. Units are never forced to advance after combat. After advancing, units may neither attack nor be attacked in that Phase (see 7.14), even if their advance places them next to Enemy units whose battles are yet to be resolved, or who were not involved in combat. However, advances are useful in cutting off the retreat of Enemy units whose combat has not yet been resolved.
7.97 Example. (See separate sheet.)
8.0 Artillery
General Rule: Artillery units may participate in combat from adjacent and non-adjacent hexes. The Artillery unit's Barrage Strength may be used to attack Enemy units. The Artillery unit's Final Protective Fire Strength may be used to supplement the Defense Strengths of other Friendly defending units. In either case, Artillery units need not be adjacent to, but must be within range of the defending unit. An Artillery unit may use both its Barrage Strength and Final Protective Fire Strength in a single Game-Turn. When attacked, an Artillery unit defends itself with its own Defense Strength.
Cases:
8.1 Barrage Attacks
8.11 Artillery units may attack non-adjacent Enemy units up to the extent of their Range Allowance, but they are never forced to attack an Enemy unit merely because it is within range. Artillery units are not subject to Line of Sight restrictions.
8.12 Range from the Barraging Artillery unit to the defending unit is counted by including the target hex (defending unit's hex), but not the Barraging unit's hex.
8.13 Artillery units may only attack a single Enemy occupied hex when barraging, except when making a combined attack with other units attacking from adjacent hexes (see 8.2).
8.14 Barraging Artillery (artillery attacking from a non-adjacent hex) suffer no Combat Results; they are never destroyed or retreated as a result of their own attacks. Of course, other units cooperating with the Barraging Artillery units from an adjacent position would be affected by Combat Results.
8.15 Attacks made solely by Artillery and/or Ground Support Air Strength are always resolved on the Mobile CRT. Only Combat Results of D2, D3, D4 and De affect the defending unit in such attacks.
8.2 Combined Attacks
8.21 Artillery units may attack alone, in concert with other Barraging Artillery and/or Ground Support, or in concert with any Friendly units making adjacent attacks, adding their bombarding Combat Strength to the attack. These attacks are called Combined Attacks.
8.22 When Friendly units are attacking adjacent Enemy units in more than one hex, the Barraging Artillery units need be within range of only one of the defending units to add their Barrage Strength to the attack.
8.3 Adjacent Attacks
8.31 When adjacent to an Enemy unit, Artillery units must participate in an attack against adjacent Enemy units. In making this attack, the Artillery unit uses its Barrage Strength.
8.32 When attacking from an adjacent hex Artillery units may attack as many units as they are adjacent to, but may not attack non-adjacent units.
8.33 Artillery units attacking from an adjacent hex must suffer all the Combat Results of their attacks.
8.4 Final Protective Fire
8.41 A non-Phasing Artillery unit, which has not yet been subject to an attack in the current Combat Phase, had suffered no adverse Combat Results in its previous Combat Phase, and is not adjacent to an Enemy unit, may use its Final Protective Fire Strength (FPF) to supplement the Defense Strength of Friendly units which are under attack. If a non-Phasing Artillery unit has been attacked in any fashion, has been displaced, had suffered a Combat Result in its previous Combat Phase, or is adjacent to an Enemy unit, it may not use its FPF during the current Enemy Combat Phase.
8.42 The Friendly defending unit receiving Final Protective Fire must be in range of the Artillery unit providing the FPF. This range is computed to the hex occupied by the defending unit [the Friendly unit], not to the hex occupied by the attacking unit [the Enemy unit].
8.43 FPF Strength Points are simply added to the Defense Strength of the unit receiving Final Protective Fire.
8.44 When an Artillery unit supplies FPF it neither benefits nor suffers from the Combat Result.
8.45 FPF may not be used to supplement the Defense Strength of Friendly units which are under attack solely by Enemy Artillery (either adjacent or non-adjacent) and/or Ground Support.
8.5 Defense
When an Artillery unit is attacked in any fashion it uses its Defense Strength, not its FPF.
8.6 Terrain Effects
8.61 An Artillery unit may use its Barrage or FPF Strength anywhere within its Range Allowance, regardless of intervening terrain or units (either Enemy or Friendly).
8.62 Defending units benefit fully from the terrain in the hex they occupy when attacked by Artillery (regardless of range). Defending units do not receive any hexside benefits if attacked solely by Artillery and/or Ground Support. Defending units do receive hexside benefits if they are subject to a Combined Attack involving adjacent non-artillery units, all of which are attacking across the terrain hexside type in question.
9.0 Air Power
General Rule: Air Power in the game is not represented by units, but rather by the allocation of Ground Support Points on a Turn by Turn basis. These Points are allocated in the Scenario. The Players must record (on scratch paper) the allocation and expenditure of Ground Support Points. Ground Support Points are presumed to fly in from off the map. There are neither airbases nor air units.
Procedure: Ground Support Points may be used during any Combat Phase, exactly as if they were Artillery, and can function as Barrage and FPF. Example: A Player has 10 Ground Support Points allocated in a given Game-Turn. When he is the Phasing Player he may use these Points as Barrage Strength Points. When he is the non-Phasing Player he may use these same Points as FPF.
Cases:
9.1 Restriction and Prohibitions
9.11 One Ground Support Point equals one Artillery Strength Point (both Barrage and FPF).
9.12 A Player may assign as many Ground Support Points as he has to one target unit, or he may split them up between as many targets as he sees fit.
9.13 Ground Support Points have unlimited range. They may attack any Enemy unit on the map.
9.14 Ground Support may not be accumulated from Game-Turn to Game-Turn. If they are not used in the Turn allocated by the Scenario, they are lost.
9.15 If, for example, a Player has eight Ground Support Points available on a given Game-Turn, he may use those eight Points as Barrage Strength Points during his Combat Phase, and he may use those same eight Points as FPF during the Enemy Player's Combat Phase of the same Game-Turn.
Charts and Tables
The following reproduces the Modern Battles Charts & Tables sheet (Combat Results Tables 7.63 and 7.64, Terrain Effects Chart 5.4), referred to in the text above as "separate sheet."
7.63 Active Combat Results Table
Combat Differential (Attacking Strength minus Defending Strength)
| Die Roll | -7 | -6,5 | -4,3 | -2 | -1 | 0 | +1 | +2,3 | +4,5 | +6,8 | +9,11 | +12 | Die Roll |
|---|---|---|---|---|---|---|---|---|---|---|---|---|---|
| 1 | A1 | A1 | A1 | Br | Ex | Ax | D2 | D3 | D4 | D4 | D4 | De | 1 |
| 2 | A1 | A1 |
Attacks at greater than "+12" are treated as "+12," attacks at less than "-7" are treated as "-7."
7.64 Mobile Combat Results Table
Combat Differential (Attacking Strength minus Defending Strength)
| Die Roll | -7 | -6,5 | -4,3 | -2 | -1 | 0 | +1 | +2,3 | +4,5 | +6,8 | +9,11 | +12 | Die Roll |
|---|---|---|---|---|---|---|---|---|---|---|---|---|---|
| 1 | A1 | A1 | A1 | Br | Br | D1 | D2 | D2 | D3 | D3 | D4 | De | 1 |
| 2 | A1 | A1 |
Attacks at greater than "+12" are treated as "+12," attacks at less than "-7" are treated as "-7."
5.4 Terrain Effects Chart
Note: Not all terrain is applicable to all games in this series. See Terrain Key on Game map.
| Terrain | Movement Points (MP) to Enter (or Cross) | Effect on Combat |
|---|---|---|
| Clear Hex | 1 MP | No effect |
| Mixed Hex | 2 MP | No effect |
| Sand Hex | 3 MP | No effect |
| Broken Hex | 3 MP | Shift 2 |
| Rough Hex | 4 MP | Shift 3 |
| Mountain Hex | 6 MP | Shift 3 |
| Woods Hex | 2 MP | Shift 2 |
| Grove Hex | 2 MP | Shift 1 |
| Trail Hex |
7.97 Example
The printed example is a hex diagram (separate sheet) showing a retreat path. Its text reads: A defeated unit retreating three hexes may be followed by up to three victorious units in its Retreat Path.
The page also reprints the 7.65 explanation of combat results (see other side). It duplicates the text transcribed under 7.65 above and is not repeated here.
13.3 SAM Resolution Table
Number of Israeli Ground Support Points (columns: 1, 2, 3, 4, 5, 6, 7-10, 11+)
| Number of SAM Points Allocated | 1 | 2 | 3 | 4 | 5 | 6 | 7-10 | 11+ |
|---|---|---|---|---|---|---|---|---|
| 1 | 1 | 1 | 1 | 1 | 1 | 2 | 2 | 2 |
| 2 | 1 | 1 | 1 | 1 | 2 | 2 | 3 | 4 |
| 3 | 1 | 1 | 1 | 2 |
Explanation of SAM Resolution Table: The number result is the number of Victory Points the Arab Player receives if he rolls the correct die result (see SAM unit fire).
13.21
Immediately after the commitment of all Israeli Ground Support Points, the Arab Player may use his SAM units to fire on those Ground Support Points. This is accomplished by totalling the SAM Strength being used against the Israeli Ground Support in a given hex, and cross-indexing this total (on the SAM Resolution Table) with the total number of Israeli Ground Support Points committed to that hex. Then the die is rolled. If the number that is rolled is equal to or less than the number shown on the Table, the Arab Player receives a number of Victory Points equal to the number rolled.
14.4 SAM Suppression Table
| Die Roll | Ground Support Points Allocated: 1 | 2 | 3+ |
|---|---|---|---|
| 1 | 1 | 1 | 2 |
| 2 | 1 | 1 | 1 |
| 3 | 0 | 1 | 1 |
| 4 | 0 | 1 | 1 |
| 5 | 0 | 0 | 1 |
| 6 | 0 | 0 | 0 |
Explanation of SAM Suppression Table: The number result equals the number of Game-Turns that the SAM unit is neutralized.
14.5 Use of SAM Suppression Table
The Israeli Player totals the number of Ground Support Points allocated to the SAM target hex and rolls the die. He then compares the die roll to the SAM Suppression Table. The results are applied immediately. This must be done for each SAM unit under SAM Suppression attack.
15.1 Nuclear Weapons Chart
Weapon Type columns: 5kt, 20kt, 50kt, 100kt, 200kt.
| Distance in hexes from Impact Hex | 5kt | 20kt | 50kt | 100kt | 200kt | Differential |
|---|---|---|---|---|---|---|
| 0 | 0 | 0-1 | 0-2 | 0-3 | 0-4 | +12 |
| 1-2 | 1-2 | 2-4 | 3-7 | 4-10 | 5-13 | -2 |
| US Available | 12 | 7 | 1 | * | * | |
| Soviet Available | 5 | 3 |
The printed chart shows the distance bands and Differential values as transcribed; the "" marks are printed as they appear on the chart.*
15.22
In order to detonate a Nuclear Weapon, find the proper Weapon Type column, and determine the hex in which the Weapon is to be detonated (the Impact Hex). Each unit within range is subject to attack on the Active Combat Results Table. Find the distance in hexes from the Impact Hex to the unit in question and cross-reference this to find the Combat Differential Column at which the unit is attacked.
Errata (QuadriGame Errata, as of 19 Sept. 1976)
Entries for the Modern Battles games of this quadrigame only. The errata sheet's entries for other SPI games are omitted.
Modern Battles Golan
- [12.12] (CLARIFICATION) The additional Movement Point cost for the anti-tank ditch on Game-Turns 1 and 2 is not negated by roads and trails running through the hexside.
- [20.12] (CLARIFICATION) The Israeli Player deploys his units first.
- [20.13] (CORRECTION) Only 1 (3-5-8) should be included in the Syrian Reserve.
Mukden
- [11.0] (CORRECTION) All references to mountain hexes should be to rough hexes. Note also that a unit with a Movement Allowance of four or less must expend two additional Movement Points to cross a river hexside.
- [14.13] (CLARIFICATION) This is the only time during the Game-Turn that the Chinese Player may voluntarily create Guerillas.
- [14.14] (ADDITION) Guerillas are also formed from Chinese units destroyed by nuclear weapons.
- [16.21] (CLARIFICATION) City hexes are considered road hexes for purposes of supply.
- [19.1] (CLARIFICATION) The effect of anti-tank units is computed at the instant of combat. Therefore, an anti-tank unit may be eliminated before that combat is resolved.
Chinese Farm Exclusive Rules
Copyright © 1975, Simulations Publications, Inc., New York, N.Y.
10.0 Introduction
Chinese Farm is a simulation, on an operational level, of combat between the Israeli and Egyptian forces around the Suez Canal, during the latter half of the Yom Kippur War, October 15 to 21, 1973.
11.0 Suez Canal
GENERAL RULE:
The Suez Canal, in almost every instance, is to be treated as a river. It does have certain properties that allow only specific units to cross it via specified means.
CASES:
[11.1] EFFECT ON MOVEMENT
[11.11] Zones of Control for all units extend across the Canal.
[11.12] Egyptian units may cross the Suez Canal, during the Movement Phase or as a result of combat, at the Ismailia Bridge only (0701-0801). Egyptian units may cross the Ismailia Bridge in either direction. The Egyptians may be prohibited from crossing the Ismailia Bridge during specified Game-Turns.
[11.13] Israeli (4-3-12) and artillery units may only cross the Canal via the Israeli Engineer unit or the Ismailia Bridge. No units may retreat across an unbridged Canal hexside. All units may retreat across a bridged hexside.
[11.14] All other Israeli units may cross the Canal, either during the Movement Phase or during Advance After Combat, without the aid of a bridge (the Ismailia Bridge or an Israeli Engineer unit). They must pay the appropriate Movement Point Cost when crossing the Canal without a bridge.
[11.2] USE OF ENGINEERS
[11.21] Once an Engineer unit moves adjacent to a Canal hexside, it must cease all further movement. It may not be moved again, voluntarily, from that hex in that or any subsequent Game-Turn. The Engineer unit may move adjacent to the Canal while in a Disrupted state.
[11.22] Beginning on the Game-Turn after the Engineer unit moves adjacent to the Canal, the Israeli Player may use it to allow Friendly units to cross. This is done provided that the Engineer unit is in an undisrupted state (see 11.25) and free of Enemy ZOC.
[11.23] In order for an Israeli unit to use the Engineer unit in crossing the Canal it must pass through the Engineer unit's hex and then into the hex on the other side of the Canal (or vice-versa), paying the appropriate cost for the terrain in the hex (it does not pay the additional 3 MP for the Canal).
[11.24] An Engineer unit bridges all hexsides that it is adjacent to.
[11.25] If, due to combat, the Engineer unit is forced to retreat from the hex in which it is performing its bridging function, it does so and as a result becomes Disrupted. The effects of Disruption last for one complete Game-Turn. The Disrupted unit may not use its bridging function. It may move, have combat, trigger reinforcements, or perform any function other than bridging.
[11.26] If forced to retreat due to combat when not adjacent to the Canal, the Engineer unit does not become Disrupted.
[11.27] If the Engineer unit is eliminated, it re-enters the map on the following Israeli Movement Phase at hex #2901. This represents a replacement unit and the destroyed unit does count towards Victory Conditions.
12.0 Egyptian Special Rules
GENERAL RULE:
These rules pertain to the Egyptian Player only and are to be used in all Scenarios. These are not optional rules.
CASES:
[12.1] ARTILLERY
[12.11] Non-adjacent Egyptian artillery may not use their Offensive Strength (Barrage) against Israeli units that are not adjacent to Egyptian units.
[12.12] Egyptian non-adjacent artillery may always combine or attack alone, using the Barrage Strength, against an Israeli unit that is adjacent to another Egyptian unit.
[12.2] ISMAILIA DEFENSE FORCE
[12.21] The Ismailia Defense Force consists of the following units: 3(1-2-8), 1(3-1-4/1-8).
[12.22] If the Israeli Player, at the end of the Israeli Player-Turn, has units within four hexes of Ismailia, the Egyptian Player receives the Ismailia Defense Force. It arrives in the following Egyptian Movement Phase and appears anywhere between hex 0101-0701.
13.0 Surface to Air Missiles (SAM's)
[13.1] EFFECT ON COMBAT
[13.11] SAM units cannot attack Israeli ground units, nor can Israeli ground units attack SAM units. SAM units have no Zones of Control.
[13.12] A SAM unit is immediately destroyed at the instant an Israeli unit enters the hex (during the Movement or Combat Phase) occupied by the SAM unit.
[13.13] A SAM unit which is displaced due to the retreat of a Friendly unit is destroyed instead.
[13.2] SAM UNIT FIRE
[13.21] Immediately after the commitment of all Israeli Ground Support Points, the Arab Player may use his SAM units to fire on those Ground Support Points. This is accomplished by totalling the SAM Strength being used against the Israeli Ground Support in a given hex, and cross-indexing this total (on the SAM Resolution Table) with the total number of Israeli Ground Support Points committed to that hex. Then the die is rolled. If the number that is rolled is equal to or less than the number shown on the Table, the Arab Player receives a number of Victory Points equal to the number rolled.
EXAMPLE: Two SAM Points are allocated against a hex in which the Israeli Player has committed five Ground Support Points. Cross-indexing yields the number "2." The Arab Player now rolls the die. If a "1" were the result, the Arab Player would receive 1 Victory Point, and if a "2" were rolled, 2 Victory Points would be scored. But if a "3" (or higher) were rolled, the Arab Player would get no Victory Points.
[13.22] A SAM unit may fire only at one hex, and only once per Phase. However, an individual SAM unit may fire once each in three separate Phases: Special Weapons, Israeli Combat, and Arab Combat. After a SAM unit fires during a specific Phase, it should be flipped over, and after the Phase is over, flipped back.
[13.23] The SAM Fire is resolved before any other combat. It must be emphasized that a result against Israeli Air Points counts only towards Victory Points; there is no effect which removes the Air Points from the game or negates their effect on Arab units.
14.0 SAM Suppression
GENERAL RULE:
Arab SAM units may be suppressed by Israeli Ground Support Points for a Game-Turn or longer.
PROCEDURE:
During the Special Weapons Interphase of the Game-Turn, the Israeli Player allocates what Ground Support Points, if any, are to be used in SAM Suppression attacks. He then commits these Ground Support Points against individual SAM units for the attack. Each attack is resolved separately, using the SAM Suppression Table, and the results are applied immediately.
CASES:
[14.1] RESTRICTIONS
[14.11] All Ground Support Points committed to SAM Suppression can only attack once that Game-Turn.
[14.12] SAM units may only SAM Fire once during SAM Suppression.
[14.13] The Israeli Player allocates any number of available Ground Support Points, from those given for that Game-Turn, against any number of SAM's. The remaining Ground Support Points may be used to attack Arab units normally during the Israeli and Arab Combat Phases.
[14.14] All Ground Support Points allocated to SAM Suppression cannot be used for the remainder of the Game-Turn.
[14.2] EFFECTS OF SAM SUPPRESSION
[14.21] A SAM unit may not move or SAM Fire while suppressed.
[14.22] Suppression results are cumulative. Example: A SAM unit which receives an S2 on Game-Turn Four and another S2 on Game-Turn Five is suppressed until the end of Game-Turn Seven.
[14.23] All SAM's regain their normal status at the end of suppression.
[14.3] SEQUENCE OF SAM SUPPRESSION
The Israeli Player announces the number of Ground Support Points that are attempting to suppress an individual SAM unit. Prior to the Israeli attack on the SAM's, the Arab Player has the option to SAM Fire against the Israeli Ground Support Points. The target SAM unit, as well as other SAM units, may combine in the attack. After SAM Fire is resolved, the Israeli Player may proceed with his suppression attack.
[14.4] SAM SUPPRESSION TABLE (See the SAM Suppression Table in the Charts & Tables section above.)
[14.5] USE OF SAM SUPPRESSION TABLE
The Israeli Player totals the number of Ground Support Points allocated to the SAM target hex and rolls the die. He then compares the die roll to the SAM Suppression Table. The results are applied immediately. This must be done for each SAM unit under SAM Suppression attack.
15.0 Reinforcements
GENERAL RULE:
Both Players receive Reinforcements. These appear during the Owning Player's Movement Phase on the Game-Turn indicated on the Reinforcement Schedule. The Reinforcement Schedule states the Game-Turn of appearance, the number of units, the Strength and Movement Value and the specific hex or map edge on which they enter.
PROCEDURE:
During his Movement Phase, the Owning Player places a Reinforcing unit in the scheduled hex or on any hex of the specified map edge. The Owning Player may place them at any time during his Movement Phase.
CASES:
[15.1] MOVEMENT OF REINFORCEMENTS
[15.11] Reinforcements are presumed to be poised adjacent to the map. When placed on the map a Reinforcing unit expends Movement Points to enter the entry hex according to the Terrain Effects Chart. In almost all cases the Reinforcements are entered onto a hex which has a road leading off the map; these units expend Movement Points at the road movement rate to enter the map.
[15.12] In several cases, more than one unit is scheduled to appear in the same hex in the same Game-Turn. These units are deployed off map, one behind the other, with the lead unit poised adjacent to the map entry hex itself. If the entry hex is a road hex, a hypothetical road may be presumed to stretch off the map, away from the entry hex.
[15.13] As each unit enters the map, it will pay the cost for entering the entry hex, plus any additional cost for any hypothetical clear terrain hexes that it would have to traverse to reach the entry hex. If units are entering on a road hex, they are considered to be moving through hypothetical road hexes until they reach the map. Example: The lead unit in the column would pay 1/2 Movement Point to enter the map, the second would pay 1 Movement Point to enter the map, the third 1 1/2 Movement Points, etc., etc.
[15.14] Once on the map, Reinforcements may be moved normally. The Owning Player may begin the arrival of his Reinforcements at any time during his Movement Phase.
[15.2] RESTRICTIONS
[15.21] Reinforcements may not enter a hex which is, at that point, occupied by an Enemy unit. A Reinforcing unit may enter an Enemy controlled hex (but it must cease movement therein).
[15.22] If, and only if, a scheduled entry hex is occupied by an Enemy unit, or a Friendly unit in an Enemy Zone of Control, the Reinforcing unit may enter the nearest unblocked map edge hex to the scheduled hex, in the direction of the nearest Friendly unit.
[15.23] A Player may deliberately withhold Reinforcements from Game-Turn to Game-Turn, bringing them into play (if at all) on some later Turn.
[15.24] Regardless of whether a Reinforcement unit is brought into play on its scheduled Turn, it must appear in its scheduled hex or alternate (see 15.22).
[15.25] Until they enter the map, Reinforcements have no effect on play; they may in no fashion attack Enemy units or hinder their movement until they enter the map.
16.0 Exiting the Map
GENERAL RULE:
Players may exit their units from the map. An exiting unit must expend Movement Points to enter an imaginary hex presumed to be adjacent to the map edge. The terrain in this imaginary hex is presumed to be similar to the terrain in the hex from which the unit exited.
CASES:
[16.1] RESTRICTIONS
[16.11] Once a unit exits the map it may not return.
[16.12] Exited units are not considered eliminated (but see Case 16.13) and are kept separated from eliminated units.
[16.13] A unit may not exit the map as a result of combat. If it does so then it is eliminated. Units may only exit the map during the Owning Player's Movement Phase.
17.0 Victory Conditions
GENERAL RULE:
Victory is judged at the end of a Scenario on the basis of Victory Points scored by the Players. Victory Points are awarded to Players for eliminating Enemy units, for seizing territorial objectives, for exiting the map and (for the Arab Player) as a direct consequence of SAM Fire (see 13.21).
PROCEDURE:
There is no Victory Point record chart. Players must keep track of Victory Points on a piece of scratch paper.
CASES:
[17.1] VALUE OF UNITS IN VICTORY POINTS
[17.11] Each unit has a numerical Victory Point Value equivalent to its total Combat Strengths (Attack plus Defense Strengths for non-Artillery units; Barrage, FPF and Defense Strengths for Artillery units and SAM Strength for SAM units). Thus a 4-3-12 armored battalion is worth seven Victory Points.
[17.12] Victory Points are awarded to the Player when he eliminates Enemy units. If the Arab Player eliminates an Israeli 4-3-12, the Arab would receive seven Victory Points.
[17.2] TERRITORIAL OBJECTIVES
[17.21] Each Scenario will state that a Player will receive a number of Victory Points for each unit that obtains a specific objective (or exits the map). These Points are awarded to the Player at the end of the game on the condition that his units fulfill the requirements. Example: In Scenario I, the Egyptian Player ends the game with five units on the East side of the Canal. He therefore receives fifty Victory Points (5 x 10).
[17.3] LINE OF COMMUNICATIONS
[17.31] Israeli units (only), in order to receive Victory Points for units on the map, must be able to trace a Line of Communication back to El Tasa (2904).
[17.32] A Line of Communication is defined as a series of contiguous hexes not blocked by Enemy units or their Zones of Control.
[17.33] To trace the Line of Communication across the Suez Canal, it may go through either the Ismailia Bridge or the Engineer unit. All Israeli units on the West bank of the Canal must trace a Line of Communication through one or the other.
[17.34] Exited Israeli units need not trace a Line of Communication.
[17.35] Egyptian units are not subject to the Line of Communication Rule.
[17.4] LEVELS OF VICTORY
Victory is determined by comparing the total Victory Points won by each Player, stating the comparison as a ratio (Israeli Player to Arab Player) and evaluating this ratio against the Schedule below.
| Ratio | Victory Level |
|---|---|
| 3.0 or more to 1 | Israeli Decisive |
| between 2.5 and 2.99 to 1 | Israeli Substantive |
| between 2.01 and 2.49 to 1 | Israeli Marginal |
| 2.0 to 1 | Draw |
| between 1.5 and 1.99 to 1 | Arab Marginal |
| between 1.01 and 1.49 to 1 | Arab Substantive |
| 1.0 or less to 1 | Arab Decisive |
18.0 The Scenarios
GENERAL RULE:
Each Scenario specifies each Player's Initial Order of Battle and Reinforcements. Units are identified by their Strength and Movement Values. Units must be deployed in the map area or specific hexes listed.
18.1 Scenario I
[18.11] HISTORICAL NOTES
This Scenario concentrates on the land operation of the Israeli counteroffensives to penetrate the Egyptian line and force a crossing of the Suez Canal. Sharon's Task Force was to open up a bridgehead on the west bank of the Canal, while keeping open a link to the east. The operation began on the evening of Oct. 15, 1973. Opposing the Israelis were the forces of the 16th Egyptian Infantry Division and later the 21st Armored Division, as well as GHQ Reserve units. When the bridge was secured, the Israelis committed Adan's Task Force to penetrate to the west bank.
[18.12] ISRAELI INITIAL ORDER OF BATTLE
Set up according to the positions shown:
4-3-12: 2022, 2123, 2322, 2303, 2306, 2309, 2311, 2404, 2407. 2-3-12: 2222, 2503, 2506, 2510, 2803, 2804. 1-1-12: 2422. 2-1-7/2-12: 2604. 1-2-5/2-12: 2607. 2-1-13/1-12: 2907. 1-1-8: 2904.
[18.13] EGYPTIAN INITIAL ORDER OF BATTLE
Set up according to the positions shown:
1-2-8: 1801, 1803, 1805, 1807, 1809, 1811, 1602, 1606, 1511. 1-2-12: 1603, 1206. 5-3-12: 0902. 1-1-6: 0302, 2126. 3-1-4/1-8: 1503. 3-1-7/1-8: 1406. 4-1-8/1-8: 1308. 3-1-11/1-8: 1103.
[18.14] ISRAELI REINFORCEMENT SCHEDULE
All Israeli Reinforcements enter on hex 2901. The Israeli Player receives Reinforcements on the Game-Turn following the emplacement of the Engineer unit adjacent to the Suez Canal, or on Game-Turn Six, whichever occurs first. These units are:
6(4-3-12), 3(2-3-12).
Two Game-Turns following the emplacement of the Engineer unit, or on Game-Turn Seven, the following arrive:
3(2-3-12), 1(1-2-5/2-12), 1(2-1-7/2-12).
[18.15] EGYPTIAN REINFORCEMENT SCHEDULE
On Game-Turn Two (on hex 2732): 2(3-2-12). On Game-Turn Three (on hex 1001): 2(5-3-12), 1(1-2-12), 1(5-1-7/1-8). On Game-Turn Four (on hex 2532): 3(1-2-12), 1(3-1-4/1-8). On Game-Turn Five (on hex 0701): 3(1-2-12), 1(6-4-12), 1(3-1-4/1-8). On Game-Turn Six (on hex 1831): 3(1-2-12), 1(3-1-7/1-8). On Game-Turn Seven (anywhere on the west edge of the map): 1(6-4-12), 3(1-2-12).
[18.16] SPECIAL RULES
- The Israeli Player is the First Player.
- The Egyptians may not cross the Canal until Game-Turn Four.
- Both Players must use the Mobile CRT for the complete game.
- There are no SAM units or Ground Support Points in this Scenario.
[18.17] GAME LENGTH
The Scenario length is eight Game-Turns.
[18.18] VICTORY CONDITIONS
The Egyptian Player receives Points for the following territorial objectives, as well as for Israeli units destroyed (see 17.1 and 17.2). The Egyptian Player receives ten Points for each Egyptian unit on the East side of the Suez Canal (they must be on the map).
The Israeli Player receives Points for the following territorial objectives: 25 Points (total) for occupying all Ismailia hexes. 10 Points for each Israeli armor unit on the West bank of the Canal. 5 Points for each Israeli non-armor unit on the West bank of the Canal. The Israeli Player does not receive Victory Points for destroying Egyptian units.
18.2 Scenario II
[18.21] HISTORICAL NOTES
This Scenario covers the entire Israeli counterattack to cross the Suez Canal and defeat the Egyptians. Both the land battle and SAM vs. Air Power battle are simulated. Sharon's Task Force was responsible for securing the crossing of the Canal, while a second Task Force drove across bridgehead. But the Egyptians counterattacked. The ensuing battle for the crossing point became known as the Battle of "Chinese" Farm, the local Japanese agricultural station. The Israelis blunted this drive, then proceeded to cross the Canal in force and drove to Suez City.
[18.22] ISRAELI INITIAL ORDER OF BATTLE
Same as (18.12).
[18.23] EGYPTIAN INITIAL ORDER OF BATTLE
Same as (18.13), plus:
3-15/0-12: 0102, 1202. 2-15/0-0: 0404, 0512, 0521, 1427. 1-25/0-0: 0308, 0316, 0925, 2029.
[18.24] ISRAELI REINFORCEMENT SCHEDULE
Same as (18.14), plus the following Ground Support Points, which are available on the indicated Game-Turns:
On Game-Turn One: 6. On Game-Turns Two and Three: 8 each. On Game-Turns Four, Five and Six: 12 each. On Game-Turns Seven, Eight and Nine: 15 each. On Game-Turns Ten, Eleven and Twelve: 18 each.
[18.25] EGYPTIAN REINFORCEMENT SCHEDULE
Same as (18.15), plus:
On Game-Turn Eight (on hex 1831): 3(1-2-12), 1(3-15/0-12), 1(3-1-7/1-8). On Game-Turn Nine (anywhere on the south edge of the map, west of hex 2532, inclusive): 1(6-4-12), 1(3-1-7/1-8). On Game-Turn Ten (on hex 1831): 2(6-4-12), 1(4-1-8/1-8).
[18.26] SPECIAL RULES
- The Israeli Player is the First Player.
- The Egyptians may not cross the Canal until Game-Turn Four.
- The Egyptian Player may use the Active CRT for any three or fewer consecutive Game-Turns.
- The Israeli Player may only use the Mobile CRT.
[18.27] GAME LENGTH
The Scenario length is twelve Game-Turns.
[18.28] VICTORY CONDITIONS
The Egyptian Player receives Points in the same manner as in (18.18) and, in addition, receives one Victory Point for each Israeli Air Point scored upon (see 13.21).
The Israeli Player receives Points for the following territorial objectives: 25 Points (total) for occupying all Ismailia hexes. 3 Points for each armor unit on the West bank of the Canal. 2 Points for each non-armor unit on the West bank of the Canal. 3 additional Points for each Israeli unit to exit off the west edge of the map between hexes 0119-0132 (inclusive) only. 5 additional Points for each Israeli unit to exit off the south edge of the map between hexes 0232-2532 (inclusive) only. The Israeli Player does not receive Victory Points for destroying Egyptian units.
18.3 Scenario III
[18.31] HISTORICAL NOTES
This Scenario gives the Egyptian Player more flexibility. It assumes that the Arabs had defended their position in depth. The Israelis, on the other hand, are forced to drive against the Egyptians in force and try to clear the East side of the Canal through a head to head struggle.
[18.32] ISRAELI INITIAL ORDER OF BATTLE
Set up anywhere east of the 2200 hexrow (inclusive):
15(4-3-12), 12(2-3-12), 1(1-1-12), 1(1-1-8), 1(2-1-13/1-12), 2(2-1-7/2-12), 2(1-2-5/2-12).
[18.33] EGYPTIAN INITIAL ORDER OF BATTLE
Set up anywhere east of the Suez Canal and west of the 1900 hexrow (inclusive):
9(1-2-8), 3(1-2-12), 3(5-3-12), 1(3-1-4/1-8), 1(3-1-7/1-8), 1(3-1-11/1-8), 1(5-1-7/1-8), 1(4-1-8/1-8).
Set up anywhere west of the Suez Canal:
2(1-1-6), 6(1-2-12), 1(6-4-12), 1(3-1-7/1-8), 4(1-25/0-0), 4(2-15/0-0), 2(3-15/0-12).
[18.34] ISRAELI REINFORCEMENT SCHEDULE
The following Ground Support Points are available on the indicated Game-Turns:
On Game-Turns One, Two, Three, Four and Five: 12 each. On Game-Turns Six, Seven and Eight: 14 each. On Game-Turns Nine, Ten, Eleven and Twelve: 16 each.
[18.35] EGYPTIAN REINFORCEMENT SCHEDULE
On Game-Turn Two (on hex 0501): 3(1-2-12), 1(3-1-4/1-8). On Game-Turn Three (on hex 2732): 2(3-2-12). On Game-Turn Five (on hex 0106): 2(1-2-12), 1(4-1-8/1-8), 1(6-4-12). On Game-Turn Six (on hex 0103): 2(6-4-12), 1(3-1-7/1-8), 1(3-15/0-12). On Game-Turn Seven (on hex 0119): 3(1-2-12), 1(3-1-7/1-8). On Game-Turn Eight (on hex 0116): 1(1-2-12), 1(3-1-4/1-8), 1(6-4-12).
[18.36] SPECIAL RULES
- The Israeli Player is the First Player.
- The Israelis set up first.
- The Egyptian Player may cross the Ismailia Bridge at any time during the game.
- Either Player may use the Active or Mobile CRT for ground attacks. Once the specific Phasing Player has stated that he is using a specific CRT, he must use it for all his ground combats in his Combat Phase. The following Game-Turn he may change CRT's.
[18.37] GAME LENGTH
The Scenario length is twelve Game-Turns.
[18.38] VICTORY CONDITIONS
The Egyptian Player receives Points in the same manner as (18.28).
The Israeli Player receives Points in the same manner as (18.28), and, in addition, receives Points for destroying Egyptian units (see 17.1).
19.0 Game Notes
[19.1] PLAYER'S NOTES
The Israeli strategy for all three Scenarios is one of total offense. The Israeli Player's first priority is to get his Engineer units emplaced on the Suez Canal. This must be accomplished as quickly as possible. Time works against the Israelis.
In Scenarios I and II, the Israelis must rely on the force that begins to the south of the Egyptian lines. This force should serve two functions. First, to secure a crossing area and, second, to attack the Egyptians from the rear. This attack from the rear coupled with a direct frontal assault should quickly open up for the Israelis an access route from El Tasa to the Great Bitter Lake.
In Scenario II, the introduction of Air Power will help the Israelis immensely. But the Israeli Player must remember to be cautious in allocation, since a concentration of Ground Support Points gives the Egyptian SAM's a greater chance of success. In this Scenario, the Israeli should dispatch at least one unit, as early as possible, across the Canal to destroy SAM's.
Scenario III is somewhat more evenly matched. The Israelis should try a two-pronged attack; one against Ismailia and the other towards the center of the Canal. The Israelis should try to eliminate all Egyptian units on the East side of the Canal, or at least force them to withdraw, before attempting to cross. Crossing the Canal will be difficult and concentrated artillery and Air Power will be needed to breach the Canal and maintain a bridgehead.
In Scenarios I and II, the overall situation for the Egyptians is one of defense. But they do have the capacity for local counterattacks and must use it to its utmost. Scenario I gives basically three options to the Egyptian. The first option would be for the Egyptians to counterattack on the First Game-Turn toward the "Y" junction (around 1810). The objective would be to block the Engineer unit from using the roads to reach the Canal. The second option is to attack immediately the unit or units screening the bridging site. Using armor and artillery, this could be successful. The third option is one of total withdrawal, falling back to the Canal and holding on the West bank. Should the Egyptian Player find himself in a good position by the Third Game-Turn, then he should use those reinforcements to drive south on the Israeli bridge site.
The second Scenario changes things drastically. Again delay is the key word. The Egyptian Player must look to exploit any Israeli mistake (breakout to El Tasa) and use his SAM's to the maximum.
In the third Scenario, the Egyptians usually win or lose the game at the Canal. Deploy infantry in the front line, on the East bank, with artillery in the rear, but spaced so that it can give interlocking fire to all units. The more mobile units should be held in reserve. The SAMs must be placed so that they can reach the front line.
The Egyptians should retreat in good order and eventually pull all of their units across the Canal. A cardinal rule for the Egyptian Player is to guard his artillery at all costs. The defense of the Canal is extremely important.
In all Scenarios the tactic is: Surround to eliminate. Both Players should stick to the Mobile CRT. Only the Egyptian Player should ever think of using the Active CRT and only in desperate situations, i.e., direct assault against the Engineers.
[19.2] DESIGNER'S NOTES
For obvious reasons it is difficult to obtain detailed information about the October War of 1973. There have been at least two books published on the war and numerous articles have been written in professional journals, but much relevant information has not been revealed yet. The most difficult project in doing the game was trying to find an Order of Battle for the Egyptians and Israelis. Many major units have been identified, but below that it is mainly conjecture.
Other problems occurred in trying to discover the T.O.&E. (Table of Organization and Equipment) for units involved in the fighting. The Israelis do not use a permanent divisional structure. They grouped their brigades and support units into an "Ugda" or Task Force. An Ugda is usually three brigades, but it can be more or less, depending upon its task. An armored Task Force may contain three armored brigades or two armored brigades and one mechanized brigade. A unit operating in the Sinai would usually have the former configuration. Attached to the Ugda would be one battalion of self-propelled artillery (105 or 155), a recon battalion, a mechanized parachute battalion and service units.
The armor brigade would have either three armored battalions (in the game, each battalion is a 4-3-12) or two armored battalions and a mechanized battalion (2-3-12). Again, depending upon the situation and use. A mechanized brigade would have the converse organization: two mech bns. and one arm. bn. Attached to the brigades are a recon company (1-1-12), a self-propelled mortar battalion and other service units. The SP mortars are 160mm and they usually operate amongst the battalions and not independently. Therefore, in the game they are not represented as individual units.
The Egyptians use a more standard organization for their forces. The infantry division is composed of three brigades of three infantry battalions each (three 1-1-8's). The infantry division also has one armored brigade, which is dispersed among the infantry units and is never used as a single armor force. Each division would also have a number of artillery units. It is assumed that they have a rocket battalion (3-1-4/1-8) and a regiment of 122mm howitzers (3-1-7/1-8) as well as other service units.
The armored division is composed of three armored brigades (5-3-12 or 6-4-12) and one mechanized brigade. In the game, the armor was kept in brigade formation and the mechanized brigade was broken down into its three battalions (1-2-12's). Divisional artillery, again, is based on assumption. Probably (resembling the Soviets), a howitzer regiment (3-1-7/1-8) and a rocket battalion (4-1-8/1-8). An Egyptian mechanized division contains two mech brigades and one armored brigade. In total, six 1-2-12's and one 6-4-12. Artillery for this division is put at one rocket battalion (3-1-4/1-8) and one howitzer battalion (3-1-7/1-8).
Much has been written on the missile war aspect of the Fourth Arab-Israeli War. A great deal of publicity has also been given to the SNAPPER and SAGGER wire-guided anti-tank missiles. Their effectiveness, though still potent, may be overestimated. These missiles did manage to put out of action some 32% of Israel's 840 (estimated for both fronts) tank losses. But at least 75% of these were during the first few days of fighting. The other Egyptian infantry operated weapon, the RPG-7 (equivalent to the U.S. LAW) accounted for another 10%. But by the second week of fighting, the Israelis had developed tactics to diminish the effectiveness of these weapons.
The Israelis used the integration of more anti-personnel firepower into the armored battalions to help suppress the missile firing infantry. They did this by adding a company of armored infantry to the tank battalions. These fourteen to sixteen APC's mounted 4-5 machine guns, plus a squad of infantry each. The men and weapons would be able to apply concentrated fire onto any enemy infantry that tried to move against the tanks they screened. Also the SAGGER was discovered to be a slow moving missile that took approximately 25 seconds to travel the maximum 3,000 meters to its target. This gave an alert crew time to take advantage of the folds in the desert terrain to "dodge" the projectile. All this lead to the loss of effectiveness to the missile-heavy Egyptian infantry.
The Israelis still maintained their advantage in tank to tank actions. Superior range finding equipment, better quality weapons and marksmanship prevailed. But the Egyptians still gave a good account of themselves, maneuvering in close where they had a greater chance for success. The combined Arab tank effort accounted for 21% of Israel's tank losses.
The air war required even further analysis than what the press reported. The game only simulates the air to ground tactical operations of the Israeli Air Force. The air to air aspect was a one-sided affair — the Egyptians losing at least 150 aircraft to approximately ten Israeli. Certainly not much of a contest.
Concerning surface to air missiles, though they did bring down a number of Israeli aircraft, their effect must be looked at in conjunction with conventional anti-aircraft fire. Especially the Soviet-made ZSU-23. In the game, as in the war, their effects are combined. A SAM unit represents a battery of SAM's and its local AA defense. 80% of the 103 (approx.) Israeli aircraft losses were due to SAM and AA. But some 55-80 planes were lost on both fronts in the first three days of fighting. And some 30 or so of those were due to the new SAM-6's. Approximately 20 additional aircraft were lost by Israel over the Suez during the duration of the war. This somewhat reduces the power of the SAM's during the second week, which is what Chinese Farm covers.
The loss of the SAM effectiveness is due to the lessons learned quickly by the Israeli pilots on how to maneuver (or at least try) the SAM-6's. The SAM 2's and 3's were almost impotent throughout the war. The Israelis had already found effective ECM. While SAM-7 (a hand-held weapon) could very rarely destroy aircraft, but only damage them due to their small, high-explosive charge, they did manage to bring down at least three and possibly seven planes. But for the game, their effect is nil.
One Israeli Ground Support Point represents either two Phantoms or three Skyhawks, with each plane flying four sorties. At no time did the Egyptian SAM/AA umbrella stop the Israeli Air Force from completing a mission. They went in and took their losses. This was especially true during the opening days when they went against the bridges.
Golan Exclusive Rules
10.0 Introduction
Golan is a two-Player simulation of the conflict between Israel and the Arab allies (primarily Syria, Iraq and Jordan) in October of 1973. The game focuses on the ground-air battle which opened with a nearly successful Syrian attack, and ended with the Israelis at the gates of Damascus. There are two hypothetical Scenarios and one historical Scenario. Play is regulated by a simple sequential movement and combat system.
11.0 Fortified Hexes
General Rule. Fortified hexes simulate the rather extensive network of semi-permanent field fortifications which both the Israelis and the Syrians had erected. Fortified hexes affect Combat and Zones of Control.
Cases:
11.1 Effect on Defense
11.11 A unit defending in a Fortified hex has its printed Defense Strength doubled.
11.12 Final Protective Fire does not double when added to a unit defending in a Fortified hex.
11.2 Effect on Combat Resolution
11.21 In an attack where the defending unit is in a Fortified hex, shift the Combat Resolution Differential three columns to the left. This is noted on the Terrain Effects Chart. This effect is in place of, rather than in addition to, other terrain benefits in the hex.
11.22 If a unit is defending in a Fortified hex and a Br (both retreat) Result is rolled, the attacking unit(s) must retreat first. (This is an exception to the explanation in Rule 7.65.)
11.23 Given an Exchange or an Attacker Exchange (Ex or Ax) Result, losses are calculated on the basis of the printed Defense Strengths of the units concerned.
11.3 Effect on Zones of Control
11.31 A unit in a Fortified hex maintains its normal Zone of Control.
11.32 A unit in a Fortified hex is exempt from Rule 7.2, which essentially requires a Friendly unit to attack an adjacent Enemy unit. This exemption is an option open to the Player owning the unit in the Fortified hex. He may, if he wishes, cause the unit in the Fortified hex to attack. If he does so, Rule 7.2 applies with full vigor (i.e., all adjacent Enemy units must be attacked; he can't be selective). If he applies the exemption, the unit in a Fortified hex simply remains inactive and in place during his Combat Phase (though it maintains its Zone of Control).
11.4 Effect on Movement
A Fortified hex has no effect on Movement, per se. The other terrain in the hex dictates Movement Point costs normally.
11.5 Permanence of Fortified Hexes
11.51 A Fortified hex is permanent, regardless of the fate of occupying units.
11.52 A Fortified hex benefits whichever nationality is in occupation. The terms "Syrian" Fortified hexes or "Israeli" Fortified hexes refer to their initial positions on either side of the DMZ and are of no consequence in play (though Victory Conditions may reflect on final occupation).
11.6 Effect on Air War and Artillery
11.61 SAM units derive no benefit from a Fortified hex.
11.62 A unit in a Fortified hex is not affected by Barrage Fire which is not combined with a ground attack. Thus, the Attacking Player cannot use Artillery Barrage Fire to "soak off" against a unit in a Fortified hex. If he uses Barrage Fire against a Fortified hex, he must do so in conjunction with the attack of an adjacent unit.
12.0 Israeli Anti-Tank Ditch and DMZ Line
General Rule. The De-Militarized Zone (DMZ) was established by the U.N. to keep Syrian and Israeli forces apart. In addition, the Israelis had erected an anti-tank ditch running behind the DMZ.
Cases:
12.1 Effect
12.11 Units may not be initially deployed in DMZ hexes, nor may reinforcements enter the map via DMZ hexes. DMZ hexes have no effect upon Combat. The other terrain in the DMZ hex determines the Movement Point cost.
12.12 During Game-Turns One and Two a unit must expend two additional Movement Points to cross the Anti-Tank Ditch, and must shift left one column on the CRT when attacking solely across the Anti-Tank Ditch. From Game-Turn Three on, the Anti-Tank Ditch is ignored.
Errata (Quadrigame Errata, 19 Sept. '76), 12.12 Clarification: The additional Movement Point cost for the anti-tank ditch on Game-Turns 1 and 2 is not negated by roads and trails running through the hexside.
13.0 Surface to Air Missiles (SAMs)
General Rule. SAM units are used to score Victory Points against Israeli air power. These units exert no Zone of Control and have no Attack or Defense Strength against ground units.
13.1 Effect on Combat
13.11 SAM units cannot attack Israeli ground units, nor can Israeli ground units attack SAM units. SAM units have no Zones of Control.
13.12 A SAM unit is immediately destroyed at the instant an Israeli unit enters the hex (during the Movement or Combat Phase) occupied by the SAM unit.
13.13 A SAM unit which is displaced due to the retreat of a Friendly unit is destroyed instead.
13.2 SAM Unit Fire
13.21 Immediately after the commitment of all Israeli Ground Support Points, the Syrian Player may use his SAM units to fire on those Ground Support Points. This is accomplished by totalling the SAM Strength being used against the Israeli Ground Support in a given hex, and cross-indexing this total (on the SAM Resolution Table) with the total number of Israeli Ground Support Points committed to that hex. Then the die is rolled. If the number that is rolled is equal to or less than the number shown on the Table, the Syrian Player receives a number of Victory Points equal to the number rolled.
Example: Two SAM Points are allocated against a hex in which the Israeli Player has committed five Ground Support Points. Cross-indexing yields the number "2." The Syrian Player now rolls the die. If a "1" were the result, the Syrian Player would receive 1 Victory Point, and if a "2" were rolled, 2 Victory Points would be scored. But if a "3" (or higher) were rolled, the Syrian Player would get no Victory Points.
13.22 A SAM unit may fire only at one hex, and only once per Phase. However, an individual SAM unit may fire once each in three separate Phases: Special Weapons, Israeli Combat and Syrian Combat. After a SAM unit fires during a specific Phase, it should be flipped over, and after the Phase is over, flipped back.
13.23 The SAM Fire is resolved before any other combat. It must be emphasized that a result against Israeli Ground Support Points counts only towards Victory Points; there is no effect which removes the Ground Support Points from the game or negates their effect on Arab units.
14.0 SAM Suppression
General Rule. Syrian SAM units may be suppressed or neutralized by Israeli Ground Support Points for a Game-Turn or longer.
Procedure. During the Special Weapons Interphase of the Game-Turn, the Israeli Player allocates what Ground Support Points, if any, are to be used in SAM Suppression attacks. He then commits these Ground Support Points against individual SAM units for the attack. Each attack is resolved separately, using the SAM Suppression Table, and the results are applied immediately.
Cases:
14.1 Restrictions
14.11 All Ground Support Points committed to SAM Suppression can only attack once that Game-Turn.
14.12 SAM units may only SAM Fire once during SAM Suppression.
14.13 The Israeli Player allocates any number of available Ground Support Points, from those given for that Game-Turn, against any number of SAM's. The remaining Ground Support Points may be used to attack Arab units normally during the Israeli and Arab Combat Phases.
14.14 All Ground Support Points allocated to SAM Suppression cannot be used for the remainder of the Game-Turn.
14.2 Effects of SAM Suppression
14.21 A SAM unit may not move or SAM Fire while suppressed.
14.22 Suppression results are cumulative. Example: A SAM unit which receives an S2 on Game-Turn Four and another S2 on Game-Turn Five is suppressed until the end of Game-Turn Seven.
14.23 All SAM's regain their normal status at the end of suppression.
14.3 Sequence of SAM Suppression
The Israeli Player announces the number of Ground Support Points that are attempting to suppress an individual SAM unit. Prior to the Israeli attack on the SAM's, the Syrian Player has the option to SAM Fire against the Israeli Ground Support Points. The target SAM unit, as well as other SAM units, may combine in the attack. After SAM Fire is resolved, the Israeli Player may proceed with his suppression attack.
14.4 SAM Suppression Table
(See separate sheet.)
14.5 Use of SAM Suppression Table
The Israeli Player totals the number of Ground Support Points allocated to the SAM target hex and rolls the die. He then compares the die roll to the SAM Suppression Table. The results are applied immediately. This must be done for each SAM unit under SAM Suppression attack.
15.0 Reinforcements
General Rule. Both Players receive Reinforcements. These appear during the Owning Player's Movement Phase on the Game-Turn indicated on the Reinforcement Schedule. The Reinforcement Schedule states the value of the Reinforcing units, the number of units, Game-Turn of appearance and the specific hex or mapedge on which they enter the map.
Procedure. During his Movement Phase, the Owning Player places a Reinforcing unit in the scheduled hex or on any hex of the specified mapedge. He may place them at any time during his Movement Phase.
Cases:
15.1 Movement of Reinforcements
15.11 Reinforcements are presumed to be poised adjacent to the map. When placed on the map, a Reinforcement expends Movement Points to enter the entry hex according to the Terrain Effects Chart. In almost all cases the Reinforcements are entered onto a hex which has a road leading off the map; these units expend Movement Points at the road movement rate to enter the map.
15.12 In several cases more than one unit is scheduled to appear in the same hex in the same Game-Turn. These units are deployed off map, one behind the other, with the lead unit poised adjacent to the map entry hex listed. If the entry hex is a road hex, a hypothetical road may be presumed to stretch off the map, away from the entry hex.
15.13 As each unit enters the map, it will pay the cost for entering the entry hex, plus the additional cost for any hypothetical clear terrain hexes that it would have to traverse to reach the entry hex. If units are entering on a road hex, they are considered to be moving through hypothetical road hexes until they reach the map. Example: The lead unit in a column would pay 1/2 Movement Point to enter the map, the second would pay 1 Movement Point to enter the map, the third 1 1/2 Movement Points, etc., etc.
15.14 Once on the map, Reinforcements may be moved normally. The Owning Player may begin the arrival of his Reinforcements at any time during his Movement Phase.
15.2 Restrictions
15.21 Reinforcements may not enter a hex which is at that point occupied by an Enemy unit. A Reinforcement may enter an Enemy controlled hex (but it must cease movement therein).
15.22 If, and only if, a scheduled entry hex is occupied by an Enemy unit (or a Friendly unit in an Enemy Zone of Control), the Reinforcing unit may enter the nearest unblocked mapedge hex to the scheduled hex, in the direction of the nearest Friendly unit. (However, all Friendly units must appear on the Friendly side of the DMZ.)
15.23 A Player may deliberately withhold Reinforcements from Game-Turn to Game-Turn, bringing them into play (if at all) on some later Turn.
15.24 Regardless of whether a Reinforcement unit is brought into play on its scheduled Turn, it must appear in its scheduled hex or alternate (see 15.22).
15.25 Until they enter the map, Reinforcements have no effect on play; they do not cast a Zone of Control onto the map, nor may artillery units (for example) fire from imaginary hexes off the map.
16.0 Exiting the Map
General Rule. Players may exit their units from the map. An exiting unit must expend Movement Points to enter an imaginary hex presumed to be adjacent to the mapedge. The terrain in this imaginary hex is presumed to be similar to the terrain in the hex from which the unit exited.
Cases:
16.1 Restrictions
16.11 Once a unit exits the map it may not return.
16.12 Exited units are not considered eliminated (but see Case 16.13), and are kept separated from eliminated units.
16.13 A unit may not exit the map as a result of combat. If it does so, then it is eliminated. Units may only exit the map during the Owning Player's Movement Phase.
17.0 Allocation of Israeli Ground Support Points
17.1 Allocation
17.11 On every Game-Turn the Israeli Player has 30 Ground Support Points available for his use. Prior to the start of the Game-Turn, he must decide exactly how many of these Ground Support Points he will use in that Game-Turn. He may use no Points, all thirty Points, or some number in between. He decides on the number and notes this number secretly on a piece of scrap paper.
17.12 Whatever number he selects, the Israeli Player must use all of the Points during the course of the Game-Turn. That is, if he selected twenty-five Points, he must use these twenty-five Points during the course of that Game-Turn, in some combination of legitimate actions.
17.13 The Israeli Player must select the number of Ground Support Points available for his use, without necessarily knowing exactly what course the Game-Turn will take.
18.0 Syrian Restrictions
18.1 Artillery
18.11 Syrian artillery units may only use Barrage Fire against Israeli targets in Israel in coordination with ground attacks. The term "Israel" includes the Golan occupied zone behind the DMZ.
18.12 Syrian artillery may be used without restriction to fire on targets in Syria. (Printed as "may by used".)
18.2 SAM's
18.21 Syrian SAM units may not move into Israeli Golan.
18.3 Syrian Reserves
The Syrian Reserve units which are deployed in and around Sasa (2804) may not be moved until Game-Turn Eight or until an Israeli unit enters Syria, whichever comes first.
19.0 Victory Conditions
General Rule. Victory is judged at the end of a Scenario on the basis of Victory Points scored by the Players. Victory Points are awarded to Players for eliminating Enemy units, for seizing territorial objectives and (to the Syrian Player) as a direct consequence of SAM Fire (see 13.21).
Procedure. There is no Victory Points record chart. Players must keep track of Victory Points scored on a piece of scrap paper.
Cases:
19.1 Value of Units in Victory Points
19.11 Each unit has a numerical Victory Point value equivalent to its total Combat Strengths (Attack plus Defense Strength for non-artillery units; Barrage, FPF and Defense Strengths for artillery units; and SAM Strength for SAM units). Thus a 4-3-12 armored battalion is worth 7 Victory Points.
19.12 Victory Points are awarded to a Player when he eliminates Enemy units. If the Syrian Player eliminates an Israeli 4-3-12, he (the Syrian) would receive seven Victory Points.
19.2 Territorial Objectives
19.21 Each Scenario will list certain hexes by number and Victory Point Value, to each Player. These Points are awarded to the Player at the end of the game on the condition that his units occupy the hex. Occupation is defined as being the last Player to have a unit physically present in the hex.
19.22 Some hexes are listed as having conditional Victory Point Value. E.g., Player X receives Y Points if he has occupied Hex Z by the end of the Sixth Game-Turn, etc.
19.3 Levels of Victory
19.31 Victory is determined by comparing the total Victory Points won by each Player, stating this comparison as a ratio (Israeli Player to Syrian Player) and evaluating this ratio against the Schedule below.
19.32 Victory Level Schedule
| Ratio | Victory Level |
|---|---|
| 3.0 or more to 1 | Israeli Decisive |
| between 2.5 and 2.99 to 1 | Israeli Substantive |
| between 2.01 and 2.49 to 1 | Israeli Marginal |
| 2.0 to 1 | Draw |
| between 1.5 and 1.99 to 1 | Syrian Marginal |
| between 1.01 and 1.49 to 1 | Syrian Substantive |
| 1.0 or less to 1 | Syrian Decisive |
19.4 Mandatory Syrian Offensive
The play balance of all Scenarios in Golan is based on the assumption that the Syrian Player will conduct an all-out offensive into Israeli-held Golan. In order to realize this assumption, the following requirements are normally incumbent on the Syrian Player. In all Scenarios, if he fails to meet these requirements, he automatically loses and the Israeli Player wins a Decisive Victory regardless of the Victory Point Ratio.
19.41 The Syrian Player must seize at any time at least three Israeli Fortified hexes. Seizure is defined as moving a Syrian unit into or through the hex. The Syrian need not hold these hexes nor does he need to seize all three on the same Game-Turn. (There is no time-limit to this requirement. It must be met by the end of the Scenario. In most games it becomes obvious long before the end of a Scenario whether the Syrian Player will meet this requirement.)
19.42 At the end of any one Game-Turn (of the Syrian Player's choice) there must be at least ten Arab units west of hexrow 1200, inclusive. After this condition is met, these units need not remain west of hexrow 1200.
19.5 Automatic Syrian Victory
The Syrian Player wins an Automatic Syrian Decisive Victory if he exits an Arab unit off the west edge of the map and meets the requirements in 19.4. He may exit the unit during any Game-Turn, but it only counts if and when he fulfills the conditions of Case 19.4.
20.0 The Scenarios
Golan has three Scenarios; the first, or historical, Scenario is based on the actual forces engaged in the war; the second examines the consequences of an early Israeli mobilization; the third envisions a more competent Arab army. Each Scenario is a complete game in itself.
General Rule. The instructions for each Scenario include: Historical Notes, detailing briefly the events and circumstances of the Scenario; each Player's Initial Order of Battle and these initial units' deployment hexes; the Reinforcement Schedule for each Player; Special Rules in effect for that particular Scenario; the length (in Game-Turns) of the Scenario; and the special Victory Conditions of that Scenario.
Cases:
20.1 Scenario I
20.11 Historical Notes. Shortly after noon on October 6, 1973, Israeli radar began plotting incoming Syrian threats which soon after turned out to be Suhkoi 7 fighter-bombers delivering the opening strikes of the Yom Kippur War at targets inside Israeli-held Golan. These attacks were followed by an intense artillery barrage and the onfall of two Syrian infantry divisions and a mechanized division reinforced with strong armored components. By nightfall the Israeli defenders (two understrength armored brigades, plus scattered infantry) were totally committed along a 50 kilometer front. Within twenty-four hours the Syrians were within three or four klicks of the escarpment heights overlooking the Jacov Bridge and the all-important road leading up from the bridge to Naffak and Kuneitra. But this was their high water-mark. Arriving Israeli reserves, the incessant strikes of the Israeli Air Force and severe attrition caused by the self-sacrifice of the initial Israeli defenders stopped the Syrian advance. The Israeli Counter-attack began on October 8th. It was no blitzkrieg, but an effective, methodical combined arms operation which first crushed the Syrian forces in Golan, then advanced into pre-war Syria, dealing in turn with Syrian reserves and newly arrived Iraqi and Jordanian forces. The Israeli drive persisted for about a week, terminating in a salient that reached to Sasa. For the remainder of the war, the Israelis were content to stay in place, confident that they had shattered the Arab offensive capability.
20.12 Israeli Initial Order of Battle
- Within six hexes of hex 1416: 3(4-3-12)
- Within seven hexes of hex 1424: 2(4-3-12).
- On hex 1411: 1(2-3-12).
- On hex 2028: 1(2-3-12).
- Anywhere in Israeli Golan: 2(1-2-5/2-12), 2(2-3-7/2-12).
20.13 Syrian Initial Order of Battle
- Within two hexes of hex 1710: 3(3-5-8), 1(6-4-12), 1(2-1-8/1-8).
- Within two hexes of hex 2014: 3(3-5-8), 1(6-4-12), 1(2-1-8/1-8).
- Within three hexes of hex 2230: 2(5-5-12), 1(6-4-12), 1(2-1-8/1-8).
- On or adjacent to hex 2310: 3(6-4-12), 1(1-2-12), 1(2-1-8/1-8).
- On or adjacent to hex 2823: 3(6-4-12), 1(1-2-12), 1(2-1-8/1-8).
- On hex 1507: 1(3-5-8).
- Anywhere in Syria: 2(4-2-7/1-6), 2(2-1-11/1-8), 2(3-1-4/1-8).
- Anywhere in Syria: 6(1-25/0-0), 4(2-15/0-0), 6(3-12/0-12).
- Within three hexes of Sasa. (This is the Syrian Reserve. See 18.3 for employment.) 2(6-4-12), 1(4-5-12), 2(3-5-8), 2(2-1-8/1-8).
20.14 Israeli Reinforcement Schedule
- On Game-Turn Two (on hex 0124): 2(4-3-12).
- (on hex 0115): 2(2-3-12).
- (on hex 0132): 1(2-3-12), 1(1-2-5/2-12).
- On Game-Turn Three (on hex 0124): 3(4-3-12).
- (on hex 0633): 1(4-3-12).
- (on hex 0132): 1(2-3-12), 1(2-3-7/2-12).
- On Game-Turn Four (on hex 0124): 2(4-3-12), 2(2-3-12), 1(3-2-13/1-12).
- (on hex 0633): 1(4-3-12).
- (on hex 0132): 1(2-3-12), 1(3-2-13/1-12).
- On Game-Turn Five (on hex 0115): 2(2-3-12).
- (on hex 0132): 1(2-3-12).
- (on hex 0633): 1(1-2-12).
20.15 Syrian Reinforcement Schedule
- On Game-Turn Ten (on hex 2914): 2(6-4-12), 1(4-4-12), 1(5-5-8).
- On Game-Turn Nineteen (on hex 2823): 1(8-6-12).
20.16 Special Rules
- The Syrian Player is the First Player.
- During the first six Game-Turns the Syrian Player must use the Active Combat Results Table. Thereafter he may continue to use the Active Combat Results Table for as long as he wishes, reverting to the Mobile Combat Results Table when he sees fit. When he does switch to the Mobile CRT, he may not thereafter revert to the Active CRT.
- The Israeli Player may use either the Active or the Mobile Combat Results Table on any Game-Turn as he sees fit.
20.17 Game Length. This Scenario lasts thirty-two Game-Turns.
20.18 Victory Conditions. Victory Point Values for Territorial Objectives:
| Objective/Hex | Israeli | Syrian |
|---|---|---|
| Sasa 2804 | 25 | — |
| Baht Jinn 2003 | 15 | — |
| Nawa 2933 | 10 | — |
| Harrah 2721 | 10 | — |
| Kuneitra 1416 | — | 50 |
| Naffak 0921 | — | 100 |
| Massada 1007 | — | 25 |
| Rafid 2028 | — | 10 |
The Syrian Player receives a bonus of 25 Victory Points if at the end of Game-Turn Twelve there are six or fewer Israeli units inside Syria as defined by the Syrian DMZ line.
20.2 Scenario II
20.21 Historical Notes. Israeli intelligence had monitored the Arab forward deployment of troops both on the Golan and Suez fronts. However, for a complex variety of reasons, the Israelis chose not to mobilize their reserves until almost too late. Assuming that the Israelis had mobilized some twenty-four to forty-eight hours earlier than they did, they could have presented a much stronger defense in the Golan. Assuming that the Arabs still attacked when they did, we would expect that the Syrians would have been stopped almost on the DMZ and quickly thrust back into Syria.
20.22 Israeli Initial Order of Battle. Set up exactly as shown in Scenario I (20.12).
20.23 Syrian Initial Order of Battle. Set up exactly as shown in Scenario I (20.13).
20.24 Israeli Reinforcement Schedule. Exactly as shown in Scenario I (20.14).
20.25 Syrian Reinforcement Schedule. Exactly as shown in Scenario I (20.15).
20.26 Special Rules
- The Syrian Player is the First Player.
- During the first three Game-Turns neither Player may move his units across the DMZ line, no artillery may be fired, and no air power used. Each Player is restricted to moving forces within his own country and receiving reinforcements. Starting with Game-Turn Four, both Players may move and fight normally.
- On Game-Turns Four, Five and Six, the Syrian Player must use the Active Combat Results Table.
- The Israeli Player may use either the Active or the Mobile Combat Results Table on any given Game-Turn.
20.27 Game Length. This Scenario lasts thirty-two Game-Turns.
20.28 Victory Conditions. Victory Point Values of Territorial Objectives:
| Objective/Hex | Israeli | Syrian |
|---|---|---|
| Baht Jinn 2003 | 15 | 10 |
| Sasa 2804 | 25 | 20 |
| Nawa 2933 | 15 | 10 |
| Massada 1007 | — | 20 |
| Kuneitra 1416 | — | 50 |
| Rafid 2028 | — | 10 |
Special Victory Conditions. The requirements of a mandatory Syrian offensive (see 19.4) are almost impossible to fulfill against a competent Israeli Player in this Scenario. Therefore, the Syrian Player can substitute the following requirements for those in 19.4: He must seize at least one Israeli Fortified hex and he must have at least ten Arab units across the Israeli DMZ line at the end of any one Game-Turn.
The Israeli Player may permanently withhold Reinforcements and convert them into Victory Points. To do this he states to the Syrian Player on the Turn in which the Israeli unit is due to arrive "I am permanently withholding this unit." He then places the unit aside and counts its Value toward his (Israeli) Victory Point total. Such a unit may never be brought into play at a later Turn.
20.3 Scenario III
20.31 Historical Notes. The Syrian Army which crossed the DMZ on October 6 came to fight. Even after taking crippling losses it did not fold up like it did in 1967. The individual infantrymen and tankers fought with a tenacity which the Israelis soon learned to respect. However, after the initial impetus was spent, the army showed it could not manage a mobile battle. It had serious inadequacies in its command control and its logistical systems. Some units ran out of gas. Others held in place too long, to be surrounded and cut up by the nimble Israelis. Reserves, including arriving Iraqi and Jordanian armor, were thrown against the advancing Israelis piecemeal. Even the early offensive was poorly managed and inefficient. The Syrians used mass instead of finesse, did not reinforce success and persisted in costly attacks against Israeli strongpoints. Given the level of training and experience, it is questionable whether the Syrians could have improved on their performance. This Scenario will examine the possibility.
20.32 Israeli Initial Order of Battle. Same as shown in Scenario I (20.12).
20.33 Syrian Initial Order of Battle. Same as shown in Scenario I (20.13).
20.34 Israeli Reinforcement Schedule. Same as shown in Scenario I (20.14).
20.35 Syrian Reinforcement Schedule. Same as shown in Scenario I (20.15).
20.36 Special Rules
- The Syrian Player is the First Player.
- After the Players have set up and before the start of the First Game-Turn, the Syrian Player (only) may make a free move (each unit may move its full Movement Allowance from its deployment hex). Units may not move across the Syrian DMZ during this free move.
- Both Players may use either the Active CRT or the Mobile CRT on any Game-Turn.
- Increased Syrian Effectiveness: The Syrian restrictions in Rule 18.0 are removed. Syrian reserves may be moved as soon as the Syrian Player seizes one Israeli Fortified hex (addition to Rule 18.0).
20.37 Game Length. This Scenario lasts thirty-two Game-Turns.
20.38 Victory Conditions. Victory Point Values for Territorial Objectives:
| Objective/Hex | Points to Israeli | Points to Syrian |
|---|---|---|
| Baht Jinn 2003 | 15 | — |
| Sasa 2804 | 30 | 5 |
| Nawa 2933 | 15 | — |
| Harrah 2721 | 10 | — |
| Massada 1007 | — | 15 |
| Rafid 2028 | — | 15 |
| Kuneitra 1476 | — | 50 |
| Naffak 0921 | — | 100 |
(Kuneitra is printed as hex 1476 in this Scenario; Scenarios I and II list it as 1416. Transcribed as printed.)
Special Victory Conditions. The Syrian Player receives a bonus of 25 Victory Points if he seizes both Naffak and Kuneitra by the end of Game-Turn Five. The Israeli Player receives a bonus 25 Victory Points if he seizes Sasa by the end of Game-Turn Twenty.
21.0 Game Notes
21.1 Player's Notes
The Syrian Player is well advised to follow historical precedent and thrust decisively into Golan. He has to meet the requirements of Rule 19.4 early in the contest or he might as well concede. Once he meets these requirements, he will be faced with his most important decision: Whether to stay and try for an automatic victory or a big win (which almost certainly will require him to commit most of his reserves into the Golan) or to pull back, fight an attrition battle and go for Marginal Victory. The risks are commensurate with the rewards. If he goes for the big win and doesn't get it, the Israeli Player will probably put him in the bag cheap and occupy most of the map before the game's end. If, on the other hand, he withdraws and fights from his fortified zone, he most assuredly can keep the Israeli Player from getting a Decisive win.
The Israeli Player must play to stop the Syrian advance early in the battle, covering at all costs access to the escarpment road defiles. He can play to prevent the Syrian requirements in Rule 19.4, but to do so usually requires him to fight a static battle, spread out with (a) greater losses and (b) a greater chance of Syrian breakthrough. The Israeli is given a cornucopia of air power. The secret is not to use it except for battles which the Israeli cannot afford to lose. Except against an Arab cretin, use of air power draws SAM Fire which inevitably puts Victory Points in the Arab column.
As a general rule, he should only suppress SAM's which could otherwise SAM Fire at large concentrations of Ground Support Points intervening in the ground battle. If the Syrian Player deploys his immobile SAM 2 and 3 units forward, he will insure maximum SAM Fire coverage of the map, but they will become easy meat for the Israeli in the later stages of the Scenario.
21.2 Designer's Notes
Surprisingly, the stickiest design problems in Golan were what are usually the easiest in other games. These were the map and the orders of battle. In September of '74, when the game was conceived, the Yom Kippur War had been over for almost a year. Many published and unpublished accounts of the conflict were available, but with one or two exceptions, they were bereft of hard information needed to compose a battalion level game. Those sources which did give units and numbers never agreed with each other. There existed no official or unofficial history which gave anything but the most general account of the course of the battle. The Israelis in particular seem to be past masters in the art of disguising their order of battle. In the end, we relied quite heavily on information derived by Col. Dupuy (USAR) who was doing concurrent research on the same subject and who has published and will publish further accounts of the war. The map presented quite the same problem as the OB's. We could not lay our hands on any 1:100,000 or even 1:150,000 scale topographical maps. The Defense Map Agency provided us with 1:250,000 scale sheets, which, in conjunction with satellite photos obtained from the EROS program, gave us the lay of the land. The road net is a distillation of all the various small maps we were able to obtain, plus, again, the aid of Col. Dupuy. The placement of the fortifications and the anti-tank ditch is surmised from a reading of the course of the battle.
Finally, the Victory Conditions reflect the designer's opinion that the Israelis won a military victory, but that the Arabs won the war. Given the willingness of the Soviet Union to arm and rearm the Arab armies, the Yom Kippur War, and particularly the Golan battle, showed that the security of Israel could not be guaranteed by force alone; that the Arabs need not win, but only fight half-way competently.
Mukden Exclusive Rules
10.0 Introduction
Mukden is a simulation of hypothetical actions that could take place between the armed forces of the Soviet Union and of the People's Republic of China, in the area of the vital city of Shenyang (Mukden). Mukden is likely to become an important objective in any such conflict, due to its concentration of industry and its importance as a transportation center. Players may choose to play one of three Scenarios. The first, The Battle for Asia, is an example of a decisive battle in the area. The second, The Siege of Mukden, is a game of bitter house-to-house fighting in the city. The third Scenario, Guerrilla!, shows the difficulties (and advantages) a western-style army has in coping with eastern guerrilla warfare.
11.0 Terrain Modifications
In all Scenarios, all units with a Movement Allowance of four or less may treat all woods, mountain, and grove hexes as clear terrain, for movement purposes only. They also expend one Movement Point to cross Road Hexsides.
Errata note: see the QuadriGame errata entry [11.0] under Errata above, which changes references to mountain hexes to rough hexes and adds a river hexside cost for these units.
12.0 Reinforcements
General Rule: Both Players receive Reinforcements. These appear during the Owning Player's Movement Phase on the Game-Turn indicated on the Reinforcement Schedule. The Reinforcement Schedule states the Game-Turn of appearance, the number of units, the Strength/Movement Value, and the specific hex or map edge on which they enter.
Procedure: During his Movement Phase, the Owning Player places a Reinforcing unit in the scheduled hex or on any hex of the scheduled map edge. The Owning Player may place them at any time during his Movement Phase.
Cases:
12.1 Movement of Reinforcements
12.11 Reinforcements are presumed to be poised adjacent to the map. When placed on the map, a Reinforcing unit expends Movement Points to enter the entry hex according to the Terrain Effects Chart. In almost all cases, the Reinforcements are entered onto a hex which has a road leading off the map; these units expend Movement Points at the road movement rate to enter the map.
12.12 In several cases, more than one unit is scheduled to appear in the same hex in the same Game-Turn. These units are deployed off map, one behind the other, with the lead unit poised adjacent to the map entry hex itself. If the entry hex is a road hex, a hypothetical road may be presumed to stretch off the map, away from the entry hex.
12.13 As each unit enters the map, it will pay the cost for entering the entry hex, plus any additional cost for any hypothetical clear terrain hexes that it would have to traverse to reach the entry hex. If units are entering on a road hex, they are considered to be moving through hypothetical road hexes until they reach the map. Example: The lead unit in the column would pay 1/2 Movement Point to enter the map, the second unit would pay 1 Movement Point to enter the map, the third, 1 1/2 Movement Points, etc.
12.14 Once on the map, Reinforcements may be moved normally. The Owning Player may sequence the arrival of his Reinforcements with the movement of his already present units in any order he sees fit.
12.2 Restrictions
12.21 Reinforcements may not enter a hex which is, at that point, occupied by an Enemy unit. A Reinforcing unit may enter an Enemy controlled hex (but it must cease movement therein).
12.22 If, and only if, a scheduled entry hex is occupied by an Enemy unit (or a Friendly unit in an Enemy Zone of Control), the Reinforcing unit may enter the nearest unblocked mapedge hex to the scheduled hex, in the direction of the nearest Friendly unit.
12.23 A Player may deliberately withhold Reinforcements from Game-Turn to Game-Turn, bringing them into play (if at all) on some later Turn.
12.24 Regardless of whether a Reinforcement is brought into play on its scheduled Turn, it must appear in its scheduled hex or alternate (see 12.22).
12.25 The concept that Reinforcements are poised adjacent to the map is strictly a concept. Until they enter the map, Reinforcements have no effect on play. They may in no fashion attack Enemy units or hinder their movement.
13.0 Exiting from the Map
General Rule: Players may exit their units from the map. An exiting unit must expend Movement Points to enter an imaginary hex presumed to be adjacent to the map edge. The terrain in this imaginary hex is presumed to be similar to the terrain in the hex from which the unit exited.
Cases:
13.1 Restrictions
13.11 Once a unit exits the map it may not return.
13.12 Exited units are not considered eliminated (but see Case 13.13) and are kept separated from eliminated units.
13.13 A unit may not exit the map as a result of combat. If it does so then it is eliminated. Units may only exit the map during the Owning Player's Movement Phase.
14.0 Guerrillas
Commentary: The Chinese have oriented much of their military doctrine towards guerrilla warfare. Most Chinese units, especially the Militia, have a strong guerrilla function.
14.1 Guerrilla Unit Creation
14.11 Guerrilla units are represented by inverted Chinese units. Guerrilla units have Attack Strengths and Movement Allowances of zero, and a Defense Strength of two, regardless of what their strength was before they were inverted.
14.12 Guerrilla units may be created by inverting any Chinese Militia (1-1-3) or other infantry unit. They may be created as a result of combat, or voluntarily by the Chinese Player, even if in the Zone of Control of a Soviet unit.
14.13 To voluntarily convert a Militia, regular Infantry or Paratroop unit to a Guerrilla unit, the Chinese Player announces he is doing so at the end of any Chinese Movement Phase. He then inverts any units he wishes to become Guerrillas. The conversion to guerrilla status is permanent and cannot be reversed.
Errata note: see the QuadriGame errata entry [14.13] under Errata above.
14.14 Chinese units can also become Guerrillas automatically as a result of combat. Whenever a Chinese Militia, regular Infantry or Paratroop unit is destroyed as a result of combat and it is not surrounded by Soviet units or Zones of Control, it is not destroyed, but rather it remains in the hex it occupied and is inverted, becoming a Guerrilla unit.
Errata note: see the QuadriGame errata entry [14.14] under Errata above.
14.2 Guerrilla Units Effect on Combat
14.21 Guerrilla units attacked by Soviet units, which are not surrounded by Soviet units or Zones of Control, are effected only by Combat Results of De and Ex. All other results have no effect. Guerrilla units surrounded by Soviet units or Zones of Control are unaffected by D1 or D2
Results. Soviet units attacking Guerrilla units in any situation are subject to all Combat Results.
14.22 Guerrilla units do not exert a Zone of Control. They do, however, exert a Zone of Delay into all adjacent hexes. For Soviet units to enter a hex in a Zone of Delay requires the expenditure of two additional Movement Points. This effect is cumulative if a hex is in the Zone of Delay of more than one Guerrilla unit. Soviet units may not retreat into a Zone of Delay hex, nor may they trace supply through such hexes. Zones of Delay have no other effects. Soviet units may not enter a hex containing a Guerrilla unit.
14.23 Guerrilla units receive the benefits of terrain in combat in the same manner as regular units.
15.0 Combat Results Table Selection
General Rule: After the odds have been computed for an attack, but before the Defending Player has committed his FPF artillery and aircraft, the Attacking Player must announce whether this particular attack will be resolved on the Active Combat Results Table or the Mobile Combat Results Table. The attacker always has a choice of which CRT to use in a particular attack. He may use different CRT's in each different attack in any particular Turn. He is never compelled to use any one CRT and always has full choice as to which one he will use.
16.0 Supply
General Rule: On the plains of Manchuria, logistics are a vital consideration, even in small-scale actions. Supply effects a unit's ability to move and to fight. Units are said to be either supplied or "unsupplied" for movement and attack. The state of supply is dependent on the unit's tracing an uninterrupted route to a supply source.
16.1 Supply Procedure
16.11 Units trace Supply to Supply Sources by counting hexagons through the hexagonal grid. Supply state for movement purposes is determined at the start of the Phasing Player's Movement Phase, and holds for that unit for the entire Movement Phase. A unit which is judged unsupplied is unsupplied for the entire Movement Phase, even if at some point in its movement the unit may reach a position where it could trace supply. A unit judged to be in supply at the start of the Movement Phase is supplied for the entire Movement Phase, even if it moves out of supply.
16.12 Supply for combat is determined in the same manner, but it is determined at the start of the Phasing Player's Combat Phase, and holds for that unit for the entire Combat Phase following.
16.2 Soviet Supply
16.21 The Soviet Supply Sources are the road hexes on the north edge of the mapsheet, namely hexes 1201, 2001, 2401 and 2501. To be in supply, a Soviet unit must trace a supply line, of which no more than eleven hexes may be non-road hexes, to one of these Supply Sources. The supply line may consist of any number of road hexes.
16.22 The Soviet Player may not trace his supply line through hexes containing Chinese units, Zones of Control, or Zones of Delay.
16.23 All Soviet units, except Paratroop units, not in supply have their Attack Strength reduced by 50% (losing fractions) and their Movement Allowance reduced to six.
16.24 Soviet Paratroop units are always considered in supply (by airdrop) and are not subject to any of the above restrictions.
16.25 Supply considerations do not affect the Defense Strength of any unit.
16.3 Chinese Supply
16.31 The Chinese Supply Sources are: Any city hex, any hex on the south edge of the map, and any hex on the east or west edges of the map south of the Hun-Ho River. To be in supply, a Chinese unit must trace a supply line of any length to one of these Supply Sources.
16.32 The Chinese Player may not trace his supply route through hexes containing Soviet units or Zones of Control.
16.33 Chinese Artillery, Anti-Tank (0-2-9), Armored and Armored Cavalry (2-3-9) units not in supply have their Movement Allowance and Attack Strength reduced by 50% (losing fractions). All other unsupplied Chinese units have their Attack Strength reduced by one.
16.34 Chinese Guerrilla units (units functioning as Guerrillas) and the Gunboat unit are always considered in supply and are not subject to the above restrictions.
16.35 Supply considerations do not affect the Defense Strength of any unit.
Errata note: see the QuadriGame errata entry [16.21] under Errata above.
17.0 Paratroops
Commentary: The Soviets maintain the world's largest airborne force, to compensate for their weakness in airmobile units. Soviet combat doctrine emphasizes both the strategic and tactical role of paratroops, especially in blocking retreat routes, and securing vital objectives.
17.1 Use of Paratroops
17.11 The Soviet Player may airdrop his three Paratroop units only before his Movement Phase on Game-Turn One. [It is assumed to be the only time transport aircraft are available.]
17.12 Before the Soviet Player moves any other units on Game-Turn One, he places each of his three Paratroop units on the hex he wishes it to land on. Paratroop units may land on any hex on the mapsheet, except for hexes containing Chinese units or grove hexes.
17.13 After the Soviet Player has placed each Paratroop unit in its designated landing hex, he rolls the die for each Paratroop unit. A die roll of 1 or 2, if the Paratroop unit is landing on a clear terrain hex, or a die roll of 1, 2, 3, 4 or 5, on any other type of hex, means that the Paratroop unit has scattered. Once a unit is determined to have scattered, the die is rolled again for each scattering unit. A die roll of 1 means the Paratroop unit lands in the hex directly north of its originally intended landing hex, as a result of scattering. A die roll of 2 means the unit scatters to the next hex to the right (clockwise) of the hex directly north of the landing hex, and so on.
17.14 If, due to scattering, a Paratroop unit ends up overstacked or in a grove hex, it is destroyed. If a Paratroop unit ends up in a Chinese Zone of Control, it must attack the Chinese unit it is adjacent to during the subsequent Soviet Combat Phase. If, due to scattering, a Soviet Paratroop unit lands in the same hex as a Chinese unit, it must attack immediately, before any more Paratroop dropping or movement is resolved. The Soviet Player may not use Ground Support Points to aid this sort of attack. The attack is resolved normally, according to usual combat procedures, except that if the Paratroop unit is forced to retreat, it is destroyed instead.
17.15 Paratroop units may not move, except as a result of scattering or combat, on the Game-Turn in which they land.
18.0 Gunboats
General Rule: The Chinese Gunboat unit serves a unique role in the game. This unit represents a flotilla of gunboats, one of many used by the Chinese to provide mobile artillery. The Gunboat unit always moves along major river hexsides. The Gunboat unit is physically placed on the hex-grid within a hex with the bow of the gunboat silhouette pointed to the river hexside that the unit is located in. Therefore, the Gunboat unit, although located, theoretically, in the river hexside, occupies a hex adjacent to the river hexside it is in.
18.1 Movement
18.11 The Gunboat Movement Allowance is equal to 45 Movement Points. It expends 1 Movement Point per major river hexside entered, regardless of the terrain within the adjacent hexes. The Gunboat unit may only move along major river hexsides.
18.12 No Chinese unit may be stacked with the Gunboat unit.
18.13 The Gunboat unit exerts a full, normal Zone of Control from the hex it has been placed in. It is affected by Enemy Zones of Control which effect the hex the Gunboat unit has been placed in, in the same manner as regular Artillery units.
18.2 Combat
The Gunboat unit is treated, basically, like any other Artillery unit. Its Defense Strength of two remains unchanged, regardless of the terrain occupied by the Gunboat unit. The Gunboat unit is not affected by any Combat Results except Ae, De and Ex. Any other Results are considered to have no effect.
19.0 Anti-Tank Units
Commentary: Only the Chinese Player has Anti-Tank units. These are massed groups of anti-tank guns employed much as the Soviets used them at Kursk. This proved a successful tactic in one of the Sino-Soviet border clashes.
19.1 Effect of Anti-Tank Units on Combat
Anti-Tank units have an Attack Strength of zero and cannot participate or aid in any attack. Any Soviet Armor (not Armored Infantry) units attacking a hex containing or adjacent to an Anti-Tank unit have their Attack Strength halved (losing fractions) in addition to any normal adjustments of Combat Odds.
Errata note: see the QuadriGame errata entry [19.1] under Errata above.
19.2 Effect of Zones of Control on Anti-Tank Units
Anti-Tank units in an Enemy Zone of Control are not required to attack an adjacent Enemy unit. They may not move out of an Enemy Zone of Control, however. They may not voluntarily enter an Enemy controlled hex.
20.0 Nuclear Weapons [Optional Rule]
General Rule: Only the Soviet Player may use Nuclear Weapons. He may only use them during the "Battle for Asia" Scenario. The use of Nuclear Weapons is a two Game-Turn procedure, involving plotting and detonation.
Procedure: During the Special Weapons Interphase, the Soviet Player writes down (plots) the hex number(s) and weapon size(s) of Nuclear Attacks to be made in the subsequent Game-Turn's Special Weapons Interphase. After plotting, the Soviet Player detonates Nuclear Attacks plotted in the previous Game-Turn. These Attacks are made in any order that the Soviet Player wishes, one at a time. All effects of one Nuclear Attack are applied immediately before proceeding to other Nuclear Attacks.
Cases:
20.1 Nuclear Weapons Chart
(See separate sheet; transcribed under Charts and Tables above.)
20.2 How to Use the Nuclear Weapons Chart
20.21 The Weapon Type identifies the yield of the Nuclear Weapon in thousands of tons of TNT. Soviet Available shows the number of each type of weapon the Soviet Player may use throughout the Battle for Asia Scenario.
20.22 In order to detonate a Nuclear Weapon, find the proper Weapon Type column, and determine the hex in which the Weapon is to be detonated (the Impact Hex). Each unit within range is subject to attack on the Active Combat Results Table. Find the distance in hexes from the Impact Hex to the unit in question and cross reference this to find the Combat Differential Column at which the unit is attacked.
20.3 Effects of Nuclear Weapons
20.31 Units which are Eliminated or Exchanged are immediately removed from the map. Units which are to Retreat are moved by the Owning Player the number of hexes indicated by the Result, according to the Rules of Retreat. These retreated units are then flipped over, lose their Zone of Control and may not attack or move for the remainder of the Game-Turn; these units defend normally and may retreat as a result of Combat. At the end of the Game-Turn, units which have not been eliminated are flipped back over and function normally.
20.32 If a unit is retreated into the blast zone of an unresolved Nuclear Attack, it suffers any results rolled against it as a result of that attack. A unit may thus suffer any number of Nuclear Attacks in a single Special Weapons Interphase.
20.4 Restrictions
20.41 The Soviet Player may not plot or detonate more than three Nuclear Weapons in a single Special Weapons Interphase.
20.42 The Soviet Player may not make more Nuclear Attacks in the course of the game than he has Weapons shown on the Nuclear Weapons Chart.
20.43 The Soviet Player may not detonate a Nuclear Weapon in a hex if there are Friendly units within the Maximum Effect Radius of that Weapon (the radius at which units are attacked with a +12 differential).
20.44 The Soviet Player may detonate a Nuclear Weapon in a hex even if there are Friendly units within the Minimum Effect Radius of that Weapon (the radius at which units are attacked with a -2 differential). The Soviet Player must attack those Friendly units at -2 on the Active Combat Results Table.
20.45 If the Soviet Player plots a Weapon which subsequently may not be detonated due to the above restrictions, that Weapon is not detonated, but is nevertheless considered expended. It may not be replotted or reused on subsequent Game-Turns.
20.46 Nuclear Attacks have unlimited Range; they may be plotted anywhere on the map within the above restrictions.
20.47 For each Soviet Nuclear Weapon used, the Soviet Victory Conditions are increased by one unit. For example, if the Soviets use two Nuclear Weapons, they would have to have eight or more units in supply south of the Sha-Ho to meet the Victory Conditions of the first Scenario (21.18). For Victory purposes, the 50kt Weapon counts as two weapons.
20.48 Those Nuclear Weapons marked with an asterisk (*) on the Nuclear Weapons Chart may not be used in Mukden.
21.0 Scenarios: How to Set Up and Play the Game
General Rule: Mukden contains three Scenarios: The Battle for Asia, The Siege of Mukden, and Guerrilla.
The instructions for each Scenario include: Historical Notes, detailing briefly the events and circumstances of the Scenario; each Player's Initial Order of Battle and these initial units' deployment hexes; Special Rules in effect for that particular Scenario; the length (in Game-Turns) of the Scenario; and the special Victory Conditions of that Scenario.
21.1 Basic Scenario: The Battle for Asia
21.11 Historical Notes. This Scenario postulates a Soviet breakthrough of the Chinese frontier defenses and a drive deep into the industrial heart of Manchuria. The Chinese have screened the vital city of Mukden (Shenyang) with a force of militia and infantry until a mobile Chinese counterattack force can come up. The Soviets seek not only to clear Mukden, but to continue their drive into China.
21.12 Soviet Initial Order of Battle. All Soviet units enter from any road hex on the north edge of the mapboard (1201, 2001, 2401, 2501). The Soviets receive the following units: 3(4-2-12), 3(1-2-12), 1(5-1-7/1-9), 1(4-0-8/1-9), 3(2-2-4).
21.13 Chinese Initial Order of Battle. The following Chinese units may be placed, during the initial set-up, anywhere on the map, except for the 0001 and 0002 hex rows, where no Chinese units may be placed in initial set-up. No Chinese unit may be converted to Guerrilla status during the initial set-up. The Gunboat flotilla must be deployed in accordance with the Gunboat Rules (18.0). 9(1-1-3), 3(2-2-3), 1(3-3-5/1-9), 1(3-3-2/1-9), 1(0-2-9), 1(5-3-5/2-45).
21.14 Soviet Reinforcement Schedule. Soviet Reinforcements arrive on hex 1201, 2001, 2401 or 2501.
- On Game-Turn Two: 3(3-2-12), 6(1-2-12), 1(3-1-7/1-9), 1(4-0-8/1-9).
- On Game-Turn Three: 1(7-2-7/1-9), 1(3-1-11/1-9), 1(4-0-8/1-9), 1(3-1-7/1-9), 3(3-2-12), 6(1-2-12), 1(4-1-8/1-9).
Soviet Ground Support Points:
- Game-Turns One through Eight: 10 each
- Game-Turn Nine: 8
- Game-Turns Ten through Thirteen: 7 each
21.15 Chinese Reinforcement Schedule.
- On Game-Turns Two through Four: Chinese Reinforcements may arrive on any hex of the city of Mukden not occupied by a Soviet unit or Zone of Control; any hex on the south edge of the map, and any hex on the east or west edges of the map south of the Hun-Ho River.
- On Game-Turns Five through Seven: Chinese Reinforcements arrive as Turns 2-4, except that no Chinese units may arrive in Mukden.
- On Game-Turn Eight: Chinese Reinforcements may only arrive on the south edge of the map, unless 25 or more hexes on the south edge of the map have been covered by Soviet units or Zones of Control. In this case, they may enter under the same conditions as the Game-Turn 5-7 Reinforcements.
Units:
- Game-Turn Two: 1(2-3-9), 1(0-2-9).
- Game-Turn Three: 3(2-2-3), 1(3-3-5/1-9), 1(5-2-7/1-9).
- Game-Turn Four: 3(2-2-3), 1(3-3-5/1-9), 1(5-2-7/1-9).
- Game-Turn Five: 3(2-2-3), 1(3-3-5/1-9).
- Game-Turn Six: 3(2-2-3), 1(3-3-5/1-9).
- Game-Turn Eight: 8(3-2-9), 4(4-3-7/1-9), 2(2-3-9), 6(3-2-4), 2(3-3-2/1-9), 2(5-2-7/1-9).
Chinese Ground Support Points:
- Game-Turn Eight: 8
- Game-Turn Nine: 3
21.16 Special Rules.
- The Soviet Player is the First Player.
- The Chinese Player deploys his units first.
21.17 Game Length. The Scenario length is 13 Game-Turns.
21.18 Victory Conditions. For the Soviet Player to win, he must, at the end of the game, have six or more units in supply south of the Sha-Ho River or have ten units in supply more than eight hexes south of the Hun-Ho River or have exited four Soviet units with a Movement Allowance of twelve from a road hex on the south edge of the mapsheet (hexes 0833, 1033, and 2934) and have the appropriate exit hex in supply at the end of the game.
For the Chinese Player to win, he must prevent the Soviet Player from accomplishing his Victory Conditions.
21.2 The Siege of Mukden
21.21 Historical Notes. Here Soviet objectives are more limited and they are simply concerned with taking Mukden, which the Chinese, of course, are defending. This Scenario postulates a non-nuclear invasion of China. It is possible that this invasion would not go well, although it would doubtlessly break through the frontier defenses. Here the Chinese have thrown an army into Mukden by river and rail, hoping to hold off until reinforcements arrive to counterattack. Here Mukden becomes a "Stalingrad" to a Russian who has not broken through as easily as he has hoped.
21.22 Soviet Initial Order of Battle. Soviet units may be set up anywhere in hexrows 0004-0001, inclusive. 3(4-2-12), 9(1-2-12), 3(3-2-12), 2(4-0-8/1-9), 1(5-1-7/1-9), 1(3-1-7/1-9), 1(3-1-11/1-9), 1(7-2-7/1-9), 1(4-1-8/1-9).
21.23 Chinese Initial Order of Battle. Units may be set up in any hex of the city of Mukden. The Gunboat unit may be placed anywhere in accordance with the Gunboat Rules (18.0). 9(2-2-3), 3(3-3-5/1-9), 1(5-2-7/1-9), 1(5-3-5/2-45), 3(3-2-4), 1(3-3-2/1-9).
21.24 Soviet Reinforcement Schedule. Ground Support Points:
- On Game-Turn One: 14
- On Game-Turn Two: 12
- On Game-Turn Three: 10
- On Game-Turn Four: 8
- On Game-Turn Five: 4
- On Game-Turn Six: 2
21.25 Chinese Reinforcement Schedule. The Chinese Player receives the following units on any hex of his choice, three or more hexes south of any Hun-Ho hexside. An exception to this is the Chinese Militia units, which arrive on any hex of the city of Mukden not in Soviet Zone of Control or occupied by a Soviet unit.
- On Game-Turn Two: 1(2-2-3), 1(1-1-3), 1(0-2-9).
- On Game-Turn Three: 1(2-2-3), 1(3-3-5/1-9), 1(1-1-3).
- On Game-Turn Four: 1(2-2-3), 1(2-3-9), 1(1-1-3).
- On Game-Turn Five: 1(5-2-7/1-9), 1(3-2-4), 1(1-1-3).
- On Game-Turn Six: 1(3-3-2/1-9), 1(1-1-3).
- On Game-Turn Seven: 1(2-3-9), 1(1-1-3).
- On Game-Turn Eight: 1(3-2-4), 1(3-3-2/1-9), 1(1-1-3).
- On Game-Turn Nine: 1(3-2-4), 1(1-1-3).
- On Game-Turn Ten: 1(1-1-3).
21.26 Special Rule. The Soviet Player is the First Player.
21.27 Game Length. The Scenario length is ten Game-Turns.
21.28 Victory Conditions. The Soviet Player wins if there are ten or less Chinese units in Mukden city at the end of the Soviet Player's Attack Phase on Game-Turn Ten. The Chinese Player wins if the Soviet Player does not fulfill his Victory Conditions.
21.3 Guerrilla
21.31 Historical Notes. This Scenario postulates a successful Soviet invasion of Manchuria, with the Chinese main forces being pushed back to Peking or beyond. Here Soviet garrison forces try to supress Chinese partisan activity attempting to interdict supplies and disrupt rear-area operations.
21.32 Soviet Initial Order of Battle. Units may be set up in any road or city hex or in any hex adjacent to a road or city hex that is not adjacent to or containing a Chinese unit. 3(3-2-12), 6(1-2-12), 1(3-1-7/1-9), 1(4-0-8/1-9), 3(4-2-12).
21.33 Chinese Initial Order of Battle. Units may be set up in any mountain hex; or in any hex adjacent to a mountain hex that does not contain a road. 13(1-1-3), 2(3-3-2/1-9).
21.34 Soviet Reinforcement Schedule. Soviet Ground Support Points: On Game-Turns One through Ten: 5 each.
21.35 Chinese Reinforcement Schedule. The Chinese Player receives no Reinforcements in this Scenario.
21.36 Special Rules.
- The Chinese Player is the First Player and sets up first.
- A bridge may be destroyed by the Chinese Player at the end of a Turn if he has a unit adjacent to the bridge hexside and there is no Soviet unit adjacent to the same bridge hexside. Once a bridge is destroyed, it is treated as a normal river hexside.
- For Interdiction purposes, the map is deemed to be made up of nine roads, running as follows: 1915 to 2911, 1518 to 2913, 1518 to 2934, 1518 to 1033, 0116 and 0815 to 0833, 0105 to 1112, 1201 to 1313, 2001 to 1612, 2501 to 1712. To interdict a road, the Chinese Player must have at least four units on or adjacent to hexes of this road at the end of the game.
21.37 Game Length. The Scenario length is ten Game-Turns.
21.38 Victory Conditions. Victory in this Scenario is decided on Points. Each Player gets Points in a different manner.
The Chinese Player receives the following Points at the end of the game:
- 10 Points for each Soviet unit destroyed.
- 8 Points for each airfield hex moved through at least once by a Chinese unit. Airfield hexes are: 1608, 0714, 1317, 1816, 2714, 2330.
- 5 Points for each bridge destroyed.
- 20 Points for each one of the nine roads interdicted by the Chinese Player at the end of the game.
The Soviet Player receives the following Points at the end of the game:
- 4 Points for each (1-1-3) unit destroyed.
- 8 Points for each (3-3-2/1-9) unit destroyed.
- 15 Points for each Guerrilla headquarters hex moved through during the game (each Guerrilla headquarters may be moved through only once per each game, for victory purposes). Guerrilla headquarters hexes are: 2625, 2624, 2923, 2620, 2308, 2906.
At the end of the game, both Players total their Victory Points and compare the sums. If the sums are equal, the game is a draw. If one Player has a one (or more) to one superiority in Points, he has won a Marginal Victory. If one Player has a two (or more) to one superiority in Points, he has won a Substantive Victory. If one Player has a four (or more) to superiority, he has scored an Overwhelming Victory.
22.0 Game Notes
A war between the USSR and China would not only be a clash between ideologies, but between widely differing conceptions of strategy and tactics.
The Soviet army in Mukden is a hard-hitting mobile force. It is well supplied with air and artillery support. In the first Scenario, they have paratroops to sieze vital objectives. All the fuel and ammunition for their form of warfare must be carried from the USSR, hence the vulnerable Soviet supply line in the game. To succeed in Mukden, especially the first Scenario, the Soviet Player must duplicate the blitzkrieg tactics the Soviets learned from the Germans. He must not spread his forces too widely. If he does so, he will go nowhere. He must concentrate with air and artillery support on a sector of the Chinese front - about three units wide, and blow it open. A few elimination and "D4" results will open a hole the Chinese cannot fill, due to their limited maneuverability. Then he must keep moving and drive on his objectives. He should not hold his armored spearheads back to mop up Chinese in the rear. He must use "keil und kessel" tactics, encircle and bypass resistance, and take the objective. Watch out for the Chinese counterattack in Scenario One, however. It can be decisive. In Scenario Two, the blitzkrieg grinds to a halt, but the basic concepts still apply. Attack where the Chinese are weak, isolate and mop up their strongpoints. Here, especially, the Soviets must rely on air and artillery to dig the Chinese out of the rubble. In the Third Scenario, the Soviets are on the defensive. Their superior mobility allows them to use part of their force as a mobile reserve against guerrilla attacks while other units attack headquarters. A static defense of bridges and airfields will almost certainly result in defeat. The guerrilla is a wily opponent, and to survive the Soviet Player must be both mobile and aggressive, while keeping an eye out for his supplies.
The Chinese Player must not think in terms of a conventional western-style defense or attack, although he can do this with great effect in the latter Turns of the First Scenario. The Chinese Player, in the First Scenario, must expend both distance and troops carefully, but he must remember that China is a big place and his resources are limited. If he fights too far forward, he will be defeated in detail by the Soviets. If, on the other hand, he gives up too much ground too early, the Soviets will be in defensive positions waiting for the reinforcements. He should try and infiltrate at least a proportion of his force into the Soviet rear. Use the Guerrilla rule wherever possible. The chance to leave a guerrilla unit on a Soviet supply line should not be passed up in any Scenario. In the First Scenario, he must simply delay and weaken the Soviets until his reinforcements come in to counterattack — just holding the line will not give the Chinese Player victory. The Second Scenario requires tenacious defensive fighting and judicious employment of reserves. He should try and pin the Soviets before they break into the city, thus channelling their advance. As in the First Scenario, the "specialized" units, such as the gunboat and anti-tank units, are most helpful. The Third Scenario is great fun for the Chinese Player, but he must balance off the troops assigned to various objectives with those needed for defense of his headquarters hexes.
Mukden is more than two armies fighting, it is a test between two rival traditions of tactics. If the Soviet Player conducts a correct armored attack, he will win, while a properly done conventional-guerrilla operation will give the Chinese Player victory. The game lies in the interaction between the two.
Wurzburg Exclusive Rules
10.0 Introduction
Battle of Wurzburg is a battalion/regimental level simulation of hypothetical combat in Southern Germany in the 1970's. Wurzburg has been chosen as the locale for these battles primarily because of its geographic location; half-way between the East German-Czechoslovak border and the Rhine River. In addition, it occupies a central position with regard to the Fulda Gap and the Hoff Gap; the two main invasion routes from the east. The Wurzburg area contains a number of first class roads and thus becomes a bit of a "bottleneck" if it can be held by American forces responsible for this area of Germany. The American Third Mechanized Infantry Division is stationed in Wurzburg, and Wurzburg itself is a convenient place for the American First Corps to concentrate if there is an invasion.
11.0 Helicopters
There is only one Helicopter unit in the game; the American 48th Helicopter Company. This unit performs differently from other units.
11.1 Special Characteristics
11.11 The Helicopter unit pays 1 Movement Point from its Movement Allowance for each hex it enters, regardless of Terrain. It may enter any type of terrain hex.
11.12 The Helicopter unit may retreat across rivers. (It is the only unit in the game which may do so.)
11.13 The Helicopter unit has a Zone of Control, and Enemy Zones of Control inhibit its movement like any other unit.
11.14 Beyond the exceptions above, the Helicopter unit is treated exactly like any other unit. Its Barrage and FPF Strengths are used in the same way as artillery units.
12.0 River Crossings
General Rule: There are no bridges across any of the rivers in Wurzburg. All Bridges are considered to have been destroyed.
Cases:
12.1 Effects of Rivers
12.11 In all cases (even when moving from road hex to road hex), a unit moving across a river hexside must expend 3 additional Movement Points (exception: see 11.11).
12.12 Units may not retreat across a river due to combat. Units that have no other retreat option open to them are eliminated instead (exception: see 11.12).
13.0 Reinforcements
General Rule: Both Players receive Reinforcements. These appear during the Owning Player's Movement Phase on the Game-Turn indicated on the Reinforcement Schedule. The Reinforcement Schedule states the Game-Turn of appearance, the number of units, the Strength/Movement Value, and the specific hex or map edge on which they enter.
Procedure: During his Movement Phase, the Owning Player places reinforcement units in the scheduled hexes or on any hex of the scheduled map edge. The Owning Player may place them at any time during his Movement Phase.
Cases:
13.1 Movement of Reinforcements
13.11 Reinforcements are presumed to be poised adjacent to the map. When placed on the map, a Reinforcing unit expends Movement Points to enter the entry hex according to the Terrain Effects Chart. In almost all cases, the Reinforcements are entered onto a hex which has a road leading off the map; these units expend Movement Points at the road movement rate to enter the map.
13.12 In several cases, more than one unit is scheduled to appear in the same hex in the same Game-Turn. These units are deployed off map, one behind the other, with the lead unit poised adjacent to the map entry hex itself. If the entry hex is a road hex, a hypothetical road may be presumed to stretch off the map, away from the entry hex.
13.13 As each unit enters the map, it will pay the cost for entering the entry hex, plus any additional cost for any hypothetical clear terrain hexes that it would have to traverse to reach the entry hex. If units are entering on a road hex, they are considered to be moving through hypothetical road hexes until they reach the map. Example: The lead unit in the column would pay ½ Movement Point to enter the map, the second unit would pay 1 Movement Point to enter the map, the third, 1½ Movement Points, etc.
13.14 Once on the map, Reinforcements may be moved normally. The Owning Player may sequence the arrival of his Reinforcements with the movement of his already present units in any order he sees fit.
13.2 Restrictions
13.21 Reinforcements may not enter a hex which is, at that point, occupied by an Enemy unit. A Reinforcing unit may enter an Enemy controlled hex (but it must cease movement therein).
13.22 If, and only if, a scheduled entry hex is occupied by an Enemy unit, or a Friendly unit in an Enemy Zone of Control, the Reinforcing unit may enter the nearest unblocked mapedge hex to the scheduled hex, in the direction of the nearest Friendly unit.
13.23 A Player may deliberately withhold Reinforcements from Game-Turn to Game-Turn, bringing them into play (if at all) on some later Turn.
13.24 Regardless of whether a Reinforcement is brought into play on its scheduled Turn, it must appear in its scheduled hex or alternate (see 13.22).
13.25 The concept that Reinforcements are poised adjacent to the map is strictly a concept. Until they enter the map, Reinforcements have no effect on play. They may in no fashion attack Enemy units or hinder their movement.
14.0 Exiting From the Map
General Rule: Players may exit their units from the map. An exiting unit must expend Movement Points to enter an imaginary hex presumed to be adjacent to the map edge. The terrain in this imaginary hex is presumed to be similar to the terrain in the hex from which the unit exited.
Cases:
14.1 Restrictions
14.11 Once a unit exits the map it may not return.
14.12 Exited units are not considered eliminated (but see Case 14.13) and are kept separated from eliminated units.
14.13 A unit may not exit the map as a result of combat. If it does so then it is eliminated. Units may only exit the map during the Owning Player's Movement Phase.
15.0 Nuclear Weapons [Optional Rule]
General Rule: The use of Nuclear Weapons is a two Game-Turn procedure, involving plotting and detonation.
Procedure: During the Special Weapons InterPhase, Players simultaneously write down (plot) the hex number(s) and weapons sizes of Nuclear Attacks to be made in the subsequent Game-Turn's Special Weapons InterPhase. After plotting, Players simultaneously detonate Nuclear Attacks plotted in the previous Game-Turn. These Attacks are made in any order that the Attacking Player wishes, one at a time. All effects of one Nuclear Attack are applied immediately before proceeding to other Nuclear Attacks.
Cases:
15.1 Nuclear Weapons Chart
See the Nuclear Weapons Chart in the Charts and Tables section above.
15.2 How to Use the Nuclear Weapons Chart
15.21 The Weapon Type identifies the yield of the Nuclear Weapon in thousands of tons of TNT. US and Soviet Available show the number of each type of weapon each Player may use throughout the game. The asterisk (*) denotes weapons that are not actually tactical weapons, and would not be employed at the level represented in the game; these may be used at Player option.
15.22 In order to detonate a Nuclear Weapon, find the proper Weapon Type column, and determine the hex in which the Weapon is to be detonated (the Impact Hex). Each unit within range is subject to attack on the Active Combat Results Table. Find the distance in hexes from the Impact Hex to the unit in question and cross reference this to find the Combat Differential Column at which the unit is attacked.
15.3 Effects of Nuclear Weapons
15.31 Units which are Eliminated or Exchanged are immediately removed from the map. Units which are to Retreat are moved by the Owning Player the number of hexes indicated by the result, according to the Rules of Retreat. These retreated units are then flipped over, lose their Zone of Control and may not attack or move for the remainder of the Game-Turn; these units defend normally and may retreat as a result of Combat. At the end of the Game-Turn, units which have not been eliminated are flipped back over and function normally.
15.32 If a unit is retreated into the blast zone of an unresolved Nuclear Attack, it suffers any results rolled against it as a result of that attack. A unit may thus suffer any number of Nuclear Attacks in a single Special Weapons InterPhase.
15.4 Restrictions
15.41 Players may not plot or detonate more than three Nuclear Weapons in a single Special Weapons InterPhase.
15.42 Players may not make more Nuclear Attacks in the course of the game than they have Weapons shown on the Nuclear Weapons Chart.
15.43 Neither Player may detonate a Nuclear Weapon in a hex if there are Friendly units within the Maximum Effect Radius of that Weapon (the radius at which units are attacked with a +12 differential).
15.44 The American Player may not detonate a Nuclear Weapon in a hex if there are Friendly units within the Minimum Effect Radius of that Weapon (the radius at which units are attacked with a -2 differential). The Soviet Player, however, may detonate a Nuclear Weapon in a hex even if there are Friendly units within the Minimum Effect Radius of that Weapon. The Soviet Player must attack those Friendly units at -2 on the Active Combat Results Table.
15.45 If a Player plots a Weapon which subsequently may not be detonated due to the above restrictions, that Weapon is not detonated, but is nevertheless considered expended. It may not be replotted or reused on subsequent Game-Turns.
15.46 Nuclear Attacks have unlimited Range; they may be plotted anywhere on the map within the above restrictions.
16.0 Scenarios
General Rule: There are four Scenarios in Battle of Wurzburg. The first three postulate forces of various sizes, with varying missions coming into contact in the Wurzburg area. In these first three Scenarios, the Soviet forces are the aggressive forces. The fourth Scenario presents an American counterattack on over-extended Soviet forces.
The instructions for each Scenario include: Historical Notes, detailing briefly the events and circumstances of the Scenario; each Player's Initial Order of Battle and these initial units' deployment hexes; the Reinforcement Schedule for each Player; Special Rules in effect for that particular Scenario; the length (in Game-Turns) of the Scenario; and the special Victory Conditions of that Scenario.
16.1 The Advance to Contact
16.11 Historical Notes: Following the initial Soviet invasion, the Wurzburg area was stripped of Allied forces to support the main battle in the north and the east. After a week of heavy fighting Wurzburg suddenly became a key area for both sides. Both Soviet and American forces were sent to seize the key communications center that Wurzburg had now become. The Scenario opens with the American 2nd Armored Cavalry Regiment advancing from the south and running head on into the Soviet vanguard, consisting of the 27th Guards Mechanized Rifle Division. This advance to contact was heavily reinforced by both sides.
16.12 US Initial Order of Battle: No U.S. units begin on the map in this Scenario.
16.13 Soviet Initial Order of Battle: No Soviet units begin on the map in this Scenario.
16.14 US Reinforcement Schedule: All U.S. Reinforcements enter anywhere on the south map edge.
- On Game-Turn One: 3(3-3-12), 1(2-1-7/1-12), 1(2-3-2/1-30).
- On Game-Turn Two: 1(3-3-12), 4(2-3-12), 3(3-2-12).
- On Game-Turn Three: 3(1-2-7/2-12), 2(2-3-12), 1(3-2-12).
- On Game-Turn Four: 2(2-1-7/1-12), 2(2-1-13/1-12), 2(2-3-12), 2(3-2-12).
16.15 Soviet Reinforcement Schedule: All Soviet Reinforcements enter anywhere on the north map edge.
- On Game-Turn One: 6(1-2-12), 3(3-2-12), 1(4-0-8/1-9), 1(3-1-7/1-9).
- On Game-Turn Three: 3(4-2-12), 3(1-2-12).
- On Game-Turn Four: 6(1-2-12), 3(3-2-12), 1(4-0-8/1-9), 1(5-1-7/1-9).
- On Game-Turn Five: 1(4-0-8/1-9), 1(3-1-7/1-9).
16.16 Special Rules:
- The U.S. Player is the First Player.
- Each Player may use the Active CRT for one Game-Turn.
16.17 Game Length: The Scenario length is six Game-Turns.
16.18 Victory Conditions: The city of Wurzburg consists of 10 hexes. At the end of Turn Six, the side that occupies or controls the most Wurzburg hexes is the winner. If a hex is unoccupied and both Players' Zones of Control extend into it, neither Player may count that hex. Both Players must be able to trace a line of hexes from these Wurzburg hexes back to the edge of the map where his reinforcements arrived, along road hexes that are not obstructed by Enemy units and/or Zones of Control. If neither side has exclusive control of any of the Wurzburg hexes, or neither Player can trace back to his mapedge, or if both sides control the same number of city hexes, the game is a draw. If only one side is able to trace back to his map edge and that side controls any Wurzburg hexes, then that side is the winner.
16.2 The Siege of Wurzburg
16.21 Historical Notes: The initial Russian advance suddenly turned toward Wurzburg. At that time, only about half of the U.S. Third Mechanized Infantry Division was deployed in the vicinity. The Soviets advanced upon the city with two Mechanized Rifle Divisions. For two days the U.S. forces in Wurzburg had to hold off a Soviet siege. On the third day another brigade entered the area, and on the fourth day a division-sized unit came in to break the siege. In the meantime, the Soviets were reinforced with two more divisions.
16.22 US Initial Order of Battle: All of the following units must be set-up anywhere within three hexes of any Wurzburg hex. 4(2-3-12), 3(3-2-12), 1(3-3-12), 2(1-2-7/2-12).
16.23 Soviet Initial Order of Battle: No Soviet units begin on the map in this Scenario.
16.24 US Reinforcement Schedule: All U.S. Reinforcements enter anywhere on the south map edge.
- On Game-Turn Two: 3(3-3-12), 1(2-3-2/1-30).
- On Game-Turn Three: 2(2-3-12), 1(3-2-12), 1(1-2-7/2-12), 1(2-1-7/1-12).
- On Game-Turn Five: 3(3-2-12), 1(2-3-12), 1(1-2-7/2-12), 1(2-1-3/1-12).
- On Game-Turn Seven: 4(2-3-12), 3(3-2-12), 1(3-3-12), 2(1-2-7/2-12), 2(2-1-7/1-12), 1(2-1-13/1-12).
U.S. Ground Support Points:
- Game-Turns One, Two and Three: none.
- Game-Turn Four: 6.
- Game-Turns Five, Six and Seven: 10 each.
- Game-Turn Eight: none.
16.25 Soviet Reinforcement Schedule: All Soviet Reinforcements enter anywhere on the north map edge.
- On Game-Turn One: 12(1-2-12), 6(3-2-12), 2(3-1-7/1-9), 2(4-0-8/1-9).
- On Game-Turn Three: 3(4-2-12), 3(1-2-12).
- On Game-Turn Four: 1(5-1-7/1-9), 1(4-0-8/1-9).
- [Editor's note: no Game-Turn Five entry is printed in this schedule.]
- On Game-Turn Six: 6(1-2-12), 3(3-2-12), 1(3-1-7/1-9), 1(4-0-8/1-9).
- On Game-Turn Seven: 1(3-1-11/1-9), 1(4-1-8/1-9), 1(7-2-7/1-9).
16.26 Special Rules:
- The Soviet Player is the First Player.
- Each Player may use the Active CRT for two Game-Turns.
- Any U.S. 2-3-12 units which begin the Scenario in any town hex receive a bonus terrain benefit of "Shift 4" when attacked. The Combat Differential Column is shifted four columns to the left when these units are attacked. Units receive this advantage only in their hex of initial placement. Once they move, either voluntarily or due to Combat Results, they no longer receive this bonus terrain benefit.
16.27 Game Length: The Scenario length is eight Game-Turns.
16.28 Victory Conditions: If, by the end of the game, there are no American units in the city of Wurzburg that can trace a line of hexes, unblocked by Enemy units and/or Enemy Zones of Control to the southern map edge, the Soviets win. Otherwise the Americans win.
16.3 The Gramschatzer Wald
16.31 Historical Notes: The initial Soviet invasion came through the Fulda Gap to the northeast of Wurzburg and through the Hoff Gap to the east. The Soviet Combined Arms Army coming through the Hoff Gap was slowed down to a crawl by West German and American forces. The Soviets made a bigger effort coming through the Fulda Gap and they were steadily pushing back the opposing American forces. The Americans were forming up their First Corps to the southwest of Wurzburg to be used as a major attacking force. The Soviets, meanwhile, decided to turn south and cut off the American and German forces holding up the Soviet advance out of the Hof Gap. Stationed around Wurzburg was the American Third Mechanized Infantry Division. The Division was forced for a three day period to delay an entire Soviet Combined Arms Army. Starting on the third day, the First Corps began to enter the area and push the Soviets back.
16.32 US Initial Order of Battle: The following units may be deployed in any hex on the map, except those in the northernmost four hexrows. 6(2-3-12), 4(3-2-12), 4(3-3-12), 3(1-2-7/2-12), 1(2-1-7/1-12), 1(2-3-2/1-30).
16.33 Soviet Initial Order of Battle: The following units may be deployed in any hex in the northernmost four hexrows. 12(1-2-12), 6(3-2-12), 2(3-1-7/1-9), 2(4-0-8/1-9).
16.34 US Reinforcement Schedule: All U.S. Reinforcements enter anywhere on the south map edge.
- On Game-Turn Five: 2(3-2-12), 2(2-3-12), 1(3-3-12), 2(1-2-7/2-12).
- On Game-Turn Six: 2(3-2-12), 1(2-3-12), 1(1-2-7/2-12), 1(2-1-7/1-12).
- On Game-Turn Seven: 2(2-3-12), 1(3-2-12), 2(2-1-7/2-12).
- On Game-Turn Eight: 1(2-3-12), 1(3-2-12), 2(2-1-7/1-12), 2(2-1-13/1-12).
- On Game-Turns Nine, Ten, Eleven and Twelve (each): As many as six units of the U.S. Player's choice, from among those U.S. units that have been destroyed in the game up to the current Game-Turn, may be brought back into the game as Reinforcements on each of the last four Game-Turns.
16.35 Soviet Reinforcement Schedule: All Soviet Reinforcements enter anywhere on the north map edge.
- On Game-Turn Two: 6(1-2-12), 3(3-2-12).
- On Game-Turn Three: 1(3-1-7/1-9), 1(4-0-8/1-9), 3(4-2-12), 3(1-2-12).
- On Game-Turn Four: 1(5-1-7/1-9), 1(4-0-8/1-9).
- On Game-Turn Six: 1(7-2-7/1-9).
- On Game-Turn Eight: 1(3-1-11/1-9), 1(4-1-8/1-9).
16.36 Special Rules:
- The Soviet Player is the First Player.
- The U.S. Player deploys his units on the map first; after he has completed setting up, the Soviet Player deploys, and then begins the First Game-Turn.
- The Soviet Player may use the Active Combat Results Table for three Game-Turns.
- The U.S. Player may use the Active CRT for two Game-Turns.
16.37 Game Length: The Scenario length is 12 Game-Turns.
16.38 Victory Conditions: The Soviet Player obtains a Marginal Victory if he has at least one unit on any hex of the autobahn at the end of the game. The Soviets win a Substantive Victory if all American units and American Zones of Control are off all autobahn hexes and out of all Wurzburg hexes by the end of the game. The Soviet Player achieves a Decisive Victory if he can fill the Substantive Victory Conditions and if the Americans have no artillery units within range of the autobahn or the city of Wurzburg at the end of the game.
The U.S. Player wins by avoiding all of the Soviet Victory Conditions. That is, if he can keep all Soviet units off the autobahn at the end of the game.
16.4 The Main River Line
16.41 Historical Notes: The initial assault has overrun the Wurzburg area and pressed on toward the Rhine. The American counteroffensive force massing southwest of Wurzburg has made contact with the Soviet flank and is now ready to attempt to cave it in. The Americans have no more than three days to smash the Russian line. Failure to do so may leave the Russians capable of reaching the Rhine and thus cutting West Germany in half.
16.42 US Initial Order of Battle: Place a unit of the specified type in each of the hexes listed for that type of unit.
- Unit Type 2-3-12: 0418, 0720, 1021, 1323, 1623, 1925, 2224, 2423, 2622.
- Unit Type 3-2-12: 0523, 0823, 1123, 1124, 1826, 1927, 2027, 2327, 2426.
- Unit Type 3-3-12: 0217, 2720, 2817, 2915.
- Unit Type 1-2-7/2-12: 0421, 0822, 1125, 1827, 2726, 2724.
- Unit Type 2-1-13/1-12: 2029, 2228.
- Unit Type 2-1-7/1-12: 2329, 1828, 2028.
- Unit Type 2-3-2/1-30: 1528.
16.43 Soviet Initial Order of Battle: Place a unit of the specified type in each of the hexes listed for that type of unit.
- Unit Type 1-2-12: 0215, 0416, 0517, 0818, 0919, 1120, 2420, 2421, 2418, 2616, 2715, 2913.
- Unit Type 3-2-12: 1621, 1722, 1923, 2123, 2222, 1321.
- Unit Type 3-1-7/1-9: 0916, 2317.
- Unit Type 4-0-8/1-9: 1417, 1920.
16.44 US Reinforcement Schedule: All U.S. Reinforcements enter anywhere on the south map edge.
- On Game-Turn Three: On this Game-Turn, the U.S. Player receives all remaining units which did not begin the game on the map (a total of 8).
16.45 Soviet Reinforcement Schedule: The Soviet Reinforcement units enter anywhere on the north map edge. The Soviet Player receives one Soviet Tank Division (see 17.12) on the Game-Turn following the first Turn in which any five U.S. units are across the autobahn (having moved through any autobahn hexes from south to north). If this does not occur, the Soviet Reinforcements do not arrive.
16.46 Special Rules:
- The U.S. Player is the First Player.
- The U.S. Player may use the Active CRT for 3 Game-Turns.
- The Soviet Player may use the Active CRT for 1 Game-Turn.
16.47 Game Length: The Scenario length is ten Game-Turns.
16.48 Victory Conditions: The Americans obtain a Decisive Victory if, by the end of Game-Turn Seven, they have exited at least 10 units off the northern map edge. The Americans achieve a Substantive Victory if, by the end of the game, they have exited at least 10 units off the northern map edge. The Americans achieve a Marginal Victory if, at the end of the game, they have exited at least 5 units off the northern map edge.
The Soviets achieve a Decisive Victory if, at the end of the game, there are no more than 10 American units on or north of the autobahn and no American units have exited the northern map edge. The Soviets achieve a Substantive Victory if, at the end of the game, no American units have exited the northern map edge. The Soviets gain a Marginal Victory if less than five American units exit the northern map edge.
17.0 Constructing Your Own Scenarios
Commentary: American doctrine holds that a mechanized infantry division (reinforced by non-divisional artillery and armored cavalry units) can delay a Soviet combined arms army for two to three days before becoming seriously depleted and in danger of being overwhelmed. The Soviets are more prone to use a heavier delaying force and be more willing to sacrifice it to weaken the attacking force.
A Soviet combined arms army would normally attack on a 30 to 80 kilometer front (19 to 50 hexes). The combined arms army would defend on a 100 kilometer front (63 hexes). A Soviet motorized rifle division would attack on a 10 to 30 kilometer front (6 to 19 hexes) and defend on a frontage as large as 45 kilometers (28 hexes). American divisions generally employ these same frontages.
The situations we are dealing with in Battle for Wurzburg are generally "fluid" mobile situations employing entirely mechanized forces. For this reason, really large concentrations of artillery will not be found; the Soviets are still capable of artillery on the scale they employed in the Second World War.
In Soviet doctrine nuclear weapons are intended to replace mass artillery fire in mobile situations which would not normally allow conventional artillery to be massed in sufficient quantities. Soviet doctrine (on paper anyway) insists that they can maintain a daily advance rate to in excess of 50 kilometers a day. A glance at Wurzburg will show you that they would only be able to do this against the most feeble resistance. It is assumed, therefore, that in order to achieve this advance rate it would be necessary to employ large quantities of tactical nuclear weapons. In such a "Soviet Nuclear Blitzkrieg" attack, a Soviet combined arms army could be expected to use up to three nuclear weapons a turn. You could easily put together a scenario like this using some of the other scenarios as models. Keep in mind, however, that for every nuclear weapon the Soviets have, the Americans have at least two. It is true, though, that a successful Soviet sneak attack could destroy many of these American weapons.
A hypothetical game such as Wurzburg is intended to be used as an experimental vehicle. You can put to the test literally anything you have read about the possible conduct of ground warfare in the near future in Europe. That's what the game is for.
General Rule: The Battle of Wurzburg counter-mix contains sufficient units that Players may represent one Soviet combined arms army (three mechanized rifle divisions, and one tank division, plus non-divisional artillery), and one weak American Corps (one armored division, one mechanized infantry division, one armored cavalry regiment, plus non-divisional artillery).
Cases:
17.1 Soviet Divisional Organization
17.11 Soviet Mechanized Rifle Division: The mechanized rifle division consists of four regiments: three infantry and one armored, plus artillery units and small support units. The armored regiment is usually broken up and distributed right down to the company level. It is for this reason that no tank regiment is represented in the game. The main maneuver element is the reinforced battalion. One of the regiments is more heavily reinforced than the other two with divisional support units and thus becomes the "Assault" regiment. Thus in the game a Soviet mechanized rifle division consists of 6(1-2-12), 3(3-2-12), 1(3-1-7/1-9) and 1(4-0-8/1-9).
17.12 Soviet Tank Division: A Soviet tank division consists of four regiments: three tank and one infantry. The tank regiments normally have infantry organic to them and are used en masse. In the game, the tank division consists of 3(4-2-12), 3(1-2-12), 1(5-1-7/1-9), and 1(4-0-8/1-9).
Also included in the counter-mix are a number of non-divisional artillery units.
17.2 U.S. Divisional Organization
American Divisions are more flexible than their Soviet counterparts. There is only one type of American division, but, depending on the mix of mechanized infantry and armored battalions, it is either called an armored division or a mechanized infantry division. Both "types" of divisions have the same divisional artillery, which consists of 3(1-2-7/2-12) SP 155mm battalions, and 1(2-1-7/1-12) SP 203mm battalions. In addition, each division has one armored reconnaissance battalion (3-3-12). The mechanized infantry division normally has five or six mechanized infantry battalions and four or five tank battalions. In the armored divisions the ratio is usually reversed.
Other units included in the counter-mix are non-divisional units. These are all artillery, including the anti-tank helicopter company, which is used much like artillery. In addition, there is the armored reconnaissance regiment, which simply consists of 3(3-3-12). Divisions are usually divided into three brigades, each consisting of three or four battalions.
18.0 Game Notes
FPF enables a Player to deny his opponent a critical position on the map at a critical moment. Because FPF is applied after the Phasing Player has announced and committed his attacks, its effects can be particularly devastating. There are ways to counter FPF. Counter Battery fire is one way to eliminate the threat of Artillery based FPF. Another method is to stage an attack with the specific objective of (1) Drawing FPF away from a later attack, or (2) Following a retreating unit to a point adjacent to unused Artillery units (Artillery units may not use FPF when adjacent to Enemy units). The mark of a good defending Player in Wurzburg is his ability to utilize his FPF, and thus stop important attacks.
Wurzburg uses locking Zones of Control. Consequently, try to leave at least one hex between Friendly units when forming a line, as the opposing Player will be stopped by ZOC's, but will not be able to envelope your units through advance after combat. Another effect of the "locking Zone" is that units can become easily tied down and lose their mobility and, since all units in Zones must attack, it is possible to force a unit to make an attack at "suicidal" differentials in the Owning Player's Turn. Units may not retreat through ZOC's; remember at all times that a unit is dead no matter how it is killed. A surrounded or enveloped unit is just as dead as a unit attacked at high odds on the Active Combat Results Table. The use of two Combat Results Tables is unique. In playtesting, we found that Players did not like to use the Active CRT; it makes sense, it's very bloody for both sides. The Active Table, however, does have its uses. It is particularly effective for knocking holes in lines that would otherwise just keep retreating. A situation in which a Player has a large quantitive advantage in units and a limited amount of time to achieve a specific objective is a good situation in which to go to the Active Table.
The Advance to Contact: This is a meeting engagement on a large scale that rapidly turns into a slugfest in the city of Wurzburg. The Americans should set up a couple of defense perimeters outside Wurzburg and on the roads to delay the Soviets for as long as possible and hold on for reinforcements. The Soviet Player should attack vigorously using his initial artillery superiority to the hilt. The Americans should stay on the defensive until the last few moves and should then win back some of those valuable city hexes. It is a tough fight for both sides (the Americans especially) and both should watch their all important line of communications, as Wurzburg is useless without it. Use of the Active CRT should come early to middle for the Soviets and middle to late (if at all) for the Americans. Neither side should ignore the possibility of raids on the Enemy's rear areas to cut that line of communications (it can turn the game entirely around).
The Siege of Wurzburg: The Americans have their hands full with this one; the Soviets will have a field day. The Americans should block the initial Soviet advance along those crucial roads and then grudgingly give up their flanks. The Soviet should concentrate and send secondary forces around the flanks to surround Wurzburg and cut it off from the outside world. The Soviet Player should go to the Active CRT middle to late in the game, the American Player, if he is faced with a surrounded Wurzburg, should attempt to clear the road with the Active CRT late in the game.
The Gramschatzerwald: There are a lot of seemingly hopeless situations and a lot of action in this Scenario. It opens with a massive Soviet attack. The American Player should fall back slowly. The Soviet Player must attack vigorously at all times and keep his units as mobile as possible to change the area of concentration for the attack. The American Player should keep a mobile reserve to plug the gaps that will inevitably develop.
Late in the game (seldom too late) the Americans receive massive reinforcements from the destroyed units. These can win the game in the last few Game-Turns. The American Player should (even early in the game) make counterattacks to destroy the Soviet units, as these losses will hurt him late in the game. The Soviet Player should go to the Active CRT early to mid-game and the American Player should use it late in the game.
The Main River Line: American forces jump the unprepared Soviet position and try for a breakthrough to the north. Soviets should remove units from the salient on the left flank. The Americans should make that removal as difficult as possible and destroy as many Soviet units as they come in contact with. The Soviet Player should use the Active CRT to stop and destroy the American breakthrough whenever it happens. The Americans use the Active CRT when they need to knock a large hole in the Soviet line.
Nuclear Weapons: Nuclear weapons eliminate large breakthroughs in lines because any concentration of troops that is not closely engaged with your own troops can be "nuked" with impunity; the disrupted units can then be destroyed fairly easily. In using nuclear weapons, keep two main tactics in mind: Keep your forces in contact with Enemy forces (even the Soviets won't nuke themselves, we don't think); and keep your forces spread out; any concentration of troops invites nuclear attack.