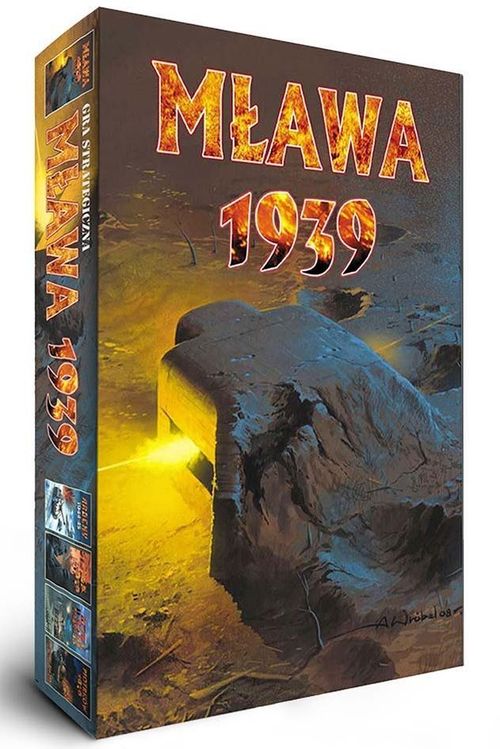
Mława 1939
Mława 1939 Rulebook
Table of Contents
Table of Contents
- Introduction
- Game Components
- The Game Phases and Turns
- Movement Rules
- Stacking
- Division of Units into Sub-Units
- The Zone of Control
- Combat
- Artillery
- Air Forces
- Fortifications
- Armored Raids
- Headquarters
- Supply
- Units Arrangement
- Camouflage
- Replacements
- Transport Trains
- Transport Columns
- Bridges and Ferries
- Disorganization
- Panic
- Reserve Centers
- Tables
- Scenarios
Introduction
"September 1939" (W-39) system allows players to recreate all the major battles of the 1939 campaign in the regiment scale, although battalions are used as well. All the games of this series were designed as parts of one, big game, so if players have enough time and space, they can link their games together and create one big map of the west, north, south, central and partially eastern Poland and play whole campaign day by day.
An idea of this game was to give players a feel of the 1939 campaign, with both devastating power of the blitzkrieg and desperate defense of the Polish army. It's important to remember that German tactics was still in progress and the Polish campaign was a first full scale attempt of such combat. Polish resistance was also strongest than Germans expected, even with their superior equipment and air control, as well as the support of the Soviet allies.
The rules are fairly easy, while they still try to capture all the important elements of the 1939 campaign. Each game contains a number of the historical scenarios and sometimes a hypothetical ones as well. While each game of this series is stand alone product, some minor scenarios might require units from the other games.
Game Components
[2.1] Each game contains a board that pictures the battlefield of one of the 1939 battles fought between Poland versus III Reich and its allies. The map shows the road network (primary and secondary roads), towns and cities, woods, rivers etc., which are vital to a military operation. A hexagonal grid is printed on the map to regulate movements and the placement of units. Each hex has its number. All "W-39" boards were designed as a part of the series, so they can be linked with each other, to create a bigger one, so you can play not just single battles but also bigger parts of the whole 1939 campaign.
Map was made in the 1:250 000 scale. Each hex covers about 3000 m of real terrain.
[2.2] Counters
There are two kinds of counters in the game: combat units that represent historical troops, and information counters.
Combat unit key
Each nationality's combat unit counters are identified by the following symbols (the key as printed on page 1 of the file):
- Germans: armored units; reconnaissance units; infantry units; heavy artillery units; motorized artillery units; motorized infantry units; light artillery units; cyclists units; motorcycle units; headquarters; heavy machine gun units.
- Soviets: headquarters; armored units; reconnaissance units; motorized infantry units; infantry units; cavalry units; artillery units.
- Slovaks: headquarters; infantry units; artillery units.
- Poles: heavy machine-gun units; cavalry units; light artillery units; horse artillery units; infantry units; armored units; heavy artillery units; headquarters.
- Lithuanians: headquarters; infantry units.
Information counters
- Retreat (marked "U")
- Level 1 Out of Supply
- Level 2 Out of Supply
- Attack (arrow)
- Bridge Destroyed
- Field fortifications (hexagon symbol)
Counter data
Artillery unit counters show: unit size; unit number; Movement Points; division number; unit type; fire modifier.
Non-artillery counters show: unit size; regiment number; Movement Points; division number; unit type; sub-units amount.
All armored, motorized infantry, reconnaissance and artillery units with a movement factor of 10 or greater are called mechanized units for movement purposes. Numbers and names of units show the historical numeration and designation of a desirable unit, e.g. 17/31 means the seventeenth regiment of the thirty first division. The remaining symbols used in the description of units' names mean:
- ND – National Defense Units
- ND Kurpie – National Defense Battalion "Kurpie"
- R.B. – Rifle Battalion
- p.cz – Tank Regiment
- pal – light artillery regiment
- dac – heavy artillery squadron
- puł – uhlan regiment
- sk – horse rifles
The unit's scale is:
- I – company/squadron
- II – battalion
- III – regiment
- X – brigade
- XX – division
A unit's strength is expressed in strength points (SP). It represents the real strength of a unit, with its manpower, equipment, morale and training.
The modifier of a gunfire is expressed in decimal fractions. It is printed on artillery units only and pictures the fire efficiency of these units.
The range of fire shows the maximum distance (expressed in hexes) of artillery units' effective fire. It is 3 hexes for all artillery units.
Movement factor is expressed in Movement Points (MP) and shows a potential ability of movement during the Movement Phase. Having a certain pool of points, the unit pays from this pool for admittance to each hex. Units expend Movement Points according to the type of terrain in the hex and the type of unit. These costs are presented in the Terrain Effects Chart.
The number of sub-units shows the number of sub-units a unit can be divided into.
Each non-artillery unit and sub-unit has a reverse with all characteristic data and an obverse where both sides of the conflict are marked. Units' strength points are in the Unit Charts. The Unit Charts are used for recording the current strength of the units used in the game.
For a certain degree of generalization, the game presents regiments (which can be divided into battalions) and self-contained battle groups. However, there are no engineer troops and anti-tank units. Their strength is included in the remaining division units. Virtually the artillery of the division (included in each division) is composed of a light artillery regiment and a heavy artillery squadron, but in the game the whole artillery of each division is portrayed by one counter which is marked by the number of the division in question (it usually corresponds with the light artillery regiment numeration). The artillery units which belong to corps and armies are marked with their symbols, e.g. artillery with an inscription "art. III" is the artillery of the third corps.
Abbreviations:
- a/d ratio – the attacker/defender strength ratio
- MP – Movement Points
- SP – Strength Points
- ZoC – Zone of Control
Rounding a quantity (in favor of defender) means the following: all ratios up to xxx.5 are rounded down and all ratios above xxx.5 are rounded up.
Example: 2.5 (2.5:1) rounds down to 2 (2:1) and 2.5001 (2.5001:1) rounds up to 3 (3:1).
The Game Phases and Turns
All games of the "September 1939" system are played in turns. Each turn represents one day of real time. During the turn each side performs certain actions. A turn is divided into 11 cycles, called Phases. During these Phases each side has the right or is obligated to carry out a number of specified activities.
It is forbidden to carry out any activities connected with the game apart from the phase during which they should take place. A turn is considered finished after the accomplishment of all activities provided in phases 1 to 11. A player may voluntarily skip each of his phases if he is not obliged to perform any actions there.
[3.1] Phases
There are a total of 11 phases in the turn. A phase can be omitted when the activities provided in it need not be carried out, or players do not want to carry them out. There are German and Polish phases. All Soviet, Lithuanian and Slovakian units perform their actions in the German phases, but they have to be done independently, so the player moves all the German units first, then the Soviet ones.
Phase 1 – Weather phase. During this phase one of the players rolls a die to set the weather for the turn:
- 1, 2, 3, 4 – good weather, air counters may be put on the chart without any obstacles.
- 5 – weather is changed for the worse, the placed counters may accomplish only one mission (they are turned up with number one facing up).
- 6 – bad weather, the aviation of both sides does not work – distribution of air counters over a chart is impossible.
Phase 2 – German Movement Phase. At the beginning of the phase German panicked and disorganized units may regain their efficiency. The German player may then move any number of his units up to the distance limited by Movement Points of each unit (with help of the Terrain Effects Chart). German units may conduct Armored Raids. Transport trains may move. Units may be loaded/unloaded in/off the transport trains.
During this phase of the game German reinforcements enter the board.
Phase 3 – Field Fortification Building Phase. In this phase German units, which have not moved in this turn, are not disorganized or panicked and are not covered with a Retreat counter, may build fortifications. They are marked by a Field Fortifications counter, placed underneath the units.
At the end of this phase Retreat counters are removed from German units.
Phase 4 – The German Attack Phase. During this phase the German units may attack Polish units. Attacks may be supported by artillery and air forces. The defender, that is to say the player operating the Polish units, may support the defense of his units with his own artillery. Place Attack counters on all German units which made an enemy retreat. Place Retreat counters on all Polish units which are retreating in consequence of the battle. After all attacks are done, the German player may conduct Armored Overruns.
At the end of this phase remove all the Attack counters from Polish units.
Phase 5 – Polish Counterattack Phase. When all the German attacks are resolved, the Polish player may perform counter-attacks. All Polish units, if they were not attacked in the previous phase (see [8.3]), may counter-attack all German units in their Zones of Control which are not in offensive (do not have Attack counters on). Counter-attack is fought like an ordinary combat. During a counter-attack the Germans may use the air force and the artillery which were not used for an attack in the previous phase, and the Poles may reinforce their assault by the artillery that has not fired during the turn yet. The counters symbolizing the escape and offensive of units are not placed in the counter-attack phase.
Phase 6 – German Supply Phase. The German player checks if any of his units surrender to the enemy. Then the German player checks if all these units are supplied (see [14.0]). Place Out of Supply counters on the units that are not supplied. German Headquarters may rebuild destroyed and damaged bridges.
Phase 7 – Polish Movement Phase. At the beginning of the phase Polish panicked and disorganized units may regain their efficiency.
The Polish player may move any number of his units up to the distance limited by Movement Points of each unit (with help of the Terrain Effects Chart). Transport trains may move. Units may be loaded/unloaded in/off the transport trains and Transport Columns.
During this phase of the game Polish reinforcements enter the board.
Phase 8 – Polish Field Fortification Building Phase. In this phase Polish units, which have not moved in this turn, are not disorganized or panicked and are not covered with a Retreat counter, may build fortifications. They are marked by a Field Fortifications counter, placed underneath the units.
At the end of this phase Retreat counters are removed from German units. (As printed: this Polish phase text refers to German units, as in the source.)
Phase 9 – Polish Attack Phase. During this phase the Polish units may attack German units. Attacks may be supported by artillery and air forces. The defender, that is to say the player operating the German units, may support the defense of his units with his own artillery. Place Attack counters on all Polish units which made an enemy retreat. Place Retreat counters on all German units which are retreating in consequence of the battle.
At the end of this phase remove all the Attack counters from German units.
Phase 10 – German Counterattack Phase. When all the Polish attacks are resolved, the German player may perform counterattacks. All German units, if they were not attacked in the previous phase (see [8.3]), may counter-attack all Polish units in their Zones of Control which are not in offensive (do not have Attack counters on). Counter-attack is fought like an ordinary combat. During a counter-attack the Polish player may use the air force and the artillery which were not used for an attack in the previous phase, and the German player may reinforce his assault by the artillery that has not fired during this turn yet. The counters symbolizing the escape and offensive of units are not placed in the counter-attack phase.
Phase 11 – Polish Supply Phase. The Polish player checks if any of his units surrender to the enemy. In this phase the Polish player checks if all these units are supplied (see [14.0]). Place Out of Supply counters on the units that are not supplied. Polish Headquarters may rebuild damaged bridges. Polish units may receive reinforcements from the Reserve Centers.
Movement Rules
[4.1] General rules
During the Movement Phases the players may move as many units as they want in any direction. Units may be moved in any order, but each nationality has to move independently, e.g. the German player has to move all the German units first and then he may move any units of his allies. Units must move constantly from hex to hex; skipping a hex is forbidden (players of the opposing side must see the whole route of a unit). At the beginning of each Movement Phase all units have their movement limits, represented by a certain number of Movement Points (MP). Entering each hex costs a certain amount of Movement Points. Movement is possible as long as the unit has enough MP to enter the next hex.
The movement of units is allowed only during each side's Movement Phases or as a combat result.
[4.2] Detailed rules
[4.21] A unit cannot enter a hex occupied by an enemy unit (exceptions: [12.0] and [13.26]).
[4.22] A unit cannot spend more Movement Points in a phase than its total movement ability amount.
[4.23] A unit does not have to spend all its MP in the phase.
[4.24] Movement Points which were not used up in a phase do not pass to the next phase.
[4.25] Movement Points may not be transmitted from one unit to another.
[4.26] When the player removes his hand from a unit's counter, the movement is considered to be finished; correction of the position is possible in the same phase only with the opponent's approval.
[4.3] Terrain Effects
[4.31] A unit spends one Movement Point for entering a clear terrain hex; units have to pay more or less Movement Points for entering other kinds of terrain.
[4.32] A unit moving ALONG the primary road spends ½ of a Movement Point per hex.
[4.34] A unit entering the road from a non-road hex pays a number of Movement Points equal to the cost of the terrain the road goes through. The road movement is possible only between two hexes directly connected by the road.
[4.35] A unit moving along a secondary road, irrespective of the terrain it goes through, always spends one Movement Point for entering the next hex with that kind of road.
[4.36] Streams and small rivers may be crossed at any place, but a non-mechanized unit must spend additionally 1 or 2 Movement Points (stream and small river respectively) if not using the bridge, and 3 or 6 Movement Points in the case of mechanized units.
[4.37] Non-mechanized units are also allowed to cross big rivers (the Vistula River, the Warta River, the Bug River). The unit which intends to cross a big river must (in its own Movement Phase) be on the hex adjacent to it. In its next Movement Phase the unit may cross the river by moving onto the hex on the other side of the river. A unit spends 4 Movement Points for crossing a big river. If the unit was attacked, it can't continue crossing. If a hex is occupied by an enemy unit the crossing can only occur as a result of a combat. Instead of moving, the unit must engage enemy units in its attack or counter-attack phase. If enemy unit(s) is forced to retreat, the attacking unit can only enter the hex formerly occupied by the enemy. If not, the crossing is cancelled.
A big river reduces the unit's Zone of Control extension (see [7.15]); it does not include hexes on the other side of a river.
[4.38] While entering the hex which includes a wood, the unit must spend +1 or +3 (in the case of mechanized units) Movement Points in addition.
Note: hexes where a wood covers 100% of a surface reduce the effect of a Control Zone (see [7.17]).
If a unit is marching through the wood along railroad tracks, it has to pay:
- Infantry – 1 MP per hex
- Cavalry – 2 MP per hex
- Mechanized – 3 MP per hex
- Artillery – 2 MP per hex
[4.39] Effects of terrain on units' movement are added up.
Example: a mechanized unit climbing up a hill which is overgrown with wood spends 1 MP entering the hex, 2 MP for climbing up the hill and 3 MP for the wood, which gives totally 6 MP.
[4.40] Soviet mechanized units' movement depends on their mechanical reliability. A lot of them suffered such problems which limited their speed. When such a unit starts its movement, the player has to make a roll to see if no mechanical failures occurred:
- 1 – Unit has its normal MP
- 2 – Unit has 10 MP
- 3 – Unit has 8 MP
- 4 – Unit has 6 MP
- 5 – Unit has 4 MP
- 6 – Unit has 0 MP
[4.4] Effect of Friendly Units
[4.41] A unit may move through a hex occupied by another Friendly Unit or its Zone of Control (see 7.0) without spending any additional Movement Points.
[4.42] There is no limit to the number of Friendly Units that may be moved through a particular hex during a Movement Phase.
[4.5] Effects of the German Air Force
The German entire air supremacy effectively restricted the movement of Polish units on the battlefield. According to the weather and the number of planes (counters) employed in a battle, the Germans have been able to slow down the Polish units' movement (detailed information – see 10.0).
Stacking
[5.1]
In the "September 1939" system one hex may be occupied by several units of different kinds.
[5.11] There is no additional Movement Point cost to stack or unstack.
[5.2] Detailed Rules
[5.21] Units of total strength of more than 9 SP of one nationality can't occupy one hex after the completion of each phase. Units of total strength of more than 14 SP of one nationality can't stay on a hex designated as a stronghold.
[5.22] Each artillery unit has 1 SP for stacking and river crossing purposes.
[5.23] Each 1 SP of an armored unit is halved for stacking purposes.
Example: A player may stack a total of 18 SP of armored units on one hex, because each of their 1 SP counts as a half.
There might also be a situation where 5 SP of infantry stacks with 8 SP of armored units on the same hex. In such a situation the player may use all the 13 SP in the combat.
[5.24] Units of different nationalities (e.g. Germans and their allies) may move through each other, but they can't finish their movement on the same hex.
Division of Units into Sub-Units
[6.1] General Rules
All units which are marked as consisting of a number of sub-units may be divided into smaller tactical units, e.g. regiments into battalions. Only units with a red circle with a number of sub-units in the lower right corner of the counter may divide. Each regiment that can be divided has its own battalion counters.
[6.2] Detailed Rules
[6.21] A unit consisting of several sub-units may divide itself at any moment during the Movement Phase. The player who has decided to do that removes such unit from the board and puts a definite number of sub-units instead. They may move in their Movement Phase using the Movement Points of the mother unit left, according to the ordinary rules described in [4.0].
[6.22] The sum of sub-units' strength must be equal to the mother unit's strength at the moment of division.
[6.23] After the division, all sub-units have the same characteristics as other units.
[6.24] A unit may also divide during Attack Phases and Counter-attack Phases. The division is accomplished before the fight has been determined.
[6.25] The sub-units which form a stack and belong to one unit may merge again, but only if they were originally parts of the same unit.
[6.26] There is no additional Movement Point cost for division or merging of units.
[6.27] The unit which the player decided to divide must divide itself strictly into such a number of sub-units as it possessed at the beginning of the battle or still possesses at this moment of the game (the number of sub-units the unit consisted of may have been reduced by SP losses).
Example: At the beginning of the battle the 62 Infantry Regiment (6 SP) may have been split into three battalions (1st, 2nd and 3rd), each of them having 2 SP. After heavy losses during the second day of the battle (elimination of the 1st battalion and losses in the second – total loss of the 3 SP) the 78 Infantry Regiment may now divide itself into two sub-units:
- II battalion of 1 SP
- III battalion of 2 SP
Player makes a roll for each unit, not for a stack. Unit has to make a move first, then the player may make a roll for another unit.
The Zone of Control
[7.1] General Rules
[7.11] The Zone of Control of a unit covers the six hexes surrounding the hex occupied by that unit.
[7.12] All units (except artillery units and Headquarters) have Zones of Control at every moment of the game (exception, see [8.51] and [22.16]).
[7.13] The presence of several Zones of Control on enemy or Friendly units at the same hex does not cause any consequences; all Zones of Control exist independently of each other – they neither negate nor exclude themselves. A hex may thus be controlled by several units (enemy or friendly).
[7.14] The friendly Zone of Control never affects Friendly Units.
[7.15] The Zone of Control never extends into the hexes on the opposite bank of a big river and a lake.
[7.17] The Zone of Control never extends through the hexes covered by woods in 100%. There is no Zone of Control on such a hex.
Example: Unit A took its position in a wood and is expecting a frontal attack. Meanwhile unit number 1 turns the enemy back, seizing the opportunity of the fact that there are no Zones of Control in a hex 100% covered by wood, and cuts off the enemy's possible retreat. In the meantime the main forces are attacking in front. If forced to retreat, unit A may avail itself of the same rule and retreat next to unit number 1 (only through the field 100% covered by the wood), ignoring its Zone of Control.
[7.2] Zones of Control and Movement
[7.21] After a unit enters an enemy Zone of Control it must immediately stop, regardless of the amount of Movement Points which have not been used yet in this phase (the unit can no longer move in this phase) (exception – see 12.0).
[7.22] A unit never pays an additional cost to enter an Enemy Zone of Control.
[7.23] Moving an own unit within an Enemy Zone of Control (in particular within the Zones of Control of unit(s) on one hex) is allowed only during the pursuit (see 12.0). Otherwise it is forbidden.
[7.24] During the retreat a unit may pass through the hex in an Enemy Zone of Control but only when another Friendly unit is on that hex. The retreating unit (stack) loses 1 strength point (from the sum of all its points) for each hex crossed this way.
[7.3] Zones of Control Abandonment
[7.31] If a unit begins its own Movement Phase within an enemy Zone of Control it can leave it voluntarily without spending any additional Movement Points.
[7.32] During the same Movement Phase a unit may leave the Zone of Control of one enemy unit and enter the ZoC of another enemy unit; it may also move directly from one Zone of Control to another, but it cannot move within the Zones of Control of the same enemy unit.
Combat
[8.1] General Rules
[8.11] Combat between units may be conducted only during Attack and Counter-attack Phases (exception see [12]). A unit may attack or be attacked only once per phase (exception: [12.2]).
[8.12] A unit may be attacked only when it is in the enemy unit's Zone of Control at the beginning of the opponent's Attack or Counter-attack Phase (exception: a unit may be attacked if it is on the opposite side of a big river or on a hex 100% covered with wood, even if it is not actually in an enemy Zone of Control).
[8.13] The attacking player is considered as "the attacker" when his Attack or Counter-attack Phase is on; the other player is then "the defender".
[8.2] Attacks and Their Limitations
[8.21] A unit may, but does not have to, attack an opponent's unit or units which are in its Zone of Control at the beginning of its own attack or counter-attack phase (exception: [8.28]).
[8.22] All enemy units which are in the Zone of Control of a unit which performs an attack must be attacked.
Example (see I): if unit A attacks unit 1, unit 2 must also be attacked by unit B or A (it is in the Zone of Control of the attacking unit A). In the second case (see II) unit 2 does not have to be attacked when unit A attacks unit 1.
[8.23] An enemy unit may be attacked at the same time by any number of units which are in its Zone of Control. In this case the strength of all attacking units is combined. A single unit may attack several enemy units (if they are in its Zone of Control). Then the defender sums up the strength of all defending units.
[8.24] In the case when several units are defending on one hex, it is forbidden to attack each of them separately. In this situation the combat should be resolved in one attack and the strength of all defending units occupying the same hex is summed up.
[8.25] It is allowed to divide the combat into several attacks when the attacking units occupy the same hex, e.g. units A and B attacking unit 2 and then unit C attacking unit 1.
Note: It is the way of getting out of an encirclement – a unit (if allowed) divides itself into sub-units. In the attack phase the strongest units attack the weakest unit in the opponent's group and the weakest sub-unit is sacrificed to engage remaining enemy units.
[8.26] The attacker resolves all attacks in any order and combination he wishes.
[8.27] In the case when the attack is taken up simultaneously from 3, 4, 5, or 6 hexes, the attacker/defender ratio is modified (see [8.4] and [8.4] – explanation) by values of +1, +2, +3 or +4, respectively.
Example: the units A, B, C, D attack unit 1 from four hexes, so the attacker/defender ratio is modified additionally (according to [8.27]) by +2.
[8.28] All units which, at the beginning of their own attack phase (not the counter-attack phase), have attacking enemy units (having Attack counters on them – meaning they successfully attacked in their last attack phase) in their Zones of Control, must attack. This does not affect the units in field and/or stationary fortifications.
[8.29] The attacker's several units do not have to attack several defender's units at the same time unless the defending units and/or the attacking units occupy one hex, e.g. (see III) units 1 and 2 attack units A, B, C (or inversely). Only a simultaneous attack from several (or from one) hexes, directed to one hex, or an attack from one hex upon several hexes, is allowed. An Attack Phase (or Counter-attack Phase) lasts as long as all mandatory attacks have been resolved.
[8.30] Germans and their allies can't attack together; they have to attack individually.
[8.3] Allowance and Restrictions of Counter-attacks
[8.31] All rules described in [8.2] except [8.28] are obligatory in a Counter-attack Phase when attacks are conducted. A counter-attack gives a unit the possibility of attacking twice in the same turn.
[8.32] The units which may counter-attack are:
- the ones which were not attacked by non-artillery units or artillery and/or Air Force with the sum of fire modifiers greater than 3 in the opponent's last attack phase;
- the ones which do not have attacking enemy units (with Attack counters on them) in their Zones of Control (as opposed to [8.28] – they do not have to attack them in a Counter-attack Phase, but they also must not counter-attack if they are in their ZoCs).
[8.4] Resolving the Combat
To resolve an attack or counter-attack the following procedure is conducted:
a) The attacker chooses the attacked unit(s) and the unit(s) which attack(s) (together with artillery);
b) The attacking unit's strength is divided by the defender's unit's strength and the obtained ratio is rounded to the closest integer (e.g. 2.5:1 rounds to 2:1; 2.50001:1 rounds to 3:1);
c) The obtained result is modified according to the effect of terrain, the presence of commands, supporting artillery and/or air force and number of attack directions as well (see [8.27]). All the modifiers positive for the attacker are included first and then the defender's modifiers are included;
d) Having the modified ratio, the adequate column should be found on the Combat Results Table (CRT); the ratios greater than 10:1 are treated as 10:1 and the ratios less than 1:4 – as 1:4;
e) The attacker makes a 2D6 roll and finds the result in the column;
f) To see if the attacker suffered any losses, a 2D6 roll is made. The result is found in the "Attacker's Losses After Combat" table in the row with the defender's SP, and shows the number of SP that the attacker's units lost in the combat.
Explanation: The sum of modifiers (in [8.4]c) is a quantity expressed by a positive or negative number which changes the attacker/defender strength ratio by an adequate number of positions to the left or to the right. Negative modifiers shift the primary result to the left and positive ones to the right, e.g. if the attacker/defender ratio is 3:1, the modifier +3 shifts the primary result by three positions to the right, giving the result 6:1. The negative modifier –3 would change 3:1 into 1:2 in the same case.
[8.5] Combat Results
[8.51] The following symbols may appear in the first part of a combat result:
- A1, A2 – All attacking units retreat by one or two hexes respectively; any defending unit involved in a combat may stay in its place or pursue the enemy retreating units.
- B1, B2, B3, B4 – All defending units retreat by one, two, three or four hexes respectively.
- B5 – All defending units retreat and lose their Zones of Control during the next turn.
[8.52] It was quite a common situation on the 1939 battlefields that the Poles fought till the last man, despite the heavy losses. The following rule allows the player to recreate such situations. It is still a question whether it is worth sacrificing soldiers' lives to keep a key position at all cost.
The unit or units forced to retreat may remain on their hex at the cost of SP losses. To check the amount of these losses, the player should refer to the column obtained in (e) in the Losses Table. The intersection of that column and the row corresponding to the combat outcome gives the losses the unit(s) has (have) to take in order not to give up the position.
Example: Let's assume that the attacker's strength was 7 and the combat result was B2. In this case the defeated unit (or units) must lose one SP to stay in the same place.
[8.53] An attacking unit which has been forced to retreat may also stay in its hex at the cost of losses. In such a case, in the Losses Table, in the "strength" row you must find the range including the defender's strength (not the attacker's). Having the applicable column you must find the results at the proper intersection (in this case we treat A results as if they were B results).
Example: Let's assume that the attacker has to retreat 2 hexes and the defender's strength was 8 (7–12 column). If the attacker wants to stay at his hex, his unit must lose 1 SP.
[8.53a] The defender may also retreat partially by a smaller number of hexes than the result forced him to. In this case the retreating unit sustains losses proportional to the number of hexes it does not retreat (e.g. a unit has received a B3 result against a total of 15 SP of attackers; the unit may retreat 3 hexes, stay and lose 3 SP, or retreat 2 hexes and lose 1 SP for the remaining B1 result).
[8.54] A unit's strength reduction is marked by a reduction of strength points on the unit's table. When a unit is composed of several sub-units, the player allocates possible losses at his own discretion, but it is recommended to do it evenly.
[8.55] The loss of SP of a unit is irreversible (exception see [23.0]). A unit whose strength has come down to 0 is eliminated from the game.
[8.56] If more stacks were involved in the combat where losses were suffered, SP reduction must be done evenly.
[8.57] If an artillery unit suffers SP losses, it is eliminated from the game.
[8.6] Retreat
[8.61] A defeated unit which decided to retreat may move in any direction with the objective of retreating as far from the attacker as possible. If it is possible, it should retreat in the direction of "its" board edge. It may not enter the enemy's Zone of Control during the retreat (unless it is retreating through a friendly unit and there are no other hexes free of enemy ZoCs to escape – see [7.24]), impassable terrain (a swamp for tank units), or move beyond the edge of the map. It is also prohibited to cross a big river during the retreat. Otherwise the retreating unit loses an appropriate amount of strength points and/or stays on the last hex possible to retreat.
Example: The defender obtained the result B4, but after retreating two hexes the player finds that further movement is blocked by a big river. In such a case the retreating unit suffers loss of strength points. The amount of those points is read at the point of intersection of the B2 row and the proper column of the Defender's Losses Table.
[8.62] Defeated units retreat irrespective of the movement points they possess and of terrain type (except impassable terrain and big rivers).
[8.63] Place "U" (Retreat) counters on all retreating units.
[8.64] For each retreating unit (stack) the player makes a D6 roll. A 1 or 2 result means that the unit (stack) lost 1 SP.
[8.7] Pursuit
[8.71] If a unit (attacking or defending) has decided to retreat, all victorious units may accomplish a pursuit, moving by the same (or fewer) number of hexes as the defeated unit has been forced to retreat (exception: a pursuit across a big river, see [4.37]). "Attack" counters are placed on all units in pursuit.
[8.72] The first hex entered by a victorious unit must be the hex formerly occupied by a retreating unit (or any of such hexes if there were several retreating units); the further direction of a pursuit depends on the victorious player's decision.
[8.73] A unit moving in pursuit along the path of retreat (the hexes that the defeated unit was retreating through) ignores the Zones of Control of the enemy units.
[8.74] A unit that performs a pursuit is obligated to stop on the first hex which does not belong to the retreat path.
[8.75] While performing a pursuit a unit moves irrespective of the Movement Points it possesses and of terrain type (except impassable terrain and big rivers).
[8.76] Pursuit may be performed by all victorious units involved in a combat except artillery units.
Example (see V): The units A and B have attacked unit 1 and have forced it to retreat by four hexes. The victorious units perform a pursuit: unit A, going along the opponent's retreat path, ignores unit 3's Zone of Control and moves by four hexes, but unit B moves only by two hexes along the opponent's retreat path, and after entering the hex in unit 3's Zone of Control (the hex is not on the retreat path) it must stop.
[8.77] A victorious unit can't perform a pursuit if a defending unit has been eliminated as a consequence of the loss of SP but it kept its position thanks to this loss. As a result of this procedure the attacker may move no more than two hexes from the position of the defending unit(s).
Example: The attacker's SP is 20 with a +3 modifier, while the defender's SP is 3 with a –2 modifier. Odds are 8:1. The attacker rolled 7, which brings a B2 result. The defender has to retreat 2 hexes, but he may also keep his position at the cost of 3 SP (according to [8.52]). If the defender decides to fight till the last man, the attacker may occupy the defender's hex only. If the attacker would roll 2 and get a B4 result, the defender would have to retreat 4 hexes. If he decided to defend, his unit would be eliminated (4 SP loss) and the attacker would be allowed to occupy the defender's hex and move one more hex.
[8.78] When the attack is unsuccessful, only the attacking units must retreat. Other Friendly Units that were not involved in the combat but occupied the same hex must stay in their place. In this case a pursuit is forbidden.
Example: Units 1 and 2 conduct two attacks: in the first attack unit 1 attacks unit A, in the second one unit 2 attacks unit B. In the result of the unsuccessful first attack unit 1 retreats, but unit 2 remains in its place till the moment of its own attack's result and thereby foils unit A's pursuit.
[8.79] The next attack may be resolved only when the results of the previous combat have been fully resolved first (described in [8.5], [8.6], [8.7]).
[8.8] Effects of Terrain in a Combat
[8.81] Terrain influences the combat by its modifiers (see [8.4]). The specification of all types of terrain and the corresponding modifiers are presented in the Terrain Effects Chart.
[8.82] Only terrain occupied by the defender influences the combat – the only exception is swamps (see [8.97]; the cross-reference number is kept as printed, and the swamp rule itself is at [8.87]).
[8.83] The effects of terrain are cumulative, e.g. a total modifier for a hill (–2) covered by forest (–1) makes –3.
[8.84] Rivers (all types) and bridges have an effect on a combat only when the majority of attacking units (the sum of their strength points, not their numerical force) is on the other side of a river or a bridge.
[8.85] When several units are being attacked at the same time and each of them is in a different terrain, the most profitable modifier is taken.
Example: Three units placed on different hexes are being attacked in a single combat. One of them has field fortifications. The units have positions as follows: hills (with fortification, total –3 modifier), a forest (–1) and a town (–2). Considering rule [8.85], the most profitable modifier is taken for them, that is –3 (fortifications in the hills).
[8.86] Roads have no effect on a combat.
[8.87] The units attacking from swamps have their SP halved (rounding up).
[8.88] Armored and reconnaissance units standing in a forest, or attacking the opponent's units which are in a forest, have their SP halved (rounding up).
[8.89] Armored or reconnaissance units attacking or defending in a town have their SP halved (rounding up). The above rule is not applied if the armored or reconnaissance units occupy the same hex or perform an attack with infantry or cavalry units' participation.
Artillery
[9.1] General Rules
[9.11] Artillery is the only kind of unit that may participate in combat while not in the Enemy Zone of Control.
[9.12] Artillery units affect combat by the Artillery Fire Modifier they possess (see example in [8.4]).
[9.13] Artillery that supports combat may not retreat, unless it is on the same hex as the retreating unit.
[9.14] Artillery may never take part in a pursuit.
[9.15] Artillery units do not have Zones of Control.
[9.16] An artillery unit which is not stacked with another non-artillery Friendly unit on the same hex may be eliminated in the Enemy Movement Phase or during a pursuit if the Enemy non-artillery unit passes through that hex. During this procedure the enemy unit spends an additional 1 Movement Point (during the movement phase). If the armored unit performs this action, a D6 roll is made – a result of 1 means that such armored unit lost 1 SP. Artillery units in field and stationary fortifications can't be destroyed in this way.
[9.17] An artillery unit may fire only once per turn.
[9.2] Attack Support
[9.21] Artillery may support an attack only during the own Attack or Counter-attack Phase. An attacked unit(s) must be within the range of the artillery supporting an attack. When the defending units are in different hexes, it is enough for at least one to be within the range of artillery.
[9.22] An attack may be supported by any number of artillery units, provided they belong to the division conducting the attack or are corps auxiliary units such a division belongs to.
[9.23] The attacking player is obligated to indicate the artillery units supporting an attack.
[9.24] When several artillery units support the same attack, their fire modifiers should be summed.
Example: The attack odds are 2:1. The attacking player supports the attack with three artillery units whose modifiers are 1, 0.7 and 0.4; the sum of modifiers is 2.1 and the modified ratio changes from 2:1 to 4.1:1, rounded up to 4:1.
[9.3] Defense Support
[9.31] Artillery units may support friendly units' defense during the enemy's Attack or Counter-attack Phase.
[9.33] The unit whose defense is being supported must be within the range of assisting artillery fire (note also [9.48]).
[9.34] A defense may be supported by several friendly artillery units, but only if they belong to the defending division or are corps auxiliary units that such a division belongs to.
[9.35] If the enemy attacks several units, at least one of them must be within the range of assisting artillery fire in order to support the defense.
Example: The odds are 2.75:1; the defender is supported by an artillery unit with a 1 modifier, so according to [9.35] it works as a –1 modifier. Thanks to that the odds are 1:1.75 and after rounding up, it's 2:1.
[9.36] The defender may declare the support of his own artillery (indicating the supporting artillery) not sooner than the attacker presents the total forces which would participate in the attack (non-artillery units, artillery support and possible air support). Adding new units to the attack after the declaration is forbidden (to prevent manipulation of the attacker/defender ratio).
[9.4] Individual Artillery Attacks
[9.41] Artillery units may conduct individual attacks without other types of units being involved.
[9.42] Artillery unit(s) may attack only one hex during the Attack Phase.
[9.43] One hex may be attacked by several artillery units in one attack.
[9.44] Results of the Individual Artillery Fire are checked in the Individual Artillery Attack Table (see Tables, below).
[9.45] Units that are targets of the Individual Artillery Fire suffer losses in SP, but never retreat.
[9.46] The sum of fired modifiers is rounded to the closest full value (e.g. 2.40 makes 2; 2.6 makes 3).
[9.47] Artillery may support the defense of a Friendly Unit which is the target of an Individual Artillery Attack, but only when the attacking artillery unit is within the range of its fire.
[9.48] If the attacked units are in fortifications, their losses are halved.
[9.5] Direct Combat of the Artillery
[9.51] The artillery unit, which is in the enemy unit's Zone of Control at the beginning of the player's Attack or Counter-attack Phase, may attack only the units on adjacent hexes. It is forbidden to attack at longer distances. A fire modifier is used to attack. Rule [8.22] is not obligatory for artillery.
[9.52] The artillery unit in the enemy Zone of Control at the beginning of the enemy Attack or Counter-attack Phase may only support the friendly non-artillery units' defense if they both occupy the same hex. A fire modifier is used when supporting the defense.
[9.53] The artillery unit in the enemy unit's Zone of Control at the beginning of the enemy Attack or Counter-attack Phase, and not sharing the hex with a friendly non-artillery unit, defends itself using 1 SP. It can't support the defense of other units, but it still can be supported by other artillery units.
[9.54] Fortified artillery units occupying the same hex together with friendly non-artillery unit(s) halve the strength (rounding up) of attacking enemy armored units. If the defender decides to use artillery in this way, he may not use it to support the defense. The attacker must mark possible losses among armored units and the defender must mark them among artillery units (which means elimination of an artillery unit if a stack suffers any losses, since one point of loss means elimination of an artillery unit; note that such a loss will be counted with multiplying the fire modifier by six). While counting the losses the full strength of the attacker is used.
Air Forces
Polish and German air counters do not correspond with the real numeration of units. They represent the total strength of the air units involved in the battle.
[10.1] General Rules
[10.11] At the beginning of each turn players receive air support as indicated in the scenarios. Air power of each side is expressed in a certain number of counters. Each counter has a reverse and an obverse (which differ in strength factor only). A strength factor has just the same effect on a combat as an artillery fire modifier.
[10.12] Air force may be used to support the attacks or the defense of friendly units. Rules for its use and effects are the same as in the case of artillery use (see [8.4] – c and [9.38]).
[10.13] Air units may conduct Individual Air Attacks or cooperate with artillery (only) in Individual Attacks; in such a case the same rules as in [9.4] and [9.47] are in effect. When conducting an Individual Air Attack, the initial odds are 1:1. While resolving an Individual Air Attack, the result 1–5 (regardless of an effect) causes the attacked unit's (units') mobility to be reduced by half in its immediate Movement Phase (such a unit is covered with the S1 counter).
[10.14] Transport trains may also be the targets of Individual Air Attacks (see [10.35]).
[10.15] Air Forces may not be used for attacks on units in woods.
[10.16] A player may use more than one air unit counter to attack a single hex, with one exception: on the 1st and 2nd September the German Air Force may not use more than two air counters on a single hex.
[10.2] Air Attack Procedure
[10.21] In order to use air force, air counter(s) should be placed on the hex the player wishes to attack or defend. To perform Individual Air Attacks, air counters must be placed on the enemy units.
[10.23] The Polish player always places his air units first. A player may decide to write down in secret the locations where they want to use their air units and reveal them simultaneously. If both players place their air units on the same hex, both air units are removed – it is considered that an air battle occurred and neither side could perform any other actions.
[10.24] When setting a final odds for the combat (in the Attack or Counter-attack Phase), roll a D6 for each air unit involved in the attack. The results:
- 6 – air unit returns to base (the counter is immediately removed from the board);
- 5 – air unit remains on the board, but the counter is turned face up (with strength factor 1); the counter is removed from the board if it already had one strength point (due to the weather) before this procedure;
- 4–1 – air unit remains on the board.
After the accomplishment of this procedure, all air units that are still on the board may attack the enemy (using their remaining strength).
[10.3] Individual Air Attacks
[10.31] Individual Air Attacks take place in the Movement Phase before any movement actions.
[10.33] When an attack is conducted only with air forces, artillery units can't support the defense.
[10.34] The units in fortifications attacked with an air raid have their losses halved.
[10.35] If an air unit attacks a transport train, the player rolls a D6 for each air counter involved. Results:
- 6 – elimination of the train (its counter is removed from the board and it does not participate in the game any more); transported units lose 1 SP and in the immediate Movement Phase have their MP halved.
- 5 – half of the train's Movement Points have been lost, without any effect on transported units.
- 1–4 – the attack was a failure (printed as "4 - 1"; read as the range 1–4).
[10.36] Air force can also target bridges on the big rivers. An attack is conducted at the beginning of the enemy Movement Phase, before units move. An air unit with Strength Factor 2 destroys the bridge if the player rolls a 1 on a D6. Rolling a 2 means that the bridge is damaged, and any other result means the attack was unsuccessful. For an air unit with Strength Factor 1, rolling a 1 means damaging of a bridge. During a single phase the bridge may be attacked by a maximum of two units. The second damage counts as destruction of the bridge.
[10.36] Hexes covered with wood can't be targets of Individual Air Attacks.
(The source prints the number [10.36] twice; both clauses are transcribed as printed.)
[10.37] Despite the result, Individual Air Attacks might cause disorganization of the attacked unit. To see if this happened, the player makes a D6 roll. If the result is lower than the sum of the air units' strength, the attacked stack is disorganized. If it was already disorganized, it becomes panicked then. Despite the amount of the modifiers used, rolling a 6 always means a failure of the disorganization attempt.
[10.4] Weather
[10.41] A number of air counters is stated precisely for each day. The counters indicate only the potential ability of the Air Force; however, it doesn't mean that all support points will be allowed to be used in all turns. The employment of the Air Force depends on the weather.
[10.42] At the beginning of each turn one of the players makes a roll and checks the weather (see [3.1] Supply and Weather Phase).
The description of the procedure and its consequences is described in [3.1] Supply and Weather Phase.
[10.5] Disruption of Land Units' Movement
[10.51] German air units may block or slow down the movement of Polish units. To perform such an operation, the German player has to use air units with a maximum of 2 SP on a single hex.
[10.52] 1 SP of the air units used on a hex causes land units to pay an additional 1 MP to enter such a hex. 2 SP extends the influence of the air units on all neighboring hexes as well.
[10.53] Wood hexes are immune to such air operations.
Fortifications
[11.1] General Rules
[11.11] All units which did not move in the last Movement Phase, are not covered with Retreat counters and are not disorganized or panicked may build fortifications during their own Fortifications Building Phase. This fact is marked by the location of the Field Fortifications counter below such unit(s).
[11.12] Field Fortifications may be built on any hexes regardless of the terrain type (exception – it is forbidden to build Field Fortifications in a swamp).
[11.13] The Field Fortifications counter is removed from the board if, at the end of the Movement Phase, none of the friendly units occupies a hex where Field Fortifications are.
[11.14] During the same Movement Phase a unit is allowed to leave the Field Fortifications hex, and if any other friendly unit enters such a hex, it may occupy such Field Fortifications without the need of building new ones.
[11.15] The Field Fortifications counter is removed from the board if the unit occupying that hex was eliminated or forced to retreat as a result of a combat.
[11.16] Once destroyed, Field Fortifications may be built again at the same hex (according to [11.11]).
[11.2] Effect of Field Fortifications on Combat and Movement
[11.21] Field Fortifications affect defense only. They give a –2 modifier.
[11.22] The modifier is used if at least one of the attacked units is in the Field Fortifications (see [8.83] and [8.85]).
[11.23] The Field Fortification modifier is used regardless of the terrain modifier.
Example: Three units on different hexes are being attacked. One of them is in the Field Fortifications. The units have positions as follows: hills (–1, and along with Field Fortifications –2, which totally makes –3), a forest (–1) and a town (–2). Considering rule [8.83], the most profitable modifier is taken for them, that is –3 (for the Field Fortification in the hills).
[11.24] Field Fortifications do not affect the combat result if the attacking unit is in the Field Fortifications.
[11.25] Field Fortifications do not affect the units' movement in any way.
[11.3] Fortified Lines
[11.31] These positions give the defender the modifier –3 to the attacker/defender ratio if the defending units are attacked through the edge of the hex that contains Fortified Lines.
[11.32] If a unit at the hex with the Fortified Line is not attacked through the edge with the Fortified Line, it receives the modifier –2 as if it was in Field Fortifications.
[11.4] Stationary Fortifications
There were Polish Stationary Fortification lines in certain places along the border (especially in Silesia and Masovia) and around some towns (Modlin or Mława). They were still important pieces of the Polish defensive plans, even if some of them were already outdated (Brześć).
[11.41] The strength of a unit which is attacking across the edge of Stationary Fortifications is halved, and after this the ratio of the attacker/the defender is calculated.
[11.42] Stationary Fortifications give the defender an additional modifier of –4.
[11.43] When the defending units are in Stationary Fortifications, their losses are halved (rounding down).
Example: After a combat the Polish regiment defending the Mława fortifications obtained the result B3 and is forced to retreat 3 hexes, but the player decides to keep the position at a cost of strength points. The attacking units had 30 SP, so the defender should pay 4 SP to keep the position, but because of being in Stationary Fortifications he loses 2 points instead (in accordance with [11.43]).
Armored Raids
(The source prints paragraph numbers [12.22] and [12.23] twice each, for the Armored Overrun rules; they are transcribed as printed.)
The overwhelming power of massive armored attacks was one of the reasons for the quick German advance. Armored Raids are a specific form of movement and combat combination, and are the only combat permitted in the Movement Phase by Germans.
[12.1] Detailed Rules
[12.11] Raids may be conducted only by mechanized units, and at least 2/3 of their SP must be tanks.
[12.12] Units conducting a raid may enter a hex occupied by enemy units at an additional cost of three Movement Points, but only when the modified (by terrain effect or fortifications) odds ratio (calculated normally, but without artillery and air support) is at least 10:1. If these conditions have been fulfilled, the raiding units may enter that hex and all the enemy units there are eliminated (note that [8.22] and [8.24] must be accounted for).
[12.13] The raiding units can't move within ZoCs of Polish units (all movement restrictions must be considered), save to the one that is the target of the raid.
[12.14] During one Movement Phase the same units may conduct as many raids as their MP limit allows.
[12.15] Artillery units participating in a raid do not modify the odds.
[12.16] When an artillery unit is attacked, it defends with 1 SP. The rule [9.64] is compulsory during the raid. In this case the 1 SP is not counted into the sum of defending units.
Example: The attacking unit 1 may not directly enter the hex occupied by unit B because it would have to attack all units A, B and C. It is possible, however, to annihilate first unit A and then unit B. The unit spends its Movement Points as follows:
- for entering the first hex a unit spends 1 Movement Point (as for entering a clear terrain);
- for entering the second hex a unit spends 4 Movement Points (one point for entering a clear terrain and three points – see [12.12] – for the annihilation of unit A);
- the cost of entering the third hex is identical.
[12.2] Armored Overrun
A certain German units may perform quick, surprising attacks called "Armored Overrun". Such attacks were very effective, especially against weaker and non-fortified enemy units.
[12.21] The following types of German units may perform an Armored Overrun:
- Armored
- Motorized
- Reconnaissance
[12.22] An Armored Overrun may be performed in the German Attack Phase, after resolving all the other German attacks. Only the units mentioned in [12.21] may perform it.
[12.23] The player may use only a half of the SP of the units involved in the Armored Overrun.
Example A: According to the stack limits, 18 SP of armored units might be stacked on one hex, or 14 SP of armored units and 2 SP of infantry. If such units are about to perform an Armored Overrun, they may use 9 SP and 7 SP respectively.
Example B: In the German Attack Phase units of the 1st Armored Division (1 and 2 p.cz, 4 pzmot and 1 brozp – 27 SP together) attacked the Polish I/84 infantry battalion. As a result of the combat, the Germans lost 1 SP, while the Polish battalion retreated 3 hexes. The Germans performed a pursuit and reached the ZoC of another Polish unit – II/84. When all the attacks are resolved, the player may perform another attack with his units (only those mentioned in [12.21], with half of the SP). In that case 1 pcz. and 4 pzmot. (15 SP/2 – 8 SP) attack I/84, while 2 pcz. and 1 brozp. (12 SP/2 – 6 SP) attack II/84.
[12.22] Armored Overruns are performed according to the basic combat rules. They may be supported with Headquarters and air units, if they are in range.
[12.23] If as a result of the Armored Overrun the defender is destroyed and the number of the suffered losses was higher than the unit's SP, the attacking units may move forward. The number of hexes they may move is equal to the difference between the defender's SP and the losses he suffered.
Example C: Polish I/84 (2 SP) was surrounded by two German armored units (12 SP) as the result of an Armored Overrun. The odds are 6:1 and the roll brings a B2 result. The Polish unit can't retreat (all the possible hexes are in the enemy ZoC), so it is destroyed. If the result were B3 and the Polish unit suffered 3 SP loss, then the German units could enter the hex where the defender was and move one more hex. With the B4 result, the Germans could enter the defender's hex and move two more hexes. If such a combat took place at the beginning of the German Attack Phase, both German units could perform an Armored Overrun then.
[12.26] If the player declares an Armored Overrun, his units are forced to stop in the first ZoC of the enemy unit and attack such unit. It can be done only if the cost of the terrain on such a hex is 1 MP or less. If it is impossible (for example, by the terrain restrictions), the Armored Overrun is cancelled.
[12.27] An Armored Overrun is the only situation when one unit may be attacked twice in one Attack Phase.
[12.28] Artillery can't support Armored Overruns.
[12.29] If the player decides to perform an Armored Overrun after the combat, his armored units are first to suffer any losses in this combat.
[12.30] During the Armored Overrun the player may perform an Armored Raid, according to [12.1]. The cost of non-fortified artillery is +1 MP higher, and for fortified artillery it is +3 MP higher.
Headquarters
Headquarters represent commanders of armies and battle groups on the Polish side and commands of corps on the German side. Headquarters affect the combat by better coordination of the actions of units in their direct vicinity (better communication with nearby units).
The command range is expressed on the counter (and if it is not, it is 2).
[13.1] Detailed Rules
[13.11] Headquarters have neither Control Zone nor Strength Points.
[13.12] Headquarters have 12 MP. Headquarters move just like mechanized units (during the Movement Phase), with all restrictions.
[13.13] Headquarters may share hexes with other units. They have no SP, so they do not count toward the stack limits.
[13.14] Each Headquarters has a command range factor on its counter. If it is not printed, it is 2.
[13.2] Effect of Headquarters on Combat
[13.21] All units which are in the command range of their own Headquarters are considered under its full command and gain its support during a combat.
[13.22] If all attacking units are in the command range of their Headquarters, the ratio is modified additionally by +1.
[13.23] If all defending units are in the command range of their Headquarters, the ratio is modified additionally by –1.
[13.24] The effect of Headquarters on a combat is not cumulative; the presence of a greater number of Headquarters gives no more modifiers than 1.
[13.25] Headquarters may not attack alone nor enter the hex occupied by enemy Headquarters or units.
[13.26] A Headquarters is considered eliminated when an enemy unit moves through or stops on a hex occupied by the sole Headquarters, for instance during the enemy Movement Phase or as a consequence of a pursuit.
[13.3] Bridge Building
[13.31] If during the Supply Phase a Headquarters is within 3 hexes of a destroyed or damaged bridge, such bridge is considered rebuilt (if the player wishes). It can't be done if there is an enemy unit on either side of the bridge.
[13.32] Polish Headquarters can rebuild damaged bridges only.
[13.4] Effect of Headquarters on Panicked and Disorganized Units
[13.41] Any panicked or disorganized unit that shares the same hex with a Headquarters at the beginning of its Movement Phase may try to regain full combat efficiency. In order to do that a dice roll has to be made for each stack/unit:
- 1, 2, 3, 4, 5 – disorganized unit regains full combat efficiency
- 1, 2, 3, 4 – panicked unit regains full combat efficiency
A unit that regained combat efficiency is marked with an S1 counter, so it may move in the same Movement Phase with half of its MP.
Supply
Supplying the army (with ammunition, food, medicine etc.) is the basic element of conducting military operations. The lack of supply essentially affects the combat ability of units. It was a big problem for many Polish units during 1939, since they were cut off from supply by the fast movement of the German mechanized units.
[14.1] A Supply Line
[14.11] A supply line is a sequence of adjacent hexes that links a supply base with a unit.
[14.12] A supply line may not go through a hex including an enemy unit or enemy unit's Zone of Control (exception: [14.13]), across rivers (save to the bridges) and swamps (save to the roads that run through the swamp).
[14.13] A supply line may go across a hex with an enemy unit's Zone of Control if there is a friendly unit on this hex.
[14.14] Supply bases for German units are cities in Germany.
[14.15] Supply bases for the Polish units are described in the scenarios.
[14.16] Only units linked with their supply bases by supply lines have supply.
[14.17] Units in Stationary Fortifications are always considered as supplied.
[14.2] Detailed Rules
[14.21] The supply of all units on the board is checked in the Supply Phase (considering [14.16]). Counters representing "out of supply 1" are placed on the units which have no supply. If a unit is not supplied in the next Supply Phase again, the supply counter should be turned over to the other side, "out of supply 2", and so on, till it reaches 6. Each of these numbers is an out of supply level.
[14.22] When a unit regains supply, the counter is removed (the removal is only possible during the Supply Phase).
[14.23] At the beginning of the Supply Phase, each player makes a roll for each of his out-of-supply units. If the result is smaller than the out of supply level, the unit surrenders and it is removed from the game.
[14.24] If a 6 is rolled, nothing happens, even if the out of supply level is higher than six.
[14.25] German units have a +1 modifier for the surrender check roll.
[14.3] Effect of Supply on Combat and Movement
[14.31] Units with "out of supply" have their attack SP halved (rounding up). If there are some units with "out of supply" on the same hex, their SP are summed and then halved and rounded up.
[14.32] If a mechanized unit has "out of supply 1" its MP are halved. When a mechanized unit has "out of supply 2" or more, it cannot move at all.
[14.33] An artillery unit which has "out of supply 2" may not fire.
Special Notes (as printed in the rules text of this file):
- All the Polish units marked "U" have Field Fortifications.
- On the first day of the combat, all German units may use only a half of their MP.
- Crossing the State Border towards the opponent's country costs 1 MP.
[14.4] Supply of the German Fast Units
[14.41] The following rule concerns German units with 12 and 15 MP and expresses possible problems with fuel supply. Such units are considered "fast".
[14.42] Each of the units that are considered "fast" have to make a break for refueling once for each four days of moving. So, if the Armored Division "K" was moving on the 1st, 2nd and 3rd of September, it has to stop on the 4th of September. It may also stop and refuel on the 3rd of September, to be able to move on the 4th, 5th and 6th.
[14.43] Only supplied units can be refueled.
[11.44] To mark that the unit is going to be refueled, place an inverted "S1" counter on it at the beginning of its Movement Phase. It is removed at the start of its next Movement Phase.
[11.45] A unit that refuels may fight, but it can't perform a pursuit. If it is forced to retreat or disorganized, refueling is cancelled.
(Note: the source prints paragraphs [11.44] and [11.45] under section 14.4; the numbering is transcribed as printed.)
[14.5] Polish Cities and Supply
The following rule pictures the problems that the Germans met in the first weeks of the war. Many destroyed Polish units turned into partisans, attacking the supply lines and causing unrest behind the enemy lines.
[14.51] Each city and town in Poland which is not within five hexes of any non-HQ German unit cuts the German line of supply. To avoid such problems, the German player has to use some of his troops to secure the supply lines.
Units Arrangement
Before the start of the game, players should set up their units on the hexes according to the scenario's set-up information. For units that enter the board during the game as reinforcements, their starting hexes are provided in the scenarios.
If the scenario does not state otherwise, all units have their maximum SP at the beginning of the game.
Camouflage
Each counter has an obverse (with all data concerning the unit) and a reverse (national status). The players may move their units with the reverse face up, to hide their real strength from the enemy. The show-down must occur immediately when enemy units are in the enemy Zone of Control or when an air counter is placed on the same hex.
Replacements
During the game, both sides receive replacements in the form of new units. All information concerning the time and the place of entry on the board is described in each scenario.
[17.1] Detailed Rules
Explanations:
- A designation of a type 3500 informs that all units which are on this hex must start their movement from the hex having this hex;
- A designation of a type 3546-4636 informs that the units may start to move from any hex adjacent to the edge of the map between the hexes 3546–4636 (inclusive);
- Pn means that the army enters the game from the north edge of the board;
- Wsch means that the army enters the game from the east edge of the board, etc.;
- (N) means that the army enters the game from Germany.
[17.11] New units may enter the board at any moment during the Movement Phase.
[17.12] Units may enter the board combined into stacks.
[17.13] While entering the board, a unit also spends 1 Movement Point for the first hex adjacent to the edge of the map (the one from which the unit started its movement).
[17.14] When a replacement enters the board, the players should keep the rules relative to stacking and the consequences arising from them. Units that enter the board from one hex and whose total strength is greater than 24 SP (see [5.22]) should gather into stacks (in accordance with [5.21]) before entering the board.
The first stack starts the movement from a hex in accordance with rule [17.13]. Each following stack spends one additional Movement Point.
Example: On 5th September the units of 5 ID enter the board from any (one) hex on the east edge of the map. The total strength of all units is 18 SP, so they have to be grouped into two stacks. When the first one enters, e.g. at hex 49,2, it spends 1 MP (clear terrain) and 1 MP for entering the board, while the second stack must spend 3 MP when it enters the board from the same hex.
[17.15] Units may not enter the board from a hex occupied by an enemy unit or from a hex in an enemy unit's Zone of Control. In such a case replacements may enter from the nearest hex.
[17.16] All replacements may be delayed by any number of turns.
[17.17] Units which delayed their entry by one turn may start their movement from a hex (adjacent to the edge of the map) six hexes to the left or to the right of the primarily specified hex. They cannot start on the other side of a big river or from enemy territory unless stated otherwise.
Example: Units of the Armored Division "K" enter the board in the third turn from hex 150 of the west edge of the map. If the player decides to delay their entry, they might enter the board in the fourth turn and they'll be able to start their movement within six hexes (of the board's edge) from hex 150. Delaying the entry for one more turn extends this by another six hexes on each side.
Transport Trains
Each scenario gives a player a certain number of transport trains at his disposal (represented by counters).
[18.1] General Rules
[18.11] Every train counter may transport up to 9 SP of infantry, artillery and cavalry, or 18 SP of tanks.
[18.12] Trains can move up to 60 hexes during a day (on the railways only). Polish trains cannot cross country borders.
[18.13] Trains with units transported have 1 Strength Point for defense purposes. If they are forced to retreat and have no way out on the tracks, they are annihilated together with the transported units.
[18.14] If an empty train is attacked it is destroyed automatically.
[18.15] An empty train can be destroyed in the enemy Movement Phase (for an additional 1 MP) or during a pursuit if an enemy unit moves on or through the hex where it is located.
[18.2] Unloading Procedure
[18.21] In order to unload a unit from a train, the player has to pay a number of MP according to:
- for infantry – 1 MP in towns/cities; 2 MP in clear terrain and in hills; 3 MP in other types of terrain;
- for cavalry and non-motorized artillery – 2 MP in cities; 3 MP in towns; 4 MP in clear terrain and in hills; 5 MP in other types of terrain;
- for mechanized and armored units – 4 MP in cities; 6 MP in towns; 8 MP in clear terrain and in hills; 10 MP in other types of terrain.
[18.23] After unloading the unit, the transport train may be removed from the board.
[18.24] Loading procedure: the loading procedure is the same as unloading. If both the train and the boarded unit have MP left, the train can continue movement (up to the limit of 60 MP per day) according to the MP of the transported unit(s) that are left. The equivalent is as follows:
- for infantry and non-motorized artillery, each 1 MP left allows the train to spend its 10 MP;
- for cavalry, each 1 MP left allows the train to spend its 7 MP;
- for motorized units, each 1 MP left allows the train to spend its 5 MP.
Example: A cavalry unit has spent 6 MP to get to the train waiting for it in clear terrain. The unit has a total of 9 MP, so it cannot board the train during the current Movement Phase, as it needs 5 MP to perform the operation. It is considered unloaded and can move on in the current phase (3 MP left) or wait until the next phase to board the train.
[18.3] Detailed Rules
[18.31] It is forbidden to load artillery, cavalry and mechanized units in woods (unless it happens in a town that is located in the woods).
[18.32] If attacked by a land enemy unit, transported units fight with 1 SP. If they are forced to retreat, both the train and the transported units are eliminated.
[18.33] If an enemy unit enters a hex with an empty transport train on it, it may destroy the train at the cost of 1 MP. If attacked during combat, an empty train is instantly eliminated.
[18.34] Each scenario describes the number and the set-up of the transport trains for each side.
Transport Columns
In some games of the "September 1939" system there are Transport Columns. They are used for quick transport of units in areas where transport trains can't be used.
To load a unit into a Transport Column it is enough for the unit to enter the hex where the Transport Column is. The loading cost is 2 MP. Each Transport Column may carry up to 6 SP of infantry. A unit may be unloaded in the same phase and may use its MP, if it still has any.
If attacked, a Transport Column is instantly eliminated and the transported units fight with 1 SP.
Bridges and Ferries
[20.1] Bridges
Players may destroy bridges on the big rivers. The player whose unit is at one of the edges of a bridge declares "destruction of a bridge". After this procedure the bridge is considered destroyed and the counter "Z" (as destroyed) is placed on the edge of the hex where the bridge was. Any river crossing through such an edge requires the procedure described in [4.37]. Reconstruction of a bridge proceeds according to [13.3].
[20.12] Damaged bridges can be used by infantry and cavalry units only if they spend, respectively, +2 and +4 MP for crossing a river on such a bridge.
[20.2] Ferries
[20.21] Ferries can transport infantry (+2 MP), cavalry and artillery (+3 MP) and recon units (+5 MP) to the other side of the river.
[20.22] During one phase a ferry can transport up to 24 SP of units.
[20.22] Ferries can be destroyed and damaged just like bridges, but they can't be rebuilt.
(The source prints the number [20.22] twice; both paragraphs are transcribed as printed.)
Disorganization
[21.11] Any unit that retreated as a result of a combat by more than one hex may be disorganized. To check whether such a unit was disorganized, a player has to roll a die. The results are as follows:
- B5 – a result of 1, 2, 3, 4 – disorganization
- B4 – a result of 1, 2, 3 – disorganization
- B3 – a result of 1, 2 – disorganization
- B2 – a result of 1 – disorganization
[21.12] Headquarters do not disorganize.
[21.13] A disorganized unit cannot fortify itself.
[21.14] If a disorganized unit retreated through another friendly unit(s), a dice roll must be made to check whether any of these units was disorganized too. The result of 1 means that the disorganization spread and that both disorganized units have to retreat (the same number of hexes that is left for the unit primarily disorganized).
[21.15] Each 8 SP of armored units involved in the attack gives a –1 modifier for the disorganization roll.
[21.16] Each Air Force Strength Point involved in the attack gives a –1 modifier for the disorganization roll.
[21.17] A result of 6 always means that the unit is not disorganized.
Example: The Germans performed an attack with 9 SP of armored units (–1) and 1 SP of air units (–1). The Polish defenders get a B2 result. If the Polish unit retreats, it makes a D6 roll with a –2 modifier. Rolling 1, 2 or 3 disorganizes the Polish unit.
[21.2] Disorganization's Effect on Movement and Combat
[21.21] Disorganization does not affect movement.
[21.22] Every disorganized unit fights with its SP halved (rounding up); artillery modifiers are also halved.
[21.23] Units that have 1 SP after disorganization lose their ZoC.
[21.24] Any losses of such units are counted on the basis of their full SP.
Page 13 of the source also prints a two-line artillery modifier comparison, labelled in Polish "normalnie" (normal) and "w dezorganizacji" (disorganized). It lists the values 1.5, 1.0, 0.6, 0.5, 0.4 on the normal line and 0.8, 0.5, 0.3, 0.3, 0.2 on the disorganized line. The source does not print which fire-modifier column each value belongs to, so the values are not tabulated here.
Panic
[22.1] Detailed Rules
[22.11] If an already disorganized unit is disorganized again, it is considered panicked.
[22.12] During its own Movement Phase every panicked unit must move on the shortest way (using all its MP) towards the nearest reorganization center. These centers are described for each scenario.
[22.13] If the shortest way is blocked by an enemy unit or its ZoC, the panicked unit is eliminated.
[22.14] A panicked unit fights using 1 SP.
[22.15] Panicked units cannot fortify.
[22.16] Panicked units do not have ZoCs.
[22.17] Any losses of such units are counted on the basis of full strength of a unit.
[22.18] If an enemy non-artillery and non-command unit passes through the hex on which a panicked unit is located, such unit is eliminated (such elimination requires spending an additional 1 MP).
[22.19] If a panicked unit retreats through other friendly unit(s), a dice roll is made to check whether this unit disorganizes or panics (if it was disorganized already). A 1 means that the unit is disorganized (panicked). If the unit panics this way, it has to retreat together with the primarily panicked unit.
[22.20] Regaining Full Efficiency
[22.21] Every disorganized unit that wasn't moving and fighting for the entire day, and is not within an enemy ZoC, regains full efficiency at the end of a turn.
[22.22] Every panicked unit in the reorganization center that does not move and is not within an enemy ZoC during a whole day regains full efficiency at the end of a turn.
Reserve Centers
[23.1] Detailed Rules
During 1939 the Polish army had Reserve Centers for reorganization and strengthening of the troops. They were used to gather reservists and reinforce the units that suffered losses in combat.
A Reserve Center may strengthen units that have a supply line and are within 6 MP of it. Each Reserve Center may distribute 1 SP per Turn, so one unit within the range of the Reserve Center may regain 1 SP in the player's Supply Phase.
A Reserve Center is removed from the board if any enemy unit appears within 3 hexes of it.
Only lost SP may be regained with the help of a Reserve Center.
Only infantry and cavalry units may be reinforced with Reserve Centers.
Tables
The printed tables are transcribed below. The Terrain Effects Chart is cited in the rules as the Terrain Characteristics Chart.
Terrain Effects Chart
| Terrain | Mechanized units | Other units | Combat modifier |
|---|---|---|---|
| Clear Terrain | 1 | 1 | - |
| City | 2 | 1 | -2 |
| Town | 1 | 1 | -1 |
| Primary Road | 1/2 | 1/2 | - |
| Secondary Road | 1 | 1 | - |
| Wood | +3 | +1 | 1 (printed without a sign; see note) |
| Swamp |
Note (transcription): the Wood combat modifier is printed as "1" with no sign. The rules examples treat a forest as –1 ([8.83], [8.85], [11.23]), so the sign is left as printed here and should be read as –1.
Individual Artillery Attacks
Column header: 2D6. Row header: total artillery fire modifier (after terrain and fortification effects are counted).
| Modifier | 2 | 3 | 4 | 5 | 6 | 7 | 8 | 9 | 10 | 11 | 12 |
|---|---|---|---|---|---|---|---|---|---|---|---|
| 0.4–0.8 | - | - | - | - | - | - | - | 1 | 1 | 1 | 1 |
| 0.9–1.2 | - | - | - | - | - | - | 1 |
Example (printed): attacker's artillery fires with 5.5 strength; the defender is in woods (–1) and in Field Fortifications (–2), so the row moves three rows up, from 5.3–5.6 to 4.1–4.4.
Combat Results Table (CRT)
| 2D6 | less 1:4 | 1:4 | 1:3 | 1:2 | 1:1 | 2:1 | 3:1 | 4:1 | 5:1 | 6:1 | 7:1 | 8:1 | 9:1 | 10:1 |
|---|---|---|---|---|---|---|---|---|---|---|---|---|---|---|
| 2 | -- | -- | B1 | B2 | B2 | B2 | B2 | B3 | B3 | B3 | B4 | B4 | B4 | B5 |
| 3 |
Note: the CRT header prints the ratio columns as 1:4 through 10:1, with a "less 1:4" column; ratios greater than 10:1 are treated as 10:1 and ratios less than 1:4 as 1:4 (see [8.4] d).
Attacker's Losses After Combat
Row: defender SP. Column: 2D6 roll.
| Defender SP | 2 | 3 | 4 | 5 | 6 | 7 | 8 | 9 | 10 | 11 | 12 |
|---|---|---|---|---|---|---|---|---|---|---|---|
| 1 | - | - | - | - | - | - | - | - | - | 1 | 1 |
| 2-3 | - | - | - | - | - | - | 1 |
Defender's Losses
Row: combat result. Column: attacking SP (total).
| Combat result | 1-6 | 7-12 | 13-18 | 19-24 | 25-30 | 31-36 | 37-42 | 43-48 | 49-54 | 55-60 | 61-66 | 67-72 |
|---|---|---|---|---|---|---|---|---|---|---|---|---|
| B1 | 1 | 1 | 1 | 2 | 2 | 3 | 4 | 5 | 6 | 7 | 8 | 9 |
| B2 | 1 | 1 | 2 | 3 | 4 |
The source's last page (page 21) is a blank record chart for tracking fighting-unit casualties by day for each side and a German army combat-efficiency summary. It is a play aid with no rules text and is not transcribed.
Scenarios
The source file contains scenario sheets that are not part of the Mława 1939 game: "Kock, 1 October" (1–6 October 1939), "Kock, 5 October" (5–10 October 1939), "Barbarossa 1939" (1–15 October 1939) and "Brześć" (14–17 September 1939). The Brześć sheet notes that it "uses German units from the Game 'Mława 1939'". The source contains no Mława 1939 scenario set-up, unit list or victory conditions, so none are transcribed here.