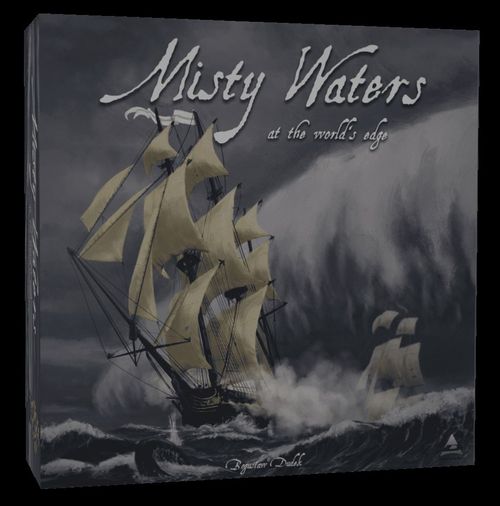
Misty Waters: At the World's Edge
Misty Waters: At the World's Edge Rulebook
Table of Contents
Table of Contents
- Introduction
- Game Summary
- Components
- Setup
- Map Locations
- Points of Interests
- Rounds and Phases
- Phase 1: Wheel of Time Phase
- Phase 2: NPC Movement and Attack Phase
- Phase 3: Weather Phase
- Phase 4: Drawing Action Cards Phase
- Phase 5: Player's Turn Phase
- Phase 6: Reset Phase
- Cards
- Experience Tokens
- Negotiations
- Building
- Player Ships
- Battles
- End Game
- Advanced and Variant Rules
- Quick Reference
- Errata (Official, ENG)
- Official Interpretation of the Rules (Q&A, v4)
Introduction
The world nations agree in secret protocols that, as a precaution, any action taken by a commander flying a nation's flag on their ship, however forceful, would not affect international relations until a single nation covering the archipelago could be established. So, you have a free hand, but so do other commanders that sail the Misty Waters. You will have strong competition.
However, thanks to the fact that you are now the official representative of your nation and its 'authority' on the new archipelago, you have access to several types of ships that you would never normally have a chance to set foot on. Your nation tasks you to subjugate the archipelago in its entirety, because the presence of other nations on neighboring islands within such a short distance from each other could quickly escalate into open war.
Either way, the temptation to become Viceroy of the Misty Waters may be too great to resist or perhaps simplify matters by looting the conquistadors' treasure yourself and sailing home. Your journey's path is yours to decide.
Game Summary
Misty Waters is a 1 to 4 player strategy, adventure, sandbox, historical-fiction board game set in the 18th century and sailing around an archipelago. The age of the wooden ships, great sails, and brave seafarers. Full of gunpowder smoke, strange phenomenon, and creatures of different sizes.
Players will set sail into the uncharted waters, Explore and Capture unknown islands hopefully without getting devoured! They can Build Forts and defend their Captured Islands. Players can invest in Plantations and Mines to harvest crops (Barrels) and excavate ore (Crates) to barter. They'll visit Taverns to undertake tasks, secret missions, and even gamble! Your fleet must stay nimble with a maximum of 2 ships, but you can spend Silver Coins to buy better ships that are stronger and faster. Don't forget to Recruit a good deck crew (Sailors and Officers) to improve your abilities and increase your chance of success in firing cannonballs during Broadside Battles and in sword duels with Boarding Battles. When your ship has taken some damage, stop at a Base or the Docks and Repair your ship (Cannons). Hunt for pirates and other ships to loot their riches or Negotiate with other players for an advantage. Be mindful of the weather that is constantly changing and impacting ships and the sea.
Do you have what it takes to set sail for and survive the Misty Waters at the world's edge? Setup the game and find out!
Components
Misty Waters comes with multiple game components including cardboard token/tiles/boards, plastic miniatures, cards, wooden tokens*, metal coins*, and much more. Components denoted with a * are expansion or add-on components and may not be contained in your version of Misty Waters.
Tokens, Tiles, and Boards
Board Markers
- 1 cardboard/plastic ship wheel* Priority Token
- 1 cardboard/metal anchor* Round Phase Marker
- 1 cardboard/metal cloud* Weather Marker
- 1 cardboard/metal sextant* Wheel of Time Marker
Cannons, Sailors, Officers, and Passengers
- 50 Cannon tokens
- 50 Sailor tokens
- 8 Captains/First-Class Captain tokens
- 8 Gunners/First-Class Gunner tokens
- 8 Fencing Masters/First-Class Fencing Master tokens
- 8 Passenger tokens
Cargo
- 15 Barrels
- 15 Crates
Currency
- 24 Silver Coins
- 20 Gemstones* of various colors
- 24 Gold Coins
Infrastructure
- 3 cardboard/plastic miniature* Forts
- 3 cardboard/plastic miniature* Mines
- 3 cardboard/plastic miniature* Plantations
- 2 plastic miniature* Taverns
- 3 cardboard/plastic miniature* Battery of Cannons
- 1 plastic miniature* Last Day Temple*
Miscellaneous
- 1 Conquistadors' Treasure
- 6 plastic flame Damage Markers* (some tokens have full-strength/damaged sides in lieu of markers)
- 40 Experience Tokens
- 5 Hourglass Tokens
- 1 cardboard Letter token
- 1 Pearl of Ocean token
- 8 Raft tokens
- 4 Treasure Chest tokens
- 1 plastic Black Chest* token
- 1 plastic Silver Barrel* token
Player Items
- 24 cardboard Nation Flags, 1 set for each nation (Portugal/Spain (red) Nation Flags are double-sided)
- 20 plastic flag markers* as alternate Nation Flags, 1 set in each color
- 4 Skull-Rocks, 1 in each player color
- 4 functional treasure chest* Treasuries
- 4 player reference sheets
Sea Monsters
- 1 Leviathan, 1 Megalodon, 1 Kraken, 1 Hydra, 1 Sea Serpent, 1 Sperm Whale (each a cardboard token/plastic miniature*)
Ships Miniatures and Ship Boards
- 1 in each player color: 4 Sloop (S), 4 Caravel (C), 4 Brig (B), 4 Galleon (G), 4 Heavy Frigate (HF) ship miniatures and boards; 2 Frigate (F) ship miniatures* and boards* (blue/white only); 2 Fluyt (T) ship miniatures* and boards* (red/orange only)
- Additional:
- 1 Ship-of-the-Line: Heavy Line Battleship (HL) ship miniature and board
- 1 Ship-of-the-Line: Line Battleship (L) ship miniature* and board*
- 1 Silver Freighter ship miniature*
- 1 Flying Dutchman ship miniature*
- 2 Conquistadors' Caravel ship miniatures*
- 1 Conquistadors' Galleass ship miniature and board
- 8 cardboard token/plastic miniature* xebec Pirate Ships
- 20/24 plastic ship stands* for ship miniatures
Weather Tiles
- 24 cardboard Weather Tiles with 'wind' backs
Cards
- 108* Action Cards with 'rifle and sword' card backs
- 30* Event Cards with 'question mark' card backs
- 60* Exploration Cards with 'palm tree' card backs
- 56* Sea Adventure Cards with 'leviathan tail' card backs
- 42* Tavern Cards with 'tankard' card backs
*Depending on the version of the game, there may contain additional cards of each type.
Additional Components
- 1 cardboard/neoprene* gameboard
- 1 instruction booklet
- 16 double-sided numbered counters
- 10 six-sided regular dice
- 1 six-sided Direction Dice
- 12 numbered island exploration counters
Setup
Steps denoted with a * use expansion or add-on components and can be skipped if your version of Misty Waters does not contain them.
See 'Advanced and Variant Rules' on page 43 or see 'Empires Expansion Rules', 'Pirate Faction' and 'Solo & Cooperative' in separate manuals for additional setup steps beyond the standard setup.
- Highlighted Sections of this rulebook can be read first to gain a general understanding of the rules before diving deeper into the additional details.
- Blue Italics: Defined 'on-map' game components, locations, and infrastructures.
- Purple Italics: Defined gameplay mechanics and related 'off-map' components.
- Red Italics: Signals a rule is for 'Advanced, Variant, or Expansion Rules'.
Step 1: Priority Token
The first player to start the game with the Priority Token is the player who most recently set foot on a ship or boat, or is chosen at random.
Step 2: Nations and Bases
The player with the Priority Token selects either a Nation Flag or a Base location on the game board. The next player to the left then selects a Nation Flag or a Base location and so on. The last player on the left, selects both a Nation Flag and a Base location, and then selection goes to the right for players to choose their remaining Nation Flag or Base location.
- With 2 players, only the north-east (NE) and south-west (SW) corner Bases on the map are available to be chosen.
- With 3 players, only the west (W), north-east (NE), and south-east (SE) Bases on the map are available to be chosen.
- With 4 players, only the north-east (NE), north-west (NW), south-east (SE), and south-west (SW) corner Bases on the map are available to be chosen.
After selection, players place their chosen Nation Flag at their chosen Base location on the game board.
- Before setup, a majority of players should agree if 'Empires Expansion Rules'* are being used. If not, choosing a nation has no effect on gameplay, as they all have identical abilities and Player Ships.
- See 'Empires Expansion Rules' manual for details.
Step 3: Board Markers
A. Wind Force: Place the Weather Marker on the wind strength of 5oB on the Wind Force at the top of the game board.
B. Wheel of Time: Place the Wheel of Time Marker on Round I, on the Wheel of Time at the top left of the game board.
C. Sash: Place the Round Phase Marker on the fifth Phase from the left (e.g. Phase 5, the Player's Turn Phase) on the Sash at the top-right of the game board.
Step 4: Card Decks and Tiles
A. Event Cards: Before the cards with the 'question mark' backs (Event Cards) are shuffled, first find and set aside the 'Last Transport'* card. Second, shuffle the remaining cards and place them face-down in their designated spot at the top of the game board. Finally, put the 'Last Transport'* card that was set aside face-down on top of the Event Card Deck, it will activate at the start of Round II.
B. Weather Tiles: The tiles with 'wind' backs (Weather Tiles) are shuffled and placed face-down in the furthest left spot in the designated area on the game board at the top. Flip over the top tile and place it face-up on the top of the stack.
C. Exploration Cards: The cards with the 'palm tree' card backs (Exploration Cards) are shuffled and then 3 cards are placed face-down on each of the six Main Islands that have the blue anchor spaces on the map.
- If players prefer, they may set the six stacks of Exploration Cards to the side of the board. Use the numbered island exploration counters on top of each stack and each island to track which stack goes with which island.
D. Action Cards: The cards with 'rifle and sword' card backs (Action Cards) are shuffled and each player is dealt 6 cards to their hand. Players can always look at the Action Cards in their hand, but not in other players' hand. The remaining Deck is placed face-down in their designated spot on the game board at the bottom left.
E. Tavern Cards: The cards with 'tankard' card backs (Tavern Cards) are shuffled and placed face-down in their designated spot on the game board at the bottom right.
F. Sea Adventure Cards: The cards with 'leviathan tail in the water' card backs (Sea Adventure Cards) are shuffled and placed face-down in their designated spot on the game board at the bottom right.
Step 5: Game Board
A. Pirate Ships: Place 4 black Pirate Ship on the 4 Black Ship symbolled spaces on the map, that surround the Labyrinth Islands.
B. Battery of Cannons: Place 1 of the Battery of Cannons tokens on their furthest west designated spot on the map in the center at the Red Water Lagoon.
- If there is no 'Last Transport'* Event Card active from previous setup step, place all 3 Battery of Cannons instead.
C. Conquistadors' Treasure: Place the Conquistadors' Treasure token on the designated spot marked with a 'X' in the center of the map next to the last space of the Red Water Lagoon.
D. Skull-Rocks: Each player places a Skull-Rock of their nation's color on the closest Main Island to their starting Base which has a blue anchor space within 6 spaces from the Base.
E. Taverns*: Place 2 plastic Tavern miniatures* on the game board; 1 at the Puerto Bello, north (N) of the center Labyrinth Islands and 1 at the Puerto Arturo to the south (S).
Step 6: Player Components
Each player receives:
- A Treasury* with 2 Experience Tokens and 8 Silver Coins placed inside.
- 4 remaining Nation Flags and a player reference sheet.
- A Sloop (S) ship, a Caravel (C) ship and in their nation's color.
Each player places their Player Ships at their Base on the map and then takes the corresponding ship boards for a Sloop (S) and a Caravel (C) ship. Finally, each player places 2 Sailors and 2 Cannons on their Sloop (S) board, and 2 Sailors and 2 Cannons on their Caravel (C) board.
The remaining Player Ships in chosen colors and corresponding boards are placed to the side next to the game board. Any Skull-Rocks, Nation Flags, and Player Ships and corresponding boards in a player color not used can be returned to the game box.
Step 7: Alternate Rules
Before starting a game of Misty Waters, players should discuss which, if any, 'Advanced Rules' or 'Variant Rules' are in effect. These additional rules and/or variants are in effect if the majority of the players agree.
- See 'Advanced and Variants Rules' on page 43 for details.
Step 8: Supply and Extra Components
Put the following remaining components nearby the side of the game board to form a supply that all players can reach:
- Silver Coins, Gemstones*, and Gold Coins.
- Barrels and Crates.
- Sailors, Cannons, Officers (Captains, Gunners, and Fencing Masters), and Passengers.
- Damage Markers*, Experience Tokens, Hourglass Tokens, and counters.
Put any other remaining components off to the side, to access later:
- Battery of Cannons, Forts, Mines and Plantations.
- Tokens of: Letter, Pearl of Ocean, Black Chest*, Silver Barrel*, Rafts, and Treasure Chest.
- Additional ship miniature(s), ship boards, and Sea Monster tokens.
The Adventure Begins, Start Sailing… Once the players are familiar with the rules, the player with the Priority Token starts the game with Phase 5: Player's Turn Phase.
Map Locations
Components denoted with a * use expansion or add-on components and can be skipped if your version of Misty Waters does not contain these them.
The board shows a map of the archipelago. The compasses at the top-left and bottom-center of the board are helpful for determining the directions of the world: north (N), east (E), south (S), and west (W). The smaller islands and rocks are of little importance to the gameplay.
Bases
At the map edges there are symbols for the 6 possible player Bases. It is from them that players will start their voyage to the sea of mists. When a Player Ship is stopped at a Base, during Phase 5 (Player's Turn Phase), the player can:
Recruit Deck Crew: Recruit deck crew, Sailors or Officers, onto their Player Ship that is at the Base.
- See 'Recruiting' on page 33 for details.
Repair Ship: Purchase Cannons for 1 Silver Coin each and place on their Player Ship that is at the Base to Repair it.
- See 'Repairing' on page 33 for details.
Sell Ship: Sell their Player Ship currently at the Base.
- See 'Selling Player Ships' on page 34 for detail
Trading Post: Unload and sell Barrels for 2 Silver Coins each, Crates for 3 Silver Coins each, Disembark Rafts, or turn-in cards or other valuables from the Cargo Hold, Passenger Cabin, or Captain's Cabin of the Player Ship at the Base.
- See 'Trading Posts' on page 10 for details.
Each Base can accommodate more than 1 Player Ship at any time, but NPCs cannot enter.
No Battles: A Player Ship at a Base cannot attack or be attacked.
- Exception: When both exits from the Base are occupied and blocking a Player Ship from exiting, then a Player Ship in the Base may attack, but they will usually risk being damaged by the defender except by a Sea Monster.
Weather Refuge: Bases represent a location on a nearby continent that are not At Sea and therefore any Player Ships there are unaffected by Wind Force and Weather Tile effects.
Undeclared Bases: Players start with a Base according to the setup rules, but during Phase 5 (Player's Turn Phase), they can purchase an undeclared Base and place their Nation Flag there for 20 Silver Coins.
- A Player Ship cannot enter an undeclared Base.
- A Player Ship does not need to be in an Adjacent Space in order to purchase an undeclared Base.
- Bases can never be Captured, attacked, or have a change in ownership.
- There is no limit to the number of Bases a player can own.
Foreign Bases: A Player Ship cannot enter a Base belonging to another player nor use its benefits, unless the Base owner agrees to allow it, through Negotiation.
- Permission is needed for entering the Port space and also to Recruit, Repair, sell a Player Ship, trading post, resolve missions/tasks on cards at the Base, Embark/Disembark Passengers, and Load/Unload Barrels/Crates to the Base.
- When a Player Ship is at a Base that does not belong to them, the ship cannot stop longer than 1 Round (use an Hourglass Token to track), otherwise the Player Ship is Lost.
Main Islands
There are 6 large Main Islands that circle around the center of the Labyrinth Islands. Each of these islands initially have a convenient Anchorage, denoted by the blue anchor spaces with 1-6 dots around it. When a Player Ship is stopped at a Main Island's Port, during Phase 5 (Player's Turn Phase), the player can:
Explore Islands: Explore the Main Island if there remains unrevealed Exploration Cards.
- Only 1 Exploration Card per Player Ship per Round.
- See 'Exploration' page 24 for details.
Capture Islands: Capture the Main Island by removing the island's final Exploration Card from the map.
- When they do so, a player places their Nation Flag on it to convert it to a Captured Island.
- See 'Capturing' on page 24 for details.
Build Infrastructures: Build Forts, Mines, and Plantations on a Captured Island if their Nation Flag is on it.
- See 'Building' on page 29 for details.
Each Main Island can only accommodate 1 Player Ship at a time, and NPCs cannot enter.
Skull Curse: For each player, there may be a Skull-Rock in their nation's color on the island closest to their starting Base (within 6 spaces of its Anchorage). Players are not allowed to Explore a Main Island with their matching color Skull-Rock.
- This is because seafarers are superstitious and believe that this island is cursed, and will not set foot on it. Interestingly, this rock only looks cursed from the side of the nearest player's Base. To others it looks perfectly normal.
- Player Ships are allowed to still stop at the island's Anchorage and perform other non-Explore actions.
When another player Captures an island for the first time, any Skull-Rocks on that island are returned to the game box and the curse effect is removed.
- In addition, if a player ever has a Player Ship defeated for a second time, their matching color Skull-Rock is removed thanks to support from their nation's government for sending a very capable exorcist.
Labyrinth Islands
In the center of the archipelago is the remains of an extinct volcano, which forms a group of Labyrinth Islands ('Islas Dédalas'). Among these islands the conquistadors have a secret garrison to hold their treasure (marked with a 'X') which can be accessed from the Adjacent Space.
If a Player Ship arrives at the 'X' before Round XII, they can launch the Conquistadors' Galleass themselves with the Conquistadors' Treasure. Otherwise, at the start of Round XII, the conquistadors will launch their ship in an attempt to escape from the Misty Waters with their treasure.
- See 'Grand Finale' on page 41 for details.
Red Water Lagoon
Leading to the Conquistadors' Treasure is the Red Water Lagoon ('Agua Roja'), which has 8 red spaces and can only be entered from the west (W) side.
The Red Water Lagoon is not considered At Sea as it is sheltered from the sea and also storms.
Maximum Range: The wind is unable to penetrate the narrow Red Water Lagoon, and therefore Player Ship and Conquistadors' Galleass movement is limited to a Maximum Range of 3 spaces each Round when moving within the lagoon.
- A Player Ship entering the Red Water Lagoon always ends its movement that Round on the first red space.
- When exiting the lagoon and movement includes at least 1 red space, the Maximum Range is still limited to 3 spaces.
NPCs cannot enter the Red Water Lagoon, but they can still attack ships in the Red Water Lagoon that are in an Adjacent Spaces to them.
- Exception: The Conquistadors' Galleass will eventually begin its journey in the Red Water Lagoon and can exit it.
- Exception: A Sea Monster cannot attack nor counterattack ships here as the water is too shallow.
Weather Refuge: Since the Red Water Lagoon is not At Sea, any Player Ships or NPC Ships in the lagoon's red spaces are unaffected by Wind Force and Weather Tile effects.
Hidden Exit: It is possible to exit, but not enter the Red Water Lagoon crossing the one-way Shoal from the east (E) side, but to do this a player needs to play an appropriate Action Card or have a First-Class Captain on their Player Ship.
- The Conquistadors' Galleass may always use either Red Water Lagoon exit.
North-South Passage
There is a bizarre phenomenon in the Misty Waters archipelago; When a ship moves 1 space to leave the map through the north (N) exit space ('Paso del Norte'), they appear at the south (S) exit space ('Paso del Sur') and vice versa.
- Pirate Ships and other NPC Ships, can enter the North-South Passage, but Sea Monsters cannot.
- Pirate Ships will use the passage effect, but other NPC Ships are removed from the game when entering the North-South Passage.
Taverns
There are 2 Taverns in the archipelago, Puerto Bello north (N) of the center Labyrinth Islands and at the Puerto Arturo to the south (S). When a Player Ship is stopped at a Tavern, during Phase 5 (Player's Turn Phase), the player can:
Recruit Deck Crew: Recruit deck crew, Sailors or Officers, onto their Player Ship that is at the Tavern.
- See 'Recruiting' on page 33 for details.
Trading Post: Unload and sell Barrels for 2 Silver Coins each, Crates for 3 Silver Coins each, Disembark Rafts, or turn-in cards or other valuables from the Cargo Hold, Passenger Cabin, or Captain's Cabin of the Player Ship at the Tavern.
- See 'Trading Posts' on page 10 for details.
Tavern Card: Draw the top card of the Tavern Card Deck and possibly find well-paying jobs, secret missions, or indulge in gambling.
- Can draw only 1 Tavern Card per Player Ship per Round.
- See 'Tavern Cards' on page 26 for details.
Each Tavern can only accommodate 1 Player Ship at a time, and NPCs cannot enter.
No Repair/Sell Ship: Does not allow for the ability to Repair Player Ships through purchasing Cannons nor sell Player Ships.
Tavern Fees: A Player Ship can only stay at a Tavern for free for 1 Round. Always place an Hourglass Token next to a Player Ship with the number 1 showing when it first stops at a Tavern.
- If a Player Ship does not have an Hourglass Token next to it, it must move out of that Tavern and cannot move back to it until a future turn. If it fails to do so, the Player Ship is Lost.
- However, a Player Ship can extend their stay at that Tavern by a Round by paying to the supply 1 Silver Coin for the next turn. When they do so, place an Hourglass Token with the number 1 showing. Each subsequent Round costs twice as much as the previous turn.
- Exception: When all the exit routes are blocked, Player Ship may stay extra turn for free.
No Battles: A Player Ship at a Tavern cannot attack or be attacked.
- The old law states such an act is illegal, and the water is too shallow to allow a Sea Monster to attack.
- Exception: When both exits from the Tavern are occupied and blocking a Player Ship from exiting, then a Player Ship in the Tavern may attack, but they will usually risk being damaged by the defender except by a Sea Monster.
Weather Refuge: Taverns are not At Sea and any Player Ships there are unaffected by Wind Force and Weather Tile effects.
Desert Island and the Atolls
The Desert Island ('Isla Desolada') is located to the west (W) and there are Atoll ('Atolón') islands located to the north-east (NE) and the south-west (SW) of the Labyrinth Islands.
A player must have the appropriate mission card that allows them to move their Player Ship on to or through these island spaces, the islands do count as 1 space of movement.
Each island location is not considered At Sea as the water surrounding them is very shallow.
The Desert Island and each of the Atolls can only accommodate 1 Player Ship at a time, and NPCs cannot enter.
No Protection: A Player Ship that is stopped at a Desert Island or an Atolls can still attack and be attacked.
- Exception: A Sea Monster cannot attack nor counterattack ships here as the water is too shallow.
Weather Refuge: Since the Desert Island and the Atolls are not At Sea, any Player Ships there are unaffected by Wind Force and Weather Tile effects.
Black Ships
Between the various islands to the north (N), east (E), south (S), and west (W) of the Labyrinth Islands, there are 4 Black Ship spaces.
These At Sea spaces cannot be entered by Player Ships, but can be entered by Pirate Ships, other NPC Ships, and Sea Monsters.
- These spaces are where additional Pirate Ships will appear from certain Event Cards.
- Each Black Ship space counts as 1 space of movement.
- Exception: Certain Tavern Cards have missions related to Black Ship spaces and allow for a Player Ship to enter them.
Whirlpools
There are 6 Whirlpools surrounding the Labyrinth Islands, where sea debris will be washed up by the waves. These spaces are denoted with a blue dice symbol and 1-6 dots.
- Some Weather Tiles will make reference to these spaces for adding Crates or Rafts to the map, but they are otherwise treated as regular At Sea spaces.
- See 'Weather Tile Effects' on page 17 for details.
Shoals
There are several Shoals in the archipelago where the water is shallow making it difficult for ships to cross. They are in various locations and can be identified with wavy-dotted lines directly connected to a small circle Shoal space.
A player needs to play an Action Card that allows a Player Ship to move onto a Shoal space during movement or have a First-Class Captain onboard that ship.
A Shoal is not considered At Sea as the water is too shallow.
NPCs cannot use Shoal routes or spaces.
- Exception: The Conquistadors' Galleass may always use the Red Water Lagoon's east (E) side Shoal when exiting the lagoon.
No Protection: A Player Ship that is stopped at a Shoal space can still attack and be attacked.
- Exception: A Sea Monster cannot attack nor counterattack ships here as the water is too shallow.
Weather Refuge: Since a Shoal space is not At Sea, any Player Ships there are unaffected by Wind Force and Weather Tile effects.
Trading Posts (Bases and Taverns)
When a Player Ship is stopped at a Base or Tavern, a player can use these locations as a trading post. During Phase 5 (Player's Turn Phase), from that ship's Cargo Hold, Passenger Cabin, or Captain's Cabin, players can:
- Unload and sell any number of Barrels for 2 Silver Coins each, Crates for 3 Silver Coins each.
- Disembark a Raft for 4 Silver Coins and keep the token as a 'trophy' in Treasury for 4 Votes.
- See 'Viceroy Voting' on page 42 for details.
- Turn-in applicable mission/task/other cards as detailed on the cards themselves or other valuables.
Cannons, Sailors, Officers, Experience Tokens, Forts, Mines, and Plantations cannot be sold here or anywhere.
Supply: Unless otherwise stated, any coins earned by players are taken from the supply and placed into the player's Treasury. Coins are returned to supply as they are spent unless given to another player through Negotiation. All prices in the Misty Waters are quoted in 'silver coins'.
- Silver Coins (e.g. 'Silver') are worth 1.
- Gemstones* (e.g. 'Gems') are worth 3.
- Gold Coins (e.g. 'Gold') are worth 5.
Coins are not physically limited to what is in the supply. Coins in the Treasury can be converted to any denomination at any time.
- Contents on a Player Ship are not part of a player's Treasury and are not safe.
- Contents in a Treasury are not specific to a particular Player Ship and are safe.
- Contents in a Treasury are not public information.
Points of Interests
Adjacent Spaces
An Adjacent Space are those spaces on the map that are directly connected by either a dashed-line, a wavy-dotted line (Shoals), or a solid line (Atolls/Black Ship).
- Adjacent Spaces to a Fort or a Battery of Cannons are those space that have a red arrow pointing to them, which can include Port spaces.
- Player Ships both at the same Base are considered to be on Adjacent Spaces.
- The north (N) exit space ('Paso del Norte') and the south (S) exit space ('Paso del Sur') are connected spaces, but are not considered Adjacent Spaces.
At Sea
At Sea spaces are those spaces that are not a Port space (e.g. Anchorages, Docks, Bases, or Taverns), not a Shoal, not a Desert Island, not an Atoll, and not a red space in the Red Water Lagoon. Each At Sea space can only accommodate 1 ship or Sea Monsters at a time.
Weather Exposure: Any Player Ships, Pirate Ships, or other NPC Ships that are At Sea are affected by Wind Force and Weather Tile effects are considered.
Ports
The term Port refers to any space where a Player Ship can stop its movement and can be anchored (Anchorages) or moored (Bases, Docks, or Taverns). Different types of Ports have different characteristics.
Each Port can only accommodate 1 Player Ship at a time, and NPCs cannot enter any Port.
- Also, a Sea Monster cannot attack nor counterattack ships at a Port as the water is too shallow.
- Exception: Bases can accommodate more than 1 Player Ship at a time.
To be 'at' a location means for the Player Ship to have stopped movement on the location's Port space.
- To be 'at' locations that do not have a Port (e.g. Shoals, Desert Island, Atolls, or Red Water Lagoon etc…) means for the Player Ship to have stopped movement on the location's space(s).
Weather Refuge: Ports are not At Sea and any Player Ships there are unaffected by Wind Force and Weather Tile effects.
Embark/Disembark: When a Player Ship is stopped at a Port, during Phase 5 (Player's Turn Phase), the player can Embark (e.g. to pick up specific tokens, typically Passengers, and place in the Passenger Cabin) or also Disembark (e.g. to remove a token from the Passenger Cabin and place at location).
- See 'Passenger Cabins' on page 32 for details.
Load/Unload: When a Player Ship is stopped at a Port, during Phase 5 (Player's Turn Phase), the player can Load (e.g. to pick up specific tokens, typically Barrels or Crates, and place in the Cargo Hold) or also Unload (e.g. to remove a token from the Cargo Hold and place at location).
- See 'Cargo Holds' on page 32 for details.
Anchorages
There is an Anchorage space at each of the six Main Islands marked with a blue anchor and 1-6 dots around it.
No Protection: A Player Ship that is stopped at an Anchorage can still attack and be attacked.
- Exception: A Sea Monster cannot attack nor counterattack ships here as the water is too shallow.
Weather Refuge: Anchorages are not At Sea and any Player Ships there are unaffected by Wind Force and Weather Tile effects.
Foreign Anchorage: A Player Ship can enter an Anchorage belonging to another player and can use its benefits, and does not need the Anchorage owner to agree through Negotiation.
- A foreign Anchorage is by definition unprotected, and likely an opponent will simply re-Capture the island for themselves immediately upon entering.
- See 'Capturing' on page 24 for details.
Docks
When a Captured Island has a Fort or Plantation built on it, the island's Anchorage turns into the Docks. If later there is no Fort nor Plantation on the island, the Docks will revert back to an Anchorage. The Docks functions the same as an Anchorage except when a Player Ship is stopped at the Docks, during Phase 5 (Player's Turn Phase), the player can now:
Recruit Deck Crew: Recruit deck crew, Sailors or Officers, onto their Player Ship that is at the Docks.
- See 'Recruiting' on page 33 for details.
Repair Ship: Purchase Cannons for 1 Silver Coin each and place on their Player Ship that is at the Docks to Repair it.
- See 'Repairing' on page 33 for details.
No Trading: The Docks do not act as a trading post and therefore does not allow a player to sell Barrels, Crates, or turn-in cards or other valuables that require a Base or Tavern.
No Protection: A Player Ship that is stopped at the Docks can still attack and be attacked.
- Exception: A Sea Monster cannot attack nor counterattack ships as the water is too shallow.
- Exception: When a Player Ship at the Docks that is at an island with a Fort, they cannot be attacked except by the owner of the Fort.
Weather Refuge: The Docks are not At Sea and any Player Ships there are unaffected by Wind Force and Weather Tile effects.
Foreign Docks: A Player Ship can enter the Docks belonging to another player, but if the island has a Fort, they cannot use its benefits, unless the Docks owner agrees, through Negotiation.
- With 'Advanced Rules', benefit permission is also required when there is a Plantation with a Militia.
- See 'Advanced Rules' on page 43 for details.
- Permission is not needed for stopping or passing through the Docks, but it is needed to Recruit, Repair, resolve missions/tasks on cards at the Captured Island, Embark/Disembark Passengers, and Load/Unload Barrels/Crates to/from the Captured Island.
- When a Player Ship is stopped at the Docks that does not belong to them, the ship cannot stop longer than 1 Round (use an Hourglass Token to track), otherwise the ship is Lost.
- A Fort may attack a Player Ship stopped at a foreign Docks (with or without benefit permission).
Occupied Spaces
Except at Bases, a space can only ever be occupied by 1 unit, whether it is a Player Ship, NPC Ship, or Sea Monster.
Location and Points of Interests Summary
(The original table also has icon columns for Battles, Weather, Recruit, Repair, Sell Ship and Trading Post; only its text notes are reproduced here.)
- Bases: 1+ Player Ship per Base. Only able to attack if blocked. Entrance and benefit use of foreign Bases requires permission.
- Taverns: 1 Player Ship per Tavern. Only able to attack if blocked.
- Docks: 1 Player Ship per Docks. Not able to be attacked if a Fort is protecting the Docks. Benefit use requires permission for foreign Docks if protected by a Fort or a Plantation with a Militia (with 'Advanced Rules').
- Main Islands: 1 Player Ship per Port. Sea Monsters can't attack Player Ships.
- Desert Island and Atolls: 1 Player Ship per location with card. Sea Monsters can't attack Player Ships.
- Red Water Lagoon: Maximum Range of 3 movement. Can only enter from west (W) entrance. Sea Monsters can't attack Player Ships.
- Black Ships: Player Ships cannot enter without card.
- Whirlpools: Regular At Sea space.
- Shoals: Only Player Ships with card or First-Class Captain. Sea Monsters can't attack Player Ships.
- North-South Passage: North (N) and south (S) exit spaces are connected for Player Ship and Pirate Ship movements.
- At Sea: Any non-Port, non-Shoal, non-Desert Island, non-Atoll, or non-Red Water Lagoon space.
- Only Player Ships can enter. Sea Monsters can't attack Player Ships.
Rounds and Phases
Components denoted with a * use expansion or add-on components and can be skipped if your version of Misty Waters does not contain these them.
Rounds
A Round refers to a complete cycle of all 6 Phases, beginning with the movement of the Wheel of Time Marker on the Wheel of Time and ending with the transfer of the Priority Token to the next player on the left. Each Phase is illustrated on the Sash on the top-right section of the board.
The player with the Priority Token moves the Round Phase Marker gradually on the Sash from left-to-right, performing the following 6 Phases in the same order each Round:
- Wheel of Time Phase
- NPC Movement and Attack Phase
- Weather Phase
- Drawing Action Cards Phase
- Player's Turn Phase
- Reset Phase
Phases 1-4 will not be performed during the first Round I.
Phase 1: Wheel of Time Phase
At the beginning of a new round, the new player with the Priority Token moves the Wheel of Time Marker clockwise to the next Round and triggers the effects illustrated there.
- If there is more than 1 Wheel of Time effect to be trigged in the same Round, Event Cards are considered first, otherwise the effects are simultaneous.
The game does not end after completing Round XII, and the Wheel of Time Marker continues to move clockwise.
- See 'End Game' on page 39 for details.
The Wheel of Time effects are illustrated on the game board as follows:
Harvest Rounds
At the beginning of Rounds I, VI, VIII, and X, each built Mine produces a Crate and each built Plantation produces a Barrel, which are taken from the supply and placed on the corresponding Captured Island(s).
- Exception: No more than 3 Barrels and 3 Crates can be stored on any island.
Free Trade Route
At the beginning of a Harvest Round, a player has a Free Trade Route if they can connect their Port on a Captured Island that has a Mine or Plantation to any Tavern by a sea-route of no more than 10 spaces of movement to reach the destination, and where that sea-route is free from opponent Player Ships, Pirate Ships, and other NPC Ships.
- A Free Trade Route cannot go through Shoals, Atolls, or Black Ship spaces.
- Player Ships stopped (e.g. moored) at a Tavern and Sea Monsters do not block a Free Trade Route.
If a player has a Free Trade Route on a Captured Island, then instead of producing a Barrel and/or Crate on that island during the Harvest Round's effect, that player may immediately sell them as if they were at a Tavern.
- These Barrels and Crates are thematically delivered immediately by a virtual 'Courier Freighter' saving the player a trip.
- The 'Courier Freighter' only takes the current Harvest Round's production, and any Barrels or Crates already stored on the island must be delivered by a Player Ship as normal.
Event Rounds
At the beginning of Rounds II, IV, VII, and X, the player with the Priority Token draws the top card of the face-down Event Card Deck and reads it aloud. The Event Card effect will either trigger immediately and ends this Phase 1 (immediate effect symbol), or continues until the next Event Card is drawn (continuing effect symbol).
Pirate Movement Rounds
In Rounds III, V, IX, and XI, Pirate Ships will move during the Phase 2 (NPC Movement and Attack Phase). These are the only Rounds they move, but not the only Rounds they attack.
Gold Coin Rounds
At the beginning of Round VI and Round XII from the support of their nation's government, each player receives 1 Gold Coin (e.g. 5 Silver Coins) from the supply and places it into their Treasury.
Grand Finale Round
At the start of the first Round XII, the Conquistadors' Galleass begins its escape from the Misty Waters starting on the Adjacent Space to the 'X' at the Red Water Lagoon.
- See 'Grand Finale' on page 41 for details.
Phase 2: NPC Movement and Attack Phase
There are Sea Monsters and ships in the Misty Waters that are not controlled by players, but instead perform actions according to predetermined algorithms, and they are called NPCs (non-player characters). NPC Ships include the Conquistadors' Caravels*, Conquistadors' Galleass, Silver Freighter*, Flying Dutchman*, and the Pirate Ships.
Steps 1-3 Movement: Pirate Ships, Other NPC Ships, Sea Monsters.
For each Round, at the beginning of Phase 2, Pirate Ships move first, followed by other NPC Ships, then Sea Monsters last. However, Pirate Ships only move during Rounds III, V, IX, and XI as marked on the Wheel of Time.
Steps 4-6 Attack: Sea Monsters, Battery of Cannons, Pirate Ships.
After all NPC movement is completed, then eligible targets on Adjacent Spaces are attacked by Sea Monsters, followed by Battery of Cannons, then finally by Pirate Ships.
When NPCs present on the map move, they move sequentially between Adjacent Spaces directly connected by dashed-line or solid-line (sea-route) and may not move more spaces, than their Maximum Range.
- If there are any timing conflicts within a step for NPC movements or attacks that have game impact, the player with the Priority Token rolls a regular dice to randomly determine what occurs first.
NPCs and Weather
NPCs are affected by Wind Force effects. However, they are unaffected by any Sailor/Officer, or Cannon removal effects.
- Exception: The Maximum Range of the Conquistadors' Galleass is not affected by Wind Force effects below a wind strength of 3 oB.
- Exception: The Flying Dutchman*, Battery of Cannons, and Sea Monsters are unaffected by Wind Force effects, except for the effect that returns all Sea Monsters into the deep at 11 oB wind strength.
Direction Dice
Pirate Ships and Sea Monsters use the Direction Dice to determine the direction of their movement. The player with the Priority Token rolls the Direction Dice for each individual Pirate Ships or Sea Monsters.
Each face of the Direction Dice indicates one main direction (i.e. N), and two adjacent directions (i.e. S and NE).
After the Direction Dice has been rolled, rotate the NPC to face the main direction shown on the dice then move them. If that direction has no available spaces, the NPC will choose an adjacent direction indicated on the top-left or top-right of the dice. If both directions are available, the NPC will always choose the top-right direction.
As the NPC continues their movement, they will always try to return to the main direction whenever possible, moving until their Maximum Range is used. At any time, including the start, if it is not possible for an NPC to move in the main direction or in the adjacent directions, the NPC ends their movement in their current space.
Example: Since the rolled direction (N) is unavailable, the NPC has a choice of 2 adjacent directions (NW and NE) both of which are available. The NPC will always choose the top-right direction (NE) when both adjacent directions are available. The NPC continues this direction until they can return to their main direction (N), followed by another choice of 2 available adjacent directions, which they choose the top-right direction (NE) again.
Step 1: Pirate Ship Movement
During Rounds III, V, IX, and XI as marked on the Wheel of Time, all Pirate Ships present on the map will move before any other NPC Ships or Sea Monsters.
For each Pirate Ship individually, the player with the Priority Token rolls the Direction Dice to determine the direction of movement, and then moves that Pirate Ship with a Maximum Range of 4 spaces + speed modifications due to Wind Force effects.
- A Pirate Ship with a Damage Marker has a Maximum Range of only 3 spaces + speed modifications due to Wind Force effects.
- Additional Pirate Ships are added from the 'Another Pirate Ship!' Event Card(s). They will start on a specified Black Ship space, but if occupied, will instead be placed at the next clockwise unoccupied Black Ship space. If all Black Ship spaces are occupied, no additional Pirate Ship is added.
- Pirate Ships get an extra movement when added to the map, but typically will not move again in the Round they first appear.
Pirate Ships can stop at and move freely through Black Ship spaces, but cannot enter nor move through any non-At Sea spaces (e.g. Port, Shoal, Desert Island, Atoll, or Red Water Lagoon).
- A Pirate Ship can pass through other Pirate Ships, other NPC Ships, and Sea Monsters with their movement, but not Player Ships. If the final available space where a Pirate Ship is to finish its movement on is occupied, it stops right in front of it.
Combat Contact: If a Pirate Ship is ever on an Adjacent Space to a Player Ship that they can attack, the Pirate Ship will stop and end their movement.
- This can result in a Pirate Ship not moving at all.
- A Pirate Ship will not stop their movement for Forts, other Pirate Ships, other NPC Ships, or Sea Monsters, unless the last available space is occupied.
- A Pirate Ship will not stop their movement early for Player Ships that they cannot attack.
- This includes Player Ships that are stopped at a Tavern, the Docks protected by a Fort (even foreign) or a Base.
- This also includes Player Ships when the effects of the Wind Force do not allow ships to Broadside Battle (e.g. fire cannonballs).
Step 2: Other NPC Ship Movement
After all Pirate Ships have completed any possible movements, all remaining other NPC Ships present on the map will perform their movement. Unlike Pirate Ships, other NPC Ships will move every Round during Phase 2 (NPC Movement and Attack Phase) and utilizes either the gray or white arrows on the map to determine movement.
- Exception: All NPC Ships do not move in the Round they first appear.
Other NPC Ships can stop at and move freely through Black Ship spaces, but cannot enter nor move through any non-At Sea spaces (e.g. Port, Shoal, Desert Island, Atoll, or Red Water Lagoon).
- Exception: The Conquistadors' Galleass will eventually begin its journey in the Red Water Lagoon and it may always use either Red Water Lagoon exit, including crossing the Shoals on the east (E) side.
Other NPC Ships (not Pirate Ships) can pass through occupied spaces. If the final space where it finishes its movement on is occupied, these ships move 1 extra space (or more) to find themselves on the other side of the occupied space(s).
Conquistadors' Caravels*: Except for the Round they appear, if a Conquistadors' Caravel* is present on the map, it moves with a Maximum Range of 4 spaces + speed modifications due to Wind Force effects.
- A Conquistadors' Caravel* with a Damage Marker has a Maximum Range of only 3 spaces + speed modifications due to Wind Force effects.
- From the 'Last Transport'* Event Card, a Conquistadors' Caravel* will start at the south (S) exit space ('Paso del Sur') and follows the white arrows north and will also start at the north (N) exit space ('Paso del Norte') and follows in reverse the white arrows south.
If a Conquistadors' Caravel* reaches the Adjacent Space to the Red Water Lagoon, the ship is removed and an additional Battery of Cannons will be added to the west (W) most available space.
- If the Adjacent Space to the Red Water Lagoon is occupied, a Conquistadors' Caravel* is still removed if it otherwise would reach the space and a Battery of Cannons is still added.
Conquistadors' Galleass: Except for the Round they appear, if the Conquistadors' Galleass is present on the map, it moves with a Maximum Range of 4 spaces + speed modifications due to Wind Force or the Red Water Lagoon spaces effects.
- Exception: The Maximum Range is not affected by Wind Force effects below a wind strength of 3 oB.
- At the start of Round XII, the Conquistadors' Galleass starts at the Adjacent Space to the 'X' at the Red Water Lagoon. If this space is occupied, it starts on the next unoccupied space along its route.
- The Conquistadors' Galleass follows the grey arrows and is removed when it enters the North-South Passage from either the north (N) exit space ('Paso del Norte') or the south (S) exit space ('Paso del Sur').
- When the grey arrow route forks and there are multiple routs, the player with the Priority Token rolls a regular dice to randomly determine which route the Conquistadors' Galleass chooses.
If the Conquistadors' Galleass enters the North-South Passage, the ship is removed and if the Conquistadors' Treasure was onboard, it too is removed from the game and triggers an end game condition at the end of the Round.
Silver Freighter*: Except for the Round they appear, if the Silver Freighter* is present on the map, it moves with a Maximum Range of 8 spaces + speed modifications due to Wind Force effects.
- From the 'Expresso Tropical'* Event Card, the Silver Freighter* will start at the north (N) exit space ('Paso del Norte'). If this space is occupied, it starts on the next unoccupied space along its route.
- The Silver Freighter* follows in reverse the white arrows south until it is removed when it enters the North-South Passage from the south (S) exit space ('Paso del Sur').
The Flying Dutchman*: Except for the Round they appear, if the Flying Dutchman* is present on the map, it is always the last NPC Ship to move after all Pirate Ships and all other NPC Ships have moved. It moves with a Maximum Range of 4 spaces and is unaffected by Wind Force effects.
- From the 'Flying Dutchman'* Event Card, the Flying Dutchman* starts at the south (S) exit space ('Paso del Sur'). If this space is occupied or a Player Ship is on an Adjacent Space, it starts on the next space along its path where this does not occur.
- The Flying Dutchman* follows the white arrows north until it is removed when it enters the North-South Passage from the North (N) exit space ('Paso del Norte').
Death Zone: As the Flying Dutchman* moves, it automatically and immediately removes from the map any Player Ships, Pirate Ships, other NPC Ships, or Sea Monsters on Adjacent Spaces at any point during its movement (start, middle, end).
- This 'death zone' ability also applies when other ships or Sea Monsters are moving on their turns. They are immediately removed if they start, move through, or stop on an Adjacent Space to the Flying Dutchman*.
- The Flying Dutchman* can never be blocked and can never be attacked.
At any time, players can pay 3 Experience Tokens to the supply from their Treasury to save their Player Ship from the Flying Dutchman* removal effect for 1 Round.
Step 3: Sea Monster Movement
After all Pirate Ships and other NPC Ships have completed any possible movements, all Sea Monsters present on the map will move.
Similar to Pirate Ship movement, the player with the Priority Token rolls the Direction Dice to determine the direction for each Sea Monsters' movement individually. After rolling the Direction Dice, each Sea Monster is moved with a Maximum Range of spaces as described on their individual Sea Adventure Card.
- A Sea Monster's Maximum Range is unaffected by all Wind Force effects.
Sea Monsters can stop at and move freely through Black Ship spaces, but cannot enter nor move through any non-At Sea spaces (e.g. Port, Shoal, Desert Island, Atoll, or Red Water Lagoon).
- A Sea Monster can pass through other Sea Monsters, and will not stop their movement unless the last available space is occupied.
Combat Contact: If a Sea Monsters is ever on an Adjacent Space to a Player Ship, Pirate Ship, or other NPC Ship, the Sea Monster will stop and end their movement.
- This can result in a Sea Monster not moving at all.
- A Sea Monster will not stop their movement for Player Ships they can't attack. This includes Player Ships that are at a Port, a Shoal, a Desert Island, and an Atoll.
NPC Movement Summary
| NPC | Movement | Maximum Range | Weather |
|---|---|---|---|
| Pirate Ships | Direction Dice, for each | 4 Speed (Full-Strength), 3 Speed (Damaged), + Speed Modifications | (1) No Losses |
| Conquistadors' Caravels* | South to North & North to South | 4 Speed (Full-Strength), 3 Speed (Damaged), + Speed Modifications | (1) No Losses |
| Conquistadors' Galleass | Randomized (North to South) | 4 Speed + 3 oB or higher Speed Modifications | (1) No Losses |
| Silver Freighter* | North to South | 8 Speed + Speed Modifications | (1) No Losses |
| Flying Dutchman* | South to North | 4 Speed | |
| Sea Monsters | Direction Dice, for each |
NPC Attacks and Target Priority
An individual NPC only attacks once per Phase 2. If an NPC has multiple targets, the player with the Priority Token rolls a regular dice to randomly determine which target is attacked.
- NPC attacks follow the Broadside Battle steps, even Sea Monsters without Cannons, and therefore they risk being counterattacked.
- See 'Battles' on page 35 for details.
- The Silver Freighter*, Conquistadors' Caravel*, and Conquistadors' Galleass never attack and only defend.
- During step 3 of a Battle and after a target has been selected, players can still play certain Action Cards that will stop an NPC attack and thus protect their Player Ship or Fort.
Step 4: Sea Monster Attack
After all NPC possible movements have been completed, all Sea Monsters present on the map will attack if on an Adjacent Space there is a Player Ship, Pirate Ship, or other NPC Ship.
- Sea Monsters don't have Cannons, but their attacks do still follow the Broadside Battle steps, except they do not roll any dice and they are unaffected by Battle restrictions due to Wind Force effects.
- An attacked Player Ship suffers the damage described on the Sea Monster's Sea Adventure Card.
- An attacked Pirate Ship or other NPC Ship, gain a Damage Marker, which can lead to the ship being defeated.
- A Sea Monster will not attack Forts, Player Ships stopped at any non-At Sea space (e.g. Port, Shoal, Desert Island, Atoll, or Red Water Lagoon) or other Sea Monsters (plenty of chum in the sea).
Step 5: Battery of Cannons Attack
After all Sea Monsters completed their attacks, all Battery of Cannons present on the map will attack by Broadside Battle (e.g. fire cannonballs) if on an Adjacent Space (those spaces that have a red arrow pointing to them) there is a Player Ship.
- Any Wind Force effects that do not allow ships to Broadside Battle are ignored, in the Red Water Lagoon.
Battery of Cannons will not attack the Conquistadors' Galleass as it is their own ship and does not make much sense to attack.
- Exception: Conquistadors' Galleass acquired by a player will be attacked as the player tries leave the lagoon and make their escape.
- Pirate Ships, other NPC Ships, and Sea Monsters cannot enter the Red Water Lagoon and therefore will not be attacked.
For each Conquistadors' Caravel* that reaches the Adjacent Space to the Red Water Lagoon, an additional Battery of Cannons will be added to the west (W) most available space.
- In addition, the Conquistadors' Caravel* that completed its delivery is removed.
Step 6: Pirate Ship Attack
After Sea Monsters and Battery of Cannons have completed their attacks, all Pirate Ships present on the map will attack by Broadside Battle (e.g. fire cannonballs) if on an Adjacent Space there is a Player Ship, a Fort, or a Sea Monster.
- Pirate Ships will not attack Player Ships stopped at a Tavern, the Docks protected by a Fort (even foreign), or a Base.
- Pirate Ships will not attack any target if the effects of the Wind Force do not allow ships to Broadside Battle.
Pirate Ships do not attack other Pirate Ships or other NPC Ships.
- Due to the terms of their contract, Pirate Ships will not attack the Conquistadors' Caravels*, Conquistadors' Galleass, Silver Freighter or fellow Pirate Ships. The Flying Dutchman* will take out any Pirate Ships on Adjacent Spaces before they can even ready a cannonball.
- Exception: Conquistadors' Galleass acquired by a player will be attacked as the player tries to make their escape.
NPC Attack Summary
| NPC | Attackable Targets | Protected Locations |
|---|---|---|
| Pirate Ships | (1) Player Ships Only | Player Ship at Tavern, Docks w/Fort, Base |
| Conquistadors' Caravels* | Defender Only | n/a |
| Conquistadors' Galleass | Defender Only | n/a |
| Silver Freighter* | Defender Only | n/a |
| Flying Dutchman* | n/a - Immune to damage/Battles and removes from map any ship or Sea Monster in Adjacent Spaces at any time. | |
| Sea Monsters | Player Ship at non-At Sea spaces | |
| Battery of Cannons | (1) Player Ships only |
Phase 3: Weather Phase
Each round, the weather may change from where the Weather Marker is currently positioned on the Wind Force. Players will have time to prepare for the worst the weather has to offer and if they're cunning enough, perhaps even take advantage of it. The player with the Priority Token performs the following steps:
Step 0: Check Wind Strength. For each Round, if at the beginning of Phase 3, the Weather Marker is at a wind strength of 11 oB or 12 oB on the Wind Force the wind quiets and the Weather Marker is moved three boxes lower before activating the next Weather Tile.
Step 1: Activate Weather Tile. Activate the face-up Weather Tile in the middle then move it to the right. Put it on top of any previously activated Weather Tile and leave it face-up and turned 90 degrees to show that it's already been activated.
Step 2: Draw New Weather Tile. Move the face-up Weather Tile on top of the stack on the left to the middle. This tile will be activated next Round. Then flip a new Weather Tile face-up from the top of the stack on the left and place back on top of the stack. This tile will be activated in 2 Rounds.
Weather Marker
Most, but not all, Weather Tiles will have a number in the upper-left that denotes how many boxes to move the Weather Marker on the Wind Force. When a Weather Tile is activated, move the Weather Marker the number shown on the activated tile. The Weather Marker moves to higher wind strength boxes on the Wind Force for positive numbers, and to lower wind strength boxes for negative numbers.
If the Weather Marker would be moved off the Wind Force, then the entire movement of the Weather Marker should be made in the opposite direction starting from its original position on the Wind Force (e.g. a +1 becomes a -1 or a -1 becomes a +1).
Weather Tile Effects
Most, but not all, Weather Tiles have an illustrated effect that is triggered when the tile is activated.
Abundant Crops and Ore Deposits: Trigger production: From the supply, 1 Barrel is placed next to each Plantation, and 1 Crate is placed next to each Mine present on the map.
- These cannot be automatically sent to the Tavern even if a player has a Free Trade Route.
- See 'Free Trade Route' on page 12 for details.
- Ignore this effect if the Weather Marker will be at a wind strength of 12 oB on the Wind Force at the end of this Phase.
Thar She Blows: Starting with the player that has the Priority Token and then going left to the next player, each player who has a Player Ship on an At Sea space draws 1 Sea Adventure Card from the Deck and reads it aloud.
- If a player has multiple Player Ships on At Sea spaces, they must pick which ship to assign the Sea Adventure Card before drawing their card.
- Ignore this effect if the Weather Marker will be at a wind strength of 11 oB or 12 oB on the Wind Force at the end of this Phase.
- See 'Sea Adventure Cards' on page 25 for details.
Ship Debris Afloat: Roll a regular dice. From the supply, 1 Crate is placed on the Whirlpool that matches the dice face.
- In Phase 5 (Player's Turn Phase), Crates that are At Sea may be Loaded onto a Player Ship that is at that Whirlpool space and placed in that ship's Cargo Hold.
- Crates can be later Unloaded and sold at a Base or Tavern for 3 Silver Coins as normal.
- Ignore this effect if the Weather Marker will be at a wind strength of 9 oB or higher on the Wind Force at the end of this Phase.
Waves have Washed up a Castaway: Roll a regular dice. From the supply, 1 Raft token is placed on the Whirlpool that matches the dice face.
- In Phase 5 (Player's Turn Phase), Rafts that are At Sea may be Embarked onto a Player Ships that is at that Whirlpool space and placed in that ship's Passenger Cabin.
- Rafts can be later Disembarked and at a Base or Tavern, the castaway will pay them 4 Silver Coins from the supply and cast 4 Votes to them at end game. Place the Raft token in a player's Treasury for an end game reminder.
- See 'Viceroy Voting' on page 42 for details
- Ignore this effect if the Weather Marker will be at a wind strength of 9 oB or higher on the Wind Force at the end of this Phase.
Whirlpools
If a Whirlpool is occupied by any Player Ship, Pirate Ships, other NPC Ships, or Sea Monsters, or other object when Weather Tiles are activated, place any new Crate or Raft at the next clockwise unoccupied Whirlpool. If all spaces are occupied, ignore these effects.
- A Crate or Raft on a Whirlpool is returned to the supply if a Pirate Ship, other NPC Ship, or Sea Monster passes through or stops at the space.
- In addition, Pirate Ships (not other NPC Ships) will remove any Damage Markers gained earlier by 'repairing' with the picked-up supplies.
Wind Force Effects
When the Weather Marker is moved on the Wind Force, certain levels of wind strength cause Wind Force effects to trigger. Effects that cause a removal of Sailors/Officers, and Cannons are one-time effects, but all others are ongoing effects.
- Example: If the Weather Marker is moved to a wind strength of 10 oB on the Wind Force, all Player Ships that are At Sea will immediately remove a Sailor or an Officer during Phase 3 (Weather Phase). If a Player Ship that was not At Sea during Phase 3, later moves to be At Sea in Phase 5 (Player's Turn Phase), they do not remove a Sailor or an Officer.
- Example: If the Weather Marker is moved to a wind strength of 10 oB on the Wind Force, all Player Ships that are At Sea will not be able to perform Broadside Battles. However, if a Player Ship moves to an Anchorage in Phase 5 (Player's Turn Phase), they would be able to perform Broadside Battles.
Besides from the exception of speed modification effects or effects that cause a removal of Sailors/Officers, and Cannons, the negative Wind Force effects logically accumulate.
- Example: If the Weather Marker is at a wind strength of 7 oB on the Wind Force, the 'there is no more fog' effect is on, and it will also be on for wind strength greater than 7 oB. Similarly, the 'No Transshipments' effect is on for any wind strength 8oB or greater.
Weather Refuges
Wind Force effects that apply to ships only apply to them when they are At Sea and not at a Port, a Shoal, a Desert Island, an Atoll, or the Red Water Lagoon.
- Exception: Speed modification effects impact Maximum Range if a ship is ever on an At Sea space at any point during its movement (start, middle, end).
- Example: If a +1 speed modification is active and gives an At Sea ship a Maximum Range of 4, that ship can move 4 spaces total even if it enters a Port.
- Example: If a +1 speed modification is active, with ship at a Port. If that ship has a ship speed of 3 and moves onto an At Sea space, then its Maximum Range will be 4.
- Exception: NPC Ships never remove any Sailors, Officers, or Cannons due to Wind Force effects.
- Exception: The Conquistadors' Galleass is unaffected by Wind Force effects below a wind strength of 3 oB.
- Exception: The Flying Dutchman* is unaffected by Wind Force effects.
A Sea Monster is unaffected by Wind Force effects, except for the effect that returns all Sea Monsters in 11 oB wind strength on the Wind Force.
Most of the 12 boxes on the Wind Force have an illustrated effect that is triggered when the Weather Marker is at that box or higher. (The box in which each effect appears is printed on the board's Wind Force track.)
Winds Feed the Sails: Speed modifications that change the Maximum Range for all ships positively or negatively at the start of movement, by the number written in the sail next to the current Wind Force box.
- This effect is ongoing, but does not accumulate.
- Minimum range of all ships is always 1.
Overboard: Each Player Ship At Sea immediately removes the number of Sailors/Officers or Cannons written next to the current Wind Force box.
- This effect is one-time and does not accumulate.
- Players can interrupt this effect and protect their Player Ship by playing an applicable Action Card at this moment.
It's Clearing Up: The 'Fog' Event Card temporarily ceases to apply.
- This effect is ongoing and does accumulate.
No Transshipments: Players can no longer tranfer Cannons, Sailors, Officers, or contents of Passenger Cabins, Cargo Holds, or Captain's Cabin between Player Ships.
- This effect is ongoing and does accumulate.
- This does not impact Negotiations with 'off-the-map' items (e.g. Action Cards and components in player Treasuries).
- This does not impact Transshipments that occur immediately after defeating a Player Ship or the Conquistadors' Galleass.
Sheath the Swords: Player Ships At Sea cannot perform Boarding Battles (e.g. sword duels) the seas are too rough.
- This effect is ongoing and does accumulate.
- This does not impact land-based defenders like with 'Advanced Rules' where there are Plantations with a Militia.
Sea Giveth and Sea Taketh Away: Crates and Rafts are not allowed At Sea. Any that are currently At Sea are immediately removed and returned to the supply.
- This effect is ongoing and does accumulate.
- Ignore Whirlpool Weather Tile effects when this is in effect.
Rocky Seas: Player Ships, Pirate Ships, and other NPC Ships At Sea cannot perform Broadside Battles, (e.g. fire cannonballs) as the cannoneers can't get a good aim.
- This effect is ongoing and does accumulate.
- This does not impact land-based attackers like a Fort or Battery of Cannons.
Return to the Depths: Sea Monster are not allowed on the map. Any that are currently on the map are immediately removed and returned to the supply. Also, their corresponding card is shuffled back into the Sea Adventure Card Deck.
- This effect is ongoing and does accumulate.
- Ignore Sea Adventure Card Weather Tile effects and cards that add new Sea Monsters when this is in effect.
Hunker Down: Each Crate and Raft present on the map that are on a Main Island are removed and returned to the supply.
Phase 4: Drawing Action Cards Phase
For each Round, at the start of Phase 4, the player with the Priority Token draws Action Cards from the top of the face-down Deck on the game board. The player draws as many Action Cards as the number of players plus 1 additional to form a pool of drafted cards.
The player with the Priority Token, looks at all of the drafted Action Cards (privately), then they may take 1 and add it to their hand of Action Cards. Finally, they pass the remaining Action Cards to the next player on their left who does the same process.
- When any player is looking at the newly drawn Action Cards during Phase 4, instead of selecting from the drafted cards, they may instead select the top face-up Action Card from the Discard Pile.
- The last player to make their Action Card selection, discards the remaining unselected Action Cards, in any order, face-up in their designated spot on the game board at the bottom left ('fish skeleton' illustration).
- With 'Advanced Rules', a player may spend 1 Experience Token to draw an additional Action Card.
- A player may spend more than 1 Experience Token, drawing an additional Action Card from the drafted cards or top of Discard Pile for each.
- For each additional drafted card drawn, the next player replenishes the remaining drafted cards with an Action Card from the top of the Deck.
- See 'Advanced Rules' on page 43 for details.
Once the player with the Priority Token, makes the first Action Card selection in Phase 4, they may begin Phase 5 without waiting for the other players to select their cards (to speed up gameplay).
Hand Limit
If after drawing (or receiving) cards to their hand, a player has more than 7 Action Cards, they must immediately discard cards until they have 7 cards in their hand.
- Cards not in hand (i.e. non-Action Cards, cards in Captain's Cabin or elsewhere) do not count towards this hand limit.
- Players can always look at the Action Cards in their hand, but not in other players' hand.
- Exception: With 'Advanced Rules', the hand limit is 9 cards instead of 7.
- See 'Advanced Rules' on page 43 for details.
Phase 5: Player's Turn Phase
Movement, Attack, Action.
For each Round, at the start of Phase 5, the player with the Priority Token begins their turn by moving their Player Ships currently present on the map. Subsequent steps are performed sequentially, so first a player has to finish moving all of their Player Ships, then a player completes any attacks they choose to, and finally a player may perform any possible actions.
- A player can never move their Player Ships after they attack.
- A player can never move or attack with their Player Ships after an action.
Reminder: 'Good Seamanship' is for players to think about their turn during the turns of other players to reduce time spent waiting.
Step 1: Player Ship Movement
A player may move each of their Player Ships present on the map between Adjacent Spaces directly connected by a dashed-line (sea-route) and each may not move more spaces, in Phase 5 (Player's Turn Phase), than that ship's Maximum Range.
- Typically, players complete movement with each Player Ship separately, but players can switch between ships, just as long as the total movement for each ship does not exceed their Maximum Range for that turn.
- Each movement is sequential and not simultaneous. Therefore, a player cannot swap their Player Ships in Adjacent Spaces without extra movement.
- See 'Maximum Range' on page 32 for details.
A player that plays an appropriate Action Card or has a First-Class Captain on their Player Ship, may also move on to Shoal spaces directly connected by wavy-dotted lines (shallow water).
- Player Ships cannot enter a Desert Island, an Atoll, or Black Ship space without having the appropriate mission card.
Occupied Spaces: Only 1 Player Ship, Pirate Ship, other NPC Ship, or Sea Monster can ever be on any individual space.
- Exception: Bases can accommodate more than 1 Player Ship at a time.
If a space where a Player Ship would like to end its movement is occupied, it stops in the Adjacent Space before it. However, if a Player Ship has enough movement to pass through an occupied space, it can pass through NPCs that do not have Cannons (e.g. Sea Monsters, the Conquistadors' Galleass, and the Silver Freighter*).
- A Player Ship can also passthrough another Player Ship, even belonging to another player, provided the other player agrees through Negotiation
- Unless the 'Fog' Event Card is active, a Player Ship cannot passthrough a Pirate Ship, a Conquistadors' Caravel*, or the Flying Dutchman* (However, 'Death Zone' ability will still remove ships and Sea Monsters during an active 'Fog').
Step 2: Player Attacks
After a player has completed all of their (optional) movements with all of their Player Ships present on the map, only then may they decide to attack with each eligible Player Ship and Fort, in a sequential order.
A player may attack with each of their Player Ships or Forts that are in an Adjacent Space to an opponent's Player Ship, Pirate Ship, other NPC Ship, opponent's Fort, Sea Monster, or Battery of Cannons.
- See 'Battles' on page 35 for details.
A Player Ship or Fort cannot attack if:
- Their Player Ship is at a Base or Tavern unless the exit is blocked.
- The effects of Wind Force do not allow for the attack to occur.
- See 'Wind Force Effects' on page 18 for details.
- The targeted Player Ship is stopped at a Base, a Tavern, or the Docks protected by a Fort (unless it's the owner who is attacking).
- During step 3 of a Battle, and after a target has been selected, the targeted player plays an applicable Action Card to interrupt the attack and protect their Player Ship or Fort.
An attack is not mandatory, and each Player Ship and Fort may only choose to attack once per Phase 5 (Player's Turn Phase).
- Battles where Player Ships or Forts are the defenders don't count towards the once per Phase 5 attack limit.
- A defender can be attacked multiple times in a Round, even by the same player with multiple attackers.
- If a Player Ship or Fort chooses to attack, they will usually risk being damaged by the defender, but not always.
- Sea Monsters cannot counterattack Forts, or Player Ships stopped at any non-At Sea space (e.g. Port, Shoal, Desert Island, Atoll, or Red Water Lagoon).
- There are situations where a Wind Force effect does not affect the attacker, but does still prevent a counterattack.
- There are also other situations where a defender is unable to do damage or is defeated before they have a chance to.
Step 3: Player Actions
After a player has completed all of their (optional) attacks with all of their eligible Player Ships and Forts present on the map, only then may they decide to perform actions. A player can perform any number of actions (including zero) and may even repeat actions multiple times during this step of Phase 5 (Player's Turn Phase).
Restriction: Each Player Ship can only draw 1 Exploration Card and 1 Tavern Card per Round.
A player freely decides the order in which their Player Ships perform actions. Thus, it is possible to perform actions that allow a surge of Silver Coins first, and then use them to perform other actions in the same Phase 5.
All player interactions with Bases, Main Islands, and Taverns require the presence of their Player Ship at its Port.
- Using benefits from a foreign Base or a foreign Docks with a Fort requires permission from its owner, through Negotiation.
- With 'Advanced Rules' a foreign Docks with a Plantation with a Militia also requires permission.
When a player has completed their actions, the next player to their left begins their Phase 5 continuing to adhere strictly to the sequential steps of: Movement, Attack, Action.
When a Player has a Player Ship at a Main Island's Port, they can:
- Explore or Capture. (1 Exploration Card per Player Ship per Round. See 'Exploration' and 'Capturing' both on page 24 for details.)
- Build a Fort, Mine, or Plantation. (Player may also remove their own Fort, Mine, and Plantation. See 'Building' on page 29 for details.)
- Restore a Damaged Fort. (See 'Forts' on page 29 for details.)
- Establish a Militia for a Plantation ('Advanced Rules' Only). (See 'Advanced Rules' on page 43 for details.)
When a Player has a Player Ship at specific Ports, they can:
- Repair and Purchase Cannons. (Base/Docks only. See 'Repairing' on page 33 for details.)
- Recruit Deck Crew: Sailors or Officers. (Base/Docks/Tavern only. See 'Recruiting' on page 33 for details.)
- Sell Player Ship. (Base only. See 'Selling Player Ships' on page 34 for details.)
- Trading Post: Sell Barrels, Crates, or Other Valuables. (Base/Tavern only. See 'Trading Post' on page 10 for details.)
- Draw a Tavern Card. (Tavern only. 1 Tavern Card per Player Ship per Round. See 'Tavern Cards' on page 26 for details.)
- Pay Tavern Fee to Extend Stay. (Tavern only. See 'Taverns' on page 9 for details.)
Other Possible Player Actions are:
- Resolve Mission/Task/Other Cards. (See 'Card Descriptions and Icons' on page 27 for details.)
- Transshipment between Player Ships. (See 'Transshipments' on page 34 for details.)
- Load/Unload Barrels or Crates, on to/from Player Ship. (See 'Cargo Holds' on page 32 for details.)
- Embark/Disembark Passengers or Rafts. (See 'Passenger Cabins' on page 32 for details.)
- Purchase an Undeclared Base. (See 'Undeclared Bases' on page 7 for details.)
- Buy a new Player Ship. (Maximum of 2 Player Ships on the map per player. See 'Buying Player Ships' on page 34 for details.)
Player Actions During Any Step of Phase 5:
- Play an Action Card. (1) (See 'Action Cards' on page 22 for details.)
- Negotiate with other players. (2) (See 'Negotiations' on page 28 for details.)
(1) Some Action Cards, but not all, are playable during player movement or Battles. (2) Negotiations, like permission to move through a Player Ship or use the benefits of a foreign Base, can be done outside of step 3 and even before movement.
Phase 6: Reset Phase
For each Round, at the start of Phase 6, the player with the Priority Token resets the game for the next Round. This cycle continues until an end game condition is met.
Step 1: Reset Hourglass Tokens
The player with the Priority Token, will first return to the supply Hourglass Tokens with the number 1 faceup. Then, they will flip over any Hourglass Tokens with the number 2 faceup to have the number 1 faceup.
Hourglass Tokens are used when an action temporarily immobilizes a ship, when an effect takes place for a certain period of time, or to track the Tavern fees for Player Ships. When active, they are placed next to the ship or on the card with an icon.
Step 2: Check for End Game Condition
At the end of every Round, players will check to see if any end game condition has occurred (see 'End Game' on page 41 for details).
- If a player controls 3 or more Captured Islands for two consecutive Rounds, the game ends.
- 4 or more Captured Islands are required for two player or 'Team Mode' games.
- If a player loses control of a Captured Island, they can still qualify as long as they've gained control back of it or another island before Phase 6 in each Round.
- If the Conquistadors' Treasure has been removed from play whether by sinking or the conquistadors have escaped with it, the game ends.
- If a player ever brings the Conquistadors' Treasure back to their Base, do not finish the Round, the game ends immediately.
Step 3: Rotate Priority Token and Reset Sash
The Round ends with the Priority Token passing to the player on the left and resetting the Round Phase Marker on the Sash by moving from Phase 6 (Reset Phase) to Phase 1 (Wheel of Time Phase).
- Exception: With 'Advanced Rules', once per Round at the end of Phase 6 (Reset Phase), the new owner of the Priority Token, through Negotiation, can exchange it to another player.
- See 'Advanced Rules' on page 43 for details.
Cards
Components denoted with a * use expansion or add-on components and can be skipped if your version of Misty Waters does not contain these them.
Action Cards
Action cards are player cards that are held in their hand and not shown to other players. They are a set of tools and skills to help in moving, battling, and other various situations. During Phase 4 (Drawing Action Cards Phase) of each Round, each player will each draw an additional card and then immediately discard a card if they have more than 7 cards in hand after drawing.
- See 'Drawing Action Cards Phase' on page 19 for details.
- With 'Advanced Rules', players can spend Experience Tokens during Phase 4 (Drawing Action Cards Phase) to draw additional Action Cards, and their hand limit is increased to 9 cards.
- See 'Advanced Rules' on page 43 for details.
Players will typically play Action Cards each Round during Phase 5 (Player's Turn Phase). Any number of Action Cards (including 0) can be played, but most cards are specific to either the movement, attack (before or after dice rolls), or action steps of the Phase. Also, some cards can be played as a response to an opponent's decision (i.e. a player or NPC attack) or even as a response to Wind Force effects or other cards.
Some Action Cards can also be played as a counter in response to an opponent's play, while their turn is in process, to NPC attacks, to changing weather effects, or to a Sea Adventure Card.
When playing Action Cards, players must adhere to the text as written, but also keep in mind the following:
- All Action Cards are one-time use and only take effect when playing it.
- An individual player cannot play a copy of an Action Card that they have already played in the same Battle.
After any Action Card is used, even if it had no effect, it is returned to the game box and not placed in the Discard Pile.
Event Cards
The active Event Card will always be face up on top of its Deck on the game board. They describe different occurrences that will impact the world of Misty Waters and gameplay.
Each game will start with the 'Last Transport'* Event Card, and at the beginning of Rounds II, IV, VII, and X the player with the Priority Token will draw a new Event Card to place face-up on top of the Deck, replacing the old event. Each Event Card effect will trigger and either complete the effect immediately (immediate effect symbol), or continue until the next Event Card is drawn (continuing effect symbol).
'Terror from the Deep': If the 'Terror from the Deep' Event Card is activated, look through the Sea Adventure Card Deck and set aside in draw order all cards that contain a Sea Monster icon. Remaining cards are shuffled back into Deck. Next, the player with the Priority Token rolls a regular dice to determine the Whirlpool location to put the corresponding Sea Monster token for the first card. Subsequent Sea Monsters are placed on the next clockwise Whirlpool.
- If a Whirlpool is occupied by a Player Ship, the Sea Monster immediately attacks and the owner chooses an Adjacent Space to place the Sea Monster.
- If a Whirlpool is occupied by another component, it is removed, except for the Flying Dutchman* which immediately defeats the Sea Monster instead.
When an Event Card is fully and completely resolved, it is returned to the game box.
'The Last Transport'*: The conquistadors see new and increasing activity in the archipelago. Their operations have been exposed, and they need to reinforce the Red Water Lagoon where their secret garrison holds the Conquistadors' Treasure! They've sent word home to add additional Battery of Cannons to the latest shipment forthcoming.
'The Last Transport' Event Card will add 2 Conquistadors' Caravels* onto the map. One will start at the south (S) exit space ('Paso del Sur') and follow the white arrows north and the other will start at the north (N) exit space ('Paso del Norte') and follow in reverse the white arrows south. They will begin their journey towards the Red Water Lagoon the Round after they first appear.
A Conquistadors' Caravel* has a ship speed of 4 (3 if damaged) plus Wind Force speed modifications. When a Conquistadors' Caravel* reaches the Adjacent Space to the Red Water Lagoon, the ship is removed and an additional Battery of Cannons will be added to the west (W) most available space.
- See 'Other NPC Ship Movement' on page 14 for details.
A Conquistadors' Caravel* will never attack, but will counterattack in Broadside Battles with 2 Cannons (1 if damaged). A Conquistadors' Caravel* cannot receive more than 1 Damage Marker in the same Broadside Battle unless three or more '6's are rolled. It does have anti-boarding nets and cannot be attacked by Boarding Battle.
- See 'Battles' on page 35 for details.
If a Conquistadors' Caravel* ever receives their second Damage Marker, they are immediately defeated and removed from the map. The opponent player will receive 2 Experience Tokens (0 Silver Coins), and a Treasure Chest token worth 7 Silver Coins in their Captain's Cabin.
- See 'End of Battle' on page 38 for details.
'Expresso Tropical'*: Each year the conquistadors sail home their richest bounties of gold and valuables. It takes a fast ship to ensure mercenaries and opportunist don't get a chance to get their hands on it. Nothing is faster than the conquistadors' Silver Freighter*.
The 'Expresso Tropical' Event Card will add the Silver Freighter* onto the map. It will start at the north (N) exit space ('Paso del Norte') and will follow the white arrows south. If the starting space is occupied, it will start on the next unoccupied space along its route.
The Silver Freighter* has a ship speed of 8 plus Wind Force speed modifications. When the Silver Freighter* enters the North-South Passage from the south (S) exit space ('Paso del Sur'), it is removed.
- See 'Other NPC Ship Movement' on page 14 for details.
The Silver Freighter* will never attack and has 0 Cannons to mount any kind of counterattack in Broadside Battles. It does have anti-boarding nets and cannot be attacked by Boarding Battle.
- See 'Battles' on page 35 for details.
If the Silver Freighter* ever receives a Damage Marker, they are immediately defeated and removed from the map. The opponent player will receive 5 Silver Coins, 2 Experience Tokens. If the Silver Freighter* was disabled (a '2' instead of a '6' dice roll), the opponent player also receives a Treasure Chest token worth 7 Silver Coins in their Captain's Cabin.
- See 'End of Battle' on page 38 for details.
'Ghost Ship'*: They said it was just a rumor. Only stories that drunken seafarers tell each other when they've drank a few too many! The sea can play tricks on your eyes, but not tonight. The spectre of the Flying Dutchman* is as awe inspiring as it is deadly. Steer clear of its path as you will join its crew if you sail too close.
The 'Ghost Ship' Event Card will add the Flying Dutchman* onto the map. It will start at the south (S) exit space ('Paso del Sur') and will follow the white arrows north. If the starting space is occupied or a Player Ship is on an Adjacent Space, it will start on the next space along its path where this does not occur.
The Flying Dutchman* has a ship speed of 4 and is unaffected by Wind Force effects. When the Flying Dutchman* enters the North-South Passage from the north (N) exit space ('Paso del Norte'), it is removed.
- See 'Other NPC Ship Movement' on page 14 for details.
The Flying Dutchman* is never involved in Battles, however it can 'attack' through its 'Death Zone' ability. Any Player Ship, Pirate Ship, other NPC Ships, or Sea Monsters on Adjacent Spaces at any point during their movement (start, middle, end) or the Flying Dutchman's* movement is automatically and immediately removed.
- Players can pay 3 Experience Tokens to save their Player Ship for 1 Round.
- See 'Death Zone' on page 15 for details.
The Flying Dutchman* cannot be defeated, and is only removed from the map due to its own movement.
Exploration Cards
Exploration Cards are cards that are placed on top of the 6 Main Islands at the start of the game. They represent various adventures, discoveries, and dangers from venturing on to the islands of the archipelago.
During Phase 5 (Player's Turn Phase), after completing all potential Player Ship movements and attacks, if a Main Island has unrevealed Exploration Cards, a Player Ship stopped at its Anchorage may Explore the island. Each Player Ship may only Explore once per Round.
Exploration: To Explore, the player draws 1 Exploration Card from the top of that island and reads the card text aloud.
- Any completed tasks or currency (e.g. Silver Coins) found go immediately to the player's Treasury.
- Exploration Cards with off-island unresolved tasks, for example that deal with Passengers, or represent other non-currency valuables, are placed face-up into a Captain's Cabin and are public knowledge.
Exploration of the Main Islands is not safe. If a Player Ship already has valuables in its Cargo Hold or Captain's Cabin, a player may want to consider suspending further Exploration until after selling or resolving them.
Exploration Suspended: Some Exploration Cards block further Exploration of a Main Island (suspension icon) and when revealed, are placed face-up on top of the stack on the island. The same is done with Exploration Cards that cannot be immediately removed or placed face-up into a Captain's Cabin. Attempt to resolve face-up Exploration Cards may be repeated on subsequent turns until a player succeeds.
- If the task described on the Exploration Cards does not contain the suspension icon, it does not have to be performed, and may be returned to the game box.
- Removing a previously revealed Exploration Card, by meeting its conditions, will not prevent Exploring a face-down Exploration Card in the same Round.
Capturing: If a player Explores and removes the last Exploration Card, they Capture the Main Island.
- When this occurs, a player places their Nation Flag on the Main Island to convert it to a Captured Island.
- From the support of their nation's government, the player receives 4 Silver Coins and also 1 Experience Token from the supply and places them into their Treasury.
A Captured Island may be re-Captured by an opponent's Player Ship at its Port, if there is no Fort.
- When this occurs, the original Nation Flag is returned to the player, and the opponent's Nation Flag is placed on the Captured Island.
- Nation Flags are not physically limited to a player's starting supply.
- Silver Coins and Experience Tokens are not rewarded in a re-Capture situation.
- Any existing infrastructure (e.g. Mine/Plantation) or other components (i.e. Barrels/Crates) are transferred to the new owner and stays on the island.
- With 'Advanced Rules', a Plantation with a Militia will also prevent re-Capturing like a Fort.
- See 'Advanced Rules' on page 43 for details.
When any type of Exploration Card is fully and completely resolved, it is returned to the game box.
Exploration Card icons:
- Mandatory card. This card is not optional, and the player revealing the card must follow its instructions before it is removed.
- Exploration suspended. The conditions described on the card must be met to remove the card from the stack and Exploration to be continued.
- Roll the dice, and follow the instructions described on card. Player may use Experience Tokens to reroll.
- Deliver this card (sometimes with an accompanying Token) in the Captain's Cabin to Base or Tavern to exchange for the coins. Keep in mind the limit of 3 cards on a ship!
- This icon may have different meanings, depending on the description on the card. Set the Hourglass Token next to the ship. Sometimes the Hourglass Token prevents a ship from performing moves, attacks, and actions until it is removed. If attacked, the ship can still defend itself in this case. In other cases, this icon suspends Exploration, and it may have other uses as described on the individual card.
- Deliver this card in the Captain's Cabin to a Tavern to exchange for 2 Silver Coins for each tankard icon on the card.
- Sail to the location described on the card to complete the task.
- Options or actions dependent on player choice or dice roll result.
Sea Adventure Cards
Sea Adventure Cards are drawn by each player that has a Player Ship that is At Sea when a Weather Tile with a Sea Adventure effect is activated during Phase 3 (Weather Phase). They represent the trials and tribulations of sea life, including engaging with the fearsome and dangerous creatures from the depths below.
Before a player draws a Sea Adventure Card from the top of the Deck, they must assign the card to a Player Ship they own that is At Sea. Then players read their card's text aloud, in turn-order, and follow the notations on the cards.
Sea Monsters: If a Sea Adventure Card contains a Sea Monster icon, the player who drew the card chooses an unoccupied At Sea and Adjacent Space to their assigned Player Ship to place the corresponding Sea Monster token. Place their corresponding card face-up to the side of the game board.
Immediately and still within Phase 3 (Weather Phase), the Sea Monster attacks the assigned Player Ship. Sea Monsters don't have Cannons, but this attack, as normal, still follows the Broadside Battle steps and risks being counterattacked (see 'Battles' on page 35 for details).
- The assigned Player Ship will suffer the damage described on the corresponding Sea Adventure Card.
- Players can interrupt the Sea Monster attack and protect their Player Ship by playing an applicable Action Card during step 3 of the Battle.
- If there is no available Adjacent Space for the Sea Monster, still complete a Broadside Battle and if the Sea Monster survives, remove their token and shuffle the corresponding Sea Adventure Card back in the Deck.
A Tale to Tell: Other Sea Adventure Cards (and other cards) may involve unresolved tasks, for example that deal with Passengers, which are placed face-up into the Captain's Cabin of the assigned Player Ship and are public knowledge.
Some Sea Adventure Cards that are placed into a Captain's Cabin have tankard icons. The Player Ship can stop at a Tavern and 'tell' the story for coins. From the Tavern patrons, the player receives 2 Silver Coins per icon from the supply and places them into their Treasury.
When any type of Sea Adventure Card is fully and completely resolved, it is returned to the game box.
Adventure Card icons:
- Sea Monster. Follow the rules described above.
- Move your ship as described on the card. On a Sea Monster card this icon indicates its speed.
- Remove components of the Player Ship's Cargo Hold as described on the card.
- Place the Crate in the Cargo Hold. Then, at the Tavern or Base, it can be exchanged for 3 Silver Coins.
Tavern Cards
Tavern Cards are cards that originate at a Tavern, and offer opportunities for well-paying jobs or tasks to carry out, secret missions, competition invitations, or to sit at a table and gamble.
During Phase 5 (Player's Turn Phase), after completing all potential Player Ship movements and attacks, for each Player Ship at a Tavern, the player may draw 1 Tavern Card per Round.
After drawing the top Tavern Card from the Deck, most cards should be read aloud by the player.
Missions and Tasks: After revealing a Tavern Card (or other cards) with a mission or task, the player places the card face-up into the Captain's Cabin of the Player Ship currently at the Port and is public knowledge.
- Unless the card says otherwise, a card with a mission can only be completed by the Player Ship that currently holds it, including Embarking relevant Passengers.
Secret Missions: Tavern Cards with a padlock icon denotes this card has a secret mission. These cards should not be read aloud, and should be placed in the Captain's Cabin face down and are not public knowledge until the mission is completed.
Mandatory Tasks: Tavern Card (or other card) tasks, missions, etc… are optional, unless the card shows a black triangle icon, which denotes that the task described on the card is mandatory.
- When at a Base or Tavern, Players can 'opt-out' of a non-mandatory card in the Captain's Cabin by returning the card to the game box and foregoing any reward.
No Cheating: During any competitions, contests or gambling in the Tavern or with Tavern Cards, players are not allowed to use any supporting Action Cards, Experience Tokens, or other means to influence the outcome.
'Aged Falcon': When a player draws this Tavern Card, put any unused ship minature from the box at the Tavern where their Player Ship is currently at. This temporary ship represents the 'Thousand-Year-Old Falcon'. The player who drew this card will roll the regular dice and move the 'Falcon' the same number of spaces towards the other Tavern in the shortest route (including Shoals) along the eastern side of the Labryinth Islands.
- Each roll is considered a 'parsec', and the player repeats the dice roll until the 'Falcon' reaches the other Tavern, remembering to count each 'parsec'.
- Wind Force effects and occupied spaces are not considered when moving the 'Falcon'.
- In turn order, after each dice roll, each paid player can decide to add 1 Silver Coin to the pool of bets from their Treasury. If they do, they immediately move the 'Falcon' forward or backwards 1 space, their choice.
- An individual player cannot spend more than 1 Silver Coin per dice roll, but Negotiations can occur.
- This option is unavailable once the 'Falcon' reaches the other Tavern.
Remove the 'Falcon' when it reaches the other Tavern. If the 'Falcon' reached it in 5 or less 'parsecs' (e.g. 'dice rolls'), then it has succeed, if not, it has failed.
- All players who correctly bet on the 'Falcon' to succeed or fail are the winners.
- Each of the winners receive 4 Silver Coins from the supply plus they split equally the pool of bets (including any Silver Coins added after dice rolls).
- Any amounts unable to be split equally are removed.
'Dice Poker': When a Tavern Card allows players to participate in Dice Poker, a player rolls 5 regular dice and then chooses any number (including 0) of dice to reroll once. The player sitting to the left of the player who drew the Tavern Card starts, then the next players, clockwise. After all players have finished rolling the regular dice, the player with the highest score wins. If there is a tie for highest score, the tied players roll again in the same order and play a second hand, repeat until there is a sole winner.
| Dice 'Hand' | Dice Combination | Score |
|---|---|---|
| Pair | 2 identical dice | Sum of the 2 dice |
| Two Pairs | 2 sets of 2 identical dice | Sum of the 4 dice |
| Three Of A Kind | 3 identical dice | 10 points + sum of the 3 dice |
| Straight | 4 sequential dice (not 6 to 1) | 15 points + sum of the 4 dice |
| Full House | 2 identical dice and 3 identical dice | 20 points + sum of all dice |
| Four Of A Kind | 4 identical dice | 25 points + sum of the 4 dice |
| Poker | 5 sequential dice (not 6 to 1) | 30 points + sum of all dice |
| General | 5 identical dice |
Reminder: 'Dice Poker' is different than standard card poker. In 'Dice Poker' seemingly 'better' hands can be beaten by 'lesser' hands depending on the score. For example, a weak two pairs of 1s and 2s (6 points) can be beaten by a strong single pair of 4s (8 points).
When any type of Tavern Card is fully and completely resolved, it is returned to the game box.
Card Description and Icons
Action Card Priority: Card text and icons on cards take priority over the rules written in the rulebook.
- Example: A player has a card that allows their Player Ship to Broadside Battle at a distance greater than an Adjacent Space, they can do so if played.
Weather Limitations: If a card specifies a Wind Force requirement, then the card may only be played if the Weather Marker is currently at a wind strength that meets this requirement.
- Example: If an Action Card says it only works with Wind Force 1-7, then it cannot be played if the wind strength is at 8 oB or greater.
If the card does not specify a Wind Force requirement, then the card may be played regardless of where the Weather Marker is currently at.
Card Costs: If a player is required to remove Sailors, Officers, Barrels, Crates, or other items as a result of completing a card, but there is none on board the Player Ship, then the player removes nothing.
- Example: A card says that as a result of an unfortunate accident a Sailor is removed, and there are no Sailors on board, then nothing is removed including any possible Officers or Cannons.
If completing a card requires the sacrifice of Sailors, Officers, Barrels, Crates, or other items to achieve the card's benefit, but there is none on board the Player Ship, then the card cannot be completed.
- Example: A card said in order to obtain a reward, a player must sacrifice a Barrel, but if there are none on board, getting the reward is not possible.
Card Rewards: Some cards may have multiple steps to obtaining rewards. Unless the card says otherwise, only the Base and/or Tavern can provide Silver Coin rewards.
- Example: A card may say to bring a Passenger to a location in exchange for a valuable artifact which is worth 5 Silver Coins. The first step to reward is Disembarking the Passenger at the location. The valuable artifact will be received and be represented by the card in the Captain's Cabin. The player can now bring their ship to a Base or Taven to sell the valuable artifact (turn in card) and receive 5 Silver Coins to their Treasury.
Cards for Battle: All Action Cards that are played in a Battle will be marked next to their title with either a before-roll icon or an after-roll icon to designate that they can be played either before or after the initial roll of the regular dice.
Card Icons: Action, Event, Exploration, Sea Adventure, and Tavern Cards may have various icons that help illustrate the details of the card.
Action Card and Event Card Icons
- Action Card that is used in a Battle.
- Action Card is to be played before regular dice is rolled.
- Action Card is to be played after regular dice is rolled.
- Action card or other card described in the content.
- Use card during movement.
- A card with a different use or has a multipurpose.
- Action card used in Boarding Battles or Broadside Battles.
- Event Card effect will trigger and either complete the effect immediately or continue until the next Event Card is drawn.
- A ship (Player Ship, Pirate Ship, or other NPC Ship) initiator or target.
- A Sea Monster initiator or target.
- A Fort initiator or target.
- A Plantation initiator or target.
- Action Cards that player controlled 'Pirate Faction'* can use. See 'Pirate Faction Rules' in the 'Empires Expansion Rules' manual for details.
Sea Adventure, Tavern Card and Other Icons
- Card is not used in 'Solo Mode' or 'Cooperative Mode'.
- Secret Mission; do not read contents aloud until after completing the task.
- Go to or deliver to a Base or Tavern to receive a reward.
- Go to or deliver to a Base to receive a reward.
- Go to or deliver to location described on the card to receive a reward.
- Exploration of the island is suspended until the task is completed.
- Mandatory Task, player must complete card task.
- Ship movement or Sea Monster's speed for movement.
- Sailor or Officer (e.g. deck crew).
- Cannons (e.g. below deck cannoneers).
- Experience Token.
- Sea Adventure Card or a Sea Monster.
- Removal of card(s) (e.g. Action Cards or the card its displayed on).
- Roll a regular dice.
- While at a Tavern, tell the story to receive 2 Silver Coins per icon on the card.
- Barrels or Crates from the Player Ship's Cargo Hold.
- Pause; use an Hourglass Token as described on the card.
- Silver Coins from the supply and for a player's Treasury.
Experience Tokens
Components denoted with a * use expansion or add-on components and can be skipped if your version of Misty Waters does not contain these them.
Earning Experience Tokens
Experience Tokens represent the knowledge and skills a player's fleet has gained throughout their Misty Waters journey. A player will gain Experience Tokens and other rewards by completing cards or through various accomplishments
| Accomplishment | Reward |
|---|---|
| Defeating any ship by Broadside Battle. | 2 Experience Tokens and 5 Silver Coins. Exception: Defeating a Sloop (S), Caravel (C), or Conquistadors' Caravel* does not earn Silver Coins. |
| Defeating any ship by Boarding Battle. | 1 Experience Token. |
| Defeating an opponent's Fort. | 2 Experience Tokens. |
| Defeating a Sea Monster. | 2 Experience Tokens and 5 Silver Coins. |
| Defeating Last Day Temple*. | 2 Experience Tokens and 5 Silver Coins. |
| Defeating a Battery of Cannons. | 1 Experience Token. |
| Removing the last Exploration Card from a Main Island. | 1 Experience Token and 4 Silver Coins. |
When earned, the player receives Experience Tokens from the supply and places them into their Treasury, where they are free to spend as needed by returning back to the supply.
- Experience Tokens cannot be sold and cannot be transferred through Negotiation or any other means.
Using Experience Tokens for Rerolls
After rolling regular dice, a player may choose to spend Experience Tokens to reroll dice. For each spent Experience Token a player may reroll 1 of their regular dice, except for those dice involving the Tavern or Tavern Cards.
- Before rerolling any dice, a player must declare the number of Experience Tokens they are using.
- A player can reroll different dice or the same dice multiple times, as long as they've declared in advance enough Experience Tokens for each individual dice and each individual reroll.
- A player only declares the number of Experience Tokens once, they cannot later decide to use more tokens. All declared Experience Tokens must be returned to the supply whether they were used or not.
Using Experience Tokens for Additional Action Cards
If playing with 'Advanced Rules', players may also spend Experience Tokens to draw additional Action Cards (see 'Advanced Rules' on page 41 for details).
Negotiations
During Phase 5 (Player's Turn Phase), a player can communicate with other players in an attempt to Negotiate. Both players must agree to the terms of the Negotiation before any exchanges or permissions take place.
The most common negotiations involve:
- Permission for a Player Ship to use benefits of a foreign Base or a foreign Docks protected by a Fort.
- Permission for a Player Ship to move through an opponent's Player Ship.
- Transfer 'off-map' components in a player's Treasury (e.g. Silver Coins, Rafts, Sea Monster or Pirate Ship trophies, etc…).
- Experience Tokens cannot be Negotiated.
- Transfer of 'off-map' player-controlled Action Cards in hand (or set aside).
- The current player cannot receive Action Cards on their turn.
- Same as in Phase 4 (Drawing Action Cards Phase), if after receiving a card the player has more than 7 Action Cards in their hand, they must discard a card afterwards as to not increase the total number in hand.
- If multiple cards are received, they are received sequentially.
- Exception: With 'Advanced Rules' the hand limit is 9 cards instead of 7 (see 'Advanced Rules' on page 43 for details).
- Transshipment of 'on-map' components in Player Ships (e.g. Cannons, Sailors, Officers, or any components present in a Passenger Cabin, Cargo Hold, or Captain's Cabin).
- The Player Ships must be on Adjacent Spaces and have room for tokens.
- Transshipments cannot occur if the Weather Marker is at a wind strength of 8 oB or above and at least 1 of the Player Ships is affected.
Terms of Negotiations can include the current turn as well as future turns.
- Example: A loan of an item (i.e. Silver Coins) to be repaid at a later time.
- Example: Not attacking or attacking specific targets in the current or a later turn.
- Example: Permissions for longer than a Round.
The subject of Negotiations can be almost anything except:
- Cannot include already built Forts, Mines, and Plantations.
- Cannot include 'on-map' items that can't currently be Transshipped as they are out of reach (i.e. non-Adjacent Spaces, Wind Force effects, etc…).
- Cannot include a player receiving an Action Card on their own Phase 5 turn.
- Cannot include Experience Tokens or the Priority Token.
- Exception: With 'Advanced Rules', players can Negotiate with the Priority Token (see 'Advanced Rules' on page 43 for details).
Players should feel free to be creative with their Negotiations, but recommend that they should be kept simple, specific, and clear to avoid miscommunication, especially when parts of the Negotiations are completed on later turns.
- Example: If a player provides permission to an opponent to use their Base or Docks, they likely want to exclude the ability to Load/Unload if they have Barrels or Crates on there.
- Example: If players are agreeing to not attack each other, both will want to be specific if it's for 1-Round, 2-Round, or longer.
- Example: If a player provides a loan of Silver Coins, they should be specific as to when the opponent has to pay it back (as soon as they can, or at their choice).
Binding Negotiation
Negotiations are binding, and must be completed by the agreeing parties to the best of their abilities. If there ever is a disagreement of terms previously agreed to and it cannot be resolved verbally, roll a regular dice to randomly resolve.
- Exception: If playing with 'Advanced Rules', and the majority of the players agree before the start of the game, Negotiations are not binding for a more cutthroat game (see 'Advanced Rules' on page 43 for details).
Building
During Phase 5 (Player's Turn Phase), when a Player Ship is at a Captured Island with their Nation Flag on it, the player may Build a Fort, Mine, or Plantation to improve their island in exchange for paying Silver Coins to the supply from their Treasury. Each island is limited to 1 token of each type of infrastructure and also each type of infrastructure is limited to 3 tokens for the entire map, so players should not wait too long to Build.
Self-Removal: Player may never sell their built Fort, Mine, and/or Plantation, but when their Player Ship is at a Captured Island with their Nation Flag on it, during Phase 5 (Player's Turn Phase) they may choose to 'destroy them' and remove them from the map.
- Although this is an unorthodox decision, it may be better to remove than to allow an opponent an opportunity to gain through re-Capturing the island.
- No other tokens (e.g. Barrels, Crates, Passengers, etc…) on an island can be removed in this way.
Forts
A Fort's primarily purpose is to defend a player's Captured Island. It costs a player 7 Silver Coins to Build a Fort on their Captured Island.
When a player Builds a Fort, they place the corresponding token on the Fort-shaped space on the island with red arrows pointing from it.
A player cannot Build a Fort if:
- There is already a Fort on the island or already 3 Forts on the map in total.
- They do not have a Player Ship currently at the Captured Island's Port.
- There would be an opponent Player Ship, Pirate Ship, or other NPC Ship in an Adjacent Space (e.g. space that has a red arrow pointing to it) to the Fort.
- With 'Advanced Rules', when a Fort is built, if there is a Plantation with a Militia, remove any Sailors from the Captured Island.
- See 'Advanced Rules' on page 43 for details.
The island workers who maintain a Fort will cast 5 Votes at end game.
- See 'Viceroy Voting' on page 42 for details.
Docks Installation: When a player builds a Fort, they also automatically upgrade the Captured Island's regular Anchorage into the Docks, where now a Player Ship at the Docks can Recruit deck crew, Sailors or Officers, as well as Repair their ship by purchasing Cannons.
- See 'Docks' on page 11 for details.
Permissions: If a Captured Island has a Fort, then an opponent Player Ship can no longer use its Port's benefits, unless the owner agrees, through Negotiation.
- With 'Advanced Rules', benefit permission is also required when there is a Plantation with a Militia.
- See 'Advanced Rules' on page 43 for details.
- Permission is not needed for stopping or passing through the Port, but it is needed for Recruit, Repair, resolve missions/tasks on cards at the Captured Island, Embark/Disembark Passengers, and Load/Unload Barrels/Crates, and other valuables to/from the Captured Island.
Protection: Any Player Ship that is stopped at the Docks can attack, but cannot be attacked by an opponent Player Ship, Pirate Ship, or other NPC Ship if there is a Fort.
- Exception: The owner of the Captured Island is not prevented from attacking a Player Ship at its Docks with their Fort or a Player Ship.
- If a Player Ship at the Docks with a Fort chooses to attack, it will usually risk being damaged by the defender, except for Sea Monsters.
Captured Islands cannot be re-Captured by opponent Player Ships if there is a Fort present. Once a Fort is defeated however, an opponent can re-Capture the island and replace the Nation Flag on the Captured Island.
- See 'Capturing' on page 24 for details.
- With 'Advanced Rules', a Plantation with a Militia will also prevent re-Capturing like a Fort.
- See 'Advanced Rules' on page 43 for details.
Battle: During the player attack step of Phase 5 (Player's Turn Phase), a player can choose to have their Fort attack by Broadside Battle against an opponent Player Ship, Pirate Ship, other NPC Ship, or Sea Monster that is on an Adjacent Space (e.g. space that has a red arrow pointing to it, including the Docks space).
- If a Fort chooses to attack, it will usually risk being counterattacked by the defender, except for Sea Monsters.
To attack a Fort and try to defeat it, an opponent Player Ship or Pirate Ship needs to be in an Adjacent Space and choose to attack by Broadside Battle.
- If the Fort survives, it will counterattack any attacker.
- If the Fort is defeated by a Player Ship, the Fort's opponent receives 2 Experience Tokens from the supply to their Treasury.
- Add a Damage Marker to a Fort when they receive damage. A Fort is at full-strength with no Damage Markers, and is damaged with 1 Damage Marker. If a Fort receives a second Damage Marker, it is defeated.
- A Fort cannot receive more than 1 Damage Marker in the same Broadside Battle unless three or more '6's are rolled.
- When attacking or counterattacking, a full-strength Fort acts as if it has 4 Cannons while a Fort with a Damage Marker on it acts as if it has 3 Cannons.
- Ricochets (rerolls from dice roll = '4' or '5') do not occur in Broadside Battles involving land targets like a Fort.
- Other NPC Ships and Sea Monsters will not attack Forts.
Restoration: If a player has a Player Ship at the Docks protected by a damaged Fort, they may spend 3 Silver Coins to remove the Damage Marker on the Fort and return it to the supply.
- A player cannot remove the Damage Marker if there is an opponent Player Ship, Pirate Ship, or other NPC Ship in an Adjacent Space (e.g. space that has a red arrow pointing to it) to the Fort.
Plantations
A Plantation's primary purpose is to harvest crops and produce Barrels for the Capture Island's owner. It costs a player 5 Silver Coins to Build a Plantation on their Captured Island.
When a player Builds a Plantation, they place the corresponding token anywhere on the Captured Island. A player cannot Build a Plantation if:
- There is already a Plantation on the island or already 3 Plantation on the map in total.
- They do not have a Player Ship currently at the Captured Island's Port.
The island workers who work the fields of a Plantation will cast 5 Votes at end game.
- See 'Viceroy Voting' on page 42 for details.
Docks Installation: Like a Fort, when a player builds a Plantation, they also automatically upgrade the Captured Island's regular Anchorage into the Docks, where now a Player Ship at the Docks can Recruit deck crew, Sailors or Officers, as well as Repair their ship by purchasing Cannons.
- See 'Docks' on page 11 for details.
Production: At the beginning of Harvest Rounds (Rounds I, VI, VIII, and X), each Plantation on the map produces 1 Barrel which is placed from the supply and next to the Plantation token on the Captured Island. Weather Tile effects can also trigger production.
- Exception: There can never be more than 3 Barrels on any 1 Main Island.
A Player Ship at the Captured Island can later Load Barrels from the island to the ship's Cargo Hold and then later Unloaded at a Base or Tavern to sell as normal for 2 Silver Coins. If the Captured Island has a Free Trade Route, the player may immediately sell the Barrel when it's produced during a Harvest Round.
- See 'Free Trade Route' on page 12 for details.
No Permissions Required: Unlike a Fort, a Plantation by itself does not require an opponent Player Ship to receive permission to use and benefit from the Captured Island's Port.
- Exception: With 'Advanced Rules', benefit permission is required when there is a Plantation with a Militia (see 'Advanced Rules' on page 43 for details).
No Protection: A Plantation does not offer any form of protection and a Player Ship that is stopped at a Captured Island can be attacked by an opponent Player Ship, Pirate Ship, or other NPC Ship if there is not a Fort.
A Plantation by itself does not prevent a Captured Islands from being re-Captured by opponent Player Ships.
- A Plantation cannot be attacked nor removed (except by self-removal).
- A Planation does transfer to new owner from re-Capturing.
- Exception: With 'Advanced Rules', a Plantation with a Militia will prevent re-Capturing like a Fort, and the Militia itself can be attacked through a Boarding Battle, but the Plantation itself cannot be attacked (see 'Advanced Rules' on page 43 for details).
Mines
A Mine's primary purpose is to excavate ore and produce Crates for the Captured Island's owner. It costs a player 5 Silver Coins to Build a Mine on their Captured Island.
When a player Builds a Mine, they place the corresponding token anywhere on the Captured Island. A player cannot Build a Mine if:
- There is already a Mine on the island or already 3 Mines on the map in total.
- They do not have a Player Ship currently at the Captured Island's Port.
The island workers who dig in the Mine will cast 5 Votes at end game.
- See 'Viceroy Voting' on page 42 for details.
Production: At the beginning of Harvest Rounds (Rounds I, VI, VIII, and X), each Mine on the map produces 1 Crate which is placed from the supply and next to the Mine token on the Captured Island. Weather Tile effects can also trigger production.
- Exception: There can never be more than 3 Crates on any 1 Main Island.
A Player Ship at the Captured Island can later Load Crates from the island to the ship's Cargo Hold and then later Unload at a Base or Tavern to sell as normal for 3 Silver Coins. If the Captured Island has a Free Trade Route, the player may immediately sell the Crate when it's produced during a Harvest Round.
- See 'Free Trade Route' on page 12 for details.
No Permissions Required: Unlike a Fort, a Mine does not require an opponent Player Ship to receive permission to use and benefit from the Captured Island's Port.
No Protection: A Mine does not offer any form of protection and a Player Ship that is stopped at a Captured Island can be attacked by an opponent Player Ship, Pirate Ship, or other NPC Ship if there is not a Fort.
A Mine does not prevent a Captured Islands from being re-Captured by opponent Player Ships.
- A Mine cannot be attacked nor removed (except by self-removal).
- A Mine does transfer to new owner from re-Capturing.
Infrastructure Summary
| Infrastructure | Silver Coin Cost | Docks | Harvest Round | Benefit Permission | Protection | Attack |
|---|---|---|---|---|---|---|
| Fort | 7 (3 for Restoration) | Yes | n/a | Required | Yes | Yes |
| Mine | 5 | No | Produces Crate | No | No | No |
| Plantation | 5 | Yes | Produces Barrel | No | No | No |
| Plantation with Militia | 5 (+ Sailors Cost) |
Player Ships
Components denoted with a * use expansion or add-on components and can be skipped if your version of Misty Waters does not contain them.
Ship Types
A player is limited to 2 Player Ships on the map, but there are several types of Player Ships in the game and each of them is fully universal with the differences in the details. The type of Player Ship a miniature is can be identified by the shape of the hull and the rigging or by using the ship stands* sold separately.
The following are the different types of Player Ships:
- Sloop (S)
- Caravel (C)
- Brig (B)
- Galleon (G)
- Heavy Frigate (HF)
- Ship-of-the-Line: Heavy Line Battleship (HL)
- With 'Empires Expansion Rules' in effect:
- Ship-of-the-Line: Line Battleship (L)* (Netherlands (orange) / Portugal (red) nations only)
- Frigate (F)* (England (white) / France (blue) nations only)
- Fluyt (T)* (Netherlands (orange) / Portugal/Spain (red) nations only)
- See 'Empires Expansion Rules' manual for details.
Player Ships, except for Ship-of-the-Line ships, come in each player color and have a corresponding ship board. Each ship board will have the following details that can vary ship-to-ship:
- Ship Type
- Ship Cost
- Ship Initials
- Ship Speed
-
of Passenger Cabins
-
of Cargo Holds
- Max # of Sailors
- Max # of Cannons
- 1 Officer-Gunner
- 1 Officer-Fencing Master
- 1 Officer-Captain
- Captain's Cabin
Ship Type Summary (where the original shows an icon without a number, the quantity is 1)
| Ship Type | Ship Cost (Silver Coins) | Ship Speed | Max Cannons | Max Sailors | Cargo Hold | Passenger Cabins |
|---|---|---|---|---|---|---|
| Sloop (S) | 8 | 5 | 2 | 2 | 1 | 1 |
| Caravel (C) | 10 | 4 | 2 | 2 | 2 | 2 |
| Fluyt* (T) | 12 | 5 | 2 | 2 | 2 | 2 |
| Brig (B) | 14 | 6 |
Maximum Range
The Maximum Range for a Player Ship is the highest number of spaces during Phase 5 (Player's Turn Phase) that it can move, but they can always move fewer spaces (including zero). A Player Ship's Maximum Range is equal to the ship type's speed plus any speed modifications. Speed modifications are cumulative and have a variety of sources.
- The lowest maximum range is always 1 regardless of speed modifications.
- Wind Force effects that impact Maximum Range will do so if a ship is ever on an At Sea space at any point during its movement (start, middle, end).
Speed Modification Summary
| Source | Speed Modification |
|---|---|
| Captain | +1 Speed. |
| No Sailors | -1 Speed. |
| Red Water Lagoon | Maximum of 3 Speed. |
| Wind Force Effects | -1, -2, -3 or +1 Speed depending on wind strength. |
| Action Cards | +1 or +2 Speed depending on card. |
Numbered Counters: There are 4 sets of double-sided numbered counters. Each set has numbers 1-2, 3-4, 5-6, 7-8. These counters are not required, but can be used for helpful reminders. Their main use is for remembering the current Maximum Range of your player ships.
- Example: A player's Sloop has 0 Sailors, place a '4' counter on the upper-right corner of that ship board as a reminder that the ship's speed is reduced from 5 to 4.
There are card tasks that involve specific island locations. A numbered marker placed on the task's card with the matching island's number can be used to help remember which island.
Passenger Cabins
Player Ships have Passenger Cabins on their ship boards and each cabin can be used to carry 1 occupant, typically a Passenger, but can also be a Raft (e.g. castaway) or a redundant Officer who can quickly replace a removed Officer.
- Cannons and Sailors cannot be stored in Passenger Cabins as they represent respectively 8 guns with their cannoneers and 30 people each!
- Players cannot intentionally destroy contents in Passenger Cabins.
- Passengers will typically have a corresponding card that is stored in the Captain's Cabin until resolved.
Embark/Disembark: Passenger tokens can show up at almost any location within the archipelago, as described on various Event Cards, Exploration Cards, Sea Adventure Cards, and Tavern Cards. In order to Embark (e.g. to pick up a token at a location and place in the Passenger Cabin), the Player Ship will have to be at the location's Port and have an empty Passenger Cabin during action step of Phase 5 (Player's Turn Phase). Also, a Passenger can only come onboard if their corresponding card is in the ship's Captain's Cabin.
- If the location is At Sea, like for Rafts, Player Ships can Embark if they're on the At Sea space.
A Player Ship can Disembark (e.g. to remove a token from a Passenger Cabin and place at a location), if at a location's Port or as detailed on corresponding card.
- Locations to Disembark is not limited to only the final destination.
- A Player Ship cannot Disembark to an At Sea space or other non-Port spaces.
- Cannons and Sailors cannot Disembark, but they can be Transshipped.
- Exception: With 'Advanced Rules', Sailors can Disembark in order to create or replenish a Plantation with a Militia.
- See 'Advanced Rules' on page 43 for details.
Cargo Holds
Player Ships have Cargo Holds on their ship boards and each can be used to carry 1 Barrel, 1 Crate, or the Conquistadors' Treasure.
- Passengers, Rafts, Cannons, Sailors, and Officers cannot be stored in a Cargo Hold.
- Players cannot intentionally destroy contents in Cargo Hold.
- All other valuables are stored in the Captain's Cabin.
- Additional tokens specified by their corresponding card such as Black Chest token*, Silver Barrel token*, may also be placed in a Cargo Hold.
Load/Unload: In order to Load (e.g. to pick up a token and place in the Cargo Hold), the Player Ship will have to be at the Port of a location that has a Barrel or Crate, and have an empty Cargo Hold during action step of Phase 5 (Player's Turn Phase).
- If a Barrel or Crate is At Sea, like for Whirlpools, Player Ships can Load if they're on the At Sea space.
- The Conquistadors' Treasure can be Loaded when in the Adjacent Space to the 'X' in the Red Water Lagoon.
A player can Unload (e.g. to remove a token from a Cargo Hold and place at location), if their Player Ship is at a location's Port or as described on a card.
- Locations to Unload are not limited to only Bases or Taverns.
- A Player Ship cannot Unload to an At Sea space or other non-Port space.
Captain's Cabin
Player Ships have a Captain's Cabin on their ship boards and it can be used to carry up to a maximum of 3 cards that contain missions, tasks, or other valuables that typically need to be delivered to a Base or Tavern to complete and exchange for Silver Coins or other rewards.
- Except for cards with a padlock icon denoted, cards in a Captain's Cabin are placed face-up and are public knowledge.
- Additional tokens specified by their corresponding card such as Letter token, Pearl of Ocean token, or Treasure Chest tokens, which are not placed in a Cargo Hold, are also placed here and do not count towards the card limit of a Captain's Cabin.
- Passengers, Rafts, Barrels, Crates, Conquistadors' Treasure, Cannons, Sailors, and Officers cannot be placed in the Captain's Cabin.
If after drawing a card, the card would normally be placed into a Captain's Cabin, but it has already reached (or exceeded) its 3-card maximum, the drawn card is instead returned to the game box and left unresolved.
- Exception: The limit of 3 cards in a Captain's Cabin can only be exceeded when a Player Ship defeats an opponent's Player Ship and a player obtains the Lost ship's Captain's Cabin contents.
Players cannot intentionally destroy contents in a Captain's Cabin and they can only be removed from the game by completing them or when the Player Ship is Lost and the contents are not seized.
- Exception: When at a Base or Tavern, Players can 'opt-out' of a non-mandatory card in the Captain's Cabin by returning the card to the game box and foregoing any reward.
Repairing
During Phase 5 (Player's Turn Phase), after completing all Player Ship movements and attacks, if a Player Ship is stopped at a Base or the Docks, a player may use these locations to Repair the ship through adding as many Cannons they want by paying Silver Coins to the supply from their Treasury.
- A player may not add more Cannons onto a Player Ship that does not have an open spot designated for Cannons on their ship board.
Cannon Tokens: A single Cannon token represents about 8 actual guns and their cannoneers that are below deck on a real ship. It costs a player 1 Silver Coin to Repair and purchase a Cannon to add on to their ship's board at a Base or the Docks.
A Cannon's main purpose is to add 1 regular dice per Cannon when the Player Ship is firing its cannonballs in Broadside Battles. A Cannon (e.g. cannoneers) also takes part on equal footing with Sailors by adding 1 regular dice per token when sword dueling in Boarding Battles. Their other purpose is to be an indicator of a Player Ship's condition (e.g. health), where removing the last Cannon from the ship board means the ship is defeated.
- Example: If a Player Ship has 3 Cannons and 2 Sailors, it would roll 3 regular dice in a Broadside Battle, while it would roll 5 regular dice for a Boarding Battle.
A Cannon onboard a Player Ship will cast 1 Vote at end game.
- See 'Viceroy Voting' on page 42 for details.
Recruiting
During Phase 5 (Player's Turn Phase), after completing all Player Ship movements and attacks, if a Player Ship is stopped at a Base, the Docks, or a Tavern, they may use these locations to Recruit as many deck crew, Sailors or Officers, they want by paying Silver Coins to the supply from their Treasury.
- A player may not Recruit Sailors nor Officers onto a Player Ship that does not have an open spot for that type on their ship board.
- Both Sailors and Officers are part of the deck crew, but a Sailor cannot go into a spot designated for Officers, and an Officer cannot go into a spot designated for a Sailor nor a non-matching Officer type.
Sailor Tokens: A single Sailor token represents about 30 seafarers on a real ship. It costs a player 1 Silver Coin to Recruit a Sailor to add on to their ship's board at a Base, the Docks, or a Tavern.
A Sailor is part of the deck crew and their main purpose is to set and trim the sails, which means that the loss of all Sailors will result in a decrease in speed of 1 for the Player Ship. Their other purpose is to participate in close combat during Boarding Battles by adding 1 regular dice per Sailor (or Cannon).
A Sailor onboard a Player Ship or with 'Advanced Rules' in a Plantation with a Militia, will cast 1 Vote at end game.
- See 'Viceroy Voting' on page 42 for details.
Officer Tokens: An Officer token represents a single seafarer who is part of the deck crew, but has the leadership qualities to make the Player Ship they're onboard operate more efficiently. Officer tokens are double-sided with black markings representing the basic side and the yellow markings representing the first-class side.
- During Recruit actions, a basic Officer can be upgraded (e.g. flipped over) to First-Class Officer for 3 Silver Coins.
There are three different types of Officers, and each Player Ship may have 1 of each type in their designated ship board spots.
- Officer abilities only apply to the Player Ship they're present on.
- Officers may also be placed in empty Passenger Cabins, but while there, they have no effect to Player Ship until they are moved into their designated ship board spot during action step of Phase 5 (Player's Turn Phase).
An active Captain onboard a Player Ship will cast 5 Votes at end game and an active Gunner or Fencing Master onboard a Player Ship will cast 3 Votes.
- Officers in a Passenger Cabin or Disembarked will not cast Votes.
- See 'Viceroy Voting' on page 42 for details.
Officer Summary
| Officer | Recruit Cost (Silver Coins) | Abilities |
|---|---|---|
| Captain | 5 | Increase Player Ship's speed by 1. |
| First-Class Captain | 8 (only 3 for upgrade) | Increase Player Ship's speed by 1. Allows Player Ship to use Shoal spaces (wavy-dotted lines). |
| Gunner | 3 | May add 1 additional regular dice when Player Ship is firing its cannonballs in Broadside Battles. |
| First-Class Gunner | 6 (only 3 for upgrade) | May add 1 additional regular dice and allows for 1 reroll of any number of its regular dice when Player Ship is firing its cannonballs in Broadside Battles. |
| Fencing Master | 3 | For each regular dice, may add 1 additional point when Player Ship is sword dueling in Boarding Battles. |
| First-Class Fencing Master | 6 (only 3 for upgrade) | For each regular dice, may add 1 additional point and allows for 1 reroll of any number of its regular dice when Player Ship is sword dueling in Boarding Battles. |
Deck Crew Removal: A Sailor is not an Officer and an Officer is not a Sailor, however both are part of a ship's deck crew. If a card, rule, or other game effect ever says to remove a Sailor/Officer, the owner of the ship always decides which token to remove. If multiple tokens are removed, the owner decides independently for each removal, but must remove the total number if able.
- Example: If a card says to remove 2 Sailors or Officers, the owner can remove 2 Sailors, 2 Officers, or 1 of each.
If a card, rule, or other game effect specifically mentions Sailor, only a Sailor is impacted, not an Officer. If it specifically mentions Officer, only an Officer is impacted, not a Sailor. Cannons are not apart of the deck crew as they are below deck, and are treated independently and seperately.
Transshipments
During Phase 5 (Player's Turn Phase), if a Player Ship is on an Adjacent Space to another Player Ship (even an opponent's), they may transfer any number of Cannons, Sailors, Officers, or any components present in a Passenger Cabin, Cargo Hold, or Captain's Cabin as long as there is room on each Player Ship.
- Transshipments cannot occur if the Weather Marker is at a wind strength of 8 oB or above and at least 1 of the Player Ships is affected.
- Requirements for Transshipment only includes the 'on-map' items listed, and does not apply to exchanging 'off-map' items like Silver Coins that are in a player's Treasury or Action Cards.
- Both owners of the Player Ships must agree to the transfer, through Negotiation.
- Players cannot intentionally destroy their Player Ship by transferring their last Cannon.
- When transferring a component related to a Captain's Cabin card, such as a Passenger, the corresponding card must be transferred as well.
Selling Player Ships
Selling Player Ships: During Phase 5 (Player's Turn Phase), if a Player Ship is at a Base they may sell that Player Ship. The player receives Silver Coins equal to half the ship's cost shown on the corresponding ship board from the supply and places them into their Treasury.
- Any Officers present on the sold Player Ship can Disembark to the Base and later Embark on a new Player Ship.
- Any Cannons or Sailors present on the sold Player Ship are returned to supply (they disperse and find new jobs) and do not impact the sale price of the Player Ship.
- Cannons, Sailors, and Officers cannot be sold at this time or any time.
Scrapping Player Ships: If a player wants to get rid of a Player Ship without the hassle of going back to a Base and selling it, a player may 'scrap' a ship that is at the Docks (as well as at a Base). A player does not receive any Silver Coins for 'scrapping'.
- A player cannot 'scrap' their last Player Ship.
- A Player Ship at a Base will typically be sold for Silver Coins rather than 'scrapped', but none the less, it can be scrapped at Base.
- A Player Ship cannot be 'scrapped' at other non-Docks/non-Base Ports nor be intentionally sunk At Sea; the crew has no intention of swimming with sharks.
- If a Player Ship is at a foreign Docks protected by a Fort or a Plantation with a Militia ('Advanced Rules'), then they need benefit permission to use the Docks.
Buying Player Ships
Buying Player Ships: During Phase 5 (Player's Turn Phase), a player may purchase a new Player Ship by paying Silver Coins equal to a new ship's cost shown on the corresponding ship board to the supply from their Treasury. After purchasing, the player places the Player Ship miniature at a Base they own (foreign Bases not allowed), takes the corresponding ship board, and adds Cannons and Sailors to the new ship board until their designated spots are full.
- A player does not need to have a Player Ship at a Base in order to buy a new Player Ship, but the new Player Ship always starts at a Base.
- A player can only have at most 2 Player Ships in their fleet at any time, and each Player Ship must be different ship types.
Ship-of-the-Line: In addition to the standard types of Player Ships, there is also a Ship-of-the-Line: Heavy Line Battleship (HL). This extremely powerful and expensive Player Ship is not specific to a player color and can only be purchased by the first player to do so.
- With 'Empires Expansion Rules', Ship-of-the-Line: Line Battleship (L)* is available for purchase instead for the Netherlands (orange) and Portugal (red) nations and 2 types of Ship-of-the-Lines are able to be on the map.
- See 'Empires Expansion Rules' manual for details.
When a Ship-of-the-Line ship is Lost, it becomes available for purchase by all players again.
- Through Boarding Battles, players can take ownership of a Ship-of-the-Line, like any other Player Ship, without needing to purchase it. Through this mechanism, it is technically possible with 'Empires Expansion Rules' in effect, for a player to control both types of a Ship-of-the-Line ships.
- See 'End of Battle' on page 38 for details.
Battles
Components denoted with a * use expansion or add-on components and can be skipped if your version of Misty Waters does not contain them.
Theoretically, players can win a game of Misty Waters without participating in any Battles, but most often cannonballs (Broadside Battles) and the clash of swords (Boarding Battles) accompany players throughout. Attacking Player Ships, Forts (or Plantations with a Militias if playing with 'Advanced Rules'), Pirate Ships, other NPC Ships, Sea Monsters, or Battery of Cannons is always to some extent risky, but it may provide rewards as well as limit or weaken the opponent.
Step 1: Selecting Attack Target
An NPC will select an attack target during steps 4, 5, or 6 during Phase 2 (NPC Movement and Attack Phase) and a player will select an attack target during step 2 of Phase 5 (Player's Turn Phase).
- Exception: Sea Monsters will also attack when they first appear typically during Phase 3 (Weather Phase).
In a single turn, 1 attacker can only attack 1 defender. However, a defender can be attacked by multiple attackers, 1 by 1 in the same Round.
An eligible attack target must be in an Adjacent Space to the attacker. However, if the defender is at a Base, a Tavern, or the Docks protected by a Fort, they are protected and cannot be attacked.
- Exception: The owner of a Captured Island is not prevented from attacking a Player Ship at its Docks with their Fort or Player Ship.
- Exception: A Player Ship at a Base or Tavern cannot attack a target unless it is blocked.
- Exception: Certain Wind Force effects may not allow certain attack situations to occur and may even allow for a one-sided Battle.
- See 'Wind Force Effects' on page 18 for details.
- Exception: A Sea Monster cannot attack nor counterattack a Fort nor a Player Ship stopped at any non-At Sea space (e.g. Port, Shoal, Desert Island, Atoll, or Red Water Lagoon).
Step 2: Declaring Battle Type
After selecting an eligible attack target, the attacker must declare what type of Battle they are starting:
- Broadside Battle (e.g. fire cannonballs).
- Boarding Battle (e.g. sword duels).
A Fort, a Pirate Ship, and a Battery of Cannons will always attack via Broadside Battle. Sea Monster don't have Cannons, but their attacks do still follow the Broadside Battle steps, except they inflict damage as described on their corresponding Sea Adventure Card instead of rolling dice. All NPC attacks do risk being counterattacked by the defender via Broadside Battle steps.
- Other NPC Ships are never attackers and are only defenders.
A Fort, a Pirate Ship, a Conquistadors' Caravel*, the Silver Freighter*, a Sea Monster, and a Battery of Cannons cannot be attacked by Boarding Battle.
- These ships have anti-boarding nets, Forts and Battery of Cannons are fortified, and Sea Monsters are protected by the sea.
- Exception: With 'Advanced Rules', Pirate Ships can be attacked by a Boarding Battle.
- See 'Advanced Rules' on page 43 for details.
Only a Player Ship and the Conquistadors' Galleass can be attacked by Boarding Battle.
- Exception: With 'Advanced Rules', Plantation with a Militia are never attackers and can only be attacked via Boarding Battle.
- See 'Advanced Rules' on page 43 for details.
Step 3: Pre-Dice Roll Action Cards
After a Battle type is declared, but before the Battle starts, players may play Action Cards from their hand that are marked with a before-roll icon.
- These Action Cards must be played before the regular dice are rolled in Battle.
- NPCs will never play Action Cards.
The first cards that players play must be Action Cards that prevent the Battle from occurring or cards that reverse the order of attacks between attacker and defender.
- Players can choose not to play these types of Action Cards, but they then cannot play them after they've played other types of Action Cards.
- If an Action Card prevents the Battle from occurring, the attacker does not get to choose a new attack target that Round.
The first Action Card played is by the defender, then the attacker, and so on alternately. This continues until a player no longer can play or chooses not to play another Action Card. At which point their opponent may play any remaining Action Cards they choose.
- Players can only play Action Cards applicable to a Battle situation and they will have a Battle icon and a before-roll or after-roll symbol on them. Cards may also have other requirements (i.e. Wind Force limitation) to be playable.
- Example: In response to an attack on your Player Ship, a player cannot play 'Saboteur' to target an opponent's Port. That Action Card effect can only be played as a player action in step 3 of Phase 5 (Player's Turn Phase). A player may however play 'Saboteur' to target the opponent in the Battle with the cards' other, Battle-specific, effects.
No Copies: An individual player cannot play a copy of an Action Card that they have already played in that Battle, but it is possible to play a copy of an Action Card that their opponent has played.
- If both players play identical Action Cards that give priority of firing cannonballs (e.g. rolling regular dice) for Broadside Battles, the effects cancel each other out and the attacker is still the first to roll regular dice.
Step 4A: Broadside Battle
If Broadside Battle (e.g. fire cannonballs) was declared and both players have finished playing pre-dice roll Action Cards, then the attacker rolls up to as many regular dice as it has Cannons.
- Other players roll the maximum regular dice for an NPC.
- NPCs do not have Officer, Experience Tokens, or Action Cards.
- Sea Monsters do not roll regular dice (no Cannons), but instead add 1 Damage Marker to an NPC ship, or inflict the damage described on the Sea Adventure Card to Player Ships.
- Exception: For Conquistadors' Galleass remove 1 Sailor instead.
- Exception: The Sea Serpent Sea Monster forces opponent to roll as many regular dice as they have Sailors instead of Cannons.
| Attacker / Counter Attacker | # of Cannons (e.g. # of regular dice) |
|---|---|
| Player Ships | As many currently on corresponding ship board. +1 for Gunner for Broadside Battles. |
| Fort | 4 Cannons (Full-Strength). 3 Cannons (Damaged). |
| Plantation with a Militia | With 'Advanced Rules', n/a - Boarding Battles only. |
| Pirate Ships | 4 Cannons (Full-Strength). 3 Cannons (Damaged). |
| Conquistadors' Caravels* | 2 Cannons (Full-Strength). 1 Cannon (Damaged). |
| Conquistadors' Galleass | 0 Cannons. |
| Silver Freighter* | 0 Cannons. |
| Flying Dutchman* | n/a - Immune to damage/Battles and removes from map any ship or Sea Monster in Adjacent Spaces. |
| Sea Monsters | n/a - Adds 1 Damage Marker to an NPC Ship (against Conquistadors' Galleass remove 1 Sailor instead), and against Player Ships inflict the damage described on the Sea Adventure Card: Leviathan removes 1 Cannon and 1 Sailor. Megalodon removes 1 Cannon. Kraken removes 1 Cannon and 2 Sailors/Officers. Hydra removes all Sailors and Officers, except Captain. Sea Serpent removes 1 Cannon. Sperm Whale removes 1 Cannon and moves the ship. |
For each regular dice rolled (e.g. fire cannonball) during a Broadside Battle, the number of the dice represents a result (see dice result table for details).
Rerolls and Action Cards: Various game effects may allow an attacker to reroll regular dice or modify the results, these effects should be resolved in the following order:
- Ricochet rerolls (4s and 5s, but only if two ships are Battling).
- First-Class Gunner rerolls (may reroll each dice once).
- Experience Token rerolls (may reroll a dice once per spent token).
- Must declare total number of Experience Tokens in advance.
- Previously played Action Card modifications.
The attacker can then play any Action Cards from their hand they choose and their effects are resolved in the order they were played.
- NPCs will never play Action Cards.
- These Action Cards must be played after the regular dice are rolled and rerolled and must be applicable to a Broadside Battle situation.
- Same as before, Action Cards played cannot be copies.
Broadside Battle Dice Result
6 - Hull Hit!
- Remove 1 Cannon for a Player Ship.
- If it is the last Cannon, the Player Ship is defeated.
- Add 1 Damage Marker to a Fort, a Pirate Ship, a Conquistadors' Caravel*, or the Last Day Temple*.
- They can only receive 1 Damage Marker per Battle, unless three or more 6s are rolled.
- If already a Damage Marker, target is defeated.
- Silver Freighter* and Battery of Cannons are defeated (1 hit to defeat).
- No damage occurs for the Conquistadors' Galleass due to its massive hull.
4 or 5 - Ricochet! If two ships are Broadside Battling, the cannonballs bounce off the surface of the sea and each die is rerolled until a result other than 4 or 5 is rolled.
- Exception: Miss with Silver Freighter*, it's too fast.
- This is a miss if either attacker or defender is a Sea Monster or a land-based targets like a Fort, Battery of Cannons, or with 'Advanced Rules' the Last Day Temple*.
2 or 3 - Miss! No damage occurs.
- Exception: On '2' dice rolls, the Silver Freighter* is disabled by hitting its masts!
1 - Deck Crew Hit!
- Remove 1 deck crew (e.g. 1 Sailor or 1 Officer) for a Player Ship. If none, then no damage.
- Remove 1 Sailor for the Conquistadors' Galleass. If it is the last Sailor, it is defeated.
- No damage occurs for a Fort, a Pirate Ship, a Conquistadors' Caravel*, Silver Freighter*, the Battery of Cannons, or the Last Day Temple*.
Sea Monster! (the table's dice symbol is a '#' rather than pips) Sea Monsters are defeated after 1 damage as described on their card.
Counterattack: When the attacker has completed their attack and the resulting damage, still during the attacker's turn, the defender now counterattacks in the same manner (roll+reroll+cards) as the attacker.
- Exception: The defender cannot counterattack if they were already defeated.
If the defender has received damage during the attacker's attack, they may have fewer regular dice to roll than they had at the start of the Battle. The counterattack happens even in situations where normally the defender couldn't attack the attacker (e.g. attacker at a protected Port).
- Exception: A Sea Monster still cannot counterattack a Fort or a Player Ship stopped at any non-At Sea space (e.g. Port, Shoal, Desert Island, Atoll, or Red Water Lagoon) due to shallow water.
- Exception: The effects of Wind Force still apply and may cause a one-sided Battle by preventing a counterattack from occurring.
- See 'Wind Force Effects' on page 18 for details.
After the counterattack has completed, the Broadside Battle ends.
Step 4B: Boarding Battle
If Boarding Battle (e.g. sword duels) was declared instead and both players have finished playing pre-dice roll Action Cards, then both attacker and defender simultaneously roll as many regular dice as they have Sailors and Cannons up to a maximum of 10 dice and a maximum of double their opponent's dice.
- Officers do not count towards this calculation, but the below deck 'cannoneers' (e.g. Cannons) do join their Sailor crewmates to take part in hand-to-hand combat.
- When an NPC is involved in a Boarding Battle, other players roll regular dice for them. NPCs do not have Officers, Experience Tokens, or Action Cards.
- Example: An attacker has 6 Sailors and 6 Cannons, if the defender only has 1 Sailor and 1 Cannon, the attacker cannot roll more than 4 regular dice.
Large Crew: If either attacker or defender involved in a Boarding Battle have more than 5 dice, then the Battle is divided into two clashes, dividing the dice in half.
- If there is an odd number of dice, the extra die goes into the first clash.
- If within a clash an attacker or defender have more than double the dice of their opponent, they remove dice until that isn't so.
- Finish resolving the first clash, including ties, before rolling the second clash.
- All bonuses and modifiers in the first clash also apply to the second clash.
- Example: An attacker has 6 dice and the defender has 4 dice, there will be separate clashes, both 3 vs 2. If the defender only had 3 dice instead, then there'd still be separate clashes, but a 3 vs 2 and a 2 vs 1.
Duel Arrangement: The player with the least regular dice involved arranges their rolled dice first in order from highest to lowest. In case of tie, the defender arranges first. Then, their opponent arranges their dice in a parallel row and in reverse order, from lowest to highest. If they have any remaining dice (which should be those with the highest values), they must choose where in a second row to place the remaining dice, behind any dice of their choice.
- A second-row dice will add its number to the total max 6 in that individual duel.
- No more than 3 dice can be involved in any individual duel.
- NPCs place second-row dice with the priority of highest behind lowest value.
Rerolls and Action Cards: Regardless of who arranged dice first, the defender now applies their various game effects that may allow them to reroll regular dice or modify the results, these effects should be resolved in the following order:
- First-Class Fencing Master rerolls (may reroll each dice once).
- Experience Token rerolls (may reroll a dice once per spent token).
- Must declare total number of Experience Tokens in advance.
- Previously played Action Card modifications.
The defender can then play any Action Cards from their hand they choose and their effects are resolved in the order they were played.
- These Action Cards must be played after the regular dice are rolled and rerolled and must be applicable to a Boarding Battle situation.
- NPCs will never play Action Cards.
- Same as before, Action Cards played cannot be copies.
Once the defender has completed their rerolls and Action Cards, the attacker follows in the same manner (rerolls + cards) as the defender.
At the end, additional points for both the attacker and defender can be added to all of their dice from Fencing Masters (e.g. +1 to each regular dice) and from played Action Cards. A single duel cannot ever exceed the value of 6.
Duel Results: Each individual duel evaluates independently, 1 at a time, but is considered simultaneous. The opponent with the lowest total score for each duel loses the duel, they remove those regular dice (including any second-row dice), and also remove 1 Sailor for each dice removed. If they have no more Sailors to remove, they remove a Cannon instead.
Ties: For any dice where the duel was a tie, repeat the previous step (4B) of a Boarding Battle (roll, arrange, reroll/action cards) as before. After resolving the second duel results, the Boarding Battle ends. If there remain any further ties, do not repeat again, they remain unresolved until a future Battle.
Boarding Battle Example: A 'blue' ship with 3 Sailors and 2 Cannons attacks a 'green' ship with 1 Sailor and 3 Cannons through a Boarding Battle. The 'blue' ship rolls 5 regular dice and the 'green' ship rolls 4 regular dice simultaneously.
The 'green' ship is the defender and also has the fewest dice so they line-up their dice first from highest to lowest. The 'blue' ship has the most dice, so they line-up their dice second, in reverse order from lowest to highest. Since the 'blue' ship has more dice, they can place their remaining dice in a second row. They decide to move their '5' die behind their '1' die and force a tie.
Neither the 'blue' or the 'green' ship have any rerolls or modifications to consider from Fencing Masters, Experience Tokens, or played Action Cards. The results of the first and third duel is a tie, so those dice remain. The second duel is won by the 'green' player, so those dice are removed and the 'blue' player removes a Sailor. The fourth duel is won by the 'blue' player, so those dice are removed and the 'green' player removes a Sailor.
All remaining dice, from tied duels, are rerolled and a second set of duels take place. This second run through results in both 'blue' and 'green' ships removing a Sailor. However, since the 'green' ship doesn't have a Sailor to remove, they will instead remove a Cannon. The Boarding Battle is over, and both ships remain.
| Attacker / Defender | # of Boarding Battle Dice (Sailors + Cannons = # of regular dice) |
|---|---|
| Player Ships | As many Sailors and Cannons currently on ship board. |
| Fort | n/a - Broadside Battles only. |
| Plantation with a Militia | With 'Advanced Rules', as many currently on the island (2 Sailors max + 0 Cannons). |
| Pirate Ships | n/a - Broadside Battles only. With 'Advanced Rules', 0 Sailors + 4 Cannons (Full-Strength) or +3 Cannons (Damaged). |
| Conquistadors' Caravels* | n/a - Broadside Battles only. |
| Conquistadors' Galleass | As many currently on corresponding ship board, starts with 10 Sailors + 0 Cannons. |
| Silver Freighter* | n/a - Broadside Battles only. |
| Flying Dutchman* | n/a - Immune to damage/Battles and removes from map any ship or Sea Monster in Adjacent Spaces. |
| Sea Monsters | n/a - Broadside Battles only. |
| Battery of Cannons |
Step 5: End of Battle
Whether a Broadside Battle or a Boarding Battle has ended, all played Action Cards, even cards that resulted in no practical use, are returned to the game box and are not placed in the Discard Pile.
During a Battle, attackers and defenders can be defeated and removed from play. If a participant is defeated in the middle of a Battle, Step 4 of the Battle ends immediately.
- This can result in a one-sided attack with no counterattack during a Broadside Battle.
- During a Boarding Battle, duels happen simultaneously, so all duels should always be resolved.
It may also happen, that neither attacker nor defender is defeated when a Battle comes to an end. In which case, the attacker or defender may on a future turn continue with a new Battle or instead escape by moving away.
Damage Markers: Damage Markers* are used to denote how much damage an NPC or a Fort has taken, but the physical components may not be contained in your version of Misty Waters. If this is the case, where rules say to add a Damage Marker, instead simply flip over the cardboard token from the full-strength side to the damaged side. Furthermore, all tokens should start on the full-strength side until receiving damage.
Damage Markers are not limited to the physical number in the game, in the rare circumstance that players run out, use another token as a placeholder.
Rewards: A player may receive Silver Coins, Experience Tokens, Pirate Ship tokens, or Sea Monster tokens for defeating their opponent. If a player defeats a ship, they may also be able to seize various contents that are onboard the ship, or potentially even the ship itself!
- An NPC that defeats an opponent does not receive any Silver Coins, Experience Tokens, Pirate Ship tokens nor Sea Monster tokens that otherwise a winning player would receive. The components remain in the supply or are removed.
- An NPC, a Fort, or with 'Advanced Rules' a Plantation with a Militia does not seize contents onboard a ship (or the ship itself), and all content on the defeated ship sinks and is removed.
Defeated Forts: A Fort cannot receive more than 1 Damage Marker in the same Broadside Battle unless their opponent rolls three or more '6's.
If a Fort ever receives their second Damage Marker during a Broadside Battle, they are immediately defeated and the Battle ends.
- Remove the Fort token from the map (which can be built again in the future by any player).
- The opponent player receives 2 Experience Tokens from the supply and places it into their Treasury.
Defeated Plantation with a Militias: With 'Advanced Rules', if a Plantation with a Militia ever has 0 Sailors during a Boarding Battle they are immediately defeated and the Battle ends.
- Do not remove the Plantation token from the map.
- Although the opponent player does not directly receive a reward, with no Militia, the island should be unprotected and the opponent can re-Capture the island for themselves.
- See 'Capturing' on page 24 for details.
Defeated Conquistadors' Caravels*: A Conquistadors' Caravel* cannot receive more than 1 Damage Marker in the same Broadside Battle unless their opponent rolls three or more '6's.
If a Conquistadors' Caravel* ever receives their second Damage Marker during a Broadside Battle, they are immediately defeated and the Battle ends.
- Remove the Conquistadors' Caravel* from the map.
- The opponent player receives 2 Experience Tokens from the supply and places them into their Treasury.
- Silver Coins are not reward for NPC 'Caravels'.
- Also, if the opponent was a Player Ship, place a Treasure Chest token in their Captain's Cabin. Otherwise, the treasure sinks to the bottom of the sea with the ship. It can be taken to Base or Tavern and sold for 7 Silver Coins.
Defeated Conquistadors' Galleass: If the Conquistadors' Galleass ever removes their last Sailor during a Battle, they are immediately defeated and the Battle ends.
- Remove the Conquistadors' Galleass from the map.
- If defeated during a Broadside Battle, the opponent player receives from the support of their nation's government, 5 Silver Coins and also 2 Experience Tokens from the supply and places them into their Treasury.
- The ship sinks too fast from a Broadside Battle and the Conquistadors' Treasure in the below deck Cargo Hold goes to the bottom of the sea and is removed before an opportunity to seize. This will trigger end game at the end of the Round.
- If defeated during a Boarding Battle by a Player Ship, place the Conquistadors' Treasure token in their Cargo Hold. It can be taken to their Base to win the game!
- If needed to make room for the Conquistadors' Treasure, a player is always able perform a Transshipment before the ship sinks, regardless of Wind Force effects.
- The opponent player receives 1 Experience Token from the supply and places it into their Treasury.
- Silver Coins are not reward for Boarding Battles.
Defeated Silver Freighter*: If the Silver Freighter* ever receives any damage or is disabled (a '2' dice roll) during a Broadside Battle, they are immediately defeated and the Battle ends.
- Remove the Silver Freighter* from the map and from the support of their nation's government, the opponent player receives 5 Silver Coins and also 2 Experience Tokens from the supply and places them into their Treasury.
- Also, if the opponent was a Player Ship and the ship received no damage (no '6' dice rolls) but was just disabled ('2' rolled), place a Treasure Chest token in their Captain's Cabin. It can be taken to Base or Tavern and sold for 7 Silver Coins.
- The ship is sinking too fast from a direct damage (a '6' dice roll) and the Treasure Chest token in the below deck Cargo Hold goes to the bottom of the sea and is removed before an opportunity to seize.
Defeated Pirate Ships: A Pirate Ship cannot receive more than 1 Damage Marker in the same Broadside Battle unless their opponent rolls three or more '6's.
- With 'Advanced Rules', Pirate Ships can be attacked by a Boarding Battle and receive Damage Markers.
- See 'Advanced Rules' on page 43 for details.
If a Pirate Ship ever receives their second Damage Marker during a Battle, they are immediately defeated and the Battle ends.
- From the support of their nation's government, the opponent player receives 5 Silver Coins and also 2 Experience Tokens from the supply and places them into their Treasury.
- With 'Advanced Rules', if a Pirate Ships is defeated from a Boarding Battle, 0 Silver Coins and 1 Experience Token is rewarded instead.
- See 'Advanced Rules' on page 43 for details.
- With 'Advanced Rules', if a Pirate Ships is defeated from a Boarding Battle, 0 Silver Coins and 1 Experience Token is rewarded instead.
- Also, the opponent player places the corresponding Pirate Ship token into their Treasury as a trophy. The citizens of the Misty Waters will cast 5 Votes at end game for each Pirate Ship defeated.
- See 'Viceroy Voting' on page 42 for details.
Defeated Sea Monsters: If a Sea Monster ever receives a damage as described on its corresponding Sea Adventure Card during a Broadside Battle, they are immediately defeated and the Battle ends.
- The corresponding Sea Adventure Card is returned to the game box.
- From the bounties placed on all Sea Monsters, the opponent player receives 5 Silver Coins and also 2 Experience Tokens from the supply and places them into their Treasury.
- Also, the opponent player places the corresponding Sea Monster token into their Treasury as a trophy. The citizens of the Misty Waters will cast 5 Votes at end game for each Sea Monster defeated.
- See 'Viceroy Voting' on page 42 for details.
Defeated Battery of Cannons: If a Battery of Cannons ever receives any damage during a Broadside Battle, they are immediately defeated and the Battle ends.
- Remove the Battery of Cannons token from the map.
- The opponent player receives 1 Experience Token from the supply and places it into their Treasury.
Defeated Last Day Temple*: Last Day Temple cannot receive more than 1 Damage Marker in the same Broadside Battle unless their opponent rolls three or more '6's.
With 'Advanced Rules', if the Last Day Temple* ever receives their second Damage Marker during a Broadside Battle, it is immediately defeated and the Battle ends.
- Remove the Last Day Temple* token from the map.
- The opponent player receives 5 Silver Coins and also 2 Experience Tokens from the supply and places it into their Treasury.
Defeated NPC Summary
| Unit | Defeated Criteria | Result | Reward |
|---|---|---|---|
| Fort | 2 Damage Markers | Remove token | 2 Experience Tokens |
| Plantation with Militia | 0 Sailors | Do not remove token | None, likely re-Capture |
| Conquistadors' Caravel* | 2 Damage Markers | Remove token | 2 Experience Tokens + Treasure Chest token worth 7 Silver Coins |
| Conquistadors' Galleass | 0 Sailors | Remove Token | 5 Silver Coins + 2 Experience Tokens for Broadside Battle. 1 Experience Token + the Conquistadors' Treasure for Boarding Battle. |
| Silver Freighter* | 1 damage or disabled | Remove Token | 5 Silver Coins + 2 Experience Tokens + if disabled, also a Treasure Chest token worth 7 Silver Coins |
| Pirate Ships |
Defeated Player Ships
When the last Cannon is removed from a Player Ship's ship board, the Player Ship is defeated and may sink to the bottom of the sea where it is Lost.
When a player has a Player Ship defeated for the first time, their nation's government will send a support of 5 Silver Coins. When a player has a Player Ship defeated for the second time, remove their matching Skull-Rock as their nation's government has sent a specialist (e.g. an exorcist) to remove the skull curse. There are no further benefits for additional defeats.
However, if a player ever removes their last Player Ship and cannot afford to buy a new ship, their nation's government will bail them out by donating a new Sloop (S). This does require the player to return to the supply from their Treasury any Silver Coins above 5 total. During the action step of the player's next turn (e.g. Phase 5 - Player's Turn Phase), this new Player Ship can be placed at the player's starting Base.
- This will cause a player to miss a Round worth of Player Ship movement and attack regardless of when in a Round a ship is defeated.
Lost Player Ship from Broadside Battle: If a Player Ship was defeated from a Broadside Battle (e.g. fire cannonballs), the ship is Lost: Remove the Player Ship, any remaining components onboard after seizing, and the corresponding ship board.
- From the support of their nation's government, the opponent player receives 5 Silver Coins and also 2 Experience Tokens from the supply and places them into their Treasury.
- Exception: Defeating a Sloop (S) or Caravel (C) does not earn Silver Coins.
If the opponent was a Player Ship, it can 'rescue' (i.e. seize) people abandoning the defeated Player Ship by transferring any remaining Sailors, Fencing Masters, Gunners, Passengers, or Rafts (e.g. castaways) of their choice in addition to seizing any cards or other contents from the Captain's Cabin.
- The opponent Player Ship must have room for any components seized, except the limit of 3 cards in a Captain's Cabin can be exceeded.
- A Captain cannot be seized as they respectfully go down with their ship and is removed.
- The ship is sinking too fast and anything in the below deck Cargo Holds including the Conquistadors' Treasure goes to the bottom of the sea and is removed before having an opportunity to seize.
- Forts and NPCs cannot seize, and all content on the defeated Player Ship sinks and is removed.
Lost Player Ship from Boarding Battle: If the Player Ship was defeated from a Boarding Battle (e.g. sword duels), the ship is not necessarily Lost. First, all Officers are removed from the losing Player Ship's board as they all fought bravely to the end. Second, the opponent player receives 1 Experience Token from the supply and places it into their Treasury.
If the opponent was not a Player Ship, then the ship is Lost: Remove the Player Ship, any remaining components onboard, and the corresponding ship board.
Otherwise, if the opponent was a Player Ship, the opponent player chooses 1 of 4 decisions as to what to do with the defeated Player Ship.
-
Seize and Sink: The opponent Player Ship can seize any Passengers, or Rafts (e.g. castaways) of their choice from Passenger Cabins in addition to seizing any cards or other contents from the Captain's Cabin. Also, unlike Broadside Battles, Boarding Battles allow the time to also seize the below deck Cargo Holds for Barrels, Crates, or the Conquistadors' Treasure.
- The opponent Player Ship must have room for any components seized, except the limit of 3 cards in a Captain's Cabin can be exceeded.
- If needed to make room, a player is always able to perform a Transshipment before sinking the ship, regardless of Wind Force effects.
- After seizing, the Player Ship is Lost and the Player Ship, any remaining components onboard, and the corresponding ship board are removed.
-
Unite into the Fleet: If the opponent player has less than 2 Player Ships on the map (e.g. in their fleet), they can take over control of the defeated Player Ship and its corresponding ship board.
- Except for Ship-of-the-Line miniatures, swap the new Player Ship miniature into the new nation's color.
- If a player is unable to do this due to that ship type already being in their fleet or they don't have that ship type available to their nation (e.g. Frigate (F)* or Fluyt (T)*), then they cannot choose option 2.
- The opponent player must transfer at least 1 Cannon or more from their original Player Ship to their new Player Ship. In this situation, they can do a one-time exchange of a Sailor for a Cannon on the new Player Ship. If this would cause the original Player Ship to have 0 Cannons, then the opponent cannot choose option 2.
- A player is always able to perform a Transshipment before taking on the new ship, regardless of Wind Force effects.
- Except for Ship-of-the-Line miniatures, swap the new Player Ship miniature into the new nation's color.
-
Swap Ships: The opponent player can take over control of the defeated Player Ship and its corresponding ship board by transferring some or all of their original Player Ship's contents (Sailors, Cannons, Officers, Cargo Hold contents, Passenger Cabin contents, and Captain's Cabin contents) onto the defeated Player Ship, and cause their original Player Ship and corresponding ship board to be removed.
End Game
Components denoted with a * use expansion or add-on components and can be skipped if your version of Misty Waters does not contain them.
Grand Finale
At the start of the first Round XII, the conquistadors, horrified by the development of events in the Misty Waters, load their treasure onto their archaic, barely defendable ship, and begin their escape to their home nation.
The player with the Priority Token, places the Conquistadors' Galleass on the Adjacent Space to the 'X' at the Red Water Lagoon. If this space is occupied, it starts on the next unoccupied space along its route. The player also places the corresponding ship board next to the game board with 10 Sailors (0 Officers) from the supply on it and the Conquistadors' Treasure token in its Cargo Hold.
- Exception: This does not occur if any player has reached the 'X' before Round XII and has acquired the Conquistadors' Treasure or the Conquistadors' Galleass.
The game does not end after completing Round XII, and the Wheel of Time Marker continues to move clockwise. After Round XII, the Conquistadors' Galleass will move each Round during Phase 2 and utilize the grey arrows to make progress towards either the north (N) exit space ('Paso del Norte') or the south (S) exit space ('Paso del Sur').
- Like other NPC Ships, the Conquistadors' Galleass will not move in the Round that they first appear.
Acquiring the Galleass: If, before Round XII, a player moves a Player Ship to the Adjacent Space to the 'X' at the Red Water Lagoon, they can swap their own ship and launch the Conquistadors' Galleass themselves under their control. The original Player Ship must be abandoned as part of this swap. As a player action during step 3 of Phase 5 (Player's Turn Phase), the player can:
- First, remove their Player Ship miniature, corresponding ship board, and anything remaining onboard including content in its Captain's Cabin, Passenger Cabin, and Cargo Hold.
- The player can perform a Transshipment first, but the only components the Conquistadors' Galleass can receive is a Fencing Master and a Captain.
- Then second, the player places the Conquistadors' Galleass on the Adjacent Space to the 'X' at the Red Water Lagoon and also takes the corresponding ship board with 10 Sailors from the supply on it and the Conquistadors' Treasure token in its Cargo Hold.
After the player has taken over the Conquistadors' Galleass, it is treated as a regular Player Ship with a speed of 4 (before speed modifications) except:
- It cannot attack nor counterattack, but it can defend in a Boarding Battle.
- 0 Cannons, and is only defeated when all 10 Sailors are removed.
- Only damage related to removal of Sailors is considered, including from Sea Monsters, as its hull is too massive to consider any other kind of damage.
- When defeated, it is always Lost after onboard components are seized, an opponent can never unite it into the fleet, swap it, or use it as a 'Prize Ship'.
- It cannot stop at a Port, besides a Base, but it can pass through a Port as part of its movement.
- It does not have a Captain's Cabin nor a Passenger Cabin and cannot Embark/Disembark nor draw Sea Adventure Cards (or any other cards).
- Since it's controlled by a player, it does not have to follow the grey arrows, but it is always able to exit (not enter) the Red Water Lagoon by crossing the Shoals on the east (E) side, but other Shoals still require a First-Class Captain or applicable Action Card.
- The ship's Maximum Range is not affected by Wind Force effects below a wind strength of 3 oB and it is unaffected by any Sailor/Officer or Cannon removal effects.
Loading the Treasure: Instead of acquiring the Conquistadors' Galleass, if, before Round XII, a player moves a Player Ship to the Adjacent Space to the 'X' at the Red Water Lagoon, the Conquistadors' Treasure can be Loaded into the Player Ship's Cargo Hold.
- A Player Ship can also Unload components from their Cargo Hold to the 'X' if they need to make room in their Cargo Hold for the Conquistadors' Treasure.
Last Day Temple*: With 'Advanced Rules', the Last Day Temple* must be removed first before being able to acquire the Conquistadors' Galleass or Load the Conquistadors' Treasure from the Adjacent Space to the 'X'.
- See 'Advanced Rules' on page 43 for details.
Victory 1 – Conquistadors' Treasure
Players can battle and attempt to defeat the Conquistadors' Galleass, but they're only able to seize the Conquistadors' Treasure with a Player Ship through a Boarding Battle. There are other ways beyond seizing to obtain the Conquistadors' Treasure.
- See 'Grand Finale' on page 41 for details.
Once a Player Ship has the Conquistadors' Treasure in their Cargo Hold, they can immediately win the game if they bring the treasure to their Base. Opponent Player Ships may attempt to defeat and stop them from victory or even worse, seize the Conquistadors' Treasure from them after a Boarding Battle and attempt to earn victory for themselves.
- Foreign Bases and 'Prize Ships' cannot be used to obtain victory this way. However, purchased Bases can be used.
Victory 2 – Island Conquest
If at the end of two consecutive Rounds, a player has control of 3 or more Captured Islands, they have won the game!
- Exception: 4 or more Captured Islands are required for victory in a game of two player or 'Team Mode' game.
- Exception: Victory cannot be obtained this way in 'Solo Mode' or 'Cooperative Mode'.
- See 'Solo & Cooperative' manual for details.
- Exception: In the unlikely circumstance where more than 1 player has accomplished this, proceed to 'Viceroy Voting' with the tied players only.
Victory 3 – Viceroy Voting
If the Conquistadors' Treasure is removed from play, whether by escaping with the Conquistadors' Galleass reaching an exit space or sinking with a defeated ship, then the game ends at the conclusion of that Round. If during Phase 6 (Reset Phase) of that Round, no other victory conditions have been met, then players proceed to voting for Viceroy of the Misty Waters to determine the winner.
All people of the archipelago will participate in voting and provide their Votes to the player who has earned their respect and gained their attention. From workers brought in to support a player's Captured Islands, to the below deck cannoneers and the deck crew above on Player's Ships, to the natives who appreciate making trophies of Pirate Ships and Sea Monsters or accept bribes, to a rescued castaway. In Misty Waters, democracy is found in its more 'developed' form as the Votes of citizens of 'greater value' to the community have Votes of greater weight.
| Voters | # of Votes |
|---|---|
| Island Workers | 5 Votes per Fort, Plantation, or Mine on player's Captured Island. |
| Captains (1) | 5 Votes per active Captain on a Player Ship. |
| Other Officers (1) | 3 Votes per active Gunner or Fencing Master on a Player Ship. |
| Remaining Crew | 1 Vote per Sailor or Cannon on a Player Ship. With 'Advanced Rules', also count Sailors in a Militia. |
| Natives | 5 Votes per Pirate Ship or Sea Monster token in player's Treasury. Also, 5 Votes per 'Vote Auction' won. |
| Rescued Castaways | 4 Votes per Raft in player's Treasury. |
(1) Officers not on a Player Ship (e.g. ones that are in a Passenger Cabin or have been Disembarked), do not Vote.
Vote Auction: After the initial Votes have been tallied and made public, there is a bidding war for the Votes of the remaining natives of the Misty Waters. These indigenous islanders are completely uninterested in the colors of the flags flying over the archipelago, so a player needs to win a bid to convince them and acquire their support and Votes.
For each Captured Island, all players will secretly bid for Votes of the natives of that island. Each auction is separate and performed after the previous auction, 1 by 1. To bid, players will privately take any amount of Silver Coins from their Treasury into a closed hand. When all players are ready, they will simultaneously open their hand and reveal their bid for that auction. The player who bid the most receives 5 Votes, and all other players receive nothing. All Silver Coins that were bid from all players are returned to the supply, and the next auction, if any, begins.
- To make the bidding more transparent, players are suggested to use a Passenger token as a proxy for each Captured Island auction won.
- If there is a tie for the most Silver Coins bid, no player has convinced the natives of that island to cast a Vote for them, so neither player receives any Votes and all Silver Coins are still returned to the supply.
- If the highest bid is 0 Silver Coins, no Votes are rewarded from the natives of that island.
- As always, players can convert coins to any denomination (e.g. Silver Coins, Gemstones*, Gold Coins) at any time and contents in a Treasury are not public information.
Viceroy of the Misty Waters: After the 'Vote Auction', add the additional Votes to their previous total. The player with the most Votes is the winner and The Viceroy of the Misty Waters! They will wisely manage the archipelago, taking care of its citizens, while also wallowing in luxuries, growing fat from laziness, and eventually die content in their old age from overeating and abusing a variety of other pleasures.
- If there is a tie for most total Votes, all tied players have a final confrontation to determine the winner.
- Each tied player forms an individual pool of tokens by collecting all of their Cannons and Sailors currently onboard all of their Player Ships and all of their Sailors in a Plantation with a Militia.
- See 'Advanced Rules' on page 43 for details.
- No Action Cards are played, no Officer abilities, no Experience Tokens, and no other forms of aid can be used.
- Each tied player with 1 or more tokens in their pool rolls 1 regular dice simultaneously. The player(s) with the lowest dice remove 1 token from their pool. If all dice are tied, no tokens are removed.
- Repeat until only 1 player has tokens remaining in their pool, who is then declared the winner!
- Each tied player forms an individual pool of tokens by collecting all of their Cannons and Sailors currently onboard all of their Player Ships and all of their Sailors in a Plantation with a Militia.
Advanced and Variant Rules
Rules denoted with a * use expansion or add-on components and can be skipped if your version of Misty Waters does not contain them.
'Advanced Rules' and 'Variant Rules' can be used to mix up the gameplay of Misty Waters or make for a more challenging game. Any of these alternate rules should be agreed to by the majority of players and declared in step 7 of the initial setup.
Advanced Rules
'Advanced Rules' can be included separately or as an entire package. It is recommended to only use these rules with players who are comfortable with the standard Misty Waters rules.
Last Day Temple*: During setup, place the Last Day Temple* miniature on top of the Conquistadors' Treasure token that is on the 'X' in the center of the map at the Red Water Lagoon.
When a Player Ship is at the Adjacent Space to the 'X' in the Red Water Lagoon, it cannot acquire the Conquistadors' Galleass nor the Conquistadors' Treasure as normal until it opens a way through the walls of the Last Day Temple*. To open the walls, a Player Ship must perform a Broadside Battle against the Last Day Temple*.
- A hull hit (a '6' dice roll) adds a Damage Marker to the Last Day Temple*.
- A second Damage Marker removes the Last Day Temple* miniature, opens up its walls, and grants access.
- Last Day Temple* cannot receive more than 1 Damage Marker in the same Broadside Battle unless three or more '6's are rolled.
- The Last Day Temple* is a land-based target and therefore no ricochets occur.
- The Last Day Temple* has 0 Cannons and cannot damage an attacker and cannot participate in a Boarding Battle.
The player that causes the Last Day Temple* to be removed is the first to search the ruins and receives 5 Silver Coins and 2 Experience Tokens and places them into their Treasury.
Priority Token Negotiation: As part of a Negotiation, the Priority Token can be exchanged between players, but only once per Round at the end of Phase 6 (Reset Phase). After step 3, where a new player has received the Priority Token, that player may choose to Negotiate and give the Priority Token to another player. If they do, the next Round will begin, and the entire queue of player turn-order has shifted accordingly. If they choose to not Negotiate or no other player is interested in Negotiating, then the current owner of the Priority Token starts the next Round.
- The Priority Token is considered an off-map component and therefore the requirements of Transshipments do not apply.
- This option is not available in team play mode.
- The Priority Token cannot be traded in such a way that the same player has it for 2 consecutive Rounds.
- Players that do not have the Priority Token may only Negotiate to receive the Priority Token. They may not Negotiate for another player to receive it, nor Negotiate to prevent another player from receiving it.
Additional Action Cards: During Phase 4 (Drawing Action Cards Phase), a player may spend 1 Experience Token to draw an additional Action Card from the pool of drafted cards or top of Discard Pile.
- A player may spend more than 1 Experience Token, drawing an additional Action Card for each.
- For each additional drafted card drawn, the next player replenishes the remaining drafted cards with an Action Card from the top of the Deck.
Spending Experience Tokens for additional Action Cards will increase the size of the hand, but a player cannot have more than 9 cards in hand. If after drawing all cards a player has more than 9 cards in hand, they will always discard cards immediately down to 9.
Example: At the start of Phase 4 (Drawing Action Cards Phase), Bernard has 6 cards in hand. He first draws 1 card from the drafted pool as normal (7 cards). Bernard then chooses to spend an Experience Token to draw an extra card from the drafted pool (8 cards) and a 2nd Experience Token to draw an extra card from the top of the Discard Pile (9 cards). Even though he is at the hand limit. Bernard sees that a great card is now on top of the Discard Pile. He chooses to spend a 3rd Experience Token to draw one more card from the top of the Discard Pile (10 cards). Bernard ends his Phase 4 with 10 cards in hand and must choose 1 card to discard to the top of the Discard Pile (9 cards). When done, Bernard then passes the drafted pool to Alex, who replenishes the pool by drawing 1 card from the top of the Action Card Deck, because Bernard drew 2 cards from the drafted pool instead of 1.
Pirate Ship Boarding Battles: When a Pirate Ship attacks it will still always choose a Broadside Battle, but now it can also be a defender in a Boarding Battle against a Player Ship attacker.
When a Player Ship attacks a Pirate Ship and chooses Broading Battle, a full-strength Pirate Ship acts as if it has 4 Cannons (e.g. they roll 4 regular dice).
- A Pirate Ship with a Damage Marker acts as if it has 3 Cannons (e.g. they roll 3 regular dice).
If a full-strength Pirate Ship loses 4 Boarding Battle duels (e.g. have no remaining dice at the end if Battle) then it is defeated.
- If a full-strength or a damaged Pirate Ship loses 2 or 3 Boarding Battle duels, add a Damage Marker to the Pirate Ship.
- Nothing happens when losing 0 or 1 duels.
- If a Pirate Ship ever receives a second Damage Marker they are defeated.
- If a Pirate Ship is defeated from a Boarding Battle, the opponent player receives no Silver Coins as a reward, 1 Experience Token (instead of 2) from the supply, and also the Pirate Ship token as a trophy and places them both into their Treasury. The citizens of the Misty Waters will cast 5 Votes at end game for each Pirate Ship defeated.
- See 'Viceroy Voting' on page 42 for details.
Plantations with a Militia: Instead of only a Fort fulfilling a defensive function for a Captured Island, players can instead have a Plantation with a Militia.
During Phase 5 (Player's Turn Phase), when a Player Ship is at the Docks connected to a Plantation and there is no Fort, it can Recruit and place on the island next to the Plantation up to 2 Sailors to establish a Militia. The Sailors can also come directly from the Player Ship at the connected Docks.
- Removed Sailors can later be replenished through the same process, but there can never be more than 2 Sailors in the Militia.
- A Captured Island may never have a Fort and a Plantation with a Militia at the same time. If a Fort is built on a Captured Island that has a Plantation with a Militia, the Sailors are removed as the people disperse.
- Each of these Sailors will cast 1 Vote at end game.
- See 'Viceroy Voting' on page 42 for details.
When a Captured Island has a Plantation with a Militia, opponent Player Ships are required to receive benefit permission from the owner before using the connected Docks. Also, the Plantation with a Militia prevents the island from being re-Captured.
The Plantation with a Militia is only for defensive function and cannot attack. It can only be attacked through a Boarding Battle with an opponent Player Ship at the connecting Docks.
- Instead of all Sailors and Cannons participating in the Boarding Battle, the attacking Player Ship must declare in advance which tokens will go to shore. The attacker may declare as many or as few tokens as they wish, but they must leave at least 1 Cannon out of the Boarding Battle and stay onboard the Player Ship.
- The attacker must also declare in advance whether a Fencing Master onboard the Player Ship will participate. If they do, the Fencing Master does not add a regular dice to the Battle, but does now add its normal abilities.
- Battles with a Plantation with a Militia are land-based and therefore unaffected by Wind Force and Weather Tile effects.
- If the attacker removes all Sailors from the Plantation with a Militia, they have defeated it. Do not remove the Plantation. The attacker will likely next re-Capture the island for themselves.
- If the attacker fails to defeat the Plantation with a Militia, the attacker removes all of their Sailors, Cannons, and Fencing Master that participated in the Boarding Battle.
Reminder: Any interaction with the Captured Island or Plantation with a Militia requires that the player has a Player Ship at its Docks.
Non-Binding Negotiations: Negotiations are not binding, and may be disregarded by either of the agreeing parties. The only consequences of breaking an agreement are the player relationships for future Negotiations and the increased possibility of revenge.
- Example: If a player provides an opponent a loan of Silver Coins to later be paid back as soon as they can, the opponent can choose to ignore the requirement and refuse to pay back at that time or ever.
It is strongly recommended that not just majority, but all players agree to this particular rule before playing as it can be quite cutthroat.
Variant Rules
'Variant Rules' are a set of alternate rules that combine to modify the gameplay experience. They can be combined with any number of 'Advanced Rules' and also other 'Variant Rules'.
Simplified Variant: In the spirit of 'Simplified Variant', it is recommended 'Advanced Rules' are not used. All standard Misty Waters rules are used, but to simplify the gameplay, the following modifications can be used:
- Setup: Players only start with 1 Sloop (S).
- Drawing Action Cards Phase: Drafting rules are not used. Instead, starting with the player with the Priority Token, each player chooses to draw either the top Action Card from the face-down Deck or the face-up Discard Pile.
- Recruiting: First-Class Officers are not used.
- Boarding Battles: Players do not roll all of their regular dice for all duels simultaneously. Instead, each duel is resolved sequentially by each player rolling 1 regular die each at the same time. If a player ties or has the highest number in a duel, they keep that die for the next duel, otherwise they remove that die. Repeat duels until the total number of duels is equal to the most amount of regular dice between the opponents at the start of the Battle or until a player has removed all of their dice.
Shortened Variant: All standard Misty Waters rules are used, but to speed up the gameplay, the following modifications can be used:
- Setup: Players start with 1 Sloop (S), 1 Brig (B) (instead of Caravel (C)), 4 Experience Tokens (instead of 2), and 10 Silver Coins (instead of 8).
- Conquistadors' Galleass: The Conquistadors' Galleass will appear and begin its escape when there are 4 Captured Islands in total on the map in addition to the start of Round XII.
- Simplified Variant: Recommended to also use rules from 'Simplified Variant', except players still start with 1 Sloop (S) and 1 Brig (B).
Extended Variant: 'Extended Variant' can be a bit of a 'death match' and is recommended only for experienced players. All standard Misty Waters rules are used, but to play a longer game, the following modifications can be used:
- Fleet Size: Players can have up to 3 Player Ships (instead of 2) in their fleet.
- Conquistadors' Treasure: The Conquistadors' Treasure does not provide victory nor triggers the end game when removed from play. Instead, it can be sold at a Base for 15 Silver Coins.
- Conquistadors' Galleass: A player-controlled Conquistadors' Galleass can use the benefits of a Base such as:
- It can Recruit new Sailors or Officers, but not a Gunner and cannot Repair (purchase Cannons).
- It can 'scrap' the Conquistadors' Galleass to get it out of the fleet.
- It can Load/Unload and use the trading post.
- Game End: The game only ends when a player has control of 3 or more Captured Islands for two consecutive Rounds or after 24 Rounds (proceed to 'Viceroy Voting').
Adventure Variant: All standard Misty Waters rules are used, but to emphasis the 'adventure elements' of the gameplay, the following modifications can be used:
- Setup: 4 Exploration Cards (instead of 3) are placed face-down on each of the six Main Islands.
- Black Ship Spaces: A Player Ship can enter and move through a Black Ship space and when it does, player draws a Sea Adventure Card, assigns it to that ship, and considers it before continuing movement. Card is not drawn if the Player Ship has a mission involving a Black Ship space.
- Captain's Cabin: The Captain's Cabin card limit is 5 cards (instead of 3).
Team Mode
'Team Mode' allows for 4 players to setup and play a game of Misty Waters where the players are split into two 2-player teams. Each player has their own nation with their own fleet of ships, but they are friendly and have a common goal for shared victory with their teammate.
'Team Mode' can be combined with any number of 'Advanced Rules', 'Variant Rules', with or without the 'Empires Expansion Rules', and 'Pirate Faction Rules'.
- Exception: 'Advanced Rules' can be used, but not Priority Token Negotiation.
- Exception: 'Empires Expansion Rules' can be used, but not the asymmetric victory conditions.
- Exception: 'Pirate Faction Rules' can be used, but requires 5 players in total.
Setup and Gameplay: All standard Misty Waters rules are used with the following modifications:
- Setup: Teammates must sit opposite of each other at the game table such that players from the same team do not take turns after each other.
- Setup: Teammates must have opposite corner starting Bases. Teams can select either north-east (NE) and south-west (SW) Bases or south-east (SE) and north-west (NW) Bases during setup.
- Treasury: Teammates share 1 Treasury between them which starts with 8 Silver Coins total (instead of 8 per player). Experience Tokens are not placed in the Treasury and is instead collected in separate pools for each player.
- Negotiation: A player can 'Negotiate' with their teammate.
- Exception: A player can only give their teammate a maximum of 1 Action Card per Round, and as normal, they cannot receive a card on their own Phase 5 (Player's Turn Phase).
- Exception: Both players have automatic permission to use each other's Bases and Ports and have no need to Negotiate.
- As normal, players can only Build on Captured Islands that have their Nation Flag on it, their teammate's flag is not sufficient.
- Attacking: Players cannot attack their teammate's Player Ship, Forts, or Plantations with a Militia.
- See 'Advanced Rules' on page 43.
- Re-Capture: Players cannot re-Capture their teammate's Captured Islands.
Victory Conditions: All standard Misty Waters victory rules are used with the following modifications:
- Labyrinth Islands: Players can place their Nation Flag on the Labyrinth Island when their Player Ship is on the Adjacent Space to the 'X' at the Red Water Lagoon. Remove any opponent's Nation Flag that was previously there. If players have their Nation Flag on the Labyrinth Island, it counts as a Captured Islands towards an 'Island Conquest' victory and Vote Auction for 'Viceroy Voting' victory.
- Island Conquest: If at the end of two consecutive Rounds, a team has control of 4 or more (instead of 3) Captured Islands, they have won the game!
- Conquistadors' Treasure: Teams can deliver the Conquistadors' Treasure to their own Base or their teammate's to instantly win the game!
- Votes: Teammates pool their Votes together and bid as one for Vote Auction.
Quick Reference
Phase 1: Wheel of Time Phase
- Harvest Rounds: Add 1 Barrel per Plantation. Add 1 Crate per Mine. 3 Barrels and 3 Crates per island max. Check for Free Trade Route.
- Free Trade Route: A Captured Island's Port within 10 unblocked spaces of a Tavern. Automatically sell newly produced Barrels and Crates.
- Event Rounds: Draw 1 Event Card.
- Pirate Movement Rounds: Pirate Ships will move during Phase 2.
- Gold Coin Rounds: Each player receives 1 Gold Coin (e.g. 5 Silver Coins).
- Grand Finale Round: The Conquistadors' Galleass is placed in the Red Water Lagoon.
Phase 2: NPC Movement and Attack Phase
- Step 1, Pirate Ship Movement: for each, 4 speed + modify (3 if damaged).
- Step 2, Other NPC Ship Movement: Flying Dutchman* always moves last.
- Step 3, Sea Monster Movement: for each; see corresponding card for details.
- Step 4, Sea Monster Attack: Any ship on Adjacent Space. See corresponding card for details.
- Step 5, Battery of Cannons Attack: Any Player Ship on Adjacent Space. 2 Cannons.
- Step 6, Pirate Ship Attack: Any Player Ship, Fort, or Sea Monster on Adjacent Space. 4 Cannons (3 if damaged).
Phase 3: Weather Phase
- Step 0, Check Wind Strength: Move Weather Marker three boxes lower if currently at Wind Strength 11 oB or 12 oB.
- Step 1, Activate Weather Tile: Move the Weather Marker according to the tile. Trigger the illustrated effect on tile.
- Step 2, Draw New Weather Tile: Shift face-up Weather Tile and flip over new face-up tile.
Phase 4: Drawing Action Cards Phase
- Draft: Player with Priority Token draws # of players + 1 Action Cards for pool.
- Draw: In turn order, each player draws 1 card from draft pool or top face-up Action Card from Discard Pile.
- Hand Limit: If after drawing, player has 7 or more Action Cards in their hand, they discard until they have 7 cards in hand.
Phase 5: Player's Turn Phase (Movement, Attack, Action)
- Step 1, Movement: Player Ship Maximum Range equals Ship Type's Speed + Speed Modifications.
- Step 2, Player Attacks: Each controlled Player Ship and Fort may each choose to perform 1 attack on eligible targets.
- Step 3, Player Actions: A player can perform any number of actions and even repeat with exception of each Player Ship may only draw 1 Exploration Card and 1 Tavern Card per Round.
Phase 6: Reset Phase
- Step 1, Hourglasses: Remove '1' Hourglass Tokens, flip '2' Hourglass Tokens to '1'.
- Step 2, Check End Game: Check for end game conditions (3 or more Captured Islands for 2 consecutive Rounds, Conquistadors' Treasure removed from play).
- Step 3, Priority & Sash: Rotate Priority Token clockwise, and move Round Phase Marker to Phase 1.
Locations (Recruit / Repair / Sell Ship / Trading Post): see Map Locations. Bases: Recruit, Repair, Sell Ship, Trading Post. Taverns: Recruit, Trading Post. Docks: Recruit, Repair.
| Token | Cost | Ability |
|---|---|---|
| Cannon | 1 Silver Coin | 1 regular dice for Battles. 0 Cannons = defeated ship |
| Sailor | 1 Silver Coin | 1 regular dice for Boarding Battles. 0 Sailors = -1 ship speed. |
| Captain | 5 Silver Coins (+3 for first-class) | +1 for movement. First-class = Can use Shoals. |
| Gunner | 3 Silver Coins (+3 for first-class) | + for Broadside Battles. First-class = 1 reroll for Broadside Battles. |
| Fencing Master | 3 Silver Coins (+3 for first-class) | + for each dice in Boarding Battles. First-class = 1 reroll for Boarding Battles. |
Main Island Actions (Step 3 of Phase 5)
- Explore (once per ship per Round) or Capture.
- Build a Fort (7 Silver Coins), Mine (5 Silver Coins), or Plantation (5 Silver Coins).
- Restore a damaged Fort (3 Silver Coins).
- Establish a Militia for a Plantation ('Advanced Rules' Only)
Other Possible Actions (Step 3 of Phase 5)
- Sell Barrels (2 Silver Coins), Crates (3 Silver Coins), and other valuables.
- Draw a Tavern Card (once per ship per Round).
- Pay a Tavern fee to extend stay (1 Silver Coin at first then doubles each Round).
- Resolve mission/task/other cards.
- Transshipment between Player Ships.
- Load/Unload Barrels or Crates.
- Embark/Disembark Passengers or Rafts.
- Purchase undeclared Base (20 Silver Coins).
- Buy new Player Ship.
Phase 5 Actions (Any Step of Phase 5)
- Play an Action Card (cards are usually specific to movement, attack, or action step).
- Negotiate with other players.
Errata (Official, ENG)
Source: official "Misty Waters – Errata ENG" document from the publisher; page numbers refer to the printed rulebook v3.5.
Page 22 (Event Cards): Add section under the Event Cards frame: "Another Pirate Ship!" Place another Pirate Ship on the board, as described on the card. If placing the Pirate Ship would cause the total number of them on the board to exceed the number of players, shuffle the card back into the deck and draw another Action Card.
- Comment: According to the standard rules of the game, there cannot be more Pirate Ships on the board than there are players.
Page 37 (Boarding Battle, Duel Arrangement and Rerolls): Remove "max 6" (from "A second-row dice will add its number to the total max 6 in that individual duel"), and replace "duel" with "die" (in "A single duel cannot ever exceed the value of 6").
- Comment: After adding all modifiers, no die may exceed 6. However, in the case of two rows of dice in a duel, their values are added together without limitation, so the maximum strength value of one side in such a case can be as high as 12.
Official Interpretation of the Rules (Q&A, v4)
Source: official "Misty Waters – Official interpretation of the rules" and "Q & A" document from the publisher.
Cards
Action Cards played before Pirate boarding (advanced rules): Cards that allow you to shoot at the crew (sailors, officers) before boarding, such as Marksman or Grapeshot, are not applicable against pirates before the clash.
Action Cards played during the Weather Phase: The weather icon markings on action cards are only auxiliary, for faster identification of cards in your hand, and do not mean that other cards cannot be played in this phase. For example, during a monster attack, you can use certain combat cards, similarly to other sea adventure cards drawn.
Action Cards played in combat: The cards are played alternately by both players, with the defender playing first. If at any point one of the players decides that they will not play a card, they cannot play any more cards in that phase of combat, even if they later find a card that they could play. Skipping one "round" of card play means that the player will not play any more cards. Of course, if this is the phase before the dice rolls, then after the dice rolls, both players can play again, in exactly the same way as in the previous phase.
Sea Adventure Cards drawing: These cards are drawn exclusively when the corresponding weather tile is activated:
- a) Under normal rules, players draw one card each and then, without looking at it, assign it to one of their ships currently "at sea". This rule minimizes downtime.
- However, if players would like to experience more sea adventures (even if it takes a little longer), there is another option: b) Each player draws as many cards from the deck as the number of their ships currently "at sea" - that is, outside of ports, shoals, or the Red Water Lagoon. Then, without revealing them, they assign them to each ship (e.g., by placing them on its board) and, revealing them one by one, carry out the actions described on them.
Ships
Conquistador's Galleass under player command: A Galleass commanded by a player cannot be blocked by any other player's ship. If the space it would pass through is occupied, it treats it as free and stops only after the last blocking ship.
Exploration
Multiple ships: If two of the player's ships are on two different islands at the same time, both can explore in the same turn.
Q & A
Why is cannon fire so random? Because that's how it was in real life. Aiming on a rocking sea was tough, cannons didn't have rifled barrels, so even if you aimed perfectly, the cannonball might hit… or not. The strategy was to have as many cannons as possible and fire rapidly - statistics did the rest. In the game, faster firing is represented by the Gunner Officer, who increases the number of shots. Works especially well on smaller ships. A First-Class Gunner trains the crew to shoot faster and more accurately. So yes, hit chances go up - but don't expect miracles.
Why can't I deliberately sink my own ship to prevent a stronger opponent from taking my cargo? Ships didn't have enough lifeboats to save everyone. Most sailors couldn't even swim. They'd sooner toss the captain overboard than agree to drown themselves. But you can actually do it, for example by attacking the Flying Dutchman...
Why can't I throw loot overboard when threatened? Same reason - the crew would toss you overboard before they gave up their hard-earned loot!
Why do my surviving crew and officers join the enemy when my ship sinks? Their options are limited: drown, get eaten, or live. Back then, patriotism wasn't exactly overwhelming.
Why do I get a grant after losing my first ship, an exorcist after the second, and nothing after that? Maybe their faith in you is fading? Still, they'll never leave you completely stranded - your government wants you in the Misty Waters game till the end. So after losing your last ship, you'll always get a new Sloop.
Why is my fleet limited to two ships? To keep the game flowing. Planning moves for multiple ships takes time, and other players start yawning. There's an advanced option for seasoned players that lets you expand your fleet by 50%!
I tried boarding another player's ship and failed. Why? What did you expect? With equal crew sizes, losses are usually equal too. To win in one round, you need to prepare: hire a Fencing Master (ideally First-Class), get the right Action Cards, and stock up on Experience Tokens. If you also have a numerical advantage - then you can expect success. Otherwise, it's just luck.
Which attack type is better - boarding or cannon fire? There's no single right answer, except: "It depends." If both ships are similar in class and crew, cannon fire is recommended. Luck might help you knock out the opponent's cannons. Boarding has less randomness, so it's harder to win with equal forces.
Can you win Misty Waters without fighting? Theoretically - yes! But it's never happened. You can focus on economic dominance, and long-term it's often a smart move. But once opponents catch on, they might get aggressive - even form a temporary alliance against you. Misty Waters is a game of balancing economy and the politics of gunpowder. Negotiation and diplomacy often play a big role in the outcome.