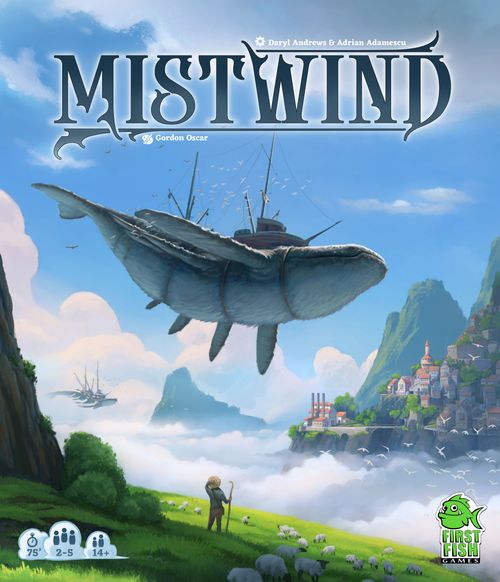
Mistwind
Mistwind Rulebook
Table of Contents
Table of Contents
Box Contents
- 1 Resource Board
- 1 Worker Board
- 1 Round Marker
- 5 Player Aids
- 1 Game Board
- 5 Player Boards
- 36 Cargo Markers
- 20 Resource Markers (5 per color)
- 15 Transport Whales (3 per color)
- 60 Outposts (12 per color)
- 25 Action Chips (5 per color)
- 20 Control Markers (4 per color)
- 48 Demand Tiles "Territory" (12 per region)
- 12 Demand Tiles "Capital" (3 per region)
- 24 Achievement Tiles (6 per letter A, B, C, D)
- 1 Starting Player Marker
- 12 Network Tiles (3 per region)
- 36 Character Cards
- 26 Port Cards
- 15 Network Cards
Setup
A. Place the game board in the middle of the table. Place the resource board on the left and the worker board on the right side of the game board, each with side "A" face up (the symbols must match those on the game board).
B. Shuffle all port cards and place them face down as the port deck under the game board. Reveal the top 5 cards and place them at the numbers 1 to 5.
C. Shuffle all character cards and place them face down as the character deck above the game board. Reveal the top 5 cards and place them at the numbers 1 to 5.
D. Sort the achievement tiles by the letters A, B, C, D. Shuffle each letter group separately. Randomly draw one tile from each group and place it face up at the bottom left of the game board. Return the rest to the box.
E. Sort the network tiles by their region color. Shuffle each region separately. Randomly draw one tile and place it in the matching-colored region of the game board next to the capital ports. Use the side of the tile that matches the number of players. Return the rest to the box.
F. Sort the demand tiles by their region color and victory point value ("Capital" = 2 VP, "Territory" = 1 VP). Shuffle each separately and stack them. Place them in one of the removable plastic inserts (ideally green/purple in one insert and silver/brown in the other). Place these inserts on the matching-colored side of the game board so they are easily reachable for all players. Take the top 2 "Capital" demand tiles of each color from the plastic inserts and place them with the shown cargo face up on the matching-colored fields next to the network tiles.
G. Take 4 "Territory" demand tiles of each color from the plastic inserts and place them with the shown cargo face up on the matching-colored fields in the middle of the game board.
H. Sort the cargo markers by color and divide them evenly between the two inserts. This is the general cargo supply.
I. Sort the network cards (Easy, Medium, Hard) and give one of each difficulty level to every player.
J. Place the round marker on the leftmost first field on the game board.
K. Whoever last saw a whale becomes the starting player and receives the starting player marker. Each player receives (in their chosen color) 12 outposts, 3 transport whales, 4 control markers, and 5 action chips numbered 1 to 5. Each player also receives a player aid, a player board, and a resource marker of each color. Whenever you spend or gain resources during the game, you move the corresponding resource marker forward or backward on your player board. Set your resource markers at the start of the game to the following values: steel (green) to 1, wood (brown) to 1, and coins (white) to 2. In addition, the starting player begins with 1 krill (yellow), the second player with 2 krill, the third player with 3 krill, and so on.
Before the first round begins, each player, in clockwise order, must place a transport whale on any territory port. Transport whales may share port spaces with their own and other players' transport whales.
Overview and Game Goal
Over several game rounds you place action chips to gather resources, build outposts, and train transport whales. In this way you expand your networks and earn rewards. You use your transport whales to deliver cargo to capitals and territories or to obtain demand tiles.
During the game there are 7 different ways to earn victory points (VP) (more on this on → page 9 [see the Scoring section below]). The game ends when the round marker reaches the following fields: the 4th field with 1 to 4 players, and the 5th field with 5 players. The player with the most victory points wins.
Round Structure
Each game round consists of 3 phases (A, B, C):
PHASE A – ACTION CHIPS
If you want to carry out one of the actions around the game board in Phase B, you must play the action chip with the matching number — and do so four times. Before that, at the beginning of the game round, your fifth action chip is secretly discarded. Place the discarded chip face down, number side down, on the compass on the game board. This discarded chip is not used this round. (With 5 players, the special rules on → page 9 [see the 5-Player Rules section below] apply.)
PHASE B – YOUR TURN
With your remaining action chips you take multiple turns, until no one has an action chip left. Only then does the round end with Phase C. The starting player begins with their first turn, after which all other players take their turn clockwise. The starting player then begins their second turn.
A turn consists of up to four actions, carried out in a fixed order: 1. Playing an action chip is mandatory. 2. Moving transport whale(s), 3. loading or unloading cargo, and 4. fulfilling victory conditions are optional.
1. Play an Action Chip (mandatory)
In every round, the following applies to each individual player:
- On the resource board (left) and the worker board (right) you may only place an action chip on one of the action fields 1 to 5.
- On the character cards (top) and the port cards (bottom) you may place chips on several of the action fields 1 to 5.
In every round, the following applies to everyone:
- On each numbered field, generally only one action chip may ever lie, regardless of which player it belongs to.
- Exception: on the port cards (bottom), several action chips may lie. If a chip is already on a numbered field there, place the next chip on top of it, forming a chip stack.
Starting a turn: Place an action chip on an available numbered field around the game board and carry out the action of that field/card.
Note: the number of the played action chip must match the number of the chosen field.
Numbered fields exist in the following locations:
I. Resource Board (only one action chip per player per round): Take all the resources shown on the chosen field.
II. Character Cards: Pay the cost shown at the top right of the card to hire a character. When a card is taken from the display, it is not replaced until the end of the round. Place your purchased character cards face up in your play area.
There are 4 types of character cards:
- The ability must be used immediately after purchase (one-time use).
- The ability may be used during your turn in the current or a later round (one-time use).
- The ability can be used at any time.
- The ability grants victory points at the end of the game.
Turn the card face down after using it, to show that it can no longer be used.
III. Worker Board (only one action chip per player per round): Each field has a different ability.
IV. Port Cards (if an action chip is already on the field you chose, place your chip on top of it): Build an outpost or a transport whale in the port shown at the top left of the card. Pay the required resources and adjust the values on your player board: an outpost costs 1 wood and 1 steel, a transport whale costs 2 wood and 2 steel.
Instead of building, you may on your turn choose one type of resource (wood, steel, krill, coins) and receive as much of that resource as there are action chips on that field (including the one you just played).
Note: all players may own an outpost in the same port, but only one outpost per player is allowed there. A player's transport whales may share port spaces with their own as well as other players' transport whales.
At the end of the round, the player whose action chip lies on top of a stack receives the port bonus — even if they are the only one there. The bonus is shown at the bottom of the port card.
Port cards can be used by several players. Simply stack the action chips on top of each other.
2. Move Transport Whale(s) (optional)
You may move any number of your transport whales any number of fields. You must finish the movement of one transport whale before moving the next. Movement must follow these rules:
I. If a transport whale leaves a port where you have no outpost or transport whale, you must pay 1 krill.
II. If a transport whale leaves a port where you have an outpost or transport whale, you pay no krill.
Note: you must finish moving all of your transport whales before you can carry out the next optional action.
3. Load or Unload Cargo (optional)
I. Loading Cargo: You may load one cargo into any of your transport whales; it must exactly match the cargo type available at the port where your transport whale currently is. Take the cargo from the general supply. If you already have cargo loaded on your transport whale, you may put it back into the supply in order to load the new cargo.
Note: if you load cargo at a krill port, move the krill marker on your player board forward one space. You may load krill in addition to other cargo; discarding is not necessary here.
II. Unloading Cargo: Unloading cargo is only possible at a territory port or a capital port — and only when a demand tile lies there that matches the goods you have loaded. Each transport whale can only receive one tile; if several with the same goods are displayed, you may choose one. Whoever takes one of the two demand tiles at the bottom end of the territory demand row may additionally choose between the shown resources. When a space among the territory demand tiles becomes empty, immediately slide the tile above it down one space to fill the empty space. Then refill the topmost space from the supply. Whoever takes a capital demand tile immediately places a tile of the same color from the supply onto the empty space.
4. Fulfill Victory Conditions (optional)
At the end of your turn you may fulfill victory conditions. These include:
I. Network Cards: Reveal your secret network card if you have fulfilled all the conditions shown on it and want to claim the complete network.
II. Network Tiles: If you can claim the network of a network tile, place one of your control markers on one of the two VP fields. Only one control marker may be placed on the upper field; several may be placed on the lower field. Each player may place only one control marker per network tile.
III. Achievements: Take the achievement tile whose requirements you have fulfilled.
Claiming a network (via a network card or a network tile): In order to claim a network for yourself, you must own an unbroken chain of outposts and/or transport whales.
- For a network tile, the capital port where the network tile lies must be connected to the destination port shown on the tile.
- For a network card, the territory port on the card must be connected to the shown destination ports.
The reward is never lost! Once a network has been claimed, transport whales may leave the port in a later round and break the network chain — this does not undo the claim.
For a network card, connecting the territory port to both shown destination ports earns the larger reward; connecting to only one port by the end of the game earns the smaller reward.
Phase C – End of Round
- In ascending order of fields 1 to 5, you may claim the port bonuses shown at the bottom of the port cards. If several players have an action chip on a card, the player whose action chip lies on top of the stack receives the bonus.
- In clockwise order (starting with the starting player) you may fulfill victory conditions that were made possible by a port bonus.
- Take all action chips (including those discarded in Phase A) back into your own supply.
- Discard all remaining character cards and all port cards from their rows and draw five new cards each to refill the rows.
- Move the round marker to the next field. At the end of round 2, each player must discard a network card. The game ends when the round marker reaches the following fields: the 4th field with 1 to 4 players, and the 5th field with 5 players.
Scoring
With 1 to 4 players, the game ends after 4 rounds. The player with the most victory points (VP) wins.
Here is how you earn points:
- Starting player marker: The player with the starting player marker receives 2 VP.
- Cargo points: Receive 1 VP for each territory demand tile you collected, and 2 VP for each capital demand tile you collected.
- Cargo majority: Receive 5 VP if you delivered the most cargo to a region. To determine this, count the VP values shown on the demand tiles you collected in each region. 1-VP tiles count as 1 point toward the majority, 2-VP tiles count as 2 points toward the majority. In case of a tie, the points are split evenly (rounded down).
- Achievements: Four achievement tiles lie on the game board. If you fulfill the requirements on one of these tiles during the game, take the tile immediately and receive the victory points shown on it at the end of the game.
- Network tiles: Receive the VP of the network tiles on which one of your control markers lies.
- Network cards: Receive the higher VP value on your network cards if you have completely fulfilled their conditions during the game. You receive the lower VP value if the conditions were only partially fulfilled.
- Character cards: Receive the VP shown on your purchased character cards.
In case of a tie, the player with the most remaining wood and steel resources wins. If still tied, you share the victory.
5-Player Rules
Changes to the round structure: the game is played over 5 rounds.
Phase A – Action Chips: Each player secretly chooses two action chips, which they discard in the current round.
2-Player Rules
Additional setup: Choose the action chips of two unused player colors for the automa players (AUT). Shuffle the AUT action-chip decks and place them between the two human players (PLA). Alternating turns between PLA and AUT are now simulated (turn order: AUT, PLA, AUT, PLA).
Sequence of play: The game begins with one of the AUT as starting player, who (like a human player) places action chips. The AUT do not build outposts or transport whales, do not take character cards, do not deliver cargo, and do not receive achievements. However, an AUT does take the starting player marker whenever it randomly places its chip on the fourth field of the worker board.
Draw a random action chip for the AUT and, starting in zone 1, carry out the following steps:
- Check whether the AUT has already played an action chip in this zone. If so, repeat step 1 for the next zone. If not, continue with step 2.
- Check whether the numbered field that matches the drawn action chip is still free. If so, place the AUT's action chip on the matching field. If not, continue to the next zone and start again at step 1.
- If the AUT reaches zone 4, it always discards its action chip, even if it has already discarded an action chip in this zone.
If another player's action chip is already on the field matching the drawn action chip, the AUT's action chip is placed on top of it, following the normal game rules.
Solo Mode Rules
Setup: Set up the game as usual, as if it were a multiplayer game. Please note zones 1 to 4 on → page 10 [see the 2-Player Rules above], as these are also used in solo mode.
Choose 3 unused action-chip decks to simulate 3 automa players (AUT1, AUT2, and AUT3). Shuffle each chip deck and place the 3 decks number-side down within reach. Make sure to place them so that you can remember the player order. Give one of the AUT the starting player marker. The 3 AUT players begin the game; you are in fourth position. This means you begin with 4 krill; adjust this value on your player board. The player order can change during the game whenever you or one of the AUT receives the starting player marker.
The AUT do not build outposts or transport whales, do not take character cards, do not deliver cargo, and do not receive achievements. However, an AUT does take the starting player marker whenever it randomly places its chip on the fourth field of the worker board.
Sequence of play: The game is played over 4 rounds. The normal game rules apply, with the following exceptions:
- When you discard your action chip in Phase A, take the top action chip from each AUT deck and place it face down on the compass on the game board.
- If AUT1 has the starting player marker in Phase B of the first round, take the top action chip from AUT1, reveal it, and place it on the matching numbered field in zone 1. Repeat this process for the action chips of AUT2 and AUT3. If the numbered field for a just-revealed action chip is already occupied, place it on the matching numbered field in the next zone instead. These action fields are blocked for you.
- In future turns, each AUT may only ever place one action chip in zones 1–3. First check whether an AUT has an action chip in zone 1. If so, check the next zone, and continue as described in the 2-player rules. If you place an AUT's action chip on a port card in the bottom row, give that AUT the lowest revealed territory demand tile matching the region (color) of the port card.
- For scoring cargo majority (→ page 9 [see the Scoring section above]), all 3 AUT add up their collected demand tiles together, as if they had been collected by a single player.
How to Win the Game
Mushroom Farmer (Easy) – Obtain 1 achievement tile, 1 network tile, and at least 30 points.
Port Worker (Medium) – Fulfill the conditions of your network card, obtain 2 achievement tiles, 2 network tiles, and at least 45 points.
Deep-Mist Diver (Hard) – Fulfill the conditions of your network card, obtain 3 achievement tiles, 3 network tiles, and at least 60 points.
Alternative Tableau Sides
Side "B" of the resource board and the worker board offers more interactive actions for a different game experience. We recommend playing a few times with side "A" before trying side "B".
Resource Board, side B:
- The player to your left names a type of resource. Receive 5 resources that are not of the named type.
- Whenever another player places an action chip on the resource board this round, you receive 1 coin or 1 krill.
- Whenever another player places an action chip on the resource board this round, you receive 1 wood or 1 steel.
- Receive 1 steel, 1 wood, 1 krill, and 1 coin. You also receive 1 resource of your choice from the player to your left.
- Receive 2 resources of any one type and 3 resources of another type. All other players may then take 1 resource from the two chosen resource types.
Worker Board, side B:
- Draw 2 character cards. Keep one and give the other to another player (these cards are free).
- Buy an outpost with coins. Pay 3 coins if there are no outposts of other players at the port. If the port is occupied, pay 1 coin to every player with an outpost there.
- Move a transport whale up to 2 fields. You may move any number of fields further if you pay 1 resource of your choice to any player per additional field moved. When doing so, you ignore krill costs and outposts/transport whales. During the movement you may load or unload once.
- You receive the starting player marker and 2 krill. You may trade up to 1 resource of your choice with up to 2 different players.
- Pay 1 resource to any other player in order to use an action field on the resource board or worker board on which another player's action chip already lies (you do not have to pay the player whose action chip is there).
Symbol Overview
- Resource: Wood
- Resource: Steel
- Resource: Krill
- Resource: Coin
- Build: gain an outpost/transport whale for resources
- Outpost
- Transport whale
- Any territory port
- Any capital port
- Starting player marker
- Victory points (VP)
- Port bonus
- Action chip
- Load cargo
- Unload cargo
- Any demand tile
- Specific demand tile
- Specific region
- Cargo: Coal
- Cargo: Mushrooms
- Cargo: Coffee
- Cargo: Textiles
- Cargo: Oil
- Cargo: Medicine
- Move transport whale
- Spend resources
- Receive resources or figures