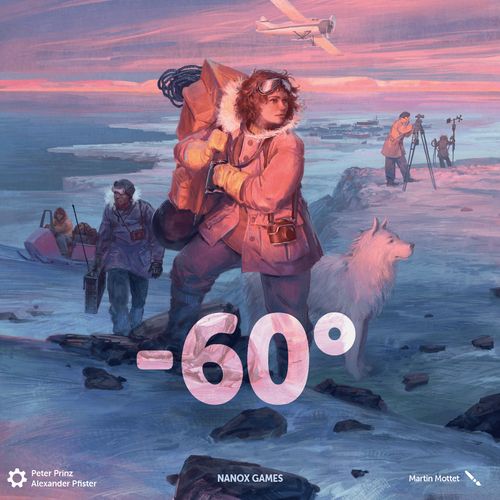
-60°
-60° Rulebook
Table of Contents
Table of Contents
Components
- 4 double-sided Expert Action Tiles
- 1 Harbor
- 1 Expert Plan
- 4 double-sided Landscapes in the range of -30° to -37°
- 10 Landscapes in the range of -40° to -49°
- 3 double-sided Meteorites in the range of -60.1° to -60.6°
- 10 Landscapes in the range of -62.1° to -63°
- 24 Station Sites in the range of -54.1° to -57.5°
- 16 Experts (Mission Coordinator)
- 40 Coins
- 36 Construction Material (Material)
- 16 Forecast Tiles
- 16 Radar Tiles
- 1 Starting Indicator
- 1 Round Indicator
- 32 Experts
- 1 Cloth Bag
- 18 Milestone Cards
- 84 Expedition Cards
- 4 Meteorite Expedition Cards
- 70 Project Cards
- 4 Meteorite Project Cards
For the solo game against Arka:
- 9 Arka Cards marked with one star
- 5 Arka Cards without a star
- 6 Arka Milestone Cards
- 1 Arka Tableau
4x (one per player):
- 1 dual-layered Tableau consisting of two halves
- 4 double-sided personal Station Sites in the range of -10.1° to -10.8°
- 3 Milestone Tiles
- 1 Milestone Tile for games with the -60.4° Meteorite
- 10 Cards for your starting deck: 5 Storms and 5 Expedition Cards marked with 0°
- 17 Explorers
- 1 Expedition Marker
- 5 Stations
- 4 Upgrades level one
- 4 Upgrades level two
- 3 Upgrades level three
- 1 Energy Marker
Game Setup
General Setup
-
Place the Expert Plan and the Harbor side by side as shown. Place the Round Indicator in the corresponding slot to the left.
Fill up the area to the right by placing Mission Coordinators. Draw at random the remaining experts out of the cloth bag and fill the columns of the Expert Plan. Spaces marked with 3+ or 4+ must be filled only when playing with 3 or 4 players.
The remaining Experts stay in the cloth bag and won't be used for this game anymore.
-
Draw a number of Landscapes in the range of -30° to -37° at random equal to the number of players. Pick a side at random for each of them. Place the Tiles from left to right, starting from the Harbor board. The red mark on the edge of the Tile shows where to place the next Landscape. The orientation of all Landscapes has to be the same.
Then draw the same amount of Landscapes in the range of -40° to -49° at random and place them on the board one by one with the unexplored side up. Start from the last face-up Landscape and follow the red marks.
Place the top left hex of the Meteorite adjacent to the last Landscape. For your first play, it is recommended to use the -60.2° Meteorite. You can find setup information and details for other Meteorites on page 18.
Draw the same amount of Landscapes in the range of -62.1° to -63° at random and place them with the unexplored side up one by one next to the Meteorite following the red marks.
The remaining Landscapes and Meteorites won't be used in this game and can be returned to the box.
-
Take the Station Sites in the range of -54.1° to -57.5° and shuffle them separately to form four face-down piles.
-
Draw two Expert Action Tiles at random and place them below the Expert Plan. For your first game, it is recommended to use the Expert Action Tiles depicted here.
-
Take the 84 Expedition and the 70 Project Cards and shuffle them together to form the common deck. Leave some space beside it for a common discard pile.
-
Place the Coins, Construction Material, Radar Tiles and Forecast Tiles on the table and form a general supply.
Personal Setup
-
Assemble your Tableau from the two halves and place it in front of you.
-
Take your starting deck consisting of 10 Cards: 5x Storm Cards and 5x Expedition Cards (marked with 0°).
Shuffle it well and place it face down to form your Expedition Deck. Place the deck beside your Tableau as depicted here. Leave some space below for your personal discard pile.
-
Choose a colour, take the corresponding components and place them as depicted here:
- 1 Expedition Marker on space zero
- 1 Energy Marker on space zero
- 5 Stations
- 4 Upgrades level one
- 4 Upgrades level two
- 3 Upgrades level three
- 5 Explorers in the area on the right
- 12 Explorers in the general supply (not pictured)
-
Take 3 Milestone Tiles in your colour, 1 Forecast Tile, 2 Coins and 1 Radar Tile.
-
Take your 4 personal Station Sites. These are marked on both sides with Temperatures ranging from -10.1° to -10.8°.
-
Each player draws 7 Cards from the common deck. Choose 4 of them and place them in the corresponding area above your Tableau. This is your personal display. Place the remaining 3 Cards in the common discard pile. Once you are more familiar with the game, you may choose which 3 cards to discard after "Setup Step 13" instead.
-
Choose a first player. This person receives the Starting Indicator. Now, in clockwise order, each other player receives 1 Energy more than the previous player (i.e. 1, 2 and 3 Energy in a four player game).
The person to the right of the first player draws at random:
- 4 Milestone Cards in a 1-2 player game
- 5 Milestone Cards in a 3 player game
- 6 Milestone Cards in a 4 player game
That player chooses one of them. The chosen Card is now their personal Milestone. The remaining Milestone Cards are passed to the next player to the right. This player now chooses a Milestone Card, then passes the rest and so on until the first player finally receives three Milestone Cards. The first player chooses one of them as their personal Milestone, then places the remaining two face up above the Expert Plan, as common Milestones.
Goal of the Game
Sixty Below is played over six rounds. Each round, players will prepare an expedition and take actions. After the third, fifth and sixth round, a Milestone will be scored. Once the third Milestone has been scored, i.e. at the end of the sixth round, the game is over. The researcher with the most victory points will go down in history.
Gameplay
The game is played over 6 rounds. Each round is divided into three phases. At the end of the third, fifth and sixth round, there is an additional fourth phase where a Milestone will be scored.
I. PREPARATION → II. PLANNING → III. ACTION → IV. MILESTONE
I. Preparation
The Preparation Phase is played simultaneously by all players. In this phase, players will draw Cards from their Expedition Decks and place them face-up on their Tableaus. At the end of the phase, each player receives an Expedition Bonus depending on the Cards on his Tableau.
Draw Cards: At the beginning of the game, your Expedition Deck consists of 5 Storm Cards and 5 Expedition Cards. Draw a Card from your personal Expedition Deck, look at it and decide whether you want to: a.) Play it face-up on your Tableau or b.) Discard it and end the "Draw Cards" step.
a.) If you draw an Expedition Card, place it on the leftmost empty space of the bottom row of your Tableau. At the start of the game, you have three spaces available. If you draw a Storm Card instead, you must place it on an empty Base of your choice in the top row of your Tableau. At the beginning of the game, you have three Bases.
If you draw a Card and don't have an empty space where to place it, you must perform "b.)" instead.
b.) Put the Card you drew in your discard pile. This Card has no effect. This action ends your "Draw Cards" step.
Each time you play a Card on your Tableau, you must decide if you want to continue and draw another Card or if you want to end your "Draw Cards" step. If you continue and your personal Expedition Deck is empty, take the Cards from your discard pile, shuffle them and form a new Deck. Once you ended your "Draw Cards" step, move on to the "Expedition Bonus".
While "Draw Cards", you may use your Forecast Tile at any time. By discarding the Forecast Tile, you may place any Card (Storm as well) from your Tableau or the one you just drew in your discard pile. Using the Forecast Tile does not end the "Draw Cards" step.
Example: (1) Rodrigo draws a Card from his personal Expedition Deck. It is an Expedition Card. He plays it face-up on the leftmost empty space of the bottom row. He then decides to keep drawing.
(2) He draws another Card from the Expedition Deck. Since he draws another Expedition Card, he places it again in the bottom row. He decides to draw again.
(3) He draws a Storm Card. He could place the Storm on one of the three Bases, since they are still all empty. He decides to place the Storm in his discard pile, ending his "Draw Cards" step.
Expedition Bonus: After ending the "Draw Cards" step, you receive an Expedition Bonus from your Tableau. You gain this bonus based on your Expedition Cards, Storm Cards and Bases in any order you wish.
Expedition Cards:
- If you have 0 or 1 Storm Card on your Tableau, you gain the top bonus of your Expedition Cards.
- If you have 2 Storm Cards on your Tableau, you gain the bottom bonus of your Expedition Cards.
- If you have 3 or 4 Storm Cards, you do not gain any bonus from your Expedition Cards.
Storm Cards:
- If you have 1 Storm Card, gain 2 Energy (keep track of it with your Energy Marker).
- If you have 2 Storm Cards, gain 5 Energy.
- If you have 3 or 4 Storm Cards, gain 11 Energy.
Bases: There are three Bases on your Tableau (top row) - an Investor Base, a Radio Base and a Hangar. Each Base that is not covered by a Storm Card, gives you a bonus:
Investor Base — Grants you 1 Coin for each investor icon on your Tableau. Always check your Expert area (you start the game with one investor icon) and your face-up Expedition Cards.
Hangar — Allows you to choose between:
- buying a Station. Take the leftmost Station, pay the matching cost in Construction Material (the first Station is free) and place it in your Reserve.
- spending one Energy to gain one Construction Material. You may perform this action as many times as you have Engineer icons on your Tableau. Always check your Expert area (you start the game with a matching icon) and your face-up Expedition Cards.
Radio Base — Grants you one step on the Expedition Track for each radio icon on your Tableau. Always check your Expert area (you start the game with one radio icon) and your face-up Expedition Cards. Move your Expedition Marker by the corresponding number of steps in the direction of the arrow. Some steps trigger an immediate bonus.
If - by advancing the Expedition Marker - you free up a space in the bottom row, you may place Expedition Cards on it starting next turn.
If you move the Marker onto or pass a space with a bonus, gain that bonus immediately.
Should you reach the end of the Expedition Track, further advancements function as a rondel. When advancing on the rondel, gain the depicted bonuses, even multiple times per turn.
Once all players have concluded the Preparation Phase, the Planning Phase can begin.
Example: Rodrigo has a Storm and two Expedition Cards on his Tableau. He ended his "Draw Cards" step.
(1) He gains 2 Energy for the Storm on his Tableau. He gains 1 Energy from both Expedition Cards. Therefore, he moves his Energy Marker 4 steps to the right on the Energy Track.
(2) Rodrigo then gains 2 Coins from the Investor Base, since he already has an Investor in his Expert area and an additional Investor on one of his Expedition Cards.
(3) Rodrigo gains 2 steps from the Radio Base, since he has a Radio operator with a radio icon in his Expert area and an additional Radio icon on one of his Expedition Cards. He moves his Expedition Marker two steps on the Expedition Track in the direction of the arrow. He still needs one step to free up an additional space in the bottom row.
Example: Catalina has two Storm Cards and an Expedition Card with an engineer icon on her Tableau. She ended her "Draw Cards" step.
(1) She gains 5 Energy for the two Storms and 1 Energy from the Expedition Card - for a total of 6 Energy. She moves her Energy Marker accordingly on the Energy Track.
(2a) The Hangar gives Catalina a choice: She can either get a Station or, since she has two engineer icons (2b), she could exchange one Energy for one Construction Material up to two times. She decides to buy the Station. Since it is her first Station, she does not need to pay any resources (2c). She places the Station in her Reserve (2d).
II. Planning
The Planning Phase is played simultaneously by all players. This phase is divided into two steps:
- Take 2 Explorers in your colour from the general supply and place them on the Reserve of your Tableau.
- Each player draws five Cards from the common deck. Keep one of them for free or spend two Energy to keep two Cards. Place the chosen Card or Cards in your personal display.
Once all players have concluded the Planning Phase, the Action Phase will begin.
III. Action
The Action Phase is played in clockwise order, starting from the player with the Starting Indicator. On your turn, you must perform exactly one action or pass. Players keep playing in clockwise order, until all players have passed. You can perform the following actions:
- a.) Activate an action space
- b.) Build a Station
- c.) Upgrade a Station
- d.) Use a Radar Tile
- e.) Activate a Pilot or Mechanic
- f.) Pass
a.) Activate an action space
To perform this action, take an Explorer from your Reserve and place it on a free action space. The Explorer will remain on this space for the rest of the game. You can find action spaces on Expert Action Tiles, on the Harbor, on Landscapes, on the Meteorite, on Station Sites and on your Project Cards. You can recognize an action space by its "foot-shaped" icon.
Action spaces function in the same way, no matter where they are located. Place an Explorer on the action space, gain the covered Placement Bonus and activate the action indicated by the gear icon. Once an action space is occupied by an Explorer, that space is no longer available.
Harbor
On the Harbor you can find a special action space. This space is larger and is never considered occupied, so it can be activated by any number of Explorers. To activate this space, place an Explorer there following the normal rules.
Placing an Explorer here gives you a choice between two possible actions. You may spend two Coins to buy an Expert or you may spend six Coins to buy two Experts.
The Round Indicator tells you which Experts are available for you to buy. In the first round, you may take Experts from the first three columns of the Expert Plan. In each following round will be one additional column available. Otherwise, you can always buy a Mission Coordinator.
Choosing Experts: When you take an Expert from the first column (or later in the game from the columns on the left), you gain one Coin as a bonus. When you take an Expert from the third column, you must spend an additional Coin. You may take Experts from the middle column without additional costs. Experts in the fourth column and beyond cannot be taken in the first round.
When buying a Mission Coordinator, you must spend two additional Coins.
Placing an Expert: Place the chosen Expert in the matching row on your Tableau. At the beginning of the game you already have an Engineer, an Investor and a Radio Operator printed on your Tableau.
Mission Coordinators are "wild" Experts and can therefore be placed in any row. They will count as an additional icon from that column for the rest of the game.
Pilots and Mechanics can also be placed in any column. However, they do not count as an additional icon in that column. You can find more details on page 15.
If you place an Expert on one of these three spaces, you immediately gain the depicted bonus:
- Gain an Explorer.
- Advance one step on the Expedition Track for each Radio icon on your Tableau.
- Draw two Cards from the common deck.
When you activate this action space on the Harbor, you gain a Radar Tile and may perform the action of a Station that you already built (you can find more information on Stations below).
This icon indicates that you may place only one Explorer between these four action spaces. Since there are two of these areas with four action spaces, you may perform this action a total of two times during the game. You can find similar action spaces on Expert Action Tiles.
Exploring Landscapes
At the beginning of the game, depending on the number of players, there are two to four explored Landscapes. The action spaces of explored Landscape Tiles are available to all players. To explore a new Landscape, set an Explorer on the nearest unexplored Landscape Tile. The nearest unexplored Landscape is always the one that was placed earlier during setup. Follow the red marks. Once all Landscapes have been explored, place additional ones, as described in setup step 2, next to the last Landscape.
Choose the nearest unexplored Landscape and gain a Radar Tile. Turn the Landscape Tile on the "explored" side and move your Explorer on the space with the eye icon.
The newly explored Landscape has an action (Gear icon) with action spaces that are available to all players from now on.
b.) Build a Station
If you have purchased a Station during the Planning Phase, you may now - as an action - build a Station Site on the board. Count the number of Engineer icons on your Experts (you have one from the beginning of the game) and from your face-up Expedition Cards. Take a Station Site that shows that number of Engineer icons or less. Place it on the board so that at least one edge of the Tile touches a explored Landscape. You may choose any side of one of your personal Station Sites or a face-down Station Site from one of the common piles (see step 3 of setup).
Finally, place your Station on the corresponding space of the Station Site and, as a bonus, perform the action (Gear icon) of an adjacent explored Landscape.
The Station Site counts now as an explored Landscape. Therefore, its action space is available to all players from now on.
A Meteorite is explored as soon as it is adjacent to an explored Landscape.
Example: Catalina builds a Station.
(1) She has a total of two Engineer symbols on her Tableau. She takes one of her personal Station Sites with value two.
(2) She places the Station Site adjacent to an explored Landscape.
(3) She places her Station on the matching space of the Tile and performs the action of an adjacent explored Landscape. She chooses the action "gain 3 Energy".
c.) Upgrade a Station
During the Action Phase, there are three levels of Station Upgrades available to you. Station Upgrades must always be built in ascending order. This means that you must first build a level one Upgrade on a Station, before you can build a level two Upgrade there. To build a level three Upgrade, you need a Station that has already a level one and a level two Upgrade. Furthermore, each Upgrade costs Construction Material and requires a certain amount of Presence in the area around the Station. After upgrading a Station, you gain the corresponding reward.
Important: At the end of the game, you lose three victory points for each own Upgraded Station you have that is adjacent to one of your Upgraded Stations!
Check the Presence requirement: Count how many Explorers and Stations you have adjacent to the Station you want to Upgrade. Explorers directly on the Station Site count as well. If the sum is at least equal to the Presence requirement, then you may build that Upgrade.
This Station has an Explorer on the Station Site, plus an Explorer and a Station of the same colour on adjacent Tiles. Therefore, this Station would fulfill a Presence requirement of 3.
Construction costs: Pay the required Construction Materials to the general supply and place the Upgrade into one of the slots of your now-Upgraded Station.
Gaining Rewards: Finally, gain the matching reward.
- Gain one Expert from the Expert Plan.
- Gain a Radar Tile.
- Burn (remove) a Storm Card from your Tableau or your personal discard pile.
- Gain one Explorer immediately. Additionally, during the Planning Phase, you gain one extra Explorer from the pool of five from your Tableau.
Once you have built this Upgrade (level 2) on a Station, you gain a new Base.
This Base does not provide an Expedition Bonus. However it provides an additional space to place a Storm Card.
Example: Rodrigo builds a level two Upgrade on a Station. (1) He fulfills the Presence requirement of "4", since he has three adjacent Explorers and one on the Station Site. He pays five Construction Materials to the general supply. (2) He takes the Upgrade and adds it to the Station on the Station Site. (3) Then, he gains the reward. He burns one Storm Card from his personal discard pile and one Storm Card from his Tableau. At the end of the game, he will gain three victory points for this Upgrade.
d.) Use a Radar Tile
Take a Radar Tile from your Tableau and place it in the general supply. Then, follow these steps - activate the Radar Effects & buy Cards - in any order.
Activate the Radar Effects: Activate every effect with a Radar icon in any order. You can find Radar icons on Project Cards and Expedition Cards on your Tableau. If you activate the Radar Effect of an Expedition Card, place that Card in your personal discard pile afterwards. If you activate the Radar Effect of a Project Card, turn the Card 60° sideways to indicate that you already used it this round. If you decide to activate an effect, you must activate the entire effect and therefore also pay all the associated costs.
At the beginning of the game, you have one Card in your Expedition Deck with a Radar Effect. You may discard a Card from your personal display to the common discard pile to gain one Construction Material. Then place the Card to your personal discard pile.
Buying Expedition and Project Cards: You can buy any number of Cards from your personal display. To buy an Expedition Card, check if you fulfill its conditions (if any) and pay the depicted costs. Then place the purchased Card face-down on top of your Expedition Deck. To buy a Project Card, pay its cost to the general supply and place the purchased Project Card to the right of your Tableau.
Structure of Project Cards: Cost (e.g. Six Coins), Effect, Reward for buying (e.g. one Construction Material), Victory points at the end of the game.
Structure of Expedition Cards: Effect, Expedition Bonus, Cost (e.g. Ten Energy) and Requirement (e.g. you already have two Project Cards bought), Victory points at the end of the game.
Effects of Project Cards:
- Ongoing effect: After buying this Card from your display, its effect is active for the rest of the game.
- Radar effect: You may activate this effect once per round when you spend a Radar Tile for the "Activate the Radar Effects & buy Cards" effect. Turn the Card 60° sideways after activating the effect.
- End game: This effect will be activated during final scoring, giving you victory points depending on the degree to which the condition is met.
- Action space: This effect can be activated using the action space on the Card and is only available to you. Follow the usual rules for action spaces.
Effects of Expedition Cards:
- Round effect: This effect is active as long as this Card is face-up on your Tableau.
- Radar effect: You may activate this effect once per round when you spend a Radar Tile for the "Activate the Radar Effects & buy Cards" effect. Afterwards, place this Card in your personal discard pile.
- Immediate effect: This effect activates immediately after placing the Card on your Tableau during the Preparation Phase.
Examples of costs and requirements:
- Pay four Coins and discard two Cards from your personal display.
- Pay four Coins and one Construction Material.
- Requirement: Have at least three Upgrades. Pay twelve Energy.
- Requirement: Have at least two Project Cards in play. Pay fifteen Energy.
- Requirement: Have at least three Engineer icons. Pay eight Energy.
- Requirement: Have at least two Stations built. Pay thirteen Energy.
Example: Rodrigo wants to buy a Project and an Expedition Card from his personal display.
(1) He spends a Radar Tile.
(2) He activates the Radar Effect of the Expedition Card on his Tableau. He discards a Card from his personal display to the common discard pile (not in this picture) and gains two Coins and one Construction Material. Since he used its effect, he places the Expedition Card in his personal discard pile.
(3) Since he now has sufficient Coins, he buys the Project Card for four Coins. He gains a Radar Tile as a Reward. He places the purchased Project Card in the designated area to the right of his Tableau.
(4) Rodrigo has purchased his second Project Card. He therefore fulfills the requirement of the Expedition Card. He pays seven Energy and places the Card face-down on top of his Expedition Deck.
Radar Tiles as a free action
At any time during your turn, in addition to taking an action, you can also discard one or more Radar Tiles to receive either three Energy, two Coins, three Cards (from the common deck) or one Construction Material.
e.) Activate a Pilot or Mechanic
During setup, two Expert Action Tiles will be chosen at random. One is connected to the Pilot and the other one to the Mechanic. You can recognise them by their matching icons. If you have a Pilot or Mechanic Tile on your Tableau, as an action, you can flip the Tile face-down to the grey side and take the corresponding Expert action. This means that each Pilot and Mechanic Tile can only be used once.
Expert Action Tiles have an action space that can be activated with an Explorer and indicate which Expert Actions the Pilot and the Mechanic can perform. Here you can find an explanation of the Expert Actions:
- Burn an Expedition Card (not Storm) from your Tableau or your personal discard pile. Gain two Coins. This Expert is worth two victory points at the end of the game.
- Build a Station with two additional Engineer icons. This Expert is worth two victory points at the end of the game.
- Spend six Energy. Gain two Construction Material, two Coins and buy a Project Card. This Expert is worth two victory points at the end of the game.
- Move an Explorer from a Landscape to an empty action space in an adjacent Landscape and perform its action. A movement from or to the Meteorite is not allowed. This Expert is worth two victory points at the end of the game.
- Gain two Construction Material. This Expert is worth two victory points at the end of the game.
- Upgrade a Station. You have a three Presence discount during this Upgrade. This Expert is worth two victory points at the end of the game.
- Move an Explorer to an empty action space in an adjacent Landscape and perform its action. This Expert is worth two victory points at the end of the game.
- Gain six Energy. This Expert is worth two victory points at the end of the game.
Example: Rodrigo uses the action of the Pilot. (1) He flips the Tile face-down. (2) As his action, he gains six Energy - as indicated by the Expert Action Tile.
f.) Pass
If you cannot or you don't want to take more actions, you have to pass. Place all Storm and Expedition Cards from your Tableau on your personal discard pile. You can bring one unused Explorer to the next round. You cannot keep other unused Explorers or Stations.
Once all players have passed, the round is over. Check if it is time to score a Milestone. Milestones will be scored at the end of the third, fifth and sixth round.
Then pass the Starting Indicator to the next player in clockwise order and move the Round Indicator one space forward. At the end of the fifth round, when you move the Round Indicator to the last round, every player gains one Forecast Tile. Now you can start a new round with the Preparation Phase.
IV. Milestone
At the end of the third, fifth and sixth round, each player will score a Milestone. During the first scoring, i.e. at the end of the third round, you can choose one of the three available Milestone Cards: Two common Milestones and your personal Milestone Card.
Each Milestone Card has four columns. The first two are relevant for the first scoring. The two columns in the middle are relevant for the second scoring and the last two for the third scoring.
First scoring: Take your Milestone Tile marked with "I." and place it onto the chosen Milestone Card. If you fulfilled the conditions of the first column, you must place the Tile on the Milestone Card on the side showing the lowest amount of victory points. If you already fulfilled the conditions of the second column instead, place the Tile on the side showing the highest amount of victory points.
Follow the same logic with the columns for the second and third scoring. However, previously scored Milestone Cards are no longer available to you!
If you do not fulfill the condition of any Milestone Card, place the Milestone Tile back in the box instead.
Milestone Cards overview
A condition is represented as a combination of a symbol and a number. The symbol indicates the category. The number indicates how often you must fulfill said category to achieve the objective.
- Number of Engineers on your Tableau. This includes Mission Coordinators in the same column. At the beginning of the game you already have an Engineer.
- Number of Radio Operators on your Tableau. This includes Mission Coordinators in the same column. At the beginning of the game you already have a Radio Operator.
- Number of Investors on your Tableau. This includes Mission Coordinators in the same column. At the beginning of the game you already have an Investor.
- Number of Mission Coordinators on your Tableau. All Mission Coordinators count, no matter in which column they are.
- Number of Engineers on your Tableau. This includes Mission Coordinators in the same column. At the beginning of the game you already have an Engineer.
- Number of steps you reached on the Expedition Track.
- Number of Stations you have built.
- The number of Upgrades you have built. Levels do not matter for this Milestone.
- Number of Project Cards you have in play.
- Check your Station Site with the highest number of Engineer icons.
- Number of Cards in your Expedition Deck. Starting Cards and Storms count.
- Number of Explorers on your Project Cards.
- Number of Storm Cards you have burned from your Expedition Deck.
- Number of your Explorers and Stations on Landscapes in this temperature range.
- Number of Landscapes where you have at least one Explorer or Station.
- Number of Explorers that are not on Landscapes or on the Meteorite. i.e. Explorers on Project Cards, the Harbor or Expert Action Tiles.
End of the Game
After six rounds and after scoring three Milestones, the game is over. Add up victory points from the following categories:
- Experts: Gain two victory points for every fourth and fifth Expert in each of the three columns on your Tableau. Gain one additional victory point for each Mission Coordinator. Pilots and Mechanics can also be worth victory points depending on the Expert Action Tiles. Add up all these victory points.
- Expedition Track: Add up all victory points from spaces you have reached on the Expedition Track.
- Station Sites: Add up all the victory points from the Station Sites you have built.
- Stations: Add up the victory points from the Stations you have removed from your Tableau.
- Upgrades: Add up the victory points from all Upgrades you have removed from your Tableau.
- Negative points for Upgrades: Lose three victory points for each of your Upgraded Stations that is adjacent to another of your Upgraded Stations.
- Expedition Cards: Add up the victory points from the Expedition Cards in your deck.
- Project Cards: Add up the victory points from your Project Cards. This also includes victory points from end-of-game effects.
- Milestones: Add the victory points from the Milestones you achieved.
The researcher with the most victory points is the winner. In case of a tie, the researcher with the most Coins wins. If there is still a tie, all tied players share the victory.
Meteorite
In the game, you can find the following six Meteorites. The additional setup steps and their effects are explained in detail here. A Meteorite is explored as soon as it is adjacent to an explored Landscape. The number of your own Explorers and Stations adjacent to the Meteorite is your Presence.
-60.2° Meteorite Setup: No additional setup steps required. Action: You need a Presence of 3 to activate the action space of this Meteorite, i.e. you need at least three Explorer and/or Stations adjacent to the Meteorite. As an action, gain two Coins and the corresponding bonus.
-60.3° Meteorite Setup: Create a public display with the 4 Meteorite Expeditions. Action: You need a Presence of 3 to activate the action space of this Meteorite. Choose one of the four face-up Cards and place it immediately on top of your Expedition Deck. Additionally, gain a Forecast Tile. As soon as you reveal this Card, it will remain on your Tableau for the rest of the game! It counts as a purchased Card and is part of your Deck.
-60.5° Meteorite Setup: Create a public display with the 4 Meteorite Projects. Action: You need a Presence of 3 to activate the action space of this Meteorite. Choose one of the four face-up Cards and build it for free, adding the Card to your Projects in play. Additionally, gain two steps on the Expedition Track.
-60.4° Meteorite Setup: Place the fourth Milestone Tiles on the Meteorite and four unused Milestone Cards face-up in the general supply. Action: You need a Presence of 3 to activate the action space of this Meteorite. Gain your fourth Milestone Tile, two Construction Material and choose a Milestone Card. Only you may score this Milestone Card.
During any Milestone Phase, you may additionally place the fourth Milestone Tile on any Milestone Card you did not score yet, as long as you fulfill its condition.
-60.1° Meteorite Setup: No additional setup steps required. Action: You need a Presence of 6 or 4 to activate the action space of this Meteorite. At the end of the game, you receive the corresponding victory points and, as an action, you gain one Construction Material and draw two Cards from the common deck and place them in your personal display.
-60.6° Meteorite Setup: No additional setup steps required. Action: This Meteorite has no action space. You can perform this action only by building a Station adjacent to it (see "Build a Station" on page 11). Gain 5 Energy. Game End: Check your Presence at the end of the game. The player with the highest Presence gains 5 victory points. The player on second place gains 2 victory points. In case of a tie, all tied players gain the indicated amount of victory points.
Solo Game Against Arka
You can also play the game solo against Arka. For a solo game, follow the normal setup for a two player game. Also, complete the personal setup until step 12. Then, follow the following setup step 13:
- Take the Starting Indicator and 4 Milestone Cards at random. Choose 3 of them and place them above the Expert Plan. Place the fourth Milestone Card back in the box, as it won't be needed.
Setup Arka
-
Take Arka's Tableau, then place the 4 personal Station Sites, 5 Stations, 15 Explorers, 3 Milestone Tiles and all the Upgrades of a color next to the Tableau.
-
Take an Explorer and place it on the first step of the Expedition Path. Place the last Explorer on the starting space of the rondel. Place the Expedition Marker on the first space of the Expedition Track. Arka does not need the Energy Marker.
-
Shuffle Arka's Milestone Cards and place three of them below her Tableau. The remaining Arka Milestone Cards won't be needed for this game.
-
Take Arka's 9 Action Cards with 1 star icon. Then, depending on the difficulty level, draw at random a number of Arka's Action Cards without a star icon.
- Standard: 1-2 Arka's Action Cards without a star icon
- Legendary: 3-4 Arka's Action Cards without a star icon
- Epic: 5 Arka's Action Cards without a star icon
Shuffle Arka's Cards together to form a face-down deck and place it beside her Tableau, as depicted. Leave some space to the side to flip Cards face-up and some space below for a discard pile.
Arka's three Milestone Cards each show an "Always fulfilled" condition with an Overfulfill bonus:
- Always fulfilled. Overfulfill: Twice as many Engineers. Special Action: Take the leftmost Engineer.
- Always fulfilled. Overfulfill: One more presence on Landscapes. Special Action: Place an Explorer on a Landscape.
- Always fulfilled. Overfulfill: Three Project Cards more. Special Action: Take the leftmost Investor.
Arka's Turn
The solo player follows all phases as normal. Arka instead does not perform a Preparation and a Planning Phase. Therefore, Arka is only active during the Action Phase and scores Milestones at the end of the third, fifth and sixth round.
I. PREPARATION (skipped) → II. PLANNING (skipped) → III. ACTION → IV. MILESTONE
Arka's Action Phase
On her turn, Arka either carries out the actions on an Action Card or passes. The Expedition Level shows how many stars Arka will play in the current round. At the beginning of the game, Arka plays until three stars. On Arka's turn, reveal the top Card of the Action Card deck and carry out the actions listed on it. If you can not perform an action, then move the Explorer in the Rondel one step forward. Place the Action Cards face up next to the Action Card deck, slightly offset. This way you can easily count how many stars Arka has already played in the current round. If on her turn Arka has already played the specified number of stars, she passes instead. If the Action Card deck is empty, shuffle the Cards in Arka's discard pile to form a new deck. At the end of the round, take the played Action Cards and put them on the discard pile.
Most Action Cards have multiple actions. Always carry out the actions from top to bottom.
Rondel: In the middle of Arka's Tableau, there is a rondel. The first action on most Action Cards is to move the Explorer on the rondel. Move the Explorer the indicated number of steps clockwise and carry out all the actions that the Explorer comes across.
This action means: Move the Explorer one step clockwise and carry out all the actions that the Explorer comes across.
If the Explorer crosses this action, Arka draws a number of Cards from the common deck equal to the number of Investor icons on her Tableau. Place these Cards face down to the left of Arka's Tableau.
The Cards do not trigger any effects. They are worth only the victory points shown during final scoring.
If the Explorer crosses this action, move the Expedition Marker on the Expedition Track forward by a number of steps equal to the number of Radio icons on Arka's Tableau.
If you move the Explorer past the last space, start over at the beginning and move one step forward on the Expedition Path.
From now on, Arka will play Action Cards until four stars.
If the Explorer crosses this action, take an Upgrade of your choice and place it in the marked area next to the action.
Each Upgrade here is worth 4 victory points at the end of the game.
Additional rondel actions:
- Take the left-most Radio Operator. If none is available, take a Mission Coordinator instead.
- Take the left-most Engineer. If none is available, take a Mission Coordinator instead.
- Take the left-most Investor. If none is available, take a Mission Coordinator instead.
- Build a Station: Take a Station and the Station Site corresponding to the number of Engineer icons +1. Build next to the coldest Landscape adjacent to as many Landscapes as possible. In the event of a tie, you decide. If there are several Station Sites available, choose the coldest one. If there are no more Station Sites with that value available, take the next lower one.
- Building a Station if Arka has at least 3 Engineer icons: This action works just like "Build a Station", except it can only be carried out if Arka has at least 3 Engineer icons on her Tableau.
- Take the upper-most available Expert from the left. If Arka takes a Pilot or Mechanic this way, place it in the column with the most Experts on her Tableau. In case of a tie, choose freely.
- Take an Explorer and explore the next Landscape (following the red marks). Arka does not gain a Radar Tile.
- Take an Explorer and place it on the Landscape with the most available Action Spaces. In the event of a tie, place it on the coldest one. Prioritize choosing a Coin reward. Arka does not carry out the action, but only occupies the action space.
- Take an Explorer and place it on an Expert Action Tile. Choose the space with the highest Coin reward. If all are occupied, choose the one with the highest Energy reward. In the event of a tie, choose the leftmost space. Arka does not carry out the action, but only occupies the action space.
- Carry out the special action of Arka's next Milestone Card.
- Carry out the special actions of all Arka's Milestone Cards that haven't been scored yet.
Arka Milestones
At the end of the third, fifth and sixth round, Arka scores a Milestone just like a normal player. Arka has her own Milestone Cards. Arka scores them always from left to right. Arka automatically fulfills the condition for the lower victory point value. To exceed the requirement and thus score the higher victory point value, Arka must meet the specified condition compared to you. After scoring a Milestone Card, flip it face-down. Place the Milestone Tile with the correct side on the face-down Milestone Card.
Arka's final scoring
Arka gains the following victory points:
- Victory points for Experts (2 victory points for each fourth and fifth Expert in each column)
- Arka gains 4 victory points for each Upgrade.
- Arka gains 1 victory point for each step on the Expedition Track (each 5 steps are tracked on the path).
- Add up the victory point values on Arka's Cards (left of her Tableau). Project Cards with Game End - effect score always the lower victory point value.
- Add up the victory points of Arka's Milestone Tiles.
Symbology
Expedition Cards
- Round effect: Counts as a Radio Operator, Engineer or Investor symbol as long as the Card is face-up on your Tableau.
- Radar effect: Discard a Card from your personal display and gain one Construction Material.
- Radar effect: Count your Stations and Explorers on Landscapes in the specified temperature range. Gain one energy for each of them.
- Immediate effect on the Tableau: Discard a Storm from a Base or gain one Construction Material.
- Immediate effect on the Tableau: Exchange this Card with one from your personal discard pile or gain one Coin.
- Round effect on the Tableau: Project Cards cost one Coin less.
- Round effect on the Tableau: Gain one Construction Material each time you burn a Card.
- Radar effect: Buy an Expedition Card with a discount of four Energy. Put it on your deck as usual.
- Radar effect: Gain two Energy for each Storm on your Bases.
- Radar effect: Burn a Card (not a Storm) from your Tableau or personal discard pile. Gain one Construction Material.
- Radar effect: Gain one Coin for every two Investor icons (rounded down).
- Radar effect: Buy a Project Card with a discount of two Coins.
- Radar effect: Spend seven Energy to gain three Construction Material.
- Radar effect: Gain two Energy for every Mission Coordinator.
- Radar effect: Discard a Card from your personal display. Gain two Coins and one Construction Material.
Project Cards with end-game effects
- Total number of Experts of a specific type on your Tableau. Mission Coordinators count.
- Number of Mission Coordinators on your Tableau, regardless of column.
- Total number of Experts. At the beginning of the game you already have three.
- Number of Storm Cards you burned.
- Number of Project Cards purchased.
- Number of Expedition Cards purchased. Starting Cards do not count.
- Number of Explorers on your Project Cards.
- Number of Explorers on this action space.
- Number of your Explorers and Stations on Landscapes in the specified Temperature range.
- Number of Station Sites with at least five Engineer icons.
- Number of Upgraded Stations.
- Number of Stations you have built.
- Number of Upgrades.
Project Cards with ongoing effects
- Project Cards cost one Coin less.
- Each time you build a Station, gain one Construction Material.
- Each time you burn a Card, gain one Construction Material.
- Stations cost one Construction Material less.
- You have Presence discount of two when upgrading Stations.
- Each time you build a Station, gain the effect of two adjacent Actions.
- Each time you build a Station that requires at least one Engineer icon fewer than you have, gain two Construction Material.
- Each time you build a Station or place an Explorer adjacent to the Meteorite, gain one Construction Material.
Project Cards with action spaces or Radar Effects
- Activate the Radar Effects without discarding Expedition Cards and without turning Project Cards.
- Burn an Expedition Card from your Tableau or personal discard pile.
- Move an Explorer from one of your other Project Cards to a Landscape and activate its Action.
- Upgrade a Station with a Presence discount of three.
- Perform the action of one of your Stations.
- Gain one Coin for every two Investor icons.
- Build a Station Site with a discount of two Engineer icons.
- Gain two Coins and one Construction Material for each Storm.
- Gain one Coin for each of your Explorers and Stations on Landscapes in the specified temperature range.
- Buy a Station for the specified cost and place it in your reserve.
- Radar Effect: Gain two Energy and draw a Card from the common deck.
Landscapes
- Gain one Coin.
- Gain three Energy.
- Draw a Card from the common deck.
- Gain one step on the Expedition Track.
- Gain one Construction Material.
- Gain a Radar Tile.
- Gain a Forecast Tile.
- Buy an Expedition Card and put it on top of your Expedition Deck.
- Buy a Mission Coordinator.
- Perform the action of one of your Stations.
- Spend three Energy to gain an Expert.
- Burn an Expedition Card from your Tableau or personal discard pile. Gain two Coins and two Cards from the common deck.
Quick Reference
The game is played in 6 rounds, each one divided into 3 phases. Milestones will be scored at the end of the third, fifth and sixth round.
I. PREPARATION → II. PLANNING → III. ACTION → IV. MILESTONE
I. Draw Cards: Place the Card on your Tableau OR discard it. If you discard the Card, you end the "Draw Cards" step. If you place the Card on your Tableau, choose if you keep drawing Cards or if you end the "Draw Cards" step. Forecast Tiles: You may spend a Forecast Tile at any time to place the Card you just drew or a Card from your Tableau on your personal discard pile. You may keep drawing Cards after doing so. Expedition Bonus: Gain the Expedition Bonuses of your Expedition Cards and from your Bases in any order.
II. Explorer: Gain two Explorers and place them in your Reserve. Cards: Draw five Cards from the common deck. Keep one of them for free or spend two Energy to keep two cards. Place the chosen Card or Cards in your personal display.
III. a.) Activate an action space: Place an Explorer from your Reserve on an action space. b) Build a Station: Take a Station from your Reserve and a Station Site with a requirement equal to the number of your Engineer icons. Place the Station Site adjacent to a explored Landscape. Activate an adjacent action. c.) Upgrade a Station: First, check the Presence requirement and the Upgrade level of the Station (Upgrades must be placed in increasing order of levels). Take the Upgrade and pay the cost in Construction Material. Place the Upgrade on a Station. d) Radar Tile: Activate all Radar Effects and buy Cards from your personal display in any order. Alternatively, you may discard the Radar Tiles at any time as a free action to gain one of the depicted bonuses. e) Pilot or Mechanic: Flip the Tile face-down and perform the matching effect specified by the Expert Action Tile. f) Pass: Place all Cards from your Tableau in your personal discard pile. If you were the last player to pass, pass the Starting Indicator to the next player clockwise and check if it is time to score a Milestone. If necessary, first score the Milestones, then move the Round Indicator one step forward. If this was the last round, move to final scoring.
IV. Milestone: Choose which Milestone Card you want to score. Place your Milestone Tile with the correct side face up on the Milestone Card. You may not score this Milestone Card again.
Scoring Track
| Column 1 | Column 2 | Column 3 | Column 4 | |
|---|---|---|---|---|
| Name | ||||
| Experts | ||||
| Expedition Track | ||||
| Station Sites | ||||
| Stations | ||||
| Upgrades | ||||
| Negative Points | ||||
| Expedition Cards | ||||
| Project Cards | ||||
| Milestones | ||||
| Sum |
Designers: Alexander Pfister & Peter Prinz Art & Graphic Design: Martin Mottet
© 2026 Nanox Games e.U.