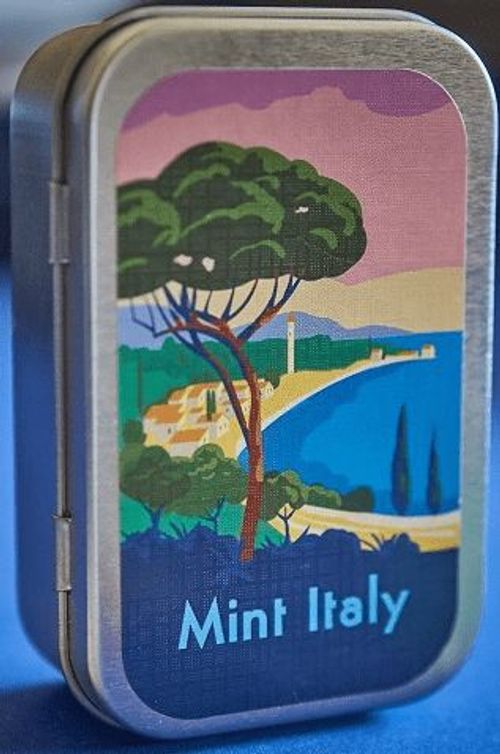
Mint Italy
Mint Italy Rulebook
Table of Contents
Table of Contents
- Objective
- Game Setup
- Gameplay
- Player Phase
- Production Phase
- Scoring Phase
- Cleanup Phase
- End of Game Scoring
- Solo Rules
- Solo Rules - Bot Personas
- Solo Rules - Game Setup
- Solo Rules - Player Phase - Bot Actions
- Solo Rules - The Bot Expand Action
- Solo Rules - Resolving Ties For Bot
- Solo Rules - The Bot Order Action
- Solo Rules - The Bot Buying Goods Action
- Solo Rules - The Bot Selling Goods
- Solo Rules - Production Phase Changes
- Solo Rules - Cleanup Phase
- Frequently Asked Questions
Objective
Players compete to earn the most victory points by building settlements and cities, finishing orders, and trading goods on a small island off the coast of Italy.
Game Setup
-
Build the island (map), place the marina map cards in their respective corners. Separate and shuffle the map cards. Put X north and south cards between marinas where X is the number of players. Randomly put food tokens (apple, ear of corn, and crossed-stalk icon) onto the 0 box of the commercio card.
-
Players get 2 player mats, 4 cubes and all tokens in a matching color. Put a player cube on the start box for both the mercato track and the navigation track. Put tokens onto mats. Place 1 of each player's cubes onto the top-left map card's starting VP box (this is the VP Track).
-
Randomly select player order, place the player cubes onto the boxes below the player order (person and cube) symbol in selected player order. (The player order boxes are located on the top left map card.)
-
Each player gets a coin tracking card. Put 1 of each type of supply tracking cards beneath it and rotate it to 0. Put their coin tokens onto the coin tracking card equal to these values:
- Player 1 = 30
- Player 2 = 31
- Player 3 = 32
- Player 4 = 33
(A supply tracking card is shown in the rules as a small tan card, rotated to show its value.)
-
Shuffle the scoring deck and deal 4 cards in a face up row.
-
Shuffle the marina deck and deal each player 2 cards. Players gain those starting bonuses, then return cards and reshuffle the marina deck. Then deal 1 card next to each corner map card (marina action side up).
-
Randomly flip as you shuffle the order cards (horse and cart symbol) to make a deck. Deal out a row of cards based on player count:
- 1-2 players = 5
- 3 players = 7
- 4 players = 9
-
Set mercato cards, put brown cubes on the green boxes.
-
In player order, perform a (expand) action on any land hex. Repeat the process in reverse player order (it doesn't need to be adjacent). Players must pay build costs.
Example of setup for steps 1-8 is on page 2.
Example of a 2 player game setup. The red player is the first player. Starting bonus for Blue: gain 1 white egg and 3 coins. Starting bonus for Red: gain 1 grapes and gain 1 grapes.
Gameplay
The game is played over 4 rounds. Each round has 4 phases. After 4 rounds, do end of game scoring (see End of Game Scoring below).
-
Player Phase: Players alternate taking turns in player order. Players perform 1 action on their turn.
-
Production Phase: Players gain goods and coins, then they may optionally convert grapes into a jar or a bottle if able.
-
Scoring Phase: Players earn victory points (VP) for the leftmost face up scoring card in the scoring row.
-
Cleanup Phase: Adjust food tokens on the commercio card. If it's not the last round, perform the steps required to set up the next round (see Cleanup Phase below).
Player Phase
Players perform 1 action on their turn. Afterwards, the next player in player order takes an action. Player order continues from last player back to first player. Continue taking actions until all players have passed. If a player can't take an action they must pass (see Pass Action).
The actions are listed as follows:
- Upgrade Action
- Marina Action
- Gain Order Action
- Finish Order Action
- Expand Action
- Mercato Action
- Pass Action
Upgrade Action
Players spend 7 coins to upgrade either the navigation track or the mercato track by 1 level. Move the cube right 1 box when upgrading a track. Gain the +1 coin bonus (white figure icon) once fully upgraded on the navigation track. The +1 bonus makes each white figure settlement produce 1 more coin.
Marina Action
If a player has a settlement (token on a land hex) that is next to or can reach a marina hex through lake hexes due to their navigation level, then they can take a marina action by taking a marina token from their player mat and putting it onto the card. Then do what the card says. Players can only perform a marina action on a marina that doesn't have their marina token on it.
Example - Blue takes a marina action because they can reach the marina with a navigation level of the green and blue hex icon from their settlement.
Gain Order Action
If a player does not currently have an order card, they can take one from the row of order cards. Depending on which round they take an order card, that player might gain coins, pay coins, or neither. The amount a player gains or pays is listed on the purple reference card. Place the gained order card to the left of that player's mats.
Finish Order Action
To finish an order card, a player must have all the goods in the needed box. If so, that player loses only those needed items, then moves the order card below their player mat to show it's finished (these are not hidden) and gains the rewards. If a hen is needed, the player must pick one built settlement from the map and put it back onto their player mat.
Example - To finish the order card, a player must have 1 black oval and 1 built settlement, the reward is 7 coins.
Below are the types of rewards players can gain:
- Coins
- VP
- Any 1 Upgrade
Moving Food Tokens (During Cleanup Phase)
A token moves from its box to the next numbered box. (Place it on top of any tokens that exist in the next box.)
Scoring Orders (End of Game): Commercio Card
The food token (printed as "fook" in the source, read here as "food") in the highest position (numbered box) is worth 4, next is 2, and last is 1. Players only gain VP for their finished order cards. The amount of VP gained is based on the food's worth that matches the icon on the bottom of order cards. If multiple tokens are stacked on top of each other in the same box, the one on top is considered in a higher position than the others, followed by the next token under it.
Example - A player has 5 finished orders which are 1 apple, 1 ear of corn, and 3 crossed-stalk icons. They get 9 using above image.
Expand Action
Place any settlement (square token) onto land (a hex on the island). The following are rules to place settlements:
-
You must build settlements adjacent to your existing settlements, or have enough navigation level to reach the desired hex through lakes from any of your existing settlements. Rivers need a navigation level of the green hex to build over.
-
You must pay both the settlement build cost and the land build cost in order to build onto that land.
-
There are 3 terrain types (light green hex, dark green hex, grey hex). The land must contain the required terrain type for that settlement.
-
Settlements can only be built on unoccupied land with no other settlements in it (yours or other players).
-
Pick the topmost settlement token to place from mat.
(Note: Land formed from 2 cards is considered 1 hex.)
Example - The player wants to build from the blue settlement, they have a navigation level that allows for river and lake crossing. To expand a settlement, the player must put it on land that contains either full or partial grey hex. The settlement costs 3 and the land they can reach from the blue settlement costs 4. The player spends a total of 7 to place a settlement from their player mat onto that land hex.
After a player expands their last marina token or settlement, they may take 1 available order card from the order row or the top card of the order deck without paying a fee. This only happens once during the expand action and does not occur during the production phase. If a player already has an order card, they may expand their last marina token or settlement, but can't take 1 available order card during that expand action.
Mercato Action
Players use rotated supply tracking cards to keep track of how many goods they have. Players take a mercato action to either sell goods they have or buy goods they need. Each player can only buy or sell each type of good once per round. To keep track, place the supply tracking cards below the coin tracker under "ready for mercato", and move them above the tracker above "gone to mercato" after taking the mercato action with that good. Players can buy or sell 1 good type per mercato action. The mercato tracker tracks the level for Quantity. Quantity is the amount of a good that can be sold or bought during a mercato action.
The mercato card keeps track of each good's price. Move the good's cube up (buy) or down (sell) a number of spaces equal to the amount of goods the player bought or sold. Never move the cube off the top or bottom box of the card.
Example - A player takes a mercato action to sell a bottle. The maximum they can sell is 3 and they want to sell 3 bottles. They gain 24 = (8 x 3). Update the coin tracker card from 5 to 29. Next, the player moves the bottle supply card from "Ready For mercato" to "Gone To mercato" and flips and rotates from 4 to 1. Finally, lower the bottle good's price 3 spaces from 8 to 6 on the mercato card.
Pass Action
Players can take a pass action on their turn. If a player takes a pass action, they can't take actions anymore in this phase. The top left map card contains the player order boxes. When a player passes, take their colored cube and move it to the topmost available box without a cube on it, located below the hand icon on the bottom left map card. They gain the coin amount on that box. The order of these boxes (top to bottom) is used for player order for the next round.
Example - Red chooses to pass on their turn. They get 14 coins and play continues to the Blue player, then Green player, then back to Blue player repeating until another player passes. After all players have passed, do the production phase.
Production Phase
Do this phase in reverse player order of the hand-icon boxes (passing boxes).
-
Gain the black oval, grapes, and coins shown on the player mats within the built settlement squares. Based on the mercato upgrade track, gain 1 good that is pictured below its level (if able).
-
May convert 1 grapes to a jar or a bottle for each grapes-to-bottle or grapes-to-jar conversion shown on the player mat that you have enough grapes for.
Example - The Blue player gains 1 black oval, 3 grapes, and 15 coins. They may use the 3 grapes they produced with the 1 grapes they had to convert 4 grapes into 2 jars and 2 bottles. Total gained after converting is 0 grapes, 1 black oval, 2 jars, and 2 bottles.
Scoring Phase
Each player simultaneously scores VPs on the leftmost scoring card's criteria. Track VP by moving player cubes on the VP track. If a player reaches the end of the track, place their cube at the beginning to keep counting VP.
Cleanup Phase
-
Discard each card in the order row from left to right and move its food token up 1 on the commercio card.
-
The player who passed first moves a food token up 1.
-
Deal out X new order cards based on player count. If the order deck is ever empty on any phase, flip over the discard pile to make a new deck (don't shuffle).
-
Move player cubes (keeping the same order) from the passing boxes (hand icon) to the player order boxes (person and cube icon).
-
Flip over the leftmost scoring card. If no scoring cards remain face up then go to End of Game Scoring.
End of Game Scoring
Score each step below. The player with most VP wins:
- 1 VP per each jar and bottle a player has on their supply cards.
- 1 VP per every 10 coins a player has.
- Gain VP based on the city numbers (see City Scoring).
- Gain VP based on finished orders (see Scoring Orders).
(Tie breaker: player closest to 1st player in player order.)
City Scoring
A city is a collection of adjacent settlements that are separated by empty land, rivers or lakes. Players score based on the number of different cities they can make. See the chart:
| Cities | 1-5 | 6 | 7 | 8 | 9 | 10+ |
|---|---|---|---|---|---|---|
| VP | 1 | 2 | 3 | 5 | 7 | 9 |
Example - Blue has 8 cities (circled in red). They would score 5 VP.
Solo Rules
Solo Rules - Bot Personas
There are 4 persona bot cards; each one has a unique bot action. They are on the back of the coin tracking cards. A persona is used to play solo. You start as first player.
Solo Rules - Game Setup
Follow normal game setup with the following changes:
- The bot doesn't get starting bonus cards, instead it gets 1 black oval, 1 grapes, and 50 coins.
- Use the bot side of player mats (see the setup image on page 9).
- Shuffle the bot deck and discard top card.
- Randomly pick a bot persona as the bot. Randomly pick another persona card and use its color to match the 2 map card positions located on the persona symbol. These map cards are used to place the starting 2 settlements.
- Build a person-shaped (grey) settlement first, then a person-shaped (green) settlement, for free, each on a separate map card.
- Pick the highest costing full hex land (page 10 for ties).
- Afterwards, place your starting settlements (pay costs).
Example - The Governatore's green card was selected to locate which map cards to use for the starting person placements.
Solo Rules - Player Phase - Bot Actions
Whenever you shuffle the bot deck, immediately turn over the top card and place it in the discard pile. On the bot's turn, if it has at least 10 coins, reveal the top card of the bot deck and perform the "do this" action. If it can't do it, then perform the "if can't then" action. Place the revealed card next to the discard pile and use the right section from the revealed card, and the left section from the top card of the discard pile for details on how to do the bot action. If the bot ever starts its turn at 0 coins it will pass. The bot gets 20 coins for passing first, 10 coins for passing last, instead of the hand-icon bonus.
Example - It costs 10 coins to do a build action to build a hen settlement. If the bot doesn't have any hen or if there are no valid lands within reach, it does a mercato action instead.
Discard the revealed card after the bot takes its action. The bot only uses 1 bot card on its turn. Some cards cost no coins to perform. Costs are shown below the action.
Solo Rules - The Bot Expand Action
The bot never pays a land build cost when expanding.
Solo Rules - Resolving Ties For Bot
First determine all the possible spots with the highest cost land that the bot can reach using its navigation level. Use the top discarded bot card to scan the direction shown. The start-arrow icon indicates to start at the top of the map, scan left to right, top to bottom. Select the first possible spot that is reached when performing the scan.
Example - Shows which 3 hex to build a settlement on from the existing settlement. The bot has a navigation level of the green and blue hex icon.
Solo Rules - The Bot Order Action
The bot tries to finish an order it has; if it can't, it tries to finish a new order by gaining a card X spaces from the left in the order row (X is number on bot card). Loop the selection if fewer cards in row than number. Only do this action if it can gain or finish an order. If the bot has enough coins to buy all missing grapes, black ovals, jars, and bottles, it'll spend 10 coins per each good; adjust prices by amount bought. Ignore any hen requirements on orders. The bot only gains VP from rewards.
Example - (X is 3). The bot has 1 grapes, 0 black ovals, 0 bottles, and 30 coins. It gains the first card, pays 20 to buy 1 black oval and 1 bottle and finishes the order.
Solo Rules - The Bot Buying Goods Action
If a bot is taking a mercato action and has none of the goods shown on the bot card, it will only spend 10 coins and buy X, where X is the quantity on the mercato level of the bot's mat. Adjust the price of the good by the amount purchased.
Example - Bot has no grapes, so it will purchase 2 grapes.
Solo Rules - The Bot Selling Goods
If a bot takes a mercato action and has those goods, it only spends 10 coins to sell up to the quantity listed at the mercato level on the bot mat. It only gains 1 VP per amount sold.
Example - Using the cards above, the bot sells its only grapes (the max it could have sold is 2). The bot gains 1 VP and no coins. Then adjust the market price by 1.
Solo Rules - Production Phase Changes
Perform the following steps for the bot in this order:
-
Perform an expand action with 1 person-shaped settlement token. Try to build a grey person-shaped settlement first. If bot can't or runs out, then try to build a green person-shaped settlement. If there is no available land the bot can reach, do not build a person-shaped settlement.
-
Gain the black oval, grapes, jar, bottle, VP, and coins shown on both bot's mats.
-
Upgrade the navigation track and the mercato track by 1 (does not cost any coins).
Solo Rules - Cleanup Phase
If the bot passes first, increase the food token by 1 where the bot has the most completed orders. If tied, choose the food token the player has the fewest completed orders of. If this is tied, use the highest position tied food token.
Frequently Asked Questions
What's the max coins and goods a player can have? Answer: Player = 89, bot player = 80. Max 7 per good.
How are these green and blue hexes used in an expand action? Answer: The blue hex allows the ability to build on a hex that touches any group of lake hexes from an existing settlement. The green hex allows building over rivers. Example: the yellow checks show all valid build spots with a navigation level of the green hex, and the green checks show all valid build spots with a navigation level of the blue and green hex icon.
Some hexes are formed by 2 cards. Are those treated as 1 hex? If yes, does that hex include both terrain types? Answer: Yes, the formed hex includes both terrains.
What's "Always use first choice" mean for Navigatore? Answer: When given a choice, pick the first option on the marina action card. Example: it would get a jar for "Gain 1 jar or 1 bottle". When choosing which built settlements to produce on the marina action card, pick from left to right on top row of the bot mat.
How do you move food tokens not on the top of stack? Answer: Take it from its position within the stack and move it to the next numbered box.