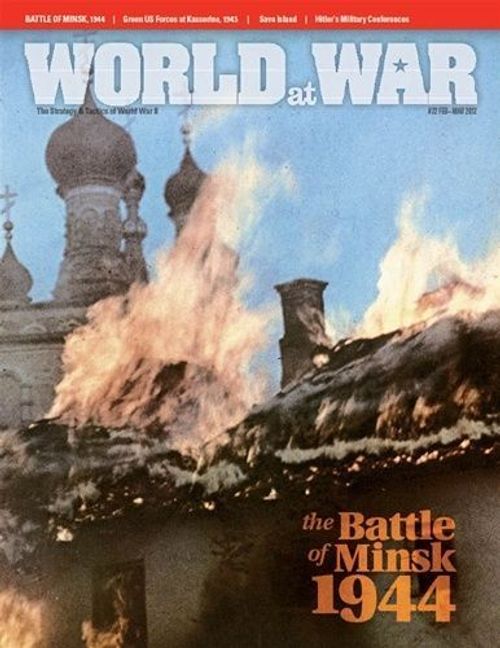
Minsk '44: East Front Battles, Volume II
Minsk '44: East Front Battles, Volume II Rulebook
Table of Contents
Table of Contents
- 1.0 Introduction
- 2.0 Components
- 3.0 Setup
- 4.0 Sequence of Play
- 5.0 Events
- 6.0 Reinforcements and Replacements
- 7.0 Command and Control
- 8.0 Movement
- 8.1 General Movement
- 8.2 Movement Procedure
- 8.3 Restrictions and Prohibitions on Movement
- 8.4 Minimum Movement Guarantee
- 8.5 Movement and Zones of Control (ZOC)
- 8.6 Effects of Terrain on Movement
- 8.7 Road Movement
- 8.8 Railroad Movement
- 8.9 Trail Movement
- 8.10 Bridge Movement
- 8.11 Exiting the Map
- 8.12 Halved Movement
- 9.0 Stacking
- 10.0 Zones of Control
- 11.0 Adjacent Combat
- 11.1 Combat General
- 11.2 Adjacent Combat Procedure
- 11.3 Restrictions and Requirements
- 11.4 Units with Zero Combat Factor
- 11.5 Multi-Unit and Multi-Hex Combat
- 11.6 Diversionary Attacks
- 11.7 Reducing the Combat Differential
- 11.8 Bombardment and Adjacent Attacks
- 11.9 Combat Strength Unity
- 11.10 Stacking in Combat
- 11.11 Choice of CRT
- 12.0 Ranged Combat
- 12.1 Ranged Combat General
- 12.2 Types of Ranged Combat
- 12.3 Range
- 12.4 Line of Sight
- 12.5 Spotting
- 12.6 Which Artillery Units May Attack
- 12.7 Bombardment and Other Types of Attack
- 12.8 Bombardment Procedure
- 12.9 Bombardment of Stacks
- 12.10 Close Support
- 12.11 Adjacent Attacks
- 12.12 Final Protective Fire (FPF)
- 13.0 Combat Results
- 14.0 Second Combat Wave
- 15.0 Suppression
- 16.0 Antitank Fire
- 17.0 Air Power
- 17.1 Air Attack Markers
- 17.2 Availability of Air Attacks
- 17.3 Conducting Air Attacks
- 17.4 Air Bombardment
- 17.5 Air Attacks in Close Support
- 17.6 Air Attacks as FPF
- 17.7 Range of Air Attacks
- 17.8 Combining Air Attacks
- 17.9 Limits on Air Attacks
- 17.10 FPF Restriction
- 17.11 No Accumulation of Air Attacks
- 18.0 Weather
- 19.0 Fog of War
- 20.0 Supply
- 21.0 Unproven Units
- 22.0 Special Units and Tactics
- 23.0 Victory Conditions
- 24.0 Scenario Rules
- Optional Rules
1.0 Introduction
East Front Battles (EFB) presents an operational simulation of the battles fought on the Eastern Front during World War II. The counters represent the units that took part in those battles. The map represents the terrain over which those units fought.
These rules are intended to be used in all games of the series. There are two players in each game; one controls the Axis forces (generally German), and the other controls the Soviets. Certain rules are designated as optional: this means that the players may or may not use them, at their own discretion.
2.0 Components
2.1 The Map
The map shows the battle area. A hexagonal grid (hexes) has been superimposed over the terrain features on the map, to regularize movement and the placement of counters.
Errata: The turn record track is printed 1941, but it should read 1944.
2.2 Cards and Tables
The Terrain Effects Chart (TEC) provides information about the effects of terrain on movement and combat. There are three Combat Results Tables (CRT), Mobile, Assault and Ranged, used to resolve combat. The turn passage track, printed on the map, indicates the current game turn.
Errata: On the Terrain Effects Chart, ignore the reference to rule 22.10 on the Hilltop line. On the Railroad line, the reference to 28.6 should be to 24.6 (see railroad movement).
Note that, on the Terrain Effects Chart, the reference to rule 13.1 applies specifically to the result "BR".
Errata: In the notes below the Ranged Combat results, "+12" is mistakenly given as the maximum differential: the maximum differential is "+16".
2.3 Counters
The counters represent the military units that took part in the campaign. The numbers and symbols on the counters quantify combat strengths and movement capabilities, and also indicate the unit types. Counters are called units for military forces, and markers for informational counters.
2.4 How to Read Units
Certain units have their combat factors in square brackets. This is explained in the antitank rule.
Range: a "U" range means the unit has unlimited range: it can fire at any location on the map.
Example of a supply unit. Example of an HQ unit.
2.5 Printed Back
Except for unproven units (see 21.0) and some markers, counters have values only on their front side (obverse). The reverse of most units is either blank or shows their parent organization.
2.6 Unit Types
There are two general types of units: maneuver (non-artillery) and artillery. Maneuver units are those with attack-defense-movement factors. Artillery units are those with bombardment-FPF-range/defense-movement factors. In addition, certain units are armored: all units that have an oval symbol, alone or superimposed over another unit-type symbol (for example, self-propelled artillery).
2.7 Unit Sizes
- ••• = platoon or section
- I = company or troop/battery
- II = battalion or squadron
- III = regiment, battle group of regimental size
- X = brigade
- XX = division HQs
- XXX = corps HQs
- XXXX = army HQs
- = task force or battle group
2.8 Unit Designations
Units may be identified by a single number or by a two-part designation. In the two-part designation, the number to the left is the unit's higher formation. This higher formation may be a battalion for companies, or a regiment, brigade or division for battalions.
2.9 Unit Colors
Several colors are used to differentiate each side and certain different formations within each side. The colors are specified in the scenario rules.
2.10 Air Units
Air units have no factors printed on them. Each is worth one point for combat, depending on how it is used.
- Ground Attack air (GA)
- Medium Bomber air (MB)
2.11 Game Scale
The scale of each game is determined in the scenario rules.
2.12 Inventory
A complete game of Minsk 44 should include the following parts: a 34" x 22" map, a rulebook and a counter sheet. Players will need a six-sided die.
3.0 Setup
3.1 Beginning
The map is placed between the players; the players then determine which sides they will command. Then, if the game has not been played before, the counters are separated from the counter sheet.
3.2 Deploying Units
Players consult their initial deployment instructions in the sections corresponding to the special scenario rules. These indicate which units are deployed on the map at the start of the game. Units may be assigned to specific setup hexes, or players may be instructed to choose the setup hexes for their units within certain areas of the map. After all starting units have been placed, the remaining units must be set aside and brought into the game according to the reinforcement schedule.
3.3 First Player and Length of Game
The scenario rules state which player is the first player, that is, the one who moves first in each game turn. The scenario victory conditions also say how the game is won. The game continues according to the sequence of play (see section 4.0) for the number of game turns specified by the scenario rules, or until a player surrenders, whichever occurs first.
4.0 Sequence of Play
4.1 Game Turns
A game of Minsk is played in successive game turns, each alternating player turns. During each game turn the players maneuver their units and resolve combat in sequence, according to the following summary and within the limits established in the rules that follow. At the conclusion of the last game turn, the victory conditions are consulted and the winner is determined.
4.2 Player Turns
Game turns are divided into a "First Player Turn" and a "Second Player Turn". Each turn in turn is divided into a series of segments, called "phases". The player whose turn is currently in progress is called the "phasing player" and the other player the "non-phasing player". The scenario rules designate who is the first player and who is the second player.
4.3 Game Turn Outline
I. Events Phase. Make any random event/weather determinations for the turn.
II. First Player Turn
- A. Reinforcement Phase. The first player places any reinforcements of his side on the map for that turn.
- B. Movement Phase. The first player moves all, some or none of his units, as he wishes, within the limits of the rules.
- C. Final Protective Fire Phase. The second player may now fire any final protective fire (FPF).
- D. First Combat Wave Phase. The first player uses his units to attack the units of the non-phasing player.
- E. Second Combat Wave Phase. The first player may use his units in command to attack the units of the non-phasing player.
- F. Recovery Phase. The first player attempts to remove all suppressed markers from his units.
III. Second Player Turn
- A. Reinforcement Phase. The second player places any reinforcements of his side on the map for that turn.
- B. Movement Phase. The second player moves all, some or none of his units, as he wishes, within the limits of the rules.
- C. Final Protective Fire Phase. The first player may now fire any final protective fire (FPF).
- D. First Combat Wave Phase. The second player uses his units to attack the units of the non-phasing player.
- E. Second Combat Wave Phase. The second player may use his units in command to attack the units of the non-phasing player.
- F. Recovery Phase. The second player attempts to remove all suppressed markers from his units.
IV. Game Turn Interphase. Advance the turn marker to the next box on the record track. If it is the last turn of the scenario, the game ends and victory is determined.
4.4 Phasing Player
During each first player turn, the first player is the phasing player, and the second player is the non-phasing player. During the second player turn, the second player is the phasing player and the first player is the non-phasing player.
5.0 Events
During each events phase, the players must check for random events. One player (it does not matter which) rolls a die and cross-references the result on the events table. Do not roll for events on the first turn of the scenario. Begin with turn 2 and following. An event may occur more than once per scenario, or may be a one-time event, as explained.
6.0 Reinforcements and Replacements
6.1 Reinforcements
Players may receive additional units during the course of the game. These units are called "reinforcements". Reinforcements appear in the reinforcement phase of the owning player on the game turn indicated by the scenario. Reinforcements are listed in the scenario instructions.
6.2 Placing Reinforcements
During your reinforcement phases, you may place on the map any of the reinforcements scheduled to arrive for your side. Units are generally placed on map-edge hexes. Placing units costs no MPs. They are simply placed on the appropriate map-edge hex.
6.3 Reinforcement Entry
Reinforcements must enter in accordance with the normal stacking restrictions. They may not be placed in a hex containing enemy units, although they may be placed in enemy zones of control (EZOCs). Once on the map, reinforcements are treated exactly the same as the other units previously deployed in your army.
6.4 Road Entry of Reinforcements
In certain cases, units may enter by road. In this case, the first unit would be placed on the map, and the remaining units would be placed lined up on the road off the map, within the stacking restrictions. They would pay the additional MPs they would need to place them on the first map-edge hex. If not all units can do so in a single turn, they will be received in the following turn. Units off the map have no effect on the game: they can neither attack nor be attacked.
6.5 Restrictions on Reinforcement Entry
If, and only if, all scheduled entry hexes are blocked by the occupation of enemy units, blocked reinforcements may enter via the unblocked map-edge hex closest to the scheduled hex. A player may not deliberately delay or hold back ground reinforcements.
6.6 Air Reinforcements
The scenario instructions will determine the number of air units a player receives each turn, if any. Each player places all air units available to him in an opaque cup or container, called the "Air Pool". When air units are claimed, choose that number at random and place them in the available air box. They may be used at any time during the following player turn. In some cases they may be used in the following friendly FPF phase (in the enemy player's turn). After an air unit is used for combat, return it to the Pool. In addition, all air units that have not been used at the start of the next friendly reinforcement phase are returned to the Pool (see section 17.0).
6.7 Contingency Reinforcements
A scenario may indicate that a unit may arrive as a "contingency reinforcement". Contingency reinforcements are units that either cost the player VPs to put into play on the map, or that appear as the result of an activation event being triggered in the game.
Note: There are no contingency reinforcements in Minsk, although there are "What If" reinforcements (see 24.6).
6.8 Replacements
Players may bring units that have been eliminated back into the game. These units are called replacements. Replacements may be taken only if a scenario assigns a player replacement points (RP). An RP may be used to attempt to bring back an eliminated unit.
6.9 Replacement Procedure
During a friendly reinforcement phase, a player determines his replacements as follows:
- He designates the unit to be replaced.
- He rolls a die.
- If the result is "5-6," it is permanently eliminated and cannot be returned to the game.
- If the result is "1-4," it returns to the game that number of turns later.
6.10 Types of Replacements
Scenarios may differentiate between replacement points used for armored units and those for non-armored units. Otherwise RPs may be used by any unit type.
6.11 Replacements and Command
To be eligible for replacement, a unit must be in command (see 7.0) when it was eliminated. Otherwise it is permanently destroyed when eliminated.
6.12 Accumulating Replacements
A scenario may give RPs as a renewable resource that may be used each turn. In that case, unused RPs may not be accumulated. A scenario may alternatively give RPs for a single use. In this case they are used in the same game turn in which they are granted, or they are lost.
7.0 Command and Control
7.1 Command Radius
Each headquarters (HQ) unit has a command radius. The command radius determines the number of hexes over which that HQ projects command. A unit is in command if it is within that number of hexes. If not, it is "out of command" (OOC). Use OOC markers to indicate this if necessary.
7.2 Command Radius
The command radius is traced in hexes, not in MPs (7.0). It may be traced through any type of terrain, and through enemy units and ZOCs.
7.3 Command Structure
Each scenario has a "command structure" section for each side. This will outline which HQ may provide command and for which units.
7.4 Multiple HQs in One Command
In some cases, a given command may have more than one HQ. In that case, each of those HQs may control all the units of that command.
7.5 Units Without an HQ
In certain cases, a unit may not have an HQ assigned to it, which means that the unit is always OOC (unless otherwise specified in the scenario rules).
Note: The Minsk scenarios allow many German units without HQs to be assigned to other HQs; otherwise they are OOC.
7.6 When Command Is Determined
Command is determined using the following procedure:
- Reinforcement phase. All reinforcement units are in command when placed on the map, and for the first movement phase in which they come into play.
- Movement phase. The command status is determined at the start of the movement phase, before any unit moves.
- Combat (Final Protective Fire phase, 1st combat wave phase, 2nd combat wave phase). The command status is determined at the moment a combat begins.
- Recovery phase. The command status is determined at the start of the recovery phase, before any unit checks for recovery.
7.7 Effects of Command
A unit in command functions normally. A unit that is OOC is limited as follows:
- Its movement allowance is halved (rounding down).
- It cannot supply any bonus for any offensive shifts (combined arms, engineers, offensive antitank, etc.). Defensive shifts are not affected (but this does not include antitank; see 16.5).
- It cannot engage in second-wave attacks.
- OOC artillery cannot make any kind of ranged fire (12.0). It may make adjacent attacks.
7.8 Duration of OOC
The in-command or out-of-command status lasts only for the phase or action for which the command status is checked. A unit in command may move to an OOC position and not be affected. Similarly, an OOC unit that moves to a position in command is not restored to command in that turn.
7.9 Command of HQ Units
HQ units are always in command and do not have to be within the command radius of other HQs in order to function normally.
7.10 Command of Air Units
Air units are always in command; however, an air unit cannot provide close air support to an OOC ground unit.
8.0 Movement
8.1 General Movement
During the movement phase of each player, the phasing player may move as many units as he wishes (and the circumstances of the battle allow). Units may be moved in any direction or combination of directions, within the hexagonal grid across the map.
8.2 Movement Procedure
Units are moved one at a time, tracing a route of contiguous hexes across the hexagonal grid. Thus, each unit entering a hex pays one or more MPs, or fractions of MPs (for example, roads), from its movement factor (MF).
[Transcriber's note: in the Spanish printing, the parenthetical in this rule is incomplete; the sentence is reproduced as printed.]
8.3 Restrictions and Prohibitions on Movement
Movement may never take place out of sequence. A player's units may generally be moved only during his own movement phase. Advances and retreats after combat are not considered part of regular movement and therefore do not consume MPs. A unit may never spend more MPs during a given movement phase than it has available (although road movement may effectively triple a unit's MF).
A unit may spend all, some or none of its MPs in any player turn, but unused MPs may not be accumulated from turn to turn or phase to phase, nor may they be transferred, passed or given from one unit to another. Once a unit has been moved and the player's hand has left the counter, it may not be moved again during this phase, unless the opposing player kindly permits it.
8.4 Minimum Movement Guarantee
All units may generally move a minimum of 1 hex per movement phase, spending all of their MFs in doing so, regardless of the exact number of MPs that would otherwise be required to make that move.
Exceptions. Units may never move directly from one enemy ZOC (EZOC) to another, may not enter an occupied enemy hex, and may not enter terrain prohibited to them.
8.5 Movement and Zones of Control (ZOC)
EZOCs affect movement; see rule section 10.0 for more details.
8.6 Effects of Terrain on Movement
A unit must spend 1 MP to enter a clear hex. To enter other types of terrain, a unit must spend more than 1 MP. Different costs apply depending on whether the unit is armored or unarmored. When the TEC calls for a cost of one MP to cross a hexside terrain feature or water barrier, this cost is in addition to the terrain cost for entering the hex.
8.7 Road Movement
A unit that moves from a road hex directly into an adjacent road hex, via a hexside crossed by a road, spends only 1/3 MP (0.33) to do so, regardless of the other terrain involved.
In addition, a unit using road movement:
- must begin in a road hex, and enter only road hexes during that movement phase;
- may not enter a road hex if that hex is over-stacked;
- may not enter EZOCs under normal movement, subject to the normal ZOC rules.
8.8 Railroad Movement
A unit that moves along a railroad line (like an ersatz road-replacement) pays only 1 MP per hex, regardless of the other terrain in the hex. All restrictions of 8.7 apply. Some scenarios permit special movement using railroad lines. This is covered in the scenario rules.
Note: Railroad embankments are hexside features. They provide no movement improvement and require extra MPs to cross.
8.9 Trail Movement
A unit that moves along trail hexes pays only 1 MP per hex, regardless of the other terrain in the hex. All restrictions of 8.7 apply.
8.10 Bridge Movement
Moving across a river hexside using a bridge never costs additional MPs. A unit moving across a bridge via road, railroad line or trail is subject to the restrictions of 8.7.
8.11 Exiting the Map
Players may exit their units from the map only if a scenario requires it. To do so, the unit must be on a designated map-edge hex and then move out as if entering an imaginary hex adjacent to the map edge. The terrain in that off-map hex is assumed to be the same as that of the hex from which the unit exited. A unit may start on or move to the map-edge hex and then move out, provided it has enough MPs. A unit may not exit if it is in an EZOC.
Example: If exiting via road, the unit would pay only 1/3 MP; if exiting via forest, it would cost 2 MPs (for an armored unit).
Units may exit the map only during the movement phase of the owning player. They may not do so as the result of an advance or retreat after combat. Units forced to retreat off the map are, on the contrary, eliminated. Once a unit exits the map, it may not return. Units that exit are not considered eliminated. Note that, in some cases, units exited will give VPs to the owning player.
8.12 Halved Movement
A unit's movement may be halved for several reasons in the game (see disengagement, weather). If more than one thing would halve a unit's movement, it is reduced to 25%. A unit's movement may not be reduced below 25% of its printed movement allowance, by any combination of things. Remainders are retained. A unit's movement, however, may never be reduced to less than "1".
9.0 Stacking
9.1 Stacking General
Stacking is the term used to describe having more than one unit in the same hex at the same time. The stacking limit is the maximum number of units you may have in a hex at the end of any phase. Friendly units may move through hexes occupied by other friendly units at no extra MP cost; they may not end any phase over-stacked. If for any reason the stacking limit is violated in any hex(es) at the end of any phase, the owning player of the units violating that limit must eliminate the excess (which does not count for VPs).
9.2 German Stacking
German stacking is always three units per hex.
9.3 Axis Allied Stacking
Stacking for Axis allied units is always 2 units per hex.
9.4 Soviet Stacking
Soviet stacking varies by scenario. In the 1941 and 1942 scenarios, the Soviets are limited to one unit per hex (in other words, no stacking is allowed). In the 1943 and 1944 scenarios, the Soviets may stack two units per hex.
9.5 Stacking with Air Units and Markers
Stacking limits apply to all ground units, including armored, unarmored, HQ and supply. Stacking limits do not apply to air units and game markers.
9.6 Stacking and Enemy Units
Friendly ground units may never enter hexes that contain enemy ground unit(s).
10.0 Zones of Control
10.1 Zones of Control (ZOC) General
The six hexes immediately surrounding a unit's hex constitute that unit's zone of control (ZOC). Units must cease movement for that phase when they first enter an enemy ZOC (EZOC), and are then obliged to attack during the subsequent combat phase.
10.2 Extent of ZOC
All effective ground combat units exert a ZOC at all times, regardless of the phase, player turn or game turn being played. ZOC projection is never negated by other units, friendly or enemy. Air units and suppressed units do not exert ZOC; however, suppressed units lose their ZOC (15.0).
10.3 Terrain and ZOC
In general, the ZOC extends into and out of all types of terrain and across all types of hexsides. The exception is that the ZOC does not extend across major river hexsides without a bridge, even with a bridge. Other exceptions may be noted in the scenarios.
10.4 Multiple ZOC
Both friendly and enemy units may simultaneously project ZOC into the same hex. There is no additional effect if more than one unit projects a ZOC into the same hex at the same time.
10.5 Effects of ZOCs on Movement
Units must stop their movement for that phase when they first enter an EZOC; otherwise, there is no additional MP cost that needs to be paid to enter an EZOC.
10.6 Effects of ZOC on Combat
You must attack all enemy units that exert ZOC over your units during the first combat wave phase of each of your player turns (you may attack, but do not have to, in the second combat wave phase). All friendly units in EZOCs must attack some enemy unit in the first combat wave phase, but not the second.
10.7 ZOC and Retreat After Combat
Units that retreat after combat within an EZOC are eliminated (see 13.5).
10.8 ZOC and Advance After Combat
Units may advance after combat into and/or through ZOCs. EZOCs never affect advances after combat (see 13.7).
10.9 Leaving an EZOC
Units may move out of an EZOC only if they:
- make a retreat or advance after combat; or
- disengage (10.10).
10.10 Disengagement
All units may use disengagement to move out of an EZOC. To disengage, a unit begins its movement in an EZOC and moves normally, with the following prohibitions:
- the movement allowance of the disengaging unit is halved (rounding down) in that phase; and
- disengaging units may not move directly from one EZOC to another; and
- a disengaging unit may not enter another EZOC in the same movement phase; it may do so in later phases.
11.0 Adjacent Combat
11.1 Combat General
There are two types of combat in EFB, adjacent and ranged.
- Adjacent combat is between opposing units in adjacent hexes and is (generally) mandatory in the first combat wave phase, and optional in the second wave phase. Adjacent combat is explained in section 11.2.
- Ranged combat occurs when artillery units attack units that are not directly adjacent to them, and such ranged combat is always conducted at the attacker's choice. Note also that air attacks are considered a form of ranged combat, although the air attack marker is placed in the hex to be attacked. Ranged combat is explained in section 12.0.
- In both types of combat, the phasing player is called the "attacker"; the non-phasing player is the "defender", regardless of the general situation across the map.
11.2 Adjacent Combat Procedure
For each attack, follow these steps.
- The phasing player chooses the CRT on which the combat will be resolved, either assault or mobile.
- The phasing player establishes the number and strength of his attacking ground units.
- The attacking player assigns the bombardment strength of artillery units and/or air attack markers.
- The players calculate the "combat differential", the total attacking strength (adjacent units plus close air and artillery support), minus the total defending strength. This result is the combat differential, expressed as a positive (+) or negative (-) number, or zero (0).
- Consult the previously chosen CRT under the appropriate differential column. Make any adjustments for terrain, combined arms, engineers, suppression and antitank fire. The modifiers on the Terrain Effects Chart are column shifts (for example, a unit defending in swamp terrain gives the attacker a +1 column shift).
- The attacker rolls a die and crosses the result in the appropriate differential column. The indicated combat result is applied immediately.
- Conduct any retreats.
- Conduct any advances.
- Proceed to the next combat.
11.3 Restrictions and Requirements
The attacker may resolve his combats in any order he wishes. During the first combat wave phase, all phasing units in an EZOC must attack. See section 14.0 for second-wave combat.
Generally, all non-phasing units in the ZOC of one or more phasing units must be attacked. The phasing player must choose which of the attacking units will attack which defending units, provided this structure is observed. A defending unit may be attacked from all six adjacent hexes, with possible built-in artillery and air attack support. No unit may attack or be attacked more than once per combat phase.
The phasing player should declare which of his units adjacent to enemy units will attack which defending units at the beginning of each combat, so as to ensure that all adjacent units are in fact being attacked. Close support from ranged fire should also be declared at the beginning of each attack.
Note: Suppressed units have no ZOC, so they do not have to be attacked, although they may be (15.0).
11.4 Units with Zero Combat Factor
Units with an attack factor of zero attack normally, using a strength of zero. For example, a unit with an attack factor of "0" attacks a unit that has a defense factor of "3". The combat differential would be "-3." This rule does not apply to artillery and air units, which attack adjacent units with their bombardment strength.
11.5 Multi-Unit and Multi-Hex Combat
If a phasing unit is in the ZOC of more than one enemy unit, it must attack all those enemy units that are not engaged by some other attacking unit.
Units in two or more different hexes may combine their combat strengths and attack a single hex, provided that all attacking units are adjacent to all defending units. Attacks may potentially involve any number of attacking or defending units. For an attack to be resolved as a single combat, all attacking units must be adjacent to all defending units, with the possible addition of ranged artillery bombardment and/or air support.
11.6 Diversionary Attacks
By making a series of attacks, a player may commit his attacking units in some attacks made at very poor or unfavorable differentials, while other attacks are made at more advantageous differentials.
11.7 Reducing the Combat Differential
The phasing player may never choose to reduce the differential of any attack. That is, he may never make an attack with a lower differential than that determined in 11.2.
11.8 Bombardment and Adjacent Attacks
A bombardment (ranged fire) counts as an attack; see section 12.0. A player may bombard an enemy unit that is adjacent to other friendly units, in order to free those friendly units from the obligation to attack the bombarded enemy unit, provided that the freed friendly units attack at least one other adjacent enemy unit.
11.9 Combat Strength Unity
The attack and defense strength of a given unit is always unitary. No single unit's strength may be divided between different combats, whether in attack or defense.
11.10 Stacking in Combat
Units attacking from the same hex may be combined into a single adjacent attack, or may attack separately into different adjacent occupied enemy hexes. Units defending in the same hex must be attacked as a single combined total; they may not be attacked separately.
Exception: ranged combat.
11.11 Choice of CRT
There are two CRTs to use in adjacent ground combat, mobile and assault. In general, the attacker chooses which CRT will be used in each battle, announcing that choice at the beginning of the resolution of each individual attack. Units defending in fortification or city hexes may never be attacked using the mobile CRT; units in entrenchment markers may be attacked using the mobile CRT.
The German player may always choose the mobile CRT if at least one armored or rifle (reconnaissance infantry) unit is involved in an attack. Otherwise, the attack must be on the Assault CRT. If only Axis allies are involved in the attack, it must be made on the Assault CRT, unless the scenario rules specify otherwise.
The Soviet player may choose only the Assault CRT for any scenario before November 1942. For scenarios beginning in November 1942 through the end of the War, the Soviet player may choose the mobile CRT if at least one armored unit is involved in the attack. Otherwise the attack must be on the Assault CRT.
[Transcriber's note: the Spanish printing reads "as alto" in this rule, which is taken to be the printed "asalto" (Assault).]
11.12 Shifting the Differential Column
Once the differential column on the CRT has been determined, the players make their "shifts" according to the factors listed below. Add up the total of the attacker's shifts (to the right); subtract it from the total of the defender's shifts (to the left). This produces the final shift.
Example: If attacking units with a total strength of 16 are attacking defending units with a total strength of 10, this produces a differential of "+6." The attacker receives one shift for combined arms; the attacker receives two shifts for antitank against tank units, and one for terrain. The total attacker shifts = "+1"; total defender shifts = "-3." The final shift is "-2." That moves the differential to the column "+2,3".
11.13 Column Shifts for the Attacker
In addition to the terms of 11.11, the attacker shifts the differential column on the CRT to the right by:
- One (1) column for engineers against certain types of terrain (22.2);
- One (1) column per bracketed attack factor (antitank) against a force defending with armor (16.0);
- Two (2) columns if there is at least one suppressed unit in the defending force (15.0).
11.14 Column Shifts for the Defender
The defender shifts the differential column on the CRT to the left by:
- Two (2) columns per bracketed defense factor (antitank) against an attacking force with armor (16.0);
- Two (2) columns if there is at least one suppressed unit in the attacking force (15.0);
- A variable number of columns for terrain (11.15, 11.16).
11.15 Effects of Terrain
Defending units benefit from the terrain in the hex they occupy and/or the hexside of that hex. Terrain in hexes occupied by the attacker has no effect on combat. The effect of terrain on combat is reflected by shifting the combat differential that will be used to resolve each battle.
Terrain shifts for combat are not cumulative. A defending unit benefits from the most advantageous terrain shift available to it. When two or more defending units are being attacked in a single combat, and they are in two different types of terrain, each having a different column shift, the entire attack is modified by the terrain in the hex that gives the most favorable benefit to the defender.
11.16 Hexsides
A unit may receive a shift for defending behind a hexside only if all attacking units are attacking across that hexside, and the restriction given above limiting terrain shifts to the best one available to the defender still applies here. That is, the defender does not get both the best terrain shift and the best hexside terrain shift; he gets one or the other, whichever is better.
12.0 Ranged Combat
12.1 Ranged Combat General
Artillery units may take part in combat both from adjacent hexes and from non-adjacent hexes. Each artillery unit may fire once per player turn. That is, each may fire once during the friendly player's turn for bombardment or close support, and once in the enemy player's turn for final protective fire.
12.2 Types of Ranged Combat
Unlike other units, artillery units do not have attack factors printed on them. Artillery units use their bombardment strength when attacking adjacent enemy units. When defending they use their defense strength. Artillery units may use their strength in three ways:
- "Bombardment" takes place when an artillery unit attacks an enemy hex not in conjunction with friendly maneuver units. Bombardment uses the "bombardment strength" of the firing artillery units.
- "Close support" takes place when an artillery unit adds its bombardment strength to the attack strength of friendly maneuver units making an adjacent attack. This also uses the "bombardment strength" of the firing artillery units.
- "FPF" is used in the final protective fire phase by non-adjacent artillery units firing to help the defense of other friendly units that are themselves defending against an adjacent attack. The unit's "FPF strength" is used.
12.3 Range
Range is counted in number of hexes. The range from a firing artillery unit to a target hex is counted including that target hex, but not the hex of the firing artillery unit.
12.4 Line of Sight
Artillery units are not subject to "line of sight" requirements; they may fire into and/or over any type of terrain, as well as into and through hexes containing friendly or enemy units.
12.5 Spotting
There is no need for a friendly unit to be adjacent to an enemy unit that is the target of ranged artillery bombardment. Scenarios may provide exceptions.
12.6 Which Artillery Units May Attack
Artillery units are not obliged to attack simply because an enemy unit is within their range. Each artillery unit may attack only a single occupied enemy hex when conducting a bombardment attack, and it counts, for the purpose of determining which enemy units are attacked in a combat phase, (so it may use artillery bombardments as "diversionary attacks" against enemy units). Note, also, that you may fire bombardment against enemy units that are adjacent to friendly units without those adjacent friendly units being involved. The number of artillery units that may fire in a single combat is determined by 22.4. Artillery may be combined with all types of air attacks and vice versa; see section 17.0.
12.7 Bombardment and Other Types of Attack
Bombardment takes place when artillery and/or air points attack non-adjacent enemy units and there are no other friendly units involved adjacent to the occupied enemy hex involved in that combat. There may be friendly units adjacent to the enemy; they simply may not be involved in the bombardment. Bombardment takes place only in friendly combat phases.
12.8 Bombardment Procedure
The procedure for resolving bombardments is similar to that for ground combat.
- Designate the bombarding artillery units and their target hex, which must be within the range of all artillery units involved.
- Total the number of bombarding strength points.
- Subtract from that the defense strength of the unit(s) being attacked.
- Make any normal terrain shifts (if any).
- Resolve the bombardment on the ranged CRT. Apply the modified results determined in 13.2.
12.9 Bombardment of Stacks
When bombarding a hex that contains more than one defending unit, resolve the attack individually for each unit. For example, if a bombarding artillery unit is attacking two defending units in clear terrain, the attacker would resolve the combat as two separate bombardments, one against each defending unit, using the full bombardment strength against both, computing the combat differential for each unit, and rolling the die separately for each unit being attacked.
12.10 Close Support
Artillery units may attack in concert with friendly units making adjacent attacks against enemy units. To do so, simply add the artillery's bombardment strength to the attack. Close support may take place only in the friendly combat phase. When friendly units are attacking adjacent enemy units in more than one hex, the supporting artillery units need to be within range of only one of the defending hexes in order to be able to add their bombardment strength to the attack. An artillery unit must be in command to provide close support.
12.11 Adjacent Attacks
When an artillery unit is directly adjacent to one or more enemy units, it must take part in an attack against at least one of those adjacent enemy units; it may not use ranged fire. In making that attack, the artillery unit uses its bombardment strength as its attack factor.
12.12 Final Protective Fire (FPF)
FPF is fired during the final protective fire phase. It uses the unit's FPF strength, but otherwise is treated as bombardment (it uses the ranged CRT). It is not added to the strength of friendly units defending. Instead, it fires on its own. Note that the main effect will be the suppression of the attacking units, which will disrupt the attacker's plans. FPF may be fired into adjacent hexes.
Designer's note: This is a change to the various games of the "Modern Battles" system, and more accurately reflects the effects of firepower in this era.
12.13 FPF Prerequisites
An artillery unit must be in command to provide FPF. FPF may be fired only against occupied enemy hexes adjacent to occupied friendly hexes; it may not bombard a hex that is not adjacent to a friendly unit.
12.14 Restrictions on FPF
An artillery unit may not FPF if:
- It is adjacent to an enemy unit; and/or
- It has been subject to a combat result that has caused its retreat or its suppression earlier in that same combat phase (or if it has been eliminated).
The fact that an artillery unit has merely been the target of a bombardment does not negate its ability to use FPF; it must have received a combat result to negate its FPF ability.
12.15 Defending Artillery Units
When an artillery unit is attacked, it uses its defense strength, not its FPF.
12.16 Effects of Terrain on Bombardment
Defending units may still receive a defensive terrain shift when being attacked by enemy bombardment, if they occupy certain types of terrain; see the TEC. Hexside effects apply when artillery is firing FPF; however, hexside shifts do not apply when a defending unit is being attacked by bombardment only.
[Transcriber's note: the Spanish printing of this rule ends with the stray characters "0020" after "bombardeo solo"; they are reproduced here as printed and are not part of the rule.]
Note: Terrain shifts are always given in terms of combat differential columns. For example, if 5 factors are attacking two factors defending in a town (column "+2,3"), it is shifted to the column "+1".
12.17 No Other Shifts
Apart from terrain, there are no other shifts when conducting ranged fire.
12.18 Combat Results and Artillery
Artillery involved in making and/or supporting any type of non-adjacent attack is not affected by adverse combat results. Artillery attacking enemy units from adjacent hexes is treated as normal maneuver units in those combats and is affected by adverse combat results. It uses its bombardment strength as its attack factor and to compute EX or AX results. It uses its defense strength when defending and to compute EX or AX results. It is retreated normally, but artillery may never advance after combat.
12.19 Fire Coordination
Generally, there are no restrictions on the number of artillery units and/or air attacks that may be used against any particular hex (see rule 17.0 for exceptions).
12.20 Impact Markers
Artillery impact markers may be used as a reminder to make it easier to remember which artillery units were assigned to which battles. They have no other effect on the game (if they are in a scenario).
13.0 Combat Results
13.1 Adjacent Combat Results
A1, A2 = Attacker retreat. All attacking units involved retreat the number of hexes indicated. The attacking player retreats his units in accordance with the rules of retreat. The defender may advance after combat along the retreat route.
AA = Attacker shot. The attacker must eliminate one unit first. Any remaining attacking units are then retreated two hexes. The attacker retreats his units in accordance with the rules of retreat. The defender may choose to advance after combat along the retreat route.
AE = Attacker eliminated. Eliminate all attacking units. The defender may advance into the attacker's hex.
AX = Attacker exchange. All defending units involved are retreated one hex, then one attacking unit is eliminated. Surviving attackers may then advance into the defender's hex.
BR = Both retreat. Both the attacker and the defender retreat one hex. The defender retreats first, followed by the attacker. There is no advance after combat. A BR retreat is otherwise treated as a normal retreat result. Note that, if a defending unit is surrounded by enemy units or EZOCs, it is eliminated, even if the surrounding units are retreated due to the same result.
BR conversion: the defender may, at his option, instead declare "Stand firm" when a BR result occurs and the defender is located in a fortification, city, town, village, hill or (optional rules) entrenchment or rubble hex, or if all adjacent attacking units are across minor and/or major river hexsides. In that case, treat the result as an EX. The defender must declare this before the die is rolled.
D1, D2, D3, D4 = Defender retreat. The defender retreats the number of hexes indicated. The defender retreats his units in accordance with the rules of retreat. The attacker may advance after combat along the retreat route.
DA = Defender shot. The defender must eliminate one unit first. Any remaining defending units are then retreated two hexes. The defender retreats his units in accordance with the rules of retreat. The attacker may choose to advance after combat along the retreat route.
DE = Defender eliminated. Eliminate all defending units involved. The attacker may advance into the defender's hex.
EX = Exchange. The defender eliminates one unit. Then the attacker eliminates one unit. If all defending units are eliminated, the attacker may advance after combat into the defender's hex. The reverse is not true; defenders may never advance even if they are the only surviving units.
13.2 Explanations of Ranged Combat Results
Ranged combat results are explained as follows:
- D1 = the target unit retreats one hex.
- DE = the target unit is eliminated.
- DS = the target unit is suppressed. A unit that is already suppressed is not further affected.
- DT = the target unit is suppressed. If the target unit was already suppressed, it is eliminated.
- — = no effect.
13.3 Eliminating Units
If there is a choice between units that may be eliminated, the owning player always chooses which are to be lost. Artillery making non-adjacent attacks and air attacks are not affected, nor are their strengths added to the total to be lost, nor are they counted in computing "exchange" type results.
13.4 Retreat After Combat
When combat results require that a unit(s) be retreated, the owning player must immediately move those units the indicated number of hexes away from their position. Retreat after combat is not normal movement; retreating units pay no MP costs from their MF to make retreats.
13.5 Retreat Structures
Retreat is subject to the following restrictions, and if a unit is not able to retreat within those restrictions, it will instead be eliminated. If a unit is forced to retreat into an EZOC or enemy-occupied hex, it is eliminated in that hex. Units may, however, retreat into hexes that contain enemy air point markers. Units may not retreat off the map, nor may they retreat across prohibited hexsides (see the TEC). A unit attempting to retreat across a major or minor river hexside (not a stream) must roll a die, and on a 1-3 it is eliminated; otherwise it retreats normally.
Bridges (printed and engineer) negate the need to make this die roll. Where possible, retreating units must retreat into and through vacant hexes. If no other route is available, retreating units may move through occupied friendly hexes. If the final hex on the retreat route is occupied to the point that the arrival of the retreating units would cause over-stacking, the retreating unit retreats one additional hex(es), until it reaches a hex in which it can stack within the given limits. Within these restrictions, a player is not required to favor one compass direction over another when making his retreats after combat. In all cases, retreating units must end the indicated number of hexes away from their previous combat position (or more if the last hex is over-stacked).
No given hex may be entered more than once during any one retreat after combat. Retreats must be carried out in as straight a line of hexes as possible. If more than one retreat route is available that apparently satisfies the above restrictions equally, then the owning player of the retreating units may choose between them. If a retreating unit cannot retreat the required number of hexes, and can retreat only a portion of the required number of hexes, it is eliminated in the last hex within which it was able to retreat. In such cases, the retreat route ends at the hex in which it was eliminated. Units may retreat into and through friendly units in excess of the stacking limit. If this occurs, the retreating unit is eliminated in the last hex within which it could retreat.
13.6 Units with Zero Movement Factor
Units with a movement factor of zero (0) may never retreat or advance after combat. They are eliminated instead if forced to retreat due to an adjacent attack. They are never retreated due to bombardment results; instead they receive a DS result; otherwise there is no effect.
13.7 Advance After Combat
All maneuver units may advance after combat if required by the combat result. Note that this may be for either the attacker or the defender (artillery units may never advance after combat, regardless of whether they make an adjacent attack or a ranged attack). When an enemy unit is forced to retreat as the result of combat, it will generally leave a route of vacant hexes behind it called the "retreat route". A unit may not advance across a major river hexside unless there is a bridge (printed or engineer).
13.8 Retreat Route and Advance
Any or all victorious units that took part in the combat and were adjacent to the retreated unit are permitted to advance along the enemy retreat route. If a unit is eliminated in a hex, the victorious units may advance into the hex it formerly occupied (within stacking limits). Artillery units may never advance. Also, air points are removed at the instant their battle is resolved; thus, they do not advance.
As with retreat, advance after combat is in terms of hexes, not MPs. If a unit is eliminated while retreating, the last hex it occupied is the end point of its retreat route. Victorious advancing units may stop their advance in any hex along the retreat route. They may not violate the stacking restrictions at the end of their advance. Victorious advancing units may ignore EZOCs. If a unit retreats into a hex that contains a friendly unit, the retreat route ends at the last hex entered by the retreating unit before entering the hex with that unit. In connection with this, note also the above.
13.9 Exercising the Option to Advance
The option to advance after combat must be exercised immediately, before beginning any other combat resolution. Units are never forced to advance after combat. Advancing units may neither attack nor be attacked again in that same phase, even if their advance places them next to enemy units whose battles have not yet been resolved, or that were not involved in combat (see the second combat wave rule below for how these units may attack again).
14.0 Second Combat Wave
14.1 Second Combat Wave Procedure
During the second combat wave phase, the phasing player may use any and all of his units in command to attack. This includes units that attacked in the first combat wave phase; it is entirely at the player's choice. Even if a unit is in an EZOC, it does not have to attack. Under the normal combat rules, if a unit conducts an attack in the second wave, it must attack all adjacent units that exert a ZOC into its hex.
14.2 Artillery and the Second Combat Wave
Any type of artillery that conducted ranged fire in the first combat wave phase may not do so again in the second combat wave.
14.3 FPF During the Second Combat Wave
No FPF is conducted in the second combat wave (the idea is that the defender already had his fire in the FPF phase).
14.4 Air Support in the Second Wave
Air points used in the first wave of attacks may not attack in the second wave. You may withdraw air points from the first wave to attack in the second wave, whether for adjacent or ranged fire.
15.0 Suppression
15.1 Suppression General
Units are in one of two states: either "effective in combat" or "suppressed". Units that are effective in combat become suppressed due to certain combat results. Suppressed units regain their combat effectiveness via "recovery". All units of both sides always begin each scenario in the "effective in combat" state, unless otherwise stated.
15.2 Causing Suppression
Certain bombardment results cause suppression. Place a suppressed marker on the affected unit(s). Suppression occurs only in bombardment, not in close support, even if artillery and/or air points are used (the Assault and Mobile CRTs never cause suppression).
15.3 Effects of Suppression
Suppressed units are automatically OOC (see 7.0) and suffer all the effects of being OOC (see 7.7), in addition to those effects of being suppressed. HQs may not provide command to them. The effects of suppression are listed below:
- Suppressed units lose their ZOC while in this state.
- If any of the units involved in an adjacent attack are suppressed, the CRT column is shifted two to the left.
- If any units involved in an adjacent defense are suppressed, the CRT column is shifted two to the right.
- Suppressed artillery may not fire ranged combat.
- Suppressed units may never advance after combat.
- Suppressed HQs may not grant command to their units.
- Suppressed units may not supply any shift for engineer attacks (22.2) or antitank fire (16.0).
15.4 Recovery
During the recovery phase of its side, a unit in command is automatically restored to combat effectiveness. A unit that is OOC must roll a die: on a "1-3" it remains suppressed; on a "4-6" it removes the suppression marker. The HQ recovers automatically, but suppression markers are removed from HQs after all other units have recovered.
16.0 Antitank Fire
16.1 Units with Antitank Capability
Units with bracketed attack and/or defense strengths [#] either had a large number of antitank guns, or armament especially effective against enemy tanks at long range.
16.2 AT Units in Attack
If any unit in an attacking force has a bracketed attack strength, and the defender has at least one unit of armored class, that combat receives one additional column shift to the right (+1).
16.3 AT Units in Defense
The benefits of an AT unit defending are as follows:
-
If any unit in a defending force has a bracketed defense strength, and the attacker has at least one unit of armored class, that combat receives an additional column shift of two to the left (-2).
-
If a unit with a bracketed defense strength is adjacent to any friendly units defending against an attack that has at least one unit of armored class in it, those units also receive the two-column defensive shift to the left (-2). This is determined at the moment of combat. The adjacent AT unit does not suffer any combat result. There is no line-of-sight consideration for this shift.
Note: The defending adjacent (non-participating) AT column shift is always received, even if the adjacent AT units are under a separate attack of their own.
16.4 Accumulation of AT Shifts
No more than one shift may be taken by the attacker for this. No more than two column shifts may be taken by the defender for friendly antitank fire. This accumulates with the other shifts.
16.5 AT Restrictions
An AT unit must be effective in combat to provide these shifts. It does not have to be in command (an AT unit that is OOC provides it as a unit in command would).
17.0 Air Power
17.1 Air Attack Markers
Air power is represented by air attack markers. There are two types of air markers: GA (ground attack) and MB (medium bombers).
17.2 Availability of Air Attacks
Air attacks are kept off the map until they are generated as reinforcements by a scenario. Each air marker may be used for one mission per game turn. Each air marker may potentially be refused each game turn according to the scenario rules.
17.3 Conducting Air Attacks
MBs are used in the same general way as artillery, within the restrictions determined below. Each air power counter counts as a bombardment, close support or FPF point. MBs may generally function only as bombardment. GAs may generally function as bombardment, close support and FPF.
17.4 Air Bombardment
Air units may attack enemy hexes by themselves in the same way as artillery bombardment. Use the ranged CRT.
17.5 Air Attacks in Close Support
Add air points to the strength of friendly ground units as if they were artillery.
Note. Each air point counts as a combat factor, not as a shift to the column of the combat differential.
17.6 Air Attacks as FPF
Air units may attack enemy hexes by themselves as FPF if otherwise permitted. Use the ranged CRT. See 17.10.
17.7 Range of Air Attacks
Air attacks may be used anywhere on the map; they have unlimited range.
17.8 Combining Air Attacks
A player may generally combine any number and types of air attacks against the same hex during the same phase, if otherwise permitted by the limits in 17.9. They may also be combined with artillery fire.
17.9 Limits on Air Attacks
A player may use the following number of air attacks per hex:
The German player may use any number of air attacks per hex. Axis allies may use a maximum of 2 air attacks per hex.
Soviet capacity varies by year: they may use only one air attack per hex in 1941; two per hex in 1942, three per hex in 1943 and four per hex in 1944 & 1945.
[Transcriber's note: the limits table that accompanies this rule is not present in the text layer of the printed Spanish rules; the limits are reproduced from the prose as printed.]
17.10 FPF Restriction
Air attacks may not be used for FPF in 1941-42. They may be used in 1943-45.
17.11 No Accumulation of Air Attacks
Air attack markers may be refused each turn; however, unused air attacks may not be accumulated from turn to turn. For example, a scenario might allocate 3 GA air attacks per turn. The player could therefore use up to three GA each turn. If he uses two in one turn, he could not use four in the next; however, he may still refuse the three in the next turn. Each air point may be used only once per complete game turn, either as bombardment, close support or FPF, within the restrictions given above. That is, if you use an air attack in the friendly player's turn, you may not use it again in the enemy player's turn as FPF, and vice versa.
17.12 Air Results and Combat
Air attack markers are never affected by ground combat results. A player may not use air attacks to attack or intercept enemy air attacks.
17.13 Air Attacks Are Not Units
Air attack markers do not count for stacking, have no ZOCs, do not block the movement or retreat of enemy units, and may not advance after combat.
17.14 Air Defense
Air units conducting any mission within the air defense range of an enemy air defense unit are affected as follows: their strength is halved, rounding down any remainder. That is, two air attacks would be equal to one combat point; one air attack would equal zero.
Note. There are no air defense units in Minsk.
17.15 Air Defense Range
Many units may fire on air attacks attacking their hex. Those units with the anti-aircraft symbol may fire on air attacks up to two hexes away.
18.0 Weather
18.1 Weather Determination
The default weather for the scenario will be indicated in the scenario instructions. Weather changes for a turn may be determined as a result of the events table. In some scenarios, more than one weather condition may apply. This will be explained in the scenario rules.
19.0 Fog of War
19.1 Examining Enemy Stacks
You may not examine enemy stacks unless one of the following conditions applies.
- You may always examine the unit that occupies the top of a stack.
- At the moment of combat, you may examine the enemy stacks that are attacking or defending.
- You may always examine the terrain type of a hex.
20.0 Supply
20.1 Supply and Supply Units
There are no general supply rules or effects in the game; all units are considered fully supplied throughout the game. Supply units are used to provide artillery units (only; non-artillery units are not affected) with increased combat strength. A player may have supply units assigned by the scenario.
Note. Supply units still grant supply even when they are suppressed.
20.2 Procedure
The supply unit must be within the supply radius of the units to be supported. All friendly artillery units then have their attack (bombardment) strength doubled during that combat phase. This is called "maximum attack supply".
20.3 Supply Radius
Each supply unit has a supply radius printed on it. The supply radius is traced as MPs from the supply unit to the unit that is to be supplied. A single supply unit may supply any number of friendly artillery units once. A supply line may not be traced through hexes that contain enemy units or prohibited terrain. It must stop at the first EZOC it enters, which may contain a friendly artillery unit (that is, you may supply an artillery unit in an EZOC).
20.4 No Replacement
Each supply unit may be used only once per game. Once a supply unit has granted maximum attack supply, to any number of units, it is expended (removed from the map). It may not be replaced after being expended. Supply that has been destroyed in combat may also not be replaced.
21.0 Unproven Units
21.1 Unproven Units General
Units with a question mark printed on their reverse instead of combat factors are green or unproven units, meaning that no player knows their current combat strength. When initially deployed on the map, they are placed showing their unproven side.
21.2 Turning Unproven Units
Units remain in their unproven state until the first time they become engaged in combat. They are then turned over after all attacking units have been declared and committed to combat. This also applies to unproven artillery units engaging in any type of ranged or adjacent combat, as well as units that are being targeted by ranged combat and/or air attacks.
21.3 Hidden Strength of Proven Units Until Turned
No player may examine the hidden side of units. Once revealed, they remain so, face up, for the rest of the game.
21.4 Units with Zero Strength
Units with a defense factor of zero are eliminated when revealed. Units with an attack factor of zero remain in the game.
22.0 Special Units and Tactics
Designer's note. Players wishing to play quickly, or those new to the wargame world, may skip this section.
22.1 German Advance After Combat
German armored units conducting an advance after combat do not have to follow the retreat route after the first hex. Starting with the second hex of the advance, they may move in any direction, up to the number of hexes they would otherwise be permitted to advance. This may be through EZOCs.
22.2 Engineers
Engineer units may carry out the following special functions:
- Assault engineers. If an assault engineer is involved in an attack against a hex that contains city or fortification terrain, or entrenchment markers, the attack is shifted one column to the right, cumulative with other offensive or defensive shifts.
- Bridges. An engineer unit may build a pontoon bridge across a stream or river hexside. The engineer must begin a movement phase adjacent to these types of hexsides and conduct no movement during the turn. During that turn, friendly units may cross the hexside at no additional cost. The bridge remains in place as long as the engineer unit remains in place. An engineer in an EZOC may not build a bridge, and if an enemy unit moves adjacent to the engineer, the bridge is considered destroyed. An engineer unit may cross the bridge by itself if no other unit does so in the same turn. The effect of an engineer bridge is to negate the cost of crossing a river hexside. This does not create a road in the hex. Units moving across an engineer bridge may not violate stacking restrictions in either hex of the bridge's hexside.
- Assault crossing. Normally, you may not advance after combat across a minor or major river hexside. However, if an engineer unit is part of the attack, then any unit in that attack may do so. This applies only to an attacker, not to the defender.
22.3 Screening
If the only units defending in a combat are armored recon or motorcycle units, the defending player chooses, instead of the attacker, which CRT (assault or mobile) will be used. This applies only to adjacent combats, not to defense against a bombardment.
22.4 Fire Control
There is a limit to the number of ranged units that may be involved in a single ranged combat. The German limit is 4 units; the Axis allies limit is 2. The Soviet limit varies by scenario: in the 1941 and 1942 scenarios the limit is 1 unit; in the 1943 scenarios the limit is 1 unit for FPF and close support, 2 units for bombardment; in the 1944 and 1945 scenarios the limit is 2 units for FPF and close support, 3 units for bombardment. The limits indicated above do not include air units, nor do they apply to situations in which ranged units are firing into adjacent hexes.
23.0 Victory Conditions
23.1 Victory Points (VPs)
Each scenario has its own particular victory conditions. In general, players accumulate VPs by meeting certain objectives during the course of the game, and by occupying certain terrain features at the end of the game. The player with more VPs at the end of the game wins (generally). Players should record their VPs on a sheet of paper or by using the VP markers and indices.
23.2 Levels of Victory
At the end of the game, the player with fewer VPs subtracts his total from that of his opponent, to determine the extent of victory (if any). In the table below, tactical victories are the lesser type of victory, and strategic victories are the greatest victories.
| Difference in VPs | Game result |
|---|---|
| 0-9 | Draw |
| 10-19 | Tactical victory |
| 20-29 | Operational victory |
| 30+ | Strategic victory |
23.3 Occupying Hexes
Occupation of target hexes means that the player has a unit in the hex at the moment it is claimed. Air attack markers or other types of markers do not count for these purposes.
23.4 Replaced Units
Units that are eliminated but subsequently replaced still count for VPs. Keep the record on paper.
23.5 VPs for Exiting
Some scenarios award VPs for units exiting the map. Units exiting the map count for VPs only if they exit by ground movement. They do not count if they exit via airborne movement.
Note: There is no airborne movement in Minsk.
23.6 Line of Communication (LOC)
If a victory condition requires the tracing of a LOC: The LOC is a route of hexes from the victory hex back to a friendly map edge; it may be of any length; it may not enter enemy units or terrain prohibited to ground unit movement. It may not enter an EZOC unless a friendly unit occupies that hex.
24.0 Scenario Rules
24.1 Historical Notes
This game covers the crucial exploitation phase of the great Soviet summer offensive against the German Army Group Center. Beginning 22 June, enormous Soviet offensives pierced the weak German front in multiple places. Soviet reserves were introduced through the gaps, aiming deep into the German rear to trap the German Fourth and Ninth Armies. The Third Belorussian Front campaign, led by the 5th Guards Tank Army and the 11th Guards Army, aimed at crossing the Berezina River and the transport hub of Minsk. The German 4th Army deployed an amalgam of shattered units plus the 5th Panzer Division to keep the escape route through Minsk open long enough for the rest of the units of the broken front line to escape.
24.2 Players and Sides
The German player deploys first. The Soviet player is the first player.
The German units are divided into three groups, all with the types or icons in black:
- Group von Saucken (green background)
- 5th Panzer Division (green background)
- Luftwaffe (blue background)
The Soviet units are divided into 4 groups, all types or icons in white:
- 5th Guards Tank Army (red background)
- 11th Guards Army (brown background)
- 3rd Guards Mechanized Corps (orange background)
- Red Air Force (mustard background)
24.3 Game Scale
Each hex represents approximately 3.5 kilometers from side to opposite side. Each turn represents one day.
24.4 Length of Game
There are six game turns, beginning on 27 June and ending on 2 July 1944.
24.5 Victory Conditions
The German player gains VPs as follows:
- 2 VP for each Soviet armored-type unit eliminated.
- 1 VP for each other type of Soviet unit eliminated.
The following points are gained at the end of each complete game turn if the Germans occupy the listed towns, and can trace a LOC from them to the west map edge:
| Town | VPs |
|---|---|
| Minsk (hex 1126 only, city center) | 4 VPs |
| Moldechno (0108) | 2 VPs |
| Krupki (4209) | 1 VP |
| Borisov (3114 only) | 1 VP |
| Berezino (4225) | 1 VP |
| Bopr (4807) | 1 VP |
Note: A LOC is defined as a route of contiguous hexes that is not occupied by an enemy unit or within any EZOC.
The Soviet player gains VPs as follows:
- 4 VP for each German armored-type unit eliminated.
- 2 VP for each other type of German unit eliminated.
- 10 VPs to the Soviets if they occupy any railroad hex between Krupki and Borisov during game turn 1 or 2; or 5 VP if they occupy any railroad hex during game turn 3 or 4 (only).
- 20 VP to the Soviets if they occupy any railroad hex between Borisov and Minsk during game turn 1 or 2; or 10 VP if they occupy any such railroad hex during game turn 3 or 4; or 5 VP if they occupy such a railroad hex during game turn 5; no VP in game turn 6.
The following points are obtained at the end of the scenario if the Soviets occupy them with a LOC to a friendly map edge:
| Town | VPs |
|---|---|
| Minsk (hex 1126 only, city center) | 12 VP |
| Moldechno (0108) | 6 VP |
| Krupki (4209) | 3 VP |
| Borisov (3114 only) | 3 VP |
| Berezino (4225) | 3 VP |
| Bopr (4807) | 1 VP |
Note: A LOC is defined as a route of contiguous hexes that is not occupied by an enemy unit or within any EZOC.
Designer's note: The Germans gain VPs each turn because this battle was being fought to cover the evacuation of other troops (not shown in the game), via the railroad line in the vicinity of Minsk. The Soviets obtain points only at the end of the scenario because they are achieving geographic objectives to close the pocket.
24.6 German Deployment
Friendly map edge: west edge.
The Germans may also receive reinforcements on the north and east edges (see below), but those edges are hostile.
Initial deployment
- FP garrison: any hex of the city of Minsk.
- 31 Infantry Division (all units), 267 Infantry Division (all units), 185 assault guns: within two hexes of the Berezina River.
- 5th Panzer Division: in or adjacent to any railroad line hex.
- 505 heavy tanks: in or adjacent to any railroad line hex.
- Harko 302 Artillery, 1 x supply unit: in any of the Minsk hexes.
- Von Saucken HQ, 23 Flak Division (all units), KG Anhalt (all units): anywhere west of the Berezina River.
Reinforcements
Beginning with the German reinforcement phase of turn 2, the German player checks for each of the following groups of units, rolling a die for each one. If the die roll is within the listed range, then all units of that group are received at the designated map edge. Once a unit appears as a reinforcement, the die is not rolled again for it.
West map edge (these units may use railroad movement to enter):
- 7th Panzer Division (all units): enter with a die roll of "6."
- 170 Infantry Division (all units): enter with a die roll of "6."
- 221 Security Division (all units): enter with a die roll of "6."
North map edge (these units may not use railroad movement to enter):
- KG Gottberg (all units): enter with a die roll of "4," "5" or "6."
- KG Florke (all units): enter with a die roll of "4," "5" or "6."
East map edge (these units may not use railroad movement to enter):
Place all of the following units of the 39 Corps, face down, off the map: KG A/FHH, KG B/FHH, KG 12, KG 110, KG 337, A/Kav, B/Kav. Roll a die for each unit individually; the unit enters with a die roll of "6."
Replacements
The German player receives ½ RP per turn (beginning in turn 2), for each of the following hexes that is occupied by the Germans and can trace a LOC to the west map edge:
- Minsk (1126)
- Moldechno (0108)
- Borisov (3114 only)
- Krupki (4209)
Round up any remainder. The German player may place a maximum of 1 replacement per hex per turn.
Note. RPs that are not used are lost. They may not be accumulated from turn to turn. Replacements enter the game via the friendly map edge (for example, the west for the Germans), and may use the railroad normally.
Air power
At the start of the game, place one ground attack marker and one medium bomber marker in the used air units box on the map. During each German reinforcement phase, roll a die: on a 1-4 no air units are received; on a 5-6 draw one air unit at random.
Command structure
- HQ von Saucken: may command all German units.
- Each of the German divisional commands (5th Panzer, 7th Panzer, 31 Infantry, 267 Infantry, 170 Infantry, 221 Security, 23 Flak, KG Florke, KG von Gottberg, KG Anhalt) has one or more battle group HQs: each HQ may command all units of that division plus one unit from any other command.
- The units of the 39 Corps have no HQ, but may be commanded within the limits above.
- The supply unit may be commanded by any HQ.
- German air units are always in command.
Special rules
The following special rules apply to this scenario.
-
Unproven units. German units with an unproven side are initially deployed showing their unproven side, and thereafter rule 21.0 applies.
-
Blowing bridges. The first time a Soviet unit moves adjacent to a bridge hexside, the player may, at his option, attempt to destroy that bridge. Roll a die: on a 1-4 the bridge is destroyed; on a 5-6 it remains intact. The German player need not have a unit adjacent to the hex from which it attempts to destroy the bridge. However, the German player may attempt to destroy each bridge only once per game, regardless of later situations.
-
Railroad movement:
-
The German player may move his units via railroad lines on the map. The unit must begin its movement in a railroad hex and may then move an unlimited number of railroad hexes. The unit may not begin or enter an EZOC.
-
A maximum of three German units per turn may use railroad movement. Railroad movement is not the same as road movement (so you may move through stacks while using railroad movement, unlike 8.7).
-
Reinforcements may enter the map using railroad movement, counting these against the limit of three units by railroad per turn.
-
Soviet units may not use railroad movement.
-
-
German road movement. German units may use road movement through units that have a movement value of 0 (for example, the garrison unit starting in Minsk). They ignore the stacking provisions of 8.7, in this case.
-
Historical German reinforcements. Instead of rolling the die for the units that appear on the west map edge, they are received in the designated turn:
- 221 Security Division: 30 June.
- 170 Infantry Division: 2 July.
- 7th Panzer Division: not received (historically, it did not reach the area until 2 July).
For the other German reinforcements, roll the die normally.
- "What If" reinforcements (optional).
The Germans had several units that they considered committed to Army Group Center, but did not have them, or they were used elsewhere on the Eastern Front. When this option is used, beginning with the reinforcement phase of turn 3, the German player checks for each of the following groups, rolling a die for each. If the die is within the listed range, then all units in that group are received on the west map edge. Additionally, the units of the 16th Parachute (FJ) may be placed on the hexes of Minsk provided those hexes are not occupied by enemy units. Once a unit appears as a reinforcement, do not roll the die again for it:
- 18SS battle group (all units): 4-6
- 16th Parachute (all units): 6
- FB Panzer Grenadiers: 5-6
- Walkyrie Infantry (all units): 4-6
If the German player chooses this option, the Soviet player receives 2 VPs for each individual contingency reinforcement unit received. The 18SS HQ commands all 18SS units; the 16th Parachute HQ commands all 16th Parachute units; the FB Panzer Grenadiers are always in command; Walkyrie units may be commanded by any German HQ.
Abbreviations
- FB: Fuhrer Begleit (escort)
- FP: Festung Platz (strongpoints)
- FHH: Feldherrnhalle (Field Marshals Hall)
- FJ: Fallschirmjaeger (paratroopers)
- Harko: Hoeherer Artillerie-Kommandeur (detachment)
- JgKdo: Jagdkommando, German anti-partisan special forces.
- Kav: Cavalry (a battle group formed of artillerymen mounting their guns on horses... real!)
- KG: Kampfgruppe (battle group).
- Walk: Valkyrie
- SS: Schutzstaffel (Nazi party troops).
24.7 Soviet Deployment
Friendly map edge: the east map edge and the north map edge east of the Berezina River are friendly to the Soviets.
Initial deployment
No units are deployed initially; all units enter as reinforcements.
Reinforcements
- 27 June: FD HQ, 3rd Guards Tank Corps (all units): on the north map edge, east of the Berezina River.
- 28 June: 5th Guards Tank Army (all remaining units): on the north map edge, east of the Berezina River.
- 28 June: 2nd Guards Tank Corps: on the east map edge.
- 29 June: 3rd Guards Mechanized Corps: on the north map edge, west of the Berezina River.
- 29 June: either the 8th Guards Corps or the 16th Guards Corps: on the north map edge, east of the Berezina River.
- 30 June: 11th Guards Army (all units other than those received under (3) and (5)); 2 x supply units: on the north map edge, east of the Berezina River.
Replacements
1 RP per turn.
Note. RPs that are not used are lost. They may not be accumulated from turn to turn. Replacements enter the game via the friendly map edge (for example, the east for the Soviets), and may use the railroad normally.
Air power
At the start of the game, place 4 ground attack markers and two medium bombers in the available air units box on the map. During each Soviet reinforcement phase, roll a die and draw randomly a number of air units equal to the result.
Command structure
- HQ 5th Guards Tank Army (5GTA) commands all units of: 5th Guards Tank Army.
- HQ 11th Guards Army (11GA) commands all units of: 11th Guards Army.
- Each tank and mechanized corps HQ commands all units of its own corps. Note: The 3rd Guards Mechanized Corps is not a formation of either the 5th Guards Tank Army or the 11th Guards Army.
- The FD HQ commands: any Soviet unit.
- The supply unit may be commanded by any Soviet HQ.
- Air units are always in command.
Abbreviations
- 5GTA: 5th Guards Tank Army.
- 11GA: 11th Guards Army.
- FD: Advanced Detachment (Forward Detachment).
- GC: Guards Corps.
- GD: Guards.
- MC: Mechanized Corps.
- TC: Tank Corps.
24.8 Weather
The weather is always clear in turn 1. In each of the subsequent turns, the weather is determined by the events table.
24.9 Events
In turn 1: skip the events phase. Roll the die normally for events beginning with turn 2.
24.10 Effects of Weather
If the result of the events table is hazy, reduce all air attacks by 50% (rounding down). LOS is limited to six hexes. If the result on the events table is light precipitation, reduce air attacks by 50% (rounding down). LOS is limited to three hexes. Also, movement factors are reduced by 50% (rounding down).
Optional Rules
25.0 German Long-Range Antitank Fire
25.1 Long-range AT units. German units with a bracketed attack factor have long-range antitank guns. In addition to the normal effects of the brackets, they may also conduct long-range antitank fire. This allows them to take part in hexes containing enemy units of armored class, using a modified form of ranged fire.
25.2 Long-range AT fire. It is conducted in the same way as ranged fire, both for attack and for defense.
- The long-range armored unit must be in command and effective in combat. It may not be located in an EZOC.
- The target hex must contain at least one enemy unit of armored class. A unit conducting this type of fire does not supply any combined-arms shift or shift for bracketed strength per se, although adjacent units may do so.
25.3 Range and line of sight (LOS). The maximum range for this fire is two hexes. Terrain and enemy units do not block LOS.
26.0 Prepared Defenses
26.1 Entrenchments. You may construct entrenchments as follows: you have an engineer unit in command and effective in combat in a hex. It does not move and, at the end of the movement phase, places an entrenchment marker. You may not construct an entrenchment in an EZOC.
26.2 Effects. Entrenched units receive an additional two-column shift to the left on defense. Also, entrenched units may convert a BR result into an EX when defending.
26.3 Duration. An entrenchment remains in place until there are no friendly units in it, either because they have been moved out or because they have been eliminated in combat. Therefore, you may not capture and use enemy entrenchments.
26.4 Commitment. It costs 2 movement factors to enter the ZOC of an enemy unit that is in a fort or entrenchment. This represents the time the attacker spends penetrating advanced lines, minefields and various other advanced defenses.
27.0 Rubble
27.1 Placing rubble. "Rubble" is the generic term for the various types of terrain devastation and the generation of smoke and dust columns that result from the massive use of firepower. When a ranged fire attack has a result of DT or DE, place a rubble marker in that hex.
27.2 Effects. A rubble marker has the following effects: 1) it adds +1 to the movement cost for entering the hex; 2) any road in the hex is eliminated; 3) any bridge on all hexsides of the hex is eliminated; and 4) if the hex contains urban terrain, the defender receives an additional column shift to the left.
27.3 Duration. Once placed, a rubble marker remains in the hex for the rest of the game.