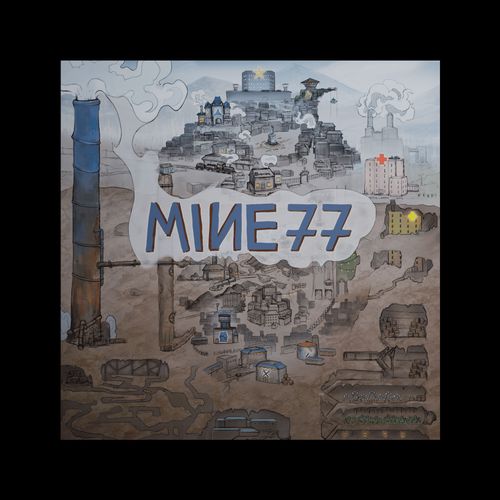
Mine 77
Mine 77 Rulebook
Table of Contents
Table of Contents
- Game Contents
- Setup
- Game Layout
- Playing the Game
- End of the Game
- Final Scoring
- Winning
- Explaining the Mechanics
- Activities on the Work Order Cards
- Government Order Cards
- Hospital
- Rosettes
- Improvements
- Trophies
- Dealing and Bartering
- For Your Information
- Rondels, Segments and Actions
- The Mine Rondel
- Non-Player Characters (NPCs) for Solo and 2-Player Games
- Glossary
- Icons
Game Contents
Small Cards
- 15 Commissariat Work Order cards
- 45 Player Work Order cards (9 cards each in 5 coloured sets, which includes 2 Easy cards)
Large Cards
- 16 Mining cards
- 22 Patrol cards
- 24 Patrol Resolution cards
- 14 NPC Player Work Order cards (7 cards each in 2 named sets)
- 18 Secret Objective cards
- 16 Government Order cards
- 16 Elven Embassy cards
Reference Cards
- 5 Resource Reference cards
- 5 Rondel Segment and 1 Night Shift Summary sheets
- 5 Steam Generation / Processing Plant cards
Boards
- 1 Main Game Board
- 1 Organiser Board
- 5 Player Boards
- 1 General Supply Board
- 2 NPC Player Boards
Tokens
- 20 Worker Meeples (4 each in 5 colours)
- 5 Victory Point Markers (1 each in 5 colours, double sided (Victory Point / +20))
- 23 Worker Action Markers
- 12 Blocked Action Markers
- 14 Warehouse Expansion Tiles
- 5 Incinerator Markers
- 5 Crane Markers
- 1 Steam Marker
- 10 Private Steam Markers
- 24 Rosettes
- 24 Trophy Markers (8 each in 3 types)
- 6 Add 5 Victory Point Markers (for exceptional scores)
- 1 Shift Marker
- 9 Barred Action Markers (for use with NPC players)
- 32 Research Tiles (4 different shapes and sizes)
- 120 Resources (10 of each: Flax, Wood, Marble, Lichen, Mushroom, Beer, Coal, Magic, Gems, Steel, Copper, Gold)
Setup
The Setup shown on these pages is for 3 or 4 players. If you are playing with 2 or 5 players it will be almost identical except that you will need to place more or fewer Blocked Action Markers in step 7. If you are playing Solo you will need to refer to the section on Non Player Characters (NPCs) on page 28. If you are playing with 2 players you may also wish to add an NPC, in which case the NPC player section would also be of interest.
Layout the Boards
Place all the boards on the table as shown in Game Layout on pages 8-9.
Put all the Resources into their respective columns on the General Supply Board.
Prepare each Player Area
-
Give each player a Player Board.
The Player Board is where each player will record their progress, and store their Resources and achievements. It has:
- Work Order deck
- Player Work Order cards for the day
- Purchased Commissariat Work Order cards (max. 2)
- Trophy storage shelves (max. 6)
- Research grid with bonuses and Improvements
- Crane, Incinerator and Private Steam slots
- Personal Warehouse with slots for Expansion Improvements. The Small Warehouse slot can store up to 2 Magic (and only Magic) tokens even before it is built. Once built it can, of course, store any Resources, including Magic.
-
Decide whether you are playing the Standard or Easy version of the Work Order decks and construct the decks accordingly (see Work Order Cards).
-
Give each player a set of 4 Workers, 1 Victory Point Marker and a basic deck of 7 Work Order cards in matching colours.
-
Deal 2 Secret Objective cards to each player (see Final Scoring). Each player then chooses one to keep and discards the other unseen. (Printed as "chooses on to keep"; read as "one".) The Secret Objectives are not essential for gameplay and for your early games you may wish to omit them for simplicity.
Prepare the Main Game Board
- Take 9 tokens each of Flax, Lichen, Mushroom and Wood. You should now have 36 tokens. (The printed step shows each token with its icon; the icon-only pictures are given here by name.)
- Take 25 of these, at random, and put 5 in each of the 5 Farm Field columns (the 3 Harvest Fields with purple boxes and the 2 Sowing Fields with brown boxes).
- Place the remaining 11 tokens into the Farming supply.
- Set each player's Victory Point marker to 0 on the Victory Point track with the side uppermost.
- Set the Steam marker to 3, as highlighted on the board.
- Place the Shift Marker on the Setup space on the Time Track.
- Add one black Blocked Action Marker to each Action space which shows a higher player count than you have, to remind you not to use them.
- Place all 4 of each player's Workers on the Entrance (1) segment of the Surface Rondel.
Prepare the Organiser Board
- Shuffle the Mining deck, draw the top card and place it, face up, in the first Mining slot.
- Place the rest of the deck face up in the second Mining slot. There should now be two cards showing, the drawn card in slot 1 and the top card of the deck in slot 2.
- Shuffle the Patrol deck, draw the top card and place it, face down (picture side up), in the first Patrol slot. If you are playing with fewer than 3 players you may first choose to remove the Patrol cards that call for more than 2 Workers. This is not essential but will make the game slightly easier.
- Place the rest of the deck face down in the second Patrol slot.
- Shuffle the Commissariat Work Order deck, deal one card, face up, into each of the three Commissariat Order slots.
- Place the rest of the deck face down in the Commissariat Order draw pile slot.
- Shuffle the Government Order deck, draw the top card and place it, face up, in the Today slot.
- Place the rest of the deck, face up, in the Tomorrow slot. There should now be two cards showing, the drawn card in Today and the top card of the deck in Tomorrow.
- Shuffle the Patrol Resolution deck and place it face down in the Patrol Resolution slot.
- Shuffle the Elven Embassy deck and place it face down in the Elven Embassy slot.
- Sort the Research tiles according to size and shape. Take 5 of the small squares and rectangles at random, shuffle them and place them in piles in their respective places blue side up, showing the price of the innovation. Repeat for the other small squares and rectangles. Also repeat for the L shapes and large squares using all 6 in each pile.
Game Layout
- Main Game board. This is where most of the action takes place. It shows the Surface and Mine Rondels, Time track, Steam track, the Train, Patrol area, Mine Warehouse, Farm, Hospital and Victory Point track. Setup for this board is detailed on page 7.
- Organiser board. Contains all card decks and the Research tiles. Setup for this board is detailed on page 7.
- General Supply board. Shows the columns for storing all Resource tokens not currently in play. Setup for this board is prompted on page 6.
- Player Board. Shows Work Order cards in play, Work Order draw deck, selected Secret Objective and earned Trophies. The anatomy of the Player Board is explained on page 6.
- Player Board (with Research). Shows Work Order cards in play, Work Order draw deck, selected Secret Objective, earned Trophies and Research tiles, and a Reference card. The anatomy of the Player Board is explained on page 6.
- Token store. All other Tokens and Markers not yet in play are placed to the side within reach of all players. Trophies are shown here as an example.
Playing the Game
Work is hard in Mine 77. Workers toil double shifts for 4 days a week, consoled by the fact that there will be three days of rest at the end of it.
Each of the four days has two Shifts, a Morning and Afternoon. During each of these players play cards and activate Workers. After each Afternoon Shift there is a Night Shift, which works differently and is mainly maintenance.
The standard game lasts for three days, consisting of six player Shifts and three Night Shifts. The long game adds an extra day to make eight player Shifts and four Night Shifts.
The Shift
Move the Time Marker onto the next Shift and play either a Morning, Afternoon or Night Shift, depending on what the Time Marker prompts.
Morning and Afternoon Shifts
You will begin each Shift with a hand of 5 Work Order cards (see Work Order Cards). You will then perform the following sequence 3 times during the Shift. When all Work Orders for this Shift have been resolved for these 3 cards there will be an optional 4th work order sequence, but if you wish to play a 4th Work Order you must spend 1 Rosette.
- Work Order Selection. Each player secretly selects one of the remaining Work Order cards from their hand. Once all players have chosen, all cards are revealed simultaneously.
- Work Order Activation. You will now activate your Work Orders in increasing Initiative order, as indicated on the bottom right corner of the cards. You may apply the Work Order to any Worker of yours that is not already committed to an Action slot.
When each player has played and activated exactly 3 Work Orders it is time to check if anyone does Overtime. Overtime requires 1 Rosette. Overtime expenditure is checked in ascending initiative order using initiatives of 3rd work order of the shift. Any players who opted to do Overtime will select the fourth work orders and resolve those just as before. After the Overtime is done, the Shift is over. Return to the top of The Shift and continue by moving the Time Marker.
Night Shift
Night is the time of rest in the dwarven mining complex. Except, of course for the small team of dwarves who form the Night Shift. They always have a lot of tidying up to do.
A Night Shift consists of the following steps:
-
Change Government Order cards.
"Have we hit our target for today?"
a. If Today has been completely fulfilled go to step 1c. b. If Today has not been fulfilled:
- All players lose 1 Victory Point for each missing resource on the unfulfilled Order.
- A player may spend 2 Rosettes to avoid this penalty. c. Return all Resources from the Today order to the General Supply. d. Discard the Today order and move Tomorrow to Today which will reveal a new Tomorrow card.
-
Steam Maintenance.
"Check the dials from first to last. If it rumbles, run quite fast!" - traditional Odrixian chant.
Steam remaining from the previous day is carried over into the next Morning Shift. If Steam is negative (see Shipping):
- All players lose 1 Victory Point for each negative Steam point.
- A player may spend 2 Rosettes to avoid this penalty.
- Move the Steam marker to 0.
-
Heal Hospitalised Workers.
"Doctor. I think he might be coming round. How many fingers am I holding up?"
Move all Workers in the Hospital together down one step (ICU > General Ward > Release).
- When a Worker reaches Release, place them immediately on the Elevator Hall (7) segment. This could lead to a fight (see Elevator Hall).
-
The Elven Embassy issues Purchase Orders.
End of the Game
When the game ends, proceed to Final Scoring to determine total Victory Points. The game can end in one of two ways:
End of the Week
"TFI Friday, that's all I can say!"
The most usual way for the game to end is after the Third or Fourth Night Shift.
Disaster
"Well, that could have gone better!"
If at any point a player's current Victory Point total falls to -10 on the chart the game ends instantly and proceeds directly to Final Scoring. It is possible that the triggering player could end up with the most Victory Points after Final Scoring, if everyone was doing extremely badly. But whatever the situation at the end of Final Scoring, the player who triggered the end by falling to -10 is always considered to have lost the game.
Final Scoring
"End of the week, chaps. Easy shift tonight."
Reminder: You should already have performed steps 1 to 4 of the final Night Shift.
-
Rosettes.
"These are going on my wall, and no mistake!"
Gain 1 Rosette for each Worker on the Entrance (1) space. Spend full sets of 3 Rosettes to score 1 Victory Point.
-
Magic.
"Ka-zaam!"
Spend 2 Magic to score 1 Victory Point (rounded down).
-
Trophies.
"And these go on the mantelpiece."
a. Each Trophy scores 1 Victory Point. b. Each full set of 3 different Trophy types scores an additional 2 Victory Points.
- Each Trophy can only be used in one set for this scoring.
-
Bonus Award for Secret Objective.
"Whaddya mean, you didn't know I had an agenda? Everybody has an agenda!"
Reveal your Secret Objective and add the bonus Victory Points shown if you have fulfilled it.
Winning
The Winner is the player with the highest Victory Point total. If your total ever goes past 20, flip the token over to the +20 side and continue counting from 1. Joint wins are possible.
Explaining the Mechanics
Standard or Easy Game
There are 2 Work Order cards in each player's deck marked with an E, meaning Easy. If you prefer a slightly easier game, these should be used instead of the 2 Standard Work Order cards 5 and 4. The Standard and E cards should not be used together, as there should always be a 7 card starting deck.
Work Order Cards
"Can you believe what they want me to do now? Bloody management!"
- All players begin the game with a set of 7 Work Order cards, matching their Worker colour. These cards have the same combination of Activities (Movement and Action), but the Initiative values vary. Each deck has Initiative values from 1 to 7.
- Your deck can be honed with new cards bought during the game from the Commissariat (see Commissariat), and these advanced Work Orders may allow additional Activities.
- You may not discard cards without playing them.
- At the start of each Morning and Afternoon Shift you draw from your deck until you have replenished your hand to 5 cards. During the Shift you will use 3 or 4 of them and you must keep the remainder.
- When your Work Order draw pile is empty, shuffle the discard pile to make a new draw pile.
Basic Work Order Deck (as printed on the player reference):
- For the same Worker: Movement 5; Movement 4; Action 1; Action 1 + Movement 3; Movement 3 + Action 1; Movement 2 + Action 1.
- For 2 different Workers: Movement 4 (Different Workers) Movement 4.
Easy (E) replacements:
- Action 1 + Movement 5 (replaces Movement 5).
- Movement 4 (Different Workers) Action 1 (replaces Movement 4).
Using Work Order Cards
- Select. Each player selects a Work Order card from their hand and places it face down in front of them. All cards are then revealed simultaneously.
- Play. Cards are then played in order of Initiative, from lowest to highest.
- If two cards have the same Initiative, the player with the most Rosettes goes first. If a tie still exists, the players must agree on an order or neither card can be used.
- Activate. When your Initiative comes round you select a Worker to whom to apply your chosen card. You may choose any of your 4 Workers, even one who has already performed an Activity this Shift.
- The selected Worker may only perform an Activity which is on your Work Order card.
- When there are multiple Activities on the card, you must use them, or skip them in order, top to bottom.
- It is never mandatory for you to use any given Activity. But if you choose not to, you forfeit that Activity.
- Multiple Activities on any given card must be used by the same Worker unless they are divided by a Different Workers symbol, in which case the Activities must be applied to different Workers. There is never a choice whether you may split Activities across Workers.
Activities on the Work Order Cards
Movement
- A Movement Activity allocates a specified number of Movement Points to the selected Worker.
- The selected Worker may then move clockwise around their current Rondel a number of segments up to the limit of their Movement Points.
- Each Rondel segment can hold an unlimited number of Workers, however with too many Workers in the Elevator Hall things can get.... fractious (see Elevator Hall).
Bonus Movement Points
As well as the Movement Points that may be on your Work Order card, you may buy individual bonus Movement Points at any time during your turn. These may be purchased at any point during your card's Activities, as often as you can afford, even if there is no Movement Activity on the card.
- The cost is 1 Rosette per Movement point.
Changing Rondels
There are only two ways to change Rondels.
a. From the Entrance (1), a Worker can choose to use the Shaft at the cost of 1 Movement Point to go down to the Elevator Hall on the Mine Rondel. All Workers begin their work week (the game) at the Entrance so they may immediately choose to go down below or continue to the administrative side via the Processing Plant (2).
- This is a one-way move. You cannot use your Movement Points to go from the Elevator Hall up to the Surface Rondel.
b. From Shipping (11), a Worker can return, by Train, back up to the Station along with any other Workers who are on the Train at the time when the Train departs. This is part of a Shipping Action resolution, however, and not a Movement Activity (see Shipping).
Action
Most Actions may only be taken if the Work Order bears an Action symbol.
To use an Action in your Worker's current segment you must place a Worker Action Marker into one of the Action spaces in the same segment.
- One Rondel segment, the Elven Embassy (6), however, does not require you to have a Work Order Action in order to use it and can therefore be performed freely. The Action spaces here are green squares instead of the regular Action spaces. In this instance you must use your Worker as the Marker and place them in the lowest numbered empty box. Since the Elven Embassy effect takes place at night your Worker will need to remain here until the Night Shift to gain the benefit.
- If all the Action spaces on a segment are occupied by Worker Action Markers or Worker markers, no further Actions can be taken there at that time. All Worker Action Markers will be removed during the Night Shift.
Draw and Increase Hand Size
This will only appear on some of the advanced Commissariat Work Order cards.
It is not an activity but, upon purchase, you draw 1 more card to add to your hand and then tuck this Commissariat card under the top of your Player Board where indicated. From now on your hand size is increased by 1. You may subsequently purchase another and increase your hand size by a further 1, but you may never hold more than 2 of these cards. There are 3 of them in the Commissariat deck.
Government Order Cards
"This order, to be referred to henceforth as 'The Order', stipulates, other activities notwithstanding, the heretofore required resources, (see worker manual for details) that the Odrixian Government and subsidiary bodies require, today, for the continuing success of the society. Substitutes and surpluses are not acceptable."
Government Order cards represent the Resources that the Government needs to be mined for that day. Each card shows 7 Resources. Some of these are specific Resources while others allow some degree of choice. Government Orders are a joint venture and it is in all players' interests to try to fulfil them.
Today
This is the order which should be fulfilled during the current day. Resources will be placed on this card as they arrive from the Mine (see Shipping and Station). If the Today is not fulfilled by the time Night Shift rolls round all players will take a penalty (see Night Shift).
Accepted Carts
(see also Station) Any Cart arriving in the Station containing something that matches any of the currently unfulfilled Resources for Today supplies Resources for the Today Order.
Rejected Carts
(see also Station) A Cart which does not contain anything still needed for Today may be penalised.
Tomorrow
This is the order card that will need to be fulfilled the following day. Resources may not be placed on it until it becomes Today, but you can now see what's coming.
Hospital
Workers can get injured and end up in the Hospital, either in Intensive Care (red cross) or in the General Ward (yellow cross) and are unable to be used as long as they remain there.
Hospitalised Workers recover one step, Intensive Care > General Ward > Release, during the Night (see Night Shift).
- You may, on your turn, pay the cost to move a Worker toward Release.
- Move a Worker from Intensive Care (red cross) to the General Ward (yellow cross): 1 Gold, 1 Marble or 1 Beer.
- Move a Worker from the General Ward (yellow cross) to Release: 1 Any Resource.
- You may pay for both steps at the same time if you have the Resources to do so.
- You may also pay for more than one Worker to move, providing you have the two Resources for each.
When a Worker reaches Release they are moved directly to the Elevator Hall. This could lead to a fight (see Elevator Hall).
Rosettes
Rosettes are tokens of recognition within the community and function as a type of currency. You can use Rosettes to avoid certain penalties, play an additional Work Order card and pay for varying services. They are also a valid commodity when making Deals (see Dealing and Bartering).
Rosettes score Victory Points at the end of the game (see Final Scoring).
Improvements
Small Warehouse Expansion
Adds 2 spaces to your Warehouse.
- IMPORTANT: The first player to add a Small Warehouse Expansion must also add a Small Expansion to the Mine Warehouse.
Large Warehouse Expansion
Adds 4 spaces to your Warehouse.
- IMPORTANT: The first player to add a Large Warehouse Expansion must also add a Large Expansion to the Mine Warehouse.
Incinerator
Once per Work Day (not Shift) you may, on your turn, Burn up to 2 Any Resource. For each cube burned you receive your choice of 1 Rosette or 1 Private Steam.
- Turn your Incinerator Marker face down to indicate it has been used. It will be reactivated during the next Night Shift (see Night Shift).
Return Burned Resources to the General Supply.
Crane
Once per Work Day (not Shift) whenever you perform an Action on the Mine Rondel that would normally place Resources into the Train, you may first move any 2 of them directly to your Warehouse, bypassing the need to use the Train and avoiding Government Confiscation (see Shipping and Station). Any remaining Resources go into the Train as usual.
- Turn your Crane Marker face down to indicate it has been used. It will be reactivated during the next Night Shift (see Night Shift).
Magic
Magic is a powerful multipurpose Resource, as well as being needed to pay for certain effects or services. A Magic Resource can be used to do any of the following:
- Substitute for any 1 Resource.
- Substitute for 1 Steam or 1 Private Steam.
- Substitute for 1 Rosette.
- Add 8 Movement Points at any point during your Work Order activation this turn.
- Add 1 Action at any point during your Work Order activation this turn.
Magic is consumed when used. Return the Magic to the General Supply. Magic scores Victory Points at the end of the game (see Final Scoring).
Trophies
Trophies are obtained by the results of various Actions and can be traded freely among players, no doubt as part of a Deal (see Dealing and Bartering).
You must store them on your Player Board in the spaces provided. They do not take up Warehouse space but each player is limited to 6 Trophies.
Trophies score Victory Points at the end of the game (see Final Scoring).
Trophies come in 3 different types and each can also be used for a once-per-game effect. Turn the Trophy face down to show it has been used.
Battle Trophies
Once Work Order cards have been revealed each player, in Initiative order, gets the chance to play one or more Battle Trophies, to reduce the Initiative value on their card by 3 (becoming faster). This can turn it into a temporary negative number. Once everyone has done so the adjusted Initiative order is determined.
Community Trophies
Use during your turn to gain 2 Private Steam.
Forbidden Trophies
Use during your turn to gain 1 Magic.
Dealing and Bartering
Deals between players are not only permitted, but actively encouraged. It will often be necessary to co-operate and negotiate to achieve your goals.
So, before you start playing, you should agree on whether negotiations will be binding or not. These rules advise that they should be, but some player groups are happy with pie-crust promises. It is your choice.
If you agree on binding deals then the loss of 1 Rosette or 1 Victory Point for a broken deal is a suggested default fine, but you are free to agree on other penalties.
Whatever you decide, General Supply Resources cannot be part of a deal. Deals may only affect components controlled by the dealing player(s). Deals may involve multiple players and may set very specific timing parameters.
Example: David may offer to trade 1 Gold and 1 Victory Point with Sheila in exchange for 2 Rosettes and an unspecified favour in the next Shift. Whether or not Sheila is then duty bound to deliver on that favour depends on your decision about binding Deals.
For Your Information
Storage
There are several locations where Resources are stored.
General Supply
This is for storing all the available Resources. All players will be able to see what is currently available.
Personal Warehouse
This is located on your Player Board and begins the game with a capacity of 4 Resources.
- It can be extended with Small and Large Warehouse Improvements (see Improvements).
Personal Warehouse contents are not secret and should be known to all players. When you are required to add earned Resources to Train Carts you may always choose to supplement them with Resources from your own Warehouse.
Redistribution
The Resources in your personal Warehouse can be moved at any time, freely, to any other Storage area, provided they are appropriate.
Mine Warehouse
This is located on the Main board. It is a common use Warehouse and begins the game with a capacity of 4 Resources.
- It will be extended with Small and Large Warehouse Improvements as players improve their own Warehouse (see Improvements).
Any Worker who produces anything on the Mine Rondel can save excess items here. Whenever you use the Mine Warehouse you may Reconfigure the Stock.
Reconfiguring the Stock
You may freely rearrange Resources between the Mine Warehouse and any of the Train Carts subject to the capacity of both.
Today Government Order Card
The Today card behaves as temporary Storage while it is being fulfilled. However, Resources committed to a Today card cannot be removed until the order is fulfilled or failed. Once completed, or if the day moves on, the Resources are returned to the General Supply (see Station and Government Order Cards).
Elven Embassy Cards
Elven Embassy cards behave as temporary Storage while they are being fulfilled. However, Resources committed to an Elven Embassy card cannot be removed until the Elven Embassy order is fulfilled. Once completed, the Resources are returned to the General Supply (see Elven Embassy).
Farming Supply
The Farm stores Flax, Lichen, Mushroom or Wood Resources which are yet to be Harvested (see Farming).
Private Steam
Each player has 2 spaces on their Player Board for holding Private Steam, which is the maximum they may have at any one time. Private Steam is, as it suggests, only usable by the player who owns it. Private Steam can be used any time in place of Steam.
Limited Resources
All Resources are limited. If a Resource runs out it will not be available. You may not use substitute tokens.
Rondels, Segments and Actions
The upper Rondel is the Surface Rondel, where players perform the above ground activities. It represents the mine's interaction with the town of Odrixia and the outlying community as well as all the administrative duties of the mine itself.
The lower Rondel is the Mine Rondel, representing the mine itself, where, unsurprisingly, the mining activities are performed.
The Surface Rondel
1. Entrance (No Action Available)
This is the starting location for all Workers. From here you may use one of your Movement Points to move down to the Elevator Hall on the Mine Rondel.
2. Processing Plant (Action Required)
"What am I going to do with thirty five tons of mushrooms?"
When a worker finds himself holding bucket loads of stuff he doesn't need, this might be the place to try to refine some of it into something more useful.
When your Worker takes an Action here they may perform as many Processing Cycles as they wish limited only by available Resources and Steam.
Each Cycle costs 1 Steam and converts unwanted Resources from your Warehouse into more useful things. Each Processing Cycle can do 1 of the following:
- 3 Any Food + 1 Any Metal → 3 Victory Points
- 2 Lichen + 1 Any Material → 2 Victory Points
- 3 Gold + 1 Gems → 3 Victory Points
- 3 Gems → 2 Magic + 1 Victory Point
- 2 Coal → 1 Magic + 1 Victory Point
- 2 Marble → 1 Magic + 1 Rosette
- 2 Beer → 1 Magic + 1 Rosette
- 3 Any Resource → 1 Rosette
- 2 Marble / Gold → 1 Rosette (as printed; the printed table gives one quantity for this line and the slash is read as "or")
Return all used Resources to the General Supply. Store all the newly processed Advanced Resources in your Warehouse on your Player Board.
3. Station (No Action Available)
"That lot over here! All the rest there! And put that... what the hell? Who ordered that?"
Here is where the resources from the mine are gathered, sorted and allocated. The government is very keen that mining should be as efficient as possible. Waste is not appreciated.
There is no effect if a Worker lands here at the end of a Movement. The Station is where Carts aboard the Train will return to from the Mine Rondel (see Shipping).
Arrival of a Train
When a Train arrives, go through these steps for each Cart individually in order of first to last.
-
Government Confiscations (see Government Order Cards)
Accepted Carts. a. If the Cart being evaluated contains something that matches any of the currently unfulfilled Resources for Today it makes this an Accepted Cart and as many of those goods as possible must be placed on the Today Order. The Accepted Cart scores 2 Victory Points for each player with a Worker on that Cart.
- If there is a choice of what to put where, the player owning the Worker in Seat 1 of the Cart decides.
- The number of accepted Resources is unimportant, the Cart merely scores or it doesn't.
- If a player has more than 1 Worker on the Cart they do not score extra Victory Points. The score is per Cart, not per Worker.
Rejected Carts. a. If the Cart being evaluated contains at least one Resource but does not contain anything still needed for Today any player with at least 1 Worker aboard loses 1 Victory Point.
- A player with more than 1 Worker aboard does not take a multiple penalty.
- A player may spend 2 Rosettes to avoid this penalty. b. If all the Resources for Today are already present, any Cart arriving with Resources after that will be considered to be carrying no matching Resources and so will be penalised as above.
Unmanned Carts. If a Cart has no Worker aboard, all the Resources are wasted and go straight back into the General Supply.
-
Empty Cart. Carts containing no Resources at all can be used to travel up to the Station without incurring a benefit or a penalty. This is just seen as transport.
-
Player Resources. All Resources that have not been taken by the Government are now shared out to the Warehouses of the players owning the Workers aboard the Cart.
4. Research (Action Required)
"Hmm. We could really do with more space in here!"
When an Overseer feels they could do with upping their game they send workers here to investigate the possibilities of enhancing their productivity. There is kudos to be earned for swanky new improvements.
Purchase
When your Worker takes an Action here you may buy the top tile from any of the six available Research piles. You must pay the cost indicated on the tile's blue purchase side.
- Where there are two Resource costs listed you may pay either cost.
- The smallest tiles have just one Resource showing, which means a single Resource of that type.
- Taking the tile will reveal the next available tile in that pile.
Placement
You must now try to place the purchased tile in the Research Grid on your Player Board with the orange, in use, side up.
- The entire tile must lie within the Research Grid and must not overlap any previously purchased tiles.
- If no valid placement is possible you must retain it and perhaps use it for bartering with other players.
Once a Research tile has been placed it is fixed and cannot be later moved or removed.
Rewards
Columns. As soon as you complete a column on your Research Grid you immediately score the bonus listed at the top of the completed column (2 Magic, 2 Victory Points or 4 Rosettes).
Rows. As soon as you complete a horizontal row you gain use of the Improvement listed at the right of the completed row (Large Warehouse, Small Warehouse, Work Orders, Crane or Incinerator). Take the appropriate tile and place it on your Player Board (see Improvements).
Full Grid. If you manage to fill out your entire Research grid (all 12 squares) you immediately score all three column bonuses again (2 Magic, 2 Victory Points and 4 Rosettes).
5. Commissariat (Action Required)
"What do you think we need today, councillor?" "I don't know, councillor. How about some metal?" "Possibly. Let's ask the councillor over there." Head Office. Here is where the bureaucrats and civil servants toil ceaselessly to issue the various dictates of the State. At first sight it appears they don't really know what they're doing but if you're lucky you might learn a few wrinkles from their methods.
When your Worker takes an Action here you may buy one of the 3 face up advanced Work Order cards by paying the Commissars one or more Bribes.
- 1 Bribe is 1 Any Resource or 1 Rosette.
- The first card bought for the day costs 1 Bribe, the second costs 2 Bribes, and the third costs 3 Bribes.
Once you have paid the requisite number of Bribes, you may choose any available Work Order card and put it directly into your hand. New cards will become available during the next Night Shift (see Night Shift).
Commissariat Work Orders (card reference).
For 2 different Workers:
- Action 1 (Different Workers) Action 1
- Action 1 (Different Workers) Action 1
- Movement 5 (Different Workers) Action 1
- Action 1 (Different Workers) Movement 6
- Movement 7 (Different Workers) Action 1
For the same Worker:
- Movement 9
- Movement 2 + Action 1 + Movement 3
- Movement 3 + Action 1 + Movement 2
- Movement 6 + Action 1
- Action 1 + Movement 7
- Action 2
- Movement 4 + Action 1
Hand Size Modifiers: three cards carry the Draw and Increase Hand Size symbol (see Draw and Increase Hand Size).
6. Elven Embassy (No Action Required)
"Ok. So, I don't really LIKE Elves, but sometimes it's useful to..ah..fraternise a little. In a purely business sense, of course."
Every night the Elves turn up with requests, and the Overseers are only too happy to take their coin. Sometimes the Government even knows about it!
When your Worker ends their movement here you may place them onto a green Action box without needing a Work Order Action. The Worker does nothing until the Elven Embassy step of the Night Shift (see Night Shift). There is no cost to use the Elven Embassy but it can take time. You will be waiting there until the Night Shift.
Elven Embassy Purchase Orders
The player owning the Worker in box 1 draws 3 Elven Embassy cards, chooses 1 to keep, and passes the remaining 2 to the player owning the Worker in box 2. This player chooses 1 and passes the last card to the player owning the Worker in box 3.
- If there are fewer than 3 Workers, the extra cards are discarded.
All three then move together to the Elevator Hall thereby possibly sparking a fight (see Elevator Hall).
Elven Embassy Cards
You must not reveal your Elven Embassy cards until you use them.
Whenever you perform an Action on the Mine Rondel that would normally place Resources into the Train, if you have an incomplete Elven Embassy card you may teleport any of the listed Resources directly to the Embassy card without the need to go through Shipping, Government Confiscations and Warehouse space restrictions (see Shipping, Mining and Patrol).
Completing the Order
- The first time you wish to add Resources to your Elven Embassy Order you must reveal it and place the matching Resources on the card. The card then stays with you until complete, which may require a future Action.
- For a completed Elven Embassy Order you earn your choice of 2 Victory Points or 3 Magic. Return all Resources from the Elven Embassy card to the General Supply.
The Mine Rondel
7. Elevator Hall (No Action Available)
"Hi, mate, how's it going? Gimme five! Wait, who's that over there? Hey you! I thought I told you I didn't want to see your face around here again!"
Large, echoey and bustling. The Elevator Hall is a good place to mingle with your fellow Workers, or visit Barbara's Barter Bar but, just occasionally things can get fractious. There's a reason it is known colloquially as 'The Arena'.
When your Worker ends a Movement here or is placed here by a game effect, you must check for both of the following effects.
a. Socialising. If there is already one or more of your Workers in the Hall you gain 1 Rosette.
b. Brawling. If there are now 5 or more Workers in the Hall, irrespective of who owns them, randomly select one of the Workers who gets wounded in the bust-up and moves immediately to the Hospital General Ward (yellow cross).
Trading. However your Worker arrived here, assuming they are still present in the Hall after resolving effect b, above, you may now visit Barbara's Barter Bar and Trade Resources. This is not an Action and you may make 1 Trade of any 2 Resources for any 1 Resource except for Magic:
- 2 Any Resource → 1 Any Resource (except Magic)
8. Farming (Action Required)
"Arrr. This be where the plantin' be doin'. Ain't nowt so fine as a field o' growin' mushrooms." "Why are you talking in that strange accent?" "Dunno. Just seemed appropriate, somehow."
The farm is mainly where the edible resources are grown. Well, some of them are edible, anyway.
The farm consists of five Fields (columns). The two Sowing Fields have brown boxes (right) and the three Harvest Fields have purple boxes (left).
When your Worker takes an Action here you must do the following steps:
- Harvest and Grow.
a. Select 1 of the leftmost 3 vertical Harvest Fields and collect all the Resources from that Field.
- Place all these Resources in any of the 3 Carts, divided as you wish. You may also supplement these with Resources from your own Warehouse.
- If all 3 Carts are full, place as many of the excess Resources as will fit in the Mine Warehouse.
- If the Mine Warehouse is also full, return the excess to the General Supply. b. Move the contents of each remaining Field, as a block, including any empty boxes, one step to the left, if possible, such that all the Harvest Fields are populated if there are enough Resources.
- Sow. Place up to 5 Resources of your choice from the Farming Supply into an empty Sowing Field.
- Board the Train. Your Worker may now choose Board the Train by moving immediately to the lowest numbered empty seat in any Cart in which you placed Resources during Farming.
- Arrival of Farm Supplies. Add 1 Flax, 1 Wood, 1 Mushroom and 1 Lichen from the General Supply (if available) to the Farming Supply.
9. Mining (Action Required)
"This is where the REAL work is done, at least it is as long as I'm working here." It's all 'Hi, Ho', pickaxes and heavy lifting.
For your Worker to be able to take an Action here you must do the following steps:
- Spend a Steam. In order to Mine you must first spend 1 Steam. Move the Steam Marker 1 space down the Steam Track. If you choose not to, or the Steam Track is on 0 or below your Mining ends here.
- Mine.
a. Select one of the face up Mining cards.
b. Choose one of the two sets of materials on this card (dark or light).
c. Take the chosen Resources from the General Supply and place them in any of the 3 Carts, divided as you wish. You may also supplement these with Resources from your own Warehouse.
- If all 3 Carts are full, place as many of the excess Resources as will fit in the Mine Warehouse.
- If the Mine Warehouse is also full, return the excess to the General Supply.
- If all 3 Carts are full, place as many of the excess Resources as will fit in the Mine Warehouse.
- Board the Train. Your Worker may now choose Board the Train by moving immediately to the lowest numbered empty seat in any Cart in which you placed Resources during Mining.
Mineable Resources (card reference): in variable quantities and combinations.
10. Patrol (Action Required)
"Last time old Diego went on patrol he came back with a leg missing and a bag of forty odd gleamstones!" "Good trade, if you ask me!" There are many dangerous things lurking in the mines and somebody has to keep an eye on them. Fortunately, the rewards can often be worth the risks.
When your Worker takes an Action here you start a Patrol and become Patrol Leader. You will notice there are no boxes in this segment. The Patrol boxes are at the top of the separate Patrol area. When you start a Patrol do the following steps:
-
Gather your Team. a. Check the 2 face down Patrol cards. On the back of each there are two circles: the number of Reward items for the Patrol and a minimum requirement of Workers to undertake it.
- If there are not enough Workers present on the Patrol segment for either card, a Patrol cannot happen. b. Pick a team from among the Workers currently on the Patrol segment. These Workers cannot refuse the Patrol.
- You must take as many as possible, including your Patrol Leader, up to a maximum of 4.
-
Organise your Team. a. Place your Patrol Leader, and all of your other involved Workers, each into any one of the 4 Patrol boxes. b. In the order chosen by the Patrol Leader's player, all other players place their Workers into any one of the remaining boxes.
-
Choose the Patrol. Select 1 viable Patrol from among the 2 Patrol cards, reveal it and place it in the Patrol area.
-
Resolve the Patrol. Draw a small Patrol Resolution card and place it in the box indicated on the Patrol card such that the passages line up with the dots. In some cases you will not get the whole Resolution card on the Patrol card and it will hang over the edge so some of the pathways will not be relevant.
Follow the Paths. For each Worker, in numerical box order, trace the pathway to the Reward.
- If you meet Hazards on the way you may take one or more Wounds.
- An Automatic Wound (skull) automatically inflicts 1 Wound.
- A Resource Hazard will inflict 1 Wound unless you pay the shown Resource from your Warehouse.
- If you meet Hazards on the way you may take one or more Wounds.
Example of a Patrol: A Worker takes a Patrol path containing an Any Metal Resource Hazard and an Automatic Wound. If their player's Warehouse contains Copper, Gold or Steel they may spend one of them to prevent the Resource Hazard from taking a wound. If a previous Worker had passed this place and already paid the fee they would not need to worry about it at all. The Automatic Wound cannot be avoided, but the Worker will get to the end of the path and earn the Resources shown. If the Worker is alone they will earn all of the Reward, if not they will need to share. If the player, or a previous passing Worker, paid the Any Metal cost, the Worker will now have 1 Wound (due to the Automatic Wound) and go directly to the Hospital General Ward. If not, they will have 2 Wounds and go directly to the Hospital Intensive Care.
Had this been a particularly dangerous path and the Worker took 3 Wounds they would go straight to the Hospital Intensive Care without their Reward but gain 1 Rosette instead.
11. Shipping (Action Required)
"All aboard who's going aboard! Leaving in five!" The whistle blows and the train heads up to the surface laden with mined resources. All the stuff the government asked for... yeah...right... dream on!
When your Worker takes an Action here you must do the following steps:
-
Spend a Steam. To activate the Train you must first spend 1 Steam. Move the Steam Marker 1 space down the Steam Track.
- If the current Steam is at 0 or below you may go into Steam deficit and move the Steam Marker down 1.
- This is the only situation where Steam can actively be pushed negative.
- If the Steam Track is already at -5, Shipping will still happen but instead of the Steam Track going more negative, all players lose 1 Victory Point.
- A player may spend 2 Rosettes to avoid this penalty.
- If the current Steam is at 0 or below you may go into Steam deficit and move the Steam Marker down 1.
-
Board the Train. Place your Worker in the free Seat with the lowest number in the Cart of your choice. If there are no free Seats, your Worker will Ride Cargo.
Riding Cargo. Place your Worker at the side of any of the 3 carts. The Worker is considered to be in a virtual Seat number 3 for the purposes of dividing up the Resources (see Station).
-
The Train Departs. Distribute the cargo from all 3 carts in numerical order (top to bottom) amongst the Government Order and the Workers on board (see Station and Government Order Cards).
-
Job Well Done. The player who took the Shipping earns 1 Rosette.
12. Steam Generation (Action Required)
"It's 'psch-kupp-uh', I tell you!" "I think it's rather more like 'fshhh-uh'. Listen." The hottest, sweatiest place in the complex. Nobody ever wants to work in the steam generation plant, but it's a sad fact that somebody has to.
When your Worker takes an Action here, move the Steam Marker up the Steam Track as Steam is generated.
Earlier is Best
- The First Worker to occupy box 1 generates 3 Steam.
- The Second Worker to occupy box 2 generates 2 Steam.
- The Third Worker to occupy box 3 generates 2 Steam.
- The Fourth Worker to occupy box 4 generates 1 Steam.
Reward
Your Worker earns a Reward of 1 Rosette or 1 Any Food (any mix) for each Steam generated.
Bonus Steam Generation
After generating Steam your Worker may Burn Coal, Flax, Lichen, Mushroom or Wood from your Warehouse. Each Burned Resource moves the Steam Track up 1 and you will earn 1 Rosette, 1 Any Food or 1 Private Steam for each Resource Burned.
- You may NOT Burn Resources earned during this Steam Generation Action.
- Return all Burned Resources to the General Supply.
Ka-Boom!
If the Steam Marker ever hits Bang! on the Steam Track the generator executes emergency venting. When this happens:
- All players lose 2 Victory Points.
- A player may spend 2 Rosettes to avoid this penalty.
- Move the Steam marker to 0.
13. Secret Shredder (Action Required)
"No sir, I never received any such document." A useful place for Overseers who think it would be better for the community if they hadn't received that rather inconvenient government instruction.
When your Worker takes an Action here, you may destroy (remove from play) Work Orders from your hand or your discard, but not from your draw pile. To do so perform the following steps:
-
Spend a Steam. In order to use the Shredder you must first spend 1 Steam. Move the Steam Marker 1 space down the Steam Track. If you choose not to, or the Steam Track is on 0 or below your Shredding ends here.
-
Pay Shredder Cost. The costs for using the Shredder is incremental.
- Your First card removed costs nothing.
- Your Second card removed costs 1 Rosette.
- Your Third card removed costs 2 Rosettes.
- Your Fourth card removed costs 3 Rosettes.
- Keep incrementing the cost beyond the fourth card.
Draw one card from your deck after shredding.
-
Remove Card(s). You may remove as many cards as you wish in a single visit provided you are able to pay the Rosette cost. The increasing cost is absolute, not per visit, so tuck the removed cards under your Player Board, out of the way, to remind you of future costs should you visit here again.
IMPORTANT: You can never reduce your Work Order deck to fewer than 5 cards.
Non-Player Characters (NPCs) for Solo and 2-Player Games
If you are playing Solo you will need an opponent to match yourself against. Mine 77 offers two NPC personalities, for this purpose.
Simple Sergio is the more straightforward opponent, recommended for learning the basics of the game in Solo mode. It should be easy enough to beat Sergio. When Sergio becomes too easy, try your mettle against Dutiful Rosana.
If you are playing with 2 players, you may also wish to add an NPC opponent to turn it into a virtual 3 player game.
To be perfectly honest you could add an NPC any time you have fewer than maximum players, but we advise this is not necessary and overly involved if you already have 3 or more humans!
However you play it, when you add NPC players they are considered part of the player count for the purposes of setting up the Blocked spaces (see Setup).
Playing the NPC Opponents
In each case, take the desired NPC Player Board and set it up as though they were a real player, with a set of meeples and a Victory Point marker.
Give the NPC player their bespoke Work Order deck which bears their name on the back. The fronts are also different: Sergio's have grey borders while Rosana has orange borders.
Each NPC player behaves slightly differently and starts with different commodities. Each NPC Player Board summarises this and you can find a detailed description under each NPC player in this rulebook.
Common Rules for Both NPCs
Whenever an NPC opponent comes to make a choice it is incumbent upon the player(s) to try to make an optimal decision for them, as though they were a human player. In a two player game you may discuss the NPC's actions to agree on their best move. Remember, by deliberately underplaying the NPC opponent you are only cheating yourself.
Whenever it is not clear what the NPC's best option is, they will choose the first option. Such as the leftmost or top as appropriate.
NPC Work Orders Explained
An NPC Work Order deck works differently to a player deck. Each card has Keywords and two Activity boxes, top and bottom.
Work Order Selection
Draw the top card of the NPC deck for Select and Play.
Work Order Activation
a. Choose any NPC who can fulfil the top Activity on the card. If this is performed that ends the NPC turn. b. If there is no NPC able to complete the top Activity, check the bottom Activity and do that instead. c. If there is no NPC who can do either action, the NPC player passes and earns 1 Rosette.
Any NPC Activity that can be done must be taken. An NPC will not choose to simply skip and move further down the Activation chain.
Keywords Explained
Reach: Pick an NPC Worker who can actually arrive on the specified segment within the Movement Points listed on this Activity. They do not need to use the full Movement Points in order to achieve this. If there is an Action listed afterwards, that Worker will perform the Action. Otherwise that Worker cannot be selected for this Activity.
Towards: Pick an NPC Worker. They will use the listed Movement Points to head in the direction of the specified segment, whether or not they can actually get to it. If they do arrive there, they will stop. They will not perform an Action there.
Shuffling
After each Morning and Afternoon shift, once the NPC has played their 4 cards, shuffle all the NPC's cards to make a new Work Order draw deck.
Barred Actions
Each NPC has a list of Actions they will never perform. Place a Barred Action marker on each of these segments to remind yourself.
Dealing and Bartering with NPC Players
An NPC will only agree to Deals involving Any Resource and/or Rosettes. They will only accept a Deal if they gain MORE Any Resource and/or Rosettes than they give you. They will not accept a Deal if they gain more Any Resource than will fit in their Warehouse.
Farming, Mining, Patrol and Shipping
Whenever an NPC needs to choose an option for obtaining Resources for distribution you will need to analyse their situation according to these priorities:
a. If they can obtain Resources that will help to fulfill an Elven Embassy Order or the Today Government Order they will choose the option that gets them the most Resources for these purposes. They will then distribute the Resources according to these priorities:
- Fulfill their Elven Embassy Order as much as possible.
- Fill the Train as much as possible with the remaining Resources that match the Today Order and then Board the Train. b. If they cannot obtain Resources that fulfill either their Elven Embassy or the Today Order, they will choose the option that yields the least Resources, stash as many as they can in the Mine Warehouse and place any leftover Resources into the Train Carts, distributing them as evenly as possible. They will NOT then Board the Train.
Boarding the Train
An NPC Worker will only decline to Board the Train in case b. (above). See Farming, Mining, Patrol and Shipping. The NPC Worker will attempt to get a Seat in the most advantageous Cart and position.
Simple Sergio
Setup (summarised on Sergio's Player Board).
Sergio begins the game with 6 Victory Points, 2 Flax in his Warehouse and a Large Warehouse expansion. Use Sergio's special 7 card Work Order deck (grey borders), shuffled. Place his Victory Point marker on 6 on the Track.
Starting Setup (as printed on the board). Sergio never does any of the following: Research, Commissariat, Processing, Secret Shredder, Trading in the Elevator Hall.
Using Sergio's Work Order deck:
- Draw one and apply it to any Worker that can fulfill the first action on the card.
- If there are none who can, apply it to any Worker that can fulfill the second action on the card.
- If there are no Workers that can do any of the card, Sergio passes and gains 1 Rosette.
At night, shuffle Sergio's entire Work Order deck.
Specific Rules for Sergio. Sergio never takes an Action on Research, Commissariat, Processing or Secret Shredder and he never Trades in the Elevator Hall. He will only stop on these segments if there is no alternative but will not take the Action if he does so.
If Sergio takes a Steam Generation Action he will only create Public Steam and not elect to Burn any of his Resources for Private Steam.
Dutiful Rosana
Setup (summarised on Rosana's Player Board).
Rosana begins the game with 2 Victory Points and 2 Rosettes, 2 Lichen in her Warehouse and a Large Warehouse expansion. Use Rosana's special 7 card Work Order deck (orange borders), shuffled. Place her Victory Point marker on 2 on the Track.
Starting Setup (as printed on the board). Rosana never does any of the following: Processing, Secret Shredder or Trading in the Elevator Hall.
Using Rosana's Work Order deck:
- Draw one and apply it to any Worker that can fulfill the first action on the card.
- If there are none who can, apply it to any Worker that can fulfill the second action on the card.
- If there are no Workers that can do either action specified in the card, Rosana passes and gains 1 Rosette. Rosana will use 1 Rosette to gain 1 Movement Point if that allows her to complete the action on the card.
At night, shuffle Rosana's entire Work Order deck.
- If Rosana has an Elven Embassy card, she fills it with as much as she can. When selecting Elven Embassy cards, she takes the first one drawn.
- When Rosana goes to Commissariat, she acquires the leftmost card and puts that by her playmat. Each Commissariat card is worth 2 Victory Points for Rosana in the end, but has no other effect in the game.
Specific Rules for Rosana. Rosana never takes an Action on Processing or Secret Shredder and she never Trades in the Elevator Hall. She will only stop on these segments if there is no alternative but will not take the Action if she does so.
If Rosana takes a Steam Generation Action she will only create Public Steam and not elect to Burn any of her Resources for Private Steam.
Rosana has a special Activity among her Work Order cards - a Double Action.
Double Action: Choose two different NPC Workers. Each of these gets to move up to 1 segment and then take an Action. The first must fully complete their Action before the second takes their turn. In both cases the Movement 1 is optional and you must decide whether it is better for the Worker to move first, or to take the Action where they already are. If there are not 2 Workers who are able to fully complete their Action, then the Activity is invalid and Rosana uses her next Work Order option as determined by the standard NPC rules.
Glossary
The Resources (flame = Burnable)
- Food: Lichen (burnable), Mushroom (burnable), Beer.
- Materials: Flax (burnable), Wood (burnable), Marble.
- Metals: Steel, Copper, Gold.
- Coal (burnable), Magic, Gems.
The Surface Rondel: Entrance, Processing, Station, Research, Commissariat, Elven Embassy.
The Mine Rondel: Elevator Hall, Farming, Mining, Patrol, Shipping, Steam Generation, Secret Shredder.
Icons
- Action, Move / Movement Points, Draw, Initiative, Any Resource.
- Any Food (Lichen, Mushroom or Beer), Any Material (Wood, Flax or Marble), Any Metal (Steel, Copper or Gold).
- Hospital: Intensive Care (red cross), Hospital: General Ward (yellow cross).
- Rosette(s), Automatic Wound, Victory Point(s), Worker(s), Steam, Private Steam.
- Use only with this number of players (3+ or 5+ marker).
- Different Workers.