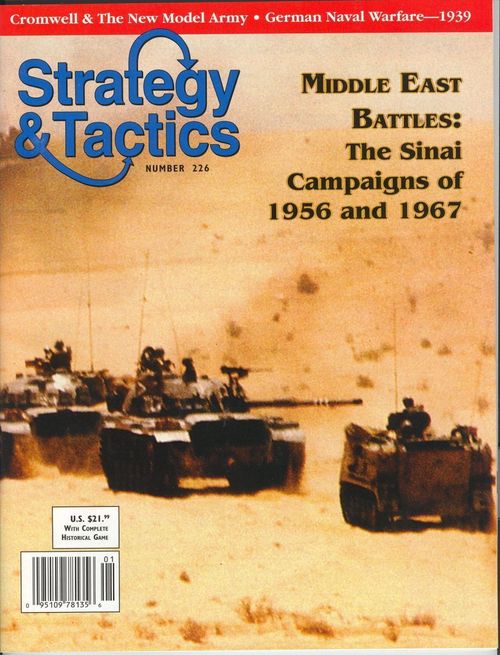
Middle East Battles: Suez '56
Middle East Battles: Suez '56 Rulebook
Table of Contents
Table of Contents
1.0 Introduction
1.1 The Middle East Battles game system is an operational simulation of mid-20th century warfare in and near the Sinai peninsula. Both games in the system represent, in two-player format, a clash between two or more of the important military powers in that region during the middle third of that century. The playing pieces represent the actual units that participated, or could have participated, in those battles, and the maps show the militarily significant terrain over which the units fought or could have fought.
The rules are divided into two main parts. The first part contains the rules standard to both battle games. The second part, sections 9.0 and 10.0, present the rules exclusive to both of the battle games, Suez '56 and El Arish '67.
1.2 Defining the Two Sides
If a rule is said to apply to the "Western player," that means it effects the Anglo-French player in Suez '56 and the Israeli player in El Arish '67. The opponent to the Western player in both those games is always referred to simply as the "Egyptian player," since he commands that nation's forces in both games. His opponent is the "Anglo-French player" in the Suez game and the Israeli player in the El Arish game.
1.3 Rules Applicability
All the rules given below apply equally to both Suez '56 and El Arish '67 unless otherwise noted.
1.4 Holding Boxes
Various holding boxes for both games are printed on the mapsheet for the convenience of the players. No combat interactions may take place between units on the map and units in holding boxes.
2.0 Components
2.1 The Game Map
The single 34x22" mapsheet contains the separate maps for both the Suez and El Arish battle games. A hexagonal ("hex") grid is superimposed over the maps in order to regulate the positioning and movement of units across it.
2.2 Charts & Tables
The mapsheet also contains some of the charts and tables needed to play the game. Their functions will be explained in the appropriate rules sections below.
2.3 Playing Pieces
The die-cut cardboard playing pieces are referred to as "units," "unit counters" and "counters." They represent the actual military formations that took part, or were in the area and could have taken part, in these battles. The numbers and symbols printed on them represent their strength in combat, their specific historical identities, their organizational size, and their type.
2.4 Sample Units
[Sample unit illustrations: Non-Artillery Combat Unit; Artillery Unit. Images not reproduced.]
2.5 Artillery & Non-Artillery
All units that have a number in each of their four corners are considered "artillery," no matter what their specific unit type and mobility classification. This distinction is important in combat; see section 7.0.
2.6 Combat Strength
This is the relative strength of a non-artillery unit with regard to fighting enemy units. It's important to remember that, in both games, whenever Egyptian non-artillery units attack, they do so with their combat strength halved (round down all remainders; see 7.17).
2.7 Barrage Strength
This is the relative strength of an artillery-type unit when attacking enemy units.
2.8 Final Protective Fire (FPF) Strength
This is the relative strength an artillery-type unit may be able to add to the defensive combat strength of friendly units. No artillery unit can use its own FPF to aid in its own defense.
2.9 Range
This is the maximum number of hexes from an artillery unit using its FPF or barrage strengths to the target enemy unit's hex. When counting range, count from a firing artillery unit to the targeted enemy unit; don't count the hex in which the firing artillery unit is located; do count the hex in which the targeted unit is located. Non-artillery units don't have ranges; they may attack only into hexes immediately adjacent to their own location.
2.10 Movement Allowances
Unlike most wargames, the movement allowances — the measure of the distance in hexes through which a unit may move during each of its own side's turns — are not printed on the counters themselves. See 5.2 and 5.3 for details.
2.11 Unit Organizational Sizes
From smallest to largest, the individual unit sizes are:
- ". . ." — Platoon
- "I" — Company, Troop or Battery
- "II" — Battalion or Squadron
- "III" — Regiment or Group
- "X" — Brigade or Group
2.12 Historical Unit Identification
Units may be designated by a single number or by a two- or three-part designation, as well as by an abbreviated name. In the two-part numeric designations, the number to the right of the slash is that unit's superior (or "parent") formation. That same principle applies again in three-part designations; the number to the right of the second slash is the supreme operational formation to which that unit belongs.
The various abbreviations on some of the units — those that had names in place of, or in addition to, numeric designations — break out as follows:
Suez '56 Unit Abbreviations
Anglo-French
- ASH: Argyll & Sutherland Highlanders
- Cdo: Commando
- Gds: Guards
- JS: Joint Service
- P: Parachute
- RCP: Colonial Parachute Regiment
- REP: Foreign Legion Parachute Regiment
- RF: Royal Fusiliers
- RS: Royal Scots
- RWK: Royal West Kent
- WY: West Yorkshire
- YL: York & Lancaster
Egyptian
- M: Mobile Infantry
- NG: National Guard
- 4A: 4th Armored Division
- R: Reserve
- Lt: Light
- PS: Port Said
El Arish '67 Unit Abbreviations
Israeli
- Ad: Adam
- Av: Aviram
- Ba: Baron
- Ma: Matt
- Se: Sela
- Shn: Shandi
- Shr: Sharon
- Tal: Tal
- SC: Southern Command
- Yof: Yoffe
- Zi: Zippori
Egyptian
- A: Armored
- PLA: Palestine Liberation Army
- SF: Sinai Front
- ShF: Shazli Force
- ZSU: Soviet-Built Self-Propelled Anti-Aircraft Gun
2.13 Unit Types & Mobility Categories
All the unit types in the game are organized into three broad groups, each based on the primary way they move across the battlefield: either in the air (helicopter), by walking and running (straight-leg), or by riding in wheeled and/or tracked vehicles (motorized/mechanized or "moto/mech"). There's also actually a fourth category, the smallest, for units that aren't allowed to move at all once placed on the map (static units). See 5.2 and 5.3 for more on the importance of these classifications.
2.14 Unit Color Schemes
The units are printed in various color schemes in order to help differentiate which "side" they're on and their organizational affiliation within their respective armies. Further, in order to help prevent confusing the units from the two games included in MEB, all those unit counters belonging to the Suez '56 game have "56" printed on their reverse sides, while all those belonging to the Suez '67 game have "67" printed there.
Suez '56 Unit Colors
- Egyptians – black on leaf green
- British – black on tan
- French – white on dark blue
El Arish '67 Unit Colors
- Egyptians – black on red
- Israeli "Tal" Division – black on sky blue
- Israeli "Yoffe" Division – black on gray
- Israeli "Sharon" Division – black on olive drab
- Israeli 202nd Airborne Brigade – white on dark gray
- Israeli "Matt" Airborne Brigade – black on white
- Israeli Southern Command units – white on dark blue
2.15 Other Game Markers
The following counters are not units in the sense of those pictured above. Rather, they are markers to denote specific rules functions or game occurrences, and their uses are explained at appropriate places in the text below.
- Game Turn Marker (see section 4.0)
- Naval Gunfire Artillery Support Marker (see 8.19)
- Airstrike Marker (see 8.18)
- Victory Point Markers (see 3.2 & 3.3)
2.16 Game Scales
Each hexagon on the Suez '56 map represents 360 yards from side to opposite side. Each game turn of Suez '56 equals from six to eight hours, depending on the time of day a given turn represents.
Each hexagon on the El Arish map represents one mile from side to opposite side. Each game turn of El Arish equals six hours.
3.0 Set Up & How to Win
3.1 Scenario & Side Selection
Players first decide between themselves which scenario battle game to play and who will command which side. They should then consult the specific battle game set up instructions given in sections 9.0 and 10.0. One player or the other will be instructed to deploy his forces first. That player should completely finish setting up his units before the other player begins setting up those of the opposing side. After all units to be initially deployed have been set up on the map, the remaining units should be placed aside within easy reach to be brought into play according to that game's reinforcement schedule or random events table.
3.2 Game Length & Winning
Each battle game's victory conditions explain how that game is won, and how many game turns, maximum, may be played through before that determination is made. Players accumulate "victory points" (VP) for accomplishing certain actions during the course of play and for occupying certain hexes at the end of play. The player who has more VP (usually) wins. Players should use the VP markers included in the counter mix to keep track of their own side's VP tally as each game progresses, using the VP Tracks printed on the mapsheet.
3.3 Suez '56 Victory
If the player with the higher VP total at the end of a match of Suez '56 has five or more VP than his opponent, he (the player with that five-or-higher VP total) has indeed won the game. If one player has more VP than his opponent, but has fewer than five more VP than his opponent, that match is considered a draw. (Of course, the match is also a draw if both players have exactly the same number of VP.)
3.4 El Arish '67 Victory
If the player with the higher VP total at the end of a match of El Arish '67 has five or more VP than his opponent, he (the player with that five-or-higher VP total) has indeed won the game. If one player has more VP than his opponent, but has fewer than five more VP than his opponent, that match is considered a draw. (Of course, the match is also a draw if both players have exactly the same number of VP.)
4.0 Sequence of Play
4.1 The games are played in a finite series of game turns, each of which is composed of two player turns. During each game turn, the players alternate in maneuvering their units and resolving combat in a strict sequence, according to the following outline and within the limits set out by the rules that follow. At the conclusion of the last game turn (or sooner if one player concedes), the victory conditions are consulted and the winner is determined.
4.2 Game Turn Sequence Outline
Each game turn is divided into a Western Player Turn and an Egyptian Player Turn, in that same order each game turn throughout the game. Each player turn is further divided into a series of sequenced steps, called "phases." The player whose player turn is currently in progress is also temporarily termed the "phasing player." The activity that may take place during each phase is outlined below. No activity may be taken out of phase, nor may a player go back to redo some poorly performed action or belatedly carry out a missed action, unless his opponent graciously allows it.
I. Western Player Turn
- A. Western Movement Phase
- B. Western Combat Phase
II. Egyptian Player Turn
- A. Egyptian Movement Phase
- B. Egyptian Combat Phase
III. Game Turn Record End Phase
4.3 Ending a Game Turn
One of the players should keep track of the passage of the game turns by moving the "Game Turn Marker" one box forward on the Turn Record Track printed on the mapsheet as the very last step of each game turn.
5.0 Movement & Stacking
5.1 During his Movement Phase, the phasing player may move as many or as few of his units as he desires within the strictures of the rules given above and below. Units may be moved in any direction or combination of directions, and moved units need not expend their entire movement allowance before stopping. No skipping or jumping over of hexes is allowed; units move from hex to contiguous hex. No unit may lend or give movement points to another, nor may movement points be accumulated from phase to phase or from turn to turn; each turn's movement is discrete. Units are moved one at a time. As each unit enters each new hex it expends some amount from its movement allowance depending on the terrain in the hex being entered and/or along its sides.
5.2 Movement Allowances in Suez '56
Each unit's movement allowance (MA) is determined by its mobility category (see 2.13).
| Mobility Category | Anglo-French MA | Egyptian MA |
|---|---|---|
| Moto/Mech | 12 | 8 |
| Straight-Leg | 6 | 4 |
| Helicopter | 60 | - |
5.3 Movement Allowances in El Arish '67
Each unit's movement allowance (MA) is determined by its mobility category (see 2.13).
| Mobility Category | Israeli MA | Egyptian MA |
|---|---|---|
| Moto/Mech | 8 | 6 |
| Straight-Leg | 6 | 4 |
| Helicopter | 30 | - |
5.4 Restrictions & Prohibitions
With one exception, the movement of a player's units never takes place outside his own movement phase. The exception is units involved in battle during a combat phase, either defending or attacking, may be called on to advance or retreat after their fight is resolved (see 7.9ff for details). During the enemy player's movement phase, and during both players' combat phases, except when advancing or retreating after combat, your units may not be moved.
5.5 Effect of Enemy Units on Movement
With one exception, friendly units may never enter a hex containing an enemy unit. The exception is that helicopter units may enter and exit enemy occupied hexes without penalty. They may not, however, end their movement (including retreat or advance after combat) in such hexes.
5.6 The Touch Rule
Once a unit has been moved and the owning player's hand removed from it, it may not be moved any farther during that phase without the consent of the opposing player.
5.7 Terrain Effects on Movement
A unit expends one movement point (MP) to enter a clear terrain hex. For a hex to be considered "clear terrain," that must be the only kind of terrain in it. Exception: an otherwise clear hex that also contained a town, village or airfield would still be considered clear.
To enter hexes containing other types of terrain, a moving non-helicopter unit must expend more than one movement point (see the Terrain Effects Chart, 11.1). Helicopters always expend just one MP to enter any hex, no matter the terrain in it or along its sides.
When the Terrain Effects Chart calls for an additional MP expenditure to cross a hexside, that cost is in addition to the cost for entering the type of terrain in the hex.
5.8 Road & Bridge Movement
A non-helicopter unit that moves from one road hex directly into an adjacent road hex through a road hexside expends only half a movement point, regardless of the other terrain in the hex or along the hexside.
Bridges are in place wherever a road crosses a wadi or water hexside. Bridges over those hexsides negate the hexside crossing cost. The bridges in both games are indestructible. (The Westerners had no interest in destroying those structures, and the Egyptians lacked the organizational finesse necessary to do so in a dependable or timely way.)
5.9 Trail Movement
A non-helicopter unit that moves from one trail hex directly into an adjacent trail hex through a trail hexside expends only one movement point, regardless of the other terrain in the hex or along the hexside. Note, though, when crossing a wadi hexside using trail movement, the trail doesn't negate the hexside crossing cost.
5.10 No Minimum Movement Guarantee
No unit may enter a hex if it doesn't have sufficient MP remaining to pay all the movement costs involved in making that move.
5.11 Stacking
"Stacking" is the word used to describe the placement of more than one friendly unit in the same hex at the same instant. In general, there is little stacking in MEB. The general rule is: there may never be more than one friendly unit in any one hex at the end of any phase or at the end of any retreat after combat or at the end of any advance after combat.
That one exception is helicopters. That is, a player may have two friendly units in a hex at the end of a phase, retreat or advance, if (and only if) one or both are helicopters.
5.12 Moving Through Friendly Units
During that side's movement phase, a Western non-helicopter unit may enter a hex containing a friendly unit—in order to move through and beyond it—by expending an additional movement point over and above the normal terrain costs involved. That same one-MP penalty is paid even when moving by road or trail. There is no extra cost for leaving a friendly occupied hex.
During that side's movement phase, an Egyptian unit may enter a hex containing a friendly unit—in order to move through and beyond it—by expending two additional movement points over and above the normal terrain costs involved. That same two-MP penalty is paid even when moving by road or trail. There is no extra cost for leaving a friendly occupied hex.
Units of both sides may, when in such situations, enter and leave more than one friendly occupied hex per friendly movement phase, as long as the moving unit has enough MPs remaining to both get in and out of such hexes.
5.13 Overall Unit Capacity Per Hex
Within the strictures given above, there are no limits on the number of friendly units that may enter and pass through a given hex during a given friendly movement phase.
5.14 Helicopter Movement Summary
Helicopter units pay only one MP per hex entered, regardless of the in-hex or hexside terrain costs that would otherwise be involved. Helicopters gain no movement advantage for following the roads or trails during their movement. Helicopter units are the only units in the game that may enter hexes containing enemy units, but even helicopters may not stop a move (or retreat or advance after combat) in such hexes. A helicopter unit may stack with one other friendly unit (either helicopter or non-helicopter) at all times during a game turn. Helicopters never pay the additional movement costs given in rule 5.12.
5.15 El Arish Night Turn Movement
Game Turns 4 and 8 of the El Arish '67 battle game are night turns. The effect of nights turns on movement is that all MFs are halved on both sides. Further, Egyptian units beginning their movement phase not in an enemy ZOC during a night turn may not enter an enemy ZOC that phase. Any Egyptian units beginning their movement phase in an enemy ZOC must remain in place there for that entire phase. For night turns' combat effects, see 7.19.
6.0 Zones of Control
6.1 The six hexagons immediately surrounding a hex constitute the "zone of control" (ZOC) of any unit in that hex. ZOC projection is not affected by any in-hex or hexside terrain or water features. There are, however, important qualitative difference between the effects of Western ZOCs on Egyptian units, and the effect of Egyptian ZOCs on Western units.
All ground units of both sides—including helicopters, but excluding Western airstrike and naval gunfire markers—exert their ZOCs at all times throughout the game turn. The projection of ZOCs is never interfered with by the presence of any other units, enemy or friendly. The ZOCs of several units, enemy or friendly, may simultaneously coexist in the same hex at the same time. If a given friendly unit is in any ZOC hex, the enemy unit is thereby also in that friendly unit's ZOC. The two are mutually affected.
6.2 Effects of Western ZOCs on Egyptian Units
All moving Egyptian units must cease their movement for that phase when they enter their first Western ZOC. Egyptian units don't, though, expend any additional MP to enter a Western ZOC. Once entered into a Western ZOC, there are only two ways for an Egyptian unit to exit that hex: 1) either by retreat or advance after combat; or 2) by removal of the Western unit(s) exerting the ZOC in which the Egyptian unit is pinned.
With two exceptions, any Egyptian unit that begins its side's combat phase in the ZOC of one or more Western units must attack at least one of those enemy units that phase (see section 7.0 for details). The first exception is that Egyptian units located in fortification hexes on the El Arish '67 map are never required to attack. The second exception is that during two night game turns of the El Arish '67 battle game, Egyptian units are never required to attack.
Fortification Design Note. Just like bridges, fortifications are indestructible in MEB. If, say, the Israeli player gained control of an Egyptian fortification hex, then that player counterattacked and gained back control of that hex, the fortifications within it are again fully functioning. Note, too, that Israeli units never gain any advantage from Egyptian fortifications; such hexes are considered clear terrain when Israeli units defend in them. Fortifications exist only on the El Arish '67 map, and all such hexes are under the control of the Egyptian player at the start of that game.
6.3 Effects of Egyptian ZOCs on Western Units
With one exception, Egyptian ZOCs have no effect on the movement of Western units into or through them. The one exception again has to do with ZOCs exerted by Egyptian units located in fortification hexes on the El Arish '67 map. Egyptian units located in such hexes exert ZOC with exactly the same properties as Western ZOCs. That is, Israeli non-helicopter units entering such ZOCs must immediately cease their movement for that phase and, once pinned in such ZOCs, may exit them only by using one or the other method described in the first paragraph of rule 6.2 above. That holds true even for Israeli non-helicopter units that have themselves entered a captured Egyptian fortification hex, but there find themselves in still another Egyptian ZOC being exerted from some other fortification hex.
In all other situations, the only effect of Egyptian ZOCs on Western units is as follows: Western units that begin their side's combat phase in one or more Egyptian ZOCs must, that same phase, attack at least one of the units exerting those ZOCs (see section 7.0 for details).
7.0 Combat
7.1 Combat between adjacent opposing units is mandatory (exception: night turns; see 7.19 below). Artillery units (see section 8.0) are the only units that may attack enemy units to which they aren't adjacent. In the rules below, the phasing player is always termed the "attacker," and the other player is always termed the "defender," no matter the general situation across the map.
7.2 Combat Procedure
Total the attack strengths, barrage strengths, aircraft ground support strengths, and naval gunfire support strengths of all attacking units involved in a specific attack. Total the defense strengths and the final protective fire (FPF) strengths of all units that are the object of (or—in the case of FPFing artillery — are taking part in) that same combat. Subtract the total strength of the involved defending units from the total strength of the involved attacking units. That result is the "combat differential" expressed in "points." It may be either a positive or negative number (or zero).
Consult one of the two Combat Results Tables (CRT, Frontal Assault or Mobile; see 11.2 and 11.3) under the combat differential column headed by the number equaling the previously determined combat differential for this attack (or a range of numbers in which that combat differential falls). Adjust the column, if necessary, to take terrain effects into account (see 7.6 and 11.1). The attacking player then rolls a six-sided die, cross indexes that result beneath the combat differential column heading chosen for this battle, then applies those results immediately and fully before going on to begin the resolution of any other combat.
For example, if 13 strength points were attacking a defender with four strength points located in a rough terrain hex, the combat differential would be +9. Because the defender is in a rough hex, before resolving the attack, the attacker shifts two columns to the left (to the advantage of the defender), from the "+9, 11" column to the "+4, 5" column.
Having determined the proper column to use, the attacker rolls the die. The result indicates a line that is cross-indexed with the proper column. The intersection of line and column gives a combat result. That should be applied to the involved units before going on to resolve any other combat. Combat may be resolved in any order the attacker wishes, as long as all attacks are resolved during the combat phase. Uninvolved units are never affected by any combat result, nor is there any carry over of combat results from one phase or turn to the next.
When applying column shifts, always apply all applicable shifters prior to going to either CRT. Final differentials worse (for the attacker) than "-7" are resolved on the "-7" column. Final differentials greater better (for the attacker) than "+12" are resolved on the "+12" column. Assume that beyond the edges of the CRTs all differential columns are headed by one number: -8; -9, etc., and +13; +14, etc.
7.3 Which Units Attack
Every enemy unit that has one or more phasing units adjacent to it must be attacked by one or more units that combat phase. The attacking player may, in general, resolve those attacks in any ways he desires as long as all adjacent enemy units are attacked within the requirements given here and below.
All of your units that end their movement phase in an enemy ZOC must attack one or some adjacent enemy unit during your immediately following combat phase. The player may choose which units will attack each defender hex, as long as all adjacent units participate in one attack (no more, no less). The player need not announce all attacks beforehand.
A given defender hex may be attacked by units from one, some or all adjacent hexes, with possible artillery barrage strength, air support and naval gunfire support thrown in.
No unit may be attacked more than once per combat phase, and no unit may attack more than once per combat phase.
Non-artillery units may attack only in a hex immediately adjacent to the defending hex.
No unit in the defender's hex may decline to enter combat.
7.4 Multi-Unit & Multi-Hex Combat
If one of your units is in the ZOC of more than one enemy unit, it must attack all those adjacent enemy units that aren't attacked by some other of your units.
Friendly units stacked together or in two or more different hexes may combine their combat strengths and together attack a single defender's hex, as long as all those attacking units are adjacent to (or in range of in the case of artillery) the enemy occupied hex.
Any single attack may thus involve any number of attacking or defending units. For such efforts to be resolved as single attacks, however, all the attacking units must be adjacent to (in range of) all the defending units.
7.5 Combat Strength Unity
A given unit's combat strength is always unitary. That is, a unit's combat strength may never be divided among more than one combat, either on attack or defense.
7.6 Terrain Effects on Combat
With one exception (the single oil tank hex in Suez '56), only defending units benefit from the terrain in the hex they occupy and along the hexsides that form it. Terrain in hexes occupied by attacking units has no effect on combat.
The effect on combat of the various terrains on the map have been integrated into the CRTs. After finding the combat differential, the attacking player will shift to the left from that column the number of columns specified on the Terrain Effects Chart (TEC, see 11.1) for the type of terrain occupied by the defending unit.
Terrain benefits for combat aren't cumulative. A defending unit or stack always benefits from only the single most advantageous terrain present. For example, a defending unit in rough terrain that was being attacked through a wadi hexside would get a two column shift from being in the rough.
When two or more defending units are being attacked in a single combat and are on two or more different types of terrain, the entire attack has its differential shifted by the single terrain type most favorable to the defender.
7.7 Diversionary Attacks
In making a series of attacks, a player may allocate his attacking units so some attacks end up being made at poor (low) differentials, so that other nearby attacks may be made at more advantageous (higher) differentials by allotting most of the attacking force against the major objective hexes. Such low differential attacks are known as "diversionary" or "holding attacks." The attacking player may never voluntarily reduce (shift) the combat differential of any attack.
7.8 Selecting a CRT
There are two CRTs included in the MEB game; each reflects a different attitude and approach to combat. The Frontal Assault CRT indicates a willingness (or need, due to lack of training in mobile combat tactics) to accept losses in order to destroy enemy units and perhaps achieve a breakthrough into the enemy front. The Mobile CRT represents a general desire to preserve units and suffer a minimum of casualties, being satisfied to push back the enemy rather than annihilate him outright.
The Egyptian player must always make his attacks using the Frontal Assault CRT. The Western player is generally free to choose which CRT he'll use on an attack by attack basis. That is, during any given combat phase he might decide to use one of the CRTs to resolve some, a few or all of his attacks, and the other CRT to resolve the rest. The exception is, any attacks made into city or fortifications hexes must be made using the Frontal Assault CRT. Further, when using the Frontal Assault CRT to resolve attacks into city or fortification hexes, all results of "D2," "D3" and "D4" are automatically and unavoidably converted to "Ex" results (see 7.9 below).
Design Note. That result conversion is also occurs when the Egyptian player attacks into city hexes. Note, though, Israeli units defending in fortification hexes do so as if they were clear terrain.
7.9 Explanation of Combat Results
- D1, D2, D3 or D4 = Defender Retreats the indicated number of hexes (1, 2, 3 or 4). Each player retreats his own units in accordance with the retreat rules (see 7.10ff below). Units may not retreat across prohibited hexsides (see the TEC, 11.1) or off the map. The involved attackers may advance.
- A1 = Attacker Retreats one hex.
- BR = Both attacker and defender must retreat one hex. The defender retreats first, which means if he's surrounded by enemy units or ZOC, he is eliminated in place.
- AE = Attacker Eliminated. Remove all involved attacking units to the dead pile. The involved defender may advance into the vacated hex.
- DE = Defender Eliminated. Remove all involved defending units to the dead pile. The involved attacker may advance into the vacated hex.
- EX = Exchange. All the involved and immediately adjacent defending units are eliminated first, then an equal or greater number of involved and immediately adjacent attacker strength points are eliminated. For example, a unit with a combat strength of two is attacked by two enemy units, one with a combat strength of three, and the other with a combat strength of four, and an "EX" result is rolled. The defending unit is permanently removed from play; then the attacking unit with the combat strength of three is also removed. The surviving attacking unit may advance into the hex vacated by the defeated defender. Note that all exchanges take place using printed combat strengths of involved and adjacent units; never include artillery units that participated in a battle from some range beyond the immediately adjacent hex. Nonadjacent artillery units are never affected by "EX" results.
- AX = Attacker Exchange. All defending units are retreated one hex (if possible, if not they're eliminated in place), then a number of attacking strength points equal to or greater than the combat strength of the defending unit(s) are also given up. Note that this kind of exchange is calculated in the same way as an "EX" result, except the defending unit(s) is retreated rather than eliminated.
7.10 How to Retreat After Combat
When the combat result calls for a player's unit(s) to be retreated, the owning player must immediately move those units the indicated number of hexes away from their combat position. That movement isn't normal movement and is subject to the following restrictions. If a unit is unable to retreat within the strictures given below, it is eliminated in place instead.
Note that to make a retreat after combat doesn't mean such units have MPs deducted from their next movement phase MA. Similarly, varied terrain costs are not paid when retreating, each hex entered uses up one hex of the required retreat length (one through four hexes).
7.11 Retreating From Enemy ZOC
A retreating unit may initially leave an enemy ZOC; it may not enter any enemy ZOC during the retreat itself. Friendly units don't negate enemy ZOC for the purposes of conducting retreats after combat.
7.12 Selecting Retreat Paths
Wherever possible, a retreating unit must retreat into and through vacant hexes. If no other route is available, the retreating unit may move into and through friendly occupied hexes, displacing every friendly unit or stack whose hex it moves into or through.
In all cases, a retreating unit must end its retreat the CRT-required number of hexes away from its initial combat position. If it can't do that, and can retreat only a portion of the number of mandated hexes, it is eliminated in the last hex into which it is able to retreat. The "retreat path" (see 7.15) is considered to end in the hex in which the unit suffers the elimination.
7.13 Advance After Combat
If friendly units occupy hexes in the only possible retreat route available to a retreating unit, those friendly units are "displaced" (moved out of their hexes) by that retreating unit. A displaced unit is moved one hex by the owning player as if it were itself retreating. Then the original retreating unit enters the vacated hex and, if necessary, continues its retreat from there. A retreating unit may displace as many units as necessary in order to retreat the required number of hexes.
7.14 Displacement Strictures
If displacement would cause any displaced units to be eliminated, the original retreating unit is eliminated instead in the last legal hex of its retreat. Displaced units can themselves displace other friendly units in a kind of "chain reaction" of displacements, provided that's the only permitted path of retreat and displacement open to them. A unit may be displaced more than once per combat phase, if that is the only alternative. Displaced artillery units that have not yet engaged in combat may not fire in any way during that combat phase. Units may not displace other friendly units if they have other paths of retreat open to them. Friendly retreating units may never displace enemy units.
7.15 Advance After Combat
Whenever an enemy unit is forced to retreat, or is eliminated outright, it will leave a path of vacant hexes behind it called the "path of retreat" or "retreat path." Any, some or all friendly units that participated in that combat and were adjacent to the retreated (or eliminated) unit may advance along its path of retreat. Such advancing victorious units may stop advancing in any hex(es) along the path of retreat at their owning player's option. Nonadjacent artillery units may never take part in such advances after combat.
Advancing units may ignore enemy ZOC throughout their advance, but such advancing units may never stray from the exact path of retreat.
7.16 More Advance After Combat Strictures
The option to advance after combat must be exercised immediately, before the resolution of the next combat is begun. Units are never required to advance after combat. After advancing, units may neither attack nor be attacked during that same phase, even if their advances places them next to enemy units that weren't yet involved in combat that phase. Advances are useful in working to cut off the possible retreats of enemy units whose combats haven't been resolved.
7.17 Egyptian Attack Strengths
In both battle games, whenever Egyptian non-artillery units attack, their combat strength is halved, rounding down any remainders, when calculating the combat differential. Egyptian artillery units fight at night, offensively and defensively, using their various combat factors, limitations and bonuses, just as printed on their counters and described elsewhere in these rules (see 7.19, 8.17 and 8.18).
The only exception to the rule above occurs in the El Arish '67 battle game. In that game, Egyptian units attacking from one fortification hex into another fortification hex, or into any hex immediately adjacent to a fortification hex, do so using their printed combat strength; no halving takes place.
7.18 Western Inter-Organizational Attack Strictures
In the Suez '56 battle game, if any Anglo-French attack contains both French and British units (including airstrike and/or naval gunfire support), that attack thereby suffers a one column left combat differential shift in addition to any other normal applicable shifters. Note that the "JS" helicopter unit is considered a British unit for all game purposes.
In the El Arish '67 battle game, no Israeli attack may ever contain units from different divisions. On defense, no Israeli artillery unit my fire FPF for a unit not part of its division. Note, though, that the two "SC" units, one artillery and the other a helicopter, are entirely exempted from this rule. They may operate, decided on a turn by turn and phase by phase basis by the Israeli player, as if they belonged to any of the divisions. Also note, the units of the Israeli "Matt" and 202nd Airborne Brigades are each considered to form their own "division" for the purposes of this rule.
7.19 Night Effects on Combat
Game Turns 4 and 8 of the El Arish '67 battle game are night turns (see 5.15 for movement effects). On those turns combat is voluntary for both players. Further, whenever the Egyptian player makes any night attack or barrage, as the second-last step in its resolution process, he must roll a die and subtract one from that result. That modified result (zero through five) is the number of columns leftward he must shift his combat differential before taking the last step to obtain a combat result (making the resolution die roll itself). Whenever the Israeli player makes a night attack or barrage, he must also roll a die as his second-last resolution step. If that result is odd, he shifts his combat differential two columns leftward; if it's even, he shifts his differential one column leftward.
If either player decides to launch a night attack, then all the normal daytime ZOC rules come into effect, meaning a single attack's launch may then require a number of other nearby attacks to be resolved.
8.0 Artillery, Air Power & Naval Gunfire
8.1 Artillery units may participate in combat from adjacent or nonadjacent hexes. An artillery unit's barrage strength may be used to attack enemy units; its final protective fire (FPF) strength may be used to supplement the defensive combat strengths of other defending friendly units. In both cases, artillery units need not be adjacent to—but must be within range of—the defending unit. An artillery unit may use both its barrage and FPF strengths during a single game turn. When attacked, an artillery unit defends itself with its own defense strength. (A unit is an artillery unit if it has numbers printed in all four of its corners. Units that don't have that feature are non-artillery, no matter what may otherwise be indicated by its unit-type box.)
8.2 Barrage Attacks
Artillery units may attack nonadjacent enemy units up to the limit of their ranges, but they are never forced to barrage an enemy unit simply because it is within range.
8.3 Determining Exact Range
Range from an artillery unit is counted by including the target hex in the count (the defending unit's hex), but not the artillery unit's hex.
8.4 Single Hex Barrage Stricture
When barraging, artillery units may attack only a single enemy occupied hex, except when making a "combined attack" (see 8.7) in conjunction with friendly non-artillery units.
8.5 Artillery & Combat Results
Artillery firing from nonadjacent hexes never suffer any combat results. That is, they are never eliminated or retreated as a result of their own ranged barrage attacks or FPFs. Other units, artillery or non-artillery, taking part in a combined attack with nonadjacent artillery do have to absorb the full combat result.
8.6 CRT Choice For Artillery
Attacks made solely by artillery, or ground support aircraft, or naval gunfire support are always resolved on the Mobile CRT. Further, only a combat result of DE, D2, D3 or D4 affect the defender in such attacks; treat other results as having no effect.
8.7 Combined Attacks
Artillery units may attack alone, in combination with other barraging artillery, or ground support aircraft, or naval gunfire support, or with any friendly units making adjacent attacks, by adding their bombardment factor to the attack strength calculation. Such attacks are called "combined attacks."
8.8 Multi-Hex Combined Attacks
When friendly units are attacking mutually adjacent enemy units in more than one hex in one battle (see 7.4), a barraging artillery unit need be within range of only one of those defenders in order to add their barrage strength to the overall attack.
8.9 Artillery in Adjacent Attacks
When adjacent to one or more enemy units, an artillery unit must participate in an attack against one of those adjacent units, just as if it were a non-artillery unit (and within the strictures of the night turn rules; see 5.15 and 7.19). In making such attacks, artillery units use their barrage strengths and take part in the absorption of all combat losses, retreats, etc., just as if they were non-artillery units.
8.10 Final Protective Fire (FPF)
An artillery unit belonging to the non-phasing player that hasn't yet been subject to any kind of attack in the current Combat Phase, suffered no retreat result in the previous Combat Phase, and is not adjacent to any enemy unit, may use its FPF strength to supplement the defense strength of friendly units that are under attack. If an artillery unit belonging to the non-phasing player had already been attacked in the current combat phase in any fashion, had been displaced or retreated during its own side's previous combat phase, or is adjacent to any enemy units, it may not use its FPF strength during the current enemy combat phase.
8.11 FPF Combat Contribution
Available FPF strength points are simply added to the defense strength of the unit receiving that FPF. When an artillery unit projects its FPF, it never suffers from the combat result of that battle.
8.12 No FPF vs. Pure Barraging
FPF strength may never be used to supplement the defense strength of friendly units that are under attack solely by enemy artillery (either adjacent or nonadjacent), and/or by aircraft ground support and/or by naval gunfire support.
8.13 Artillery Defending Itself
When an artillery unit is itself under attack of any kind it uses is defense strength, not its FPF.
8.14 No Blocking Terrain
An artillery unit may use its barrage and FPF strength anywhere within its range, regardless of intervening terrain and/or units (enemy or friendly).
8.15 More on Terrain & Artillery
Defending units of all types benefit fully from the terrain in the hex they occupy when attacked by artillery, regardless of the range or adjacency of those attacking artillery units. Defending units don't receive any hexside benefits if attacked solely by artillery, or ground support aircraft, or naval gunfire support. Defending units do receive hexside benefits if they are subject to a combined attack involving adjacent non-artillery unit, all of which are attacking through the terrain or water hexside in question.
8.16 Egyptian Artillery Limitations
No Egyptian attack of any kind may ever have more than one artillery unit participating in it from range (any number may participate from adjacent hexes). No Egyptian defense may ever have more than one artillery unit provide FPF to it. No Egyptian artillery unit may ever make ranged fire (either bombardment or FPF) unless there are also one or more Egyptian units in one or more hexes adjacent to that targeted hex.
8.17 Egyptian Artillery Fortification Advantages
As an exception to rule 8.16 above, in the El Arish '67 game, there is no limit on the number of Egyptian artillery units that may barrage or FPF into fortification hexes and/or hexes immediately adjacent to fortification hexes. Further, all ranged Egyptian artillery fires into such hexes are doubled in combat strength.
8.18 Western Ground Support Aircraft
Western air power is represented in both MEB games by airstrike markers. They are generally used in the same ways as artillery. That is, they can function (on a one-marker-to-one-strength-point basis) as bombardment and FPF. Airstrikes are available for use each turn; they are indestructible in play and can't be attacked by the Egyptian player in any way. You may use any number of available airstrike markers against the same hex in either the FPF or bombardment rolls. Unlike artillery, though, each airstrike marker may be used just once, in either the bombardment or FPF rolls, per game turn. Airstrikes may make combined attacks or bombard alone, decided on turn by turn and marker by marker basis by the owning player (and under the same strictures as artillery as given in the rules above). Airstrike markers are just that — markers. They have ZOC, no step strength or stacking values of their own, and their range is infinite across the map. In El Arish '67, airstrike markers may participate in night combat under the same provisions as all other units (see 8.19).
8.19 Naval Gunfire Support
In Suez '56, the Western player has two naval gunfire support units available for use each turn. They are essentially artillery units that remain off-map but that can fire onto it with unlimited range. They both have barrage strengths of four and FPF values of two. They may be used only to fire into Egyptian-occupied hexes that have one or more units of their nationality adjacent to them (no independent bombardments). Unlike airstrike markers, which may each be used only once per game turn, the naval gunfire markers may be used twice each game turn, once in the Anglo-French player's combat phase for bombardment, and once in the Egyptian player's combat phase for FPF. The Egyptian player may not attack the naval gunfire support markers in any way.
9.0 Suez '56 Special Rules & Victory Conditions
9.1 Suez '56 simulates the Anglo-French invasion of Egypt at the time of the 1956 Arab-Israeli War. The Anglo-French objectives were to seize the Suez Canal, which the Egyptians had nationalized, and to possibly also overthrow the regime of Gamel Abd El Nasser. Though the invaders gained their military objectives, they unleashed a political disaster on themselves when the United States joined the Soviet Union in condemning the operation.
9.2 Game Length
The game can end, or not, at its historic termination point at the end of Game Turn 6 (the end of 6 November). If the Anglo-French player, looking over the situation, decides he wants to continue the game he should take a piece of paper and write on it, out of sight of the Egyptian player the game turn number (from 7 through 12) corresponding to the end of the game turn when he does want play to end. Temporarily set aside that paper, still keeping the number written on it out of sight of the Egyptian player.
Such a decision means on each of those continuation turns the governments in London and Paris will be resisting ever-increasing American, Soviet and UN pressure to end the fighting. That resistance has its costs. To reflect that fact, at the end of each continuation game turn, the Anglo-French player should roll a die and add one to that result. That number (two through seven) is the number of bonus VP immediately awarded to the Egyptian player.
When the end of the game turn arrives corresponding to the one written earlier on the paper, the Anglo-French player should reveal that number to the Egyptian player, then both players determine the victor of that game.
9.3 Egyptian Initial Deployment
The Egyptian player sets up the following units first, in any non-Mediterranean coastal hexes on the map: the 4th Infantry Battalion (combat strength 2); the 1R and 2R Infantry Battalions (2s); the 1NG, 2NG and 3NG Infantry Battalions (2s); the PS armor platoon (1); the PS anti-tank platoon (1); the PS anti-aircraft battery (1/1/1/10); and the PS coastal artillery battery (1/1/1/40). That last unit is exceptional in that it must be placed in any Mediterranean coastal hex. (To help identify them, the Egyptian starting units described here all have large dots in the lower-right corners of their reverse sides.)
9.4 Egyptian Reinforcements
At the start of his player turn during Game Turn 2, the Egyptian player rolls a six-sided die and receives that number of militia units (2s) which he immediately places in any city hexes containing an Egyptian unit. He continues that procedure, one such die roll at the start of each of his subsequent player turns, until all six of the Egyptian militia units have been entered into play (one entry per unit), or until he no longer controls any city hexes on the map, whichever comes first. (To help identify them, the Egyptian reinforcement units described here all have large capital-Rs in the lower-right corners of their reverse sides.)
9.5 What If
Shortly after coming to power, Nasser brought in some 80 German World War II Wehrmacht veterans to serve as advisors, trainers and planners for his army. They thought the main front in 1956 should be the Sinai, believing if the Israeli attack could be held there, the French and British wouldn't make a move on Suez. Nasser disagreed, believing the Westerners would use their traditional entry route into Egypt, landing at Alexandria then marching inland to take Cairo and overthrow his regime. Accordingly, at the start of this war, most of the Egyptian army was echeloned between those two cities. As it turned out, the Anglo-French commander had indeed wanted to go in by that route, but the governments in London and Paris felt public opinion would see that as too blatantly imperialist a move. They decreed the invasion had to go in straight for the Suez Canal; the only thing in Egypt they were legally entitled to control. Here, then, we assume Nasser took some of his army and positioned it, as insurance, to block any move directly against the canal. Add the rest of the non-Militia units in the Suez '56 counter mix to the initially deployed Egyptian units in 9.3, but also see 9.8 below. (The Egyptian what-if reinforcement units described here are all those in the counter mix with nothing more than a "56" on their reverse sides.)
9.6 Initial Anglo-French Deployment
Seven British and five French airstrike markers, as well as a British naval gunfire support marker and a French naval gunfire support marker are available for the Anglo-French player's use starting on Game Turn 1 and during each game turn thereafter. All the other Anglo-French units included in the Suez '56 counter mix are also available, off shore, in that player's holding box, but may enter only according to the rules given below in 9.11, 9.12 and 9.13.
9.7 Anglo-French Reinforcements
This is largely up to the Anglo-French player; see 9.6 above and 9.11, 9.12 and 9.13 below.
9.8 Victory Point Awards to the Egyptian Player
+8 VP awarded once and automatically to the Egyptian player, reflecting anti-imperialist world public opinion, at the start of play. Note that this figure is reduced to 0 (zero) VP if the Egyptian player is making use of rule 9.5.
+2 VP for each Anglo-French unit eliminated during play, tallied the instant each is eliminated.
+1 VP each time the Anglo-French player directs artillery or airstrikes, or naval gunfire into a city hex. Only one point is tallied per hex per combat phase, no matter how many such combat factors are fired into it. Tally as each incident takes place.
+1 VP, tallied at the end of each game turn, for each objective hex that the Egyptian player occupies at that time with one of his units.
+2 to +7 VP, tallied at the end of game turns seven through 12, as described above in rule 9.2.
9.9 Victory Point Awards to the Anglo-French Player
+1 VP for each Egyptian unit eliminated during play, tallied the instant each is eliminated.
+2 VP for each British or French unit exited off the map, via hexes 4807 through 4814, inclusive, prior to the end of Game Turn 3, tallied the instant each such unit exits the map.
+1 VP for each British or French unit exited off the map, via hexes 4807 through 4814, inclusive, after the end of Game Turn 3 but prior to the end of play, tallied the instant each such unit exits the map.
+2 VP, tallied once at the end of play, for each objective hex occupied at that time by one or more Anglo-French units.
9.10 Exiting the Map
Anglo-French units may exit the map via hexes 4807 through 4814, as called for in rule 9.9 above, but they may only do so during their own side's movement phases. They may use airmobile transport to move off the map (see 9.12). They may not retreat or advance after combat off the edge of the map. Units once exited may never return, though they don't count as having been eliminated for Egyptian VP purposes. Units may exit using the road movement rate if their last on-map hex was a road hex; otherwise, they pay one movement point to move off.
9.11 Anglo-French Airborne Landings
On Game Turn 1, at the start of his movement phase, the Anglo-French player may bring onto the map any two paratroop units via airborne landing. At the start of each of his movement phases in game turns after that, he may continue to land one such unit via airborne landing.
Such units are simply placed into any clear terrain hexes on the map, including coastal hexes but excluding city hexes. Normal stacking rules apply. They may not move any farther that player turn. They may not land atop Egyptian units, but they may land in Egyptian ZOCs. They must attack any adjacent Egyptian units according to normal combat rules during their player turn of landing, but they may not advance after combat. (They do have naval gunfire and airstrikes available to aid them.) If they attack and receive an "A1" result, they are eliminated in place instead of making a retreat. Once their player turn of airborne entry is over, treat such paratrooper units as regular straight-leg infantry.
9.12 Anglo-French Airmobile Landings & Helicopters
The British JS helicopter unit may be used to bring onto the map one straight-leg unit via airmobile transport. That ability begins with Game Turn 1 and extends through each game turn of play.
The helicopter unit and the unit it's transporting are simply placed into any clear terrain hexes on the map, including coastal hexes but excluding city hexes. Normal stacking rules apply. They may not move any farther that player turn. They may not land atop Egyptian units, but they may land in Egyptian ZOCs. They must attack any adjacent Egyptian units according to normal combat rules during their player turn of landing, but they may not advance after combat. (They do have naval gunfire and airstrikes available to aid them.) If they attack and receive an "A1" result, they are eliminated in place instead of making a retreat. Once their player turn of airborne entry is over, treat such airmobile-entered units as regular straight-leg infantry.
The JS helicopter unit should begin counting its movement in the all-sea Mediterranean hex through which it first enters the map (1704 through 1232, inclusive). At the start of the next Anglo-French Movement Phase, it may again move off the map via those hexes, pick up another straight-leg unit from holding box, then move directly back on the map that same phase to complete the delivery. Similarly, the JS unit may also move to pick up a friendly straight-leg unit already on the map and transport it to any other clear terrain (non-city) hex, as long as its overall MF of 60 is not exceeded. Only the JS unit may transport British or French units, decided on a turn by turn basis by that player.
Editor's note on this paragraph: the publisher's 02/09/05 update states that the last sentence of this paragraph (the sentence beginning "Only the JS unit may transport...") was deleted. The publisher's copy of the text supplied for this transcription still prints that sentence, so it is retained as printed; the deletion is noted here rather than applied silently.
The two helicopter units included in this game's counter mix are freely available to the Anglo-French player starting with his player turn on Game Turn 1. That is, those two units, together or separately, may move to and from their side's holding boxes and the map, paying one MP to do so each time in either direction, any number of times during each Anglo-French Movement Phase, as long as they don't exceed their MFs. Such entries and/or exits in no way count against the overall Anglo-French reinforcement capacity as described in 9.11, 9.12 and 9.13.
9.13 Anglo-French Amphibious Landings
The Anglo-French player may make amphibious landings into any Mediterranean coastal hex from 2801 through 1632, inclusive, starting with his movement phase on Game Turn 4. Such landings are not required that turn, but they may never be made before that turn. During the first of his movement phases in which there is an amphibious landing, up to any six units may land. During each of his movement phases thereafter up to three units may land.
The hexes chosen for landing may contain Egyptian ZOCs but not Egyptian units. Simply move the selected units from the Anglo-French Holding Box into the desired coastal hexes. Such units may move no farther that turn. They must attack any adjacent Egyptian units according to normal combat rules during their player turn of landing, but they may not advance after combat. (They do have naval gunfire and airstrikes available to aid them.) If they attack and receive an "A1" result, they are eliminated in place instead of making a retreat.
9.14 Anglo-French Engineers & Water Crossings
Units may not normally cross all-sea, all-Lake Manzala or all-Suez Canal hexsides. Anglo-French units may do so, however, if assisted by an engineer unit (nationality doesn't matter). To do so, the unit that will cross must begin that Anglo-French Movement Phase in a hex adjacent to the assisting engineer unit. That engineer unit must itself begin that same phase located in a coastal hex containing one or more all-sea, all-Suez Canal or all-Lake Manzala hexsides. The crossing unit then moves into the engineer unit's hex, then one more hex onto the other side of the water barrier being crossed. That ends the crossing unit's movement for that player turn. Likewise, the assisting engineer unit may not move at all that player turn.
An engineer unit may assist another engineer unit to cross such water barrier hexsides, but no single engineer unit may assist itself to cross them.
No unit may make an assisted crossing into an Egyptian occupied hex; they may do so into Egyptian ZOCs. In the latter situation, the just-crossed-over unit must attack according to normal rules, except if they receive an "A1" result, they are eliminated in place instead of making the retreat. If such attacks take place in conjunction with other Anglo-French ground units, only the water-crossing units are affected by this special provision.
9.15 Anglo-French Engineers & Attacks
If an Anglo-French force is making an attack into an adjacent enemy occupied city hex, and the attacking force contains one or more engineer units, that player shifts the CRT column one to the right, cumulative with any other shifts for the defenders. There is only one shift, no matter how many engineer units may be part of a given attacking force. This shift is given even if the entire attacking Anglo-Egyptian force consists of only one engineer unit.
Design Note. Neither rule 9.14 nor 9.15 apply to the Egyptian engineer unit included in the Sinai '56 counter mix.
9.16 Special Suez '56 Terrain Considerations
No units of either side may retreat across hexsides of the Raswa Channel or Manzala Canal except via a bridge.
10.0 El Arish '67 Special Rules & Victory Conditions
10.1 The El Arish '67 battle game simulates the initial Israeli onslaught into the Sinai, which led to their spectacular triumph over the Egyptians a few days later. This opening battle could've gone much better for the Egyptians. They had actually planned a strong mechanized counterattack, but their high command lost their nerve at the last moment and ordered a general withdrawal instead. In the game, the Egyptian player has both those options available to him.
10.2 Game Length
Play begins on Game Turn 1, the morning of 5 June 1967, and ends at the conclusion of Game Turn 11 (7 June). Game Turns 4 and 8 are night game turns (see 5.15 and 7.19).
10.3 Egyptian Initial Deployment
The Egyptian player sets up first. No unit may begin in any hex on the eastern map edge (4816-4852, inclusive).
In Rafiah (4620) or within one hex of there: the 14th Armor Brigade (6); and the PLA Infantry Brigade (4). To help distinguish them, those two units have "4620-1" printed on their lower reverse sides.
Within seven hexes of any coastal hexes, inclusive, all nine units of the Egyptian 7th Infantry Division: 1/7, 2/7 and 3/7 Infantry Brigades (6s); the 7th Armor Brigade (6); the 7th Artillery Brigade (4/2/1/7); the 7th Anti-Tank Battalion (2); the 7th Anti-Aircraft Artillery Battalion (1/2/2/2); the 7th Tank Battalion (2); and the ZSU/7 Anti-Aircraft Company (1/1/1/2). To help distinguish them, these units have "C-7" (C = coastal) printed on their lower reverse sides.
Within eight hexes of Abu Aweiqla (3844), inclusive, all seven units of the Egyptian 2nd Infantry Division: the 1/2, 2/2 and 3/2 Infantry Brigades (6s); the 2nd Armor Brigade (6); the 2nd Artillery Brigade (4/2/1/7); the 2nd Anti-Tank Battalion (2); and the 2nd Anti-Aircraft Battalion (1/2/2/2). To help distinguish them, these units have "3844-8" printed on their lower reverse sides.
In the Egyptian Off Map Holding Box, all seven units of the Egyptian 3rd Infantry Division: the 1/3, 2/3 and 3/3 Infantry Brigades; the 3rd Armor Brigade; the 3rd Artillery Brigade (4/2/1/7); the 3rd Anti-Tank Battalion (2); the 3rd Anti-Aircraft Battalion 1/2/2/2). To help distinguish them, these units have "HB" (HB = Holding Box) printed on their lower reverse sides.
In any fortification hexes: the SF Artillery Brigade (5/2/1/7) and the SF Anti-Tank Missile Battalion (0/[3]/1/2). To help distinguish them, these units have "F" (F = Fortification) printed on their lower reverse sides.
Anywhere on the map other than the eastern-most hex row: the SF Infantry Battalion (2). To help distinguish it, this unit have "ABE" (ABE = Any But Easternmost hex row) printed on its lower reverse side.
10.4 Egyptian Reinforcements
The seven units of the Egyptian 3rd Infantry Division are available to be (freely) entered as reinforcements for that side starting during the Egyptian Movement Phase of Game Turn 1.
The six units of the Egyptian 4th Armor Division are also available as reinforcements for the Egyptian player starting on Game Turn 1; however, the instant one or more such units first enters the map, the Israeli player is awarded five VP. The division consists of: 1/4A and 2/4A Tank Brigades (6s); the 3/4A Mechanized Infantry Brigade (6); the 4A Artillery Brigade (4/2/1/7); the 4A Anti-Aircraft Battalion (1/2/2/2); and the 4A Armored Cavalry Battalion (2). To help distinguish them, these units have "R1" (R1 = Game Turn 1 Reinforcement) printed on their lower reverse sides.
The seven units of the Egyptian Shazli Force are also available as reinforcements for the Egyptian player starting on Game Turn 5; however, the instant one or more such units first enters the map, the Israeli player is awarded 5 VP. The Shazli Force consists of: the 1ShF, 2ShF, 3ShF and 4ShF Tank Battalions (2s); the ShF Mechanized Infantry Brigade (6); the ShF Special Forces Battalion (2); and the ShF Artillery Brigade (3/1/1/7). To help distinguish them, these units have "R5" (R5 = Game Turn 5 Reinforcement) printed on their lower reverse sides.
Egyptian reinforcements enter the map anywhere along its western edge (1928-1952), paying normal movement costs from the very first hex of entry (including the road or trail bonus if they enter via such hexes). All of the units in each of the two divisions, and in the Shazli Force, must be entered through any one hex selected by the Egyptian player at the time of entry. The units enter "in column," each paying an increased cost to get on the map depending on its exact position within the overall column. For instance, if entering through a non-road clear terrain hex, the first unit of a divisional column would pay one MP to enter that first map hex; the unit entering next would pay 2 MP, the third would pay 3 MP, etc. Reinforcements may enter the map directly into hexes containing Israeli ZOC, but not Israeli units themselves. If all the units in a divisional/force reinforcement column don't make it on in one movement phase, simply hold the laggards off map until the next turn's Egyptian movement phase and then start the process again.
10.5 Initial Israeli Deployment
No Israeli units begin set up on the map. All the units of the "Tal," "Yoffe" and "Sharon" Divisions, as well as the two SC units and the "Matt" Airborne Brigade are available for immediate entry, starting with the Israeli player turn movement phase of Game Turn 1, from the Off Map Holding Box. The units of the "Tal" Division may enter through any eastern map edge hexes lying between the two "T" indicators, inclusive (4816-4824). The units of the "Yoffe" Division may enter through any eastern map edge hexes lying between the two "Y" indicators, inclusive (4825-4836). The units of the "Sharon" Division may enter through any eastern map edge hexes lying between the two "S" indicators, inclusive (4837-4848). Any one infantry battalion of the "Matt" Airborne Brigade unit may enter through any board edge hex or via airborne landing (see 10.10 below). The two SC units and the units of the "Matt" Airborne Brigade may enter via any eastern board edge hexes (but see 10.7 below).
Unlike the Egyptians, Israeli units need not enter the map via divisional/brigade columns; they may enter through the various hexes of their division entry areas. If, however, more than one Israeli unit does enter the board via the same hex, then use the same in-column counting process as given in 10.4 above.
10.6 Israeli Air Strikes & the 202nd Airborne Brigade
The Israeli player has no air strike markers available during Game Turn 1. At the start of Game Turn 2, though, and each daylight game turn thereafter, he should roll two dice. That result is his number of available air strike markers that turn. At the start of night game turns, the Israeli player should roll just one die.
All six units of the Israeli 202nd Airborne Brigade become available as reinforcements for that player beginning with Game Turn 5. They must enter the map via the "T" entry hex span. There is no VP award given to the Egyptian player for those units' entry. To help distinguish them, these units have "R5-T" (R5-T = Game Turn 5 Reinforcement–T entry hex span) printed on their lower reverse sides.
10.7 Victory Point Awards to the Egyptian Player
+4 VP, tallied instantly each time it occurs, for every Israeli unit eliminated.
+2 VP, tallied once and instantly if the Israeli player makes an airborne infantry drop (see 10.10 below).
+10 VP, tallied once the first time a unit belonging to the Israeli "Matt" Airborne Brigade enters play via any movement method.
+1 VP, tallied at the end of each game turn, for each objective hex the Egyptian player occupies at that time with one or more of his units.
10.8 Victory Point Awards to the Israeli Player
+1 VP, tallied instantly each time it occurs, for every Egyptian unit eliminated.
+5 VP, tallied once the first time a unit belonging to the Egyptian 4th Armored Division enters play.
+5 VP, tallied once the first time a unit belonging to the Egyptian "Shazli Force" enters play.
+2 VP, tallied instantly each time it occurs, for every Israeli unit exited anywhere off the west map edge during Game Turns 1 through 4, inclusive.
+1 VP, tallied instantly each time it occurs, for every Israeli unit exited anywhere off the west map edge during Game Turns 5 through 8, inclusive.
+0.5 VP, tallied instantly each time it occurs, for every Israeli unit exited anywhere off the west map edge during Game Turns 9 through 11, inclusive.
+1 VP, tallied once at the end of the game, for every objective hex occupied by an Israeli unit at that time.
10.9 Exiting the Map
Israeli units may exit the map via hexes 1928 through 1952, as called for in rule 10.8 above, but they may only do so during their own side's movement phases. They may not use airborne transport to move off the map (see 10.10). They may not retreat or advance after combat off the edge of the map. Units once exited may never return, though they don't count as having been eliminated for Egyptian VP purposes. Units may exit using the road movement rate if their last on-map hex was a road hex; otherwise, they pay one movement point to move off.
10.10 Israeli Airborne Landing
On any one game turn, starting with Game Turn 1, at the start of his movement phase, the Israeli player may bring onto the map any one paratroop infantry unit of the Matt Brigade via airborne landing.
The selected unit is simply placed into any clear terrain hex on the map, including coastal hexes but excluding fortification hexes. Normal stacking rules apply. It may not move any farther that player turn. It may not land atop Egyptian units, but it may land in Egyptian ZOCs. It must attack any adjacent Egyptian units according to normal combat rules during its player turn of landing, but it may not advance after combat. (It does have airstrikes available to aid it.) If it attacks and receive an "A1" result, it's eliminated in place instead of making a retreat. Once the player turn of airborne entry is over, treat the paratrooper unit as regular straight-leg infantry.
10.11 Egyptian Withdrawal
At the beginning of any Egyptian player turn, that player may declare a withdrawal. That declaration is irrevocable once made, and has the following results, which come into effect instantly. The advantage to declaring a withdrawal comes from the fact it allows the Egyptian player to preserve his units—and thereby denying those VP to the Israeli player—by getting them off the map.
Disengagement. Egyptian units that begin their side's movement phases in an Israeli ZOC may move out of that ZOC provided the first hex they enter in so doing does not contain another Israeli ZOC. (The presence of a friendly unit in an enemy ZOC doesn't negate that ZOC for movement purposes.) Further, such disengaging Egyptian units may not enter another Israeli ZOC for the remainder of that player turn. Egyptian units that didn't begin their side's movement phase already in an Israeli ZOC may enter such hexes normally.
Exiting the Map. Egyptian units may move off the same map edge and methods described for Israeli units in 10.9 above. Units once exited from the map may never reenter it. Such units don't, however, count as having been eliminated by the Israeli player. Reinforcement units that never entered the map in the first place may not be counted as having exited the map unless they first spent one complete Israeli player turn on it.
Combat. Once a withdrawal has been declared, all subsequent Egyptian attacks suffer a one-left combat differential shift in addition to any other normally applicable shifts.
10.12 Egyptian Anti-Tank Missile Unit
The Egyptian antitank missile unit (part of his 4th Armored Division) is treated as a regular artillery unit with the following exceptions. It has a barrage strength of zero and an FPF strength of three. It may use the latter against only Israeli mechanized units; it may not FPF if no Israeli mechanized unit is involved in the combat. If adjacent to an Israeli unit, the antitank missile unit attacks with a combat strength of zero. Further, the unit may fire into, but never through, town, city or rough hexes. Note that the unit has a bracketed FPF as a reminder of these special characteristics.
10.13 Israeli Engineers & Attacks
If an Israeli force is making an attack into an adjacent enemy occupied fortification hex, and the attacking force contains one or more engineer units, that player shifts the CRT column one to the right, cumulative with any other shifts for the defenders. There is only one shift, no matter how many engineer units may be part of a given attacking force. This shift is given even if the entire attacking Israeli force consists of only one engineer unit.
10.14 Empty Board
If one (or both) players finds the map has been emptied of all his side's units prior to the end of Game Turn 11, play does not end. Continue to go through the turns, calculating VP for both sides according to normal rules, allowing for reinforcement entry, etc., until the end of Game Turn 11 is reached.
11.0 Charts & Tables
The publisher's rules text ends at the heading "11.0 Charts & Tables". The Terrain Effects Chart (11.1), the Frontal Assault CRT (11.2) and the Mobile CRT (11.3) are printed on the mapsheet and are not part of the rules text supplied for this transcription. They are not reproduced here; the rules above that refer to them (7.2, 7.6, 7.8, 7.9 and 8.6) are transcribed as printed.