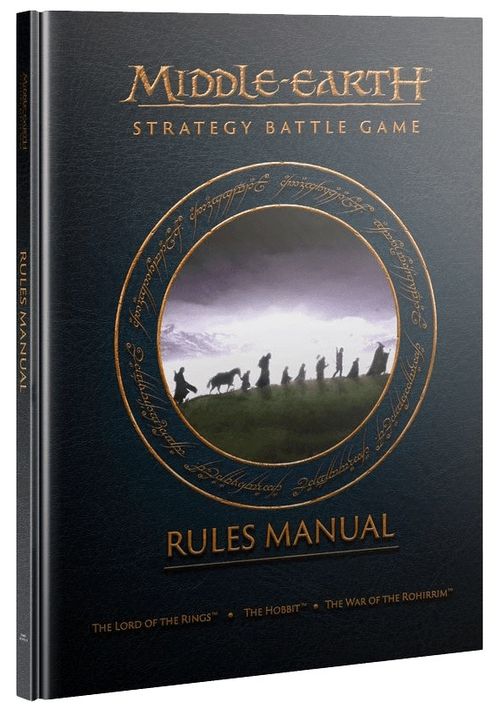
Middle-Earth Strategy Battle Game: Rules Manual
Middle-earth Strategy Battle Game: Rules Manual Rulebook
Table of Contents
Table of Contents
Introduction
Middle-earth in Miniature
Many of us who have followed the stories set in Middle-earth – whether The Lord of the Rings, The Hobbit or The War of the Rohirrim – have at some point dreamt of being part of the action; striding into battle alongside our favourite characters, going on adventures within the epic landscapes, or simply just strolling along the paths of the Shire. The Middle-earth Strategy Battle Game allows you to recreate your favourite moments, transporting you to Middle-earth and letting your imagination run wild.
If you are reading this, then there is a good chance that you have already seen a selection of the stunning range of Citadel and Forge World miniatures of the various characters and creatures from all aspects of Middle-earth. In fact, it is a distinct possibility that you may own one or two already!
This Rules Manual is here to guide you on your journey through collecting and gaming with your own collection of finely detailed Middle-earth miniatures, so that you can get the most fun and enjoyment out of them. Whether you simply want to collect your favourite heroes, villains and creatures from Middle-earth, or you wish to gather a mighty army of Men, Elves, Orcs or another army of your choosing and do battle with your friends, this Rules Manual is here to guide you every step of the way.
How to use this Rules Manual
The Middle-earth Strategy Battle Game Rules Manual contains within its pages all of the information that you will need to organise your collection and play exciting games set in the world of Middle-earth. The game allows you to faithfully recreate your favourite battles and scenes from The Lord of the Rings: Motion Picture Trilogy, The Hobbit: Motion Picture Trilogy and The War of the Rohirrim.
This Rules Manual contains all of the rules you will need to play games set within Middle-earth, including moving and shooting, fighting in close combat, using magic and even fighting in epic siege battles.
This Rules Manual also contains a selection of specially written Matched Play Scenarios, perfect for use in tournaments and other organised play environments, or just to test your skills and generalship against your friends using armies built to the same criteria.
The profiles for all your favourite heroes, warriors and creatures can be found within the relevant army supplement: Armies of The Lord of the Rings, Armies of The Hobbit or Armies of Middle-earth.
Playing the Game
Those of you who have never played a tabletop wargame before may be wondering how it all works; after all, it can seem quite strange to you if you don't know what's going on! Over the next few pages, we will look at how you go about setting up and getting started with your first game of the Middle-earth Strategy Battle Game.
The first thing you need, and possibly the most important, is a friend to play your games with and join you on your hobby journey. You will then need to decide what kind of game you wish to play – there are two main ways to play the Middle-earth Strategy Battle Game:
Narrative Play – Recreate all of your favourite scenes and battles from the films and books using your collection of Citadel and Forge World miniatures... and perhaps even change the very fate of Middle-earth through the outcome of your games. You will find more details on Narrative Play on page 150.
Matched Play – Organise your collection into mighty armies capable of taking on all comers, using the Army Lists, profiles and points values found within one of the various supplements. Then, battle with your friends in a test of skill, wits and tactics to see who will emerge victorious! More details on Matched Play can be found on page 152.
Setting up the Battlefield
Most Narrative Play and Matched Play games will have instructions and ideas on how to set up the battlefield ready for your game, including maps and even photos to help guide you. In addition, in each Scenario there will be an idea given of what the terrain should be.
If you don't have all the terrain that is recommended, don't panic! You can still play the game with a bit of improvisation and imagination – most wargamers play their first games with books standing in for hills and ruins, and even rocks and twigs from the garden as forests and areas of mountainous terrain.
Choose Forces – Every Narrative Scenario contains a list of participants to help you put together a game that faithfully recreates the scenes from the films, and will require no small amount of cunning and wits to emerge victorious. In Matched Play games, players will build their Armies to a predetermined points value before the game and using the various Army Lists presented in the supplements, allowing you to build a competitive force based upon the scenes presented in the films and the books.
Objectives – Every Scenario has a series of rules and objectives that the forces are trying to achieve. In Narrative Play games, the objectives both sides are trying to accomplish will mirror those seen in the films, allowing players to play in the same way as the armies they see on-screen. Sometimes these will be completely different from each other, especially if the Armies are trying to complete different missions. In Matched Play games, both players will have the same objectives they are trying to accomplish and will be trying to obtain a number of Victory Points by doing so. These Matched Play Scenarios are always balanced, and players can achieve up to a maximum of 20 Victory Points in each Scenario.
Of course, there is nothing stopping you from playing the Middle-earth Strategy Battle Game in your own way; playing games with your own rules, creating unique alliances and scenarios, and simply just playing the game in whatever manner suits you best – that is all part of the fun of the game!
The Rules
The rules are what make the game work on the tabletop. They govern all aspects of play, from how far a model can Move, whether a model successfully hits a target with an arrow, to how many Attacks a model has in a fight. The rules may seem a little intimidating at first, but don't be put off – after a game or two they will all seem like second nature!
Characteristics
Every model, from the most valorous of Men to the most repulsive of Orc, has a profile that reflects how powerful they are and what they can do on the battlefield. A profile is a collection of letters and numbers that at first glance may seem confusing but is quite simple once it has been explained. Each of these relates to a specific aspect, and during the course of a battle you will often be referring to these to see which model wins a fight, if a model delivers a wounding blow, and all manner of situations.
Here we describe what each of these characteristics are and what they mean:
- Move Value (MV) – The model's Move Value tells you how far in inches (") a model may Move during each of its activations.
- Fight Value (FV) – Fight Value denotes how good the model is at fighting in hand-to-hand Combat, with the higher the number the more skilled the model is in Combat. Fight Value can never be increased to more than 10 or reduced to below 1.
- Shoot Value (SV) – Shoot Value shows how skilled the model is with a Missile Weapon. It is represented by a target number, a number followed by a '+' symbol, which shows what result on a D6 is needed in order for this model to hit a target with a Shooting Attack. As a result, the lower the Shoot Value, the better the model is at Shooting. Shoot Value can never be improved to better than 2+ or worsened to worse than 6+. Every model has a Shoot Value, although not every model has access to a Missile Weapon. If a model cannot Shoot for whatever reason, you can simply ignore their Shoot Value.
- Strength (S) – This is how strong the model is, and will be used when a model makes attacks in Combat to work out how easily they can wound their opponent; the higher a model's Strength characteristic, the easier it is to wound an enemy model in Combat. A model's Strength can never be increased to more than 10. However, should a model's Strength ever be reduced to 0, then they are immediately removed from the battlefield and counted as a casualty.
- Defence (D) – Simply put, this is how tough or durable a model is. If a model is clad in thick armour, or is inherently resilient, it will have a higher Defence. The higher a model's Defence, the less likely they are to be wounded by enemy shooting or combat attacks. A model's Defence can never be increased to more than 10 or reduced to below 1.
- Attacks (A) – The Attacks characteristic represents how many blows a model can land on an enemy in Combat. It literally translates into how many dice the model will roll during a Combat, both for the initial Duel Roll and when making Strikes against an enemy.
- Wounds (W) – This denotes how many injuries a model can take before succumbing to their wounds. If at any point a model's Wounds are reduced to 0, they are immediately removed from the battlefield as a casualty. Most models have a single Wound, and so will be removed as soon as they are wounded. However, some characters and creatures will possess more, and can suffer more Wounds before being removed as a casualty.
Anatomy of a Profile
Shown opposite is an example of a profile for the Middle-earth Strategy Battle Game, in this case Elrond, Master of Rivendell. Whilst at first glance this profile may seem rather confusing if you haven't seen one before, it is actually really simple to understand. Here we will take you through each part of a model's profile and explain what each bit means – that way you will be able to understand it all in no time!
Character's Name – This provides the name of the profile in question; essentially, who this character is. Sometimes these may provide a title, and will often help to denote which part of the story this version of the character is from. It is important when you are writing an Army List that you use the full name of the profile, as certain characters may have more than one. For example, Aragorn has two profiles: one as Strider and one as King Elessar.
Points Value – Here you will find the cost in points for the model. The points value given is for the whole profile, with the exception of any options they may be able to purchase.
Base Size – This is the base size that the model must go on. It will always be a circular base, unless the profile specifically states it is an oval. Some models come as Cavalry models, however, the base size shown in the profile will be that of the Infantry model should they be dismounted. Whilst mounted, the model will always use the base size of the Mount, which can either be found in the Cavalry section, or in the model's profile.
Background Text – The text here describes the character the model is representing, giving some context as to who the hero, warrior or creature is and how they fit into Middle-earth.
Characteristics – Here you will find all of the profile's characteristics, as mentioned above. If the profile has the Hero keyword, then you will also find the Might, Will and Fate characteristics here as well.
Keywords – Here you will find all of the keywords associated with the profile. These are split into three types: Race keywords such as Man, Elf, etc., Faction keywords such as Rohan, Mordor, etc., and Unit Type keywords such as Infantry, Cavalry, etc. Many rules will reference keywords to explain which models are affected. Here we can see that Elrond has the Elf, Rivendell, Hero, Infantry and Unique keywords. For more on keywords, see the Basic Principles section below.
Wargear – Every model in the Middle-earth Strategy Battle Game has a selection of wargear that comes with their profile, as listed here. The rules for this wargear can usually be found in the Weapons & Wargear section on page 102. Sometimes, a profile will have specific items of wargear that are unique to them. In these instances, the rules for that wargear will be listed in this section. Here we can see that Elrond has both Vilya and Hadhafang, with the rules for them listed in this section.
Heroic Actions – Hero models can spend Might Points to declare Heroic Actions. Some of these are available to every Hero, others are only available to specific Hero models. Here will be listed all of the specialised Heroic Actions the model can declare. If there are no Heroic Actions listed, then the Hero cannot declare any of the specialised Heroic Actions. For more on Heroic Actions, see page 78.
Options – Profiles may have a list of options that can be purchased for the model, for the shown points cost. These can include the likes of weapons, armour, mounts, or wargear. Warrior models will only be able to take a single option from the list. If it states a Warrior must take one option, then it is mandatory to take an option. If it states that a Warrior may take one option, then they do not have to take an option if they don't wish to. Hero models may take any of the options listed in their profile in any combination.
Special Rules – Profiles may have a selection of special rules that represent the wide variety of abilities they possess. Some of these will just have the name of the special rule under the header, in which case the effect of the special rule in question can be found in the Special Rules section on page 122. Others that are unique to the profile will have the full effect of the rule listed, along with if it is Active or Passive (see page 123).
Magical Powers – In Middle-earth, a number of beings have the ability to manifest magical powers. If the profile is able to Cast any Magical Powers, they will be listed here along with their range and Casting Value. The full effects of the Magical Powers can be found on page 112.
Worked example — Elrond, Master of Rivendell (170 points):
Elrond was the herald of the High King Gil-galad during the War of the Last Alliance, fighting against the armies of Mordor. It was Elrond who tried to convince Isildur to destroy the One Ring, and also Elrond who founded the halls of Rivendell. Elrond carries Vilya, one of the three Elven Rings, whose power is used to protect the borders of Rivendell and sustain the power of the Elves. An Elf of great wisdom, Elrond also possesses the gift of foresight, allowing him to see some things that have not yet come to pass.
| Mv | Fv | Sv | S | D | A | W | C | I |
|---|---|---|---|---|---|---|---|---|
| 6" | 7 | 3+ | 4 | 7 | 3 | 3 | 3+ | 3+ |
Might 3, Will 3, Fate 3
Race: Elf. Faction: Rivendell. Unit Type: Hero, Infantry, Unique. Base size: 25mm.
Wargear: Hadhafang, heavy armour and Vilya.
- Hadhafang (Active) – This is a Unique Elven hand-and-a-half weapon. Additionally, a model wielding Hadhafang gains a bonus of +1 To Wound when making Strikes against a Spirit model.
- Vilya (Passive) – This is a Unique piece of wargear. Elrond may re-roll any failed Fate Rolls.
Heroic Actions: Heroic Channelling, Heroic Defence, Heroic Resolve, Heroic Strike.
Options: Horse ... 20 points.
Special Rules: Expert Rider, Terror, Woodland Creature.
- Foresight of the Eldar (Passive) – Blessed with the gift of foresight, Elrond is able to see where things are going to happen before they do and use such knowledge to guide his allies in battle. At the start of the game, before either side deploys, roll a D6 and make a note of the result – this is the number of Foresight Points that Elrond has for the battle. During the roll for Priority, so long as he is alive and on the battlefield, Elrond can spend these Foresight Points to increase the roll on his controlling player's roll for Priority. For each Foresight Point spent, increase the dice roll by 1, to a maximum of 6.
- Lord of the West (Active) – Few can say they have crossed blades with the greatest Elven lords and lived to tell the tale. This model may re-roll a single D6 when making a Duel Roll. Additionally, they may re-roll a single D6 when rolling To Wound when making Strikes.
Magical Powers:
| Magical Power | Range | Casting Value |
|---|---|---|
| Renew | 12" | 3+ |
| Wrath of Bruinen | 3" | 4+ |
What you need to play
Playing battles of the Middle-earth Strategy Battle Game is a rather simple thing to do. However, there are a few things you will want to organise before you settle down to play your game – a willing opponent, of course, is the first vital thing! Here we will go through all you will need to play a game, explain some of them in a bit more detail, and help you understand what you need to get started in your first games in Middle-earth.
Citadel or Forge World Miniatures – This may seem obvious, but you will need a selection of Citadel or Forge World miniatures in order to play. Whether this is a specific collection designed to faithfully recreate a scene from the films, or just a selection of your favourite models arranged into an army of your own making – the choice is up to you. As you play your first few games, you'll probably find yourself using unpainted miniatures but, as almost every hobbyist will agree, playing a game with fully painted miniatures looks and feels better!
Rules Manual and Supplements – Whenever you are playing a game, you will want to make sure that you have any relevant rules references close at hand in case you are not sure how a rule works, or if you and your opponent disagree on a particular rule. It is always important to have this Rules Manual handy, and both players are responsible for providing the supplements that contain the profiles for any miniatures they are using in the game.
Dice, Tape Measure and Tokens – We use tape measures or measuring sticks to see how far our models can move across the battlefield each turn, whether they are in range with their Missile Weapons to Shoot an enemy, and for many other distance-related reasons. It is necessary to have a measuring device that measures in inches for this game.
Dice are an integral part of the Middle-earth Strategy Battle Game as we use them to determine the outcome of how our miniatures act. From whether a model can hit an enemy when Shooting, to how effective they are in a duel, and also if they can successfully slay an opposing model in Combat. As such, you'll need a selection of six-sided dice at your disposal; between eight and twelve in a few different colours is ideal.
Tokens are often used to denote in-game effects that are affecting our models. Whether a model has been knocked Prone, is under the effects of a Magical Power, or even has a beneficial rule temporarily in play, using tokens is a great way to keep track of such situations so that they are all clear.
Playing Area and Terrain – You can play a game almost anywhere, from your kitchen table with some makeshift scenery to provide cover from arrow fire, to custom-made gaming tables designed to represent one of the varied battlefields or locations in Middle-earth. It is important to always have some form of terrain in your games, as the more varied and interesting your playing area is, the more evocative your games will be.
Pens and Paper – It is often useful to have a pen and paper close at hand to record any important information about the game. This is great for keeping track of how many Might, Will and Fate Points each Hero has spent, how many models from each side have been slain (which is important for your Break Point), and for keeping track of any other special rules that require some form of note taking.
Refreshments – In the finest tradition of Hobbits everywhere, it's often a good idea to have a selection of sensible snacks, such as biscuits or seed cakes, available for you and your opponent – you don't want to be making tricky tactical decisions on an empty stomach – as well as something nice to drink to keep you refreshed (you can't go far wrong with a nice, hot cup of tea!).
The Rules
The Most Important Rule
The Middle-earth Strategy Battle Game is designed to be exactly that – a game. One played between players who seek to have a good time rolling dice, moving miniatures and recreating the epic tales of The Lord of the Rings and The Hobbit. As such, players are expected to show good sportsmanship and fair play at all times; we are all here to enjoy ourselves, after all!
In a game filled with so many unique and exciting characters, there may be situations which arise during your games that may not seem to be fully covered by the rules presented in this Rules Manual. For example, you may not be able to find the exact place where a rule is to work out your situation, or there is a disagreement between the players on the interpretation of the rules.
Because wasting time arguing is not fun for either player (and, more importantly, is eating into the time that you could be using to have an awesome game instead), often it is good practice to interpret the rule in a way that suits both players equally at that point in time. This game is designed to be played in a generous spirit, in a manner befitting the gentlest and noblest of Hobbits, and you'll find that if you keep that spirit of kindness and fair play in mind, you can resolve almost every instance of disagreement.
If you find that you and your opponent still cannot agree upon the application of the rules, or another situation, simply roll a dice to see whose interpretation you will use for the rest of the game – on a 1-3, the Evil player gets to decide, on a 4-6, the Good player gets to decide. Then you can put the disagreement behind you and return to the much more important matter of the battle at hand. Once the game is over, you can continue the discussion (preferably over a mug of tea and a seed cake) and arrive at a consensus for future games.
Code of Conduct
The Middle-earth Strategy Battle Game is designed to be played in a manner that old Mr. Bilbo would be proud of; one where fair play, good humour and showing respect for one another are paramount. As such, we have provided a series of important principles that we expect all players of the Strategy Battle Game to uphold at all times. After all, the most important thing is that everyone involved has a thoroughly enjoyable time during the course of the game!
Cardinal Rules
- Always be polite and respectful to your opponent at all times.
- Always tell the truth and never cheat.
Important
- Make a respectful gesture to your opponent before the game begins, such as wishing them good luck, offering a handshake, etc.
- Avoid using language that your opponent or those around you may find offensive.
- Arrive on time for your game with all of the things you need to play.
- Ask your opponent's permission if you wish to use any unpainted or substitute models during your game.
- In Matched Play games, players must have all of their models fully painted and use the correct miniatures and base sizes.
- Offer your opponent the chance to examine your Army List before the game begins.
- If your opponent has any questions or queries about your Army List, you should answer them truthfully and ensure your opponent understands the answer.
- Discuss the terrain before the game begins to ensure each player has all the information regarding the terrain before starting.
- Measure moves and distances carefully and accurately. You should also allow your opponent the opportunity to check any distances before you move any models if they wish.
Principles
- When rolling dice, make sure they are clearly visible to all players and allow your opponent to examine the rolls before picking up the dice.
- Always ask your opponent's permission before touching their models.
- Remind your opponent about any rules they may have forgotten to use or they have used incorrectly, especially when doing so is to your opponent's benefit rather than your own.
- Never deliberately manipulate the amount of time a game takes in order to gain an advantage, either by playing overly quickly or by wasting time.
- Try not to distract an opponent when they are trying to concentrate, and always ensure you respect their personal space.
- Never complain about your own bad luck or your opponent's good luck.
- Always be humble in victory and graceful in defeat.
- Never fix the outcome of a game for any reason.
Basic Principles
In the Middle-earth Strategy Battle Game, there are a few important principles and terms which are worth explaining before you get started.
Turns – The Middle-earth Strategy Battle Game is split into a number of turns. During a turn, each player will get to move, shoot with and fight with their models as they try to accomplish the objectives of the scenario they are playing. Some games will last for a set number of turns, whilst others may last until a certain situation arises or a specific condition has been met. In either case this will be made clear.
Rolling Dice – During a game, the dice rolls you make will determine the outcome of your models' actions. This can be anything from seeing whether or not a model successfully hits another with a Shooting Attack, whether they are courageous enough to charge into battle against a terrifying enemy, or even whether fate has decided to step in to save them from certain death. In this game we use ordinary six-sided dice when rolling dice.
'Cocked' Dice – Many games are played on exciting, three-dimensional boards covered with detailed terrain. Because of this it may often mean that the dice will not land flat on the surface of the board, or may even roll off the board completely. If this happens, then the dice is said to be 'cocked' and should be rolled again. It is also good practice to decide with your opponent before the game starts what counts as a 'cocked' dice so that both players are adhering to the same standards during the game.
If you are playing on an exceptionally lumpy or textured surface, it is a good idea to use a dice tray to roll your dice in to prevent as many 'cocked' dice as possible throughout the game. Re-rolling a 'cocked' dice does not count as a re-roll as described later.
Good vs Evil – Every hero, warrior, creature or other being in Middle-earth can be categorised as either fighting for valourous and noble intentions, or bowing to the implacable will of the Dark Lord and waging war with cruel and twisted malice in his name. We distinguish this difference by referring to them as either Good or Evil.
During your games you will command either the forces of Good or Evil, and each side will be represented by a number of models that are controlled by one or more players. There must always be at least one player per side, so for larger games it's a good idea to split the numbers evenly so there are roughly the same number of players per side.
Although players can pitch two Good Armies or two Evil Armies against one another, it is worth bearing in mind that the Middle-earth Strategy Battle Game is designed to be played as Good vs Evil. As such, we would always recommend that players stick to this principle where possible, and be aware that should they decide to play games of Good vs Good or Evil vs Evil then this may throw up more odd situations than usual.
Friendly and Enemy – Many models will have special rules that will refer to friendly or enemy models. A friendly model is any model in the same Army as the model using the special rule. An enemy model is any model in the opposing Army to the model using the special rule.
D6, D3, 2D6 – Throughout this Rules Manual you will see a few abbreviations that are used to explain which dice are rolled and how to apply the result. It is worth explaining these here.
If a rule says to roll a D6, this means an ordinary six-sided dice where the number rolled is the result.
If a rule says to roll a D3, this means to roll a six-sided dice and halve the number shown (rounding up). So, a roll of 1-2 would be a result of 1, a roll of 3-4 would be a result of 2, and a roll of 5-6 would be a result of 3. This will always give a result of either 1, 2 or 3, hence the expression D3.
Finally, if a rule says to roll 2D6, this means to roll two six-sided dice and add the numbers together – this will give a result of between 2 and 12.
Dice Modifiers – Sometimes a rule may apply a modifier to a particular dice roll either to benefit or penalise a certain situation (such as a +1 or -1 modifier). For example, Goblins are particularly skilled at climbing up surfaces, and so receive a +1 modifier to any Climb Test they take.
In any situation, a modifier to a dice roll will change the result of that roll – so a dice roll of a 4 with a +1 modifier on it would be a 5. Some players find it easier to actually change the dice rolls themselves to help show this. Regardless of the number of modifiers applied to a roll, the result of a single dice roll cannot be modified to lower than 1 or higher than 6 – they are the limits of any dice roll.
Re-rolls – Some rules will allow for a dice to be re-rolled. In these situations the second result will always stand, even if it is worse than the first. If a rule allows for a model to re-roll multiple dice, then they must re-roll all of these together – they cannot re-roll some, see the result and then re-roll the rest.
If a model is able to re-roll dice from multiple special rules, then they may resolve the result of one special rule before declaring whether to re-roll for another.
However, once a specific dice has been re-rolled once, it cannot be re-rolled again under any circumstances, regardless of the number of special rules that might give another re-roll. The only exception to this is if the dice is deemed to be 'cocked'.
If a roll requires a second dice to be rolled if the first roll scores a certain result (such as To Wound Rolls that require a 6+/4+, 6+/5+ or 6+/6+), then any rules that allow a model to re-roll will allow either or both of these rolls to be re-rolled – so long as each individual roll isn't re-rolled more than once.
Natural Rolls – Some special rules will state that they require a roll of a 'natural X', where X is the number on a D6. What this means is that the score on the dice must be equal to the value of X without being modified in any way (such as having Might used to increase it). Re-rolls are not considered to be a modifier as they don't modify the score on the actual dice. So, if a dice is re-rolled, then the score on the re-roll is still considered to be a natural roll.
Characteristics – During the course of a game there may be instances where a model's characteristics may be increased or decreased. Certain characteristics can only ever be improved to a specific maximum or reduced to a certain minimum. These are all explained fully in the Characteristics section above.
Characteristics that are represented by a target number work slightly differently. When these characteristics are improved, the number in front of the plus sign will go down making the roll easier.
If a rule tells you to halve a characteristic for whatever reason, characteristics are always rounded up.
Line of Sight – At many points during the course of a game, you will need to work out if a particular model can see a target – this is called Line of Sight. The best way to do this is to get down to the 'model's eye view' and see if you can see the target – this is the model's Line of Sight. If, for whatever reason, you cannot get down to the model's eye view, trace a 1mm straight line between the model's head and its target using a tape measure instead. A model's Line of Sight is worked out from the head of the model, and a model is always assumed to have a 360° Line of Sight.
Whilst in reality our models are static, we imagine they are much more dynamic, swirling through the maelstrom of battle to slay their foes. Because of this we don't penalise a model for the wargear they are carrying or a dynamic pose they happen to be in. As a result, a model only has Line of Sight to another model if it can see any part of the model's head, body, arms or legs. If a model can only see the likes of banners, weapons, wings, tails or other wargear, then they do not have Line of Sight. A model always has Line of Sight to itself.
Some models have terrain modelled onto the base. In these instances, the terrain is never considered to block Line of Sight to the model or to other models. If you are unsure whether a model has Line of Sight to a target, it is good practice to ask your opponent for their opinion and agree together – and don't forget to play in a generous spirit!
Should a player place their models on a taller base (or convert them so that they are lower down than the original model), this additional height is not taken into account when working out Line of Sight to or from the model – use their 'true height' instead. Essentially, a model can never gain an advantage (or disadvantage) by being modelled to be higher or lower than they should be.
Measuring – Throughout a game you will often need to measure distances, and all distances are measured in inches. Players are always allowed to measure any distance at any time, as often as they wish.
To measure between models, always measure between the two closest parts of the base – ignore any overlapping elements such as wings, tails or weapons.
Within and Wholly Within – Some rules will require models to be 'within' or 'wholly within' something else in order to apply an effect. Though they may seem the same, there is an important difference between the two.
A model is said to be within range of something if any part of its base is within the stated range. A model is said to be wholly within range of something if every part of its base is within the stated range – if any part of the model's base is outside the given range, then it is not wholly within.
A model is always wholly within range of itself.
Keywords – Every model in the Middle-earth Strategy Battle Game has a number of keywords in its profile. These are broken into three sections: Race, Faction and Unit Type.
Race keywords denote the race of the model in question, such as Man, Elf or Orc.
Faction keywords denote the faction or allegiance of the model, such as Gondor, Rohan or Mordor. Some models may have multiple Faction keywords.
Unit Type keywords show what kind of unit the model is, such as Infantry, Cavalry or Monster. Models will almost always have multiple Unit Type keywords and many of them will also have additional rules associated with them, such as the Hero keyword. Unit Types are explained fully on page 62.
Some rules will contain words or phrases in bold; these will show which models are affected by the rule in question. For example, a model may have a special rule that affects 'all Rohan models', in which case the special rule will apply to all models with the Rohan keyword.
Some rules may list more than one keyword in them. When this is the case, a model must have all of the keywords listed in order to be affected. For example, if a special rule affects 'all Rohan Cavalry models', then a model must have both the Rohan keyword and the Cavalry keyword in order to be affected.
It is important to note that for models made up of more than one part, such as Cavalry models which are made up of a rider and a mount, then each will have their own set of keywords and will not share those of the other part of the model, unless otherwise stated. As such, there will often be instances when a special rule may affect part of a model but not the other part. For example, if a rule affects Man models then it will affect the rider of a Cavalry model if they have the Man keyword, but will not affect the Mount as they do not have the Man keyword.
Models and Bases – Every profile is represented in-game by a model, and each model is mounted on a base allowing it to be easily moved around the battlefield during the course of a game. The size of the base represents the amount of space that character takes up, which will vary from model to model. Each profile will state the size of base the model must be placed on for a game, with the size given in millimetres. A Cavalry model will have their base size listed for the rider, but when mounted, they will use the base size of the Mount, which will be listed in the profile for that Mount – either found in the Cavalry section or in the model's profile.
Bases cannot overlap each other during the course of a game and cannot be piled on top of one another. If a model's base is touching something else, whether this is terrain or another model's base, then it is said to be in base contact with it.
When measuring from one model to another (or to a point on the battlefield), always measure from the closest edge of the model's base.
What is a model? A model is anything on its own base, such as any Infantry, Monster, Chariot, etc. Whilst a Cavalry model contains two parts – the rider and the Mount – it will still count as a single model. However, should it subsequently become separated and the Mount stays on the board, they will both then count as individual models.
Directly Towards/Away – Some abilities, Magical Powers or special rules will make a model move directly towards or directly away from another model. When this occurs, draw an imaginary line through the centre of the base of the model causing the ability and through the centre of the base of the affected model. This is the direction in which the affected model must move, either towards or away from the model causing the effect, depending on what the rule states.
Choosing Models/Objectives – Sometimes, a rule associated with a particular model or scenario will tell a player to choose or select something. This could be another model, an Objective Marker, a piece of terrain or anything else. This is always done after both sides have deployed. In these instances, a player must tell their opponent what has been chosen as part of the special rule. The only exceptions to this are if the rule specifically tells a player to secretly choose something, in which case this should be written down on a piece of paper and placed next to the board, only to be revealed at the end of the game.
Turn Sequence
As a battle rages on, warriors become embroiled in a swirling maelstrom of clashing swords and a desperate fight for survival against constantly changing odds. Arrows rain down upon the battlefield, monsters rampage through enemy lines and mighty heroes lead their followers forward to glory.
To bring a sense of order to the action that goes on in a battle, a game is divided into a series of turns; the exact number of which will depend on the Scenario that is being played. Sometimes a Scenario will state that a game lasts for a set number of turns, whilst others may require a specific condition to have been met before the game ends. Whatever the situation, it will be clearly listed in the Scenario's description.
Turns – During each turn, players will have the opportunity to use their models, allowing them to Move, Shoot any Missile Weapons, Charge into Combat, use any special abilities and Magical Powers, or anything else their models are allowed to do. Each turn is divided into five phases, with each one focusing on a different aspect of the battle. The order of these phases, along with a brief description of what they do, is:
- Priority Phase – In the Priority Phase, players roll off to determine which of them has Priority for that turn.
- Move Phase – Both players get the chance to Activate each of their models in turn, allowing them to Move and use any Magical Powers or special rules they are allowed to use in the Move Phase. The player with Priority Activates all of their models first, followed by the player without Priority.
- Shoot Phase – Both players get the opportunity to Activate each of their models again to make a Shooting Attack with any Missile Weapons they may possess. The player with Priority Activates all of their models first, followed by the player without Priority.
- Fight Phase – In the Fight Phase, any models that are Engaged in Combat will fight. The player with Priority will decide the order in which the combats are resolved.
- End Phase – Finally, in the End Phase resolve any effects that remain until the end of a turn, and then clear any stray dice or tokens away before starting the next turn.
Priority Phase
Roll for Priority
To determine which player will act first in the subsequent phases, you will need to work out who has Priority for the duration of the turn. Priority represents one force acting swiftly to get the jump on the enemy, or biding their time and waiting for the most opportune moment to strike. Deciding whether to take or relinquish Priority presents a range of tactical opportunities and challenges for a player to consider throughout the turn that follows.
The Priority Phase can be broken down into a number of steps as shown below:
- Start of Priority Phase – Any special rules that come into play at the start of the Priority Phase are resolved here.
- Roll for Priority – The players will roll for Priority. After Priority has been determined, any special rules that come into play during the Priority Phase are resolved here.
- End of Priority Phase – The Priority Phase ends and any special rules that come into play at the end of the Priority Phase are resolved here.
Roll for Priority – When it is time to roll for Priority, both players must roll a D6. The player who rolls the highest may then choose which player has Priority for that turn – this does not have to be themself if they do not want to have Priority.
If the result is a tie and it is the first turn of the game, then players simply re-roll until one player wins the roll-off.
If the result is a tie in subsequent turns of the game, then the choice of which player gets Priority will go to the player who did not choose who had Priority in the previous turn. Because of this, it is often a good idea to have a token to remind both players who has Priority during the turn, and one to remind players who chose who had Priority that turn.
For example: It is the Priority Phase of a game and the players are rolling off to see who chooses who has Priority. Jay rolls a 4 whilst Rob rolls a 2, meaning that Jay gets to choose who has Priority – he chooses himself.
In the next Priority, both Jay and Rob roll a 3 – a tie. As Jay made the choice of who had Priority in the previous turn, the choice of who has Priority in this turn will go to Rob.
Having Priority – As you play more games and become more experienced with the rules, you will learn that there are a number of benefits to both having and not having Priority at certain points in a battle. After a few battles, you will start to understand the various tactics and ruses that you can use to make the Priority Phase work to your advantage. Something else to bear in mind is that there are a number of abilities that can alter the ordinary workings of having Priority in subsequent phases (such as Heroic Actions). These will be explained fully in the relevant sections.
Move Phase
Activation Phase
Success in battle will often be achieved by the general who most effectively commands their followers around the battlefield; outflanking their enemy, controlling key areas and seizing critical positions from the grasp of their foes. Whether the goal is to assail the city of Edoras, infiltrate the tower of Cirith Ungol or flee the spider-infested forest of Mirkwood, a firm grasp of the Move Phase will be required to secure victory.
The Move Phase can be broken down into a number of steps as shown below:
- Start of Move Phase – Any special rules that come into play at the start of the Move Phase are resolved here.
- Declare Heroic Actions – Any Heroic Actions that can be declared in the Move Phase are declared here.
- Player with Priority's Activation Phase – The player with Priority can Activate each of their models in turn. If a model has any special rules that come into play at the start of their player's Activation Phase, they are resolved here before any friendly model is Activated.
- Player without Priority's Activation Phase – The player without Priority can Activate each of their models in turn. If a model has any special rules that come into play at the start of their player's Activation Phase, they are resolved here before any friendly model is Activated.
- End of Move Phase – Any special rules that come into play at the end of the Move Phase are resolved here.
Activation Phase – When it is time for a player's Activation Phase, they get the chance to Activate each of their models in an order of their choosing. When a model is chosen to Activate, they follow the steps below:
- Start of Activation – Any special rules that come into play at the start of a model's Activation are resolved here.
- Start of Move – Any special rules that come into play at the start of a model's Move are resolved here, before the model Moves.
- Move Model – The model may Move as described below. Any special rules that come into play during a model's Move are resolved here, at any point during the model's Move.
- End of Move – Any special rules that come into play at the end of a model's Move are resolved here, after the model has finished Moving.
- End of Activation – Any special rules that come into play at the end of a model's Activation are resolved here.
Once a model has been Activated and started their Activation, they must complete their Activation before another model can be Activated. You cannot Activate a different model during another model's Activation. You must Activate every model you control during your turn if able, though you do not have to do everything above with a model when they are Activated – they can essentially be Activated and do nothing, then you can move on to your next model. There will be situations where models you control cannot be Activated, in which case they do not follow any of the steps above. Once each model has Activated (if able), your Activation Phase ends.
Moving Models
When you come to Move a model they can Move a number of inches (") up to their Move Value, as listed in their profile. To Move a model, measure how far it can travel and then move it along the desired distance within its Move Value, making sure to always measure from the same point on the base (you can't measure from the front of a base to the back of a base, as then the front part of the base will have exceeded the model's Move Value). Models are not required to Move in straight lines, and can Move in any direction they wish – you will often find yourself moving models around corners, obstacles, other models and navigating complicated battlefields – though they may never Move more than their Move Value.
Models may not Move through other models. If a model wants to Move in between two other models, or between a model and a piece of terrain, then there must be enough space for the base of the model to fit through.
Terrain itself has a big impact on the game, with models constantly having to traverse many different types of battlefield. There may be some instances where a model will be faced with a piece of terrain that it could in theory fit through, however, its base will not fit – such as a Cavalry model Moving through a gate or a model Moving through a doorway that is slightly too narrow to squeeze its base through. In these instances, if it is obvious that a model would be able to Move through the gap, even if its base won't allow it, then you and your opponent are free to agree this is possible – in fact, we would encourage you to do this. With this in mind, it is a good idea to have a chat with your opponent before the game starts to discuss any terrain features and make sure you are all agreed before the game begins.
Generally speaking, the facing of a model doesn't matter (there are some exceptions such as a War Beast or Chariot) since we imagine that our models are constantly fighting and looking around, rather than being static playing pieces. However, there may be times where you wish to rotate your models to give a more dramatic feel, such as having them face the target of their Shooting Attack or to face who they are fighting. This is fine to do, but should only be done to give that cinematic feel and not to rotate a model to gain an in-game advantage, such as avoiding being seen by an enemy model or causing an extra In The Way Roll.
Example 1: Frodo is trying to keep up with the rest of the Fellowship. A ruler is placed next to Frodo to measure his Move Value of 4". It's important not to exceed a model's Move Value (frankly, that's cheating!). With the distance determined, Frodo Moves level with the 4" mark.
Example 2: The wall shown here is in Frodo's path. Frodo's player measures around it to work out where the Hobbit's Move will end.
Example 3: With the other members of the Fellowship blocking his way, Frodo can only fit his base through the gap in between Sam and Gimli – note how this is the only gap big enough to fit Frodo's base through.
Moving off the board – Models may only Move off the board in Scenarios that specifically allow it, or if they have a special rule that permits them to do so. Models may only ever Move off the board voluntarily, and cannot be forced to leave the board due to the effects of enemy special rules or Magical Powers.
When models do Move off the board, only part of their base needs to be able to exit the board for them to leave it.
Models unable to Move – Sometimes a model will be unable to Move for one reason or another, and when this is the case it will be made clear in the rules. Some examples of this are when a model has lost their Activation, such as when they have been Charged or affected by a specific Magical Power, or have been rendered unable to Move due to failing a Courage Test when attempting to Charge an enemy with the Terror special rule.
Control Zones
Every model has a Control Zone – an imaginary 1" ring around the model that extends out from their base. No model may enter the Control Zone of an enemy model unless they are Charging the model in question.
There may be instances where a model is forced to enter an enemy model's Control Zone, such as being forced to Back Away after losing a Combat or failing a Jump Test and landing in another model's Control Zone. In these situations, a model may enter the enemy model's Control Zone making sure there is still a small gap between models. Note: A model still cannot choose to enter an enemy model's Control Zone without Charging – it can only happen when they are forced to.
A model's Control Zone will stop at the point where it comes into contact with an Obstacle or piece of impassable terrain.
Control Zones can be a very useful tool, allowing you to keep enemy models out of a specific area of the battlefield, or being used to protect a particular model from attack.
Example 4: Boromir is facing off against two Uruk-hai Scouts. Due to Boromir's Control Zone, the Uruk-hai cannot go within 1" of him unless they are Charging.
Stuck in a Control Zone – If a model starts its Move within the Control Zone of an enemy model, then it has three choices:
- Remain where it is and not Move.
- Charge one of the enemy models whose Control Zone it started in.
- Move Away. In this instance, a model may Move within the Control Zone of that enemy model provided that it doesn't get any closer to the enemy model in question. This also allows a model to Charge out of an enemy model's Control Zone, providing it gets no closer to the model whose Control Zone it is leaving.
Charging Enemies
If a model wants to fight an enemy model in Combat, then it must first Charge that enemy model. In order to Charge an enemy model, a model must have Line of Sight to the enemy model at the start of its Move.
To Charge, measure the distance as you would for making a normal Move and, if the model's Move Value provides it with enough movement to reach its target and get into base contact, Move the model into base contact with the enemy model. Once a model has Charged into base contact with an enemy model, they are both Engaged in Combat and the model's Activation immediately ends.
Models that are Engaged in Combat cannot be Activated during the Move Phase. However, should a model that was Engaged in Combat suddenly find themselves no longer Engaged before their turn to Activate has passed, then they may be Activated as normal.
It is quite possible, due to the order in which you Activate your models, that a model that could not make a Charge earlier in the phase might become able to as your Activation Phase continues. This makes the order in which you Activate your models extremely important. Models may end up blocking each other's ability to Move, or may end up freeing each other to Move more effectively.
Example 5: Gimli has Charged this Uruk-hai Scout. Because it is now Engaged in Combat, the Uruk-hai has lost its Control Zone and cannot be Activated during its player's Activation Phase, and therefore may not Move.
Charges and Control Zones – There are a few rules regarding Control Zones that are important to note when Charging:
The first is that if a model enters the Control Zone of an enemy model then they must Charge that model if they are able. The model may continue to Move within the enemy model's Control Zone if they wish, if they still have some of their Move Value remaining, in order to Charge a different point of the model's base; however, as soon as they come into base contact with the enemy model they must stop Moving. If a model enters multiple enemy models' Control Zones simultaneously, then they may choose which of them to Charge.
The second rule is that a model that is Engaged in Combat immediately loses their Control Zone whilst they remain in Combat. This means you can eliminate the Control Zones of enemy models in order to clear a route through them.
The third rule is that once a Charging model enters a Control Zone, they may ignore the Control Zones of other enemy models in order to Charge their original target. This means that no matter how densely packed enemy models are, a model is always able to Charge the first enemy model whose Control Zone it Moved into.
The fourth rule is that a model that wishes to Charge an enemy model that has lost its Control Zone may ignore the Control Zones of other enemy models that it would be impossible for them to Charge. This only applies if they cannot Charge the model due to the placement of other models making the Charge impossible.
Example 6: Aragorn Charges the nearest Uruk-hai – entering its Control Zone first. As soon as he enters the Control Zone of the first Uruk-hai, Aragorn is free to Move within that Control Zone, so long as he ends up Charging the Uruk-hai whose Control Zone he entered first.
Example 7: Here there is a gap between Aragorn and Boromir which the Uruk-hai would like to Move through in order to Charge Pippin. However, because of the Control Zones of Aragorn and Boromir, the Uruk-hai cannot pass through without Charging one of the two Men.
Example 8: Here, the Uruk-hai nearest to the Fellowship are all Engaged in Combat with either Legolas or Gimli and therefore have no Control Zones. Aragorn wishes to Charge the Uruk-hai nearest to him, however, he would be entering the Control Zones of the Uruk-hai behind their Engaged allies in order to do so. As there is no way of Aragorn Charging the model whose Control Zone he would be entering, he may ignore it and simply Charge the Uruk-hai he is nearest to.
Here, Aragorn wishes to Charge the Morannon Orc straight in front of him. As that Morannon Orc is already Engaged in Combat with Gimli, and therefore has no Control Zone, it may seem at first glance that the Control Zone of the Morannon Orc with spear behind the target of Aragorn's Charge is preventing him from Charging. Luckily for Aragorn, as there is no physical way for him to Charge this Morannon Orc with spear as it is blocked off by the Orcs Engaged in Combat with Gimli and Legolas respectively, Aragorn can ignore their Control Zone and Charge his target freely.
To avoid this, the Evil player has two other Uruk-hai Charge Aragorn and Boromir. Now that they are Engaged in Combat, Aragorn and Boromir have no Control Zones and so the Uruk-hai is free to Charge Pippin.
Charging Multiple Enemies – Models may Charge multiple enemy models should they wish. To do this, the model must have a high enough Move Value in order to reach all of its intended targets and be able to Move into base contact with them all, at which point it will be Engaged in Combat with all enemy models it is in base contact with.
Remember that after a model has entered the Control Zone of an enemy model it will ignore the Control Zones of other enemy models, and so is free to enter the Control Zones of any other enemy models as it completes its Charge against multiple enemies.
Example 9: Boromir wants to Charge two Uruk-hai at once. After entering the Control Zone of the first Uruk-hai, he continues to Move within its Control Zone in order to Move into base contact with two Uruk-hai and therefore Charge both of them.
Defended Positions – Sometimes a model may wish to Charge an enemy model that is on the other side of a wall, hedge or other Barrier. The rules for this are fully detailed in the Fight Phase section (see Defended Positions, below).
Terrain
Middle-earth is filled with all manner of exciting and vibrant places, all of which have their own specific terrain; from the rolling green hills of the Shire, to the rickety wooden walkways of Goblin-town, and the dense overgrown woodland of Mirkwood. It is often the battlefields that we play on that make our games feel so enjoyable and immersive, but to ensure that the games run smoothly we need a couple of rules to help govern the types of terrain.
Open Ground – The majority of any battlefield will be Open Ground. This covers the likes of grassy fields, sandy beaches, cobblestone courtyards, purpose-built roads and all manner of other easy to traverse terrain. There are no rules assigned to such terrain, and models may Move over it with no penalty to their Move Value.
Difficult Terrain – Areas of loose rocks, thick undergrowth, especially long grass, crumbling rubble and other such landscapes that would make movement difficult are described as Difficult Terrain. Any model that Moves whilst in Difficult Terrain will count the distance Moved as double whilst they remain within it. So, a model that has Moved 1" through Difficult Terrain will count as having moved 2". This penalty is applied so long as any part of a model's base is within Difficult Terrain.
At the start of a battle, it is good practice to discuss with your opponent what counts as Open Ground and what counts as Difficult Terrain.
Example 10: Boromir is racing through the thick undergrowth to rescue Merry and Pippin. As this is Difficult Terrain, every 1" Boromir Moves will count as 2". Boromir has a Move Value of 6", allowing him to Move 3" through the Difficult Terrain.
Obstacles – Obstacles are any manner of linear object on the battlefield that impede a model's ability to Move. The likes of walls, hedges, barricades, fallen tree trunks, etc., are all good examples of an Obstacle.
A model's ability to cross over an Obstacle is determined by comparing the height of the model with the height of the Obstacle. A model can automatically cross over any Obstacle that is equal to or less than half its height without penalty – simply move the model over the Obstacle and carry on with that model's Move. This means that the likes of a Man or Elf will be able to stride over an Obstacle that a Dwarf or Hobbit cannot. Whilst this may seem unfair, it is true that the little folk would struggle more with some Obstacles than the big folk might.
A model can attempt to cross over an Obstacle greater than half its height, but must take a Jump Test or Climb Test in order to do so. Usually, you will be able to tell if a model can cross an Obstacle just by looking at it. In situations where you need to check the height of a model, measure the model from the top of its head to the bottom of its feet. Be sure to always work out the model's 'true height'. What this means is to use the height of what the model should be (including its base), and not taking into account any strange poses such as crouching, being stood on a large rock or leaping off a piece of terrain – and be sure to agree this with your opponent. Once this has been done, compare it to the height of the Obstacle to see whether a test is needed.
Example 11: Aragorn wishes to Move over this low wall. As the wall is less than half of Aragorn's height, he may simply Move over it with no penalty.
Here, Boromir Moves across 2" of Open Ground before he reaches Difficult Terrain. Since he only has 4" of his Move Value remaining, Boromir can only Move 2" into the Difficult Terrain.
Jumping
From fallen trees to low walls, a battlefield will likely have a number of Obstacles that will impede a model's Movement and will need to be Jumped over in order for a model to keep Moving. Any attempt to cross over an Obstacle is done with a Jump Test.
A model may attempt to Jump over an Obstacle that is up to but no greater than its own height. If an Obstacle is greater than the model's height, then it must take a Climb Test instead.
To make a Jump Test, the model Moves into base contact with the Obstacle it wishes to Jump over and rolls a D6, consulting the Jump Table to find out how successful the attempt has been.
The horizontal distance a model Moves when it Jumps will still count towards the distance a model can Move during their Activation; however, the vertical distance will not.
Jump Table
| D6 | Result |
|---|---|
| 1 | Stumbles and Fails: The model does not Jump the Obstacle. The model remains where it is and its Activation immediately ends. |
| 2-5 | Success: The model successfully Jumps the Obstacle; place it on the other side of the Obstacle in base contact. If the model is now within the Control Zone of an enemy model, it must Move the minimum distance required in order to Charge that model, so long as it doesn't exceed its Move Value. Otherwise, the model's Move immediately ends, even if within the Control Zone of an enemy model. If the model lands in the Control Zones of multiple enemy models, it will Charge the closest one as described above. |
| 6 | Effortlessly Bounds Across: The model successfully Jumps the Obstacle; place it on the other side of the Obstacle in base contact. It may then continue its Activation as normal. |
Example 12: The Hobbits are fleeing from the pursuing Nazgûl and wish to try to cross the wall in order to escape. As the wall is no taller than the Hobbits, but more than half their height, they will require a Jump Test.
Frodo goes first, Moves into base contact with the wall and makes his Jump Test. He rolls a 3, and Moves over the wall to the other side. His Move then ends.
Pippin goes second and also takes a Jump Test, rolling a 6. Not only does Pippin cross the wall, but he may continue to Move if he wishes.
Merry goes next and takes his Jump Test, rolling a 4 and Moves across to the other side. As this puts Merry into the Control Zone of an enemy model, he must Move the minimum distance possible to Charge if he wishes.
Finally, seeing his friends clamber over the wall, Sam tries to do the same. Unfortunately, Sam rolls a 1 for his Jump Test and so fails to cross the wall and his Activation immediately ends – leaving him at the mercy of the Nazgûl.
Leaping
The likes of rickety walkways, yawning chasms and other such terrain provide plenty of opportunities for models to Leap across gaps. Any such attempt must be resolved with a Leap Test.
For a model to be able to attempt to Leap over a gap, the gap cannot be wider than twice the height of the model (compare the model and the gap in question if you are unsure) and they must have enough Move Value to be able to fully reach the other side – otherwise it is just too far to Leap across. A model may also attempt a Leap Test to try to Leap over a river in the same manner.
To make a Leap Test, the model Moves to the edge of the gap it wishes to Leap over and rolls a D6, consulting the Leap Table to find out how successful the attempt has been.
Leap Table
| D6 | Result |
|---|---|
| 1 | Stumbles and Fails: The attempt to Leap has gone wrong. The model falls to the bottom of the gap halfway between where they leapt from and where they were leaping to, suffers Falling Damage (see below) and becomes Prone. The model's Activation immediately ends. |
| 2-5 | Success: The model successfully Leaps the gap; place it on the other side of the gap in base contact with the edge. If the model is now within the Control Zone of an enemy model it must Move the minimum distance required in order to Charge that model, so long as it doesn't exceed its Move Value. Otherwise, the model's Move immediately ends, even if within the Control Zone of an enemy model. If the model lands in the Control Zones of multiple enemy models, it will Charge the closest one as described above. |
| 6 | Effortlessly Bounds Across: The model successfully Leaps the gap; place it on the other side of the gap in base contact with the edge. It may then continue its Activation as normal. |
Example 13: Gimli is being chased by two Moria Goblins and wishes to put some distance between them by Leaping over a chasm to safety. Gimli Moves to the edge of the gap and takes a Leap Test. Rolling a 4, Gimli successfully Leaps the gap and is placed on the other side. His Move then immediately ends.
Example 14: The Balrog is hot on the heels of the Fellowship and they must do all they can to escape. Aragorn decides to Move over a small fallen pillar – he must take a Jump Test. Boromir wants to put some height between himself and the fiery demon, and so chooses to scramble up a rocky cliff – he must take a Climb Test.
Climbing
In order to climb Obstacles that are greater than a model's height, such as tall walls, scaffolding or rock faces, a model will be required to take a Climb Test. It is also important to note that for a model to attempt a Climb Test there must be some way for them to scale the surface, such as handholds, jutting rocks, wooden crosspieces, etc.
To make a Climb Test, the model Moves to the bottom of the surface they wish to Climb and rolls a D6, consulting the Climb Table to find out how successful the attempt has been. Cavalry models may not take Climb Tests.
Models must Climb directly upwards, and the vertical distance a model Moves as part of a Climb Test is counted towards the distance a model can Move during their Activation. Climbing counts as Moving through Difficult Terrain.
Climb Table
| D6 | Result |
|---|---|
| 1 | Fall: The model Falls to the ground and becomes Prone at the bottom of the Obstacle they attempted to Climb. If the model was already at ground level, nothing else happens. However, if the model was higher than this then it will suffer Falling Damage. In either situation, the model's Activation immediately ends. |
| 2-5 | Success: The model successfully Climbs the Obstacle until it has reached its Move Value or reaches the top. If the model reaches the top, place it on top of the Obstacle in base contact with the edge. If the model is now within the Control Zone of an enemy model, it must Move the minimum distance required in order to Charge that model, so long as it doesn't exceed its Move Value. Otherwise, the model's Move immediately ends, even if within the Control Zone of an enemy model. If the model lands in the Control Zones of multiple enemy models, it will Charge the closest one as described above. |
| 6 | Swift Ascent: The model successfully Climbs the Obstacle until it has reached its Move Value or reaches the top. If the model reaches the top, place it on top of the Obstacle in base contact with the edge. It may then continue its Activation as normal. |
Example 15: Aragorn, Legolas and Gimli are cut off from their allies at Helm's Deep and need to Climb the scaffolding to reach them. Aragorn spends 1" of his Move Value to reach the scaffolding and then takes a Climb Test. Rolling a 4, Aragorn is successful and Moves to the top. Legolas follows suit and rolls a 6 for his Climb Test. He Moves up the scaffold and then spends his remaining Move Value (note that, as Climbing is considered to be done in Difficult Terrain, he has precious little left!). Finally, Gimli reaches the bottom of the scaffold but rolls a 1 for his Climb Test. He fails and becomes Prone. A Prone Marker is placed next to him and his Activation immediately ends.
Climbing Tall Structures – In rare circumstances, models may wish to Climb a taller structure that will take more than a single turn to reach the top. In these instances, either perch the model in a satisfactory way at roughly the right height or leave the model at the bottom of the Obstacle with a dice next to it to show how high up the structure it is. If a model starts its Activation part way up a structure in this manner, then it must attempt to make a Climb Test during their Activation in order to continue Climbing.
Unscalable Terrain – Any terrain that has a sheer surface and has no way of being scaled (such as a fortress wall), or has no place to safely balance a model on top without the risk of the model falling off (such as a small pillar or tree) cannot be Climbed during a game. This is to prevent models finding themselves in unlikely positions such as balanced on tree tops or halfway up the side of a wall. It is a good idea to discuss with your opponent before the game which terrain can be climbed, if any. If it doesn't look great and doesn't instinctively 'feel right' then steer clear of it.
Ladders, Ropes and Similar – The use of a ladder or length of rope makes Climbing significantly easier. Climbing up or down one of these doesn't require a Climb Test and doesn't count as Difficult Terrain. Instead, the model may simply Move up or down just as if they were Moving normally.
Example 16: Frodo doesn't fancy Climbing this rockface and so finds a ladder to use instead. The ladder is 3" high, and so he Moves up it at the cost of 3" of his Move Value.
Descending – Climb Tests can also be used for a model to Climb down as well as up; this is called Descending. A model can always Descend a distance equal to its own height without penalty (i.e., the distance Descended in this way will not count towards the amount a model can Move during their Activation).
If a model wishes to Descend further than this, then they must take a Climb Test exactly as described previously, with the exception that they will Move down instead of up. There must also be some way for the model to Climb down, such as footholds, wooden structures, etc.
Falling and Falling Damage – A model that falls in any situation will become Prone at the bottom of whatever it has fallen from. If a model would fall and land overlapping another model, simply move the falling model out of the way the minimum distance so that it is not overlapping or in base contact with another model. If the distance the model has fallen is equal to or less than their own height, they will suffer no further effects, though their Activation will immediately end.
If a model falls a distance greater than their own height, then they will suffer Falling Damage. When a model suffers Falling Damage, they will take one Strength 3 hit, plus another Strength 3 hit for every full 1" greater than their height they have fallen.
Example 17: Gimli has tried to Climb down this rockface to aid his allies. However, Gimli has rolled a 1 for his Climb Test and so falls to the ground at the bottom of the rockface and, as the distance he fell was greater than his own height he will suffer Falling Damage. The distance Gimli fell was two full inches taller than his height, and so he will suffer three Strength 3 hits – one for the Falling Damage, and a further two for the extra distance he has fallen.
Prone Models
During a game, there will likely be times where models will find themselves Prone. Whether this is as a result of a failed Climb Test, being on the receiving end of a Cavalry Charge or some other effect, it is important to understand how Prone models interact with the game.
If a model is ever Knocked to the Ground, then they will immediately become Prone and a Prone Marker should be placed next to them as a reminder.
Control Zones – Models do not have a Control Zone whilst they are Prone.
Prone Models and Line of Sight – When a model is Prone, we imagine that it is writhing on the floor, cowering beneath a shield or scrabbling to try to regain its footing. Usually, another model would be able to see over a model that is Prone, though there may be some instances where this may not be the case (such as a Cave Troll being Prone). For these reasons, a Prone model is considered to be half its normal height (from the top of its head to its feet) for the purpose of working out Line of Sight.
Crawling – When a Prone model Moves it does so by Crawling, instead of Moving normally. A Crawling model may only Move up to 1" regardless of the kind of terrain it is in, cannot make Jump, Leap or Climb Tests, and the only other thing it can do when it Moves is to Stand Up.
Prone models may not Charge – they must Stand Up first.
Example 18: Frodo is currently Prone and wishes to Crawl during his Move. Frodo Crawls 1" and then Stands Up, which because he Crawled is all the Moving he can do during his Move. As Frodo has now stood up, the Prone Marker is removed and he is free to use his full Move Value next turn.
Standing Up and Lying Down – During its Move, a Prone model may Stand Up at the cost of half its Move Value (so a model with a Move Value of 6" would need to spend 3" to Stand Up), and may then use its remaining Move Value to Move as normal, including Charging. A standing model may Lie Down also at the cost of half its Move Value. A model may not both Stand Up and Lie Down in the same Activation, and if it does either then it will still count as having Moved during their Activation.
A Prone model may Stand Up whilst in the Control Zone of an enemy model without Charging them, so long as they Move no closer to that enemy model.
Charging a Prone Model – Prone models can be Charged as normal. As they have no Control Zone, enemy models can Move within 1" of them without having to Charge them if they wish, provided they do not come into base contact with them. If they do, they will count as having Charged the Prone model.
Jumping over Prone Models – Models may attempt to Jump Over Prone models exactly as if they were an Obstacle, with the following exceptions:
A model that wishes to Jump Over an enemy model that is less than half its height must still take a Jump Test.
If a model attempts to Jump Over an enemy model and rolls a 1, they do not Jump Over the enemy model and instead must Charge them at the point in which they tried to Jump Over them.
If a model attempts to Jump Over an enemy model and rolls a 2-5, they will Jump Over the enemy model as normal and may choose to either Charge the model they Jumped Over after doing so, or instead be separated slightly from the enemy model and end their Move.
If a model attempts to Jump Over an enemy model and rolls a 6, they will Jump Over the enemy model and may continue their Move as normal.
Example 19: This Moria Goblin is Prone and Gimli wishes to Jump Over it, and so must make a Jump Test. Rolling a 5, Gimli successfully Jumps Over the Goblin and is placed on the other side of it, slightly separated from being in base contact. Gimli then has two choices: either to end his Move where he is, or to Move into base contact with the Goblin and Charge him – Gimli chooses the latter.
Reinforcements
Sometimes models may be kept aside to enter the battle later on. When they do, they will typically enter via the rules for Reinforcements.
When Reinforcements enter the battlefield, they will do so during their player's Activation Phase of the Move Phase, after all of that player's models on the board have Activated (if able). When models Move onto the board in this manner, a point is chosen on a specified board edge and the model will Move onto the board from that point following all the usual rules for Moving, with the exception that they may not Charge for any reason (including the effects of an enemy rule).
In Matched Play games, when a Warband is chosen to Move onto the board via the rules for Reinforcements, the whole Warband will move on together. When the point at which the Warband will enter from has been chosen, the Warband's Captain must enter first from that point. Then, any Followers from that Warband may enter the board from any point within 3" of the initial chosen point.
The player who chooses where the Warband will enter the board must choose a place where the whole Warband can physically make it onto the board and be deployed. If this is not possible for whatever reason, then the Warband will enter on the next turn instead, where they will roll again with a +1 bonus to the roll to determine which part of the board they enter from.
Example 20: Haleth's Warband has arrived via the rules for Reinforcements. First, Haleth Moves onto the board from the chosen point. After this, all of Haleth's Followers may Move onto the board from any point within 3" of the chosen point, one by one.
Shoot Phase
How to Shoot
Many armies in Middle-earth employ the use of ranged weaponry when they march to war. The likes of archers, crossbowmen or other such specialists in the use of ranged warfare are tasked with raining down death from afar in the hope of thinning out enemy ranks before the battlelines clash. Ranged weapons come in all shapes and sizes, from the humble bow to more unique pieces such as throwing spears, slings and crossbows. Though they may all be different in style, they all have the same purpose in the heat of battle – felling the enemy before they can reach the fight.
The Shoot Phase can be broken down into a number of steps as shown below:
- Start of Shoot Phase – Any special rules that come into play at the start of the Shoot Phase are resolved here.
- Declare Heroic Actions – Any Heroic Actions that can be declared in the Shoot Phase are declared here.
- Player with Priority's Shooting Phase – The Player with Priority can Shoot with each of their models in turn. If a model has any special rules that come into play at the start of their player's Shooting Phase, they are resolved here before any friendly model is chosen to Shoot.
- Player without Priority's Shooting Phase – The Player without Priority can Shoot with each of their models in turn. If a model has any special rules that come into play at the start of their player's Shooting Phase, they are resolved here before any friendly model is chosen to Shoot.
- End of Shoot Phase – Any special rules that come into play at the end of the Shoot Phase are resolved here.
Shooting Phase – When it is time for a player's Shooting Phase, they get the chance to Shoot with each of their models in an order of their choosing. When a model is chosen to Shoot, they follow the steps below:
- Start of Shoot – Any special rules that come into play at the start of a model's Shoot are resolved here, before the model Shoots.
- Make Shooting Attack – The model may make a single Shooting Attack with one of their Missile Weapons. Any special rules that come into play during a model's Shoot are resolved here.
- End of Shoot – Any special rules that come into play at the end of a model's Shoot are resolved here, after the model has finished Shooting.
How to Shoot – Shooting is a fairly simple practice, especially once you have done it a few times. When making a Shooting Attack, follow the steps below:
- Check Line of Sight to your intended target. Make sure that the model making the Shooting Attack can actually see an eligible part of the model they wish to Shoot at. Work out if there are any models or Obstacles in the way. If the Line of Sight to the target model is obscured, you will need to know what it is that is blocking the Line of Sight as this may determine whether or not the model can Shoot.
- Roll To Hit. Roll a D6 to see if the model has hit their target based on their Shoot Value.
- Make any In The Way Rolls. If there are any models or terrain along the path to the target, you will need to see if the shot has hit its intended target or something else along the way.
- Roll To Wound. If the shot hits a model, roll to see if the hit model suffers a Wound or not.
- Remove Casualties. Any model that was reduced to 0 Wounds is slain and is removed as a casualty.
Who Can Shoot?
There are a number of factors that determine whether or not a model can Shoot during their Shooting Phase. If a model has a Missile Weapon, isn't Engaged in Combat, has a target to Shoot at, hasn't moved too far during their Activation, and hasn't been rendered unable to Shoot by some other rule, then it may make a Shooting Attack. Unless otherwise stated, a model may only ever make a single Shooting Attack each turn.
Missile Weapons – In order to Shoot, a model must be equipped with a Missile Weapon. The list of common Missile Weapons can be found on page 107.
Picking a target – A model must have an eligible target to Shoot at. For an enemy model to be a viable target they must be within the Shooting model's Line of Sight and in range of their Missile Weapon. When a model makes a Shooting Attack, they may choose any eligible target to Shoot at.
Line of Sight – When you select a model to Shoot, you need to check if they have Line of Sight to any enemy models in order to make a Shooting Attack.
Moving and Shooting – It is hard to shoot a Missile Weapon whilst moving at full speed over a battlefield. As such, a model that has Moved over half its Move Value during the preceding Move Phase cannot make a Shooting Attack. Additionally, a model that has attempted to Jump, Leap, Climb or Swim may not make Shooting Attacks that turn. Prone models may never make Shooting Attacks.
A model that Moved during the preceding Move Phase, but did not Move more than half their Move Value, may still make a Shooting Attack, although it will be harder to do. To represent this, any model that wishes to Shoot after Moving during the preceding Move Phase will worsen their Shoot Value by 1 for the duration of the Shooting Attack. Therefore a model with a Shoot Value of 4+ that Moved will have a Shoot Value of 5+ for that turn. A roll of a natural 6 will always hit during a Shooting Attack.
Bear in mind that certain terrain has an impact on slowing models down further, as described in the Move Phase, and this is also applied to Moving and Shooting. For example, a model Moving within Difficult Terrain would only be able to Move a quarter of their Move Value and still Shoot that turn – halving it once for the Difficult Terrain, and then only being able to Move half of that value if they wish to Shoot. E.g., a model with a Move Value of 6" would only be able to Move 3" through Difficult Terrain, and only 1.5" if it wanted to Shoot that turn.
Shooting from or at Elevated Positions – Due to the dynamic terrain on many battlefields, there will often be times when a model making a Shooting Attack may be Shooting up or down from where it is standing. Most of the time this will have no impact as the target will likely be in range regardless, however, there may be times when it is not completely clear. When a model is Shooting down from an elevated position, measure the range from the base of the Shooting model to the closest part of the model it is Shooting at rather than its base (unless its base is closest). When a model is Shooting up at an elevated position, measure the range from the base of the Shooting model to the base of the elevated model as normal.
Example 21: Háma is readying himself to take a shot and there are four Hill Tribesmen (A, B, C and D) before him. Hill Tribesman A is in the open and therefore is an eligible target. Hill Tribesman B is partially concealed by a rock but is still a viable target. Hill Tribesman C is almost entirely obstructed but as Háma can see its head, it is still a viable target. Hill Tribesman D on the other hand is completely concealed apart from the flaming brand it is waving around – it cannot be targeted.
Measure Range – You will also need to see if the enemy model is in range. Every Missile Weapon has a maximum range which tells you how far it can Shoot in inches; this can be found on the Missile Weapon Chart on page 107. If the distance from the Shooting model's base to the nearest point of the enemy model's base is equal to or less than the Missile Weapon's range, then that enemy model is in range.
Rolling to Hit
Once a target has been chosen, you will need to see if the shot hits. To do this, you will need to make a Shoot Roll. To make a Shoot Roll, roll a D6 and compare the result to the shooter's Shoot Value. If the roll equals or exceeds the Shoot Value, then it is a hit. If the roll is less than the shooter's Shoot Value, then the shot has veered off target and misses. A roll of a natural 6 will always count as a hit, regardless of modifiers.
In The Way – You may find that there are objects, or even other models, obscuring the shots you wish to make. When you are taking a look to see if your model can see its target, keep a look out for any obstructions such as these. If the Shoot Roll was a hit, you will need to make an In The Way Test for each obstruction.
Taking an In The Way Test is simple – roll a D6 for each obstruction in turn. If the result is a 4+, then the shot has successfully passed the obstruction and moves onto the next one – or hits the target if there are no more obstructions to roll for. On a 1-3, the shot hits the obstruction. If the obstruction is another model, then you will need to roll To Wound it as normal.
If there are multiple obstructions In The Way of the shot, you will need to make an In The Way Test for each of them in turn, starting with the obstruction closest to the shooter. As soon as the shot hits an obstruction, no more In The Way Tests need to be made.
Example 22: Bard wants to Shoot at the Hunter Orc bearing down on Bain. However, the Hunter Orc is partially concealed by a house and so Bard would require an In The Way Test to see whether or not he hits the Hunter Orc. Bard rolls To Hit and rolls a 5 – a hit! He then rolls an In The Way Test and rolls a 3, meaning the arrow will stick firmly in the house and not hit the Hunter Orc – bad news for Bain!
Models in the way – Sometimes there will be other models obscuring the target you wish to Shoot at. This is slightly more complicated than when it is terrain that is obscuring the shot.
Firstly, Good models cannot make a shot if there would be any risk of hitting a friendly model – i.e., if an In The Way Test would be required for a friendly model, or an enemy model Engaged in Combat with a friendly model. Evil models do not have this restriction and may take shots if there are friendly models In The Way of the target.
The shooter must still be able to see their target; if the intervening models block their target completely, then the shot cannot be attempted.
Example 23: Bard wants to take a shot at the Hunter Orc closing in on Bain. Bard's controlling player takes a look to see if the shot is clear and realises that Bain is obscuring the shot. Because Bard is a Good model, he may not risk hurting a friendly model and so the shot cannot be made.
Shooting from behind cover – A model that is in base contact with an Obstacle or piece of cover that it can see over or around will ignore that piece of terrain for the purposes of an In The Way Test when Shooting. This represents the shooter using the likes of a low wall, tree or crop of boulders for cover whilst Shooting.
A degree of common sense is required here; this does not allow for a model to Shoot over an entire building or forest by being in base contact with it.
Example 24: Háma is behind a low wall and wishes to Shoot at the Hill Tribesman beyond it. As Háma is in base contact with the wall, he can Shoot across it without penalty.
Shooting from behind friends – Though other models are generally considered to be obstructions when making a Shooting Attack, there is an exception to the rule. A model that is in base contact with a friendly model that has the same base size or smaller, ignores that friendly model when determining In The Way Tests for making a Shooting Attack – unless that friendly model is Engaged in Combat. This is to represent the model Shooting over the shoulder of an ally, or their ally ducking out of the way.
If a model is Shooting from behind a friendly model in this manner, and that friendly model is in base contact with a Barrier which it can therefore ignore, the model Shooting over their friend can also ignore the Barrier as described above.
Shooting into a Combat – Evil models can Shoot at an enemy model that is Engaged in Combat – Good models cannot, for fear of them accidentally Shooting their allies. However, as a Combat isn't a static affair, there is a risk that an Evil model Shooting in this manner will hit one of their allies.
To Shoot at a model Engaged in Combat, the shooter must be able to see their target as normal. They then roll To Hit and make any In The Way Tests as normal, with the exception of for any models in the same Combat as the target. Note that In The Way Tests are only taken for things that are obstructing the target, not for things that are obscuring other models in the same Combat.
Finally, if the shot reaches the Combat, the shooter will need to make a special In The Way Test to see who in the Combat is hit. On a 4+, the initial target is hit. However, on a 1-3, the friendly model closest to the shooter and within line of sight will be hit instead.
Example 25: Kíli is standing behind Dwalin and wishes to Shoot at the Goblin dashing towards them. Because he is in base contact with Dwalin, and Dwalin has the same base size as him, Kíli can Shoot past him and no In The Way Test is required.
Example 26: Narzug wants to Shoot at Thorin who is Engaged in Combat with two Hunter Orcs. Because he is an Evil model, Narzug may take the shot. First he rolls To Hit, and rolls a 6 – a very clear hit! Next, Narzug must make a special In The Way Test to see who he hits in the Combat, either Thorin or one of his allies. Narzug rolls a 2, meaning that he will hit a friendly model rather than Thorin, and therefore hits the Hunter Orc closest to him.
Rolling to Wound
When a shot hits a model, there is a chance it will cause some serious injury or even death. Of course, there is also the chance that it merely causes a flesh wound or bounces off a model's armour, causing no damage at all.
Every Missile Weapon has a Strength Value, which is shown on their entry on the Missile Weapon Chart. When rolling to see if the hit will wound the target, compare the Strength of the Missile Weapon with the Defence of the target on the To Wound Chart. The result indicates the minimum dice roll required to inflict a Wound on the target.
A score of a 6+/4+, 6+/5+ or 6+/6+ means you must roll a single dice and score a 6+, followed by a further dice which must score a 4+, 5+ or a 6+ respectively. In these instances, both dice rolls are individual rolls and so either (or both) can be re-rolled as the result of a relevant special rule or ability.
A '-' on the chart means that model cannot wound that target – they are just too tough to be harmed. If the dice roll is not high enough, no Wound is inflicted.
To Wound Chart — rows are the attacker's Strength, columns are the target's Defence:
| S \ D | 1 | 2 | 3 | 4 | 5 | 6 | 7 | 8 | 9 | 10 |
|---|---|---|---|---|---|---|---|---|---|---|
| 1 | 4+ | 5+ | 5+ | 6+ | 6+ | 6+/4+ | 6+/5+ | 6+/6+ | - | - |
| 2 | 4+ | 4+ | 5+ | 5+ | 6+ | 6+ | - | 6+/4+ | 6+/5+ |
Example 27: Háma's arrow has hit its target, so now we need to work out if it has done any damage. Checking the To Wound Chart we compare the Strength of Háma's bow (which is 2) to the Defence of the Hill Tribesman he has hit (which is 3) and discover that we need to roll a 5+ in order to cause a Wound. Háma rolls To Wound and rolls a 5, meaning that the Hill Tribesman will suffer a Wound and, as it only has a single Wound, is slain!
Record Wounds and Remove Casualties
When a model suffers a Wound, check against its profile to see how many Wounds it has. A model with a Wounds characteristic of 1 is slain and removed as a casualty as soon as it suffers its first Wound. A model with a Wounds characteristic of 2 must suffer two Wounds before they are slain, and so on. For models with multiple Wounds, it can help to place a marker next to the model to indicate how many Wounds they have remaining, or to make a note on a piece of paper so you don't forget.
When a model loses its last Wound, it is slain and removed as a casualty. Simply remove it from the board and place it carefully to one side.
Taking Shots Together – Sometimes you may have multiple models all Shooting at the same targets. To save time, these situations can be resolved quicker by taking all the shots together. To do this, count up the number of shooters and roll that many dice at once. Work out which have hit the target, and then roll To Wound.
To make things clearer, it helps to roll different coloured dice for different variables. If the Shooting models have different Shoot Values, have different obstructions In The Way or will require different rolls To Wound the target are all good examples of this. For example, you could say 'blue dice need a 3+ To Hit, red dice need a 4+ To Hit, and white dice need a 4+ To Hit and have an In The Way Test for that tree' for instance – so long as it is clear to all players.
Taking shots together can really make your game flow quicker and smoother, and works really well so long as both players clearly communicate their intent and are open with each other as they play.
If you have multiple models Shooting at multiple targets, it is best to break them up into smaller groups and resolve shots at individual targets as above.
Example 28: Bilbo Baggins is in trouble – five Hunter Orcs are lining up shots against him. Two of the Hunter Orcs will need to take an In The Way Test, indicated by the red lines, whilst three will be unobscured, indicated by the white lines. To keep track of this and to make rolling all of the dice quicker, the Evil player rolls two red dice for the Hunter Orcs that need an In The Way Test, and three white dice for the Hunter Orcs that do not. Once it is clear which shots have hit, all of the To Wound Rolls can be made together.
Fight Phase
Battles are won and lost in the chaos of hand-to-hand combat, where warriors meet each other face-to-face in an epic clash of steel. Skill with a blade, a stout heart and no small amount of luck are required to achieve victory when the fighting gets up close and personal. In order to emerge victorious, a general will need to amass their forces and use them to great effect on the battlefield, crushing their foes in combat.
During the Fight Phase, models will battle for their lives in a series of Combats. A Combat is essentially a duel between two or more enemy models that are Engaged in Combat with each other.
Remember, enemy models can only be placed in base contact with each other if one of the models has Charged the other, and all enemy models in base contact (and therefore Engaged in Combat) must fight – there is no standing idly by! Every Combat must be resolved during the Fight Phase; you cannot choose not to resolve some of them.
The Fight Phase can be broken down into a number of steps as shown below:
- Start of Fight Phase – Any special rules that come into play at the start of the Fight Phase are resolved here.
- Combats are Paired Off – The Player with Priority will Pair Off those models that are Engaged in Combat into individual Combats where possible.
- Declare Heroic Actions – Any Heroic Actions that can be declared in the Fight Phase are declared here.
- Combats are Resolved – The various Combats are resolved one at a time in an order chosen by the player with Priority.
- End of Fight Phase – Any special rules that come into play at the end of the Fight Phase are resolved here.
Pairing Off Combats
At the start of the Fight Phase, the very first thing that needs to be done is to work out which models are Engaged in Combat with one another. Any models that are Engaged in Combat with an enemy model will need Pairing Off into Combats. By the end of the Pairing Off Combats step, you will need to reach a situation where all models that were Engaged in Combat are assigned to a Combat, and that no Combat has multiple models from both sides involved in the Combat – i.e., you cannot have a Combat with two (or more) models from each side.
When it comes to Pairing Off Combats, there are a few rules that govern how it works.
The first is that all models Engaged in Combat with an enemy model must be Paired Off into a Combat – they cannot be Paired Off in a way that would stop them being Engaged in Combat. Models can only be Paired Off into a Combat with a model they are in base contact with.
Secondly, if a model could be Paired Off into multiple different Combats, then the player with Priority may decide which Combat the model is Paired Off into. These do not need to be done equally, so long as every model that was Engaged in Combat has been Paired Off into a Combat.
In practice, it is often a good idea for players to look over the Combats at the start of the Fight Phase and split them, with the player with Priority deciding on any where there are multiple options. It can be a good idea whilst you are learning to separate the Combats slightly so that there is a small gap between them. However, this should only be done for clarity and not to gain an advantage in-game by moving a model into or out of range of an ability. If models are moved in this way for the sake of clarity, they will still count as being in base contact with what they were with beforehand.
Sometimes there may be a situation where a rule will target or affect a model in a Combat which could cause multiple other models to be affected as well – such as a Shooting Attack, Magical Power or an ability that could Move a model out of Combat before the Fight Phase. When this would be the case, the game should be temporarily paused and the player with Priority should decide how the affected Combats should be Paired Off for the purpose of the rule or ability in question. Once this has been done, the rule is resolved as normal and play continues. When it gets to the Fight Phase, the player with Priority will then Pair Off the Combats again as normal.
Example 29: Frodo is in base contact with Moria Goblin A. As it's clear who Frodo is fighting, and there are no other models in the Combat, no Pairing Off is required.
Sam is in base contact with Moria Goblins B and C. Merry is also in base contact with Moria Goblin C, and so Merry is Paired Off against Moria Goblin C, leaving Sam to be Paired Off against Moria Goblin B.
Finally, and most complex of all, Pippin is in base contact with Moria Goblins D, E and F, whilst Aragorn is in base contact with Moria Goblins F and G. It is clear that Pippin is fighting Moria Goblins D and E, and that Aragorn is fighting Moria Goblin G. However, as Moria Goblin F could be fighting either Pippin or Aragorn, and both are already in a Combat it is up to the player with Priority to decide which Combat it will be Paired Off into. As the Evil player has Priority, they choose to Pair Off Moria Goblin F into Pippin's Combat – bad news for the Hobbit!
When to Fight
Combats are resolved one at a time in an order chosen by the player with Priority. Players use dice to determine the outcome of a Combat and whether any casualties are caused. Once a Combat has been resolved, the player with Priority chooses another Combat to resolve, and so on until all Combats have been resolved.
The order that Combats are resolved in is often of little consequence, and so it is usually best to work them out in an arbitrary manner such as left to right or saving the most interesting ones until last. However, sometimes the order in which you resolve Combats can make a big difference – models might be Trapped, banners may be in jeopardy, and so on. Because of this it is always worth the player with Priority taking a look at how best they can pick the order of Combats to work in their favour.
Resolving a Combat
Resolving a Combat is simple, especially once you have done it a few times. A Combat is broken down into four steps as shown below:
- Duel Roll – Players roll a number of dice equal to the number of Attacks their models have in that Combat to see who wins.
- Loser Backs Away – The losing model, or models, must Back Away 1".
- Winner Makes Strikes – The winning model, or models, now roll To Wound to try to cause any Wounds.
- Remove Casualties – Any models slain are removed from play as casualties.
Who Re-rolls First? – There may be instances where models on both sides have the chance to use a re-roll, such as during a Combat if models from both sides are in range of a banner or have a special rule that allows them to. In these instances, the player who is currently losing the Duel Roll decides whether or not to re-roll first. After they have re-rolled, the player who is then losing chooses whether or not to use any of their re-rolls (if they have any remaining). This continues until either no more re-rolls can be used, or neither player wishes to use their re-rolls.
Example 30: Frodo is fighting for his life against this Moria Goblin. They need to make a Duel Roll, and both roll a dice to see who wins. Frodo rolls a 5, whilst the Moria Goblin rolls a 2. With the highest result, Frodo wins the Duel Roll and the Moria Goblin must Back Away.
Example 31: Here, Aragorn is fighting an Uruk-hai. As a skilled combatant, Aragorn has 3 Attacks on his profile. This allows him to roll three dice for his Duel Roll, compared to the Uruk-hai's 1, and pick the highest result.
Duel Roll – To see who wins a Combat, players must make a Duel Roll. When making a Duel Roll, each player rolls a D6 and the player with the highest roll wins the Combat.
If a model in a Combat has multiple Attacks, they will roll a number of D6 equal to their Attacks characteristic rather than just one, and then use the highest individual result.
Many things can affect a Duel Roll, so when making a Duel Roll follow these steps in order:
- Gather the number of dice you need for the Duel Roll; use a different colour of dice for each model with modifiers or Might Points available.
- Declare any models that wish to use any weapon abilities that would affect the Duel Roll, such as using a two-handed weapon.
- Roll all of your dice.
- Apply any modifiers to the dice rolls.
- Use any re-rolls, banners, special rules, etc. Remember to apply any modifiers to these re-rolls as well.
- Use Might Points.
- Determine the winner.
Drawn Combat – Quite often, the highest result that both players get in a Duel Roll will be the same, and is therefore tied. When this is the case, compare the Fight Values of the models in the Combat – the model with the highest Fight Value wins the Combat.
If this is still a tie, then the player with Priority will need to roll a D6 to see who wins. On a 1-3 the Evil side wins, whilst on a 4-6 the Good side wins.
Example 32: Frodo is fighting yet another Moria Goblin. Making a Duel Roll, both Frodo and the Moria Goblin roll a 3 – a tie. Comparing their Fight Values, we see that Frodo has a Fight Value of 3, whilst the Moria Goblin has a Fight Value of 2, meaning that Frodo wins the Duel Roll and the Moria Goblin must Back Away. Frodo will then have the opportunity to make a Strike.
Trapped – If a model cannot Back Away when they lose a Duel Roll then they are Trapped. Usually this happens when a model is backed against terrain or surrounded by other models.
If a model is Trapped then it does not Back Away at all; instead it will remain in place whilst the enemy models make their Strikes. Once these have been resolved, if the Trapped model has not been slain, slightly separate the enemy models from the Trapped model so they are no longer in base contact.
Some rules may ask you to check to see if a model would be considered to be Trapped in order to apply an effect. When this is the case, these rules should be applied at the time the special rule in question comes into effect. For example, some may say 'at the start of the Fight Phase', in which case you would check to see if the model is Trapped at the start of the Fight Phase. Others might say 'during a Combat' or similar, in which case you would check at the start of that Combat before any dice are rolled. In all instances of this type of rule, a model would be considered Trapped if, should they lose the ensuing Duel Roll, they would be unable to Back Away as normal. If the model would be able to Back Away as a result of a friendly model deciding to Make Way, then they would not be considered Trapped for the purpose of the special rule.
Loser Backs Away – Once the winner of the Duel Roll has been determined, the loser must Back Away in a direction chosen by their controlling player. To Back Away, the losing model must Move 1" in a straight line (though this does not have to be directly away). When a model must Back Away it may Move through the Control Zones of enemy models, but cannot Move into base contact with them.
When a model must Back Away this will not count as a normal Move, and so can still be done if a model used their full Move Value during their Activation or has been affected by a special rule or Magical Power that would normally prevent them from Moving. This also means that Backing Away is not slowed by Difficult Terrain. Backing Away cannot be used to cross Obstacles or take a Jump, Climb or Leap Test. However, if the loser is at the edge of a vertical drop, with nowhere else to Back Away to, then they must Back Away over the edge and will fall as described in the Move Phase section. Make any Strikes against the model being pushed over the edge first and then resolve any Falling Damage if the model survives.
Example 33: Haleth has beaten Wulf in a Duel Roll, and so Wulf must now Back Away 1". The direction in which Wulf Backs Away is up to his controlling player, as long as he Moves the full 1" away from Haleth. As Wulf retreats backwards, Haleth readies his weapon to make Strikes.
Example 34: Bombur has lost a Duel Roll and finds himself pinned in place by two Goblins with his back to a sheer drop. As he must Back Away, Bombur is forced over the edge! First the Goblins resolve their Strikes as normal and then, assuming Bombur survives, he will fall and suffer Falling Damage.
Make Way – Sometimes a model may find themselves Trapped because a friendly model is blocking their retreat. In these situations it is possible for a friendly model to make a special Make Way Move of up to 1" to clear a path for their ally to Back Away into. This can still be done even if the model Backing Away could Back Away without needing an ally to Make Way – in fact, this can be a good way of trying to keep models in formation.
To Make Way, simply Move the friendly model as described above in order to allow their ally to Back Away the full 1". A Make Way Move is not slowed by Difficult Terrain and can still be made if the model is Prone.
A model cannot Make Way if they are Engaged in Combat, have been rendered unable to Move by a special rule or Magical Power, or if doing so would require them to Move over an Obstacle. A model cannot take a Jump, Climb or Leap Test as part of a Make Way Move, and cannot use a Make Way Move if doing so would force them over the edge of a cliff (or similar) which would require them to take Falling Damage.
Only a single friendly model can Make Way for an ally; if one model using a Make Way is not enough to prevent a model from being Trapped, then no Make Way Move is made and the model is Trapped.
A Make Way Move is entirely optional, though not doing so will likely result in an ally being Trapped.
Example 35: Théoden has lost a Duel Roll against the Witch-king, and finds himself Trapped by Éowyn and Merry. Not wanting Théoden to take double Strikes from the Lord of the Nazgûl, the Good player has Merry Make Way to allow Théoden the space he needs to Back Away.
Prone Models in Combat – Whilst a Prone model cannot Charge an enemy, they can still be Charged as normal. A Prone model will still participate in a Duel Roll as normal, with one exception. If a Prone model wins a Duel Roll, they do not get to make Strikes against enemy models and instead may immediately Stand Up.
A Prone model must still Back Away as normal, however, if a Prone model loses the Duel Roll they will always be considered to be Trapped.
If both models in a Combat happen to be Prone, the Duel Roll will still be made; however, the winner will simply get to Stand Up and the loser will Back Away as normal.
Multiple Combats
In a Combat where there is more than one model on one (or, in very rare instances, both sides), things work the same as in a one-on-one fight. Though there are still some things to mention for clarity.
Duel Roll – Both players make a Duel Roll to see who wins the Combat. A player with multiple models in the Combat rolls a number of D6 equal to the combined Attacks characteristics of all of their models involved in that Combat.
When comparing the results on the dice to work out which side has won the Duel Roll, only count the highest individual dice result and the highest Fight Value from each side.
Loser Backs Away – If there are multiple models on the losing side, they must all Back Away as normal, in an order chosen by their controlling player. If a model is Backing Away from multiple models, they must choose one of them to Back Away the full 1" from.
Winner Makes Strikes – Once the Duel Roll has been resolved and the loser has Backed Away, the winner gets the chance to make Strikes against their enemy. To make a Strike, roll To Wound by comparing the model's Strength against the target's Defence on the To Wound Chart in the same manner as Shooting (see the Rolling to Wound section above). If the To Wound Roll is successful, the target suffers a Wound; reduce their remaining Wounds by 1. If this reduces a model's Wounds characteristic to 0, they are slain and removed as a casualty. If the To Wound Roll fails, nothing happens.
Multiple Attacks – If a model with multiple Attacks wins a Duel Roll, they may make a number of Strikes equal to their Attacks characteristic. Make a To Wound Roll for each.
Striking a Trapped Model – Whenever a model resolves a Strike against a Trapped model, they make two To Wound Rolls simultaneously and apply both of the results. This means that a model making two Strikes against a Trapped model will make four To Wound Rolls in total; a model making three Strikes would make six To Wound Rolls, and so on.
Example 36: Gandalf has forced this Moria Goblin against a rocky wall, trapping it. The Wizard wins the Duel Roll, causing the Moria Goblin to be Trapped. Gandalf makes a Strike against the Moria Goblin and rolls two To Wound Rolls against his Trapped foe, applying both results.
Remove Casualties – Any model that is reduced to 0 Wounds is immediately slain and removed as a casualty.
Winner Makes Strikes (multiple models) – A model that wins a Duel Roll against multiple models may make Strikes against any model they were fighting against. If multiple models win a Duel Roll, they can resolve their Strikes in any order as chosen by their controlling player – however, you must fully resolve all of one model's Strikes before moving on to the next one.
Multiple Attacks (multiple models) – If a model with multiple Attacks wins a Duel Roll against multiple enemy models, they may choose to resolve these either one at a time or all together, whichever suits you. However, there are some things to bear in mind if you do this.
If a model resolves their Strikes one at a time, they must fully resolve the result of that Strike – including choosing whether or not to spend Might, use any relevant special rules and so forth – before moving onto the next one. Once they move on to the next Strike, they cannot go back. However, the benefit of a model deciding to resolve their Strikes one at a time, is that they can wait to see the result of that Strike before deciding where to use their next Strike (if they have any remaining).
If a model resolves all their Strikes simultaneously, they must declare where each Strike will go before making any To Wound Rolls. They will then make all their To Wound Rolls at the same time and can use any Might Points or relevant special rules as they see fit.
Often, if a model with multiple Attacks is making Strikes they will do so in the most beneficial manner to them. It is important to make sure your opponent is aware of what is happening, and that you are clear about your intentions when making Strikes. It is also important to ask your opponent how they are using their Strikes if you are unsure.
Outnumbered in a Combat – Some special rules will come into effect when a certain model is outnumbered in a Combat, i.e., if the model is on its own and fighting multiple opponents – such as if it is two-on-one. It is important to note that Supporting models (see page 104) never count towards working out if a model is outnumbered in a Combat.
Example 37: Aragorn is fighting two Uruk-hai: one Trapped against a rocky wall, and another that has Charged in against him. Aragorn wins the Duel Roll and now gets to resolve his Strikes. He chooses to use his first Strike against the Trapped Uruk-hai and makes two To Wound Rolls simultaneously as it is Trapped. If the Uruk-hai survives, Aragorn can direct another Strike at it (for a further two To Wound Rolls) or he can choose to use his Strikes against the other Uruk-hai, which will only make a single To Wound Roll each as the other Uruk-hai is not Trapped.
Defended Positions
Certain areas of the battlefield are ideally suited as defensive positions, giving fighters a chance to use their surroundings to their advantage. From walls and hedges to the likes of Doorways and Elevated Positions, these defensible positions can see a warrior hold out far longer than they normally could.
Barriers – Barriers encompass the likes of walls, hedges, barricades and other such terrain. Essentially, to count as defendable, a Barrier needs to be at least half the height of the attacker and the defender needs to be able to see over the Barrier.
For a model to defend a Barrier they must be in base contact with it. When this is the case, the defending model's Control Zone will extend over the Barrier rather than stopping at it. As with any other Control Zone, an enemy model cannot enter the defending model's Control Zone without Charging them. To Charge a defending model, place the attacking model in base contact with the Barrier as close to the defender as possible.
Additionally, so long as a defending model has a Control Zone, enemy models cannot attempt to cross the Barrier within that Control Zone – they must Charge and fight them.
If the attacker is more than twice the size of the Barrier, then it will offer no protection for the defender and they may still ignore it as they Move.
Prone models may never defend a Barrier.
Example 38: Haleth is in base contact with a low wall and is therefore defending it, with his Control Zone extending over it. No enemy model may cross the wall within Haleth's Control Zone unless they first Charge and slay him. The Hill Tribesman must decide whether to cross the wall further away from Haleth, or whether to risk taking on a skilled fighter behind the barricade.
Charging a Model Behind a Barrier – To Charge a model that is defending a Barrier, simply Move the Charging model into base contact with the Barrier as close to the defending model as possible on the opposite side of the Barrier. Even though they are not in base contact, these models will still count as being Engaged in Combat and in base contact for all other purposes. The defending model's Control Zone is then cancelled out.
Only a single model may Charge a model over a Barrier. However, models on the same side of the Barrier as the defender may still Charge them as normal.
Duelling Over Barriers – The rules for making a Duel Roll over a Barrier are exactly the same as those for a normal Duel Roll.
Example 39: Here, Haleth and General Targg are fighting over a Barrier with Haleth as the defender. Haleth wins the Duel Roll and makes his Strikes against General Targg without needing to make an In The Way Test for each Strike. If General Targg had won, he would have needed to take an In The Way Test for each of his Strikes.
Making Strikes Over Barriers – Unlike in other Combats, when models fight over a Barrier then Strikes are made before models Back Away. If the defender wins, then they may make Strikes as normal. However, if the attacker wins, then they must make an In The Way Test for each of their Strikes before rolling To Wound. For each Strike that fails its In The Way Test, nothing happens. For each Strike that passes its In The Way Test, a To Wound Roll is made.
As Backing Away happens after Strikes are made, models fighting over a Barrier will never count as Trapped if they couldn't Back Away – unless the Combat has attackers on both sides (see below).
Backing Away from Barriers – If the defender wins the Duel Roll and the attacker survives, the attacker Backs Away as normal.
If the defender loses but survives, then they do not Back Away; the attacker must Back Away instead.
If the defender is slain, then the attacker may immediately cross the Barrier and be placed where the defender was on the other side of the Barrier.
Attacked From Both Sides – Should a model defending a Barrier also be Charged by an enemy model on the same side of the Barrier as themselves, then they will lose all protection that Barrier would offer. As a result, the Combat is treated the same as any other Combat and all models will ignore the Barrier when making Strikes.
If the defending model is slain, the attacking model may cross the Barrier as described above.
In an alternative situation, if the attacking model is Charged by another model on the defender's side on the same side of the Barrier as the attacker, then this will also be treated as a normal Combat as described above – with the exception that even if the attacker slays the defender they may not cross the Barrier.
Example 40: Haleth is still defending the low wall against General Targg but now a Hill Tribesman has arrived. Because the Hill Tribesman is on the same side of the Barrier as him, Haleth will receive no protection from the Barrier. Should Haleth lose the Duel Roll, General Targg and his ally will be able to make Strikes against Haleth without needing to take an In The Way Test for each Strike.
Doorways – A model in a Doorway counts as defending a Barrier if they are Charged by an enemy model, so long as the enemy model cannot Move through the Doorway without Moving into base contact with the defender. If the enemy model could Move through the Doorway without Moving into base contact with the defender (even though they must still Charge the defender), then the model in the Doorway will not count as defending a Barrier.
Only a single model can defend a Doorway at a time. If two models could stand in the Doorway at the same time, then it is too big of a Doorway to be defended.
Example 41: Here, Gothmog is blocking a Doorway he is standing in. Because Aragorn cannot Move through the Doorway without Moving into base contact with Gothmog, the sneaky Orc gets the advantage of defending the Doorway.
Elevated Positions – Models positioned on higher ground can also defend it in the same manner as a Barrier, so long as the higher ground is at least half the height of, and no taller than, the attacking model. Such positions may include a model standing on a raised platform, at the top of a steep cliff, or at the top of a ladder.
Defending an Elevated Position works in the same way as defending a Barrier, and so all the rules associated with it are the same here. This means only one model can Charge and attack a model defending a position at once (unless they are attacked from both sides of course), the defender will not Back Away if they lose the Duel Roll, the attacker must take an In The Way Test for any Strikes they are resolving, and if the attacker kills the defender they may take their place at the top of the Elevated Position.
Models may not Charge a model defending an Elevated Position that is greater than the height of the model wishing to Charge – it is simply too tall for them to viably attack.
Example 42: Kíli and Fíli are atop a ledge, facing a tide of Goblins. Because their Elevated Position is higher than half the height of the Goblins, both brothers will receive the bonuses for defending a Barrier.
Example 43: The Mordor Troll has Charged the Warrior of Minas Tirith which is atop this ruin. As the ruin is taller than half the height of the Troll, but not taller than it, the Warrior of Minas Tirith will count as defending a Barrier. If the ruin had been less than half the height of the Troll, then it would have provided no benefit to the Warrior of Minas Tirith and the Combat would have been resolved as normal.
Courage and Intelligence
As a battle rages on, those fighting will become surrounded by death, destruction and the horrors of war. They will also be faced with all manner of dire situations which require a swift decision to be made in the heat of battle. With peril around every corner and mere seconds to make important choices, warriors will need to muster every ounce of bravery and intellect if they are to hold fast and make it through to the end of the battle.
Every profile in the Middle-earth Strategy Battle Game has two characteristics that represent the model's inherent bravery and how smart they are when faced with choices on the battlefield: Courage and Intelligence. Some models may be both equally courageous and intelligent, whilst others may excel at (or simply not be very good at) one or the other.
Courage and Intelligence function in much the same way, and we will cover them both in this section.
Courage
There will be many situations that arise in a game when a model will need to take a Courage Test – the most common of which have been listed below. To take a Courage Test, roll 2D6 and compare the result to the model's Courage characteristic. If the score of the 2D6 is equal to or greater than the model's Courage, the Courage Test has been passed. If the score is less than the model's Courage, the test has been failed and the model will suffer the consequences as stated in the rule causing the Courage Test to be taken.
Example 44: A lumbering Cave Troll has Charged Frodo. Wishing to save their friend from this terrifying beast, Merry and Pippin both attempt to Charge the Troll. As the Cave Troll has the Terror special rule, both Merry and Pippin must take a Courage Test. Merry goes first and rolls a 3 and a 4 for a total of 7. As his Courage is 6+, Merry passes the Courage Test and may Charge. Next, Pippin takes his Courage Test and rolls a 1 and a 2 for a total of 3. As his Courage is also 6+, Pippin fails and so cannot Charge the Troll – or Move at all this Move Phase.
When to Test – The most common occurrences that cause a Courage Test to be taken are:
- Broken Army – When an Army is reduced to less than 50% of its starting numbers it will become Broken, and models may start fleeing the battlefield.
- Separated Mounts – If the rider and Mount of a Cavalry model become separated, the Mount must immediately take a Courage Test.
- Terror – If a model wishes to Charge an enemy model which has the Terror special rule.
There will be other situations that also require a model to take a Courage Test. When these occur, it will be clearly stated in the relevant rules.
Taking Multiple Courage Tests – If a model passes a Courage Test caused by a special rule or ability, it will automatically pass any other Courage Tests it is required to make for the same special rule or ability for the remainder of the turn, unless otherwise stated.
Example 45: Aragorn has Charged a Ringwraith after passing his Courage Test due to the Ringwraith's Terror special rule. Aragorn declares a Heroic Combat and successfully slays the Nazgûl. Aragorn does not need to take a second Courage Test to Charge the second Ringwraith as he has already passed one Courage Test for the Terror special rule this turn.
Broken Army – When you write an Army List for Matched Play, you will also need to calculate your Army's Break Point. This is always equal to half the number of models in your starting Army, even if the number of models in your Army would increase during the game. So, an Army of 50 models would have a Break Point of 25, whilst an Army of 13 models would have a Break Point of 6.5.
During the game, you should keep track of how many casualties your Army has suffered. If, at the start of any turn, the number of casualties your Army has suffered is greater than its Break Point, then your Army is considered to be Broken from that point onwards. Once your Army is Broken, every time a model from your Army Activates it must take a Courage Test before doing anything else. As models that are Engaged in Combat, or are under the effects of a special rule or Magical Power that renders them unable to Activate, cannot Activate they do not have to take this Courage Test.
If the Courage Test is passed, the model will stay and fight. If this Courage Test is failed then the model flees and is removed from the board as a casualty.
Example 46: The army of Minas Tirith have been frantically fending off the Mordor Orcs, killing as many as possible. At the start of the game there were 30 Orcs, but at the start of the tenth turn, 16 have been slain. As the Orcs had a Break Point of 15, they are now a Broken Army – they must now start taking Courage Tests at the start of each of their Activations.
Stand Fast – Stand Fast is a rule that only applies to Courage Tests taken by Hero models as part of the rules for a Broken Army.
When a Hero model takes a Courage Test for being part of a Broken Army and passes, then at the end of their Activation they must call Stand Fast. Any friendly Warrior model that Activates within 6" of a Hero who has called Stand Fast, and who can draw Line of Sight to the Hero, will automatically pass their Courage Test for being part of a Broken Army. Other Hero models are not affected by this rule and make their own Courage Test as normal.
Remember that Hero models that are Engaged in Combat or affected by a special rule or Magical Power that renders them unable to Activate, cannot Activate and do not take this Courage Test, and therefore cannot provide a Stand Fast.
Example 47: Haleth's Army has been Broken. At the start of his next Activation, Haleth takes his Courage Test and passes it. At the end of Haleth's Activation he calls Stand Fast, which has a range of 6". Warriors of Rohan A, B and C are all within range of Haleth's Stand Fast and can draw Line of Sight to him. Warrior of Rohan D is within range of Haleth's Stand Fast, but cannot draw Line of Sight to him – they must take their own Courage Test. Warrior of Rohan E is not within range of Haleth's Stand Fast, and so must also take a Courage Test.
Intelligence
There will be many situations that arise in a game when a model will need to take an Intelligence Test. To take an Intelligence Test, roll 2D6 and compare the result to the model's Intelligence characteristic. If the score of the 2D6 is equal to or greater than the model's Intelligence, the Intelligence Test has been passed. If the score is less than the model's Intelligence, the test has been failed and the model will suffer the consequences as stated in the rule causing the Intelligence Test to be taken.
Example 48: Thorin is trying to free a relic from the ground and requires an Intelligence Test to do so. Thorin rolls a 1 and a 3 for his Intelligence Test, for a total of 4. As his Intelligence is 5+, Thorin fails to retrieve the relic which stays in the ground. The next turn, Thorin tries again. This time he rolls a 2 and a 6 for a total of 8 – a pass. Thorin retrieves the relic.
Taking Multiple Intelligence Tests – If a model passes an Intelligence Test caused by a special rule or ability, it will automatically pass any other Intelligence Tests it is required to make for the same special rule or ability for the remainder of the turn, unless otherwise stated.
Example 49: Frodo has been targeted by a Spectre's A Fell Light is in Them special rule, and must now take an Intelligence Test. Frodo has an Intelligence of 5+ and rolls a 4 and a 5 for his Intelligence Test for a total of 9 – a clear pass. A second Spectre then also targets Frodo with the A Fell Light is in Them special rule. However, as Frodo has already passed one Intelligence Test this turn due to this special rule, he will automatically pass the second test.
Unit Types
To be successful in battle, an army will need to muster various types of warriors, creatures, war machines and experienced leaders to guide their followers forwards to secure victory. The most powerful armies have a blend of all manner of units and know how best to utilise them on the battlefield to bring ruin upon their foes. From humble blocks of infantry, to galloping formations of cavalry and hulking monsters that stomp around the field of battle, there are numerous types of units available to a general – and the very best will know how to get the most from each of them.
Every profile in the Middle-earth Strategy Battle Game has a number of keywords on it (as described in the Basic Principles section), divided into three sections: Race, Faction and Unit Type – the latter of which we will cover here.
A profile's Unit Type keywords denote the model's role on the battlefield. Whether it be a simple Warrior designed to make up the battleline of a force, or a Hero whose job it is to lead the army in the art of warfare, and so on.
Many Unit Type keywords have additional rules associated with them. Some of the more common ones have sections in this Rules Manual that explain how they work in more detail, whilst others are explained fully here.
Infantry – This is the term used to describe a model on foot; essentially a model not riding a Mount, war machine or composed in some other unusual manner. Most models in the game will be classed as Infantry models, and the Infantry keyword has no additional rules associated with it.
Cavalry – Models that are riding on a horse, Warg or some other ridden beast are classed as Cavalry models. Cavalry models have a number of additional rules that govern how they work, which are outlined fully in the Cavalry section below. If a Cavalry model becomes dismounted, then the rider will exchange their Cavalry keyword for the Infantry keyword. Additionally, an Infantry model that purchases a Mount will exchange their Infantry keyword for the Cavalry keyword whilst they remain mounted.
Mount – The part of a Cavalry model that is being ridden will often have the Mount keyword. A Mount has no specific rules associated with it, though will be referred to often in the Cavalry section. There may be rare situations where the ridden part of a Cavalry model does not have the Mount keyword.
Monster – Monster models are those big, imposing creatures that can have a great impact on the direction a battle can take. As a result, Monster models have a number of additional rules that govern how they work. These are covered in the Monsters section below. Many Monster models will also have another Unit Type keyword, usually either Infantry or Cavalry.
War Beast – The term War Beast describes the great, lumbering creatures ridden to war by many of their allies, and are used to trample their foes underfoot. A War Beast has a number of additional rules explaining how to use these complex models, as detailed in the War Beasts section below.
Chariot – A Chariot is a type of war machine pulled by the likes of horses, goats or some other beasts. They are primarily used to charge into the fray and allow the rider to fight from an elevated platform. Chariot models have their own section detailing how they work in the Chariots section below.
Siege Engine – A Siege Engine is a term for the huge weapons of war used to batter down gates and walls in the event of a siege. Siege Engine models have their own section detailing how they work in the Advanced Rules section.
Hero – Hero models are the lifeblood of the Middle-earth Strategy Battle Game as they act as the focal point of an Army and allow the player to use a number of unique actions to command their Army on the battlefield. Hero models are easily identified not just by the Hero keyword, but also by the presence of the Might, Will and Fate characteristics. Hero models have a number of additional rules that explain how they work in the Heroes section below.
Warrior – A model that is not a Hero will be described as a Warrior – those that follow their leaders into battle. Warrior models have no additional rules associated with them.
Unique – Many of the characters in Middle-earth are individuals, i.e., they are one of a kind. You can only use one of each model with the Unique keyword in your Army – for example, you can't take two Gimlis. Additionally, some characters may have multiple profiles representing them at different times – such as Gandalf the Grey and Gandalf the White. Again, you can only ever take a single one of these Unique characters, even if they have different profiles.
Some items of wargear will also have the Unique keyword and may be able to be taken by multiple characters, such as Orcrist. Again, you can only include a single copy of a Unique piece of wargear in your Army; though if there is a choice about who can wield it, that choice is up to you.
Beast – A Beast is a model that is a creature rather than a more humanoid figure, and one that will usually act on instinct or training. A Beast does not have the ability to pick up items and use them, and so can never pick up wargear (such as being passed a banner) and cannot carry or be passed Objective Markers in Scenarios that use them – unless otherwise specified. A Beast can never act as Untrained Crew (see the Siege Engines section).
Swarm – Some smaller creatures will act as a Swarm rather than as individual creatures. A Swarm is very hard to pin down, and as a result a Swarm can never become Prone or be considered to be Trapped.
Elite – An Elite model is one that is more than the standard rank and file of an Army, and will only usually follow certain characters into battle. A model with the Elite keyword can only be included in the Warband of a Hero who has the Leader (X) special rule, where X is the name of the Elite model. So, a Citadel Guard (which is an Elite model) can only be included in the Warband of a model with the Leader (Citadel Guard) special rule.
Cavalry
Many of the most feared and formidable armies in the history of Middle-earth have utilised cavalry to devastating effect. Whether from the back of a horse, Warg or some other mount, an impactful cavalry charge is enough to scatter even the most steadfast battleline; and those that try to stand against such a charge often find themselves trampled into the ground. There are a number of different cavalry options available to the armies of Middle-earth, each of which are capable of unleashing untold devastation upon the ranks of their enemies.
What is a Cavalry Model?
A Cavalry model consists of two parts: the rider on top, and the Mount being ridden. Riders that are separated from their Mount will immediately replace their Cavalry keyword with the Infantry keyword. Additionally, an Infantry model that purchases a Mount will replace their Infantry keyword with the Cavalry keyword. A model may only ever purchase a single Mount.
Which models can ride? – The only models that can ride a Mount are those who either start with the Cavalry keyword in their profile, or have purchased a Mount from their wargear options. Models that do not fit these criteria cannot be Cavalry models.
Cavalry Line of Sight – To determine whether or not a Cavalry model has Line of Sight to another model, always check Line of Sight from the rider and not the Mount.
Characteristics for Cavalry Models – A Cavalry model has two sets of characteristics: one for the rider and one for the Mount.
Cavalry and Movement
A Cavalry model moves in the same way as an Infantry model, with the exception that it cannot take a Climb Test, Lie Down, Crawl or use the likes of ladders, ropes or similar. Cavalry models must also use the Move Value of the Mount when they Move.
When comparing the height of the Cavalry model to an Obstacle or gap, use the height of the full model from the top of the rider's head to the feet of the Mount. If the Cavalry model is in an unusual pose – such as rearing up or hunched down low – remember to use the model's true height.
One of the benefits of riding a Mount is that the rider uses some of the Mount model's characteristics. Cavalry models must use the Move Value of the Mount. Additionally, during a Combat, the rider must use the Fight Value, Strength and Attacks characteristics of their Mount if they are higher than their own.
In the example above, the Mordor Orc must use the Warg's Strength of 4 as it is higher than their own.
Models that must Charge – Some Cavalry models may have, or be affected by, a special rule that means they must Charge when they are Activated. When this is the case, if the only way for the model to Charge is for them to dismount, then they do not have to Charge as part of the special rule – they may Move as normal.
Reference profiles:
| MV | FV | SV | S | D | A | W | C | I | |
|---|---|---|---|---|---|---|---|---|---|
| Mordor Warg Rider | 6" | 3 | 5+ | 3 | 4 | 1 | 1 | 8+ | 8+ |
| Warg | 10" | 3 | 6+ | 4 | 4 | 1 | 1 | 8+ | 8+ |
Cavalry and Difficult Terrain – A Cavalry model that Moves whilst within Difficult Terrain counts the distance Moved as four times what it would normally be, rather than just two times as it would be for Infantry. So, a Cavalry model that Moves 1" within Difficult Terrain will count the distance Moved as 4". This penalty is applied the entire time a Cavalry model's base is within Difficult Terrain.
Additionally, whilst within Difficult Terrain, Cavalry models never get any of their usual combat bonuses for Charging, including the use of a lance if they carry one.
Example 50: Éowyn is riding towards Pelennor Fields, however she needs to pass through a rocky outcrop on her way. A horse can move 10" in total: Éowyn spends 2" of her Move Value moving up to the Difficult Terrain, leaving her with 8" remaining. This is enough to allow Éowyn to Move 2" through the rocky outcrop this turn.
Jumping and Leaping – Cavalry models must take Jump and Leap Tests in the same way as other models. Jumping and Leaping from the back of a mount is not without risk, however. If a 1 is rolled for either a Jump or Leap Test for a Cavalry model, then in addition to applying the result rolled on the relevant chart, the model has also been Knocked Flying exactly as if they had rolled a 1 on the Thrown Rider Chart (see below).
Descending – A Cavalry model may Descend a distance equal to the height of the model without penalty. However, if a Cavalry model Descends a distance greater than this, then the Mount will suffer one Strength 3 hit, plus an additional Strength 3 hit for each additional 1" it Descends greater than the height of the model.
Example 51: Wulf is on his horse and wishes to Descend from atop this large boulder. Because the drop is taller than the model, there is a chance that it will be injured. The horse suffers one Strength 3 hit. If it survives, it may continue to Move as normal.
Stairs, Doorways and Water Features – There are a number of interactions with terrain features that can give pause for thought when using a Cavalry model. We will cover those here.
- Stairs – Cavalry models can climb stairs, provided they are not too steep. Steps that are broad and shallow can be Moved over as normal, however, steps that are too steep cannot be Moved over by Cavalry models. If you are unsure whether or not a Cavalry model can climb a set of stairs, make sure you discuss this with your opponent before the game starts and decide whether or not those stairs are traversable by Cavalry models.
- Doorways – Cavalry models cannot pass through Doorways or ceilings that are too low. See if the model will fit through the Doorway – of course, be reasonable here; as long as the Mount fits through, it's safe to assume the rider is ducking down low in the saddle. As long as both players agree, the Cavalry model can Move through the Doorway.
- Water Features – Cavalry models can Swim, in fact they gain some bonuses when Moving through water features as explained in the Advanced Rules section.
Cavalry and Courage Tests – When you are required to take a Courage Test for a Cavalry model, only the rider needs to test. Cavalry models cannot use the Courage value of their Mount.
Separated Mounts – During a battle, there are situations where the rider of a Cavalry model will become separated from their Mount.
Whenever a Mount loses its rider, whether this is because they have been slain, knocked from their steed, or dismounted for some other reason, the Mount must immediately take a Courage Test using its own Courage value. If the test is passed, the Mount will stay and fight and the Cavalry model is replaced with a suitable unridden Mount model (if you have no such model available, remove the model as if the Mount had failed the test). If the test is failed, the Mount flees and is removed from the board.
A Mount that has an Attacks characteristic of 0 (such as a horse) will automatically fail this Courage Test (even if a rule would say they automatically pass), and will flee as soon as it has no rider.
If, at any point, a Cavalry model is knocked Prone for any reason, the rider will automatically suffer the effects of Knocked Flying as per the Thrown Rider Chart. If a Cavalry model is knocked Prone whilst it is surrounded in a Combat, and the Mount does not flee meaning there is no space to place the dismounted rider, simply treat both the rider and Mount as occupying the same space for the duration of the Combat. All enemy models may make Strikes against either the rider or the Mount should they win the Duel Roll. If, after the Combat has been resolved, both rider and Mount are still alive, simply move models the minimum distance so that both can be placed as close as possible to where the original model was.
Once a rider has become separated from their Mount, they cannot remount again during the game.
Dismounting – The rider of a Cavalry model may Dismount from their steed at any point during their Move. Dismounting is automatic, and there is no roll required. Place the newly dismounted Infantry model in base contact with the Cavalry model, and then the Mount becomes a Separated Mount. The Infantry model cannot be placed in base contact with an enemy model in this manner. Once placed, the Infantry model can continue their Move as normal, including Charging if they wish, subtracting the amount the Cavalry model Moved prior to them Dismounting from their Move Value.
If a rider Dismounts and their Mount stays, the Mount cannot Move any further that turn.
Example 52: Wulf wishes to Move under a low arch whilst mounted. However, the arch is too low for Wulf and his horse together, and so he must Dismount and continue on foot, or find an alternative route.
Example 53: Aragorn and Legolas are chasing down Gothmog, who has moved through a gap too small for a Cavalry model to fit through. As he is further away, Legolas has to Move 8" to get close to Gothmog and Dismount; though as he has now Moved over the 6" he can Move on foot, Legolas cannot Move any further. Aragorn Moves 3" before Dismounting, which then gives him 3" of his Move Value remaining – enough to Charge Gothmog.
Sometimes, when a model Dismounts there will not be an official model that can accurately depict the wargear that the rider was carrying – such as a Rider of Rohan carrying both a shield and a bow (and possibly also throwing spears). If this is the case, then when the model Dismounts they must discard pieces of wargear so that they can be accurately represented as a model. So, in the example of a Rider of Rohan, they would have to discard either their bow or their shield. If the Rider of Rohan also had throwing spears, then they would have to discard either their bow, their bow and throwing spears, or their shield and throwing spears in order to represent a legal dismounted model – in this case a Warrior of Rohan.
The choice of which wargear is discarded is always down to the model's controlling player.
Cavalry and Shooting
Cavalry models Shoot in the same way as other models, measuring Line of Sight from the point of view of the rider.
Shooting at Cavalry – When a model targets a Cavalry model with a Shooting Attack, they must always target the rider (unless they have a special rule that says otherwise). However, if a Shooting Attack hits a Cavalry model, it may hit either the rider or the Mount. To determine which part is hit, the player making the Shooting Attack makes a special In The Way Test and rolls a D6. On a 1-3, the shot will hit the part of the Cavalry model that was not the target. On a 4+, the shot will hit the part of the Cavalry model that was the target.
Example 54: Kíli is Shooting at the Hunter Orc on Fell Warg, targeting the rider. After successfully rolling To Hit, Kíli must now take a special In The Way Test to see whether he hits the Mount (on a 1-3) or the rider (on a 4+). Rolling a 5, Kíli's shot hits the rider and he must now roll To Wound.
Slain Riders and Mounts – If the rider is slain, then the Mount becomes a Separated Mount as described above. If it stays on the battlefield, replace the Cavalry model with a suitable unridden Mount model – it will then lose the Mount keyword.
Should the Mount be slain, then the rider must immediately take a Thrown Rider Test by rolling a D6 and consulting the Thrown Rider Table. If the rider survives, replace the Cavalry model with a dismounted Infantry version of that model. The Infantry model must be placed wholly within the footprint of where the Cavalry model was, as close to the centre as possible. If the model was Engaged in Combat when it was dismounted, it will still count as being Engaged in Combat with all enemy models it was in base contact with, even though it will no longer be in base contact with those models.
Thrown Rider Table
| D6 | Result |
|---|---|
| 1 | Knocked Flying: The rider hits the dirt and immediately suffers one Strength 3 hit and, if they survive, are placed Prone. A model that was Knocked Flying cannot Activate, Move, Shoot, make Strikes or Cast Magical Powers for the remainder of the turn. If the Mount survived, place the rider in base contact with the Mount instead of in the centre of where its base was; if there is not enough room, separate the models the minimum distance to make it so. If the rider is Engaged in Combat, they fight as a Prone model. |
| 2-5 | Rises From the Dust: The rider disentangles themselves from their Mount and gets to their feet. A model that Rises From the Dust cannot Activate, Move, Shoot, make Strikes or Cast Magical Powers for the remainder of the turn. |
| 6 | Leaps into Action: The rider bounds from the saddle and is ready for action. A model that Leaps into Action stays on its feet and can act as normal for the remainder of the turn. |
Cavalry and Combat
List of Mounts – There are various steeds that can be ridden by Cavalry models. The most unusual ones can be found in the profile of the Cavalry model in question, but the more common ones can be found here.
Mount models have their own list of keywords; for their Faction keyword, a Mount will take on the same Faction keyword as their rider, even if the rider is slain. Some will have their own special rules as well, which are described in the Special Rules section.
Cavalry models fight as one during a Combat, and must always use the highest Fight Value, Attacks and Strength available between the rider and Mount – even if that means using some from one and some from the other. Whilst when a Cavalry model fights it may combine the characteristics of both rider and Mount, it is always the rider that is considered to be fighting, and so will use any special rules or abilities, or apply any modifiers (such as fighting with a two-handed weapon) associated with the rider fighting in Combat.
To illustrate the point, let's compare the characteristics of a Rider of Rohan with those of a Warg Rider:
| MV | FV | SV | S | D | A | W | C | I | |
|---|---|---|---|---|---|---|---|---|---|
| Rider of Rohan | 6" | 3 | 4+ | 3 | 5 | 1 | 1 | 7+ | 7+ |
| Horse | 10" | 2 | 6+ | 3 | 4 | 0 | 1 | 7+ | 7+ |
| Mordor Warg Rider | 6" |
Common Mounts
| Mount | Base | MV | FV | SV | S | D | A | W | C | I | Race | Faction | Unit Type | Special rules |
|---|---|---|---|---|---|---|---|---|---|---|---|---|---|---|
| Horse | 40mm | 10" | 2 | 6+ | 3 | 4 | 0 | 1 | 7+ | 7+ | Horse | See Rider | Mount | — |
| Armoured Horse |
The Rider of Rohan uses their own characteristics during a Combat as they are better than (or at least the same as) those of their horse. On the other hand, the Mordor Orc uses the Warg's Strength of 4 when rolling To Wound – a considerable advantage.
Cavalry Charge – The main advantage of Cavalry models is the devastating charge they can unleash, using great momentum to bowl their opponents over to the ground. When a Cavalry model Charges, it gets two additional bonuses in the ensuing Fight Phase: Extra Attack and Knock to the Ground.
To gain these bonuses, all of the following must be true:
- The Cavalry model has Charged only Infantry models and, when the Combat is resolved, they are fighting exclusively against Infantry models.
- The Cavalry model is not Engaged in Combat with another Cavalry model, a Chariot or a War Beast when the Combat is resolved.
- The Cavalry model is not in any kind of Difficult Terrain.
- The Cavalry model has not been Transfixed.
These bonuses will still apply even if the Cavalry model is subsequently Charged by other enemy models, so long as all the above statements remain true.
Example 55: Théoden Charges a pair of Morannon Orcs. As they are both Infantry, Théoden will get the Extra Attack and Knock to the Ground bonuses. Théoden rolls three dice for his Duel Roll (2 for his Attacks +1 for Extra Attack) and wins the roll, knocking both Morannon Orcs Prone. Théoden then gets to make three Strikes, and may choose how to assign them. As his Strikes are being made against Prone enemies, Théoden will roll two dice rather than one and apply both results. He assigns the first Strike to the first Orc, rolls two dice, and then checks the results before deciding which Orc to assign the next Strike to.
Example 56: Théoden has Charged another Morannon Orc. However, this time a Warg Rider has subsequently Charged Théoden as well. Since Théoden is no longer fighting solely against Infantry models, he no longer gains the Extra Attack and Knock to the Ground bonuses he would normally get. This means that Théoden will only roll two dice (the number of Attacks on his profile) when making his Duel Roll.
Extra Attack – A Cavalry model benefitting from this bonus increases their Attacks characteristic by 1 for the duration of the Combat. So, a Cavalry model with 1 Attack would have 2 Attacks with this bonus, rolling two dice for the Duel Roll and making two Strikes.
This bonus still applies if the rider is using the Attacks characteristic of their Mount.
Knock to the Ground – If a Cavalry model benefitting from this bonus wins the Duel Roll, then all Infantry models they are Engaged in Combat with will be knocked Prone after Backing Away – with the exception of Monster models or models with a Strength of 6 or above.
Making Strikes Against Cavalry Models – If a model wins a Duel Roll against a Cavalry model, then it may choose to make its Strikes against either the rider or the Mount. This choice is down to the player making the Strikes, and they can distribute them however they choose, and may even resolve them one at a time in the usual fashion, and even alternate between rider and Mount if they wish. No In The Way Tests are required to Strike either the rider or Mount.
If the rider is slain, then the Mount becomes a Separated Mount.
If the Mount is slain, then the rider will need to take a Thrown Rider Test; however, this is only taken and the effects applied after all other Strikes have been resolved.
Fighting Across Barriers – Cavalry models can defend Barriers in the same way as Infantry models. If a Cavalry model Charges a model that is defending a Barrier, then they do not get either the Extra Attack or Knock to the Ground bonuses. Remember though, that the Barrier must be at least half as tall as the attacker (in this case the Cavalry model) in order for it to count as a Barrier that can be defended.
Cavalry and Special Rules
If a special rule states it affects a model, or all models within a certain range or specification, then both the rider and the Mount of a Cavalry model will be affected unless otherwise stated.
Cavalry and Magic – If a model uses a Magical Power that targets a Cavalry model, then the whole model (both rider and Mount) is considered to be the target of the Magical Power, and both will feel the effects. Some Magical Powers may state that if it targets a Cavalry model then they must choose whether the rider or Mount is affected, in which case only the chosen part of the Cavalry model will be affected if the Magical Power succeeds.
Example 57: Gandalf is mounted upon Shadowfax and is the target of Saruman's Flameburst Magical Power. As this is a Cavalry model, both Gandalf and his Mount, Shadowfax, will feel the effects.
Cavalry and Break Points – As a Cavalry model contains two parts – the rider and the Mount – it can be confusing trying to understand if and when slain Cavalry models count as a casualty in regards to working out if an Army has been Broken.
A Cavalry model will count as a casualty in regards to working out whether an Army is Broken (or reduced to 25%) as soon as the rider is slain, regardless as to whether the Mount stays or flees. If the Mount is slain, either before the rider or after the rider has been slain themselves, then this will not count as a casualty towards an Army's Break Point.
Heroes
Throughout its extensive history, Middle-earth has had numerous exceptional individuals that have left their mark on the world and changed the course of history, either for good or for ill. Such entities can loosely be referred to as heroes – although villains is perhaps a more suitable term for the followers of the Dark Lord. Regardless, these are the famous characters that make up the forefront of the greatest stories in Middle-earth, and who are sung about in legend or spoken of in hushed tones across the lands. From noble kings such as Aragorn, mighty warriors such as Boromir, fearsome servants of Sauron such as Azog, or even the humble Hobbits of the Shire who gave their all to see to the destruction of the One Ring, Heroes come in all shapes and sizes.
Models that are heroes will have the Hero keyword, and have an important role to play in any battle. Hero models have a number of special abilities that distinguish them from the rank and file Warrior models that make up the bulk of any Army. These are covered in this section and, as you will soon realise, make Hero models an absolutely crucial part of any game you play.
Might, Will and Fate
The most obvious difference between a Hero and a Warrior is that a Hero will have three additional characteristics: Might, Will and Fate. These characteristics do a great deal to separate a Hero from ordinary folk, and allow them to pull off extraordinary feats of heroism on the battlefield.
Unlike other characteristics, Might, Will and Fate act as a finite resource, and once you spend these points your store of them is reduced – so use them wisely! Players will need to look for the most opportune moments to use their Might, Will and Fate Points during the course of a game, and will need to carefully keep track of how many each of their Hero models has spent so they know exactly how many more they have remaining. Once a Hero has spent all of their Might, Will or Fate Points they can spend no more, unless they are able to regain them in some way during the battle.
If a special rule allows a Hero to regain a Might, Will or Fate Point, this may not take that Hero above their starting number, unless specifically stated otherwise.
If a special rule allows for a Hero to do something that would usually cost a Might, Will or Fate Point without spending that Might, Will or Fate Point, then the Hero can still do this even if they have no Might, Will or Fate remaining – it is free.
All Hero models have an extra section to their characteristics that shows how many Might, Will and Fate Points they have at their disposal (for example, Haleth has 3 Might Points, 2 Will Points and 1 Fate Point).
Hero Mounts – In rare situations, a Mount may also have the Hero keyword and have its own store of Might, Will and Fate. When this is the case, both the rider and the Mount can use each other's Might, Will and Fate interchangeably whilst the rider remains mounted. The only exception to this is that a rider cannot use the Will Points of their Mount to Cast a Magical Power. So, a rider could use their Might Points to improve a Resist Test made using Will Points from their Mount, a rider or Mount could use their Fate Points to prevent Wounds caused upon the other, and if targeted by a Magical Power the controlling player could choose to use a mixture of Will Points from both the Mount and the rider, though they should roll different coloured dice for each. When doing this, you should still mark down which of the two has actually spent the Might, Will or Fate Point.
A Hero Mount with an Attacks characteristic of 0 will still automatically fail its Courage Test if it becomes a Separated Mount.
Might
Arguably the single most valuable characteristic available to a Hero, Might Points represent the ability of a Hero to seize the initiative, act faster than their foes, fight off seemingly impossible odds, and summon strength they may not even know they possessed in order to win the day. Might Points are a reserve of resolve and heroism, and spending a Might Point is often a sign that something truly heroic is afoot.
Might Points can be spent in one of two ways: to modify dice rolls or to declare Heroic Actions.
Modify Dice Rolls – A Hero model is able to spend a Might Point to adjust the score on a dice roll made on their behalf. For each Might Point spent in this manner, they may increase the result on one dice by 1. Might Points can only ever be spent to improve a dice roll, and cannot be used to reduce the score on the dice. It is also important to note that Might Points can never be used to increase the score on a dice above 6 – no matter how many Might Points the Hero has!
A player does not need to decide to use any Might Points until all the dice have been rolled, any re-rolls have been used, and all other modifiers have been applied. Essentially, Might Points are always the last thing that can affect a dice roll. This is also true in the case of the likes of a Duel Roll where players are rolling against each other; Might Points are always the last thing to be used. This often means that a player can ensure the result they want if they have enough Might Points at their disposal.
If two opposing Hero models are fighting, both may use Might Points in order to try to win the Duel Roll. This is done as a bidding system, where the player whose Hero is currently losing the Duel Roll has the first opportunity to use Might. Should they choose to use Might to win, then their opponent then gets the opportunity to use Might as well. This goes back and forth until both players have used all the Might Points they wish to, or no more can be used.
Hero models can only ever use Might Points to alter their own dice rolls, and never to affect the rolls of their allies or enemies. This means in situations such as a Multiple Combat, it is important to roll the dice associated with a Hero separately or in a different colour so that all players know which dice can be modified by Might. A good system would be to have a different colour dice for each Hero in a Combat, and then another for Warrior models (as they don't have Might to use). If you don't have enough coloured dice to do this, then simply roll each Hero model's dice separately and keep them apart from the others.
Example 58: Háma takes a shot at a Hill Tribesman and scores a hit. There is a wall In The Way, however, so Háma must pass an In The Way Test in order to hit the Hill Tribesman. Háma rolls a D6 and scores a 3, which will mean the arrow hits the wall. If Háma wants to hit the Hill Tribesman, he will need to spend 1 Might Point to make the In The Way Test successful.
Example 59: Jay and Rob are both using Hero models in a Combat. Rob is using Gothmog (Fight Value 5 and 3 Might) and Jay is using Éomer (Fight Value 6 and 3 Might). Rob rolls his dice for the Duel Roll and scores a 1 and a 3, whilst Jay scores a 2, 3 and a 4. As Rob is currently losing, he has the first opportunity to spend Might. Rob chooses to spend Might, though as Gothmog has a lower Fight Value than Éomer, Rob must spend 2 Might Points to improve his 3 to a 5 in order to be winning the Combat. As Rob is now winning, Jay can now spend Might and chooses to spend 1 Might Point to improve his 4 to a 5, meaning that Éomer is now winning thanks to his higher Fight Value. Rob then chooses to spend his last Might Point to improve his 5 to a 6 and be winning once more, and so then Jay chooses to do the same and wins the Combat. As both players are now at a 6, no more Might can be used and Éomer wins the Combat.
Can I Use Might? – Might can only be used in certain situations, and only to alter certain dice rolls. Here we have provided a list of what dice rolls Might Points can be used to alter, and some notes on how they take effect. It's worth remembering that Might can only be used to alter the Hero model's own rolls, and not those of allies or enemies. It also cannot be used to alter rolls made indirectly for the Hero, such as randomly determining an effect that impacts them, or during a roll-off to see which side wins a Duel Roll in the case of a tie.
Unless explicitly stated otherwise, Might Points cannot be used to alter any dice rolls other than the ones presented here. Where this is the case, it will be stated in the relevant special rule.
- Taking Tests – Might can be used to improve the result of Jump, Climb, Leap, Swim, Thrown Rider and In The Way Tests.
- Duel Rolls – Might can be used to improve a Hero model's score during a Duel Roll. When used in this way, Might will be used after any modifiers and re-rolls have been applied.
- Shooting – Might can be used to improve a To Hit Roll.
- Wounding – Might can be used to improve a To Wound Roll caused directly by the Hero, such as with a Shooting Attack, a hit from a Magical Power, or when making Strikes. If a To Wound Roll requires two values, such as a 6+/4+, then any Might Points used on the first roll will also carry over to improve the second roll. Might cannot be used to improve a To Wound Roll caused indirectly by the Hero, such as an enemy model failing a Thrown Rider Test and suffering a hit, an enemy model hit by a model flung back by the Hero model's special rules (such as a Brutal Power Attack or Magical Power), or an enemy model that was forced over the edge of a drop due to the Hero and suffering Falling Damage.
- Courage – Might can be used to improve the result of a Courage Test.
- Intelligence – Might can be used to improve the result of an Intelligence Test.
- Using Will – Might can be used to improve the result of a Casting or Resist Test when using Will Points.
- Using Fate – Might can be used to improve the result of a Fate Roll.
Some Hero models will have special rules that will allow them to use Might Points to alter the dice roll associated to that special rule. Where this is the case it will state 'Might can be used to alter this roll'.
Example 60: Beorn is in a Combat against Bolg. Looking at their Duel Roll, Beorn has scored a 1, 3 and 4, whilst Bolg has rolled a 2, 5 and 6. Beorn must now decide whether he loses the Combat, or whether he spends 2 Might Points in order to boost his 4 to a 6 – and with the higher Fight Value, that may well be a very sensible thing to do!
Heroic Actions
The other way that Hero models can spend Might Points is through the use of Heroic Actions. These are spectacular deeds that have the potential to alter the course of a battle and swing victory in your favour when used.
Each of the major phases of the game (Move, Shoot and Fight) have a Declare Heroic Actions step in them, and this is where players get the opportunity to declare the use of any Heroic Actions they wish their Hero models to perform. A Hero may only declare a single Heroic Action in each phase, though they can declare multiple Heroic Actions in the same turn provided they are in different phases.
Each Heroic Action has the phase it can be declared in shown in brackets after its name. When a Hero declares a Heroic Action, the player states which Heroic Action is being declared and by which Hero; they then expend a Might Point and mark it down in some manner. A Hero cannot declare a Heroic Action if they have 0 Might Points remaining, unless they have a special rule that gives them a free Might Point, or a special rule that allows them to declare a free Heroic Action in certain situations. A Hero cannot declare a Heroic Action if they are not on the board.
During the Declare Heroic Actions step of each phase, players take it in turn to declare a Heroic Action starting with the player without Priority. A player may choose to either declare a Heroic Action as above, or to 'pass'; after which the player with Priority then does the same. This continues back and forth until both players pass in succession or are satisfied with the Heroic Actions they have declared – essentially it means that you always have the opportunity to declare a Heroic Action if your opponent does so. If a player decides to pass and their opponent then declares a Heroic Action, when the opportunity comes back to the player who passed, they do not have to pass again and can now decide to declare a Heroic Action if they wish.
Example 61: During the Move Phase, it is Jay's Priority and so Rob has the first opportunity to declare a Heroic Action and chooses to declare a Heroic Move. Jay then also declares a Heroic Move in response. Rob decides to pass, and Jay then does the same. As both players have passed in succession, the sequence ends and the Heroic Moves are resolved.
Example 62: During the Fight Phase of the same turn, Rob has the first opportunity and declares a Heroic Combat. Jay elects to pass, and then Rob declares a Heroic Strike with a different Hero. Jay now decides to declare a Heroic Strike of his own, and Rob decides to pass as he has no more Hero models that can declare a Heroic Action. Jay then declares a Heroic Defence, Rob passes and then Jay also passes. The sequence then ends.
It is important to note that once a Hero has declared a Heroic Action, they cannot take it back and cannot change their declared Heroic Action for a different one.
Some Heroic Actions (Heroic Move and Heroic Combat) interfere with the order in which a particular phase is conducted. For instance, a Hero who declared a Heroic Combat will resolve their Combat first. If two or more Hero models from the same side wish to perform such a Heroic Action, then their controlling player simply decides the order in which they are resolved. However, if Hero models from opposing sides wish to perform such Heroic Actions, then follow the system below to determine the order in which they are resolved:
- Players nominate which Hero models are declaring Heroic Actions as described previously, and make a note that those Hero models have expended a Might Point.
- The player with Priority rolls a D6. On a 1-3, the Evil player chooses one of their Hero models to perform the first Heroic Action. On a 4+, the Good player chooses one of their Hero models to perform the first Heroic Action.
- The other player (the one who lost the roll-off) then chooses one of their Hero models to perform their Heroic Action. Note that as a result of the opposing Hero model's Heroic Action, this may no longer be possible. In which case the Heroic Action is cancelled and the Might Point spent is lost.
- Players alternate performing Heroic Actions in this manner until none are left.
A model may only ever benefit from a single Heroic Action of each type during the course of a turn – a model could only benefit from one Heroic Move or Heroic March for example. The only exception to this is in the case of a Heroic Combat – a model that takes part in a successful Heroic Combat and then joins a second Combat, that is also a Heroic Combat, may still fight again as normal. However, in this situation, the model may not Move and fight again should the second Heroic Combat also be successful.
Universal Heroic Actions
Some Heroic Actions can be used by any Hero in the game, regardless of who (or what) they are – so long as they have Might Points remaining, of course! Every Hero can use the following three Heroic Actions:
Heroic Move (Move Phase) – A Heroic Move enables a Hero to Activate before other models – essentially defying the usual Priority system. The Hero can then Activate exactly as normal and do anything they would normally be able to do when they Activate. The Hero cannot then be Activated again later in the Move Phase.
This Heroic Action can prove extremely valuable, and often when the player without Priority declares a Heroic Move their opponent will also declare one in order to try to keep the initiative.
If a Hero who has declared a Heroic Move is Charged and Engaged in Combat, or rendered unable to Activate in some other way, then their Heroic Move is cancelled and the Might Point spent is lost.
Example 63: The Evil side has Priority, and Tom the Troll is closer to Thorin's Company than they would like! Bilbo Baggins uses 1 Might Point to declare a Heroic Move, enabling him (and any friendly models within 6" if he shouts With Me) to Activate first, outside the normal order of Priority.
If Tom decided to also spend 1 Might Point to declare a Heroic Move, then the player with Priority (the Evil player) would roll a D6 to see whose Heroic Move takes place first.
With Me – A Hero who is performing a Heroic Move may choose to shout "With Me" as soon as they are Activated. If they do, note their starting position before they Activate. All friendly models within 6" of the Hero when they shout With Me are automatically affected, and after the Hero has finished their Activation, they must choose to do one of two things:
- Activate as normal in an order chosen by their controlling player. Any model that Activates as part of a With Me must finish their Activation within 6" of the Hero that shouted With Me. If the model attempts to finish their Activation within 6" of the Hero, but fails a roll (such as a Courage Test, Jump Test or Climb Test) that makes this impossible, they simply stop where they are.
- Forego their Activation, in which case they do not Activate and cannot do so later in the Move Phase. A model that cannot finish its Activation within 6" of the Hero that shouted With Me must choose this option.
In either case, the affected models cannot be Activated again later in the Move Phase for any reason.
A Hero that shouts With Me doesn't have to Move as part of their Activation, and as With Me is shouted at the start of their Activation, if anything would render them unable to Move as part of their Activation (such as failing a Courage Test to Charge an enemy with the Terror special rule) then they will still shout With Me. However, should the Hero be removed as a casualty for any reason (such as fleeing or suffering Falling Damage) then their Heroic Move and With Me will immediately be cancelled.
If two friendly Hero models within 6" of each other both declare a Heroic Move, and the one that goes first shouts With Me, the second Hero has two options:
- Activate as normal for a model affected by With Me, in which case their Heroic Move will be cancelled.
- Forego their Activation, in which case they do not Activate later in the Move Phase and their Heroic Move will be cancelled.
If a Hero who shouted With Me Moves off the board, then any friendly models who are affected by their With Me may also Move off the board if able; however, if they cannot then they must choose to forego their Activation. If a model is affected by a Hero model's With Me, then they can only Move off the board if that Hero also does so.
Heroic Shoot (Shoot Phase) – A Heroic Shoot allows a Hero to Shoot before all other models in the Shoot Phase. A Hero does not need to have a Missile Weapon to declare a Heroic Shoot, but they cannot declare a Heroic Shoot if they are Engaged in Combat.
Loose – A Hero who is performing a Heroic Shoot may choose to shout "Loose". The Hero does not need to Shoot first (or at all if they don't wish to) when they shout Loose.
If they do, all friendly models within 6" of the Hero when they shout Loose are automatically affected, and may also Shoot at the same time as the Hero – in an order chosen by their controlling player.
Friendly models affected by the Loose of a friendly Hero do not need to target the same enemy model, and may Shoot as normal. However, any model affected by a friendly Hero model's Loose that chooses not to Shoot as part of it cannot then do so later that Shoot Phase.
Heroic Combat (Fight Phase) – When a Hero declares a Heroic Combat, their Combat is resolved first before any others. In addition, if the Hero wins their Combat and all enemy models involved in that Combat are removed as a casualty, then the Hero and any friendly models that were involved in that Combat (with the exception of any War Beast or Chariot models) may immediately Move in the same way as they would during the Move Phase – however, the only things they may do is to Move or Charge. If they Charge, then they will fight again in the ordinary way – i.e., in an order chosen by the player with Priority.
If models Charge during this Move, then the way the Combats should be divided may be altered. In this situation, the player with Priority will Pair Off Combats again after each successful Heroic Combat.
A model may only benefit from one Heroic Combat per turn; so, if a model that was involved in one Heroic Combat Moves to join another Combat that is also a Heroic Combat, which is then itself successful, the model may then not Move again as part of the second Heroic Combat.
There may be a situation where two opposing Hero models in the same Combat both declare a Heroic Combat. When this happens, if either side causes all enemy models to be removed as a casualty, then they are considered to have made a successful Heroic Combat and may Move as described above, regardless of which player's choice of Heroic Combat it was.
Example 64: Haleth is fighting a lone Hill Tribesman, a Combat he is very likely to win. Because of this, Haleth has declared a Heroic Combat and spends 1 Might Point. Haleth wins the Duel Roll and slays the Hill Tribesman, allowing him to Move again and even Charge if he wishes. Haleth uses this extra Move to Charge the other Hill Tribesman, and will fight it during the normal order of Combats.
Heroic Channelling (Move Phase) – A Hero who declares Heroic Channelling will count the result of their next Casting Test this turn as a 6. As a result, they do not need to roll the dice for the Casting Test but will still need to spend a Will Point to Cast the Magical Power as normal.
Heroic March (Move Phase) – A Hero who declares a Heroic March adds 3" to their Move Value for the duration of the Move Phase if they have the Infantry, Chariot or War Beast keyword; if they have the Cavalry keyword or have the Fly special rule, then they add 5" to their Move Value instead. Additionally, the Hero may not Charge under any circumstances during the same Move Phase.
If a Hero who has declared a Heroic March is Charged and Engaged in Combat, or rendered unable to Activate in some other way, then their Heroic March is cancelled and the Might Point spent is lost.
At the Double – A Hero who is performing a Heroic March may choose to shout "At the Double" as soon as they are Activated. If they do, note their starting position before they Activate. All friendly models within 6" of the Hero when they shout At the Double are automatically affected and, after the Hero model has Activated, gain the following benefit: A model affected by At the Double adds 3" to their Move Value for the duration of the Move Phase if they have the Infantry, Chariot or War Beast keyword; if they have the Cavalry keyword or have the Fly special rule, then they add 5" to their Move Value instead. Additionally, the model may not Charge under any circumstances during the same Move Phase.
Models affected by At the Double must finish their Activation within 6" of the Hero that shouted At the Double. If the model attempts to finish their Activation within 6" of the Hero, but fails a roll (such as a Courage Test, Jump Test or Climb Test) that makes this impossible, they simply stop where they are. A model that cannot finish their Activation within 6" of the Hero who shouted At the Double must forego their Activation, and cannot be Activated later on in the same Move Phase. Models can choose not to Activate when affected by a Heroic March, in which case they will also forego their Activation.
Should the Hero be removed as a casualty for any reason (such as fleeing or suffering Falling Damage) then their Heroic March and At the Double will immediately be cancelled.
Models can only ever be affected by one Hero model's At the Double each turn – you can't stack multiple Heroic Marches together!
If a Hero who shouted At the Double Moves off the board, then any friendly models who are affected by their At the Double may also Move off the board if able; however, if they cannot then they must choose to forego their Activation. If a model is affected by a Hero model's At the Double, then they can only Move off the board if that Hero also does so.
Example 65: The Goblins are trying to catch the fleeing Thorin's Company, and so the Goblin Captain declares a Heroic March. When they Move as part of their Activation, the Goblin Captain and friendly models within 6" of it will be able to Move 5" (as per their Move Value) plus an additional 3" for the Heroic March; though they must finish their Move within 6" of the Goblin Captain.
Specialised Heroic Actions
Some Heroic Actions can only be declared by certain Hero models. In each Hero model's profile there will be a section listing the additional Heroic Actions that Hero can declare. These Heroic Actions are described here:
Heroic Resolve (Move Phase) – When a Hero declares a Heroic Resolve it has two effects, the first of which is resolved as soon as the Heroic Action is declared. Friendly models within 6" of a Hero who declared a Heroic Resolve gain an additional free dice when making Resist Tests until the End Phase of the turn. Note that for models that have no Will Points (or none remaining), this allows them to make a Resist Test on one dice rather than none.
Additionally, a Hero who declares a Heroic Resolve will automatically pass any Courage Tests they are required to make that turn as a result of their Army being Broken. If a Hero who has declared a Heroic Resolve is Charged and Engaged in Combat before they are able to Activate, they are still able to Activate solely in order to provide a Stand Fast even though they would not normally be able to (though this is the only thing they can do in this Activation). However, a Hero who has been rendered unable to Activate by some other means (such as being Transfixed) still cannot provide a Stand Fast as normal.
Example 66: Gandalf the White's Army has been Broken and he has declared a Heroic Resolve. Friendly models within 6" of Gandalf gain an additional free dice to any Resist Tests they take this turn. During the Move Phase, Gandalf has been Charged by the Witch-king before he can Activate. Normally, this would mean that Gandalf could not provide a Stand Fast to keep his allies fighting; however, as he declared a Heroic Resolve, Gandalf will automatically pass his Courage Test for being Broken, and may still provide his Stand Fast even though he is Engaged in Combat.
Heroic Accuracy (Shoot Phase) – When a Hero declares a Heroic Accuracy, they gain the Sharpshooter special rule until the End Phase of the turn if they don't already have it. Additionally, the Hero may re-roll any failed In The Way Tests when making a Shooting Attack. This includes any failed In The Way Tests when targeting a Cavalry model with a Shooting Attack to determine whether the target part of the model has been hit.
A Hero may not declare a Heroic Accuracy if they are Engaged in Combat or otherwise rendered unable to Activate.
Take Aim – A Hero who is performing a Heroic Accuracy may choose to shout "Take Aim". The Hero does not need to Shoot first (or at all if they don't wish to) when they shout Take Aim.
If they do, all friendly models within 6" of the Hero when they shout Take Aim are automatically affected, and may also re-roll any failed In The Way Tests when making a Shooting Attack. This includes any failed In The Way Tests when targeting a Cavalry model with a Shooting Attack to determine whether the target part of the model (usually the rider) has been hit.
Friendly models affected by the Take Aim of a friendly Hero do not need to target the same enemy model, and may Shoot as normal.
Example 67: Tauriel and her Mirkwood Rangers are about to loose arrows at some Hunter Orcs. Because the Orcs are protected by some terrain, Tauriel spends 1 Might Point to declare a Heroic Accuracy. Tauriel gains the Sharpshooter special rule, and when she or any friendly models within 6" of her Shoot this turn, they may re-roll any failed In The Way Tests.
Heroic Challenge (Fight Phase) – When a Hero declares a Heroic Challenge they must also declare an enemy Hero within 6" of them, with the same Heroic Tier or higher, to be the target of the Heroic Challenge. If there is no enemy Hero within 6" with the same Heroic Tier or higher, then the Hero cannot declare a Heroic Challenge.
Whilst Engaged in Combat with their target, the Hero gains a bonus of +1 Attack (both in the Duel Roll and when making Strikes) and a bonus of +1 To Wound when making Strikes against their target. Additionally, if they slay their target (i.e., they inflict the final Wound that causes them to be removed as a casualty) then the Hero immediately gains 1 Might Point, though this cannot take them above their starting limit.
The target of the Heroic Challenge can choose to either accept or decline the challenge. If they accept, then they get the same benefits as the Hero who declared the Heroic Challenge as listed above (as if the Hero who declared the Heroic Challenge was their target). Additionally, if the target chooses to accept, then when either Hero Activates, they must Charge each other if possible. A Hero who accepts a Heroic Challenge cannot declare a Heroic Challenge themselves until the Hero who challenged them is slain. If a Hero accepts a Heroic Challenge, no other Hero may declare a Heroic Challenge against either Hero involved in the Heroic Challenge until one of them has been slain.
If the target declines, then they gain none of the benefits listed; though the Hero who declared the Heroic Challenge will still gain them. Additionally, if the target declines, they cannot then themselves declare a Heroic Challenge against the Hero who they declined against.
A Hero who has already issued a Heroic Challenge against a target cannot declare another Heroic Challenge until their target has been removed as a casualty.
Example 68: Thorin has declared a Heroic Challenge against Azog, who is within 6" of him. Azog decides to accept Thorin's challenge. Until one of them is slain, both Thorin and Azog must Charge each other if possible and both will gain a bonus of +1 Attack when fighting against each other and +1 To Wound when making Strikes against the other. Whoever slays their opponent will gain 1 Might Point.
Example 69: Haleth has declared a Heroic Challenge against Wulf, who is within 6" of him. Wulf doesn't want to fight Haleth and so chooses to decline. If Haleth gets into a Combat with Wulf, then he will still gain the +1 Attack and +1 To Wound when making Strikes against Wulf; however, as he chose to decline, Wulf doesn't gain any of the benefits himself though he isn't required to Charge Haleth. If Haleth slays Wulf, he will gain 1 Might Point.
Heroic Defence (Fight Phase) – A Hero model that declares a Heroic Defence will only suffer a Wound on the roll of a natural 6 in the ensuing Fight Phase, regardless of any special rules, modifiers, Brutal Power Attacks or the use of Might. If the Hero would normally be wounded on a 6+/4+, 6+/5+ or 6+/6+, then they will only be wounded if both rolls are a natural 6. Heroic Defence does not confer to a Hero model's Mount if it has one.
Heroic Strength (Fight Phase) – A Hero that declares a Heroic Strength will count their Strength characteristic as double (to a maximum of 10) when making Strikes until the End Phase of the turn.
Heroic Strike (Fight Phase) – A Hero that declares a Heroic Strike will add D3 to their Fight Value for the duration of the Fight Phase (to a maximum of 10). This D3 is rolled at the start of the first Combat that the Hero is involved in that Fight Phase, and will last for the duration of the Fight Phase. This bonus is always applied after any other effects that would affect a model's Fight Value.
Some Heroic Actions allow a Hero to shout something in order to benefit their allies (With Me, Loose, etc.). In the heat of battle it can be easy for a player to declare a Heroic Action and then forget to say that their Hero is going to shout whichever particular phrase. Though these are optional, it is sporting and good practice to check with your opponent if they meant to shout the relevant phrase as part of their Heroic Action or if they purposefully did not – you should always check with them if you can. If they have just forgotten, it is expected that players will still allow their opponent to do so – after all, they had clearly planned to but just forgot to say it out loud.
Will
Many characters in Middle-earth possess an indomitable strength of will; an iron resolve that allows them to carry on the fight even in the face of seemingly insurmountable odds. This heroic willpower can manifest as steely bravery and enable the hero to set aside their fears and charge headlong into battle for glory. Many inhabitants of Middle-earth also harbour some innate form of magic, allowing them to invoke subtle magical powers upon their foes or allies. The act of using, and attempting to shrug off such powers, both require a sufficient reserve of will.
Hero models may expend Will Points in one of three ways:
Pass a Courage Test – A Hero may spend one or more Will Points to increase the result of a Courage Test. For each Will Point spent, the Hero may increase the result of their Courage Test by 1. A Hero may spend a mixture of both Might Points and Will Points to increase their Courage Test in this manner.
Example 70: Bofur wishes to Charge the Goblin King and must take a Courage Test to do so due to the Terror special rule. Bofur has a Courage characteristic of 5+, however, he has rolled a 1 and a 3 for his Courage Test for a total of 4 – a fail. Bofur decides to spend 1 Will Point to improve his Courage Test by one, to 5. Bofur has now passed his Courage Test and can Charge the Goblin King.
Cast a Magical Power – A Hero who has Magical Powers in their profile can spend Will Points in order to attempt to Cast them. For each Will Point spent, the Hero may add one D6 to their Casting Test. Magical Powers are covered fully in the Magic section.
Resist a Magical Power – A Hero who has been targeted by a Magical Power can spend Will Points in order to try to Resist the effects. For each Will Point spent, the Hero may add one D6 to their Resist Test. Resisting Magical Powers is covered fully in the Magic section.
Fate
The greatest in Middle-earth seem to be able to cheat death, avoiding wounds that would otherwise slay a lesser being and surviving injuries that by all accounts should see them perish. Whether this is down to some divine favour, or perhaps some darker power, is a mystery, though what is certain is that fate has a plan for these heroes. To represent this in our games, Hero models have a store of Fate Points which can prevent Wounds.
Whenever a model with Fate Points suffers a Wound, their controlling player may choose to spend a Fate Point in order to attempt to prevent that Wound.
When a Hero spends a Fate Point, mark down that they have spent it, and then roll a D6. On a 4+ the Wound is prevented and has no effect – do not reduce the Hero model's remaining Wounds.
If the Fate Roll is unsuccessful, and the Hero has more Fate Points remaining, they may spend another one in the same manner.
Fate Points must be rolled one at a time and fully resolved before spending another Fate Point. If a model wishes to spend Might to increase their Fate Roll, then they must choose to do so before spending another Fate Point. So, if a Fate Roll comes up with a 3, you must decide if you wish to Might it to a 4 before making another Fate Roll – if the next roll is worse, you can't go back!
Some special rules may allow a model to do multiple Wounds from a single Strike if the To Wound Roll is successful, or even kill a model outright. In these instances, the effect will only be resolved if the Wound is successful (i.e., it will reduce the target model's remaining Wounds), so a single successful Fate Roll will prevent all of the damage the Strike would cause.
Whilst Fate can prevent any manner of Wound dealt to a Hero, it cannot save them from fleeing the board as a result of a failed Courage Test and being removed from the board as a casualty. In these instances the Hero has shown a craven heart and fate has clearly abandoned them!
Example 71: Éowyn has been wounded by Gothmog and decides to spend 1 Fate Point. Unfortunately, she only rolls a 1 and the Wound is not prevented. Éowyn then decides to spend a second Fate Point, and this time rolls a 5 – preventing the Wound entirely.
Example 72: Thorin has defeated Grinnah in Combat and has inflicted 2 Wounds upon the Goblin. Orcrist has the Goblinbane special rule, which will mean that each successful Wound will do D3 Wounds instead. Grinnah spends his 1 Fate Point to try to prevent the first Wound, rolling a 5 and preventing the Wound, which will therefore not become D3 Wounds. However, as he has no Fate remaining, the other Wound is successful and will then become D3 Wounds. Thorin rolls a 6, dealing 3 Wounds and cleaving the Goblin's head right off!
Example 73: Háma has been shot by a Hill Tribesman and suffered a Wound. Háma spends 1 Fate Point and rolls a 3, which is not enough to prevent the Wound. Háma decides to spend 1 Might Point to improve his Fate Roll to a 4, meaning the roll is successful and the Wound is ignored.
Monsters
There are all manner of different creatures that reside across Middle-earth, all of them varying in size, strength, ferocity and even allegiance. Some such creatures, like the swift Great Eagles of the Misty Mountains, are noble beasts that trouble themselves little with the goings-on of the world, whilst others are vicious, bloodthirsty creatures that stalk dark places or are bred solely for the purpose of war. Regardless, these mighty beings can all be described as monsters, and the presence of one or more on the battlefield can shift the tide of a battle in one fell swoop.
Generally speaking, Monster models follow the same rules as all other models in the game. However, because Monster models are so powerful, there are a few special rules that set them apart from the standard Infantry and Cavalry models within the game – all of which we will cover here.
Monsters and Cavalry
Cavalry models will still gain the Extra Attack bonuses when they Charge against Monster models – so long as the Monster also has the Infantry keyword. Cavalry models will still get the bonus for a lance when Charging against a Monster.
A Monster that has a rider is also a Mount. In these situations, when a model hits a Monster that is also a Cavalry model with a Shooting Attack, when it makes the In The Way Test to see if it hits the rider or the Mount, a roll of a 1-4 will hit the Mount, whilst a roll of a 5+ will hit the rider.
Monsters in Combat
Monster models excel in a fight, and are often able to cause significant damage to enemy lines and even smash right through them.
Whenever a Monster model makes a Strike against an enemy model that it is Engaged in Combat with and slays them, they may immediately make a single additional Strike against each model that was Supporting the slain model. This cannot be used if the Monster model kills an enemy with a Brutal Power Attack, only when they make a Strike.
Example 74: This Mordor Troll has won the Combat against the Warriors of Minas Tirith. It makes its first Strike against Warrior A, killing it. It then makes its second Strike against Warrior B, killing them as well. As Warrior C was Supporting Warrior B, the Troll may now make a free Strike against Warrior C; however, it doesn't kill them in this instance. As that was a free Strike, the Troll still has one remaining and chooses to Strike Warrior D, killing them as well. As Warrior E was Supporting Warrior D, the Troll may now make a free Strike against them as well, and this time the Troll successfully kills its victim!
Brutal Power Attacks
If a Monster wins a Combat, its controlling player may decide for the Monster to not make Strikes and instead use a Brutal Power Attack. There are three Brutal Power Attacks that can be used by any Monster, though some may have their own unique ones in their profile.
It's worth pointing out that Brutal Power Attacks are not Strikes, and therefore are not affected by any special rules, Heroic Actions or other rules that will affect a model's Strikes (e.g., Heroic Strength, a model being Trapped, a Morgul blade, Venom, etc.). Monster models that are Supporting cannot make Brutal Power Attacks.
A Monster model can only ever make a single Brutal Power Attack per turn, and should a Monster wish to use a Brutal Power Attack then it must do so before any other models in the Combat resolve any Strikes.
In the situation where there are multiple Monster models on the same side in the same Combat, and both wish to use a Brutal Power Attack, then the order in which these are resolved is chosen by their controlling player. However, there may be situations where as a result of a Brutal Power Attack, the other Monster will find themselves unable to use one of their own – these situations will be described where relevant.
Rend – When a Monster uses this Brutal Power Attack, they must nominate one enemy model involved in the Combat to Rend (if this is a Cavalry model, you must choose either the rider or the Mount). The Monster makes a number of To Wound Rolls equal to its Attacks characteristic (including any modifiers to its Attacks) against the nominated model. When resolving these To Wound Rolls, use the nominated model's Strength characteristic instead of their Defence when using the To Wound Chart.
Example 75: The Goblin King has beaten Thorin in a Combat, and has elected to use the Rend Brutal Power Attack. The Goblin King will make three To Wound Rolls (as his Attacks characteristic is 3) against Thorin, though instead of using Thorin's Defence of 7 the Goblin King will compare his Strength of 5 with Thorin's Strength of 4. Looking at the To Wound Chart, these To Wound Rolls will succeed on a 4+ – Thorin is in serious trouble!
Barge – When a Monster wishes to use this Brutal Power Attack, enemy models do not Back Away as normal. Instead, all enemy models involved in the Combat, plus any enemy models that were Supporting, must Back Away 3" rather than 1". The order and direction that these models Back Away is chosen by the Monster model's controlling player. Models may still Make Way for losing models (which will be decided by the Monster model's controlling player) and, if they do, must Make Way 3" rather than the usual 1", in a direction chosen by the Monster model's controlling player.
Any models that cannot Back Away or Make Way the full 3" are moved as far as possible and then knocked Prone. When doing this, if it is possible for a Monster to choose a direction for a model to Back Away or Make Way so that it goes the full 3", then it must choose that direction – it can't force a model to Back Away or Make Way less than 3" and be knocked Prone if there was a way for it to Back Away the full 3".
Once a Monster model has used a Barge, the Combat immediately ends and no further Strikes or Brutal Power Attacks can be made.
Once all models have Backed Away, the Monster that made the Barge can then Move D3+3" in any direction, following all the usual rules for Moving a model. It can even Charge again if it wishes, in which case it will fight again that Fight Phase in the ordinary way – i.e., in an order chosen by the player with Priority.
A Monster cannot Barge in the same turn in which it participates in a Heroic Combat.
Hurl – When a Monster wishes to use this Brutal Power Attack, it must nominate a single enemy model involved in the Combat before models Back Away – this is the model that will be Hurled. A Monster cannot nominate a model to be Hurled that has a Strength equal to or higher than their own. Then, all other enemy models (not the nominated model) Back Away as normal. The Monster will then Hurl the nominated model.
To Hurl a model, follow the steps below:
- The Monster rolls a D3 and adds the difference in Strength between the Monster and the nominated model – this is the Hurl Distance.
- The Monster must then take an Intelligence Test (if the Monster is also a Mount, it may use the Intelligence of its rider if it is better).
- If the test is passed, the Monster chooses an enemy model it can draw Line of Sight to, and within the Hurl Distance from itself, to Hurl the nominated model at – this is the target. A model can only be chosen as the target of a Hurl once per turn. If the test was failed, the opposing player may choose one of their models in Line of Sight of the Monster, and within the Hurl Distance, to be the target instead.
- The Hurled model suffers two Strength 6 hits (if it is a Cavalry model then both rider and Mount will suffer these hits), and if it was a Cavalry model then it is also Knocked Flying. If it is slain, skip the next step and move straight to step 6.
- If it survives, place it in base contact with the target model as close to the Monster as possible. If this is not possible, place the model in base contact with the target as close to the position it should have been in as possible. If there is nowhere to place the model in base contact with the target, move other models the minimum distance to make this possible. The Hurled model is then knocked Prone.
- The target model is then knocked Prone, if it has a Strength of 5 or less, and will suffer one Strength 6 hit (if it is a Cavalry model then both rider and Mount will suffer these hits). If it is a Cavalry model then it is also Knocked Flying.
If there are no enemy models eligible to be the target, then the Monster may choose a point on the battlefield it can draw Line of Sight within the Hurl Distance instead. Place the Hurled model on the chosen point; it is then knocked Prone and suffers two Strength 6 hits.
Once a Monster model has used a Hurl, the Combat immediately ends and no further Strikes or Brutal Power Attacks can be made. A Monster cannot Hurl in the same turn in which it participates in a Heroic Combat.
Example 76: Beorn has won a Combat against the Gundabad Orc and elects to Hurl them. He rolls a D3 and scores a 4 – a D3 result of a 2. Beorn has a Strength of 8, whilst the Gundabad Orc has a Strength of 4 – a difference of 4. This means that the Hurl Distance is 6"; 2 for the D3 roll, plus 4 for the difference in Strength. Beorn then chooses an enemy model within the Hurl Distance to throw the Orc at, and selects Azog. The Hurled model suffers two Strength 6 hits, which they luckily survive in this instance. The Hurled model is then placed in base contact with Azog, as close to the Monster as possible. As there is another Orc in this position, the Hurled model is placed slightly further around Azog's base as shown in the diagram, and is then knocked Prone. Azog is then also knocked Prone and suffers one Strength 6 hit, which also wounds the Pale Orc in this instance.
War Beasts
Some truly monstrous beasts roam parts of Middle-earth; huge, lumbering creatures that tower over even the likes of Trolls and fortifications. Some races have been able to harness such creatures, using them as massive weapons of war to trample their enemies underfoot or riding atop them in howdahs (or similar) from where they can fire down upon their enemies. From the mutilated Troll Brutes used by Azog's legions to the fearsome Mûmakil used by the Haradrim at the Battle of Pelennor Fields, these huge war beasts are a powerful force to be reckoned with.
Whilst a War Beast is its own unit type and has its own keyword, a War Beast will also be affected by any special rules that affect Monster models. However, as they function very differently to standard Monster models, they do not benefit from the Monster rules described above and instead use those listed here.
What is a War Beast?
A War Beast is always composed of two parts: the actual War Beast and its Commander. These count as two separate models for the purpose of working out an Army's Break Point, and when working out how many models are in your Army. Both will have their own separate profiles and characteristics.
The Commander will always be a Hero, and will count as the Warband's Captain. The War Beast never takes up a space in their Commander's Warband.
A War Beast, its Commander and any models in the Howdah automatically pass all Courage Tests for being part of a Broken Army.
Howdah – Some War Beast models will have a Howdah. If they do, the rules for what can go in their Howdah will be provided in their profile. Enemy models may never go in the Howdah of a War Beast.
A Howdah has its own Defence and Wounds characteristics, which will be listed in the profile of the War Beast. If a Howdah is reduced to 0 Wounds remaining, then it is destroyed and any models riding in it will automatically suffer Falling Damage – any that survive are placed Prone and in base contact with the War Beast, in a position chosen by their controlling player.
War Beasts and Movement
A War Beast Moves differently to other models. Instead of following the normal rules for Movement, a War Beast will instead Trample, as described below. The Commander and any models within the Howdah follow the normal rules for Movement, and are covered shortly.
Trample – When a War Beast Activates and Moves, it does so by Trampling. A War Beast must Move if able. To Trample, pivot the War Beast around the centre point of the base to face any direction you wish by the shortest route. If the War Beast comes into contact with other models when pivoting, simply move them out of the way by the shortest route to allow the War Beast to finish its pivot. If the War Beast comes into contact with terrain whilst pivoting, move the War Beast away just enough to finish its pivot.
After the War Beast has pivoted to face its desired direction, it will Move forwards the full distance of its Move Value in a straight line. A War Beast ignores enemy Control Zones, and any model it comes into base contact with whilst it Tramples (not whilst pivoting) will suffer a number of Impact Hits; the exact number and Strength of these Impact Hits will be stated in the War Beast model's profile. Cavalry models suffer these Impact Hits on both the rider and Mount.
If the model is slain, the War Beast will continue with its Trample. If the model is not slain then the War Beast will stop and move into base contact with them, counting as Charging and be Engaged in Combat. A War Beast affected by a Heroic March can still Trample as normal.
When a War Beast Tramples, it may cross any obstacles that are 2" or smaller without penalty; though it cannot cross any Obstacles higher than this. A War Beast is unimpeded by Difficult Terrain or water features, and may Trample through them as normal; however, a War Beast cannot enter a piece of woodland terrain. A War Beast cannot make Jump, Climb or Leap Tests, cannot Lie Down and cannot defend a Barrier.
If a War Beast comes into contact with a piece of terrain it cannot cross, or hits the edge of the battlefield, then it will immediately stop. If a War Beast comes into contact with another War Beast then it will inflict three Strength 8 hits on it and will suffer three Strength 8 hits in return.
A War Beast can still be Activated even if it has been Charged, and may even still be able to Trample. If, when a War Beast is Activated, the combined Strength of enemy models that have Charged it is higher than that of the War Beast, then it cannot Trample and must remain stationary. However, if the combined Strength of enemy models that have Charged it is equal to or less than that of the War Beast, then it may Trample as described above. If it does, then all enemy models that had Charged it must be Trampled first, before the War Beast pivots, and will all be Trampled simultaneously.
A War Beast that is entering the board via the rules for Reinforcements cannot Trample any models on the turn in which it arrives.
Example 77: These Mûmakil have been Charged and Engaged in Combat before they have been Activated. The Mûmak on the left has been Charged by Théoden and three Riders of Rohan, whose combined Strength adds up to 13 – this Mûmak cannot Trample. The Mûmak on the right has been Charged by two Riders of Rohan, whose combined Strength adds up to 6, which is less than the Mûmak's Strength. The right Mûmak can therefore Trample, and does so on the two Riders of Rohan it is in Combat with first, killing them both. It may then pivot and Trample as normal.
The Commander – The Commander of a War Beast is always in a fixed position on the War Beast, and whilst riding it may not Move from that position. Should the Commander be slain whilst riding a War Beast, then another model in the Howdah immediately takes their place as the new Commander – move the model to the Commander's position if required. Any Heroic Moves or Heroic Marches that the Commander declares will always affect their War Beast, and if they shout With Me or At the Double, then it will only affect the War Beast and any models in the Howdah.
A War Beast may only ever benefit from a Heroic Move or Heroic March declared by their Commander, and may never benefit from a Heroic Combat unless specifically stated otherwise.
The Commander can never make Shooting Attacks.
Moving within the Howdah – Models in the Howdah may Move as normal, treating the Howdah as Open Ground, including Moving up levels if the Howdah has them. Models in the Howdah cannot leave it unless they have a special rule that specifically states otherwise. Models in a Howdah cannot Lie Down, and if knocked Prone must Stand Up as quickly as possible. Models in the Howdah that remain stationary will not count as having Moved for the purpose of Shooting, regardless of how far the War Beast has Moved.
Models in the Howdah cannot be knocked out of it, and if they would be forced out of the Howdah they will simply be knocked Prone where they stand instead. This includes the Commander.
War Beasts and Magic
Models may target a War Beast with Magical Powers, though must select either the Commander, one of the models in the Howdah or the War Beast as the target. Magical Powers that affect all models in a given range will affect the War Beast, and the Commander/models in the Howdah if they are in range.
A War Beast is completely immune to any Magical Power that would prevent it from Activating, moving its full Move Value, or that would attempt to Move it.
If the Commander is affected by a Magical Power (or special rule) that would prevent it from Activating, then this will only affect the Commander. The War Beast will still Activate as normal, however, it will not be able to pivot before it Tramples. Additionally, in these instances, the War Beast cannot use the Commander's Courage if it is required to take any Courage Tests to see if it Stampedes, and must instead use its own.
War Beasts and Shooting
Being such massive creatures, Shooting at a War Beast can throw up some interesting situations, which we will cover here.
Shooting at a War Beast – A War Beast can be shot at as normal, and the Howdah never counts as In The Way of the War Beast. Additionally, a War Beast will always have the Large Target special rule. Models in the Howdah, including the Commander, are considered to be separate models and so can be shot at separately (unless otherwise stated).
If a Siege Engine Shoots at the Howdah, or a model in the Howdah, and rolls a Slight Deviation on the Scatter Chart, then it will automatically be allocated to the War Beast.
The Howdah is always considered to be In The Way for any model in the Howdah, or for the Commander, regardless of how clearly it may seem they can be seen.
Shooting from a War Beast – Models in a Howdah are never considered to be Engaged in Combat and so can always Shoot as normal, measuring the range and Line of Sight from each individual model. Models in the Howdah may Shoot regardless of how far the War Beast has Moved, so long as they themselves haven't Moved over half their Move Value or gone up or down a level.
War Beasts and Combat
When a War Beast is in a Combat, then it is the War Beast itself that is considered to be fighting and not the Commander, and so the Commander cannot contribute any of its characteristics, use Might Points to influence the Duel Roll or To Wound Rolls, or declare any Heroic Actions that would affect the Combat, unless they have a rule that specifically states otherwise. However, as it is the Commander that is controlling the War Beast, any kills the War Beast makes in a Combat are attributed to the Commander themselves.
Irresistible Force – If a War Beast ends a Trample in base contact with an enemy model, then it will count as Charging them and will fight them as normal in the Fight Phase. If the War Beast wins the ensuing Combat, then all enemy models involved in the Combat with a Strength of equal to or lower than that of the War Beast will be knocked Prone.
Immovable Object – A War Beast can never be knocked Prone for any reason, cannot be Hurled or Barged, and never counts as Trapped. Additionally, a War Beast will never Back Away if it loses a Combat – its opponents must Back Away instead. The only exception is if the War Beast is fighting another War Beast, or a model with a similar special rule (such as Smaug). In these instances, the smaller of the two models will Back Away. If both are the same size, roll a D6. On a 1-3 the Evil player's model will Back Away, on a 4+ the Good player's model will Back Away.
War Beasts and Damage
When wounded, there is the chance that a War Beast will lose control and Stampede, causing it to careen uncontrollably across the battlefield.
Stampede – Each time a War Beast suffers a Wound, it must take a Courage Test using the Courage value of the model currently commanding it. This is an exception to taking multiple Courage Tests of the same type in the same turn. If there is no model commanding it, use the Courage value of the War Beast itself. If any of these Courage Tests are failed, the War Beast will Stampede at the start of its next Activation. If a player has a War Beast that is going to Stampede during its Activation at the start of their Activation Phase, then they must Activate the War Beast first and cannot choose not to Activate it.
Additionally, if a War Beast begins its Activation with no models riding it, then it must take a Courage Test using its own Courage value. If it fails, it will immediately Stampede.
The Commander of a War Beast may use Might and Will to improve the result of this Courage Test as normal.
When a War Beast Stampedes, the opposing player may pivot the War Beast to face any direction (as described earlier) and then have it Trample its full Move Value in that direction, exactly as described earlier.
If, when a War Beast Stampedes, it comes into contact with a piece of terrain it cannot cross, or another War Beast, then it will immediately inflict three Strength 8 hits on it (if applicable) and will suffer three Strength 8 hits in return.
If, when a War Beast Stampedes, its Move would take any part of its base off the board, it is removed as a casualty along with any models riding it. When a War Beast Stampedes, then any models riding it cannot make Shooting Attacks that turn.
At the end of an Activation in which a War Beast Stampedes, it will revert back to the control of its controlling player.
Slain War Beasts – Should a War Beast be slain, then the Howdah (if any) is also destroyed and any models riding the War Beast will suffer Falling Damage. If any survive, place them Prone and within the footprint of the base of the War Beast.
Chariots
Some armies in Middle-earth utilise more than just cavalry to charge into the fray, mounting their warriors upon great chariots drawn by multiple steeds and designed to smash through enemy ranks leaving a trail of crumpled armour and broken bodies in their wake. Though chariots are less manoeuvrable than the standard cavalry, they make up for it with pure wanton destruction on the battlefield; and there are few in Middle-earth that can survive the full-force charge of an armoured chariot.
A Chariot is an unusual model in that, unlike a War Beast or Cavalry, it is represented by a single combined profile rather than being made up of constituent parts. Chariot models have a number of rules that govern how they work, all of which will be explained in this section. A Chariot is a single model, and therefore will count as a single model towards working out an army's Break Point, and will count as a single model if slain, and any other situation that refers to a number of models.
A Chariot automatically passes all Courage Tests for being part of a Broken Army.
Chariots and Movement
A Chariot does not Move in the normal way. Instead, when it Moves it will Chariot Charge as described below.
Chariot Charge – When a Chariot Activates and Moves, it does so by performing a Chariot Charge. A Chariot must Move if able. To Chariot Charge, pivot the Chariot around the centre point of the base up to 45° using the Chariot Pivot Template, placing its 'X' over the centre of the Chariot model's base with the dashed line facing forwards and then pivoting it. If the Chariot comes into contact with other models when pivoting, simply move them out of the way by the shortest route to allow the Chariot to finish its pivot. If the Chariot comes into contact with terrain whilst pivoting, move the Chariot away just enough to finish its pivot.
The Chariot will then Chariot Charge up to its Move Value in a straight line. After each full 4" of Move Value the Chariot has Moved, it may pivot again as described above before continuing its Chariot Charge.
A Chariot ignores enemy Control Zones, and any model it comes into base contact with during its Chariot Charge (not whilst pivoting) will suffer a number of Impact Hits; the exact number and Strength of these Impact Hits will be stated in the Chariot model's profile. Cavalry models suffer these Impact Hits on both the rider and Mount.
If the model is slain, the Chariot will continue with its Chariot Charge. If the model is not slain, the Chariot will stop Moving and remain in base contact with them, and will count as Charging and be Engaged in Combat. A Chariot affected by a Heroic March can still Chariot Charge as normal.
A Chariot will halve its Move Value whilst within Difficult Terrain as normal, though may still Chariot Charge through it if needed. However, a Chariot that spends any of its Chariot Charge in Difficult Terrain must roll a D6; on a 1, the Chariot immediately suffers a Wound. A Chariot cannot make Jump, Climb, Leap or Swim Tests, cannot lie down and cannot defend a Barrier.
If a Chariot comes into contact with an Obstacle, then it will inflict three Strength 6 hits upon it, and will suffer three Strength 6 hits in return.
A Chariot may choose to forego its Chariot Charge and instead pivot to face any direction, in which case it may not Chariot Charge that turn.
A Chariot that is entering the board via the rules for Reinforcements cannot Chariot Charge any models on the turn in which it arrives.
Chariots and Magic
As a Chariot is all one model, any Magical Power (or special rule) that targets the Chariot will affect the whole model. A Chariot is completely immune to any Magical Power (or special rule) that would prevent it from Moving, or attempt to Move it against its will. If a Chariot is affected by a Magical Power (or special rule) that would prevent it from Activating, then it will simply not be able to Activate that turn.
Chariots and Shooting
Some Chariot models will have the ability to make Shooting Attacks. Those that do can still Shoot regardless of how far the Chariot has moved, and do not suffer the -1 penalty for Moving and Shooting.
Some larger Chariot models may also be able to Shoot whilst Engaged in Combat. Where this is the case it will be stated in their profile.
Shooting at a Chariot – As mentioned earlier, a Chariot is essentially a single model with a combined profile. As such, models cannot target different parts of the Chariot individually – it is all one model.
Chariots and Combat
If a Chariot ends a Chariot Charge in base contact with an enemy model, then it will count as Charging them and will fight them as normal in the Fight Phase. A Chariot that Charged gains a bonus of +1 Attack in the following Fight Phase. If the Chariot wins the ensuing Combat, then any enemy Infantry or Cavalry models involved in the Combat, that don't also have the Monster keyword, will be knocked Prone.
Once a Chariot has lost all of its Wounds, the entire model is removed as a casualty.
Immovable Object – A Chariot can never be knocked Prone for any reason, cannot be Hurled or Barged, and never counts as Trapped. Additionally, a Chariot will never Back Away if it loses a Combat – its opponents must Back Away instead. The only exception is if a Chariot is fighting another Chariot or a model with a similar special rule (such as Smaug). In these instances, the smaller of the two models will Back Away. If both are the same size, roll a D6. On a 1-3 the Evil player's model will Back Away, on a 4+ the Good player's model will Back Away.
Chariots and Heroes
Some Hero models can be upgraded to ride a Chariot. When this is the case, they will still count as a single model. Additionally, the Hero will provide their own Fight Value, Strength, Courage and Intelligence to the Chariot if they are better, and will add their Attacks characteristic to that of the Chariot. The Hero may use their Might Points to influence any rolls the Chariot makes, with the exception of Impact Hits. A Hero riding a Chariot cannot declare a Heroic Combat whilst on the Chariot, unless otherwise stated. A Hero riding a Chariot may also use its Will Points to Resist any Magical Powers that target the Chariot, and to affect any Courage Tests the Chariot takes.
The Hero will still have its own Wounds characteristic, and is wounded separately from the Chariot. If the Chariot is slain then the Hero is not removed, and instead is immediately dismounted as if it had rolled the Knocked Flying result on the Thrown Rider Chart. A Hero riding a Chariot may use its Fate Points to attempt to prevent Wounds on the Chariot. Enemy models cannot Shoot at or Strike the Hero separately; they must target the Chariot.
Any kills the Chariot makes in Combat (not Impact Hits) are associated to the Hero.
A Hero who has been upgraded to ride a Chariot may choose to Dismount in the same manner as a Cavalry model; however, the effect of doing so may differ between the specific types of Chariot, and will be listed in the profile for the Chariot.
Weapons and Wargear
The weapons used in warfare within Middle-earth come in all manner of types, shapes and sizes. From the elegantly crafted and finely balanced blades of the Elves to the hardened axes of the Dwarves wrought out of steel and iron, and the crude and wicked weapons of the Orcs: weapons can take all kinds of forms. There are even some weapons that have, through their valorous use in battle and their wielder's epic deeds, themselves been forged into legend.
Up until now, we have made no distinction as to what a model is armed with, what type of armour it may be wearing or any other wargear they may be carrying, such as banners or war horns. The Strategy Battle Game has a variety of different weapons and wargear that models can use in battle, many of which will have a massive impact on their effectiveness, and in this section we are going to cover what these all do.
In each model's profile it will state all the pieces of wargear they carry, such as weapons, armour, equipment and sometimes pieces of wargear unique to them (which will be detailed in their profile). Some profiles will also have a section stating any additional wargear the model can purchase.
This section is split into two sections: Weapons and Wargear.
Weapons
Weapons are what models use to try to cause damage, and can be split into Melee Weapons and Missile Weapons.
Melee Weapons – Melee Weapons are used by models in Combat during the Fight Phase in order to try to wound each other. There may be cases where a model may be armed with multiple types of Melee Weapon. In these instances, the model's controlling player must decide which Melee Weapon is being used before the Duel Roll is made. Here we will explain the various types of Melee Weapons and what they do.
Hand Weapon – These are the standard kind of weapon a model may carry, and is anything wielded in a single hand, such as a sword, an axe, a mace or all manner of other weapons. The exact kind of weapon being carried doesn't matter; all hand weapons function the same. A hand weapon has no specific rules attached to it.
Two-handed Weapon – A two-handed weapon is the kind that requires two hands to wield; as a result, a model wielding a two-handed weapon cannot use any other wargear that would also require the use of a hand (such as a shield) in the same Combat in which they use a two-handed weapon. If the only Melee Weapon a model carries is a two-handed weapon, then they must use it in a Combat – they cannot choose not to.
When a model fights with a two-handed weapon in a Combat, they suffer a -1 penalty to their Duel Roll. However, if the model rolls a natural 6 for their Duel Roll, they do not suffer this penalty. When a model with a two-handed weapon makes a Strike against an enemy model, they apply a +1 modifier to their To Wound Roll – so a 3 would become a 4, a 4 would become a 5, and so on. In the case of when two rolls are required (such as needing a 6+/4+), this will affect both rolls.
Hand-and-a-half Weapon – A model armed with a hand-and-a-half weapon can choose to fight with it as either a hand weapon or a two-handed weapon. When a model with a hand-and-a-half weapon takes part in a Combat, they must decide if they are using their weapon as a hand weapon or a two-handed weapon before they make their Duel Roll.
Unarmed Models – Some models don't carry any weapons at all; such models are said to be Unarmed. A model is only ever considered to be Unarmed if their profile explicitly states so, or if they started the game with some form of weapon and those weapons have been lost or destroyed during the course of the game. An Unarmed model suffers a -1 penalty to any Duel Roll they make, and also suffers a -1 penalty to any To Wound Rolls they make when making Strikes.
Spear – An Infantry model armed with a spear may assist a friendly model during a Combat, so long as their ally has the same base size or smaller – this is called Supporting.
If a spear-armed model is not Engaged in Combat, then it can Support a friendly model in base contact. When they do, they contribute a single dice to the Duel Roll of the Combat the model they are Supporting is part of. This dice uses the Supporting model's own Fight Value, and if they win they will make a single Strike using their own Strength. In a Multiple Combat, a Supporting model doesn't have to Strike the same model as the model it is Supporting.
Models that are Supporting do not count as being involved in the Combat they are Supporting. As a result, they cannot be targeted by Strikes, will not be knocked Prone by a Charging Cavalry model, cannot benefit from a Heroic Combat, and never count as being part of the Combat for the purpose of special rules or determining how many models are taking part on each side.
A spear-armed model can only Support a single Combat during each Fight Phase. A spear-armed model cannot Support a Combat after already being Engaged in Combat. The only exception to this is that a spear-armed model that is involved in a successful Heroic Combat, and therefore gets to Move, may Move to Support a Combat, provided it hasn't Supported another Combat that Fight Phase.
A model with a spear can use it as a hand weapon when they are Engaged in Combat. A model can't Support if it is Prone, rendered unable to Activate or has made a Shooting Attack during the same turn.
A Hero that is Supporting may use Might Points to improve a Duel Roll or To Wound Rolls as normal. However, a Hero that has declared a Heroic Action in the Fight Phase cannot Support during that Fight Phase.
Example 78: Wulf is fighting a pair of Warriors of Rohan, and so a Hill Tribesman with a spear has come to aid him. Because the Hill Tribesman is in base contact with Wulf, they can Support. In the Duel Roll, the controlling player will roll three dice for Wulf as usual, and one extra dice for the Hill Tribesman.
Pike – Pikes function in much the same way as spears, and allow models to Support in exactly the same way as those armed with a spear.
Additionally, a model armed with a pike can Support another friendly model armed with a pike that is Supporting a friendly model Engaged in Combat – essentially giving two Supports to the same model.
A pike requires two hands to use, and so a model armed with a pike will suffer a -1 penalty to their Duel Rolls if they are armed with a shield or a Missile Weapon.
As models armed with pikes can effectively Support at three models deep (one Engaged in Combat and two Supporting), it can be very easy to cause your own models to be Trapped, as only one model may Back Away not two. This is the risk of Supporting in such depth.
Additionally, if a Cavalry model Charges a model armed with a pike, then the model with a pike will gain a bonus of +1 To Wound when making Strikes against the Mount in the ensuing Combat.
Example 79: This Uruk-hai Captain is holding the centre of a battleline. Because the Uruk-hai Captain is Supported by two Uruk-hai Warriors with pike, in addition to its own 2 Attacks, the controlling player will roll an additional two dice in the Duel Roll – one for each Supporting Uruk-hai with pike.
Lance – A Cavalry model using a lance applies a +1 modifier on any To Wound Rolls when making Strikes in a Combat in which it Charged. This modifier is not applied if the Cavalry model Charges whilst within Difficult Terrain.
If a Cavalry model Dismounts or loses their Mount, then they must discard their lance.
Staff of Power – A Staff of Power is a hand-and-a-half weapon. Additionally, the wielder of a Staff of Power gains a free Will Point at the start of each turn. If this free Will Point is not spent by the end of the turn, it is lost.
Fire-based Attacks – Some weapons, special rules, or even Magical Powers will say they are fire-based attacks. This has no inherent effect, though some models may be immune to fire-based attacks. A weapon, special rule, Magical Power, etc., is only a fire-based attack if it specifically states so in its profile.
War Spear – A war spear follows the rules for a spear when wielded by an Infantry model, and follows the rules for a lance when wielded by a Cavalry model. The only exception is that a Cavalry model doesn't have to discard the war spear when they Dismount or lose their Mount.
Whip – A whip counts as a throwing weapon with a Strength of 1 and a range of 2". It can also be used as a hand weapon in a Combat.
Elven Weapon – Some weapons will be described as an Elven weapon; for example, a model may have an Elven hand weapon or an Elven two-handed weapon.
If a model fights with an Elven weapon in a Combat, they will be more likely to win the Duel Roll in the result of a Drawn Combat. In these instances, a Good model armed with an Elven weapon will win the roll-off on a 3+, whilst an Evil model armed with an Elven weapon will win the roll-off on a 1-4. If both sides have an Elven weapon, neither side gains the benefit.
Some Missile Weapons may also be classed as Elven weapons; however, the above bonus only applies to Melee Weapons as a model cannot choose to fight with a Missile Weapon in a Combat.
Any weapon with the word 'Elf' in its name is automatically considered to be an Elven weapon.
Master-forged – Some weapons may be classed as Master-forged. A model using a Master-forged weapon doesn't suffer the -1 penalty to the Duel Roll for using it as a two-handed weapon.
Missile Weapons
Missile Weapons are used during the Shoot Phase to make Shooting Attacks, and come in all shapes and sizes. If a model has a Missile Weapon it will be listed in their profile; some models may be able to purchase Missile Weapons. In some cases, a model may be armed with multiple Missile Weapons. In these instances, their controlling player must decide which Missile Weapon is being used to make the Shooting Attack before rolling To Hit – they cannot use both.
All Missile Weapons have a range and a Strength, which are used when measuring the range of the Shooting Attack and when making any To Wound Rolls for successful hits caused by the Missile Weapon.
Throwing Weapons – A model with a throwing weapon can make a Shooting Attack with it in the Shoot Phase, even if it Moved its full Move Value in the preceding Move Phase.
Alternatively, once per turn, a model may make a Shooting Attack with a throwing weapon during the Move Phase as it Charges an enemy model. If a model wishes to use a throwing weapon in this manner, then when it Charges it will stop 1" away from the model it wishes to Charge, and then make a Shooting Attack against the model. If the model using the throwing weapon begins its Move within the Control Zone of an enemy model it wishes to Charge, then it doesn't need to Move first before throwing the weapon. This is made using all the normal rules for a Shooting Attack, with the exception of that throwing weapons thrown in this manner do not suffer the -1 penalty To Hit for Moving and Shooting.
If the target is not slain, then the model continues their Charge as normal and must Charge the target of their Shooting Attack. If the target is slain, then the model may continue to Move as normal, and may even Charge a different target if they wish.
Throwing weapons do not count towards an Army's Bow Limit. However, an Army can only have one third of its models armed with throwing weapons, unless specifically stated otherwise.
Throwing spears follow the same rules as throwing weapons, but have a slightly different profile, as shown on the Missile Weapon Chart.
Missile Weapon Chart
| Name | Range | Strength |
|---|---|---|
| Blowpipe | 12" | 2 |
| Bow | 24" | 2 |
| Crossbow | 24" | 4 |
| Dwarf bow | 18" | 3 |
| Dwarf longbow | 24" | 3 |
| Elf bow | 24" | 3 |
| Esgaroth bow | 24" | 3 |
| Great bow | 24" | 4 |
| Longbow | 24" |
Bow – The term bow covers a wide range of Missile Weapons, including bows, longbows, Elf bows, Dwarf bows, and so on – essentially any Missile Weapon with 'bow' in its name (with the exception of a crossbow). All bows function the same; a model can make a Shooting Attack with a bow during the Shoot Phase provided it has not Moved over half its Move Value during the preceding Move Phase.
The only difference between the various types of bow will be the Strength and range of that particular bow, as shown on the Missile Weapon Chart above.
Crossbow – A model with a crossbow cannot make a Shooting Attack with it in the same turn in which it Moved.
Blowpipe – A model with a blowpipe can make a Shooting Attack with it in the Shoot Phase provided it has not Moved over half its Move Value during the preceding Move Phase. Additionally, a blowpipe benefits from the Poisoned Attacks special rule.
Blowpipes do not count towards an Army's Bow Limit.
Sling – A model with a sling can make two Shooting Attacks with it in the Shoot Phase, providing they did not Move at all during the preceding Move Phase. If the model Moved up to half their Move Value in the preceding Move Phase, they may make a single Shooting Attack. If they Moved over half their Move Value in the preceding Move Phase, they may not make a Shooting Attack in the Shoot Phase.
Wargear
Wargear can be loosely described as the items that models use during a fight that aren't used as weapons. Wargear can be split into two types: equipment and armour. There is also a section for the most powerful piece of wargear of all – the One Ring.
Equipment – Equipment are the kinds of wargear that are commonly seen on the battlefield, and are all used to gain some form of advantage during the course of a battle. From banners that fly the colours of their lord to inspire their followers, to the likes of horns and drums used to rouse warriors to march in quick time or steel themselves against foreboding odds – equipment can take many forms.
Example 80: Here a Warrior of Minas Tirith carrying a banner is within 3" of four different Combats: A, B, C and D. The Warrior of Minas Tirith in Combat A is within 3" of the banner bearer, and so may benefit. Combat B may benefit as it has one friendly model within 3" of the banner, allowing either model to re-roll even if they are not in range of the banner themselves. Combat C may also benefit from the banner as it has a Supporting model within 3" of the banner. Combat D may not benefit as, even though it is within 3" of the banner, only enemy models are in range.
If a Warrior carrying a banner (not a Hero) is removed from the battlefield as a casualty for any reason (such as being slain or fleeing the board as the result of being part of a Broken Army), then they may pass their banner onto another friendly Warrior model in base contact. However, they cannot pass their banner onto a model that is Prone, Engaged in Combat or to a model that could not normally take a banner as part of their profile. Swap the models over if they are the same type of Warrior, or find a suitable model in your collection. When a model takes a banner in this manner, it will count as having the wargear its profile allows it to have when it is upgraded to carry a banner as part of its profile, and will drop all others. So, if a Warrior of Minas Tirith with a spear and shield were to pick up a banner, it would have to drop its shield and spear as a Warrior of Minas Tirith that has a banner does not also have a spear and shield.
Banner – A banner has a 3" area of effect that extends out from the model carrying the banner (although some special banners may have a larger range). If a friendly model is within the range of one or more friendly banners, can draw Line of Sight to that banner, and is either Engaged in Combat or Supporting a friendly model, then that Combat is affected by the banner. If a Combat is affected by a banner then a single friendly model in that Combat (including a Supporting model) can re-roll a single dice in the Duel Roll. If a Combat is affected by multiple friendly banners, then this will still only allow a single dice to be re-rolled as part of the Duel Roll, not one for each banner. A model cannot use a banner to re-roll a dice in a Duel Roll that the model is currently winning, in order to try to lose the Combat.
A banner must be flying in order to inspire its followers. If a model carrying a banner is Prone, then friendly models cannot benefit from it, or any special rules associated with the banner if applicable.
If a Hero has a special rule that means that friendly models in a certain range treat them as a banner, then the Hero must be standing in order for the effect of the banner to be applicable.
It is possible that one player will use their banner to re-roll a dice and then find themselves winning the Duel Roll, in which case their opponent may wish to use a banner of their own. This is perfectly fine, though each side may still only re-roll a single dice as the result of using a banner or a special rule that counts as a banner.
If a banner states that it only affects models with certain keywords, then those models must be in range of the banner themselves for the banner to affect that Combat, and only those models may re-roll a dice as a result of the banner.
A model carrying a banner suffers a -1 penalty to their Duel Rolls.
Elven Cloak – A model wearing an Elven cloak has the Stalk Unseen special rule. Additionally, models targeting an Infantry model wearing an Elven cloak with a Shooting Attack suffer a -1 penalty when rolling To Hit.
War Drum (X) – A model with a war drum may use it during the Declare Heroic Actions step of each Move Phase to declare a Heroic March for free, without spending a Might Point, even if they are not a Hero. This free Heroic March has the following exceptions:
- A model with a war drum that declares a Heroic March must always shout At the Double.
- The range of this At the Double is 12" rather than 6". Additionally, friendly models must finish their Activation within 12" rather than 6".
- The Heroic March declared when a model uses a war drum will only affect friendly models with the same keywords as the ones shown in brackets after the war drum. So if a model has a war drum (Mordor) then it will only affect models with the Mordor keyword.
As a war drum allows a model to declare a free Heroic March, models cannot be affected by both a war drum and a normal Heroic March in the same turn.
War Horn – Models within 24" of a friendly model with a war horn gain a bonus of +1 to any Courage Tests they take. Additionally, a model with a war horn gains the Dominant (2) special rule and can use it once per game to increase the range of a friendly Hero model's Stand Fast by 3", so long as the model with the war horn is in range of the Hero model's Stand Fast before this increase. If a Hero model has a war horn themselves, they may use it to increase the range of their own Stand Fast by 3" instead. A war horn is treated as an Active ability.
Armour
Armour is designed to protect the wearer from harm, deflecting blows or stopping otherwise wounding attacks from injuring its wearer. Armour provides a bonus to the wearer's Defence characteristic. Where a model is listed as having a type of armour in its profile, then the improvement in its Defence characteristic will already have been included in their profile. If a model has the opportunity to upgrade one type of armour to another, then they will replace one with the other – they will not get the Defence benefits of both.
Shields are also covered in this section; however, they are not considered to be a type of armour and so any rules that affect armour will not affect a shield.
Armour – A model wearing armour will add 1 to their Defence characteristic.
Light Armour – A model wearing light armour will add 1 to their Defence characteristic against Shooting Attacks. If a model is wearing light armour then the Defence improvement will not have been added onto their profile.
Heavy Armour – A model wearing heavy armour will add 2 to their Defence characteristic.
Heavy Dwarf Armour – A model wearing heavy Dwarf armour will add 3 to their Defence characteristic.
Mithril Armour – A model wearing Mithril armour will add 3 to their Defence characteristic. Additionally, Monster models cannot use the Rend Brutal Power Attack against a model wearing Mithril armour.
Shields
A model carrying a shield adds 1 to their Defence characteristic. Where a model is listed as carrying a shield in its profile, then the improvement in its Defence characteristic will already have been included in their profile.
A shield is cumbersome, and so a model carrying a shield that wishes to use their hand-and-a-half weapon as a two-handed weapon during a Combat cannot gain the Defence bonus for carrying a shield during that Combat. Additionally, a model carrying a shield does not gain the Defence bonus if it also carries a type of bow, crossbow, two-handed weapon or pike.
A model with a shield can also use the Shielding special rule:
Shielding – A model carrying a shield may declare they are Shielding at the start of a Combat they are involved in, before the Duel Roll is made. If they do, the Shielding model will double their Attacks characteristic for the duration of the Combat; however, if they win the Duel Roll they cannot make Strikes having put their effort into surviving. They also don't gain any advantages of the special rules of their weapons (such as if they have an Elven weapon) as they are not using them in the Combat and are using their shield instead.
In a Multiple Combat, if one model wishes to declare they are Shielding, then all friendly models must do so. If some of them cannot, then no models may declare they are Shielding. Models that are Shielding cannot be Supported.
Cavalry models cannot declare they are Shielding. Additionally, Shielding is treated as an Active ability.
A Prone model can declare they are Shielding – in fact, it is a sensible way of trying to get them to stand back up as a Prone model can't make Strikes anyway!
Light Shield – A model with a light shield does not gain a bonus to its Defence. However, it may use the Shielding special rule as described above.
The One Ring
Forged in the fires of Mount Doom by the Dark Lord himself, the One Ring contains great power that can be used to devastating effect, yet may corrupt those who wear it for too long.
A model who carries the One Ring is referred to as the Ringbearer.
Wearing the Ring – A Ringbearer can put on the One Ring at any point during their Activation. As soon as they do they benefit from the Invisible special rule. A Ringbearer who is unable to Activate (such as if they are Engaged in Combat) cannot put on the Ring.
If a model puts on the Ring whilst they are mounted, then their Mount will immediately bolt and flee the battlefield (the Mount is therefore removed), and the model must immediately take a Thrown Rider Test.
Sauron's Will – If a Ringbearer begins its Activation wearing the One Ring, then their controlling player must test to see if the model can overcome the call of the Ring. To do this, the Ringbearer's controlling player rolls a D6 before doing anything else for the Ringbearer during their Activation. A Hero may use Might to improve this roll. On a 3+, the Ringbearer is able to keep control and may Activate as normal. However, on a 1-2 the opposing player may Move the Ringbearer during their Activation, and may even make them Charge – in this case, the model passes all Courage Tests for the Terror special rule. The opposing player cannot make the Ringbearer remove the Ring when they Move them.
The opposing player cannot make the Ringbearer pick up or put down items, perform anything that may bring the Ringbearer to harm (such as Jumping off a cliff or making a Leap Test), or make them leave the board in Scenarios that allow it.
It's important to note that even when an opposing player gets to Move the Ringbearer in this manner, they are still part of their controlling player's Army, and all other actions such as Shooting, fighting in Combat, or anything else the Ringbearer can do remains under the control of their controlling player.
Removing the Ring – Such is the hold of the Ring, that any model who is wearing it and wants to remove it must take a Courage Test. This can be done at any point in the model's Activation, though after making the roll for Sauron's Will (if applicable). If the model fails this Courage Test then they cannot take the Ring off this turn and must wait until the following turn to try again.
My Precious! – During a Matched Play game, if the Ringbearer is the only model left on their side and is Invisible (i.e., they are wearing the Ring), then they succumb to the call of the Ring and are removed as a casualty. If the opposing side's objective is to kill the Ringbearer, then this is still achieved if the Ringbearer is removed in this manner.
There may be the odd occasions in Matched Play games where there is more than one model on the battlefield who can carry the One Ring. As the One Ring is unique, there is a hierarchy as to who carries the One Ring in the case of multiple Ringbearers. The model closest to the top of the hierarchy table below will get to use the Ring – the other will not be a Ringbearer at all for that battle.
- The Dark Lord Sauron
- Isildur
- Bilbo Baggins or Bilbo Baggins, Master Burglar
- Frodo Baggins
- Bilbo Baggins, Ageing Hobbit
- Gollum
In the rare situation where both players have a Ringbearer, and both are at the same highest point on the hierarchy table, then both may carry the One Ring – though one of them is clearly a fake, and only the winner can claim that theirs was the real One Ring!
Magic
Certain individuals within Middle-earth have the ability to harness magic, utilising all manner of arcane powers to subtly affect those around them and have an impact on the course of a battle. From cunning weaves designed to manipulate a foe, noble powers used to protect allies from harm, to dark sorceries that are used maliciously to weaken and cripple a target, and perhaps even inflicting death, magic has countless forms. Those that can conjure such magic can be a valuable ally – or a terrible foe to be on the wrong side of...
A number of models in the Strategy Battle Game can utilise Magical Powers, providing them with an alternative way of being effective on the battlefield. Though magic may not be a dominant force, bringing ruin upon an army in a fiery cataclysm (magic in Middle-earth is typically a subtle affair), the use of a well-timed power can be crucial in altering the outcome of a battle. It is folly to underestimate the power of a Wizard or a servant of the Dark Lord, and those that do may often find themselves confounded by illusion or on the wrong end of a magical barrage.
Using Magical Powers
Models that can use Magical Powers will have a section in their profile listing the Magical Powers they have the ability to Cast. Casting Magical Powers requires a model to spend Will Points and so, typically speaking, a model must have Will Points remaining in order to Cast a Magical Power. A model with no Will Points remaining cannot Cast a Magical Power. A Prone model cannot Cast a Magical Power.
When can you use a Magical Power? – A model with Magical Powers (and Will Points remaining) can attempt to Cast a single one (and only one) during their Activation. They can use their Magical Power at any point during their Activation, after any abilities that must happen at the start of their Activation. This means that a model could Cast a Magical Power before their Move, after their Move, or even part way through their Move should they wish. A model that is Flying must land in order to Cast a Magical Power, and so cannot Cast a Magical Power whilst it is above other models.
A model can use a Magical Power in the same turn in which it Charges, and even if it decides not to Move. If a model enters the Control Zone of an enemy model and then Casts a Magical Power that means they are no longer in that model's Control Zone, then they are not obliged to Charge that model unless they then enter that model's Control Zone during their remaining Move. A model that cannot Activate for whatever reason cannot then Cast Magical Powers that turn.
Who can you target? – Magical Powers come in three basic types: those that target a specific model, those that target all models within a given range, and those that don't target any specific model. Who, or what, the Magical Power can target will be stated in the description of the Magical Power.
A model can be the target of a Magical Power even if it is Engaged in Combat, unless the rules for the Magical Power state otherwise.
When a Magical Power targets a Cavalry model, then it will target the whole model (and both parts will be affected) unless it specifically states that the caster must choose either the rider or the Mount to be the target. In these instances, the caster must declare if the rider or the Mount is the target before making the Casting Roll.
Good models cannot Cast a Magical Power if by doing so they would risk wounding a friendly model.
Check Range and Line of Sight – A model will need Line of Sight to the target in order to Cast a Magical Power upon them. The range of a Magical Power will be listed either in the model's profile, or sometimes in the description for the Magical Power itself. If the range is listed as 'self' then the Magical Power must target the caster themselves.
Making a Casting Roll – To Cast a Magical Power, the model must take a Casting Test. Every Magical Power will have a Casting Value, which is given as a dice score and can be found in the model's profile. Some models will be able to Cast certain Magical Powers easier than other models can – after all, mastery of magic just comes easier to some than it does to others!
To make a Casting Test, the model's controlling player states which Magical Power they are using, what they are targeting, and declares how many Will Points they are spending to attempt to Cast that Magical Power. For each Will Point spent, the caster rolls a D6. The model must decide how many Will Points they are spending before making their Casting Test – they cannot roll some, see the result, and then roll more. If the result of any of the dice rolled equals or beats the Casting Value of the Magical Power, then it has been successfully Cast – resolve the effects as stated in the Magical Power's description.
If none of the dice equal or beat the Casting Value, then the Magical Power has not been Cast and has no effect. Hero models can spend Might Points to improve the result of their Casting Test, but must do so before the target attempts to Resist, if applicable.
Resisting a Magical Power – If a model is targeted by a Magical Power, then there is a chance that they can Resist its effects. After the Casting Roll has been made, but before applying the effects of the Magical Power, a model must decide if it wants to spend any Will Points to make a Resist Test.
For each Will Point spent, the model making the Resist Test will roll a D6. If any of the dice rolled equal or beat the highest score in the Casting Test, then the Magical Power has been resisted and has no effect. The model must decide how many Will Points they are spending before making their Resist Test – they cannot roll some, see the result, and then roll more. Hero models may use Might to improve the result of their Resist Test.
If, when making a Resist Test, a Hero rolls a dice that results in a natural 6, they immediately regain the Will Point spent to roll that dice. Note that rolling a natural 6 on dice from a 'free' Will Point (such as from Heroic Resolve or Resistant to Magic) does not confer this effect – the Will Point was already free!
If a Magical Power targets a specific part of a Cavalry model, then either part of the model may attempt to Resist its effects, regardless of whether or not they were the targeted part of the model.
Some models may be indirectly affected by a Magical Power – for instance, a model may be flung back by a Magical Power and hit another model. In cases where a model is indirectly affected by a Magical Power, but is not listed as a target of the Magical Power, they may not attempt to Resist it. Be careful where you place your models!
Example 81: Gandalf is trying to help Thorin's Company escape from the pursuing Goblins, and attempts to Cast Transfix on Grinnah to stop him Charging Ori. Gandalf requires a Casting Test of 4+ and so rolls two dice, rolling a 1 and a 4, which is enough. Not wanting to be prevented from Activating, Grinnah decides to spend 1 Will Point to make a Resist Test, and rolls a 5 – which is enough to Resist Gandalf's Transfix. The Magical Power has been resisted and does not take effect.
Resisting with no Target – Some Magical Powers have no specific enemy target, such as those that target the caster or only models friendly to the caster. In these instances, no Resist Test can be made.
Resisting with Multiple Targets – Some Magical Powers will target multiple enemy models, such as those that target all models within a certain range. In these instances, a single target model may attempt to make a Resist Test. The model that may make the Resist Test is chosen by their controlling player, and they can select any of their models that was a target to make a Resist Test as normal.
If the Resist Test is passed, the Magical Power is resisted as normal. If the Resist Test is failed, then the Magical Power succeeds and all target models will be affected.
Magical Power Durations – Every Magical Power has a duration that specifies how long it lasts for. The effects of a Magical Power will immediately come to an end if the caster is slain or leaves the battlefield for any reason. The three types of Magical Power duration are:
- Instant – These Magical Powers take place straight away; after they are resolved, they end. These Magical Powers tend to be ones that cause damage.
- Temporary – These Magical Powers last until the End Phase of the turn they were Cast in, at which point they end.
- Exhaustion – These Magical Powers remain in play until the caster reaches 0 Will Points remaining, at which point they immediately end.
Magical Powers List
Aura of Command (Duration: Exhaustion) – Harnessing their full strength of mind, the caster is able to steel themselves and their allies against otherwise terrifying foes, inspiring them to great deeds of valour. This Magical Power targets the caster. Whilst this power is in effect, the caster and all friendly models within 6" of them automatically pass all Courage Tests they are required to take.
Bladewrath (Duration: Temporary) – The caster causes the target's weapons to glow with a faint red hue, seemingly making it cut through armour and flesh with far greater ease. This Magical Power targets one friendly model within range. In the ensuing Fight Phase, all Strikes made by the target are resolved at a Strength of 6, regardless of any other modifiers.
Aura of Dismay (Duration: Exhaustion) – The caster weaves a web of lies and deceit, conjuring images of what their foes most fear. This Magical Power targets the caster. Enemy models within 6" of the caster suffer a -1 penalty to any Courage Tests they are required to take.
Banishment (Duration: Instant) – Unleashing a blast of pure and brilliant light, the caster is able to drive off spirits and creatures of undeath. This Magical Power targets one enemy Spirit model within range. The target immediately suffers 1 Wound. If this Magical Power targets a Cavalry model, the caster must choose whether the rider or the Mount is the target.
Black Dart (Duration: Instant) – A sinister dark force leaps from the caster's hand, driving itself into the flesh of its victim and towards their very heart. This Magical Power targets one enemy model within range. The target immediately suffers one Strength 6 hit. If this Magical Power targets a Cavalry model, the caster must choose whether the rider or the Mount is the target.
Blessing of the Valar (Duration: Instant) – The caster speaks words imbued with great power, invoking the Valar to renew the hope of their allies and for fate to look kindly upon them should they come into great peril. This Magical Power targets one friendly model within range. The target immediately regains 1 Fate Point spent earlier in the battle.
Blinding Light (Duration: Temporary) – The caster conjures a brilliant, bright light to shine across the battlefield, illuminating the area around them and dazzling their foes from afar. This Magical Power targets the caster. Whilst the power is in effect, the area within 6" of the caster is always considered to be daylight (perfect if you are playing a battle at night). Additionally, whilst this power is in effect, enemy models that make a Shooting Attack that targets a model within 6" of the caster will only hit on a To Hit Roll of a 6. Models cannot benefit from this Magical Power if there is a piece of impassable terrain, such as a wall or building, directly between all parts of the model and the source of the light.
Call Winds (Duration: Instant) – Summoning powerful winds, the caster causes the target to be flung back away from them by a great gale capable of knocking them to the ground. This Magical Power targets one enemy model within range. The target is immediately blown D3+3" directly away from the caster in a straight line. If the model comes into contact with another model or piece of terrain, then it will immediately stop. After it has been blown back, the target is knocked Prone. If the target was Engaged in Combat, the effect is the same and they can be blown out of a Combat.
Chill Soul (Duration: Instant) – A vile magic that bypasses any physical defences and targets the very life essence of the victim. Only those who possess enough willpower will be spared from its malice. This Magical Power targets one enemy model in range. The target immediately suffers 1 Wound. If this Magical Power targets a Cavalry model, the caster must choose whether the rider or the Mount is the target.
Drain Courage (Duration: Instant) – Even the boldest heroes cannot hold their nerve forever, especially when malign sorceries gnaw at every fibre of their resolve and drain their valour away. This Magical Power targets one enemy model in range. The target immediately worsens their Courage value by 1 for the remainder of the game; so a model with a Courage of 5+ that is affected by this Magical Power would then have a Courage of 6+. A model can be affected by this Magical Power multiple times over the course of the battle, worsening its Courage value each time. If this Magical Power targets a Cavalry model, the caster must choose whether the rider or the Mount is the target.
Collapse Rocks (Duration: Instant) – Unleashing a deafening blast, the caster sunders rock and stone causing it to fracture and crumble around the target. This Magical Power targets one enemy model in range that is within a ruin, stone or brick building, cave, rock pile, or some other piece of terrain where the caster could crack rock either underfoot or overhead. The target suffers one Strength 7 hit and is knocked Prone. If the target was a Cavalry model, they will automatically count as suffering the Knocked Flying result on the Thrown Rider Chart.
Compel (Duration: Instant) – The caster infiltrates the mind of its target, luring them away from their allies and causing them to move against their will. This Magical Power targets one enemy model in range. The caster may Move the target up to half its Move Value, even if the target has already Moved this turn. They cannot Move the target out of Combat, make them take a Jump, Climb, Leap or Swim Test, lie them down or make them dismount. They can, however, make them Move into Difficult Terrain or Charge an enemy model (if able), in which case no Courage Test would be required to Charge an enemy with the Terror special rule. They can make the target drop an Object they are carrying as part of a Scenario (but not Wargear) or put on the One Ring if they carry it. Once the target has been Moved, it cannot Move any further that turn for any reason but may otherwise act normally. If the model affected by this Magical Power would normally have to Charge as part of their Move, they are not forced to when under the influence of this Magical Power.
Curse (Duration: Instant) – Some of the most potent curses in Middle-earth are capable of stripping away the protective powers that lay upon those otherwise destined for greatness, leaving them vulnerable and unguarded. This Magical Power targets one enemy model in range. The target immediately loses 1 Fate Point. If this Magical Power targets a Cavalry model, the caster must choose whether the rider or the Mount is the target.
Enchant Blades (Duration: Temporary) – The caster imbues their allies' weapons with great power, magically sharpening their blades and making them all the more likely to find their mark upon an enemy. This Magical Power targets one friendly model within range. In the ensuing Fight Phase, the target may re-roll all failed To Wound Rolls when making Strikes.
Enrage Beast (Duration: Temporary) – Invoking a primal fury within their target, the caster is able to whip nearby beasts into a bloodthirsty frenzy and set them on their foes. Yet such fury will take its toll on the beasts, which will succumb to exhaustion once the power wears off. This Magical Power targets one friendly Beast model within range. The target increases its Fight Value, Strength and Attacks by 2, and gains the Fearless special rule, until the End Phase of the turn, at which point the target will immediately suffer 1 Wound.
Flameburst (Duration: Instant) – The caster summons forth a gout of flame, hurling it towards their foe with the intention of searing flesh from bone. This Magical Power targets one enemy model in range. The target immediately suffers one Strength 6 hit. This is a fire-based attack, so if a model is immune to fire-based attacks, they are immune to this Magical Power.
Fog of Disarray (Duration: Exhaustion) – Weaving a cloud of illusion and trickery around them, the caster confines the minds of those nearby to a cage of mistruths and confusion, where one's intellect seemingly suffers. This Magical Power targets the caster. Enemy models within 6" of the caster suffer a -1 penalty to any Intelligence Tests they are required to take.
Nature's Wrath (Duration: Instant) – By unleashing the awesome power of nature, the caster causes the ground to shake, gales to blow and rivers to surge – knocking their foes to the ground. This Magical Power targets all enemy models within range, even if they are not in Line of Sight of the caster. All target models are immediately knocked Prone. Cavalry models are automatically treated as suffering a Knocked Flying result on the Thrown Rider Chart.
Foil Magic (Duration: Instant) – By finding the right words of power, the caster is able to undo the magical weaves of their rivals, rendering their magic as useless. This Magical Power targets one enemy model within range. The caster may choose one Magical Power Cast by the target with the Exhaustion duration that is currently in play. That Magical Power immediately ends.
Fortify Spirit (Duration: Exhaustion) – This blessed power protects the caster's allies from unsavoury magics, shielding them from malign conjurations that would seek to bring them harm and despair. This Magical Power targets one friendly model within range. Each time the target becomes the target of a Magical Power Cast by an enemy model, they gain an additional free dice to any Resist Test they would take. This free dice can still be rolled even if the target has no Will Points or chooses not to use any from their store.
Fury (X) (Duration: Exhaustion) – By chanting spiteful incantations imbued with power, the caster is able to drive their followers into a rage, transforming them into a reckless, fearless mob. This Magical Power targets the caster. Friendly models within 6" of the caster who have the same keywords as those shown in brackets will automatically pass any Courage Tests they are required to take.
Instil Fear (Duration: Temporary) – The caster conjures up some form of blood-curdling screech or terrifying visage around them, causing their enemies to freeze in their tracks out of sheer terror. This Magical power targets the caster. Enemy models within 6" of the caster are considered to have the Fearful special rule.
Panic Steed (Duration: Instant) – The mind of a simple beast is far easier to penetrate than that of a trained warrior. A caster can create a strong sense of panic in the likes of horses and even Wargs, causing them to bolt and flee and sending their rider crashing to the ground. This Magical Power targets one enemy Cavalry model within range. The rider is thrown and the Mount immediately flees and is removed as a casualty. The rider is automatically treated as suffering a Knocked Flying result on the Thrown Rider Chart.
Paralyse (Duration: Exhaustion) – Drawing on their dark powers, the caster is able to render their target completely helpless. Unable to move their limbs, or even utter a word, this malign spell leaves its victim paralysed and at the mercy of their enemies. This Magical Power targets one enemy model in range. The target immediately becomes Paralysed. A Paralysed model immediately becomes Prone and may do nothing until it recovers. This includes Activating, making Shooting Attacks, declaring Heroic Actions or using Active abilities. If a Paralysed model is Engaged in Combat, it may contribute no dice to the Duel Roll, and does not provide its Fight Value – it may also not make Strikes or stand up if its side wins. If a Paralysed model is the only model from its side involved in a Combat, then it automatically loses the Duel Roll – no dice are rolled.
At the end of the End Phase of each turn, a Paralysed model may roll a D6. On a 6, the model immediately recovers (they may use Might to improve this roll). Additionally, after making this roll, any friendly model in base contact with a Paralysed model may also roll a D6 one at a time. If any model rolls a 6, the Paralysed model immediately recovers (a Hero model may use their own Might to improve this roll).
If a Paralysed model is in a water feature at the end of the Move Phase, then it must take a Swim Test to see if it sinks.
Protection of the Valar (Duration: Temporary) – The caster draws on their reserve of inner strength, shrouding themselves in a nimbus of bright energy and producing a shield of pure light to protect themselves or their allies from any vile magics directed at them. This Magical Power targets one friendly model within range. The target cannot be chosen as the target of enemy Magical Powers or enemy special rules that specifically target a model. Additionally, enemy models that target the protected model with a Shooting Attack will suffer a -1 penalty to their To Hit Roll.
Terrifying Aura (Duration: Exhaustion) – The caster uses their power of illusion to seemingly change their very being; their stance becomes more imposing, their visage becomes more terrifying, and their physique becomes more intimidating, causing their foes to quake in fear. This Magical Power targets the caster. Whilst this Magical Power is in effect, the caster has the Terror special rule.
Renew (Duration: Instant) – Using some soothing power, wounds heal quickly, bones fuse back together, and a warrior who was seemingly badly hurt is able to swiftly rejoin the fray. This Magical Power targets one friendly model in range. The target immediately regains 1 Wound lost earlier in the battle. If this Magical Power targets a Cavalry model, the caster must choose whether the rider or the Mount is the target.
Sorcerous Blast (Duration: Instant) – The caster unleashes a pulse of invisible force upon their foe in an attempt to injure them and send them sprawling to the ground. This Magical Power targets one enemy model in range. The target immediately suffers one Strength 5 hit. If they survive, the target is immediately knocked Prone. If the target was a Cavalry model, they will automatically count as suffering the Knocked Flying result on the Thrown Rider Chart.
If the target was Engaged in Combat, then any other model that is also Engaged in the same Combat will also be knocked Prone if it has a Strength of 5 or lower – make sure to Pair Off Combats before working out which models are knocked Prone in this manner.
Strengthen Will (Duration: Instant) – Channelling their own fortitude, the caster instils a well of great fortitude in their ally, restoring their willpower and giving them the strength to carry on. This Magical Power targets one friendly model within range. The target immediately regains a single Will Point spent earlier in the battle. If this Magical Power targets a Cavalry model, the caster must choose whether the rider or the Mount is the target.
Transfix (Duration: Temporary) – The victim's limbs become as heavy as lead, leaving them rooted in place and unable to move. Defending themselves becomes more difficult, and it takes every ounce of their strength just to fend off attackers. This Magical Power targets one enemy model in range. Until the End Phase of the turn, the target cannot Activate, declare Heroic Actions, use Active abilities, or make Shooting Attacks. If the target wins a Duel Roll, they may not make Strikes. If the target has a piece of wargear that has an Active ability, they still have that piece of wargear but cannot use the ability tied to it.
Tremor (Duration: Instant) – The caster slams their staff into the ground, causing it to rupture and fissure towards their foes and leaving a gaping crack in the battlefield. Draw an imaginary 1mm line that extends D3+3" directly away from the caster in a direction chosen by the caster. This Magical Power targets every model (friend or foe) that lies under the line. Each target immediately suffers one Strength 4 hit and is knocked Prone; if the target was a Cavalry model, they will automatically count as suffering the Knocked Flying result on the Thrown Rider Chart. If a target is Engaged in Combat, then all other models in the same Combat are also considered to be a target – make sure to Pair Off Combats before working out which models are a target.
Models with the Fly special rule can never be a target of this Magical Power under any circumstances.
Wither (Duration: Instant) – Harnessing a crude form of dark sorcery, the caster causes their victim to begin to weaken and wither. Bones become brittle and muscles waste away as those affected become a shadow of their former selves. This Magical Power targets one enemy model in range. The target immediately reduces their Strength value by 1 for the remainder of the game. A model can be affected by this Magical Power multiple times over the course of the battle, reducing its Strength value each time. Should a model ever have its Strength reduced to 0, they are immediately slain and removed as a casualty. If this Magical Power targets a Cavalry model, the caster must choose whether the rider or the Mount is the target.
Wrath of Bruinen (Duration: Instant) – The caster invokes great power, stirring rivers and once still pools into a devastating maelstrom that surges forth to knock their foes from their feet. This Magical Power targets all enemy models within range, even if they are not in Line of Sight of the caster. All target models immediately suffer one Strength 2 hit and are knocked Prone. Cavalry models are automatically treated as suffering a Knocked Flying result on the Thrown Rider Chart. If a target is within a water feature, they will suffer one Strength 8 hit instead of one Strength 2 hit.
Writhing Vines (Duration: Temporary) – The caster summons forth great vines from the ground, which wrap around the feet of their foes and slow their march to war. This Magical Power targets the caster. Place a 25mm Vine Marker wholly within 3" of the caster. Enemy models treat the area within 3" of the Vine Marker as Difficult Terrain. Remove the Vine Marker during the End Phase.
Your Staff is Broken (Duration: Instant) – The most powerful magic users are able to break the staffs of their peers, separating them from the source of their power and leaving them cut off from the magic they would normally be able to harness. This Magical Power targets one enemy model that has a Staff of Power within range. The target's Staff of Power is immediately destroyed – remove it from their wargear.
Special Rules
With the vast number of races, creatures and heroes that populate the lands of Middle-earth, it should come as little surprise that so many of them possess a variety of abilities, skills and attributes that set them apart from each other. From creatures that instil a sense of dread and fear in those around them, to those that are experts at traversing particular types of terrain, to those who can utilise vile toxins and even set their foes on fire, special rules can take on all forms.
Models will often have a selection of these special rules, and we have compiled the most common special rules in this section for easy reference. Models must be on the battlefield in order to use their special rules, unless specified otherwise.
Active & Passive Special Rules
Many of the models in the Middle-earth Strategy Battle Game will have a selection of special rules included in their profiles, representing all the different abilities that model has. You'll notice these in the profiles of Hero and Warrior models, and sometimes on pieces of Wargear too. All special rules can be described as Active or Passive.
An Active special rule is one that requires the user to physically move, act or think about doing whatever the special rule is describing. These special rules are not usable if a model is rendered unable to Activate (with the exception of having been Charged) or unable to use Active special rules, such as being under the effects of the Transfix Magical Power. Some examples of an Active special rule include Mighty Blow, Expert Shot or Woodland Creature. Some other abilities may also be classed as an Active special rule, such as Shielding or using a war horn.
A Passive special rule is one that takes effect regardless of other factors. They require no specific act or thought in order for them to take place – a Troll is still terrifying even if it is not thinking about it, for example. Passive special rules are always in effect, even if the model cannot Activate. Examples of Passive special rules include Terror, Horse Lord and Resistant to Magic.
Timing of Special Rules – Many special rules or other abilities will state the step of a particular Phase in which they take place, such as 'at the start of the Move Phase' for example. There may be instances where multiple of these rules will come into effect at the same time, which begs the question which one happens first?
If all such special rules or abilities belong to the same player, then they may simply choose in which order they are resolved. However, if both players have special rules or abilities that come into effect at the same time, then the player with Priority gets the first opportunity to use one or to pass. Then, the player without Priority may choose to use one of theirs or to pass. This then alternates back and forth until either both players have used all the special rules or abilities they wish, or until both players pass in succession. If such a special rule or ability states it must come into play, then the player cannot choose to pass until it has been used.
In the very rare situation where both players have a special rule or ability that comes into play before Priority has been determined, then the player who had Priority in the previous turn gets the first chance to use their special rules.
List of Special Rules
Ancient Enemies (X) (Active) – Some races have been warring against each other for generations, and have developed a keen understanding of each other's weaknesses and how best to exploit them in a fight. A model with this special rule must re-roll To Wound Rolls of a natural 1 when making Strikes against a model with the keywords listed in brackets in that model's profile. So, a model with the Ancient Enemies (Elf) special rule would re-roll To Wound Rolls of a natural 1 against Elf models.
Backstabbers (Active) – Some creatures have mastered the sly, cunning art of murder as an art form, and fight far more effectively when their prey is cornered – or better yet, unaware of their presence. This model receives a bonus of +1 To Wound when making Strikes against a Trapped model.
Bane of Kings (Active) – By lacing their weapons with the most potent of exotic toxins, some fighters in Middle-earth can turn mere scratches or flesh wounds into a devastatingly fatal strike as poison rushes through the veins of their victims. This model must re-roll all failed To Wound Rolls when making Shooting Attacks or when making Strikes.
Bane Weapons (Active) – Forged in ages past, or enchanted specifically to kill those of a certain race, some weapons can prove particularly effective against certain foes and can kill more readily than mere steel alone. A Bane Weapon will be presented as Xbane, where X is a specific Race keyword. For each successful Strike caused by a Bane Weapon (i.e., one that causes a Wound that is not prevented), the Bane Weapon will inflict D3 Wounds rather than 1 if the target of the Strike has the same keyword as the Bane Weapon. So, a weapon with the Orcbane special rule will deal D3 Wounds rather than 1 against Orc models.
Blades of the Dead (Active) – The weapons of the dead do not cut through armour and flesh, instead striking deep into the resolve of their targets causing them to succumb to spectral wounds. Models with this special rule don't roll To Wound when making Strikes in the same way. Instead, when a model with this special rule makes a Strike, the target counts their Defence value as 10 minus the numerical value of their Courage. So, a model with a Courage of 8+ would treat their Defence as 2 (10-8) when a model with Blades of the Dead makes a Strike against them.
Bodyguard (Passive) – These elite warriors have dedicated their lives to the service of their leaders and will sooner fight to the death than abandon those they have sworn an oath to protect. All models with this special rule in an Army must select a Hero to bodyguard; this will automatically be the General if they have the same Faction keyword as this model. If the General does not have the same Faction keyword as this model, then they will bodyguard the Hero with the highest Heroic Tier amongst those who have the same Faction keyword (if there are multiple of the same Heroic Tier, you may choose which will be bodyguarded). All models of the same type must choose the same Hero to bodyguard.
So long as the bodyguarded Hero is alive and on the battlefield, all models who are bodyguarding that Hero will automatically pass all Courage Tests they are required to take.
Burly (Passive) – Some warriors are able to shoulder heavy burdens as if they were nothing, allowing them to carry heavy objects single-handedly or swing massive weapons with incredible ease. A model with this special rule does not suffer the -1 penalty to the Duel Roll for using a two-handed weapon. Additionally, a model with this special rule can still Move its full Move Value whilst carrying a Heavy Object.
Cave Dweller (Active) – Living within the depths of the mountains or winding caves gives a number of advantages, namely being accustomed to the dark and being able to scrabble up and down rocky surfaces with ease. A model with this special rule applies a +1 modifier to any Jump, Leap and Climb Tests they take. Additionally, a model with this special rule suffers no penalties to how far they can see when fighting in the dark.
Dominant (X) (Passive) – Not every creature in Middle-earth was created equally, many are far more imposing than others and command a far more dominant presence on the battlefield. This model counts as the number of models as shown in brackets when working out how many models are in range of an objective, in a specific area of the board, or when working out how many models have escaped the battlefield. So, a model with Dominant (3) would count as three models in range of an objective, or in a specific area of the board, or three models when working out how many models have escaped the battlefield. If a model would gain this special rule whilst in range of another model or specific area of the board, and then Moves off the board, they will not gain the benefit of this special rule once off the board.
If a model has two sources of the Dominant (X) special rule, then they use the highest value.
Expert Rider (Active) – Many warriors find themselves far more at home in the saddle than on foot, and have become incredibly adept at riding and fighting from horseback. A Cavalry model with this special rule may re-roll the dice on any Jump, Swim or Thrown Rider Tests, and can pick up Light Objects without having to Dismount.
Additionally, a model with this special rule that is carrying both a bow and a shield will still get the +1 bonus to their Defence for having a shield whilst they remain mounted.
Expert Shot (Active) – The most skilled archers in Middle-earth have lightning fast reactions, allowing them to loose arrows far quicker than their allies and unleash a volley without even thinking. A model with this special rule can make two Shooting Attacks in the Shoot Phase rather than one. These Shooting Attacks are made one at a time and do not have to target the same enemy model, though both must be made with the same Missile Weapon.
Fearful (Passive) – Not everyone is a trained warrior or natural fighter. Some find the very prospect of being in a battle a terrifying experience and may be reluctant to get into the action. If a model with this special rule wishes to Charge, then it must take a Courage Test at the start of its Move. If the test is failed, the model may not Move that turn but may otherwise act normally.
Fearless (Passive) – Some in Middle-earth possess an innate bravery and there is nothing that can deter them from fighting to the last in the heat of battle. A model with this special rule automatically passes any Courage Test it is required to take.
Fell Sight (Passive) – Through some mysterious power, or heightened senses of detection, some are able to sense the presence of their foes without needing to be able to see them. A model with this special rule does not need to have Line of Sight to be able to Charge an enemy model. Additionally, a model with this special rule can Charge or target an enemy model with the Stalk Unseen special rule with no penalty. If a Mount has this special rule, the rider may benefit from it whilst they remain mounted.
Fly (Active) – From the Great Eagles of the Misty Mountains, to the dreaded Fell Beasts ridden by the Nazgûl, many creatures in Middle-earth possess the ability to fly above the battlefield. A model with this special rule ignores intervening models and terrain when it Moves – flying over buildings, woods and so on, and ignoring the vertical distance as they Move. A model that Moves in this way cannot end its Move overlapping another model, within a piece of woodland terrain, or upon any surface in which it cannot balance safely (flat rock and hills are fine, but don't try perching a model upon a sloped roof for example). Additionally, a model that Moves in this way cannot finish its Move atop a piece of terrain which it is impossible for the enemy to reach, such as at the top of a sheer rock face with no way up, or straddling one or more pieces of terrain that would allow other models to Move underneath.
If a model wishes to do something part way through its Move whilst it is Flying (such as Cast a Magical Power), then it must land in order to do so. When a model lands, there cannot be any models underneath it, and if it lands in an enemy model's Control Zone then it must Charge that enemy model.
A model with this special rule can choose not to Fly, and in which case will treat its Move Value as 4" rather than that listed in its profile (usually 12"). If it does, then it gains none of the benefits of the Fly special rule, though it may enter a piece of woodland terrain; however, if it enters a piece of woodland terrain, it cannot elect to Fly again until it has completely left the woods.
A model that chooses to Fly will ignore enemy Control Zones as it Moves. A model that wishes to Charge when it is flying can Charge any model whose Control Zone it finishes its Move in. If a Flying model wishes to Charge a model that is already Engaged in Combat (or has otherwise lost their Control Zone) then it can only do so if it can land in a position where it is not within the Control Zones of other enemy models.
General Hunter (Active) – Some heroes are experts in hand-to-hand combat and will actively seek out the leader of the enemy army for a duel, using their past victories to spur them on as they attempt to slay their foe. If this model slays the enemy General in a Combat, they immediately regain a single point of Might spent earlier in the battle.
Harbinger of Evil (X) (Passive) – There are those in Middle-earth who can instil a deep sense of dread within their foes, and the sight of such creatures can be a portent of doom. An enemy model within the range shown in brackets in this model's profile suffers a -1 penalty to any Courage Tests it is required to make. This is not cumulative with other special rules that also provide a similar effect. A model with this special rule is unaffected by the Harbinger of Evil special rule of enemy models.
Hatred (X) (Active) – Many races will harbour a simmering resentment towards each other, either through ill treatment or the perception of being wronged. When these foes face each other upon the battlefield, such resentments quickly turn to burning hatred as they seek vengeance for acts of the past. A model with this special rule gains a bonus of +1 To Wound when making Strikes against a model with the same keyword as the one shown in brackets. So, a model with the Hatred (Man) special rule would gain a bonus of +1 To Wound when making Strikes against Man models.
Horse Lord (Passive) – Some heroes develop a close bond with their steeds, having ridden them into countless battles over the years. To them, their mounts are just as important as their allies, and they will seek to protect them. Whenever the Mount of a model with this special rule suffers a Wound, roll a D6 – on a natural 6, the Wound is ignored. Additionally, a model with this special rule can use their own Fate Points to prevent Wounds inflicted upon their Mount.
Invisible (Passive) – In rare situations, or through the use of a particularly powerful item, it may be possible for a creature to disappear from view entirely, slipping through enemy lines and avoiding conflict. A model that is Invisible cannot be targeted by Magical Powers, Shooting Attacks or special rules and other models cannot draw Line of Sight to it.
An Invisible model has no Control Zone, and models (from either side) may Move through them as if they were not there, though they cannot finish their Move overlapping the Invisible model. An Invisible model may Move through other models (from either side) and may ignore enemy Control Zones; however, it may not end its Move overlapping another model.
If a model wishes to Charge an Invisible model, they must take an Intelligence Test, suffering a -1 penalty to the test for every full 1" that the Invisible model is away from them. If this Intelligence Test is failed, the model may not Charge the Invisible model at all that turn, but may Charge a different target if they wish.
An Invisible model may declare Heroic Actions, but friendly models may never benefit from their Heroic Actions. So, an Invisible model cannot shout With Me, At the Double, Loose or Take Aim, and if they declare a Heroic Combat, other friendly models cannot Move as part of it. An Invisible model also cannot provide a Stand Fast.
During the Fight Phase, if an Invisible model is Engaged in Combat and has no other friendly models as part of the Combat, they will halve the Fight Value of all enemy models they are Engaged in Combat with. A friendly model cannot Support an Invisible model, and models cannot Support a model that is only fighting an Invisible model.
None of the above applies to Sauron or Ringwraith models – see the Will of Evil special rule for further details.
Large Target (Passive) – The largest creatures in Middle-earth tower over the battlefield, allowing them to survey the battlefield but also making them easy targets for arrows and other missile fire. When a model makes a Shooting Attack that targets a model with this special rule, when they are determining models that are In The Way, they ignore models (both friendly and enemy) that do not have any of the following keywords: Monster, Siege Engine, War Beast. If the target model is Engaged in Combat, then the In The Way Test for Shooting into Combat is still applied regardless of the model the target model is Engaged in Combat with.
Leader (X) (Passive) – Some classes of warriors are specially trained to fight for certain nobles and lords, and will only follow orders from those who are tasked with leading them or that they have pledged their lives to. A model with this special rule can include Warrior models of the type listed in brackets in their Warband.
Master of Battle (X+) (Active) – There are a few, truly exceptional, leaders who over their years at the head of their army have become masters of reading the flow of a battle, and experts in reacting to the decisions of enemy leaders. Whenever an enemy Hero declares a Heroic Action within 6" of this model, this model may roll a D6. If the result on the dice equals or beats the number shown in brackets, then this model may immediately declare a Heroic Action of the same type without spending a Might Point. This may still be done if this model has no Might Points remaining, or would not normally be able to declare that Heroic Action. If the roll is failed, this model may still declare a Heroic Action if they wish (though not one they cannot usually declare), for the usual cost of a Might Point.
Mighty Blow (Active) – Whether through exceptional skill with a keen-edged blade or through raw strength and power, some impressive warriors are capable of delivering devastating blows and even cleaving their foes asunder. For each successful Strike caused by this model (i.e., one that causes a Wound that is not prevented), the target will suffer 2 Wounds rather than 1.
Mighty Hero (Passive) – Only the greatest heroes have been chosen by fate; and they are destined to leave their mark upon the history of Middle-earth and etch themselves into songs and stories for ages to come. A model with this special rule gains a free Might Point at the start of each turn (even if their store of Might is full). If this free Might Point has not been spent by the end of the turn, it is lost.
Monstrous Charge (Active) – Many of the largest creatures in Middle-earth charge into the fray with reckless abandon, often with enough force to send their prey sprawling to the ground and at their mercy. If a model with this special rule Charges into Combat, then it will increase its Attacks characteristic by 1 during the ensuing Fight Phase.
Additionally, if this model Charges and subsequently wins the Duel Roll, then all enemy models involved in the Combat with a Strength characteristic lower than this model, will be immediately knocked Prone before this model makes Strikes. Cavalry models will automatically count as suffering the Knocked Flying result on the Thrown Rider Chart.
Mountain Dweller (Active) – Some races make their homes within the rocky, mountainous terrain in Middle-earth, and know the best ways to traverse such areas safely and quickly. A model with this special rule may Move through areas of rocky terrain that are classed as Difficult Terrain as if they are Open Ground. If a Cavalry model has this special rule, but their Mount does not, then this rule does not apply to the Mount. If a Mount has this special rule, then they will still gain their Cavalry Charge bonuses when they Charge, even if the rider does not have this special rule.
Additionally, a model with this special rule may re-roll any Jump, Leap or Climb Tests.
Poisoned Attacks (Active) – Whether through coating the edges of their weapons in poison, or by using their own natural toxins, some in Middle-earth can turn simple wounds into life-threatening situations. A model with this special rule must re-roll any To Wound Rolls of a natural 1 when making Shooting Attacks or making Strikes.
Sometimes, a particular weapon will be described as benefiting from this special rule. When this is the case, only To Wound Rolls made for that weapon will be able to re-roll To Wound Rolls of a natural 1.
Resistant to Magic (Passive) – Though some may find themselves easily susceptible to magic and their willpower easily overcome, some in Middle-earth are naturally resistant to such powers and can fight them off through sheer perseverance. Every time this model is targeted by a Magical Power, they gain an additional free dice when making a Resist Test, even if they have no Will Points remaining or decide not to use any Will Points. This is cumulative with other rules that confer a similar effect.
Set Ablaze (Passive) – Fire is a deadly tool in any arsenal and is particularly potent against the living. Those who catch alight need to act quickly if they are to avoid being engulfed in flame. A model can be Set Ablaze through a number of means. During the End Phase of a turn, any model that is Set Ablaze will immediately suffer one Strength 5 hit.
A model that is Set Ablaze can extinguish the flames either by Lying Down and Crawling 1", or by entering a water feature. If either of these things happen, the model is no longer considered to be Set Ablaze.
If a model is immune to fire-based attacks, they cannot be Set Ablaze under any circumstances.
Sharpshooter (Active) – Through many years of practice, some archers have perfected the art of hitting specific targets from great distances and can even pick out a horse from its rider with expert precision. When a model with this special rule makes a Shooting Attack that targets a Cavalry model, it may choose either the rider or the Mount as its target. Additionally, if a model with this special rule hits a Cavalry model that it targeted with a Shooting Attack, it does not need to make the In The Way Test to see which part of the model it hits – it will automatically hit the part of the model it targeted, either rider or Mount.
Shieldwall (Active) – Some warriors are trained to fight in tight-knit ranks, interlocking their shields to protect both themselves and their allies from incoming blows. If this model is carrying a shield, then whilst it is in base contact with two or more other friendly models who also have this special rule and are carrying a shield, then this model receives an additional +1 bonus to its Defence. In Combat, this bonus is calculated before the model Backs Away.
Models that are Prone or have the Cavalry keyword cannot benefit from, or provide an ally with the benefit from, this special rule.
Spectral Walk (Passive) – A relentless spectral march is not slowed by the same mundane features that would hamper the living; moving over rocks, woodland and even water without so much as missing a step. A model with this special rule is never slowed by Difficult Terrain. Additionally, a model with this special rule always counts as rolling a 6 for any Climb, Jump, Leap or Swim Tests.
Stalk Unseen (Passive) – The ability to walk silently and undetected is a rare gift indeed; yet those who can, ensure they remain unseen if they wish, striking when the moment best suits them. An Infantry model with this special rule that is partially concealed from view by a piece of terrain cannot be seen at distances of more than 6". This means that enemy models cannot target this model with Shooting Attacks, Magical Powers, special rules, or anything else that requires Line of Sight unless they have a completely clear view of this model.
Survival Instinct (Active) – Within the bowels of Middle-earth lurk creatures that are more used to stalking and hunting their prey than fighting on the battlefield. Should such creatures feel threatened, they may turn tail and flee should their prey fight back! Every time a model with this special rule suffers a Wound that is not prevented, it must take a Courage Test. If the Courage Test is failed, the model flees and is removed from the board as a casualty. This is an exception to taking multiple Courage Tests of the same type in the same turn.
Swift Movement (Active) – Some creatures are able to scale almost any surface, climbing over rocks and scaling walls with ease. Such freedom of movement can have massive advantages on the battlefield. A model with this special rule is never slowed by Difficult Terrain, with the exception of water features. It can also ignore Obstacles as it Moves, allowing it to Move at any angle without having to make a Climb or Jump Test, though it will still count any vertical distance it has Moved towards its Move Value.
A model with this special rule must finish its Move as flat to the playing surface as possible – no models finishing upside down, halfway up a wall, or at an angle, for example!
Sworn Protector (X) (Passive) – Some warriors will stop at nothing to protect those close to them – whether they are kin, liege or lord. Models with this special rule will have a specific model listed in brackets as part of the special rule. Whilst the named model is alive and on the battlefield, this model automatically passes all Courage Tests it is required to make.
Terror (Passive) – From towering beasts to undead horrors, there are numerous beings in Middle-earth that are a terrifying sight to behold. Such creatures can freeze the hearts of those who wish to charge them, chilling the blood of usually brave warriors and forcing them to stumble in fear. If a model wishes to Charge a model with this special rule, then it must take a Courage Test at the start of its Move. If the test is passed, the model may Charge as normal. If the test is failed, the model cannot Move that turn, but may otherwise act normally.
Sometimes a situation may open up the chance for a model to Charge a model with Terror part way through their Move, such as moving a different model with magic or killing something in the way with a throwing weapon. In such instances, the model only needs to take the Courage Test at the point in which the Terror causing model becomes possible to Charge. If a model making a Jump, Climb or Leap Test finishes within the Control Zone of an enemy with Terror and would normally be able to Charge, they will take their Courage Test after they have made their Jump, Climb or Leap Test.
Sometimes, a model may only cause Terror in certain enemies. In these instances, a keyword will follow Terror in brackets, and only models with that keyword will need to take a Courage Test to Charge the model. So, a model with Terror (Orc) will only cause Terror in Orc models.
Throw Stones (Active) – In the Shire, the art of throwing stones is considered more of a pastime or an art form; however, a well-placed stone can cause a target to be stunned, or perhaps worse! This is even more true of larger creatures – they just hurl larger rocks! If this model does not Move during the Move Phase, it may make a Shooting Attack during the following Shoot Phase. The Strength and range of this Shooting Attack will be shown in the model's profile.
Timid (Passive) – Whilst horses are bred to be ridden and charge full pelt into enemy lines, the likes of ponies are far more timid creatures; ones that cannot muster as much force and may well refuse to charge altogether. If a Mount has this special rule, then every time it wishes to Charge an enemy model it must take a Courage Test. It may use its rider's Courage Value, but may never benefit from special rules or Magical Powers that would allow it to automatically pass a Courage Test. If the test is failed, the model cannot Move that turn but may otherwise act normally. A model with this special rule gains no Cavalry Charge bonuses.
Unyielding Combat Stance (Active) – Whether through bull-headed stubbornness or an elegant, practiced agility, some warriors can keep their footing in dire situations where others find themselves crashing into the dirt. If this model would be knocked Prone for any reason, roll a D6. On a 4+, the model keeps their footing and is not knocked Prone. If this model is mounted and passes this roll, they will still be separated from their Mount but will count as rolling a 6 on the Thrown Rider Chart. If this model would normally automatically suffer the Knocked Flying result, they may still make this roll and, if successful, will treat the result as a 6 on the Thrown Rider Chart.
Venom (Active) – Some of the most deadly creatures in Middle-earth can inject a potent and fast-acting venom into those in their clutches as a means of swiftly dispatching their prey. This model must re-roll all failed To Wound Rolls when making Strikes. Additionally, at the end of a Combat involving this model, choose one enemy model that was wounded by this model but not slain and roll a D6. On a natural 6, the model suffers an additional Wound.
Will of Evil (Passive) – Certain spectral creatures are only kept in existence through the sheer will of the Dark Lord. Should they become disconnected from Sauron's power, they will fade away and vanish like smoke on the breeze. This model must give up 1 Will Point during the End Phase if it has been involved in one or more Combats that turn; if it is in base contact with an enemy model, it is involved in that Combat – it cannot choose not to fight! Should this model be reduced to 0 Will Points, it is immediately banished and removed as a casualty. A model with this special rule cannot use their last Will Point to Cast a Magical Power or use a special rule if by doing so they would be reduced to 0 Will Points.
Additionally, this model ignores the Invisible special rule and, if it was involved in a Combat with an Invisible model that turn, does not give up a Will Point during the End Phase.
Woodland Creature (Active) – Some warriors and creatures are able to traverse woodland as easily as if it were clear terrain, making them a deadly foe within the forests of Middle-earth. A model with this special rule may Move through woods and forests that are classed as Difficult Terrain as if they are Open Ground. If a Cavalry model has this special rule, but their Mount does not, then this rule does not apply to the Mount. If a Mount has this special rule, then they will still gain their Cavalry Charge bonuses when they Charge, even if the rider does not have this special rule.
Advanced Rules
This section of the Rules Manual will cover a number of different aspects of the game that, whilst all important to know, will only come up in certain situations or in specific Scenarios. Here we will cover the likes of water features, carrying objects, models riding a mount as a passenger, and more. There will also be a few sections afterwards that will go into the detail surrounding sieges and how to use the likes of siege engines in your games.
Some of these rules will also be great for adding variety to your games, or when you create your own Scenarios or battles. For example, having a raging river across the board can completely change the way a battle is played. Some of these rules will be used solely in Narrative Play games, but are covered here for ease.
Water Features
From fast flowing rivers to shallow fords and pools of still water, there are numerous areas of Middle-earth where water can be found either on or around a battlefield – these are all referred to as water features. Before you start a game, if there are any water features on the battlefield, you should discuss with your opponent whether they are classed as Shallow Water or Deep Water for the duration of the game.
A model cannot choose to Lie Down in a water feature.
Shallow water – Areas of water that pose a minimal risk to those crossing them, such as streams, small ponds and fords, are classed as Shallow Water. Although these will slow models down, they are unlikely to do any harm to a model. Models treat Shallow Water as Difficult Terrain, with the exception of Cavalry, Monster and War Beast models who treat it as Open Ground.
However, if any model begins its Activation Prone whilst within Shallow Water, then it must take a Swim Test as the first thing it does when it Activates. To make a Swim Test, the model rolls a D6 and consults the Swim Table. There are a number of modifiers that can affect a Swim Test, so make sure you check the list of them when taking a Swim Test.
Swim Table
| D6 | Result |
|---|---|
| 1 | Sink: The model is overcome by the weight of its wargear (or its complete inability to swim) and drowns. Remove the model as a casualty. |
| 2-5 | Swim: The model may Move up to half its remaining Move Value through the water. |
| 6 | Swim Strongly: The model may Move all its remaining Move Value through the water. |
Deep Water – Any stretch of water that is deep enough that a model could not stand with its feet on the bottom without drowning is classed as Deep Water (Hobbits and Goblins probably find more areas of water deeper than others). Any model that enters an area of Deep Water must immediately take a Swim Test. Additionally, any model that begins its Activation within Deep Water must take a Swim Test as the first thing it does when it Activates.
Models in Deep Water may not make Shooting Attacks. Models that are knocked Prone within Deep Water must immediately take another Swim Test and apply an additional -1 modifier.
The following circumstances will modify the result of a Swim Test. All modifiers are cumulative:
- If the model is a Cavalry model, apply a +1 modifier.
- If the model is equipped with heavy armour or heavy Dwarf armour, apply a -1 modifier.
- If the model is carrying a shield (but not a light shield), apply a -1 modifier.
- If the model is carrying a banner, apply a -1 modifier.
Carrying Objects
There will be many situations where a model will be able to carry objects around the battlefield, and these can come in all shapes and sizes, from small trinkets and items used as objectives to the likes of large, weighty demolition charges and siege ladders, and even, in some instances, other models. The heavier an item is, the harder it will be to carry it round the battlefield. Objects that can be carried fall into one of three categories: Light Objects, Heavy Objects and other models.
Light Objects – Light Objects are small things that are not a model in their own right. The likes of keys, rings, healing draughts or even weapons are good examples of a Light Object. Such items are typically used as objectives in Scenarios, and when they are used they will be clearly listed in the special rules of that Scenario. When not being carried by a model, a Light Object is always represented by a 25mm marker.
A model can pick up a Light Object at any point during their Move by Moving into base contact, and may continue to Move after doing so (unless a special rule states otherwise). A Cavalry model must Dismount in order to pick up a Light Object. A Light Object can be passed from one friendly model to another (including a Cavalry model); simply Move the bearer into base contact with a friendly model and declare they have passed the Light Object to the other model. This can only be done during the Move Phase. A Light Object can only ever be Moved once during a turn, and passed once during a turn – it is not possible to do 'relay race'-style antics with them.
A model carrying a Light Object cannot drop it or pass it whilst they are Engaged in Combat. A model can drop a Light Object during their Move if they wish. To do this, place the 25mm marker in base contact with the model dropping it so that it is not overlapping another model's base. If this is not possible, the model cannot drop the Light Object.
If a model carrying a Light Object is slain in Combat by a model in base contact with them, then the model that killed them immediately gains possession of the Light Object. If a model carrying a Light Object is slain by another means (such as by a Shooting Attack or a Supporting model), place the Light Object marker in the place where the model was before they were slain, as centrally as possible.
Heavy Objects – Items that are especially large or cumbersome are considered to be Heavy Objects. The likes of demolition charges, or similar, are examples of Heavy Objects. A Heavy Object will usually be represented by a model or a 25mm marker of some description, and when they are used they will be clearly listed in the special rules of that Scenario.
A model can pick up a Heavy Object at any point during their Move by Moving into base contact, and may continue to Move after doing so (unless a special rule states otherwise). When a model carrying a Heavy Object Moves, they must put it down in base contact with themselves when they have finished Moving – they will essentially drop it. Whilst a model carries a Heavy Object, their Move Value is halved. Additionally, if two friendly models are both in base contact with the same Heavy Object before either of them have Activated, then they can both Activate at the same time and Move simultaneously. If they do, the two models do not halve their Move Value though must both Move so that they both remain in base contact with the Heavy Object; the Heavy Object must then be placed in base contact with both models. Models that Activate in this way cannot Charge that turn.
A Heavy Object cannot be Moved twice in the same Move Phase, and cannot be placed so that it overlaps the bases of other models.
Cavalry models cannot carry a Heavy Object. Monster models can still Move their full Move Value whilst carrying a Heavy Object.
Other Models – In Narrative Play, there may be situations where models need to carry a fallen ally or prisoner – when this is the case it will be stated in the special rules for that Scenario. The weight of the model being carried, compared to how strong the carrying model is, will determine how the carried model is treated.
A model is treated as a Light Object if its Defence characteristic is half, or less, of the carrying model's Strength. A model is treated as a Heavy Object if its Defence characteristic is greater than half of the carrying model's Strength.
Passengers
Passenger is the term used for a model that is also mounted upon a steed, but is not the rider of a Cavalry model – they are essentially carried into battle by their ally.
The Passenger rules are more commonly seen in Narrative Play games, though there are some aspects that can also be used in a Matched Play game as well. If the Passenger rules are in play for a Narrative Play game, it will say as such in the Scenario special rules. The Passenger rules are only in use in Matched Play if explicitly stated as such in a model's profile. In these instances, the Mounting rules are never used – only the rules for Dismounting and Hitting Passengers.
A Passenger is still a model in its own right, and will count as a separate model for the purpose of working out how many models an Army has, how many casualties an Army has suffered, and when calculating the number of models in a specific area.
Whilst mounted upon a Cavalry model, a Passenger cannot Activate, make Shooting Attacks, or contribute to a Combat in any way (unless otherwise specified).
If a rule states it would affect both the rider and the Mount, then it will also affect any Passengers.
Dismounting – A Passenger can Dismount from a Cavalry model at any point during the Cavalry model's Move; place the Passenger in base contact with the Cavalry model. The Cavalry model may continue Moving as normal, however, the Passenger can Move no further that Move Phase, though may otherwise act normally.
If the rider Dismounts from their Mount, the Passenger will also immediately Dismount.
Hitting Passengers – Whilst they are a Passenger, a model may be struck by enemy models.
If a Shooting Attack hits a Cavalry model with a Passenger on it, any shots that would hit the rider must roll a further D6. On a 1-3 the shot will hit the Passenger, and on a 4+ the shot will hit the rider.
If a Cavalry model with a Passenger on it loses a Duel Roll, then enemy models may make Strikes against the Passenger in the same manner as making Strikes against the rider.
If the Mount is slain, a Passenger must take a Thrown Rider Test in the same manner as the rider. If the rider is slain, then the Passenger must also immediately take a Thrown Rider Test.
Mounting – In specific Narrative Scenarios, models may be able to Mount a Cavalry model and become a Passenger. To do this, the model must Move into base contact with the Cavalry model and roll a D6. On a 1, the model fails to Mount and neither model may Move any further that turn. On a 2-5, the model successfully Mounts, though neither model may Move any further that turn. On a 6, the model successfully Mounts and the Cavalry model can still Activate if it hasn't already done so that turn.
Sentries
Some Narrative Scenarios will use Sentries – models that are simply on patrol and unaware of an enemy sneaking around and therefore cannot engage them directly until they are discovered.
If a player has any Sentries, they must always be the first models that Activate during their Move Phase. Before each Sentry Activates, their controlling player rolls a D6 and consults the Sentry Chart that follows to see how they act.
Sentry Chart
| D6 | Result |
|---|---|
| 1 | The Sentry is distracted and searching around its vicinity. It may not Move this turn. |
| 2-3 | The Sentry has heard a noise elsewhere. The opposing player may Move the Sentry up to half its Move Value following all the normal rules for Moving a model. |
| 4-5 | The Sentry is suspicious of intruders. Their controlling player may Move the Sentry up to half its Move Value following all the normal rules for Moving a model. |
| 6 | The Sentry is convinced they spotted something lurking in the dark. Their controlling player may Move the Sentry as normal. |
Until the alarm is raised, Sentries cannot make Shooting Attacks, or use Magical Powers or special rules that need to target enemy models.
If during the End Phase of a turn a Sentry is within 3" of an enemy model and can draw Line of Sight to them, then the alarm will be raised. If a Sentry was hit by a Shooting Attack and was not slain, and has not been removed as a casualty (or otherwise incapacitated), then during the End Phase of that turn they will raise the alarm.
Once the alarm has been raised, Sentries will act normally from that point onwards.
Fighting at Night
Some Scenarios take place at night, which will have an impact on the battle and the fighters waging war in the darkness.
In Scenarios that take place at night, models can only see a distance of 12". This means that they cannot target enemy models with Shooting Attacks, Magical Powers or special abilities over 12" away.
As it is much harder to avoid a shot in the dark, all Shooting Attacks gain a bonus of +1 To Wound if they target a model in the dark. Siege Engine models may still target enemy models more than 12" away – however, in this situation they will only ever hit on the roll of a 6. Wounds done by the Area Effect of a Siege Engine do not gain this +1 To Wound.
Models that have been illuminated by a special rule or Magical Power (such as the Blinding Light Magical Power), can be targeted by Shooting Attacks, Magical Powers and special rules from distances greater than 12" away. Shooting Attacks will not gain the bonus of +1 when rolling To Wound when Shooting at illuminated models.
Models with the Cave Dweller special rule can see in the dark normally, and therefore may target models from greater than 12" away with Shooting Attacks, Magical Powers and special rules. Additionally, Shooting Attacks that target a model with the Cave Dweller special rule will not gain the bonus of +1 when rolling To Wound.
Siege Engines
Throughout the storied history of Middle-earth, there have been numerous cities that have been put under siege by grand hosts or seemingly endless tides of enemies. Such battles are a different beast to those that take place upon open fields or traversable terrain where armies can engage one another, and as such require vastly different tactics. To this end, armies will often employ the use of siege engines, great weapons of war that are designed to smash down fortress walls or to blow great holes in the ranks of the attackers. Whatever form they take, siege engines pose a serious threat to any army and can vastly change the flow of a battle.
In this section, we present the rules for using a Siege Engine in your games. Every Siege Engine will have its own profile which will differ to a standard profile as a number of characteristics simply aren't relevant to an inanimate lump of wood and metal! A Siege Engine profile only contains four characteristics: Range, Strength, Defence and Wounds – as shown in the example below:
| Range | Strength | Defence | Wounds | |
|---|---|---|---|---|
| Gondor Battlecry Trebuchet | 12" - 96" | 10 | 10 | 3 |
Deploying a Siege Engine – In a Matched Play game, a Siege Engine does not follow the usual rules for deployment. Instead, all Siege Engine models are deployed before any other models, starting with the player who is deploying the first Warband and then alternating from there. A Siege Engine must always be deployed wholly within its player's deployment zone, and wholly within 6" of a table edge.
In Scenarios where players don't have a deployment zone (such as those that use Maelstrom of Battle), all Siege Engine models are deployed before the first turn of the game. As players don't have a deployment zone in these Scenarios, both players roll off before the game begins, with the player that rolls highest choosing one table edge to deploy their Siege Engine models wholly within 6" of. Their opponent then deploys their Siege Engine models wholly within 6" of the opposite table edge. If only one player has Siege Engine models, they are automatically counted as winning this roll-off. A Siege Engine that deploys in this manner does not count as having Moved on the first turn.
Siege Crew – A Siege Engine will also have a number of crew listed in its profile; these are the warriors who are trained to operate the Siege Engine. The profile for the siege crew will also be given in the profile for the Siege Engine, showing their characteristics, wargear and any special rules they may have.
Siege crew can operate any Siege Engine from their Army List, not just their own.
Siege Veteran – Additionally, one of the crew members is always a Siege Veteran. A Siege Veteran has exactly the same profile as the normal crew, with the exception that they exchange the Warrior keyword for the Hero keyword, and have a single point each of Might, Will and Fate. A Siege Veteran may use their Might Point to improve the To Hit, Scatter or To Wound Roll of the Siege Engine.
A Siege Veteran is a Minor Hero; however, their Warband can only ever include the Siege Engine and the crew. A Siege Engine never counts as a model for the purpose of holding objectives or areas of the battlefield when working out how many models are in your Army or when working out your Army's Break Point.
A Siege Engine does not Activate. Additionally, a Siege Engine will always be defined as either Large or Small, which will have an impact on how easy it will be to Move or Shoot. This will be covered later on.
Siege Engines and Moving – As you may have guessed, a Siege Engine Moves in a very different way to other models, and in some instances they cannot Move at all. The way the crew of a Siege Engine Moves also differs slightly, and we will cover all of that here.
Moving a Siege Engine – A Siege Engine cannot Move by itself and does not have an Activation; however, a Siege Engine may be Moved by friendly models. The number of friendly models required to Move a Siege Engine depends on its size. Three models are required to Move a Large Siege Engine, whereas only two models are required to Move a Small Siege Engine.
To Move a Siege Engine, the models wishing to Move it must all be in base contact with the Siege Engine at the start of the Move Phase. When they Activate, they can all Activate simultaneously in order to Move the Siege Engine, which can then Move up to the Move Value of the slowest model helping to Move it. When Moving a Siege Engine, it can also be rotated about its centre point as part of this Move. If a player wishes to rotate a Siege Engine but not Move it, this is done in the same way, however, the Siege Engine will only rotate and not Move – both Moving and rotating a Siege Engine will have an impact on when, or if, the Siege Engine shoots later that turn. A Monster counts as three models when calculating how many models are Moving a Siege Engine.
A Siege Engine cannot Move through Difficult Terrain, cross Barriers or make Jump, Climb, Leap or Swim Tests. A Siege Engine cannot be Moved if an enemy model is in base contact with it.
If a Siege Engine has the Static special rule, then it cannot be Moved or rotated.
Moving the Crew – The crew Move in the same way as normal models. However, crew cannot Move further than 6" away from their Siege Engine unless it has been destroyed.
Siege Engines and Shooting – Siege Engine models may Shoot in the Shoot Phase like any other model following all of the usual steps, provided it has not been Moved during the preceding Move Phase and has enough crew in base contact with it who are not Engaged in Combat. A Large Siege Engine requires two unengaged crew members, whilst a Small Siege Engine only requires one.
Firing a Siege Engine – A Siege Engine isn't able to Shoot just in any direction, and needs to be facing its target in order to Shoot it. As a result, a Siege Engine has an Arc of Sight: this is a 45° angle that a Siege Engine can Shoot within. To determine if a model is in the Arc of Sight of a Siege Engine, place the Firing Arc Template over the centre of the Siege Engine with the middle line facing the same way as the Siege Engine. If a model is within this Firing Arc, then the Siege Engine has Arc of Sight to it.
A Siege Engine cannot make a Shooting Attack if there is an enemy model in base contact with it.
Target Types – Battlefield Targets: Infantry models, Cavalry models, Monster models, Chariot models, doors, Small Siege Engine models. Siege Targets: Large gates, War Beast models (including their Howdah), Smaug, houses, boats, Large Siege Engine models.
When playing your games, you may wish to Shoot at something not covered in this list. In these instances, players should agree whether the target is a Siege or Battlefield Target. If it is something that both players agree would be easy for trained crew to hit, then it should be a Siege Target, so make sure to discuss this before you start your game.
When making a Shooting Attack with a Siege Engine, start by picking a target model within the range of the Siege Engine, in Line of Sight from the Siege Engine and within its Arc of Sight. Many Siege Engine models have a minimum and maximum range (e.g., 12"-60") and as such they cannot choose a target that is closer than their minimum range or further than its maximum range. Every model can be described as either a Battlefield Target or a Siege Target, which will determine how easy it is to hit.
Once a target has been chosen, determine which crew members are firing the Siege Engine and then roll To Hit using the Shoot Value of the crew. If the crew members firing the Siege Engine have different Shoot Values, use the highest numerical value. So, if two crew were firing and one had a Shoot Value of a 3+, and one had a Shoot Value of a 4+, then you would use the Shoot Value of 4+ when rolling To Hit. If a Siege Engine was rotated in the preceding Move Phase, then it suffers a -1 penalty when rolling To Hit.
If the To Hit Roll fails, the shot veers wildly off course and misses – nothing happens. If the target is a Siege Target and the To Hit Roll succeeds, the shot hits as normal. If the target is a Battlefield Target and the To Hit Roll succeeds, then the Siege Engine will need to roll on the Scatter Table to determine which model is actually hit by the shot. A shot can scatter onto a target that is out of the maximum range of the Siege Engine, or out of their Arc of Sight – this represents the shot veering or being blown off course.
Scatter Table
| D6 | Result |
|---|---|
| 1 | Wide of the Mark: Your opponent may choose one Battlefield Target (from either Army) within 6" of the initial target. The chosen model becomes the actual target. The chosen model must be within the Line of Sight of the Siege Engine, otherwise it cannot be chosen. If there is no alternative Battlefield Target within 6", or if your opponent does not wish to choose an alternative, then the shot misses completely. |
| 2-5 | Slight Deviation: Your opponent may choose one Battlefield Target from their own Army within 6" of the initial target. The chosen model must be within the Line of Sight of the Siege Engine, otherwise it cannot be chosen. The chosen model becomes the actual target. If there are no alternative targets, treat the result as Dead On instead. |
| 6 | Dead On: The shot hits the initial target, who becomes the actual target. |
Siege Engines and In The Ways – Depending on how a Siege Engine Shoots, there may be models or terrain in the paths of the shot between the Siege Engine and the actual target – the one who was actually hit by the shot. A Siege Engine will Shoot in one of two ways, either an Arcing Shot or a Direct Shot, which will be stated in the special rules of that Siege Engine.
Arcing Shot – A Siege Engine that Shoots by Arcing Shot does not need Line of Sight to its target, or to a model its shot would scatter on to, so long as another friendly model has Line of Sight to the initial target. After determining the actual target, a Siege Engine with Arcing Shot does not make In The Way Tests for intervening models and terrain (the shot goes over them). However, anything that is clearly taller than the actual target and would be above the actual target when the shot comes down will incur an In The Way Test. This could include the likes of trees, ledges, or rocks that jut out from cliff faces; a degree of common sense will be needed here – a whole tree would provide this In The Way, but a single branch would not!
This is also the case for when a Siege Engine with Arcing Shot hits a War Beast with a Howdah, as the Howdah is above the War Beast and so will provide an In The Way Test.
Direct Shot – A Siege Engine that Shoots by Direct Shot will need Line of Sight to the initial target. Additionally, if the shot scatters onto another target, the Siege Engine will need to have Line of Sight to this target in order for them to be selected as the actual target. In both of these instances, this Line of Sight is drawn from the firing point of the Siege Engine, so the tip of a ballista or siege bow for example.
After determining the actual target, a Siege Engine with Direct Shot will make In The Way Tests in the same way as any other Shooting Attack.
Friends in Proximity – Like normal Shooting Attacks, a Good Siege Engine cannot make a shot if having it land as intended would cause harm to friendly models (including any area effect the Siege Engine may have), or if there are any friendly models In The Way of the initial target. A Good Siege Engine also cannot Shoot into a Combat.
However, a Good Siege Engine can still make a shot if the only way it would end up risking hitting its allies is from the scatter.
Untrained Crew – Other friendly models may need to help a Siege Engine Shoot should the crew be slain during the game, in which case they are referred to as untrained crew. Any other friendly model can do this in the same manner as normal crew, however, any untrained crew that wishes to help will always treat their Shoot Value as 6+ whilst helping to Shoot the Siege Engine, and will never use their own Shoot Value. Hero models that act as untrained crew cannot use their Might to influence the To Hit, Scatter or To Wound Rolls of the Siege Engine.
Rolling To Wound – Once a Siege Engine has made a Shooting Attack, and the actual target has been determined, then a To Wound Roll needs to be made in the same way as normal, using the Strength of the Siege Engine.
A Siege Target that is wounded will suffer 1 Wound.
A Battlefield Target that is hit is immediately knocked Prone. Additionally, a Battlefield Target that is the actual target and is wounded will be instantly slain and removed as a casualty, unless they are able to prevent the Wound (such as by using Fate). Models hit by the area of effect of a Siege Engine (if applicable) will not be automatically slain in this manner.
The only exceptions to this auto-slain rule are if the actual target has a Defence or Wounds characteristic of 10 or more. In these instances, a successful Wound will deal a number of Wounds equal to half the actual target's starting Wounds characteristic instead.
If a Cavalry model is hit by a Siege Engine, then all parts of the model (rider, Mount and any passengers) will all be hit individually – make a To Wound Roll for each of them as described above.
Attacking a Siege Engine – A Siege Engine can be shot at in the same manner as other models. A Siege Engine can also be the target of a Magical Power or special rule, but will ignore all effects of any Magical Power or special rule with the exception of damage.
If, during the End Phase of a turn, a model is in base contact with an enemy Siege Engine, that model hasn't done anything during that turn except Move (i.e., has not made a Shooting Attack, Cast a Magical Power, been Engaged in Combat), and that model was not affected by a Magical Power that turn, then it can disable the Siege Engine.
A Siege Engine that is disabled immediately reduces its remaining Wounds to 0. When a Siege Engine is reduced to 0 Wounds for any reason, remove it from play. Remember that a Siege Engine never counts as a model in regards to the total number of models in the Army, or towards an Army's Break Point.
A Siege Engine does not have a Control Zone, cannot be Engaged in Combat, and cannot be knocked Prone for any reason. A Siege Engine counts as having a Strength of 6 for the purpose of rules that refer to a model's Strength.
Sieges
Throughout the long history of Middle-earth, many devastating sieges have taken place during times of war. From the siege of Helm's Deep where the valiant Men of Rohan desperately defended their people from the relentless onslaught of Saruman's Uruk-hai, to the Battle of Pelennor Fields where arguably the greatest army of the Third Age was amassed to breach the walls of Minas Tirith and bring the realm of Gondor to its knees, sieges have served as a titanic clash of armies in one final push to win a war.
Over the following pages, we present you with the additional rules you will need to play your own siege battles, as well as a Siege Scenario for you to use when you recreate these epic battles.
Castles and Fortresses – These rules are designed to help you fight battles across purpose-built fortifications, recreating the danger and thrill of laying siege to a castle or attacking the walls of a great fortress against a determined defender. A castle, fortress or other such fortification is made up of two main elements: the walls and the gates and doors.
Purpose-built defensive walls that are taller than the height of a model cannot be Climbed by that model – the wall will be too sheer and will have no foot or hand holds to grasp onto. Models with the Swift Movement special rule can Climb such walls, provided they can make it all the way to the top and be placed flat on the walls, otherwise they cannot Climb them. For models to assault those atop the walls, they will need a Siege Ladder or even a Siege Tower. We don't make allowances for smashing down walls in our games – it's impossible to imagine what kind of fortress you have created at home and, in our experience, siege games can get quite complicated enough without this. However, should you wish to create your own rules for destroying walls in your own games, feel free to do so – though it's not advisable to have the likes of ordinary models be capable of destroying such things!
Almost every fortress will have the likes of gates and doors dotted throughout them, ranging from the impressive heavy gates used as the main entrance, to standard doors in between buildings. These are quite capable of being destroyed or moved through during the course of a game.
Attacking Gates and Doors – Gates and doors can be shot at like any other model, and can be attacked in the Fight Phase. Shooting Attacks with a Strength of 5 or more may damage gates or doors, however, Shooting Attacks with a Strength of 4 or lower cannot damage gates or doors.
For a model to attack a gate or door, it must be in base contact with it at the end of the Fight Phase, and not have been Engaged in another Combat that turn. Models may Support those attacking a gate or door, provided that they also haven't been Engaged in a Combat, or Supported a Combat, that turn. When a model attacks a gate or door, no Duel Roll is made – they will automatically win. Models may then Strike against the gate or door following the normal rules, counting the gate or door as Trapped. Should a gate or door be reduced to 0 Wounds, it is destroyed and models from either side can Move through them freely. Monster models may not use Brutal Power Attacks against a gate or door.
Below is a list of the various types of gates and doors, along with their Defence and Wounds characteristics. It is always a good idea to discuss with your opponent what each type of gate or door will count as before the game starts.
| Type | Defence | Wounds |
|---|---|---|
| Fortress/Castle Gate | 10 | 3 |
| Dwarven Door | 9 | 3 |
| Heavy Armoured Door | 9 | 2 |
| Armoured Door | 8 | 2 |
| Heavy Door | 7 | 2 |
| External Domestic Door | 6 | 2 |
| Internal Domestic Door | 5 | 1 |
Moving Around the Fortress – Generally speaking, models will move around a fortress in much the same way as a battlefield. After all, fortresses are usually well-paved and easy to navigate. However, there are some aspects of a fortress that function slightly differently, which we will cover here.
Doors, Gates and Hatches – Defending models may Move through the likes of doors, gates and hatches without penalty. However, attacking models will need to batter them down and destroy them to Move through them, as described earlier.
Moving Through Buildings – Depending on the configuration of your fortress, there may be doorways and trapdoors that lead through internal rooms and staircases. In these instances, players should decide between themselves how much of a model's Move Value is required to Move through such areas to reach the exit, and also whether models can stop halfway within such areas.
Stairs – Models can Move freely up and down stairs, though Cavalry have some alternative interactions with stairs as described in the Cavalry rules.
Fighting on stairs is much the same as fighting anywhere else, with one exception. Should a model have to Back Away down the stairs, they must roll a D6 before the winner makes Strikes. On a 1-3, the model that Backed Away will slip and become Prone.
Assaulting the Fortress – In a siege game, one side will be the attacker (the one trying to get into the fortress) and one will be the defender (the one trying to protect the fortress). Attacking a fortress is simple in principle but much harder in practice. The attacker must simply breach the gates or scale the walls to get inside, though this is much easier said than done!
There are a number of different methods that the attacker can use when assailing a fortress. They can use the likes of Siege Ladders propped up against the walls for their troops to climb up, heavy battering rams that are used to smash down the gates and open them up for the rest of the army to flood through, or even great siege towers that can carry numerous warriors within its structure, before unleashing them upon the battlements. We will cover each of these aspects here.
Siege Ladders – A Siege Ladder is a Heavy Object, however, it is not mounted on a 25mm base and will simply use the template of the model when carried. If it is not being carried, a Siege Ladder can be shot at and attacked as normal; it counts as having a Defence of 8 and 2 Wounds. If any model that is carrying a Siege Ladder Moves into base contact with the walls of the fortress, the Siege Ladder is immediately raised; place it in position against the wall. Models may Move up a Siege Ladder in the same way as a normal ladder.
Fighting Up Ladders – Models may Charge up Siege Ladders against a defender on the walls, in which case they will be Engaged in Combat with that defender, and may Move onto the battlements if possible. If the defender is in base contact with the battlements where the ladder was placed, then the Charging model will remain at the top of the ladder when they fight. A model Charging up a ladder can only Charge a single enemy model if it remains on the ladder. A model cannot Support a model on a ladder. Defending models cannot Charge models fighting atop a ladder in this manner as they are already Engaged in Combat, though they may Support their ally in the Combat.
If a model fighting up a ladder wins the Combat, their opponent will Back Away as normal. If they slay their enemy, they may immediately Move onto the walls into base contact with the battlements where their Siege Ladder is placed.
If a model fighting up a ladder loses the Combat then, after any Strikes have been resolved, they must roll a D6 instead of Backing Away. On a 1-3, the model will fall off the ladder and suffer falling damage. If there are any other models climbing up the ladder, roll a D6 for each of them as well. On a 1-3, they will also fall and suffer Falling Damage.
Example 82: These Uruk-hai have both Charged up ladders and become Engaged in Combat with the Warriors of Rohan. Uruk-hai A wins their Combat and successfully kills their target; they may then Move onto the walls. However, Uruk-hai B loses their Combat though is not slain by the Warrior of Rohan. After the Strikes have been resolved, Uruk-hai B rolls a D6, scoring a 2 meaning they fall and suffer Falling Damage.
Pushing Down Siege Ladders – If a model on the walls is in base contact with the battlements at the same point where a Siege Ladder is propped up, they can attempt to push it down during their Activation so long as there is no attacker at the top of the ladder, in which case they would need to Charge the attacker. A model that attempts to push down a ladder cannot do anything else in its Activation after attempting to do so.
When a model attempts to push down a ladder, roll a D6. Apply a +1 modifier to the roll for each friendly model in base contact with the pushing model that is not Engaged in Combat. Apply a -1 modifier to the roll for each enemy model that is currently on the ladder. A Monster will modify the dice roll by 3 in either direction, depending on if they are pushing or on the ladder.
If, after all modifiers have been applied, the result is a 4+, then the ladder is pushed down and all models on the ladder suffer Falling Damage.
Battering Rams – A Battering Ram is a Heavy Object, however, it is not mounted on a 25mm base and will simply use the template of the model when carried. If it is not being carried, a Battering Ram can be shot and attacked as normal; it counts as having a Defence of 8 and 3 Wounds. A Battering Ram must always have a minimum of two models carrying it, otherwise it cannot be carried.
Battering Down Doors and Gates – To use a Battering Ram, it must be in base contact with a door or gate at the start of the Fight Phase. After any Heroic Combats have been resolved, but before any other Combats are resolved, a Battering Ram can be used against the doors or gates. It will automatically hit its target, and will make a single Strike against it. Note that as a door or gate is always considered Trapped, the Battering Ram will make two rolls To Wound as a result.
The Strength of the Battering Ram is equal to the Strength of the strongest model helping to carry it, +1 for each additional model carrying it, to a maximum of 10. If a Battering Ram would have a Strength of higher than 10, then it may re-roll any failed To Wound Rolls.
Example 83: These Uruk-hai are about to use a Battering Ram against the gates of the Hornburg. The Strength of the battering ram is 4 (the Strength of the Uruk-hai) plus 5 for the additional 5 Uruk-hai that are carrying it, for a total Strength of 9. The Battering Ram can then make one Strike against the gates, making two To Wound Rolls because the gate is considered to be Trapped – the gate is in deep trouble!
Siege Tower – A Siege Tower should be tall enough for the ramp to reach the battlements of the fortress when lowered and should be no more than 4" wide across the ramp. Infantry models may be deployed within or on top of a Siege Tower, with the exception of Monster models. A Siege Tower can be pushed by friendly models, and will Move 6" when they do so. It requires six Infantry models to push a Siege Tower, with an additional Infantry model required for each model in or on the Siege Tower. Monster models count as six models for the purpose of pushing a Siege Tower. To count as pushing a Siege Tower, a model must be in base contact with either the rear or side of the Siege Tower, or in base contact with another model that is pushing from the rear.
If a Siege Tower moves into base contact with the fortress in the Move Phase, then the ramp is immediately lowered. Models in the Siege Tower do not count as Moving whilst the Siege Tower is being pushed, unless they specifically Move within it.
A Siege Tower can be shot at or attacked normally, has a Defence of 10 and 4 Wounds, and is a Battlefield Target. If a siege tower would be destroyed, all models in or on it will suffer Falling Damage.
Attacker and Defender Equipment – When choosing your forces for a siege game, both the attacker and the defender can spend their points on extra equipment that will aid them in the battle. Attacker equipment has largely already been covered and so just have their point costs listed here; however, the defender equipment will have some additional rules that they can use in their games.
Attacker Equipment
- Siege ladder — 5 points
- Battering ram — 15 points
- Siege tower — 40 points
Defender Equipment
- Barricade — 5 points. A Barricade should be no more than 3" in length, 1" in width and 1" in height. A Barricade can be defended in the same way as a Barrier, and can be Jumped over in the same way as an Obstacle. A Barricade has a Defence of 7 and 2 Wounds.
- Spiked Barricade — 10 points. A Spiked Barricade follows all the rules for a regular Barricade, with the following additions: Any model that attempts to Jump over a Spiked Barricade will suffer one Strength 3 hit after resolving their Jump Test, unless they rolled a 6. Any model that is fighting across a Spiked Barricade and accidentally Strikes it instead of their opponent immediately suffers one Strength 3 hit.
- Rallying Point — 25 points. A Rallying Point is represented by a 25mm base. Models may Move over a Rallying Point but cannot finish their Move overlapping it. Defending models treat a Rallying Point as a banner. Additionally, defending models within 6" of a Rallying Point apply a +1 modifier to any Courage Tests they are required to take. If, during the End Phase of a turn, an enemy model is in base contact with a Rallying Point, that model hasn't done anything during that turn except Move (i.e., has not made a Shooting Attack, Cast a Magical Power, been Engaged in Combat), and that model was not affected by a Magical Power that turn, then it can destroy the Rallying Point – remove it from play.
- Rocks — 5 points. A pile of Rocks is represented by a 25mm base and is a Light Object. A defending model in base contact with the Rocks and in base contact with the battlements can make a Shooting Attack with them during the Shoot Phase. This Shooting Attack can only target enemy models within 1" of the walls, or climbing a Siege Ladder, and has a range of 8". A model making a Shooting Attack with a rock treats their Shoot Value as 4+ regardless of its actual value. Any model hit by a rock suffers one Strength 6 hit. A model climbing a Siege Ladder that is hit must roll a D6, and on a 1-3 they will fall off and suffer Falling Damage.
- Boiling Oil — 25 points. A vat of Boiling Oil is a Heavy Object and is represented by a 40mm base. If two defending models are in base contact with the Boiling Oil, and are not Engaged in Combat, they can pour it on an attacker as a Shooting Attack. This Shooting Attack can only target enemy models within 1" of the walls, or climbing a Siege Ladder, and has a range of 8". Models making a Shooting Attack with Boiling Oil treat their Shoot Value as 4+ regardless of its actual value. Any model hit by Boiling Oil suffers one Strength 8 hit, and any model (friend or foe) within 2" of the target suffers one Strength 4 hit. A model climbing a Siege Ladder that is hit must roll a D6, and on a 1-4 they will fall off and suffer Falling Damage. After making a Shooting Attack with Boiling Oil, the defender rolls a D6. On a 1, the supply of oil has run dry and that vat of Boiling Oil cannot be used for the remainder of the game.
The Grand Siege
Contained within their fortress, the defenders must fend off the impending siege from their foes, who are intent on claiming the fortification for their own – or seeing it razed to the ground...
Scenario Outline – The defenders must defend the fortress at all costs, whilst the attackers seek to lay claim to it.
The Armies – Players may either decide who is the attacker and defender, or may roll a D6 with the player who rolls highest choosing which to be. Players then build their Armies as described in the Matched Play section. The attacker gains an additional 25% of the points value of the defender's Army to add to their own. So, if the defender's Army is 1,000 points, then the attacker may have up to 1,250 points.
Both the attacker and defender may purchase items from their respective siege equipment list.
Layout – The fortress will run the length of the board 12" from a board edge. The gate of the fortress is in the centre of the walls, and there may be a selection of towers along the length of the walls.
Starting Positions – The defender deploys their Army anywhere atop or behind the wall of the fortress. The attacker then deploys their Army wholly within 12" of the board edge opposite to the fortress.
Initial Priority – Players roll off for Priority on the first turn as normal.
Objectives – The game lasts until the end of a turn in which one player has completed their objective. The attacker wins if during the End Phase of any turn there are 12 or more attacking models either on or within the walls of the fortress. The defender wins if during the End Phase of any turn, the attacker has been reduced to 25% or less of their starting numbers. If both sides complete their objective in the same turn, the game is a draw.
Special Rules
- Ride Out – If needed, the defenders can open the gates of the fortress and charge out. The defender may choose to open the gates at the start of any Move Phase. From this point on, the gates will be open and models can Move through them with no penalty. This cannot be done if the gates have already been destroyed – they are already open at that point!
- Breach the Gates – If the gates are destroyed by the attacker, then defending models within the fortress suffer a -1 penalty to any Courage Test they have to take as a result of being part of a Broken Army.
Narrative Play
The Middle-earth Strategy Battle Game is ideally suited to Narrative Play, allowing you to recreate all your favourite battles and scenes from the films using your collection of Citadel and Forge World miniatures. Many publications will have a number of Narrative Scenarios in them, detailing how to play those events and which miniatures you will need to faithfully recreate the scenes from the films. There are no points values in Narrative Play, and sometimes a Scenario may seem unbalanced in regards to the forces being used. However, each Scenario will also have a number of special rules which will impact the course of the battle, helping to balance the game and capture the essence of that particular scene.
Narrative Play Scenarios are also great to play as part of a campaign, where you can re-enact a chain of events, such as following the journeys of the Fellowship from the Hobbits leaving the safety of the Shire all the way up to the destruction of the One Ring in the fires of Mount Doom. Some Scenarios may provide a short, fast-paced game with only a handful of models that can be played in a short period of time. Others, such as the Siege of Helm's Deep or the Battle of Pelennor Fields, can take a whole day and use a vast collection of miniatures. Many supplements will explore Narrative Play and provide you with a number of Scenarios, and even linked campaigns, for you to play with and re-tell the stories of with your friends.
Participants – The forces of the greatest battles of Middle-earth are woven into the fabric of history, and the great deeds done by heroes and warriors alike are forged into legend. The participants of these battles are very much set in stone – we all know that the likes of Aragorn, Legolas and Gimli were present at the Battle of Pelennor Fields, but the likes of Smaug or the Dark Lord Sauron most definitely were not.
Every Narrative Play Scenario will have a list of participants, detailing exactly which models the forces of Good and Evil will need to recreate that specific battle. These are not necessarily designed to be balanced forces in their own right, but to faithfully capture the feel of the armies presented at that point in time and in that scene or battle. When we present the participants for a specific Scenario, bear in mind that these will be the exact same forces that we have used when designing, balancing and playing them.
However, should you wish to experiment by altering aspects of the Scenario, such as changing victory conditions, participants or even special rules, in your own games, then you are more than welcome to do so. Perhaps you want to see how a battle would unfold if different heroes had been present, or what would have happened if a completely different army had turned up instead.
You can also use Narrative Play as a basis for creating your own 'What If?' style Scenarios. What would have happened if Saruman had led his forces at the siege of Helm's Deep? What if Haldir had taken the Galadhrim to Minas Tirith instead of coming to the aid of the Rohirrim? What if Smaug had unleashed his fury upon the Battle of Five Armies? What if Sauron had discovered that the One Ring was hidden within the Shire, and launched an all-out assault upon it? That's all part of the fun of the game!
Special Rules – The real flavour of Narrative Play Scenarios comes from the special rules that they are presented with. These help to give a much better feel of the scenes from the films and may represent anything from endless hordes of Orcs at the War of the Last Alliance, to Gandalf destroying the Bridge of Khazad-dûm, or Thorin's Company navigating the rickety walkways of Goblin-town.
It is these special rules that balance Narrative Play Scenarios, and provide players with a truly unique gaming experience that allows them to relive their favourite scenes from both the books and the films. It is worth noting that not all Scenarios will be balanced – some may be purposefully more difficult for one side than the other, if the event calls for it.
Objectives – The objectives of Narrative Play Scenarios are vastly different to those presented in Matched Play. Often, in Narrative Play, the Good side will be fighting to achieve a certain goal, whilst the Evil side may be trying to accomplish something completely different.
For example, when recreating Amon Hen, the Evil player is trying to capture the Hobbits, escape the board with them and slay as many of the Fellowship as they can; whereas the Good player is trying to prevent this from happening and have Frodo escape the board to continue his journey. This allows players to fight for the same reasons as the characters they are controlling.
Narrative Play Notes – In Narrative Play, the Good side is always considered to have Priority on the first turn; there is no need to roll. Additionally, unlike in Matched Play games, neither Army is subject to the rules for a Broken Army in a Narrative Play game. There is no fleeing in these situations – it's do or die!
Perhaps the most important thing to consider when playing Narrative Scenarios, is that they are often the most fun when you try to play as the characters in the films. Thinking things like 'what would Aragorn do in this situation?' rather than trying to make the most tactical choice will often lead to the most satisfying and engaging games for both players, and give a more faithful recreation of the scenes you are playing.
Matched Play
In Matched Play games, you and your opponent gather your forces together to create an army from your collection, up to an equal points limit, before unleashing them upon each other in an epic clash to influence the very fate of Middle-earth. Matched Play games are another fun way of playing the Strategy Battle Game, and allow you to use the armies and models you like the most to create a balanced army and test your skill, generalship and tactical ability upon the tabletop.
Perhaps the greatest strength of Matched Play games is that they are ideally suited for pick-up-and-play games at home, your local gaming club or even on your lunch break at school (or work if you are really lucky!). They are also perfect for running tournaments and gaming weekends, as everyone will have created an Army to the same points limit allowing for a series of balanced and engaging games with everyone on a level playing field. All you need for a Matched Play Game is an agreed points limit, some terrain and, of course, an opponent. In this section, we present all of the rules for creating your Army for a Matched Play game.
Points Values
Every model is given a points value as part of its profile. A model's points value is how we measure its effectiveness on the battlefield and how formidable it is in a fight. A lowly Moria Goblin costs a mere 4 points, whilst the mighty Dragon Smaug costs a whopping 700! All of these values reflect the overall power and usefulness of the model in a game; some characters may be expensive because of the amount of enemies they can cut down, whilst others may cost more because of how they impact and aid their allies during the course of the game.
By adding together the points values of all the models in your Army, you will be able to work out the total points value of your Army. Knowing the points value of your Army is a handy way of determining its effectiveness and makes sure you have an even contest. If you have enough Hobbits, it is possible to overwhelm even the mightiest of foes!
Size of Game – When playing a Matched Play game, you and your opponent will first need to agree upon a points limit – this is the maximum number of points you can spend on your Army. So, if you were to decide on a points limit of 700, then each player would be able to spend up to 700 points on models for their Army.
In reality, most Armies will be just shy of the points limit; many 700 point Armies may actually be the likes of 698 or 699 points instead. This is perfectly fine as the points limit hasn't been exceeded, and in a friendly game you may be willing to let an opponent be a couple of points over to ease things along. However, in the likes of a tournament or gaming weekend, you must make sure that you do not exceed the limit at all – so at a 700 point event, a 701 point Army would need to be tweaked to be below the limit.
What Points Limit? – The size of game you wish to play will probably come down to how much time you and your opponent have to play your game in – nothing is more irritating than having to abandon an exciting game before reaching a satisfying conclusion because you have run out of time.
If you are looking for a small-scale, quick game that can be played over the likes of a lunchtime or when you are tight on time, then a game of no more than 400 points per side is ideal. This will give both sides a couple of lower ranked Hero models, and a few Warrior models to use for their Army, or a single major Hero leading a Warband. These games will usually take no longer than an hour.
Most games will typically be around the 600-1,000 point mark, as this gives both sides plenty of points to play with and create an interesting Army. Often at these points levels you will be able to field more interesting Hero models, and some of the larger models in your collection that you may not have been able to do otherwise. Such games usually take between one and a half and two and a half hours, which makes them ideal for the likes of tournaments and gaming weekends.
If you are looking for a truly epic clash, you can play games at significantly larger points levels – usually starting at around the 1,250 point mark. Such large games allow for players to field huge and impressive armies using their entire collection. These kinds of games will often take multiple hours or even a whole day or weekend, and are perfect for getting your whole gaming club or group of friends together and play games with multiple players, or even armies, on each side.
Building a Matched Play Army
Now that you have decided your points limit, you will need to build your Army. The rules for building an Army are simple, and we will cover them all here.
Selecting an Army List – Every model in the Strategy Battle Game can be placed into one (or more) Army Lists. An Army List is designed to represent a specific faction in Middle-earth, or an alliance of different characters and races. There are many Army Lists available, allowing you to recreate almost every fighting force seen within the films on the tabletop.
Each Army List will present you with a list of the various Hero and Warrior models that you can take within that Army List, as well as specific rules you need to be aware of when putting together that Army – some may have to include certain Hero models, for example. There will also be a section of special rules for that Army List, which they will benefit from when you play a game with them.
The Army Lists are designed to be played as single lists, and there should be an Army List to represent almost any force presented within the films – though more may be presented in the future. You cannot take Warbands from different Army Lists in the same Army in a Matched Play game.
Warbands – Once you have selected your Army List, you can now start building an Army. An Army is comprised of a series of Warbands. Each Warband is led by a Hero, and then can include a number of Warrior models to follow them. Some Hero models can lead more Warrior models than others, depending on their Heroic Tier, which is explained shortly. All models in your Army must be included in a Warband, though there is no limit to the number of Warbands your Army can include.
The Captain – When making a Warband, the first thing you must select is a Hero to lead the Warband, known as the Warband's Captain. This Hero can be given any of the wargear options from their profile, for the listed points cost. This may include anything from relatively standard equipment such as a shield, to the likes of a Mount, or even more specialised and unique wargear. If the Hero doesn't have something as an option in its profile, then it cannot take it.
Sometimes Hero models may be bought as a pair, or more (such as Sigrid & Tilda). Where this is the case, it will tell you in their profile whether they must be included in the same Warband, whether they can each have their own Warband, or even if they must be included in another Hero model's Warband.
Followers – Once you have chosen your Warband's Captain, you can then add a number of Warrior models from the same Army List to their Warband – these are called Followers. Some Army Lists may have rules that limit which Warrior models can be part of certain Hero model's Warbands; where this is the case, it will be clearly stated in the rules for that Army List. Otherwise, any Warrior from the Army List can be included in the Warband of any Hero from the same Army List.
A Captain does not have to include the maximum number of Followers in their Warband, and can include none if they wish. Only Warrior models can be Followers; Hero models must form their own Warbands and cannot be included in the Warbands of other Hero models unless explicitly stated otherwise.
Followers can select wargear as options from their profile in the same manner as Hero models. The points cost for these options is presented in the profile for the Warrior models.
Bow Limit and Throwing Weapon Limit – Some types of Missile Weapon are restricted as keeping an army supplied with an abundance of arrows, throwing daggers and other such items is a hard task at best. Because of this, there is a limit on the number of bows and throwing weapons you can include in your Army.
An Army can only have one third of its Warrior models equipped with any type of bow or crossbow – simply put, one in three Warrior models can carry a bow. This only applies to Warrior models, and so Hero models are ignored entirely when working out how many models in your Army can have a bow – a third of your remaining models can have a bow.
This is also true for throwing weapons, and so an Army can only have one third of its Warrior models equipped with any type of throwing weapon or throwing spear – simply put, one in three Warrior models can carry a throwing weapon. This only applies to Warrior models, and so Hero models are ignored entirely when working out how many models in your Army can have a throwing weapon – a third of your remaining models can have a throwing weapon.
These two limits are independent of each other, and so an Army could have one third of its Warrior models armed with a bow, and a different third of the Army armed with throwing weapons – so long as there is never more than a third of either.
For example: The bow limit of an Army with 34 Warrior models is 12 (34 divided by 3, rounded up). So an Army with 34 Warrior models could have 12 models with bows, and 12 different models with throwing weapons.
Siege Engines – Some Army Lists contain Siege Engine models in them. A Siege Engine forms its own Warband with the Siege Veteran as the Warband's Captain. A Siege Veteran is classed as a Minor Hero, however, their Warband will only ever include the Siege Engine and the crew, and may not have other Followers. An Army may only include one Siege Engine for each Hero with a Heroic Tier of Hero of Fortitude or higher.
The General – Once you have selected all of the Warbands for your Army, you will need to choose which of your Hero models will lead your Army – this is your General, and they will gain the General keyword.
Your General will automatically be the Hero in your Army with the highest Heroic Tier. If multiple Hero models in your Army are tied for the highest Heroic Tier, then you may choose which of them will be your General. You must always have a General – you cannot choose not to.
Some Army Lists may state that a specific Hero must be your General. Where this is the case, that Hero must be your General, even if they don't have the highest Heroic Tier in your Army.
There may be some rare situations where a Hero with the highest Heroic Tier cannot be your General. Where this is the case, it will be stated either in the special rules for that model or Army List.
Additionally, your General gains the Dominant (3) special rule (unless they already have a better Dominant value).
What about Allies? – In previous versions of the Strategy Battle Game, players were able to ally factions together to form the alliances we see in the films. However, in this edition this is no longer the case and Army Lists cannot ally with each other. This is because the Army Lists presented should cover all of the factions and alliances we see in the films, allowing players to simply pick the Army List for the scenes they wish to represent. It also stops factions allying together and then using characters together that never fought alongside one another due to timelines or specific events, even though their factions did.
In your own games at home, players are more than welcome to create alliances of their own if they wish, though not for organised play events such as tournaments.
Heroic Tiers
Simply put, some heroes in Middle-earth are greater than others, and as such command much greater respect and loyalty from those around them. Aragorn, for example, would inspire many more warriors to follow him than Damrod would.
This is represented in the Strategy Battle Game by Heroic Tiers. In each Army List, Hero models will be broken down into one of five Heroic Tiers, depending on their rank and prowess on the battlefield. It's worth noting that if a Hero is a certain Heroic Tier in one Army List, this doesn't mean they will automatically be the same Heroic Tier in other Army Lists they can be part of. A Hero model's Heroic Tier represents their importance to that particular Army, not in the grand scheme of Middle-earth. For example, the Master of Lake-town is incredibly important to Lake-town as he is their leader, whilst the likes of Gamling or Tauriel are lower down the ranks in their own Army Lists. Even though both Gamling and Tauriel are almost undeniably greater heroes than the Master of Lake-town, his status within his Army List will mean he has a higher Heroic Tier than either Gamling or Tauriel.
Below are the different Heroic Tiers, which outline how many Followers they can take in their Warband, and any other rules that are associated with Heroic Tiers.
- Hero of Legend – Kings, rulers, lords and truly formidable fighters, Heroes of Legend are those who have had the greatest impact on Middle-earth, for good or evil, and can command great swathes of followers when they march into battle. Heroes of Legend may have up to 18 Followers in their Warband. Additionally, if a Hero of Legend is your General, then they gain the Last Stand special rule. Last Stand – The first time a Hero with this special rule takes a Courage Test as a result of being part of a Broken Army, they will automatically pass the Courage Test.
- Hero of Valour – Heroes of Valour may not be at the forefront of their kingdom or at the head of their army; however, they are still mighty enough to sway the course of Middle-earth in their own way – one way or the other. Heroes of Valour may have up to 15 Followers in their Warband.
- Hero of Fortitude – Tasked with commanding a portion of a much larger army, Heroes of Fortitude can usually be described as captains, chieftains or similar. Yet although they may not be destined for true greatness, they are still more than capable of proving their worth in the heat of battle. Heroes of Fortitude may have up to 12 Followers in their Warband.
- Minor Hero – Some within the armies of Middle-earth do not command great portions of an army, either through their inexperience, cowardly nature or position within their army's structure. Minor Heroes may have up to 6 Followers in their Warband.
- Independent Hero – Some heroes are simply incapable of leading warriors into battle – either through a complete lack of martial prowess, inability to communicate with those around them or simply that they are far too deadly for anyone to risk following them into the fray. Independent Heroes may never have Followers in their Warband. However, they may be included in the Warband of another Hero as one of their Followers, even though they would not normally be able to.
Matched Play Games
All Matched Play games are designed to be fought between two Armies of equal points value. However, there is nothing stopping you and an opponent from having different points values in your own games if you wish; sometimes a desperate and hopeless defence can be just as fulfilling an experience as a battle where both sides have an equal chance of winning – it's certainly just as exciting!
Every Matched Play Scenario will have all the information you will need to play that game, including how to lay out the board and place Objective Markers (if applicable), how to deploy the Armies, any special rules associated with the Scenario and, most importantly, what the objective is for both sides and how to score Victory Points.
Layout – The layout section of each Scenario will tell you about any notable features of the battlefield, such as key pieces of terrain used as objectives, or the placement of Objective Markers. The rest of the battlefield is up to you, and will allow you to create battlefields themed around different locations in Middle-earth. We would always recommend a minimum of 33% of the board to be covered in terrain so there are plenty of interesting aspects for models to fight around.
The quickest (and fairest) way to set up a battlefield is for one person to set up the terrain and then the other player to automatically win the roll-off to decide which deployment zone they want. Alternatively, you and your opponent can alternate placing terrain features (which can range from trees and walls, to entire forests and buildings) until you are both happy that there is enough terrain to make for an interesting game.
Whichever method you choose, you should do whatever you can to ensure the battlefield evokes the imagery of Middle-earth, and also presents an interesting and challenging strategic situation for both players.
Starting Positions – The starting positions will tell you where the deployment zones are for the Scenario; which is where you will deploy your Armies before the start of the game. Some Scenarios may not have deployment zones, and instead require all or part of an Army to enter the board as Reinforcements.
Models must always be deployed wholly within the stated deployment zone, unless otherwise specified.
Initial Priority – This is where the Scenario tells you which side has Priority on the first turn. This will almost always be determined by a roll-off.
Objectives – Matched Play Scenarios use Victory Points to determine the winner and loser of a battle. Both sides will score Victory Points based on certain achievements they can accomplish during the course of the game, such as capturing key areas of the battlefield, killing specific targets (such as the General), causing the enemy Army to be Broken, and so on. When the game ends, the side with the most Victory Points is the winner. If both sides have the same number of Victory Points, the game is a draw.
Objective Markers – Many Matched Play Scenarios require the use of Objective Markers to represent things on the battlefield. Objective Markers are always represented by a 25mm marker, and are treated as Open Ground. Models can Move freely over Objective Markers; however, Infantry and Cavalry models may never end their Move overlapping an Objective Marker. Infantry and Cavalry models may also not Back Away or Make Way so that they are overlapping an Objective Marker.
Objective Markers can never be placed in a position where models cannot get into base contact with them.
Objects such as a Siege Engine, Heavy Object, or other such items can never be placed so that they are overlapping an Objective Marker.
Special Rules – The final section of a Matched Play Scenario will contain any special rules that are associated with that Scenario. Many of these special rules will be common to multiple Scenarios, and the Middle-earth Matched Play Guide will have all of these listed in a separate section for easy reference.
This Rules Manual contains a selection of the Matched Play Scenarios found in the Matched Play Guide, and as such their special rules are presented within the Scenario as well. However, they are still considered to be the same Scenario as the one printed in the Matched Play Guide.
Matched Play Principles
Matched Play Scenarios are designed to pit players against each other in a battle of wits and generalship to see who will emerge victorious. This can throw up some seemingly strange situations, so we have included some important principles that will apply in the Matched Play Scenarios. Some may apply only to Scenarios with certain special rules or victory conditions, but most will apply to all Scenarios in some way. Below is a list of Matched Play Principles to remember:
- In Scenarios that award Victory Points for killing the enemy General, you will still gain these Victory Points if the General is removed as a casualty in any way, such as fleeing the board or a Hero model with the Will of Evil special rule being reduced to 0 Will Points.
- In Scenarios that require models to hold Objective Markers, models that can temporarily switch sides will always count as scoring for their original owning player.
- In Scenarios where you score Victory Points for wounding the General or a specific Hero, if the Hero in question has been wounded and then subsequently healed, Victory Points will still be scored as if they had been wounded.
- In Scenarios where you score Victory Points should a particular Hero have spent Fate Points (or having a particular Hero not have spent any Fate Points), then should they spend a Fate Point and then regain it in some manner, then it will still count as being spent.
- If a model has a special rule that comes into play when in range of an Objective Marker, then the range will be dependent on how close to an Objective Marker the model needs to be in order to count as scoring for the purpose of Victory Points.
- If an Army suffers enough casualties that at the start of the next turn they would be considered Broken, but the game ends before the next turn can start, they will still count as being Broken for the purpose of scoring Victory Points.
- In Scenarios where models can exit the board, only part of the model's base needs to exit the board to allow them to move off the board.
- When deploying models within 6" of their Warband's Captain, they must still be within 6" of the Warband's Captain's base if they deploy on an Elevated Position.
- When playing on a 6'x4' board (typically in 1,000 point games), players must choose one of the long board edges as their board edge as shown in the maps. When playing on a 4'x4' board, players may choose any board edge as their board edge as they are all the same length.
Sudden Death – In addition to the victory conditions presented in the Scenario, if one player's Army is completely wiped out then their opponent will automatically win. In this rare situation, both players will still receive the Victory Points they would normally have at that point in time. This may create some odd situations where the player who was wiped out actually has more Victory Points than their opponent; however, regardless of this, the other player will still win even though they have fewer Victory Points.
If a player still has models left to enter the board due to the rules of the Scenario (such as those that use the Maelstrom of Battle special rule) then this does not result in sudden death. However, if a player only has models yet to arrive due to a special rule associated with those models or the Army List they are part of, then this will count as sudden death.
Good vs Good & Evil vs Evil – The Middle-earth Strategy Battle Game is designed to be played as Good vs Evil, and this is where we find the game to be most balanced. However, there may be occasions where you may find you and your opponent both playing as either Good or Evil. In these situations, you will need to decide which of you is 'Good' and which of you is 'Evil' for the purpose of any roll-offs. This can also lead to a fun discussion about which Army is 'more Good' or 'more Evil', which doesn't impact the game but can be very entertaining!
In such games, there is a chance that the same characters feature on both sides. It is important to note that if a character has a special rule that triggers off a specific friendly model (such as a character that is able to re-roll a dice whilst within range of a specific character), that these rules will only come into effect from the friendly character, and that the enemy version will not inadvertently provide benefits to the characters from the other Army.
For example: Samwise Gamgee may declare a free Heroic Combat if Frodo Baggins is Engaged in Combat and within 6" of him. If both players have Frodo and Sam in their Army, then the Sam from one army cannot declare this free Heroic Combat if only the enemy Frodo is in range – the Frodo from their own Army must be in range to provide the benefit.
Multiplayer Games – Though the Matched Play Scenarios are designed to be fought between two opposing Armies, this doesn't mean you are limited to just two players! If you have several players who want to join in, simply divide into two teams – one Good and one Evil – and decide amongst yourselves how you wish to split control of your Armies. If you are playing at home and have multiple Army Lists per side, then simply roll off or decide amongst yourselves which player's General is the General for the entire side for the purpose of Victory Points.
Of course, this works best when a team is composed entirely of Good or Evil models. However, sometimes this just isn't possible and you'll have to come up with a suitable explanation as to why the Good and Evil Armies are fighting alongside one another. Note that in these situations, only Good models can benefit from the Heroic Actions, Stand Fast and banners of Good models, and only Evil models can benefit from the Heroic Actions, Stand Fast and banners of Evil models.
Scenarios – With your Army Lists chosen, your Warbands selected, and your General determined, you are ready to begin your Matched Play game. All that is left to do is to determine the Scenario you are going to play. All Matched Play Scenarios are specially formulated to give both players an equal chance of winning.
You can either agree with your opponent which Scenario you are going to play, or you can roll on the chart below to determine for you.
| D6 | Scenario |
|---|---|
| 1 | Domination |
| 2 | To the Death! |
| 3 | Hold Ground |
| 4 | Destroy the Supplies |
| 5 | Reconnoitre |
| 6 | Fog of War |
Each Scenario contains all of the information you will need to set up and start playing, and will be broken down into the following sections: Armies, Layout, Starting Positions, Initial Priority, Objectives and Special Rules (if there are any for that Scenario).
The six Scenarios presented here give a balanced mix of different styles of Scenario, giving you a chance to try out multiple different ways of playing the Strategy Battle Game. Each Scenario has its own victory conditions, and each will have a maximum of 20 Victory Points available in it.
If you are looking to expand your Matched Play experience, then the Middle-earth Matched Play Guide is the ideal companion. It contains a further 18 Matched Play Scenarios (for a total of 24) that each change the way you play the game. It also has six specially designed doubles Scenarios – perfect for fighting side-by-side with a friend!
Scenarios
Scenario 1: Domination
This battlefield will provide a distinct tactical advantage for whoever holds it for many years to come. Victory can be achieved by forcing the enemy back and securing the key points on the battlefield. Failure will not be permitted!
Scenario outline – Players fight to control five objectives scattered across the battlefield.
The Armies – Players choose their Armies to an equal points value.
Layout – Set up terrain as normal. Then, place five Objective Markers on the battlefield; one is automatically placed in the centre of the board. To place the other objectives, both players roll a D6. The player with the highest score places one objective anywhere on the battlefield at least 12" away from the existing objective and 6" away from any board edge. Their opponent then places a third objective at least 12" away from existing objectives and at least 6" away from any board edge. The players then alternate placing the remaining two objectives, according to the restriction noted earlier.
Starting Positions – Both players roll a D6 – the player with the highest result chooses one of the deployment zones. They then select a Warband in their Army to deploy wholly within 24" of their board edge. Models must be deployed within 6" of the Captain of their Warband.
When this has been done, the opposing player chooses one of their Warbands and deploys it wholly within 24" of their board edge, as described above. Players then alternate until all of their Warbands have been placed.
Initial Priority – Both players roll a D6. The player who rolls highest chooses who has Priority in the first turn.
Objectives – The game lasts until the end of a turn in which one Army has been reduced to a quarter (25%) of its starting number of models or below, at which point the player that has scored the most Victory Points wins the game. If both players have the same number of Victory Points, the game is a draw.
Scoring Victory Points
- For each Objective Marker, you score 1 Victory Point if you have more models within 3" than your opponent. If you have at least twice as many models as your opponent within 3", you instead score 2 Victory Points. If you are the only player to have models within 3", you instead score 3 Victory Points.
- You score 1 Victory Point if the enemy General was wounded during the game. If the enemy General was removed as a casualty, you instead score 2 Victory Points.
- You score 1 Victory Point if the enemy Army is Broken at the end of the game. If the enemy Army is Broken and your Army is not, you instead score 3 Victory Points.
Scenario 2: To the Death!
Once again, fate has pitted the forces of Good and Evil against each other, and no matter the cost, the enemy must be slain. No quarter shall be asked and none shall be given. Only the Valar know who will win the day!
Scenario outline – Victory goes to the force which can crush the foe and slay the enemy leader.
The Armies – Players choose their Armies to an equal points value.
Layout – Set up terrain as normal.
Starting Positions – Both players roll a D6 – the player with the highest result chooses one of the deployment zones. They then select a Warband in their Army to deploy wholly within 12" of their board edge. Models must be deployed within 6" of the Captain of their Warband.
When this has been done, the opposing player chooses one of their Warbands and deploys it wholly within 12" of their board edge, as described above. Players then alternate until all Warbands have been placed.
Initial Priority – Both players roll a D6. The player who rolls highest chooses who has Priority in the first turn.
Objectives – The game lasts until the end of a turn in which one Army has been reduced to a quarter (25%) of its starting number of models or below, at which point the player who has scored the most Victory Points wins the game. If both players have the same number of Victory Points, the game is a draw.
Scoring Victory Points
- You score 1 Victory Point if the enemy General was wounded during the game. If the enemy General has been wounded, and only has 1 Wound remaining, then you instead score 3 Victory Points. If the enemy General was removed as a casualty, you instead score 5 Victory Points.
- You score 3 Victory Points if the enemy Army is Broken at the end of the game. If the enemy Army is Broken and your Army is not, you instead score 5 Victory Points.
- You score 2 Victory Points if your opponent has no banners remaining at the end of the game (if they didn't have a banner to start with, you automatically score this).
- You score 1 Victory Point if you have at least one banner remaining at the end of the game. If you have more banners remaining than your opponent, then you instead score 2 Victory Points.
- You score 3 Victory Points if the enemy Army has been reduced to 25% of its starting models at the end of the game.
- You score 1 Victory Point for each enemy Hero model that has been removed as a casualty, up to a maximum of 3 Victory Points.
Scenario 3: Hold Ground
In the swirl of battle it becomes apparent that a certain, usually insignificant, area of the battlefield has become vital to the victory of both sides. Both forces surge towards this new tactical advantage, desperate to control it.
Scenario outline – Control the centre of the battlefield, no matter the cost.
The Armies – Players choose their Armies to an equal points value.
Layout – Set up terrain as normal. Once the battlefield has been set up, an Objective Marker is placed in the centre of the battlefield. Players must also agree which direction is north – this is important for determining where and when Reinforcements arrive from.
Starting Positions – At the battle's start, the Armies are yet to arrive – models are not deployed at the start of the game, but will enter as the game continues (see Special Rules).
Initial Priority – Both players roll a D6. The player who rolls highest chooses who has Priority in the first turn.
Objectives – Once one Army has been Broken, the game might suddenly end. At the end of each turn, after this condition has been met, roll a D6. On a 1-2, the game ends – otherwise, the battle continues for another turn.
At the end of the game, the player who has scored the most Victory Points wins the game. If both players have the same number of Victory Points, the game is a draw.
Scoring Victory Points
- You score 4 Victory Points if you have more models within 6" of the objective than your opponent. If you have twice as many models within 6" of the objective than your opponent, then you instead score 8 Victory Points. If you have three times as many models within 6" of the objective than your opponent, or you are the only player to have models within 6" of the objective, then you instead score 12 Victory Points.
- You score 1 Victory Point if the enemy General was wounded during the game. If the enemy General was removed as a casualty, you instead score 3 Victory Points.
- You score 1 Victory Point if the enemy Army is Broken at the end of the game. If the enemy Army is Broken and your Army is not, you instead score 3 Victory Points.
- You score 2 Victory Points if your opponent has no banners remaining at the end of the game (if they didn't have a banner to start with, you automatically score this).
Special Rules
Maelstrom of Battle – At the end of your Move Phase, roll a D6 for each of your Warbands not on the battlefield and consult the chart that follows (the Warband's Captain can use Might to increase this roll). Roll for each Warband separately, Activate the models in the Warband, then roll for the next. Warbands yet to arrive count as being on the battlefield for the purposes of determining if your Army is Broken.
| D6 | Result |
|---|---|
| 1 | The Warband does not arrive. |
| 2 | Your opponent chooses a point on either the north or south board edges at least 6" from a corner – the Warband arrives from this point via the rules for Reinforcements. |
| 3 | Your opponent chooses a point on either the east or west board edges at least 6" from a corner – the Warband arrives from this point via the rules for Reinforcements. |
| 4 | You choose a point on either the north or south board edges at least 6" from a corner – the Warband arrives from this point via the rules for Reinforcements. |
| 5 | You choose a point on either the east or west board edges at least 6" from a corner – the Warband arrives from this point via the rules for Reinforcements. |
| 6 | You choose a point on any board edge at least 6" from a corner – the Warband arrives from this point via the rules for Reinforcements. |
Scenario 4: Destroy the Supplies
By destroying the supplies and rations of their enemy, one force can gain an immediate upper hand in the battles between the two armies.
Scenario Outline – Destroy your opponent's supplies whilst protecting your own.
The Armies – Players choose their Armies to an equal points value.
Layout – Set up terrain as normal. Then, place three Objective Markers in each player's deployment zone so that the objectives are equidistant along the edge of each player's deployment zone, with one in the centre.
The first is placed 12" from the centre of the player's board edge. The others are then placed halfway between the central objective and the board edges on either side, so that all three objectives are equidistant along the edge of one player's deployment zone.
Starting Positions – Both players roll a D6 – the player with the highest result chooses one of the deployment zones. They then select a Warband in their Army to deploy wholly within 12" of their board edge. Models must be deployed within 6" of the Captain of their Warband.
When this has been done, the opposing player chooses one of their Warbands and deploys it wholly within 12" of their board edge, as described above. Players then alternate until all of their Warbands have been placed.
Initial Priority – Both players roll a D6. The player who rolls highest chooses who has Priority in the first turn.
Objectives – The game lasts until the end of a turn in which one Army has been reduced to a quarter (25%) of its starting number of models or below, at which point the player who has scored the most Victory Points wins the game. If both players have the same number of Victory Points, the game is a draw.
Scoring Victory Points
- You score 3 Victory Points for each enemy Supply Marker that has been destroyed.
- You score 1 Victory Point for each enemy Supply Marker that has not been destroyed, but you have more models within 3" than your opponent.
- If you have destroyed more Supply Markers than your opponent, you score 1 Victory Point.
- You score 1 Victory Point if the enemy General was wounded during the game. If the enemy General was removed as a casualty, you instead score 3 Victory Points.
- You score 1 Victory Point if the enemy Army is Broken at the end of the game. If the enemy Army is Broken and your Army is not, you instead score 3 Victory Points.
- You score 2 Victory Points if your opponent has no banners remaining at the end of the game (if they didn't have a banner to start with, you automatically score this).
- You score 1 Victory Point if you have at least one banner remaining at the end of the game. If you have more banners remaining than your opponent, then you instead score 2 Victory Points.
Special Rules
Supply Markers – The Objective Markers represent a series of supplies that both sides are trying to destroy. To destroy an enemy Supply Marker, a model must be standing and in base contact with the marker during the End Phase of a turn having not Cast any Magical Powers, used a Missile Weapon, been Engaged in Combat, Supported a Combat, been rendered unable to Move any further that turn due to a special rule or result of a test (such as a Thrown Rider Test) or been under the effects of an enemy Magical Power that turn. Once a Supply Marker has been destroyed, remove it from play.
Scenario 5: Reconnoitre
Scouts have been sent out by both forces in order to gather vital information from behind enemy lines. Each force is attempting to sneak past the enemy whilst simultaneously preventing their foes from doing the same.
Scenario outline – Ensure more of your models escape the battlefield than your opponent.
The Armies – Players choose their Armies to an equal points value.
Layout – Set up terrain as normal.
Starting Positions – At the battle's start, the Armies are yet to arrive – models are not deployed at the start of the game. Both players roll a D6. The player with the highest result chooses one of the long table edges to be their board edge – the opposing player has the opposite board edge as their board edge (see Special Rules).
Initial Priority – Both players roll a D6. The player who rolls highest chooses who has Priority in the first turn.
Objectives – The game lasts until the end of a turn in which one Army has been reduced to a quarter (25%) of its starting number of models, or below, at which point the player that has scored the most Victory Points wins the game. If both players have the same number of Victory Points, the game is a draw.
Models that have escaped the board count as being on the board for the purpose of determining if an Army is Broken or reduced to 25%.
Scoring Victory Points
- You score 4 Victory Points if more of your models have escaped the battlefield via your opponent's board edge than vice versa. If at least two of your models and twice as many models than your opponent have escaped the board, then you instead score 8 Victory Points. If at least three of your models, and three times as many models than your opponent have escaped the board, then you instead score 12 Victory Points.
- You score 1 Victory Point for each of your Hero models that escapes the board, to a maximum of 3 Victory Points.
- You score 1 Victory Point if the enemy General was wounded during the game. If the enemy General was removed as a casualty, you instead score 2 Victory Points.
- You score 1 Victory Point if the enemy Army is Broken at the end of the game. If the enemy Army is Broken and your Army is not, you instead score 3 Victory Points.
Special Rules
Reinforcements – At the end of your Activation Phase, roll a D6 for each of your Warbands that are not on the battlefield and consult the chart below (the Warband's Captain can use Might to improve the roll). Models enter the board via the rules for Reinforcements.
Roll for each Warband separately, Activate the models in the Warband, then roll for the next. Warbands yet to arrive count as being on the battlefield for determining if your Army is Broken. Warbands that have still not arrived by the start of turn 4 will automatically arrive on turn 4.
| D6 | Result |
|---|---|
| 1-3 | The Warband does not arrive, but receives +1 to this dice roll next turn. This is cumulative, so will arrive on a 3+ on turn 2, a 2+ on turn 3, and automatically on turn 4. |
| 4-6 | The controlling player chooses a point on their board edge at least 6" from a corner – the Warband arrives from this point via the rules for Reinforcements. |
Designer's Note: Special rules that allow for models to arrive on from any table edge (such as the Goblin Mercenary Captain's Mercenary Ambush) must choose the controlling player's table edge for this Scenario.
Scenario 6: Fog of War
Amidst the maelstrom of the battle that rages, the two forces clash in an endless swirl of shields and swords. Battle plans constantly change and the two generals become locked in a battle of wits, both trying to work out their adversary's aims.
Scenario outline – Outwit your opponent by concealing your true objective.
The Armies – Players choose their Armies to an equal points value.
Layout – Set up terrain as normal.
Starting Positions – Both players roll a D6 – the player with the highest result chooses one of the deployment zones. They then select a Warband in their Army to deploy wholly within 12" of their board edge. Models must be deployed within 6" of the Captain of their Warband.
When this has been done, the opposing player chooses one of their Warbands and deploys it wholly within 12" of their board edge as described above. Players then alternate until all Warbands have been placed.
Initial Priority – Both players roll a D6. The player who rolls highest chooses who has Priority in the first turn.
Objectives – Once one Army has been Broken, the game might suddenly end. At the end of each turn after this condition has been met, roll a D6. On a 1-2, the game ends – otherwise, the battle continues for another turn.
At the end of the game, the player who has scored the most Victory Points wins the game. If both players have the same number of Victory Points, the game is a draw.
Scoring Victory Points
- At the start of the game, secretly note down one of your own Hero models – this may not be your General unless you only have one Hero. You score 1 Victory Point if the nominated Hero is still alive at the end of the game. If the nominated Hero is still alive and has suffered no Wounds, you instead score 3 Victory Points. If the nominated Hero is still alive and has suffered no Wounds, and spent no Fate Points, you instead score 5 Victory Points.
- At the start of the game, secretly note down one of your opponent's Hero models – this may not be your opponent's General unless they only have one Hero. You score 1 Victory Point for causing one or more Wounds on the nominated Hero. Wounds prevented by a successful Fate roll do not count. If the nominated Hero has been removed as a casualty, you instead score 3 Victory Points. If the nominated Hero has been removed as a casualty as a result of one of your models wounding them in Combat, you instead score 5 Victory Points.
- At the start of the game secretly note down a single terrain piece wholly within your opponent's half of the board. You score 1 Victory Point if at the end of the game you have more models than your opponent on or in base contact with your chosen terrain piece. If at the end of the game, you have at least two models and twice as many as your opponent on or in base contact with your chosen terrain piece, you instead score 3 Victory Points. If your opponent has no models on or in base contact with your chosen terrain piece and you have at least two, you instead score 5 Victory Points.
- You score 1 Victory Point if the enemy General was wounded during the game. If the enemy General was removed as a casualty, you instead score 2 Victory Points.
- You score 1 Victory Point if the enemy Army is Broken at the end of the game. If the enemy Army is Broken and your Army is not, you instead score 3 Victory Points.
Designer's Note: In this Scenario you should not reveal any of your objectives to your opponent, even if you successfully complete them during the game. Part of the skill of this Scenario is trying to work out what your opponent is attempting to accomplish, whilst simultaneously trying to mislead them into thinking that you are trying to accomplish something that you aren't.