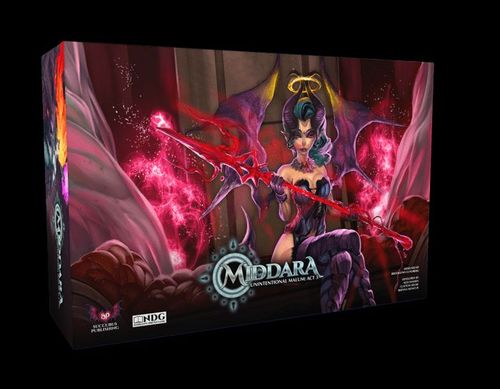
Middara: Unintentional Malum – Act 3
Middara: Unintentional Malum – Act 3 Rulebook
Table of Contents
Table of Contents
- Act 3 Component List
- How to Use this Content
- New Rules
- Special Encounter Rule Types
- Matching a Target's Defense
- Affected by a Spell
- HP and Attribute Tokens
- Contiguous Spaces
- Ability Templates
- Navigate
- Tiles vs Sheets
- Tile Zones
- Doors
- Broadsiding
- Increasing the Limits of Tokens
- Discipline LVL Bonus
- Stealth Encounters
- Defeating Opponents During Stealth Encounters
- Leaving Corpses
- Dragging & Execution
- Combatant Loot Deck Setup
- FAQ & Errata
- New Variants
- New Combatant Tags
- New Tags
- New Effects
- New Terrain
- New Encounter/Tracker Tokens
- New Encounter/Tracker Tokens (Continued)
- New Combatant Tokens
- New Combatant Tokens (Continued)
- Dice Breakdown
Act 3 Component List
Printed as the "UM3 Components" list on page 8 of the New Rules book.
- 1 Adventure Book
- 1 Diagram Book
- 35 Miniatures
- 27 Standees
- 2 Double-Sided Sheets
- 2 Tokens
- 96 Large Cards (5x6 Unique Size)
- 94 Hidden Cards
- 2 Hidden Card Shields
- 93 Mini Cards (Mini American)
- 5 Combatant Loot Cards
- 86 Hidden Cards
- 2 Hidden Card Shields
- 124 Item Cards (Standard Euro)
- 21 Hidden Cards
- 2 Hidden Card Shields
- 23 Extra Large Cards (10x6 Unique Size)
- 21 Hidden Cards
- 2 Hidden Card Shields
- 1 Large Hidden Deck
- 1 Small Hidden Deck
- 2 Medium Hidden Decks
- 1 Extra Large Hidden Deck
How to Use this Content
What Is This Book Exactly?
The Middara: New Rules book contains all the new rules required to play Unintentional Malum: Act 2 and Act 3.
Adding New Cards
Printed for Act 2. The sentence below applies to the non-Hidden cards in the Act 3 component list as well.
There are new cards included in Unintentional Malum: Act 2 that are intended to be added to your existing available cards. Any card that is not hidden is intended to be available in any play through of Unintentional Malum, or any other game mode such as the Crawl Mode.
Why Are There So Many Hidden Cards?
Middara can be overwhelming to new groups. To help pare down the amount of content required and to add mystery, we've decided to hide cards that are not intended to be read or used at the start of an Adventure. This means that there is a significant number of Hidden Cards in both Unintentional Malum: Act 2 and Act 3.
While we always recommend that you preserve the mystery, if you are playing the Crawl Mode, or are simply curious, you can look at these cards and easily put them back in their intended order by using either the hidden card numbers in the top left, or the card numbers themselves.
New Rules
This section contains all the new rules associated with content found within Unintentional Malum: Act 2 and Act 3.
Line of Sight (LOS)
The Mysterious Cultist does not block LOS to Totems. When he uses a Move Action he will always move towards a space adjacent to the farthest Totem on the board.
Line of Sight is now abbreviated on many cards as LOS. See Line of Sight on Pg. 43 in the Middara Rule Book for a refresher on Line of Sight.
New Card Size: Extra Large
There is a new card size that is typically used for Combatants. These cards follow all the same rules associated with their corresponding card type. (E.g., Intelligent or Command Combatant Cards.)
Printed on the X-Large Hidden Card Deck: "STOP! Do not Reveal cards in this deck until specifically instructed to do so."
Long Based Figure
Some figures and standups have bases that occupy two spaces at once. We call these Long Based Figures. With some notable exceptions, a Long Based Figure counts as a Large Based Figure and follows all the same rules associated with Large Based Figures. See Large Base Figures on Pg. 71 in the Middara Rule Book for a refresher on Large Based Figures.
Example: The Yaoguai is a Combatant that takes up two spaces.
Notable Exceptions to Large Base Figure Rules
- When a Long Based Figure uses an Action or Ability that would move itself, it does so as if it occupied a single space. When choosing the space an Intelligent Combatant starts its movement from, choose the most optimal space within the context of its AI Step.
- When a Long Based Figure is moved by an Ability controlled by an opponent, it does so as if it occupied a single space. When choosing the space it occupied in this way, always choose the space targeted by the opponent's Attack, Spell, or Ability that caused the movement.
- A Long Based Figure that starts its movement from a space it occupies that is not adjacent to an opponent will not provoke a Break Attack. An Intelligent Combatant will never choose to start its movement from a space that would provoke a Break Attack unless it must to keep its AI Step true or optimal.
- A Long Based Figure may not willingly end any type of movement in a space that they cannot fit in due to Obstructing Terrain. If something would cause them to end their movement in a space they can not fit in due to Obstructing Terrain, end the current Action and all Abilities. Then, the Long Based Figure is placed on the closest legal space they've moved into this Move Action/Ability and Dealt 6 IRREDUCIBLE DMG. If required, this could move them into the spaces they started from.
Orthogonal
Some Abilities or rules in Middara refer to orthogonal spaces or orthogonal lines.
Orthogonal Spaces: Spaces that share an edge (not a corner) with a referenced space are considered orthogonal. When an Ability or rule references orthogonal spaces, it refers only to the spaces directly adjacent in the four cardinal directions (up, down, left, right), not including diagonal spaces.
Example: An Ability that targets all the spaces that are orthogonal to a figure, would only target the four spaces directly north, east, south, and west of that figure. (Not the four diagonal spaces at the corners.)
Orthogonal Lines: An orthogonal line is a straight row or column of contiguous spaces extending from the targeted space and into one of the four cardinal directions. When an Ability references targeting 1 or more spaces in an orthogonal line, it means the Ability can affect up to that many contiguous spaces in a straight line, including the referenced space, in any one of the four cardinal directions.
Example: WIP: Need example text.
Orthogonal movement and targeting does not allow diagonal movement or interactions unless specifically stated otherwise by an Ability or Special Encounter Rule.
Total HP vs Current HP
Cards, Encounters, and Abilities may refer to the following states of HP:
- Total / Maximum HP: The total amount of Damage a figure can sustain before being Defeated. This value is printed on the figure's Adventurer or Combatant Card and may be increased by certain Items, Abilities, or Effects.
- Current / Remaining HP: The amount of HP a figure has at any given moment. Current HP is calculated by subtracting the total Damage tokens on a figure's card from their Maximum HP.
IMPORTANT: A figure's Current HP can never exceed their Maximum HP. If an effect would heal a figure above their Maximum HP, they instead heal to their Maximum HP and any excess healing is lost. When a figure's Current HP reaches 0, they are Defeated.
See Being Defeated in the Middara: Act 1 Rule Book, Pg. 69.
Ability Tokens and AI
Intelligent Combatants may Gain Ability tokens through various effects or Special Encounter Rules. When an Intelligent Combatant Gains an Ability token, they will use it at the first opportunity that meets the token's conditions.
Intelligent Combatants will use Ability tokens in the following manner:
- DODGE: Used immediately when targeted by an Attack, before the Attack roll is made.
- HEAL: Used at any time during the Intelligent Combatant's turn if there is a figure within SOI (including itself) that has 6 or more Damage tokens. The Intelligent Combatant will prioritize healing the figure with the most Damage relative to their Maximum HP.
- INTERVENTION: Used immediately after any roll made by the Intelligent Combatant that would miss or fail to affect a target after accounting for Abilities available to the Intelligent Combatant using Intervention.
- VOW: Used at the first opportunity to deal Damage.
- SUMMON: Used according to the specific rules listed on the Intelligent Combatant's card. If no specific rules are listed, the token is used at the first opportunity that would be most beneficial to the Combatant.
- ENERGY: Used according to the specific rules listed on the Intelligent Combatant's card. If no specific rules are listed, the token is used at the first opportunity that would be most beneficial to the Combatant.
IMPORTANT: Intelligent Combatants will always use Ability tokens in a way that is most beneficial to them or detrimental to the Adventurers, following their AI Steps and any Special Encounter Rules.
Special Encounter Rule Types
Types of Encounter Rules
Previously, Middara lumped all the Special Encounter Rules together as one massive idea of rules that were read when you were instructed to and changed the current Encounter in interesting and strange ways.
To help manage gameplay, narrative flow, and hidden information, we've separated our Special Encounter Rules into three distinct types of Encounter Rules.
Special Encounter Rules, Diagram Rules, and Curiously Hidden Rules. For all intents and purposes, mechanically, these are all still Special Encounter Rules and mechanically function the same. In short, when one is revealed, do what it says.
But this distinction helps when referring to where a rule can be found and hints at when and how that Encounter Rule is likely to be referenced.
Keeping these rule types separate helps maintain suspense and narrative flow while ensuring that players have access to all necessary gameplay information at the appropriate times.
Due to the narrative complexities involved with a game like Middara, the following definitions of different Encounter Rules are guidelines on what you can expect from each and not hard rules.
Special Encounter Rules:
- Listed at the beginning of each Encounter.
- Must be read and understood before starting the Encounter.
- May or may not be hidden.
- Rules that must be referenced over the course of an Encounter will typically be found here.
Diagram Rules:
- Listed on Diagrams in the Diagram Book.
- Are only revealed and applied when a specific Diagram is revealed.
- Rules listed will never need referencing after the next (another) Diagram has been revealed.
- Often provide unique setup instructions, spawn information, or location-specific rules.
- Might override or modify Special Encounter Rules.
Curiously Hidden Rules:
- Listed at the back of Encounter pages.
- Typically separate narrative moments from constantly referenced rules.
- Always hidden and only revealed when you are instructed to do so.
- Often contain story elements or surprise events.
- May introduce temporary rule changes or one-time effects.
- Rules introduced that require the players to reference long term will be found elsewhere.
- Might override or modify Special Encounter Rules.
IMPORTANT: Intelligent Combatants will always use Ability tokens in a way that is most beneficial to them or detrimental to the Adventurers, following their AI Steps and any Special Encounter Rules.
Resolution Order
When a Special Encounter Rule, Diagram Rule, or Curiously Hidden Rule lists one or more things that are supposed to occur in an Encounter, they are intended to be done in the chronological order in which they are listed.
Diagram Rules might list one or more rules. In these cases, resolve each rule as listed starting from the top.
The printed example panel for Diagram Rules shows three example entries: "Ilium's Glow" (replace any Smoke tokens depicted on the Diagram with Miasma), "Special Stone" (the Special Terrain on Tile UM1 is Normal Terrain), and "Orange Objective" (read and reference the Special Encounter Rules for the Orange Objective token). The final entry is "Erupting Contamination", which refers to Miasma Geysers in the Pit Boss Bounty Pack: Adventure Book on Pg. 47.
More Encounter Tokens
New Encounters often require additional Totems, Loot tokens, and Objective tokens. These tokens come in 9 different colors: Red, Blue, Green, Yellow, White, Purple, Orange, Pink, and Brown.
When Setting Up an Encounter:
- Use only the token colors specifically listed in the Encounter Setup.
- When instructed to shuffle Loot tokens to determine random Loot, only include the colors of Loot tokens listed in that specific Encounter.
IMPORTANT: When playing Unintentional Malum: Act 1 or any Adventure that instructs you to shuffle Loot tokens, do not include all 9 colors by default. Only use the colors explicitly mentioned in the Encounter instructions.
Encounter Rules Tip: New Encounters have a lot of different things that can happen! When revealing Curiously Hidden Rules or Diagram Rules, read them carefully and note any ongoing Effects or rule changes they introduce.
Continuing a Turn
Whenever you finish reading the text of any Encounter Rule, Totem, Loot token, or Objective token, you should continue the current turn unless something says otherwise. (I.e., you're instructed to read another rule or reveal something new).
However, in more complex Encounters it is possible to reveal a long series of events, rules, or Diagrams. On a case by case basis, we've determined that it can help make it very clear to the player when a complex series of events has ended by adding "Continue the turn." at the end of some Diagram and Curiously Hidden Rules. This reminder is listed only in some cases and only on Curiously Hidden Rules or Diagram Rules and will specifically say "Continue the turn." This is not an exception to any rule and is only intended to signal to the reader that they are good to get back to the game.
If there is an exception to the above rule, it will also be listed in the same way (E.g., "End the current turn").
Attribute Based Pass/Fail
Some Skill Checks let an Adventurer choose the type of Attribute being used when making that Skill Check. (E.g., Strength, Agility, etc.) When this occurs, it's possible that the outcomes are also specific to the type of Attribute chosen. Meaning, if an Adventurer were to attempt a Skill Check via Strength instead of Agility, they would read different outcomes.
When this happens, there will be a specific Icon associated with that Attribute next to the PASS or FAIL hidden text. Use the corresponding PASS or FAIL associated with the type of Attribute that was used to make the Skill Check.
The printed example panels for this section (a Strength 12 or Agility 12 Skill Check and its PASS and FAIL text) are shown as red-highlighted hidden text in the book and are not legible in the printed scan.
Matching a Target's Defense
Some Abilities occur when a figure making an Attack would match the target's Defense.
An Attacking figure matches the target's Defense when their Attack roll equals the target's Defense Value after resolving step 5c: Determine if the Attack Hit of the Roll to Hit step of an Attack Action. Meaning, all Abilities that modify either the Attack roll or the target's Defense Value are accounted for.
Printed example: An Adventurer makes an Attack roll of 7 against a target with Defense 8. The Adventurer then uses an Ability that grants +1 TO THE ATK ROLL. The final Attack roll of 8 matches the target's Defense of 8, resulting in a hit.
Affected by a Spell
Some rules refer to figures being affected by Spells. A figure is affected by a Spell when they fail the Conviction Check of a Spell and are affected by one or more of the Abilities caused by the Spell. (E.g., PUSH, MAGIC DMG, or an Effect.)
HP and Attribute Tokens
HP and Attribute tokens provide an easy way for Special Encounter Rules to modify specific Combatants, adding variety and challenge to familiar enemies. These tokens provide a flexible way to adjust individual Combatant capabilities without altering their cards.
Each token represents a static increase to a specific Attribute or HP. When an Ability or rule adds them, the token is placed directly on the Combatant card they're modifying. The bonus from these tokens is added to the printed value on the Combatant card.
- +X HP: Increases the Combatant's Maximum HP by X.
- +X DEFENSE: Increases the Combatant's Defense Value by X.
- +X MOVEMENT: Increases the Combatant's Movement Value by X. (There are no tokens of this type included in this product. But future products do use this token.)
- +X ARMOR: Increases the Combatant's Armor Value by X.
Printed example: A Cave Sickle with 8 Defense is given a +1 Defense token. Its new statistics would be 9 Defense.
Contiguous Spaces
Some Abilities or rules will refer to contiguous spaces. Contiguous spaces are defined as two or more spaces connected in at least one orthogonal direction.
Some Abilities or rules will refer to a body of Terrain or tokens. A body of Terrain or tokens is defined as any group of contiguous spaces containing the same type of Terrain or tokens. These spaces are only considered contiguous if they are connected in at least one orthogonal direction to another contiguous space with the same type of Terrain or that contains the same type of token.
Printed example (Zafir): "The first time Zafir begins his turn with Damage more than half his maximum HP, all other opponents within the same body of terrain as Zafir are dealt a PURPLE die of MAGIC DMG." This hidden Command version of Zafir has an Ability that deals Damage to all figures in the same body of Terrain as him.
Printed Example diagram: A green line represents a body of Water Terrain (A). This body of Water Terrain contains all spaces connected by a set of contiguous spaces with Terrain of the same type. The Water space marked B is not connected in an orthogonal direction to any other spaces containing water, meaning it is not part of the same body of water as the spaces that contain the green line depicted in A.
Ability Templates
What Is an Ability Template?
Example: The Bile Ball card (Combatant Card, ability 3) reads "FU: Use the Short Projectile Template, Place Bile on each space within the template." This Combatant Card instructs the players to use the Short Projectile Template.
When players are instructed to use an Ability Template, refer to the Template Diagrams chart on Pg. 21 to determine what template to use and which figures and/or spaces that are targeted by the Ability.
Origin Markers
Templates always have an Origin Marker. There are two types of Origin Markers, Origin Arrows (orange arrow) and Origin Diamonds (orange diamond).
Origin Arrows: When a figure or rule instructs you to use a template with an Origin Arrow, place the template with the arrow adjacent to and pointing away from the base of the figure using the Ability or the space the template originated from.
Origin Diamonds: When a figure or rule instructs you to use a template with an Origin Diamond, place the diamond directly on the target determined by the Ability in question.
Large Based Figures
A Large Based Figure using an Ability Template with an Origin Arrow may place the Ability Template on any single adjacent space the figure occupies. So long as the instructed target is within Range of the Ability Template, and the arrow is adjacent to, and pointing at the Large Based Figure using the Ability Template, players may choose how it is oriented and which space occupied by the Large Based Figure the Ability Template is oriented from.
A Large Based Figure using an Origin Diamond Ability Template that targets itself, may place the diamond on any single space the figure occupies.
When targeting a Large Based Figure with an Ability Template, that figure is affected by the Ability if at least one of the spaces it occupies is within Range of the Ability Template.
Intelligent Combatants
Combatants that use Ability Templates will always specify which figures they attempt to target using an Ability Template (e.g. the closest opponent).
Ability Templates that use the Origin Diamond are placed directly on the target as directed by the Ability.
Ability Templates that use an Origin Arrow are placed adjacent to and pointing away from the base of the Intelligent Combatant using the Ability. So long as the listed target is still within Range of the Ability Template, and the arrow is adjacent to the figure using the Ability Template, players may choose how it is oriented.
Within Range of a Template
Ability Templates might target spaces and/or figures within those spaces. Any Ability that instructs a figure to use an Ability Template to Attack, cast a Spell, or otherwise target figures or spaces does not require SOI or Line of Sight and ignores the Range of any equipped weapons or modifiers to Range or SOI that the figure using the Ability might have.
A space or figure is only considered within range of an Ability Template if the space they occupy is also contiguously connected to the space occupied by the figure using the Ability Template using the spaces depicted by the Ability Template itself.
Meaning, an Ability Template can target figures behind Obstructing Terrain, around corners, and through other figures, so long as there is a contiguous set of spaces between the space the target occupies within the template and the space the figure using the Ability Template occupies.
See Contiguous Spaces, Pg. 19.
Template Example: Is there an opponent within Range 3? Cast a SPELL 6 against all opponents within the Medium Wave Template, targeting as many opponents as possible. Deal a HUNTER (of MAGIC DMG) and PUSH 4.
In this example, the Ascended Water Loa has used a Spell that uses the Medium Wave Template on as many targets as possible. Since the Ability Template uses an Origin Arrow the Water Loa must place it adjacent to her figure.
All figures targeted by this Spell must make a Conviction Check like normal. Let's determine the targets. Nightingale is an obvious target. However, Remi is not within Line of Sight of the Hallowed Water Loa, but she is still targeted by the Spell since there is a set of unobstructed and contiguous spaces between Remi and the Hallowed Water Loa. Finally, Rook is not a target, since even though he is within the Ability Template and within LOS of the Loa, he is not in a contiguous space within the Ability Template itself.
Remember, when counting for contiguous spaces, only use spaces that are also within the Ability Template being used.
Finally, after making Conviction Checks, if either Nightingale or Remi failed this check, they'd be pushed in the direction of the Origin Arrow.
Templates That Push or Pull
When an Ability Template Pushes or Pulls a figure, always Push or Pull the figure directly towards or away from the Origin Arrow printed on the Ability Template.
If the Ability Template uses an Origin Diamond the figure is pushed or pulled direction towards or away from the center of the template, meaning the direction they are moved will vary depending on which arm of the template they are on.
FU Abilities and Ability Templates
FU Abilities, and Spells that place Ability Templates are placed on the space the target of the Attack or Spell occupied. These Abilities may still be used even if the target was Defeated by the Attack or Spell before being placed.
Template Diagrams
The printed Template Diagrams chart on Pg. 21 lists the following templates. The shapes are drawn as diagrams in the book; the names are: Short Projectile, Medium Projectile, Long Projectile, Small Wave, Medium Wave, Large Wave, Small Cross, Medium Cross, and Large Cross. The Short, Medium and Long Projectiles are a straight line of 3, 5 and 7 spaces respectively, with the Origin Arrow on the first space. The remaining templates are drawn as printed on Pg. 21.
Navigate
Some Encounters take players to new locations without the need or intent to go through the steps of setting up a new Encounter. When this occurs, an Encounter Rule will instruct Adventurers to NAVIGATE to a new location.
When any Adventurer in the party is instructed to NAVIGATE to a new location, end the current turn. Then, remove all figures, tokens, and tiles from the Encounter area.
Following the listed instructions in the Encounter, you will be instructed to place new tiles, tokens, and figures using a revealed Diagram. After setting up all the new components, place Adventurers in the marked Start Location on this revealed Diagram in the position and order of your choosing.
Finally, rebuild the Initiative Track, removing any figures no longer on the board, and adding any new ones now present according to the Diagram. Then, shuffle the Initiative Track and take the first turn of the Round.
Other Rules Associated with NAVIGATE:
- Any Defeated Adventurers remain Defeated.
- All tokens types on Adventurer Cards or cards they control are not removed.
- PER ENCOUNTER Abilities are not refreshed (as this is not considered a new Encounter).
- Any Ability referencing the first round of an Encounter is not used when you NAVIGATE (as this is not considered a new Encounter).
- When you clean up the board to NAVIGATE, all rules associated with, requiring, or otherwise referencing a moment when a figure, token, or card would be removed or Discarded does not apply when removing figures, tokens, or any other game component in this way.
- When you clean up components to Navigate, all figures removed in this way do not count as being Defeated.
- After setting up the new board via the revealed Diagram, and after placing Adventurers, all other Allied Combatants (e.g., Espers) may be spawned adjacent to any Adventurer.
The printed Navigate Example panel is marked WIP in the book and has no text.
Tiles vs Sheets
Middara Act 2 and 3 contain Sheets. For all intents and purposes, a Sheet is intended to be a very large Tile. Sheets allow us to provide larger encounters for fixed locations and are primarily used to represent encounters that are not intended to be randomized when playing.
Setup Diagrams and Encounter Diagrams might instruct players to attach Tiles to Sheets or Sheets to Tiles. In either case, a Sheet works the same way as a Tile and is subject to all the same rules associated with Tiles.
Tile Zones
Some tiles are meant to be placed in one or more configurations and represent a single structure or area, we call these groups of tiles zones. When a tile is meant to be used in a specific configuration in this way, the name of the zone will be printed beside the tile number. A rule that references the name of a zone is referring to all tiles with the name of that zone printed on them. Rules referring to this name apply to every space on Tiles that make up that zone.
Example: The Gong Fu (UM76 & UM78)
Sheet Names and Zones
Sheets may also be considered zones. In these cases they will have the name of their zone printed beside their tile number. Rules referring to the name of a zone printed on a sheet apply to every space on that sheet.
Example: The Oppressor (UMS1)
Doors
Some tiles and sheets have the Door Icon printed on the line between two spaces. These two spaces are considered to be connected by a door.
A door is considered to always be closed and blocks Line of Sight, including the Line of Sight between the two connected spaces. However, figures may move between spaces connected by a door.
A figure may attempt to break a door by making an Encounter Action while in a space connected by a Door Icon. When making this Encounter Action, the figure must Pass a Strength 10 Skill Check. If they pass this Skill Check, replace both connected spaces with Hindering Terrain and place a Broken Door token on the icon to denote that a door has been broken.
TIP: Tracking Broken Doors: Typically, placing the Hindering Terrain in the two connected spaces can be used to easily denote what doors have been broken down and which ones have not been. But just to accommodate for all situations (such as Abilities that might place Terrain or unusual Diagrams, you may want to use the Broken Door token to denote that a door has been broken.
Broadsiding
Encounters may instruct you to set up a sheet, tile, or a zone made up of a set of tiles that are Broadsiding. A Broadsiding game board represents a sheet, tile, or zone that is too far away from another sheet, tile, or zone for figures to interact with them normally.
Diagrams and Encounters that depict Broadsiding game boards will also show a graphic arrow to easily show you which game boards are Broadsiding.
Below: The Gong Fu (UM76 & UM78) begins this Encounter Broadsiding The Oppressor (UMS1).
Example: The Oppressor might be Broadsiding The Gong Fu. Both of these ships are close enough to interact in ways specifically instructed by the Encounter, but otherwise, figures on each of these boards cannot interact with each other.
Broadsiding Continued
When a sheet, tile, or zone is Broadsiding another set of game board pieces, those sheets, tiles, or zones are also Broadsiding it.
Example: If The Oppressor is Broadsiding The Ying Long, then both ships are considered to be Broadsiding each other!
If a third game board piece is placed that Broadsides another sheet, tile, or zone that is already Broadsiding a game board, then all game boards are considered to be Broadsiding each other.
Example: If The Gong Fu joined the fray, then all three ships would be considered Broadsiding each other!
When setting up an Encounter, or placing a Diagram that calls for a Broadsiding tile, sheet, or zone, place the components on the table in relation to each other using the depicted broadsiding arrows and so that their edges do not make contact with any other game board.
Combatants and Broadsiding
- Figures that occupy a Broadsiding sheet, tile, or zone (e.g., The Oppressor) cannot use Abilities, target, or otherwise interact with figures or spaces on other game boards that are at Broadsiding distance unless an Encounter Rule says otherwise. While making a MOVE Action, if an Adventurer has FLIGHT, they may travel between one Broadsiding game board and another by spending 8 movement points during that MOVE Action. If they do, WARP them to any unoccupied non-Dangerous Terrain space closest to the outside edge of another Broadsiding game board. Then, they may continue their MOVE Action (and turn) normally.
- Intelligent Combatants on Broadsiding zones that contain no opponents will not go through their AI Steps normally. Instead, the Encounter's Special Rules will dictate what they do on their turn.
Closing In
When a Broadsiding sheet, tile, or zone is intended to connect to another Broadsiding game board, the Special Encounter Rules will specifically allow for it by describing how you can "Close In". When a figure in a sheet, tile, or zone would "Close In" on another sheet, tile, or zone, connect the two game boards by sliding them together using the depicted "Broadsiding" graphical arrows in the corresponding Encounter Setup or Diagram.
Once a Broadsiding sheet, tile, or zone is connected in this way, neither game board is considered to be Broadsiding each other, but may still be Broadsiding other unconnected game boards. A third game board that is Broadsiding one or more other game boards connected after using "Close In" is considered to be Broadsiding all connected game board zones.
TIP: Broadsiding in Action! Figures can't normally interact with figures on other Broadsiding tiles, however, nearly all Encounters will list one or more Special Rules that give figures a specific way to interact with Broadsiding. Mounted Weapons and the Ability "Close In" are two common examples.
Increasing the Limits of Tokens
Some Abilities increase the Limit of existing Effect tokens.
When an Ability increases the Limit of Effect tokens a figure may have, they may Gain additional Effect tokens up to the new Limit listed. This also means that any Abilities associated with those Effect tokens will now occur more than once.
Example: If a figure had an Item that increased their Barrier Limit to 2, they could now have up to two different instances of Barrier applied to them. Meaning, if they Gained Barrier two times, they would have +2 Armor instead of +1.
Figures may also Gain Abilities that increase the Limit of Effects they can inflict onto others. In these cases, targets may have additional Effect tokens up to the Limit listed even when they themselves do not have a way to increase this Limit.
Example: If an Adventurer were to use the Discipline Magia Bacteremia to increase their Poison Limit to 2, they could now inflict Poison on other targets up to 2 times instead of 1. (Magia Bacteremia, CRUOR LVL 3, PASSIVE: Increase the Poison limit on abilities you control to 2. EXHAUST: All adjacent opponents are Inflicted with Poison FORCE X, where X equals 9 + your highest LVL Discipline.)
Example: An Ability that said "Remove an Effect from a figure within SOI" would remove a single Effect regardless of how many copies of that Effect is applied to the target. (Soul Clear, SANCTUS LVL 2, EXHAUST: Remove an Effect from a figure within SOI. Reduce the SP cost of this Discipline by 1 if the target is an ally other than yourself.)
When resolving more than one instance of an Effect that isn't Passive, you resolve each instance one at a time. In the above Example, an Adventurer would deal the damage caused by Poison as two separate individual rolls that deal Damage.
Multiple instances of a single effect on a target are treated as separate effects. When removing an Effect token with an Ability, treat each Effect token as an individual instance of the Effect.
IMPORTANT: When an Ability Limit is decreased or lost, any Effect tokens or benefits Gained by an Adventurer above those Limits are also lost.
TIP: Symbol Abilities and Limits! Some Symbol Abilities, (e.g., symbols on weapons), can Inflict Effects such as Poison. A figure may use these Abilities multiple times by spending Symbols more than once. Of course, this only makes sense if the Limit of the Effect is higher than one. In these cases, a target rolls for Conviction multiple times and may be Inflicted by the Effect multiple times.
Discipline LVL Bonus
Icon: "+X" (the Discipline LVL Bonus icon).
As players scale into higher tiers of Loot, they might find new Cores with the Discipline LVL Bonus icon printed on them.
Items with this icon add the printed value as a bonus to any Ability you control that references your "highest level Discipline".
Meaning, cards with the icon will improve many Abilities printed on cards you might already have equipped.
Example: The Epic Core Shroud of Six Acts provides the player a +1 Bonus to all Abilities that reference your "highest level Discipline".
Example: Life Tithe (CRUOR LVL 1, EXHAUST: An opponent within your SOI is dealt MAGIC DMG equal to your highest LVL CRUOR Discipline.) uses your Highest LVL Cruor Discipline. If you have the Core equipped from the above example, you would add the value shown to the Highest LVL Cruor Discipline you control to Determine the Damage of the Ability. In this case if you only have Life Tithe and Shroud of Six Acts, you would be doing 2 MAGIC DMG.
Stealth Encounters
What Is a Stealth Encounter?
Encounters that have the stealth symbol are considered Stealth Encounters. These dangerous Encounters contain Diagrams with Patrol Paths and contain Intelligent Combatants that use the Patrol / Alerted Combatant tokens. See Patrol / Alerted Combatant on Pg. 30.
These Encounters represent moments in our story where Adventurers are sneaking around, infiltrating, and generally trying their best to stay quiet while achieving an objective.
During these Encounters, players will be able to choose how and when they approach the situation. They will also get huge bonuses by taking opponents by surprise, carefully planning turns, and systemically clearing out areas as a team. But be careful! If you choose the wrong time to go loud, or get spotted out of position, it might be you who is getting ambushed.
Patrol Path
During a Stealth Encounter, Encounter Diagrams will have a Red and Blue Patrol Path. This is the path that any Intelligent Combatants with the Patrol / Alerted Combatant token will follow. The direction of the arrows on the Patrol Path indicate the direction these Combatants move while on the Patrol Path.
Patrol Paths only affect Intelligent Combatants with the Patrol / Alerted Combatant token.
Making Noise
Sneaking around means staying quiet! During Stealth Encounters, Actions and Abilities both make Noise. Of course, that may not matter if those on Patrol are far enough away, or if you end up killing your target in a single strike.
If an Adventurer makes Noise while they are within an opponent's SOI, that opponent will become Alerted.
While they are within an opponent's SOI, before an Adventurer makes any Action or uses a non-Standard Stealth Ability, they may spend 1 additional SP to take extra precautions and do it quietly.
If they don't spend this additional SP, they must roll the BLACK die. If the result is a skull, they make Noise!
Patrol / Alerted Combatant Token
During Stealth Encounters there are Intelligent Combatants who are on PATROL, looking for Ne'er-do-wells, thieves, or enemies who might be infiltrating their areas. These Intelligent Combatants are not actively engaged in combat with the Adventurers and will never be unless they spot the Adventurers.
This also means that Adventurers can leverage these moments to Defeat unaware opponents, or meet an Encounter's Win Conditions without having to engage these opponents.
The Patrol / Alerted Combatant token has two sides, Patrol and Alerted. Depending on which side this token is on, the figure will either have the Patrol Special Effect or the Alerted Special Effect.
An Intelligent Combatant with the Patrol / Alerted Combatant token doesn't follow their normal AI Steps when taking their turn. Instead, they perform a set of specific AI Steps depending on which side the Patrol / Alerted Combatant token is on.
Patrol Special Effect (PASSIVE): While a figure has the Patrol Special Effect, instead of using their normal AI Steps, they will use the following AI Steps on their turn.
- Is this figure on a Patrol Path? MOVE following the Patrol Path shown in the Encounter Setup Diagram.
- Is this figure not on a Patrol Path? MOVE towards the nearest space containing a Patrol Path. If the Patrol Path is reached and this figure has leftover Movement Points, this figure will continue moving following the Patrol Path. If there is no Patrol Path printed in the Diagram, or if there is no Patrol Path the figure could ever get to regardless of its total Movement Points due to being blocked or separated from its access to a Patrol Path, this figure will become ALERTED.
An Intelligent Combatant with the Patrol Special Effect will stay on Patrol until something "Alerts them". When ALERTED, a figure loses the Patrol Special Effect and flips the token to the ALERTED side to Gain the Alerted Special Effect.
An Intelligent Combatant is ALERTED when any of the following occurs:
- If they end their turn and an Adventurer is within their Line of Sight.
- If they are the target of an Attack, a Spell, or a Spell-like Ability.
- If they take Damage of any type.
- An Adventurer makes noise while within their SOI and rolls the skull result.
- Another figure within their Line of Sight has or Gains the ALERTED Effect.
Alerted Special Effect (PASSIVE): When an Intelligent Combatant is thematically confused, worried, or concerned about the safety of their Patrol, they become ALERTED. Being ALERTED represents an Intelligent Combatant who is in a paranoid state. They might have heard a yell in the dark, seen movement in the shadows, or have otherwise experienced an unusual event. They still have not confirmed that there are intruders afoot!
When an Intelligent Combatant becomes ALERTED, flip the Patrol / Alerted Combatant token to the Alerted side.
While an Intelligent Combatant is ALERTED they will use the same AI Steps listed on the Patrol Special Effect. However, they now use the red Patrol Path shown in the Encounter's Setup Diagram instead of the blue Patrol Path. The red Patrol Path represents a wider search area, one that they normally wouldn't have reached. These Intelligent Combatants are now actively searching for the players!
An Intelligent Combatant who is ALERTED will stay ALERTED until they can prove something is amiss, a Special Encounter Rule returns them to their previous PATROL state, or the Patrol / Alerted Combatant token is removed from their Activation Number.
Printed example panel: "Patrol Path Example" (header text, subheader, and placeholder body text; the panel is marked NEEDS TEXT in the book and has no rules content).
The Patrol Path Example page (Pg. 31) shows a worked diagram with red and blue Patrol Paths and the markers A, B and C. Its text panel is a "PLACEHOLDER: NEEDS TEXT" block and carries no rules content.
Removing the Patrol / Alerted Token
If an Intelligent Combatant who is on Patrol or Alerted is able to prove that there is treachery about, the Patrol / Alerted Combatant will be removed. When this token is removed, the Intelligent Combatant will use the normal AI Steps printed on their Intelligent Combatant Card.
An Intelligent Combatant removes the Patrol / Alerted Combatant token when any of the following occurs:
- An Adventurer ends their turn while within this Intelligent Combatant's Line of Sight.
- Another Intelligent Combatant is Defeated within this Intelligent Combatant's Line of Sight.
- Another ally within this Intelligent Combatant's Line of Sight removes the Patrol / Alerted Combatant token.
- Anything that would Alert a figure that is already Alerted.
- Seeing a Corpse. See Leaving Corpses, Pg. 33.
When an Intelligent Combatant removes the Patrol / Alerted token, move their Initiative card to be immediately following the Initiative card of the Adventurer that caused them to lose the Patrol / Alerted token.
If more than one Intelligent Combatant removes this token at the same time, resolve the movement of these Initiative Cards in reverse Initiative order, starting from the back of the Initiative track and moving forward.
Then, when this Initiative Card's turn is considered, any Combatants who removed the Patrol / Alerted token will take turns even if they have already taken a turn this round. Other Intelligent Combatants associated with this Initiative Card will take turns as normal. Meaning, Intelligent Combatants who still have a Patrol / Alerted token and have already taken a turn this round will not take another. Additionally, any Combatants in the same Group who are on Patrol will stay on Patrol.
Normally, an Intelligent Combatant that loses the Patrol / Alerted Combatant token during an Encounter will never regain it. Once they know someone has infiltrated their area, they will try their best to stop it!
Standard Stealth Abilities
When playing a Stealth Encounter, Adventurers have additional Standard Abilities they may use during their turn. These new Standard Abilities only affect Intelligent Combatants with the Patrol / Alerted Combatant token. An Adventurer who uses one of these new Abilities must end the current Action and all Abilities.
DISTRACT
Sometimes you need to lure a guard out of a Patrol, or maybe you need to put them in a vulnerable position so another ally can dispose of them. Either way, the DISTRACT Ability can help you!
During Stealth Encounters, Adventurers may purposely make noise to force Intelligent Combatants on Patrol to move to a desired space. Thematically, they might be throwing a stone, kicking a can, or perhaps knocking on a wall.
To use DISTRACT, spend 1 SP and choose a space within RANGE 6. Make an Agility 10 Check adding X to its difficulty, where X is the Range of the chosen space from your figure.
- If you succeed: place the Distract token on the chosen space.
- If you fail: reduce the Range to the space you selected by X, where X equals the difference by which you failed the Skill Check by. When reducing this Range, count back and up to the space your figure occupies. Then place the Distract token on the space.
Alternatively, Adventurers may use DISTRACT without making a Skill Check if they choose the space they occupy.
At the end of your turn, all opponents on Patrol who haven't taken a turn this round and are also within SOI of a Distract token MOVE towards the nearest Distract token. Then, remove all Distract tokens from the board.
SUBDUE
During a Stealth Encounter, a non-lethal way to take down an opponent might come in handy. Depending on the story and who you're up against, you might not want to kill everybody. Or, you may want a way to get past an opponent on Patrol without Alerting his friends. The SUBDUE Standard Ability allows Adventurers to thematically incapacitate a foe, move them, and keep them disoriented and pinned for a fixed duration.
To use SUBDUE, at any time spend 1 SP and choose an adjacent opponent with the Patrol / Alerted Combatant token and make a Strength 12 Check or a Lore 12 Check.
If you fail this Skill Check, the target overpowers you and cries out. Discard their Patrol / Alerted Combatant token and Deal yourself a PURPLE die of IRREDUCIBLE DMG.
If you succeed this Skill Check, the Adventurer who made the Skill Check may immediately move up to X spaces, where X equals the difference by which they succeeded this Skill Check. After making this movement, they may WARP the target of SUBDUE to a space they moved out of using this Skill Check.
Then, the target Combatant is Inflicted with the Subdued Special Effect.
When a Subdued opponent would remove the Subdued Special Effect, any adjacent Adventurer may spend 1 SP to prevent them from removing the Subdued Effect. This will keep the opponent Inflicted with Subdued for another round.
While Inflicted with Subdued, this figure is thematically assumed to be knocked out, disoriented, or otherwise incapacitated. An Adventurer may move or even kill a Subdued opponent. See Dragging and Execution, Pg. 39.
Subdued Special Effect (PASSIVE): End the Intelligent Combatant's Action or Ability. This figure may not make Actions or use Abilities other than Passive and Status Abilities. They cannot be Alerted or discard the Patrol / Alerted Combatant token. They can still be affected by PUSH, PULL, and COMMAND.
This Intelligent Combatant does not block Line of Sight and can be moved through as though they were Hindering Terrain. This negative to movement does not stack with Hindering Terrain. Adventurers may not end their turn on their space.
When making an Attack, casting a Spell, or using Spell-Like Abilities against a target Inflicted with Subdued, Gain +10 TO THE ATK roll or +10 TO THE FORCE OF THE SPELL.
DISCARD this token at the end of this Combatant's next turn. Then, they Gain IMMUNITY: Subdued until the end of the Encounter.
IMPORTANT: Subdued does not affect Actions or Abilities granted to a figure by Special Encounter Rules.
Scramble
While sneaking around, you might find yourself coming face to face with a Combatant on Patrol. In these situations, you'll want to hide as quickly as possible to avoid Alerting them.
Whenever an Intelligent Combatant on Patrol would end their turn and an Adventurer is within their Line of Sight, that Adventurer may use the Standard Ability SCRAMBLE.
To use SCRAMBLE, spend 1 SP and make an Agility 12 Check. Then, that Adventurer may move up to X spaces, where X equals the difference by which they succeeded this Skill Check. After making this movement, if this Adventurer is no longer within Line of Sight of the Intelligent Combatant, that Combatant will not become Alerted.
However, any other Intelligent Combatants on Patrol who are now within Line of Sight will become Alerted.
An Adventurer may only use SCRAMBLE once per round.
Defeating Opponents During Stealth Encounters
During a Stealth Encounter players have many more tools to dispose of opponents. An opponent who is Defeated during a Stealth Encounter is removed from the board as normal. If they are Defeated without Alerting others, all the better.
Opponents on Patrol who are Defeated will still return their Patrol / Alerted Combatant token to the game box as if it was any other token. Meaning, this doesn't count as "removing the token" for the purposes listed in the Patrol / Alerted Combatant token rules. Instead, these Combatants make no noise when they die and will not affect the Initiative Card they are associated with in any special way.
Leaving Corpses
Intelligent Combatants on Patrol leave Corpses behind when they are Defeated. These Corpse tokens can be found by other Combatants on Patrol!
When an Intelligent Combatant on Patrol is Defeated, place a Corpse token in the space the figure occupied when it was Defeated. The space this token occupies doesn't block Line of Sight and can be moved into, but costs an Adventurer an additional 1 MOVEMENT to move out of. This modifier can stack with other modifiers to movement (such as Hindering Terrain).
At the end of the Round, after taking the last turn on the Initiative Track, before ending the turn, all Intelligent Combatants on Patrol who have Line of Sight to a Corpse token will Discard their Patrol / Alerted Combatant token.
Dragging & Execution
When making the Move Action, an Adventurer may CARRY up to 1 Corpse or Subdued Combatant. See Carry, Pg. 39. While on or adjacent to a space that contains a Subdued Combatant, an Adventurer may make an Encounter Action to execute that opponent. If they do, they must make a Strength 12 Skill Check. If they pass, the opponent is Defeated. If they fail, the opponent removes the Subdue token.
Combatant Loot Deck Setup
Loot deck makeup by Combatant level. Each row lists the loot card numbers (top of each column) and how many copies of each number go in the deck (the "x" count). Every level also contains one Item Loot, one Monster Loot and one Unique Loot card.
| LVL | Loot numbers and copies | Item | Monster | Unique |
|---|---|---|---|---|
| MUNDANE | 4 x3, 5 x4, 6 x5, 7 x5, 8 x5, 9 x5 | x1 | x1 | x1 |
| COMMON | 5 x3, 6 x4, 7 x5, 8 x5, 9 x5, 10 x5 | x1 | x1 | x1 |
| UNCOMMON | 6 x3, 7 x4, 8 x5, 9 x5, 10 x5, 12 x5 | x1 | x1 | x1 |
| RARE | 7 x3, 8 x4, 9 x5, 10 x5, 12 x5, 14 x5 | x1 | x1 | x1 |
| EPIC | 8 x3, 9 x4, 10 x5, 12 x5, 14 x5, 16 x5 | x1 | x1 |
Item Loot (the same card layout on each level): Roll 2 WHITE dice: 4-5 Accessory, 6-7 Armor, 8-10 Relic, 11-12 Core, 13-14 Weapon.
Monster Loot and Unique Loot cards carry no further rules text on the card face in the setup chart.
FAQ & Errata
Frequently Asked Questions
If my Card has DOUBLE and a PER ENCOUNTER Ability on both sides, can I use each PER ENCOUNTER once?
No. An Ability with the PER ENCOUNTER Condition Tag is considered to be the same Ability on each side of a DOUBLE card. Meaning, if you have USED the Ability on one side, it is considered USED on the other.
There are new Monster Loot cards for lower tier (e.g., Mundane, Common, Uncommon, and Rare) Combatants in the Hidden Card decks. Can I use these without revealing them?
You probably shouldn't. All Hidden Cards in an Adventure are intended to stay hidden until revealed. In this case, there are higher level Variations of some Combatant Cards. These new cards are meant to provide new options and earnable equipment for players as they progress into the higher tiers.
However, with all that said, you can reveal them and use them in the Crawl Mode or on a new playthrough of Middara with minimal effect on the balance of your game.
Does Damage caused by Movement Abilities that do Damage (e.g., LEAP, RELENTLESS, CRUSH, etc) Stack?
No. A figure causing Damage using one of these Abilities must choose which one they are using and in turn, the one that will do Damage. However, Damage and Effects caused by other sources (like being pushed into a wall or into Dangerous Terrain) will still cause additional Damage or even Defeat you.
Can I use COMMAND to move a figure into another figure or wall (like I could with PUSH or PULL) to deal them Damage?
Yup. You can even bounce them off another figure or wall multiple times for damage.
Can I use REDIRECT to target the same figure that is already being targeted?
No. To use REDIRECT you must target a figure that is not already being targeted.
Do Spell-like Abilities count as Spells?
No. Abilities that specifically reference a "Spell" or "Attack" are not referencing "Spell-like" Abilities. However, many Spell-like Abilities can happen during the steps of an Attack and can be targeted by Abilities that can be used during the steps of an Attack.
Do Intelligent Combatants who are trying to Move "Up To", "Within", etc, account for Terrain, Effects, and Special Rules that might interact with their Ranges?
Yes. The intent is that an Intelligent Combatant who is trying to Attack from the farthest space, the closest space, or any other space that is reliant on their Range, SOI, or an Ability like REACH are all variable based on the conditions they find themselves in.
In other words, an Intelligent Combatant should attempt to do the smartest thing given the circumstances they find themselves in and should account for bonuses and negatives to their ranges based on Terrain and other rules that might effect these ranges.
If I'm not subject to the Effect of a Terrain Type, (e.g., Water), does the Current still move me?
No. If you ignore the Effects of a Terrain Type, you also ignore any Currents that are part of that Terrain.
While in Conduit Form, can I use Abilities printed on cards that reference being in Conduit Form?
Yes.
Can an Adventurer have more than one Font of Renewal on the board at a time?
Yes.
What Actions or Abilities made by an Intelligent Combatant are considered Standard Action or Standard Abilities?
MOVE, ATTACK, Encounter Actions, and Re-Equip are all considered Standard Actions. DODGE, EMPOWER, and COUNTER are all considered Standard Abilities. (I.e., any Action or Ability listed as a Standard Action or Standard Ability on Pg. 32 of the Unintentional Malum Rule Book.)
Does that mean if an Intelligent Combatant with Bleed makes an Attack that they also EMPOWERED, they are dealt 2 Damage?
Yes.
What do I do if an Effect token doesn't say when its discarded?
Effects and Special Effects are never removed from a figure unless that figure is Defeated or an Ability says otherwise. (E.g., using the DISCARD Ability on the Effect "Vow".)
If an Ability that deals Damage also Inflicts Frozen and the target already has Frozen, when do I resolve the existing Frozen Effect?
When dealing Damage with an Attack or Spell that also Inflicts Frozen, resolve any existing Frozen Effects before Inflicting new instances of Frozen.
If a Diagram Spawns a Combatant with an Activation Number depicted and that specific Activation Number is already in use, do I still spawn a Combatant if I have a Combatant of the same type that is unused?
Yes. Spawn a Combatant starting with the lowest numbered Combatant of the type you're instructed to Spawn.
Errata for v1.2 (WIP)
The errata section is marked WIP in the book.
BRIGHT: The following Items from Unintentional Malum: Act 1 have been appended with the BRIGHT Tag. See the Bright Tag, Pg. 39.
- The Iridescent
- Azrael's Harvester
- Casualty Engine
- Salvation Umbrella / Cave Bow
- Angel Symbols
- Seraphim Sidekick
- God Machine
- Wand of Manipulation
- Charm of Ash
- Spectral Banner
- Doomcaster
- Hammer of Evil Similitude
- The Svalinn
- Etched Console
Tentacle Tokens: The rule for these Tentacle tokens was omitted from the rulebook. Luckily, the basic token rules are on the token itself, meaning they are still usable. However, we've included the rules in their complete form here in this rule book for reference.
Adjacent Spaces (Appended): The space a figure occupies isn't considered adjacent to that figure.
BURROW: If a Burrowed Figure and another figure occupy the same space, they are considered Adjacent.
Conduit Summoning: When Defeating the Variation of a Base Combatant with a Conduit card that has not been earned, a player with Conduit Summoning may earn the Conduit card associated with the Base Combatant. (E.g., if they Defeat a Burrowing Cave Sickle and have not Gained the Conduit Card for the Cave Sickle, they may Gain the Cave Sickle Conduit Card.)
New Variants
The New Variants section is marked WIP in the book.
Difficulty Tweak: Narrative Resilience
This Variant rule provides an easier difficulty option for players who want to reduce the impact of narrative-based damage on their Adventurers. When using this Variant, Adventurers cannot be Defeated by certain types of narrative damage (i.e., Damage dealt to them from story moments in the Adventure Book or Diagram Book.) Instead, they will always survive with at least 1 HP remaining.
This rule applies to Damage dealt from failed Skill Checks listed on Special Encounter Rules, Curiously Hidden Rules, and Diagram Rules.
- Calculate Damage normally from the above sources.
- If the Damage would Defeat an Adventurer, reduce the Damage so that the Adventurer is left with 1 Remaining HP.
- Place Damage tokens accordingly.
IMPORTANT: This rule only applies to Damage dealt from Skill Checks that an Adventurer fails.
New Combatant Tags
Minion
Combatants with the MINION Tag have a Minion icon depicted as the Value listed for their HP. These Combatants are Defeated when they are dealt 4 or more Damage from a single Attack, Spell, or Ability. Otherwise, a Combatant with the MINION Tag ignores all Damage being dealt to them that is equal to or less than 3.
New Tags
Alternate (X)
The ALTERNATE Tag may have a number listed next to it.
Combatants with the ALTERNATE (X) Tag are Combatants that are strong enough to require more than one Base Combatant to Spawn before they can be included as a Possible Spawn. They otherwise follow the same rules as Combatants with the ALTERNATE Tag.
When checking for Possible Spawns, you only include Combatants with the ALTERNATE (X) Tag if you are instructed to Spawn at least X of the Base Combatant, where X equals the number listed beside the ALTERNATE Tag. (E.g., ALTERNATE 2)
If you draw a Combatant with the ALTERNATE (X) Tag, (e.g., ALTERNATE 2), you will Spawn one of that Combatant's figure instead of X Base Combatants. After Spawning all possible Combatants with the ALTERNATE (X) Tag, if you still have more Base Combatants to Spawn, continue the Possible Spawn process as normal.
Example: You are instructed to Spawn 3 Cave Sickles. From the Possible Spawns, you draw a Cave Sickle Defender. This Combatant has the ALTERNATE 2 Tag. This means that you can Spawn 1 Cave Sickle Defender for every 2 Cave Sickles you are instructed to Spawn. In this case, you could only Spawn 1 Cave Sickle Defender. Then, you would need to draw a different Possible Spawn for the remaining Cave Sickle. If you drew another Combatant with the ALTERNATE (X) Tag, if it required 2 or more Combatants, you would need to draw again since there is only a single Cave Sickle left on the board.
Bright
Figures with an Item equipped that have the BRIGHT Tag ignore negatives associated with certain Special Encounter Rules found in many Encounters and may be referenced by other Abilities.
Note: Some Items from previous products should have the BRIGHT Tag but do not. This is any Item that we deemed appropriate given its artwork and theme. See Errata, Pg. 37 for a list of Items from Unintentional Malum: Act 1 that should have this tag.
Carry (X)
At any time during a MOVE, a figure with CARRY may WARP up to X adjacent allies onto their card. After the Move Action ends, all allies on their card must be placed into adjacent unoccupied spaces. If a figure with CARRY is Defeated while an ally is on their card, or if for any reason an ally cannot be placed when the Move Action ends, the ally is Defeated.
Charge (X)
A figure using this Ability moves up to X spaces orthogonally in a straight line and into the first space occupied by an opponent. This movement does not provoke Break Attacks, DISPLACE the figure that occupied that space and make a free Melee Attack against the DISPLACED figure.
This Attack cannot be countered and Gains +X Damage where X equals twice the amount of spaces moved using CHARGE. If the figure using CHARGE has a larger base size than the target, or if they are using the BLACK die as part of their Combat Dice pool, when Determining Damage, deal an additional PURPLE die of PHYSICAL DMG.
CHARGE may only be used on targets that have equal to or smaller base sizes than the figure using CHARGE as determined by the amount of spaces a base occupies.
A Large Based Figure who uses CHARGE may DISPLACE multiple figures (as it is possible to move into more than one figure simultaneously with a larger base.) In these cases all figures are DISPLACED. The Large Based Figure may make a single Attack following the same rules listed previously.
Mirror
MIRROR is used to deal Damage and Inflict Effects back onto an opponent. The amount of Damage it deals and Effects it Inflicts is determined by the original Attack or Spell used by the opponent.
When you MIRROR an Attack, reference the Final Damage and any Effects Inflicted by that Attack or its FU step. When you MIRROR a Spell, reference the Damage that Spell dealt and any Effects it inflicted.
When you MIRROR an Attack or Spell, all Damage dealt is IRREDUCIBLE DMG.
Abilities that reference MIRROR will also specify how targets are dealt Damage and Inflicted with Effects. (E.g., EXHAUST: When you are dealt Damage by a Spell, MIRROR that Spell against an opponent within SOI, FORCE 10.)
Ricochet (X)
RICOCHET deals the Final Damage you just dealt with an Attack to another figure that is adjacent to the original target.
When using RICOCHET, choose a different target that is also adjacent to the figure you originally Attacked. Then, deal that figure X PHYSICAL DMG, where X is the Final Damage your Attack dealt.
When targeting a figure with RICOCHET, ignore Range and Line of Sight.
New Effects
Negative Effects
Bleed (PASSIVE): Before a figure with BLEED would make a Standard Action or Standard Ability, they are dealt 1 IRREDUCIBLE DMG.
During the Status Phase, an Adventurer may Spend 1 SP to discard Bleed.
IMPORTANT: Intelligent Combatants will still make Actions or use Abilities that would cause Bleed to Defeat them.
Burn (STATUS): You are Dealt 3 IRREDUCIBLE DMG.
IMPORTANT: A figure that moves into, ends their turn in, or occupies a space that has Water Terrain placed into it removes the Burn Effect. A figure that occupies Water cannot be inflicted with Burn. A figure inflicted with Burn who already has Frozen removes all Frozen Effect tokens and does not Gain Burn. A figure already inflicted with Burn who would be inflicted with Frozen removes Burn and does not Gain Frozen.
Choked (PASSIVE): Your RANGE and SOI are reduced by 2.
During the Refresh Phase, Gain one less SP.
If an Effect or Ability would cause you to be Inflicted with Choked while you are already Inflicted with Choked, you are dealt 3 IRREDUCIBLE DMG instead.
Frozen (PASSIVE): Figures inflicted with Frozen take +3 IRREDUCIBLE DMG from Attacks and Spells. When a figure with Frozen takes damage from an Attack or Spell, remove a Frozen Effect token. (Limit 4)
IMPORTANT: A figure that moves into, ends their turn in, or occupies a space that has Lava Terrain placed into it removes all Frozen Effect tokens.
A figure Inflicted by Burn who already has Frozen removes all Frozen Effect tokens and does not Gain Burn. A figure already Inflicted with Burn who would be Inflicted by Frozen removes Burn and does not Gain Frozen.
Misfortune (PASSIVE): A figure with Misfortune does not take their turn when their turn would normally occur on the Initiative Track. Instead, a figure with Misfortune takes their turn as though they were the last figure on the Initiative Track.
At the end of the round, if multiple Combatants have Misfortune, they will activate in the order in which their Initiative Cards are currently placed on the Initiative Track.
IMPORTANT: Misfortune does not change the position of a Combatant's Initiative Card.
Rooted (PASSIVE): A figure inflicted with ROOTED may not make the Move Action or benefit from Free Movement granted by Abilities they use. Remove the ROOTED effect at the end of the figure's next turn.
IMPORTANT: Paralyze does not affect Actions or Abilities granted to a figure by Special Encounter Rules.
Sedate (PASSIVE): When making a MOVE Action, you only Gain half of your total Movement Points (Rounded Up). You also only Gain half of any bonus Movement or Movement Points added to that MOVE action (Rounded up).
Slow (PASSIVE): During the Refresh Phase, Gain one less SP.
IMPORTANT: A figure Inflicted by Slow who already has Haste removes Haste and does not Gain Slow. A figure already inflicted with Slow who would Gain Haste removes Slow and does not Gain Haste.
Stupefy (PASSIVE): When an Adventurer or Command Combatant is inflicted with STUPEFY, they must place this Effect token on a Discipline or Item with an Exhaust Ability of their choice. During the Refresh Phase that Discipline or Item does not Un-Exhaust.
Intelligent Combatants inflicted with Stupefy must ignore the first FU Ability that they would perform each turn for each Stupefy token they have. These FU Abilities are treated as though they weren't printed on the card.
Combatants may have more than one instance of a Stupefy Effect token at a time. If a target has no Abilities that can be affected by Stupefy, they cannot be Inflicted with Stupefy.
Positive Effects
Haste (STATUS): Gain +1 SP.
IMPORTANT: A figure Inflicted by Slow who already has Haste removes Haste and does not Gain Slow. A figure already Inflicted with Slow who would Gain Haste removes Slow and does not Gain Haste.
New Terrain
| Name | Effect/Description |
|---|---|
| Glass | Areas on Tiles or Sheets that are marked with a white line represent windows or other structures that are made up mostly of glass. These lines do not surround spaces and will only ever be placed in between one or more spaces and in a way that separates spaces from one another. Spaces separated from each other in this way share an orthogonal direction with Glass. |
| Lava | Figures that move into, end their turn in, or occupy a space that has Lava Terrain placed into it, are inflicted with BURN. If they are already inflicted with BURN, they are dealt 3 IRREDUCIBLE DMG instead. Lava Terrain can replace all Terrain except for Dangerous and Obstructing Terrain. If Lava is ever placed onto Water, or if Water is ever placed onto Lava, the space is replaced with Normal Terrain (i.e., Terrain with no special rules) instead. |
| Middle Passage Spikes | Middle Passage Spikes are a common type of Special Terrain found on Tiles that represent the Middle Passage. A Figure that moves into, ends their turn in, or occupies a space that has Middle Passage Spike Terrain placed into it, is dealt a PURPLE die of PHYSICAL DMG. Figures that are dealt 1 or more Damage in this way are Inflicted with Bleed. Middle Passage Spike Terrain can replace all Terrain and can only be placed in Normal and Hindering Terrain. |
| Normal | New Encounters and Abilities might depict or place Normal Terrain. Normal Terrain tokens have no border, and have one or more spaces printed on them. Normal Terrain can be placed on and be replaced by all types of Terrain other than Obstructing. |
Glass
Glass rules, as printed in the New Terrain table and the New Encounter/Tracker Tokens section.
Figures may draw LOS, make Attacks, and cast Spells through Glass. If they do, the Glass is broken.
A figure that moves through Glass is dealt 1 IRREDUCIBLE DMG and inflicted with Bleed. Then, the Glass is broken.
When Glass is broken, replace each space that shares an orthogonal edge with the Glass with Glass Shard tracker tokens. A section of Glass that separates two spaces cannot be broken more than once. (Note: Using Glass Shard tokens in this way also keeps track of which sections of Glass have been broken.)
A figure may make an Attack that targets Glass. If they do, the Glass is broken. When playing a Stealth Encounter, any Action that breaks Glass also causes noise and may not be done quietly. See Stealth Encounters, Pg. 30.
New Encounter/Tracker Tokens
Glass Shards: Anytime a figure Attacks, casts a Spell, or moves through Glass, replace each space that shares an orthogonal edge with the Glass with Glass Shard tracker tokens. Glass Shard tracker tokens represent hazards to any figure that moves through this space in the future and also help players keep track of which areas of glass have been broken.
- Figures that move into, end their turn in, or occupy a space that has a Glass Shard tracker token placed into it, are dealt 1 IRREDUCIBLE DMG and inflicted with Bleed.
- Glass Shard tracker tokens do not block LOS and may not be targeted or moved. Glass Shards may occupy any non-Dangerous and non-Obstructing Terrain Type and may share the same space as any other non-Glass Shard token.
- A space may not contain more than 1 Glass Shard tracker token.
Gust: Gust tokens represent dangerous wind being blown across the encounter and will PUSH figures and some tokens. They are Encounter tokens placed by Diagrams and Abilities.
- Gust tokens can be placed onto any type of Terrain and may even be placed on the edge of tiles or sheets to depict that the Gust is intended to start on the very edge of a board.
- Gust tokens have an arrow that indicates the direction the Gust is blowing. This arrow represents strong wind blowing in a single orthogonal direction. This wind is assumed to continue in the direction depicted until stopped by Obstructing Terrain or until reaching the edge of the board. Meaning, Gust do not continue or affect figures in spaces beyond Obstructing Terrain, the edge of a board.
- The path of a Gust does not affect figures on Elevations lower than the first space on the board affected that path.
- At the end of a Round, all figures in the path of a Gust token are PUSHED the amount of spaces specified by the Special Encounter Rules or Ability that placed the Gust token. When moving multiple figures in this way, do so in the order of their position on the Initiative Track.
- When being PUSHED by a Gust, figures may not move through other figures, Obstructing Terrain, or up Elevation.
- If a figure being PUSHED by a Gust cannot move for any reason, then the figure is dealt IRREDUCIBLE DMG equal to the amount of spaces it was not able to move.
- A figure that is moved from a higher Elevation to a lower Elevation by a Gust is dealt 3 IRREDUCIBLE DMG.
- Any game component that can or cannot be moved by a Current also can and cannot be moved by a Gust.
- Gust tokens come in different colors. The color is only referenced when an Encounter needs to keep track of the timing of one or more different Gust tokens. Otherwise, all Gust tokens are resolved at once regardless of which color is used.
Reference chart: Not moved by Currents / Gusts: Terrain tokens (e.g., Plank tokens), Objective tokens, Tracker tokens, Totems, Exit tokens, Direction tokens, Elevation & Elevation tokens, Tracker tokens, Fire, Fallen Saint, Tentacles, Boulder, Ladders, Mounted Weapons, Rigging, Routes, Bile, Glass Shards, Fetid Crimson Bloat, Ice Spikes, Spiritual Needle, Spirit Crux. Moved by Currents / Gusts: Figures (always, see Large Based Figures Pg. 71, or the Heavy Tag Pg. 93, for exceptions), Loot tokens, Combatant tokens, Lotus Flower, Bug Bomb, Loa Crystal Token, Shotgun, Bleep Bomb, Obscuring tokens (Gusts only).
The Gust Example page (Pg. 43) is marked GUST WIP in the book and has no text.
New Encounter/Tracker Tokens (Continued)
Ladders: Ladders are special Tracker tokens that are found both on tokens and printed on Tiles and Sheets. Using some Abilities, Adventurers may also add them to the board. Ladders provide a new way for figures to move up and down Elevation during a Move Action that they normally couldn't.
- Ladders may only be placed on spaces that also have an adjacent space with an Elevation difference.
- Ladders do not block line of sight, do not modify a space in any way, and can be placed on any Terrain a figure could also normally occupy.
- Ladders can occupy and share the same space as any other token or figure.
- When a figure moves from one Elevation to another, they may use a ladder so long as the ladder token occupies either the space they moved from, or the space they moved to. When doing so, they may move to or from any difference in Elevation by spending additional movement points equal to the difference in Elevation from one space to another. If they do not have enough Movement Points, they may not use the ladder to make this Elevation change.
- Free Movement cannot be used to use a Ladder.
Mounted Weapons: Mounted Weapons are Combatant tokens that might appear as part of an Encounter. These tokens are numbered 1-9 with each token representing a unique Mounted Weapon. Figures close enough can fire a Mounted Weapon using its unique profile listed under the Special Encounter Rules associated with the Mounted Weapon.
- To fire a Mounted Weapon, an Adventurer must be on or adjacent to a space occupied by the Mounted Weapon. If the Adventurer doesn't have LOS to the Mounted Weapon or any part of the Mounted Weapons token is occupied by an opponent, it cannot be fired. Then, so long as it is loaded, an Adventurer may spend 1 SP to fire it.
- After spending the required 1 SP, the figure firing the Mounted Weapon must choose a space within Line of Sight and Range of the Mounted Weapon's printed profile in the Special Encounter Rules.
- If the profile uses an Ability Template with an Origin Diamond, then that template must be placed and oriented so that the Origin Diamond occupies a space that is within Range and Line of Sight of the Adventurer firing the Mounted Weapon. If the Ability Template uses an Origin Arrow, then that template must be placed and oriented so that the Origin Arrow is adjacent to the space the Mounted Weapon occupies.
- After resolving the Mounted Weapon's Ability, place a Used token on this Mounted Weapon's token. A Mounted Weapon with a Used token placed on it is considered Unloaded. Unless otherwise specified, all Mounted Weapons on a Diagram will start loaded.
- Only loaded Mounted Weapons can be fired. To reload a Mounted Weapon, an Adventurer must spend 1 SP and also be able to otherwise fire that Mounted Weapon.
- If a Mounted Weapon takes damage from an Ability Template, Terrain Effect, or a Special Encounter Rule it is destroyed and removed from the board. A figure that is on or adjacent to a space a Mounted Weapon occupies may take an Encounter Action to attempt a Lore or Perception 12 Skill Check. If they succeed, they sabotage the machine, and remove it from the board.
- Note: Intelligent Combatants will never sabotage a Mounted Weapon unless instructed to do so.
- Intelligent Combatants will interact with Mounted Weapons only when specifically instructed to do so via the Special Encounter Rules. An Intelligent Combatant follows all the same restrictions as Adventurers when determining if they can use a Mounted Weapon and who they can target.
Example cannon profile (printed): When firing this Cannon, use the Small Cross Template on any space within LOS. Then, the figure firing this Cannon must make a Perception 12 Skill Check. If they fail this Check, the shot misses. If they pass, the shot hits the target, and all figures within this template are dealt a 2X PURPLE die of PHYSICAL DMG. A figure who occupies the Origin Diamond is dealt IRREDUCIBLE DMG instead. A figure who gains a Defense bonus against Attacks from Terrain they occupy take 1X PURPLE instead. After resolving the Damage dealt against each figure within this template, a figure who occupies the Origin Diamond is PUSHED 3 in a direction of their choice. Then, place a Dangerous Terrain token on the space they occupied. When an Adventurer is the target of a cannon, after rolling for Damage, they may spend 1 SP to attempt a Agility or Perception 12 Skill Check to leap for cover. If they succeed, reduce any non-IRREDUCIBLE DMG dealt by half. Finally, the zone (i.e. The Oppressor) where the Dangerous Terrain was placed is dealt 5 Damage.
Round / Turn Tokens: Round/Turn Tracker tokens are used to help players keep track of any Ability, Special Encounter Rule, or Intelligent Combatant AI Step that might instruct players to do something once per round or turn. In addition, these tokens can be used to track Passive Abilities that call for an Ability or Action to occur "The first time each turn".
Rigging Tokens: Rigging tokens are Tracker tokens that might appear as part of an Encounter. Figures may use Rigging tokens to move around the board more efficiently.
- If a Rigging token takes damage from an Ability Template, Terrain Effect, or a Special Encounter Rule it is destroyed and removed from the board. A figure that is on a space a Rigging token occupies may take an Encounter Action to sabotage the Rigging and remove it from the board. Intelligent Combatants will never sabotage a Rigging token unless instructed to do so.
- An Adventurer who starts a Move Action while on or adjacent to a Rigging token may Gain Flight until the end of their Move Action. If they do, they may not add additional Movement in any way to this Move Action.
- A figure that moves at least 1 space using a Rigging token will Gain +1 to their ATK ROLL on the next Attack they make this turn.
- An Intelligent Combatant may only use a Rigging token if the encounter specifies that they can. If an Intelligent Combatant is allowed to use a Rigging token as part of an encounter they will use them if they are instructed to perform a Move Action and using the Rigging token would be more beneficial than performing the Movement normally. For example, if the rigging would allow them to complete the Move action that otherwise would have been false, or if they could Gain the bonus to their Attack Roll without provoking a Break Attack.
Route Tokens: Route tokens represent tunnels, traversable pits, corridors, portals, staircases, or anything else that is meant to thematically connect two different and distant areas together. Route tokens are marked "Route A" or "Route B" and always come in sets of two with a matching type (i.e., artwork) and a matching color on their border.
When you are instructed to place a Route token, you will also be instructed to place a Route token of the same type at a different location, with one marked A and the other marked B. Spaces that contain a Route token of the same color are thematically and mechanically connected. (I.e., A Blue Route A token will always connect to a Blue Route B token.)
- During a figure's turn, they may move from any space a Route token occupies to any space another Route token of the same type and color occupies by spending 1 Movement Point during a Move Action.
- A figure may never draw LOS, Range, or SOI from one Route to another. Meaning, they may also never make Actions or use Abilities to target figures from one Route token to another.
- Figures that move from one Route token to a connected Route token will DISPLACE any figure who occupies the connected Route token (and any figures that must also be Displaced to be able to move).
- Only Large Based Figures with Squeeze may use a Route token.
- Due to the thematic nature of Routes, it's possible that some Routes will be marked using Special Terrain. In these cases, the Special Encounter Rules will make it clear. Routes printed on Tiles and Sheets follow all the same rules but will not require a token to represent them as they are already printed on the Tile or Sheet in question.
Unaware Tokens: Unaware tokens represent Combatants that are not aware of an Adventurer's presence and are temporarily not a threat to the Adventurer.
Combatants that have the Unaware Tracker token skip their turns until the token is removed. An Unaware Tracker token is removed when the Intelligent Combatant is the target of an Ability, Spell, Attack, is dealt Damage, or starts their turn within LOS of an opponent.
New Combatant Tokens
Berserk: Some Intelligent Combatants and Special Encounter Rules might place a Berserk token onto a Combatant. The Berserk Combatant token is treated as a Special Effect for the purposes of other Abilities.
After the last figure on the Initiative Track has taken their turn, before Ending the Round, doing any Abilities, or doing any Special Encounter Rules that occur at the end of a Round, Combatants with Berserk Special Effect take a second turn. If multiple Combatants have a Berserk token, activate them in the order in which their Initiative Cards are on the Initiative Track.
Bile: Figures that Move into, end their turn in, or occupy a space that has Bile placed into it are dealt 1 IRREDUCIBLE DMG.
Dark Tendril: Dark Tendril tokens are spawned by Abilities that are used by both Adventurers and Combatants. Dark Tendrils count as figures with 6 HP, 10 Defense, and 6 Armor. Dark Tendrils have RESISTANCE: MAGICAL DMG unless the source of the Damage is from an AXE.
- Opponents who provoke a Break Attack from a Dark Tendril are dealt a GREEN die of PHYSICAL DMG.
- When a figure that spawned a Dark Tendril starts their turn, all opponents adjacent to a Dark Tendrils they spawned are dealt a GREEN die of PHYSICAL DMG.
- Dark Tendrils do not drop Combatant Loot.
Dark Tentacle: Dark Tentacle tokens are placed by Abilities that are used by both Adventurers and Combatants. Dark Tentacles are considered Special Effect tokens. Depending on if Dark Tentacles are placed on a figure that is allied or opposing the figure who used the Ability that placed the token changes how they affect a figure.
Dark Tentacle Tokens:
- A figure may not have more than one Dark Tentacle token on them.
- A figure with Dark Tentacle token, or an adjacent ally, may spend 1 SP and make an Encounter Action to attempt a STRENGTH 10 check to remove a Dark Tentacle. Intelligent Combatants with a Dark Tentacle will attempt this Skill Check at the end of each of their turns by rolling the BLACK die. If they roll a skull, remove this token.
Allies with a Dark Tentacle Token:
- They Gain +2 MOVEMENT.
- If they would be dealt PHYSICAL DMG or MAGIC DMG by an opponent, roll the BLACK die. If either of the two icon results printed in the rule (shown as icons in the book) is rolled, remove this token and all Damage is ignored. If this token was added by an Esper controlled by a Summoner, that Summoner does not remove this token when using this Ability.
Opponents with a Dark Tentacle Token:
- Gain STATUS: Move 2 spaces towards the figure who placed the Dark Tentacle on this figure. If that figure has been Defeated, move this figure towards the nearest non-adjacent opponent instead.
- This figure may not Dodge and may not Empower Attacks or Spells.
- Spells cast against this figure are EMPOWERED.
Fallen Saint: Some Encounters and Combatants will specify that they use Fallen Saint tokens. Fallen Saint tokens are placed on or adjacent to Adventurers. While near them, an Adventurer has Limited options available to them until they can free themselves from the grasp of the Fallen Saint. A Fallen Saint token may never occupy a space that already contains a copy of the same token.
While occupying a space containing a Fallen Saint token, Adventurers:
- May not make the Move Action or use the Counter Ability.
- May only cast a Spell or make an Attack if that Spell or Attack is also Empowered.
- An Adventurer adjacent to (but not occupying) a space containing a Fallen Saint token may spend 1 SP to make a STRENGTH 12 or LORE 12 Skill Check. If they Pass this Skill Check, they may remove an adjacent Fallen Saint token from the board.
- An Adventurer that occupies the same space as a Fallen Saint token may remove the token from the space they occupy by spending 5 SP.
Fetid Crimson Bloat: Some Encounters and Combatants will specify that they use Fetid Crimson Bloat tokens. Fetid Crimson Bloat tokens are placed on or adjacent to Adventurers. While near them, these Adventurers will have Limited options available to them until they can free the grasp of the Fetid Crimson Bloat.
Fetid Crimson Bloat tokens may never occupy spaces that already contain a copy of the same token.
While occupying a space containing a Fetid Crimson Bloat token, Adventurers:
- May not make the Move Action or use the Counter Ability.
- Gain and have PASSIVE: Burn, Poison, and Darkness.
An Adventurer adjacent (but not occupying) a space containing a Fetid Crimson Bloat token may spend 1 SP to make a Strength 12 or Lore 12 Skill Check. If they Pass this Check, they may remove an adjacent Fetid Crimson Bloat token from the board.
An Adventurer that occupies the same space as a Fetid Crimson Bloat token may remove this token by spending 5 SP.
Fire: Fire tokens are placed by Diagrams and Abilities. These tokens count as Combatant tokens that can be placed onto Hindering Terrain and Normal Terrain.
- A figure that occupies a space where fire is placed, enters a space with fire, or starts their turn in a space that contains a Fire token is Inflicted with Burn. If they are already Inflicted with Burn, they take 3 IRREDUCIBLE DMG instead.
- At the start of a Round, Fire will spread. Before dealing Initiative Cards, place a single Fire token on an adjacent space to each individual body of Fire currently on the board. When placing Fire Terrain in this way, prioritize placing Fire Terrain on the closes space that contains Hindering Terrain. If Fire is placed in a space that contains Hindering Terrain in this way, place fire on all spaces that are also part of that body of Hindering Terrain.
- Fire can occupy the same space as any other token. If the token can take Damage, Fire will Inflict Damage to it. Otherwise, Fire has no effect on other tokens unless explicitly mentioned in the Special Encounter Rules or Rules associated with that token.
- An Adventurer may make an Encounter Action to remove up to 1 Fire tokens from spaces on or adjacent to the space they occupy.
Gnashing Appendage: Gnashing Appendage tokens are used during Encounters that feature Hogrifar. They are used as a Combatant token or an Intelligent Combatant depending on the rules associated with them in their corresponding Encounter Setup.
Gnashing Appendages:
- Count as figures with 1 HP, 23 Defense, 0 Armor, and two Conviction Dice.
- Have PROVOKE 3.
- All Attacks they make have FU: PULL 3 and inflict Disease, Poison, and Rooted, FORCE 15.
Ice Spikes: Some Encounters and Combatants place Ice Spike tokens. These tokens deal damage and obstruct players from freely drawing Line of Sight. Ice Spikes are only ever placed using templates and come in a variety of sizes.
Ice Spikes:
- When determining if a figure has Line of Sight to a space, figures can draw Line of Sight into but not through a space containing an Ice Spike token.
- A figure that moves into, ends their turn in, moves out of, or occupies a space that has Ice Spikes placed into it is dealt 2 MAGIC DMG and inflicted with Frozen twice.
- Ice Spikes come in various sizes intended to be placed using Templates. They may only be placed on Normal and Hindering Terrain and may only be placed if all spaces the token would occupy can be occupied by Ice Spikes.
- An Adventurer on or adjacent to a space containing an Ice Spike token may spend 2 SP to make a STRENGTH 12 or PERCEPTION 12 Skill Check. If they Pass this Check, they may remove an Ice Spike token of any size on or adjacent to the space they occupy.
Bleep Bomb: Bleep Bomb tokens are placed on the board by Combatants and Special Encounter rules. A Bleep Bomb will detonate at the start of the next Round.
When a Bleep Bomb detonates, place the Small Cross Template on the Bleep Bomb. All Adventurers within this template are dealt a YELLOW die of PHYSICAL DMG. Then, place Poison Gas in every space within this template.
Palimpsest of the Dead: Adventurers have access to the Medium for the Blasphemous Discipline to place a Palimpsest token onto the board. This token counts as Hindering Terrain and cannot be placed on Dangerous, Obstructing, or Special Terrain spaces.
When a figure is within 4 spaces of a space the Palimpsest token occupies:
- The figure loses and cannot gain Positive Effects.
- If the figure is the target of an Attack or Spell, when Rolling to Hit or Determining the Force of a Spell against them, they are dealt 2 MAGIC DMG for each black die rolled.
- If the figure makes an Attack or casts a Spell, when Rolling to Hit or Determining the Force of a Spell against the target, they are dealt 2 MAGIC DMG for each black die rolled.
Note: A figure that is both within 4 spaces of the Palimpsest and targeting a figure that is also within 4 spaces of the Palimpsest will take 4 MAGIC DMG for each black die rolled.
Phantom Sentry: Phantom Sentry tokens are used during Encounters that feature the Ghostslinger. Each Ghostslinger has a corresponding Phantom Sentry with a matching color and Activation Number.
The Phantom Sentry and Ghostslinger share an Initiative Card. When a Ghostslinger takes her turn, her Phantom sentry will take a turn after her.
When a Phantom Sentry takes its turn, it will Attack opponents. If there are less than 3 different opponents to Attack, it will Attack the nearest opponent 3 times. If there are 3 or more opponents within range, it will make a RANGE 6 Attack against every opponent within Range.
Phantom Sentries:
- Count as figures with 1 HP, 23 Defense, 6 Armor, INCORPOREAL, IMMUNITY: MAGIC DMG, and automatically pass all Conviction Checks.
- Have PROVOKE 6.
- All Attacks they make ignore Armor. In addition, they have FU: PUSH 3 and Inflict Rooted, FORCE 15.
Obscuring Tokens: Obscuring tokens represent debris, clouds, or other forms of airborne particulates that impede your vision.
- Cannot be moved, Damaged, or affected by Currents, Abilities, or Special Encounter Rules that don't specifically call them by name.
- Can be placed in any non-obstructing space. Obscuring tokens do not replace Terrain, instead, they add to the existing effects of the Terrain they are placed on.
- Come in different types. These types may have additional rules associated with their tokens.
- Obscuring tokens placed into a space that already contains an Obscuring token of the same type cannot be placed. If the type of Obscuring token being placed is different, it will replace the existing Obscuring token type with the new type.
- When determining if a figure has Line of Sight to a space, figures can draw Line of Sight into but not through a space containing an Obscuring token.
- Figures do not provoke Break Attacks while leaving spaces that contain Obscuring tokens.
Smoke: Smoke represents non-dangerous clouds that obscure vision. They follow all the basic rules associated with Obscuring tokens.
Smoldering Gas: Smoldering Gas represents dangerous clouds produced by fires, burning debris, or other obstacles of intense heat. In addition to following all rules associated with Obscuring tokens, Smoldering Gas has the following rules:
- A figure that moves into, ends their turn in, or occupies a space that has Smoldering Gas placed into it, is dealt 1 IRREDUCIBLE DMG and Inflicted with Choked.
Miasma: Miasma represents noxious fumes produced by Raw Itlum Crystals. In addition to following all rules associated with Obscuring tokens, Miasma has the following rules:
- When determining if a figure has SOI to a space, figures can draw SOI into but not through a space containing Miasma.
- A figure that moves into, ends their turn in, or occupies a space that has Miasma placed into it, is dealt 1 IRREDUCIBLE DMG. THEN make an Intelligence + Presence 15 Check: if they fail they are Inflicted with Sedate.
Poison Gas: Poison Gas represents toxic fumes produced by Combatants, Terrain, and Abilities. In addition to following all rules associated with Obscuring tokens, Poison Gas has the following rules:
- A figure that moves into or ends their turn in a space that has Poison Gas is Inflicted with Poison. When Inflicting Poison in this way, the Poison Limit of a figure is 2.
- If you end your turn in a space containing Poison Gas, you are Inflicted with Poison and Sedate.
New Combatant Tokens (Continued)
Reanimation: Combatants with the UNDEAD tag use Reanimation tokens. When a Combatant with the UNDEAD tag is Defeated, place a Reanimation token on the space(s) it occupied. At the end of the next Round, if this token is still on the board, remove this token from the board and Spawn a new Combatant of the same type that placed this Combatant token.
Reanimation Tokens:
- Are double-sided to keep track of what turn they were placed on and when the Combatant will respawn. One side depicts a hand raising the dead. This means that the token was placed this turn. The other side depicts a skeleton hand bursting from the ground. This means that the token will spawn the corresponding Combatant at the end of this Round. When placing a Reanimation token, always place them on the board with the hand raising the dead.
- Come in multiple sizes. When a Combatant places a Reanimation token, always place a token that matches the base size of the Combatant who placed it.
- Come in numbered pairs. When a Combatant places a Reanimation token, place one on the board and another of the same number on the Combatant's Activation Number. That way, you know that this Combatant is the one marked to Respawn.
- Prevent future Combatants of the same type from Spawning. Until the corresponding Reanimation token has been removed from the board, a Combatant with a Reanimation token on its Activation Number is treated as though it is still currently spawned for the purpose of component limitations and spawning rules.
- If a Reanimation token's space is occupied when spawning a Combatant, DISPLACE all figures occupying its spaces before Spawning the Combatant.
- Can be removed to prevent a Combatant from Spawning again! These tokens can be targeted by Attacks as though they were a figure, but still do not block Line of Sight or movement in any way. If an Adventurer or one of their allies can remove this token by making an Attack action against it. No roll is required. Instead, remove this token from the board.
- Opponents that use Reanimation tokens will not normally drop Loot. To Gain a Loot card from an opponent that uses a Reanimation token, a player must remove the token from the board. If they do, they Gain a Loot card like normal. SWARM (and other TAGS that affect Loot draws) must still be considered when determining if the opponent qualifies for a Loot draw.
- Reanimation cannot be canceled.
- Intelligent Combatants target Reanimation tokens placed by opponents as though it were an opponent.
Shadow Image: Some Intelligent Combatants will have AI Steps that might instruct them to place a Shadow Image token onto a Combatant. The Shadow Image Combatant token is treated as a Special Effect for the purposes of other Abilities.
When making an Attack or casting a Spell against an opponent with Shadow Image, roll the BLACK die. If the two icon results printed in the rule (shown as icons in the book) are rolled, the Attack or Spell misses or fails to affect this figure.
Spirit Crux: Some Encounters and Combatants place Spirit Crux tokens. These tokens expand the range of SOI and prevent players from using certain types of Abilities while near them.
Spirit Crux Tokens:
- Adventurers within SOI of a Spirit Crux may only use Standard Actions and Abilities that cost 1 or more SP. If an Ability would reduce the cost of a Standard Action or Ability or allow a player to use the Standard Action or Ability without paying its cost, it cannot be used.
- Opposing Combatants within SOI of a Spirit Crux Gain RESISTANCE: PHYSICAL DMG against all Attacks that do not have at least 1 ARMOR PIERCING.
- An Adventurer on or adjacent to a space containing a Spirit Crux token may spend 1 SP to make a Strength 12 or Lore 12 Skill Check. If they Pass this Check, they may remove a Spirit Crux on or adjacent to the space they occupy.
Spiritual Needle: Some Encounters and Combatants will specify that they use Spiritual Needles. This Combatant token is tied to specific Combatants. These Combatants will Gain a set of unique Abilities printed on their Combatant card until the last Needle has been destroyed.
Spiritual Needle Tokens:
- There are 5 tokens marked 1 through 5. These tokens are always placed in a set as determined by the Special Encounter Rules or Combatant that uses them. Destroying the last Spiritual Needle in the set will also cease any Abilities printed on the corresponding Combatant card or Special Encounter Rules that use them.
- Spiritual Needles only ever correspond to a single Combatant card in any given Encounter unless noted otherwise.
- Unless a Combatant's Ability says otherwise, Spiritual Needles have no Effect.
- An Adventurer on or adjacent to a Spiritual Needle may make an Encounter Action to attempt a Lore 10 Check to remove a Spiritual Needle from the board.
- Spiritual Needles cannot be Moved by any Ability that doesn't specifically move them by name.
Tentacles: Tentacle tokens are part of Encounter setups that feature the Corpse Collector Combatant.
A Tentacle token will be instructed to move during the Corpse Collector's turn. If an opponent starts their turn on the same space as a Tentacle token, they put the token on their card as a Special Effect. Figures may be affected by multiple Tentacle tokens. Figures with Tentacle tokens or adjacent allies may spend 1 SP and make a Strength 10 Check to remove a Tentacle token.
If the Tentacle token is removed, place it in an nearest unoccupied non-Dangerous space adjacent to the Corpse Collector at the end of the Corpse Collector's next turn.
Combatant Token rule exceptions:
- Tentacles cannot be moved by Currents and other Special Encounter Rules that would move figures or tokens on the board.
- Tentacles Ignore the effects of non-Obstructing Terrain.
- Tentacles cannot be targeted, PUSHED, PULLED, or otherwise moved by Abilities that don't explicitly allow moving Tentacles.
Dice Breakdown
Not transcribed: the Dice Breakdown page (Pg. 52) is a symbol chart for the dice colours and faces (BLACK, WHITE, PURPLE, GREEN, YELLOW, etc.) and is drawn as an image; the Act 3 component list contains no dice. Use the printed page for the dice symbols.