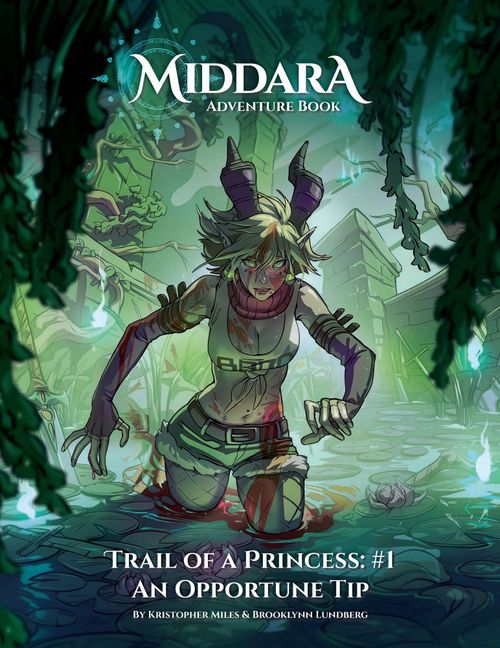
Middara: Trail of a Princess – An Opportune Tip
Middara: Trail of a Princess – An Opportune Tip Rulebook
Table of Contents
Table of Contents
- How to Use This Content
- Summary of Components
- Component List
- Quick Build Guide
- Story: Missing Piece (Pg. 7)
- Encounter: Dockside Mugging (Pg. 10)
- Story: Unfair Fight and Better Late Than Never (Pg. 12)
- Story: Evading Evie (Pg. 13)
- Story: Remarkably Unremarkable and Old Friends (Pg. 13 to 15)
- Story: To the Docks (Pg. 16)
- Story: Where Are We Going? and Never Go Back (Pg. 17)
- Story: Old Flame (Pg. 19 to 20)
- Story: Being Vulnerable Is Hard (Pg. 21)
- Story: This Message Will Self-Destruct (Pg. 21)
- Story: A Second Chance (Pg. 22)
- Story: Feeling the 'Urge and Prison Ship (Pg. 22 to 23)
- Story: Finally Underway (Pg. 24)
- Story: My Biggest Regret (Pg. 26)
- Story: My Biggest Weakness (Pg. 27)
- Story: Lots to Think About (Pg. 28)
- Story: Friendly Advice (Pg. 29)
- Encounter: What Do They Live On When They Can't Get Princess? (Pg. 30)
- Story: So Aggressive and Baited (Pg. 32)
- Story: Silent Running (Pg. 33)
- Story: Dirty Secrets (Pg. 34)
- Story: We'll Find Her (Pg. 35)
- Story: Crack of Dawn (Pg. 36 to 37)
- Story: To Build a Bookshop and The Burden of Power (Pg. 38)
- Encounter: Hit and Run (Pg. 40)
- Story: Left to Die (Pg. 44)
- Story: Karma Bites and Good Thing You Came Along (Pg. 45)
- Encounter: Fragile Like a Bomb (Pg. 46)
- Story: Get to da Choppa (Pg. 49)
- Story: Take It to the Grave (Pg. 49)
- Story: Face the Truth (Pg. 50)
- Story: We'll Never Know (Pg. 51)
- Story: Et Tu, Brute? and Hand-me-down Handcuffs (Pg. 52)
- Story: The Most Unkindest Cut of All (Pg. 53)
- Story: Not the Reason You Think (Pg. 55)
- Story: You Have the Right to Remain Silent (Pg. 56)
- Story: This Country Ain't Big Enough For the Two of Us (Pg. 56)
- Story: Her Eternal Rest (Pg. 57)
- Story: Bye Bye Georgie and Send More Cuffs (Pg. 58)
- Story: Draw Them Off (Pg. 59)
- Story: Let's Split Up (Pg. 61)
- Story: The Lone Hunter (Pg. 61)
- Diagrams (Pg. 62 to 71)
How to Use This Content
Required Content: Middara: Unintentional Malum Act 1 (Ver. 1.2). Trail of a Princess is a standalone Adventure Pack that requires Act 1 to play.
Recommended Play Order: For the most organic play experience, this Micro Adventure should be inserted into Middara: Unintentional Malum Act 1 Adventure mode after Chapter 2 but before Chapter 4. If you choose to play this Adventure at any other point in the story or as a Standalone Adventure, you might find yourself in a strange place when a Story Flag you don't have, or have never had the opportunity to have, is called for. A Canon Adventure Sheet PDF is available at www.Middara.com. Default Story Flags for the play-through:
- Culprit Identified
- Prized Possession
Using this Adventure Pack: When starting a new Adventure, you may choose any Adventure you own to play. You may add all "non-hidden" cards to their respective decks to expand the options in any Adventure. Then, set aside all of the Story items and/or Hidden decks included in this product until you're told to reveal these cards. Hidden Cards from this product are marked as TPXX on their Hidden Card tabs. As you play through an Adventure, you'll reveal Hidden Cards associated with that Adventure. Once a non-Story Hidden Card has been revealed, they can also be used in other Adventures where appropriate (i.e. Combatant Variations, Item Cards, etc.). If you don't want to play through an entire Adventure Pack to unlock and use the content it includes in the Crawl Mode (or other Adventurers for that matter) players may choose to ignore this rule. However, be aware that this won't provide the most balanced experience. But it is useful for those who simply want more options for their home brew or their Crawl Mode.
The Diagrams that should be referenced by any and all Encounters during this Adventure Pack will use the Diagrams printed in the back of the Adventure Book.
Summary of Components
- Adventure Book: contains the adventure of Shayliss, any new rules, a Quick-Build Guide, and all the Diagrams for this Adventure.
- Adventurer Cards: When playing Middara, players take on the role of Adventurers. When playing the Adventure Mode, players will be instructed to use specific Adventurers. When playing the Crawl Mode, players may choose from any Adventurers they own to create a party. See Adventurers in the Middara Rulebook, Pg. 25.
- Combatant Cards: these cards have the rules for all figures other than Adventurers. Each Combatant Card is double-sided. The front side describes all the rules associated with that figure, while the back of the card presents some lore and context. See Combatants in the Middara Rulebook, Pg. 56.
- Initiative Cards: every figure has one or more corresponding Initiative Card. At the start of every Encounter, players deal out the Initiative Cards associated with each Adventurer and Combatant in the Encounter. Starting from the first card of the Initiative Track, figures take their turns. See An Adventurer's Turn in the Middara Rulebook, Pg. 36.
- Item Cards: Item Cards represent gear that Adventurers can earn or buy. See Item Tiers and Types in the Middara Rulebook, Pg. 27.
- Story Item Cards: Item Cards that are only available in the Adventure Mode. These cards cannot be acquired normally. They must be earned during the Adventure. When playing the Crawl Mode, these cards are not used and can be kept in the game box. See Story Disciplines and Items in the Middara Rulebook, Pg. 13.
- Terrain tokens: double-sided Terrain tokens are used to add variety and unpredictability to Encounters. Each Encounter will dictate which Terrain tokens are needed. See Tiles and Terrain in the Middara Rulebook, Pg. 21.
- Cardboard Figure Standups: some Combatant Cards in the game are represented by Cardboard Figure Standups. These Standups have their stats and Abilities detailed on their corresponding Encounter or Combatant Card. These Standups follow all the rules associated with their plastic figure counterparts.
Component List
- 1 Adventure Book
- 7 Large Cards (5x6 Unique Sized): 2 Adventurers, 2 Intelligent Combatants, 3 Command Combatants
- 7 Medium Cards (Standard Euro): 1 Unique Item, 6 Story Items
- 6 Mini Cards (Mini American): 5 Initiative Cards, 1 Companion
- 10 Tokens
- 5 Cardboard Standups
Quick Build Guide
Ready to Adventure
- This Micro Adventure is designed around using Shayliss Arsen.
- If you haven't already, Reveal Large and Small Hidden Cards UM45 Shayliss Arsen. You may use the Adventure Card and Initiative Card revealed, or you may use any other Shayliss Arsen Adventurer and Initiative Cards you may have (e.g. the Shayliss Arsen Adventurer and Initiative Card from the KS1 Promo Pack).
Special: Gear Shayliss up.
- Shayliss may spend 18 XP.
- Shayliss Gains 1 Common Weapon with the LIGHT Tag, 1 Straight Shiv Common Weapon, 1 Common Armor with the CLOTH or LEATHER Tag, and the Garter Knives Wandering Relic.
- Shayliss may purchase 40 Gold worth of Mundane and Common Items that aren't Weapons.
If you would rather a quicker build option, you can choose from one of the following premade builds:
Shayliss Arsen (premade build)
- Subterfuge Discipline: Follow Through (LVL 1), Murder Circus (LVL 1), Blade Distortion (LVL 2), False Idol (LVL 2)
- Mundane Items: Utility Core (Core), Enchanted Piercings (Relic), Throwing Knives (Consumable)
- Bottled Blessing (Consumable)
- Common Items: Straight Shiv (Weapon), Ocean Cleaver (Weapon), Hoodie of Deflection (Armor)
- Wandering Items: Garter Knives (Relic)
Ballroom Shayliss Arsen (premade build)
- Martial Discipline: Blade Works (LVL 1), Physically Perfected (LVL 2)
- Subterfuge Discipline: Murder Circus (LVL 1), Quick Blow (LVL 2)
- Mundane Items: Utility Core (Core), Enchanted Piercings (Relic), Throwing Knives (Consumable), Bottled Blessing (Consumable)
- Common Items: Straight Shiv (Weapon), Assassin's Punchdagger (Weapon), Hoodie of Deflection (Armor)
- Wandering Items: Garter Knives (Relic)
Once you have completed gearing up Shayliss, continue to Missing Piece Pg. 7.
Story: Missing Piece (Pg. 7)
Story prose omitted. Continue to Dockside Mugging Pg. 10.
Encounter: Dockside Mugging (Pg. 10)
Environment: Wilderness. Loot LVL: Common.
Setup
- Tiles: UM47, UM57, UM59
- Terrain: 3 x Dock (2x3), 5 x Crate (1x1), 2 x Obstructing (2x1), 1 x Plank (1x1)
- Totems: 1 x Blue
- Objectives: 1 x Blue
- Loot: 1 x Blue
- Figures: 2 x Elenian Thug
End Conditions
Win Condition: If the round begins with four Time tokens on the Initiative Track.
- Reward: [MASKED IN SOURCE PDF]
- Continue to Unfair Fight Pg. 12.
Lose Condition: Shayliss is defeated.
- Reward: [MASKED IN SOURCE PDF]
- Continue to Better Late Than Never Pg. 12.
Special Encounter Rules
- Suspicious Rocks: The Special Terrain printed on Tile UM57 has no Effect.
- Well Worn Bridge: The Special Terrain printed on Tile UM59 has no Effect.
- Friendly Field: At the end of each round, place a Time token at the end of the Initiative Tracker. If there are ever four Time tokens on the tracker at the start of the round, Shayliss has survived long enough to attract the city watch's attention, and the Encounter ends in victory.
- Mysterious Adversaries: Reveal Hidden Cards TP1 to access the Elenian Thug and their associated cards. The first time an Elenian Thug is Defeated, read the following hidden text. [MASKED IN SOURCE PDF]
Special Encounter Rules (continued, Pg. 11)
- That Looks Useful: If Shayliss is adjacent to a Crate Token, as an Encounter Action she may make a Strength 10 Skill Check. If she passes, read the following hidden text. [MASKED IN SOURCE PDF]
- Loot, LVL: Common:
- Blue Loot: [MASKED IN SOURCE PDF]
- Red Loot: [MASKED IN SOURCE PDF]
Objectives (Pg. 11)
- Blue Objective: This token represents a large bell suspended on the skydock. If Shayliss is adjacent to this token, she may take an Encounter Action to ring it loudly, drawing attention from every nearby street. Each time she does, add a Time token to the end of the Initiative Tracker.
- Red Objective: If an Adventurer moves onto or adjacent to the space this token occupies, read the hidden text below. [MASKED IN SOURCE PDF]
- Yellow Objective: If Shayliss is adjacent to an Intelligent Combatant and either figure is on or adjacent to the space this token occupies, as an Encounter Action read the following hidden text. [MASKED IN SOURCE PDF]
Totems (Pg. 11)
- Blue Totem: [MASKED IN SOURCE PDF]
- Red Totem: [MASKED IN SOURCE PDF]
Achievements (Pg. 11)
- Cleaning Up the Streets: If no Elenian Thug Intelligent Combatants remain on the board when the Encounter ends, read the following hidden text. [MASKED IN SOURCE PDF]
Story: Unfair Fight and Better Late Than Never (Pg. 12)
Story prose omitted. Two short story passages, one after a win and one after a loss of Dockside Mugging. Each one ends with: Continue to Evading Evie Pg. 13.
Story: Evading Evie (Pg. 13)
Special: Gear Shayliss up.
- Return all the equipped Items on Shayliss. Keep the Garter Knives and any Loot or Items Gained during the last Encounter.
- Gain 1 2-handed Common Weapon or 2 1-handed Common Weapons, 1 Common Core and 1 Common Armor.
- Gain Common and Mundane Items worth 65 Gold.
- Shayliss may Re-spec her learned Disciplines for free.
Flag Check: Does the Party have the Story Flag Experienced Guide?
- YES: Continue to Remarkably Unremarkable Pg. 13.
- NO: Continue to Old Friends Pg. 14.
Story: Remarkably Unremarkable and Old Friends (Pg. 13 to 15)
Story prose omitted. Remarkably Unremarkable (Pg. 13) and Old Friends (Pg. 14–15) each end with: Continue to To the Docks Pg. 16.
Story: To the Docks (Pg. 16)
Flag Check: Does the party have the Story Flag Experienced Guide?
- YES: Continue to Where Are We Going? Pg. 17.
- NO: Continue to Never Go Back Pg. 17.
Story: Where Are We Going? and Never Go Back (Pg. 17)
Story prose omitted. Each one ends with: Continue to Old Flame Pg. 19.
Story: Old Flame (Pg. 19 to 20)
Story prose omitted.
Decision: Shayliss must make a choice.
- Appeal to her emotions with a sob story about your missing sister: Continue to Being Vulnerable Is Hard Pg. 21.
- Be honest with Aiko about the national security situation: Continue to This Message Will Self-Destruct Pg. 21.
TIP: Thinking with your heart or your head! Trail of a Princess has narrative choices just like Unintentional Malum. The choices you make here will be tracked by increasing Flags.
- PRETTY LIES represents telling people what you think they want to hear.
- UGLY TRUTH represents honesty regardless of how others might feel.
Story: Being Vulnerable Is Hard (Pg. 21)
Special: Increase the Pretty Lies counter by one. Continue to A Second Chance Pg. 22.
Story: This Message Will Self-Destruct (Pg. 21)
Special: Increase the Ugly Truth counter by one. Continue to A Second Chance Pg. 22.
Story: A Second Chance (Pg. 22)
Flag Check: Does the party have the Story Flag Experienced Guide?
- YES: Continue to Prison Ship Pg. 23.
- NO: Continue to Feeling the 'Urge Pg. 22.
Story: Feeling the 'Urge and Prison Ship (Pg. 22 to 23)
Story prose omitted. Each one ends with: Continue to Finally Underway Pg. 24.
Story: Finally Underway (Pg. 24)
Decision: Shayliss must make a choice.
- Share an emotional apology for the breakup: Continue to My Biggest Regret Pg. 26.
- Share the truth behind the breakup: Continue to My Biggest Weakness Pg. 27.
Story: My Biggest Regret (Pg. 26)
Special: Increase the Pretty Lies flag by one. Continue to Lots to Think About Pg. 28.
Story: My Biggest Weakness (Pg. 27)
Special: Increase the Ugly Truth flag by one. Continue to Lots to Think About Pg. 28.
Story: Lots to Think About (Pg. 28)
Flag Check: Does the party have the Story Flag Experienced Guide?
- YES: Continue to What Do They Live On When They Can't Get Princess? Pg. 30.
- NO: Continue to Friendly Advice Pg. 29.
Story: Friendly Advice (Pg. 29)
Story prose omitted. Continue to What Do They Live On When They Can't Get Princess? Pg. 30.
Encounter: What Do They Live On When They Can't Get Princess? (Pg. 30)
Environment: Wilderness. Loot LVL: Common.
Setup
- Tiles: UM31, UM37
- Terrain: 1 x Hindering (2x1), 1 x Obstructing (1x1), 1 x Water (2x1), 1 x Water (1x1)
- Totems: 1 x Blue
- Loot: 1 x Blue
- Figures: 1 x Earth Loa
End Conditions
Win Condition: Any Adventurer ends their turn on the Blue Exit.
- Reward: [MASKED IN SOURCE PDF]
- Continue to So Aggressive Pg. 32.
Lose Condition: Shayliss and all Allies are Defeated.
- Reward: [MASKED IN SOURCE PDF]
- Continue to Baited Pg. 32.
Special Encounter Rules
- Guided by Experience: After placing Shayliss, perform a Flag Check for Experienced Guide. If it is present, read Demiurge Assistance. If not, read Double Barrel Aid.
- Demiurge Assistance: [MASKED IN SOURCE PDF]
- Double Barrel Aid: [MASKED IN SOURCE PDF]
- Under Pressure: The attackers seem almost endless, pouring out of every opening. At the end of the second round, and each round after, if the Adventurers did not activate a Totem that round, Spawn 2 Cave Sickles on the edge of the tile nearest to Shayliss in a Normal Terrain space. If this is not possible for any reason, gain an Urgency token.
- Without Number: If a Diagram Setup requires you to Spawn a Combatant that is not available, do so by removing the appropriate Combatant of that type that is as far from any Adventurer as possible. That Combatant is not Defeated. The new Combatant begins with zero Damage as though it had just been Spawned.
Loot, LVL: Common (Pg. 31)
- Blue Loot: [MASKED IN SOURCE PDF]
- Red Loot: [MASKED IN SOURCE PDF]
- Green Loot: [MASKED IN SOURCE PDF]
- Yellow Loot: [MASKED IN SOURCE PDF]
Objectives (Pg. 31)
- Blue Objective: This token marks where the cliffs begin and the airship was parked. If an Adventurer moves onto Tile UM35, read the hidden text below. [MASKED IN SOURCE PDF]
- Red Objective: When an Adventurer is adjacent to this token, read the following hidden text. [MASKED IN SOURCE PDF]
Totems (Pg. 31)
- Blue Totem: [MASKED IN SOURCE PDF]
- Red Totem: [MASKED IN SOURCE PDF]
- Green Totem: [MASKED IN SOURCE PDF]
- Yellow Totem: [MASKED IN SOURCE PDF]
Achievements (Pg. 31)
- Tightly Bound: If Padric was present at the start of this Encounter and still has Bound Aisling when it ends, read the following hidden text. [MASKED IN SOURCE PDF]
Curiously Hidden Rules (Pg. 31)
- Together as One: Only read the following Special Encounter Rule if instructed to do so. [MASKED IN SOURCE PDF]
Story: So Aggressive and Baited (Pg. 32)
Story prose omitted. Both the win passage (So Aggressive) and the loss passage (Baited) end with: Continue to Silent Running Pg. 33.
Story: Silent Running (Pg. 33)
Story prose omitted.
Aisling in chains! If you have Small Hidden Card TP4 or Large Hidden Card TP5 remove them from the game.
Flag Check: Does the party have the Story Flag Experienced Guide?
- YES: Continue to Dirty Secrets Pg. 34.
- NO: Continue to We'll Find Her Pg. 35.
Story: Dirty Secrets (Pg. 34)
Story prose omitted.
New Story Flag: Gain the Story Flag Daddy Issues. Continue to Crack of Dawn Pg. 36.
Story: We'll Find Her (Pg. 35)
Story prose omitted.
New Story Flag: Gain the Story Flag A Pound of Flesh. Continue to Crack of Dawn Pg. 36.
Story: Crack of Dawn (Pg. 36 to 37)
Story prose omitted.
Decision: Shayliss must make a choice.
- Tell Aiko you would have chosen to stay with her: Continue to To Build a Bookshop Pg. 38.
- Tell Aiko that Elenia mattered more than she did: Continue to The Burden of Power Pg. 38.
Story: To Build a Bookshop and The Burden of Power (Pg. 38)
Story prose omitted.
To Build a Bookshop: Special: Increase the Pretty Lies Flag by one.
The Burden of Power: Special: Increase the Ugly Truth flag by one.
Both passages then read: Tally Pretty Lies and Ugly Truth Flags, then continue to the appropriate Encounter.
- If Pretty Lies has more: Continue to Hit and Run Pg. 40.
- If Ugly Truth has more: Continue to Fragile Like a Bomb Pg. 46.
The source does not state the outcome if the two Flags are tied.
Encounter: Hit and Run (Pg. 40)
Environment: Underground. Loot LVL: Common.
Setup
- Tiles: UM36, UM40, UM58
- Terrain: 3 x Obstructing (2x1)
- Totems: 1 x Blue, 1 x Red
- Figures: 1 x Aiko, 2 x Elenian Thug
End Conditions
Win Condition: If any Adventurer ends their turn on the Blue Exit.
- Reward: [MASKED IN SOURCE PDF]
- Continue to Karma Bites Pg. 45.
Lose Condition: If Aiko is adjacent to the Blue Exit at the start of her turn. Or if Shayliss and all allies are Defeated.
- Reward: [MASKED IN SOURCE PDF]
- Flag Check: Do the Adventurers have the Story Flag Experienced Guide?
- YES: Continue to Left to Die Pg. 44.
- NO: Continue to Good Thing You Came Along Pg. 45.
Special Encounter Rules
- Aiko the Spurned: When setting up this Encounter, reveal Small and Large Hidden Cards TP9 to access the Cards for Aiko the Spurned. During the first round of this Encounter after dealing the Initiative Track, move Aiko's Initiative Card 1 space forward on the Initiative track and place an Energy token on her Intelligent Combatant Card.
- Aiko Has Fallen: When Aiko is Defeated, read Curiously Hidden Rule Capture and Subdue.
- Guided by Experience: After placing Shayliss, perform a Flag Check for Experienced Guide. If it is present, read Demiurge Assistance. If not, read Double Barrel Aid.
- Demiurge Assistance: [MASKED IN SOURCE PDF]
- Double Barrel Aid: [MASKED IN SOURCE PDF]
Without Number (Pg. 41)
If a Diagram Setup requires you to Spawn a Combatant that is not available, do so by removing the appropriate Combatant of that type that is as far from any Adventurer as possible. That Combatant is not Defeated. The new Combatant begins with zero Damage as though it had just been Spawned.
Loot, LVL: Common (Pg. 41)
- Blue Loot: [MASKED IN SOURCE PDF]
- Red Loot: [MASKED IN SOURCE PDF]
- PASS: [MASKED IN SOURCE PDF]
- FAIL: [MASKED IN SOURCE PDF]
- Yellow Loot: [MASKED IN SOURCE PDF]
Objectives (Pg. 41)
- Blue Objective: An Adventurer within 4 spaces of this token may read the hidden text below. [MASKED IN SOURCE PDF]
- Red Objective: This is the mooring line of the Byon Byon Bōto. Release the ship to get out of here. While adjacent to the space this token occupies, as an Encounter Action an Adventurer may make a Strength 12 Skill Check. If they pass, read hidden text A. [MASKED IN SOURCE PDF]
- If Aiko makes a Move Action while on or adjacent to the space this token occupies, before moving, she rolls the BLACK die. If 2 or more shield symbols are rolled, read hidden text B. [MASKED IN SOURCE PDF]
Totems (Pg. 41 and 43)
- Blue Totem: If an Adventurer activated this Totem, read A. If Aiko did, read B. [MASKED IN SOURCE PDF]
- Red Totem: If an Adventurer activated this Totem, read A. If Aiko did, read B. [MASKED IN SOURCE PDF]
- Green Totem: If an Adventurer activated this Totem, read A. If Aiko did, read B. [MASKED IN SOURCE PDF]
- Yellow Totem: If an Adventurer activated this Totem, read A. If Aiko did, read B. [MASKED IN SOURCE PDF]
- Orange Totem: If an Adventurer activated this Totem, read A. If Aiko activated this Totem and Shayliss is standing on tile UM35 or UM45, read B. Otherwise, read C. [MASKED IN SOURCE PDF]
Achievements (Pg. 43)
- On Wings of Shadow: Do not read the following hidden text unless instructed to do so. [MASKED IN SOURCE PDF]
Curiously Hidden Rules (Pg. 43)
- Capture and Subdue: [MASKED IN SOURCE PDF]
- Sail Away: [MASKED IN SOURCE PDF]
Story: Left to Die (Pg. 44)
Story prose omitted. Ends: "The End."
Story: Karma Bites and Good Thing You Came Along (Pg. 45)
Story prose omitted.
Karma Bites (after a win of Hit and Run) ends with a Flag Check.
Flag Check: Does the party have the Story Flag Experienced Guide?
- YES: Continue to Et Tu, Brute? Pg. 52.
- NO: Continue to Hand-me-down Handcuffs Pg. 52.
Good Thing You Came Along (the Hit and Run lose branch when the Flag is absent) ends: Continue to Hand-me-down Handcuffs Pg. 52.
Encounter: Fragile Like a Bomb (Pg. 46)
Environment: Underground. Loot LVL: Common.
Setup
- Tiles: UM36, UM40, UM58
- Terrain: 3 x Obstructing (2x1)
- Totems: 1 x Blue, 1 x Red
- Figures: 1 x Aiko, 1 x Animate (Mundane), 2 x Elenian Thug
End Conditions
Win Condition: If any Adventurer ends their turn on the Blue Exit.
- Reward: [MASKED IN SOURCE PDF]
- Continue to Get to da Choppa Pg. 49.
Lose Condition: Shayliss and all Allies are Defeated.
- Reward: [MASKED IN SOURCE PDF]
- Continue to Take It to the Grave Pg. 49.
Special Encounter Rules
- Guided by Experience: After placing Shayliss, perform a Flag Check for Experienced Guide. If it is present, read Demiurge Assistance. If not, read Double Barrel Aid.
- Demiurge Assistance: [MASKED IN SOURCE PDF]
- Double Barrel Aid: [MASKED IN SOURCE PDF]
- Aiko the Forgiving: When setting up this Encounter, reveal Small and Large Hidden Cards TP11 to access the Cards for Aiko the Forgiving.
Without Number (Pg. 47)
If a Diagram Setup requires you to Spawn a Combatant that is not available, do so by removing the appropriate Combatant of that type that is as far from any Adventurer as possible. That Combatant is not Defeated. The new Combatant begins with zero Damage as though it had just been Spawned.
Loot, LVL: Common (Pg. 47)
- Blue Loot: [MASKED IN SOURCE PDF]
- Red Loot: [MASKED IN SOURCE PDF]
- PASS: [MASKED IN SOURCE PDF]
- FAIL: [MASKED IN SOURCE PDF]
- Yellow Loot: [MASKED IN SOURCE PDF]
Objectives (Pg. 47)
- Blue Objective: An Adventurer within 4 spaces of this token may read the following hidden text. [MASKED IN SOURCE PDF]
- Red Objective: This is the mooring line of the Byon Byon Bōto. Release the ship to get out of here. While adjacent to the space this token occupies, as an Encounter Action an Adventurer may make a Strength 12 Skill Check. If they pass the Check, read the hidden text below. [MASKED IN SOURCE PDF]
Totems (Pg. 47)
- Blue Totem: [MASKED IN SOURCE PDF]
- Red Totem: [MASKED IN SOURCE PDF]
- Green Totem: [MASKED IN SOURCE PDF]
- Yellow Totem: [MASKED IN SOURCE PDF]
- Orange Totem: [MASKED IN SOURCE PDF]
Achievements (Pg. 47)
- Honest with Ourselves: If Aiko has not been Defeated when you win this Encounter, read the following hidden text. [MASKED IN SOURCE PDF]
Curiously Hidden Rules (Pg. 47)
- Sail Away: [MASKED IN SOURCE PDF]
Story: Get to da Choppa (Pg. 49)
Story prose omitted.
Flag Check: Does the party have the Story Flag Experienced Guide?
- YES: Continue to Et Tu, Brute? Pg. 52.
- NO: Continue to Hand-me-down Handcuffs Pg. 52.
Story: Take It to the Grave (Pg. 49)
Story prose omitted.
Flag Check: Does the party have the Story Flag Experienced Guide?
- YES: Continue to We'll Never Know Pg. 51.
- NO: Continue to Face the Truth Pg. 50.
Story: Face the Truth (Pg. 50)
Story prose omitted.
New Story Flag: Gain the Story Flag Redemption At Any Cost. Continue to Let's Split Up Pg. 61.
Story: We'll Never Know (Pg. 51)
Story prose omitted.
New Story Flag: Gain the Story Flag Redemption At Any Cost. Continue to Draw Them Off Pg. 59.
Story: Et Tu, Brute? and Hand-me-down Handcuffs (Pg. 52)
Story prose omitted.
Special: Check the Pretty Lies/Ugly Truth flags.
- If Pretty Lies has more: Continue to The Most Unkindest Cut of All Pg. 53.
- If Ugly Truth has more: Continue to Not the Reason You Think Pg. 55.
The source does not state the outcome if the two Flags are tied.
Story: The Most Unkindest Cut of All (Pg. 53)
Story prose omitted.
Decision: Shayliss must make a choice.
- Arrest Aiko: Continue to You Have the Right to Remain Silent Pg. 56.
- Execute Aiko: Continue to Her Eternal Rest Pg. 57.
Story: Not the Reason You Think (Pg. 55)
Story prose omitted.
Decision: Shayliss must make a choice.
- Arrest Aiko: Continue to You Have the Right to Remain Silent Pg. 56.
- Banish Aiko: Continue to This Country Ain't Big Enough For the Two of Us Pg. 56.
- Execute Aiko: Continue to Her Eternal Rest Pg. 57.
Story: You Have the Right to Remain Silent (Pg. 56)
Story prose omitted.
Flag Check: Does the party have the Story Flag Experienced Guide?
- YES: Continue to Bye Bye Georgie Pg. 58.
- NO: Continue to Send More Cuffs Pg. 58.
Story: This Country Ain't Big Enough For the Two of Us (Pg. 56)
Story prose omitted.
New Story Flag: Gain the Story Flag Kicked Out. Continue to The Lone Hunter Pg. 61.
Story: Her Eternal Rest (Pg. 57)
Story prose omitted.
Flag Check: Does the party have the Story Flag Experienced Guide?
- YES: Continue to Draw Them Off Pg. 59.
- NO: Continue to Let's Split Up Pg. 61.
Story: Bye Bye Georgie and Send More Cuffs (Pg. 58)
Story prose omitted. Each one ends with: Continue to The Lone Hunter Pg. 61.
Story: Draw Them Off (Pg. 59)
Story prose omitted. Continue to The Lone Hunter Pg. 61.
Story: Let's Split Up (Pg. 61)
Story prose omitted. Continue to The Lone Hunter Pg. 61.
Story: The Lone Hunter (Pg. 61)
Story prose omitted. No further Continue or ending instruction is printed after this passage.
Diagrams (Pg. 62 to 71)
The Diagrams are placement maps printed as images in the back of the Adventure Book (Diagrams 1 to 10, pages 62 to 71). The Encounters above refer to them for token and figure placement. They are not transcribed here.