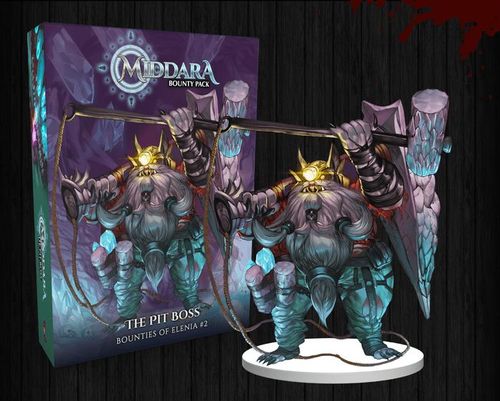
Middara: Bounty Pack – The Pit Boss
Middara: Bounty Pack – The Pit Boss Rulebook
Table of Contents
Table of Contents
Bounties of Elenia: Intro
Bounty Packs can be used during any Story Round that allows for Bounties of the corresponding difficulty rating or higher (expressed by a number of red skulls). They can also be inserted into your Crawl Mode adventure, or played directly using the Quick Start Rules contained in this book. For detailed Bounty Pack rules, see Bounties on Pg. 13 of the Middara Rule Book.
Bounty Packs are designed to be difficult. Many of the monsters within a Bounty Pack are far more challenging than those you would encounter at the same difficulty rating in the base game. In Middara, every failure is a chance to learn and grow stronger. You'll still keep any rewards you earn even if you fail a Bounty.
How do I use a Bounty Pack?
First, add all "non-hidden" cards to their respective decks. Then set aside the Hidden Deck included in this product until you're told to reveal these cards. Hidden cards from this product are marked as PBXX on their hidden card tabs.
While Bounty Packs include new content like Encounters, Items, Adventurers, Combatants, or Disciplines, they always require a specific Middara base game to play. They may also reference other products, if the Encounters explore specific aspects of those adventure packs or expansions. To determine which products you need to own, refer to the "Required Content Box" printed on the product's packaging, or inside its Adventure Book.
For this Bounty Pack the Required Content is: Middara: Unintentional Malum Act 1 (Ver. 1.2). The base game provides tiles, tokens, and characters.
Hidden cards: Hidden cards found within Bounty Packs are meant to be hidden until you are instructed to reveal them. If you restart a Bounty, we recommend that all hidden cards from that Bounty should be collected and re-hidden. This way, repeated attempts at a Bounty can retain that authentic experience of discovery, without unnecessarily bloating your decks.
New rules: Because Bounties explore parts of our world that haven't been seen before in other products, there's a good chance each one will introduce new rules, tokens, or enemies. Those rules will always come before the Bounty's Encounters. A Quick Reference to new tokens and keywords is also included at the end of the Bounty Book.
Diagrams: Often the Encounter Setup Diagram will not contain everything needed to play through that Encounter. As the Adventurers explore, they may be required to reveal Diagrams that expand the play area, Spawn new enemies, or react to their choices. These Diagrams are printed in the back of the Bounty Book.
Bounties of Elenia: New Rules
Quick Start Rules
What if you don't have an ongoing game at the appropriate level for a new bounty? Or maybe you'd just like a fun way to introduce players to Middara? Whatever your reasons, you don't have to wait for the bounty to slot into an existing playthrough of Middara's Story Mode, or as part of an extended Crawl Mode campaign.
If you'd like to hop right in and play, you can with our Bounty Quick Start rules! Using these instructions, you can quickly assemble a party of the appropriate level to challenge a bounty pack.
Normal Quick Start
- This Bounty is designed around using 4 Adventurers.
- Each Adventurer in the Party may spend 27 XP.
- Each Adventurer may purchase 475 Gold worth of Mundane, Common and Uncommon Items.
- The Party draws 1 random Unique Uncommon Item; this may be purchased by any Adventurer. Draw 1 random Unique Uncommon Item; this Item is free and may be equipped by an Adventurer.
- The party gets to draw 2 Monster Loot cards. Shuffle the Monster Loot cards for the following Intelligent Combatants: Animate, Blighted Guardian, Cave Sickle, Corpse Collector, Earth Loa, Fragor, Gate Keeper, Gevaudan, Grotesque Effigy, Living Oblation, Merk Hound, and Water Loa to draw from.
- Any Items the party Gain with the MATERIAL Tag may be traded in for the normal benefits listed on Pg. 28 of the Middara Rulebook.
Easy Quick Start
- This Bounty is designed around using 4 Adventurers.
- Each Adventurer in the Party may spend 32 XP.
- Each Adventurer may purchase 525 Gold worth of Mundane and Common Items.
- The Party draws 1 random Unique Uncommon Item; this may be purchased by any Adventurer. Draw 2 random Unique Uncommon Items; these Items are free and may be equipped by any Adventurer.
- The party gets to draw 3 Monster Loot cards. Shuffle the Monster Loot cards for the following Intelligent Combatants: Animate, Blighted Guardian, Cave Sickle, Corpse Collector, Earth Loa, Fragor, Gate Keeper, Gevaudan, Grotesque Effigy, Living Oblation, Merk Hound, and Water Loa to draw from.
- Any Items the party Gain with the MATERIAL Tag may be traded in for the normal benefits listed on Pg. 28 of the Middara Rulebook.
New Tokens in this Product: The rules for the new Tags, Terrain, and Tokens can be found on the back pages of this Rulebook. See the Quick Reference Rules on Pg. 48.
Alternate and/or Variation Tag Combatants
Any Combatant cards included in this Bounty with the ALTERNATE or VARIATION tags: ignore the rules for those tags on the first playthrough of this Bounty. Any attempts past the first follow the Alternate and Variation Rules as they are presented starting on Pg. 79 of the Middara Rulebook.
ALTERNATE (X)
The ALTERNATE Tag may have a number listed next to it. Combatants with the ALTERNATE (X) Tag are Combatants that are strong enough to require more than one Base Combatant to Spawn before they can be included as a Possible Spawn. They otherwise follow the same rules as Combatants with the ALTERNATE Tag.
When checking for Possible Spawns, you only include Combatants with the ALTERNATE (X) Tag if you are instructed to Spawn at least X of the Base Combatant, where X equals the number listed beside the ALTERNATE Tag. (E.g., ALTERNATE 2)
If you draw a Combatant with the ALTERNATE (X) Tag (e.g., ALTERNATE 2), you will Spawn one of that Combatant's figure instead of X Base Combatants. After Spawning all possible Combatants with the ALTERNATE (X) Tag, if you still have more Base Combatants to Spawn, continue the Possible Spawn process as normal.
Example: You are Instructed to Spawn 3 Cave Sickles. From the Possible Spawns, you draw a Cave Sickle Defender. This Combatant has the ALTERNATE 2 Tag. This means that you can Spawn 1 Cave Sickle Defender for every 2 Cave Sickles you are instructed to Spawn. In this case, you could only Spawn 1 Cave Sickle Defender. Then, you would need to draw a different Possible Spawn for the remaining Cave Sickle. If you drew another Combatant with the ALTERNATE (X) Tag, if it required 2 or more Combatants, you would need to draw again since there is only a single Cave Sickle left on the board.
New Variant rule
Organic Alternates and Variations
When checking for Possible Spawns, if you would need to Spawn a new Combatant Card, instead of shuffling all their corresponding ALTERNATE and VARIATION cards with their given Base Combatant cards, you will roll 2 WHITE dice and consult the chart below.
| Roll (2 WHITE dice) | Result |
|---|---|
| 4 - 7 | VARIATION: X |
| 8 - 11 | Base Combatant/Opposing Esper |
| 12 - 14 | ALTERNATE: X |
If you rolled and got VARIATION: X or ALTERNATE: X, shuffle all the Possible Spawns with that tag related to the Base Combatant/Opposing Esper listed as X, draw one and Spawn figures following the rules for that tag. If you rolled and got Base Combatant/Opposing Esper, Spawn figures following the normal Spawning rules as if you didn't have Alternates or Variations for that Base Combatant/Opposing Esper.
If remaining Spawns are required, repeat this process as needed until all figures are Spawned.
If you don't have ALTERNATE Tag cards but do have VARIATION Tag cards for a base Combatant, or don't have VARIATION Tag cards but do have ALTERNATE Tag cards for a Base Combatant, there are 2 options. You either:
- Use the chart as listed, which is simple but you will see those Combatants less.
- Or if you roll and get VARIATION: X or ALTERNATE: X treat it as (VARIATION: X and ALTERNATE: X), which is less organic, but you will see those Combatants more often.
New Terrain/Encounter token rules
Augmented Terrain
Some Terrain tokens will have a Terrain type listed in parentheses ( ) after the name of the token. What that means is that Terrain functions identical to the Terrain type listed in parentheses but also adds some new rules when those tokens are used. If a Figure ignores an augmented Terrain they only ignore the rules for that new Terrain token, not the Terrain listed in the parentheses.
Obscuring Tokens
Obscuring tokens represents debris, clouds, or other forms of airborne particulates that impede your vision.
Obscuring Token rules:
- Cannot be moved, Damaged, or affected by Currents, Abilities, or Special Encounter Rules that don't specifically call them by name.
- Can be placed in any non-Obstructing space. Obscuring tokens do not replace Terrain; instead, they add to the existing effects of the Terrain they are placed on.
- Come in different types. These types may have additional rules associated with their token.
- Obscuring tokens placed into a space that already contains an Obscuring token of the same type cannot be placed. If the type of Obscuring token being placed is different, it will replace the existing Obscuring token type with the new type.
- When determining if a figure has Line of Sight to a space, figures can draw Line of Sight into but not through a space containing an Obscuring token.
- Figures do not provoke break attacks while leaving spaces that contain Obscuring tokens.
Types of Obscuring Tokens
Miasma Token
Miasma represents noxious fumes produced by Raw Itlum Crystals. In addition to following all rules associated with Obscuring tokens, Miasma has the following rules:
- When determining if a figure has SOI to a space, figures can draw SOI into but not through a space containing Miasma.
- A figure that moves into, ends their turn in, or occupies a space that has Miasma placed into it is dealt 1 IRREDUCIBLE DMG. Then make a Lore + Presence 15 Check: if they fail, they are Inflicted with Sedate.
Miasma Token Placement Example
Miasma tokens can occupy the same space as other tokens and figures. If it happens in an Encounter, the Setup Diagram will have a white dotted line that will point to the space the Miasma token is located in. (See Example A on Pg. 8.)
Miasma Geyser Placement Example
At the end of a round Miasma Geysers place 1 Miasma token on the board. The below examples are intended to help you resolve how that token placement is resolved.
Example 1 shows what happens at the end of a round for these Miasma Geysers. The green arrows show the best space to place the Miasma token related to the location of the left Miasma Geyser. And the red arrow shows the best space to place the Miasma token related to the location of the right Miasma Geyser. The spaces chosen don't already contain a Miasma token and are the space that would be adjacent to the most Miasma tokens placed by their respective Miasma Geysers.
Example 2 shows what happens at the end of the next round. Like before, the green arrow shows the best space to place the Miasma token for the left Miasma Geyser. What ever space you didn't choose in Example 1 will be the space. And the red arrow shows the best space to place the Miasma token for the right Miasma Geyser. There is now an orange arrow that shows a potential position for the right Miasma Geyser if the left Geyser wasn't there. The spaces the green and red arrow are indicating are the best locations to place the Miasma tokens, because it results in the tokens being in the space that is adjacent to the most possible Miasma tokens.
(Example 1 and Example 2 are diagrams on Pg. 8 of the Bounty Book; the arrows are not reproduced here.)
New Tags
MIMICRY
Combatants with the MIMICRY tag represent hidden threats and will be Spawned from the hidden text in Loot tokens and Special Encounter Rules. When you Defeat a MIMICRY Combatant, you will draw a random Wandering Item or 2 Random Consumables matching the Loot LVL listed for the Encounter. This is instead of the Combatant Loot card you would normally draw.
IMPORTANT: Newer products made after Middara: Unintentional Malum Act 1 will include MIMICRY Spawns in the Loot token and Special Encounter Rules. We included the Mimicry Loot token as a way to use the MIMICRY Tag Combatants included in the product in with Middara: Unintentional Malum Act 1.
Encounters
Transcription note: the Encounter pages in the source PDF mask a large part of each Encounter's text (Objectives, Totems, Loot, exit rewards, lose rewards, and some Special Encounter Rules) with a red-and-green noise overlay that makes it unreadable. Those masked passages are not transcribed here. Each masked passage is marked [MASKED IN SOURCE PDF]. The unmasked text and set-up information that is legible is transcribed.
Tier One: Sealed for Your Safety
Fueled by the allure of glory, the glint of gold, or perhaps a reckless streak of audacity, your party have embarked upon the precarious descent down a rickety mineshaft. Your goal: to discover the legendary Kingdom of the Adlets and the precious Itlum they mine. Following the rusty tracks, hours blur together in the interminable abyss. Just as you're about to turn back, a rhythmic chipping sound reverberates in the still air, beckoning you from deeper. A surge of anticipation rekindles your flagging energy, propelling you towards the source of the chipping. A cluster of Adlets harvest gleaming Itlum Crystal Deposits from the cavern walls. Get excited!!
Loot LVL: Uncommon
Setup
- Tiles: UM23, UM29
- Terrain: 1 x Obstructing (2x1); 2 x Itlum Deposit (1x1)
- Totems: 1 x Blue; 1 x Red; 1 x Green
- Figures: 3 x Adlet Drudge
Special Pre-Encounter Rules
Bunch of Savages in this Town: Before you head out to pay a visit to the Adlet Pit Boss, you decide it's worth looking for useful items from the merchants close to the mine. They may have some items that will help you deal with the harsh environment down there.
Reveal Medium Hidden Cards PB01. To Gain Access to the Itlum Respirator and Companion Harness cards, add them to the Relic deck. Before you begin the first Encounter, you may PURCHASE Itlum Respirators or Companion Harnesses.
End Conditions (Sealed for Your Safety)
Win Condition: Any Adventurer finds and ends their turn on an Exit.
- Reward if you take the Blue Exit: [MASKED IN SOURCE PDF]. Continue to The Dig Pg. 12.
- Reward if you take the Red Exit: [MASKED IN SOURCE PDF]. Continue to Rapid Falls Pg. 14.
- Reward if you take the Green Exit: [MASKED IN SOURCE PDF]. Continue to The Commissary Pg. 18.
- Reward if you take the Yellow Exit: [MASKED IN SOURCE PDF]. Continue to In the Pits Pg. 16.
Lose Condition: All Adventurers are Defeated.
- Reward: [MASKED IN SOURCE PDF]. Continue to the current Story Round.
Special Encounter Rules (Sealed for Your Safety)
What are Adlets? As you approach the sealed section of the mine you see some strange small creatures mining the crystal formations. Reveal Small, Medium and Large Hidden Cards PB02 to access the Adlet Drudge Initiative, Monster Loot and Combatant Cards.
Itlum Deposits (Obstructing Terrain): Itlum Deposits contain the lifeblood of the Adlets, Itlum crystals. They MINE the crystals to use them for tools, technology and consumption. Each time an Itlum Deposit is MINED by an Adlet Type Combatant, roll the BLACK die; if a skull is rolled, the Itlum Deposit is now empty, place a Miasma Geyser on the space adjacent to the Adlet Type Combatant. If the Itlum Deposit is bigger than 1x1 all other spaces it occupied are replaced with Obstructing Terrain.
If there are already 4 Miasma Geysers on the board, instead the Itlum Deposit detonates and is removed from the board, replaced with Obstructing Terrain. All figures adjacent to the exploding Itlum Deposit are dealt a WHITE die of IRREDUCIBLE DMG.
Miasma Geysers (Obstructing Terrain): Miasma Geysers release highly toxic Miasma Gas into the atmosphere.
When a Miasma Geyser is first placed onto the board, place Miasma tokens in all non-Obstructing Terrain spaces adjacent to the Miasma Geyser. At the end of every round, open Miasma Geysers will place 1 Miasma token in the nearest non-Obstructing space to the Miasma Geyser that doesn't contain a Miasma token but is adjacent to as many Miasma tokens as possible.
As an Encounter Action a Miasma Geyser may be closed by making a Strength 10 Check while adjacent to it. However if you fail, all adjacent figures are dealt a WHITE die of IRREDUCIBLE DMG and are Inflicted with Sedate.
Once a Miasma Geyser has been closed the Miasma that surrounds it begins to dissipate. Remove all Miasma tokens adjacent to the Miasma Geyser. Then, at the start of the next round, remove any remaining Miasma tokens placed from the now closed Miasma Geyser. All Miasma Geysers are placed open unless specified otherwise. (Limit 4).
Miasma: (see the Miasma rules under New Rules above)
Sedate Effect (Passive): When making a MOVE Action, you only Gain half of your total Movement Points (rounded up). You also only Gain half of any bonus Movement or Movement Points added to that MOVE Action (rounded up).
Loot LVL: Uncommon
- Blue Loot: [MASKED IN SOURCE PDF]
- Red Loot: [MASKED IN SOURCE PDF]
Objectives: Yellow Objective (only read the hidden text if instructed): [MASKED IN SOURCE PDF]
Totems: Blue Totem; Red Totem; Green Totem; Orange Totem; Purple Totem: [MASKED IN SOURCE PDF]
Tier Two: The Dig
Continuing your exploration of the mine, you stumble upon a second excavation site. Straight ahead yawns a vast pit, undoubtedly a testament to the Adlets' relentless toil. To the east, Adlets labour with single-minded focus, wresting precious Itlum from the resistant cavern walls. Any southern view is obscured by the violent geysers belching out a noxious Miasma, a grimy curtain drawn over the landscape.
Loot LVL: Uncommon
Setup
- Tiles: UM9, UM11, UM23, UM29
- Terrain: 2 x Dangerous (1x1); 2 x Dangerous (2x1); 9 x Itlum Deposit (1x1); 3 x Miasma Geyser (1x1)
- Totems: 1 x Blue; 1 x Red (Miasma occupies same space); 1 x Green; 1 x Yellow; 1 x Purple; 1 x Orange
- Special: 9 x Miasma Token
- Figures: 3 x Adlet Drudge
End Conditions (The Dig)
Win Condition: Any Adventurer finds and ends their turn on an Exit.
- Reward if you take the Red Exit: [MASKED IN SOURCE PDF]. Continue to Miasma Corridor Pg. 20.
- Reward if you take the Green Exit: [MASKED IN SOURCE PDF]. Continue to The Treasury Pg. 24.
Lose Condition: All Adventurers are Defeated.
- Reward: [MASKED IN SOURCE PDF]. Continue to the current Story Round.
Special Encounter Rules (The Dig)
Itlum Deposits (Obstructing Terrain): Itlum Deposits contain the lifeblood of the Adlets, Itlum crystals. They MINE the crystals to use them for tools, technology and consumption. Each time an Itlum Deposit is MINED by an Adlet Type Combatant, roll the BLACK die; if a skull is rolled, the Itlum Deposit is now empty, place a Miasma Geyser on the space adjacent to the Adlet Type Combatant. If the Itlum Deposit is bigger than 1x1 all other spaces it occupied are replaced with Obstructing Terrain.
If there are already 4 Miasma Geysers on the board, instead the Itlum Deposit detonates and is removed from the board, replaced with Obstructing Terrain. All figures adjacent to the exploding Itlum Deposit are dealt a WHITE die of IRREDUCIBLE DMG.
Miasma:
- When determining if a figure has SOI to a space, figures can draw SOI into but not through a space containing Miasma.
- A figure that moves into, ends their turn in, or occupies a space that has Miasma placed into it is dealt 1 IRREDUCIBLE DMG. Then make a Lore + Presence 15 Check: if they fail they are Inflicted with Sedate.
Miasma Token Placement: The white dotted line shows that the Miasma token occupies the same space as the Red Totem.
Sedate Effect (Passive): When making a MOVE Action, you only Gain half of your total Movement Points (rounded up). You also only Gain half of any bonus Movement or Movement Points added to that MOVE Action (rounded up).
Loot LVL: Uncommon
- Blue Loot: [MASKED IN SOURCE PDF]
- Red Loot: [MASKED IN SOURCE PDF]
Objectives: Red Objective (only read the hidden text if instructed): [MASKED IN SOURCE PDF]
Totems: Blue Totem, Red Totem, Green Totem (A and B), Yellow Totem, Orange Totem, Purple Totem: [MASKED IN SOURCE PDF]
Tip (printed on the page): As mentioned in the beginning of the book, we aren't going to put the rules for the new Terrain in every Encounter. If you need to reference the rules for any new Terrain or Effect tokens, go to Pg. 7 or Pg. 49.
Tier Two: Rapid Falls
The sonorous crash of cascading water greets you as you enter the chamber. The deluge seems to spill from above, likely flowing from a surface river. Here it spirals into a powerful vortex, pulling everything towards the yawning pit at the chamber's center. With the water stretching wall to wall, the only way to get to the other side is to go through it. Miasma veils the path ahead, yet through its murkiness, you see the playful figures of two Water Loas frolicking in the torrent.
Loot LVL: Uncommon
Setup
- Tiles: UM17, UM19
- Terrain: 3 x Dangerous (2x1); 1 x Miasma Geyser (1x1)
- Totems: 1 x Red
- Special: 5 x Miasma Token
- Figures: 2 x Water Loa (Common)
End Conditions (Rapid Falls)
Win Condition: Any Adventurer finds and ends their turn on an Exit.
- Reward if you take the Yellow Exit: [MASKED IN SOURCE PDF]. Continue to The Infestation Pg. 22.
- Reward if you take the Blue Exit: [MASKED IN SOURCE PDF]. Continue to The Chapel Pg. 26.
Lose Condition: All Adventurers are Defeated.
- Reward: [MASKED IN SOURCE PDF]. Continue to the current Story Round.
Special Encounter Rules (Rapid Falls)
Raging Currents: These Currents move figures and tokens (except Totems and Terrain) 3 spaces. See the Middara Rulebook Pg. 22.
Miasma:
- When determining if a figure has SOI to a space, figures can draw SOI into but not through a space containing Miasma.
- A figure that moves into, ends their turn in, or occupies a space that has Miasma placed into it is dealt 1 IRREDUCIBLE DMG. Then make an Lore + Presence 15 Check if they fail they are Inflicted with Sedate.
Miasma Geysers (Obstructing Terrain): Miasma Geysers release highly toxic Miasma Gas into the atmosphere.
When a Miasma Geyser is first placed onto the board, place Miasma tokens in all non-Obstructing Terrain spaces adjacent to the Miasma Geyser. At the end of every round, open Miasma Geysers will place 1 Miasma token in the nearest non-Obstructing space to the Miasma Geyser that doesn't contain a Miasma token but is adjacent to as many Miasma tokens as possible.
As an Encounter Action a Miasma Geyser may be closed by making a Strength 10 Check while adjacent to it. However if you fail, all adjacent figures are dealt a WHITE die of IRREDUCIBLE DMG and are Inflicted with Sedate.
Once a Miasma Geyser has been closed the Miasma that surrounds it begins to dissipate. Remove all Miasma tokens adjacent to the Miasma Geyser. Then, at the start of the next round, remove any remaining Miasma tokens placed from the now closed Miasma Geyser. All Miasma Geysers are placed open unless specified otherwise. (Limit 4).
Sedate Effect (Passive): When making a MOVE Action, you only Gain half of your total Movement Points (rounded up). You also only Gain half of any bonus Movement or Movement Points added to that MOVE Action (rounded up).
Loot LVL: Uncommon
- Blue Loot: [MASKED IN SOURCE PDF]
Totems
- Blue Totem (A and B): [MASKED IN SOURCE PDF]
- Red Totem: [MASKED IN SOURCE PDF]
- Yellow Totem: [MASKED IN SOURCE PDF]
Tier Two: In the Pits
As you press further into the mine, it becomes evident that this segment has been ruthlessly scoured of its Itlum. The floor is pockmarked with gaping holes and treacherous pits. Testing the ground beneath your feet, you sense an unsettling fragility. The floor seems brittle, ready to collapse at the slightest provocation. To the northwest, diligent Adlets persist in their labor, filling rusting minecarts with more precious Itlum.
Loot LVL: Uncommon
Setup
- Tiles: UM1, UM23, UM25, UM27
- Terrain: 1 x Obstructing (2x1); 1 x Dangerous (1x1); 3 x Dangerous (2x1); 6 x Itlum Deposit (1x1)
- Totems: 1 x Blue; 1 x Red; 1 x Green; 1 x Yellow; 1 x Purple; 1 x Orange
- Objectives: 1 x Blue; 1 x Orange
- Figures: 6 x Adlet Drudge
End Conditions (In the Pits)
Win Condition: An Adventurer finds and ends their turn on an Exit.
- Reward if you take the Red Exit: [MASKED IN SOURCE PDF]. Continue to Miasma Corridor Pg. 20.
- Reward if you take the Yellow Exit: [MASKED IN SOURCE PDF]. Continue to The Infestation Pg. 22.
Alternate Win Condition: An Adventurer finds and ends their turn on a White Exit.
- Reward if you take the White Exit: [MASKED IN SOURCE PDF]. Continue to The Treasury Pg. 24.
Lose Condition: All Adventurers are Defeated.
- Reward: [MASKED IN SOURCE PDF]. Continue to the current Story Round.
Special Encounter Rules (In the Pits)
Unstable Ground: This area of the mine seems to be almost completely stripped of all the Itlum. This has caused the floor to become more fragile and thinner than other parts of the mine. If an Adventurer EMPOWERS an attack and a skull is rolled, read the Yellow Objective.
Itlum Deposits (Obstructing Terrain): Itlum Deposits contain the lifeblood of the Adlets, Itlum crystals. They MINE the crystals to use them for tools, technology and consumption. Each time an Itlum Deposit is MINED by an Adlet Type Combatant, roll the BLACK die; if a skull is rolled, the Itlum Deposit is now empty, place a Miasma Geyser on the space adjacent to the Adlet Type Combatant. If the Itlum Deposit is bigger than 1x1 all other spaces it occupied are replaced with Obstructing Terrain.
If there are already 4 Miasma Geysers on the board, instead the Itlum Deposit detonates and is removed from the board, replaced with Obstructing Terrain. All figures adjacent to the exploding Itlum Deposit are dealt a WHITE die of IRREDUCIBLE DMG.
Loot LVL: Uncommon
- Blue Loot: [MASKED IN SOURCE PDF] (includes Pass and Fail or No Plank outcomes)
Objectives
- Blue Objective (an Adventurer adjacent to this token may read the hidden text): [MASKED IN SOURCE PDF]
- Yellow Objective (only read the hidden text if instructed): [MASKED IN SOURCE PDF]
- Orange Objective (only read the hidden text if instructed): [MASKED IN SOURCE PDF]
- Purple Objective (an Adventurer adjacent to this token may read the hidden text): [MASKED IN SOURCE PDF]
Totems
- Blue Totem: [MASKED IN SOURCE PDF]
- Red Totem: [MASKED IN SOURCE PDF]
- Green Totem: [MASKED IN SOURCE PDF]
- Yellow Totem: [MASKED IN SOURCE PDF]
- Orange Totem: [MASKED IN SOURCE PDF]
- Purple Totem: [MASKED IN SOURCE PDF]
Tier Two: The Commissary
The potent aroma of Adlets' Itlum-based cuisine assaults your senses as you gaze into a room that could only serve as their communal dining hall. Dominating the space is a lengthy table, around which half a dozen Adlets devouring their meal. To the west, a stretch of elevated terrain looms, while to the north, a hulking iron door stands guard over a gleaming hoard of treasure. As you take your first step into the room, the Adlets' ears twitch in unison before their eyes swivel to fixate on you. A cloud of suspicion darkens their features, prompted by the fear that you've come to steal their lunch. One Adlet rings the lunch bell to alert anyone nearby while the others grab their tools and prepare to fight.
Loot LVL: Uncommon
Setup
- Tiles: UM3, UM7, UM9, UM13
- Terrain: 3 x Stone Slab (2x2); 4 x Itlum Deposit (1x1)
- Totems: 1 x Red
- Exits: 1 x White
- Special: 6 x Itlum Shard; 1 x Ladder
- Loot: 1 x Blue
- Figures: 6 x Adlet Drudge
End Conditions (The Commissary)
Win Condition: An Adventurer unlocks and ends their turn on the White Exit.
- Reward: [MASKED IN SOURCE PDF]. Continue to Miasma Corridor Pg. 20.
Lose Condition: All Adventurers are Defeated.
- Reward: [MASKED IN SOURCE PDF]. Continue to the current Story Round.
Special Encounter Rules (The Commissary)
Locked Exit: The White Exit token is locked and may not be taken until it has been unlocked.
Dinner Table: The Special Terrain on Tiles UM3 and UM9 count as Normal Terrain.
Itlum Haul: All Adlet Drudges that Spawn in this Encounter do so holding 3 Itlum Shard tokens. The Itlum Shard tokens on the Special Terrain spaces can be MINED as if they were Itlum Deposits. When MINED, reduce the token count by 1. Once they reach 0, that token is removed.
Dinner Time: When you Defeat an Adlet Drudge, gain a Time token. Once you have 9 tokens, read the Yellow Objective.
Lunch Bell: Reveal Small Hidden Card PB06, add the Encounter Initiative card to the Initiative deck before dealing the Initiative Track. When the Encounter Initiative Activates, Spawn up to 3 Adlet Drudges. Spawn Adlets in any empty Elevation 1 space along the south or west edge of the board, prioritizing spaces closest to Adventurers.
Sedate Effect (Passive): When making a MOVE Action, you only Gain half of your total Movement Points (rounded up). You also only Gain half of any bonus Movement or Movement Points added to that MOVE Action (rounded up).
Built-in Ladder: The Ladder token in the Encounter can't be moved. In addition, it has the following rules:
- Ladders do not block line of sight, do not modify a space in any way, and can be placed on any Terrain a figure could also normally occupy.
- Ladders can occupy and share the same space as any other token or figure.
- When a figure moves from one Elevation to another, they may use a Ladder so long as the Ladder token occupies either the space they moved from, or the space they moved to. When doing so, they may move to or from any difference in Elevation by spending additional movement points equal to the difference in Elevation from one space to another. If they do not have enough Movement Points, they may not use the Ladder to make this Elevation change.
- Free Movement cannot be used to use a Ladder.
Itlum Deposits (Obstructing Terrain): Itlum Deposits contain the lifeblood of the Adlets, Itlum crystals. They MINE the crystals to use them for tools, technology and consumption. Each time an Itlum Deposit is MINED by an Adlet Type Combatant, roll the BLACK die; if a skull is rolled, the Itlum Deposit is now empty, place a Miasma Geyser on the space adjacent to the Adlet Type Combatant. If the Itlum Deposit is bigger than 1x1 all other spaces it occupied are replaced with Obstructing Terrain.
If there are already 4 Miasma Geysers on the board, instead the Itlum Deposit detonates and is removed from the board, replaced with Obstructing Terrain. All figures adjacent to the exploding Itlum Deposit are dealt a WHITE die of IRREDUCIBLE DMG.
Loot LVL: Uncommon
- Blue Loot: [MASKED IN SOURCE PDF]
- Red Loot: [MASKED IN SOURCE PDF]
Objectives
- Red Objective (only read the hidden text if instructed): [MASKED IN SOURCE PDF]
- Yellow Objective (only read the hidden text if instructed): [MASKED IN SOURCE PDF]
Totems
- Red Totem: [MASKED IN SOURCE PDF]
Tip (printed on the page): As mentioned in the beginning of the book, we aren't going to put the rules for the new Terrain in every Encounter. If you need to reference the rules for any new Terrain or Effect tokens, go to Pg. 7 or Pg. 49.
Tier Three: Miasma Corridor
Venturing deeper into the mine's recesses, a palpable shift in both climate and pressure greets you. This chamber seems to have been wholly claimed by the Miasma, its presence so heavy that it obscures what lies beyond. All you know is that the exit is at the other side of this corridor. As for what lurks in the Miasma, you have no idea…
Loot LVL: Uncommon
Setup
- Tiles: UM13, UM9, UM7
- Terrain: 2 x Hindering (2x1); 4 x Miasma Geyser (1x1); 7 x Itlum Deposit (1x1)
- Totems: 1 x Blue; 1 x Red; 1 x Green; 1 x Yellow
- Objectives: 1 x Blue
- Special: 16 x Miasma Token
End Conditions (Miasma Corridor)
Win Condition: An Adventurer finds and ends their turn on an Exit.
- Reward if you take the Green Exit: [MASKED IN SOURCE PDF]. Continue to The Treasury Pg. 24.
- Reward if you take the Blue Exit: [MASKED IN SOURCE PDF]. Continue to The Chapel Pg. 26.
Lose Condition: All Adventurers are Defeated.
- Reward: [MASKED IN SOURCE PDF]. Continue to the current Story Round.
Special Encounter Rules (Miasma Corridor)
Miasma:
- When determining if a figure has SOI to a space, figures can draw SOI into but not through a space containing Miasma.
- A figure that moves into, ends their turn in, or occupies a space that has Miasma placed into it is dealt 1 IRREDUCIBLE DMG. Then make a Lore + Presence 15 Check. If they fail, they are Inflicted with Sedate.
Miasma Geysers (Obstructing Terrain): Miasma Geysers release highly toxic Miasma Gas into the atmosphere.
When a Miasma Geyser is first placed onto the board, place Miasma tokens in all non-Obstructing Terrain spaces adjacent to the Miasma Geyser. At the end of every round, open Miasma Geysers will place 1 Miasma token in the nearest non-Obstructing space to the Miasma Geyser that doesn't contain a Miasma token but is adjacent to as many Miasma tokens as possible.
As an Encounter Action a Miasma Geyser may be closed by making a Strength 10 Check while adjacent to it. However if you fail, all adjacent figures are dealt a WHITE die of IRREDUCIBLE DMG and are Inflicted with Sedate.
Once a Miasma Geyser has been closed the Miasma that surrounds it begins to dissipate. Remove all Miasma tokens adjacent to the Miasma Geyser. Then, at the start of the next round, remove any remaining Miasma tokens placed from the now closed Miasma Geyser. All Miasma Geysers are placed open unless specified otherwise. (Limit 4).
Loot LVL: Uncommon
- Red Loot: [MASKED IN SOURCE PDF]
Objectives
- Blue Objective (when an Adventurer is adjacent to a Miasma Geyser, read the hidden text): [MASKED IN SOURCE PDF]
Totems
- Blue Totem: [MASKED IN SOURCE PDF]
- Red Totem: [MASKED IN SOURCE PDF]
- Green Totem (including Pass and Fail outcomes): [MASKED IN SOURCE PDF]
- Yellow Totem: [MASKED IN SOURCE PDF]
- (One further unlabelled block at the top of the third column of the page): [MASKED IN SOURCE PDF]
Tip (printed on the page): As mentioned in the beginning of the book, we aren't going to put the rules for the new Terrain in every Encounter. If you need to reference the rules for any new Terrain or Effect tokens, go to Pg. 7 or Pg. 49.
Tier Three: The Infestation
You find yourself in a long abandoned segment of the mine, where cart tracks lay choked with rust. No trace of tools remains, save for a solitary pickaxe lying beside an empty cart. To the south, two Earth Loa linger, an odd sight given their usual preference for mineral-rich caverns. Upon closer inspection, you notice an eerie detail: the track appears intentionally dismantled in places, as if to discourage Adlet workers from the area. What secrets might those Loa guard, and why would Adlets want others to think it was deserted?
Loot LVL: Uncommon
Setup
- Tiles: UM27
- Objectives: 1 x Blue
- Figures: 2 x Earth Loa
End Conditions (The Infestation)
Win Condition: An Adventurer finds and ends their turn on an Exit.
- Reward if you take the Green Exit: [MASKED IN SOURCE PDF]. Continue to The Treasury Pg. 24.
- Reward if you take the Blue Exit: [MASKED IN SOURCE PDF]. Continue to The Chapel Pg. 26.
Lose Condition: All Adventurers are Defeated.
- Reward: [MASKED IN SOURCE PDF]. Continue to the current Story Round.
Special Encounter Rules (The Infestation)
Itlum Deposits (Obstructing Terrain): Itlum Deposits contain the lifeblood of the Adlets, Itlum crystals. They MINE the crystals to use them for tools, technology and consumption. Each time an Itlum Deposit is MINED by an Adlet Type Combatant, roll the BLACK die; if a skull is rolled, the Itlum Deposit is now empty, place a Miasma Geyser on the space adjacent to the Adlet Type Combatant. If the Itlum Deposit is bigger than 1x1 all other spaces it occupied are replaced with Obstructing Terrain.
If there are already 4 Miasma Geysers on the board, instead the Itlum Deposit detonates and is removed from the board, replaced with Obstructing Terrain. All figures adjacent to the exploding Itlum Deposit are dealt a WHITE die of IRREDUCIBLE DMG.
Loot LVL: Uncommon
- Blue Loot: [MASKED IN SOURCE PDF]
- Red Loot: [MASKED IN SOURCE PDF]
- Green Loot: [MASKED IN SOURCE PDF]
- Yellow Loot (including Pass and Fail outcomes): [MASKED IN SOURCE PDF]
Objectives
- Blue Objective (an Adventurer adjacent to this token may make an Encounter Action to read the hidden text): [MASKED IN SOURCE PDF]
- Green Objective (an Adventurer adjacent to this token may make an Encounter Action to read the hidden text): [MASKED IN SOURCE PDF]
Totems
- Blue Totem: [MASKED IN SOURCE PDF]
- Red Totem: [MASKED IN SOURCE PDF]
- Green Totem: [MASKED IN SOURCE PDF]
Tier Three: The Treasury
Pressing onward in your subterranean quest, you approach a pair of yawning pits etched into the stone floor. Further to the east, an exit beckons, promising passage yet deeper. However, your attention is riveted by a formidable iron door, ominously guarded by two unusually large Adlets. Whatever's behind that door, the Pit Boss has gone to great lengths to ensure it remains unseen.
Loot LVL: Uncommon
Setup
- Tiles: UM1, UM25
- Terrain: 8 x Itlum Deposit (1x1)
- Objectives: 1 x Blue
- Exits: 1 x Blue; 1 x Yellow
- Loot: 1 x Red
- Figures: 2 x Adlet Drudge
End Conditions (The Treasury)
Win Condition: An Adventurer finds and ends their turn on the Blue Exit.
- Reward: [MASKED IN SOURCE PDF]. Continue to The Chapel Pg. 26.
Lose Condition: All Adventurers are Defeated.
- Reward: [MASKED IN SOURCE PDF]. Continue to the current Story Round.
Special Encounter Rules (The Treasury)
Guardsmen: The two Adlets stand guard at the iron door and are under strict instructions to protect it at all costs. Don't add their Initiative Card to the Initiative Track unless you interact with the Red Loot or they are the Target of an Action or Ability from an opponent. Once a condition is met, immediately add their Initiative Card to the track after the figure that activated this rule. Then reveal Hidden Small Card PB06 Encounter Initiative and add it to the end of the Initiative Track. The Encounter Initiative card counts as a second Initiative Card for all Adlets on the map.
Both Adlets have an additional 20 Health, Barrier and Courage. At the start of their first Activation each round, if they have Courage they receive 1 Dodge token.
Itlum Deposits (Obstructing Terrain): Itlum Deposits contain the lifeblood of the Adlets, Itlum crystals. They MINE the crystals to use them for tools, technology and consumption. Each time an Itlum Deposit is MINED by an Adlet Type Combatant, roll the BLACK die; if a skull is rolled, the Itlum Deposit is now empty, place a Miasma Geyser on the space adjacent to the Adlet Type Combatant. If the Itlum Deposit is bigger than 1x1 all other spaces it occupied are replaced with Obstructing Terrain.
If there are already 4 Miasma Geysers on the board, instead the Itlum Deposit detonates and is removed from the board, replaced with Obstructing Terrain. All figures adjacent to the exploding Itlum Deposit are dealt a WHITE die of IRREDUCIBLE DMG.
Loot LVL: Uncommon
- Red Loot: [MASKED IN SOURCE PDF]
- (Unlabelled loot block with Pass and Fail outcomes in the third column): [MASKED IN SOURCE PDF]
Objectives
- Blue Objective (read the hidden text if all Adlets have been Defeated): [MASKED IN SOURCE PDF]
- Red Objective (only read the hidden text if instructed): [MASKED IN SOURCE PDF]
- Green Objective (only read the hidden text if instructed): [MASKED IN SOURCE PDF]
- Yellow Objective (only read the hidden text if instructed): [MASKED IN SOURCE PDF]
- Orange Objective (only read the hidden text if instructed): [MASKED IN SOURCE PDF]
- Purple Objective (only read the hidden text if instructed): [MASKED IN SOURCE PDF]
Tier Three: The Chapel
You stumble upon an unexpected sight: a space that strikes a chord between a chapel and a library. Tales of Adlet Priests had reached your ears, yet the scale of this archive is astonishing. A magical stone door is flanked by two vigilant Animates protecting the exit. You ponder the mysterious sway the Adlets hold over these constructs. Convinced that this path leads to the elusive Pit Boss, you steel yourself and press on.
Loot LVL: Uncommon
Setup
- Tiles: UM30
- Terrain: 2 x Obstructing (1x1); 3 x Itlum Deposit (1x1)
- Objectives: 1 x Purple
- Figures: 2 x Animate
End Conditions (The Chapel)
Win Condition: An Adventurer finds and ends their turn on the White Exit.
- Reward: [MASKED IN SOURCE PDF]. Continue to The Slaving Pit Pg. 28.
Lose Condition: All Adventurers are Defeated.
- Reward: [MASKED IN SOURCE PDF]. Continue to the current Story Round.
Special Encounter Rules (The Chapel)
Itlum Deposits (Obstructing Terrain): Itlum Deposits contain the lifeblood of the Adlets, Itlum crystals. They MINE the crystals to use them for tools, technology and consumption. Each time an Itlum Deposit is MINED by an Adlet Type Combatant, roll the BLACK die; if a skull is rolled, the Itlum Deposit is now empty, place a Miasma Geyser on the space adjacent to the Adlet Type Combatant. If the Itlum Deposit is bigger than 1x1 all other spaces it occupied are replaced with Obstructing Terrain.
If there are already 4 Miasma Geysers on the board, instead the Itlum Deposit detonates and is removed from the board, replaced with Obstructing Terrain. All figures adjacent to the exploding Itlum Deposit are dealt a WHITE die of IRREDUCIBLE DMG.
Blast from the Past: Only read the following hidden text if instructed: [MASKED IN SOURCE PDF]
Loot LVL: Uncommon
- Blue Loot: [MASKED IN SOURCE PDF]
- Red Loot: [MASKED IN SOURCE PDF]
- Green Loot: [MASKED IN SOURCE PDF]
- Yellow Loot (including Pass and Fail outcomes): [MASKED IN SOURCE PDF]
Objectives
- Blue Objective (an Adventurer adjacent to this token may make an Encounter Action to read the hidden text): [MASKED IN SOURCE PDF]
- Red Objective (an Adventurer adjacent to this token may make an Encounter Action to read the hidden text): [MASKED IN SOURCE PDF]
- Green Objective (only read the hidden text if instructed): [MASKED IN SOURCE PDF]
- Purple Objective (an Adventurer adjacent to this token may make an Encounter Action to read the hidden text): [MASKED IN SOURCE PDF]
Totems
- Green Totem: [MASKED IN SOURCE PDF]
Tip (printed on the page): As mentioned in the beginning of the book, we aren't going to put the rules for the new Terrain in every Encounter. If you need to reference the rules for any new Terrain or Effect tokens, go to Pg. 7 or Pg. 49.
Tier Four: The Slaving Pit
A palpable sense of anticipation grips you as you feel the Pit Boss's presence draw near. The chamber you now enter teems with Adlets, all laboring with heightened urgency to placate their master. Hopefully here there will be some clues, or a loose-tongued laborer might divulge the location of the commanding Adlet. Time to hose down this sweatshop!
Loot LVL: Uncommon
Setup
- Tiles: UM5, UM11, UM15, UM19
- Terrain: 2 x Obstructing (1x1); 12 x Itlum Deposit (1x1); 3 x Itlum Deposit (2x1); 1 x Itlum Deposit (3x1); 4 x Miasma Geyser (1x1)
- Totems: 1 x Blue; 1 x Green
- Special: 20 x Miasma Token
- Figures: 6 x Adlet Drudge; 2 x Adlet Overseer; 2 x Adlet Priest
End Conditions (The Slaving Pit)
Win Condition: An Adventurer finds and ends their turn on the White Exit.
- Reward: [MASKED IN SOURCE PDF]. Continue to The Itlum City Pg. 30.
Lose Condition: All Adventurers are Defeated.
- Reward: [MASKED IN SOURCE PDF]. Continue to the current Story Round.
Special Encounter Rules (The Slaving Pit)
Why are they on fire?: Only read the following hidden text if instructed: [MASKED IN SOURCE PDF]
That's me in the corner: If you haven't already, reveal Small, Medium and Large Hidden Cards PB05 and PB07.
The Chalice Bear-er: Only read the hidden text below if instructed: [MASKED IN SOURCE PDF]
Loot LVL: Uncommon
- Blue Loot: [MASKED IN SOURCE PDF]
- Red Loot: [MASKED IN SOURCE PDF]
Objectives
- Blue Objective: [MASKED IN SOURCE PDF]
- Red Objective (only read the hidden text if instructed): [MASKED IN SOURCE PDF]
- Green Objective (only read the hidden text if instructed; parts A and B): [MASKED IN SOURCE PDF]
- (Unlabelled block in the third column, below the Green Objective): [MASKED IN SOURCE PDF]
- Yellow Objective (only read the hidden text if instructed): [MASKED IN SOURCE PDF]
- Purple Objective (only read the hidden text if all the Adlet Priests have been Defeated; parts A and B): [MASKED IN SOURCE PDF]
Totems
- Blue Totem (parts A and B): [MASKED IN SOURCE PDF]
- Green Totem: [MASKED IN SOURCE PDF]
Tip (printed on the page): As mentioned in the beginning of the book, we aren't going to put the rules for the new Terrain in every Encounter. If you need to reference the rules for any new Terrain or Effect tokens, go to Pg. 7 or Pg. 49.
Tier Five: The Itlum City
Brushing aside the dense curtain of roots, a corridor of stunning grandeur reveals itself. Its walls, ceiling, and floor are entirely encrusted in the iridescent glow of Itlum. Four Adlet Priests stand sentinel on the steps, their eyes smoldering with resentment. Yet they seem frozen in place, evidently bound by orders. Beyond lies the throne room, where a staggering mound of raw Itlum glistens. Atop it sits the Pit Boss, ruling atop a throne made from Itlum.
The Pit Boss dwarfs even the largest Adlet you've encountered in the mine, radiating an aura of formidable confidence. By his side, an Adlet Overseer lingers, perhaps a second-in-command. The Pit Boss meets your eyes, a chilling smile unfurling on his face as the Overseer whispers in his ear. Then the unexpected happens, the abyssal-sized Adlet rises his hand and beckons you forward.
Loot LVL: Uncommon
Setup
- Tiles: UM44, UM42, UM62
- Terrain: 1 x Itlum Deposit (2x1); 2 x Itlum Deposit (2x2); 4 x Miasma Geyser (1x1); 2 x Steps (2x1); 1 x Itlum Throne (2x2)
- Objectives: 1 x Blue
- Special: 20 x Miasma Token
- Figures: 4 x Adlet Drudge; 2 x Adlet Priest (1-2); 2 x Adlet Priest (3-4) (Combustion Sage); 1 x Adlet Overseer; 1 x The Pit Boss (Boss)
End Conditions (The Itlum City)
Win Condition: The Pit Boss is Defeated.
- Reward: [MASKED IN SOURCE PDF]. Continue to the current Story Round.
Lose Condition: All Adventurers are Defeated.
- Reward: [MASKED IN SOURCE PDF]. Continue to the current Story Round.
Special Encounter Rules (The Itlum City)
(Unheaded rule in the source, printed in the third column of the page:) Adlet Type Combatants will not Activate unless instructed to do so. If you target or deal damage to an Adlet Type Combatant before reading the Blue Objective, read the Red Objective.
The Itlum King: The Pit Boss is the self-proclaimed Itlum King. He controls all the Adlets in his mine, and they wouldn't dare defy his orders. Reveal Small and Extra Large Hidden Cards PB14.
Ruggedo the Adlet Aide: The Adlet Overseer standing by the Pit Boss is a powerful Overseer and also his right-hand Adlet. This Adlet has an additional 15 Health. If Ruggedo would be Defeated, instead remove him from the board. If you haven't already, reveal Small, Medium, and Large Hidden Cards PB05.
Itlum Throne Room: The Special Terrain token on Tile UM44 is treated as Elevation 2, and the Special Terrain token on Tile UM42 is treated as Elevation 3. The Special Terrain token on Tile UM62 is treated as Hindering Terrain.
Bosses Orders: Only read the following hidden text if instructed: [MASKED IN SOURCE PDF]. The text continues at the top of the following page; that continuation is also masked.
Loot LVL: Uncommon (continued from the previous page)
- Blue Loot: [MASKED IN SOURCE PDF]
Objectives (continued on the following page)
- Blue Objective (only read the hidden text if all four Adventurers are on Tile UM62): [MASKED IN SOURCE PDF]
- Red Objective (only read the text if instructed): [MASKED IN SOURCE PDF]
- Green Objective (only read the hidden text if instructed): [MASKED IN SOURCE PDF]
- Orange Objective (only read the hidden text if instructed): [MASKED IN SOURCE PDF]
- Purple Objective (only read the hidden text if instructed; parts A, B and C): [MASKED IN SOURCE PDF]
Diagrams
The Diagrams are the set-up and Special Encounter Rules pages printed at the back of the Bounty Book. Each Diagram is referred to by an Encounter when the Adventurers reveal it. The tile layouts, spawn-point numbers and Start/Exit markings are drawn on the Diagram image only and are not reproduced as text; the Setup lists below are as printed.
Diagram 1
Setup
- Tiles: UM1, UM3, UM11, UM25 (the Diagram also labels UM23 and UM29)
- Terrain: 5 x Itlum Deposit (1x1); 1 x Miasma Geyser (1x1)
- Totems: 1 x Orange; 1 x Purple
- Exits: 1 x Yellow
- Special: 3 x Miasma Token
- Figures: 6 x Adlet Drudge; 2 x Earth Loa
Diagram 2
Setup
- Tiles: UM11
- Terrain: 2 x Obstructing (2x1)
- Objectives: 1 x Purple
- Figures: 2 x Animate
Diagram 3
Setup
- Tiles: UM11, UM3 (labels on the Diagram)
- Terrain: 3 x Itlum Deposit (1x1)
- Exits: 1 x Blue; 1 x Red
- Loot: 1 x Red
- Figures: 4 x Adlet Drudge
Diagram 4
Setup
- Tiles: UM19 (the Diagram also labels UM9 and UM29)
- Terrain: 1 x Passage (1x1)
- Exits: 1 x Red
- Objectives: 1 x Red
- Figures: 2 x Animate
Special Encounter Rules
Two Animates, One Unlucky Adventurer: As you peer down the passage, you see two Animates battling a weary Adventurer. As they meet your gaze, they pause for a second too long and are struck down by the Animates. If you Defeat the Animates or they are no longer adjacent to the Adventurer you may take an Encounter Action to try and assist them. If you do, read the Red Objective.
Diagram 5
Setup
- Tiles: UM17 (label on the Diagram)
- Terrain: 2 x Passage (1x1)
- Exits: 1 x Blue; 1 x Yellow
- Loot: 1 x Blue
- Figures: 2 x Earth Loa (Itlum Rich Variation)
Special Encounter Rules
Sugar, We're Going Down: The Blue Loot token travels double the speed in the Raging Current, moving 6 spaces instead of 3. If the Blue Loot token is not retrieved by the time it reaches the Dangerous Terrain, it is lost and removed from the map.
Diagram 6
Setup
- Tiles: UM3
- Terrain: 1 x Passage (1x1); 1 x Obstructing (2x1); 1 x Obstructing (3x1); 4 x Itlum Deposit (1x1)
- Totems: 1 x Red
Diagram 7
Setup
- Tiles: UM15, UM21 (label UM17 on the Diagram)
- Terrain: 1 x Miasma Geyser (1x1); 2 x Dangerous (2x1); 1 x Dangerous (2x2); 1 x Plank (1x1); 2 x Plank (2x1)
- Totems: 1 x Blue; 1 x Yellow
- Special: 4 x Miasma Token
- Figures: 2 x Blighted Guardian
Special Encounter Rules
You Shall Not Pass: Up ahead, on the rickety bridges, you see two poor souls that have become victims to the Blight. These now-blighted creatures must have been guardsmen, originally charged with standing watch, as you hear them muttering "Who goes there…" again and again. Due to their time spent in the watery environment, it seems they have adapted to the rapid currents and are not affected by them.
Diagram 8
Setup
- Tiles: UM13
- Terrain: 1 x Miasma Geyser (1x1)
- Totems: 1 x Blue
- Special: 4 x Miasma Token; 2 x Ladder
- Loot: 2 x Random
- Figures: 6 x Cave Sickle (Itlum Infused Variation)
Special Encounter Rules
Like a Treasure From a Sunken Pirate Wreck: These Cave Sickles are like none you have encountered, or even heard of before. Each Sickle has an eerie shiny blue glow about them that matches the Itlum Crystals they stand next to. As they move, their joints make snaps, crackles and pops, releasing an aura of Miasma around each of them. These Sickles are going to be trouble. Reveal Large Hidden Cards PB08.
Built-in Ladder: The Ladder tokens in on Tile UM13 can't be moved.
Miasma Token Placement: The white dotted line shows that the Miasma tokens occupy the same spaces as the White Loot token and Cave Sickle 5.
Diagram 9
Setup
- Tiles: UM26
- Terrain: 1 x Obstructing (2x1); 3 x Itlum Deposit (1x1); 3 x Miasma Geyser (1x1)
- Objectives: 1 x Blue; 1 x Red
- Special: 9 x Miasma Token
- Figures: 3 x Adlet Priest
Special Encounter Rules
Adlet Sorcery: If you haven't already, reveal Small, Medium and Large Hidden Cards PB07.
Miasma Token Placement: The white dotted line shows that the Miasma token occupies the same space as the Blue Objective.
Diagram 10
Setup
- Tiles: UM7, UM11
- Terrain: 5 x Itlum Deposit (1x1); 2 x Itlum Deposit (2x1); 1 x Itlum Deposit (3x1); 2 x Itlum Deposit (2x2); 2 x Miasma Geyser (1x1)
- Totems: 1 x Green
- Objectives: 1 x Green
- Special: 8 x Miasma Token
- Loot: 1 x Random
- Figures: 6 x Cave Sickle (Itlum Variation)
Diagram 11
Setup
- Tiles: UM28
- Terrain: 2 x Obstructing (1x1); 2 x Itlum Deposit (1x1); 2 x Miasma Geyser (1x1); 1 x Pressure Plate (2x2)
- Special: 6 x Miasma Token
- Figures: 4 x Adlet Priest
Special Encounter Rules
Chachapoyan Pressure Plate: In the middle of the room is what appears to be a giant platform pressure plate; you assume this is what unlocks the next door. It costs 2 Movement Points to move into these Special Terrain spaces. If 2 or more figures occupy the Special Terrain spaces on Tile UM28 immediately read the hidden text below that equals the number of figures occupying the Special Terrain.
- 2 Figures: You wait and hope something happens. Then you feel a slight shift, but nothing else happens.
- 3 Figures: You feel a significant amount of movement in the pressure plate, but as you look around the room nothing changes.
- 4 Figures: The plate moves a lot and you hear some grinding sounds. Read the Green Objective.
Diagram 12
Setup
- Tiles: UM34
- Terrain: 1 x Obstructing (2x1); 1 x Obstructing (3x1)
- Totems: 1 x Purple
- Loot: 1 x Blue; 1 x Yellow
Diagram 13
Setup
- Tiles: UM30, UM38 (the Diagram also marks UM30 and UM26 to be removed)
- Terrain: 2 x Obstructing (1x1); 2 x Itlum Deposit (1x1); 3 x Miasma Geyser (1x1)
- Totems: 1 x Green
- Special: 12 x Miasma Token
- Loot: 2 x Random
- Figures: 4 x Adlet Priest
Diagram 14
Setup
- Figures: 1 x Lure Bear (Whimsie Connected)
Special Encounter Rules
The Lure of the Lure Bear: Only read once the Lure Bear has been dealt 150 or more Damage. Eizzof lets out a deafening roar, it thrashes around as if in pain. You lock eyes with Ozzir – the poor creature almost looks as if it's being held captive. In those seconds the Eizzof jumps up and takes off over the ledge to the east. In its rush it breaks through a wooden partition revealing an exit and some of the loot it was using to lure in its victims. Remove the Plank and place a White Exit and Red Loot token in its place. Remove Eizzof and Ozzir from the board.
Tier Four: The Money Bin (Diagram 15)
Your fall finally comes to an end. Surprised that you survived the perilous plummet, you open your eyes to find yourself waist-deep in a mass grave full of Adventurers, Adlets and other creatures alike. In the southwest corner of the pit is a lone Water Loa, it is terrified and obviously no threat to you. Time to think quick, this is not a place you want to be at all.
Loot LVL: Uncommon
Setup
- Tiles: UM32, UM52, UM60
- Terrain: 1 x Obstructing (2x1); 1 x Plank (2x1); 2 x Miasma Geyser (1x1)
- Totems: 1 x Green
- Objectives: 1 x Red
- Special: 8 x Miasma Token
- Figures: 1 x Water Loa (Common)
Tip (printed on the page): As mentioned in the beginning of the book, we aren't going to put the rules for the new Terrain in every Encounter. If you need to reference the rules for any new Terrain or Effect tokens, go to Pg. 7 or Pg. 49. You will find what you need there.
End Conditions (The Money Bin)
Win Condition: Any Adventurer ends their turn on the White Exit.
- Reward: [MASKED IN SOURCE PDF]. Continue to The Slaving Pit Pg. 28.
Lose Condition: All Adventurers are Defeated.
- Reward: [MASKED IN SOURCE PDF]. Continue to the current Story Round.
Special Encounter Rules (The Money Bin)
Frail Limb Nursery: You're not sure how long it's been trapped in this place, or even how it wound up down here. All you know is that the Loa is terrified, huddled down in the corner of the bloody pit too scared to even move. It is definitely not a threat to you. This Water Loa is treated as an Ally this Encounter.
Never Say Die: If the Adventurers have interacted with an Objective or Loot token during the round, do not add an Urgency token to the Initiative Track.
Objectives
- Blue Objective (only read the hidden text when an Adventurer ends their turn in a space adjacent to this token): [MASKED IN SOURCE PDF]
- Red Objective (only read the hidden text when an Adventurer ends their turn in a space at Elevation 2 and adjacent to the Water Loa): [MASKED IN SOURCE PDF]
- Yellow Objective (only read the hidden text below if instructed): [MASKED IN SOURCE PDF]
Totems
- Blue Totem: [MASKED IN SOURCE PDF]
- Green Totem: [MASKED IN SOURCE PDF]
- Purple Totem (only visible once instructed): [MASKED IN SOURCE PDF]
Loot LVL: Uncommon
- Blue Loot: [MASKED IN SOURCE PDF]
- Red Loot (Yes and No outcomes): [MASKED IN SOURCE PDF]
- Green Loot (parts A and B): [MASKED IN SOURCE PDF]
- Yellow Loot: [MASKED IN SOURCE PDF]
Quick Reference
A Quick Reference to new tokens and keywords, as printed at the end of the Bounty Book. Printed table headings are kept.
Table BE2-1: New Combatant and Tracker Tokens
Itlum Shard: Itlum Shard tokens are a tracker token used by the Adlet Type Combatants and Conduits. Specific Abilities listed on Adlet Type Combatant Cards will instruct you when to gain and when to use Itlum Shard tokens.
Obscuring/Miasma: Obscuring tokens represents debris, clouds, or other forms of airborne particulates that impede your vision.
Obscuring Tokens:
- Cannot be moved, Damaged, or affected by Currents, Abilities, or Special Encounter Rules that don't specifically call them by name.
- Can be placed in any non-Obstructing space. Obscuring tokens do not replace Terrain; instead, they add to the existing effects of the Terrain they are placed on.
- Come in different types. These types may have additional rules associated with their tokens.
- Obscuring tokens placed into a space that already contains an Obscuring token of the same type cannot be placed. If the type of Obscuring token being placed is different, it will replace the existing Obscuring token type with the new type.
- When determining if a figure has Line of Sight to a space, figures can draw Line of Sight into but not through a space containing an Obscuring token.
- Figures do not provoke Break Attacks while leaving spaces that contain Obscuring tokens.
Types of Obscuring Tokens
Miasma Tokens (the only Obscuring token you will encounter in this product): Miasma represents noxious fumes produced by raw Itlum crystals. In addition to following all rules associated with Obscuring tokens, Miasma has the following rules:
- When determining if a figure has SOI to a space, figures can draw SOI into but not through a space containing Miasma.
- A figure that moves into, ends their turn in, or occupies a space that has Miasma placed into it, is dealt 1 IRREDUCIBLE DMG. Then make a Lore + Presence 15 Check: if they fail, they are Inflicted with Sedate.
Ladder: Ladders are special Tracker tokens that are found both on tokens and printed on Tiles and Sheets. Using some Abilities, Adventurers may also add them to the board. Ladders provide a new way for figures to move up and down Elevation during a Move Action that they normally couldn't.
- Ladders may only be placed on spaces that also have an adjacent space with an Elevation difference.
- Ladders do not block Line of Sight, do not modify a space in any way, and can be placed on any Terrain a figure could also normally occupy.
- Ladders can occupy and share the same space as any other token or figure.
- A Ladder that takes Damage from Terrain is removed from the board.
- When a figure moves from one Elevation to another, they may use a Ladder so long as the Ladder token occupies either the space they moved from, or the space they moved to. When doing so, they may move to or from any difference in Elevation by spending additional movement points equal to the difference in Elevation from one space to another. If they do not have enough Movement Points, they may not use the Ladder to make this Elevation change.
- Free Movement cannot be used to use a Ladder.
Mimicry Loot: Mimicry Loot are special Tracker tokens only used in Encounters where Random Loot tokens are present in Middara: Unintentional Malum Act 1. If revealed, you will spawn a Combatant with the MIMICRY TAG.
When placing Random Loot tokens in Encounters, shuffle in the Mimicry Loot token with the other Random Loot tokens. If the Mimicry Loot token is revealed, draw an unused Random Loot token and place it in the space the Mimicry Loot token occupied. Then, spawn an Intelligent Combatant with the MIMICRY TAG in an unoccupied adjacent space to the Loot token just placed.
You are limited to revealing 1 Mimicry Loot token per Encounter. If you reveal a Mimicry Loot token and have already spawned a MIMICRY TAG Combatant this Encounter, resolve the newly placed Loot token instead.
Table BE2-2: New Effect Tokens
Sedate (Negative Effect, Passive): When making a MOVE Action, you only Gain half of your total Movement Points (Rounded Up). You also only Gain half of any bonus Movement or Movement Points added to that MOVE Action (Rounded up).
Table BE2-3: New Terrain Types
Itlum Deposits (Obstructing Terrain): Itlum Deposits contain the lifeblood of the Adlets, Itlum crystals. They MINE the crystals to use them for tools, technology and consumption. Each time an Itlum Deposit is MINED by an Adlet Type Combatant, roll the BLACK die, if a skull is rolled, the Itlum Deposit is now empty, place a Miasma Geyser on the space adjacent to the Adlet Type Combatant, if the Itlum Deposit is bigger than 1×1 all other spaces it occupied are replaced with Obstructing Terrain. If there are already 4 Miasma Geysers on the board, instead the Itlum Deposit detonates and is removed from the board, replaced with Obstructing Terrain. All figures adjacent to the exploding Itlum Deposit are dealt a WHITE die of IRREDUCIBLE DMG.
Miasma Geysers (Obstructing Terrain): Miasma Geysers release highly toxic Miasma Gas into the atmosphere.
When a Miasma Geyser is first placed onto the board, place Miasma tokens in all non-Obstructing Terrain spaces adjacent to the Miasma Geyser. At the end of every round, open Miasma Geysers will place 1 Miasma token in the nearest non-Obstructing space to the Miasma Geyser that doesn't contain a Miasma token but is adjacent to as many Miasma tokens as possible.
As an Encounter Action, a Miasma Geyser may be closed by making a Strength 10 Check while adjacent to it. However, if you fail, all adjacent figures are dealt a WHITE die of IRREDUCIBLE DMG and are Inflicted with Sedate.
Closed (row label in the source): Once a Miasma Geyser has been closed, the Miasma that surrounds it begins to dissipate. Remove all Miasma tokens adjacent to the Miasma Geyser. Then, at the start of the next round, remove any remaining Miasma tokens placed from the now closed Miasma Geyser. All Miasma Geysers are placed open unless specified otherwise. (Limit 4).
Miasma Geysers - Closed (Obstructing Terrain): Miasma Geysers once closed no long release gases and function exactly like Obstructing Terrain. (Limit 4)
Table BE2-4: New Tags
MIMICRY: Combatants with the MIMICRY Tag represent hidden threats and will be Spawned from the hidden text in Loot tokens and Special Encounter Rules. When you Defeat a MIMICRY Combatant you will draw a random Wandering Item, if no Wandering Items are available, draw 2 Random Consumables matching the Loot LVL listed for the Encounter instead. This is instead of the Combatant Loot Card you would normally draw.
Source discrepancy (not corrected): the MIMICRY entry on Pg. 8 of the Bounty Book reads "will draw a random Wandering Item or 2 Random Consumables matching the Loot LVL listed for the Encounter. This is instead of the Combatant Loot card you would normally draw." Both versions are transcribed as printed.
IMPORTANT: Newer products made after Middara: Unintentional Malum Act 1 will include MIMICRY Spawns in the Loot token and Special Encounter Rules. We included the Mimicry Loot token as a way to use the MIMICRY Tag Combatants included in the product in with Middara: Unintentional Malum Act 1.
CARRY (X): At any time during a MOVE, a figure with CARRY may WARP up to X adjacent allies onto their card. After the Move Action ends, all allies on their card must be placed into adjacent unoccupied spaces. If a figure with CARRY is Defeated while an ally is on their card, or if for any reason an ally cannot be placed when the Move Action ends, the ally is Defeated.