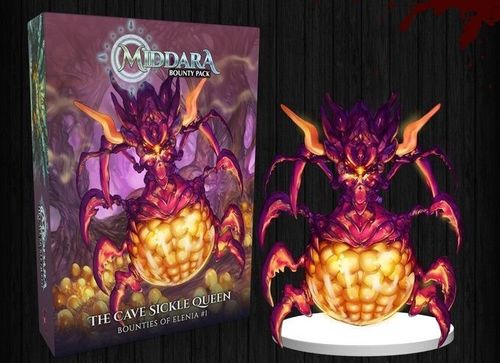
Middara: Bounty Pack – The Cave Sickle Queen
Middara: Bounty Pack – The Cave Sickle Queen Rulebook
Table of Contents
Table of Contents
Introduction
Hidden cards from this product are marked as CQXX on their hidden card tabs. Add all "non-hidden" cards to their respective decks. Set aside the Hidden Deck included in this product until you are told to reveal these cards.
Because Bounties explore parts of the world that haven't been seen before in other products, each one may introduce new rules, tokens, or enemies. Those rules always come before the Bounty's Encounters. A Quick Reference to new tokens and keywords is included at the end of the Bounty Book.
Diagrams: Often the Encounter Setup Diagram will not contain everything needed to play through that Encounter. As the Adventurers explore, they may be required to reveal Diagrams that expand the play area, Spawn new enemies, or react to their choices. These Diagrams are printed in the back of the Bounty Book.
Quick Start Rules
What if you don't have an ongoing game at the appropriate level for a new Bounty? Or maybe you'd just like a fun way to introduce players to Middara? The Bounty Quick Start Rules can be used to play a Bounty without having an existing Adventure Mode game. Using these instructions, you can quickly assemble a party of the appropriate level to challenge a Bounty Pack.
Normal Quick Start
This Bounty is designed around using 4 Adventurers.
- Each Adventurer in the party may spend 8 XP.
- Each Adventurer may purchase 100 Gold worth of Mundane Items.
- The party draws 1 random Unique Mundane Item, this may be purchased by any Adventurer.
- The party gets to draw 1 Combatant Loot Card from the Monster Loot, Unique Item and Item Loot Cards. If the Monster Loot card is drawn, shuffle the Monster Loot Cards for Animate, Cave Sickle, Earth Loa, Gevaudan, and Water Loa to draw from.
- Any Items the party Gain with the MATERIAL Tag may be traded in for the normal benefits listed on Pg. 28 of the Middara Rulebook.
Easy Quick Start
- This Bounty is designed around using 4 Adventurers.
- Each Adventurer in the party may spend 13 XP.
- Each Adventurer may purchase 225 Gold worth of Mundane and Common Items.
- The party draws 1 random Unique Common Item, this may be purchased by any Adventurer. Draw 1 Random Unique Mundane Item, this Item is free and may be equipped by an Adventurer.
- The party draws 2 Monster Loot Cards. Shuffle the Monster Loot Cards for the following Intelligent Combatants: Animate, Cave Sickle, Earth Loa, Gevaudan, and Water Loa.
- Any Items the party Gain with the MATERIAL Tag may be traded in for the normal benefits listed on Pg. 28 of the Middara Rulebook.
New Rules and Ways to Play
New Tokens in this Product: Sickle Egg (three colours), Unusual Sickle Egg, Latched, and the Bug Creep Terrain token. The rules for the new Tags, Terrain and Tokens are on the Quick Reference page at the end of this Rulebook (see Quick Reference below).
Alternate and/or Variation Tag Combatants
Any Combatant cards included in this Bounty with the ALTERNATE or VARIATION tags, ignore the rules for those tags on the first playthrough of this Bounty. Any attempts past the first follow the Alternate and Variation Rules as they are presented starting on Pg. 79 of the Middara Rulebook.
ALTERNATE (X)
The ALTERNATE Tag may have a number listed next to it.
Combatants with the ALTERNATE (X) Tag are Combatants that are strong enough to require more than one Base Combatant to Spawn before they can be included as a Possible Spawn. They otherwise follow the same rules as Combatants with the ALTERNATE Tag.
When checking for Possible Spawns, you only include Combatants with the ALTERNATE (X) Tag if you are instructed to Spawn at least X of the Base Combatant, where X equals the number listed beside the ALTERNATE Tag (e.g., ALTERNATE 2).
If you draw a Combatant with the ALTERNATE (X) Tag (e.g., ALTERNATE 2), you will Spawn one of that Combatant's figure instead of X Base Combatants. After Spawning all possible Combatants with the ALTERNATE (X) Tag, if you still have more Base Combatants to Spawn, continue the Possible Spawn process as normal.
Example: You are instructed to Spawn 3 Cave Sickles. From the Possible Spawns, you draw a Cave Sickle Defender. This Combatant has the ALTERNATE 2 Tag. This means that you can Spawn 1 Cave Sickle Defender for every 2 Cave Sickles you are instructed to Spawn. In this case, you could only Spawn 1 Cave Sickle Defender. Then, you would need to draw a different Possible Spawn for the remaining Cave Sickle. If you drew another Combatant with the ALTERNATE (X) Tag, if it required 2 or more Combatants, you would need to draw again since there is only a single Cave Sickle left on the board.
Organic Alternates and Variations (Variant Rule)
The following Variant rules are for ALTERNATE and VARIATION Tag Combatants.
When checking for Possible Spawns, if you would need to Spawn a new Combatant Card, instead of shuffling all their corresponding ALTERNATE and VARIATION cards with their given Base Combatant cards, you will roll 2 WHITE dice and consult the chart below.
| Roll (2 WHITE dice) | Result |
|---|---|
| 4 – 7 | VARIATION: X |
| 8 – 11 | Base Combatant/Opposing Esper |
| 12 – 14 | ALTERNATE: X |
If you rolled and got VARIATION: X or ALTERNATE: X, shuffle all the Possible Spawns with that tag related to the Base Combatant/Opposing Esper listed as X, draw one and Spawn figures following the rules for that tag. If you rolled and got Base Combatant/Opposing Esper, Spawn figures following the normal Spawning rules as if you didn't have Alternates or Variations for that Base Combatant/Opposing Esper.
If remaining Spawns are required, repeat this process as needed until all figures are Spawned.
If you don't have ALTERNATE Tag cards but do have VARIATION Tag cards for a Base Combatant, or don't have VARIATION Tag cards but do have ALTERNATE Tag cards for a Base Combatant, there are 2 options. You either:
- Use the chart as listed, which is simple but you will see those Combatants less.
- Or if you roll and get VARIATION: X or ALTERNATE: X treat it as (VARIATION: X and ALTERNATE: X) — less organic, but you will see those Combatants more often.
Encounters
Encounter layout: each Encounter has a Setup (Tiles, Terrain, Totems, Objectives, Sickle Eggs, Exits, Loot and Figures), a Loot Level (LOOT LVL: MUNDANE for every Encounter in this Bounty), End Conditions (Win, Alternate Win, Lose), and Special Encounter Rules. Setup Diagrams are printed as images in the Bounty Book (Diagrams 1 to 16, pages 26 to 41); the tile and token placements shown in them are not reproduced in text here.
Large Encounter Setup: some Encounters are too big to fit on a single page. In these cases, two Setup Diagrams are a contiguous setup, representing a single board connected at the centre from left to right.
A Crack in the Earth
Wilderness. Pg. 10–13.
Setup (Large Encounter Setup)
- Tiles: UM31, UM33, UM35, UM37, UM39, UM41, UM43, UM51, UM53, UM55.
- Terrain: 2 x Obstructing (3x1); 7 x Obstructing (2x1); 7 x Obstructing (1x1); 4 x Dangerous (1x1); 1 x Waterfall (2x2); 1 x Cave Entrance (3x1); 1 x Bug Creep (2x1); 3 x Bug Creep (1x1); 1 x Water (2x2); 4 x Water (2x1); 5 x Water (1x1).
- Totems: 1 x Blue; 1 x Red; 1 x Green; 1 x Yellow; 1 x Orange; 1 x Purple.
- Objectives: 1 x Blue; 1 x Red.
- Loot: 1 x Red; 1 x Green; 1 x Yellow.
- Loot Level: MUNDANE.
End Conditions
- Win Condition: An Adventurer finds and ends their turn on the Blue Exit. Reward: None. Continue to Damp Depths Pg. 18.
- Alternate Win Condition: An Adventurer finds and ends their turn on the Red Exit. Reward: None. Continue to Sickle Spelunking Pg. 14.
- Lose Condition: All Adventurers are Defeated. Reward: Restore Adventurers. Continue to the current Story Round.
Loot
- BLUE LOOT: Gain 10 Gold or each Adventurer Gains 1 random Consumable.
- RED LOOT: Reveal Medium Hidden Cards CQ03. Gain 1 Quick-Kill Applicable Poison Story Consumable. Once used, add all copies of this card to the Consumables deck for purchase.
- GREEN LOOT: You find a pile of treasure! Gain 5 Gold and 1 random Consumable.
- YELLOW LOOT: You find a pile of treasure! You Gain 1 random Consumable. Then, make a Perception 10 Check. If you pass, you find a hidden compartment! The party Gains 10 Gold.
Totems
- GREEN TOTEM: If you are on the west side of this Totem, read A; if you are on the east side of this Totem, read B.
- A: As you approach the tree, you hear a sound that makes you slow. It sounds like a hiss followed by churning rocks. What was that? Make a Lore 10 Check. PASS: Spawn figures and follow the rules according to Diagram 6. FAIL: Spawn figures and follow the rules according to Diagram 10.
- B: On the other side of the small pond, you find yourself perplexed, looking at a group of Cave Sickles, but around them its as if the earth is alive. Spawn figures and follow the rules according to Diagram 10.
- YELLOW TOTEM: An Earth Loa in a foul mood stands at the water's edge. Spawn 1 Earth Loa in the space this Totem occupied. Beyond the Loa you see a waterfall that looks like a path into the Hive. Place the Blue Exit token onto a Dangerous Terrain space on the Waterfall token. This space is now considered to be Normal Terrain.
- ORANGE TOTEM: Two Water Loas can be seen in the distance playing in the current of the water. Spawn 2 Water Loas in Water Terrain spaces adjacent to the space this Totem occupied.
- PURPLE TOTEM: To the east you see some loot and a small swarm of sleeping Cave Sickles. Spawn figures and tokens according to Diagram 1. The Cave Sickles Spawned this way will not activate unless they are attacked, the target of a spell or the Red Objective is revealed. When that happens, immediately add their Initiative card to the Initiative Track after the figure whose turn it is.
- BLUE TOTEM: As you move past the rock wall and survey the area you hear another roar coming from beneath the earth. Then suddenly just to the north of you, a sinkhole opens up with Cave Sickles emerging. It's clear that you are heading in the right direction to find the Cave Sickle hive. Place 2 Small Dangerous Terrain tokens, one on the space this Totem occupied and one on the adjacent space directly east of it on Tile UM37. Then, Spawn 2 Cave Sickles adjacent to the Dangerous Terrain.
- RED TOTEM: To the east by the hollow tree an Earth Loa has been startled, presumably by all the tremors. Spawn 1 Earth Loa in the space of this Totem.
Objectives
- BLUE OBJECTIVE: When an Adventurer moves into SOI of this token, read the following hidden text: As you approach the eastern waterfall, you begin to feel a rumbling beneath the earth. Slowly the small rumble turns into what feels like a small earthquake, then out of nowhere Cave Sickles begin pouring out of the ground. One by one they creep out of fresh burrows. Reveal Small and Large Hidden Cards CQ01. Then, Spawn figures and tokens according to Diagram 4.
- RED OBJECTIVE: When an Adventurer enters a space adjacent to this token, read the following hidden text: A loud muffled roar echoes deep from within the openings to the abyss behind you. The ground rumbles and jolts causing you to stumble a few steps. Whatever made that noise caused the surface to stir. The burst of sound spooks the creatures in the surrounding area, causing them to skitter away. All Sickle Type Combatants within SOI of this token move up to 3 spaces away from this token. Above you, the rock that creates the opening ahead loosens and begins to fall. It looks like the whole side of the wall is going to collapse! Thinking quick, you decide to either dive forward, or retreat to clear the rubble later. If you choose to jump, read A. If you decide to stay safe knowing that you could always break through the wall later, read B. Alternatively, if you have a Shield equipped or a printed Armor Value of 2 or more, you may choose to brace against the falling rocks as you move forward at a steady pace. If you choose this, read C.
- A: You jump, hoping to beat the collapse. Make an Agility 12 Check. If you have no Armor or Cloth Armor equipped add +2 to this roll.
- PASS: You hit the ground on the other side and roll to your feet expertly. As the rocks crash just behind you, dust fills the air around you, making any creatures on the other side who might have been fleeing all the more frightened of your presence. Place your figure on the nearest unoccupied non-Dangerous Terrain space on the east side of the space this token occupied. Then place an Obstructing Terrain token on the space this token occupied and on the adjacent space directly south of it on UM43.
- FAIL: You aren't quick enough! The rocks slam into your heels as you nearly make it unscathed. Your momentum carries you to the other side, but the rock that hit you gashes into your leg. You are dealt 6 IRREDUCIBLE DMG. Then, place your figure on the nearest unoccupied non-Dangerous Terrain space on the east side of the space this token occupied. Then place an Obstructing Terrain token on the space this token occupied and on the adjacent space directly south of it on UM43.
- B: It would be best to stay put. You decide that racing a bunch of falling rocks would be a stupid idea. As the rocks cascade causing other rocks to follow in their wake, you nod in reassurance to yourself at your choice. Place an Obstructing Terrain token on the space this token occupied and on the adjacent space directly south of it on UM43. Continue your turn as normal.
- A: You jump, hoping to beat the collapse. Make an Agility 12 Check. If you have no Armor or Cloth Armor equipped add +2 to this roll.
Special Encounter Rules
- RAGING CURRENTS: These Currents move figures and tokens 3 spaces. See Middara Rulebook Pg. 22.
- FRAGILE WALLS: When an Adventurer is adjacent to an Obstructing Terrain token on Tile UM43, as an Encounter Action they may make a Strength 12 Check. If they pass, they may remove 1 space worth of adjacent Obstructing Terrain tokens. If the adjacent token is a 2x1 or larger Obstructing Terrain token, replace the Obstructing Terrain tokens so that only the designated adjacent space is no longer covered.
Sickle Spelunking
Underground. Pg. 14–15.
Setup
- Tiles: UM19, UM7, UM11, UM15, UM1, UM9.
- Terrain: 3 x Obstructing (2x1); 1 x Dangerous (2x1).
- Totems: 1 x Blue; 1 x Green; 1 x Yellow.
- Objectives: 1 x Blue.
- Loot: 1 x Blue; 1 x Red; 1 x Green.
- Figures: 6 x Cave Sickle (Burrowed) (Burrowing Variation).
- Loot Level: MUNDANE.
End Conditions
- Win Condition: An Adventurer finds and ends their turn on the Blue Exit. Reward: None. Continue to The Waterway Pg. 20.
- Alternate Win Condition: An Adventurer finds and ends their turn on the Red Exit. Reward: None. Continue to The Darkway Pg. 18.
- Lose Condition: All Adventurers are Defeated. Reward: Restore Adventurers. Continue to the current Story Round.
Loot
- BLUE LOOT: You find a 4-pack of M.F. Fortitude! The Adventurers Gain 4 Stamina to distribute amongst themselves.
- RED LOOT: You find a pile of treasure! The party Gains 10 Gold.
- GREEN LOOT: You find a pile of treasure! The party Gains 5 Gold and 2 random Consumables.
- YELLOW LOOT: Gain 1 random Consumable. Then, make a Perception 10 Skill Check. If you pass, you find a hidden compartment! The party Gains 10 Gold.
Totems
- BLUE TOTEM: You hear a deep bellowing sound just up ahead, it's as if a warning bell has been rung. In the distance you make out what you believe are two giant Cave Sickles. Reveal Small, Medium and Large Hidden Cards CQ04 and spawn 1 Cave Sickle Defender in the same space as this Totem and spawn another in the south west corner of Tile UM7. Then, from out of the cracks in the ground more Cave Sickles appear. Spawn 3 Burrowing Cave Sickles adjacent to the Dangerous Terrain on UM9 as close as possible to the Adventurer that triggered this Totem.
- RED TOTEM: As you step out into the room it begins to glow a bright green and instantly you know you're not wanted. Spawn 1 Earth Loa on the space this Totem occupied.
- GREEN TOTEM: As you approach the water you see another Cave Sickle Defender standing guard with a swarm of Cave Sickles, they seem to be protecting the entrance to the lower levels of the hive. Spawn 1 Cave Sickle Defender and 3 Cave Sickles adjacent to the space this Totem occupied. Then place a small Passage token directly south of the space this Totem occupied on the Dangerous Terrain and the Blue Exit token on the passage.
- YELLOW TOTEM: A swarm of Cave Sickles claw their way up through the ground. Spawn 3 Cave Sickles adjacent to the Dangerous Terrain on Tile UM1 as close to the Adventurers as possible.
Objectives
- BLUE OBJECTIVE: Read as soon as any Adventurer moves onto this space. You see a small tunnel, only big enough for one person to crawl through at a time… or a Cave Sickle. Place tokens according to Diagram 3.
- RED OBJECTIVE: Read as soon as any Adventurer moves onto this space. The small passage comes to an end. Revealed is a small room and the faint sounds of splashing water. Place tiles and tokens according to Diagram 5.
- GREEN OBJECTIVE: Read as soon as any Adventurer moves onto this space. You see another small tunnel, and hear the sounds of water on the other side. Place tokens according to Diagram 7.
- YELLOW OBJECTIVE: Read as soon as any Adventurer moves onto this space. You make it over the small pit and finally get to the end of the tunnel. Beyond is a wide open area. Yet it was not water you could hear, but Cave Sickles moving through a silky creep. The swim through the slime all over the floor, leading down a dark hole. There is also a small lockbox to the east side of the room. Place tiles and tokens according to Diagram 9.
Special Encounter Rules
- EVEN UNDERGROUND: Read if you did not encounter the Green Totem in A Crack in the Earth (Pg. 10). Reveal Medium and Large Hidden Cards CQ02. Gain access to the Monster Loot and Combatant Cards for Cave Sickle Burrowing Variation.
- THEY'RE EVERYWHERE: All Sickle Type Combatants ignore the effects of Dangerous Terrain while moving. If they end their movement on Dangerous Terrain they are Defeated as normal.
Damp Depths
Underground. Pg. 16–17.
Setup
- Tiles: UM21, UM19, UM13, UM51.
- Terrain: 1 x Obstructing (3x1); 1 x Obstructing (2x1); 1 x Obstructing (1x1).
- Totems: 1 x Blue.
- Loot: 1 x Red.
- Figures: 3 x Cave Sickle (Burrowed) (Burrowing Variation).
- Loot Level: MUNDANE.
End Conditions
- Win Condition: An Adventurer finds and ends their turn on the Red Exit. Reward: None. Continue to The Waterway Pg. 20.
- Alternate Win Condition: An Adventurer finds and ends their turn on the Blue Exit. Reward: None. Continue to The Darkway Pg. 18.
- Lose Condition: All Adventurers are Defeated. Reward: Restore Adventurers. Continue to the current Story Round.
Loot
- RED LOOT: You find a pile of treasure! The party Gains 10 Gold and 2 random Consumables.
- GREEN LOOT: You find a pile of treasure! The party Gains 3 random Consumables.
- YELLOW LOOT: You reach out to examine the chest but instead the creep-covered ground you're standing on collapses. Make an Agility 10 Check. PASS: You jump backwards in the nick of time and avoid falling down the hole; the treasure, however, is lost. OPTIONAL: You may immediately take an Urgency token to inspect the hole further. If you do, continue reading. Upon further examination the new hole looks to be part of a tunnel system built by the Cave Sickles. It is covered with the same silky creep so it should be safe to move down and potentially be a shortcut to the center of the hive. Place the Blue Exit token onto the adjacent space east of the Red Objective. FAIL: You try to jump to safety but you can't get a grip with the silky creep beneath your feet! You slide down what reminds you of a waterslide back on Earth and prepare for landing. Read Alternate Win Condition.
Totems
- BLUE TOTEM: By the small dry area in the middle of the murky water, two Loas are resting. Spawn 2 Water Loas adjacent to the space the Blue Totem occupied. Then, place a Green Totem on the south-east corner of Tile UM21.
- GREEN TOTEM: As you round the corner you can see beyond the stale green water. There is a small swarm of Cave Sickles and what appears to be a massive Cave Sickle Warrior. They seem to be guarding the opening at the end of the cave. There is also a mat of sickly yellow goo coming out of the wall to the east that may be worth examining. Reveal Small, Medium and Large Hidden Cards CQ05, then place tiles, figures and tokens according to Diagram 14.
Objectives
- RED OBJECTIVE: Read as soon as any Adventurer moves onto this space. There is a silky creep-like substance that seems to be coming out of the nearby wall. It doesn't seem dangerous but makes movement difficult. Inside the wall you see the glimmer of gold. Place the Yellow Loot token onto the adjacent space east of the Red Objective.
Special Encounter Rules
- EVEN UNDERGROUND: Read if you did not encounter the Green Totem in A Crack in the Earth (Pg. 10). Reveal Medium and Large Hidden Cards CQ02. Gain access to the Monster Loot and Combatant Cards for Cave Sickle Burrowing Variation.
The Waterway
Underground. Pg. 20–21.
Setup
- Tiles: UM7, UM17, UM3, UM15, UM21, UM19.
- Terrain: 1 x Obstructing (3x1).
- Totems: 1 x Red; 1 x Green; 1 x Yellow.
- Loot: 1 x Green.
- Figures: 3 x Cave Sickle (Burrowed) (Burrowing Variation); 2 x Water Loa.
- Loot Level: MUNDANE.
End Conditions
- Win Condition: An Adventurer finds and ends their turn on the Blue Exit. Reward: None. Continue to Skittering Cacophony Pg. 24.
- Alternate Win Condition: An Adventurer finds and ends their turn on the Red Exit. Reward: None. Continue to Painful Plunge Pg. 22.
- Lose Condition: All Adventurers are Defeated. Reward: Restore Adventurers. Continue to the current Story Round.
Loot
- BLUE LOOT: You find a small locked box with the name Linn etched into it. To open the box you must pick the lock or break it open. If you choose to pick the lock, read A. If you choose to break it open, read B.
- A: You decide to try and pick the lock, hoping to find the treasure that may be inside. Make a Perception 10 Skill Check. If you fail to open the lock, you may pay either 1 SP or choose to receive 1 Urgency token to re-roll. There is no limit to the amount of tries you may make.
- PASS: You hear the barrel of the lock click open and you excitedly open the box. Inside you find a bottle labeled Sickle Pheromone. Reveal Medium Hidden Card CQ07 and Gain the Sickle Pheromone Story Relic.
- FAIL: The lock on the box gets the better of you; you decide that maybe the secrets kept within weren't worth your time in the end.
- B: You decide the best course of action is to smash the lock open. Make a Strength 10 Skill Check.
- PASS WITH A RESULT OF 14 OR LESS: You smash the lock with ease, its remains drop to the floor. You then open the box. Inside you find a bottle labeled Sickle Pheromone. Reveal Medium Hidden Card CQ07 and Gain the Sickle Pheromone Story Relic.
- PASS WITH A RESULT OF 15+: With maybe a little too much strength you smash the lock, but when you do you hear a smashing sound coming from within the box while a pungent odor pours from the box and fills the cave. Until the end of the Encounter, when making a Dodge against a Sickle Type Combatant, the Adventurer that opened the box adds +1 to their result.
- FAIL: You clumsily drop the box and hear a smash. Whatever was in the box sure stank, and is definitely gone now.
- A: You decide to try and pick the lock, hoping to find the treasure that may be inside. Make a Perception 10 Skill Check. If you fail to open the lock, you may pay either 1 SP or choose to receive 1 Urgency token to re-roll. There is no limit to the amount of tries you may make.
- RED LOOT: You find a small silver first aid box. You Gain 2 Magic Balm and 1 Vitality Juice Box.
- GREEN LOOT: You find a pile of treasure! The party Gains 15 Gold.
- YELLOW LOOT: You find a pile of treasure! The party Gains 5 Gold and 2 random Consumables.
Totems
- BLUE TOTEM: To the west you see a second hatchery accompanied by another Defender! Place figures and tokens according to Diagram 15.
- RED TOTEM: To the north you see a small swarm of Cave Sickles. Spawn 3 Cave Sickles adjacent to the space this Totem occupied.
- GREEN TOTEM: As you approach the deeper part of the cave you notice more of the yellow silky creep stuff you saw earlier. This time it's accompanied by a Cave Sickle Warrior! If you haven't already, Reveal Small, Medium and Large Hidden Cards CQ05. Place figures and tokens according to Diagram 11. If the Cave Sickle Warrior is Defeated, read the Green Objective hidden text.
- YELLOW TOTEM: Getting closer to the creep you see there is much more than you anticipated. It leads into what looks like a Cave Sickle Hatchery protected by a giant Cave Sickle Defender! Reveal Small, Medium and Large Hidden Cards CQ04. Place tiles, figures and tokens according to Diagram 13.
Objectives
- GREEN OBJECTIVE: Only read the following hidden text if instructed. As you defeat the Cave Sickle Warrior, you notice a silver box slide out of its freshly exposed stomach. Place the Red Loot token in the space the Cave Sickle Warrior occupied.
Painful Plunge
Underground. Pg. 22–23.
Introduction (italic): Departing the southern gateway of the hatchery, you're met with a diverging path. To the left, a precipitous decline promises a swift but perilous journey. The right fork offers a broader, safer passage, though a carpet of bug creep mars its inviting contours. A choice looms before you—direct yet dangerous, or secure but filled with potential unseen threats?
Setup
- Tiles: UM13, UM5, UM3, UM7.
- Terrain: 10 x Bug Creep (1x1); 5 x Bug Creep (2x1); 3 x Bug Creep (3x1); 4 x Bug Creep (2x2).
- Sickle Eggs: 3 x Blue; 3 x Pink; 3 x Yellow; 1 x Unusual.
- Loot: 1 x Red; 1 x Green.
- Figures: 1 x Cave Sickle Defender.
- Loot Level: MUNDANE.
End Conditions
- Win Condition: An Adventurer finds and ends their turn on the Blue Exit. Reward: None. Continue to Skittering Cacophony Pg. 24.
- Lose Condition: All Adventurers are Defeated. Reward: Restore Adventurers. Continue to the current Story Round.
Special Encounter Rules
- BLUE STARTING AREA: Only read the following hidden text if you passed or did not encounter the Red Objective in A Crack In The Earth (Pg. 10). You take the path to the left even though it looks to be more difficult. The tunnel comes to an end by a ledge, you look out to see the biggest hatchery yet! The whole room is full of multicolored eggs, all sitting in creep. Then off in the distance you see what must be their protector and nanny, the biggest Cave Sickle Defender you have ever seen. Instead of the Cave Sickle Defender cards, Reveal Small and Large Hidden Cards CQ08 and CQ09. Gain access to Docious Sickling Caretaker and Psionic Sicklings.
- RED STARTING AREA: Only read the following hidden text if you failed the Red Objective in A Crack In The Earth (Pg. 10). You take the path to the right, your injury from the earlier cave-in is starting to cramp up. Traveling through the creep-covered tunnel you slip and begin to fall, the creep must have covered another tunnel. You land with a thud in a large room infested with creep. As you look around you realize you're in trouble, you have landed in the middle of the biggest hatchery yet!
- Unlabelled hidden text (the book prints no heading for this block; it sits at the top of the middle column on page 23, between the Special Encounter Rules and SUNNY SIDE UP): To the north-east you hear a thunderous roar. You turn and lock eyes with the biggest Cave Sickle Defender you have ever seen. Instead of the Cave Sickle Defender cards Reveal Small and Large Hidden Cards CQ08 and CQ09. Gain access to Docious Sickling Caretaker and Psionic Sicklings.
- SUNNY SIDE UP:
- At the start of a round before shuffling the Initiative track, if there are less than 6 Sickling Combatants on the board, check to see if the Sickle Eggs on the board Hatch. Roll the BLACK die. If the result is a skull, flip and resolve the listed Ability on a Sickle Egg that is nearest to the Adventurers. Flip and resolve until 3 Sickle Eggs have been flipped or there are 9 Sickling Combatants on the board, whichever happens first. Spawn any Combatants on or adjacent to the space the token occupied.
- If there are less than 6 Sickling Combatants on the board, and a Sickle Egg is the target of an Attack or Spell and not Defeated, flip and resolve the listed Ability on a Sickle Egg. Spawn any Combatants on or adjacent to the space the token occupied.
- UNUSUAL SICKLE EGG: Only read the following hidden text if an Adventurer moves adjacent to the Unusual Sickle Egg. You notice a strange Sickle Egg sitting on its own beyond where the Cave Sickle Defender stood guard. The egg is larger than the others and has an unusual pink glow. You may take an Encounter Action to place the egg into your Pack.
Loot
- RED LOOT: Gain 5 Gold. Then, each Adventurer Gains 1 random Consumable.
- GREEN LOOT: You find some vials? Reveal Medium Hidden Cards CQ10 and Gain a Miracle Sickle Beard Oil Story Consumable. Once used, add all copies of this card to the Common Consumables deck for purchase.
Objectives
- GREEN OBJECTIVE: Only read the following hidden text if the Docious is Defeated. As Docious the Sickling Caretaker falls, you hear a mighty roar. This roar however, is different, it's a cry of pain. It must be the Sickle Queen, you have heard rumors that Sickles share a single mind, with knowledge flowing instantly to their leader. Killing Docious must have upset the Queen. Place the Blue Exit on the north edge of Tile UM5, in any non-Obstructing space. Instead of drawing a Combatant Loot Card, Gain 1 Cave Sickle Monster Loot Card.
Skittering Cacophony
Underground. Pg. 24–25.
Introduction (italic): Your journey culminates here: the pulsating heart of the hive, the Cave Sickle Queen's sanctum. A sea of creep and clusters of eggs occupy the lair, but the Sickles are conspicuously absent. As you tread onto the creep, a bone-chilling shriek splits the silence — a call to arms! In a cascade of movement, Sickles pour into the chamber from all directions, materializing from the ground, descending from the ceiling, flooding from the corridors. This is it, the Sickles' last stand!
Setup
- Tiles: UM11, UM3, UM9, UM7.
- Terrain: 7 x Bug Creep (1x1); 6 x Bug Creep (2x1); 3 x Bug Creep (3x1); 3 x Bug Creep (2x2).
- Sickle Eggs: 3 x Blue; 3 x Pink; 3 x Yellow.
- Figures: 2 x Cave Sickle Defender; 2 x Cave Sickle Warrior; 6 x Cave Sickle.
- Loot: None.
- Loot Level: MUNDANE.
End Conditions
- Win Condition: The Cave Sickle Queen is Defeated. Reward: Each party member Gains 1 XP. Restore Adventurers and then read Exterminator. Continue to the current Story Round.
- Lose Condition: All Adventurers are Defeated. Reward: Restore Adventurers. Continue to the current Story Round.
Special Encounter Rules
- PREPARED FOR THE WORST: During the first round after dealing Initiative Cards, move all the Adventurers' Initiative Cards to the front of the Initiative Track keeping the order they were dealt in. Then each round after the first, move each Adventurer's Initiative card 1 space forward on the Initiative Track starting from the front of the Initiative Track.
- EXTERMINATOR: Only read the following hidden text if instructed. Upon returning to town, the local chemist hears of your experience and requests to meet the adventurers that saved the town. After sharing your newfound Sickle knowledge, the chemist is delighted and shares with you some new Consumable Item upgrades. Reveal Medium Hidden Cards CQ14 and Small Hidden Cards CQ15. Add the Tossable Bug Bombs to the Common Consumables Deck and add the Item Upgrades to the Item Upgrade Deck.
- SICKLE RUSH: At the start of the second round and each round after, before shuffling and dealing Initiative cards, roll the BLACK die.
- If 4 or 4 are rolled (the two Defender die faces are printed as icons; the text layer shows both as "4"), Spawn up to 2 Cave Sickle Defenders.
- If a skull is rolled, Spawn 1 Cave Sickle Warrior.
- If any other combination of symbols is rolled, Spawn up to 3 Cave Sickles. When Spawning figures in this way they are placed on an unoccupied non-Dangerous Terrain space on the edge of the board nearest to an Adventurer.
- SUNNY SIDE UP: At the start of a round before shuffling the Initiative track, if there are less than 6 Sickling Combatants on the board, check to see if the Sickle Eggs on the board Hatch. Roll the BLACK die. If the result is a skull, flip and resolve the listed Ability on a Sickle Egg that is nearest to the Adventurers. Flip and resolve until 3 Sickle Eggs have been flipped or there are 9 Sickling Combatants on the board, whichever happens first. Spawn any Combatants on or adjacent to the space the token occupied. If there are less than 6 Sickling Combatants on the board, and a Sickle Egg is the target of an Attack or Spell and not Defeated, flip and resolve the listed Ability on a Sickle Egg. Spawn any Combatants on or adjacent to the space the token occupied.
- AND THEY'RE PSIONIC?: Reveal Small and Large Hidden Cards CQ09 to gain access to Psionic Sicklings.
- ENOUGH IS ENOUGH: Only read the following hidden text if either there are no eggs left on the board or you have Defeated 2 Cave Sickle Warriors and 2 Cave Sickle Defenders. The ground beneath you begins to rumble and you hear a blood-curdling scream from the north end of the cave. The Queen storms her way forward, angry and ready to protect her children! Reveal Small, Large and Extra Large Hidden Cards CQ11. Then, place tokens, tiles, and figures according to Diagram 16. If an Adventurer is holding the Unusual Egg read A, if they are not read B.
Loot
- NONE.
Objectives
- RED OBJECTIVE: Only read the following hidden text if you have Defeated a Cave Sickle Warrior. After defeating a Cave Sickle Warrior you notice that its blood is thicker and more pungent than the other Sickles. In that moment you are reminded of signs around town, where the local apothecarist needed rare Sickle blood to develop more advanced anti-venoms. Gain a Warrior Blood Monster Loot. For each additional Cave Sickle Warrior you slay, Gain an additional copy of Warrior Blood (maximum of 3).
- GREEN OBJECTIVE: Only read the following hidden text if the Cave Sickle Queen is Defeated. The Cave Sickle Queen finally falls from the fierce battle. The remaining Sickles, cut off from the hive scatter and flee into the depths of the cave. Instead of drawing one of the Combatant Loot Cards, Reveal Medium Hidden Card CQ12 and Gain the Sickle Thrower Story Relic. If an Adventurer is holding the Unusual Egg, continue reading. As you examine the remains of the Queen you notice she has identical markings and colors as the egg. This must be a Cave Sickle Queen Egg! You may choose to destroy the egg, and prevent another Cave Sickle infestation or you may choose to keep it. If you wish to destroy the egg read A, otherwise read B.
- A: You decide that world would be safer without another Queen on the loose and you destroy the Egg. Gain the Monster Loot Card, Sickle Venom.
- B: Unable to destroy the egg, you decide to hold onto it a little longer until you can find a home for it. Reveal Medium Hidden Card CQ13 and Gain the Royal Sickling Egg Story Relic.
Diagrams
The Bounty Book prints sixteen Encounter Diagrams on pages 26 to 41. Each Diagram's tile and token placement is a printed image and is not reproduced here. The text below gives each Diagram's Setup list and any printed special rules.
Diagram 1
- Setup: Loot: 1 x Blue. Figures: 3 x Cave Sickles.
Diagram 2
- Setup: Tiles: UM3, UM5, UM11. Terrain: 2 x Passage (1x1); 1 x Obstructing (1x3). Totems: 1 x Blue; 1 x Yellow. Figures: 3 x Cave Sickles; 1 x Cave Sickle Warrior.
Diagram 3
- Setup: Terrain: 1 x Passage (2x1); 1 x Passage (1x1). Objectives: 1 x Red.
Diagram 4
- Setup: Terrain: 3 x Dangerous (1x1). Exits: 1 x Red. Figures: 9 x Cave Sickle.
Diagram 5
- Setup: Tiles: UM3. Totems: 1 x Red. Objectives: 1 x Green.
Diagram 6
- Setup: Figures: 3 x Cave Sickles; 3 x Cave Sickles (Burrowed) (Burrowing Variation).
- Special Encounter Rules, FAMILIAR FORMS IN THE DIRT: There was no doubt in your mind, the sound of loose dirt and rocks would likely mean burrowing Cave Sickles. Reveal Medium and Large Hidden Cards CQ02. Gain access to the Monster Loot and Combatants revealed. Cave Sickles 4, 5, and 6, as depicted above, use the Cave Sickle Burrowing Variation Intelligent Combatant Card. You'd heard about a burrowing variation of Cave Sickles that were known for their strange hissing noises. You cautiously sneak up and around the corner of the tree for a better look. As you round the corner, you see something moving in the dirt. Just as you suspected. Some of the Cave Sickles were beneath the ground. Two other Cave Sickles meander nearby, poking at a rock, causing it to tumble about in the dirt. Beyond them, a third drinks from a pond. They haven't noticed you yet. If you got closer, you could kill the two nearest before the others would notice. Choose one of the following:
- A) Make an Agility 10 Check to attempt to assassinate the closest two silently: End your current Action and Ability, then place your figure adjacent to both Cave Sickles 1 and 3. If you succeed, defeat both opponents. If you fail, end your turn.
- B) Take them by surprise in a brutal fashion: Gain 1 SP and MOVE all Cave Sickle Initiative Cards down the track by 1 starting at the back, THEN: continue your turn as normal.
- TIP: Burrowed Figures: Don't forget to read the rules for figures that Burrow! You can find the rules for Burrow in the back of the Middara Rulebook, Pg. 97.
Diagram 7
- Setup: Terrain: 1 x Passage (2x1); 1 x Passage (1x1); 1 x Dangerous (1x1). Objectives: 1 x Yellow.
Diagram 8
- Setup: Terrain: 1 x Bug Creep (3x1); 1 x Bug Creep (2x1); 1 x Bug Creep (1x1); 1 x Bug Creep (2x2); 1 x Passage (2x1). Loot: 1 x Blue. Sickle Eggs: 1 x Pink; 2 x Yellow. Exits: 1 x Red. Figures: 1 x Cave Sickle; 1 x Cave Sickle Defender.
Diagram 9
- Setup: Tiles: UM5. Terrain: 2 x Bug Creep (2x2); 1 x Bug Creep (3x1); 2 x Bug Creep (1x1); 1 x Dangerous (2x2). Exits: 1 x Red. Loot: 1 x Yellow. Figures: 4 x Cave Sickles (Burrowing Variation).
- Special Encounter Rules, WET AND WILD: You look over the edge of the chasm, it could be a direct way to the center of the hive. The sides of the hole have layers of creep all over them, so jumping down should be safe, kinda like a waterslide back on Earth.
Diagram 10
- Setup: Figures: 3 x Cave Sickles; 3 x Cave Sickles (Burrowed) (Burrowing Variation).
- Special Encounter Rules, SOMETHING MOVING IN THE DIRT: You pause. Rubbing your eyes in disbelief, there are two seemingly ordinary Cave Sickles poking at a rock causing it to tumble about in the dirt and a third drinking from a pond. But, besides those three monsters, you aren't sure what you're looking at. Three mounds of dirt seemingly moving beneath the grass with a mind and life of their own. Reveal Medium and Large Hidden Cards CQ02. Gain access to the Monster Loot and Combatants revealed. Cave Sickles 4, 5, and 6 (as depicted above) use the Cave Sickle Burrowing Variation Intelligent Combatant Card.
- TIP: Burrowed Figures: as in Diagram 6, read the rules for Burrow in the back of the Middara Rulebook, Pg. 97.
Diagram 11
- Setup: Tiles: UM5. Terrain: 1 x Bug Creep (3x1); 1 x Bug Creep (2x1). Totems: 1 x Blue. Figures: 3 x Cave Sickles (Burrowed) (Burrowing Variation); 1 x Cave Sickle Warrior.
Diagram 12
- Setup: Terrain: 1 x Bug Creep (3x1); 2 x Bug Creep (1x1); 1 x Bug Creep (2x1); 1 x Bug Creep (2x2); 1 x Passage (2x1). Loot: 1 x Yellow. Sickle Eggs: 2 x Pink; 1 x Yellow. Exits: 1 x Blue. Figures: 1 x Cave Sickle; 1 x Cave Sickle Defender.
- Special Encounter Rules, SUNNY SIDE UP: At the start of a round before shuffling the Initiative track, if there are less than 6 Sickling Combatants on the board, check to see if the Sickle Eggs on the board Hatch. Roll the BLACK die. If the result is a skull, flip and resolve the listed Ability on a Sickle Egg that is nearest to the Adventurers. Flip and resolve until 3 Sickle Eggs have been flipped or there are 9 Sickling Combatants on the board, whichever happens first. Spawn any Combatants on or adjacent to the space the token occupied. If there are less than 6 Sickling Combatants on the board, and a Sickle Egg is the target of an Attack or Spell and not Defeated, flip and resolve the listed Ability on a Sickle Egg. Spawn any Combatants on or adjacent to the space the token occupied. Reveal Large and Small Hidden Cards CQ06.
Diagram 13
- Setup: Terrain: 2 x Bug Creep (3x1); 2 x Bug Creep (2x1); 3 x Bug Creep (1x1); 1 x Bug Creep (2x2); 1 x Passage (2x1). Loot: 1 x Yellow. Sickle Eggs: 2 x Pink; 1 x Yellow. Exits: 1 x Blue. Figures: 1 x Cave Sickle Defender.
- Special Encounter Rules: SUNNY SIDE UP, as in Diagram 12. Reveal Large and Small Hidden Cards CQ06.
Diagram 14
- Setup: Tiles: UM5, UM15. Terrain: 1 x Obstructing (3x1); 1 x Obstructing (1x1); 1 x Bug Creep (2x1); 2 x Bug Creep (1x1). Objectives: 1 x Red. Exits: 1 x Red. Loot: 1 x Green. Figures: 3 x Cave Sickle; 1 x Cave Sickle Warrior.
Diagram 15
- Setup: Terrain: 2 x Bug Creep (3x1); 2 x Bug Creep (2x1); 3 x Bug Creep (1x1); 1 x Bug Creep (2x2); 1 x Passage (2x1). Loot: 1 x Blue. Sickle Eggs: 1 x Pink; 2 x Yellow. Exits: 1 x Red. Figures: 1 x Cave Sickle Defender.
- Special Encounter Rules: SUNNY SIDE UP, as in Diagram 12.
Diagram 16
- Setup: Tiles: UM5. Terrain: 2 x Bug Creep (2x1); 3 x Bug Creep (1x1). Figures: 1 x Cave Sickle Queen; 3 x Cave Sickle.
Quick Reference
New Combatant and Encounter Tokens
Latched. Latched Combatant tokens are added to figures as Ability tokens by a variety of opposing figures. This token thematically represents a figure who is physically attached to another Combatant, and is a reminder for the Ability below:
- A figure with a Latched token on their card may not DODGE. Additionally, they must reduce their Adventurer or Combatant Card's printed [red icon] by half.
When a figure uses an Ability that instructs them to LATCH onto a target, remove their figure from the board and place it on the target in addition to the Latched token. They are now referred to as the Latched figure.
Latched figures still count as being undefeated and on the board. They are considered to be occupying the same space as the target they are Latched to. However, the only AI Step considered true are AI Steps that ask "Are they Latched onto an opponent?".
Latched figures may still be targeted with Attacks and Spells. If the Latched figure is the target of an Attack their Defense is the higher of theirs or the figure they are Latched on to. If the Latched figure is the target of a Spell so is the figure they are Latched on to, this means both figures must make a Conviction Check against the spell, even if the spell normally only targets a single figure.
Latched tokens are removed under one of the following circumstances:
- As an Encounter Action a figure with a Latched token may make a Strength 10 Check to remove the token. If they do, the token is discarded. Then, place the corresponding Latched figure on any empty space within 4 spaces of this figure as if you used PUSH 4.
- When a Latched figure is Defeated, remove the Latched figure and discard the Latched token.
- Latched figures and Latched tokens are removed when instructed to Refresh or Restore.
Sickle Egg. Sickle Egg Combatant tokens are put into play via Encounter Diagrams. They are also put into play by the Cave Sickle Queen Combatant.
- A Sickle Egg counts as a figure with 8 Defense, Conviction of 2 PURPLE dice and IMMUNITY: EFFECTS. A Sickle Egg is defeated by any Attack or Spell that deals 4 or more Damage in a single Action. They can't use Standard Actions or Abilities and can't be moved by any Ability. Sickle Type Combatants can move through and occupy the same space as Sickle Eggs, while a Sickle Type Combatant is in the same space as a Sickle Egg the Sickle Egg can't be targeted.
- If a Sickle Type Combatant is on the board, the Sickle Eggs Conviction Dice and Defense are equal to the highest printed value on the Sickle Type Combatant Cards on the board.
- At the start of a round before shuffling the Initiative track, if there are less than 6 Sickling Combatants on the board, check to see if the Sickle Eggs on the board Hatch. Roll the BLACK die. If the result is a skull, starting with Sickle Eggs nearest to Adventurers, flip and resolve the listed Ability on a Sickle Egg until 3 Sickle Eggs have been flipped or there are 9 Sickling Combatants on the board, whichever happens first. Spawn any Combatants on or adjacent to the space the token occupied.
- If there are less than 6 Sickling Combatants on the board, and a Sickle Egg is the target of an Attack or Spell and not Defeated, flip and resolve the listed Ability on a Sickle Egg. Spawn any Combatants on or adjacent to the space the token occupied.
- Sickle Eggs do not drop Combatant Loot.
Unusual Sickle Egg. Unusual Sickle Egg is an Encounter token and will only be put into play via Encounter Diagrams. The rules for interacting with it are explained in the Encounters it is used in.
New Terrain Types
Bug Creep. This Special Terrain is only found within Encounter Setups included in this Bounty. However, this Special Terrain may be placed by certain Combatants. Since many of these Combatants have special rules that will allow them to Spawn outside of this Bounty, Bug Creep can be placed in any Encounters within Unintentional Malum.
- BUG CREEP: While on Bug Creep, all Sickle Type and Insect Type Combatants Gain +1 [bug icon] and +1 TO THE ROLL when making a Conviction Check. All other figures have -1 [bug icon] and -1 TO THE ROLL when making a Conviction Check.
- Bug Creep Terrain can replace all Terrain except Obstructing Terrain.