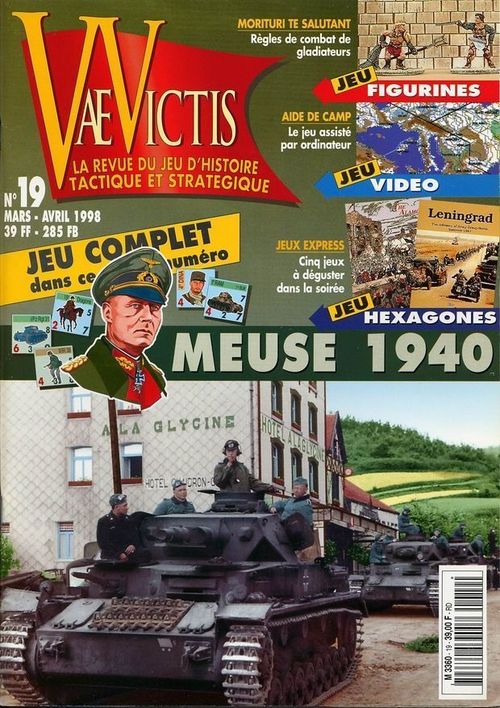
Meuse 1940
Meuse 1940 Rulebook
Table of Contents
Table of Contents
0 Components of the Game
The game includes the map, the rules and the counters to cut up and paste. The counters consist of unit counters and of markers.
0.1 Unit Counters
Each counter represents:
- a divisional HQ (EM);
- a combat unit (battalion strength).
A division includes an EM and several regiments, made up of two or three battalions.
The EM symbolizes both the command of each division at a time, and also the artillery support that it could allocate to such or such of its combat units. Rules are given below.
Within the rules, the EM is not regarded as a combat unit when this term is employed. All other units are considered in the game as combat units.
The attack value represents the offensive capacity of a unit.
The defense value represents its defensive value.
The movement potential represents, in movement points, the ability to move for that unit.
The cohesion value represents the morale and antitank rating of that unit.
The command range is the distance over which an HQ may control units. This distance is not affected by terrain or enemy units.
Reverse of Combat Units
Each combat unit counter has, other than the exceptions, a front at full strength and a back at reduced strength. When a unit undergoes one loss following an engagement, its counter is reversed in order to indicate that it is reduced. If a reversed unit undergoes a new loss, it is destroyed.
Some units have one step only and are therefore destroyed as soon as they undergo a loss in the first engagement in which they take part. Others have four steps. They are not destroyed until a fourth step loss, but they are reduced in ability each time. The units with four steps are represented by two counters, used alternately (and not simultaneously).
Reverse of EM Counters
The back of the counters of EM fulfil another function. During the turn, the counter is reversed in order to indicate that the EM has consumed its potential artillery support (on the back, the symbol of artillery surmounted by a 0), or as soon as it is inactivated by the enemy (see 4.2). At the end of the turn, all the EM counters are flipped, face up, in order to indicate that they are once again fully operational.
Cohesion Test
When requested in the rules, the player must throw less than or equal to the cohesion value on 2d6 to pass the test.
1 Game Turn
The game turn is divided into two phases: attacking player phase, then defender phase. In the sequence of play, the player whose phase it is (the one that acted) is said to be the active player, and the other player is the inactive player.
The Game Phases
The two phases are similar. Only the units of the active player can act.
- Reinforcement phase: the active player places reinforcements in the indicated hex. Eliminated EM are returned 2 turns after the turn they were eliminated. Remove fatigue markers.
- Movement: the units can move all or part of their movement points.
- Barrage fire: both players may barrage fire with artillery or air units.
- Combat: the units which are adjacent to hostile units may combat.
- Exploitation: mechanised or armoured units can move up to half their MPs again.
- Supply check: the active player verifies the supply status of all its units.
(Then the same phases for the other player.)
Once the phases of the two players are ended, the turn is ended: the EM markers of the two players are reversed, face up, in order to indicate that the artillery is again available. The aviation markers are also available. The Turn marker is advanced by one turn.
2 Terrain
The map represents the area to the west of the river Meuse in Belgium. A hexagonal grid is superimposed on the map in order to facilitate movement and combat of units. The map scale is 1 km per hex.
2.1 Effects of Terrain
The effects on combat or movement are shown on the terrain effects table.
2.2 Crossing the Meuse
Infantry units may cross the Meuse using inflatable boats at a cost of 4 MP.
In the historical scenario, the only direct way for mechanised or armoured German units to cross is via 3104 (Houx) at a cost of 4 MP.
Otherwise, the Meuse may be crossed by constructing bridges, by German Engineer units (Pion. Bat. Units).
Only these units can construct a bridge across the Meuse. To construct a bridge, the unit must be adjacent to the river. On the next turn, place a bridge under construction marker (divide the unit's defense factor by 2). On the following turn place a Bridge marker, and the bridge is usable.
Crossing the bridge costs 2 MPs, plus the cost of the terrain entered.
Combat Across the Meuse
Armour and mechanised units may only attack across the Houx and the bridges, with a normal deduction for a river.
Infantry may attack across the Meuse, with -2 to the die roll.
3 Zones of Control (ZoC)
Each combat unit has a zone of control (ZoC) into the six adjacent hexes (except into impassable terrain). This zone represents the terrain that the unit controls thanks to its combat ability (by hypothesis, the unit is deployable in combat positions around the hex on which its counter is placed). A unit must stop its movement when it enters a hostile ZoC (exception: armoured penetration).
A unit cannot move directly from enemy ZoC to enemy ZoC, whether it is a ZoC from one or several units. It is, on the other hand, possible to leave a hostile ZoC into a free hex, and then enter another enemy ZoC during the same movement phase.
Armoured penetration, a special movement that allows a unit to cross a ZoC (see 4.3), is only allowed by armoured units (and not mechanised).
4.0 Movement
4.1 Introduction
In the movement phase, the active player may move its units up to their maximum movement points. The movement of every unit must be ended before passing to another (except joint movement in one armoured penetration, see 4.3).
A unit spends a number of movement points according to the cost of the hex into which it moves. The cost of movement of every type of terrain is specified on the terrain chart. The movement points are not cumulative from turn to turn.
A unit must stop its movement when it enters a hostile ZoC (exception: armoured penetration, see 4.3).
Whatever the cost of movement into a terrain type, a unit can always move one hex (except impassable terrain and movement from ZoC to ZoC).
It is forbidden to move onto a hex occupied by a hostile unit, except if it is an EM (see 4.2).
Fatigue
Any unit, whatever it is, may attempt to do a forced march. The player indicates its intention before beginning the movement, and the unit receives a Fatigue marker.
The unit then benefits from an additional 50% of its movement (ex: a unit with 6 MP will get 9 MP).
When the marker is in place on the unit, the following penalties apply:
- in attacks, the unit applies a modifier of -1 to the die; in defense, an attacker will benefit of a bonus of +1 against a fatigued unit;
- it cannot exploit;
- if it receives an R2 combat result, it risks breaking (see 7.5).
4.2 Movement Onto an Enemy EM
Consuming two of its movement points in addition to the cost of terrain, a combat unit may enter a hex occupied by a hostile EM not stacked with an enemy combat unit. In this case, the EM has to move back one hex (at the choice of the inactive player), with the effects attached to it (see retreat after combat, rule 7.5 [sic; the retreat rules are section 7.6 in this text]), and it cannot use its artillery capacity for that turn (the EM counter is flipped, face down). This movement onto an EM can be executed in either movement phase or in the exploitation phase.
4.3 Armoured Penetration
An armour unit, which moves alone or stacked with another unit, itself not armour, may execute an armoured penetration in order to cross a hostile ZoC. If a non-armoured unit wishes to move with an armour unit, the two units must be on the same hex at the beginning of their movement phase, but they may finish their movement separately.
Procedure:
In entering a hostile ZoC, the active player may declare an armour breakthrough. It nominates the adjacent hex to which its unit wishes to go; this hex may be free or be in a hostile ZoC.
The inactive player may voluntarily let pass an opposing unit that declares an armour breakthrough.
If it does not wish to let the unit cross, the inactive player makes a cohesion test (the defense value is added to the cohesion value for this test only) for all its units that exercise a ZoC on the hex where the armour unit is. It throws the dice once for all its units (that is to say, it does not throw the dice for each unit, but for all at one time).
- If no unit of the inactive player passed its test, the armour unit may advance into the indicated hex, spending the normal cost in movement points. It may continue its movement normally if it still has points available, and it may attempt a new armour breakthrough immediately or later in its movement if it wishes to cross another hostile ZoC.
- If at least one unit of the inactive player passed its test, the armour unit stops its movement in the enemy ZoC that it attempted to leave. It cannot move further during this movement phase. Next, it has to attack the unit that passed its test, in the following combat phase and no other (but stacked units must be attacked together).
This compulsory combat may be combined with attacks done by other units of the active player against the same hostile unit.
If several enemy units pass their test, they all stop the armoured penetration, knowing that a hex will inevitably be attacked in the following combat phase.
The attacker has the option to take a cohesion test for units not in the same hex but which are adjacent to the penetrated hex. If several hostile units in different hexes pass their test, the inactive player may choose the hex that stops the armour breakthrough among those that passed, to be attacked later.
Multiple attempts:
Any unit that passes a cohesion test and that is then designated to attack cannot continue to stop further penetrations. On the other hand, a unit may continue to test so long as it is not so committed.
The active player may attempt armour penetration from a hex, provided a passive unit has not passed its cohesion test, thereby stopping the unit. It is always possible to enter the hex (in respecting the stacking limits), but no further attempts at armour breakthrough are allowed once a hex is blocked.
5 Stacking
A regiment or its equivalent may stack in the same hexagon.
Definitions: a regiment or its equivalent is made up of:
- three infantry battalions;
- or two tank battalions (BCC, Panzers) or recon (AufktAbt, RAM, GRDI);
- or two infantry battalions and one tank or recon battalion.
This limitation applies also at the time of initial placement, but it does not apply during the movement phase, that is to say, the units can move without taking stacking into account, but they cannot be voluntarily overstacked at the end of movement.
In addition, it costs 1 MP to enter a hex that is already stacked to the maximum. EM and markers have no effect on stacking limits.
It is forbidden to perform an armoured breakthrough in a hex where there is already a friendly unit, if this movement creates an overstack.
6 Leaders and Artillery Support
6.1 Introduction
Each headquarters (EM) represents the commanders of a division as well as its artillery.
Each EM has under its command from 2 to 3 regiments that are attached to it. When an EM is destroyed, these units are reduced in effectiveness (see 6.4).
6.2 Artillery
Each fresh EM has a number of artillery points that it could use in order to support its organic units at the time of a combat. Each point may only be used once per game turn, either in attacks or in defense. In order to indicate the points still available, the players may place artillery markers under the EM as a reminder. An EM who has no artillery left is flipped, face down, up to the end of the turn.
When the active player declares an attack, it may place one or several points of artillery, to the limit of the EM concerned, on an organic unit that participates in this combat, within command range. The inactive player may then react in the same way for the attacked unit. The active player may not add points once the passive player has placed support.
If several divisions are involved, each EM may place artillery points on its own units, but not on those of other divisions.
In any case, a player may only add a maximum of 5 points to a single combat, with a limit of 3 from a divisional EM and 2 from a corps EM.
Artillery reserve:
The IInd and XIth corps EM may place 1 artillery point on any unit within command range, as detailed below:
- IInd corps: 5th DIM, 1st DCR
- XIth corps: 18th DI, 22nd DI, 61st DI, 4th DINA
- either: 1st DLC, 4th DLC
The corps artillery points provide 4 attack points (this represents heavy guns).
Total both sets of artillery attack points, and take the difference. The difference is added to the attack value.
6.3 Barrage Fire
Artillery points may be used independently: after each movement phase, the two players may place artillery points on enemy units within command range of the EM. Barrage is resolved simultaneously.
Barrage is resolved on the artillery and air table with 2d6, modified by terrain. On that table, each artillery point counts as two attack factors, except corps artillery, which counts as 8. For aviation, use the attack factor on the counter.
The result of the throw on the table indicates the number of step losses on the target hex.
Artillery barrage is limited to 4 artillery points (unmodified) per hex. Artillery and air power may be combined in a single attack.
6.4 Destruction of an EM
An EM cannot engage in combat and is vulnerable to hostile attacks when it is isolated. If it is attacked in the combat phase by an enemy unit when it is alone, an EM is automatically destroyed (the attacker must declare an attack with one of its adjacent units).
If an EM is stacked with at least one friendly unit, and if this unit comes to be destroyed as a result of combat or obligation of retreat, the EM is destroyed. Otherwise, it is not affected, whether retreating or when a step loss is called for (it does not lose its artillery support capacity).
When an EM is destroyed, it is removed from the game and placed on the turn track, two turns after the one in progress (ex.: destroyed on turn 1, placed turn 3). At the end of the indicated turn, the EM is replaced on the map by the player, on or adjacent to a unit of the division. If all the units of a division are destroyed, the EM is not replaced. Similarly, an EM is retired as soon as all the combat units under its command are destroyed.
The units of a destroyed EM are automatically and immediately not in supply (see rule 10) and may not receive artillery.
7 Combat
7.1 Introduction
During the combat phase, the active player may attack hostile units with its adjacent units. This combat is obligatory for units having failed their armour penetration.
A unit cannot attack more than once per turn, and a hostile unit may not be attacked more than once per turn. The attack against an isolated EM, even though the result is automatic, counts as an attack for the unit who executes it. All the adjacent units to a hostile unit may add their strengths in order to carry out a joint attack (exception: division limits and combined arms, see 7.2).
It is forbidden to attack several hexes simultaneously (every hex is attacked independently).
All the hostile units situated on a hex must be attacked together. Each attack is declared and resolved independently. Attacks do not have to be in any particular order.
7.2 Combined Arms and Divisions
Combination attacks with different unit types and divisions follow the rules below:
- French: the player may combine the attacks of different divisions without limit or bonus.
- German: the player may not combine different divisions in attacks. However, the units of the same division attacking together have the following benefits:
- if all the battalions of an infantry regiment (foot or mechanised) attack together, the player receives a bonus of +1 to the die roll (cumulative per regiment);
- if at least one mechanised and one armoured unit attack together, there is a bonus of +1 to the die roll (one bonus only, but the above still applies).
7.3 Resolution
A unit attacks an enemy unit combined with friendly units, artillery and air power. One takes the sum of attack factors and subtracts the sum of the defence factors to give the final attack value.
The attacking player throws 1d6 and applies the following modifiers:
- attack across the river: -1
- infantry attack across the Meuse: -2
- different elevation: -1
- possible fatigue: +1 or -1
- combined arms or divisional bonus
- difference in cohesion values
Effect of cohesion:
During combat, the players take the cohesion value of a unit to give a modifier. Each player, attacker first, designates a unit to get the cohesion value. Take the difference and apply it to the die roll.
In addition, the units used by each side must take the first step loss on applying the result.
The combat result is given on the table, cross-referenced by the terrain occupied by the defender. Use the lowest attack value if the attack value is not on the table.
7.4 Combat Results
Ae or De: all the units of either attacker or defender are eliminated.
R1 or R2: the units affected retreat 1 or 2 hexes. It is possible to convert a retreat into step losses (see below).
An or Dn (n = 1 or 2): the attacker or defender loses 1 or 2 steps. The first step loss is taken from the unit used for the cohesion rating.
d: all units test against cohesion in order not to break. Units that fail apply an R2 result, according to the retreat rules.
[CR]: all the units are engaged in close combat (see 7.7). Use a CR marker. In addition, each side loses one step.
[cr]: all the units are engaged in close combat. Place a CR marker on the units.
Applying results:
Apply combat results in the following order:
- the defender takes step losses, then tests to avoid retreat results, then retreats;
- the attacker does the same. If the defender hex is vacated and the attacker did not receive a step loss as a result of a retreat result, they may advance units that took part into that hex, up to stacking limits.
Retreat and cohesion tests:
At the moment of applying a retreat result, one retreat hex may be converted into a step loss. If it wishes, the player may undertake a cohesion test for all its engaged units: throw once for all units engaged in that combat. Units that pass may take a step loss instead of retreating one hex, for units that pass only. Retreat hexes that are not so converted apply to all units in the stack.
7.5 Broken Units
A fatigued unit that receives an R2 result undertakes a cohesion test. This test is taken before all other tests, and takes effect first.
A unit tests as a result of
A unit that fails its test is broken: it retreats 4 hexes and is marked with
A broken unit that attacks has a -2 modifier to the die (-1 for fatigue and -1 for broken).
At the start of movement, a broken unit recovers if it passes a cohesion test at the start of movement. A broken unit may not force march or enter an enemy ZoC on its own.
7.6 Retreat After Combat
At the time of a retreat imposed by a combat result, the following rules apply:
- if all the adjacent hexes are occupied by hostile units (EM included), the units are eliminated (in reality captured) and are removed from the game;
- if all the adjacent hexes are in enemy ZoC and none are occupied by a friendly unit, the units are retreated and each loses one step. If at least one hex is occupied by a friendly unit, the retreating units do so (without any losses);
- a unit could not retreat into an impassable hex, and loses one step if it does not have some other alternative route of retreat.
If a retreat after combat creates overstacking, the units in retreat must continue their retreat (with the effects which attach to it) until they reach a hex that can accommodate them. In all cases, if units are unable to meet the retreat rules they are eliminated.
7.7 Engaged Combat (CR)
If a combat result is engaged in combat, all units of both sides are held in melee. They may not move until the next combat phase (place CR markers), after which they may move normally or in exploitation.
The active player of the next combat phase must attack in combat one (and only one) hex containing the same engaged units. The choice of hex is up to the player. Other units in other hexes are still engaged but do not participate.
Engaged results only last one phase, unless the counterattack also results in an engaged result, which only concerns units that participated in the last combat.
The active player is free to reinforce an engaged situation, with units placed in adjacent hexes or stacked with the engaged forces.
8 Aviation
The two players have aviation points representing the missions for supporting fire of the tactical aviation. The Germans have six points, the French have 3 for every game turn.
Errata: the counters have two sets of aviation markers; use only one set.
Use of Aviation
Before every combat, the two players may place simultaneously and in secret their aviation markers. Every player may add one or two points of aviation (at a maximum) to a combat before its resolution, and they reveal their choice simultaneously.
Every point of aviation used by the two camps for the same combat neutralizes the other and there is no effect. Otherwise, every point not neutralized adds 2 to the combat factor, to the advantage of the player who has aerial superiority.
Once a player has placed all its aviation counters, it cannot place any more, during the course of the same turn, to counter the following aerial attacks.
Aviation may be used independently, like artillery, to barrage, placed within the command range of any EM. The attack value of a German aviation unit is 6, and 4 for the French. A maximum of 2 air units may be used per combat (plus artillery).
Like artillery, every aviation point can only be used once per turn, either in attack or in defense.
9 Exploitation
During the exploitation phase, all German Panzer divisions and DLC units move all over again at half their movement rating. No unit can enter the ZoC of an enemy unit during this phase (one can, on the other hand, leave a ZoC at the beginning of the phase).
10 Supply
10.1 Introduction
The supply rules simulate the needs in munition, in fuel and in supplies of a unit. In order to be in supply, a combat unit must trace a line of supply to its EM, which itself needs to be in supply.
10.2 Line of Supply
In order to be in supply, a unit must be capable of tracing a route of hexes free of all enemy combat units, EM or ZoC to its point of supply. A friendly unit in a hex nullifies a hostile ZoC exercised on this hex, for this rule only. The maximum distance for supply and command of a unit is the first value on the EM (command range).
The point of supply of a combat unit is its EM. The point of supply of an EM is a map edge.
10.3 Supply of the EM
- The French EM must be capable of tracing a line of supply to the west or north map edge, to the west of the Meuse.
- The German EMs may trace a line of supply to the east map edge.
All the units of an out of supply EM are considered to be out of supply.
Translator's note: the EM supply line may be any length.
10.4 Out of Supply Units and EM
With each game turn, the players check the supply status of all their units. If they are unsupplied, the following penalties apply:
- an out of supply unit cannot have artillery support;
- its cohesion, attack and defense values fall by 1 (0 minimum);
- its movement points are reduced by half;
- it preserves its ZoC.
One places an out of supply marker on the unit.
An out of supply EM cannot use its points of artillery.
10.5 Checking Supply
The supply check for every unit is made at the end of the phase for each player, but solely for the units of the player who has just acted. That is to say, a unit surrounded during the enemy phase gets a normal phase in order to break the encirclement before being deprived of supply.
In the same way, an out of supply unit loses this unfavourable status at the end of the phase of the player if it could trace a line of supply at that moment.
If at the end of this phase a unit is unsupplied, place an "out of supply" marker on the unit.
10.6 The Case of the 1st DCR
The 1st DCR was relatively immobile during the campaign. In game terms, the following penalties apply to the 4 BCC units after their entry turn (the 5th RDP is not affected):
- before each movement of one BCC unit, throw 2d6: on a result of 8, 9 or 19 (as printed; 2d6 cannot total 19, so this is probably a typo for 10 in the original, which the source does not confirm), the unit cannot use more than half its movement points or force march. On an 11 or 12, the unit may not move that turn;
- when a unit is out of supply, it is immobilised on 8 or more (plus the other penalties).
In addition, an immobilised unit that receives a retreat result is eliminated.
Scenarios
Historical
Set up: see French rules.
The German player moves first in both scenarios.
Free Set Up
The French player may set up all units west of the Meuse except as follows:
- 4th DINA: place west of 03XX inclusive;
- 5th DIM: the 8th RI enter turn 1 via 3001;
- 61st DIM: the 248th RI and 337th RI enter turn 1 via 2020;
- 1st DCR: throw 1d6. On a 1 or 2, the division arrives turn 1; 3 to 6 arrives turn 2, via the historical entry points.
German placement: as per historical campaign.
The Sluice at Houx
After placement, the French player has the chance to blow the lock at Houx: in this case, this risks creating upstream fords (to the south of the sluice). The German player chooses three points of transition on the Meuse, then throws 1d6 for each one of them: on a result from 1 to 3, a ford exists. The players place a Bridge marker to indicate a ford, but the cost in order to cross is 4 PM (and always -1 to the combat die roll).
Victory Conditions
Both players receive victory points for destroying enemy units and achieving objectives. Total up at the end of the game.
- Strategic victory: the player gets 50% or more points than its opponent.
- Tactical victory: the player gets between 30% and 50% more points than its opponent.
- Drawn game: the game is a draw if the players' scores are within 30% of each other.
Victory Points
Town and city control: see French rules.
25 points for the German if they pass the western French frontier.
Destroyed units:
French scores:
- 4 per infantry
- 6 per mechanised
- 8 per armour
- 10 per EM
German scores:
- infantry: 2
- mechanised: 3
- armoured: 4
- divisional EM: 5
- corps EM: 10
Counter Errata
The EM of 1st DLC has an artillery capacity of 1 (not 7).