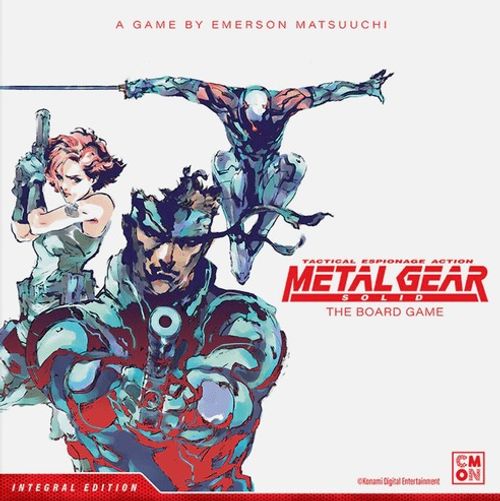
Metal Gear Solid: The Board Game
Metal Gear Solid: The Board Game Rulebook
Table of Contents
Table of Contents
Components
- 4 Player Dashboards
- 6 Boss Dashboards
- Guard Dashboard
- Memory Box
- 15 Double-Sided Tiles
- Tank Boss Tile
- Metal Gear REX Boss Tile
- Rulebook
- Shadow Moses Campaign Book
- Codec Book
- VR Missions Book
- Snake, Meryl, Meryl In Disguise, Otacon, Gray Fox, Ocelot, Wolf, Mantis, Liquid, Raven miniatures
- 12 Guards (x6 of two poses)
- 2 Cardboard Boxes
- 7 Starting Equipment Cards
- 32 Unlockable Equipment Cards
- Meryl's Disguise Reference Card
- Otacon Terminal Card
- 8 Otacon System Cards
- 27 Guard Order Cards (20 Blue Guard Cards, 7 Red Guard Cards)
- 6 Guard Reaction Cards
- 21 Otacon Boss System Cards
- 15 Boss Reference Cards
- 52 Boss Cards
- 6 Elevator/Shaft/Room Tiles
- Guard Priority Token
- Camera Facing Token
- 3 Camera Tokens
Stage Setup
A stage is meant to be played during a single game session. Each stage indicates how many players it supports and its estimated completion time. Each stage has specific setup instructions as well as any special rules that are used for that stage.
Player Count/Character Selection
In this example, a 1-player game must be played with Snake. In a 2-player game, both Snake and Meryl must be used. In a 3-player game, all but Otacon must be used. In a 4-player game, all characters are used. This format will be used for all stages to indicate which characters can or must be used depending on the player count.
Objective
The players' goal is to complete the objective(s) for the stage. Some stages may have optional objectives which give players additional rewards for completing them.
Failure
Players fail a stage if any of these conditions occur (even as part of an action that completes their final objective):
- Any player is Killed in Action (KIA)
- Players run out of time, revealing the Game Over card
- A stage failure condition occurs
Special Rules
Some stages list special rules that apply specifically to that stage. Be sure to refer to these special rules before starting the stage. Special rules always take precedence when they contradict standard rules.
Event Tokens
Some stages have lettered Event tokens on the map. When a player figure moves onto an Event token, immediately resolve its corresponding labeled section in the Campaign Book. If this occurs in the middle of a player's action (such as Dash), they continue their action after resolving the event.
Stage Cleared
When a stage has been completed successfully, follow the instructions in the Stage Cleared section. Usually, players are rewarded with additional Equipment cards to add to their Memory Box.
Memory Box
The Memory Box is used to store any Equipment cards unlocked during game sessions (including VR Missions). At the end of each game session, place all unlocked Equipment cards in the Memory Box. These may be used in any stage played next.
Stage Map
Map: The entire play area of the stage, consisting of the necessary tiles and tokens. Zones: Demarcated areas of play. Several game mechanics will reference zones. Each zone is highlighted in the Stage Setup with an orange border. Additionally, Elevator Shaft tiles, Elevator tiles, and Barracks tiles are part of the zone they are connected to. A zone is considered active if there is a player figure or a player's attention token is in that zone.
Player Area Setup
Every stage requires players to set up their play area as follows:
- Select Characters: Each player selects an available character and places their respective dashboard in front of them.
- Gather Player Tokens: Take the 4 matching Action tokens, 4 Focus tokens, and the double-sided Attention token, placing them next to their dashboard.
- Prepare Equipment: Take any matching Starting Equipment and Memory Box Equipment cards for the character, up to their equipment limit. Additionally, players take any Ammo, Charge, or special tokens shown on the top right of their Equipment cards and place them on each corresponding card.
- Prepare Dice and Additional Tokens: Place all dice, white die, black die, action token, focus token, KO damage token, and dead guard token in a pool within reach of all players.
Memory Box Equipment: Unlocked Equipment cards may be taken out of the Memory Box and equipped during setup. Players decide collectively as a group how to divvy up the equipment. Starting Equipment cards may be swapped with any number of Memory Box Equipment cards as long as they adhere to the equipment limit.
Starting Equipment
Each Equipment card shows an equipment type and sub-type, a name, an illustration, a number of uses, an equipment number, an action effect, a codec number, and an action cost.
Some characters have starting equipment that can only be used by them, as indicated by the character's image on the back. When choosing Equipment cards from the Memory Box, starting Equipment cards can be replaced. The equipment limit for each character is listed on their dashboard.
- Snake: None (On-Site Procurement)
- Meryl: Handgun (.50 Cal) and Light Assault Rifle
- Otacon: ADV Stealth Camouflage and Rations
- Gray Fox: Stealth Camouflage, High-Frequency Blade, and Arm Cannon
Some equipment has a limited number of uses. If players see those symbols in the top right corner of an Equipment card, place that many tokens of the corresponding type on it during setup. Sometimes, players will be able to get more ammo or charges, but the number of tokens on a card can never go over the printed value. Other equipment is discarded after a single use. When an Equipment card that has Action tokens on it is discarded, place them on the player's dashboard. They cannot be used again until the player's next turn.
Sneaking Stage Setup
All Sneaking stages require the Guard dashboard to be set up:
- Place the Guard dashboard near the map.
- Separately shuffle blue and red Guard Order cards, defined in the Stage Setup of every stage. Stack the blue cards above the red cards to form the Guard Order deck, placing them near the indicated section of the Guard dashboard.
- Shuffle the Guard Reaction deck and place it next to the indicated section of the Guard dashboard.
Boss Stage Setup
Boss stages do not use the Guard dashboard, the Guard decks, or Guard figures. Instead, they use specific Boss dashboards, Boss decks, and Boss figures which are placed next to the map. Read each Stage Setup instructions and Boss dashboard in detail to set up a Boss stage.
Boss Reference card: Some Boss stages use Special Action cards that allow players to perform special actions during the stage. Place the Boss reference card shown in the Stage Setup over the highlighted portion on all Player dashboards, covering the player actions that are not used during a Boss stage.
Boss Deck: Each Boss has their own Boss deck. Shuffle it and place it next to the map. After resolving a Boss card, it is placed on the bottom of the Boss deck unless instructed otherwise. Boss decks are never shuffled during the game.
Basic Concepts
Adjacency
Rules will often refer to adjacent spaces or components. In all cases, this means that the components in question are in spaces next to each other orthogonally, not diagonally, and never across obstacles, such as walls or locked doors.
Performing Actions
The main way a player interacts with the game is by performing actions. A player has 4 actions every turn and performs an action by placing the required Action tokens in the corresponding slot. What actions are available to a player are shown on various components like their Player dashboard, Equipment cards, and Special Action cards.
Some actions are considered Noisy. This is indicated by the Noisy icon next to the action.
NOTE: Players may take the same action multiple times.
Action Cost: Some actions may cost more than 1 Action token to perform, as indicated next to it on each Player dashboard, Equipment card, or Special Action card.
Standard Player Actions
Sneak: 1 Action Move 1 space.
Dash: 1 Action Move 2 spaces. Noisy.
Hand-to-Hand Attack: 1 Action Attack an adjacent figure. Roll the white die. Deals a Focus token.
Combo Attack: 2 Actions Attack an adjacent figure. Roll two white dice and a black die. Deals a Focus token.
Focus: X Actions Place X Action tokens to refresh an inactive Focus token, where X is equal to its refresh cost (see pg. 10).
Drag Body: 1 Action Pick up 1 KO Guard token or Dead Guard token in the player's space or an adjacent space. Then, move 1 space and place the token in an empty adjacent space. Noisy.
Interact: 1 Action Interact with an element on the map with the Interact icon in or on the edge of the player's space, such as Elevators or locked Doors. NOTE: If a player performs an Interact action that requires them to roll dice, such as interacting with a Locked Object, they roll the number and type of dice shown on their Player dashboard.
INTERACTING WITH LOCKED OBJECTS Some objects are locked and show a dice combination. Players may unlock these objects by performing an Interact action and rolling the indicated dice. Then, players may use this action again during their turn to reroll any number of those dice. Once the dice match the combination, discard the locked object token. NOTE: Locked objects range from levels 2 to 5, indicating how difficult they are to unlock. All locked objects must be unlocked in a single turn. If a player moves away from a locked object or their turn ends, all progress on the locked object is lost.
Knock: 1 Action Draw Attention to the player's space. This will result in the player's Attention token being placed in their space (see Drawing Attention, pg. 9). If it is already on the map, move it to their current space without changing its side. Otherwise, place it under the player's figure with its question mark side up.
Movement
All movement is done orthogonally, never diagonally. Two figures can never occupy the same space. When moving into a space with another figure, it instead moves over (leapfrogs) that figure. Leapfrogging over any number of adjacent figures is still considered 1 space of movement.
When a player leapfrogs over any number of enemy figures, they place their Attention token under their figure after completing the move. Each enemy that was leapfrogged attacks the player (see Attacking a Player, pg. 17). LOS is not required for enemies making these attacks as they are considered to be attacking the player as they were being leapfrogged.
Attention Token
Each player character has an Attention token with an Investigate side and an Alerted side. When a player makes noise or is seen by a Guard or Camera, this token is placed on the map. Depending on its side, Guard behavior will change.
Drawing Attention
Several effects will draw attention to a player's space. If a player draws attention, check for their Attention token and do 1 of the following:
- If the player's Attention token is not on the map, place it under their figure with its Investigate side up.
- If the player's Attention token is already on the map, move it to their space without changing its side.
White Dice: Any time a player rolls white dice and any exclamation results are rolled, their player draws attention to their space.
Noise Check: During a mission, players will make noise (intentionally or accidentally) which may draw Guards to that noise. At the end of each player's turn, if there is a Guard in their zone, they roll a black die for each Action token on their Noisy actions. If any exclamation results are rolled, the player draws attention to their current space.
Loud Equipment Actions: Actions on some equipment, such as guns, rifles, grenades, and missiles are LOUD actions and require the active player to place their Attention token under their figure after performing them.
Line of Sight (LOS)
In most cases, players, enemies, and other game elements require Line of Sight (LOS) when targeting another element. To determine if something has LOS, they must fulfill the following 2 conditions:
- If the figure or token has a facing, check if it is facing towards the row or column its target is in (components that don't have a facing, such as player figures or Laser Sensors, are considered to face all directions).
- Draw an imaginary box on the outer edge of both figures and/or tokens. There should be no obstacles anywhere within the box (such as walls or locked doors).
If both conditions are met, the figure has LOS to its target. NOTE: A Camera does not have LOS to its own space.
Obstacles: Obstacles are game elements that block both LOS and movement. These can include but are not limited to locked doors (A), trees (B), any feature in spaces surrounded by a red line (C), and walls indicated by either a red line or heavy black line (D).
Enemy and Token Line of Sight (LOS)
If a player is ever in LOS of a Camera or a Guard for any reason (even newly spawned or revived Guards), they are alerted and the player's Attention token must be placed under their figure. If the player begins a move in LOS of a Camera/Guard or moves through LOS of one as part of a move, place their Attention token under their figure after completing the move.
Enemies: Enemies are the Guards and Bosses that try to prevent the players from accomplishing their mission. They are always watching for signs of intruders and will become alerted if a player enters their LOS at any time during a Sneaking stage (see Line of Sight, pg. 9).
Enemy Facing: Enemies are facing the direction of the arrow on the base of their figure.
Cameras: Cameras are always watching for signs of intruders in the direction they are facing. If a Camera detects a player, a Guard, or a KO Guard token in its LOS, Guards will either be alerted or come to investigate (see Cameras, pg. 14).
Camera Facing: Cameras only face 1 direction at a time. This is indicated by the ORANGE or GREEN vision cone on their token edges, which correspond to the color of the faceup side of the Camera Facing token. Each Guard Order card will instruct players whether to flip the Camera Facing token, changing the direction of each Camera's Line of Sight.
Trap Tokens: Facedown Trap tokens are considered to face all directions. When a player enters LOS of a Trap token, flip it faceup. NOTE: If a Camera is revealed from a Trap token, orient it so that neither of the vision cones of the Camera are facing a wall.
Laser Sensors: When a player enters LOS of a Laser Sensor, they place their Attention token under their figure.
Attacking
All attacks are resolved with dice. The attacker must first ensure that their target is within Line of Sight (LOS).
- Player Attacks: The player rolls a number of dice indicated by the action or Equipment card they are using.
- Guard Attacks: The player being attacked rolls the dice indicated on the Guard dashboard. Guards will only attack players during the Enemy Phase or when a player leapfrogs over their figure.
- Boss Attacks: The player being attacked rolls a number of dice indicated on the Boss dashboard and any additional dice as a result of special rules or effects unique to that Boss.
- Defense: Compare the dice results from the attack against the target's Defense. For every result equal to or greater than their Defense, 1 damage is dealt.
NOTE: Some effects can damage both players and enemies that are not attacks (Explosives, environmental, etc.) and because no dice are rolled, there is no attacker.
Damage
When a figure is dealt damage, place Hit Damage tokens on their dashboard (for players and bosses) or next to their figure (for Guards). If a figure is dealt damage equal to or exceeding their health, they are defeated.
If a Guard is defeated, replace their figure on the map with a Dead Guard token.
If a player is defeated, they are Killed in Action (KIA) and fail the stage.
KO Damage
A special type of damage dealt by certain actions or attacks. When a figure is dealt KO damage, place 1 KO Damage token next to their figure for each KO damage. If a Guard is dealt KO damage equal to or exceeding their health, the Guard is knocked out.
If a Guard is knocked out, replace their figure on the map with a KO Guard token with its 2-star side faceup.
When a player deals damage but does not KO or defeat a Guard before the end of their turn, the enemy is alerted and the player's Attention token must be placed under their figure at the end of their turn.
NOTE: Enemies can be alerted even if they have no LOS to players.
If a Boss is dealt KO damage, it is treated as standard damage instead.
NOTE: A KO'ed Guard ignores damage from Equipment cards and cannot be attacked by players.
Special Abilities
The effects of special abilities can be found on Player dashboards, some Equipment cards, and Boss dashboards. As always, additional information can be found in their Codec entry.
Focus Tokens
Each character has a set of unique Focus tokens. Players may use any number of Focus tokens at no cost by flipping them from their active side to their inactive side (grayed out). Focus tokens that affect dice can be used by a player at any time they are rolling dice for themselves or an enemy targeting their figure. To refresh and flip a Focus token back to its active side, a player must perform the Focus action and pay the action cost shown on the inactive side of the token.
NOTE: Focus tokens that move player figures can only be used during a player's turn.
Character Specific Equipment and Abilities
Some Equipment cards unlocked by completing Stages can only be used by specific characters. If one of these Equipment cards shows a character's portrait on the front side of the card, only that character can equip it.
Snake
Actions
Silent Takedown: 2 Actions If Snake is behind an adjacent Guard, replace the Guard with a KO Guard token.
Focus Tokens
- Reroll any 1 die.
- +2 to the result of any 1 die.
- -2 from the result of any 1 die.
- Roll -1 die or Move 1 space.
NOTE: An exclamation result is not a number and cannot be modified by Focus tokens with +/- effects. However, they can be rerolled by reroll effects from Focus tokens.
Meryl
Starting Equipment Meryl may start each stage with the Light Assault Rifle and Handgun (.50 Cal). Start each Sneaking stage with the Disguise Reference card. Place the Disguised Meryl figure near her dashboard.
Actions
Gain Disguise: 2 Actions If Meryl is adjacent to a Dead Guard token or KO Guard token and her Attention token is not on the map, replace her figure with the Disguised Meryl figure.
Focus Tokens
- +2 to the result of any 1 die.
- +/-1 to the result of any 1 die.
- Gain 1 additional action this turn.
- Roll +1 die. Can be used before or after a roll.
Otacon
While Otacon lacks the combat skills that the other characters have, he's a whiz with computers and is the only character that can hack into terminals, gain System cards, and employ his unique abilities to manipulate the environment and enemies.
Starting Equipment Otacon may start each stage with the ADV Stealth Camouflage and Rations. Depending on the stage, when playing Otacon, a Stage Setup will instruct players to shuffle and place one of the System decks near his dashboard. There is a regular System deck used for Sneaking stages, as well as specific decks of System cards for Bosses when playing Otacon.
Actions
Hack Terminal (4 black dice): 1 Action Attempt to hack a Terminal in his or an adjacent space by rolling 4 black dice plus any additional dice from other effects. Otacon may perform this action again to reroll any number of these dice. Once the dice results match the dice combination on the Terminal, it is hacked. Flip the Terminal to its hacked side.
NOTE: Terminals have a dice combination on them, indicating they have not been hacked. Terminals range from level 2 to 5, indicating how difficult they are to hack. All Terminals must be hacked in a single turn. If Otacon moves away from a Terminal or his turn ends, all progress on hacking that Terminal is lost.
System Search: 1 Action While on or adjacent to a hacked Terminal, draw 1 System card. Otacon can have up to 3 System cards next to his dashboard at a time, returning 1 to the top or bottom of the System deck when a 4th is drawn.
Access Systems (black die + card): 1 Action While on or adjacent to a hacked Terminal with at least 1 System card faceup next to his dashboard, roll up to 4 black dice. Each rolled die may be allocated to an empty dice slot on any faceup System card with a value matching the die result. Allocated dice remain on System cards from round to round, but may be removed at any time, including to be rolled as part of another Access Systems action.
NOTE: The total number of black dice on System cards and those to roll cannot normally exceed 4. However, this total can be temporarily increased with abilities that grant additional dice.
EXAMPLE: Otacon's +1 black die Focus token temporarily increases the total black dice he can roll when performing Access Systems to 5. Along with the Hacker ability, this further increases the total by up to 2 black dice for a grand total of up to 5 black dice and 2 black dice if both are used.
Once all dice slots on a System card are covered, Otacon may resolve an effect at any time during his turn or when a condition on the System card is met. This effect can be equal to or less than the level of the hacked Terminal he is in the space of or adjacent to. After resolving the effect, remove all dice from the System card and return it to the bottom of the System deck.
DISCONNECTING FROM A HACKED TERMINAL If Otacon's figure moves away, or an effect causes him to disconnect, from a hacked Terminal, all dice from all System cards are discarded. Then, all System cards are returned to the top or bottom (player's choice) of the deck, in any order.
Focus Tokens
- +/-1 to the result of any 1 die.
- Reroll any 1 black die.
- +/-2 to the result of any 1 die.
- Roll +1 black die. Can be used before or after a roll.
Gray Fox
Starting Equipment Gray Fox may start each stage with Stealth Camouflage, High-Frequency Blade, and Arm Cannon.
Focus Tokens
- +2 to the result of any 1 die.
- +/-2 to the result of any 1 die.
- Roll -1 black die.
- Move +2 spaces when performing a Dash.
Player Turn Example
Meryl's Turn
Meryl spends 3 actions to Dash and 1 action to Sneak into the room.
Since Dash is a noisy action, 1 black die is rolled for each Dash action. An exclamation result was rolled, so Meryl's Attention token is placed under her figure.
Snake's Turn
Snake spends 1 action to Dash and 2 actions to perform a Combo Attack on the Guard.
Snake rolls 1 black die and 2 white dice. 2 of the rolled values are equal to or higher than the Guard's defense of 3. As Combo Attack deals KO damage, the Guard takes 2 KO damage and is knocked out.
Snake spends his Focus token to move 1 space. Then, he spends his last action to Sneak into the room.
As Snake performed a Dash this turn, he made noise and must roll 1 White die. The result is not an exclamation, so nothing happens.
Round Structure
Each stage is played through a series of rounds. Each round starts with the Player phase, during which players take their turns, and is followed by the Enemy phase.
Start of the Round
All players return all Action tokens to their available supply.
Player Phase
Players may take their turns in any order. However, a player must completely resolve their turn and perform all their actions before the next player begins.
PERFORM ACTIONS - Players perform actions by assigning their Action tokens to the actions on their Player dashboard, Equipment cards, and Special Action cards. Players may take the same action more than once but must pay its cost each time. Some actions cost more than 1 Action token to perform.
NOTE: Players are not required to use all their Action tokens during their turn.
NOISE CHECK - Players who performed any number of Noisy actions must perform a noise check at the end of their turn (see Drawing Attention, pg. 9).
Enemy Phase
The Enemy phase begins after all players have taken their turns. Depending on the stage type, the Enemy phase is resolved differently.
Boss Stage
In Boss stages, players get to battle the roster of iconic Metal Gear Solid Bosses. During the Enemy phase of a Boss stage, resolve the Boss's turn in the following way:
- Draw: Draw and resolve the top card of the Boss deck as instructed, following any additional rules for the stage as well as those on the Boss dashboard.
- End: After the Boss has fully resolved their card and any additional effects indicated on their Boss dashboard, their turn is complete. If neither the players nor the Boss have been defeated, begin a new round starting with the Player phase.
Sneaking Stage
In Sneaking stages, players use a combination of tactics, primarily stealth, to achieve the objectives and clear the stage. During the Enemy phase of a Sneaking stage, resolve the enemy's turn by drawing and resolving a Guard Order card from the top of the deck.
If the Game Over card is ever revealed, the game ends immediately as the players have run out of time and failed the stage.
Otherwise, resolve each section of the Guard Order card as instructed.
NOTE: During the Enemy phase of a Sneaking stage, many rules and effects will reference an active zone. A zone is active if at least 1 player figure or Attention token is in it.
Resolving a Guard Order Card
Section 1: Guard Action
Resolve the Guard action as follows:
Waken Guard (Active Zones): Remove each KO Guard token and spawn a Guard in its place. Then, flip all Dead Guard tokens to their 1-star side. NOTE: Players decide which direction Guards face when placing them, with the only restriction being that Guards cannot be placed facing obstacles such as walls and locked doors.
Radio-In (Active Zones): Guards report in. The Guard Count in each zone's Barracks represents how many Guards should be patrolling that zone. For each active zone, count the Guard figures. For each Guard less than the Guard Count in an active zone, spawn a Guard on the barracks icon in the barracks. NOTE: Dead Guard tokens and KO Guard tokens do not count towards the total Guard Count.
SPAWNING A GUARD Some effects may cause a Guard to spawn in a specific space. Place a Guard figure in that target space if there are no figures there. If it cannot be placed in that space, place it in an adjacent space that has no figures in it. If there are multiple adjacent spaces with no figures, the players choose which space to place it in. If a Guard is still not able to be placed because there are no eligible spaces or there are no Guard figures left in the supply, instead, take the top Guard Order card, reveal it, and place it at the bottom of the deck. NOTE: If you need to spawn more than 1 Guard, spawn each Guard one at a time.
SPAWNED GUARD FACING When a Guard figure is taken from the supply and placed on a facing-arrow icon on the map, the icon dictates the Guard's facing. Otherwise, the players may orient the Guard in any direction that is not facing obstacles such as walls or locked doors.
Lost Contact (All Zones): For every 3 Dead Guard tokens on the map, take the top Guard Order card, reveal it, and place it on the bottom of the deck.
Stay Alert (Active Zones): All players within 2 spaces of a Guard, without obstacles in-between, must place or move their Attention token (Investigate side) under their figure. If their Attention token (Alerted side) is already on the map, nothing happens.
Section 2: Cameras
Ignore this section if there are no Cameras on the map. If there are Cameras on the map, this icon will indicate whether the Camera Facing token will be flipped this Enemy phase or not.
NOTE: Cameras are always checking their LOS, so do not forget to check LOS for all Cameras when the Camera Facing token is flipped.
Section 3: Activate Guards
Activate Guards in all active zones, starting with the zone closest to the Guard Priority token. When a Guard activates, they become the active Guard and will do a variety of things during their activation that will depend on whether or not the Guard has LOS to a player, moves into a space with a token, and the mode that they are in. The Guard Priority token represents the top left corner of the map. The Guards in that zone will activate from top to bottom, left to right, starting with the Guards in the top row closest to the Guard Priority token. If there is more than 1 Guard in that row, then they will activate from left to right.
Guard Activation
Check LOS and Reaction
IMPORTANT! The active Guard ends their movement (see Ending Movement, pg. 15) after they either attack a player, resolve any Guard Reaction, or is unable to move any further.
- Check for LOS to a Player: Any time the active Guard has or gains LOS to a player, place the player's Attention token (Alerted side) under their figure if it is not already there. If there is more than 1 player in the active Guard's LOS, they attack the nearest player (see Attacking a Player, pg. 17).
- Check for Guard Reactions: Any time the active Guard is on any Attention token or Guard token (KO Guard/Dead Guard), they resolve a Guard Reaction (see Guard Reaction, pg. 17).
NOTE: An active Guard may find themselves in a position where they need to resolve an attack and a Guard Reaction at the same time. In this case, always resolve the attack first.
Determine Guard Mode
Check the following conditions to determine the active Guard's mode:
ALERT MODE: There is at least 1 Attention token (Alerted side) in the active Guard's zone.
INVESTIGATE MODE: The active Guard is not in Alert mode and is the nearest or tied for nearest Guard to any Attention token (Investigate side), or there are any KO Guard/Dead Guard tokens in their LOS or in LOS of a Camera in their zone.
PATROL MODE: The active Guard is neither in Alert nor Investigate mode.
The bottom portion of the Guard Order card shows the maximum number of spaces the Guard will move, unless they are required to stop. This could happen as a result of acquiring LOS on a player, moving into a space with an Attention token or Guard token, or running out of available spaces along the shortest path.
If the active Guard is in Alert mode, use the RED number.
In all other cases, use the BLUE number.
GUARD ROTATION WHEN FACING AN OBSTACLE If a Guard figure is blocked (facing obstacles such as a wall or locked door), rotate it to face the closest space from its current direction that is not blocked. If there is more than 1 such space, rotate it in the direction of the arrow on the Guard Order card until it is not blocked.
SHORTEST PATH Figuring out the shortest path is very important. Any time players need to determine the path a Guard takes to a space or when determining distance, the shortest path is always used.
The shortest path is the one with the fewest number of spaces between two spaces on the map that does not cross obstacles like walls or locked doors. Guards can also leapfrog over other Guards.
In some cases, there could be more than 1 path that has the fewest number of spaces. In those cases, the shortest path is the path that requires the fewest turns. If there is more than 1 path that has the fewest number of spaces and requires the fewest number of turns, the players may decide which path to use.
Any time an active Guard would move into the next space on the shortest path to their target space, they will turn to face the direction of that space. The Guard will ONLY move along this path, including while leapfrogging. If there are no available spaces on this path, the Guard MUST end their movement.
EXAMPLE: The Guard activates and goes into Alert mode as there is an Attention token (Alerted side) in their zone. The active Guard attempts to move into that space by the shortest path. They move 2 spaces forward and then turns to the left. The next space they would move into is a space with another Guard, and the active Guard checks if there is a space along the shortest path they can move into after leapfrogging. As Snake's figure is in the only space at the end of the leapfrog that would be on the shortest path to the Attention token, and 2 figures cannot occupy the same space, the Guard cannot leapfrog and ends their movement.
GUARD LEAPFROGGING Guards can leapfrog over other Guards but cannot leapfrog over player figures. When a Guard encounters other Guard figures, the active Guard must first check to see if there is a space for them to move into after leapfrogging, following all movement rules for the mode they are in.
When leapfrogging over Guards, the active Guard will face away from the last space they leapfrogged over. While a Guard may gain LOS to a player during a leapfrog, they must always complete the leapfrog first.
NOTE: This may cause the Guard to no longer have LOS to the player. The Guard will still end their movement (to radio their comrades).
ENDING MOVEMENT When an active Guard ends their movement, they will always face the next space of the shortest path, unless they have LOS to a player. If a Guard is facing obstacles such as a wall or locked door, they will find a new path. After ending their movement, if the Guard has not gained LOS to a player, they end their activation.
FINDING A NEW PATH An active Guard may need to find a new path when they would not be able to move further in the current direction, or when they end their movement on a corner icon. They will do this by turning either left or right to face a direction that has at least 1 unoccupied space they can potentially move into (e.g., around corners). If there are available paths both to the left and right, the active Guard will turn in the direction shown on the Guard Order card. If there are no paths to the left or right, the active Guard will turn in the direction on the Guard Order card until they face a path they can move into. If they have turned 360 degrees around without finding a path, they end their activation.
Alert Mode
When there is at least 1 Attention token (Alerted side) in the active Guard's zone.
The active Guard is in Alert mode. They will attempt to move into the space of the nearest Attention token (Alerted side) in their zone, moving spaces up to the RED number on the Guard Order card, along the shortest path (see Shortest Path, pg. 15).
EXAMPLE: The Guard activates and goes into Alert mode as there is an Attention token (Alerted side) in the zone. Since Snake's Attention token is the nearest, the active Guard will move toward it up to 5 spaces along the shortest path, according to the red number on the Guard Order card.
First, the Guard turns 180 degrees and move 1 space forward. Then, as there are a series of Guards in their path, they will check for a space to move into after the leapfrog. As there is, they move through each space with a Guard and rotates at the corner to face the next space. On reaching the empty space, they gain LOS to Snake, and end their movement, attacking Snake.
Investigate Mode
When the active Guard is the nearest or tied for nearest Guard to any Attention token (Investigate side), or there are any Guard tokens (KO Guard/Dead Guard) in LOS or in the LOS of a Camera in the zone.
The active Guard is in Investigate mode. They will attempt to move into the space with the nearest Attention token (Investigate side) in their zone, moving spaces up to the BLUE number on the Guard Order card, along the shortest path if they are the nearest or tied for nearest Guard to it. Otherwise, they will attempt to move towards the nearest KO Guard/Dead Guard token in their LOS or LOS of a Camera in their zone by the same means, instead.
EXAMPLE: The Guard activates and goes into Investigate mode. Although both Snake and Otacon's Attention tokens (Investigate side) are in the zone, the active Guard is not the nearest Guard to either token. However, they have LOS to a KO Guard/Dead Guard token and will move towards that space by up to 4 spaces by the shortest path, according to the blue number on the Guard Order card. The Guard moves 1 space and meets a series of 2 spaces with Guards in them. They check for a space to move into after the leapfrog, and does so, landing in the space with the token.
While the active Guard has moved 2 of the 4 spaces they can move, they immediately end their movement upon entering the space with the token and resolves a Guard Reaction.
Having ended their movement facing a wall, the Guard must find a new path. This causes them to turn to the left and gain LOS on Snake, making the player place Snake's Attention token (Alerted side) under his figure. Then, the Guard attacks Snake and ends their activation.
Patrol Mode
The active Guard is in Patrol mode. A Guard in Patrol mode does not have a target space that they are moving towards. Instead, they patrol their zone for any signs of intrusion, moving spaces equal to the BLUE number on the Guard Order card using the following rules:
The Guard will move in the direction they are facing as far as they can. If they would move into obstacles such as a wall or locked door, or there are no more available spaces in the direction they would move, the Guard will find a new path (see Finding a New Path, pg. 15).
- On a corner icon, regardless of movement remaining: Turn the Guard to face the indicated direction and continue their movement, if any.
- *On a visible corner icon with remaining movement: Ignore the icon and do not rotate.
- *On a visible corner icon having exhausted all available movement without gaining LOS to a player: The Guard will find a new path (see Finding a New Path, pg. 15).
NOTE: Locked door tokens cover corner icons in their space causing Guards to ignore them.
EXAMPLE: This Guard activates and is in Patrol mode, despite the 2 Attention tokens (Investigate side) in the zone (as they are not the nearest Guard to either) or the adjacent Guard token (as it is not in the Guard's LOS). Therefore, the Guard attempts to move forward using the blue number on the Guard Order card.
As they would move into a series of spaces with Guards, they check to see if they can leapfrog. Normally, they would leapfrog all the spaces ahead and turn left at the corner. However, as Snake's figure is blocking the path and there is not a space for them to move into, they cannot.
The Guard must now check to see if there is any point along the leapfrog where they can find a new path with a space to move into and continue their movement in Patrol mode. As there is, the Guard turns left from the first Guard's space turning just as if they were turning a corner. The Guard then continues moving in Patrol mode and encounters Otacon's Attention token (Investigate side), ending their movement and resolving a Guard Reaction.
Attacking a Player
The Guard attacks the nearest player in their LOS, according to the shortest path. That player rolls 2 black dice as indicated on the Guard dashboard, dealing 1 damage to the player for each roll equal to or greater than their Defense. Mark the damage by placing Damage tokens on their dashboard.
When a player takes damage equal to or greater than their health, that player is Killed in Action (KIA) and the players fail the stage. After resolving the attack, check to see if the Guard is on an Attention token or Guard token (KO Guard/Dead Guard). If so, proceed to Guard Reaction (below).
Otherwise, the Guard has completed their activation.
EXAMPLE: The Guard ends their movement and attacks Snake, rolling 2 black dice. This is compared against Snake's defense of 3. Just one die will deal damage to Snake. He takes 1 damage.
Guard Reaction
Draw the top Guard Reaction card from the deck. Resolve each Attention token and Guard token (KO Guard/Dead Guard) in the space as instructed by the Guard Reaction card, one at a time, from top to bottom, until there are no tokens remaining in the Guard's space or the Guard moves to another space due to an effect of the Guard Reaction card.
After resolving the Guard's Reactions, the active Guard ends their movement (see Ending Movement, pg. 15).
NOTE: Guards only react to tokens in their space during their activation.
End of Enemy Phase
After all Guards in an active zone have activated, move on to the next active zone until all Guards in all active zones have activated.
Once all Guards in all active zones have activated, the Enemy phase ends and the Player phase begins once again.
Enemy Phase Example
It is the Enemy Phase! The first portion of the phase wakes the Guards. This means all 2-star KO'ed Guard tokens in the active zone flip to the 1-star side, which happens to the 1 KO'ed Guard token on the map. If it had been already on the 1-star side, the token would be replaced by a Guard.
Following the Guard Priority token, the Guard nearest to it activates. Since this Guard is the nearest to Meryl's Attention token (Investigate side), they move 5 spaces along the shortest path towards the Attention token, according to the BLUE number on the Guard Order Card. While attempting to move to the Attention token along the shortest path, it will first gain LOS to Meryl, ending their movement. Meryl flips her Attention token to its Alerted side and places it under her figure.
The Guard attacks Meryl.
The Guard ends their movement and attacks Meryl, rolling 2 black dice. This is compared against Meryl's defense of 3. Both dice will deal damage to Meryl.
Meryl then uses 1 of her Focus tokens to reduce the value of 1 of the dice from 3 to 2. Since only 1 die is still equal or greater than Meryl's defense, she takes 1 damage.
Now that Meryl's Attention token (Alerted side) is on the board, any remaining Guards in the active zone that have not activated will move 6 spaces along the shortest path towards that token when they activate, according to the RED number of the Guard Order card.
The Guard moves 2 spaces, leapfrogs over the Guard in the hallway, and ends their movement facing Meryl. Note that the Guard started the activation in LOS to the KO'ed Guard token but ignores it as they are in Alert mode.
The Guard attacks Meryl.
The Guard then deals 1 damage to Meryl. Meryl has 2 health left.
Rules Summary
Player Phase
PERFORM ACTIONS – Spend Action tokens to perform Actions. Actions may cost more than 1 Action token to perform, and the same action can be performed multiple times.
NOISE CHECK – Roll a black die equal to Noisy actions performed.
Enemy Phase
Boss Stage
DRAW - Draw and resolve the top Boss card, following any additional rules for the stage and Boss dashboard.
END - If neither the players nor the Boss have been defeated, begin a new round starting with the Player phase.
Sneaking Stage
Draw and resolve the top Guard Order card. If the Game Over card is revealed, the game ends and players fail the stage.
Guard Order Card
Section 1: Guard Action
Waken Guard (Active Zones)
- Remove each KO Guard token and spawn a Guard in its place.
- Flip all Dead Guard tokens to their 1-star side.
Radio-In (Active Zones)
- If the number of Guards are less than the Guard Count, spawn Guards in the barracks, one at a time, up to the Guard Count.
Lost Contact (All Zones)
- For every 3 Dead Guard tokens on the map, reveal the top Guard Order card and place it on the bottom of its deck.
Stay Alert (Active Zones)
- All players within 2 spaces of a Guard must place or move their Attention token (Investigate side) under their figure.
- If their Attention token (Alerted side) is already on the map, nothing happens.
Section 2: Cameras
Flip the Camera Facing token and check all Camera LOS.
Section 3: Activate Guards
Activate Guards in all active zones, from top to bottom, left to right, starting with the Guards in the top row closest to the Guard Priority token.
IMPORTANT! The active Guard ends their movement after they either attack a player, resolve any Guard Reaction, or is unable to move any further.
Check the following conditions to determine the active Guard's mode:
- ALERT MODE: When there is at least 1 Attention token (Alerted side) in the active Guard's zone. The active Guard is in Alert mode. They will attempt to move into the space of the nearest Attention token (Alerted side) in the zone, moving spaces up to the RED number on the Guard Order card, along the shortest path.
- INVESTIGATE MODE: The active Guard is not in Alert mode and is the nearest or tied for nearest Guard to any Attention token (Investigate side), or there are any Guard tokens (KO Guard/Dead Guard) in their LOS or in the LOS of a Camera in their zone. The active Guard is in Investigate mode. They will attempt to move into the space with the nearest Attention token (Investigate side) in the zone, moving spaces up to the BLUE number on the Guard Order card, along the shortest path if they are the nearest or tied for nearest Guard to it. Otherwise, they will attempt to move towards the nearest Guard token (KO Guard/Dead Guard) in LOS or LOS of a Camera in the zone by the same means, instead.
- PATROL MODE: The active Guard is neither in Alert nor Investigate mode. The Guard will move in the direction they are facing as far as possible equal to the BLUE number on the Guard Order card. If they would move into obstacles such as a wall or locked door, or there are no more available spaces in the direction they would move, the Guard will find a new path.
- On a corner icon, regardless of movement remaining: Turn the Guard to face the indicated direction and continue their movement, if any.
- On a visible corner icon with remaining movement: Ignore the icon and do not rotate.
- On a visible corner icon having exhausted all available movement without gaining LOS to a player: The Guard will find a new path.
Attacking a Player
Attack the nearest player in LOS with 2 black dice. Then, check for Guard Reaction. Otherwise, the Guard has completed their activation.
Guard Reaction
Draw the top Guard Reaction card and resolve each Attention token and Guard token (KO Guard/Dead Guard) in the space. After resolving the Guard's Reactions, the Guard has completed their activation.
End of Enemy Phase
Once all Guards in all active zones have activated, the Enemy phase ends, and the player phase begins once again.