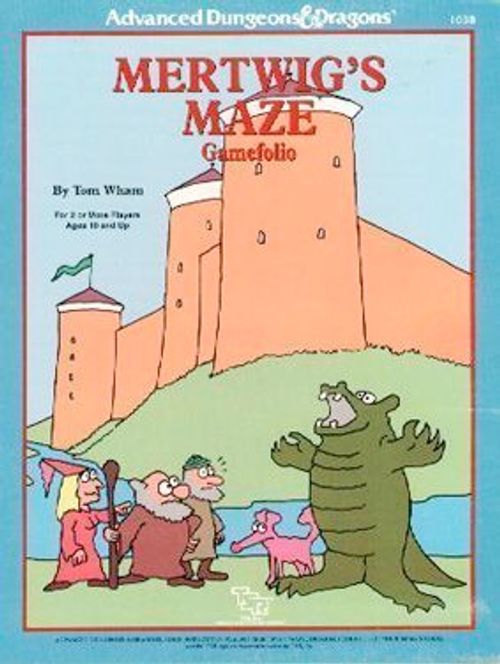
Mertwig's Maze
Mertwig's Maze Rulebook
Table of Contents
Table of Contents
Card Values
Attack Value: Each character and encounter has an attack ability. In combat, this number is added to a die roll and compared to the opponent's defense value. Cards with high attack values are very powerful in melee.
Magic Ability: Some characters and encounters know how to cast magic spells. The exact spells that the character knows are listed on the card. Each spell can be cast once per turn.
Defense Value: All characters and encounters have a defense value. A character with a high defense value is hard to wound in melee or with magic.
Starting Gold: Each player character has a certain number of gold pieces at the start of the game. You can spend or save your gold as you see fit.
Gold Pieces to Hire: You can hire a character to work for you by paying him this much gold.
Additional Encounters: Some encounter cards have a star printed at the top. This indicates that the encountered creature is accompanied by another encounter, and another encounter card is immediately drawn from the deck.
Good/Evil: Several characters are designated as good, and two of them are considered evil. Likewise many of the encounters are evil. This rather arbitrary ethical label serves several functions in the game. You cannot have both good and evil characters working for you at the same time in the game. A Protection from Evil spell neutralizes evil characters and encounters. A few characters become enraged in the presence of evil encounters.
Dead: This distinction is given to things like walking mummies, ghosts, and zombies — things that are dead, yet still wandering around causing trouble.
Slow: The giants and the giant snake are all slow. This gives you a bonus if you try to escape from them.
Treasures: This is an entry you want to see on every encounter you meet. If you defeat the encounter, you get this many treasures as fruits of victory.
Setup
Before you can play the MERTWIG'S MAZE game, you must separate and organize the various decks of cards. Ignore the arms and magic decks for now; they are only used with the optional rules, explained later.
The game requires a fairly large playing surface, as a lot happens off the game map. Elect one player to be the dealer and banker (although others can help). The encounter, treasure, and character decks need to be shuffled and placed face down near the game map. The player character deck (nine cards) is not shuffled, but is spread out on the middle of the board for all to see.
Before shuffling the encounter deck, be sure to pull out the "Death of the King" card and place it face up on the table next to the encounter deck. It is used to start the discard pile.
The dealer organizes the gold coins and wound markers neatly to form a bank. The seven adventure area cards and the Mertwig's Maze card are stacked in a convenient location, and you are ready to begin.
Selecting a Player Character
Each player assumes the role of one of the nine player characters in the game. The player character cards are arranged face up in the center of the board. Each player rolls a die. The high roller becomes the first player. The person to his left becomes the Encounter Player (this is explained later). The encounter player gets the encounter player card.
Beginning with the first player and proceeding clockwise around the table, each player selects a character card and the matching marker. Unused player character cards are set aside. Players put their markers on the game map in the Royal Palace space.
Your character card must always be kept face up on the table in front of you.
Gold and Hirelings
Beginning with the first player and proceeding clockwise, all players draw two cards from the character deck and place them alongside their player character cards. These are your first two hirelings. They will accompany you on your quest for fame and fortune. You don't need to pay these first two hirelings. The banker gives each player the starting gold listed on his character card.
A player's gold must always be kept on the table, near the character card. It can be stacked, but must be visible to all.
The Encounter Deal
The dealer now takes the encounter deck and deals four cards to each player. You may look at your own cards, but don't show your cards to the other players, as you will be playing them on one another. Keep your encounter cards face down until you play them against other players. These are the only cards you may keep secret.
Now, depending upon how many people are playing the game, the dealer counts out a number of encounter cards into a pile, turns it face up, and places it beneath the Death of the King card. This is the discard pile.
- For a 2 player game, count out 30 encounter cards.
- For a 3 player game, count out 20 encounter cards.
- For a 4 player game, count out 10 encounter cards.
- For more than 4 players, don't count out any cards.
The Game's Afoot
The first player now rolls the die and begins his first turn.
Taking a Turn
Beginning with the first player and proceeding clockwise around the table, each player takes his or her turn. A player's turn usually consists of a die roll followed by a move, whether you are in town, out of doors, or in an adventure area. Exactly what you do on your turn depends on where you are.
If you have an encounter, resolve it completely before ending your turn.
Moving in the Town
Roll one die and move any number of spaces, up to the amount you rolled, in a clockwise direction. You must move at least one space. If you roll a 0 you can move up to 10 spaces (there are no encounters in town). You can leave town through one of the three gates, or by paying one gold piece (to the bank) and leaving by water through the docks. You can start your move in town and finish it outside of town if you exit through a gate or the docks.
Do business in the space in which you have landed. If you land in a space with a red cross, you may heal a wound (if you have one). If you land in a space with one or more character symbols, you may draw that many character cards and decide whether you wish to hire them. The arms and magic symbols are only for use with the optional arms and magic decks.
Moving Outside the Town
Roll one die and move a number of spaces, up to the amount you rolled, in any direction. The different areas represent farmlands, swamps, forests, hills, lakes, rivers, and mountains. Each area costs one point to enter. You need not move the full amount rolled on the die.
More than one piece can be in an area at one time, except for adventure areas. If another player's piece is in an adventure area, you cannot land there.
Crossing a river costs one extra point. You may not travel along rivers; they are considered boundaries between spaces but are not spaces themselves. You cannot end your turn on a river.
You may enter a lake space only from an area containing a pier, and you must pay the boatman (the bank) one gold piece for the trip. You may leave a lake anywhere along the coast you wish or remain there at the end of your turn.
If you roll zero you do not move at all, but have an encounter instead.
If you land on one of the seven adventure areas, remove your marker from the board immediately and place it on the start space of that adventure area card.
Characters
A player character cannot succeed in the MERTWIG'S MAZE game without help. That's where the character deck comes to your aid. The deck consists of an assortment of people and intelligent animals who have come to the kingdom for fame and fortune, and are available for hire. You start the game with two hirelings (as they also are called) and you have the opportunity to hire more in town. Characters fight with you when you meet hostile monsters, and they want to be paid when you cash in treasure at the Royal Palace.
Collectively, your player character and the characters you hire are occasionally referred to as your Party.
Hiring Characters
In town, when you land on a space with a character symbol (or two or three), you may draw as many character cards as there are character symbols in that space. Examine these cards and decide whether you wish to hire each character to work for you. Each character's fee is printed on the card. The gold is paid to the bank.
Any character you hire is placed face up in front of you. Characters you can't afford or choose not to hire are discarded.
Paying Characters
To hire a character in town, you must pay him. There is one other time when your characters will want to be paid: when you cash in treasures at the Royal Palace in exchange for gold, you must pay each character in your party the amount shown on the card. Any character you do not pay at this time is discarded.
A Hireling is a character that joins you from the character deck. As the game proceeds, players accumulate treasures and hirelings. These cards must be arranged face up on the table in front of their owners.
Wounds and Death
Battles and events in adventure areas can cause your characters to be wounded.
When any character or encounter is wounded, place a wound marker on the card.
A player character can survive one wound. The wound marker stays on the player character card until the wound is healed or the character is killed. A second wound kills a player character.
A character or an encounter (from the deck) is killed by a single wound. The card is not removed until the end of the round, however; place a wound marker on the card so you don't forget.
After each round of combat, both you and the encounter player have an opportunity to heal wounds by using a Heal spell (or a magic potion; see Optional Rules). Also, when it is your turn, you can try to heal a wounded character instead of moving (don't even roll the die for movement). If a character is wounded by an event in an adventure area, you can immediately try to heal him. No character can cast more than one Heal spell per turn, even if it fails.
If a character is wounded twice (or three times, or four times) in one round of combat, mark each wound. A separate Heal spell is needed to cure each wound.
Any character with a wound marker on his card at the end of the round or turn is dead. Discard that character. A player character is dead only if he has two wounds at the end of the round or turn.
See How Magic Works for a more detailed explanation of the Heal spell.
Starting Over
If your player character is killed, you are out of the game. Discard all your holdings and return your gold to the bank. You may start fresh on your next turn. Select a different player character from the remaining cards, put your marker in the Royal Palace, collect your starting gold and your two hirelings, and roll the die.
Adventure Areas
Each of the seven adventure areas is a sort of small game in its own right. When you move your marker to one of these spaces on the map, remove your marker from the map. Find the appropriate adventure area card and set it on the table near you. Place your marker on the Start space on the card. On your next turn, you begin the adventure.
The movement rules for each area are different, so consult the specific rules printed on each card before proceeding. When you come to the Return to Map space, put the adventure area card away and return your marker to the map. On your next turn, you can move normally. You cannot re-enter an adventure area until the turn after you leave its map space.
You do not need to read the specific rules for an adventure area until you actually move to one.
Only one player can be in any one adventure area at a time. If another player is already in an adventure area, you cannot enter that adventure area space on the map. You may not re-enter an adventure area on the same turn that you leave it.
The seven adventure areas are:
Woods Whole — There is a mysterious hole in the middle of a spiral wood. Nobody knows why, but when you travel to the end, you become richer and relocated.
The Burial Mounds of Rhygn — Many years ago, when Mertwig was just a young prince, the armies of his father fought a long and bloody battle with the Rhygn warriors. Two days and a night the battle raged. In the end, the Rhygn were totally destroyed, and the kingdom secured. The bodies of the warriors were buried in two great mounds, along with their king. The mounds are now a holy place, filled with an air of pain and suffering. Travelers who venture beyond the circle of stones should be ready for anything.
Mystic Vale — It is rumored that a wizard or wizardess lives in this shady little valley. A trip through the vale is usually a rewarding experience.
The Toppled Temple — Long before the current inhabitants occupied the valley of King Mertwig, a mighty civilization once held these lands. Atop a small mound in the midst of the forest can be found a ruined temple that dates back to the "Old Ones." Little is known about what went on here (there are no archeologists in the kingdom), but today there are three mysterious doors. Each time someone goes in, he seems to exit (assuming he does exit) somewhat richer for the experience.
The Caves of Congor — In the side of a limestone cliff can be found these infamous caves. Long have they been hideouts for thieves, brigands, and other bad-type guys. Be careful if you enter; some of them may still lurk inside.
The Purple Castle — Once a mighty noble in Mertwig's court, Lord Purp has quitted the Royal Palace and lives a reclusive life with his family in his mountain castle. He is a rather strange recluse, as there always seem to be groups of adventurers and monsters wandering around in his home.
The Last Pyramid in the Sand — Beyond the mountains and across the desert lies the Last Pyramid in the Sand. Some say it was built by a great king of the Old Ones. Daring adventurers have entered and come back laden with riches, while others have never come back at all.
Mertwig's Maze
Although built by his great grandfather, King Mertwig takes credit for the family maze beneath the palace. All members of the royal family have the uncanny ability to find their way through the maze where others fail. The maze is also inhabited by the Mystic Musk Ox, a legendary beast of unknown origin. This creature keeps out those who do not belong.
You may only enter the maze if you have a Royal Treasure and a Royal Birthmark. The guards will only let you in alone, so you must discard all your hirelings before you enter the maze (you may keep all arms, items, gold, and treasure you have accumulated). Take your marker from the Royal Palace and put it on the start space of the maze card.
Only one player at a time can be in the maze.
In order to reach the king's chamber through the maze, the player must move through one of three barrier spaces. Two of these spaces are open; the third is blocked by an invisible barrier.
Before you enter the maze, the encounter player looks at the three maze cards. He places them under the edges of the maze, beneath the three numbers which correspond to the three places where the invisible barrier might be. Two cards indicate a clear path, one indicates a blocked path. You can look at the appropriate card when you reach a barrier space.
To move in the maze, roll one die and move up to that many spaces. You can take any path you wish and can backtrack or move less than the full amount rolled. After your second move in the maze, the encounter player puts the Mystic Musk Ox marker on the start space, rolls the die, and moves the full amount rolled. From now on, each time you take a turn, so does the ox.
If the ox lands on or passes through you, you are teleported out of the maze. The encounter player rolls one die and multiplies the result by two. He can then place your marker in any space that is that number of spaces away from the palace.
There are no encounters in the maze. If you roll a 0 you can move 10 spaces. You cannot pass through the invisible barrier. If you run into it, you must back up and go around it. Hitting the invisible barrier doesn't end your turn; you can use any movement points remaining that turn to back away from the barrier. If you reach the king's chamber, you win the game!
The onyx ox (a Royal Treasure) neutralizes the Mystic Musk Ox. If you enter the maze with this item the Mystic Musk Ox will not pursue you. You must still work your way through the maze, however, and reach the king's chamber before Mertwig dies.
The barrier cards can be rearranged whenever a new player character enters the maze.
Encounters
Frequently during the game you will have encounters. When this happens, the encounter player selects one of his encounter cards and places it face up next to your party.
You can encounter a wide assortment of monsters, strange things, unusual occurrences, friendly characters, and occasionally even unguarded treasure.
When Do You Have Encounters?
You have an encounter any turn when you roll 0 (10) for your movement. Instead of moving, you stay where you are and have an encounter. This applies whether you are in an outdoors space or an adventure area. There are only three exceptions: no one ever has encounters in town, or in Mertwig's Maze, or in an adventure area if the specific instructions for that adventure area state otherwise. In town or the maze, you can move up to 10 spaces if you roll 0 (or 10) for movement. In other adventure areas, follow the specific instructions for that area.
In addition, some spaces on the adventure area cards call for you to have one or more encounters when you land on them.
The Encounter Player
At the start of the game, one person receives the encounter player card, which identifies him as the encounter player. Being the encounter player is your way to throw good fortune and bad at the other players.
When someone has an encounter, the encounter player selects one of his face-down encounter cards and plays it.
Each player starts with four encounter cards. You cannot draw any new encounter cards until you have played all four from your hand. When all four are gone, draw four more.
As soon as the encounter player has played an encounter on someone, he passes the encounter player card to his left and that person becomes the new encounter player.
If you are the encounter player and your party has an encounter, you must immediately pass the encounter player card to your left. That person then plays an encounter on you!
In a two-player game, don't bother using the encounter player card. The other player is always the encounter player!
Special Encounters
Many of the encounter cards depict friendly, or possibly nonhostile, encounters. Follow the instructions on the card (if any) and if the encounter does not join your party, it is placed in the discard pile.
Most of the cards in the encounter deck are hostile — monsters or creatures that attack you on sight. If the card is not one on the following list, proceed to combat.
The Dreaded 20 Foot Pit: Roll a die and multiply the result by two. Repeat this once for each member of your party, including your player character. If the result exceeds the character's defense value, the character is wounded.
Lady Philippa: She joins your party and rewards you with a treasure if you proceed directly to the Last Pyramid in the Sand without stopping in the town or any other adventure area.
The Gryphon: Roll one die. On an even number the gryphon goes away. On an odd number it attacks your party; proceed to Combat.
The Unicorn: If you have at least one female character in your party, the unicorn joins your party. Otherwise, proceed to Combat. If the unicorn joins the party and the only female is discarded, discard the unicorn also.
The Gypsy King: Roll the die. On an even number he joins your party. On an odd number, he goes away.
The Mystic: This wise old man heals one wound (if you have one) or gives you a gold piece and wanders off into the sunset.
The Blatant Beast: This denizen of literature is ever in search of a good tale or rhyme. You must tell it a tale. Roll the die. If the result is even, he likes your recitation, gives you a treasure, and leaves. If the result is an odd number, proceed to Combat.
The Sphinx: Riddles are his game, and if you can solve one, a treasure is yours. Roll the die. If the result is even, he likes your answer, gives you a treasure, and leaves. If the result is an odd number, proceed to Combat.
The Forest Baker: Play his game of chance! You and the encounter player each conceal a die on the table under your hand. If the numbers match, you win a treasure from the deck. You have three chances to beat the baker.
Oops! Move the party one space: The encounter player moves your marker one space in any direction of his choice. If this causes another encounter, resolve it. If this card comes up in combination with any other hostile card that requires combat, ignore this card; do not draw another card to replace it.
Pigment of Someone's Imagination: Nothing happens!
The Magic Plant Spike: This is an item which you may keep. If you take it to the Tallest Tree in the Forest and stick it in the ground near the tree's roots, the tree rewards you with a treasure (discard the spike and draw one treasure card).
The Glowing Rock: This is an item you can keep. If you take it to the Thing That Fell from the Sky and bury it in the center of the crater, a treasure appears magically (discard the rock and draw one treasure card).
The Granite Toenail: This is an item you may keep. If you take it to the Collossus of Maurg and return it to the toe of the great statue, you will be rewarded with a treasure (discard the toenail and draw a treasure card).
The Eagle's Eye: This is an item you may keep. If you take it to Eagle Rock and insert it in the socket of the great stone bird's eye, you will be rewarded with a treasure (discard the eye and draw one treasure card).
The Talisman of the Dead: This is an item you may keep. If you take this magic charm to the Boneyard and recite the words inscribed on the bottom, you will be rewarded with treasure (discard the talisman and draw one treasure card).
Unguarded Treasure: Take one card from the treasure deck.
Friendly Character Joins You: Take the top card from the character deck and add it to your party (do this first if you are also involved with a hostile encounter).
All special encounters must be resolved before combat. In some cases this means determining whether the encounter is hostile or friendly and whether it joins you. An item which you keep or an unguarded treasure does not become yours until you defeat any hostile encounters present.
"Oops" is disregarded if there is a hostile encounter present. The Death of the King does not occur until after you have defeated or run away from any hostile encounter present.
Multiple Encounter Cards
It is possible to find your party facing several hostile opponents. If the card played by the encounter player has a star printed at the top, that encounter is not alone! Draw the top card from the encounter deck and place it next to the card already played. If this one has a star, too, continue drawing additional cards until an encounter card without a star is drawn and played. If the card has two stars, draw two additional cards.
Combat
When your party meets a hostile encounter, you must fight it. Combat is resolved in the following manner.
- The encounter player places the encounter card (or cards) on the table opposite your party. All special encounters are resolved first, one at a time.
- All remaining encounters should be hostile, bent on attacking the party. Both you and the encounter player decide what spells your characters will cast (if any). Dice are then rolled and the results of the spell(s) are determined. Any characters or encounters with enough wounds to kill them are set aside (but not discarded yet).
- Match each attacking encounter card with at least one character from your party. No more than two characters can be paired against any one encounter card. Roll dice to resolve melee and place wound markers on wounded characters or encounters. Any cards with enough wounds to kill them are set aside (but not discarded yet).
- You now have the chance to escape from the battle, if things don't seem to be going well. If you escape, you collect no fruits of victory and all attacking encounter cards, as well as any cards recently killed (with wound markers on them), are discarded. No healing is allowed. The battle and your turn are over. The encounter player can never try to escape.
- Both you and the encounter player can try to heal any character who was wounded in this round of combat. Any character with a heal spell can try to heal one wound. Killed characters who are not healed at this time are discarded.
Combat continues in this manner until all hostile encounters are dead or have run away, or until the party is all dead or has escaped.
Casting Spells
As soon as the encounter player finishes placing his cards, both you and he must decide which of your characters (if any) will cast spells. If you have no magic-using characters, you may not cast spells. If a character casts a spell at this time, he may not roll an attack die during the melee which follows!
A magic-using character or encounter can cast one or more spells during a battle. Each spell a character knows (listed on his card) can be used only once during a given battle. If the spell is not an area effect spell, you must specify its target.
The encounter player announces his spells first. After all of his spells and targets have been declared, the encounter player rolls a die for each spell and determines the result. You then do the same for each spell you are casting. Even though the encounter player resolves his spells first, all spells are considered to be cast at the same time, so results do not take effect until after both players have cast their spells. See How Magic Works for details on the spells.
Characters who were wounded or killed are set aside, but not yet discarded. Encounters which ran away as a result of a "Scare the Dead" or "Fear" spell are also set aside. Characters from your party which ran away are discarded immediately.
Melee
Once spell casting is finished, the player matches at least one character from his party against each attacking encounter card for melee (hand-to-hand combat). No more than two characters can be paired against any one encounter card.
If there are more encounter cards than characters in the melee, then the encounter player matches one or two encounter cards against each of your character cards. The side with the most cards in the melee always gets to decide who attacks who. Cards that cast magic this turn can be attacked but do not roll an attack die during melee.
When pairing cards, you can't double up against any card unless every other card has at least one opponent. Any cards that are not paired with an opponent are not involved in the melee.
Once all pairings have been made, the encounter player rolls one die for each of his cards in the melee. This is the Attack Die Roll. Add the result of your attack die roll to the attacking card's attack value. If the total exceeds the target's defense value, the target is wounded. Place a wound marker on it.
You then roll an attack die for each of your characters in the melee.
Combat is simultaneous, so no results take effect until both players have rolled all of their attacks.
Wounds
A die roll of 1, no matter what the attacker's attack value is, always misses the target. A die roll of 0, no matter how small the attack value, always wounds the target. Place wound markers on all wounded characters and encounters.
If a character or encounter is paired with two opponents, only one of them can be attacked. This decision must be made before rolling the die.
If an encounter is paired up against a hireling and a player character, the encounter must attack the hireling. During melee, a player character can be attacked only if it is the only card in that pairing.
If all of the encounters are killed, you have won the battle. You can try to heal any wounded or killed characters and then proceed to the Fruits of Victory. If your entire party, including your player character, has been killed, you are out of the game! (see Starting Over).
Escape
After melee is finished and wounded characters have been set aside, characters have a chance to escape from the battle. If you don't wish to escape, skip this step.
If you wish to escape, you and the encounter player both roll a die. If you roll the higher number, the battle is over and all living members of your party escape. You receive no Fruits of Victory, and all encounter cards and any killed or sleeping characters are placed in their respective discard piles.
Certain characters allow you to add one to your escape die roll. Some encounters (giants and the giant snake) are very slow; if they are in the battle, the encounter player must subtract one from his escape die roll. These bonuses and penalties are cumulative.
If you roll less than or the same number as the encounter player, you fail to escape. Proceed to "Healing."
Your marker remains in the same space after escaping from a battle.
Healing
If either you or the encounter player have wounded or killed characters, you can try to heal them now. Only a character with a Heal spell can try to heal someone. If you have none, no healing can be done.
Each Heal spell can be used only once per turn. Any killed character that is not healed immediately is placed in the discard pile. Killed encounter cards that aren't healed are removed from the battle, but are not yet discarded. If you win the battle, you'll want to know how many treasures you get as Fruits of Victory.
If only one side has cards still in the fight, the battle is over; proceed to Fruits of Victory. If both sides still have cards in the fight, combat continues; go back to Spell Casting and repeat the steps.
Fruits of Victory
Once you have killed or scared away all of the attacking encounters, you have won the battle and are entitled to your Fruits of Victory. Listed on the bottom of each encounter card is the amount of treasure you receive for defeating that character or monster.
Draw one treasure card from the top of the treasure deck for each treasure listed on defeated encounters. If no treasure is listed, you receive no treasure for defeating that encounter.
Any special encounter cards that were set aside earlier, such as unguarded treasure or items, now become yours. All defeated encounter cards are then discarded.
Magic
There are two types of magic in the game: magic spells, which can only be used by characters and encounters with magic ability; and magical treasures, which can be obtained from the treasure deck and are generally usable by all characters.
Magic Ability
Four of the player characters and many of the characters and encounters have magic ability. This is indicated by a list of magic spells which the character can cast. The list is printed on the character or encounter card. A magic-using character can only cast the spells he knows (those listed on his card) and each spell can be cast only once per turn (which means only once per battle).
To cast a spell, announce which character is casting a spell, which spell he is casting, and who or what is the target of the spell. Then roll a die. The number rolled is multiplied by the spell's multiplier. If the result exceeds the defense value of the target, the spell succeeds. If the result equals or is less than the defense value of the target, the spell fails.
When casting spells, a roll of 1 always means failure. A roll of 0 (10) always means success (no matter how large the target's defense value is).
Area effect spells can affect all opponents, but you must roll the die separately for each target.
Magical Treasures
Nine of the 34 treasures are magical. These can only be obtained in the adventure areas or by defeating an encounter that has a treasure. Most can be used by any character. Any treasure, including magical ones, can be exchanged for gold at the Royal Palace.
When a character uses a magical treasure, it is placed underneath his card so that the name and numbers are still visible. If a magical treasure has an attack or defense value, this is added to the appropriate value of the character using it.
Only characters with magic ability can use magic wands. Only a cleric, monk, or druid can use a holy symbol. Within these restrictions, you can shift a magical item from one character to another after each round of a battle (see Combat). A character can carry and use numerous magical treasures at the same time.
For example, a character with the Invisible Ring (+3 defense) and the Sword of Snyd (+3 attack, +2 defense) adds three to his attack value and five to his defense value.
Fredgear's Magic Wand: This device can either increase its user's attack value by one or add one to a spell effect die roll (before multiplication). Only characters with magic ability can use the wand, and only one of its effects can be used per round.
Garathy's Shield: This ancient shield adds three to its owner's defense value.
Helm of Power: The helmet was crafted by master wizards, and increases both its wearer's attack and defense values by two.
Holy Symbol of Anabachaz: The power in this artifact increases the bearer's defense value by two or adds two to his spell effect die roll (before multiplication). Only one of these effects can be used per round. Only a cleric, monk, or druid can use the holy symbol.
Invisible Ring: Using this ring increases the character's defense value by three.
Mithril Breastplate: This magnificent armour, built by a long-lost clan of dwarves, adds four to its wearer's defense value.
Sword of Snyd: The mighty warrior Snyd left behind a sword that adds three to both the wielder's attack and defense values.
Wand of Polyplox: The Stradivarius of magic wands, Polyplox's masterpiece can increase either its user's attack value or magic die rolls by three (before multiplication). Only one of these effects can be used per round, however, and only characters with magic ability can use the wand.
War Club: Although it appears simple and crude, this mighty weapon increases the wielder's attack value by four.
The Onyx Ox is not specifically a magic treasure, but helps you get past the Mystic Musk Ox in King Mertwig's Maze.
How Magic Works
The following descriptions need only be referred to when you actually cast a spell or use a magical item. Skip over them if you are just learning the rules.
Charm (x2): Pick any one opposing character, roll a die, and multiply the result by two. If the final result exceeds the defense value of the target, that character joins your party. Place it alongside your character. It will remain with your party until it either runs away, is killed, or you let it go. A charmed encounter does not need to be paid when you cash in treasure at the Royal Palace. If you charm an evil encounter, any good characters in your party are discarded immediately, or vice versa. If the encounter player successfully charms a character away from a party, the charmed character becomes a hostile encounter and must be defeated. A charmed character or encounter becomes a member of the opposing group in all respects. Only another Charm spell can bring it back to its original group.
Fear (x2, area effect): One at a time, point to each opposing character and roll a die, multiplying the result by two. If the final result is greater than the defense value of the target, it flees from the combat. Encounters which flee leave their treasures behind; you can collect these treasures if all of the encounters are defeated. Characters in your party who flee are discarded. If your player character flees, the encounter is over and the encounter cards are discarded (no treasure is gained if you flee). The entire party flees with your player character.
Scare the Dead (x2, area effect): One at a time, point to each opposing dead character and roll a die, multiplying the result by two. If the final result is greater than the defense value of the target, it flees from the combat. Encounters which flee leave their treasures behind before being placed in the discard pile. "Dead" refers to such encounter types as ghosts, mummies, and zombies.
Sleep (x2, area effect): One at a time, point to each opposing character and roll a die, multiplying the result by two. If the final result is greater than the defense value of the target, it falls asleep for the next two rounds of combat. Turn the card sideways to indicate that the character or encounter is asleep. While asleep, a character or encounter may not cast spells or attack. It can be attacked as though it was awake, however. If you escape from a combat while members of your party are asleep, the cards of the sleeping members are discarded.
Fireball (x2, area effect): One at a time, point to each opposing character and roll a die. If the final result is greater than the defense value of the target, it takes one wound. Place a wound marker on the target.
Heal (x2): Select any wounded character as your target. Roll one die and multiply the result by two. If the final result is greater than the defense value of the target, one wound marker is removed from the target. The target's defense value is not increased for armour or magical treasure.
A Heal spell can also be used any turn instead of rolling a die for movement, if you have a wounded member in your party. You must, of course, have a character in your party who knows the Heal spell. The attempt at healing constitutes your turn whether successful or not.
If a character becomes wounded in an adventure area, you may try to heal him immediately. Remember, a Heal spell can be cast only once per turn. However, a character can cast a Heal spell even if he cast another spell in combat this round.
Invisibility (x3): Select the opponent with the largest defense value. This is your target. Roll one die and multiply the result by three. If the final result is greater than the defense value of the target, the party has escaped and the encounter is over. Discard any surviving encounter cards. You do not collect treasure if you escape from an encounter.
Lightning (x3, area effect): One at a time, point to each opposing character and roll a die, multiplying the result by three. If the final result is greater than the defense value of the target, it takes one wound. Place a wound marker on the target.
Evil Protection (x3, area effect): One at a time, point to each evil character (opposing and friendly!) and roll a die, multiplying the result by three. If the final result is greater than the defense value of the target, it is entranced and can do nothing for the next two rounds of combat. Turn the card sideways to indicate that the character or encounter is entranced. While entranced, a character or encounter cannot cast spells or attack. It can be attacked, however, as though it was awake. If you escape from combat while a member of your party is entranced, that character's card is discarded.
Magic Bolt (x4): Pick one opponent as your target. Roll one die and multiply the result by four. If the final result is greater than the defense value of the target, the target is wounded.
When using any spell, a roll of 1 means failure. A roll of 0 (10) means success, no matter how large the defense value of the target.
Treasure
The deck of treasure cards is your key to victory in the MERTWIG'S MAZE game. The only way to get more gold to spend is to gather treasures and cash them in at the Royal Palace. In addition, if the king dies, the player with the most gold and treasure wins.
Treasures are obtained in two ways: as the Fruits of Victory for defeating hostile encounters, and lying about in any of the seven adventure areas.
Each treasure card you obtain must be placed face up in front of you near your party. Nine of the cards represent magical treasures which may be useful to your party.
Converting Treasures to Gold
Printed on each card is its value in gold pieces. You may not spend a treasure in town or use it as a bribe unless you first convert it to gold. When you land on the Royal Palace space in town, the chancellor of the exchequer gives you gold (from the bank) for each treasure you choose to turn in.
Put cashed-in treasures in the discard pile. The two smallest treasures — six and 10 gold pieces — are the only treasures that need not be taken to the Royal Palace. If you draw one of these, collect the gold from the bank immediately and discard the treasure card.
Royal Birthmarks
Among the treasure cards are five royal birthmark cards. No player can ever have more than one royal birthmark card. If you have a royal birthmark and draw another one, you must immediately discard one and draw the next card from the top of the treasure deck. If this, too, is a birthmark, keep drawing and discarding until you get a treasure.
Whenever a birthmark card is discarded, all treasure cards in the discard pile are shuffled back into the treasure deck. This gives every player a chance to obtain a royal birthmark.
A player can never lose or give away a royal birthmark once gained, unless his player character dies and he starts over.
Royal Treasures
Seven of the treasure cards are royal treasures, marked with a large letter "R" at the top. To prove yourself an heir to the throne, you must obtain a royal birthmark and at least one royal treasure. Show these to the guards at the entrance to the maze, and you may enter. Royal treasures may also be cashed in for gold, like any other treasures.
The gold locket (a royal treasure) is broken in half and appears on two cards. Each half is worth a few gold pieces, but you must have both parts for it to count as a royal treasure.
Winning the Game
There are two ways to win the game.
- Obtain a royal birthmark and a royal treasure and find your way through the maze to reach the King's Chamber.
- Have the most treasure and gold when the king dies. The king dies when the "Death of the King" card is drawn. If you are using the optional arms and magic decks, arms and magical items are counted, too.
Strategy
Although no one strategy guarantees success, the following few suggestions are offered.
In the beginning, spend all your gold hiring as many characters as you can. Even an inexpensive little guy is a body who gets a chance to roll a zero and can take a wound.
By all means hire Marlduk or Owlswil if you get the chance. Their ability to heal characters is a definite advantage, especially if you are not using the optional rules.
If, late in the game, you have lots of wealth but no birthmark or royal treasure, go to the adventure areas. These use up encounter cards faster than wandering around, and this increases the chance that the "Death of the King" card will be drawn.
Optional Rules
The following rules can be added at your discretion. They add more flavor and complexity to the game, and also lengthen the playing time.
Extended Life
Each character and encounter is now killed only upon receiving two wounds. This rule makes Heal spells much more important and opens the possibility of returning to town to seek out the hospital and the temple for healing.
A player character can survive two wounds and is killed only upon receiving a third wound.
Arms and Armour
The arms deck is added to the game. No player begins with any arms. However, when you land on a space in town containing one or more sword symbols, you can draw that many arms cards and have the option to buy any or all of the cards drawn.
Arms and armour can be assigned to any member of your party. Simply place the arms card beneath the character card so that you can still read the attack and defense values at the top. The attack value of a weapon card is added to the attack value of the character. Armour increases the character's defense value.
Use some common sense with arms and armour. A character can use only one weapon, wear only one helmet and one breastplate, and carry only one shield in combat. Surplus arms can be kept face up with your treasures.
Armour helps defend a character against the spells Fireball, Lightning, and Magic Bolt. All other spells are calculated against the basic defense value of the target character, no matter what that character is holding or wearing. Armour does not defend a character against a pit, trap, or snare, either.
At the beginning of a battle, you can decide what arms each member of your party is carrying. You can shift arms from one character to another at the beginning of any round of combat (before spell casting), but not between spell casting and melee.
If an arms-bearing character is killed, you can recover and reassign the card at the beginning of the next round of combat. If an arms-bearing character runs away from a battle as a result of Fear (a magic spell), the arms card is discarded. If an arms-bearing character is Charmed into joining the enemy, he takes his arms with him (discard at the end of the battle).
Missile Weapons
This rule can only be used if you are using arms. You may, if you wish, further complicate battle by considering the sling, crossbow, and bow to be missile weapons. This adds a missile fire phase to combat which is resolved after spell casting and before melee.
Only a character armed with a sling, crossbow, or bow can use missile fire. Any encounters killed by missile fire are set aside before melee. A character who fires a missile weapon cannot also attack during the following melee (he has already made his attack). A character who cast a spell during spell casting cannot make a missile attack. You can also use the dagger as a missile weapon. If you use it as such (by throwing it), it is discarded.
Missile fire is resolved the same as melee, but the target cannot fire back! (No encounters have missile weapons.) In addition, any number of characters can fire at any one target.
To resolve missile fire, declare your target and roll the die. Add your character's attack value and missile weapon value to the die roll. Compare the total with the target's defense value. If the defense value is exceeded, the target is wounded.
Magic Cards
The magic deck can also be added to the game. No player begins with any magical items. However, when you land on a town space that contains one or more scrolls, you can draw that many magic cards and have the option to buy any or all of the cards drawn.
Magical items are kept near your party like treasures. They need not be assigned to any particular character. A character does not need to have magic ability to use an item listed on a magic card. Most magical items are for use during battle, but a couple (the lucky charm and the scroll of teleportation) can be used at other times.
A magic card is discarded after use (you can only use it once).
Magical Items in Combat
A character who uses a scroll of fear or a scroll of charm is considered to have cast a spell, and cannot attack again during missile fire or melee. These scrolls function exactly the same as the spells of the same name.
A character who drinks a bottle of courage during spell casting can still attack during missile fire or melee (but cannot cast a spell). A bottle of courage temporarily increases a character's attack and defense values. Place the bottle card under the character so that the numbers are visible. The bonuses last any number of rounds, until the end of the current battle.
Healing potions are used during the healing phase of combat. One healing potion cures one wound. More than one potion can be applied to a character. Healing potions can also be used any turn in place of a movement die roll.
A smoke bomb must be used during the escape phase of combat. A smoke bomb adds two to your escape die roll. You can use more than one bomb at a time, but you only get one chance to escape after each round of battle.
The teleportation scroll can be used during the escape phase, in which case your escape is successful. The scroll can also be used any turn instead of rolling a die for movement. To teleport, roll one die and move your colored marker exactly that number of spaces in any direction you choose. Do not count anything extra for crossing rivers and do not pay any gold to cross a lake. Teleportation movement takes place only out of doors and in town; you cannot use teleportation to move to a space inside an adventure area. If you teleport while in an adventure area, place your marker on the game map and then start moving. If you roll a 0 when teleporting, you move 10 spaces and do not have an encounter.
Keys can be used at any time to open a locked door in any adventure area.
You can use a lucky charm any time you roll a die for any reason. The charm adds or subtracts one from the result as you see fit. You can see the result of your roll before using the lucky charm.
Varying Terrain Costs
Instead of paying one point for each area entered on the game board, it costs two points to enter a swamp, woods, or hill space, and three points to enter a mountain space. This increases the value of teleportation (teleporting still costs only one point per space) and gives more meaning to the different terrain types. However, a player character token can always move one space, regardless of the die roll (unless it was 0 and an encounter occurred).
Adventure areas and special areas (those printed in black and white) always cost one point to enter.
Attacking Other Players
Don't use this rule unless you have tough skins. It tends to bruise egos. You are now allowed to use your party to attack other players' parties.
You can land in the same space as another player (but only one player can be in an adventure area at a time). When you land in the same space as another player, you can try to find his party. Both you and the other player roll a die. If you roll higher, the other player has been found. Bonuses to escape die rolls apply to this roll! If you fail to find the other player, nothing happens.
Once you find another player's party, you have combat with one another just as you would with an encounter. You may, of course, negotiate bribes, ransoms, and blackmail rather than fight.
You can never attack another player while in town.