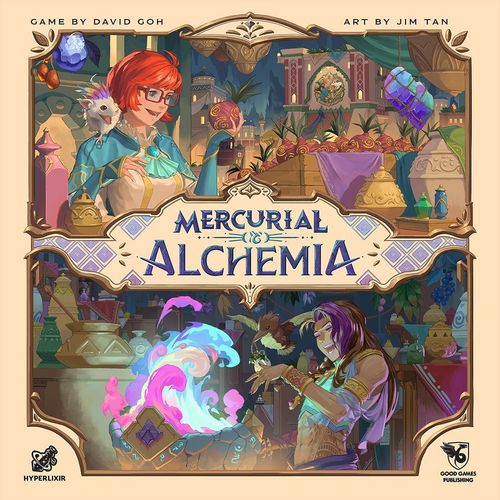
Mercurial: Alchemia
Mercurial: Alchemia Rulebook
Table of Contents
Table of Contents
Components
Main board
- Bazaar board
- 4 Shop tiles
- 4 Rune tiles
- 4 Favour tiles
- Guild structure
General pieces
- Guild assembly guide
- 4 Runalith structures with standees
- 4 "Draw 5" upgrade tokens
- 4 "Infuse 2" upgrade tokens
- 6 Alchemist tiles (double-sided)
- 6 Arcana tiles (double-sided)
- 20 Bonus tiles
- 24 Catalyst tokens (double-sided)
- 24 Reagent tokens (double-sided)
- 28 Elemental dice
- 80 Market cards (blue-edge)
- 32 Vilethorn cards (red-edge)
- 14 Echolily cards (yellow-edge)
- 10 Objective cards
- 1 Runalith Chart tile
- 82 Shell tokens (34 of 1 Shell, 24 of 5 Shells, and 24 of 10 Shells)
- First player marker
- First-to-end bonus token
Used only in solo or 2-player games
- Solo rulebook
- 10 Rival cards
- Rival base tile
- Rival scoring tile (double-sided)
Player components
Each player's components come in their player colour:
- 1 player board (double-sided, 4 total)
- 9 Starter cards (grey-edge, 36 total)
- 1 player token (4 total)
- 4 Base Blight markers (1 per player)
- 12 Silversalt tokens (3 per player, double-sided)
- 1 Snail token (4 total)
- 1 Arcana token (4 total)
- 8 discs (32 total)
- 4 "Brew ∞" upgrade tokens (1 per player)
- 4 player aids (contains guides & appendices; 1 per player)
- 4 Advanced class guides (1 per class)
All players begin with an identical set of 9 Starter cards. Check the top and bottom right parts of each card for player colour, or the numbers on the bottom left corner. Teal player's cards range from 301-1 to 309-1, brown player's are 301-2 to 309-2, and so on.
Setup
Board setup
-
Place the Bazaar board at the centre of your play area.
-
Place the 4 Favour tiles on the marked spaces near the bottom of the Bazaar board.
- If this is your first game, place each tile onto the space marked with its matching letter and side number (A1, B1, C1, and D1).
- In later games, flip the tiles to a random side, shuffle them and distribute them at random.
Letter and side numbers can be found on the corners of component art or frames.
-
Insert the 4 Shop tiles into the spaces along the bottom edge of the Bazaar board.
- First game: Use sides A1, B1, C1 and D1, and place them in that order from left to right.
- Later games: Flip the tiles to a random side and place them in the A, B, C and D order from left to right.
-
Place the 4 Rune tiles along the bottom of each Shop tile.
- First game: Use sides A1, B2, C2 and D1, and place them in that order from left to right.
- Later games: Flip 2 random tiles to their "1" side and the other 2 to their "2" side, then shuffle and place them randomly with the Shop tiles.
-
Place the 4 "Draw 5" upgrade tokens, the 4 "Infuse 2" upgrade tokens and the First-to-end bonus token on the marked spaces of the Bazaar board (above the 5, 10 and 25 spaces of the Prestige track respectively).
-
Assemble the Runaliths onto standees. Place them onto the centre of each Rune tile with matching colours. (Runaliths are cosmetic, but have optional gameplay attached to them; see Advanced Content section on pg 26.)
Player setup
- Each player chooses one of four available player colours and takes its player board. Flip the boards to side "A."
- All copies of board "A" are identical and are recommended for learning the game. Advanced classes can be found by flipping the boards to its numbered side (1-4). We recommend playing these only after you are familiar with the game (more in Advanced Content section on pg 26).
- Each player takes the following and places them on their player boards as indicated on the player setup illustration:
- a) 1 random Alchemist tile and Arcana tile. Flip them both to the numbered "A" side and insert them to the left and right sides respectively.
- b) 1 Snail token (based on colour)
- c) 1 Arcana token (based on colour)
- d) 8 discs (based on colour). There will be 2 remaining discs, set one aside for now and return the other to the box.
- e) 1 Base Blight marker
- f) 1 Catalyst (flipped to colourful refreshed side)
- g) 1 Reagent (flipped to colourful refreshed side)
- h) 2 Elemental dice (flipped to grey Void face)
- i) 1 "Brew ∞" upgrade token
- j) 1 player aid
- k) 15 Shells (consisting of two 5 Shell tokens and five 1 Shell tokens)
- First game: Take 20 Shells instead.
- l) 3 Silversalt tokens (Advanced content, explained more on pg 25)
- First game: Return these to the box instead.
- Each player creates their starting terrarium deck:
Resource supply
- Form the resource supply above the Bazaar board:
- Place piles of Elemental dice, Catalysts, and Reagents. The amount per pile differs based on player count:
- 2 players: 10 of each
- 3 players: 15 of each
- 4 players: 20 of each
- Place piles of all remaining Shells, separated by denominations.
- Place all remaining Vilethorn cards and Echolily cards in separate face-up piles.
- Place piles of Elemental dice, Catalysts, and Reagents. The amount per pile differs based on player count:
Automa (for 2-player games)
In a 2-player game, you are joined by Vaya, an automated third player (detailed rules on Automa under "Day phase", pg 15). Though also an alchemist, Vaya serves as a neutral participant: they operate by their own rules, have limited actions, but do not compete against you for Prestige.
Set aside some space for Vaya's components and do the following for setup:
- Choose an unused player colour for Vaya. Vaya takes a disc of that colour and its player token.
- Take a random Alchemist tile and place it in Vaya's space, with the coloured disc placed on the top left corner of the tile.
- Take the 10 Rival cards and shuffle them to form the Rival deck. Place it face-down beside Vaya's Alchemist tile.
- Place Vaya's player token on the location on top of the Guild structure (beside all other players).
Note: In a 1-player game, the setup instructions and rules for automated players are different — please refer to the solo rulebook.
Play order
The player who last brewed a beverage will be the first player — give them the first player marker. Play will proceed clockwise. All other players take extra Shells based on turn order:
- 2nd player: 1 Shell
- 3rd player: 2 Shells
- 4th player: 3 Shells
Want a faster game? If you're familiar with Alchemia and want an accelerated experience, consider trying Swift Mode, which shortens playtime by about 20%. All players (excluding the Automa, if any) flip their Alchemist tiles to the numbered "B" sides, then follow the instructions in the Swift Mode section on pg 27. (Swift Mode is compatible only with the standard mode of play for 2-4 players, and cannot be used for solo play.)
Overview
As an aspiring alchemist in the Taliq'ir Bazaar, your goal is to earn recognition from the Guild as a master of your craft. Spend your days browsing shops to acquire rare flora and fungi, forging collaboration (and rivalries) with fellow alchemists, and visiting Runaliths to gain enchantments. By night, tend to your enchanted terrarium, cultivating ingredients with unique properties that will define the potions you brew. Selling these potions earns you Shells for supplies and Prestige to mark your success. At the end of a round, if a player has reached 25 Prestige, the game proceeds to the end game phase and scoring occurs after. The player with the most Prestige wins!
- Shells (Glimmershells) are a unique currency used by the inhabitants of Taliq'ir Bazaar. They are coveted for their function of enriching the soil of enchanted terrariums. These opalescent Shells are shed by Glimmersnails, which you also have in your terrarium! Though round at first, once a Glimmershell is shed, it slowly flattens into a slightly circular piece, making them ideal to hold on to as money.
- Prestige gained during gameplay is signified by the blue icon. These are primarily gained through brewing and selling potions, and count towards the 25 Prestige threshold of ending the game.
- Yellow Prestige is scored only at the end of the game. These appear on Bonus tiles and a few other components.
- The advanced content icon indicates advanced gameplay content. We recommend ignoring these for your first few games as you learn the game. Detailed explanations for advanced content can be found on pages 25 and 26.
Key Concepts
Deck building
You start with a 12-card deck that represents your terrarium and the flora and fungi within. Each player's deck initially contains the same cards. During the game, you'll improve your deck by adding to it or changing it, which is a key element of a deck-building game. Because many cards are unique, each player's deck and strategy will diverge as the game unfolds.
Whenever you acquire a new card, insert it face-down into the bottom of your deck.
When you must draw a card from your deck but have no cards left, you will first do a series of actions (see Night Phase > Reshuffling Deck & Income on pg 23) which include reshuffling your discard pile to form a new deck, then continue to draw as needed.
Deck building basics: You may not look at face-down cards in your deck (or any other deck) until you draw them. However, piles of face-up cards, like those in your discard pile, are open information and can be viewed at any time by any player.
Note: Some cards or actions may override the rules as stated above!
Infusing ingredients
During gameplay, when you draw cards from your Terrarium deck, it represents you harvesting ingredients that have matured and are ready for use. You will then play them out on the table and trigger their play effects (explained more in Starting the Game > Playing Cards on pg 9).
An action you'll do often is to Infuse an ingredient, adding it to the potion you are working on. This is done by placing the card onto the cauldron at the bottom centre of your player board, forming an "Infused pile." The ingredient's Infuse effects are triggered, which modifies your potion's Elements and/or Materials. You'll track these changes by moving disc markers on their respective tracks.
Because Infused cards form a pile separate from your deck and discard pile, you cannot draw them again into your hand until they re-enter your deck, which occurs when you Brew your potion (explained later).
Dice conversion
You start with 2 Elemental dice, which hold Elements that you can Infuse into your potion when Brewing, or consume to gain bonus actions. These dice have the following elements on each of their six faces (from left to right): Fire, Water, Lightning, Earth, Aether and Void.
The first five elements are generally useful, while the element Void indicates an empty die.
An action you'll do often is to convert your dice from one element to another — this means rotating the dice face from the old element to the new one. You'll also be consuming your dice to trigger bonus actions (explained more in "Joining" on pg 14 and "Attuning" on pg 19). This means converting your dice from their current Elements to the Void face, signaling that the previous Element has been consumed and emptiness remains.
Brewing potions
Alchemy is a delicate process, and your experimental potions often take multiple rounds to complete. Once you are satisfied with your work, you'll signal your intention to Brew your potion by visiting the Guild location during the day with your player token. Brewing is a multi-step process during the Night phase that finalizes your potion and determines its value. You'll gather rewards like Shells and Prestige, reset your terrarium for the next round, and potentially unlock bonuses. The full process is explained in detail later on page 20, and a step-by-step guide can also be found on your player aid.
Blight
Over time, an unwanted substance called Blight builds up in your terrarium, which may spawn Vilethorn cards. As these weed-like plants will hinder you, a key aspect of gameplay is managing your Blight levels. If left unchecked, too much Blight threatens to corrupt your potion, forcing you to complete it before it's ready. Vilethorn cards also reduce your Prestige if they remain in your deck by the end of the game.
You'll track your Blight on the Blight track along the top of your player board. As the Blight marker progresses to the right, you may incur higher penalties as shown by the icons on the track. These penalties are applied only when you Brew your potion, meaning that you may still avoid them if you reduce your Blight in time.
Your Base Blight marker also moves forward every time you Brew, making managing Blight more challenging as the game continues.
There are ways to Purge cards, removing them from your deck altogether for the rest of the game. Besides removing Vilethorn cards, you may also strategically remove less useful ingredients from your deck to increase your chances of drawing better ingredients more often.
Gameplay
Round structure
Mercurial: Alchemia is played in a series of rounds. Each round is divided into two phases:
-
Day phase (turn-based): During this phase, players take turns in turn order to do the following:
- You must move to a different location on the Bazaar board.
- If that location has a Shop, you may perform its Day action. Other players may Join that Shop's Day action by paying the required resources.
Once all players have taken a turn, this phase ends. Proceed to Night phase.
-
Night phase (simultaneous): During this phase, all players proceed at their own pace simultaneously. 3. Based on the location you visited during the Day phase, you will either:
- Perform Night actions (from the Rune tile, and your base Night action of Infusing cards), or
- Brew your potion.
- Next, discard all previously played cards.
- Harvest your terrarium by drawing a new hand of cards.
- Play all cards from hand in any order to perform their play effects.
-
Prepare for a New Round: Once all players have completed their Night phase, check if end of game is triggered (a player has 25+ Prestige). If it's not triggered, check for Corruption (explained later under "Prepare for New Round" on pg 23). Then, pass the First player marker anticlockwise to the next player, and proceed to the next round's Day phase.
Some steps will evolve as you progress through the game and unlock upgrade tiles. These steps are marked with a polygonal outline. When you acquire the corresponding upgrade tile, place it over the step to indicate the upgrade. (The round guide is displayed along the top edge of your player board.)
Starting the game
Before starting with the first round's Day phase, draw 4 cards from your terrarium deck and play them out in any order of your choice. All players perform this step simultaneously at their own pace.
Example: For their first hand of 4 cards, Samara drew the following: a card with a "Draw 1" play effect, a Vilethorn card with the "Blight" effect, the Arcana fruit card, which triggers the Arcana's play effect, and a card with no play effect. Samara then plays out their cards: (1) they first play the card with "Draw 1" and accept its effect, and Samara draws their 5th card, which has a "Reroll 1" play effect; (2) they play the Vilethorn card, which increases their Blight by 1; (3) they then play the Arcana fruit card, which allows them to ferment to reduce their Blight by 1 — Samara exhausts a Reagent for this purpose and reduces their Blight; (4) finally, Samara plays the card with no play effect, and the other that grants "Reroll 1", which they decide to pass on.
Playing cards
When you play out a card, place it on a space near your player board, and resolve its play effects as indicated by icons on the bottom left side of the card (on black background with gold lines). These effects grant you generally beneficial actions that you may perform upon playing the card.
The only mandatory play effect is Blight. When you play a card with the Blight effect, you must gain Blight. All other play effects are optional, and if a card has multiple play effect icons, you may selectively accept or pass each individual action.
Because play effects are executed in between playing cards, you are encouraged to consider the order you play your cards in to make the most of those effects. This becomes more important as you gain more powerful cards later in the game.
Depending on the cards drawn, you may encounter the following play effects:
- Draw 1: You may draw one more card.
- Reroll 1: You may reroll a die once.
- Arcana's play effect: Your deck contains an Arcana fruit card. When played, it triggers your Arcana's unique play effect, which can be found on your Arcana tile. The player aid also has more details on what each Arcana's play effects are.
- Blight: You must gain a Blight. Move the marker on the Blight track to the right one space to record this.
Though you may choose the order of playing your cards, you must play all of them, including any extra cards you drew from play effects. Later in the game, you may encounter play effects that remove cards from your hand in various ways, bypassing the need to play them. When all players have played out the cards from their hands, start with the first round's Day phase.
Tips for new players: You're recommended to accept most play effects you encounter, especially "Draw 1", as it cycles your deck faster. The Reroll dice effects are flexible. You may accept them if you prefer more proactive play, or if you plan to acquire more dice as the game progresses. Alternatively, you may pass on them and adopt a more reactive strategy, relying on slower but consistent methods of converting your Void dice, such as using the Handshake mechanic (explained in the next page).
Your Arcana's play effects should be accepted as long as you can make use of their benefits.
Ferment: The play effects of some Arcanas are locked and may only be activated by fermenting your cards. These locked effects can be seen on the graphic to the right. To ferment, simply exhaust one Reagent or Catalyst, and all cards that benefit from fermenting (including those already played) may now trigger their play effects for the rest of the "playing cards" step. You may also encounter Market cards with ferment effects as the game progresses.
Day phase (turn-based)
Starting with the player who has the first player marker and continuing clockwise, players take one turn at a time.
1. Visit a location
On your turn, you must move your player token to a different location on the Bazaar board. There are 5 locations, but as your Alchemist will already be at one, you will always have 4 other locations from which you must choose.
You may visit a location containing any other player meeples. In fact, you may want to (see Handshake below).
- The 4 locations along the bottom side of the board give you access to Shops and Runes, and their Day and Night actions respectively.
- The location atop the Guild tower allows you to Brew your potion later during the Night phase. (It does not give you access to a Day action, though you may potentially still Join the Day actions of other players; see Joining on pg 14.)
An appendix of Favour tiles and their effects can be found on your player aid.
Transmute power: These allow the user to convert the grey Void faces of their dice into other more useful faces. When performing this, simply refer to the player's Alchemist tile whose Transmute power you are using, then convert your dice as instructed. If the power is to convert multiple dice into one or more Elements, you may convert each of those dice separately into an allowed choice. For example: If a Transmute power lets you convert 2 Void into Fire or Water, you may convert your 2 Void to 1 Water + 1 Fire, 2 Water, or 2 Fire. Or just 1 Void to either Fire or Water.
Handshake
If you visit a location with a Shop that is already occupied by one or more other players, you trigger a Handshake, a mutually beneficial event for all players:
- For the players already present: Each gains the bonus listed on the Favour tile to the left. This bonus often involves gaining Shells or bonus actions.
- For you (just entered the location): You may fully use the Transmute powers of those players once. These powers, as detailed on their Alchemist tiles, allow you to flip dice faces as specified by the power.
Both the above effects are not conditioned on the other. This means that if the players already present pass on the Favour tile bonus, the player entering may still use the Transmute powers of those other players.
Reminder: As the Guild location is solely for Brewing, Handshake is not triggered on the Guild location.
Example: On Ylstra's turn, they place their player token on the location for Shop D1. As Tomasin's and Samara's tokens are already there, Ylstra triggers a Handshake. Tomasin and Samara check the Favour tile on that location, which grants them the benefit of reducing their Blight by 1. Both players accept this benefit. Concurrently, Ylstra checks Tomasin's and Samara's Alchemist tiles for their Transmute powers, which are to convert 2 Void into either Fire or Water, and 1 Void to an Aether. Ylstra chooses to use them and convert both of their 2 Void dice into Water, then 1 more Void die to Aether. Ylstra then proceeds with their Day action.
2. Perform Day action
On your turn, you may perform a Day action based on the location you visit. Day actions involve buying Market cards, components such as Reagents, Catalysts or dice, and buying Glimmersnails. Other players may Join your Day action by spending resources that are listed on the respective Shop tiles (explained later on pg 14).
Buying Market cards: When buying a Market card, first check its price on the bottom right corner, then apply any discounts granted by your Day action (if applicable). Discard the requisite number of Shells by returning them to the supply, then place the card face-down into the bottom of your deck. If you cannot afford the cost of the card, you cannot buy it.
Buying a Reagent, Catalyst or Elemental die: Shops B1/B2's Day actions allow you to gain a Reagent, while the following Shops (C1/C2) gain you a Catalyst or Elemental die. These components have varied uses that will be explained later (pg 17 for Reagents and Catalysts, pg 20 for dice, and pg 14 for their uses in Joining).
Shop Day actions for Market cards: The following Shops allow you to buy Market cards from the stalls at the centre of the Bazaar board.
- A1: Buy a Market card. If it's on stalls past the canal, it costs 1 less Shell.
- A2: Buy a Market card. If it's on stalls past the canal, place it on top of your deck.
- B1: Spend 2 Shells to buy up to 2 Market cards or to gain a Reagent.
- B2: Spend 4 Shells to buy a Market card and gain a Reagent, or to buy a Market card and Infuse it instantly.
Shop Day actions for components:
- C1: Spend 3 Shells to gain a Catalyst or an Elemental die.
- C2: Spend 2 Shells to gain a Catalyst (flipped to exhausted side) or an Elemental die (flipped to Void).
Package deals: Instead of being ingredients, certain cards offer package deals for Reagents, Catalysts or dice. When buying such a card, you take the components as indicated, then Purge the card by placing it on the Market discard pile (instead of placing the card into your deck).
Replenish Market stalls: After you and any players Joining (explained later on pg 14) have completed your Day action of buying cards, perform the following steps to replenish the market stalls:
- a) Fill any empty stalls by shifting all remaining cards to the right.
- b) Replenish empty stalls from the left by revealing cards from the Market deck.
Reminder: If there are players Joining your Day action to buy Market cards, perform the Replenish step only after all players have completed their part of your action (Joining is explained later on pg 14).
When you gain the component, collect it from the supply and place it near your player board.
- For Reagents & Catalysts, unless otherwise specified, these are collected in their refreshed state, meaning that they are ready for use.
- For Elemental dice, unless otherwise specified, you must roll the dice to a random face immediately after collecting them.
These components are limited. If none remain in the supply, then they may no longer be purchased through the mentioned Day actions.
Reminder: The amount of Reagents, Catalysts and Elemental dice have been defined during setup, and vary for player counts: 10/15/20 of each for 2/3/4 players.
Buying a Glimmersnail or collect Income: Shop D1/D2 allows you to buy a Glimmersnail for your terrarium, or to take your Income action. Your population of Glimmersnails is recorded by the Snail token's position on your player board's Snail track.
When you buy a Glimmersnail, perform the following steps:
- Check the position of your Snail token. Above the slot immediately to the right of the token is the cost you need to pay.
- Pay the cost, then shift your Snail token to the right one space. If you cannot afford the cost, you cannot buy a Glimmersnail.
- You instantly gain both the one-time benefit listed below your Snail token's new position (NOT under), and the individual income benefit to the left of your Snail token. The Income benefit unlocked also strengthens your Income action, which you can trigger through this Shop or when you need to reshuffle your terrarium deck.
The Snail track is shown on the player board as a row of costs (to buy the next Snail), a row of income benefits, and a row of one-time benefits. The values are printed as icons on the track and are not reproduced as text here; consult the printed Snail track on the player board.
The possible one-time benefits of progressing on your Snail track are as follows:
- Draw Bonus tiles: These earn you Prestige that are scored at the end of the game if you meet their criteria. When you trigger this benefit, draw 3 Bonus tiles from the Bonus deck, then discard 2 by returning them face-down to the bottom of the deck. Place the chosen Bonus tile face-down in a space near the player board. You may refer to it at any time, but its contents are a secret to other players. An appendix of Bonus tile descriptions can be found on your player aid. Note: When discarding Bonus tiles, you may choose to discard previously drawn tiles, allowing you to keep more than one of the newly drawn tiles.
- Unlock the "Brew ∞" upgrade token: This removes the limit of how many cards you may Infuse while Brewing your potion (explained more on pg 20). When you gain this token, reposition it to cover the "Brew 5" space on the round guide of your player board.
- The Bonus tile examples on the printed rulebook page show two tile types: (1) grants Prestige based on the amount of dice you have collected; (2) grants Prestige based on the amount of cards with the "Draw 1" or "Discard a card to draw cards" effect in your deck.
Breed a rare Glimmersnail: If you progress to the end of the Snail track, you've bred a rare snail that grants you special rewards! Refer to the slots on Shop D1/D2 to see what rewards are available, then place your Snail token on top of the slot to gain the rewards.
- D1: Grants 5 end-game Prestige for the first player to breed a rare snail, and 4 for the second player.
- D2: Grants 4 end-game Prestige for the first player to breed a rare snail, and they may instantly collect a Catalyst or dice. The second player gains the same rewards, but 1 less end-game Prestige.
These slots are limited, with two available in 3 or 4 player games, and only one available in a 2-player game. If all slots are already occupied when you reach this milestone, leave your Snail token on the final space of your Snail track — it scores 3 Prestige at the end of the game.
Example: Adel visits the location with Shop D1 with their player token and buys a Glimmersnail. Their Snail token is already on the third space on the track, so they check the cost on the slot to the right, which is 6 Shells. They pay the cost by discarding the Shells, then move the Snail token to the fourth space. They collect the one-time bonus below their token, which is to unlock the "Brew ∞" upgrade token. Adel also collects the individual Income benefit to the left of their Snail token, which is to gain 2 Shells (taken from the supply).
Collect Income: If choosing to take your Income action, first check the position of your Snail token. Gain all the income benefits listed by the icons to the left of your Snail token on the track.
- Remember to include the base Income benefit of 3 Shells (this may differ for Advanced classes). Do not include the benefit that the token is covering.
- Each benefit is separate. They may be taken in any order, and be accepted or passed on individually.
Example: Adel visits the location with Shop D1 with their player token and takes their Income action. Looking to their Snail track, they gain 5 benefits: 3, 1 and 2 Shells for a total of 6, Reroll 2, and to Infuse either a Fire or Water Element. Adel accepts all benefits but the Reroll 2 action, which they pass on. They take 6 Shells from the supply and decide to Infuse a Fire into their potion.
3. Joining
After taking your Day action, all other players at a different location from you may choose to Join you, performing the Day action that you just performed. To do this, they must spend resources listed on the grey banner on your location's Shop tile.
Joining lets players take part in valuable actions outside their turns, making it a key strategy for optimizing resources.
- Players with tokens already at your location are not allowed to Join your Day action, with the idea being that they already benefited from having Handshake triggered for them.
- Joining is done in turn order, starting with the player clockwise to you.
- If the Day action being Joined involves buying Market cards, it's important to note that the selection of cards is NOT replenished between players. It is only replenished after you and all Joining players have completed your Day action.
- If you visit a location with a Shop, but you chose not to take its Day action, other players may not Join that action.
Reminder: You can only Join a Day action if your player token is currently at a different location.
Important: Joining another player's Day action doesn't move your player token! Your player token remains in place when you Join actions. It only ever moves during your own turn in the Day phase.
Joining requirements (shown on the grey banner of each Shop tile):
- Shops A1 and A2: Exhaust a Reagent or Catalyst to Join.
- Shop B1 (and B2): Exhaust a Catalyst to Join.
- Shops C1 and C2: Exhaust a Reagent to Join.
- Shops D1 and D2: Consume 2 non-Void dice of the same type to Join.
When exhausting a Reagent or a Catalyst, flip it from its refreshed (colourful) face to the exhausted (grey) face. When consuming Elemental dice, turn them to the grey Void face. If a player cannot pay the cost required, they cannot Join.
Quickpaw Express: Swift and Sly! Thematically, when you Join another player's Day action, you're hiring a merfox courier from the Quickpaw Express — the fastest and cleverest delivery service in Taliq'ir Bazaar. Shopping has never been this easy!
Example: On Adel's turn, they place their player token on a location corresponding to Shop B1. No other player has their token there, so a Handshake does not occur, and Adel proceeds with their Day action, which is to pay 2 Shells to either buy 2 Market cards or gain a Reagent. Adel pays 2 Shells and chooses to buy 2 cards, which are placed face-down at the bottom of their deck. In turn order, the other 3 players Tomasin, Ylstra and Samara may decide if they want to Join the Day action. The Shop tile states that the cost of Joining is to exhaust a Catalyst. Tomasin decides to Join. They exhaust a Catalyst, pay 2 Shells and buy 2 of the 3 remaining cards. There is now only one Market card left available. Seeing this, Ylstra declines to Join. Then, Samara decides to Join. They exhaust a Catalyst, pay 2 Shells but decide to gain a Reagent instead of buying Market cards. The Day action has ended, and the selection of Market cards are replenished. Adel's turn ends, and Tomasin's turn begins.
Automa (2-player only)
If Vaya has joined the game, they will always take their turn last during the Day phase, regardless of which human player has the first player token. Vaya will always move its player token to a new location, potentially triggering Handshake if it encounters other players at a location with a Shop. If Vaya visited a Shop, they will perform its Day action, giving human players the opportunity to Join the action the same way they would to another human player.
During its turn, perform the following steps for Vaya:
- Reveal a card from the Rival deck, placing it face-up nearby to form a discard pile. If the Rival deck is empty, shuffle the discard pile to replenish it.
- Referring to the Rival card, place Vaya's token on the primary location indicated. If Vaya's token is already on the primary location, then place it on the secondary location indicated instead.
- If Vaya visits a location with a Shop that is already occupied by other players, Vaya triggers a Handshake for those players, granting them the bonus from the Favour tile beside.
- Then, Vaya performs the Shop's Day action, but without paying any cost or gaining any benefit (no components or cards are collected). Other players who are not in the same location may then Join. After this, Vaya's Day action ends.
- If the location Vaya's token visits is the Guild, the two rightmost cards on the Market row are Purged (a reminder is shown on the relevant Rival cards). This is to simulate market activity and maintain balance.
Example: During its turn, Vaya visits Shop C2 with their player token. As Ylstra's player token is already there, Vaya triggers Handshake for them, and Ylstra gains the Favour tile bonus of Infusing an Organic or Spectral. Vaya then takes the Day action, but without spending any Shells or collecting components. Because Tomasin's player token is on the Guild tower, they have the option of Joining, which they accept. They exhaust a Reagent to fulfill the Shop's Joining requirement, then pay 2 Shells for an exhausted Catalyst. Vaya's turn then ends, which also marks the end of the round's Day phase.
After the above steps, Vaya does not do anything else for the rest of the round, including during the Night phase. During your turn, it is possible to trigger a Handshake if you visit a location that Vaya already occupies. In this case, you may use Vaya's Transmute power (refer to their Alchemist tile), but Vaya does not gain the benefit printed on the Favour tile beside.
Note: The graphics printed on the following parts of the Rival cards are only used for solo mode. Ignore them when using the Rival deck for a 2-player game. (These are the icon frames with a golden [1] on the side, the Prestige values on the top, and everything on the card's back face.)
End of Day phase
After all players have taken their turns, the Day phase ends. Proceed to the Night phase.
Night phase (simultaneous)
This phase is entirely freeform and occurs simultaneously, with players proceeding at their own pace until they have finished all the required steps.
3. Perform Night actions or Brew
During the Night phase, you may take Night actions based on the Rune tile at your location. If your player token is on the Guild location, you must Brew your potion instead and appraise it for sale (see pg 20).
Night actions from Runes
Each Rune tile provides a unique Night action, which include Infusing more cards, Purging cards, gaining Echolilies, Infusing a Chromatic Material, and reducing your Blight. Night actions are always optional, and sometimes include multiple separate effects — you may accept or pass on them individually. You may also Attune to repeat these actions, doubling their benefits but also their cost (explained later in this section on pg 19).
The Rune tile night actions are:
- Rune A1: Reduce 1 Blight or pay 2 Shells to gain an Echolily card.
- Rune A2: Pay 3 Shells to gain an Echolily card and place it on top of your deck.
- Rune B1: Reduce 1 Blight OR pay 2 Shells to Infuse a card.
- Rune B2: Pay 3 Shells to Infuse a card AND gain 3 rerolls.
- Rune C1: Reduce 1 Blight or pay 2 Shells to Purge a card and gain a Blight.
- Rune C2: Pay 3 Shells to Purge a card.
- Rune D1: Reduce 1 Blight or pay 2 Shells to Infuse a Chromatic.
- Rune D2: Pay 3 Shells to Infuse a Chromatic and use your Transmute power.
Infuse cards
The Night actions of Runes B1/B2 allow you to Infuse a played card (a card from your play area) by spending Shells. When you Infuse a card, you are adding it as an ingredient to your potion. Its Infuse effects are on the grey banner of the top left side of the card. The steps of Infusing a card are as follows:
- Choose a played card to be Infused and place it onto the cauldron at the bottom centre of your player board, forming an "Infused pile."
- Referring to the card's Infuse effect icons, you must shift the Element and Material track markers along the directions as marked by ALL the icons. You may not selectively choose which icons to accept or ignore.
The Elements with tracks are Water, Fire, Earth and Lightning, and they can be found on the upper side of your player board. Materials are Organic, Spectral, Crystalline, Metallic, Runic and Eldritch, with their tracks along the bottom side. Materials can be easily identified by their oval shape icons.
On most steps of the Element and Material tracks, values are listed for Shells and Prestige, which you collect only when you Brew your potion. These indicate the Shell and Prestige value achieved by the Elements and Materials you have added to your potion. If the marker is on the right side of the track, you refer to the values immediately to the right of the marker, while the opposite applies if the marker is on the left side. Your potion typically (but not always) becomes more valuable as your markers move out to one side.
It's important to note that each of these tracks are shared by icons on opposite ends. (For example: Fire and Water share the opposite ends of the same track.) This means that some Infuse effects may conflict with another, causing your marker to move back and forth based on what you've Infused. This makes it vitally important to choose your ingredients carefully, and consequently the cards you introduce into your terrarium!
Reagents & Catalysts
Besides allowing you to Join actions (see pg 14) or Ferment (see pg 9), Reagents & Catalysts may also be exhausted to alter a Material or Element that is in the process of being infused.
- When Infusing a Material, you may exhaust a Reagent (flip to exhausted state) to change that Material to its opposite type, causing the marker on that Material's track to move one step in the opposite direction instead.
- When Infusing an Element that isn't Aether or Void, you may exhaust a Catalyst to double its potency (shown as "x2"), moving the marker on that Element track twice instead of once.
Note: For each instance of a Material or Element, you may only use one Reagent or Catalyst on it respectively. (E.g. you may not exhaust 3 Catalysts to be used on a single Fire icon to double it three times.)
Some Market cards include a Latent Material as part of their Infuse effect. When Infusing one, first check if there is Blight on at least one other card in your play area. If yes, you must Infuse the Material indicated by the Latent Material icon.
Runic & Eldritch
In addition to Shells and Prestige, the Eldritch and Runic tracks also grant bonus components when you Brew and your marker has reached the end of the track. Advanced boards may have similar rewards for other tracks.
Infusing Arcana fruit
Important: Ingredients that do not have a grey banner on the top left side, such as Vilethorns, cannot be Infused. They will never enter your Infused card pile.
When Infused, your Arcana fruit gains the Infuse effect stated on your Arcana tile. This usually — but not always — grants some number of Materials. Initially, there is a second part of the Infuse effect, which is to shift the token on your Arcana tile one space to the right. The second time you do this, the token would reach the third step, which triggers an evolution for your Arcana. Flip the tile to reveal your Arcana's evolved form and return the Arcana token to the box. For the rest of the game, your Arcana's Infuse and Play effects are upgraded.
Thematically, when you Infuse your Arcana fruit, you are actually feeding it to your Arcana. In return, your Arcana grants you a renewable bio-material to be added to your potion, such as feathers or scales.
Purge cards
The Night actions of Runes C1/C2 allow you to Purge a played card, removing it from play for the rest of the game.
To Purge a card, choose a played card or a card from hand. If you are Purging a card through the Night action of Runes C1/C2, you will not have cards on hand and can only Purge a played card. Remove the card by placing them on the following locations:
- For Market cards: Place them onto the Market card discard pile.
- For Reserve cards (Echolily & Vilethorn): Return them to the supply.
- For Starter cards: Return them to the box.
A reminder for these effects can be found on the bottom left side of your player board.
Gain an Echolily card
The Night actions of Runes A1/A2 allow you to acquire an Echolily card. Place it face-down at the bottom of your deck as you normally would with gaining other cards.
Infuse a Chromatic Material
The Night actions of Runes D1/D2 allow you to Infuse a Chromatic Material. This is a "wildcard" material, allowing you to treat it as any Material type (not Element) of your choice during Infusion. As you are Infusing a Material directly through an action, no component enters your Infused pile.
Note: Some ingredients have Chromatic as part of their Infuse effect.
Echolilies
These ephemeral herbs have the power of mimicking another ingredient's properties.
When played, the Echolily has two play effects: you gain a Shell, and you may draw a card. When Infused, the Echolily copies the Infuse effect of a card of your choice in your play area, gaining all the icons listed on that card's grey banner on the top left corner. After Infusing, the Echolily is Purged instead of entering your Infused card pile — return it to the supply.
As Echolilies copy all icons from another card's grey banner, this will also include effects such as moving the Arcana token on its track (if copying the Arcana fruit card). These qualities make Echolilies a useful addition to your deck and are best paired with ingredients that have desirable Elemental and Material traits.
Note: When using Reagents or Catalysts, their effects apply at the point of Infusion. This means that you cannot Infuse an ingredient, use a Reagent and/or Catalyst to modify the card's Infuse effects, then attempt to use an Echolily to copy the modified effects, for the original card would no longer be in your play area after being Infused.
Example: Ylstra infuses an Echolily and selects a card in their play area with Fire and Organic Infuse effects. The Echolily copies them, infusing a Fire and Organic. Ylstra uses a Reagent on the Organic, causing its respective track marker to move in the reverse direction (towards Spectral). The Fire is infused as normal. The Echolily is then purged — it returns to the supply.
Reduce Blight
The Night actions of Runes A1/B1/C1/D1 all provide the alternate action of reducing your Blight by one, which you perform by moving your Blight marker one step to the left on your Blight track. This action has no Shell cost. Reducing Blight helps mitigate penalties during Brewing (see pg 20), and the risk of triggering Corruption.
Corruption
If your Blight track is maxed out by the end of the Night Phase, you have triggered Corruption. You must visit the Guild tower during the next Day phase and prepare to Brew, during which you'll gain 3 Vilethorn cards.
Attuning
Attuning allows you to repeat a Rune's Night action by consuming 2 Elements from your dice (specified on the tile's grey banner). The Elements do not need to match; for example, a Rune requiring Water and/or Aether can be fulfilled using 1 Water and 1 Aether, or 2 of either type. Each Night action performed is resolved separately, meaning you must fully pay the cost and resolve the effects before Attuning to perform the action again. You may Attune only once per Night phase.
Attuning requirements, by Rune tile: Lightning/Aether; Fire/Aether; Water/Aether; Earth/Aether. (Each is "consume 2" of the listed Elements.)
Later in the game, you'll unlock the ability to Infuse up to 2 cards (instead of 1) during this action by gaining the "Infuse 2" upgrade tile, which is awarded upon reaching 10 Prestige. These tiles can be found near the 10th space of the Prestige track. When you gain this tile, place it over the "Infuse 1" space on the round guide of your player board.
Reminder: When consuming Elemental dice, convert your dice from their current Elements to the Void face, signalling that the previous Element has been consumed and emptiness remains.
Example: Tomasin's token is on the location with Rune B2, which grants the Night action of paying 3 Shells to Infuse a card and gain 3 dice rerolls. Tomasin Infuses a card, then rolls 3 out of 5 dice they have. Tomasin gets a desirable roll; a Water and an Aether appear on their dice. Checking the Rune tile, Tomasin sees that the cost of Attuning is 2 Water and/or Aether. Tomasin consumes both dice, flipping them to the Void faces, then performs the Night action again. They pay 3 Shells, Infuse another card, then reroll their two Void dice, with one being rerolled twice.
Base Night action: Infuse
After doing or passing on the Night actions from Rune tiles, you may optionally perform the base Night action of Infusing a played card. Place the card onto your Infused pile and resolve its Infuse effects as normal.
Infusing Aether
The Aether face on your dice works differently from other Elements. It does not have a corresponding Element track — instead, its Infuse effect is to improve your Materials that have their markers on spaces that are charged (see illustration). For player boards "A", all Material tracks have charged spaces, meaning that it's possible to improve all those tracks if their markers are correctly positioned.
Because Infusing is done one icon at a time, you cannot benefit from Infusing multiple Aether dice. The first Aether dice will improve all markers on charged spaces, moving them to non-charged spaces. Important: The effect of exhausting a Catalyst to double an Element's potency when Infusing it does not apply to Aether. A reminder of Aether's Infuse effect can be found on the lower left corner of your player board. For Advanced player boards, the effect may differ.
Brew
If you placed your player token on the Guild during the Day phase, instead of taking Night actions, you must now Brew your potion by following these steps:
- Infuse 5 cards: Infuse up to 5 cards from your play area, one at a time. This action may be upgraded when you gain the "Brew ∞" upgrade token, which is awarded by advancing your Snail track. The upgrade allows you to Infuse any number of cards from your play area instead. You must Infuse all your desired cards before moving on to later steps.
- Transmute: You may fully use the Transmute power on your Alchemist tile once, converting any Void dice you have into other Elements. This often makes it useful to have one or two Void faces on your dice before Brewing, as you may transmute them to something more useful!
- Infuse dice: You may Infuse any number of your non-Void dice now, adding their Elements to your potion. Place Infused dice one at a time on top of your Infused card pile. Update your tracks accordingly.
- Appraise your potion: Your potion is now ready for sale.
- Referring to the position of markers on your Element and Material tracks, add their Shell and Prestige values together. The values to look at depend on which side of the board the markers are on — left if the marker is on the left side, and right if the marker is on the right.
- Your potion gains bonus Shell value based on the side with the most number of markers, with 1 Shell per marker on that side. This incentivizes you to work towards moving your Element and Material markers towards the same direction. If both sides have an equal number of markers, your bonus Shell value equals that number. (For example, 2 markers on each side grants 2 Shells.)
- Collect your Shells by taking them from the supply, and gain Prestige by moving your marker on the Prestige track accordingly. If you manage to reach the end of the Runic or Eldritch tracks, you also collect bonus components as stated (Runic: gain a Dice OR 2 Shells; Eldritch: gain a Catalyst OR 2 Shells).
- Blight track penalties: For your Blight track, refer to the space immediately to the right of the marker, and resolve the penalty if any. The penalty typically involves losing Shells (which can instantly be deducted from the Shells you've just collected), or gaining Vilethorn cards, which you must insert face-down into the bottom of your deck. Discard the stated amount of Shells, or gain the stated number of Vilethorn cards, ranging from 1 to 3 based on severity. If you triggered Corruption in the previous round and are now made to Brew, you'll then also gain 3 Vilethorn cards. Blight track penalties are mandatory.
A complete reminder of the Brewing steps is included in your player aid. As Brewing is done during the Night phase, multiple players Brewing during the same round may safely do so simultaneously. In rare cases, conflicts may arise due to effects that interact with the supply of limited components such as Reagents, Catalysts, or dice. In these cases, priority is given based on turn order for that round, starting with the player who has the first player token.
Reminder: If a player passes 25 Prestige while Brewing, you do NOT proceed to the end game phase instantly! The end of game is only checked for at the end of Night phase, so all players must still complete the phase (discard played cards, draw cards, and play them out).
Brewing example: It is Night Phase, and Ylstra is about to take the Brew action. Ylstra has 3 markers on the left side of the board and 2 on the right, so the potion's bonus Shell value is 3. Due to Ylstra's Blight track, they will also get 2 Vilethorn cards. Therefore, in total they will get 17 Shells, 7 Prestige, an Elemental die and 2 Vilethorn cards. Ylstra gains these components and moves up the Prestige track accordingly. Ylstra first Infuses 3 of their 4 dice (1 Water and 2 Lightning) and exhausts a Catalyst for each die, which doubles the Water and Lightning contributions. Ylstra also has 6 cards in their play area, and as they do not have the "Brew ∞" upgrade token, they Infuse 5 of them. The Element and Material tracks give the following rewards from top to bottom: 3 Shells and 2 Prestige; 6 Shells and 3 Prestige; nothing; 3 Shells and 1 Prestige; 2 Shells, 1 Prestige and an Elemental die. Because they went from 8 Prestige to 15, they gain the "Infuse 2" upgrade token. Ylstra resets their components, and their Base Blight marker moves from the 3rd space to the 4th, marking that they will start with 3 Blight.
Gaining Prestige
When you gain Prestige, move your Prestige marker along the Prestige track to reflect your updated amount. As you progress along the track, you will unlock upgrade tokens and bonuses:
- 5 Prestige: "Draw 5" upgrade token
- 10 Prestige: "Infuse 2" upgrade token
- 25 Prestige: If you are the first player to achieve this, you gain a 3 Prestige bonus that is scored at the end of the game. If multiple players Brewed and simultaneously qualify for this bonus, priority is given based on turn order, starting with the player holding the first player token.
When gaining upgrade tokens, find the matching shape on the round guide of your player board, and place the token over that space. These upgrades apply for the rest of the game.
Market movement and replenishment
Brewing players perform Market movement (step 6 above) once per Night phase. The Market stalls are replenished as described under the Day phase.
Prepare for new round
Discard played cards
After all players have completed the steps for the Night phase, check if any player has reached 25 Prestige or more. If so, the end of game is triggered — proceed to the end game phase and scoring (explained later). Otherwise, after either performing Night actions or Brewing in the previous step, you must discard any cards left in your play area by placing them face-up onto the discard pile to the right of your player board.
Draw cards
Your terrarium is ready to be harvested. Draw 4 cards from your deck into your hand. If you have gained the "Draw 5" upgrade token, you draw 5 cards instead. This step must be performed, and you may not choose to draw a fewer number of cards.
Reshuffling deck & Income
If you must draw a card from your deck but have no cards left, you must do the following:
- Shuffle your discard pile face-down to form a new terrarium deck.
- Gain 2 Blight (move the marker on your Blight track to the right two spaces).
- Trigger your Income action, where you gain all the benefits listed by the icons to the left of your Snail token on the Snail track. Each benefit is separate, may be taken in any order, and may be accepted or passed on individually.
- Continue to draw from your deck as needed.
As a reminder, you may also trigger your Income action with Shop tile D1/D2's Day action. Doing so this way does not cause you to gain 2 Blight as they are separate effects.
If the end of game is not triggered, do the following:
- Check for Corruption: If any player has maxed out their Blight track, they must send their player token to the Guild location on the next Day phase. This forces them to Brew their potion on the next Night phase, during which they'll gain 3 Vilethorn cards as penalty.
- First player marker: The player who has the first player marker passes it to the next player in an anticlockwise fashion. Then, proceed to the next round, starting with the Day phase.
Play cards
You must play out all cards from hand in any order onto your play area and trigger their play effects (if any). This step is identical to the "playing cards" step that you performed at the start of the game. As a reminder:
- All play effects are optional, except for gaining Blight, which is mandatory when triggered.
- Play effects such as Purging a card or discarding a card to draw a card can be either used on cards in hand or cards you have played. This makes it possible to bypass playing cards with undesirable effects.
- If you have cards that require you to ferment to use their play effects, you may ferment by exhausting one Reagent or Catalyst. Remember that only one component needs to be exhausted to use the locked effects of all cards that benefit from fermenting.
- Although you may play out your cards in any order, they must all be played out.
End of Game
End game phase
If the end of the game is triggered (a player reaches at least 25 Prestige by the end of a round), all players proceed with the end game phase:
- For players who did not Brew earlier in the last round (their player tokens would not be on the Guild location): They may immediately Brew their potions now.
- For players who Brewed (their player tokens are on the Guild location): They gain 3 Prestige.
All players return any remaining cards in their play area, discard pile, and Infused pile back to their deck. Then, proceed to scoring.
Scoring
All players now gain or lose Prestige based on the following:
- End-of-game Prestige bonuses & penalties
- Bonus tiles: Check your Bonus tiles and count their Prestige value. Many Bonus tiles will require you to reference the cards in your deck.
- First-to-end bonus: If you were the first to pass 25 Prestige and gained the First-to-end bonus token, gain the Prestige printed on it.
- Advanced Content: If you played with any Advanced Content, gain Prestige based on their Scoring criteria, detailed in the "Advanced Content" section below.
- Snail track: If your Snail track is fully upgraded, gain Prestige based on your Snail meeple's position (either at the end of your Snail track, or on Shop tile D1/D2).
- Vilethorn cards: Lose 1 Prestige for each Vilethorn card still in your deck. Separate them from your deck for the rest of scoring.
- Terrarium size: With the Vilethorn cards removed, count the remaining number of cards in your deck. For every 2 cards you have, gain 1 Prestige.
- Shells: For every 10 Shells you have left, gain 1 Prestige.
The player with the most Prestige wins! If there is a tie, it is broken in favour of the player who has the First-to-end bonus token. If none of the tied players have this token, then they share victory.
Reminders:
- The end of game can only be triggered at the end of a round. Be careful not to proceed to this phase instantly after a player passes 25 Prestige!
- For the players who Brewed, the 3 Prestige they gain from this phase is separate from the First-to-end bonus. In other words, being the first to end the game rewards you a total of 6 Prestige.
- If multiple players Brewed and simultaneously qualify for the First-to-end bonus, priority is given based on turn order, starting with the player holding the First player token.
Bonus tile scoring example: Samara is scoring their Bonus tiles. After counting the relevant cards and components, they calculate gaining 4 + 3 + 3 = 10 Prestige total from their Bonus tiles. If they had 1 more Catalyst, they would score 1 more Prestige from their third Bonus tile.
Advanced Content
As this section contains advanced gameplay content, we recommend that you do not play with these rules for your first game. They are best enjoyed once all players are familiar with the game.
1. Equilibrium
Equilibrium offers an alternate optional strategy to work towards when crafting potions. It is a challenging, highly risky but highly rewarding play style that may lead you to discovering the Philosopher's Stone, the magnum opus of alchemy.
Setup: After setting up the game, all players take 3 Silversalt tokens, flip them to the side with the "Reduce Blight" effect, and place them on the marked spaces found on the bottom right side of their player boards.
Gameplay: Instead of acquiring and Infusing cards to push your Element and Material markers further to the sides, your aim is to keep all five markers in the middle, but with as many Market cards in your Infused pile as possible. If you Brew with all five Element and Material markers in the middle, your potion achieves Equilibrium. This condition is absolute — if even just one marker is one step away from the middle, your potion does not achieve Equilibrium!
A potion with Equilibrium would have its value appraised differently. During step 4 of Brewing, instead of the usual method of appraisal, you refer to the Equilibrium table on your player board to calculate your Shell and Prestige gained:
- Shells: Collect Shells equal to 4 multiplied by the amount of Market cards infused.
- Prestige: Gain Prestige equal to the amount of Market cards infused.
You may also unlock a Silversalt if you fulfil the requisite amount of Market cards infused, or you may discover the Philosopher's Stone:
- Silversalt: These typically require between 2-6 Market cards Infused. When you unlock one, take the Silversalt token from the Equilibrium table and place it in a space near your player board. Each Silversalt grants a bonus that makes it easier to discover the Philosopher's Stone. You may unlock Silversalt in any order, but you can only unlock one per Brew. Silversalts may optionally be discarded and returned to the box at any time during your turn to reduce your Blight by one.
- Philosopher's Stone: Discovering this requires a much higher amount of Market cards in your Infused pile. If you achieve this, your Prestige is instantly set to 30, regardless of its previous amount. This is a powerful move that potentially gains you a large amount of Prestige, especially if achieved earlier during the game! The number of Market cards required ranges from 12-13 depending on the player board used, but this number is reduced by one for every Silversalt you've unlocked, up to a maximum of 3.
If the end of game has yet to be triggered, then the player discovering the Philosopher's Stone will trigger the end of game by the end of the round as they will reach 30 Prestige, exceeding the 25 Prestige threshold.
Scoring: During scoring, all players gain 1 Prestige for each unused Silversalt token they have unlocked, but did not discard for its Blight reduction effect. The 1 end-game Prestige is printed on the other side of the token as a reminder.
- Market cards only: Only Market cards (blue-edged) count toward Equilibrium scoring. Other card types can still be Infused for their effects, but they do not contribute to Equilibrium scoring.
- Using Silversalt does not lose you the bonus that reduces the number of Market cards required for the discovery of the Philosopher's Stone.
2. Advanced Classes
Advanced Classes feature asymmetric abilities and rewards for your player boards, offering fresh new ways of approaching the game. To use them, flip your player boards to their numbered side (1-4) at the start of Player Setup, then take the corresponding aid sheet for reference during gameplay. The class abilities are detailed on the separate Advanced class guides included in the box.
3. Objective Cards
Objective cards set goals for players to compete for with their neighbours. There are two types: End-game Objectives, which are checked for during end of game Scoring, and Pioneer Objectives, which can be claimed during the Night phase by the first player to fulfil their requirements.
Setup: After setting up the game, divide the Objective cards randomly into two decks of 5 End-game Objectives and 5 Pioneer Objectives. Place cards based on the following player counts:
- 2 players: Place 1 End-game & 1 Pioneer Objective between both players (total 2 Objectives).
- 3 players: Decide whether to play for End-game or Pioneer Objectives. Then, place one card of the chosen Objective type between each player (total 3 Objectives).
- 4 players: Place 1 Objective between each player, alternating between End-game and Pioneer Objectives (total 4 Objectives).
Gameplay & Scoring: Each player will always have access to two Objective cards, which they are competing for with their neighbouring players. In 3 and 4 player counts, players cannot score Objectives that they are not adjacent to.
- End-game Objectives: These are scored at the end of the game, based on the listed requirements. The winning player scores 3 Prestige. In the event of a tie, both players gain 1 Prestige instead. Example: During end of game scoring, Samara and Adel are competing for an Objective to have the most sets of dice and Reagents. Samara has 4 dice and 5 Reagents, while Adel has 6 dice and 4 Reagents. Both players score 1 Prestige from the Objective.
- Pioneer Objectives: These can be claimed by adjacent players during Night phase if the player fulfils the listed requirement. The claiming player places the Objective card near their player board and scores their Prestige during end of game scoring. If two neighbouring players can claim the Pioneer objective during the same Night Phase, priority is given based on turn order, starting with the player holding the First player token. If the game ends with any unclaimed Pioneer Objectives, those objectives do not score Prestige for any player. Example: During Night Phase, Tomasin and Adel are trying to claim an Objective to have at least 9 cards out in their play area. Tomasin has 10 cards played out, while Adel has 9. Adel has the first player token, so priority is given to them to claim the Objective.
4. Advanced Attuning
Advanced Attuning introduces Runaliths as collectible objectives, granting you one-off bonuses when you later Brew your potion.
Gameplay: When you Attune to a Rune tile during the Night Phase, perform its Night action a second time as usual. Then, if the Rune tile has its Runalith on top, you take it and place it in your play area.
The next time you Brew, after completing step 4 "Appraise your potion", check the Runalith Chart. It shows the extra bonuses gained based on the number of Runaliths you've collected. Gain the listed bonuses, after which you must return all collected Runaliths to their respective Rune tiles.
If multiple players are Attuning to the same Rune tile during Night phase, turn order defines the order in which those players take their actions. This means that the player with the earliest turn order will be the one to claim the Runalith. This also applies if a player Attunes to a Rune tile that has its Runalith just returned by another player Brewing in the same phase. If the player returning the Runalith is earlier in turn order, the Attuning player will claim the Runalith as their turn occurs after the player who Brewed.
Example: During Night Phase, Adel is first in turn order and is Brewing. After gaining the bonus, Adel returns Rune A1's Runalith. Samara and Tomasin are Attuning to Rune A1. As Samara is next in turn order, they claim the newly returned Runalith before Tomasin.
5. Swift Mode
Swift Mode starts all players out with bonuses and penalties for a faster-paced experience. Perform the following steps after completing normal setup (see pg 4–5) and any advanced content setup, after which you can begin the game.
Setup:
- All players flip their Alchemist tiles to the numbered "B" sides, which shows a "Swift Mode" table.
- Starting with the first player and proceeding clockwise, each player gains the benefits and penalties listed on the table. Resolve them in order from top to bottom, left to right.
- Once all players have completed step 2, begin the game as normal, following the instructions under "Starting The Game" on pg 9.
Swift Mode table: When resolving bonuses and penalties on this table, follow all usual rules. The first row lists bonus components or benefits normally associated with Day actions.
- A) Reagents and Catalysts gained may be either exhausted or refreshed as indicated.
- B) If a die is marked as Void, flip it to Void after gaining it. Otherwise, roll it to a random face.
- C) Each of these icons gain you a Market card of a certain Shell value. For each icon shown, do the following: 1. Reveal cards from the Market deck until you've revealed 2 cards with the exact Shell value as listed on the icon. 2. Choose one to gain and shuffle it into your personal terrarium deck. 3. Shuffle the other card and all other cards revealed in step 1 back into the Market deck.
You may find the following benefits on other Alchemist tiles:
- Echolily cards: These enter face-down into the bottom of your deck.
- Gain a Glimmersnail: Advance your Snail token right one space without paying its cost (usually 4 Shells). You still instantly gain both the one-time benefit and the individual income benefit to the bottom and left of your Snail token respectively.
- Purge a Vilethorn: Reveal and Purge a Vilethorn card from your deck, then shuffle your deck.
For the rest of the table, the second row (D) lists infused Elements or Materials that begin in your cauldron, while the third row (E) lists Blight gain and Shell loss penalties. Elements or Materials will often (but not always) offer two options per icon. Track all of these on your player board accordingly, and any Shells lost are returned to the supply.
Swift Mode table note: the table's bonus and penalty values are shown as icons on the printed page. Row A shows a Reagent, a Catalyst (2x) and a Market card with a Shell value of 2 (the "?" card with a 2 Shell icon) from the row-one bonuses; row B shows an Elemental die flipped to Void; row C shows the Market card icon; row D shows the starting Element/Material pair icons; row E shows 2 Blight gain and 4 Shell loss. The exact icon pairings in row D are not reproduced in text here; consult the printed table.
Solo Play
This section is the Solo Play section printed in the same publisher draft. The draft prints the solo Rival cards and scoring tiles as graphics, so the card-specific values are not reproduced in text.
Overview
In a solo game, you'll play against a duo of automated rival alchemists named Modus and Lothyr (Rivals), competing with them to earn Prestige and prove yourself the superior master of the craft. Though automated, these opponents will interact with you like how human players would. Your choices must not only factor in what's best for yourself, but how to avoid giving the Rivals too many advantages.
Solo components: 10 Rival cards, 1 Rival base tile, 1 Rival scoring tile (double-sided).
There will be 3 player tokens on the board (including yours), but you will effectively be playing against a single opponent as both Rivals will pool their Prestige and components together. If either you or them reaches 25 Prestige by the end of a round, the end of game is triggered — and whoever has more Prestige after scoring is the winner!
Setup
- Referencing the Setup section of the main rulebook, first perform the steps under Board Setup, then those under Player Setup for yourself. Then, perform the steps under Resource Supply with the assumption of setting up for 3 players (15 dice, Reagents, and Catalysts).
- Modus will be the primary Rival, and Lothyr the secondary Rival. Choose a player colour for each of them, then set up their play area by performing the following steps: Shuffle the Rival cards and place them face-down on the Rival base tile, forming the Rival deck.
- Choose an Alchemist tile for both Modus and Lothyr each. Place both tiles (use "A" sides) beside the Rival deck in their play area, and a disc of Modus's and Lothyr's colour on top of each tile. This is to track which tile belongs to which Rival.
- Place Modus' and Lothyr's player tokens on the Guild tower (beside yours).
- Place a disc of Modus' player colour on the (0) space of the Prestige track, but not Lothyr's. This is because the Rivals score as a team, so only one marker is needed.
- Decide the difficulty level you'd like to play this game at: normal or expert. Take the Rival scoring tile and flip it to the face corresponding to the chosen difficulty. Place it near the Rivals' Alchemist tiles.
- Draw a number of Bonus tiles and place them face-up near the Rival scoring tile. These tiles represent extra objectives for the Rivals. The number of tiles drawn depends on the chosen difficulty: 2 for normal, 3 for expert. These tiles are open information — you may refer to them any time.
- Place the following in the Rivals' play area: 9 starter cards of Modus' player colour, forming their terrarium deck; 1 Reagent; 1 Catalyst; 2 Elemental dice. The Reagent, Catalyst, and dice should be taken from the box, not from the resource supply. These are the Rivals' starting components. They will not be used for gameplay, but for scoring at the end of the game.
If playing with Objective cards, take 2 random Pioneer Objectives and place them near the top of the Bazaar board. Take both Rivals' Snail and Arcana tokens, and place them as indicated on both the Prestige track and Objective cards (Arcanas on top-left corners of Objectives). For all other advanced content, there are no additional setup steps specific to solo play.
Play order
In solo play, the first player does not rotate between rounds. You will always be the first player during Day phase, followed by Modus, then Lothyr. As such, the First player marker is not needed.
Round structure
The round structure is similar to that of normal play as detailed in the main rulebook. Each round consists of a turn-based Day phase and simultaneous Night phase. Before starting with the Day phase, perform the steps detailed under "Gameplay > Starting the Game" of the main rulebook, where you will draw 4 cards to your hand and play them out. You'll be able to interact with the Rivals in similar ways that you would with human players, such as triggering Handshakes or Joining their actions. Likewise, Rivals may also do the same to you.
Day phase (solo)
Rules of thumb:
- Rivals do not use Shells, so any actions they take that normally involve spending Shells are instead done for free.
- Whenever Rivals take Market cards, they will always take those starting from the rightmost stall. This allows you to see in advance which cards the Rivals may take as they do their actions, and how it will contribute to their Prestige based on their Bonus tiles.
- If the Day action includes a part that the Rivals cannot perform, ignore that part of the action. For example, the bottom right option of Shop B2's Day action is to buy a Market card and Infuse it instantly. When performing this, the Rival will only take a Market card, but not perform the Infuse action.
- If the Day action has options, the top face-down card of the Rival deck determines which option the Rival will choose (printed on the lower half, top left or bottom right).
Your turn: During the Day phase, perform your turn as normal by moving your player token to a different location.
Triggering Handshake for Rivals: If you visit a location with a Shop that is already occupied by one or more Rivals, you trigger a Handshake, which works differently with Rivals. Instead of gaining a bonus from that location's Favour tile, the Rivals immediately take Market cards on the Bazaar board as their reward, starting with the rightmost cards. They take 1 card if you triggered Handshake for a single Rival token, 2 cards for both Rival tokens. Place the cards on top of the Rivals' terrarium deck, then perform the replenish step to refill the empty stalls (shift remaining cards to the right, then reveal cards from the top of the Market deck). You may then use the Transmute powers of the Rivals at that location and proceed with your Day action.
Strategy tip: Triggering Handshake for the Rivals is an effective way to Transmute your dice, but take care not to do it too often! For the Rivals will gain valuable cards that count towards their Prestige during scoring.
Rivals Joining your Day action: After performing your Day action, check to see if the Rivals Join your action by referring to the top face-down card of the Rival deck (NOT the cards on the Rivals' discard pile). Unlike human players, the Rivals do not need to have their tokens be at different locations from yours to Join your action. Rivals gain components in the following manner: if the Rival is buying Market cards, they will always gain the ones starting from the rightmost stall; if the Rival is buying Reagents, Catalysts or dice, take them from the supply as normal (the dice do not have to be rolled); all components gained by the Rivals are placed in their play area. As with the normal rules, if your Day action involved buying Market cards and the Rivals Joined your action, replenish the Market stalls only after the Rivals have taken their cards. Important: As the Rivals are playing as a single combined entity, rather than two separate players, they will only Join your action once.
Printed on the upper half of the card or tile are letters corresponding to locations on the Bazaar board (A/B/C). If you visit any of these locations and perform the Day action of their Shops, the Rivals will Join your action. Strategy tip: Try to avoid visiting locations that will benefit the Rivals by allowing them to Join your Day action. Rivals will never join the Day action of Shops D1/D2.
Example: You visit the location with Shop B1 and perform the Day action of spending 2 Shells to buy two Market cards. From the rightmost card on the market stalls, you choose the 2nd and 4th cards. After placing the cards in the bottom of your deck, you check the top face-down card on the Rival deck to find that the Rivals are Joining your Day action, choosing to also buy two Market cards. As the 1st and 3rd market stall cards are still available, the Rivals take those. You then perform the replenish step, moving the 5th card on the market stalls to the rightmost slot and refilling the 4 empty stalls. Your turn ends, and Modus' begins.
Rivals' turns: The Rivals take their turns after you, starting with Modus and then Lothyr. For each Rival's turn, do the following:
- Draw a card from the Rival deck and place it face-up below the Rival's Alchemist tile, forming a discard pile. The top section of the card shows the Rival's desired primary location and its associated action, and the bottom half their desired secondary location and action. After performing both Rivals' turns for the first time, two discard piles will be formed below each of their Alchemist tiles. Cards drawn for the Rivals in later turns should be placed on these same piles. If the Rival deck is empty, the printed face of the Rival base tile indicates that the Rivals will choose the top left option.
- Determine the location that the Rival will visit: (a) if the Rival's token was already at its desired primary location, it instead visits its secondary location and performs the stated action; (b) otherwise, it visits its desired primary location and performs the stated action.
- Place the Rival's player token on the chosen location, then perform the stated action: (a) For locations A, B and C, the Rival performs the Day action of the Shop tile attached. You may Join these Day actions the same way you would with a human player. (b) For location D, the Rival performs the Day action, but resolves it differently by collecting the components stated on the Rival card. You may also join this Day action, but your version remains unchanged, meaning you may either pay Shells to advance your Snail token or trigger your Income action as usual. (c) For the Guild location, the Rival discards the two rightmost Market cards immediately, then replenishes the market stalls.
If a Rival enters a location that is already occupied by your player token, they trigger Handshake for you the same way a normal player would, letting you gain the benefit of that location's Favour tile. However, the Rival does not use your Transmute power. Rivals cannot trigger Handshake for each other. In other words, if a Rival enters a location that is already occupied by another Rival's token, nothing happens — the Rival that entered the location proceeds with their Day action.
Joining the Rivals' Day action: When Joining either or both Rivals' Day actions, all the normal rules apply; you must spend the required resources as stated on the Shop tile, and you may not Join a Rival's Day action if their tokens are at the same location as your player token.
Example: You visit Shop B1 during the Day phase. On Modus' turn, they too visit Shop B1, therefore triggering Handshake for you. You gain the benefit from the Favour tile to the left, which is 2 Shells. Modus then proceeds with their Day action, which you cannot Join. On Lothyr's turn, they visit Shop D2. They perform the modified Day action of gaining a Market card and a Catalyst as instructed on their Rival card. You then consume 2 Fire dice to Join the Day action of Shop D2, where you choose to trigger your Income Action. The Day phase then ends.
Rivals triggering Handshake for you (Example): During their turn, Modus visits Shop B2. Referring to the indicator on the top face-down card of the Rival deck, Modus takes the bottom right option of the Shop's Day action, which is to buy a Market card and Infuse it instantly. Modus takes the rightmost Market card, leaving an empty slot. Since Rivals cannot Infuse cards, Modus does not perform that part of the action. As your player token is on the Guild board space (and not at Shop B2), you may Join Modus' Day action, which you do by exhausting a Catalyst. You then spend 4 Shells to buy a Market card and gain a Reagent. Modus' turn ends, and all empty market stalls are replenished. Lothyr takes their turn next.
Whenever you trigger Handshake for the Rivals, you must also gain 1 Blight. Whenever you join a Rival's Day action, you must also pay 1 more Shell, in addition to the usual costs.
Night phase (solo)
The Rivals do not perform actions during this phase until after you have completed the Play Cards step (step 6). You may proceed with your Night phase as normal until then. After you have completed the Play Cards step, refer to the Rival base tile and the Rival deck:
- If there are Rival cards still on top of the Rival base tile, the Rivals do not do anything for this Night Phase — skip ahead to the Prepare for New Round step.
- If there are no more Rival cards on top of the Rival base tile, therefore revealing the printed face of the tile, the Rivals will Brew during this Night phase and gain Prestige (see next section).
Rivals Brewing:
- Refer to the top cards on both face-up discard piles of Rival cards near the Rivals' Alchemist tiles.
- Along the top are Prestige values. Add them together; the total is how much Prestige the Rivals gain. Advance the Rivals' marker on the Prestige track accordingly.
- Remove both cards from the discard piles and return them to the box.
- Combine all remaining cards in both discard piles and shuffle them face-down. Replenish the Rival deck by placing this new stack of cards on top of the Rival base tile.
As the Rival deck starts with 10 cards, after the first time the Rivals Brew, the Rival deck will be reduced to 8 cards. Then 6, 4 and 2 cards on subsequent Brews. This means the Rivals may Brew on rounds 5, 9, 12, 14 and 15, unless the end of game is triggered earlier.
Note: Rivals do not collect upgrade tokens when they go past the 5 and 10 Prestige marks. However, they do collect the First-to-end bonus token if they are the first to reach 25 Prestige.
Objective cards: If you claim an Objective before the Rivals do, take the card into your play area. Take the Arcana token that was on top and the Snail token of matching colour on the Prestige track, then return them to the box. If the Rivals gain Prestige while Brewing and their Prestige marker reaches or exceeds any Snail tokens on the board, they will then claim the matching Objective for themselves. Place the objective and tokens in their play area.
Prepare for new round (solo)
If either you or the Rivals have 25 or more Prestige, the end of game is triggered — proceed to end game phase and scoring. If the end of game is not triggered, perform the check for Corruption for yourself. Then proceed to the next round starting with the Day phase, with you as the first player.
End of game (solo)
If the end of game is triggered, proceed with the end game phase:
- If you did not Brew earlier in the last round, you may Brew your potion now.
- If you had performed the Brew action, you gain 3 Prestige.
- If the Rivals did not Brew earlier in the last round, they gain the Prestige equal to the higher value of the two face-up cards on their discard piles. (Note: If the Rivals did Brew, they do not gain 3 Prestige the way a player would in a normal multiplayer game.)
Proceed to scoring. Scoring for yourself is identical to the steps outlined in the main rulebook under "Gameplay > End of Game > Scoring" (see pg 24 of main rules). Perform those steps first, then perform these steps to score for the Rivals:
- The Rivals gain Prestige based on the criteria listed on their Rival Scoring tile: they add together their number of dice, Catalysts, and Reagents, then gain 1 Prestige for every 5 or 4 items (based on difficulty); they gain 1 Prestige for every 3 or 2 cards in their deck (based on difficulty).
- The Rivals gain Prestige from the Bonus tiles, scoring the same way a normal player would.
- Objective cards (Advanced content): If the Rivals gained any Objective cards, they gain the Prestige printed on it.
- Advanced Attuning (Advanced content): If this module was enabled, the Rivals gain 2 Prestige on normal difficulty or 4 Prestige on expert difficulty, as compensation for the additional objectives available to you.
- If the Rivals gained the First-to-end bonus token, they gain the Prestige printed on it.
To beat the Rivals, your Prestige must be higher than theirs! Ties are broken for who has the First-to-end bonus token.
Example: At the end of the round, the end of game is triggered. Having Brewed in the last round, you gain 3 Prestige. The Rivals did not Brew. The two cards on their discard piles show 5 and 2 Prestige. The Rivals gain the higher amount (5 Prestige).
Difficulty penalties and extras (solo)
Want a greater challenge? Try adding any or all of the following penalties:
- During setup, the Rivals start with 1 extra Bonus tile.
- During setup, your base Blight marker starts at 1 instead of 0.
- Whenever you trigger Handshake for the Rivals, you must also gain 1 Blight.
- Whenever you join a Rival's Day action, you must also pay 1 more Shell, in addition to the usual costs.
Strategy Tips, Special Cases & Reminders
Rule reminders
- Arcana fruit card: When playing or Infusing this card, refer to your Arcana tile for its corresponding effect. Initially, Infusing this card advances your Arcana token one step. After two advancements, your Arcana evolves; flip its tile to the other side and return the Arcana token to the box.
- Ferment: Cards with effects shown on the "ferment" background have those effects locked until you ferment your cards. To do so, exhaust one Reagent or Catalyst, and all cards that benefit from fermenting (including those already played) may now activate their play effects for the rest of the "playing cards" step.
- Breeding rare snails: Reaching the end of the Snail track means you've bred a rare snail! Place your Snail token on an open rare snail slot on Shop D1/D2 to gain its reward. If both slots are full, leave your token at the end of your Snail track; it will score 3 Prestige at game end.
- Package deals: When bought, these cards do not enter your deck. Instead, you instantly gain the listed components, then place this card on the Market cards discard pile.
Keyword reminders
- Purge: To Purge a card is to remove it from play for the rest of the game. Purged Market cards enter the Market discard pile, Echolily and Vilethorns return to the supply, while Starter cards return to the box.
- Infuse: To Infuse means to add to your potion. For cards, they enter the "Infused pile" at the bottom centre of your player board. Update your Material and Element tracks accordingly. For direct Material and Element Infuse effects (e.g. the Chromatic Material from Rune D1/2), no physical component is added to your Infused pile.
- Refresh & Exhaust: These apply to your Reagents and Catalysts. Refresh means to flip a component from its exhausted face (dull colours) to its refreshed face (bright and colourful), while Exhaust means the reverse.
- Converting dice: This means rotating your dice face from the current Element to the new one.
- Consuming dice: This means converting your dice from their current Elements to the Void face, signaling that the previous Elements have been consumed.
- Runic & Eldritch tracks: In addition to Shells and Prestige, reaching the end of these tracks grants extra components when you Brew.
- Gaining & reducing Blight: Move your Blight marker one step right when gaining Blight, and left when reducing it. When you Brew, your Base Blight marker moves one step right permanently.
- Collecting Income: Referring to the Snail track, gain all income benefits to the left of your Snail token, including the base benefit of 3 Shells (may differ for Advanced Classes).
- Corruption: If your Blight track is maxed out by the end of Night Phase, you have triggered Corruption. You must visit the Guild tower during the next Day phase and prepare to Brew, during which you'll gain 3 Vilethorn cards.
Special cases
- In the rare event that there are no cards left in a player's terrarium deck or discard pile, and they must draw a card, they do not trigger Income, but instead shift their Blight marker to the rightmost space. This triggers Corruption for the player, and assuming the end of game is not triggered, they must visit the Guild tower on the next round to Brew.
- In the rare event that a player must gain a Vilethorn card but there are none left in the supply, they instantly lose 1 Prestige instead. If this causes them to fall below 5 or 10 amounts, already gained upgrade tiles are not returned to the Bazaar board. Likewise, the player does not gain any of those upgrade tiles again when they go past those Prestige amounts.
- When using the "Copy Infuse effect" ability of a card, while you may copy the Infuse effects of another played card that also has the "Copy Infuse effect", you may not use that later effect to copy the previous card — or any previous cards within the single chain of effects — to create an infinite loop.
Material & Element rarities
Listed below is how often each Material and Element icon appears across all Market cards, expressed as a percentage (higher percentage = more common):
- Fire / Water: 18.8% (15 of 80)
- Lightning / Earth: 13.8% (11 of 80)
- Organic / Spectral: 23.8% (19 of 80)
- Crystalline / Metallic: 13.8% (11 of 80)
- Runic / Eldritch: 10% (8 of 80)
- Chromatic: 16.3% (13 of 80)